

Techome Power Point TH892 DIY, Power Point TH892-BT, Power Point TH892-BTE, Power Point TH892-E Installation And Instruction Manual
REMOTE CONTROL
POWER POINT TH892
(BT, BTE, E, DIY)
INSTALLATION AND INSTRUCTION
MANUAL
www.techome.com.au
info@techome.com.au | +61 (0)7 3297 9797
3
WARNING: The TH892-E/BTE must only be installed by a licenced electrician!
Warranty:
Proof of Purchase: This warranty is only valid to the original purchaser and is not transferable. Please
keep your receipt for warranty purposes, please present your receipt when claiming warranty as proof of
purchase date.
Warranty: This product is warranted to be free from any defects for a period of 12 months (one year) from
the date of purchase, any defects that may occur will be repaired or replaced.
Warranty Procedure: Please return the faulty product with the valid proof of purchase to the original place
of purchase. The customer is responsible for freight, postage and packing costs when claiming warranty.
Exclusions: This warranty does not cover: batteries, misuse, packaging, general wear and tear, power
surges, lightning strikes, floods, incorrect installation, damage due to lack of care, modifications or repair by
an unauthorised person.
Maintenance: If the power supply cord is damaged, it must be replaced by the manufacturer and/or its
service agent or similar qualified person.
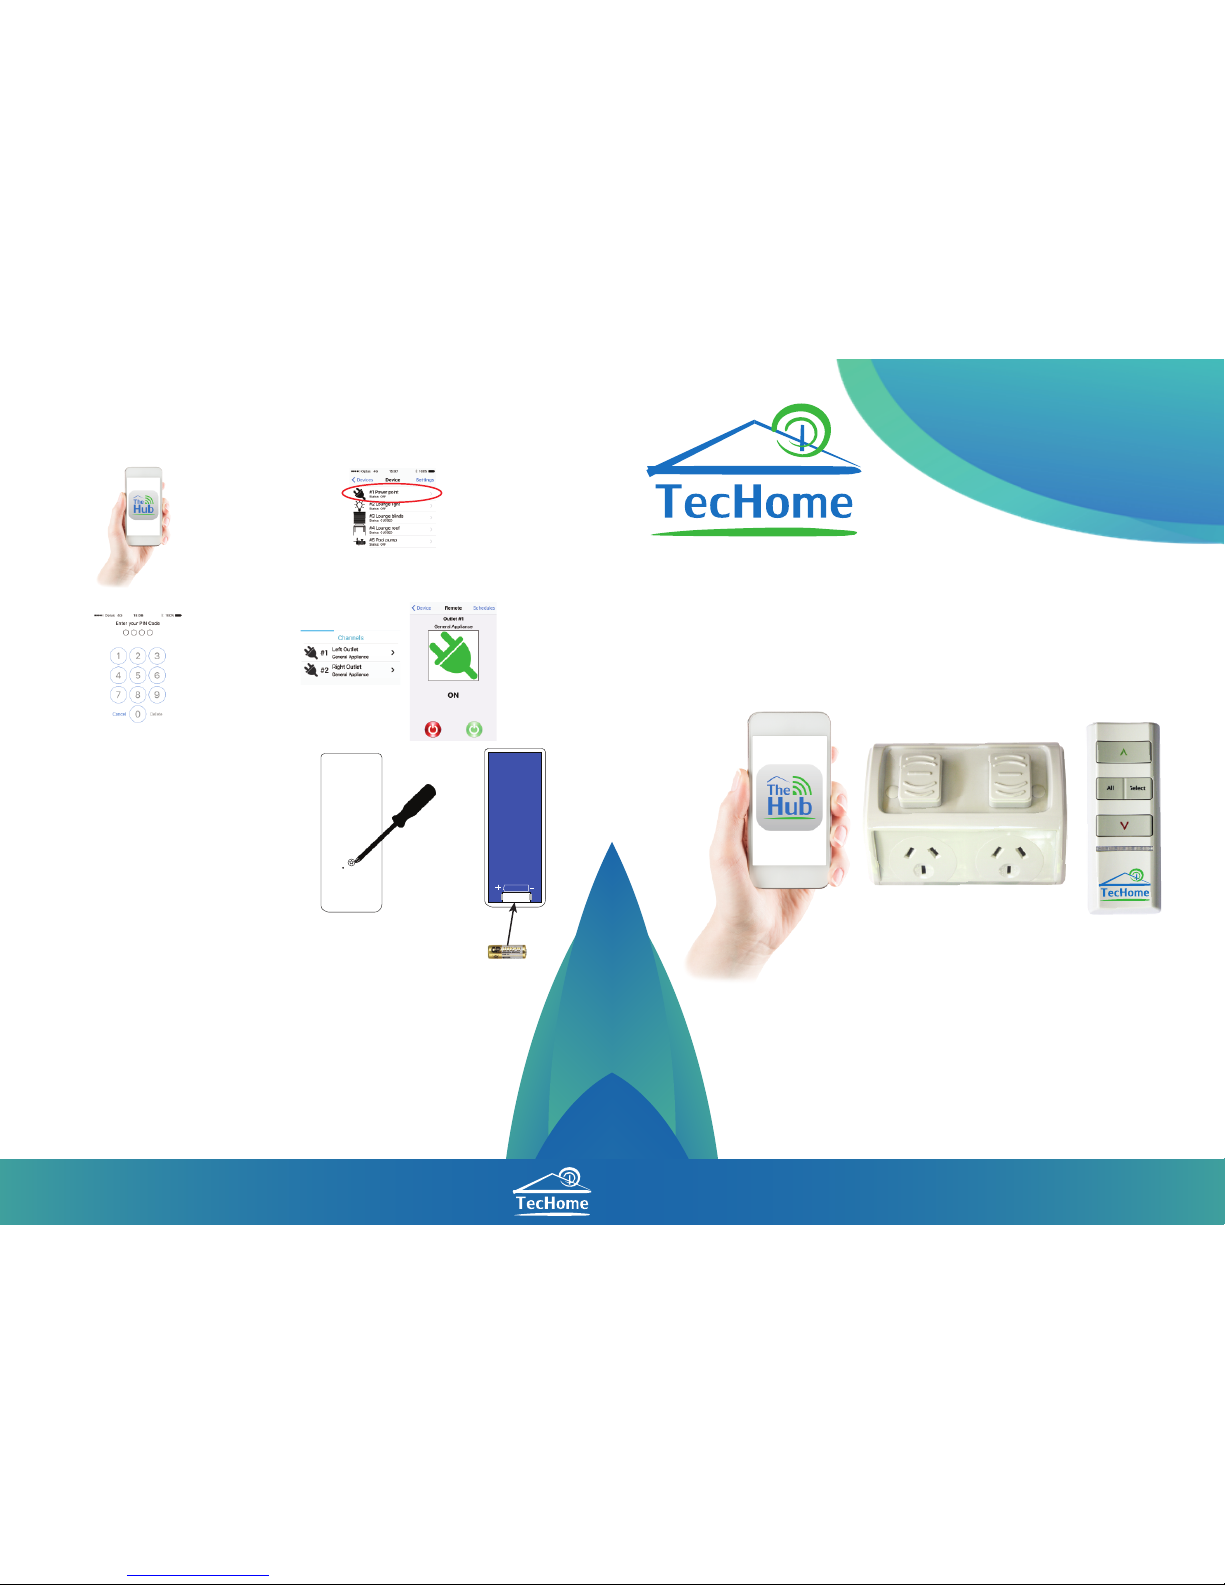
THE HUB APPLICATION (BTE/BT MODELS ONLY)
1. Download TecHome “TheHub”
from the ‘Google Play’ or ‘Apple Store’.
2. Select “Power Point” in Devices
3. Enter your PIN or the default PIN “0001”
4. Select the outlet you want to control
BATTERY REPLACEMENT FOR REMOTE
1. On the back of the remote control remove the
screw using a small Phillips screwdriver.
2. Loosen the back by inserting the flat screw drive between
the seams on both sides, top, middle and bottom.
3. Gently remove the back cover. Replace the battery with a
GP23A 12V battery.
23A 12V
1 2
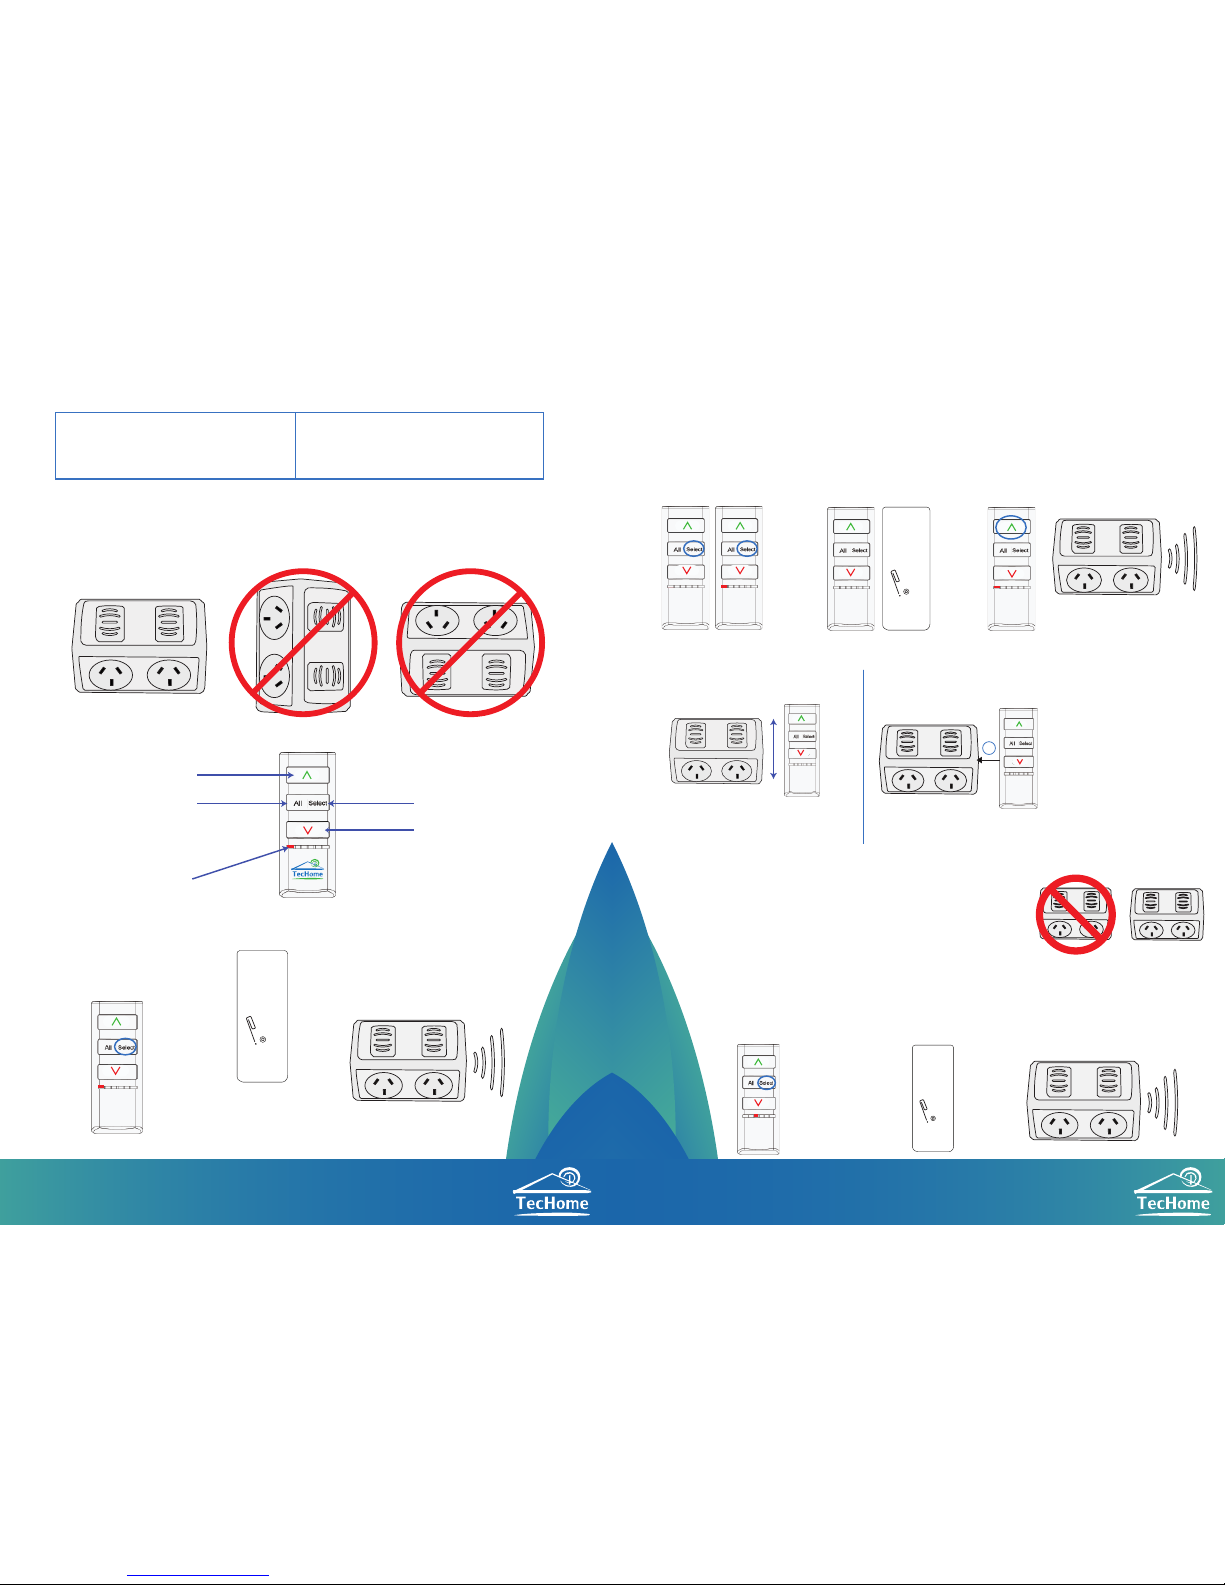
ELECTRICIAN INSTALLED SERIES
TH892-E: Power Point & Remote Controller Only
TH892-BTE: Bluetooth enabled Power Point
and Remote Control
INSTALLATION
WARNING: The TH892-E/BTE must only be installed by a licenced electrician.
Do not exceed 10AMP total. Allow 600mm clearing from the ground or wet surface
THE REMOTE
Selected
Channel On
All Channels Off
Channels 1-6
Selected
Channel Off
Change Channel
ADDING A FIRST REMOTE
1. Select Channel 1 on the
remote by using the
select button.
2. Insert a paperclip into
the learn hole on the back of
the remote (Next to the screw)
3. The Power Point will beep
four (4) times to indicate
successful pairing.
ALL ON/OFF FUNCTION
DELETE ALL REMOTES
Swipe BACK of remote to the
right-hand side of the Power Point
to turn ON or OFF both Power Points
1. Select channel 1 by pressing
“Select” on both the master and
secondary remotes.
2. Insert a paper clip pin into
the reset hole at the back of
the master remote.
3. The power point will begin
to beep. Press the ‘ON’ (^)
button on the second remote.
ADDING A SECOND REMOTE TO THE POWER POINT
4. The Power Point will beep
four (4) times to indicate
successful pairing.
S
S
M
M
M
= Master Controller (already Paired)
S = Second Remote (to be paired)
M S
1. Ensure the remote is
already learned to power
point 1 and all remotes
have been deleted from
power point 2.
2. Isolate power point 1 by cutting
the power from the mains (or
disconnecting from the wall).
PAIRING TWO POWERPOINTS TO ONE REMOTE
OFF ON
1
2
3. Select Channel 3 on the
remote by using the “select”
button.
4. Insert a paper clip pin into
the reset hole at the back of
the remote.
5. The Power Point will beep
four (4) times to indicate
successful pairing.
2
DIY INSTALLED SERIES
TH892: Power Point & Remote Controller Only
TH892-BT: Bluetooth enabled Power Point
and Remote Control
10
sec
1. Hold the back of the remote
to the right hand side of the power
point 10 seconds.
2. The powerpoint will have a
continuous tone then beep 4 times
to indicate completion of deletion.
 Loading...