

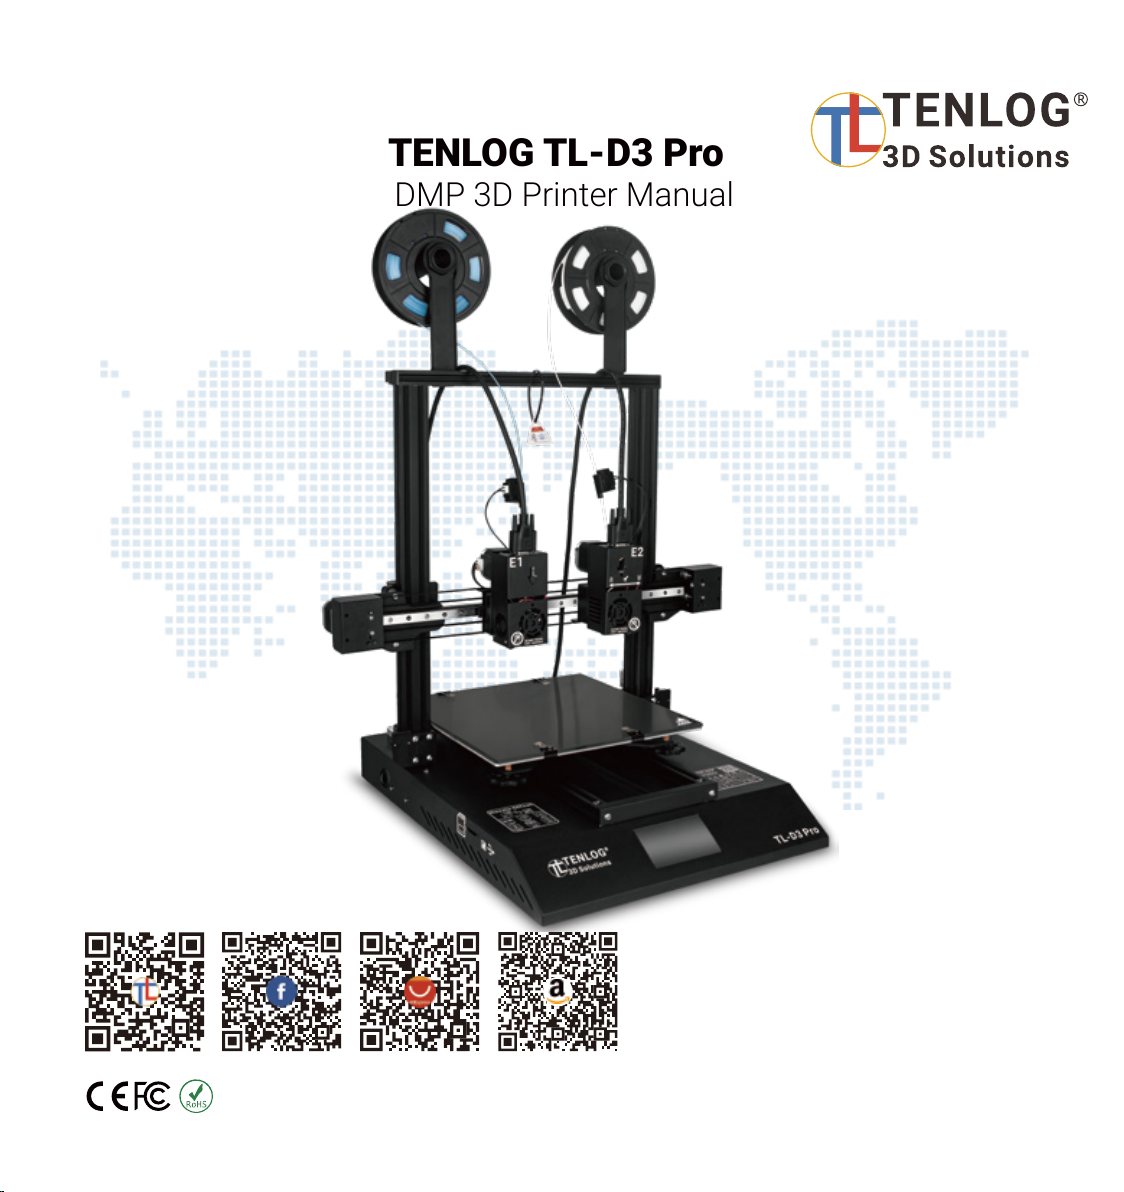
TENLOG TL-D3 Pro
DMP 3D Printer Manual
Offical website
Facebook Group
AliExpress Amazon
Shenzhen Tenlog 3D Technology Co., Ltd.
This manual is for reference only.
The structure and parts list of the Tenlog DMP 3D printer are subject to the actual product in the carton, and subject to change without notice.
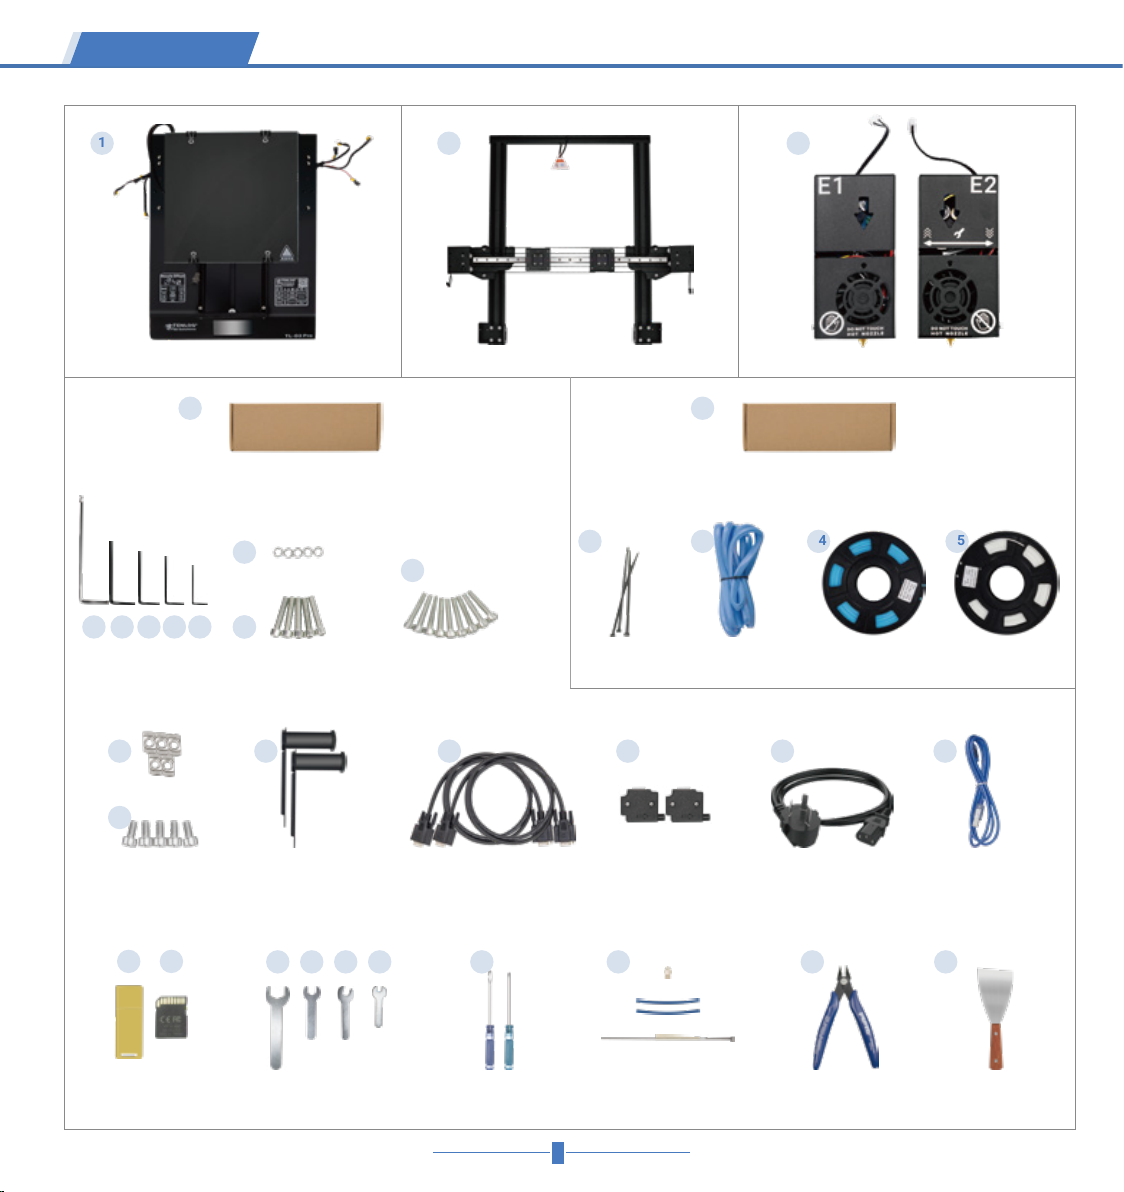
Parts List
1 2 3
Printer Host Z/X Gantry Assembly Dual Extruder & Nozzle Kits
3mm
4mm
6
7
Allen Wrench
14
M4 T-nut 5x
15
M4*6 Screw 5x
2.5mm
8
2mm
2221
4
5
Box 2Box 1
12
M5 Spring Washer 5x
1.5mm
11
10
9
11
M5*25 Screw 5x
16
13
M3*16 Screw 9x
17
32
Black Cable Tie
18
33
Decorative Strip
19
34
Test Filament
35
Test Filament
20
Filament
Filament Holder 2x
2523 24 26
8mm19mm
10mm
15 Pins VGA Cable 2x
6mm
27
Runout Sensor 2x
28
0.4mm Nozzle
Power Cable
29
1.5m USB Cable
30
SD Card
Card Reader
Open End Spanner
+ & -
Screwdriver
1
73mm Teflon Tube
0.4mm Nozzle Needle
1.5mm Wire Needle
Nozzle Cleaning Kit
Diagonal Pliers
Blade

Safety Alert
How to Assemble
Minors are not allowed
1
to use alone
Double check voltage before
3
first use
100-120
200-240
VOLTAGE SWITCH
Do not plug or unplug
2
under power
NO HOT PLUG
Do not touch hot nozzle
4
and hot bed
1. Assemble Z/X Gantry Assembly to the Printer Host
2
2
1
2. Assemble Dual Extruder & Nozzle Kits
3
3
8
126
11
8 13
5
A grounded wire
is required
Do not touch any moving
6
part
3. Assemble the Filament Holder
1616
2
16
15
7
14

4. Wiring
18
X2
Z2
18
19
17 17
17 17
X1
Z1
5. Enable Filament Runout Detection
Finish
3

How to Use Touch Screen
0/23 0/23 0/23
X: 0.0 Y: 0.0 Z: 0.0
1
Tools
Click on Tool button, you can get:
Semi-automatic Leveling
Preheat PLA ABS
Filaments Reload
Printing from any Height etc.
2
Tools Nozzle 1 Dual Material
Setting
Nozzle 1 Nozzle 2 Hot Bed
Current
Temperature
0/23
Set Temperature
Current
Temperature
0/23
Set Temperature Set Temperature
X: 0.0 Y: 0.0 Z : 0.0
Nozzle Current Coordinates
Can enter values manually
Print SD Move Axis
Working Condition:
Current
Temperature
0/23
Working Nozzle
Standby Nozzle
^-^
0.0
1 2 3
4 5 6
7 8 9
0 . -
CLRDEL OK
Dual Material
Duplication
Mirror
Nozzle Fan Switch
Leveling
Cooling
Temp
1
Print from any z
Nozzle 1
Click on Dual Material button, you can switch the print mode:
DuplicationDual Material
Dual Material
0/23 0/23 0/23
X: 0.0 Y: 0.0 Z: 0.0
1
2
Tools Nozzle 1 Dual Material
Dual Material
Setting
Duplication
Print SD Move Axis
Click on Setting button, you can configure the printer:
X Y Z E Steps : The values of Steps per millimeter of each axis
X2 Y2 Z2 : Nozzle Offset of Nozzle 2 Relative to Nozzle 1
Fan2 Temp : Set the startup temperature of Nozzle Cooling Fan
Setting
English
X Steps
Y Steps
Z Steps
E Steps
Sleep(m)
Fan2 Speed : Speed of Nozzle Cooling Fan
中文
80.00
80.00
800.00
92.60
0
354.00
X 2
4.50
Y 2
2.00
Z 2
Fan2 Temp
Fan2 Speed
Reset Back
80
Calibrate About
255
Auto Power Off
BackLeveling
2
Power OffReload
Mirror
Mirror
4

How to Use
Cura Interface Overview
How to Level1
Scan Code to Watch
How to Set Nozzle Offset2
3 How to Use
4 How to Use Borosilicate Glass Bed
1
2 3
13
12
11
Open file. Opens a 3D file.
1
Printer selection panel. Displays the selected printer.
2
Configuration panel. Contains the material and print core setup.
3
Stages. The prepare. Preview and monitor stage. Each stage is arranged
4
to efficiently go through each 3D printing step.
Print settings panel. Contains all slice strategy parameters.
5
Marketplace. Contains plugins and material packages.
6
Ultimaker account. Allows access to cloud functionality, Marketplace
7
plugins and print profiles, backups and more.
Action panel. Contains an action button dependent on the current stage.
8
Print over network. Save to removable disk or save to file.
9
Preview. Proceeds to the next stage, the preview stage.
10
Camera position tool. Easily positions the camera to default show default
11
viewing angles.
Model information. Contains the 3D model name and dimensions of all
12
printable models on the build plate.
Adjustment Tools. This allows you to easily position, scale, and rotate
13
models on the build plate in the most efficient way.
4
5 6 7
8
10
9
5
 Loading...