

Instruction Manual
ALARM 1 ON
A1A1
A2A2
ALARM 2 ON
TIME
RADIO
CONTROLLED ICON
Model WT-490
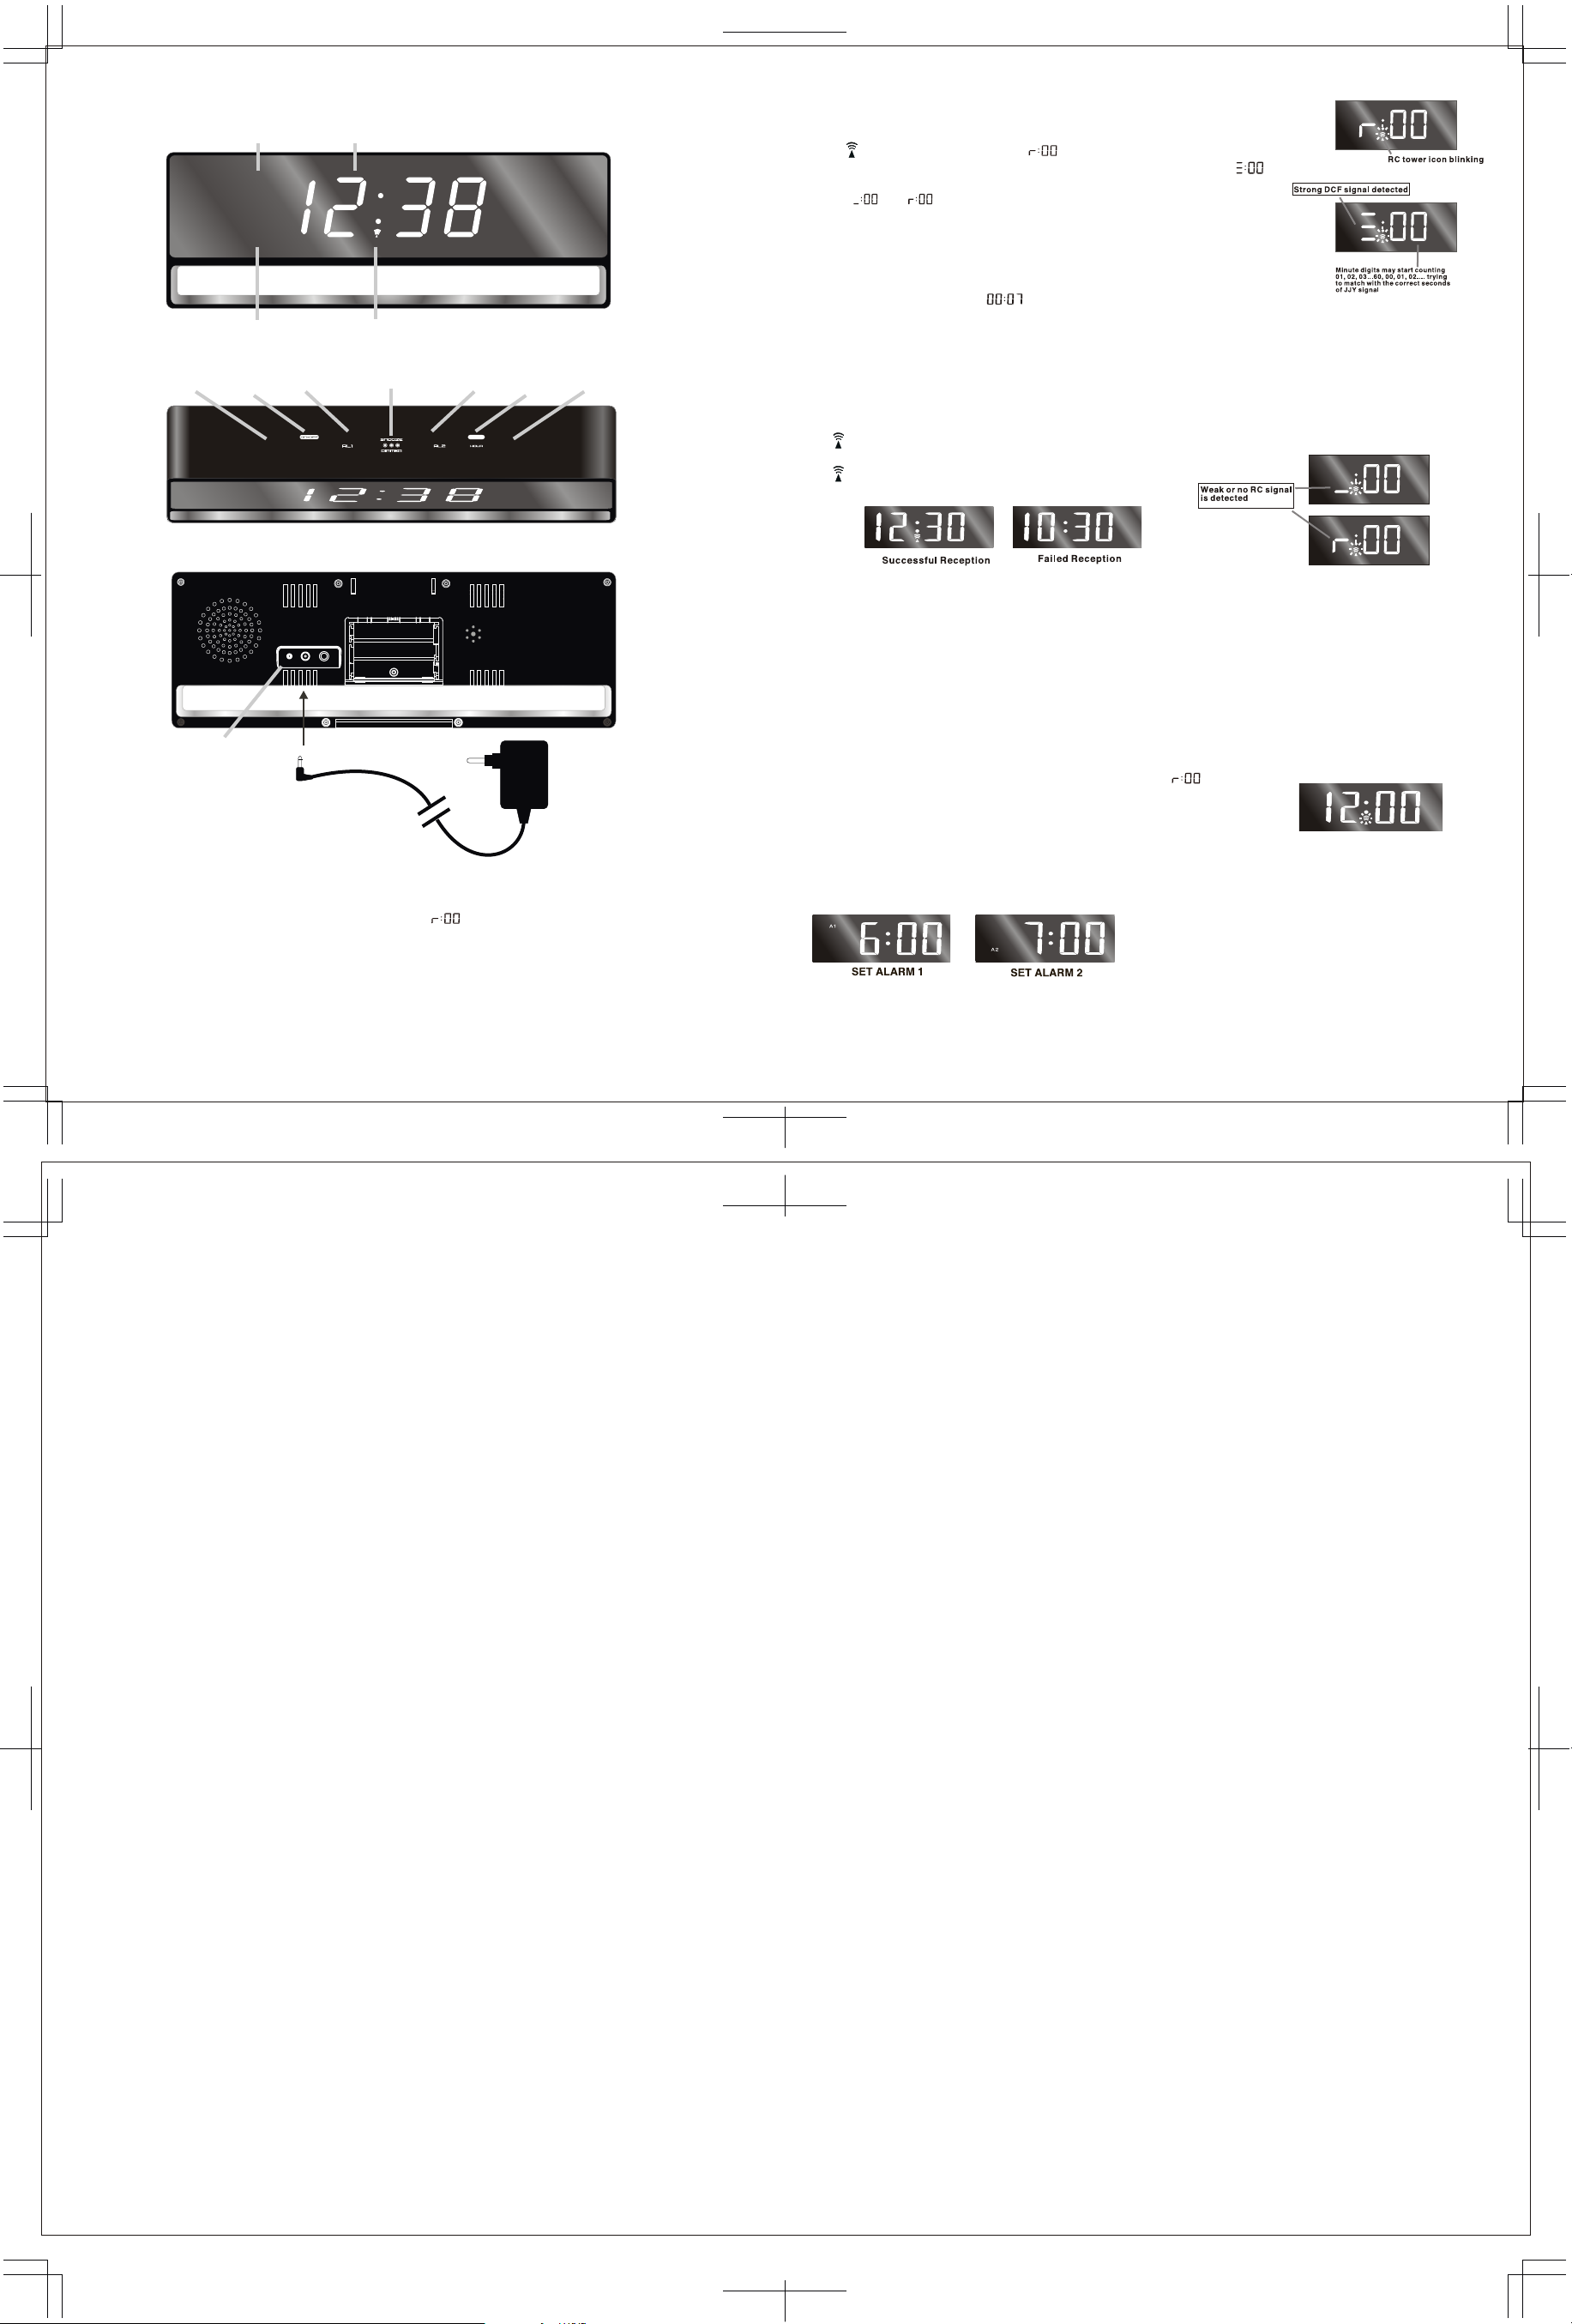
FRONT
POWER UP RECEPTION AND SIGNAL STRENGTH DISPLAY
1. After plug in AC power, the clock starts to receive DCF signal.
Icon blinks. Display shows .
2. When strong DCF signal is detected, display shows with 3 bars
When weak or no DCF signal is detected, display shows with 1 bar
or . You will need to place the clock to another area for
better reception, or unplug the AC/DC jack to start over reception
again. During reception, the signal strength may move from 1 bar to
2 bars to 3 bars. This is normal since the clock is detecting DCF
signal and other signals in the air at the same time.
3. If the clock does not catch DCF time signal for 7 minutes, it will go back
to normal time display .
4. During reception, press TIME button once will go to normal time display.
Press HOUR again will return to reception mode and signal strength indication.
TIME ALARM ALM1 SNOOZE/DIMMER ALM 2 HOUR MINUTE
ON-OFF
WAVE
INSTALLATION
RESETRESET
TIME ALARM
A1A1
A2A2
DC 4.5VDC 4.5VRESETRESET
1. Peel of the protective sheet over the lens slowly.
2. Plug the AC/DC adaptor into any 230V AC
back of the clock. The top front of the clock will show will appear.
Household outlet. Plug the DC jack into the lower
(WAVE)
MINUTE
AC/DC ADAPTOR
TOP
BACK
SUCCESSFUL RECEPTION OR FAILED RECEPTION
Icon becomes static on (stop blinking) when reception is successful
Icon disappears when reception is failed
MANUAL AND AUTOMATIC RECEPTION
Automatic reception : this clock starts reception automatically everyday at 1:00am. If auto reception fails at
1:00 am, it will start again at 3:00 am. If fails at 3:00 am, it will start again at 5:00 am.
If auto reception fails at 3:00 am still fails, it will start reception every 3 hours until it succeeds to catch correct
DCF time.
Manual reception : press HOUR button once anytime to start manual reception of DCF time signal. The
LED time display will go to radio controlled reception mode .
TO SET TIME AND ALARM
TO SET TIME : press TIME and press HOUR or MINUTE same time
TO SET ALM 1 : press ALM 1 and press HOUR or MINUTE same time
TO SET ALM 2 : press ALM 2 and press HOUR or MINUTE same time
BACK UP BATTERY
1. Slide the battery door at the back case, insert 3 x AAA batteries with correct + and - polarity signs inside
the battery compartment. Replace the battery cover.
2. When AC power is off, the batteries will power the clock to keep track of the time and alarm time.
3. When only the back-up batteries is used, the LED panel is off.
Model WT-490
Page 1 of 3
T
O TURN ON OR OFF ALARM 1 AND ALARM 2
Press ALM On/Off button to turn on Alarm 1, AL 1 LED light is on.
Press again to turn on Alarm 2, AL 2 LED light is on.
Press again to turn on both Alarm 1 and Alarm 2, both AL 1 and AL 2 LED lights are on.
Press again to turn off both Alarm 1 and Alarm 2, both AL 1 and AL 2 LED lights are off.
TO USE ALARM 1 AND ALARM 2
When time reaches set alarm time of ALM 1 or ALM 2:
When Alarm 1 beeps
Press SNOOZE to activate ALM 1 snooze alarm, alarm 1 sound will stop temporarily, AL 1 LED flashes until
ALM 1 beeps again in 5 minutes.
Press ALM 1 to turn of f alarm of the day and alarm 1 beeps again sametime next day.
Press ALM ON/OFF to turn of f ALM 1 permanently. (AL 1 LED turns off)
Model WT-490
Page 2 of 3
When Alarm 2 beeps
Press SNOOZE to activate ALM 2 snooze alarm, alarm 2 sound will stop temporarily, AL 2 LED flashes until
ALM 2 beeps again in 5 minutes.
Press ALM 2 to turn of f alarm of the day and alarm 2 beeps again same time next day.
Press ALM ON/OFF to turn of f ALM 2 permanently. (AL 2 LED turns o ff)
TO SELECT SNOOZE DUR ATION
Press SNOOZE / DIMMER
Duration s 5 minutes). Keep pressing SNOOZE / DIMMER, then press MINUTE
button and MINUTE button together, time display changes to "05", (default snooze
to set snooze duration up to 60 minutes.
TO USE THE HI-LO DIMMER
Press the SNOOZE/DIMMER button once, the brightness of LED digits will be adjusted from HI to MED, press again
will be adjusted from MED to LO, press again will turn off the mood light under the clock. Press one more time to return
to HI and turn on the mood light under the clock.
TROUBLE SHOOTING
Press the RESET button on the back of your clock. Once you do this, your clock will be reset to default setting and
needs to be up-dated by JJY time signal again.
CARE OF YOUR CLOCK
1. Clean the mirror lens with a very soft cloth if necessary. To avoid scratches, clean the lens very carefully and softly.
.2. Do not expose your clock to extreme temperatures, water or direct sunlight.
3. A
void contact with any corrosive materials
4. Do not subject the clock to excessive force, dust or humidity
5. Do not open the inner back case or tamper with any components of this clock
6. Do not plug in any other AC/DC adaptor with incorrect specifications or voltage
Model WT-490
Page 3 of 3
 Loading...