

WQ 140
Solar Powered Alarm Desktop Clock
Instruction Manual
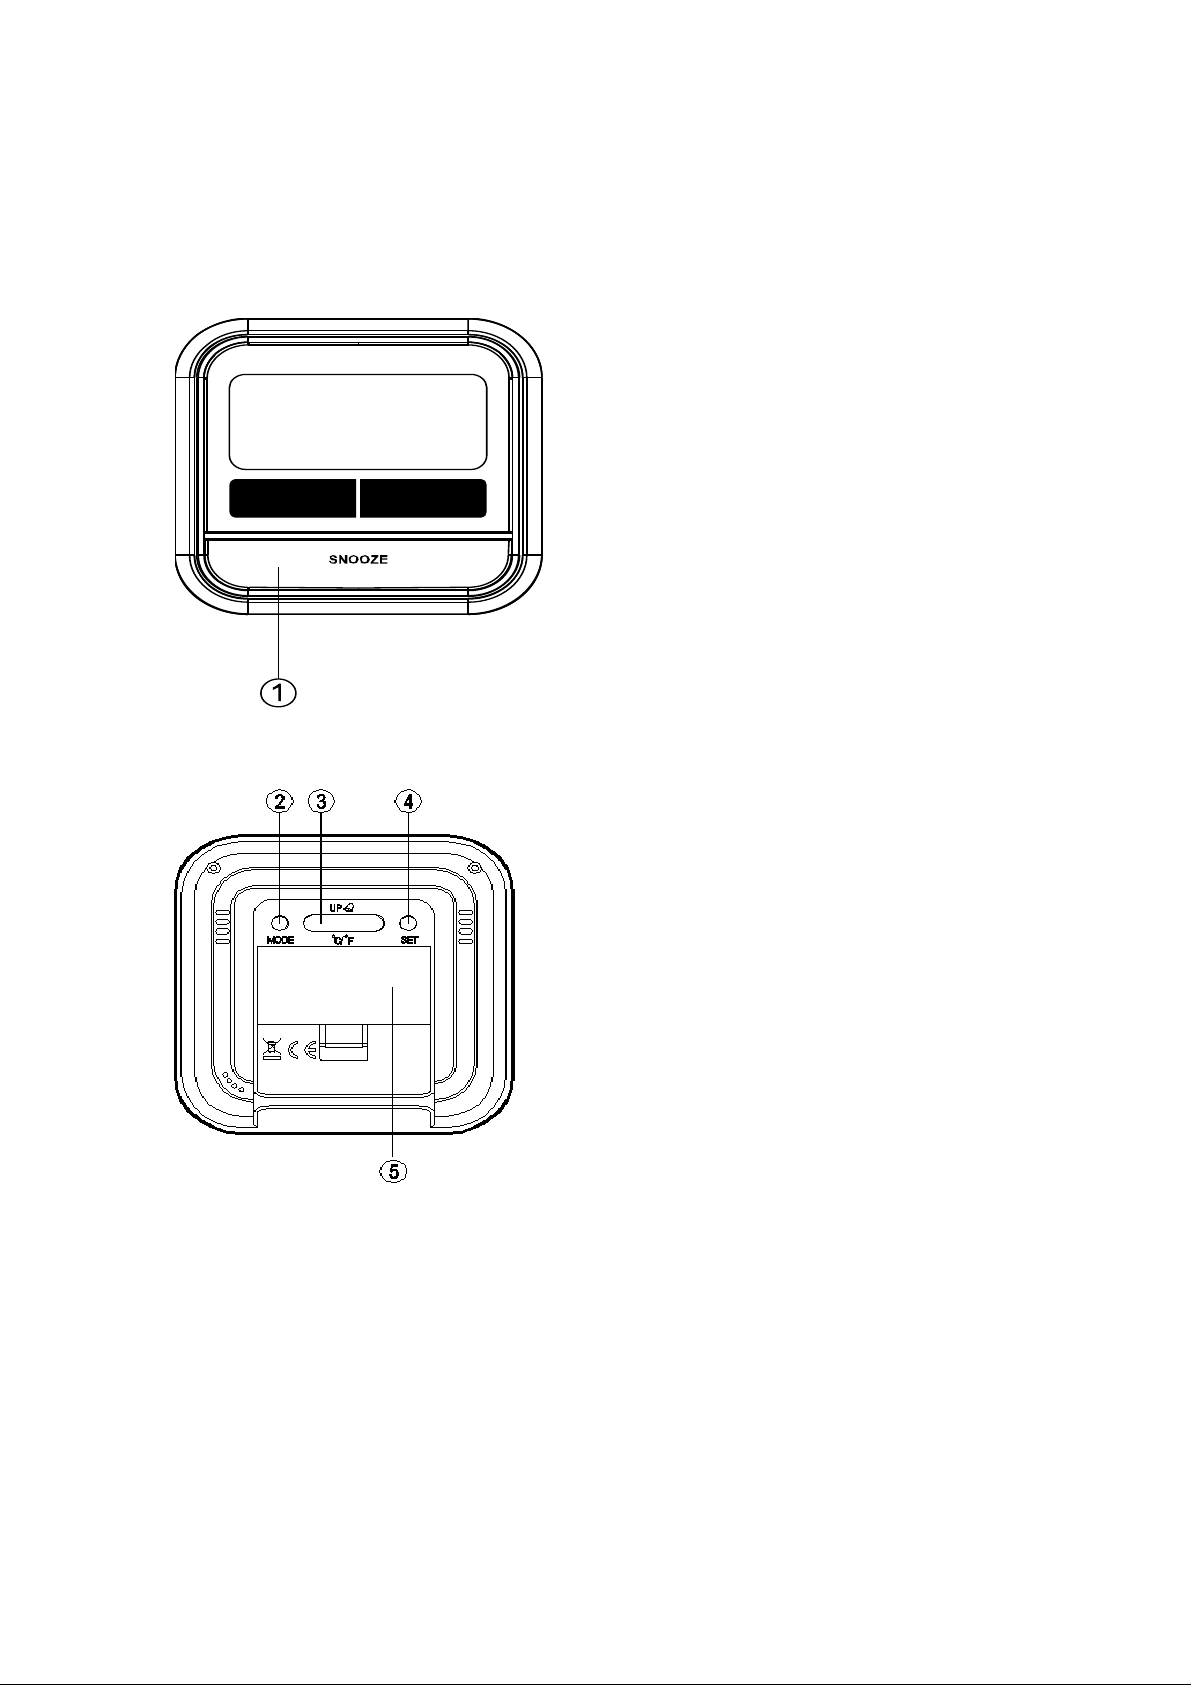
Fig. 1 Front view
Fig. 2 Back view
Introduction
This solar powered desktop clock comes with calendar, day, and temperature display. It
is solar powered with optional backup DC batteries. The light condition in most bright
indoor spaces is sufficient to recharge the built-in rechargeable batteries. Exposing the

unit to direct sunlight is not suggested and it is not necessary.
(1) “SNOOZE” button
(2) “MODE” button
(3) “UP/C/F/ ” button
(4) “SET ” button
(5) Battery compartment
Getting started:
Toggle the “On/Off” switch located under the battery compartment (5) to turn on the clock,
Optional batteries installation
1. Open battery compartment (5) on the back of the unit. (see figure 2)
2. Install / replace with 2x “AAA” size batteries in the compartment. It is
recommended that only alkaline batteries are used.
3. Replace the battery compartment (5) on the back of the unit.
Batteries safety warnings:
1. Please read all instructions carefully before use.
2. Install batteries correctly by matching the polarities (+/-).
3. Always replace a complete set of batteries.
4. Never mix used and new batteries.
5. Remove exhausted batteries immediately.
6. Remove batteries when not in use.
7. Do not recharge and do not dispose of batteries in fire as the batteries may
explode.
8. Ensure batteries are stored away from metal objects as contact may cause a
short circuit.
9. Avoid exposing batteries to temperature or humidity extremes or direct sunlight.
10. Keep all batteries out of reach from children. They are a choking hazard.
11. Please retain packaging for future reference.
To set time:
a) In clock mode ,Long press [SET] to enter setting mode, then press [UP] to
alternate to the days of the week display language. Press [SET] to confirm
setting and move on to 12/24-hour time format selecting.
b) Press [SET] and hour digits flash, press [UP] to switch between 12-hour and 24-
hour.
c) Press [SET] and second digits flash, press [UP] to clear second value to zero.
d) Press [SET] and hour digits flash, press [UP] to change values.
e) Press [SET] and minute digits flash. Press [UP] to change values.
f) Press [SET] and year digits flash. Press [UP] to change values.
g) Press [SET] and month digits flash. Press [UP] to change values.
h) Press [SET] and date digits flash. Press [UP] to change values.
The days of the week value will be changed automatically according to the
date value just changed.
i) Press [SET] to confirm setting and return to normal time display.
In setting mode, if no operation is carried out for 60 seconds, it will confirm and
return to normal time display mode automatically.
 Loading...