

VB111
Owner’s
Handbook
Viewbox


IMPORTANT SAFETY INFORMATION
CAUTION!
RISK OF ELECTRIC SHOCK
DO NOT OPEN
TO REDUCE THE RISK OF ELECTRIC SHOCK
DO NOT REMOVE COVER (OR BACK)
This symbol indicates that there are important operating and maintenance instructions
in the literature accompanying this unit.
This symbol indicates that dangerous voltage
constituting a risk of electric shock is present
within this unit.
Read these instructions.
Keep these instructions.
Heed all warnings.
Follow all instructions.
Do not use this apparatus near water.
Clean only with a slightly damp cloth.
Do not block any ventilation openings.
Install in accordance with the manufacturer’s
instructions.
Do not install or operate near any heat sources such
as radiators, stoves, or other apparatus that produce
heat.
Unplug this apparatus during lightning storms or when
unused for long periods of time.
Refer all servicing to qualied service personnel.
Servicing is required when the apparatus has been
damaged in any way, such as the power-supply cord
or plug is damaged, liquid has been spilled or objects
have fallen into the apparatus, the apparatus has been
exposed to rain or moisture, does not operate normally,
or has been dropped.
Warning: To reduce the risk of re or electrical shock,
do not expose this product to rain or moisture. The
product must not be exposed to dripping and splashing
and no object lled with liquids such as a vase of
owers should be placed on the product.
No naked ame sources such as candles should be
placed on the product.
Caution: Changes or modications not expressly
approved by the manufacturer could void the user’s
authority to operate this device.
Caution: Usage of controls or adjustments or
performance of procedures other than those specied
herein may result in hazardous exposure.
IMPORTANT
This equipment generates, uses and can radiate radio
frequency energy and, if not installed and used in
accordance with the instructions, may cause harmful
interference to radio communication. However, this
is no guarantee that interference will not occur in a
particular installation. If this equipment does cause
harmful interference to radio or television reception,
which can be determined by turning the equipment
o and on, the user is encouraged to try to correct the
interference by one of the following measures:
- Reorient or relocate the receiving antenna.
- Increase the separation between the equipment and
receiver.
- Connect the equipment into an outlet on a circuit
dierent from that to which the receiver is connected.
- Consult the dealer or an experienced radio/TV
technician for help.
ELECTRICAL INFORMATION
Use this appliance only with the supplied AC Adaptor.
Using non-approved power supplies will void the
warranty.
Mains Supply: The mains operating voltage of the
AC Adaptor is marked on a rating plate on the AC
Adaptor.
The means of disconnecting this appliance from
the mains supply is the AC adaptor. This should be
unobstructed and readily operable at all times.
1

INDEX
INDEX
Important safety information .................................. 1
Introduction ............................................................2
Controls and Connectors .......................................... 3
Remote Control & Batteries .....................................5
Getting Started, Adjusting the sound ......................6
The Function Menu, selecting a source ....................7
IPod Adaptors and Compatibility .............................8
Docking an iPod ....................................................... 9
Playing music and movies from an iPod...................9
Music status screen (iPod mode)............................10
Viewing iPod photos ..............................................11
Line input connection ............................................ 12
Listening to the radio ............................................13
Connecting Flash Drives and Cards .........................14
Playing from Flash Drives and Cards ......................15
Flash Media Music and Movie Navigation ..............16
Viewing Photos stored on Flash Media ..................18
Using a TV display .................................................. 19
Clock and calendar ................................................. 20
Setup Menus ......................................................... 21
Troubleshooting ....................................................23
Care & Maintenance...............................................24
Specications ........................................................24
Warranty ...............................................................24
The VB111 is a versatile iPod docking station with a
7”/175mm display unit and twin stereo speakers.
The VB111 plays audio music and speech, video movies and
clips or digital photos. These may be stored on an Apple iPod,
a USB Flash Drive, or a Flash Card.
The VB111 will also accept stereo analogue audio signals
from audio sources via a Line input and has a built-in FM
radio.
PRELIMINARIES INTRODUCTION
UNPACKING
Carefully unpack the unit. If it is damaged, please return it to
your nearest Tesco store for replacement. Remember to take
your purchase receipt with you.
Retain the User Handbook. If you pass the unit on to a third
party make sure you pass on the handbook.
We suggest you retain the packaging. If you dispose of it, do
so having regard to any recycling regulations in your area.
CONTENTS
The carton should contain:
The Media Player•
AC adaptor•
Remote control with battery•
Set of 7 x iPod adaptors•
AV cable•
Operating Manual•
Quick Start guide•
If any items are missing or damaged, contact your nearest
TESCO store for a replacement. Have your receipt ready when
you call. Retain the packaging. If you dispose of it, do so
having regard to any recycling regulations in your area.
LOCATION
Place the unit on dry stable surface away from heat and
damp and where it is unlikely to fall or be knocked over.
2

CONTROLS AND CONNECTORS
FRONT/TOP VIEW
a Standby/On button
b SD/MMC/MS card slot
c 3D surround mode button
d USB drive dock
e iPod dock
f Up cursor button
g Play/Pause/Enter button
h Right speaker
i Next/F.Fwd/Right cursor button
p Down cursor button
q Previous/F.Rev/Left cursor button
r Menu/Stop button
s Display screen
t Volume up button
u Volume down button
v 3D surround indicator
w Standby/On indicator
x Left speaker
3

CONTROLS AND CONNECTORS
BACK VIEW
a Headphone Jack
b Line-In jack
c Audio-Out phono jacks
d Video (CVBS) out jack
e FM aerial wire
f DC-in jack
4

REMOTE CONTROL
REMOTE CONTROL BATTERIES
BEFORE FIRST USE
To prepare the remote control for rst use, pull out the safety
strip to activate the battery.
REPLACING THE BATTERY
When replacing the battery in the remote control, refer to the
diagram below.
1. Press the catch across.
2. While holding the catch, open the battery door.
a Home button
b Movie function button
c iPod function button
d Menu/Stop button
e Volume up button
f Cursor right button
g Volume down button
h Rotate button
i Audio mute button
1) Fast search/scan forward button*
1! Next button
1@ Repeat button
1# 3D surround button
* Not for iPhone or iPod touch
1$ Settings button
1% Shue button
1^ Previous button
1& Fast search/scan back button*
1* Zoom button
1( Cursor down button
2) Cursor left button
2! Play/Pause/OK button
2@ Info button
2# Cursor up button
2$ Photo function button
2% Music function button
2^ Standby button
5
3. Fit the battery observing polarity as shown. When
replacing the battery, use only the same CR2025 type
specied.
Dispose of used batteries with regard to the recycling
regulations in your area. Do NOT short circuit batteries or
throw them into water, the general rubbish or in a re.
Weak batteries can leak and damage the remote control.
Replace them in good time!
GETTING STARTED
FM RADIO AERIAL
Before using your unit for FM reception, unwrap and fully
extend the aerial wire. You may need to adjust the position
of the aerial wire for maximum signal strength.
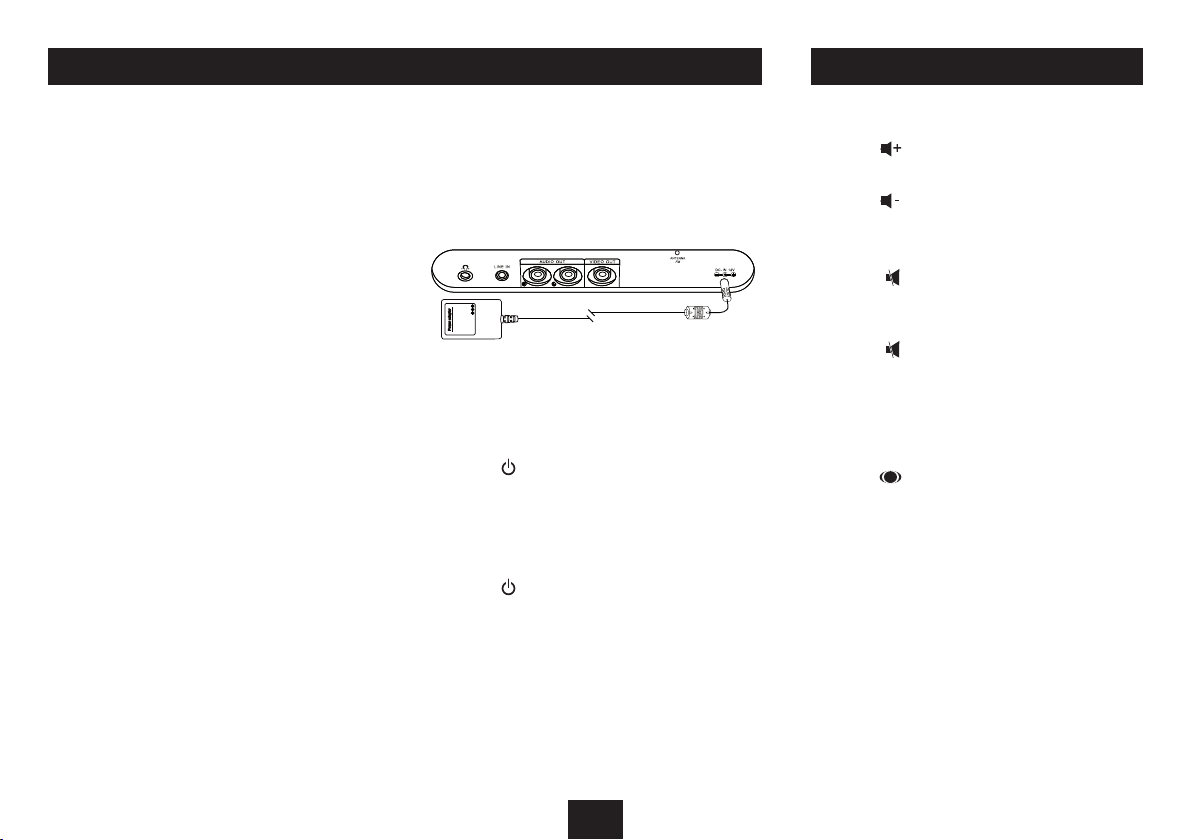
CONNECTING POWER
Check that the mains voltage on the rating plate of the AC
adaptor is the same as the voltage in your area.
Plug the DC cord from the adaptor into the unit, plug the
mains plug into the wall socket and switch the mains power
on. The unit is now ready for use.
NOTE:- The AC adaptor may become warm during operation
- this is normal.
POWER CONTROL
To turn the power on:
Press the • button on the control panel or the remote
control.
The Standby/On indicator will change to blue and the display
will light up and show the Function Menu.
To turn the power o:
Press the • button on the control panel or the remote
control.
The Standby/On indicator will change to red, and the display
will switch o.
ADJUSTING THE SOUND
VOLUME CONTROL
To increase the volume:
Press the • (VOL+) button.
To decrease the volume:
Press the • (VOL-) button.
AUDIO MUTE
To mute the audio:
Press the • button on the remote control.
The program will continue to play, but the audio will mute.
To cancel mute:
Press the • button again.
3D SURROUND SOUND
Your player has a built-in 3D Surround-Sound simulator to
project a larger ‘sound-stage’ from the built-in speakers.
To select a 3D Surround simulator mode:
Press the • button on the remote control repeatedly (or
the 3D SURROUND button on the front panel) to scroll
through the three surround sound options -
Bass On (the bass sound will be boosted).•
3D Surround Bass On (two sound eects are applied •
- Bass Boost and 3D Surround.
3D Surround Bass O (Sound eects are turned o).•
The 3D SURROUND eect applied will be displayed briey as
the Surround Eect is changed. The 3D Surround indicator
will light blue when Bass B oost is selected or purple when 3D
Surround Bass is selected..
NOTE: 3D Surround eects are not available when playing
background music to an iPod photo slideshow.
6

THE FUNCTION MENU
DIRECT ACCESS BUTTONS
The on-screen Function Menu (illustrated below) displays
the media playback and setup options that are available on
your player.
Select this option to
play Music from your
Flash Drives or Cards
Select this option to
view Photos from your
Flash Drives or Cards
Select this option to
play Movies from your
Flash Drives or Cards
Scroll selection from the Function Menu:
Press the • [ or ] button (or the O or P button on
the remote control) to scroll the display to the menu icon
that you want to select, then press the /,/OK button to
select your chosen option.
Select this option to
enter the Setup Menu
Media symbols to show
selected Flash media
Select this option to
display Clock options.
You can also select some of the function modes directly from
the remote control.
To select a function mode directly:
Referring to the diagram below, press a button to select •
the function mode you want.
(when loaded)
Select this option to
play Music from the
LINE-IN jack
Select this option to
play Music, Photos or
Movies from your iPod
Select this option to
play FM radio
7

iPod ADAPTORS SELECTING AN ADAPTOR
Before docking your iPod you must rst check if your iPod
has a docking connector. Early iPod models do not have one
and cannot be docked to your unit. The docking connector is
located on the base of the iPod as shown below.
Docking Connector
Before docking your iPod, you must rst t the correct iPod
adaptor to the docking bay. Each iPod adaptor matches the
shape of a particular iPod and is necessary to ensure that
your iPod is securely held when docked.
iPod adaptor
Docking bay
FINDING THE CORRECT iPod ADAPTOR
Your iPod docking system is supplied with a selection of
docking adaptors that are compatible with several models in
the iPod range. Refer to the table of iPod models in the next
column which lists the adaptor numbers (marked underneath
the adaptor), compatibility and instructions for obtaining an
adaptor for unlisted models.
NOTE: Do not dock an iPod without tting the correct adaptor,
you may damage the iPod and your unit.
LIST OF COMPATIBLE iPod MODELS
e iPod video (60GB or 80GB), iPod Classic (160GB)
g iPod nano (3rd generation video 4GB or 8GB)
h iPod touch (1st generation 8GB, 16GB or 32GB)
i iPod nano (4th generation video 8GB or 16GB)
1) iPod touch (2nd/3rd generation)
1@ iPhone (3G/3GS)
1# iPod nano (5th generation)
Other iPod models with dock connectors
Your iPod may have been supplied, packed with a standard
dock adaptor. If so, this can be used with the Viewbox.
If you don’t have a dock adaptor
If your iPod was not supplied with a standard dock adaptor,
you can buy one from Apple on-line. To determine the exact
model of your iPod, refer to this web-link - http://support.
apple.com/kb/HT1353. You can then browse the iPod
accessories page on the Apple website to nd an adaptor for
your iPod model that can be purchased on-line.
Once you have located the correct adaptor for your iPod, press
it gently into the iPod Docking Bay before attempting to dock
your iPod.
CONNECTING OTHER iPod
MODELS (INC SHUFFLE)
If you own an iPod Shue, a model without dock connector
or prefer to connect your iPod by cable, you can connect the
sound output to the LINE IN jack on the back panel.
Headphone socket
Using a 3.5mm stereo jack to jack cable (not supplied), •
connect one end of the cable to the headphone socket
of the iPod, and the other end to the LINE IN jack on the
back panel.
To listen to your iPod, follow the instructions under ‘Line •
Input’ on page 12 for playing equipment connected to the
LINE IN jack.
NOTE:- The volume control of the iPod must be turned up
when playing through the LINE IN jack.
NOTE:- An iPod connected to the LINE IN jack cannot be
operated from the remote control.
To the LINE IN
jack
8

DOCKING AN iPod PLAYING MUSIC AND VIDEO FROM AN iPod
DOCKING YOUR iPod
To dock your iPod:
Set the unit to Standby.•
Check that the correct iPod adaptor is tted to the docking •
bay.
Locate the iPod on the Docking Connector and press it •
gently home.
Switch on the power.•
Select iPod mode from the Function Menu.•
The display will read ‘Connecting to iPod’ for a few seconds
while the iPod is authenticated.
IMPORTANT NOTE:- Always select the ‘iPod’ option from the
Function Menu to play any type of media (music, photos or
movies) stored on your iPod. When playing from an iPod, the
media type is selected from the iPod menus.
The Music, Photo, and Movie options are only used for USB
drives or ash cards.
To remove your iPod:
Set the unit to Standby or select another function from •
the Function Menu.
Grip the sides of the iPod and remove it gently from the •
dock.
CHARGING AN iPod
When an iPod is docked and the player is switched on, the
iPod will begin to charge automatically.
NOTE:- The iPod will stop charging if the player is switched
o.
ALL MODELS
When the iPod has been authenticated, the display on your
player will switch to show the menu screens from your iPod.
You can now navigate the menus and operate your iPod
functions from the controls on the front panel or the Remote
Control.
iPod menu functions:
You can press MENU, and the cursor buttons M N and P to
navigate the iPod menus.
To move back through the iPod menu, press • MENU.
To scroll up and down menu items, press the • M N cursor
buttons.
To select menu items, press the • P button.
From the iPod menu you can select from Music or Video •
playback, then select from tracks, playlists, and movies
that are stored on your iPod.
iPod playback control:
When the iPod is playing, the following quick access playback
functions are available from the remote control:
Press the • /, button to toggle between Play and Pause
mode at any time (also available from the front panel).
When playing, press the • { or } button to select the
previous or next track, photo or movie.
When playing a music track or movie, press the • [ or ]
button to fast search back or for wards (all models except
iPhone and iPod touch). Press /, to return to play.
Press the • . button to stop playback.
Press the • button on the Remote Control to c ycle
through the repeat modes available on the iPod. These
are -
Repeat 1 (current track)
Repeat All
Repeat O (no symbol)
The repeat mode set will show on the Music Status Screen.
Press the • button on the Remote Control to c ycle
through the shue modes available on the iPod. These
are -
Shue All (all tracks on the iPod)
Shue Album
(all tracks on the current album)
Shue O.
The shue mode set will show on the Music Status Screen.
9

MUSIC STATUS SCREEN (iPod MODE)
MUSIC STATUS SCREEN
When playing music from your iPod the Music Status Screen
will be displayed.
Display items a, b, c are in the track information area
showing details relating to the track currently playing.
Display items d, e are in the selection area. showing items
selectable from the iPod menus with a highlighted cursor.
This display is used when you want to navigate to a new
album, track etc.
Display symbols f, g, h indicate the current status of an
iPod for play/pause, repeat and shue.
Display items i, 1), 1! relate to the timing of the track
currently playing.
a Name of artist currently playing
b Name of track currently playing
c Name of album currently playing
d Track list
e Selection cursor
f Shue symbol (when set)
10
g Play status symbol (play, pause etc)
h Repeat symbol (when set)
i Total time for track currently playing
1) Bargraph display of elapsed time
1! Elapsed time for track currently playing

VIEWING PHOTOS STORED ON AN iPod
Photos stored on a docked iPod can also be displayed if the
iPod is a model equipped with TV out.
Proceed to dock your iPod, switch on the power and select
‘iPod’ play from the Function Menu. Wait for a few seconds
until authentication is complete.
All models except iPod touch
Navigate to the main menu for your iPod.•
Select the ‘Photos’ option.•
The display screen will display the message ‘Navigate your iPod
Photo Library Directly from your iPod’.
Use the centre button and clickwheel on the iPod to •
navigate to a thumbnail view of the photo album you
want to display.
Use the clickwheel to browse the thumbnails and nd •
the picture you want to display.
Press the centre button on the iPod to display this picture •
full-screen on the iPod.
Press the centre button again.•
The iPod will count down, then begin a slide-show of your
pictures on the display.
IMPORTANT NOTE:- Photos can only be viewed from an iPod
model that is equipped with TV OUT. Some iPod models can
store photos, but do not feature TV OUT. Please check with
Apple if you are in any doubt that your iPod is equipped with
TV OUT.
iPod touch
Slide the bar on the screen to unlock your iPod.•
Press the HOME button on your iPod.•
Flick the ‘Photos’ application to enter the Photos menu.•
Flick the photo album you wish to display (iPod touch rst •
generation only).
Flick • P at the bottom of the iPod screen.
The photos will be displayed on the player screen in a
Slideshow.
11

LINE INPUT
The LINE-IN input may be used to connect sound sources with
a Line or Headphone analogue output to play through your
player. These may include -
iPod models that cannot be docked to the unit•
MP3 players via headphone out•
CD walkman players•
Tape walkman players•
Personal computers or laptops•
CONNECTING TO LINE-IN
You will need a stereo 3.5mm jack cable (not supplied) to
connect between the LINE-IN jack and the audio player/
computer.
Connect the cable between the headphone or LINE/AUX •
output of the personal audio player and the LINE-IN jack
on the back panel.
With the cable connected, press the • MENU button
repeatedly (or press the HOME button on the remote
control) to return to the Function Menu, then select the
Line In option from the menu.
LINE IN will be shown on the display.
Set your personal audio player/computer to PLAY.•
Set the listening volume to the level you want with the •
Volume buttons.
If there is no sound or if the volume level is not loud enough,
you may need to increase the volume setting on your personal
audio player/computer.
12

LISTENING TO THE RADIO
Your Media Player includes an FM band radio.
To listen to the radio:
Press the • MENU button repeatedly (or press the HOME
button on the remote control) to return to the Function
Menu, then select ‘Radio’ from the menu.
The display will switch to Radio Mode.
Scanning for a station:
Press the • ] or [ button on the remote control (or press
and hold the ] or [ button on the control panel) to
scan up or down the band.
When the next station is reached, scanning will stop and the
station frequency will be displayed.
If reception quality is poor, try adjusting the position of the
aerial for the highest reading on the signal strength meter.
Manual tuning:
Press the • P or O button on the remote control (or press
the ] or [ buttons on the front panel briey) to tune
manually in steps of 0.1MHz.
Saving a preset station:
You can store up to 20 of your favourite stations as presets.
Press the • M or N button.
Preset numbers will be displayed, for example as •
‘Channel #10’.
Step until the preset number you want to store is •
displayed.
Tune to the station you want to store.•
Press the • /, button.
The station will be saved to this preset location.
Browsing the preset stations:
Press the • M or N buttons to step through the presets.
a Stereo indicator
b Signal strength bargraph
c Preset number
d Tuning bargraph
e Tuning frequency
13

FLASH DRIVES AND CARDS
CONNECTING USB MEDIA LOADING FLASH CARDS
You can play compatible audio, video and photo media les
stored on USB Flash drives or Flash Cards up to a maximum
size of 32GB.
USB media may include the following
USB Flash drives.•
Compatible Flash cards
MMC cards•
SD cards•
MS cards•
Compatible le formats
File formats that are compatible with your player are -
MP3 audio les•
JPG photo les•
XVID, motion JPEG, MPEG1, video les.•
To connect a USB ash drive:
Insert the drive into the USB jack on the top panel.•
You can also load media saved to a Flash Card from your
Digital Camera, Computer or other device. The unit is
compatible with SD, MMC and MS Flash Cards.
To load a Flash Card:
Gently insert the Flash Card into the Flash Card slot on the •
top panel of the unit. If the Flash Card is marked with an
arrow this should be aligned to the back of the unit.
NOTE:- Flash Cards are polarised and can only be inserted one
way round. If the Flash Card will not load easily you may need
to reverse it. Never force a Flash Card into the Card Reader
slot.
NOTE:- If you load both a USB ash drive and a Flash Card at
the same time, you can choose the Flash media you want to
use in the next section.
14

PLAYING FLASH MEDIA PLAYBACK CONTROL
To play the media on your Flash Card or USB Drive:
Switch the player to Standby.•
Refer to the previous page to load your Flash Card or USB •
Drive.
Switch the power on.•
The display lights and the Function Menu is shown.
If both a Flash Card and USB drive are inserted, press the •
M or N button to select the media you want to use, then
press the /, button to select that media.
Select the menu option (Photo, Music or Movie) for the •
media that you want to play.
If you select Photo, the display will automatically commence a
slide-show of the photos on the Flash Media.
If you selec t Music, the display will switch to show navigation
for the music les on the Flash Media and the rst track will
begin to play.
If you select Movie, the display will switch to show navigation
for the Video les on the Flash Media.
NOTE:- You can store a mix of compatible Photo, Music and
Movie les on your Flash Card or Drive and choose which
media you want to play from the Function Menu.
Play/Pause (Still for Movies):
Press the • /, button to toggle between Play and Pause
modes at any time. If you pause a movie, a still-frame will
be shown.
Previous/Next Track/Movie selection:
Press the • { or } button on the Remote Control ([ or
] button on the control panel) to skip to the previous or
next Track, or Movie.
NOTE:- If you skip past the end of a Music album stored in
a folder, the player will change to the next album/folder (if
present) and continue to play from the rst track. Similarly,
skipping to the track before track 1 will play the last track in
the previous album/folder (if present).
Fast Search:
Press the • [ or ] button on the Remote Control to fast
search through Music tracks or Movies. Press repeatedly to
change the search speed as shown below.
Press • /, to cancel fast search and return to play.
Stopping play:
Press the • MODE/. button once to stop play and return to
the Navigation Screen.
Press the • MODE/. button again to return to the Function
Menu.
Repeat modes:
Press the • button on the Remote Control to c ycle
through the repeat modes available. These are Repeat
Track, Repeat Folder, Repeat All and Repeat O.
The repeat mode set will show briey on the display.
Random mode:
Press the • button on the Remote Control to select
Random play mode. The tracks will now play in a random
sequence. Press again to cancel random mode.
When Random mode is set, ‘Random Play ’ will be displayed.
When Random mode is cancelled, ‘Order Play’ is displayed
briey.
15

MUSIC & MOVIE NAVIGATION
Navigation screen:
The navigation screen for Music or Movie les is shown on
the next page.
The top line of the display (1, 2, 4, 6) shows information
about the track currently playing.
The Track/Movie list (3, 5) is used for selec tion of the tracks
you want to play.
The folder list (10, 11, 12) shows the Flash media source (USB
or card), and a list of folders.
NOTE: The Folder List will only show if the Flash Media
playing includes folders. It will not show if the Flash Media
only contains tracks.
To navigate the Folder or Track/Movie lists:
Press the • M or N cursor buttons to move up or down the
lists and browse Tracks, Movies or Folders.
Press the • /, button to select a Track, Movie or Folder.
To change between the Folder list and Track/Movie list
(remote control only):
Press the • O or P cursor button to move between the
Track/Movie and Folder lists.
To move up the Folder list one level:
Scroll to the Folder pane and select the ‘Up-DIR’ folder. •
To return to the Navigation Screen when watching a
Movie:
Press the • MODE/. button to stop the movie and return to
the Navigation Screen.
NOTE:- To resume the movie from the same point, press the
/, button.
Information display:
You can display le information about the movie playing by
pressing the INFO button repeatedly.
When you are playing Music or Movie les you can also
use the Playback Control buttons on the Remote Control to
navigate and search the les you are playing.
16

FLASH MEDIA FILE NAVIGATION DISPLAY
a Selected folder
b Track number/Total tracks
c Music/Movie symbol
d Track elapsed time
e Track/movie/folder list
f Repeat/random mode display
g Track total time
h Sample rate & compression
i Music analyser display
1) Folder list
1! Move up folder tree
1@ Media source
NOTE:- Folder list symbols are
only visible when the Flash Media
contains folders.
17

VIEWING PHOTOS STORED ON FLASH MEDIA
If you load Flash Media that contains photo les and select
Photo from the Function Menu, your player will automatically
start a slideshow of the photos stored on the Flash Card/
Drive.
To Pause the Slideshow:
Press the • /, button.
The pause symbol will be displayed.
To Re-start the Slideshow:
Press the • /, button again.
To skip to the previous or next photo in the
Slideshow:
Press the • { or } button on the Remote Control (or
the [ or ] button on the control panel) to skip to the
previous or next photo.
To rotate or ip the picture displayed:
Press the following buttons on the Remote Control-
Press the • O cursor button to rotate the photo 90° to the
left.
Press the • P cursor button to rotate the photo 90° to the
right.
Press the • M cursor button to ip the photo horizontally.
Press the • N cursor buttons to ip the photo vertically.
Zoom:
You can zoom into or out from the picture on the screen.
Press the • button on the remote control to zoom in the
following sequence -
Pan:
If you have zoomed into a picture (150% or 200% setting)
you can pan around the image on the screen.
To pan around a zoomed image, press the cursor buttons •
O, P, M or N.
Picture information:
You can press the INFO button at any time to display
information about a picture.
Customising the Slideshow:
You can set the interval time and transition style for your
slideshow from the SETUP menu. See pages 21 and 22.
Your player also has a ‘thumbnail’ mode that enables you to
view an index of your photos and select the photo that you
want to display.
Photo thumbnail mode:
Photo thumbnail mode displays small thumbnail images of
the pictures stored in your Flash media. You can then choose
which picture you want to see from the thumbnail display.
To switch to thumbnail display, press the • MENU button
during the Slideshow.
The display will switch to show pages of the photos stored on
your Flash Drive or Card. The selected photo will be highlighted
with a ashing yellow border.
Locate the photo you want to display by navigating with •
the O, P, M, N buttons on the remote control (or the
] and [ buttons on the front panel).
If there are multiple pages, press the • } or { button to
change pages.
Press the • /, button to display the highlighted photo
and re-start the slideshow.
Background music:
If there are music les stored on the ash media with your
photos, you can choose to play the music while the slideshow is running.
Refer to the Setup Menu section on pages 21 and 22 for •
instructions to enable background music during a slide-
show.
NOTE:- When background music is enabled, the music will
start to play automatically when the slide-show starts.
18

USING A TV DISPLAY
If your TV is equipped with AV input jacks you can connect it
to the AUDIO OUT and VIDEO OUT jacks of your Media Player.
With these connections made the menu screens, sound and
vision from your player will be displayed on the TV.
Connecting to a Composite/Audio input of the TV:
Connect the red, white and yellow jacks of an AV cable
(supplied) to the AV input jacks of your TV. These are often
located on the front or side of the TV.
Connect the other end of the cable to the AUDIO OUT and
VIDEO OUT jacks of your Media player.
Connecting to a SCART input of the TV:
The same 3-way connection cable is used to connect to the
SCART input of a TV, but a SCART adaptor (not supplied) will
be required. The SCART adaptor is a SCART plug with three
RCA jack connections.
Connect the plugs at one end of a 3-way audio/video RCA •
cable (supplied) to each of the audio and video output
jacks on the back panel of the Media Player. The plugs
are colour coded to match the jack colours.
Connect the other end of the audio/video cable to the •
jacks on the SCART adaptor.
Connect the SCART adaptor to a free AV input on the TV.•
Using your TV as a display:
Set the TV input selector to the AV input that you used •
when connecting the AV or SCART cable.
Switch on the AV output (see the Setup section on pages •
21 and 22).
Turn up the volume on both the unit and the T V.•
The TV will now play menus, audio and video from your Player.
COMPOSITE VIDEO (CVBS) CONNECTION TO A TV
SCART CONNECTION
19

CLOCK AND CALENDAR
Your player includes full display of the time and date.
To view the Time/Date display:
Navigate to the Function Menu.•
Select the Clock option from the menu.•
The display will switch to show the date in a calendar format
and the time as an image of an analogue clock face.
Refer to the image on the right for more detail of the
display.
To change the time or date:
Time and date settings are changed via the setup menu.
Refer to the Setup section on pages 21 and 22.
Using the calendar to check dates:
You can change the year and month of the calendar to display
dates from the past or in the future. This enables you to check
which day a date fell on etc.
NOTE: If you use this feature to check dates, the current date
setting will not be changed.
To nd a particular month:
Press the • M or N button to select the year you want
to display.
Press the • O or P button (or the [ or ] button on
the control panel) to select the month you want to
display in that year.
Press the /, button to return the calendar to display the
current month and year.
a Year display
b Month display
c Today marker
d Analogue clock display
e Digital clock display
f Calendar display
20

SETUP MENU
The Setup Menu enables you to customise the conguration
of your player.
To enter the setup menu:
Press the Setup mode select button on the remote •
control.
altermatively,
Navigate to the Function Menu.•
Select the Setup option.•
The setup sc reen will be displayed with the ve main setup
categories on the left -
Photo setting1.
Time/date setting2.
Display setup3.
Custom setup4.
Exit setup5.
Press the • N or M button to navigate to the setup
category that you want.
The options within this category will now be displayed.
Press the • P button to choose from the options within
this setup category.
Use the • M, N, O, P buttons to navigate the menu
options and the /,/OK button to select your choices.
To leave the setup menu, select the Exit setup option.•
More details of the settings you can change are listed on the
next page.
a Set photo slideshow
b Set time and date options
c Display setup
d Custom setup (set language or reset to factory settings)
e Exit setup
f Setup category display
g Options available (photo shown in this example)
21

SETUP MENU
PHOTO SETTINGS
Interval time:
Select this option to change the time that each photo is
shown on the screen.
Transition eect:
Choose from dierent changeover eects for photo
slideshows from Flash Drives or Cards. The RANDOM option
will apply a dierent eect for each photo.
NOTE:- These settings will not aect photo slideshows from
an iPod.
Panel:
Set to ‘Full Screen’ to display your photos across the full
display area or to ‘Original’ to display them in their original
proportions.
Background music:
If you switch on this option, music stored on the Flash media
with your pictures will play as the slideshow runs.
TIME SETTING
Set Time:
Choose this option to set the current time stored in the player
(the M and N buttons will adjust the numbers, press P to
move to the next setting).
Set Date:
Choose this option to set the calendar date stored in the
player (the M and N buttons will adjust the numbers, press
P to move to the next setting).
DISPLAY SETUP
TV Standard:
Change the system compatibility for a connected T V. This
setting should be ‘PAL’ for Europe.
AV Output:
If you choose the ‘On’ option, the display will switch to a
connected TV.
NOTE:- Ensure you have a TV connected before switching the
AV Output on as the display on the unit will switch o. If you
should switch o the display unintentionally, set the player
to Standby and switch on again to clear this setting.
Brightness:
Choose this setting to set the brightness of the display in 9
steps in the range -7 to +7.
CUSTOM SETUP
OSD Language:
Change the language for the menus and display screens.
Reset:
Choosing this option will restore all user setting to ‘factory
original’.
NOTE:- Any stored radio presets will also be erased.
EXITING SETUP
Choose this option when you have nished changing the
settings and want to exit the menu.
22

TROUBLESHOOTING
iPod OPERATION
No sound when playing music:
Check if the iPod is paused. If so, press the /, button to
start play.
Movie les stored on an iPod are not playing:
The movie les may not be compatible with your iPod. Check
that the movie plays on your iPod before docking it to the
Media Player.
A photo is displayed on the iPod screen, but not on the
Media Player screen:
Press the OK button to switch the iPod photo display to your
Player.
Photos are displayed on the iPod screen, but not on
the Media Player screen:
Your iPod may be a model that does not suppor t TV OUT.
Check the specication of your iPod.
FLASH CARD/DRIVE OPERATION
Unable to play music les (or music les not visible
when browsing media)
The format of the les may not be compatible with the
player. Try re-saving your music les in a dierent format
(MP3 recommended).
Unable to view photos
Not all JPEG les are compatible. If JPEG les will not play, try
viewing them with a computer. If you can view them with a
computer, try re-saving them.
Photo viewing is slow
The photo resolution may be too high. Try re-saving the
images with lower resolution.
Unable to view Movies
Not all MPEG4 (*.avi) les are compatible. If les will not
play, try playing them with a computer. If you can play them
with a computer, try re-saving them in a dierent format.
Flash card is incompatible
If the card is an MS Duo, MSDuo Pro, MS M2 or MS PRO-HG
Flash Card, a Memory Stick Duo replacement Adaptor or
Memory Stick Micro Adaptor (not supplied) will be required.
SDXC Flash cards are not compatible with the unit. Transfer
your data to a compatible card type.
GENERAL
Blank display screen
The Video output may be switched to TV (this will route the
display to a TV). If there is no TV connected, switch the power
o, then back on again to re-enable the display.
No picture on a TV connected to the Video out jack
The Video output may not be switched on. Open the Setup
menu and switch on the AV output.
NOTE:- The Video output is automatically switched o and
the front panel display re-activated when you turn o the
power. The Video output must therefore be switched on each
time it is required.
Unstable or black and white picture on a TV connected
to the Video out jack
The TV System may be set incorrectly. Open the Setup menu
and check the settings for the TV System.
NOTE:- in Europe, TV Setting should be ‘PAL’.
No remote control response
The battery may be exhausted or inserted incorrectly. Check
the installation of the battery and replace if exhausted.
Controls lock up
Your Media Player is a complex electronic product and
there may be occasions when playback of cer tain media
combinations could cause the control system to ‘lock’. In this
case, turn o the power, wait for 5 seconds, then turn it back
on again. This will reset the control system of the player.
23
HEADPHONES
WARRANTY SPECIFICATIONS
There is a headphone output jack on the back panel.
If headphones are connected to this jack for private listening,
the speakers will cut out automatically.
CAUTION: To avoid possible damage to your hearing, do not
listen to music at high levels through headphones.
CARE AND MAINTENANCE
AFTER USING THE PLAYER
Set the player to Standby.•
Remove any loaded media.•
Switch the unit o at the mains and unplug it for greater •
safety.
CARE AND CLEANING
Care and cleaning operations should be carried out with the unit
unplugged from the mains.
Clean the plastic parts with a barely damp cloth and then dry carefully.
Do NOT touch the screen with bare ngers, hard or pointed objects.
Clean the screen carefully with a special cloth, such as a Calotherm
cloth available from chemists and opticians.
SPECIFICATIONS
Supply Voltage, Current : . 12V , 2A
AC Adaptor input: ............ 100-240V~, 50/60Hz, 0.65A max.
File formats from iPod
Audio les: ...................... All formats compatible with iPod
Video les: ...................... All formats compatible with iPod
Photo les: ...................... All formats compatible with iPod
File formats from Flash Media
Audio les: ...................... MP3
Video les: ...................... XVID, Motion JPEG, MPEG1.
Photo les: ...................... JPEG (up to 14Mp)
Flash media capacity ....... 32GB max.
Net Weight: .....................1130g
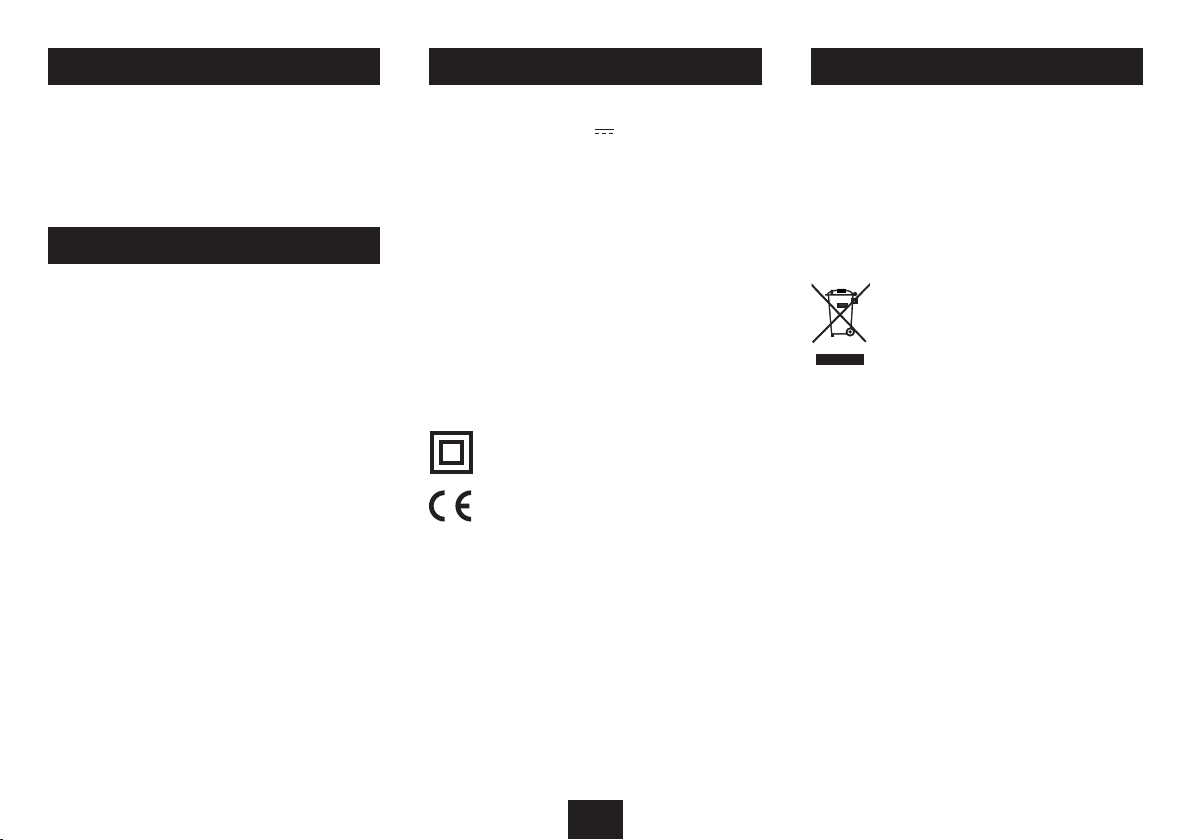
Class II construction double insulated.
This product must not be connected to earth.
Your Tesco appliance is covered by a warranty for 12 months
from the date of purchase. If a fault develops during this
period, please contact the TESCO electrical help line on 0845
456 6767. Please have your original purchase receipt with
you when you call. This warranty in no way aects your
consumer rights.
UK: Waste electrical products /batteries should
not be disposed of with household waste.
Separate disposal facilities exist, for your
nearest facilities.
See www.recycle-more.co.uk or in-store for
details.
ROI: Produced after 13th August 2005. Waste
electrical products/batteries should not be
disposed of with household waste. Please
recycle where facilities exist. Check with your
Local Authority or retailer for recycling advice.
24


Te sco Stores Ltd,
Delamare Road, Cheshunt, Herts, EN8 9SL
82-322-00030
Technika Helpline: 0845 456 6767 (Calls cost up to 4p per minute from a BT landline, other providers may vary)
VB111 V0.5
 Loading...