

Page 1

Sensor touch Timer models
TO86MSS-5
Page 2

24
25
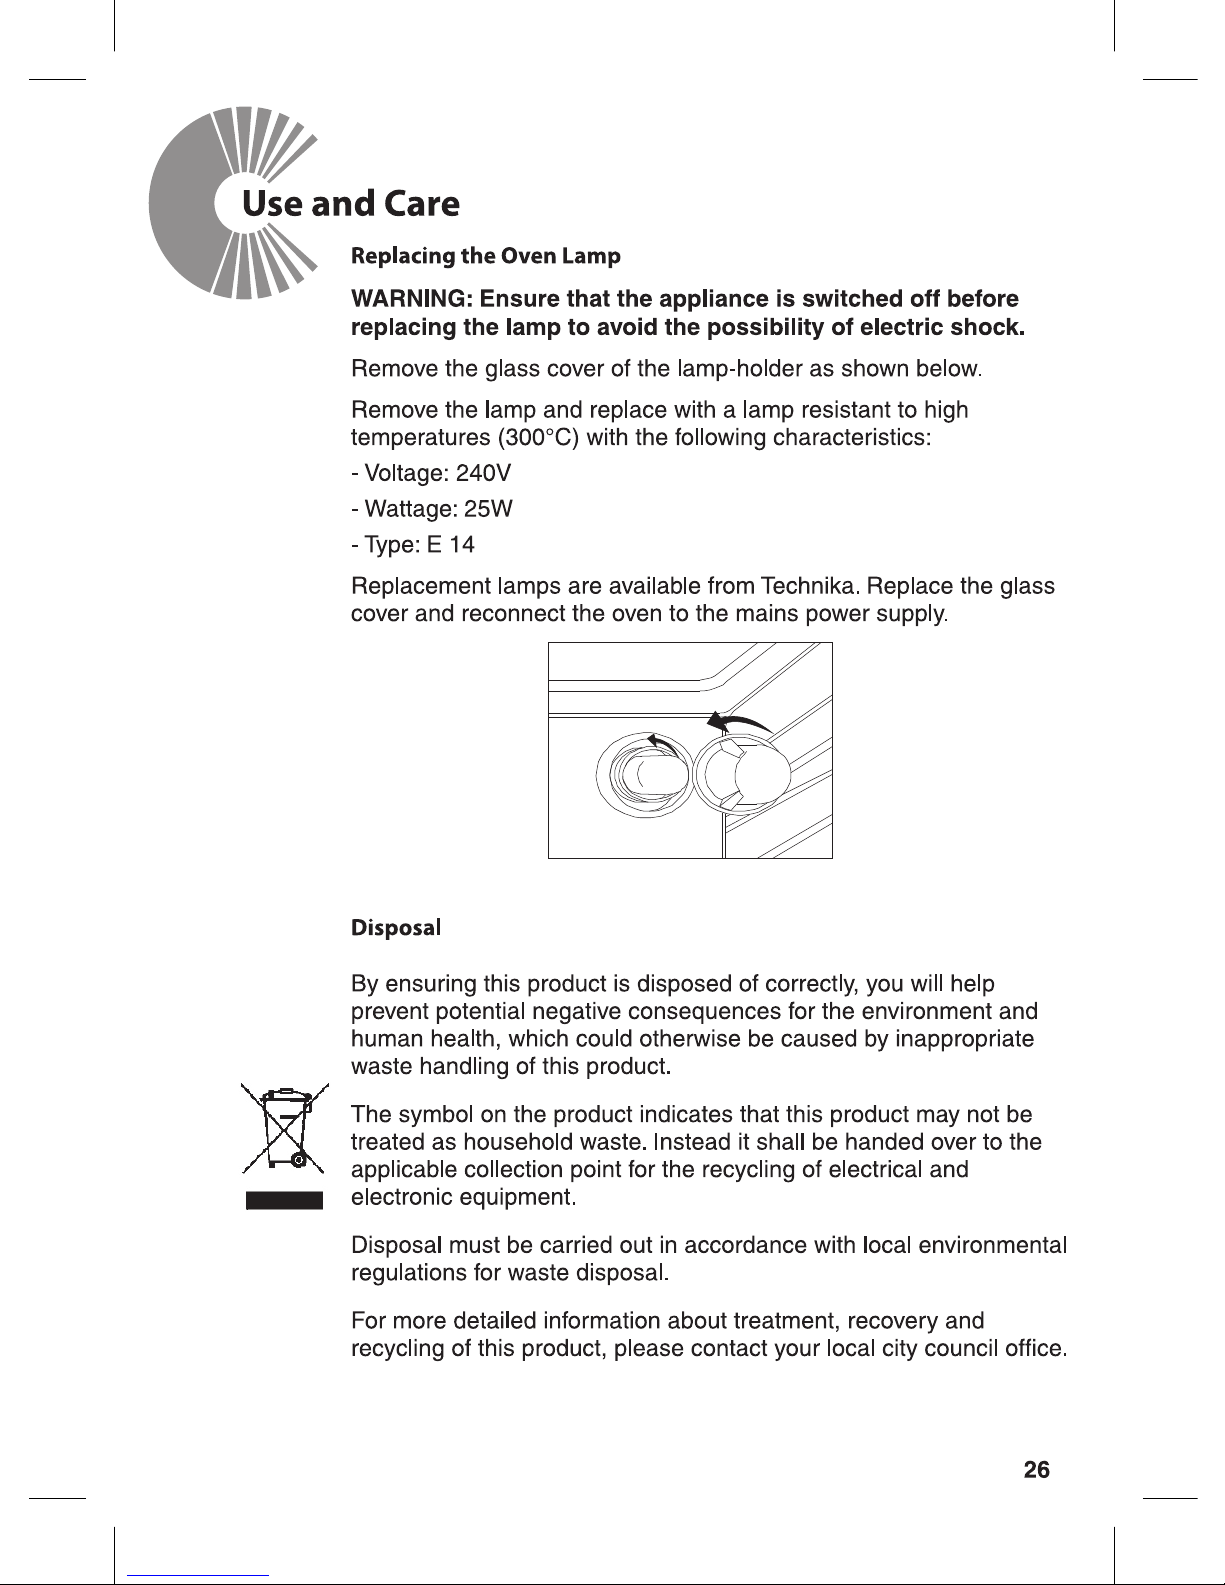
26
26
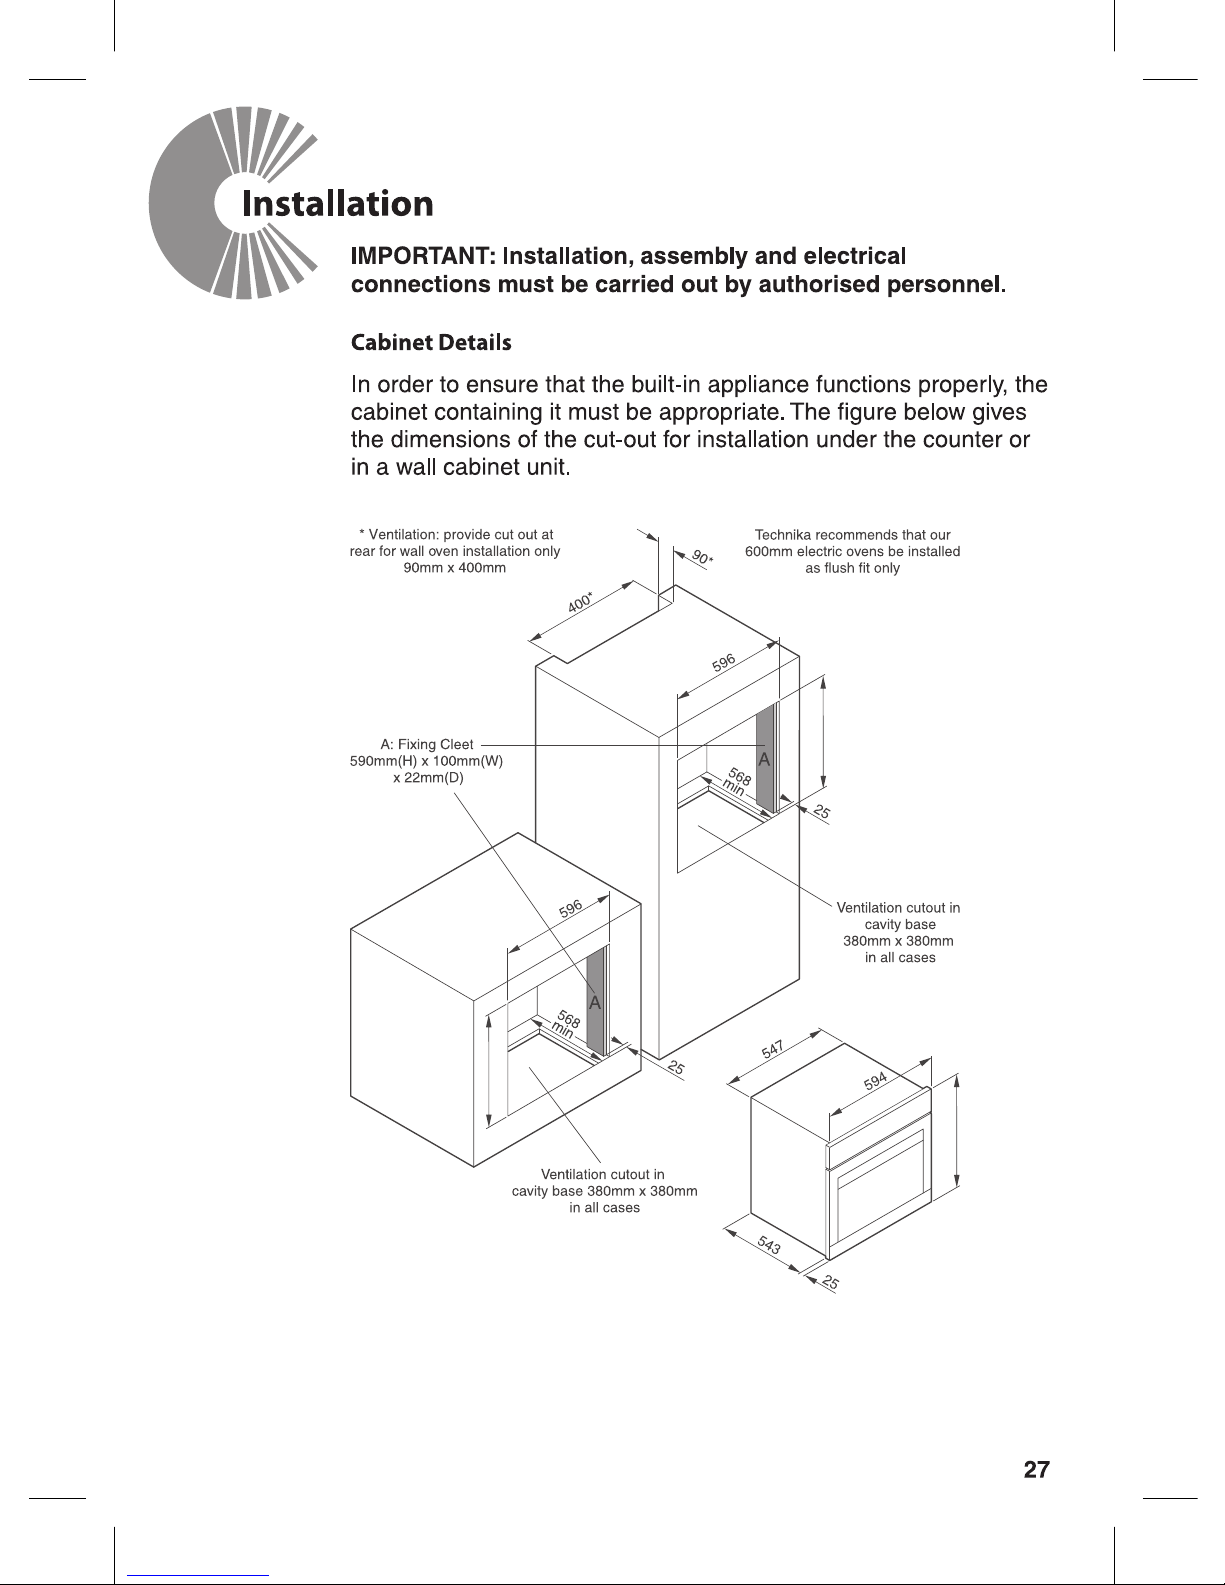
27
29
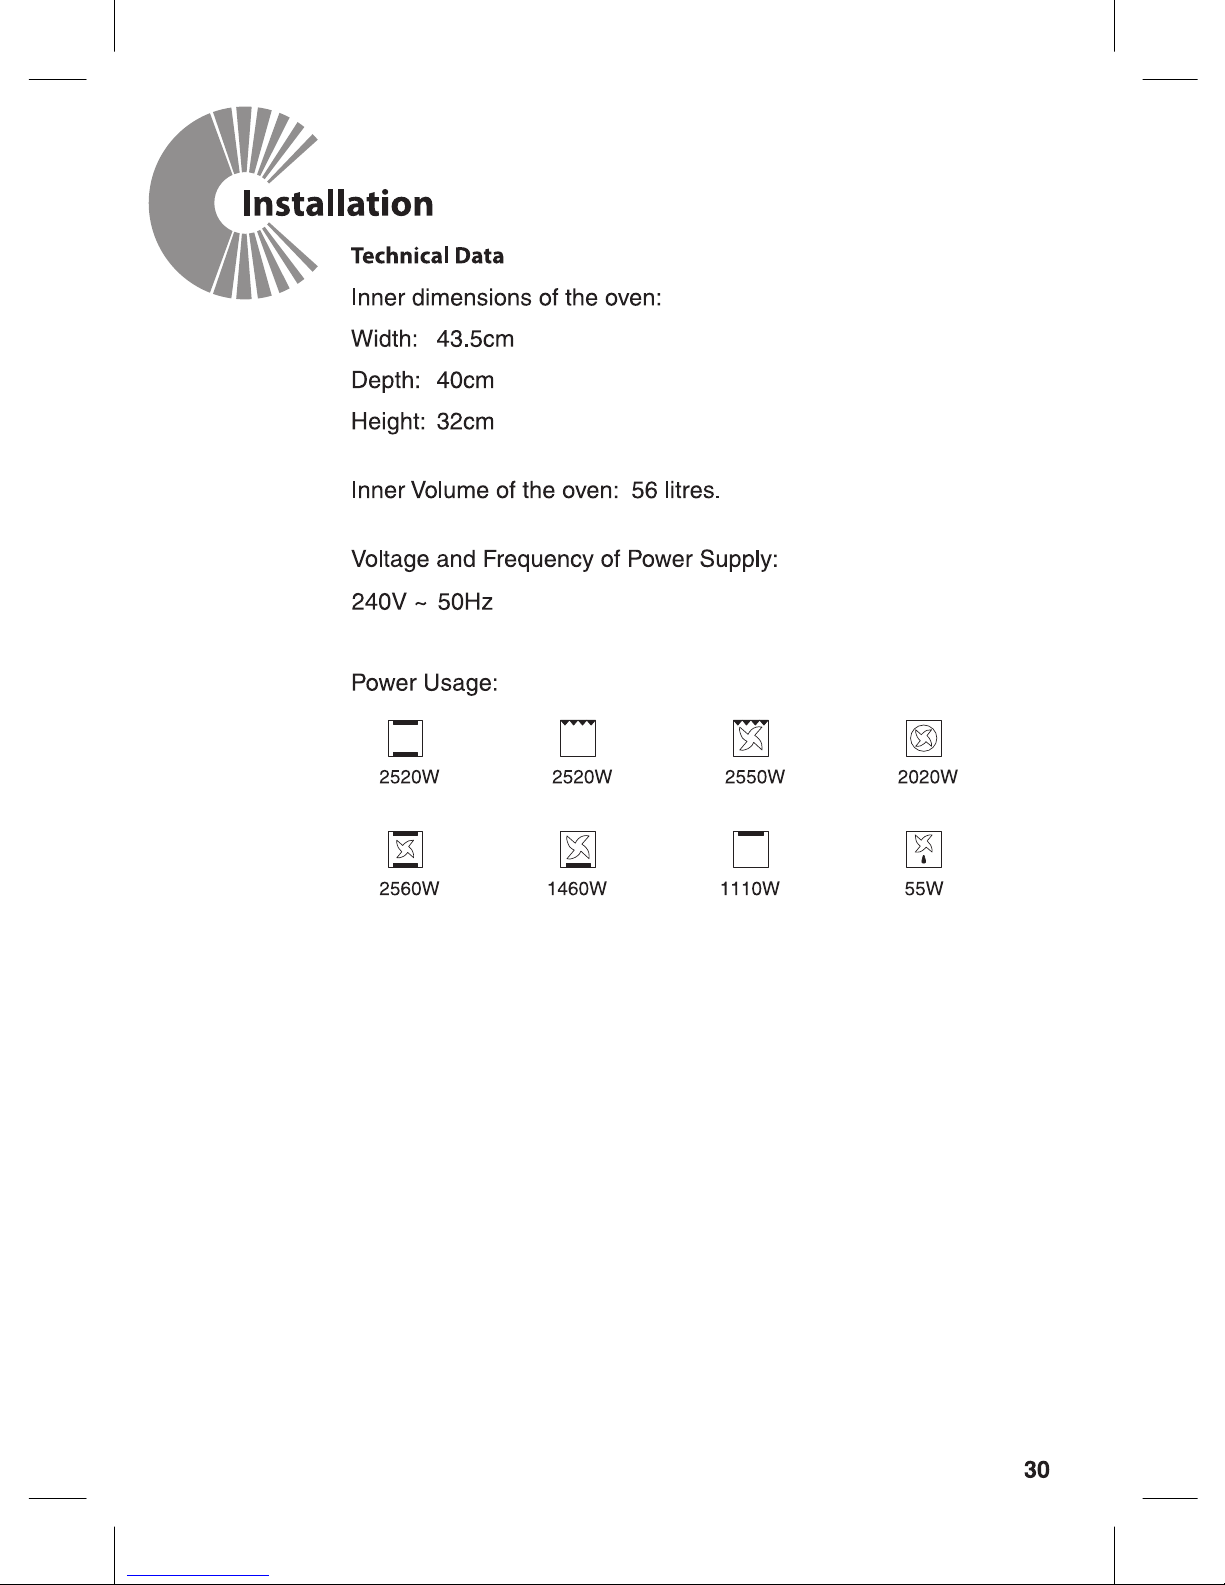
30
Digital clock timer with sensor touch control
Page 3

Page 4

Page 5

Page 6

180
220
M
AX
60
100
120
160
Page 7

Page 8

Page 9

Page 10

Page 11
Page 12

Digital clock timer with sensor touch control
Touch control
Symbol 1 will start flashing when
the unit is switched on for the
first time.The symbols 12.00
appear on the display.
Setting the clock To set the
current day time:
By pressing choice keys
2 or 3 (– or + )
you can set the time.
After a few seconds the controller
sets the time currently displayed
and the symbol 1 goes out.
The set time can be also set
afterwards. Thereforeyou have to:
Press the middle key 4 repeatedly
till the symbol 1 will start flashing.
Set the time as described.
Important! If you change the time setting,you reset the timer and
cancel former set programs.
Page 13

Electronical countdown timer
The countdown timer works
independently of all other timer
functions, and can be used
even when the oven is switched
off.
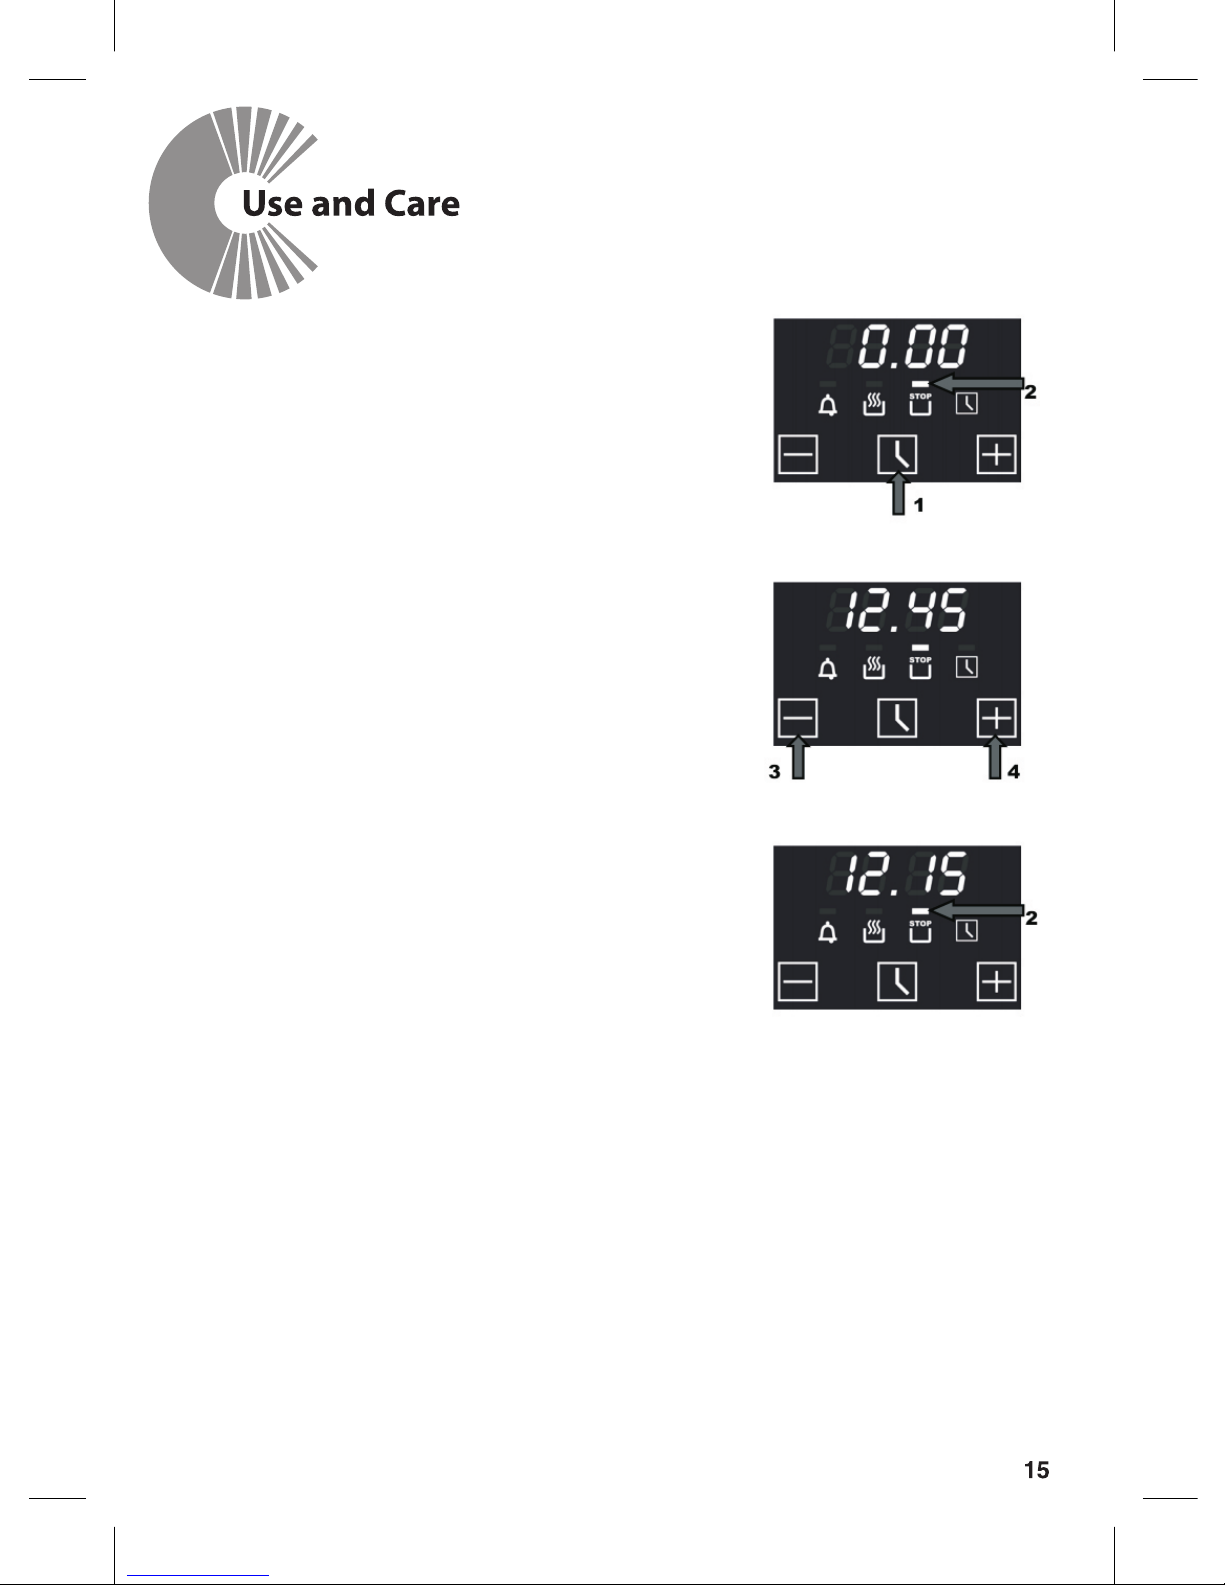
To switch on the countdown timer
Press the middle key 1 repeatedly
till the symbol 2 will start flashing.
The symbols 0.00 appear on the
display.
Press the choice keys
3 or 4 (– or +) to
set the duration and wait a few
seconds. After a few seconds
the timer starts thecountdown,
the display shows the countdown
time, the symbol countdown timer
2 appears.By pressing the button
1 you can call up the current time
indication for 5 seconds.
After the end of the countdown
the oven emits thedouble sound
signals with interval of 2 seconds
during two minutes. The symbol
countdowntimer 2 will continue to
flash after the end of emitting the
sound signals.
Press any key to turn off the sound
signals and the symbol countdown
timer 2.
The symbol countdown timer 2 goes
out. The display shows the current time.
Page 14

position
to operate.
Setting the cooking time
①、The process in the oven
should switch off after a wanted
duration automatically (only for
function electric grill).
Before setting the duration you
have to set the oven operating
function grill and the temperature
(see chapter “Electric grill”).
Press the middle key 1 repeatedly
till the symbol 2 will start flashing.
The symbols 0.00 appear on the
display.
By using the choose keys
3 or 4 (– or +)you set the wanted
duration of the preparation. After
a few seconds the countdown of
the duration starts.
The display shows the countdown
time, symbol 2 appears on the
display to confirm the successful
setting and the current time
appears again.
After the end of the countdown
the oven emits the triple sound
signals with the interval of 2
seconds during two minutes to
inform you that all processes in
the oven are switched off. The
symbol 2 will continue to flash
after the end of emitting the
sound signals.
Turn the rotary handles of oven
operating functions and of
temperature regulator in the zero
position.
Press any key to turn off the
timer and the sound signals.
The symbol 2 goes out. The
display shows the current time.
Attention! If you don't turn the rotary handles in the zero
after the switch off of the timer, the oven will continue
Page 15
day time.
②、The oven must switch off after
the set end time
(only for function electric grill).
Before setting the end of cooking
time you have to set the oven
operating function grill and the
temperature (see chapter
“Electric grill”).
Press the middle key 1
repeatedly till thesymbol 2 will
start flashing.
The symbols 0.00 appear on the
display.
By using the choose keys 3 or 4
(– or +)you set the wanted end of
the preparation.After a few
seconds the program is activated.
The display shows the countdown
time, symbol 2 appears on the
display to confirm the successful
setting and the current time
appears again.
After the set end time is reached a
fourfold tone with the interval of 2
seconds sounds and the symbols
flash to inform you that all
processes in the oven are
switched off.
Turn the rotary handles of oven
operating functions and of
temperature regulator in the zero
position.
Press any key to turn off the timer
and the sound signals.
The symbol 2 goes out. The
display shows the current time.
Important! You should set a time that differs from the current
Attention! If you don't turn the rotary handles in the zero position
after the switch off of the timer, the oven will continue to operate.
Page 16
Setting cooking duration and end times
You can combine the cooking
duration and end of cooking time
functions to set the start and end
times for cooking. In this way you
can program your electronic oven
to cook while you are out
(only for function electric grill).
A great help in the kitchen!
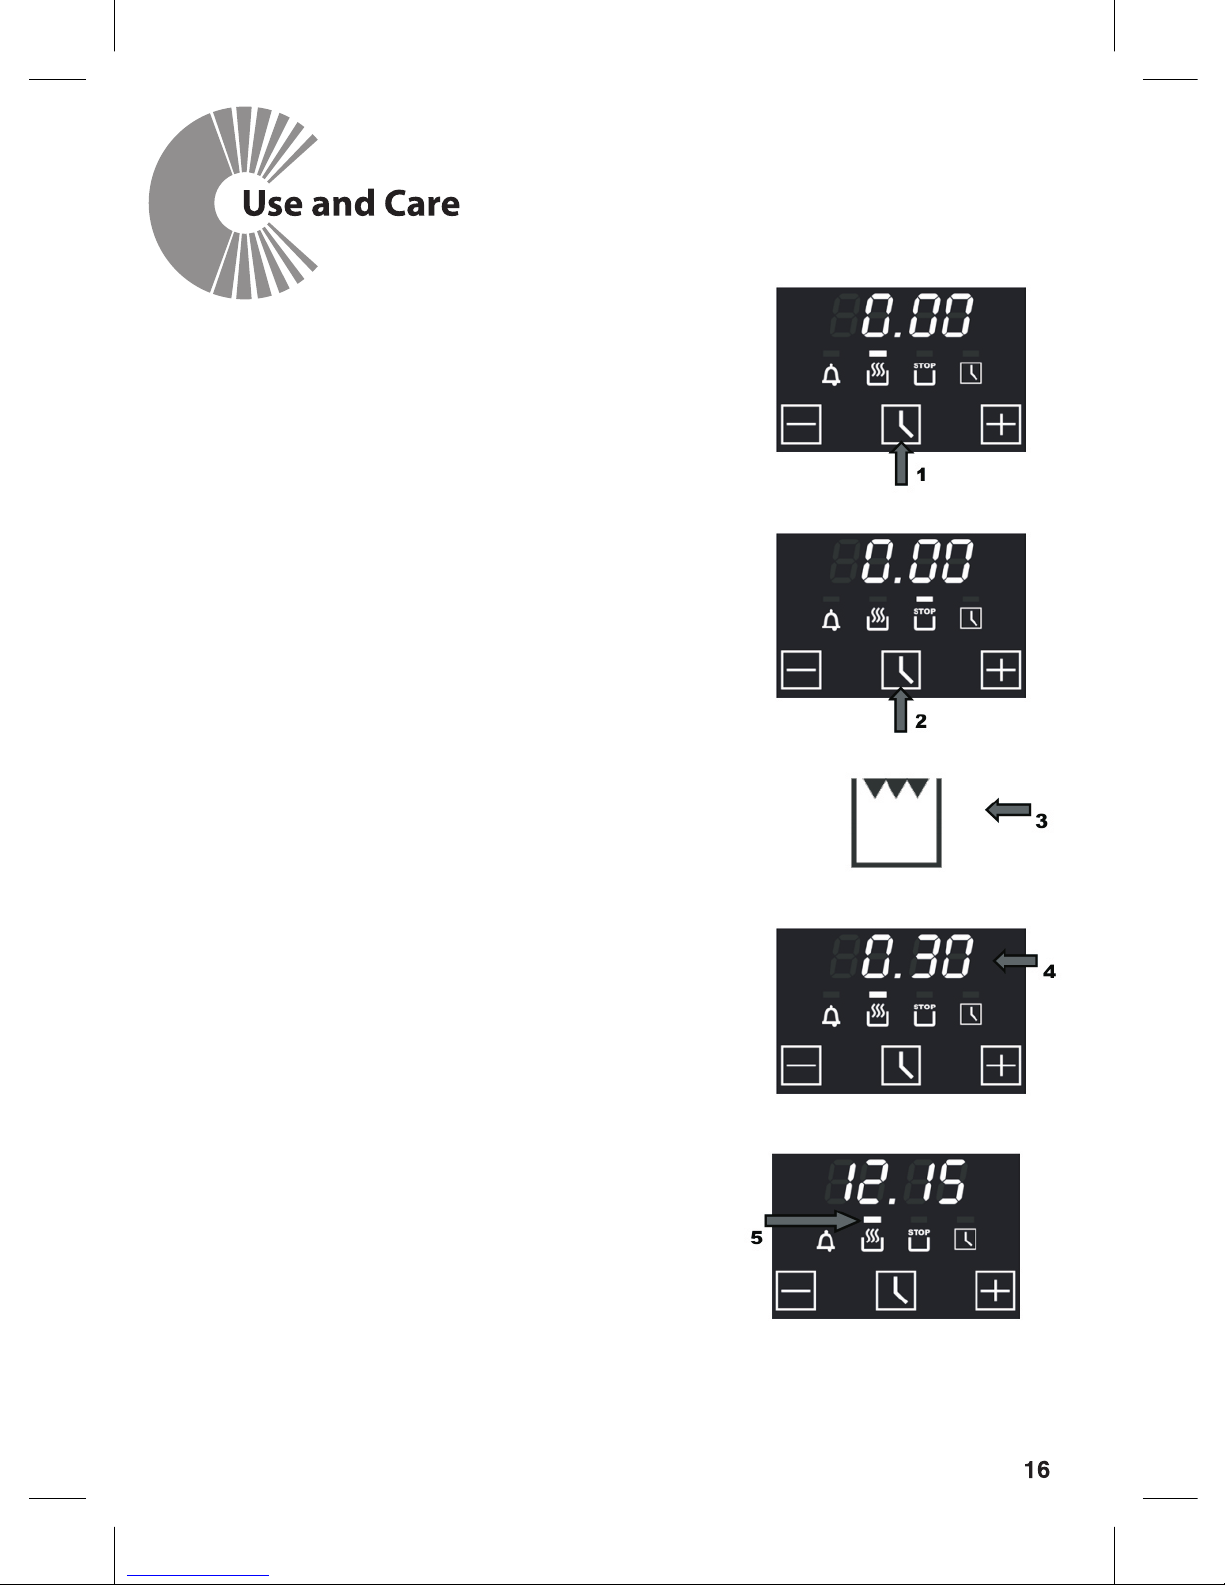
Set first the duration 1 and then
the end of cooking time 2.
Example: You want to start
cooking a dish 30 minutes before
you get home so that it will be
ready for you arrival at 12:55.
Before you set the duration and
the end of cooking time, you have
to set the oven operating function
grill 3 and the temperature (see
chapter “Electric grill”).
Set the cooking duration 4
(in our example – 30minutes).
Therefor you have to program the
wanted end of cooking time (see
chapter
«Setting cooking duration»).
The symbol 5 appears on the
display, that confirms a
successful programming of the
cooking duration and the current
day time appears again.
Page 17

Now set the wanted end time
(see chapter«Setting the end
time»).
The end time (1) appears on
the display, that accords to the
current day time plus duration
(in our example 12:45, that
means plus 30 minutes).
Set the wanted end time with
the choice key 2 ( + ).
A few seconds later this time
will be registrated 3(in our
example – 12:55, that means
we shifted the end time 10
minutes).
The oven is in expectance
state now. The current day
time is displayed 4
(in ourexample 12:15).
In our example the oven should
be turned on at 12:25 (5) with
the functions “Grill +
Thermocirculation” and be
turned off at 12:55 according
to your setting.
Attention! If you don't turn the rotary handles in the zero
position after the switch off of the timer, the oven will
continue to operate.
Page 18
Page 19

Page 20

Page 21

Page 22

Page 23

Page 24

Page 25

Page 26
Page 27
595
594
595
Page 28

Page 29
Page 30
Page 31

Page 32

 Loading...