


MP-108/ 208/ 308
MP3 Player
User Guide
2
Table of Contents
Safety Information Page 3
Windows and Windows Media Players Page 4
About Your Player Page 5
Getting Started Page 6
Uploading Music Files using WMP 9 Page 7
Transferring Other Files using WMP 9 Page 8
Disconnecting the Player in WMP 9 Page 9
Transferring Music Files using WMP 11 Page 11
Viewing the Player Drive in WMP 11 Page 15
Switching the Player On and O Page 16
Accessing Player Modes Page 17
Playing Music Page 18
Advanced Play Modes Page 19
The Hold Function Page 19
Seeking and Playing Individual Tracks Page 20
Queue Play Page 21
Using the FM Radio Page 22
Making Voice and Radio Recordings Page 26
Setting Recording Parameters Page 28
The Voice Menu Page 30
The Navigation Menu Page 32
Managing Voice and FM Recordings Page 33
Displaying the Time Page 34
System Settings Page 35
Audio Settings Page 36
Further Settings Page 37
Altering the Contrast Page 38
Altering the Backlight Time Page 38
Setting Power Savings (Auto Shut O) Page 38
Setting the System Time Page 39
Restoring System Defaults Page 39
Accessing System Information Page 39
Accessing Player Information Page 39
Warranty Page 40
Specications Page 40

3
Important Safety Information
Please follow all these guidelines to safely operate your player.
• Read these instructions before using the player
• Keep these instructions. If you are transferring this product to a third party include these instructions.
• Do not use earphones while driving, cycling or walking near trac.
• Do not listen at extremely high volumes – doing so can damage your hearing.
• To avoid damaging the player, always insert the earphones prior to switching the player on.
• Do not use or store the player in excessively dry, dusty or dirty environments.
• This product must not be exposed to dripping and splashing water or other liquids.
• Keep the player away from heat, humidity, and magnetic elds.
• Do not leave the unit exposed to direct sunlight for long periods of time.
• Keep the player away from heat sources.
• Clean the player with a soft cloth dampened slightly with clean water. Never clean the player with solvents or abrasives.
• Do not press the screen or apply excessive pressure to the player keys.
• Never disconnect the player from the PC without following the correct procedure.
• WARNING: This product contains an integral Polymer Li-ion battery. There is a risk of re and burns if the player is
handled improperly. Do not disassemble, crush, puncture, or dispose of in re or water. Do not attempt to open the
player case or service the battery pack. Use a qualied service technician to replace the battery and replace only with a
battery designated for this product. Dispose of the product with the battery intact in accordance with recycling
regulations in your area.
4
IMPORTANT INFORMATION
Windows Operating Systems And Windows Media Players (WMPs)
There have been many versions of Windows Operating Systems and their associated Media Players over the years. In most cases the default
Media Players that shipped with the Operating systems have been upgraded. Here are our recommendations:
Windows Me and Windows 2000: If you have not already done so, you should upgrade to WMP 9. This is a free upgrade. To download WMP 9
copy and paste this link into your Web Browser http://www.microsoft.com/windows/windowsmedia/download/AllDownloads.aspx?displang=en
&qstechnology= In the ‘Select Version’ Box click Windows Media Player 9 Series (for Windows 98 SE, Me, and 2000). Follow the instructions. WMP
9 does not support player synchronisation. Please follow the special instructions on Pages 7 and 8 in this guide for downloading and managing data between your MP3 player and your PC.
Windows XP: WinXP originally shipped with WMP 9. Many users upgraded to WMP 10.
Not all users have installed WMP 11 which is the latest version.
This player is optimised to interface with WMP11.
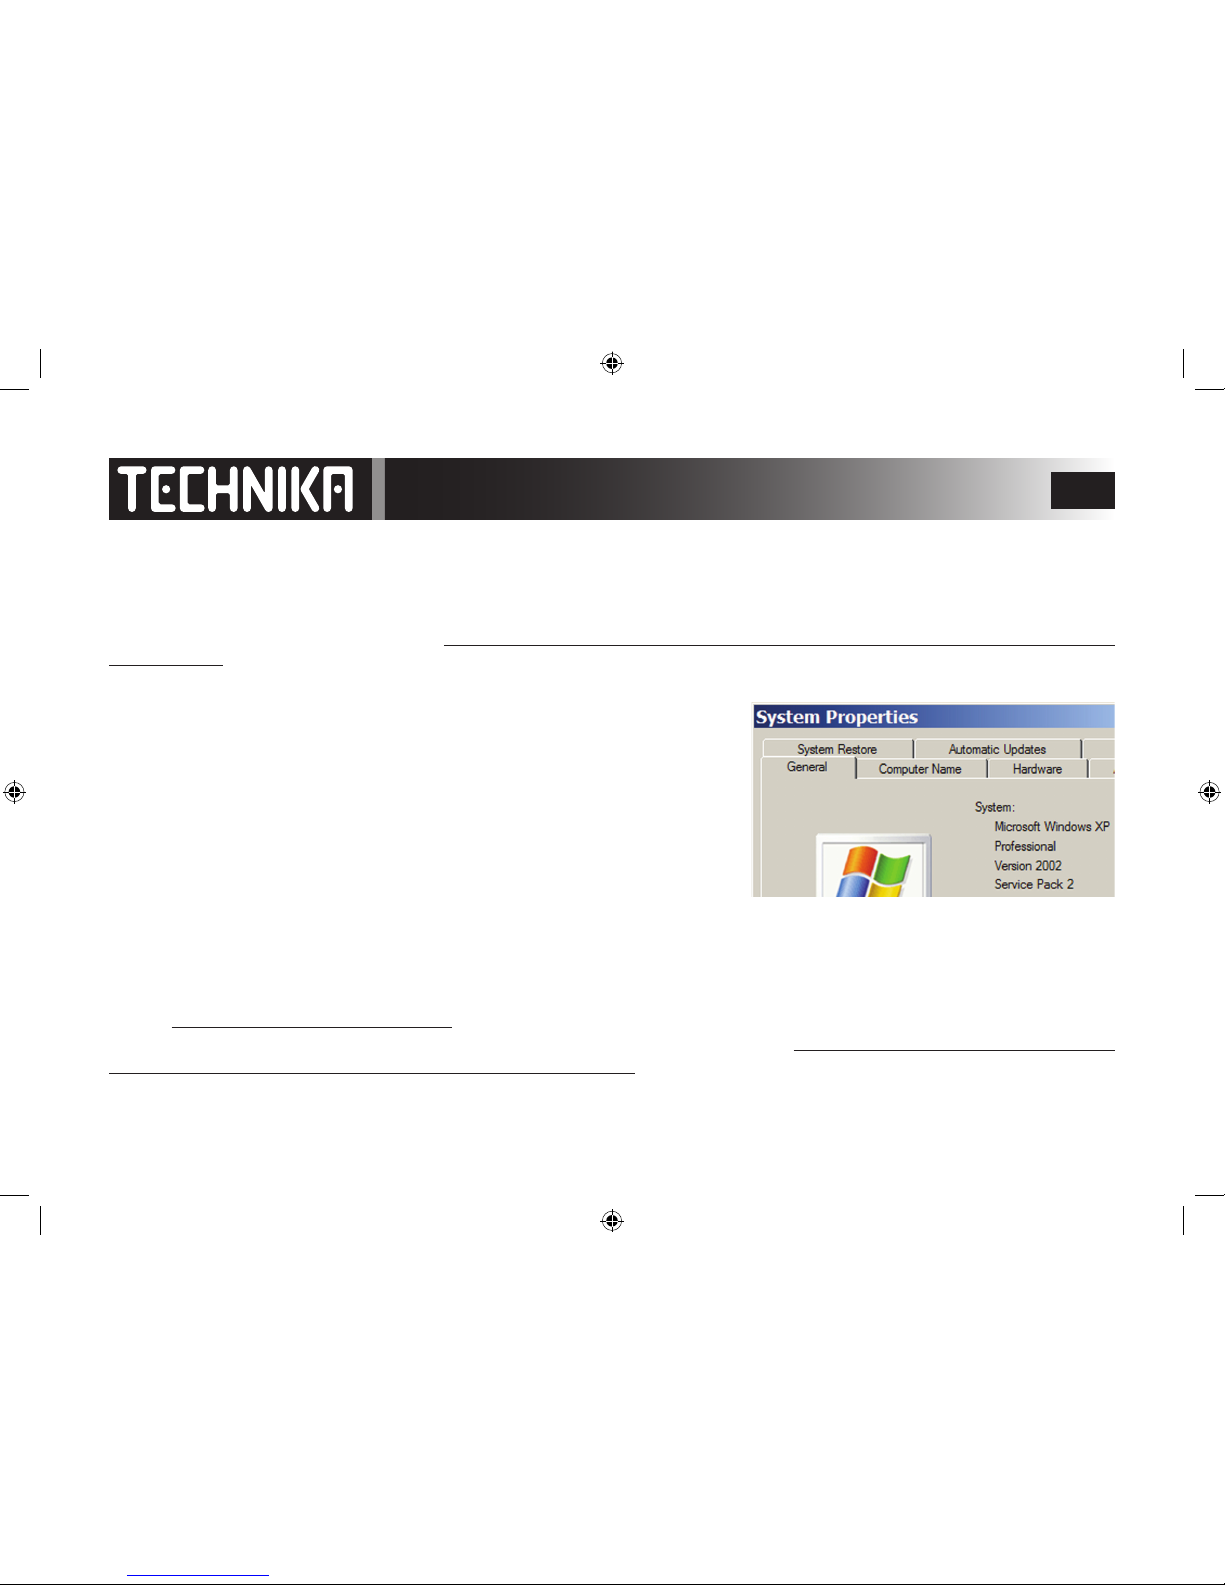
Windows XP will support MP 11 if Service Pack 2 (SP2) is installed. To nd out if your version is SP2: Click START. Right click in the Start Menu and then click on the ‘Properties’ tab
which opens. Refer to the image at the right.
If you do not have SP2 you should use WMP 10 (or preferably install SP2 and WMP 11)
Windows Vista: The default player is WMP 11 - there are no issues.
ESSENTIAL INFORMATION FOR WINDOWS MEDIA PLAYER 10 USERS
Much music is content protected and requires a licence. This is normally automatically downloaded when you download the music. This MP3
player uses DRM9 to manage content protected les. WMP 10 does not fully interface with the latest generation of MP3 players using DRM9
and the player may not be recognised when you upload protected les - you may see a message like: Windows Media Player cannot synchronize
the le because the device needs to be updated. There is a free Service Patch (Hotx) available from Microsoft. Copy and paste this link into your
browser http://support.microsoft.com/kb/922814 and follow the instructions to download the hotx applicable to your Operating System.
A better solution is to download and install WMP11. Copy and paste this link into your browser http://www.microsoft.com/downloads/details.
aspx?FamilyID=1d224714-e238-4e45-8668-5166114010ca&DisplayLang=en Follow the instructions to download and install WMP11.
To fully enjoy the facilities of your player we strongly recommend the use of WMP 11 where possible.
WMP 9 should only be used with Win 2000 and WinMe. Synchronisation of this MP3 player with WMP 9 is not possible.

5
About Your Player
A: USB port
Connect the player to computer with the supplied USB cable.
B: MICROPHONE
C: CONTROL JOYSTICK >||
During Play: Press to pause/restart the music.
In menu mode: Press to select options or enter the submenu
Rock right: to fast forward or select the next track/menu.
Rock left: to fast reverse or select the previous track/menu.
Rock up: to increase volume or move up a menu
Rock Down: to decrease volume or move down a menu
D. HOLD SWITCH
Lock the controls to avoid accidental operation
E: HEADPHONE SOCKET
F: POWER ON/OFF AND MENU SWITCH
Press to turn on the player.
Press and hold to turn o the player.
During play: Press to go to the main menu.
In menu mode: press to go up one menu item.
G: RESET BUTTON
Press to reset the player.
H: REMOVEABLE BELT CLIP
To remove the clip, slide it o in the direction of the arrow on the
drawing at the right. To replace the clip, reverse the procedure
OVERVIEW
JOYSTICK HOLD SWITCH
UNLOCKED
LOCKED
6
Getting Started
Before using the player you should charge the battery
Win Me/2000/XP/Vista – The system will auto-recognise the player
Win 2000: ensure you have SP3 installed
Win XP: To use the latest Media Player (WMP11) you should have SP2 installed.
• Make sure the player is switched o.
• Connect the supplied USB cable to the player
• Plug the cable into a free USB port on the PC.
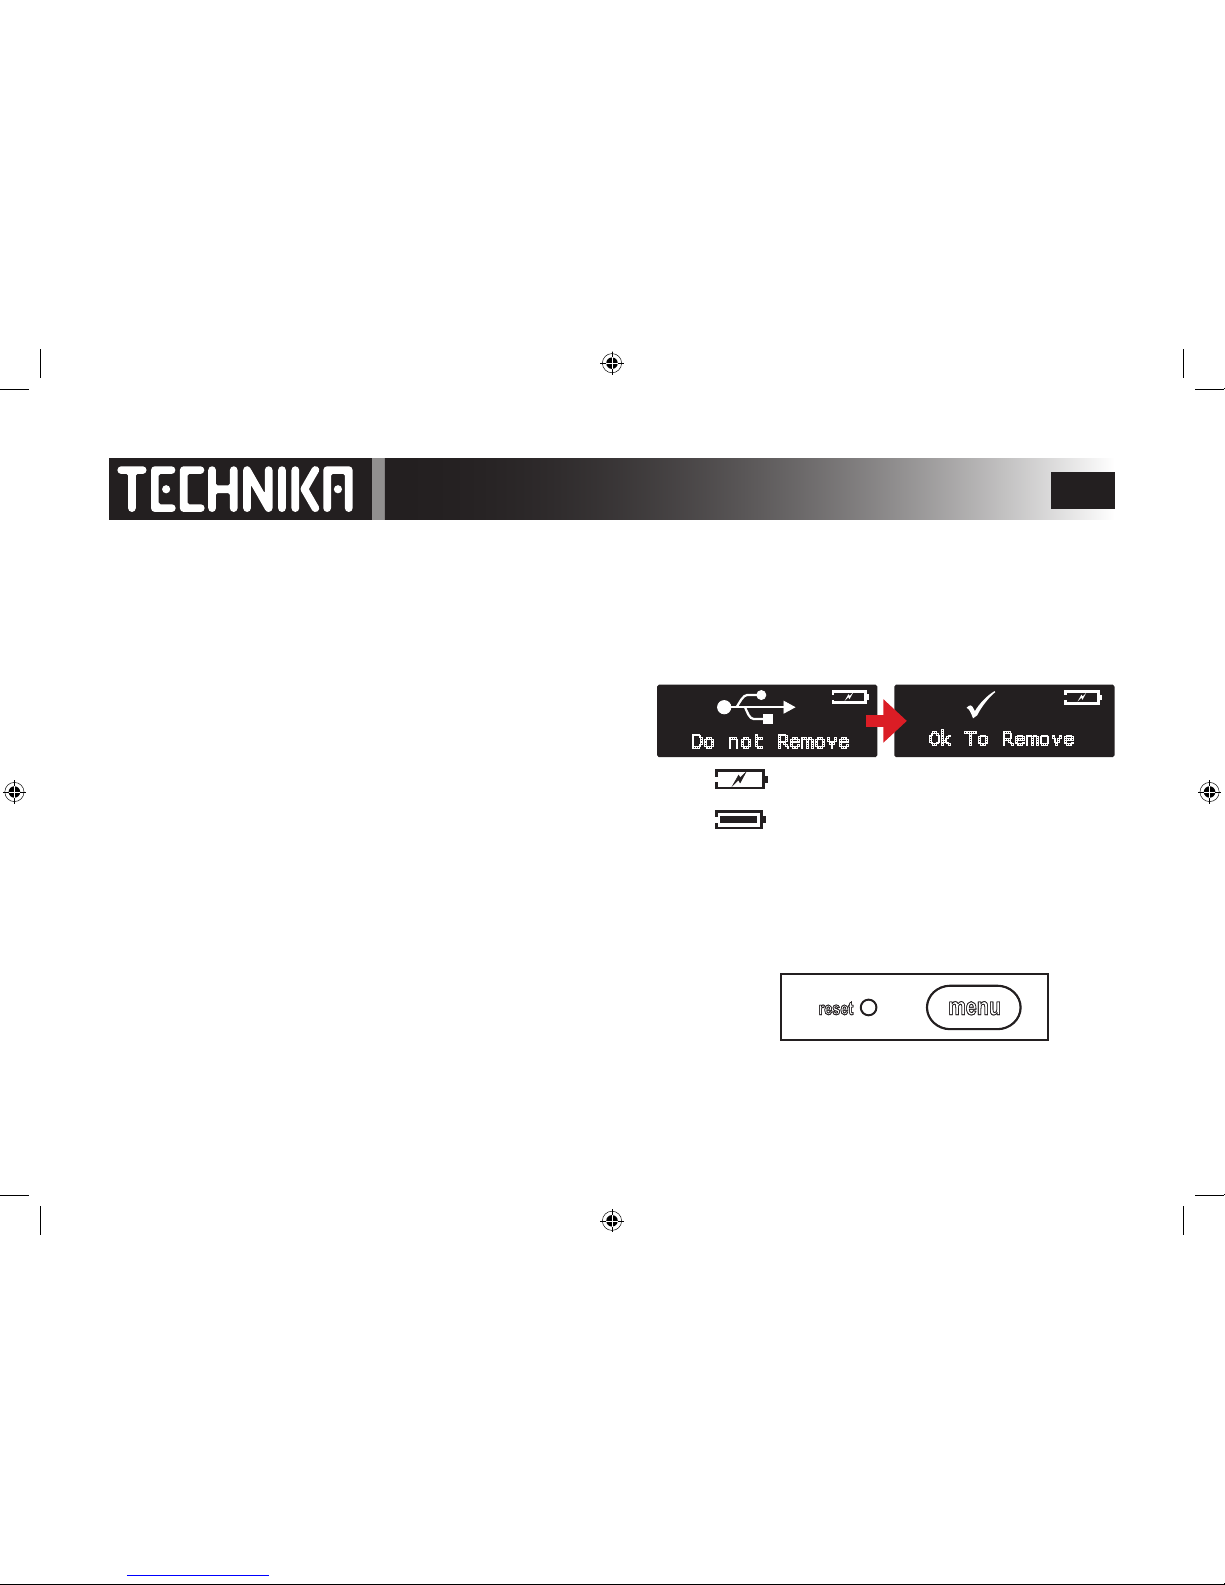
• If connection is successful the player will display these screens
• The lightning ash on the battery icon indicates the battery is charging.
You should leave the player battery to charge for at least eight hours.
When the battery is fully charged the battery icon will display.
You cannot operate the player controls when it is connected to the PC!!
RESTORING THE PLAYER
If for any reason the player freezes either during connection or disconnection from
your PC or during operation, the player will need to be restored.
• Unplug the MP3 Player from the PC (if connected)
• Locate the Reset hole. Insert a paperclip or similar object in the hole and gently
press the concealed switch. The player will then resume normal operation.
Do not Remove
Ok To Remove
menumenu
resetreset

7
Uploading Music to the Player - WMP 9
When you connect the player to a PC with Windows Media Player 9 it will appear as
a removeable drive in “My Computer”.
• To access “My Computer”: Click Start/My Computer - refer to the image on the right
• In the box that opens identify the player. It will be listed as a removeable disk.
Hint: To make it easy to identify the player on the PC, we suggest you
rename the disk. The PC will recognize the player by its new name
whenever you connect it.
You may now access and play les stored on the player, and transfer
data between the PC and the player.
Tranferring Music Files
• Locate the les on your PC hard drive in one window.
• In a second window access the player via “ My
Computer”.
• Choose the les. Right click the les and select “Copy”
• Place the mouse on the player icon Right click the icon
and select and click “Paste” to copy the les across.
Note: If your les are stored in folders you can copy the
entire folder onto the player icon. You should ensure that
only music les (MP3 or WAV) are in the folders before you
transfer them.
You may also open the player window and drag and drop
les directly into the window - see the next page.

8
Transferring Other Files - WMP 9
• In “My Computer”, navigate to the MP3
player
• Double Click on the player icon to open
the player folder
This is what the player structure looks like
before any music les are uploaded.
• Music les and folders are stored in the
player drive directly.
• Microphone recordings and Recordings
of FM radio broadcasts are stored in their
own subfolders in the RECORD folder.
When the player is connected to the PC these
folders and the seven “hidden” les are created.
Use the correct folder when uploading les. If
you accidentally delete a folder, the player will
re-create it when you next connect it to the PC.
If you store the wrong le types in the player
there is a strong possibility that the player will
not recognise the le.
MUSIC FILES
GO HERE

9
Disconnecting the Player - WMP 9
After you have transferred the les and the player battery is charged:
1. Locate the “Safely Remove Hardware” icon on the taskbar at the bottom right of the screen.
2. Double click the icon
3. In the box that opens, click Stop
4. Another screen opens. Click OK
5. When you see this balloon over the taskbar you can
disconnect the player from the PC.

10
• Start Windows Media Player 11 before connecting the Player to the PC.
• For best results connect the PC to the Internet
• Now connect the Player to the PC.
WMP 11 will detect the player as an MTP device
Transferring Files - WMP 11
You can choose to select all the les automatically or manually
At the right there is a box asking you if you want to update the player clock. If you select yes and you have any
protected music with a time limited licence that has expired, the music will not be playable.
Make your selections and click NEXT to proceed.

11
Windows Media Player will now set the
player up for Synchronization
You may, if you wish choose to give the
player a name for easy future recognition
Click “FINISH’ to continue
Transferring Files - WMP 11

12
The player is divided into two
panes.
The right pane has the image of
your player’s hard drive.
The left pane carries details of all
the les on your PC.
You can now locate the les you
want to copy to the player and
drag them to the right pane.
You can drag a complete album or
selected tracks.
If there are DRM les the player will
locate and download the licence.
If the player cannot nd the licence
it may download the licence from
the supplying website or prompt
you to nd the license.
If no valid license is available the
le will not be synchronised.
When all the les have been transferred: Click ‘START SYNC’
Transferring Files - WMP 11
13
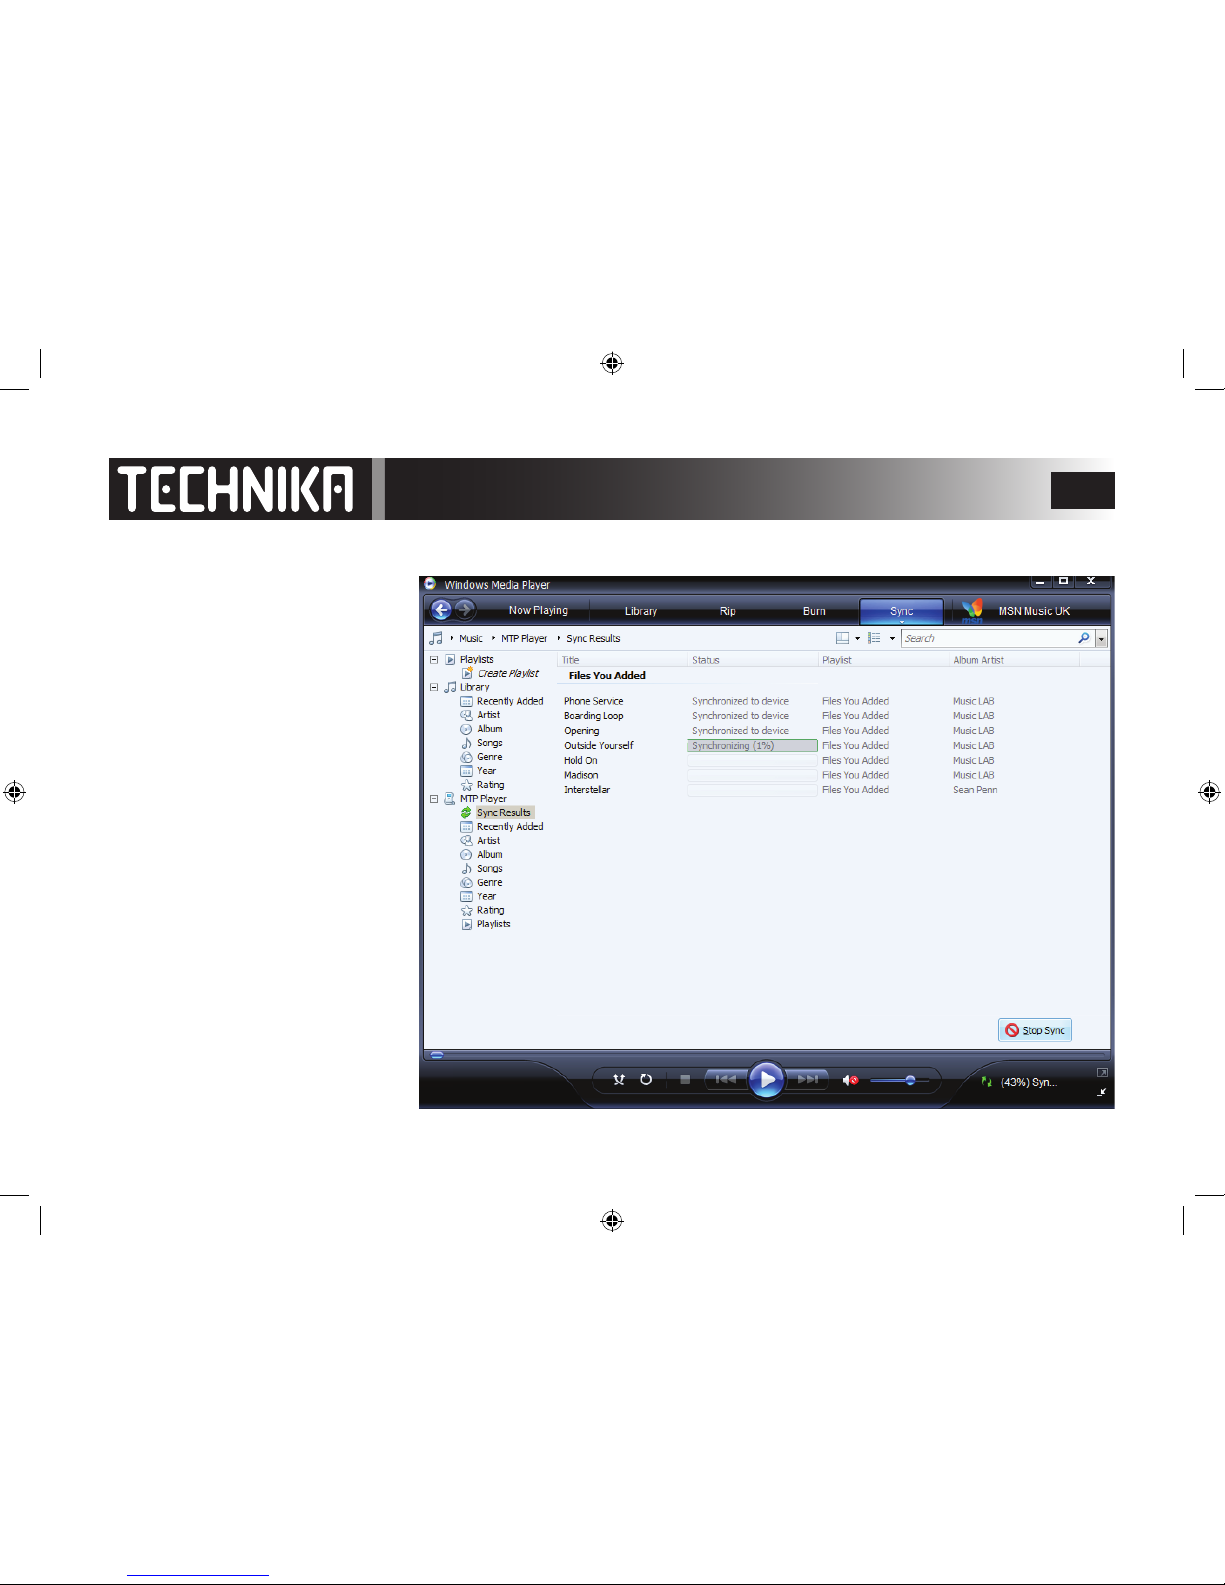
The les will now be uploaded and
synchronised to the MP3 player.
Do not interrupt this process
Transferring Files - WMP 11

14
After the process has ended
A message appears in the Right
pane asking you if you want to Sync
more les or disconnect the player.
You can now disconnect the player
and close WMP 11.
Transferring Files - WMP 11

15
Viewing Files - WMP 11
Locate the MTP Player in ‘My
Computer’
Click to access the drive
Click to open the drive
You can now access the contents of the
Mic and FM Record folders
To access the recorded Voice and FM
recordings click ‘RECORD’
Although it is possible to directly
drag music les to the hard drive, we
suggest that in all cases you should
manage your music les via WMP 11.
You can open the player directly
from WMP 11 and view and manage contents more successfully with
more options.

16
Operation
SWITCHING ON AND OFF
Allow the player to fully charge. Charging times will depend on the amount of residual charge in the battery.
Connect the earphones to the HEADPHONE socket
To Switch the player on:
• Ensure that the HOLD switch is OFF or the player will not initialise. Refer to the diagram
• Press the MENU button.
After a short delay the welcome screen will display and the player will update the music library - then activate.
When you rst switch on: the player will go into Music Play mode.
In normal use: when you switch on the player will go to the play mode it was in when you switched it o.
To Switch the player o:
• Press and hold the MENU button.
• Wait until the bar goes black and then release the button.
The player will now switch o
AUTO SWITCH-OFF
If there is a period of inactivity, the player switches o to save power. The time period can be altered in System settings.
• Press the MENU button to switch on again.
Init Start
Init Finished
Shutting Down
Shutting Down

17
RECORD
NOW PLAYING
ALL SONGS
ARTISTS
ALBUMS
GENRES
VOICE
FM
NAVIGATION
TIME
SETTINGS
Your player has 11 Modes.
To access the modes from any screen: Repeatedly Press the MENU key.
To move between modes: Rock the Joystick >> or <<
To enter the selected mode: Press the Joystick >||
This selects the last played folder. If you were last
playing all the songs or a Beatles folder the player
will start with that. If you were last replaying
Voice messages the player will start there.
This folder also acts as a tempory store for any “on
the y” playlist you make up (see Page 21)
Play all the songs in the player
Select songs by Artist name
Select songs by Genre: Rock Pop etc.
Select songs by Album title
Record voice via the
microphone. Record FM
Radio programmes.
Display the Date and
Time (if you have set this
up)
Replay Voice or FM Radio
recordings
Listen to FM Radio broadcasts
Set Eq and Replay modes,
player parameters, and
the date/time.
Select, play, and delete
songs, or Voice/FM recordings

18
Playing Music - Basic Play
Press the MENU key to switch the player on
Press the MENU key to access the MODES
Rock the Joystick >> or << to select the ALL SONGS folder.
Press the Joystick >|| to enter MUSIC mode.
The rst track will display.
Press the Joystick >|| to start play
During Play you can:
Press the Joystick >|| to pause
Press the Joystick >|| again to resume play
Rock the Joystick >> or << to go forward or back a track
Rock the Joystick << once to go to the start of the current track
Rock and hold the Joystick >> to fast forward
Rock and hold the Joystick << to fast reverse
The player indicates the time elapsed and total track time
Rock the joystick + (UP) to increase volume
Rock the joystick – (DOWN) to decrease volume
The player briey indicates the Volume Level
To stop the player:
Press the Joystick >|| to pause the player:
Now rock the Joystick once >> or << to stop the player.
When you have nished play: Press and hold the MENU key to switch o
To play all the songs in the player
012/172
The Beatles
Let it Be
LOCK (if selected)
Artist
Battery Status
Empty
Full
Song Title
Track No./Total Tracks
012/172
Volume 24
NOW PLAYING
ALL SONGS
012/172
2:08
5:37
012/172
2:08
5:37
Fast
Forward
Fast
Reverse
Shutting Down
Shutting Down
Play
Pause
Stop
►
II

19
Advanced Play Options
A-B REPEAT
During Play , when you reach the start of the passage you want to repeat
Press and hold the Joystick >|| in. The “A” segment of the A-B indicator will indicate.
when you reach the end of the passage
Press and hold the Joystick >|| in. The “B” segment of the A-B indicator will indicate.
The selected passage will now continuously repeat
To restore normal play: Press and hold the Joystick >|| in.
REPEAT AND RANDOM PLAY
These play modes are selected in the SETTINGS Menu - See Page 37
SOUND EQUALISATION
Six EQ. modes are available. and are selected in the SETTINGS Menu - See Page 36
THE HOLD FUNCTION
HOLD locks the player controls. In HOLD mode even the the ON/OFF function is
disabled. Play or recording actually in progress is unaected.
To lock the player controls: Slide the HOLD switch to the right.
The LOCK symbol appears at the top of the play screen
To Unlock the player: Slide the HOLD switch to the left.
The LOCK symbol disappears.
A-B Replay
012/172 A-B
The Beatles
Let it Be
1
all
S
S
Repeat One
Random One
Repeat All
Random All
012/172
The Beatles
Let it Be
LOCKED
012/172
The Beatles
Let it Be
012/172
The Beatles
Let it Be
UNLOCKED
If you operate the player in lock mode it will not
respond and you will see this message:
Holding...

20
Let it Be
Abbey Road
Seeking and Playing Individual Tracks
The player sorts music into categories using ID3 tags. ID3 tags are electronic tags embedded by the music producer in the
recording and contain information such as song and album title, artist, production date and much more. This is the informa-
tion the player sorts when it boots. If ID3 tags are present, you can rename a le or sort it into folders but the player can always
identify the music by the tag. If ID3 tags are not present, the player will group the music into an “anonymous” section
Search the
player by
Artist Name
Search by
Genre (Rock,
Pop, etc.)
Search by
album title
ARTISTS
ALBUMS
GENRES
A: Press the MENU key to switch the player on.
B: Press the MENU key to access the MODES
C: Rock the Joystick >> or << to select ARTISTS.
D: Press the Joystick >|| to conrm
E: The Artists menu will deploy
F: Rock the Joystick >> or << to select the Artist.
G: Press the Joystick >|| to conrm
H: All Albums by the selected artist will display
I: Rock the Joystick >> or << to select theAlbum
J: Press the Joystick >|| to conrm
K: All tracks in the selected album will display
L: Rock the Joystick >> or << to select the track
M: Press the Joystick >|| to play the track
All the tracks in the album will play from the selected
track.
Example: Choosing and playing a track from the Artists Folder. (You can use the same procedure to search by Album or Genre)
Artists
Bach
Beatles
ARTISTS
Dig It
Let it Be
06/12
The Beatles
Let it Be
NOTE: If you have grouped your music into
custom folders you can identify tracks from
those folders using the NAVIGATION menu.
See Page 32

21
Let it Be
Abbey Road
Queue Play
Example: Build a new customised play queue of 3 Beatles songs from dierent albums using the ARTISTS menu
Dig It
Let it Be
Rock >> or << to select the Album
Press >|| to conrm
Rock >> or << to select the song
Press and hold >||
Let it Be
Norwegian Wood
Cancel
Add to Queue
Play
The track plays: The TOTAL TRACKS
number shows a new queue is started
0001/0001
The Beatles
Let it Be
Rock >> or << to select PLAY
Press >|| to play the track
Press
MENU
NOW PLAYING
Artists
Bach
Beatles
ARTISTS
Rock the Joystick >> twice to return to ARTISTS
Press >|| to conrm
Rock >> or << to select the album
Press >|| to conrm
Let it Be
Abbey Road
Rock >> or << to select ‘Beatles’
Press >|| to conrm
Come Together
Something
Abbey Road
Rock >> or << to select a song
Press and hold >||
(>> or << ) Select ADD TO QUEUE
Press >|| to conrm
Let it Be
Norwegian Wood
Cancel
Add to Queue
Play
Come Together
Something
Abbey Road
Rock >> or << to select a song
Press and hold >||
Let it Be
Norwegian Wood
Cancel
Add to Queue
Play
(>> or <<) Select ADD TO QUEUE
Press >|| to conrm
NOW PLAYING
0001/0003
The Beatles
Let it Be
The songs
are added
to the queue
Repeat Steps A-H on the previous page to display the list of Beatles Albums: Now proceed as below
Press
MENU
three
times
Press
>||
NOTE: You can add new music items at any time to
the NOW PLAYING Folder but you must use the ‘Add
to Queue’ menu. If at any time you select PLAY the
NOW PLAYING folder contents will be refreshed.

22
The FM Radio
Always connect the Headphones - the cable acts as the FM Antenna!
Press the MENU key to switch the player on
Press the MENU key to access the MODES
Rock the joystick >> or << to access FM TUNER mode
Press the joystick >|| to play the radio.
When the Radio is used for the rst time: It will scan the FM band from low to high. If a station
is detected the radio will store it. During the scan the indicator will ash.
As many as 20 stations can be stored. If there are more than 20 stations the scan will stop at 20.
If there are fewer than 20 the scan will stop when the band has been searched.
The tuner willl then play the rst tuned station.
• The screen will display the Station Frequency and the Preset Number (P1)
• The reception will indicate MONO.
MONO is the default mode. Stereo reception can be enabled if you prefer. (See Page 25)
In normal use: The last used station will begin playing.
During Play you can:
Rock the joystick + /– to increase or decrease the volume
Rock the joystick >> or << to to tune up or down the FM band in 100 kHz increments.
If you rock and briey hold the joystick >> or << , tuner will search in the wanted direction.
When a usable station is found the search will stop and the station will play. If the new station
is included in a preset the preset number will display, otherwise not.
FM
87.50 MHz
91.50 MHz
P1

23
FM Radio - Preset and Scan Modes
By storing favourite stations in separate presets you can listen to them without retuning the player when you move locations.
Saving a station to a preset:
To recall a preset:
Tune the Station
Press and hold the Joystick >||
97.50 MHz
P1
Rock the Joystick >> or << to select
“Add to Preset”. Press >||
FM Tuner
Add to Preset
Load to Preset
Preset 1
Frequency 91.50
Preset Browse
FM Tuner
Preset 20
Frequency Unused
97.50 MHz
P20
The “Preset Browse” menu
displays
Rock the Joystick >> or <<
to select a Preset Number
Press the Joystick >|| to store
the station in the preset
From the existing station:
Press and hold the Joystick >||
FM Tuner
Add to Preset
Load to Preset
Preset Browse
Preset 1
Frequency 91.50
Preset Browse
Preset 20
Frequency 97.50
91.50 MHz
P1
97.50 MHz
P20
The “Preset Browse” menu
displays
Rock the Joystick >> or <<
to select a Preset Number
Press the Joystick >|| to recall
the preset station
Rock the Joystick >> or << to select
“Load to Preset”. Press >||

24
To start a new Auto Scan
To Delete a single preset:
To Delete all presets:
Follow the procedure as above but select “Delete All” to delete all the stored presets.
From the Tuner Screen:
Press and hold the Joystick >||
97.50 MHz
P1
The “Auto Scan starts The rst station now plays.
All previous presets are erased
Rock the Joystick >> or <<
Select “Yes” to delete or
“No” to retain the preset
FM Tuner
Load to Preset
Auto Scan
87.50 MHz
91.50 MHz
P1
Rock the Joystick >> or << to select
“Auto Scan”. Press >||
From the Tuner Screen:
Press and hold the Joystick >||
Rock the Joystick >> or << to select
“Delete One”. Press >||
FM Tuner
Delete One
Auto Scan
Preset Browse
Preset 1
Frequency 91.50
Preset Browse
Preset 20
Frequency 97.50
The “Preset Browse” menu
displays
Rock the Joystick >> or <<
to select the Preset Number
Press the Joystick >||
Delete All
No
Yes
Delete One
No
Yes
Press the Joystick >||
to conrm the choice
Press MENU to return
to the FM Screen
FM Tuner
Delete 1
Delete All
97.50 MHz
P20
97.50 MHz
97.50 MHz
P20
97.50 MHz

25
Mono and Stereo Reception
Mono or Stereo?
While it is preferable to listen to FM radio in Stereo, Stereo reception needs a much stronger signal. if you are in a poor signal
area or listen to radio on the move, mono reception will give you a better noise performance with less fading in and out.
The player default setting is Mono. To set the player to receive stereo FM:
To set the reception to mono, repeat the process selecting “Mono”.
FM Channel
Mono
Stereo
FM Tuner
FM Channel
Delete All
97.50 MHz
P20
97.50 MHz
P20
From the Tuner Screen:
Press and hold the Joystick >||
Rock the Joystick >> or << to select
“FM Channel”. Press >||
The Stereo Indicator displays
Rock the Joystick >> or << to select
“Stereo”. Press >||
97.50 MHz
P20
The Mono Indicator displays

26
Press the MENU key to switch the player on
Press the MENU key to access the MODES
Rock the joystick >> or << to access RECORD mode
Making a Voice Recording
Press the joystick >||
Point the microphone at the subject
Press the joystick >|| to start recording immediately.
During Recording:
Press the joystick >|| to pause and restart recording
To stop recording:
Press the MENU key
To start another recording:
Press the joystick >||
Recording starts immediately.
To exit recording:
Press the MENU key
Rock the joystick >> or << to select EXIT RECORD
Press the joystick >|| to conrm
Alternatively, press the MENU key twice to exit
Making Voice and Radio Recordings
RECORD
START RECORD
10:23:02
0:01
Recording time elapsed
Total recording time left in player memory
Recording indicator
RECORD
10:18:02
0:01
EXIT RECORDSTART RECORD
NOW PLAYING
menumenu
NOW PLAYING
MAKE SURE THAT YOU ARE
NOT LISTENING TO THE RADIO
BEFORE YOU COMMENCE VOICE
RECORDING!!
X2

27
FM Recording
A: Rock the joystick >> or << to access FM mode
B: Tune the wanted station
C: Press the MENU key
D: Rock the joystick >> or << to access RECORD mode
(make sure you are still hearing the Radio)
E: Press the joystick >|| to access the START RECORDING menu
F: Rock the joystick >> or << to access SETTINGS
G: Press the joystick >|| to access SOURCE mode
H: Press the joystick >|| again to conrm
I: Rock the joystick >> or << to select FM
J: Press the joystick >|| to conrm and exit to SOURCE
K: Press the MENU key to move up to the SETTINGS screen
L: Rock the joystick >> or << to access START RECORDING
M: Press the joystick >|| to start recording immediately.
Proceed as for VOICE Recording
FM
91.50 MHz
P1
RECORD
NOW PLAYING
START RECORD
SETTINGS
SOURCE
FM
SOURCE
SETTINGS
START RECORD
10:18:02
0:01
A
M
L
K
J
I
H
G
F
E
D
C
B

28
Setting Recording Parameters
Press the MENU key to switch the player on. Press the MENU key to access the MODES
Rock the joystick >> or << to access RECORD mode
Press the joystick >|| to access “START RECORDING”
Rock the joystick >> or << to select SETTINGS
Selecting a Recording Format
Press the joystick >||
Rock the joystick >> or << to select FORMAT
Press the joystick >|| to conrm
Rock the joystick >> or << to select a format.
Press the joystick >|| to conrm
IM ADPCM is a compressed format compatible with most MP3 players. MS ADPCM is the Microsoft equivalent. It is also a compressed format. PCM is uncompressed, oers the best quality, but takes up much more disc space.
Selecting Microphone Parameters
Press the joystick >|| to go to the FORMAT screen
Rock the joystick >> or << to select SOURCE
Press the joystick >|| to conrm.
Rock the joystick >> or << to select MICROPHONE
Press the joystick >|| to conrm and return
Rock the joystick >> or << to select RATE
Press the joystick >|| to conrm.
Rock the joystick >> or << to select a format
There are 9 rates from 8000Hz to 48000Hz. The lower rates are more memory ecient, the higher rates oer better quality.
After making your choice: Press MENU twice to return to SETTINGS
RECORD
START RECORD
SETTINGS
SOURCE
FORMAT
IM ADPCM
MS ADPCM
PCM
SOURCE
FORMAT
MICROPHONE
SOURCE
RATE 8000Hz
48000Hz
menumenu
X2
SETTINGS

29
Selecting FM Parameters
From the SETTINGS screen:
Press the joystick >|| to go to the FORMAT screen
Rock the joystick >> or << to select SOURCE
Press the joystick >|| to conrm.
Rock the joystick >> or << to select FM
Press the joystick >|| to conrm and return
Rock the joystick >> or << to select CHANNEL
Press the joystick >|| to conrm.
Rock the joystick >> or << to select MONO/STEREO
Press the joystick >|| to conrm.
After making your choice: Press MENU twice to return to SETTINGS
NOTE: The RATE settings are exclusive to Microphone recording.
The CHANNEL settings are exclusive to FM recording. The microphone is preset to MONO and not adjustable.
FORMAT
SOURCE
MICROPHONE
menumenu
X2
SETTINGS
FM
CHANNEL
MONO
STEREO
SOURCE
SETTINGS

30
0001/0005
V002.WAV
The Voice Folder is where FM and Voice recordings are stored. The VOICE menu enables you to play and manage these les.
Press the MENU key to switch the player on
Press the MENU key to access the MODES
Rock the joystick >> or << to select VOICE mode
Playing Voice Messages
Press the joystick >|| to enter the VOICE menu.
Rock the joystick >> or << to select a message store
Press the joystick >|| to display the messages
Rock the joystick >> or << to select a message
Press the joystick >|| to play the message.
During Play you can:
Press the Joystick >|| to pause and resume play
Rock the Joystick >> or << to go forward or back a message
Rock the Joystick << once to go to the start of the current message
Rock the Joystick >> or << to to fast forward or reverse
To stop the player:
Press the Joystick >|| to pause the player:
Now rock the Joystick once >> or << to stop the player.
Press the Joystick >|| to restart play.
When you have nished play:
Press and hold the MENU key to switch the player o.
VOICE
NOW PLAYING
FM Record
Mic Record
0001/0005
V002.WAV
The Voice Menu
LOCK (if selected)
Battery Status
Empty
Full
Title
Track No./Total Tracks
Play
Pause
Stop
►
II
1
all
S
S
Random One
Repeat All
Random All
Repeat One
Mic Record
V001.WAV
V002.WAV

31
Managing the Voice Menu
Press the MENU key to switch the player on
Press the MENU key to access the MODES
Rock the joystick >> or << to select VOICE mode
Managng Voice Messages
Press the joystick >|| to enter the VOICE menu.
Rock the joystick >> or << to select a message store
Press the joystick >|| to display the messages
Rock the joystick >> or << to select a message
Press and hold the joystick >||
Rock the joystick >> or << to select Delete
Press the joystick >||
To delete the message:
select Yes
Press the joystick >|| to conrm and return
To leave the message: select No (default)
Press the joystick >|| to conrm and return
When you have nished:
• Repeatedly press the MENU key to move progressively back to the main mode or
• Press and hold the MENU key to switch the player o.
FM Messages are managed in the same way but from the FM Record menu.
VOICE
NOW PLAYING
FM Record
Mic Record
Mic Record
V001.WAV
V002.WAV
Mic Record
V001.WAV
V002.WAV
Delete
Cancel
Mic Record
V001.WAV
V002.WAV
Yes
No
FM Record
Mic Record
Mic Record
V001.WAV
V002.WAV
Yes
No
Mic Record
V001.WAV
V002.WAV

32
If you select CANCEL the player will revert to the
Media list without taking further action.
Select Play to play the le
Press the joystick >|| to start play
001/12
The Beatles
Let it Be
The songs in the folder will
play starting with the
selected track
Beatles Songs
Let it Be
Norwegian Wood
Rock the joystick << or >> to select a track
Press the joystick >|| to conrm
Rock the joystick << or >> to select a track
Press and hold the joystick >||
Beatles Songs
Let it Be
Norwegian Wood
Beatles Songs
Let it Be
Norwegian Wood
Play
Delete
Cancel
Beatles Songs
Let it Be
Norwegian Wood
Play
Delete
Cancel
Select Delete
Press >||
Beatles Songs
Let it Be
Norwegian Wood
Yes
No
Select NO to leave the track
Select YES to Delete
Press >||
Media
Bach
Beatles Songs
The Media list re-appears
This menu allows you to access all the music tracks, FM and voice recordings on the player directly from the folders in which
they are stored. The selected folder contents can then be played. Individual tracks can also be played or deleted.
NAVIGATION
Navigation
Media
Recorded List
NOW PLAYING
Press the MENU key to access the MODES
Rock the joystick << or >> to access NAVIGATION
Press the joystick >||
to enter NAVIGATION
Rock the joystick << or >>
to select MEDIA
Press >|| to conrm
Rock the joystick << or >>
to select a folder
Press >|| to select the folder
Media
Bach
Beatles Songs
The Navigation Menu

33
Managing Voice and FM Recordings
Recorded List
FMRecord
MicRecord
NAVIGATION
NOW PLAYING
Hint: In a menu, repeatedly pressing the MENU key will rapidly take you up through the Menu lists and out to the main Mode
Press the MENU key to access the MODES
Rock the joystick << or >> to access NAVIGATION
Press the joystick >||
to enter NAVIGATION
Rock the joystick << or >>
to select a folder
Press >|| to select the folder
The tracklist appears. Follow the procedure on the
previous page to select, play and delete tracks.
F0001.WAV
FMRecord
F0002.WAV
Rock the joystick << or >>
to select RECORDED LIST
Press >|| to conrm
Navigation
Media
Recorded List
Beatles Songs
Let it Be
Norwegian Wood
Navigation
Media
Recorded List
Media
Bach
Beatles Songs
Press the MENU key
NOW PLAYING
Press the MENU keyPress the MENU key
YOU CANNOT ACCESS THE ‘ADD TO QUEUE ‘ FUNCTION
FROM THE NAVIGATION MENU
34
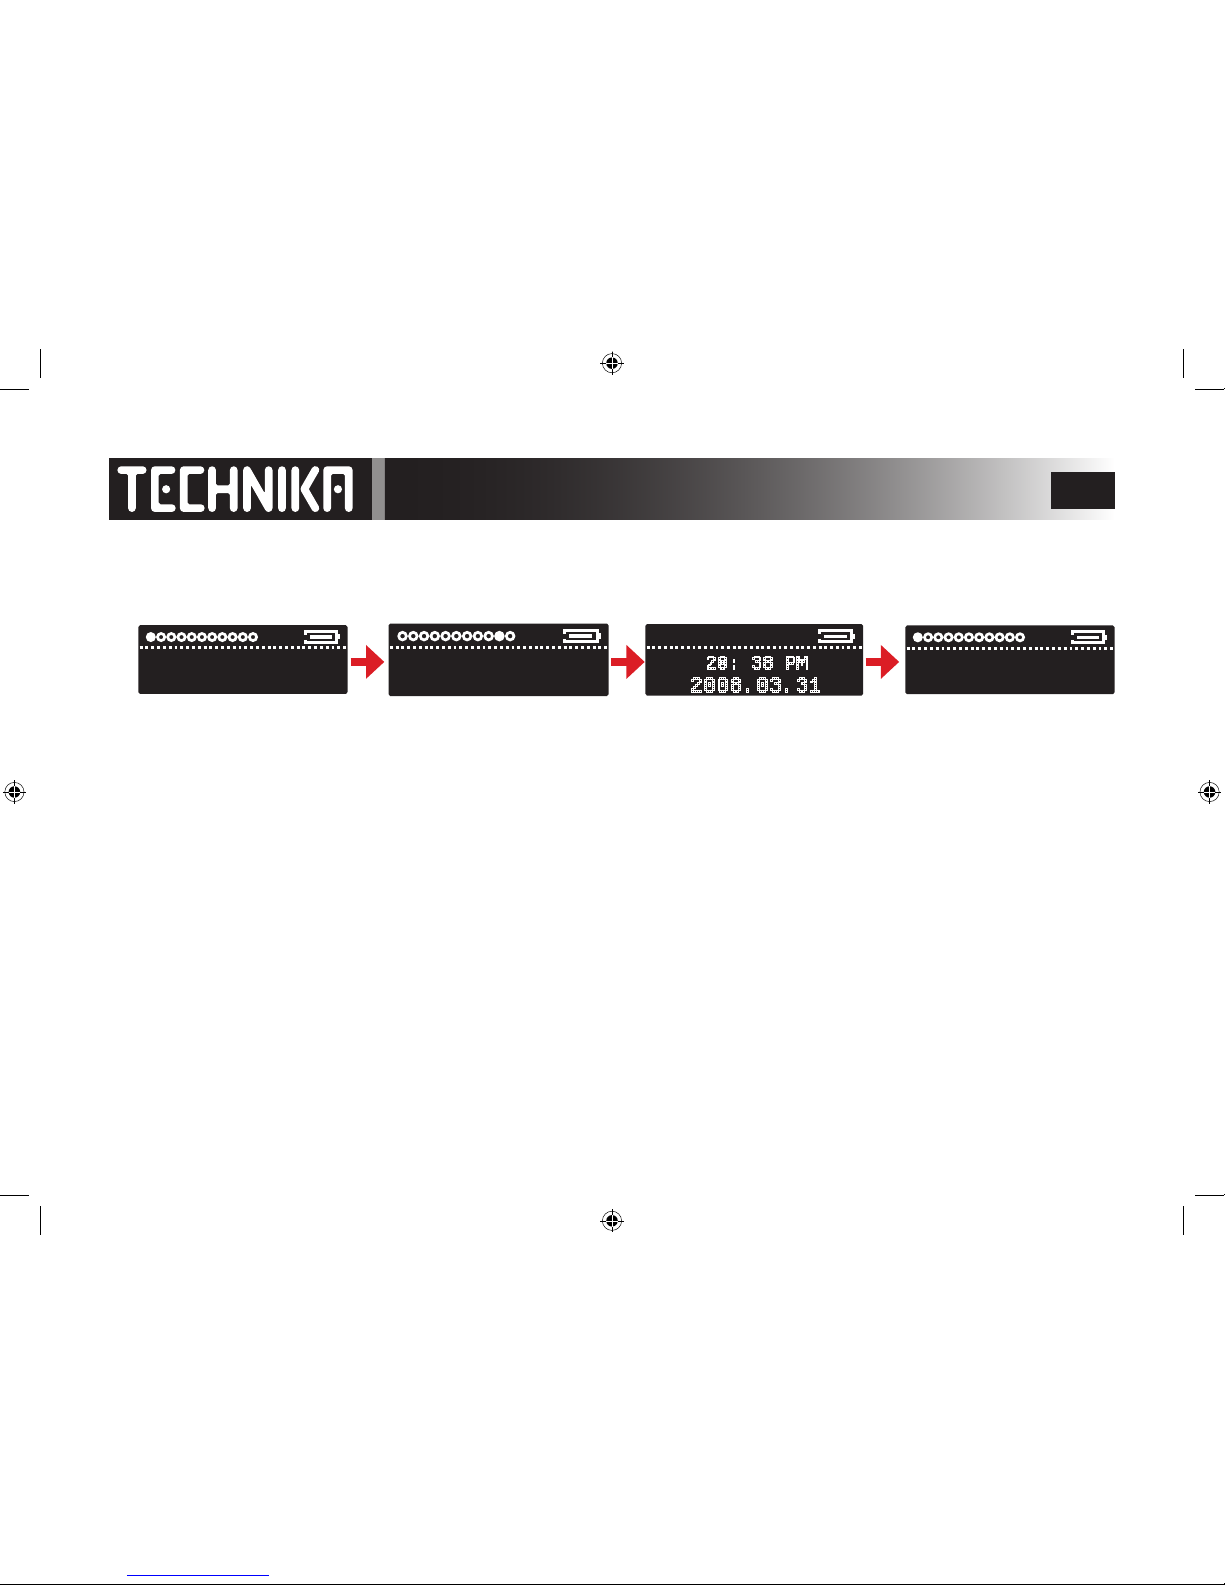
2008.03.31
20: 38 PM
TIME
To display the time:
NOW PLAYING
Press the MENU key to access the MODES
Rock the joystick << or >> to access TIME
Press the joystick >||
to display the time
Press MENU to EXIT
NOW PLAYING
To set or change the time and date please refer to Page 39

35
System Settings
You can customise the player to your personal requirements via the Settings menu
• Press the MENU key to access the MODES
• Rock the joystick << or >> to access the SETTINGS menu
• Press the joystick >|| to enter the SETTINGS menu.
• Rock the joystick << or >> to access the indivual menu items
• Follow the procedures below to alter individual parameters
Change Audio EQ Alter Backlight time
Set Auto Shut O time
Set Normal/Shue/Repeat play
Alter Display Contrast Ratio
Set Date & Time
SETTINGS
EQUALISER
REPEAT
CONTRAST
POWER SAVINGS
SET TIME
DEFAULT
ABOUT
View System Info.Reset Player Defaults
BACKLIGHT

36
• Rock the joystick << or >> to access the EQUALIZER Menu
• Press the joystick >|| to enter the EQUALIZER Menu
• Rock the joystick << or >> to change the Sound Eq. mode
• Press the Joystick >|| to conrm the setting
and return to the EQUALIZER Menu
• Press the MENU key to go to back the Main Mode Screen
Caution: Setting high levels volume and Eq. could overload
the player and damage your hearing!!
Audio Settings
Setting User EQ
SETTINGS
Rock the joystick << or >> to change the Sound Eq. mode
Rock the joystick << or >> to select SETTINGS
Press the joystick >|| to access EQUALISER settings
NORMAL
XBASS ROCK
JAZZCLASSICAL
POP
Press the joystick >|| to conrm and return
Press MENU to return
to the First Mode
NOW PLAYING
IMPORTANT NOTE
There is no icon indicating the EQ.
mode on any play screen. To check
the current Eq. you need to follow
the procedure on this page. The
current Eq. will always display rst
when you enter EQ mode.
EQUALIZER
EQUALIZER

37
Further Settings
Setting Play Modes
SETTINGS
Rock the joystick << or >> to cycle the Repeat mode
Rock the joystick << or >> to select SETTINGS
Rock the joystick << or >> to select REPEAT
Press the joystick >|| to access REPEAT settings
Press the joystick >|| to conrm and return
Press MENU to return
to the First Mode
NOW PLAYING
REPEAT
Play all tracks once and stop Repeat a track continuouly Repeat all tracks continuouly Play all tracks once randomly Repeat all tracks randomly
NORMAL
REPEAT ONE
REPEAT ALL
RANDOM
RANDOM ALL
REPEAT
1
all
S
S
Repeat One
Random One
Repeat All
Random All
These icons appear on play screens
Normal play has no icon
CAUTION!
The Play Modes remain in force after the player has
switched o. Remember to return all Play Modes to
NORMAL before you switch o the player!

38
CONTRAST
50%
Adjusting the Contrast
Rock the joystick << or >> to select CONTRAST
Press the joystick >|| to conrm
Rock << or >> to adjust the Contrast
Press the joystick >|| to conrm
CONTRAST
Adjusting the Backlight: This setting determines how long the backlight stays on after you complete an action
Rock the joystick << or >> to select BACKLIGHT
Press the joystick >|| to conrm
Rock << or >> to adjust the Backlight Time.
Choose from OFF (NEVER ON)/3 sec./5sec./10 sec./15 sec/ ALWAYS ON
Press the joystick >|| to conrm and return
OFF ALWAYS ONBACKLIGHT BACKLIGHT
POWER SAVINGS
OFF1 MINS
Rock the joystick << or >> to select BACKLIGHT
Press the joystick >|| to conrm
Rock << or >> to adjust the Backlight Time.
Choose from OFF (ALWAYS ON)/1 min/2min/5min/10min/15min
Press the joystick >|| to conrm and return
Power Savings: This setting determines after how long the player switches o if there is no activity
Note: High levels of Contrast and backlight and long Power O times will exhaust the battery faster.
POWER SAVINGS

39
SET TIME
2008.03.31
20: 38 PM
Setting the Time
Rock the joystick << or >> to select SET TIME
Press the joystick >|| to conrm
The Clock is a 24 Hr. Clock with AM/PM and date in YY YY/MM/DD format
The “Hours” highlights rst. Rock the joystick +/– to set the hours.
Now rock << or >> to move the cursor to another element. Repeat
the process to set minutes, AM/PM and the date.
When you have set up the clock: Press the joystick >|| to conrm
SET TIME
Loading...
DEFAULT
System Default: This restores all the player settings to those it had when it left the factory.
Rock the joystick << or >> to select DEFAULT
Press the joystick >|| to conrm
DEFAULT
The system will now restore. All user settings including Date and Time will be reset to factory defaults.
System Information: You can view the Version number, total disc memory and total free memory on the drive.
ABOUT
About
Version:5.010B
Int. Media: 1261Mb
About
Int. Free: 961Mb
Int. Media: 1261Mb
Rock << or >> to select ABOUT
Press the joystick >|| to conrm
Rock << or >> to scroll the three informatiion lines
Press the MENU button twice to return to the rst Menu Item.
ABOUT
NOW PLAYING
NOTE - The clock indicates:
AM times as 00:00-11:59 AM
PM times as 12:00 -23:59 PM
12:00 is always 12:00 PM
Midnight is always 00:00 AM

40
Warranty and Specications
Warranty
Your Technika appliance is covered by a warranty for 12
months from the date of purchase. If a fault develops during
this period, please contact the TESCO electrical help line on
0845 456 6767. Please have your original purchase receipt
with you when you call. This warranty in no way aects
your consumer rights.
Disposal
UK: Waste electrical products should not be
disposed of with household waste. Separate
disposal facilities exist, for your nearest facilities
see www.recycle-more.co.uk or in-store for details.
ROI: Produced after 13th August 2005. Waste
electrical products should not be disposed of with
household waste. Please recycle where facilities
exist. Check with your Local Authority or retailer
for recycling advice.
Specications
Bit rate MP3: 32~320Kbps
Music formats MP3, WMA
Recording Format IM ADPCM/MS ADPCM/PCM
Sampling rate 8 KHz~48 KHz User settable
Frequency response 20Hz~20kHz
S/N Ratio >90dB
Distortion <0.0~0.5% (level dependent)
Output power 0.6 mW/channel
Display 96 x 32 dots Dot-matrix
Weight 22.8 g
Internal Battery Polymer Lithium-Ion
USB port USB 1.1/2.0 Full-Speed
Supported OS Win Me/2000/XP/Vista
Internal memory Model dependent


42
Tesco Stores Ltd, Delamare Road, Cheshunt, Herts, EN8 9SL
 Loading...