

Page 1

Thomson Multimedia Pack
The Thomson Multimedia Pack is an offer that includes the MusicMatch jukebox Music Management software, to be installed on your PC, and a patch cable to connect your PC to your Thomson stereo system.
- Thanks to this software, you will enter the digital music world and benefit from numerous features :
- MusicMatch Jukebox allows to compress music files into MP3 & WMA* (Windows Media Audio) formats
recorded from your audio CDs, and to keep them on your PC. Y ou could also use other audio sources for your
recordings (vynil, tape),
- It makes the search and download of internet music easier ,
- It allows the management of your compressed music and the creation of your own playlists,
- The Jukebox is a true audio player installed on your PC,
- It gives access to thousands of net radios today available on the web.
The connection cable allows you to listen and share the compressed music files played by MusicMatch jukebox
directly on your Thomson audio system, and thus to enjoy the digital music with your system’s rich features.
- Simply plug the 3.5mm PC-pin end of the cable into the speaker or headphone jack of your
PC, and insert the twin RCA ends to the @/AUX connection of your Thomson audio system.
- Select the audio source on your system with the switch located on @
Y ou can download music files encoded in MP3 or WMA* from several internet sites. Here a few sites to discover :
- www.thomson-music.com
- www.emusic.com
- www.real.com
- www.mp3.com
- www.mpeg.org
- www.windowsmedia.com
* : Windows Media is a registered trademark of Microsoft Corporation.
EN
AM1550 EN rev.1 10/29/01 2:16 PM Page 1
Page 2
•
•
•
THOMSON multimedia
46/47 quai A. Le Gallo
92648 Boulogne Cedex
FRANCE
RCS nanterre
B 322 019 464
55128510 (Rev.1)
www.thomson-multimedia.com
AM1550 EN rev.1 10/29/01 2:16 PM Page 2
Page 3
3¥C¥D MAGAZINE
•
•
•
•
VOLUME CONTROL
usermanual
AM1550
AM1550 EN rev.1 10/29/01 2:16 PM Page 3
Page 4
Safety Information
EN
Thomson Information
CAUTION!
Invisible laser radiation when open. Avoid exposure to
beam. Class 3B laser product. This system must be
opened only by qualified technicians to prevent accidents caused by the laser beam.
LASER λ = 780 nm, P max = 5 mW
Rating Information: At bottom of the unit
this unit comply with the existing requirements
In accordance with the rating plate of the unit, this
unit complies with current standards concerning electrical safety and electromagnetlc compatibility.
Please respect the environment. Before throwing any
batteries away, consult your distributor who may be
able to take them back for specific recycling.
Have a Blast- Just Not in Y our Eardrums
Make sure you turn down the volume on the unit
before you put on headphones. Increase the volume to
the desired level only after headphone are in place.
OHITETTAESSA SOUJALUKITUS
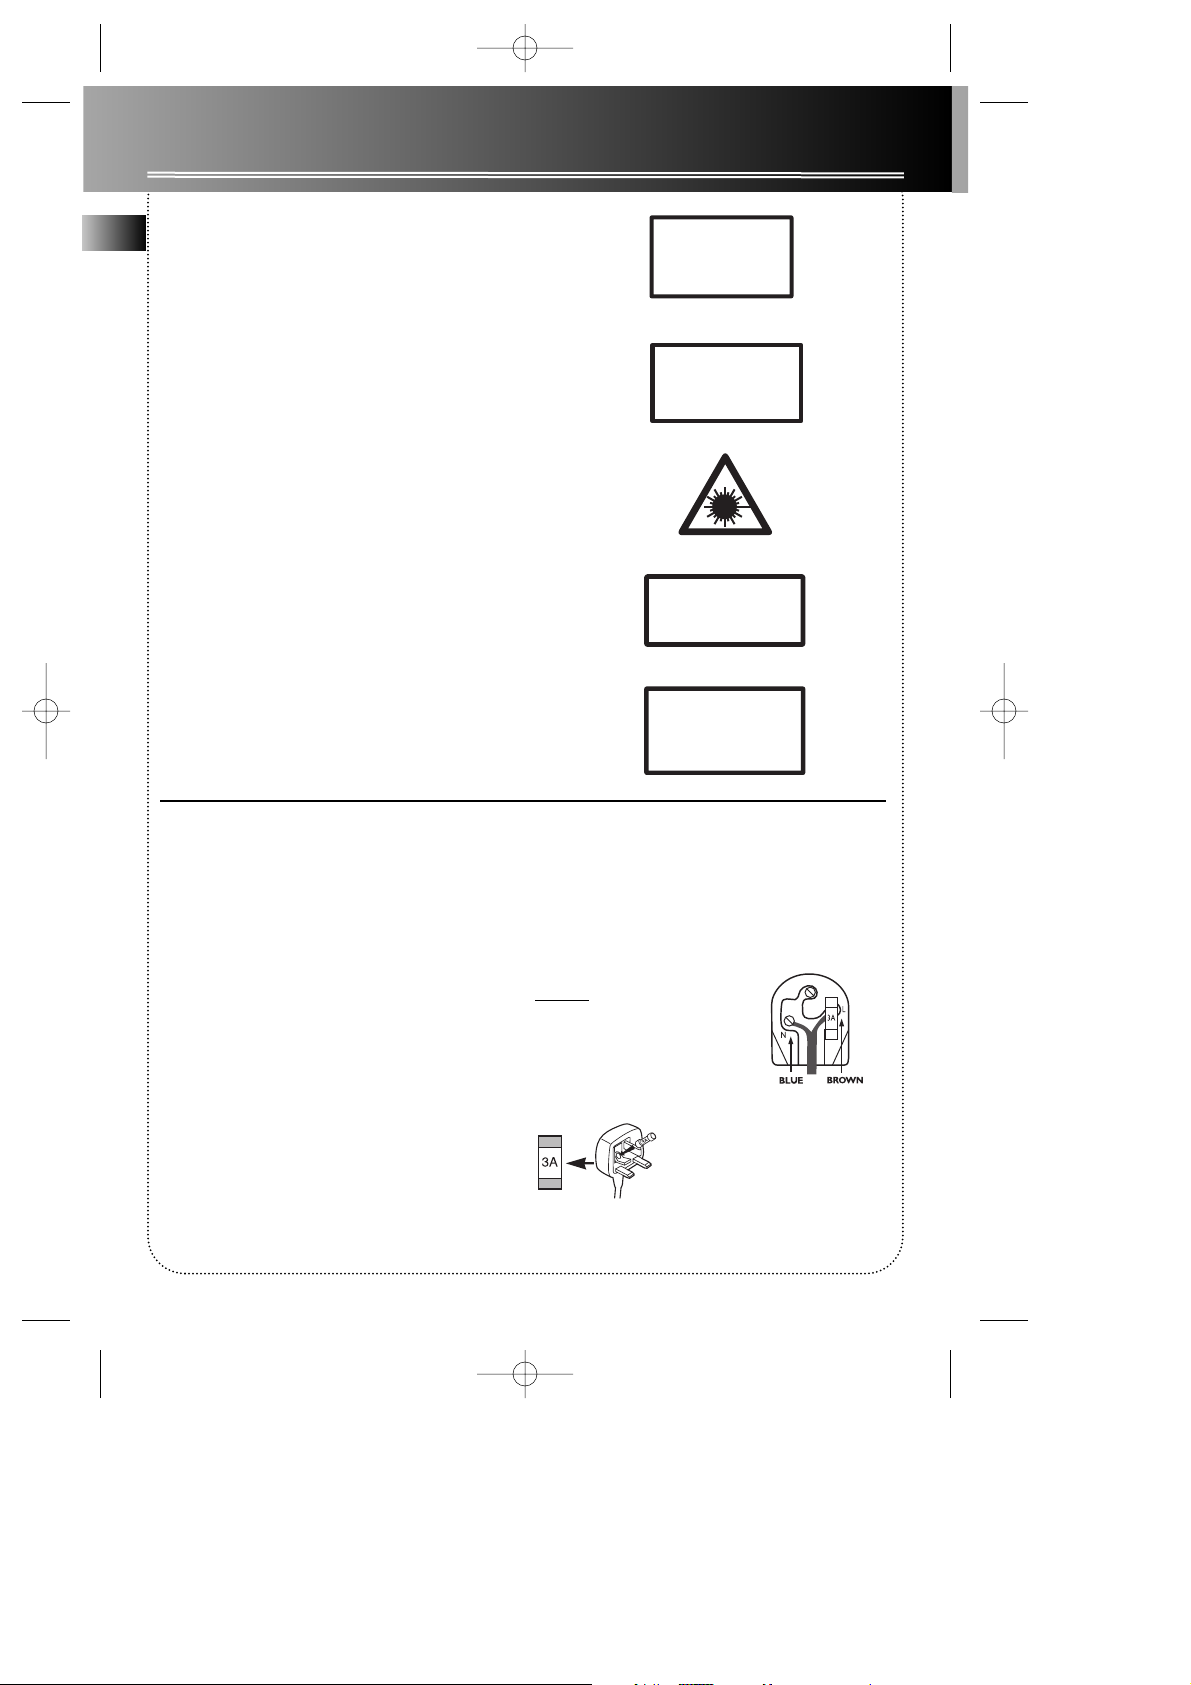
For UK Only
CONNECT THE MAIN LEAD INTO A MAINS
POWER SOCKET
POWER SUPPL Y 230V. It must not be connected to
D.C. mains.
Note; The mains lead of the set is fitted with a
moulded plug. If the mains socket are not compatible or if for any reason the plug is removed please
follow the directions below. The moulded plug cannot be rewired and if removed must be disposed of
safely.
DO NOT under any circumstances plug the severed
plug into any mains socket as this could result in
electric shock.
Important: If the plug is removed, rewire the new
plug as follow:
The wires in the mains plug are coloured in accordance to the following code:
BLUE = NEUTRAL/BROWN = LIVE
If the colours of the wires in the mains lead of this
apparatus may not correspond with the coloured
markings identifying the terminals in your plug, proceed as follows:
BLUE wire to the terminal coded N (Neutral) or
coloured black.
BROWN wire to the terminal coded L (Live) or
coloured red.
DO NOT make any connection to
the terminal in the plug which is
marked by the letter E or by the
earth symbol or coloured green
or green and yellow.
A fused plug must be fitted with
a 3A fuse approved by ASTA or
BS1362 and fuse covers must be
always be securely replaced. If
you set does not work, the fuse
may be blown.
AM1550 EN rev.1 10/29/01 2:16 PM Page 4
ADVARSEL!
USYNLIG LASERSTRĀLNING VED ĀBNING NAR
YDERE ER UDE AF FUNKTION.
SIKKERHEDSAFBR
UNGDĀ UDSAETTELSE FOR STRĀLNING.
VORSICHT!
UNSICHTBARE LASERSTRALUNG
WENN ABDECKUNG GEÖFFNET UND SICHERHEITS–
VERRIEGELUNG ÜBERBRÜCKT
NICHT DEM LASERSTRAHL AUSSETZEN!
CAUTION – INVISIBLE LASER RADIATION
WHEN OPEN AND INTERLOCKS FAILED OR
DEFEATED. AVOID EXPOSURE TO BEAM.
ATTENTION –
DANGEREUX EN CAS D'OUVERTURE ET LORSQUE
LA SECURITE EST NEUTRALISEE.
EXPOSITION DANGEREUSE AU FAISCEAU.
.
RAYONNEMENT LASER INVISIBLE
CLASS 1 LASER PRODUCT
LASER KLASSE 1
APP
AREIL A LASER DE CLASSE 1
LUOKAN 1 LASERLAITE
KLASS 1 LASERAPPARAT
VARNING–
OSYNLIG LASERSTRĀLNING NÄR DENNA DEL
ÄR ÖPPNAD OCH SPÄRRAN ÄR URKOPPLADE.
BETRAKTA EJ STRĀLEN.
VARO !
AVATTAESSA JA
OLET ALTTIINA NÄKYMÄTTÖMÄLLE
LASERSÄTEILYLLE.
Page 5
Contents
Safety Information
Before you Begin . . . . . .2
Unpacking the System . . . . .2
Check for Moisture . . . . . . . .2
Choosing System Location .2
Inserting Batteries into
Remote Control . . . . . . . . . .2
Cable Connections . . . . . . . .2
Power Connections . . . . . . . .2
General Controls
Main Unit . . . . . . . . . . . . . .3
Cassette Player . . . . . . . . . . .3
Remote Control . . . . . . . . . .4
Display
The Display . . . . . . . . . . . . . .5
Showing Demonstration . . .5
Clock and Timer
Setting the Clock . . . . . . . . .6
Displaying Clock Time . . . . .6
Setting Timer . . . . . . . . . . . . .6
Activating the Timer . . . . . .6
Sleep Mode . . . . . . . . . . . . . .6
Sound Features
Volume Control . . . . . . . . . . .7
Using Preset Equalizer . . . . .7
Boosting the Bass . . . . . . . . .7
Muting Audio . . . . . . . . . . . .7
CD Player
Loading/ Changing Discs . . .7
Disc Playback . . . . . . . . . . . .7
Repeat . . . . . . . . . . . . . . . . . .7
Random Playback . . . . . . . . .8
Program . . . . . . . . . . . . . . . . .8
Editing Program . . . . . . . . . .8
Clearing the Whole Program
. . . . . . . . . . . . . . . . . . . . . . . .8
Displaying Disc Details . . . . .8
T uner
Selecting Tuner . . . . . . . . . . .9
Tuning to a Station . . . . . . .9
Automatic Tuner
Programming (for FM only) 9
Setting Preset Station . . . . .9
Accessing Preset Stations . . .9
Suppressing Stereo Signal . .9
Tuning to an RDS Station
. . . . . . . . . . . . . . . . . . . . . . .10
Displaying RDS Station
Information . . . . . . . . . . . .10
Searching Station by Program
Type . . . . . . . . . . . . . . . . . . .10
Cassette Player
Playing the Tape . . . . . . . . .11
Recording . . . . . . . . . . . . . .11
Troubleshooting Tips
. . . . . . . . . . . . . . . . . . .12
More Information
Cleaning . . . . . . . . . . . . . . .12
CD Player . . . . . . . . . . . . . . .12
Handling CD . . . . . . . . . . . .12
Cleaning CD . . . . . . . . . . . . .12
CD Lens Care . . . . . . . . . . . .13
Cassette Player . . . . . . . . . .13
Safety Precautions . . . . . . .13
Important Battery
Information . . . . . . . . . . . . .13
Headset Safety . . . . . . . . . .13
Don’t Infringe . . . . . . . . . . .13
Technical Specifications . . .13
AM1550
EN
1
AM1550 EN rev.1 10/29/01 2:16 PM Page 5
Page 6
Before you Begin
EN
2
Unpacking the system
Unpack your new mini audio system and locate all the
accessories. Y ou should have:
• one main unit (with 2 speakers);
• one remote control;
• one AM loop antenna;
• one FM wire antenna;
• one guarantee card;
• one user’s guide.
For Thomson model, you should also have;
• one audio cable;
• Thomson Multimedia Pack including MusicMatch
Music Management software (CD-Rom) and a patch
cable to connect your PC. (Refer to the page
“Thomson Multimedia Pack” for details)
Check for Moisture
Just as moisture can form on the inside of windows
on a cold day, it can also form on the inside of your
audio system causing it to malfunction.
If there is any moisture inside the system, the system
may not operate properly. In this case, you are suggested to disconnect the power to the unit and wait
for about 30 minutes for the moisture to evaporate.
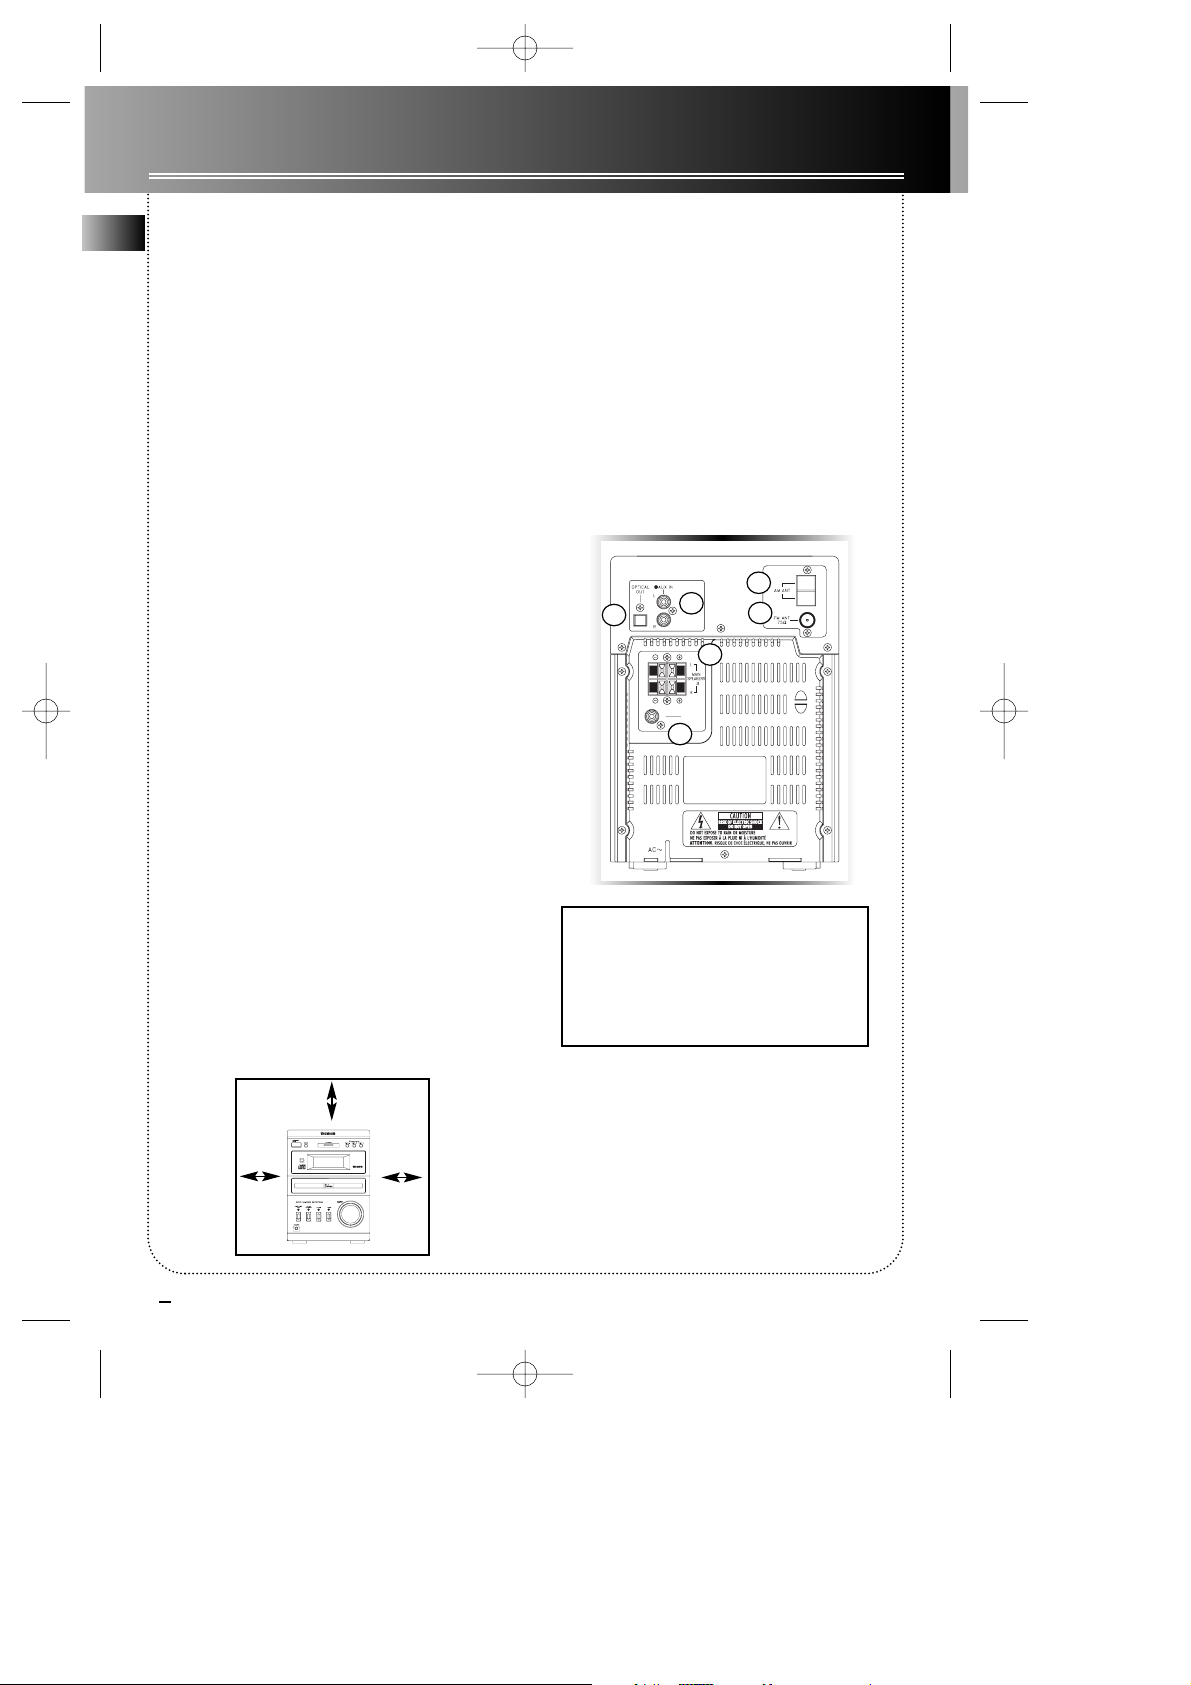
Choosing System Location
It is recommended to follow these guidelines when
setting up your system:
• Choose a solid, level surface. Don’t place on surfaces
like carpet or foam rubber .
• Choose a location away from direct sunlight, radiator , air ducts and sources of heat.
• Avoid locations subject to moisture, mechanical
vibration, shock or excessive dust.
• Ensure that the location is adequately ventilated, as
it is essential to protect the unit from internal heat
build-up.
Inserting Batteries into Remote
Control
Open the battery compartment door on the back of
the remote unit and insert correctly 2 AAA (LR03) batteries with + or - signs matching with indications.
To use the remote control, point it directly at the unit.
Cable Connections
Refer to the following for connections on the back
panel:
Power Connections
Plug the power supply cord into an AC power outlet.
Note: For the sake of safety, complete all cable connections before you plug for power .
1. AM Loop Antenna Connector
2. FM Antenna Jack
3. auxiliary Input Jacks
4. Subwoofer Pre-Amp Speaker Jacks
5. Main Speaker Jacks
6. Optical Output
10 cm
10 cm10 cm
1
26
4
3
5
AM1550 EN rev.1 10/29/01 2:17 PM Page 6
@
SUBWOOFER
PRE-AMP
OUTPUT
4
Page 7

3
General Controls
Main Unit
• POWER/ ECO - turns the unit
on/ off. (ECO mode - press briefly
for power saving with clock display turning off during unit off)
• DEMO - turns feature demonstration and timer on/ off.
• STANDBY - lights when unit is in
standby (off) mode.
• DISC 1, DISC 2, DISC 3 - opens
or closes respective disc tray.
• DISC SKIP/ CD - selects CD player . Press repeatedly to change to
desired disc tray.
• BAND/ TUNER - selects tuner.
Press repeatedly to select tuner
bands (FM/MW/LW).
• TAPE - selects cassette player.
• @ AUX - selects auxiliary input
source.
• MASTER VOLUME - controls
volume.
• PHONES - connects headphones.
SKIP BACKWARD &
SKIP FORWARD-
decreases or increases
tuner frequency, CD track. Press
and hold during CD playback for
quick CD search or during tuner
mode for auto station search.
PLA Y/ PAUSE - plays or
pauses CD playback.
STOP - stops CD playback.
• DISC DIRECT PLAY (DISC 1, 2,
3) - Starts disc playback directly on
respective disc tray.
• XBASS - activates XBASS
• EQ - selects among sound effects
of classic, pop, rock & jazz.
• ST/ MO - selects between stereo/
mono sound in tuner mode.
• RDS/ DISPLA Y - selects among
the displays showing disc/ track
details.
• PROG/ SET - enters program or
setting mode for CD & tuner
mode.
• SLEEP - enters SLEEP
mode and press repeatedly to select SLEEP
time.
• PTY/ REPEAT - selects
among repeat modes.
• MUL TI FUNCTION increases or
decreases
numerical val-
ues for clock & timer setting, tuner preset station selection, volume
control, track selection
etc.
Cassette
Player
• RECORD - starts tape
recording.
• PLA Y/PAUSE - starts
tape playback. Pauses
and resumes tape playback.
• SKIP BACKWARD -
winds tape backward.
• SKIP FORWARD -
winds tape forward.
• STOP - stops tape play-
back.
EN
AM1550 EN rev.1 10/29/01 2:17 PM Page 7
@
Page 8

EN
4
General Controls
Remote Control
• POWER/ ECO - turns the unit on/ off. (ECO mode for
Thomson model - Press briefly for power saving with
clock display turning off during unit off)
• RECORD - starts tape recording
• BAND/ TUNER - selects tuner. Press repeatedly to
select tuner bands (FM/MW/LW).
• DISC 1, DISC 2, DISC 3 - selects respective disc tray.
• TAPE/ AUX- selects between TAPE and AUX mode.
• ST/ MO - selects between stereo/ mono sound in
tuner mode.
• REPEAT - selects among repeat modes.
• MIX - enters random playback mode.
• RDS/ DISPLA Y - selects among the displays showing
disc/ track details.
• SLEEP - enters SLEEP mode and press repeatedly to
select SLEEP time.
• EQ - selects among sound effects of classic, pop, rock
& jazz.
• XBASS - activates XBASS.
• MUTE - mutes sound.
PLA Y/ PAUSE - plays or pauses CD / cassette
playback.
STOP - stops CD / cassette playback.
• SKIP BACKWARD & SKIP FORWARD - decreases or
increases tuner frequency, CD track, winds
tape backward or forward. Press and hold
during CD playback for quick CD search or
during tuner mode for auto station search.
• MASTER VOLUME - adjusts sound volume.
• CLOCK - enters clock setting mode. Displays clock
time for about 5 seconds when unit is on .
• TIMER - turns timer on/off.
• PROG/ SET - enters program or setting mode for CD
& tuner mode.
• MUL TI FUNCTION - increases or decreases numerical
values for clock & timer setting, tuner preset
station selection, volume control, track selection etc.
AM1550 EN rev.1 10/29/01 2:17 PM Page 8
RECORD/II
BAND/APP
RDS/
CLEAR
Page 9

Display
Tip: Display shows clock
time when unit is in
Standby (off) mode. Turn on
the unit to enter the mode it was in
before power off. Press C D, TUNER,
AUX 1 or AUX 2 to select desired mode. Red led
lights above the mode selection button (e.g CD)
selected.
5
Timer
SLEEP
mode
Program mode
Repeat modes:
RPT . 1 - repeat current track.
RPT . DISC - repeat current disc.
RPT . ALL - repeat all discs
X-BASS
Preset EQ - CLASSIC,
POP, ROCK & JAZZ.
Track
number
Disc tray 1, 2 & 3
(tray icon flashes
when selected)
RDS signal is
detected
Random
playback
Stereo
signal is
detected.
Radio band
Showing elapsed/ remaining playback time, radio frequency, preset tuner station, reference messages etc.
Radio signal is detected.
Showing Demonstration
1. Show demonstration.
2. Exit demonstration.
The Display
Tip: You can turn on/ off demonstration either during unit
on/ standby (off).
EN
Record mode
AM1550 EN rev.1 10/29/01 2:17 PM Page 9
RPT.
SLEEP
PROG.
RECORD
TIMER
TRACK
1
ALL
TUNED
DISC
STEREO
MIX
Page 10

6
EN
Clock & Timer
CLK --:00
ON --:12
VOL 08dB
CLOCK
Setting the Clock
1. Turn on the unit.
2. Press CLOCK twice so that the time
flashes on the display (24-hour clock).
3. Set the hour
4. Shift to minute digits.
5. Repeat step 3 to set the minute.
6. Press CLOCK to save settings.
Displaying Clock Time
When the unit is off, clock time is always shown on
display.
When the unit is on, you can press CLOCK to display
the current time for about 5 seconds.
1. Press and hold TIMER until ON and clock
time flash on the display ( ON - timer on
time ) (24-hour clock).
Timer
Setting the Timer
2. Set the hour .
3. Shift to minute digits.
4. Repeat step 2 to set the minute.
5. Shift to audio select.
6. Select among CD, Tuner or AUX (if
available).
8. Select disc tray (if CD is
selected) or preset station (if
TUNER is selected).
7. Shift to disc tray or tuner station select.
11. Shift to off time select (OFF shows on display). Repeat steps 2-4 for setting off time.
12. Press TIMER again to save setting. (Note:
Press TIMER repeatedly to review settings)
Activating the Timer
Press DEMO on the unit to turn on/off the timer .
Y ou can select the time interval in
minutes before the unit turns off
automatically. Press SLEEP on the
remote to select among 120, 105, 90, 75, 60, 45, 30,
15 minutes.
Sleep Mode
9. Shift to volume select.
10. Select volume level.
AM1550 EN rev.1 10/29/01 2:17 PM Page 10
Page 11

7
MUTE
Sound Features
Volume Contr ol
Rotate MASTER VOLUME
knob on the main unit or
press buttons on the remote
control to adjust volume.
VOL MAX indication will
blink when maximum
volume is reached.
Using Preset Equalizer
Select among CLASSICAL, POP,
ROCK & JAZZ. The display shows
briefly your selection.
Boosting the Bass
Turn on/of f boosting the bass frequency.
Muting Audio
Mute the sound. Press again for de-selection.
CD Player
Loading/ Changing Discs
1. Select CD mode.
2. Open the desired disc tray.
3. Load/ change discs with label side up.
4. Close respective disc tray.
Tip: While you are playing disc on a tray, you can still load/
change disc on other trays simultaneously by following steps
2-4.
Disc Playback
1. Start playback. Press again to
pause and repeat again to resume
it.
2. Change disc tray.
3. Select track.
4. Press and hold for quick search
through a track.
5. Stop playback.
Repeat
1. Press repeatedly to select among
repeat modes.
Repeat current
track (RPT . 1)
Repeat current
disc (RPT . DISC)
Repeat all discs
(RPT . ALL DISC)
De-selection
EN
VOL MAX
AM1550 EN rev.1 10/29/01 2:17 PM Page 11
Page 12

8
EN
CD Player
OO PR01
CLEAR
Random Playback
1. Start random playback.
2. Stop random playback.
Program
Y ou can create a playback program of up to 20 tracks.
1. While the CD player is stopped,
press PROG/ SET to enter program
mode so that you see 00 PR01 on
display.
2. Select disc tray, you can see selected disc tray number on display.
3. Select disc track.
4. Press to confirm selection or STOP
to cancel selection.
5. Repeat steps 2-4 for further programming.
6. Start program playback.
Editing Program
1. After you have created a program, press PROG/SET repeatedly to
review it. (Note: ED means program
is in edit mode)
2. Press and hold to clear unwanted track. CLEAR shows on display
when completed.
3. Otherwise, repeat steps 2-4 under “Program” to
select a new track.
Clearing the Whole Program
Press and hold until CLEAR shows
on display.
Displaying Disc Details
Press repeatedly to show the following disc details during playback.
1) current track elapsed time;
2) current track remaining time;
3) total disc remaining time.
08 ED01
01 03:45
Tip: at least one CD must be in tray before programming can
be set up.
AM1550 EN rev.1 10/29/01 2:17 PM Page 12
RDS/
Page 13

9
Tuner
EN
PR 01 FM
Selecting Tuner
1. Select tuner .
2. Press repeatedly to select radio
band.
FM/ MW/ LW
Tuning to a Station
1. Select frequency.
2. Press and hold for a while for
automatic station quick search.
Setting Preset Stations
1. Access a desired frequency.
2. Press once, radio band and preset
station number show on display.
3. Select a preset number (1-30).
4. Press to store the selected frequency with preset station number .
Accessing Preset Stations
Select a preset station in tuner
mode.
Automatic Tuner Programming (for
FM only)
Press and hold BAND/TUNER button
for 2 second to scan stations. The stations will then be stored as preset
channels. AUTOMATIC TUNER PRO-
GRAMMING keeps scrolling on display during programming which can last for more than a minute.
Maximum 30 stations can be stored. Beware of your
preset channels being erased accidentally because
the scanning and storing process is automatic upon
pressing the button.
Y ou can stop the automatic scan by pressing anybutton, but the erased stations cannot be recovered.
Suppressing Stereo Signal
Select between FM mono and stereo
sound for stereo FM stations.
AUTOMATIC.
AM1550 EN rev.1 10/29/01 2:17 PM Page 13
Page 14

10
Tuner
EN
Tip: RDS stations broadcast on
FM only. When the tuner
detects an RDS signal, the
RDS icons turns on.
Tip: You can search for stations using one
of the following program types: R D S
NEWS(news), AFFAIRS ( current affairs),
INFO (weather, medical), SPORT (sports), E D U CATE (education), DRAMA(series and plays), CULTURE
(religion), SCIENCE(science and technology), VARIED
(miscellaneous), POP M (pop music), ROCK M (rock
music), MOR M (middle-of-the road music), LIGHTM
(light music), CLASSICS (classical music), OTHERM
(unclassified music), WEATHER (weather), FINANCE
(financial information), CHILDREN (children’s program),
SOCIAL (social news), RELIGION (religious program),
PHONE-IN (phone-in program), TRAVEL (travel &
leisure), HOBBY (hobby), JAZZ (Jazz music), COUNT R Y (country music), NATIONAL (national), OLDIES
(oldies), FOLK M (folk music), DOCUMENT (documentary), TEST (test) & ALARM (alarm).
Tuning to an RDS Station
1. Select frequency in FM band.
2. Press and hold for a while for
automatic station quick search.
3. If RDS station found, RDS icon lights on display.
Displaying RDS Information
Press repeatedly to display the frequency, station name, station type,
clock time, day, PI code and radio
text.
Searching Station by Program Type
1. Enter search mode.
2. Select a program type.
3. Within 5 seconds, press to search
for a station broadcasting the selected type of program.
INFO
RADIO 1
CLK 15:10
SUNDAY
AM1550 EN rev.1 10/29/01 2:17 PM Page 14
RDS/
Page 15

EN
11
Cassette Player
Playing the Tape
2. Press the cassette door slightly for opening.
3. Insert tape and close the door .
4. Start playback.
5. Pause playback. Press again to
resume playback.
6. Wind tape forward or backward.
Press STOP to end winding.
7. Stop playback.
1. Select TAPEmode.
Recording
2. Select recording source (CD,
TUNER or AUX)
3. Start recording.
1. Insert tape into cassette player .
4. Start playing the recording source. (Note: CD
recording plays CD automatically when RECORD is
pressed.)
5. Pause recording. Press again to resume
recording.
6. Stop recording.
Tips:
• read “More Information” for care and
maintenance on cassette player.
• RECORDshows on display during
recording.
• RECORDbutton cannot be activated without
inserting cassette tape.
• Make sure the tab on the side of the tape is not
removed for recording.
TAPE000
AM1550 EN rev.1 10/29/01 2:17 PM Page 15
Page 16

EN
12
Solution
Check power cord for a secure connection.
Unplug the unit for a moment, and then
plug into power source again.
Check the outlet by plugging in another
device.
Increase the volume setting.
Check connection to speakers.
Check that you have selected the appropriate function: CD, Tuner, AUX.
Check antenna connection.
Move antenna.
Turn off nearby electrical appliances, such
as hair dryer, vacuum cleaner, microwave,
fluorescent lights.
Check that CD is in the tray.
Check that CD label is facing up.
Check that PAUSE mode is not on.
Check that CD function is selected.
Use a CD lens cleaner.
Clean the disc.
Check disc for warping, scratches, or other
damage.
Check if something is causing the system to
vibrate. If so, move the system.
Problem
System will
not turn on
No sound
Poor radio
reception
CD does
not play
CD sound
skips
Problem
CD button
will not
respond, or
does not
change
discs when
you press
DISC SKIP
Remote
control
does not
work
Solution
Switch to another function (e.g. Tuner) and
then back to CD.
Check that the batteries are properly
installed.
Replace weak batteries.
Check the system is plugged in to power
source.
Point the remote directly at the system’s
front panel.
Move closer to the system.
Remove any obstacles between the remote
and the system.
Disconnect the audio system from the power source
before performing any maintenance.
Cleaning
Clean the exterior of the system using a soft dust
cloth.
CD Player
CAUTION! This system operates with a laser. It must
be opened by only a qualified technician.
Handling CDs
• Do not touch the signal surfaces. Hold CDs by the
edges, or by one edge and the hole. Do not affix labels
or adhesive tapes to the label surfaces. Do not scratch or
damage the label. CDs rotate at high speeds inside the
player. Do not use damaged (cracked or warped) CDs
Cleaning CDs
• Dirty CDs can cause poor sound quality. Always keep
CDs clean by wiping them gently with a soft cloth from
the inner edge toward the outer perimeter.
• If a CD becomes dirty, wet a soft cloth in water , wring
it out well, wipe the dirt away gently, and then remove
any water drops with a dry cloth.
• Do not use record cleaning sprays or anti-static agents
on CDs. Also, never clean CDs with benzene, thinner, or
other volatile solvents which may cause damage to disc
surface
More Information
Troubleshooting Tips
AM1550 EN rev.1 10/29/01 2:17 PM Page 16
Page 17

13
More Information
CD Lens Care
When your CD lens gets dirty it can also cause the system
to output poor sound quality. T o clean the lens you will
need to purchase a CD lens cleaner which can maintain
the output sound quality of your system. For instructions
on cleaning the CD lens, refer to the ones accompanying
the lens cleaner.
Cassette Player
To prevent deterioration of sound quality , periodically
open the door of each deck and clean the magnetic
heads, pinch roller, and capstan with a cotton bud
dipped in alcohol. Also, demagnetize the head by playing a demagnetizing cassette (available through an
audio equipment store).
To protect recordings one or
both sides of a tape, remove
the corresponding tab. If you
later want to record on the
tape, affix a piece of adhesive
tape over the hole.
Quit Slacking - A little bit of slack
in your tapes can cause scratches
on the tape, or worse yet, the
tape could break. If you notice
some slack in the tape, use a pencil to tighten it up before you
insert it.
Safety Precautions
• Never open the cabinet under any circumstances. Any
repairs or internal adjustments should be made only by a
trained technician.
• Never operate this product with the cabinet removed.
• Do not touch the player with wet hands. If any liquid
enters the player cabinet, take the player to a trained
technician for inspection.
• This compact disc player uses a laser to read the music
on the disc. The laser mechanism corresponds to the cartridge and stylus of a record player. Although this product incorporates a laser pick-up lens, it is completely safe
when operated according to directions.
• Discs rotate at high speed inside the player. Do not use
damaged, warped, or cracked discs.
Prevent damage to this product, set switch for proper
voltage.
• Do not touch the pick-up lens which is located inside
the disc compartment. Also, to keep dust from collecting
on the pick-up lens and do not leave the compartment
door open for an extended period of time. If the lens
becomes dirty, clean it with a soft brush, or use an air
blower brush designed for camera lenses.
Important Batteries Information
• Remove the batteries to avoid leakage if you do not
use your remote control for more than one month.
Discard leaky batteries immediately as leaking batteries
may cause skin burns or other personal injuries. Dispose
of batteries in the proper manner, according to provincial and local regulations. Any battery may leak electrolyte if mixed with a different battery type, if inserted
incorrectly, if all batteries are not replaced at the same
time, if disposed of in fire, or if an attempt is made to
charge a battery not intended to be recharged.
Headset Safety
• Do not play your headset at a high volume. Hearing
experts are against continuous extended play.
• If you experience a ringing in your ears, reduce volume
or discontinue use.
• Y ou should use extreme caution or temporarily discontinue use in potentially hazardous situations.
Even if your headset is an open-air type designed to let
you hear outside sounds, don’t turn up the volume so
high that you are unable to hear what is around you.
Don’t Infringe
This product should only be used for the purposes for
which it is sold, that is, entertainment, violating no copyright law. Any attempts to use this product for which it is
not intended is unlawful and therefore not condoned by
Thomson Consumer Electronics.
Technical Specifications
Power supply: 230V~50Hz
Dimensions ( H x W x D mm):
Unit size - 329 x 307 x 360
Speaker - 246 x 170 x 195
CD player: Response curve (+/- 2dB): 20Hz to 20 kHz
Rating Plate: Look for it at the back of the set.
The descriptions and characteristics in this owner’s manual are for the purpose of general reference only and not as a guarantee. In order to provide you with the highest
quality product, we may make changes or modifications without prior notice. The
English version serves as the final reference on all product and operational details
should any discrepancies arise in other languages.
EN
AM1550 EN rev.1 10/29/01 2:17 PM Page 17
Side A ProtectionBSide B Protection
A
A
 Loading...