

Page 1
Gecko Frames
8900 SIGNAL PROCESSING SYSTEM
Instruction Manual
071063603
MARCH 2005
Page 2

Contacting Grass Valley
Region Voice Fax Address Web Site
North America (800) 547-8949
Support: 530-478-4148
Pacific Operations +852-2585-6688
Support: 852-2585-6579
U.K., Asia, Middle East +44 1753 218 777 +44 1753 218 757
France +33 1 45 29 73 00
Germany, Europe +49 6150 104 782 +49 6150 104 223
Copyright © Thomson Broadcast and Media Solutions All rights reserved.
Grass Valley Web Site
Sales: (530) 478-3347
Support: (530) 478-3181
+852-2802-2996
Grass Valley
P.O. Box 599000
Nevada City, CA 959597900 USA
www.thomsongrassvalley.com
The www
Online User Documentation
.thomsongrassvalley.com web site offers the following:
— Current versions of product catalogs, brochures,
data sheets, ordering guides, planning guides, manuals, and release notes
in .pdf format can be downloaded.
FAQ Database
— Solutions to problems and troubleshooting efforts can be
found by searching our Frequently Asked Questions (FAQ) database.
Software Downloads
— Software updates, drivers, and patches can be down-
loaded.
2Gecko Frames Instruction Manual
Page 3

Contents
Preface
. . . . . . . . . . . . . . . . . . . . . . . . . . . . . . . . . . . . . . . . . . . . . . . . . . . . . . . . . . . . . . . . . . . . . 5
About This Manual . . . . . . . . . . . . . . . . . . . . . . . . . . . . . . . . . . . . . . . . . . . . . . . . . . . . . 5
Safety Terms and Symbols. . . . . . . . . . . . . . . . . . . . . . . . . . . . . . . . . . . . . . . . . . . . . . . 7
Terms in This Manual . . . . . . . . . . . . . . . . . . . . . . . . . . . . . . . . . . . . . . . . . . . . . . . . . 7
Terms on the Product . . . . . . . . . . . . . . . . . . . . . . . . . . . . . . . . . . . . . . . . . . . . . . . . . 7
Symbols on the Product . . . . . . . . . . . . . . . . . . . . . . . . . . . . . . . . . . . . . . . . . . . . . . . 8
Warnings . . . . . . . . . . . . . . . . . . . . . . . . . . . . . . . . . . . . . . . . . . . . . . . . . . . . . . . . . . . . . 8
Cautions . . . . . . . . . . . . . . . . . . . . . . . . . . . . . . . . . . . . . . . . . . . . . . . . . . . . . . . . . . . . . . 9
Certifications and Compliances . . . . . . . . . . . . . . . . . . . . . . . . . . . . . . . . . . . . . . . . . 11
FCC Emission Control . . . . . . . . . . . . . . . . . . . . . . . . . . . . . . . . . . . . . . . . . . . . . . . 11
Canadian EMC Notice of Compliance . . . . . . . . . . . . . . . . . . . . . . . . . . . . . . . . . . 11
EN55022 Class A Warning . . . . . . . . . . . . . . . . . . . . . . . . . . . . . . . . . . . . . . . . . . . . 11
Canadian Certified Power Cords . . . . . . . . . . . . . . . . . . . . . . . . . . . . . . . . . . . . . . 12
Canadian Certified AC Adapter . . . . . . . . . . . . . . . . . . . . . . . . . . . . . . . . . . . . . . . 12
Laser Compliance . . . . . . . . . . . . . . . . . . . . . . . . . . . . . . . . . . . . . . . . . . . . . . . . . . . 12
Laser Safety Requirements . . . . . . . . . . . . . . . . . . . . . . . . . . . . . . . . . . . . . . . . . . 12
Laser Safety. . . . . . . . . . . . . . . . . . . . . . . . . . . . . . . . . . . . . . . . . . . . . . . . . . . . . . . 12
FCC Emission Limits. . . . . . . . . . . . . . . . . . . . . . . . . . . . . . . . . . . . . . . . . . . . . . . 13
Certification . . . . . . . . . . . . . . . . . . . . . . . . . . . . . . . . . . . . . . . . . . . . . . . . . . . . . . . . 13
Section 1 — Gecko 8900 Series Frames
Introduction . . . . . . . . . . . . . . . . . . . . . . . . . . . . . . . . . . . . . . . . . . . . . . . . . . . . . . . . . . 15
Frame Options and Upgrades. . . . . . . . . . . . . . . . . . . . . . . . . . . . . . . . . . . . . . . . . . . 16
8900TX Convection System . . . . . . . . . . . . . . . . . . . . . . . . . . . . . . . . . . . . . . . . . . . . . 17
8900TF Forced-air System . . . . . . . . . . . . . . . . . . . . . . . . . . . . . . . . . . . . . . . . . . . . . . 18
8900TFN Networked System. . . . . . . . . . . . . . . . . . . . . . . . . . . . . . . . . . . . . . . . . . . . 18
Frame Connections . . . . . . . . . . . . . . . . . . . . . . . . . . . . . . . . . . . . . . . . . . . . . . . . . . . . 19
Network Configuration Storage . . . . . . . . . . . . . . . . . . . . . . . . . . . . . . . . . . . . . . . 21
Frame Cooling . . . . . . . . . . . . . . . . . . . . . . . . . . . . . . . . . . . . . . . . . . . . . . . . . . . . . . . . 21
Calculating Frame Power. . . . . . . . . . . . . . . . . . . . . . . . . . . . . . . . . . . . . . . . . . . . . 22
Frame Monitor and Network Interface Modules . . . . . . . . . . . . . . . . . . . . . . . . . . . 23
. . . . . . . . . . . . . . . . . . . . . . . . . . . . . . . 15
Section 2 — Installation
Introduction . . . . . . . . . . . . . . . . . . . . . . . . . . . . . . . . . . . . . . . . . . . . . . . . . . . . . . . . . . 25
Rack Mounting the Frame . . . . . . . . . . . . . . . . . . . . . . . . . . . . . . . . . . . . . . . . . . . . . . 25
Module Installation. . . . . . . . . . . . . . . . . . . . . . . . . . . . . . . . . . . . . . . . . . . . . . . . . . . . 26
Rear Connectors . . . . . . . . . . . . . . . . . . . . . . . . . . . . . . . . . . . . . . . . . . . . . . . . . . . . . . 27
Loop-through Input Connectors . . . . . . . . . . . . . . . . . . . . . . . . . . . . . . . . . . . . . . . 28
Direct Input/Output Connectors . . . . . . . . . . . . . . . . . . . . . . . . . . . . . . . . . . . . . . 28
Frame Alarm Connector. . . . . . . . . . . . . . . . . . . . . . . . . . . . . . . . . . . . . . . . . . . . . . 30
Frame Alarm Conditions . . . . . . . . . . . . . . . . . . . . . . . . . . . . . . . . . . . . . . . . . . . 31
Frame Alarm Example . . . . . . . . . . . . . . . . . . . . . . . . . . . . . . . . . . . . . . . . . . . . . 32
Gecko Frames Instruction Manual 3
. . . . . . . . . . . . . . . . . . . . . . . . . . . . . . . . . . . . . . . . . . . . . . . . . 25
Page 4

Contents
Section 3 — Power Up
Introduction. . . . . . . . . . . . . . . . . . . . . . . . . . . . . . . . . . . . . . . . . . . . . . . . . . . . . . . . . . 33
Power Connections . . . . . . . . . . . . . . . . . . . . . . . . . . . . . . . . . . . . . . . . . . . . . . . . . . . 34
120 VAC . . . . . . . . . . . . . . . . . . . . . . . . . . . . . . . . . . . . . . . . . . . . . . . . . . . . . . . . . . . 34
240 VAC . . . . . . . . . . . . . . . . . . . . . . . . . . . . . . . . . . . . . . . . . . . . . . . . . . . . . . . . . . . 34
Line Cord Retainer . . . . . . . . . . . . . . . . . . . . . . . . . . . . . . . . . . . . . . . . . . . . . . . . . . 35
Applying Power . . . . . . . . . . . . . . . . . . . . . . . . . . . . . . . . . . . . . . . . . . . . . . . . . . . . . . 36
. . . . . . . . . . . . . . . . . . . . . . . . . . . . . . . . . . . . . . . . . . . . . . . . . . 33
Section 4 — Monitoring and Control
Introduction. . . . . . . . . . . . . . . . . . . . . . . . . . . . . . . . . . . . . . . . . . . . . . . . . . . . . . . . . . 37
Frame Monitor Module . . . . . . . . . . . . . . . . . . . . . . . . . . . . . . . . . . . . . . . . . . . . . . . . 38
Enabling Alarms and Fan Speed Control Option . . . . . . . . . . . . . . . . . . . . . . . . 39
Frame Monitor Module Indicator LEDs . . . . . . . . . . . . . . . . . . . . . . . . . . . . . . . . 39
Section 5 — Specifications
Introduction. . . . . . . . . . . . . . . . . . . . . . . . . . . . . . . . . . . . . . . . . . . . . . . . . . . . . . . . . . 41
Frame Specifications . . . . . . . . . . . . . . . . . . . . . . . . . . . . . . . . . . . . . . . . . . . . . . . . . . 41
Power Supply . . . . . . . . . . . . . . . . . . . . . . . . . . . . . . . . . . . . . . . . . . . . . . . . . . . . . . . . 43
Appendix – 8900 Frames Archive
Introduction. . . . . . . . . . . . . . . . . . . . . . . . . . . . . . . . . . . . . . . . . . . . . . . . . . . . . . . . . . 45
Identifying Frame Types . . . . . . . . . . . . . . . . . . . . . . . . . . . . . . . . . . . . . . . . . . . . . . . 45
Network Configuration Storage. . . . . . . . . . . . . . . . . . . . . . . . . . . . . . . . . . . . . . . 45
Video Frame . . . . . . . . . . . . . . . . . . . . . . . . . . . . . . . . . . . . . . . . . . . . . . . . . . . . . . . . . 46
SMPTE Alarm Connector . . . . . . . . . . . . . . . . . . . . . . . . . . . . . . . . . . . . . . . . . . . . 46
Audio Frame . . . . . . . . . . . . . . . . . . . . . . . . . . . . . . . . . . . . . . . . . . . . . . . . . . . . . . . . . 49
. . . . . . . . . . . . . . . . . . . . . . . . . . . . . . . . . . . . . . . . . . . . . 41
. . . . . . . . . . . . . . . . . . . . . . . . . . . . . . . . . . . . . . 45
. . . . . . . . . . . . . . . . . . . . . . . . . . . . . . . . . . . 37
Index
. . . . . . . . . . . . . . . . . . . . . . . . . . . . . . . . . . . . . . . . . . . . . . . . . . . . . . . . . . . . . . . . . . . . . . 51
4Gecko Frames Instruction Manual
Page 5

Preface
About This Manual
This manual provides installation and safety and regulatory information
for the Gecko 8900 Series Video and Audio frames for housing Grass Valley
8900 Series modules.
An Appendix to this manual provides summary archive information on
previously released 8900 frames.
Gecko Frames Instruction Manual 5
Page 6

Preface
6Gecko Frames Instruction Manual
Page 7

Safety Summary
Read and follow the important safety information below, noting especially
those instructions related to risk of fire, electric shock or injury to persons.
Additional specific warnings not listed here may be found throughout the
manual.
WARNING Any instructions in this manual that require opening the equipment cover
or enclosure are for use by qualified service personnel only. To reduce the
risk of electric shock, do not perform any servicing other than that contained in the operating instructions unless you are qualified to do so.
Safety Terms and Symbols
Terms in This Manual
Terms on the Product
Safety-related statements may appear in this manual in the following form:
WARNING Warning statements identify conditions or practices that may result in per-
CAUTION Caution statements identify conditions or practices that may result in damage
The following terms may appear on the product:
DANGER
the marking.
WARNING
sible as you read the marking.
sonal injury or loss of life.
to equipment or other property, or which may cause equipment crucial to
your business environment to become temporarily non-operational.
— A personal injury hazard is immediately accessible as you read
— A personal injury hazard exists but is not immediately acces-
CAUTION
Gecko Frames Instruction Manual 7
— A hazard to property, product, and other equipment is present.
Page 8
Safety Summary
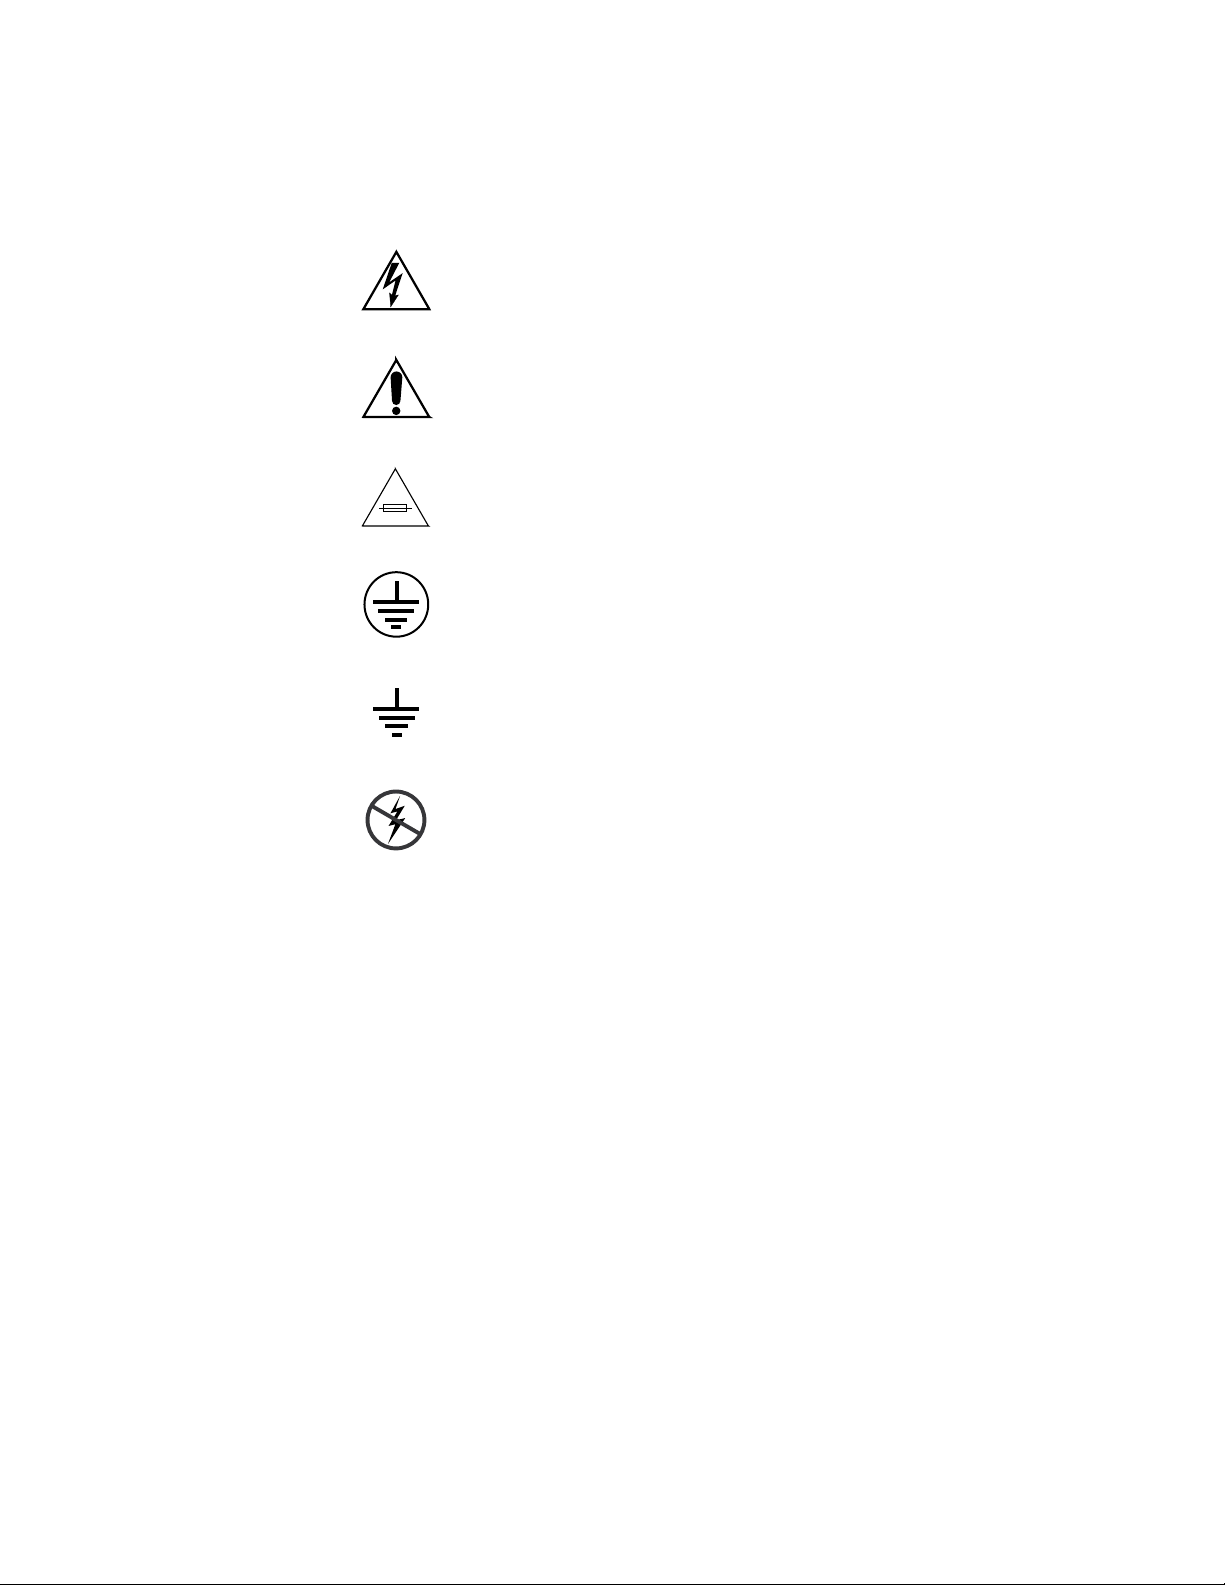
Symbols on the Product
The following symbols may appear on the product:
Indicates that dangerous high voltage is present within the
equipment enclosure that may be of sufficient magnitude to
constitute a risk of electric shock.
Indicates that user, operator or service technician should refer
to product manual(s) for important operating, maintenance,
or service instructions.
This is a prompt to note fuse rating when replacing fuse(s).
The fuse referenced in the text must be replaced with one
having the ratings indicated.
Warnings
Identifies a protective grounding terminal which must be connected to earth ground prior to making any other equipment
connections.
Identifies an external protective grounding terminal which
may be connected to earth ground as a supplement to an
internal grounding terminal.
Indicates that static sensitive components are present which
may be damaged by electrostatic discharge. Use anti-static
procedures, equipment and surfaces during servicing.
The following warning statements identify conditions or practices that can
result in personal injury or loss of life.
Dangerous voltage or current may be present
battery (if applicable) before removing protective panels, soldering, or
replacing components.
— Disconnect power and remove
Do not service alone
person capable of rendering first aid and resuscitation is present.
Remove jewelry
and other metallic objects.
Avoid exposed circuitry
circuitry when power is present.
8Gecko Frames Instruction Manual
— Do not internally service this product unless another
— Prior to servicing, remove jewelry such as rings, watches,
— Do not touch exposed connections, components or
Page 9

Safety Summary
Use proper power cord
this product.
Ground product
earth ground.
Operate only with covers and enclosure panels in place
product when covers or enclosure panels are removed.
Use correct fuse
product.
Use only in dry environment
Use only in non-explosive environment
explosive atmosphere.
High leakage current may be present
before connecting power.
Dual power supplies may be present
cord into a separate branch circuit employing a separate service ground.
Disconnect both power supply cords prior to servicing.
Double pole neutral fusing
— Use only the power cord supplied or specified for
— Connect the grounding conductor of the power cord to
— Do not operate this
— Use only the fuse type and rating specified for this
— Do not operate in wet or damp conditions.
— Do not operate this product in an
— Earth connection of product is essential
— Be certain to plug each power supply
— Disconnect mains power prior to servicing.
Cautions
Use proper lift points
Avoid mechanical hazards
servicing.
The following caution statements identify conditions or practices that can
result in damage to equipment or other property
Use correct power source
that applies more than the voltage specified for the product.
Use correct voltage setting
plies, before applying power ensure that the each power supply is set to
match the power source.
Provide proper ventilation
ment ventilation in accordance with installation instructions.
Use anti-static procedures
may be damaged by electrostatic discharge. Use anti-static procedures,
equipment and surfaces during servicing.
— Do not use door latches to lift or move equipment.
— Allow all rotating devices to come to a stop before
— Do not operate this product from a power source
— If this product lacks auto-ranging power sup-
— To prevent product overheating, provide equip-
— Static sensitive components are present which
Gecko Frames Instruction Manual 9
Page 10

Safety Summary
Do not operate with suspected equipment failure
damage or equipment failure, have the equipment inspected by qualified
service personnel.
Ensure mains disconnect
of this equipment provide the means of disconnection. The socket outlet
must be installed near the equipment and must be easily accessible. Verify
that all mains power is disconnected before installing or removing power
supplies and/or options.
Route cable properly
likely to be damaged. Properly support heavy cable bundles to avoid connector damage.
Use correct power supply cords
meet all North American electrical codes. Operation of this equipment at
voltages exceeding 130 VAC requires power supply cords which comply
with NEMA configurations. International power cords, if provided, have
the approval of the country of use.
Use correct replacement battery
reduce the risk of explosion, check polarity and replace only with the same
or equivalent type recommended by manufacturer. Dispose of used batteries according to the manufacturer’s instructions.
— If mains switch is not provided, the power cord(s)
— Route power cords and other cables so that they ar not
— Power cords for this equipment, if provided,
— This product may contain batteries. To
— If you suspect product
Troubleshoot only to board level
populated with surface mount technology (SMT) components and application specific integrated circuits (ASICS). As a result, circuit board repair at
the component level is very difficult in the field, if not impossible. For warranty compliance, do not troubleshoot systems beyond the board level.
— Circuit boards in this product are densely
10 Gecko Frames Instruction Manual
Page 11

Regulatory Notices
Certifications and Compliances
FCC Emission Control
This equipment has been tested and found to comply with the limits for a
Class A digital device, pursuant to Part 15 of the FCC Rules. These limits
are designed to provide reasonable protection against harmful interference
when the equipment is operated in a commercial environment. This equipment generates, uses, and can radiate radio frequency energy and, if not
installed and used in accordance with the instruction manual, may cause
harmful interference to radio communications. Operation of this equipment in a residential area is likely to cause harmful interference in which
case the user will be required to correct the interference at his own expense.
Changes or modifications not expressly approved by Grass Valley Group
can affect emission compliance and could void the user’s authority to
operate this equipment.
Canadian EMC Notice of Compliance
This digital apparatus does not exceed the Class A limits for radio noise
emissions from digital apparatus set out in the Radio Interference Regulations of the Canadian Department of Communications.
Le présent appareil numérique n’emet pas de bruits radioélectriques
dépassant les limites applicables aux appareils numeriques de la classe A
préscrites dans le Règlement sur le brouillage radioélectrique édicte par le
ministère des Communications du Canada.
EN55022 Class A Warning
For products that comply with Class A. In a domestic environment this
product may cause radio interference in which case the user may be
required to take adequate measures.
Gecko Frames Instruction Manual 11
Page 12

Regulatory Notices
Canadian Certified Power Cords
Canadian Certified AC Adapter
Laser Compliance
Canadian approval includes the products and power cords appropriate for
use in the North America power network. All other power cords supplied
are approved for the country of use.
Canadian approval includes the AC adapters appropriate for use in the
North America power network. All other AC adapters supplied are
approved for the country of use.
Laser Safety Requirements
The device used in this product is a Class 1 certified laser product. Operating this product outside specifications or altering from its original design
may result in hazardous radiation exposure, and may be considered an act
of modifying or new manufacturing of a laser product under U.S. regulations contained in 21CFR Chapter1, subchapter J or CENELEC regulations
in HD 482 S1. People performing such an act are required by law to recertify and reidentify this product in accordance with provisions of 21CFR
subchapter J for distribution within the U.S.A., and in accordance with
CENELEC HD 482 S1 for distribution within countries using the IEC 825
standard.
Laser Safety
Laser safety in the United States is regulated by the Center for Devices and
Radiological Health (CDRH). The laser safety regulations are published in
the “Laser Product Performance Standard,” Code of Federal Regulation
(CFR), Title 21, Subchapter J.
The international Electrotechnical Commission (IEC) Standard 825, “Radiation of Laser Products, Equipment Classification, Requirements and
User’s Guide,” governs laser products outside the United States. Europe
and member nations of the European Free trade Association fall under the
jurisdiction of the Comite European de Normalization Electrotechnique
(CENELEC).
For the CDRH: The radiant power is detected trough a 7 mm aperture at a
distance of 200 mm from the source focused through a lens with a focal
length of 100 mm.
For IEC compliance: The radiant power is detected trough a 7 mm aperture
at a distance of 100 mm from the source focused through a lens with a focal
length of 100 mm.
12 Gecko Frames Instruction Manual
Page 13
FCC Emission Limits
Certification
Regulatory Notices
This device complies with Part 15 of the FCC Rules. Operation is subject to
the following two conditions: (1) This device may no cause harmful interference, and (2) this device must accept any interference received,
including interference that may cause undesirable operation. This device
has been tested and found to comply with FCC Part 15 Class B limits for a
digital device when tested with a representative laser-based fiber optical
system that complies with ANSI X3T11 Fiber Channel Standard.
Category Standard Designed/tested for compliance with:
Safety ANSI/UL60950 Safety of Information Technology Equipment, including Electrical
IEC 60950 Safety of Information Technology Equipment, including Electrical
CAN/CSA C22.2, No. 60950-00Safety of Information Technology Equipment, including Electrical
BSEN60950 Safety of Information Technology Equipment, including Electrical
Business Equipment (Third edition, 2000).
Business Equipment (Third edition, 1999).
Business Equipment.
Business Equipment.
Gecko Frames Instruction Manual 13
Page 14

Regulatory Notices
14 Gecko Frames Instruction Manual
Page 15

Gecko 8900 Series Frames
Introduction
The Grass Valley Gecko™ 8900 Signal Processing System is a family of conversion, distribution, timing, and processing modules which provides
support for a wide variety of signal processing applications.
Two Gecko 8900 Series frame types are available to support these modules:
• 8900 BNC/Video – providing BNC input/output connectors for video
modules, and
• 8900 Balanced Audio – providing four BNC connectors and 10 three terminal audio connectors for balanced input/output connections for
audio modules.
Section
1
Note
Key features of the Gecko 8900 Series frames include:
• Support of all Grass Valley 8900 Series modules,
•Wide range of analog and digital functions,
• 10 module slots in each 2 RU frame,
•Analog/digital passive loop-through inputs,
• 100 W power supplies, each with independent AC main inputs and
• LEDs on front cover for fault and power supply status,
• Self-contained variable speed cooling,
• Ethernet control and monitoring,
• Serial interface for IP Address configuration and Frame Alarm output,
•IP network identity stored in non-volatile frame memory.
Refer to the documentation for each 8900 module for frame compatibility
information.
integrated cord retention,
and
Gecko Frames Instruction Manual 15
Page 16

Section 1 — Gecko 8900 Series Frames
The power usage of 8900 modules varies greatly from less complex analog
to higher complexity digital modules. To handle these power requirements
and offer more control and monitoring flexibility, both frame types are
offered in 8900TX, TF, and TFN models.
These models provide:
• 8900TX-V/TX-A – Vented cover for passive cooling and single 100 W
power supply for modules outputting up to 30 W power,
• 8900TF-V/TF-A – Fan front cover with a variable fan speed mode and
a single 100 W power supply, and
• 8900TFN-V/TFN-A – Fan front cover, 100W power supply, and
Ethernet capability for remote control and monitoring using a webbased GUI (Graphical User Interface) with the 8900NET Network Interface Module.
An 8900 Video frame can house 8900 Series video modules and Grass
Valley 8500 or 8800 analog distribution amplifiers (except the 8510R). The
frame can house from one to ten 8900 video modules depending upon
power requirements.
The 8900 Audio frame offers the same power, cooling, and control options
as the 8900 Video frame while providing a backplane with three-terminal
connectors for balanced audio inputs and outputs. Each audio module slot
provides 10 three-terminal connectors and four BNC connectors for functions determined by the specific audio module installed.
Frame Options and Upgrades
Table 1 shows the Gecko 8900 Series frame models available. Table 2 pro-
vides the upgrade options available to extend the frame capabilities.
Table 1.
Model # Cover type/power max. Controller Active Comm. Ports
8900TX-V/TX-A Convection/30 Watts None None
8900TF-V/TF-A Fan Front Cover/100 Watts Frame Monitor Module Frame Alarm
8900TFN-V/TFN-A Fan Front Cover/100 Watts 8900NET Network Interface Module Frame Alarm, RS-232, Ethernet
Table 2. Frame Upgrade Options and Features for Both Video and Audio Frames
Model # Upgrade Cover type/power max. Controller Active Comm. Ports
8900FAN
8900FN 8900TX to 8900TFN Fan/100 Watts 8900NET Network Interface Module Frame Alarm, RS-232, Ethernet
8900NET 8900TF to 8900TFN Fan/100 Watts 8900NET Network Interface Module Frame Alarm, RS-232, Ethernet
8900TX to 8900TF
Frame Models and Features
Fan/100 Watts Frame Monitor Module Frame Alarm
16 Gecko Frames Instruction Manual
Page 17

8900TX Convection System
The convection system consists of the following:
• 8900TX-V/TX-A, convection frame, and one power supply
• 8900PSX, redundant power supply (optional)
The convection frame has a vented front cover and filter for convective air
flow. This frame is used primarily for analog and a limited quantity of
digital modules with a total power requirement less than 30 watts. Refer to
Frame Cooling on page 21.
The convection frame is illustrated in Figure 1.
Figure 1. Convection Frame
8900TX Convection System
LOCK
LOCK
PS 1 PS 2
0636-06
Power Indicator LEDs
Note A convection frame can be upgraded to a forced-air or a networked frame.
This requires the use of model 8900FAN retrofit kit which provides fans and
the Fault indication window in the cover (see Figure 2 on page 14) and the
8900NET for networking capability.
Gecko Frames Instruction Manual 17
Page 18

Section 1 — Gecko 8900 Series Frames
8900TF Forced-air System
The forced-air system (Figure 2) consists of the following:
• 8900TF-V/TF-A, forced-air frame, Frame Monitor module, and one
power supply
• 8900PSX, 100 W redundant power supply (optional)
The forced-air system has a front cover that is equipped with three fans for
air circulation. The fan speed varies with the ambient frame temperature to
extend fan life and reduce noise when the frame is used in cooler configurations and environments. The fan speed control voltage is generated on
the Frame Monitor module and can be disabled so that the fan runs at
maximum speed only. This frame is recommended for power requirements
greater than 30 watts or when Frame alarm reporting (via the Frame
Monitor module) is required. Refer to Frame Cooling on page 21.
Note A forced-air TF-V or TF-A frame can be converted to a networked TFN-V or
TFN-A frame with the 8900NET option.
Figure 2. Forced-air or Networked Frame
LOCK
Fault Condition Indicator LED Power Indicator LEDs
8900TFN Networked System
The networked system consists of the following:
• 8900TFN-V/TFN-A, forced-air frame, 8900NET Network Interface
Module, and one power supply
FAULT
0636-07
LOCK
PS 1 PS 2
• 8900PSX, 100 W redundant power supply (optional)
The networked system has the same features as the forced-air system
including the fan cover (Figure 2) and fault and power indicators. Also
included is the 8900NET Network Interface module allowing the frame to
communicate over an Ethernet LAN to the web browser GUI interface for
remote control of 8900 modules.
18 Gecko Frames Instruction Manual
Page 19

Frame Connections
Two types of connector backplanes are available in the Gecko 8900 Series
frames. The 8900 BNC/Video frame provides ten module slots, each with
a loop-through input and up to eight connectors for input/output functions as needed for a specific module type (Figure 3).
Figure 3. 8900 Video Frame Module I/O Connectors
Frame Connections
DA10
J1 J2
O
J3 J4
U
T
J5 J6
J7 J8
J9 J10
IN
J1
J2
J3
J4
J5
J6
J7
J8
J9
J10
J11
J12
J13
J14
IN
10
DA9
J2
J1 J2
O
J4
J3 J4
U
T
J6
J5 J6
J8
J7 J8
J9 J10
IN
J1
J2
J3
J4
J5
J6
J7
J8
J9
J10
J11
J12
J13
J14
IN
9
DA8
J1 J2
O
J3 J4
U
T
J5 J6
J7 J8
J9 J10
IN
DA7
J1 J2
J2
O
J3 J4
J4
U
T
J5 J6
J6
J7 J8
J8
J9 J10
IN
DA6
J1 J2
O
J3 J4
U
T
J5 J6
J7 J8
J9 J10
IN
DA5
J1 J2
J2
O
J3 J4
J4
U
T
J5 J6
J6
J7 J8
J8
J9 J10
IN
DA4
J1 J2
O
J3 J4
U
T
J5 J6
J7 J8
J9 J10
IN
DA3
J2
J1 J2
O
J4
J3 J4
U
J6
J5 J6
J8
J7 J8
J9 J10
IN
T
DA2
J1 J2
O
J3 J4
U
T
J5 J6
J7 J8
J9 J10
IN
DA1
J1 J2
O
J3 J4
U
T
J5 J6
J7 J8
J9 J10
IN
0636 -03
The 8900 Balanced Audio frame provides 10 three-terminal connectors and
4 BNC connectors (Figure 4). As in the Video frame, two of the BNCs are for
loop-through connection.
Figure 4. 8900 Audio Frame Module I/O Connectors
J1
J2
J3
J4
J5
J6
J7
J8
J9
J10
J11
J12
J13
J14
IN
8
J1
J2
J3
J4
J5
J6
J7
J8
J9
J10
J11
J12
J13
J14
IN
7
J1
J2
J3
J4
J5
J6
J7
J8
J9
J10
J11
J12
J13
J14
IN
6
J1
J2
J3
J4
J5
J6
J7
J8
J9
J10
J11
J12
J13
J14
IN
5
J1
J2
J3
J4
J5
J6
J7
J8
J9
J10
J11
J12
J13
J14
IN
4
J1
J2
J3
J4
J5
J6
J7
J8
J9
J10
J11
J12
J13
J14
IN
3
J1
J2
J3
J4
J5
J6
J7
J8
J9
J10
J11
J12
J13
J14
IN
2
J1
J2
J3
J4
J5
J6
J7
J8
J9
J10
J11
J12
J13
0636 -17
J14
IN
1
Gecko Frames Instruction Manual 19
Page 20

Section 1 — Gecko 8900 Series Frames
The power/communication backplane section of the frame (Figure 5 and
Figure 6) provides:
• AC power plug connections
•DB-9 connector labeled RS-232 (requires the 8900NET module) with
Frame Alarm connections (pins 8 and 9 of RS-232 connector)
• Ethernet RJ-45 connector (requires the 8900NET module)
The RS-232 port provides connection to a PC used for initial network configuration. Pins 8 and 9 of the RS-232 port can be used for Frame Alarm
reporting. The RJ-45 Ethernet connector provides a 10Base-T Ethernet
network connection with the 8900NET Network Interface module.
Figure 5. Power/Communication Connectors on 8900 Video/BNC Frames
RS232
Frame Alarm
J102 pins 8 and 9
J102
U2
J1 J2
ETHERNET
J103
0636 -23
U1
Figure 6. Power/Communication Connectors on 8900 Balanced Audio Frames
Frame Alarm
J7 pins 8 and 9
0636 -18
U1
J1
RS232
J7
J2
ETHERNET
J10
20 Gecko Frames Instruction Manual
Page 21

Network Configuration Storage
Frame Cooling
Frame Cooling
Both the 8900 BNC/Video and Balanced Audio frames are equipped with
IP address storage capability on the rear backplane. When an 8900NET
module is installed (with version 3.0 software or later), the IP address
assignments made on the 8900NET module for network configuration are
stored on the frame. The current network configuration information will
then stay with the frame if the 8900NET module is moved.
Note Older version 8900 frames do not have IP address storage capability. IP
address information is stored only on the 8900NET module. Refer to Video
Frame on page 46 for more information.
The convection frame and the forced-air frame provide a great deal of flexibility in the type of modules that can be installed. Conventional low power
analog DAs can be used alongside higher power serial digital modules
with all modules performing to their full specifications.
For installations that require only low power modules or modules that
have a combined total dissipation of less than 30 watts, the convection
frame will provide adequate cooling.
Note The 30 watt TX-A/-V frame is best used for modules with less than 5.5 watts
power dissipation. When total power dissipation approaches maximum,
provide as much space as possible between the modules.
For installations where the modules dissipate greater than 30 watts, a
forced air frame must be used.
CAUTION Do not leave a fan front cover off of an air-cooled frame for extended periods.
For reliable operation, the forced-air cover should not be removed for longer
than five minutes when cooling more that 30 watts.
Gecko Frames Instruction Manual 21
Page 22

Section 1 — Gecko 8900 Series Frames
Calculating Frame Power
To calculate the power required for your frame, you must total all the
power dissipated for each individual module.
Table 3 provides the power dissipation for many of the modules compat-
ible with the 8900 Video and Audio frames. For newer modules not listed,
refer to the Specifications table in the specific module instruction manual.
Table 3. Module Power Dissipation
Module Power Dissipation Module Power Dissipation
All 8500 Modules 2 Watts 8920Mux 7 Watts
All 8800 Modules 2 Watts 8931 2 Watts
8910ADA-M/ST 3 Watts 8936 3 Watts
8910ADA-SR 5 Watts 8941 6 Watts
8911 3 Watts 8942 5 Watts
8912RDA/-D 4 Watts 8950ADC 7.2 Watts
8914 3.5 Watts 8950DAC 7.5 Watts
8916 6 Watts 8960DEC
8920ADC 4.2 Watts 8960ENC
8920ADT 6 Watts 8981FS 4.5 Watts
8920DAC 3.1 Watts 8990ARC 6.5 Watts
8920DMX 7 Watts
6.5 Watts, 8.5 Watts
with Frame Sync option
6.5 Watts, 8.5 Watts
with Frame Sync option
Two examples of power calculations are shown in Table 4 and Table 5.
Table 4. Module Power Dissipation, example 1
Module Quantity
8800 5 2 Watts 10 Watts
8960DEC
without Frame Sync
8936 2 3 Watts 6 Watts
Total Frame Power 29 Watts
2 6.5 Watts 13 Watts
Power Per
Module
Total Power
22 Gecko Frames Instruction Manual
Page 23

Frame Monitor and Network Interface Modules
The total frame power required is less than 30 watts; therefore, the convection frame may be used.
Table 5. Module Power Dissipation, example 2
Module Quantity
8836 1 3 Watts 3 Watts
8916 2 6 Watts 12 Watts
8960DEC
without Frame Sync
8941 4 6 Watts 24 Watts
Total Frame Power 58.5 Watts
3 6.5 19.5
Power Per
Module
Total Power
With ten modules, the total frame power required is greater than 30 watts
and an 8900TF or 8900TFN forced-air frame must be used.
Frame Monitor and Network Interface Modules
8900 frame configuration supports the use of either the Frame Monitor or
the 8900NET Network Interface module. The Frame Monitor module provides alarm reporting for the Frame Alarm only. The 8900NET Network
Interface module provides full functionality of the frame communication
buses including:
• Frame Alarm,
•RS-232 Configuration, and
• 10Base-T Ethernet.
Refer to the 8900NET Network Interface Module Instruction Manual.
Gecko Frames Instruction Manual 23
Page 24

Section 1 — Gecko 8900 Series Frames
24 Gecko Frames Instruction Manual
Page 25

Installation
Introduction
This section contains information about:
•Rack mounting the frame,
•Module installation,
•Rear connectors, and
• Frame Alarm.
Rack Mounting the Frame
Section 2
After carefully unpacking this equipment, check the box for a power cords
and other hardware, and examine the equipment for damage. Any damage
should be promptly reported to the carrier.
The frame is designed to mount in a standard 19-inch equipment rack.
Mounting space of 3.5 inches (89 mm) vertically and mounting depth of 14
inches (356 mm) are required. Mount the frame in a standard 19-inch rack
using customer-supplied rack mounting screws.
CAUTION Before lifting the frame, verify that the power supplies are fully seated in their
slots. Front ejector tabs should click into place when snapped on the locking
pin on the module (see Figure 7).
Figure 7. Power Supply Ejector Tab Locking Pin
Ejector
tab
lock pin
0636 -13
Gecko Frames Instruction Manual 25
Page 26
Section 2 — Installation
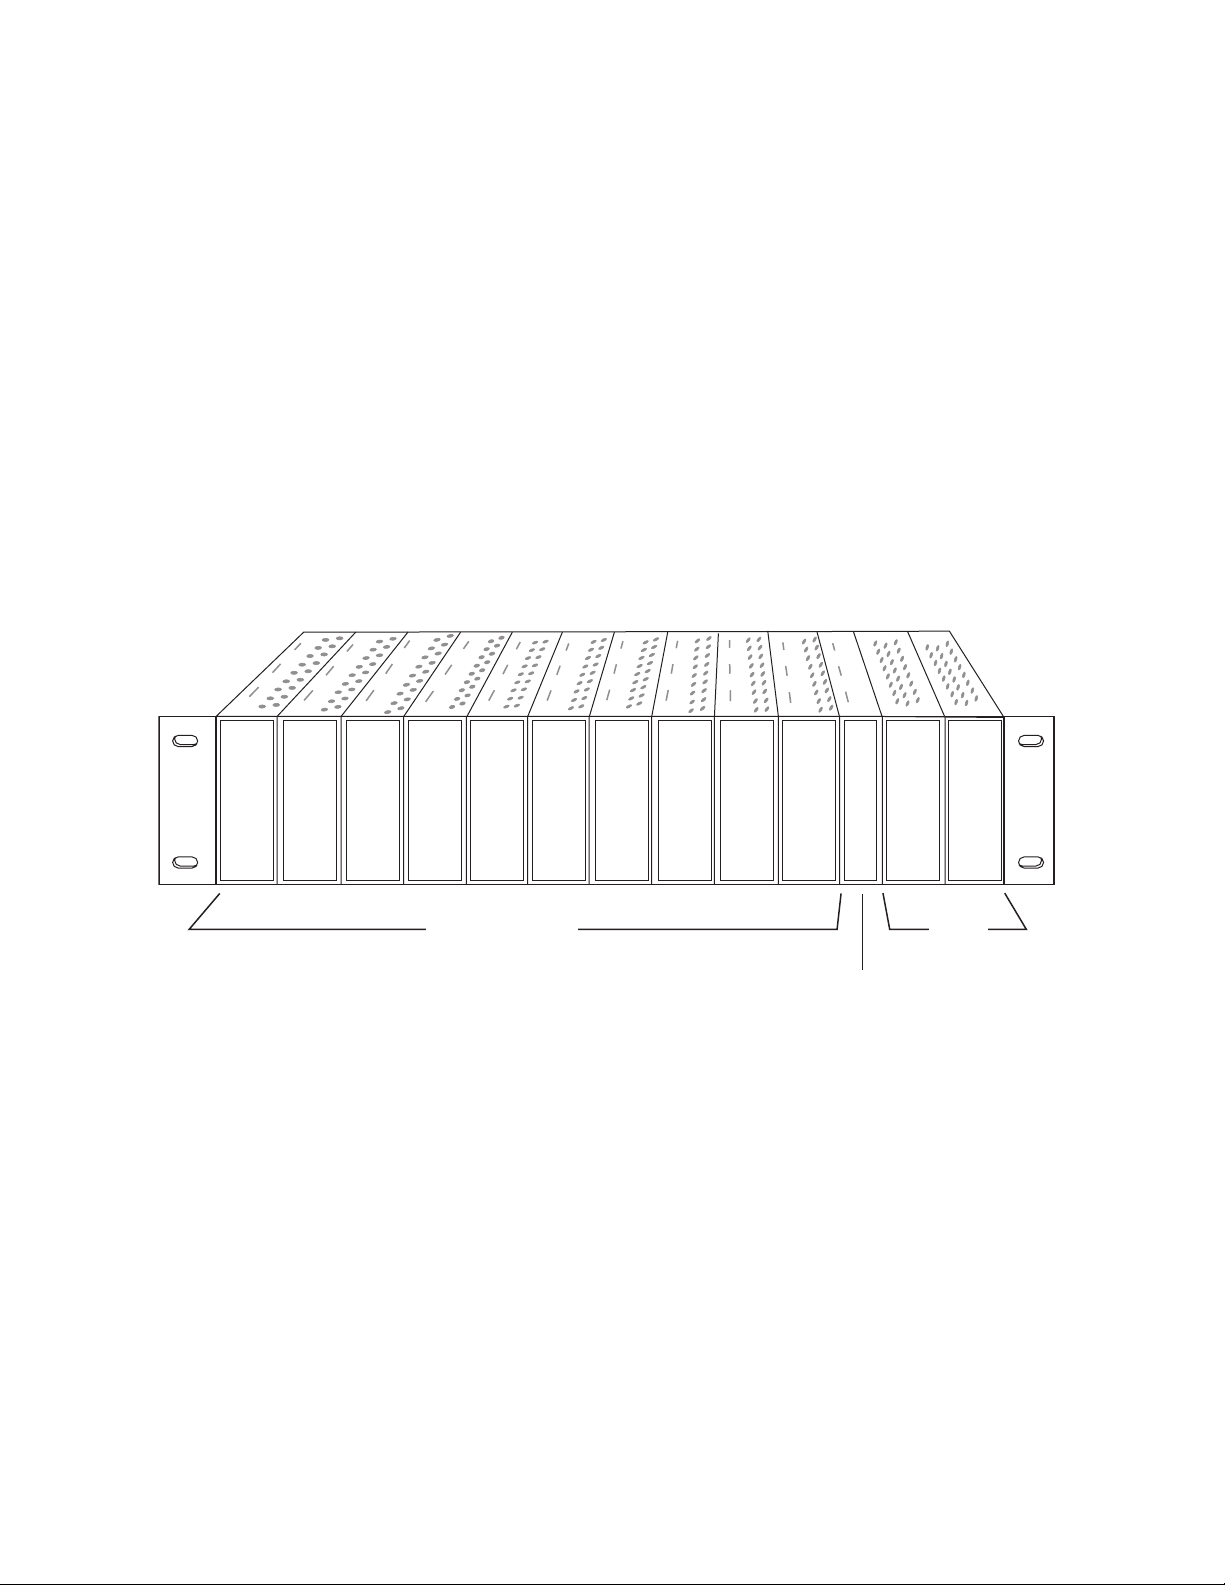
Module Installation
There are ten cell locations in each frame to accommodate either video or
audio modules (module types cannot be mixed in a frame). These are the
ten cells located on the left side of the frame. Refer to Figure 8.
Modules can be configured for up to eight outputs. The 8500 modules have
six outputs. The 8800 and 8900 modules have eight outputs. Refer to individual module manuals for input/output configuration information.
The two cells on the right are allocated for the power supplies only.
The third cell from the right, is allocated only for the Frame Monitor or
8900NET Network Interface module. This module provides the interface
for the forced-air cover, as well as the Frame Alarm reporting. For additional information concerning the Frame Monitor and Network Interface
modules, refer to Section 4-Monitoring and Control.
Figure 8. Gecko 8900 Series Frame
0636-04r2
Any 8900 Module
Frame Monitor or
8900NET Network
Interface Module
To install a module into the frame, follow these steps:
1. Insert the module into the frame, connector-end first, with component
side of the module facing to the right with the ejector tab at the top. The
Frame Monitor and the 8900NET module have a connector tab with a
circular finger-hole for pulling the module rather than an ejector tab.
The connector tab should be oriented in the top half of the frame.
2. Verify that the module connector seats properly against the backplane.
3. Press the ejector tab or connector tab in to seat the module in place.
Power
Supplies
(only)
4. Install a module template overlay from the Instruction Manual if
present.
26 Gecko Frames Instruction Manual
Page 27

Rear Connectors
Modules may be configured for a variety of inputs and outputs. The 8500
modules have six outputs. The 8800 and 8900 modules have up to eight
outputs. Refer to individual module manuals for specific configuration
information.
Note Connector configuration overlays are available for many 8900 modules that
Figure 9 illustrates the rear backplane of the 8900 BNC/Video frame.
Figure 9. 8900 Series Rear Connector Plate
Rear Connectors
do not use the standard DA configuration (one looping input and eight BNC
outputs). These overlays are found at the back of the module Instruction
Manual.
DA10
J1 J2
O
J3 J4
U
T
J5 J6
J7 J8
J9 J10
IN
J1
J2
J3
J4
J5
J6
J7
J8
J9
J10
J11
J12
J13
J14
IN
10
DA9
J1 J2
J2
O
J3 J4
J4
U
T
J5 J6
J6
J7 J8
J8
J9 J10
IN
J1
J2
J3
J4
J5
J6
J7
J8
J9
J10
J11
J12
J13
J14
IN
9
DA8
J1 J2
O
J3 J4
U
T
J5 J6
J7 J8
J9 J10
IN
DA7
J1 J2
J2
O
J3 J4
J4
U
T
J5 J6
J6
J7 J8
J8
J9 J10
IN
DA6
J1 J2
O
J3 J4
U
T
J5 J6
J7 J8
J9 J10
IN
DA5
J1 J2
J2
O
J3 J4
J4
U
T
J5 J6
J6
J7 J8
J8
J9 J10
IN
DA4
J1 J2
O
J3 J4
U
T
J5 J6
J7 J8
J9 J10
IN
DA3
J2
J1 J2
O
J4
J3 J4
U
T
J6
J5 J6
J8
J7 J8
J9 J10
IN
DA2
J1 J2
O
J3 J4
U
T
J5 J6
J7 J8
J9 J10
IN
DA1
J1 J2
O
J3 J4
U
T
J5 J6
J7 J8
J9 J10
IN
Figure 10 illustrates the 8900 Balanced Audio Frame three-terminal and
BNC connectors on the rear backplane.
Figure 10. 8900 Series Audio Frame Rear Connector Plate
J1
J2
J3
J4
J5
J6
J7
J8
J9
J10
J11
J12
J13
J14
IN
8
J1
J2
J3
J4
J5
J6
J7
J8
J9
J10
J11
J12
J13
J14
IN
7
J1
J2
J3
J4
J5
J6
J7
J8
J9
J10
J11
J12
J13
J14
IN
6
J1
J2
J3
J4
J5
J6
J7
J8
J9
J10
J11
J12
J13
J14
IN
5
J1
J2
J3
J4
J5
J6
J7
J8
J9
J10
J11
J12
J13
J14
IN
4
J1
J2
J3
J4
J5
J6
J7
J8
J9
J10
J11
J12
J13
J14
IN
3
J1
J2
J3
J4
J5
J6
J7
J8
J9
J10
J11
J12
J13
J14
IN
2
J1
J2
J3
J4
J5
J6
J7
J8
J9
J10
J11
J12
J13
J14
IN
1
0636 -03
0636 -17
The rear connector backplane will be discussed in the following order:
• Loop-through Input
•Direct Input/Output Connectors
• Frame Alarm Connection
Gecko Frames Instruction Manual 27
Page 28

Section 2 — Installation
Loop-through Input Connectors
Input signals are routed through the rear of the frame. There is one loopthrough input for each module cell refer to Figure 9 and Figure 10 on
page 27.
Note No more than five digital modules should be looped. Use cables less than
two meters in length, and an input cable of less than 200 meters of Belden
8281 (or equivalent).
If not used for looping, the unused loop-through connector must be externally terminated. The recommended termination for serial digital signals is
CONARE BCP-TA (or equivalent).
Performance of looping inputs to equipment other than 8900 modules has
not been verified; monitor signal quality carefully when configuring such
a system.
Serial digital video is a wideband RF signal. Be sure to protect the data from
environmental noise. The serial digital signal is attenuated by as much as
30 dB after traveling through 1000 feet of 8281 cable. An equalizer must be
used to restore the signal so data can be recovered. The equalizer boosts the
serial digital video signal and any environmental noise on the line. Data
corruption takes place if the environmental noise is large enough to cause
pick-off errors in the equalizer.
When connecting serial digital video signals to and from the 8900 Series
frame:
•Use high quality BNC connectors to ensure continuous shield connections.
•Use high quality cable (8281 or 1694A).
•Use one continuous cable for long cable runs. Avoid using patch panels
or BNC barrel connectors.
Note These recommendations become even more important in noisy environ-
ments (subject to radio frequencies and static) with long cable runs.
Direct Input/Output Connectors
In the video frame (refer to Figure 11) there are eight direct (not looping)
input/output BNC connectors provided for each module slot (J1 – J8).
Refer to the Instruction Manual for the specific module for input/output
connector information.
Note If 8500 modules are used in the frame, there are six outputs provided for each
module, J1 through J6.
28 Gecko Frames Instruction Manual
Page 29

Video Frame
Connectors
Rear Connectors
Figure 11. Video Frame Rear Input and Output Connector Labeling
Slot Number (1-10)
10
J10
J2
J2
J4
J4
J6
J6
J8
J8
0636-02r1
J1
J3
J5
J7
O
U
T
J9
IN
The audio frame provides two direct input/output BNCs (J11 and J12), two
looping BNCs (J13 and J14), and ten three-terminal input/output connectors (J1 – J10) shown in Figure 12. A pack of 100 audio connectors is provided with the frame for connecting audio cable to the rear connectors.
Refer to the specific audio module Instruction Manual for cabling information. Pinout information for each module may also be silkscreened on the
module circuit board.
Wiring for
Audio Connector
(top view)
Cable Tie
Audio
Cable
Figure 12. Audio Frame Rear Input and Output Connector Labeling
+ - G
+ - G
J11
J13
J1
J2
J3
J5
J7
J9
J10
IN
1
J4
J6
J8
J12
J14
J2
0636_24
Gecko Frames Instruction Manual 29
Page 30

Section 2 — Installation
Frame Alarm Connector
Use of the Frame Alarm requires the presence of either the Frame Monitor
or 8900NET Network Interface module in the frame. Frame Monitor
module features are discussed in Section 4-Monitoring and Control in this
manual. For information on the 8900NET module see the 8900 Network
Interface Module Instruction Manual.
The Frame Alarm is accessed through pins 8 and 9 of the RS-232 DB-9 connector (Video Frame – J102, Audio Frame – J7) as shown in Figure 13. Refer
to Frame Alarm Example on page 32 for using the port in an alarm circuit.
Note Earlier model 8900 frames had a SMPTE ALARM BNC for accessing the
Frame Alarm output. Refer to SMPTE Alarm Connector on page 46 for
cabling information on older frames.
Figure 13. Frame Alarm Connector Location
Frame Alarm
RS232
(Video – J102 pins 8 and 9)
(Audio – J7 pins 8 and 9)
J1 J2
ETHERNET
0636 -20r0
The pinout for the RS-232 DB-9F connector is given in Table 6.
Table 6. RS-232 Connector Pinouts
Video Frame – J102
Pin
Audio Frame – J7
1 N/C
2TX
3RX
4 N/C
5 Gnd
6 N/C
7 N/C
8 Frame Alarm
9 Frame Alarm
Pin 1
Pin 5
Frame
RS-232 Port
D-9 Female
Pin 6
Pin 9
30 Gecko Frames Instruction Manual
Page 31

Frame Alarm Conditions
The conditions monitored by Frame Alarm reporting are:
• Frame Health
• Power supply 1 voltage
• Power supply 2 voltage
• Fan rotation
• Frame temperature
•Module Health Bus (8900 Video Frames only)
• Power supply voltage
• Signal present at input
•EQ warning
The Module Health bus provides a means for older (legacy) or less capable
modules (such as DAs with no microprocessor) that cannot communicate
over the Frame serial bus to report alarm conditions to the Frame Monitor
or 8900NET module. The reporting is done using a voltage level sent by the
module to the Frame Alarm connector. When a problem exists on the
module, the Module Health bus will indicate that a problem exists on the
module but will not indicate what the problem is.
Rear Connectors
Alarm conditions are enabled or disabled by using the Alarm Reporting
DIP switch(es) on either the Frame Monitor or 8900NET modules. Refer to
Enabling Alarms and Fan Speed Control Option on page 39 for the Frame
Monitor module. For information on setting the 8900NET switches, refer to
the 8900 Network Interface Module Instruction Manual.
In addition to fault reporting through the Frame Alarm connector, there is
a red Fault LED on the 8900TF/TFN front cover. This LED is off when no
fault conditions are detected and on when either an internal fault or a
signal error is detected.
Gecko Frames Instruction Manual 31
Page 32
Section 2 — Installation
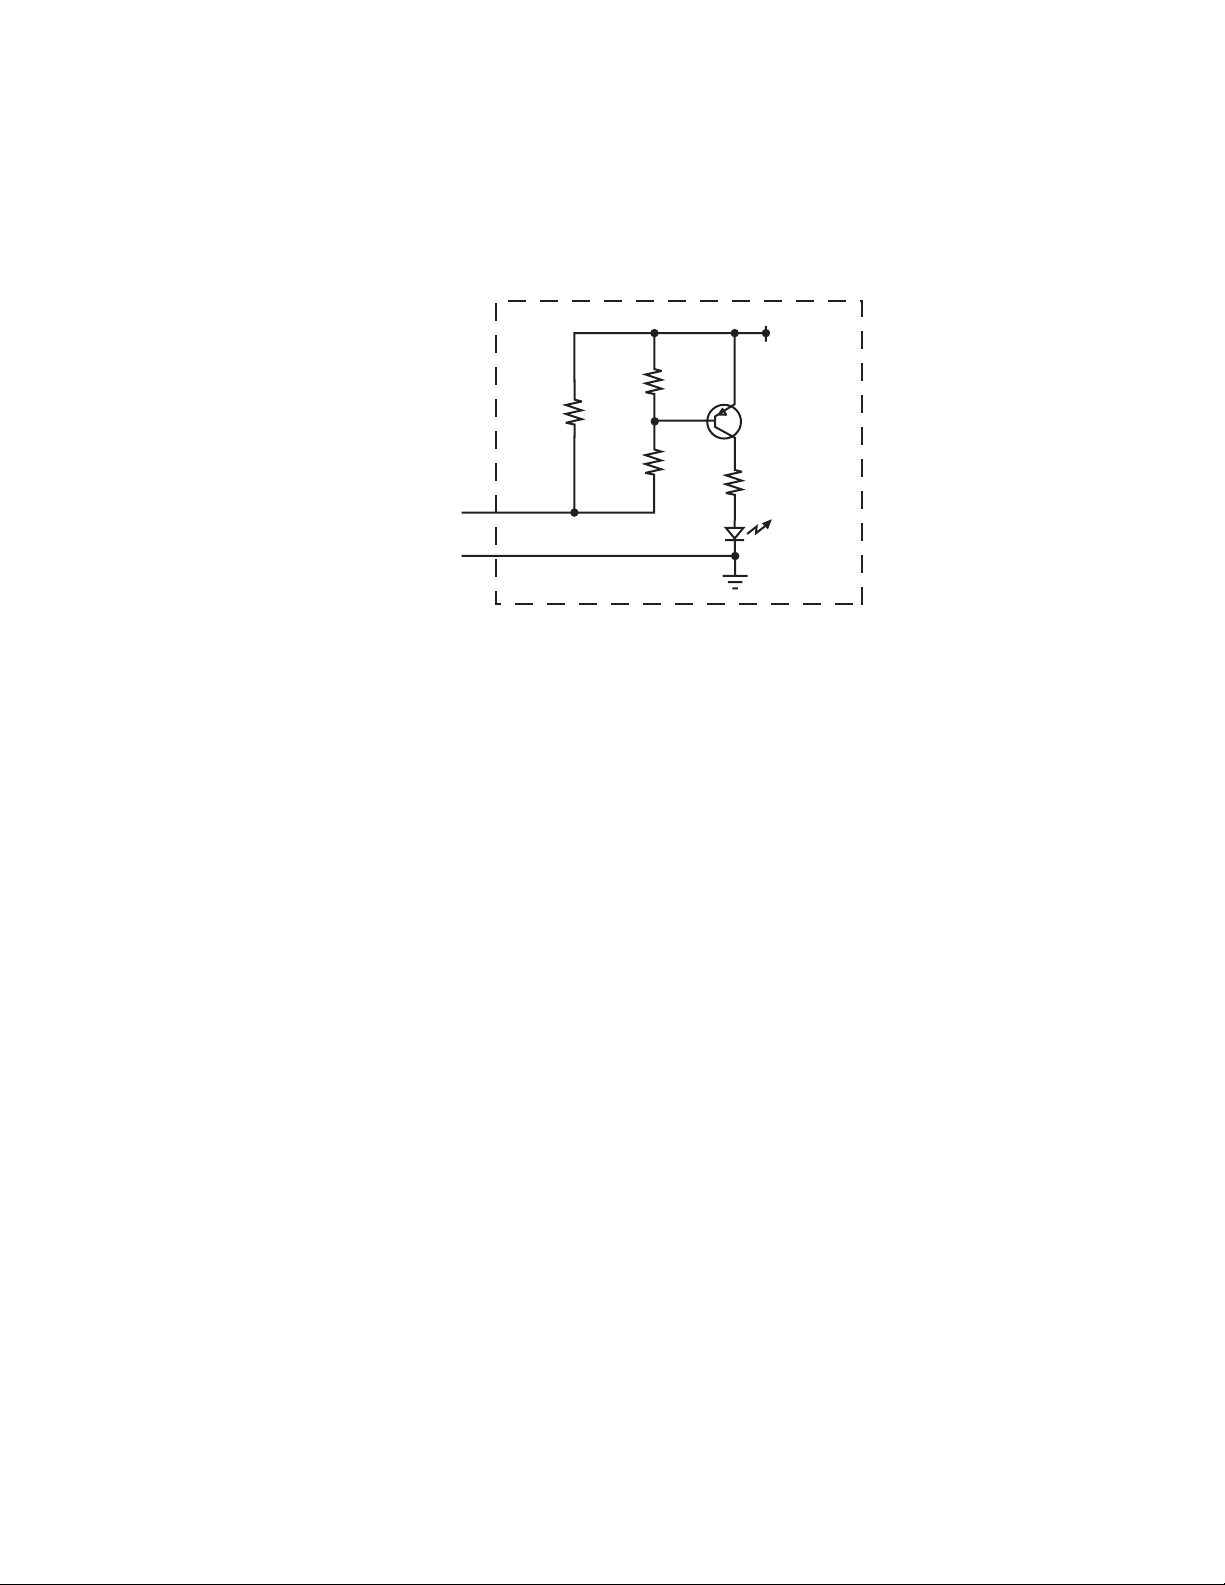
Frame Alarm Example
Refer to Figure 14 for an example of a typical alarm schematic using pins 8
and 9 of the RS-232 port.
Figure 14. Typical Alarm Schematic for Frame Alarm
+5V
4.7 kΩ
470 Ω
4.7 kΩ
330 Ω
RS-232 Pin 8
RS-232 Pin 9
2N4126
(or equivalent)
Alarm
LED
The impedance between the pins 8 and 9 of the RS-232 connector can be in
one of two states:
•Open – less than 100 µA of current will flow with 5 volts across the pins,
and
•Closed – less than 0.2 V will appear from pin 8 to pin 9 with 20 mA of
current flowing.
There are three operational conditions (capability is module dependent,
refer to specific module instruction manual):
•Open – no faults,
•Closed – there is an internal fault, and
• Pulsing – there is a missing or invalid signal on one or more of the modules.
32 Gecko Frames Instruction Manual
Page 33

Power Up
Introduction
This section contains information about:
• Power Connections
•Applying Power
CAUTION Verify that the power supplies are fully seated in their slots. Ejector tabs
Section 3
should click into place when snapped on the locking pin on the module (see
Figure 15).
Figure 15. Power Supply Ejector Tab Locking Pin
Ejector
tab
lock pin
0636 -13
Gecko Frames Instruction Manual 33
Page 34

Section 3 — Power Up
Power Connections
There are two types of power cords supplied with the 8900 Series frames
for 120 V and 240 V operation. Line voltage selection is not required for this
power supply. Optional redundant power supplies are also shipped with
both types of power cord.
120 VAC
This cord has a molded grounding plug at one end and a molded grounded
receptacle at the other end. Conductors are color-coded white (neutral),
black (line), and green or green/yellow (ground).
240 VAC
This cord has a molded grounding receptacle at one end and stripped conductors at the other end. Conductors are color-coded light blue (neutral),
brown (line), and green/yellow (ground).
For each power supply installed, AC power is fed through a line cord to a
socket (J1 and J2) on the rear of the frame (Figure 16).
Figure 16. AC Power Connectors
RS232
J1
ETHERNET
Note To maintain maximum redundant power, ensure that each power supply cord
is plugged into a separate branch circuit.
J2
0636 -05r1
34 Gecko Frames Instruction Manual
Page 35

Line Cord Retainer
To help prevent accidental loss of power, the AC line cord is held in place
by a retainer clip (Figure 17).
Figure 17. Cable Retainer Clip
To properly install the line cord, follow these steps:
Power Connections
0636 -08
Retention Clip
1. Ensure that the retainer clip is inserted properly into the holes of the
screw caps.
2. Rotate the retainer clip sideways, and plug the power cord into the
receptacle.
3. Rotate the retainer clip back onto the plug body to hold the power cord
in place.
Gecko Frames Instruction Manual 35
Page 36

Section 3 — Power Up
Applying Power
Upon applying power to the frame, verify that the green power LED for
each power supply (assuming a redundant supply is present)PS1 and PS2
is illuminated (Figure 18). If the frame is a TF or TFN model (with fans),
check the red FAULT LED. It should be off if the fans are operating correctly.
Figure 18. Power Indicator LEDs (TF frame shown)
LOCK
PS 1 PS 2FAULT
0636-15
Power Indicator LEDs
Fault LED
Other indicator LEDs can be viewed on the controller module (Frame
Monitor or 8900NET module) with the front cover removed. Frame
Monitor module indicators are discussed in Section 4-Monitoring and Con-
trol. If you have a 8900NET module installed in the frame, see the 8900NET
Network Interface Module Instruction Manual for indicator details.
36 Gecko Frames Instruction Manual
Page 37

Monitoring and Control
Introduction
The Gecko 8900TF/8900TFN frames offer monitoring and remote control
capability by providing two types of frame communication modules that
can reside in the controller cell of the frame:
• Frame Monitor module (8900TF Frame), or
• 8900NET Network Interface module (8900TFN Frame).
The 8900NET Network Interface module supports all the functionality of
the Frame Monitor module plus the 10 Base-T Ethernet bus for web-based
GUI control and monitoring. For information on the 8900NET module and
GUI refer to the 8900NET Network Interface Module Instruction Manual.
Section 4
The Frame Monitor module is described in this manual. The Frame
Monitor module is an interface for the forced-air cover and Frame Alarm
fault reporting.
The Frame Monitor module provides:
•Variable power to the fan front cover to regulate fan speed
•Analog module presence indication
• LED display for quick diagnostics of alarm conditions
•DIP switch for enabling and disabling alarms and the variable fan
speed option
Gecko Frames Instruction Manual 37
Page 38

Section 4 — Monitoring and Control
Frame Monitor Module
The Frame Monitor module comes installed in the 8900TF frame. It provides indicator LEDs on the front of the module (visible when fan front
cover is removed) that report alarm conditions and module power status.
When on, the LEDs indicate:
•TEMP — Over-temperature problem
• PS2 — Power supply position 2 health problem
• PS1 — Power supply position 1 health problem
•FAN — Cooling fan is not rotating
• MOD — Module health bus error
•INHIB — Disabled module health bus
•FAULT — Reports that one or more of the above alarm conditions is
present and the other Fault LEDs on the module should be checked.
This LED is visible through the fan front cover Fault window.
Note When an analog module in installed, the module health alarm bus is inhibited.
The front edge of the Frame Monitor module is shown in Figure 19.
Figure 19. Frame Monitor Module Front View
Temperature (red)
PS2 (red)
PS1 (red)
Fan (red)
Module Health (red)
Fault detected (red)
Configuration DIP switch S1
S1
1
2
3
4
5
6
7
8
Power (green)
Module Health Inhibited (yellow)
LED Color Key
Red = Fault
Green = OK
Yellow = Mode Active
0636 -16
38 Gecko Frames Instruction Manual
Page 39

Enabling Alarms and Fan Speed Control Option
The Frame Monitor module has an eight position DIP switch (S1) that
enables or disables the alarm functions and the variable fan speed function.
Refer to Figure 19 on page 38 for the location of S1 and Table 7 for the pos-
sible settings. A settings table is also silkscreened on the module.
Table 7. Configuration DIP Switch Settings
Segment Left Position (open) Right Position (closed)
1 PS1 Fault Reporting Enabled PS1 Fault Reporting Disabled
2 PS2 Fault Reporting Enabled PS2 Fault Reporting Disabled
3 Overtemp Fault Reporting Enabled Overtemp Fault Reporting Disabled
4 Fan Fault Reporting Enabled Fan Fault Reporting Disabled
5 Module Fault Reporting Enabled Module Fault Reporting Disabled
6 Fan Speed Controlled by Temperature Fan Speed Fixed at Maximum
7 Not Used
8 Not Used
Frame Monitor Module
Frame Monitor Module Indicator LEDs
The possible LED status and conditions indicated are shown in Table 8.
Table 8. Indicator LEDs and Conditions Indicated
LED LED State Condition
Power
(green)
PS2
(red)
PS1
(red)
FAN
(red)
MOD
(red)
INHIB
(yellow)
FAULT
(red)
Off Power is off or onboard regulator has failed
On continuously Module is powered
Off Normal operation or alarm disabled
On continuously Power supply 2 is present and reporting an alarm condition
Off Normal operation or alarm disabled
On continuously Power supply 1 is present and reporting an alarm condition
Off Normal operation or alarm disabled
On continuously One or more fans in the front cover assembly is not rotating
Off Normal operation or alarm disabled
On continuously Module health bus is not disabled and one or more modules is reporting an internal fault
Flashing One or more modules is reporting a data error
Off Normal operation or alarm disabled
On continuously A non-compliant module in the frame has disabled the module health bus
Off Normal operation
On continuously One or more of the onboard fault LEDs is illuminated or flashing
Gecko Frames Instruction Manual 39
Page 40

Section 4 — Monitoring and Control
40 Gecko Frames Instruction Manual
Page 41

SpeciÞcations
Introduction
This section discusses specifications for the Gecko 8900 frames and the
8900PSX 100 W power supply. Refer to the module instruction manual for
the specifications for a particular audio/video module.
Frame Specifications
See Table 9 for a list of the 8900 Series frame specifications. Specifications
are subject to change without prior notice.
Section 5
Table 9. 8900 Series Frame Specifications
Parameter Value
Module Cells
Input Type 75 Ω loop through BNCs (shield-isolated from ground)
Termination (Serial Digital) CONARE BCP-TA (or equivalent,
Output Type Eight 75 Ω BNCs
Frame Fault Reporting
Connector Type DB-9F pins 8 and 9 of RS-232 connector
Maximum Current — Alarm OFF 100 µA when voltage < 24 V is applied
Maximum Voltage — Alarm ON 2 V with current < 20 mA
Maximum allowable voltage —
center conductor to shield
Maximum allowable current 20 mA
Front Panel Indicators
PS 1 & PS 2 Green LED — ON indicates operating correctly
Fault (TF/TFN front covers only) Red LED — ON indicates an error or failure
customer-supplied)
24 V
Gecko Frames Instruction Manual 41
Page 42

Section 5 — Specifications
Table 9. 8900 Series Frame Specifications - (continued)
Parameter Value
Operating Conditions
Input voltage range 100 V to 240 VAC, 47 Hz to 63 Hz
Maximum input current 1.5 A
Operating temperature range 0 to 45 degrees C
Non-operating temperature range -10 to +70 degrees C
Humidity Up to 95% non-condensing
Mechanical
Height 2 RU, 3.5 inches (89 mm)
Width 19 inches (483 mm)
Depth 13.25 inches (337 mm)
Weight with no modules, 1 power supply TX frame: 18.55 lbs (8.4 kg)
TF frame: 19.2 lbs (8.7 kg)
TFN frame: 20.2 lbs (9.16 kg)
Weight with no modules, 2 power supplies TX frame: 19.75 lbs (8.96 kg)
TF frame: 20.4 lbs (9.2 kg)
TFN frame: 21.4 lbs (9.7 kg)
Power
Inputs Two independent AC inputs
Connector Type IEC with cord retention
AC voltage 100 V to 240 V, 50/60 Hz
Maximum power dissipation TX frame: 30 W
TF- and TFN frames: 100 W
Environmental
Operating temperature 0 to 45 degrees C
Non-operating temperature -10 to +70 degrees C
Humidity < 90% non-condensing
42 Gecko Frames Instruction Manual
Page 43

Power Supply
Power Supply
See Table 10 for a list of power supply specifications. Specifications are
subject to change without prior notice.
Table 10. Power Supply Specifications
Parameter Value
Inputs
Voltage Range 100 V to 240 V, continuous range
Frequency 47 Hz to 63 Hz
Outputs
Voltage/Current +12.4 V @ 8 A and –12.4 V @ 1.5 A, common ground
(total not to exceed 100 W)
Load/Line Regulation ± 3% for loads from 100 mA to 5 A
+ 7%, – 3% for loads from 0 to 100 mA
Current Limit +12 V < 10 A under short circuit conditions
–12 V < 7 A under short circuit conditions
Status Range (healthy) +12 V + 8% – 4%; –12 V + 8% – 4%
Test Points Three: +12 V, –12 V, and ground
Power Factor Correction Complies with EN61000-3-2 Class D
Gecko Frames Instruction Manual 43
Page 44

Section 5 — Specifications
44 Gecko Frames Instruction Manual
Page 45

Appendix – 8900 Frames Archive
Introduction
This appendix provides reference information for previously released 8900
frames. Use this archive to access a summary of cabling and configuration
information for earlier versions of the 8900 frames.
Identifying Frame Types
There are a number of ways to determine what type of frame you have.
Table 11 lists all available frame types and how they can be identified. The
assembly number of the frame is printed on a label located inside the frame
on the front of the chassis.
Network Configuration Storage
One of the important differences between current and earlier version 8900
frames is the location of network configuration storage. 8900NET software
version 3.0.0 and later enabled storage of the IP addresses (network configuration) on the frame backplane on frames that are equipped with storage
capability. In earlier versions of software and frame types with no storage
capacity, the IP addresses are stored on the 8900NET module and stay with
the module when it is moved to another frame.
Table 11. 8900 Frames Types IP Storage Capability
Model Number Backplane Assembly Number
8900TFN-A Audio backplane with 1 IC 610-0960-00 8900NET module
8900TFN Video backplane with 1 IC 630-0063-00 8900NET module
8900TFN-A Audio backplane with 2 ICs 610-0960-01 Frame backplane
8900TFN-V Video backplane with 2 ICs 610-0984-00 Frame backplane
Network Config
Storage
Gecko Frames Instruction Manual 45
Page 46

Appendix – 8900 Frames Archive
To determine what frame model you have and where IP addresses are
stored, you may also access the Frame Status page with the web browser.
All frames with 8900NET cards with software version 3.0.0 and later will
report a
following:
•Network configuration stored on 8900NET module, or
•Network configuration stored on frame.
Video Frame
Earlier versions of the 8900 BNC/Video TX/TF/TFN frames have a backplane configuration as shown in Figure 20. The earlier frames differ from
the current frames in two main areas:
•The Frame Alarm Port on earlier modules is accessed by an external
•There is no network configuration (IP address) storage capability on
Network Config status message on the Frame Status page as one of the
BNC connector on the backplane labeled SMPTE ALARM J101.
these frames.
SMPTE Alarm Connector
Use of the SMPTE Alarm bus requires the Frame Monitor or 8900NET
Network Interface module be installed in the frame. For more information
on the 8900NET module, see the 8900NET Network Interface Module Instruc-
tion Manual.
The SMPTE Alarm reporting is accessed through J101 shown in Figure 20.
Figure 20. 8900 Video Frame Backplane With SMPTE Alarm BNC
Alarm BNC (J101)
J1 J2
ETHERNET
J103
RS232
J102
SMPTE
ALARM
J101
DA10
J1 J2
O
J3 J4
U
T
J5 J6
J7 J8
J9 J10
IN
DA9
J1 J2
J2
J3 J4
J4
J5 J6
J6
J7 J8
J8
J9 J10
IN
O
U
T
0636 -19
46 Gecko Frames Instruction Manual
Page 47

Video Frame
The conditions monitored by SMPTE Alarm reporting are:
• Frame Health
• Power supply 1 voltage
• Power supply 2 voltage
• Fan rotation
• Frame temperature
•Module Health (capability module dependent, refer to specific module
instruction manual).
• Power supply voltage
• Signal present at input
•EQ warning
•EDH Monitoring (capability module dependent, refer to specific
module instruction manual).
•EDH error detected
The impedance between the center conductor and shield of J101 can be in
one of two states:
•Open – less than100 µA of current will flow, and
•Closed – less than 2 V will appear from center conductor to shield with
less than 20 mA of current flowing.
There are three operational conditions (capability is module dependent,
refer to specific module instruction manual):
•Open – no faults,
•Closed – there is an internal fault, and
• Pulsing – there has been a signal error detected in one of the modules.
In addition to fault reporting through the SMPTE Alarm connector, there is
a RED Fault LED on the Frame Monitor and 8900NET Network Interface
modules that is visible through the Fault window of the 8900TF/TFN front
cover. This LED is OFF when no fault conditions are detected and ON
when either an internal fault or a signal error is detected.
A number of frames can be coupled together as one alarm circuit by using
a T-connector. Refer to Figure 21 on page 48 for a typical alarm circuit interconnect diagram.
Gecko Frames Instruction Manual 47
Page 48

Appendix – 8900 Frames Archive
BNC T-connector
Up to 20 Frames
Figure 21. SMPTE Alarm Fault Reporting Connections
J101
J101
J101
4.7 kΩ
470 Ω
4.7 kΩ
Last Frame
First Frame
330 Ω
+5V
2N4126
(or equivalent)
Alarm
LED
Note Refer to “SMPTE Fault Reporting in Television System” standard for further
details.
48 Gecko Frames Instruction Manual
Page 49

Audio Frame
Audio Frame
Earlier versions of the 8900 Audio TX/TF/TFN frames have a backplane
configuration as shown in Figure 22. The earlier frames differ from the
current frames in one main area:
• There is no network configuration (IP address) storage capability on
these frames.
The Frame Alarm connection is on pins 8 and 9 of the RS-232 connector as
discussed in Frame Alarm Connector on page 30.
Figure 22. 8900 Audio Frames Backplane
Frame Alarm
RS232
J1 J2
(pins 8 and 9)
ETHERNET
J10
0636 -11r1
U1
Gecko Frames Instruction Manual 49
Page 50

Appendix – 8900 Frames Archive
50 Gecko Frames Instruction Manual
Page 51

Index
Numerics
120V line cord 34
240V line cord 34
8900 models
FAN
FN 16
TF 16
TFN 16
TX 16
8900TF frame
description
overview 16
upgrading 18
8900TFN frame
description
overview 16
8900TX frame
description
overview 16
upgrading 17
16
18
18
17
connector configurations 27
controller cell 37
controller modules 26
cord retainer 35
D
direct input/output connectors 27, 28
disables 39
disabling alarms 37
documentation online 2
E
enables 39
equipment rack 25
Ethernet 37
capability 18
connection 20
A
alarms
conditions
example 32
Frame Alarm (RS-232 connector) 30
SMPTE Alarm BNC 47
analog module presence 37
applying power 36
audio frames
earlier versions
31
49
B
branch circuit 34
C
communication ports 16
conditions indicated 39
F
FAQ database 2
Fault LED 38
features 15
Frame alarm 20
frame connections 19
Frame Monitor Module 26, 30, 37, 46
frame options 16
frame types 45
identifying 45
frequently asked questions 2
front covers 16
G
Grass Valley web site 2
Gecko Frames Instruction Manual 51
Page 52

Index
I
indicator LEDs 38
input/output configuration 26
input/output connectors 28
IP Address
storage
45
L
line voltage 34
loop-through input 28
M
maximum power 16
module health 31, 47
module health alarm 38
Module Health Bus 31
monitoring 37
N
network configuration storage 21, 45
Network Interface Module 26, 30, 37, 46
impedance 32
S
SMPTE alarm 30, 46
impedance 47
software download from web 2
specifications
frame
41
power supply 43
T
termination 28
typical alarm circuit 47
U
upgrade options 16
V
variable fan speed 39
W
O
online documentation 2
options 16
output connectors 27
over-temperature 38
P
power 42
power calculations 22
power cords 34
power supply cells 26
R
redundant power 34
remote control 37
retainer clip 35
RS-232 Connector 30
web site
documentation
FAQ database 2
Grass Valley 2
software download 2
2
52 Gecko Frames Instruction Manual
 Loading...