

Page 1
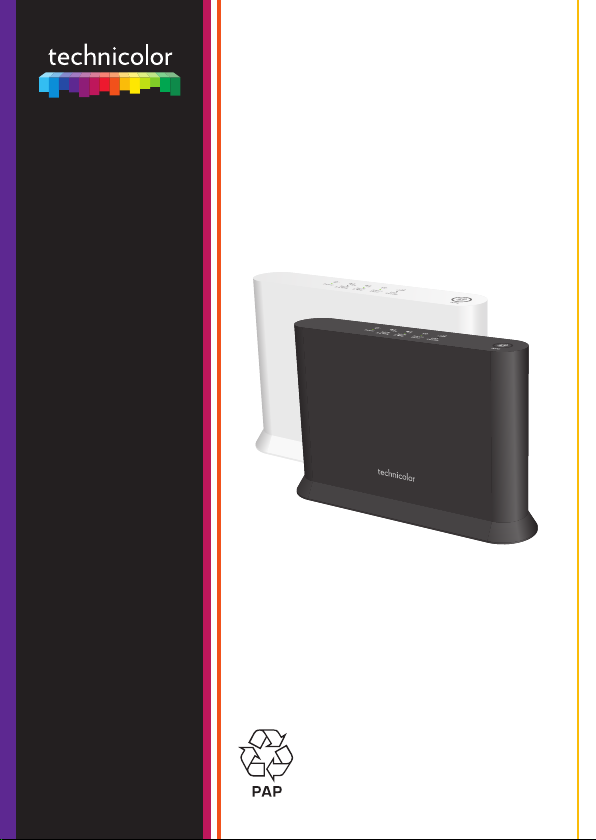
OWA0130
Copyright 2018 Technicolor. All rights reserved. DMS3-QIG-25-574 v1.0. All tradenames referenced are service marks, trademarks, or registered
trademarks of their respective companies. Specifications subject to change without notice.
TECHNICOLOR
1-5 rue Jeanne d’Arc
92130 Issy-les-Moulineaux
France
www.technicolor.com
Quick Setup Guide
*6221525A*
6221525A
Page 2
1. Before you start
DC
A
B
• Carefully read the Safety Instructions and Regulatory Notices document
included in your package before continuing with the installation of your OWA0130.
• Do not make any connections until instructed to do so!
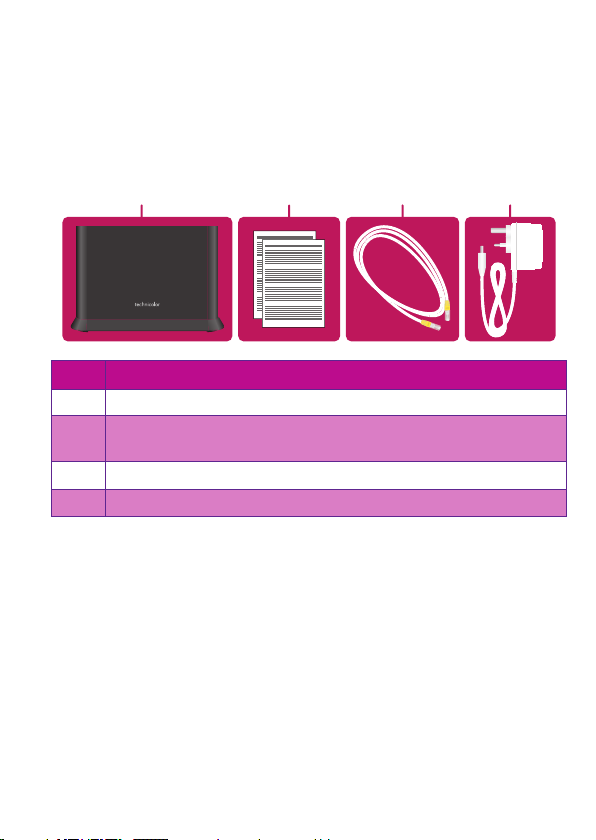
2. Check the content of your box
Your package contains the following items:
Item Description
A One OWA0130.
B User Documentation (this Quick Setup Guide, Safety Instructions &
Regulatory Notices…). Other additional documents may be included.
C One Ethernet cable with yellow connectors.
D One power supply adapter.
3. About the OWA0130
3.1. Wi‑Fi
The OWA0130 is equipped with:
• 5GHz IEEE802.11ac Wi-Fi which enables superior transfer rates and is less
sensitive to interference.
• 2.4GHz IEEE802.11n Wi-Fi which allows you to connect Wi-Fi devices that don’t
support the 5GHz Wi-Fi.
1
Page 3
Tips
BA
B C D E F
A
To achieve optimal link quality:
• Always try to reduce the number of obstacles (especially walls) between your
Wi-Fi devices to a minimum.
• Do not place your Wi-Fi devices in the neighbourhood of devices that cause
interfence (mricrowave ovens, cordless phones, baby monitors, etc.).
• Use Wi-Fi devices that support 5GHz Wi-Fi.
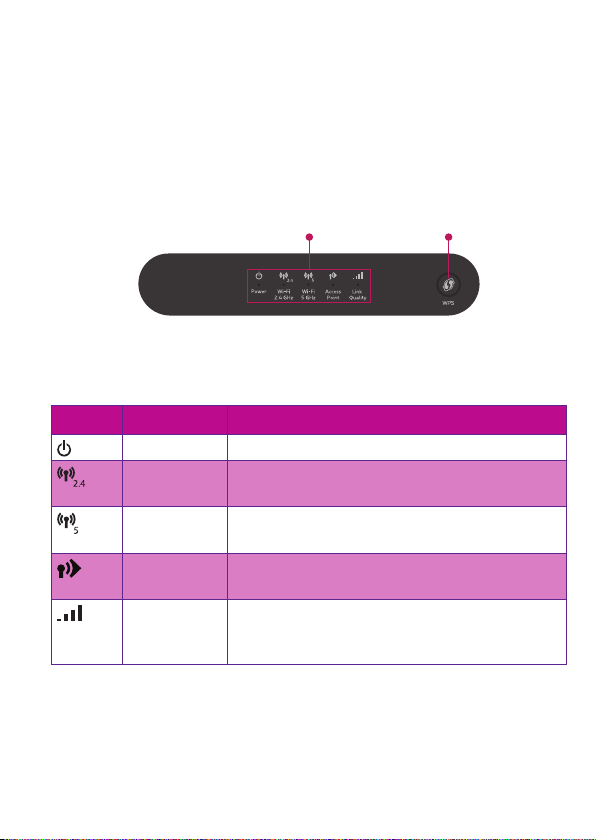
3.2. Top panel
Status LEDs (item A)
On the top panel of your OWA0130 you can find a number of LEDs that will inform
you about the status of your OWA0130.
Symbol Name Description
Power Needs to be solid green when powered on.
2.4GHz Wi-Fi At least one Wi-Fi device is connected to your home
5GHz Wi-Fi At least one Wi-Fi device is connected to your home
Access point Indicates that Wi-Fi devices can use the OWA0130 to
Link Quality The color of this LED indicates the quality of the link
network using the OWA0130’s 2.4GHz Wi-Fi.
network using the OWA0130’s 5GHz Wi-Fi.
connect to your home network.
to the connected access point. For more information,
see “5.5. Optimizing the link quality” on page9.
WPS button (item B)
Used to pair the OWA0130 with other Wi-Fi devices.
2
Page 4

3.3. Back panel
B C D E F
A
Product label (itemA)
The product label contains the default network name and wireless key of the
OWA0130.
Warning: After pairing the OWA0130 with an Internet gateway or Wi-Fi extender,
Power button (itemB)
The power button allows you to power the OWA0130 on or o.
Power port (itemC)
The power port allows you to connect the power supply.
Warning: Only use the power supply delivered with your OWA0130.
Reset button (itemD)
When the OWA0130 is powered on and you press the Reset for at least 7 seconds,
the OWA0130 will return to its factory default settings.
Ethernet ports (itemE)
The Ethernet port allows you to connect your Internet gateway or Ethernet devices
(for example a set-top box NAS drive).
Mode switch (itemF)
The mode switch allows you to force the OWA0130 in a specific mode or let it
choose the correct mode automatically at startup when in the Auto mode. We
strongly recommend to use the Auto mode.
Note: When you change the setting of the mode switch, the selected mode will only
the OWA0130 will use the network name and wireless key of that device
instead.
be applied after you restart the OWA0130.
3
Page 5

4. Set up
Auto mode
In
OWA0130
in Auto mode
Wi-Fi deviceInternet gateway or
separate OWA0130 wired to it
Wi-Fi
Wi-Fi
The OWA0130 can be used:
• As a Wi-Fi extender.
• As a Wi-Fi repeater.
• As a Wi-Fi video bridge.
4.1. Wi‑Fi extender setup
This scenario allows you to add (extra) Wi-Fi coverage in your home.
Wi-Fi
Ethernet cable
ternet gateway Wi-Fi device
OWA0130 in
You will connect the OWA0130 to your Internet gateway either:
• Directly using an Ethernet cable.
• Indirectly via a powerline adapter or similar.
Step 1: Set up the Wi‑Fi extender
1 Take an OWA0130 and make sure that the mode selector on the back is switched
to Auto.
2 Take the included Ethernet cable (this is the cable with the yellow connectors).
Connect one end of the Ethernet cable to one of the yellow Ethernet ports on
the back of your OWA0130. Connect the other end of the Ethernet cable to a
Ethernet or LAN port of your Internet gateway.
3 Take the power supply, plug the small end into the power inlet port (
OWA0130 and then plug the other end into a nearby power outlet.
4 Press the power (
must now be solid green. If this is not the case, check the connections you made.
5 Wait until the WPS (
) button on the back of the OWA0130. The Power ( ) LED
) LED turns o before connecting your Wi-Fi devices.
4
) of the
Page 6

Step 2: Connect your Wi‑Fi devices
in Auto mode
separate OWA0130 wired to it
If your Wi-Fi device:
• Supports WPS, use WPS to pair it with the OWA0130. For more information, see
“5.3. Pairing your Wi‑Fi devices to the OWA0130” on page8.
• Does not support WPS, configure it with the Wi-Fi network name (SSID) and
wireless key that are printed on the product label on the back of the OWA0130.
For more information, consult the user documentation of your device.
Step 3: Connect an Ethernet device (optional)
You can use the OWA0130’s other Ethernet port to connect an Ethernet device (for
example, a NAS drive or computer) to your home network.
4.2. Wi‑Fi Repeater setup
This scenario allows you to extend Wi-Fi coverage in your home by retransmitting
Wi-Fi messages from your existing Wi-Fi network.
Wi-Fi
Wi-Fi
OWA0130
Requirements
Your Intenet gateway must have 5GHz Wi-Fi either built-in or via a separate
OWA0130 extender.
Step 1: Set up the repeater
1 Take an OWA0130 and make sure that the mode selector on the back is switched
to Auto.
2 Position your OWA0130 half-way between your Internet gateway (or extender)
and your Wi-Fi devices.
3 Take the power supply, plug the small end into the power inlet port (
OWA0130 and then plug the other end into a nearby power outlet.
4 Press the power (
must now be solid green. If this is not the case, check the connections you made.
5 Wait until the WPS (
Internet gateway using WPS. For more detailed instrcutions, see “5.2. Pairing the
OWA0130 with your Internet gateway” on page8.
) button on the back of the OWA0130. The Power ( ) LED
) LED turns o and then pair the OWA0130 with your
5
Wi-Fi deviceInternet gateway or
) of the
Page 7

6 If the Link Quality (
OW
) LED on the front panel of the OWA0130 is green then
the repeater is up and running. If not, see “5.5. Optimizing the link quality” on
page9 for more information.
Step 2: Connect your Wi‑Fi devices
Because the OWA0130 now uses the same Wi-Fi settings as the access point,
Wi-Fi devices that were already connected to your home network will also be able to
connect to the OWA0130, and vice versa.
Step 3: Connect your Ethernet devices (optional)
You can use the OWA0130’s Ethernet ports to connect Ethernet devices (for
example, a NAS drive or computer) to your home network.
4.3. Video bridge setup
This scenario allows you to set up a high-speed Wi-Fi link capable of transmitting
multiple HD video streams between your Internet gateway and your set-top box (or
other Wi-Fi devices, for example an IP camera).
Wi-Fi
Ethernet cable
Internet gateway or
A0130 wired to it
OWA0130 in
Auto mode
Set-top box
Step 1: Prepare your Internet gateway
If your Internet gateway:
• Has built-in 5 GHz Wi-Fi, you can use it to proceed. Jump to the next step.
• Does not have built-in 5GHz Wi-Fi, set up another OWA0130 as Wi-Fi extender
to your Internet gateway as described in “Step 1: Set up the Wi‑Fi extender” on
page4.
Step 2: Connect your set‑top box to your Wi‑Fi network
1 Take an OWA0130 and make sure that the mode selector on the back is switched
to Auto.
2 Take the included Ethernet cable (this is the cable with the yellow connectors).
Connect one end of the Ethernet cable to one of the yellow Ethernet ports on
the back of your OWA0130. Connect the other end of the Ethernet cable to your
set-top box.
6
Page 8

3 Try to position the OWA0130 with as few obstacles (including your TV) as
possible between the OWA0130 and the Internet gateway.
4 Take the power supply, plug the small end into the power inlet port (
OWA0130 and then plug the other end into a nearby power outlet.
5 Press the power (
must now be solid green. If this is not the case, check the connections you made.
6 Wait until the WPS (
gateway (or Wi-Fi extender) using WPS. For detailed instructions, see “5.2. Pairing
the OWA0130 with your Internet gateway” on page8.
7 If the Link Quality (
the video bridge is up and running. If not, see “5.5. Optimizing the link quality” on
page9 for more information.
Note: When the OWA0130 connected to your set-top box is switched to Auto
mode, it will also functions as a repeater for your Internet gateway on top of its
role in the video bridge.
) button on the back of the OWA0130. The Power ( ) LED
) LED turns o and pair your OWA0130 with your Internet
) LED on the front panel of the OWA0130 is green then
) of the
Step 3: Connect your wired devices (optional)
You can use the OWA0130’s other Ethernet port to connect an Ethernet device (for
example, a NAS drive or computer) to your home network.
7
Page 9

5. Tips and tricks
5.1. Making a wired connection between the OWA0130 and your
Internet gateway
1 Take the included Ethernet cable (this is the cable with the yellow connectors).
2 Connect one end of the Ethernet cable to one of the yellow Ethernet ports on the
back of your OWA0130.
3 Connect the other end of the Ethernet cable to a Ethernet or LAN port of your
Internet gateway.
5.2. Pairing the OWA0130 with your Internet gateway
Requirements
Your Internet gateway must have 5GHz Wi-Fi either through a built-in access point
or an OWA0130 connected to it.
Procedure
1 Briefly press the WPS ( ) button on the OWA0130. The WPS ( ) LED on the
OWA0130 starts blinking orange.
2 Within two minutes, briefly press the WPS (
(or the OWA0130 connected to it).
Note: On some Internet gateways you may have to press and hold the WPS
button for a few seconds or until its WPS (
3 After some time the WPS (
connection is now successfully established.
Note: If the WPS (
blinking red?” on page9 for further instructions.
) LED on the OWA0130 turns green. The Wi-Fi
) LED is red, go to “5.4. What to do when the WPS LED is
5.3. Pairing your Wi‑Fi devices to the OWA0130
Connecting your Wi‑Fi devices using WPS
1 Briefly press the WPS ( ) button on
the OWA0130. The WPS LED on the
OWA0130 starts blinking orange.
2 Within two minutes, start WPS on your
Wi-Fi device. If your Wi-Fi device is:
Another OWA0130, briefly press its WPS (
Another type of device, consult the documentation of your device.
) button on your Internet gateway
) LED starts blinking.
WPS
) button.
8
Page 10

3 After some time the WPS ( ) LED on the OWA0130 turns green. The Wi-Fi
connection is now successfully established.
Note: If the WPS (
blinking red?” on page9 for further instructions.
) LED is red, go to “5.4. What to do when the WPS LED is
5.4. What to do when the WPS LED is blinking red?
This indicates that the OWA0130 could not make a Wi-Fi connection.
Do the following:
1 Wait until the red blinking LED goes out, then try using WPS again.
2 Turn your OWA0130 slightly and then try again.
3 Obstructions may deteriorate the signal strength. Try to minimize the number of
walls between the two devices and then try again.
4 Move the devices closer to each other and then try again.
5.5. Optimizing the link quality
If the OWA0130 has a Wi-Fi connection to an Internet gateway, extender or repeater,
the Link Quality ( ) LED will provide information about the quality of the link
between them.
If the Link Quality (
• Green: the link quality is optimal. No further actions are needed.
• Orange: the link quality is average. Change the position of the OWA0130 until the
LED turns green.
• Red: the link quality is bad. Change the position of the OWA0130 until the LED
turns green or at least orange.
Repositioning the OWA0130 for better link quality
First try to improve the link quality without unplugging the power supply:
1 Reposition the OWA0130 to avoid obstacles, like walls, furniture and TV screens,
between the OWA0130 and your access point.
2 Wait 15seconds to allow the OWA0130 to re-evaluate the link quality.
If the link quality did not improve:
1 Unplug the power supply and move the OWA0130 closer to your access point
and/or with less obstacles between the OWA0130 and your access point.
2 Plug in the power supply and wait two minutes to allow the OWA0130 to start up
all services and evaluate the link quality.
) LED is:
9
 Loading...