

Page 1
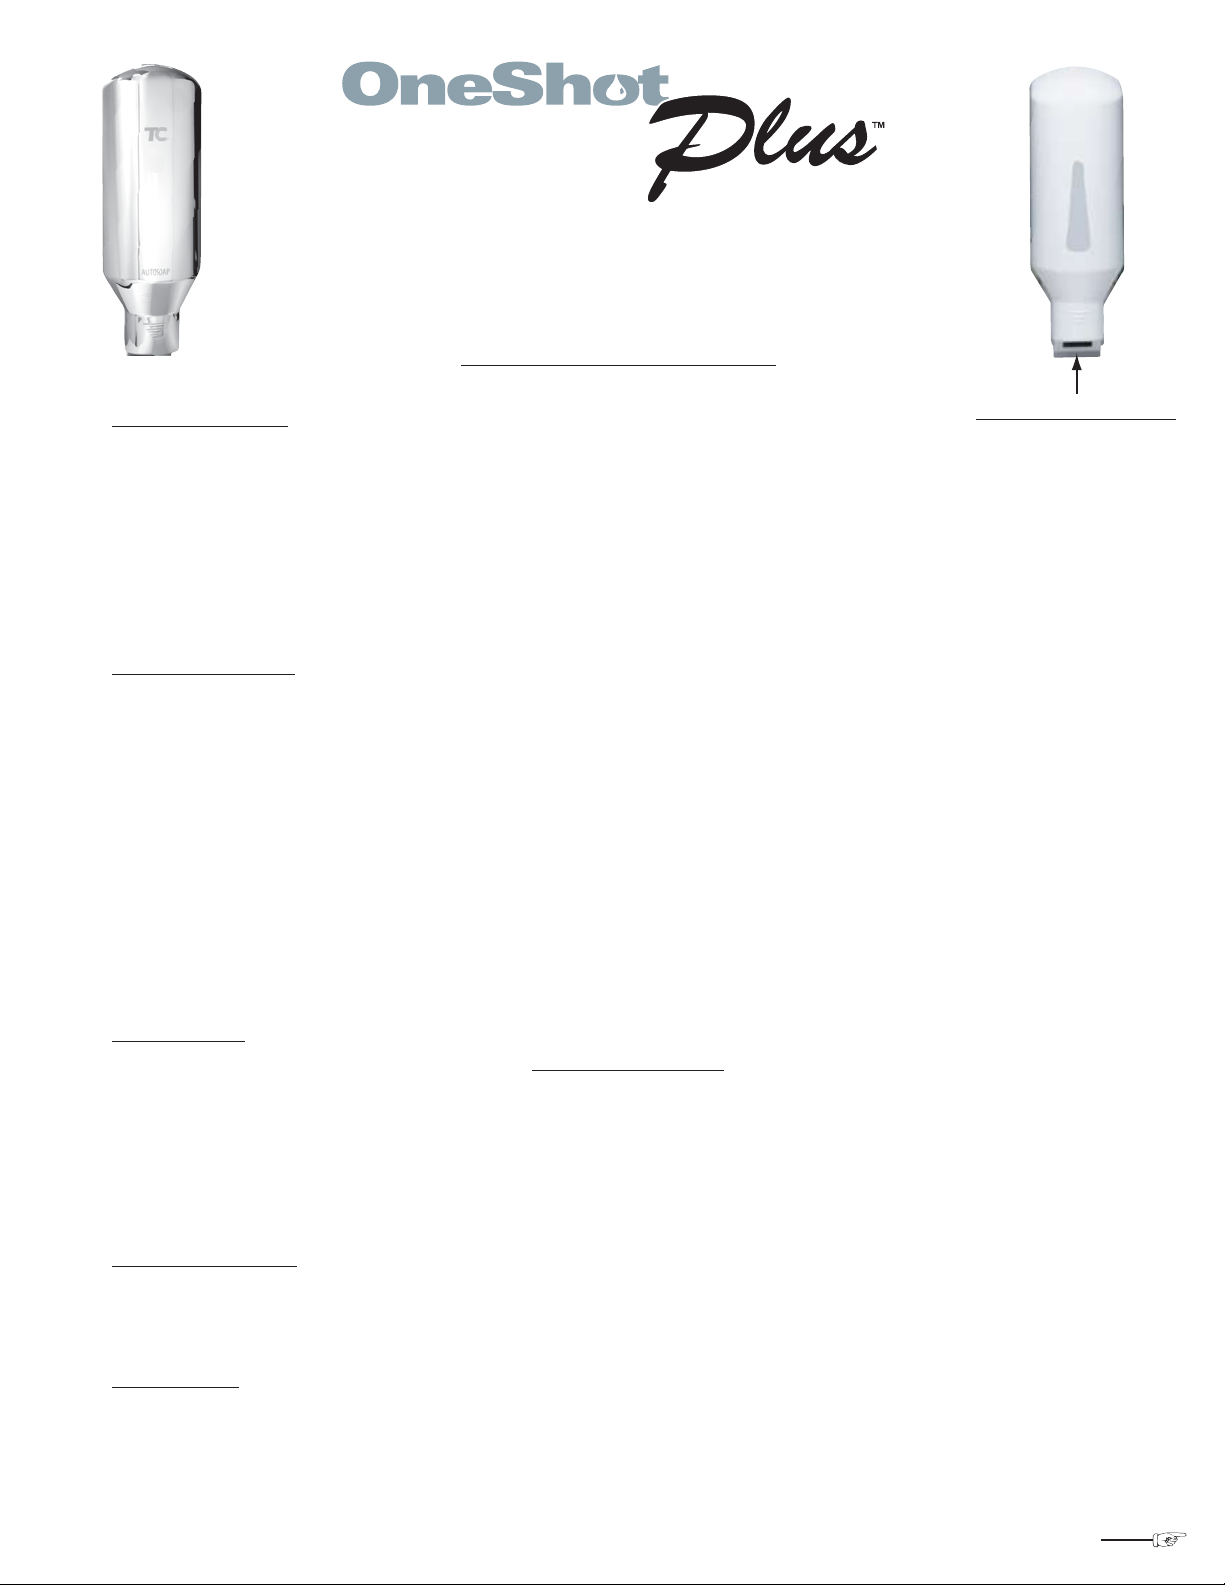
Stock # 402091 Stock # 402087
Foaming Gel Wash Dispenser
Wall-Mounted Automatic Soap System
Installation Instructions
Battery Installation
1. Use the dispenser cabinet key to open the front cover of the dispenser by inserting the key into the holes located at the top of the
dispenser, pressing the key down, and pulling the cover towards you to open. The cover is hinged at the bottom of the dispenser.
2. Remove the battery compartment cover by gripping the sides of the cover and then pull straight out.
3. Insert four D-Cell Alkaline batteries (not included) making sure to place batteries in the compartment in the proper orientation as shown
by the diagram in the battery compartment.
4. Replace the battery compartment cover.
5. The dispenser will turn "on" automatically once batteries are installed.*
* If the dispenser appears non-functional, remove batteries, wait 2 minutes and re-insert.
Place hand under here to activate
Mounting Dispenser
1. The dispenser should be mounted 8 to10 inches above the counter-top, sink or other surface.
2. Once the batteries have been installed, without a refill installed in dispenser, close dispenser cover. The setup sequence will be
initiated. During this period, the sensor will automatically detect if the dispenser is too close to a surface below by sounding a beeping
tone every half-second and the green indicator light will flash. As you are positioning the dispenser, you can verify the proper
mounting distance by moving the dispenser away from the surface below the sensor until the tone ceases.
3. The dispenser can be mounted to either a mirror or a tile surface using the double-sided tape provided. If using double-sided tape, we
recommend that you remove the batteries and let the dispenser set up for 24 hours before re-installing the batteries and refill. The
dispenser may also be mounted using the wall anchor hardware provided. NOTE: Insure that proper mounting hardware is used for
your particular wall composition.
4. You can re-initiate the start up sequence by pressing the automatic reset button switch and closing the cover. Be sure the tone switch is
ON to enable the beeping tone.
5. If an object is placed too close below the sensor, the green LED will flash and no soap will be dispensed after the initial dose.
Refill Insertion
1. Open dispenser cover with a dispenser cabinet key (DO NOT TURN DISPENSER OFF)!
2. Place the refill bottle with the actuator pointing down into the circular bracket.
3. Snap bottle into place insuring the refill is flush against the battery compartment.
4. The dispenser and dose program resets automatically each time a refill is installed.
5. Use ONLY authentic refills.
6. Close dispenser cover.
7. REMEMBER, DO NOT TURN DISPENSER OFF WHEN CHANGING REFILLS. REFILL WILL NOT ACTIVATE WITH DOOR OPEN.
Dispenser Activation
1. To activate dispenser, place hand under bottom of dispenser. If a second dose is needed, remove hand, and then replace hand under
dispenser.
2. Dispenser cover must be closed to activate.
LED Indicators
1. Green LED light will flash continuously after installing the batteries when an object is in view. A beep will sound, if there is an object in
view for more than 10 seconds. Remove object and beeping will stop.
2. Red LED light will flash when refill reaches 850 shots to indicate a low refill. The light will flash 2 times every second and beep twice
every 8 seconds to indicate the refill needs replacing.
3. Yellow LED light will flash when battery life is low. The light will flash once every second and beeps once every 16 seconds to indicate
the batteries need to be replaced.
4. A refill needs to be installed in the dispenser for the above functions to work correctly.
Over
Page 2
Shot Delay
1. Turning the delay button “ON” will delay the dispensing of soap for three seconds between subsequent shots.
Tone Switch
1. Audio tone indicator for low refill, low batteries, and object interference (factory setting ON).
2. Turning the tone button OFF will be confirmed with two beeps.
3. Turning the tone button ON will be confirmed with one beep.
Dose Control
1. To decrease the dose size, move the black toggle switch to the left.
2. To increase the dose size, move the black toggle switch to the right.
3. Be careful to not remove or dislodge the refill bottle while modifying any settings, as the dosing program will reset.
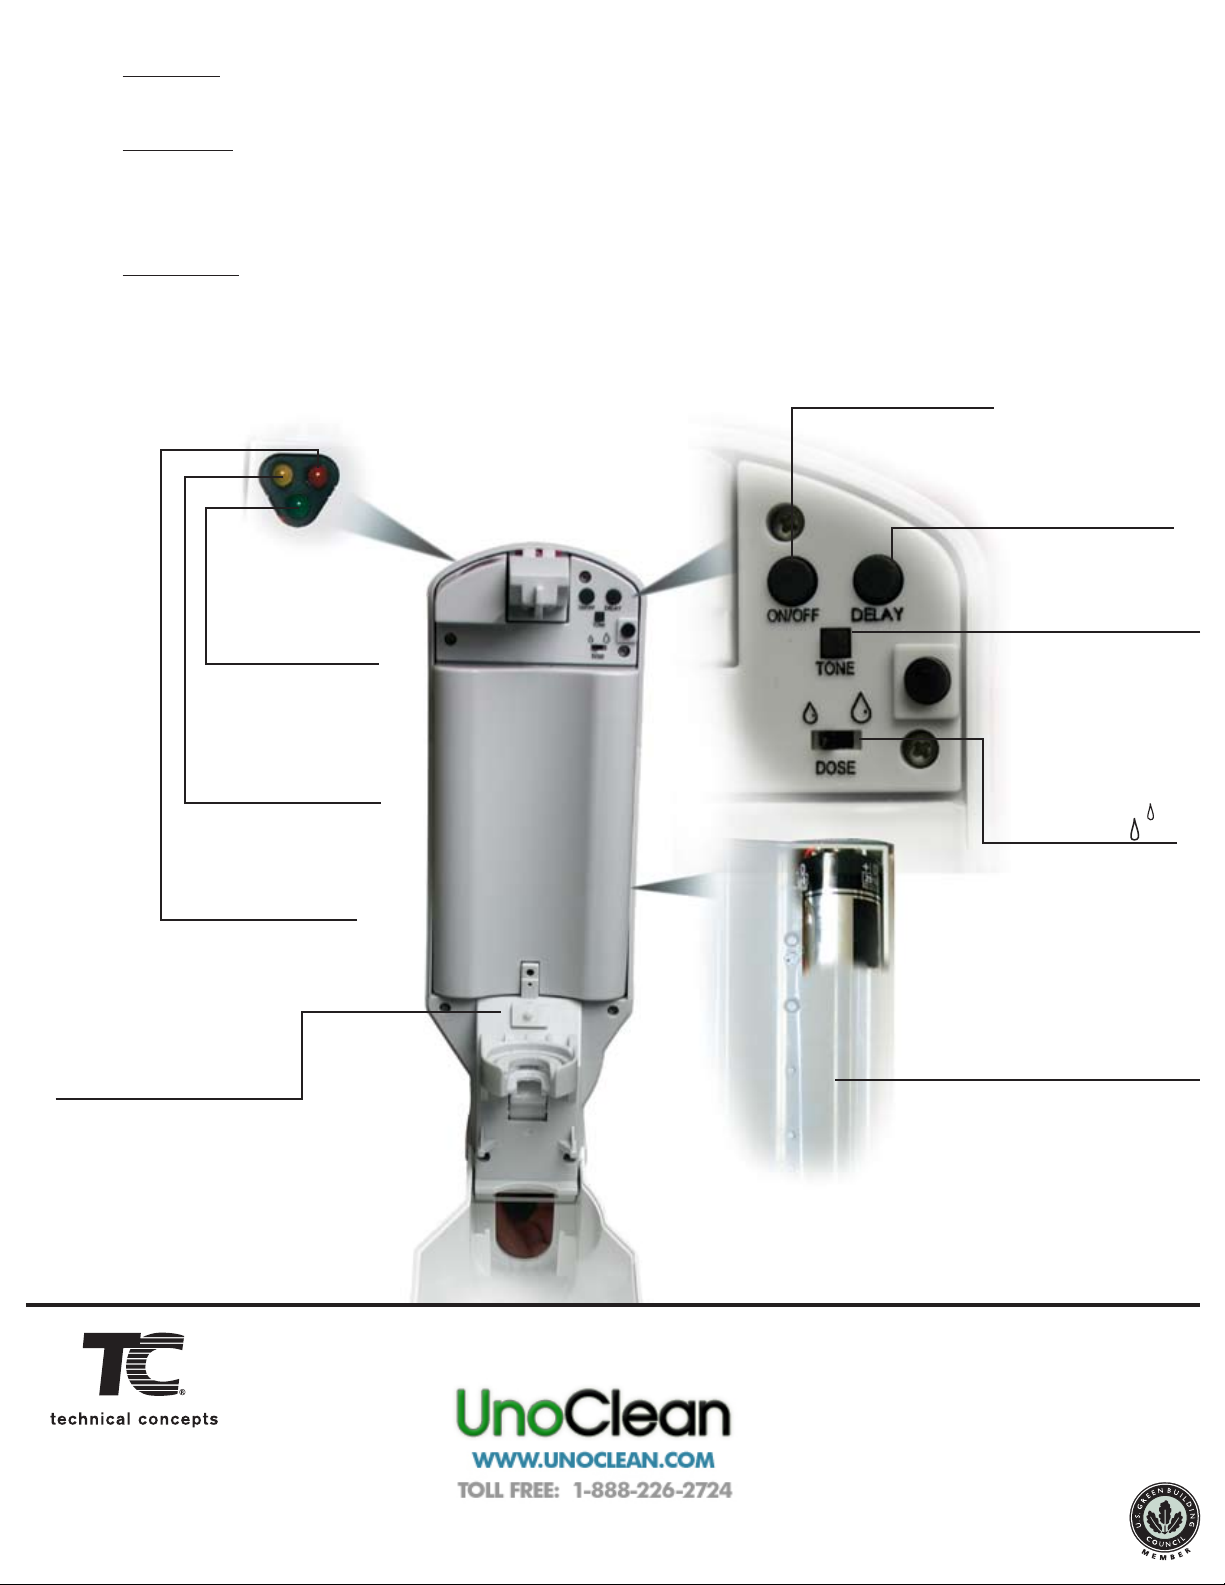
On/Off Switch
Object Indicator
(Green LED flashes when
object is in field)
Delay:
(When on, 3 second
delay between shots)
Tone Switch
(On/Off tone for low
refill and low batteries)
Battery Indicator
(Yellow LED light blinks
when battery life is low)
Refill Indicator
(Red LED light blinks
when refill is low)
Automatic Reset Button
- Detects the refill is in place
- Resets dispenser program
Dose Control
(Programmable dose size)
Left = Standard Dose
Right = High Dose
Battery Compartment
(4 D-cell alkaline batteries - not included)
REV 11/06 • 107674
 Loading...