

Page 1

Technaxx
®
* User Manual
Fitness Wristband Heart Rate TX–81
The manufacturer Technaxx Deutschland GmbH & Co.KG hereby declares that this
device, to which this user manual belongs, complies with the essential requirements of
the standards referred to the Directive RED 2014/53/EU. The Declaration of Conformity
you find here: www.technaxx.de/ (in bar at the bottom “Konformitätserklärung”).
Before using the device the first time, read the user manual carefully.
This device has a rechargeable battery. It must be fully charged before first use.
Charge the battery every 2–3 month if it is not used!
Service phone No. for technical support: 01805 012643 (14 cent/minute from German
fixed-line and 42 cent/minute from mobile networks).
Free Email: support@technaxx.de
Keep this user manual for future reference or product sharing carefully. Do the same
with the original accessories for this product. In case of warranty, please contact the
dealer or the store where you bought this product. Warranty 2 years
Contents
1
2
3
4
5
6
7
8
9
9.1
10
10.1 Time/Date................................................................................................9
10.2 Steps, distance, calories, activity..............................................................9
10.3 Heart rate...............................................................................................10
10.4 Timer......................................................................................................10
11
12
12.1 Sleep mode............................................................................................12
12.1.1 Automatic Sleep .................................................................................12
12.1.2 Preset Sleep Time..............................................................................12
12.2 Active.....................................................................................................13
Features...................................................................................................2
Technical specifications............................................................................3
Packing List..............................................................................................3
Water resistance ......................................................................................4
View of the wristband...............................................................................4
Charging..................................................................................................4
How to use your Wristband......................................................................6
Download & installation My Fitness Plus APP..........................................7
General status..........................................................................................7
Connect with your Smartphone................................................................8
Main Interface..........................................................................................9
Notifications ...........................................................................................11
APPs menu............................................................................................12
1
Page 2

12.3 Music .....................................................................................................13
12.4 Snapshot................................................................................................13
12.5 Search for Smartphone nearby..............................................................13
12.6 Setting menu..........................................................................................14
12.6.1 Battery level........................................................................................14
12.6.2 Device info..........................................................................................14
12.6.3 Flip screen..........................................................................................14
12.6.4 Restart................................................................................................15
12.6.5 Factory reset ......................................................................................15
12.7 Data Sync..............................................................................................15
13
Reminder...............................................................................................16
14
Goal.......................................................................................................16
15
Syncing..................................................................................................16
16
Upgrade.................................................................................................17
17
APP use (function desciption)................................................................17
17.1 Login, registration, installation and general information..........................17
17.2 Main menu.............................................................................................22
17.2.1 Pair device..........................................................................................22
17.2.2 Reminders..........................................................................................23
17.2.3 Find Friends .......................................................................................24
17.2.4 Goals..................................................................................................24
17.2.5 Settings..............................................................................................24
17.2.6 User Account......................................................................................28
18
Warnings................................................................................................28
19
Troubleshooting.....................................................................................29
19.1 APP failed to synchronize data...............................................................29
19.2 APP failed to connect with the band.......................................................29
1 Features
Wristband to monitor your heart rate, your fitness, your sleep & your active
phases Displays heart rate, steps, distances & burned calories Easy handling
via coloured touch screen Displays clock & date, caller name or telephone
number Notifications: reminders, calls, SMS, Email, social media, achieved
goals Text display of messenger services Anti-lost function Vibrating
function Sleep monitoring & wake up with vibrating alarm Displays statistics
via diagram in the APP Bluetooth 4.0 BLE (Bluetooth Low Energy) connection
IP65 protection class (dust proof & sprayed water protection) Free iOS and
Android APP (My Fitness Plus) Especially suitable for outdoor activities
2
Page 3
2 Technical specifications
Bluetooth / Distance Bluetooth V4.0 BLE / max. 10m
Display / Resolution 1.06” TFT colour (2.7cm) / 160 x 64 pixels
Acceleration sensor support 3-axis
Heart rate sensor AMS AS7000
Built-in rechargeable 100mAh lithium polymer battery, 3.7V /
Power supply
Material PC + Glass (housing), TPU (wristband)
Supports RTC (Real Time Clock) & time sychronisation via APP
Charger Magnetic base with Micro USB port
Charging port in the device contact points
Operation temperature –25°C up to +55°C
Weight / Dimensions 25g / (L) 4.48 x (W) 2.03 x (H) 1.08 cm
Strap of wristband (L) 14.5 – 21.5 x (W) 1.5 cm
Package Contents
Charging time ~2 hours (with 5V/1A power adapter*) (*not
included);
Working time ~5 days (depending on the use)
Fitness Wristband Heart Rate TX-81
, M
agnetic charging
base, Micro USB cable, User Manual
APPle iOS Devices: Supports iOS device with 4.0 BLE, iOS 7.0 and above.
Android Devices: Supports almost all Android devices with 4.0 BLE, Android
system 4.3 and above.
Approve which iOS or Android version your Smartphone is using.
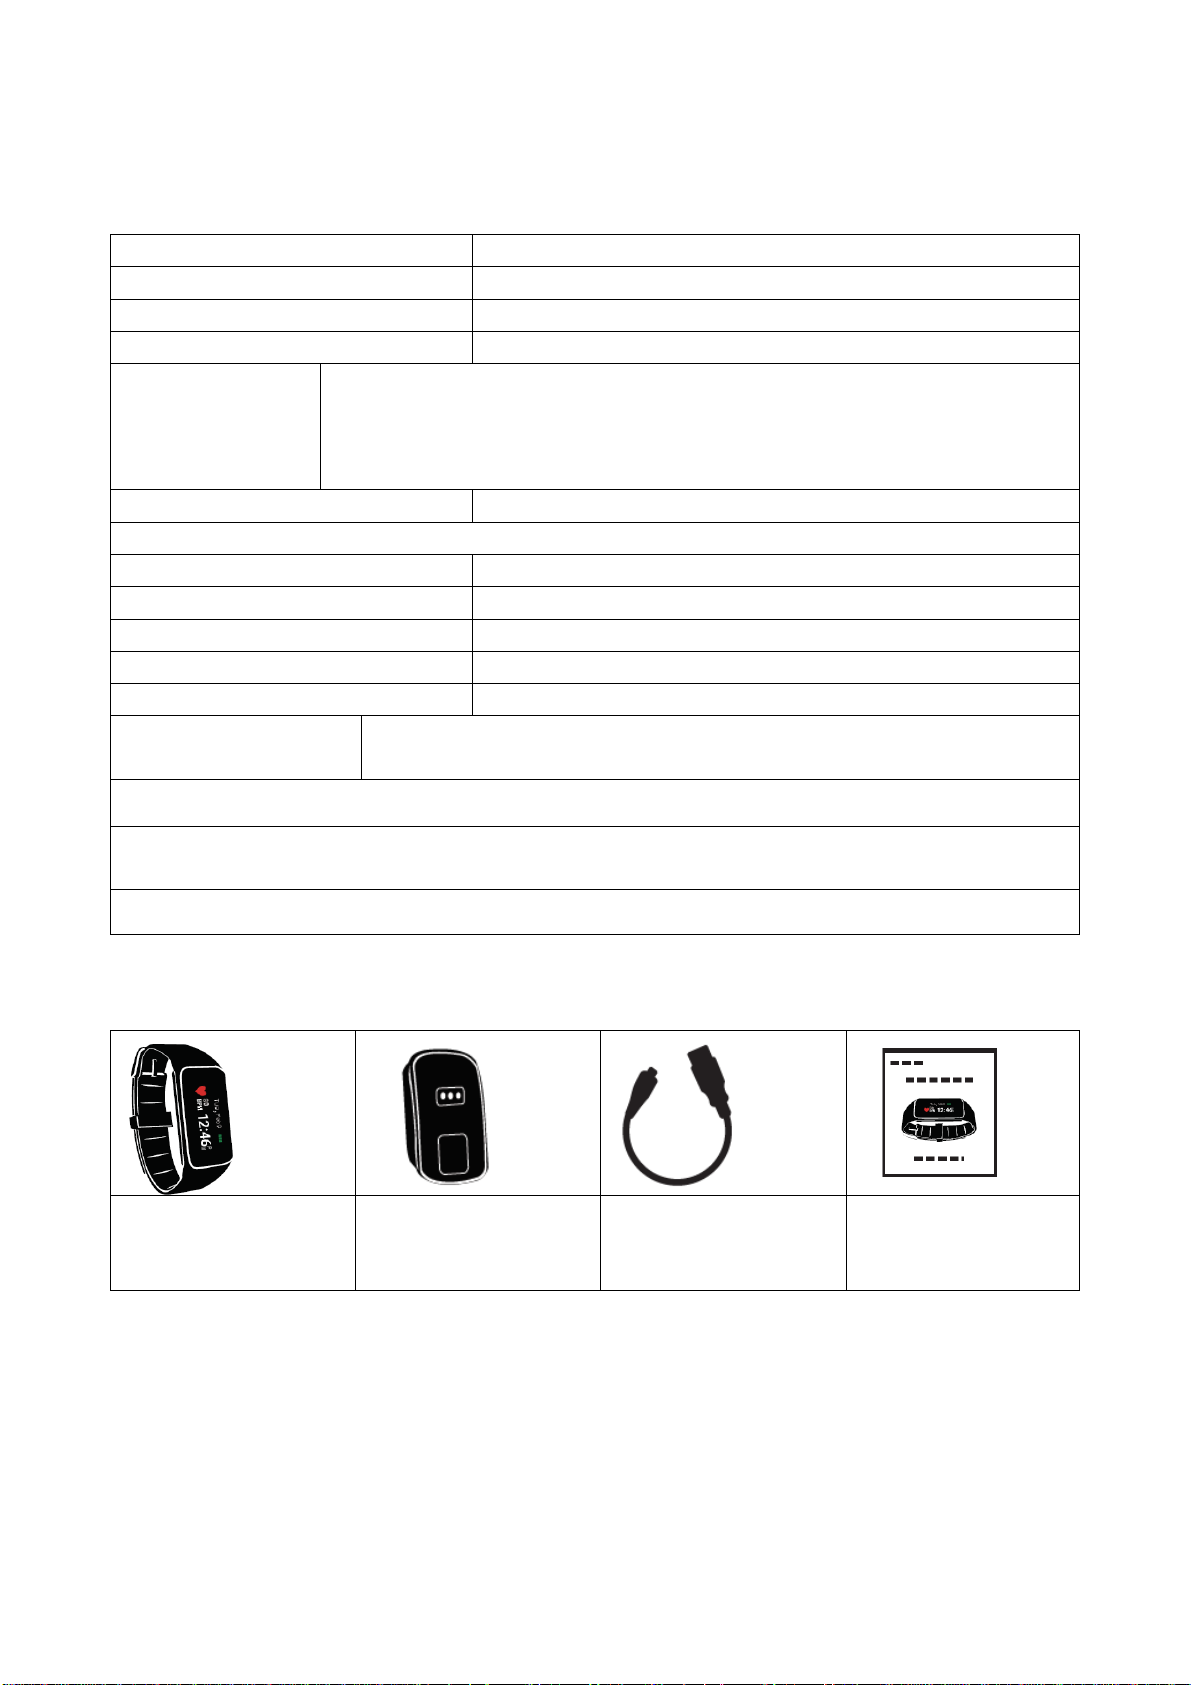
3 Packing List
Fitness Wristband
Heart Rate TX-81
Magnetic charging
base with Micro
USB port
Micro USB-cable User Manual
3
Page 4
4 Water resistance
Splash proof (IP65).
The band can be used during daily cleansing or in midst of rain, as long as only
the surface is exposed to water and no water pressure is exerted on the
device.
Do not shower with the device or submerge it under water.
Day-to-day water repellent functionality
Do not dive or swim with the device.
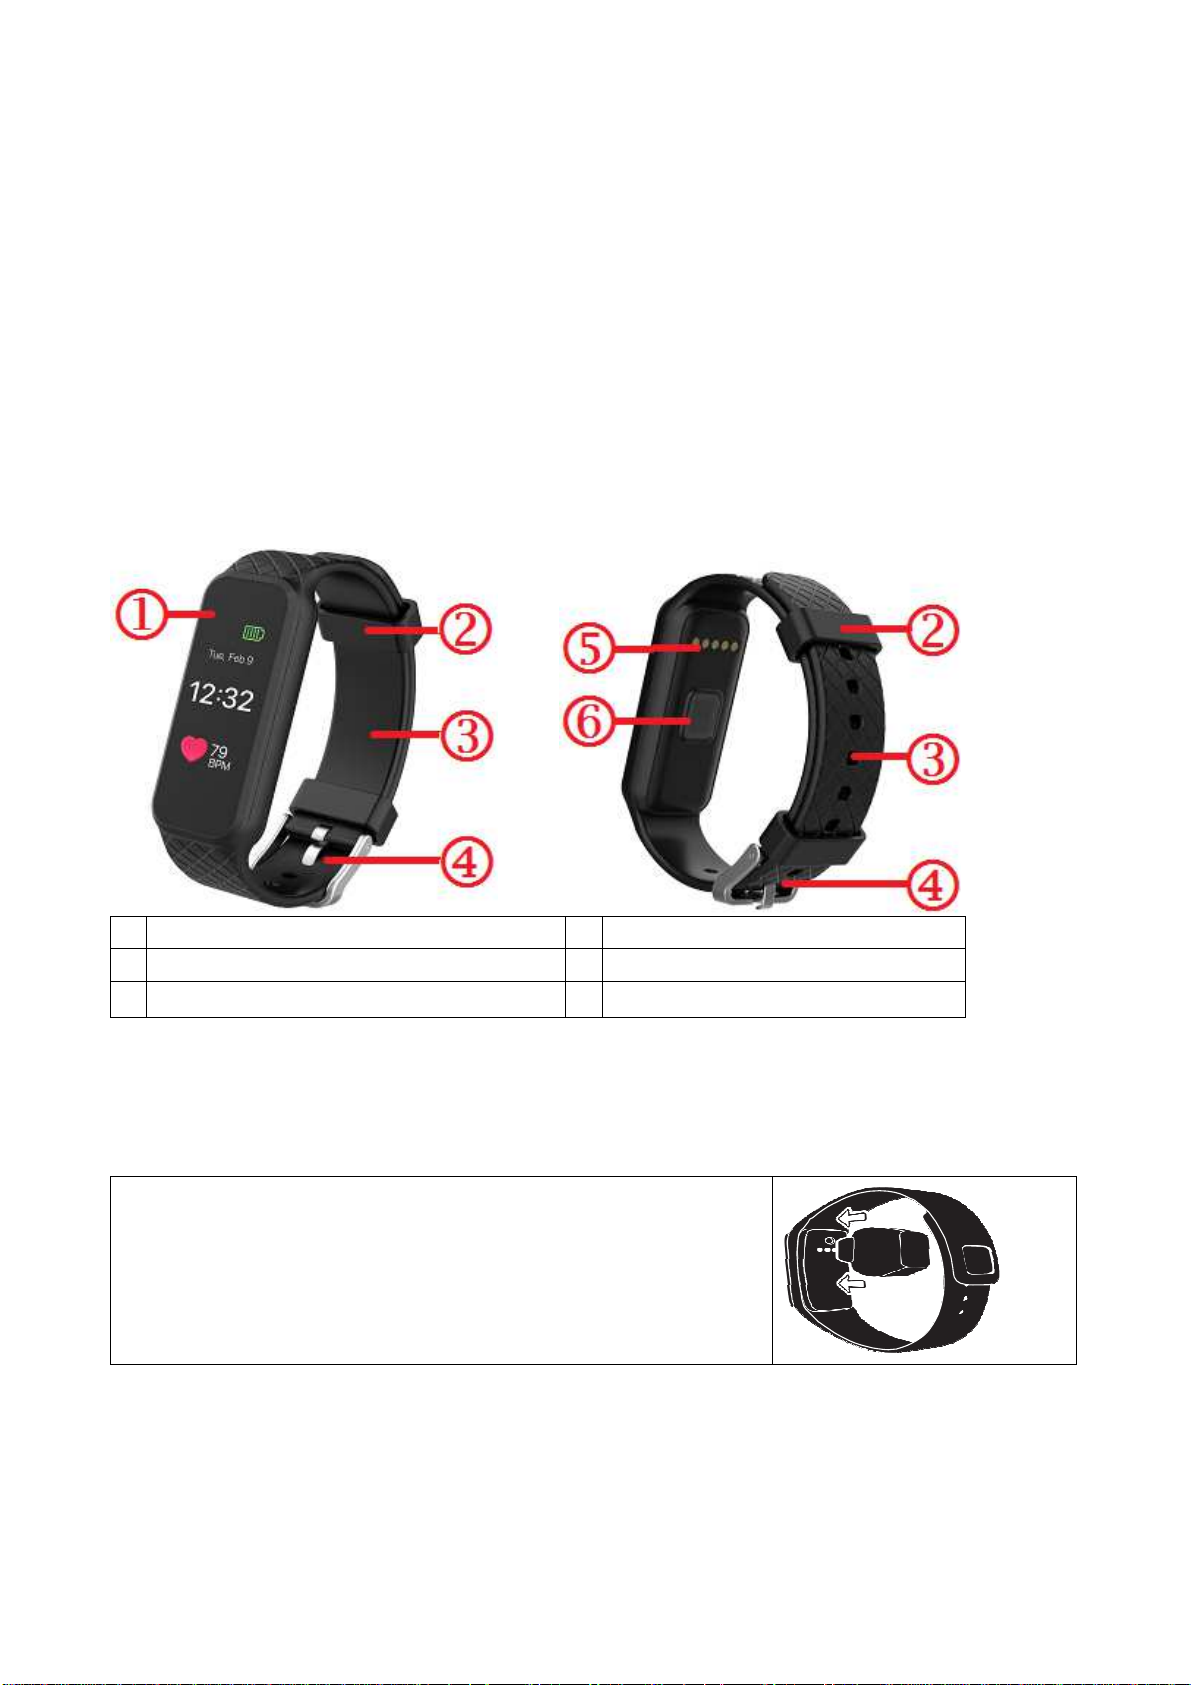
5 View of the wristband
1
TFT Touch Colour Display
2
Clamps
3
Wristband
4
Buckle
5
Charging port
6
Heart rate sensor
6 Charging
Before first use, charge the device. Follow the steps below.
1. Connect the charging adapter
Position the magnetic charging base to connect to the
back of your TX-81 wristband.
Hint: Charge your TX-81 wristband 2 hours before
first use.
4
Page 5
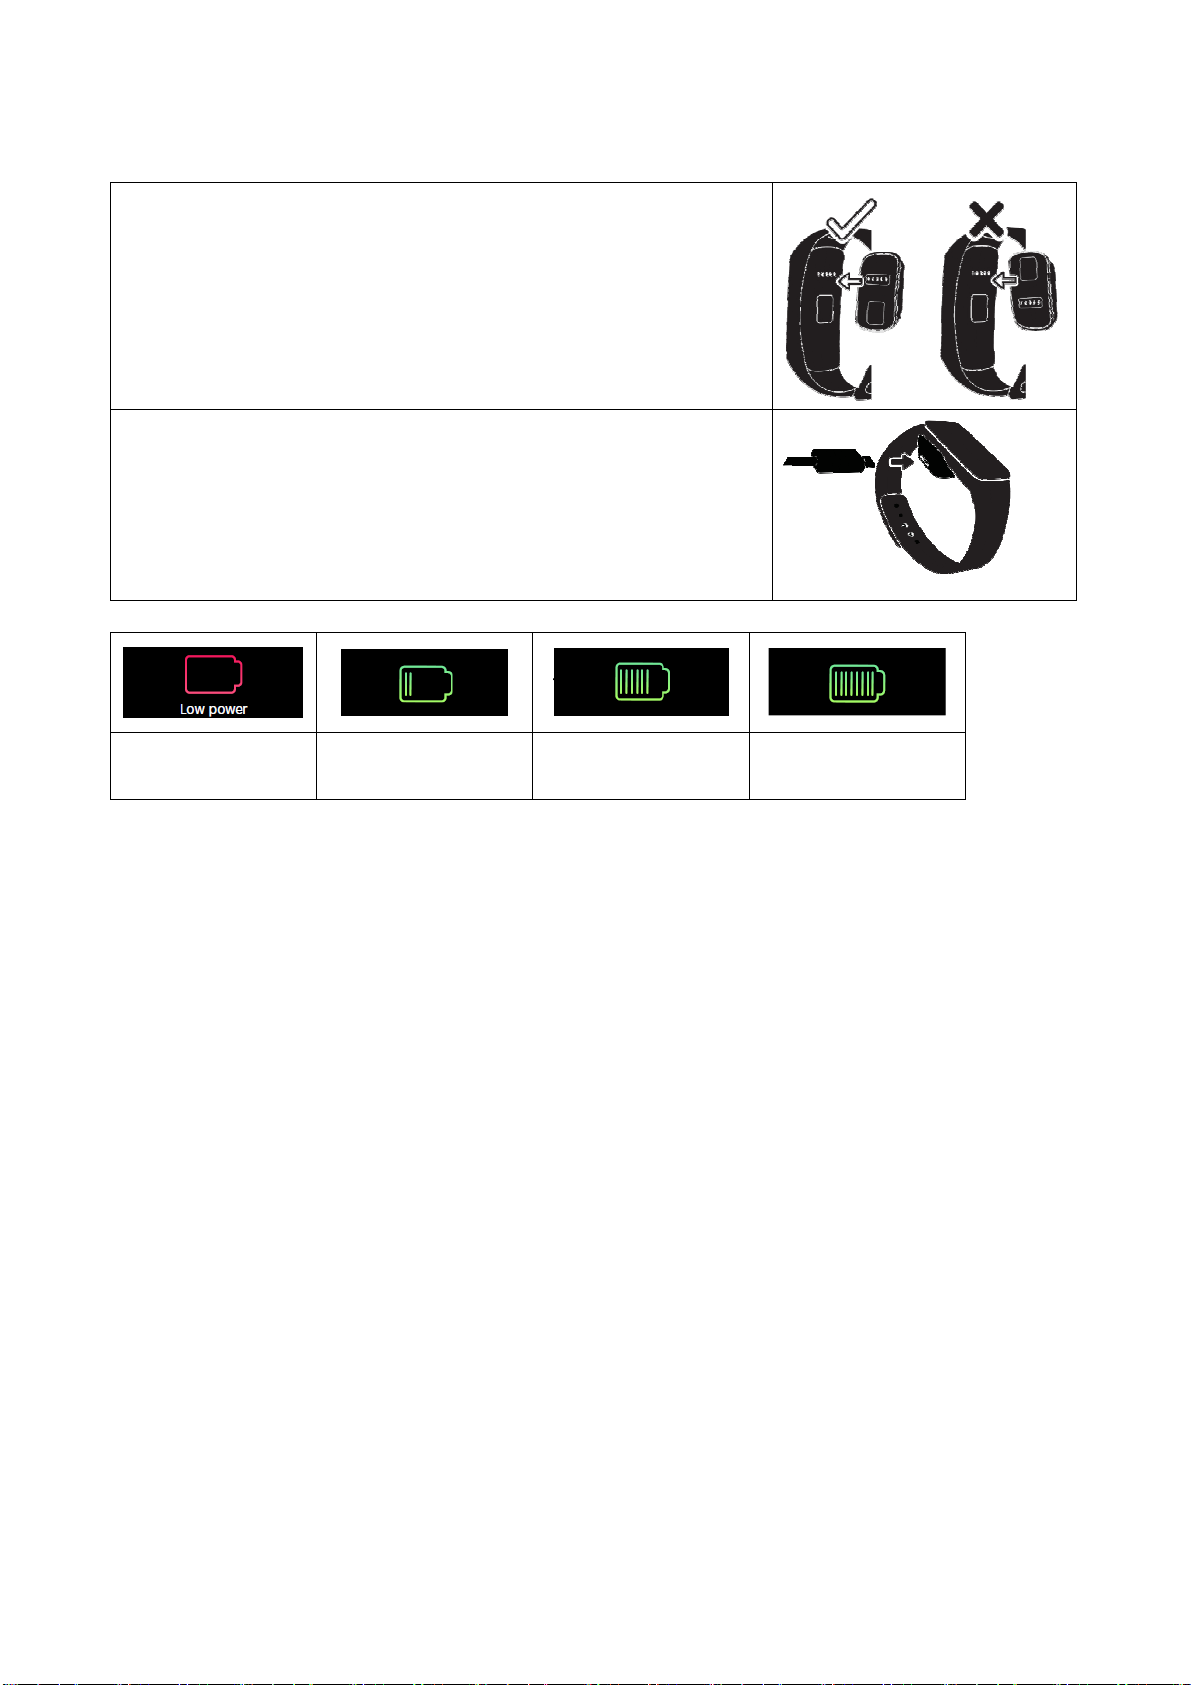
2. Make sure they are on the right places
Match the pins of the charging adapter with the
contact points on your TX-81 wristband and snap
them together. The magnet will hold the base in
place.
3. Plug it in
Plug the small end of the Micro USB cable into the
magnetic charging base, and connect the large end
to a USB power source.
Battery status will show in screen.
Low power
Charging
process
Charging
process
Charging
completed
The TX-81 wristband indicates the battery charge level when it is being charged.
Make sure the USB interface is connected in correct to the magnetic charging
base.
The TX-81 wristband can be charged directly via USB (DC 5V). Screen is always
lit up during charging. When the wristband is full charged, the power icon is
shown as full battery. The screen light turns off only after another minute. Move
out the charger, the device will display full charging for 3s, and turns into
standby.
Standby time is ~5 days (depending on the actual usage).
Do not try to take out built-in battery. Use the TX-81 charging base with the
included Micro USB cable for charging. Keep using and charging the wristband.
Attention: During charging, Bluetooth of the TX-81 wristband will be turned off
and cannot sync data.
5
Page 6
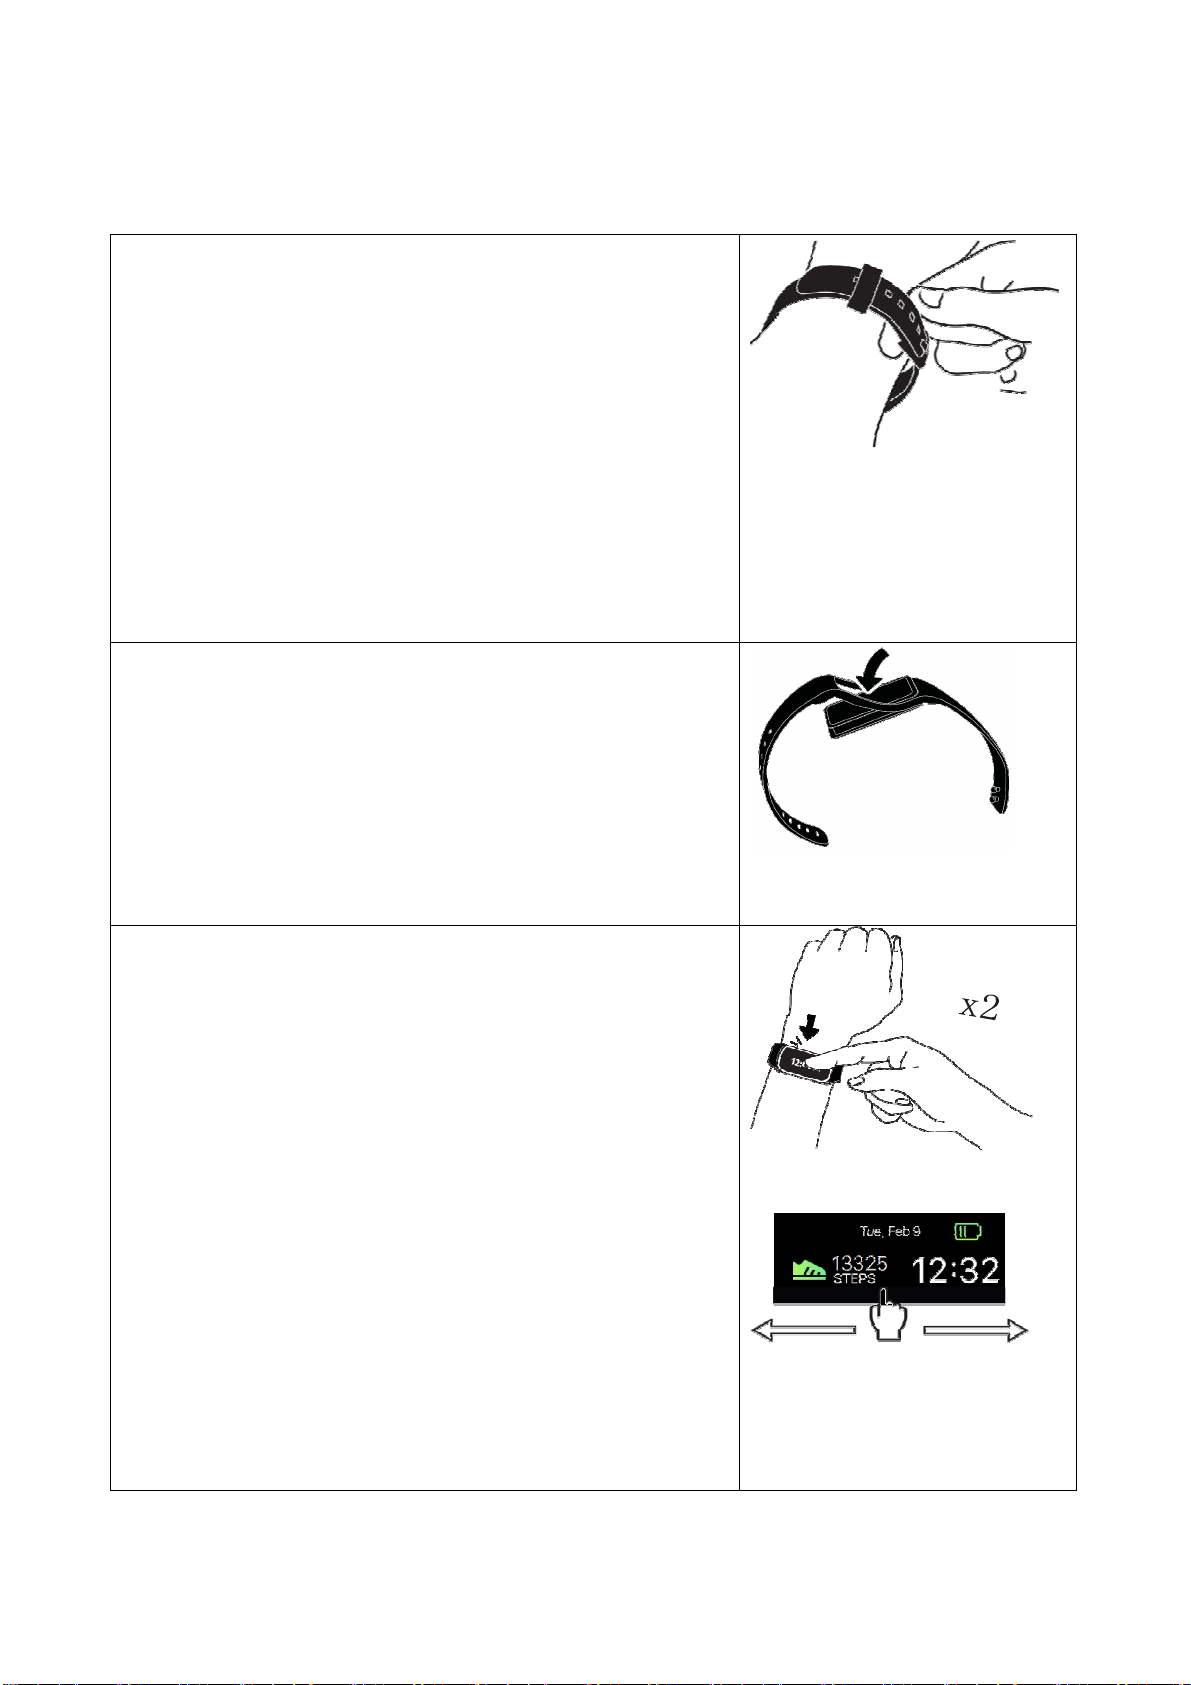
7 How to use your Wristband
Put on your TX-81 wristband
1. Wrap the device around your wrist and pull the
band through the hole in the buckle.
2. Pull the band until the device feels tight and
secure on your wrist.
3. Insert the buckle pin through one of the band's
holes to secure the wristband in place.
4. You may use the two clamps to further secure
the bands together.
Changing your TX-81 wristband
1. Remove the TX-81 wristband from your wrist.
Pull one side of
remove the complete module of the TX-81
wristband from the wristband
2. Fitting of the TX-81 module back into the
wristband works the other way around.
Screen operations of TX-81 wristband
1. Tap the touch screen of your TX-81 wristband
twice quickly to turn on the screen. This action is
called a Double-Tap. The screen will automatically
turn off after waiting a few seconds.
Tip: In order to protect and to operate the TX-81
wristband more effectively, we suggest you use
fingertip, not fingernail.
2. All screen operations can be performed by
touching the screen with your finger tip.
Slide left or right on the screen's surface to change
the screen and menu options.
Tip: If you are not sure what to do on a specific
screen, try swiping left or right to switch to another
interface.
it
over the screen’s frame to
6
Page 7
Standby time of the wristband
1. The standby time of the wristband can reach up to 5 days by synchronizing
the wristband as little as possible. Shutdown the Bluetooth of your phone.
Note. If you do like that no messages of your phone will be transferred to your
wristband.
2. Synchronize, steady Bluetooth connection, and permanently activate the
screen greatly reduce the standby time of the wristband.
Attention: In the beginning the standby time will be less because of you
setting and testing and playing around with the wristband. If the wristband will
be an everyday gadget for you, you will find out how to use it the best and how
it will last the longest.
8 Download & installation My Fitness Plus APP
Setting the wristband, reviewing and saving exercise data in the “My Fitness
Plus” APP.
Android APP: Search for “My Fitness Plus“ in GoogleTM Play Store to download
the APP below and install the respective APP.
iOS APP: Search for “My Fitness Plus“ in AppleTM Store to download the APP
and install the respective APP.
Device compatibility: Android device and Apple device with Bluetooth4.0
System compatibility: Android 4.3 and above, iOS 7.0 and above.
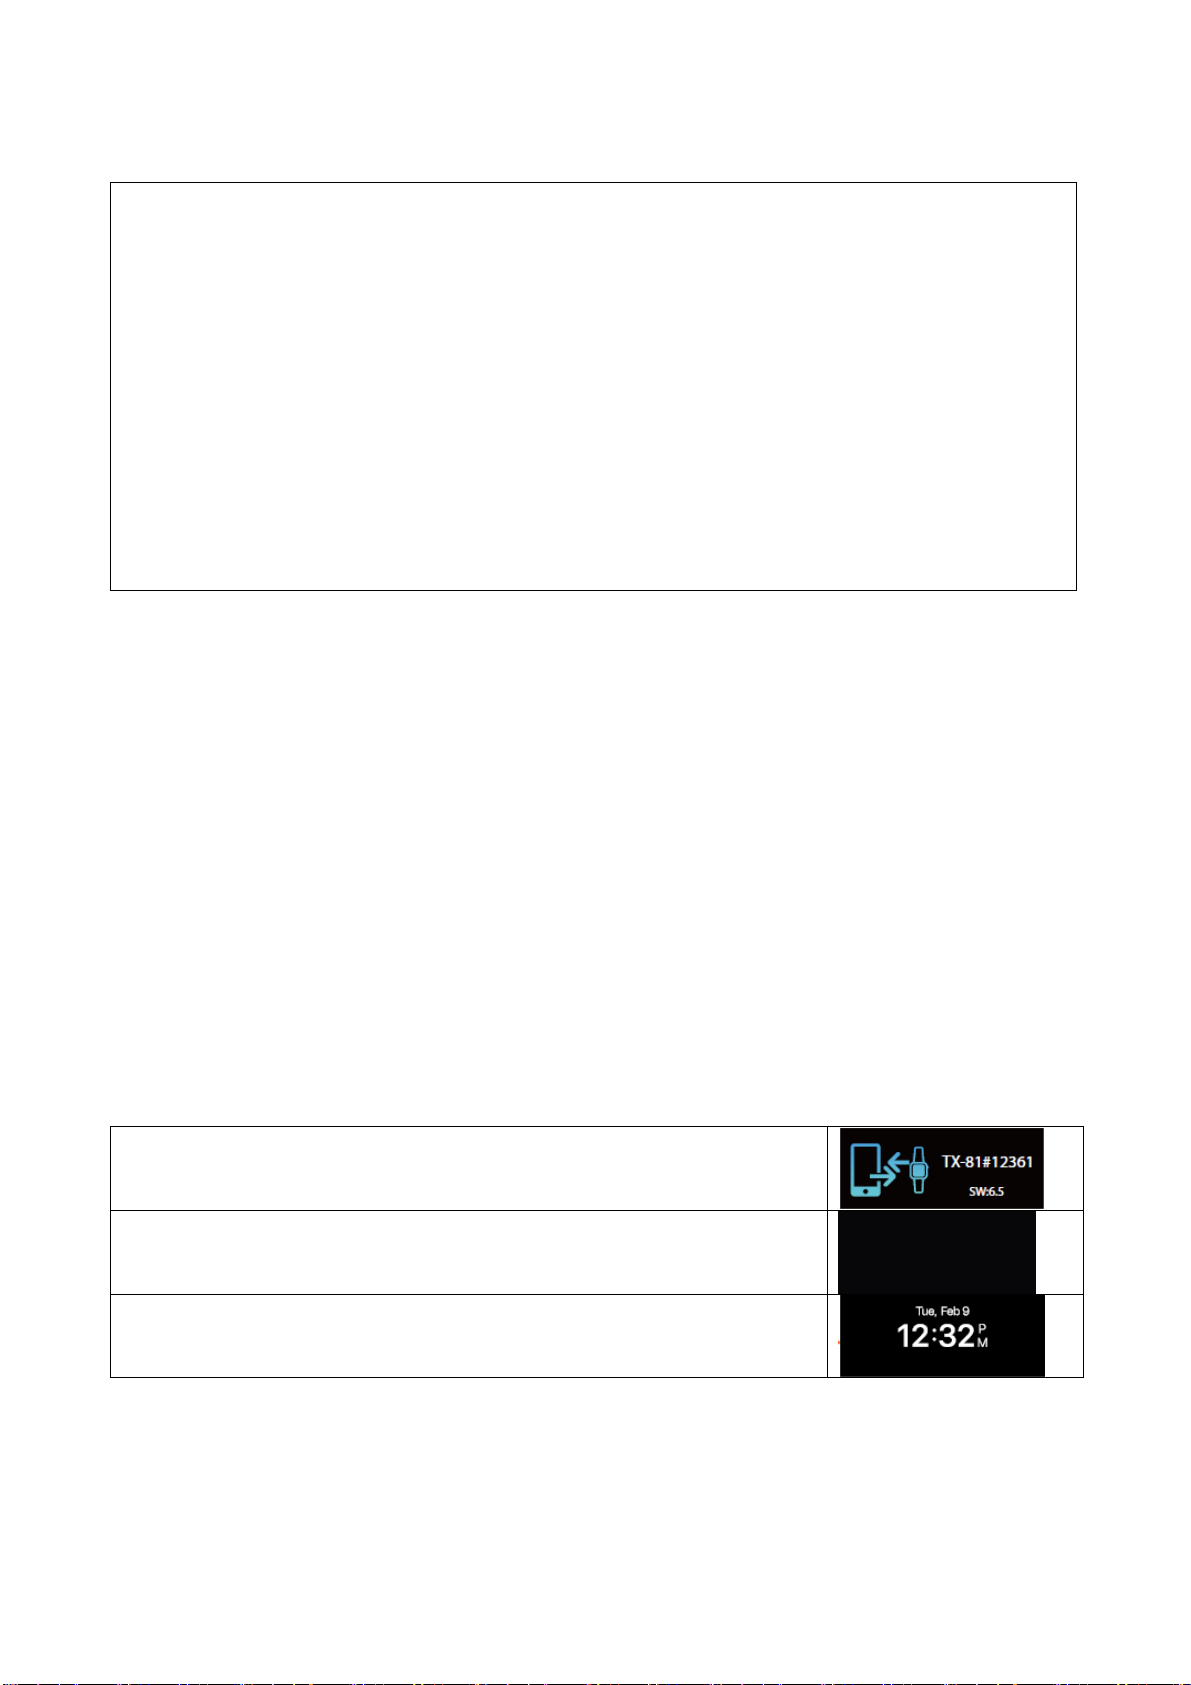
9 General status
Your wristband will show an icon device number.
If there is no operation on the device, screen is off.
If pairing is successful, your wristband will show a time
icon.
7
Page 8
9.1 Connect with your Smartphone
1. Turn on the Bluetooth on your Smartphone (if not already turned on).
2. Open the APP “My Fitness Plus” on your Smartphone.
a. If you are a new member, you will need to register a new account (Sign up).
Be sure to enter your personal information accurately in the given prompts.
b. If you are an existing member, you can just input your login email address
and password.
3. After logging in, choose the TX-81 option to start the pairing process.
4. Select the detected TX-81 # code. This should be the same code that shows
up on your TX-81 device screen.
Note: The wristband must be near your Smartphone in order for it to detect it.
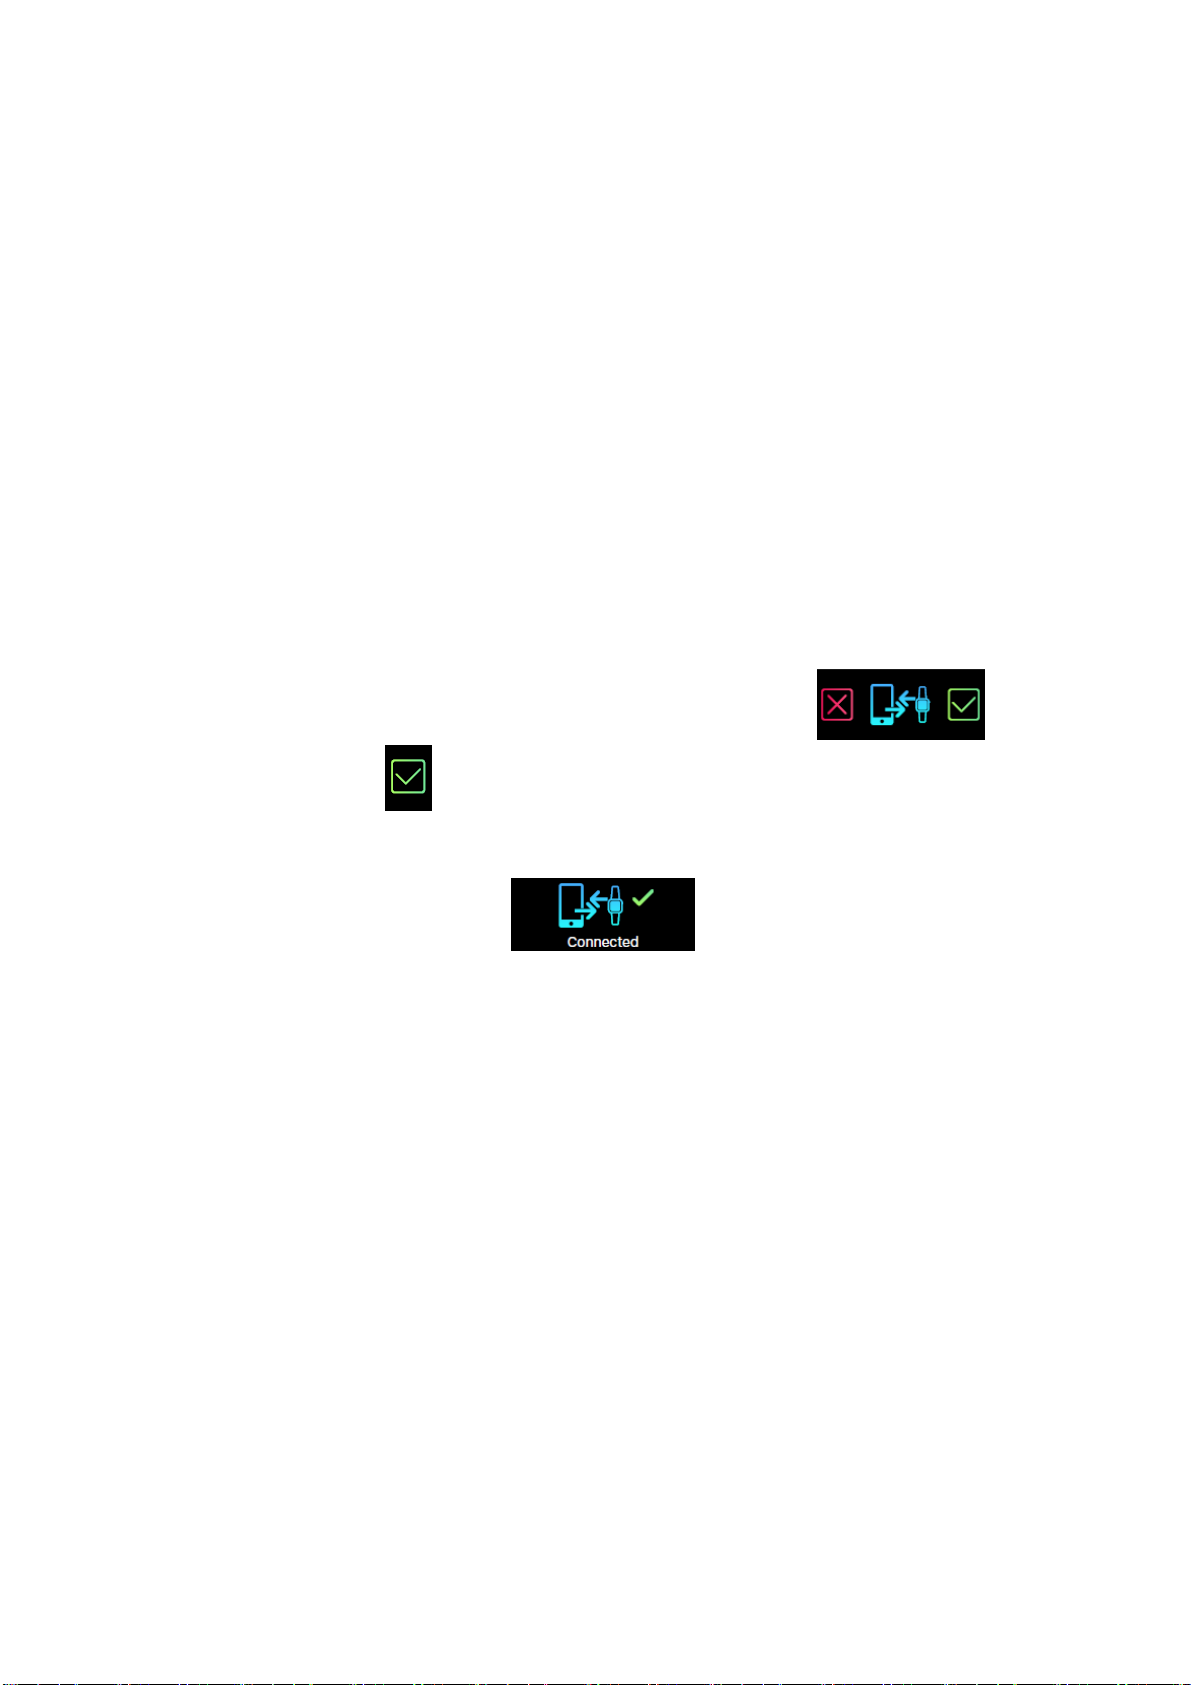
5. A connection request will be shown on your wristband. Tap on
the green check mark to confirm the Bluetooth pairing.
6. When the wristband is connected successfully, both your wristband and mobile
device will receive a notification.
If the connection is not successful, please repeat the same steps to try again.
Check also chapter 17.1 there are some pictures to show you the process
of pairing as well.
Note: The Bluetooth pairing is a one-time process. If you would like to connect
the band with a different account, you must unpair the existing connection first
through the APP settings.
8
Page 9
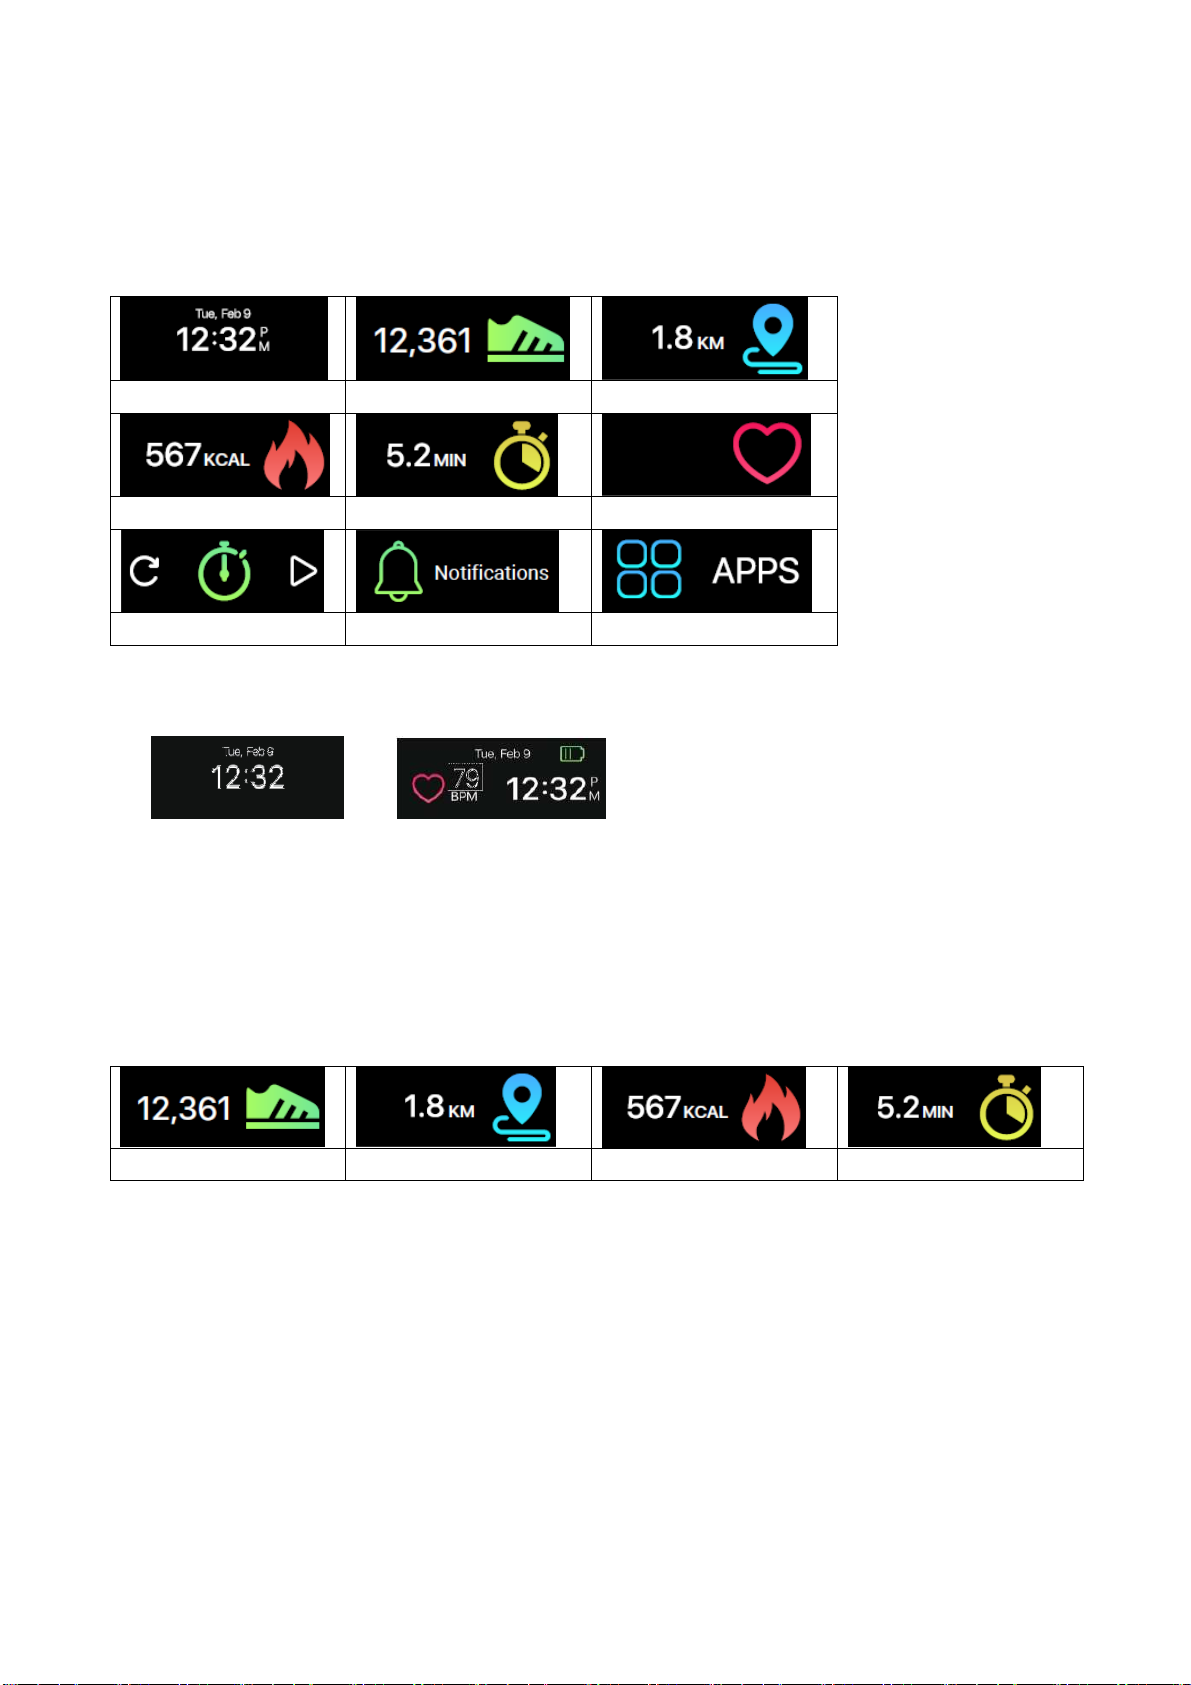
10 Main Interface
Activate the screen than slide left or right to change the display.
Time/Date Steps Distance
Calories Activity Heart rate
Timer Notifications Apps menu
10.1 Time/Date
Time and date on your wristband will automatically be synchronized with the
connected mobile device. You can also setup your preferred time and date
format manually through the settings of My Fitness Plus. Make sure there is
sufficient battery charge on your wristband to avoid resetting the time.
10.2 Steps, distance, calories, activity
Steps Distance Calories Acitivity
Your daily steps, distance, calories burned and activity can be monitored from the
band. You may swipe through the screens to check the current daily activity data
for each or you can use the My Fitness Plus APP to check your activity data and
historical data. You can also check your daily goal completion through the APP's
main page and see detailed figures of your daily, weekly, and monthly
performance by tapping the activity.
9
Page 10

Note: Your band will store your activity data for up to 5 days, so remember to
synchronize your band and APP regularly to keep accurate daily records. The
band is set to start counting your daily activity every day at midnight. The
calculation of the burnt calories reflects only an approximate value (no exact).
10.3 Heart rate
Age Resting heart rate
Child 100-110 / min
Heart rate (off) Heart rate (on) Watch-off,
can't monitor
Teen 90-100 / min
Adults 60-80 / min
Elderly 80-90 / min
To activate the heart rate monitor, switch to the heart rate interface and tap the
heart on the screen. The wristband will activate automatically and will begin
recording your heart rate.. This should only be used for manual measurement in
order to display daily events, see chapter 17.2.5 Settings – Heart rate. To turn off
the heart rate monitor, simply tap the heart icon on the heart rate screen.
Note: First time use no numbers are shown.
How does the wristband measure your heart rate?
It measures heart rate by shining light onto blood vessels, which expand and
contract as blood pulses through them. The reflections are analyzed and
recorded – which is called photoplethysmography (PPG).
10.4 Timer
Use the timer function of the wristband to stop the time
Tap the “play” button at the timer interface to start the timer.
Tap the “pause” button to pause the timer.
Tap the “reset” button to reset the timer.
Note: When stop watch is working, user can switch to other interface, such as
time, steps, calories, distance, heart rate and so on. Count time will stop when it
comes up to 99 minutes, 59 seconds and 99 hundredths.
10
Page 11

11 Notifications
The wristband can vibrate when it displays notifications from incoming calls,
missed calls, SMS, emails, social media, calendar events, and disconnection
alerts. Open the My Fitness Plus APP, select “Setting” and then “Notifications” to
select the notifications you wish to receive on your wristband. If you would like to
dismiss certain notifications, slide the select button leftwards to turn off the
setting.
Click “Save” to Sync your notification settings with the wristband.
Make sure Bluetooth is enabled on your mobile device and wristband is within
operating distance. When your mobile device and wristband are within operating
range, you will be able to receive notification that you selected.
After switched to sleep mode, all notification will be turned off.
To dismiss a notification, simply swipe left or right on the wristband’s screen. If
the notification is not dismissed, it will reappear next time you turn on the screen.
SMS notifications: Click on the icon to check your
messages. You can check up to 3 messages at a time and
each message will display up to 3-pages of contents.
Contents exceeding 3 pages will be replaced with “…” at
the end of the text.
Note: When there are multiple SMS notifications, slide the
screen to check each one of them individually.
Email notifications
Incoming call notifications: Only
Latin alphabets are supported for the
incoming call notification.
Missed call notifications: Click on the
icon to check the missed calls.
Social media notifications: Can Show different
Notifications e.g. WhatsApp, Facebook or Twitter
messages.
11
Page 12

Calendar event notifications: Shows up to remind you of
a set calendar entry from your Smartphone.
Bluetooth disconnect notification: Reminds you of not
losing or forgetting your Smartphone. Also shows when
you are out of the Bluetooth range of your Smartphone.
12 APPs menu
Tap on the “APPS” icon to enter the APPS menu. Slide left or right to change the
interface.
APPs menu Active / Sleep Music/Snapshot Settings/Nearby
12.1 Sleep mode
Tap on the “sleep” icon to enter the wristband manually into sleep mode. Slide
left or right to change the interface.
Back
“Sleep” Go to sleep Sleep duration Exit sleep
12.1.1 Automatic Sleep
The wristband recognizes when you are not moving. It automatically falls into
sleep mode and stays there as long as you are not moving. Double tap the touch
screen and you will see from any interface the “Sleep duration” displayed.
To manually exit the automatic sleep mode slide left or right and tap on the
displayed “Exit sleep” icon (or move a bit around. It will automatically wake up).
12.1.2 Preset Sleep Time
Set up sleep time in My Fitness Plus App, notice to enable auto sleep icon. For
your awake time the sleep mode will automatically exit.
12
Page 13

12.2 Active
Activate the workout modus to record your steps, calories,
distance and sport time while you exercise.
12.3 Music
The Music function is to play/pause the played music from
your Smartphone. The arrow is to change the track forth or
back.
Note: Stay in the Bluetooth range, make sure that there is a
Bluetooth connection to your Smartphone and run the My
Fitness Plus APP in the background.
12.4 Snapshot
The Snapshot function can be used as remote control.
Open the My Fitness Plus APP. Go to settings/camera to
open the camera. Tap on your watch to start the countdown
for the Selfie.
Note: Stay in the Bluetooth range and make sure that there
is a Bluetooth connection to your Smartphone.
12.5 Search for Smartphone nearby
If you do not know where you have put your Smartphone
again, activate this function and the Smartphone starts
ringing.
Note: Stay in the Bluetooth range, make sure that there is a
Bluetooth connection to your Smartphone and the My
Fitness Plus APP has to run in the background.
13
Page 14

12.6 Setting menu
Tap on the “settings” icon to enter setting menu. Slide left or right to change the
interface.
Setting
Battery level
Restart
Factory reset
12.6.1 Battery level
You can check the battery level with the first option on the
settings menu.
To ensure optimal functionalities, please make sure that
the battery level does not go below 20%.
12.6.2 Device info
You can check the device info with the “info” option of the
setting menu.
ID number of your device is available in the “info” section.
12.6.3 Flip screen
This function allows you to choose the screen orientation
that is best suited for you. To flip the screen, enter the
“Flip screen” at the setting menu.
Swipe left on the setting screen until you see the flip
screen option.
Tap the check mark to confirm.
Device
Flip screen
Back
14
Page 15

12.6.4 Restart
Restarting allows you to restart your device without
having to erase your current data. To restart your device,
enter the “restart” option at the setting menu. Tap the
check mark to confirm.
Note: If you change the Smartphone the Wristband is
connected to make a restart of the wristband.
12.6.5 Factory reset
Factory resetting will return your device to its original
state during factory shipment. This function will delete the
activity, sleep, and etc. data on your device.
For factory reset, enter the factory reset option at the
setting menu.
Tap on the check mark to confirm.
Doing so will bring you back to the original pairing code
screen.
12.7 Data Sync
The wristband can monitor steps and distance you have walked throughout the
day, as well as the calories you have burnt. You can check the data shown on
the wristband screen; you can also monitor your activity data and historical
record at the “activity” section of the My Fitness Plus APP, you can check the
progress of your daily target at the main interface, you can retrieve your daily,
weekly, and monthly detailed chart by tapping the activity column once.
The band will display daily data; the APP will be reset daily at midnight (Not
synchronized data will be stored on the wristband until you sync with APP). If you
would like to upload your latest activity data, please tap the upper right
“Synchronize” icon in the My Fitness Plus APP.
15
Page 16

13 Reminder
Break time
Sleep
Add new reminders from the "Reminders" section of the My Fitness Plus APP.
You can set up to 6 types of daily reminders and customize them by setting time,
and day. The wristband will vibrate and display the corresponding reminder.
Single-tapping the band screen will dismiss the reminder. If you haven't
dismissed the reminder, it will reappear again after 2 minutes.
Wake up
Custom
Medicine
Inactivity
Meal time
14 Goal
Select the “Goal” setting in the My Fitness Plus APP to set
up your daily goals for steps, distance, calories burned, and
hours slept. Tap the save button each time to change your
goals. When your goal is reached, your wristband will
vibrate and display the “Goal achieved” icon. Single-tap the
upper right synchronization button to save your goal
settings.
15 Syncing
Synchronize (1.) Synchronizing failed (2.) Synchronizing successful (3.)
1. Sync with APP, wristband will show “syncing” interface.
2. If syncing is failed, the wristband will show “syncing failed” icon.
3. If syncing is successful the time interface can be seen again.
16
Page 17

16 Upgrade
Wristband update (1.) Update failed (2.) Update successful (3.)
1. Synchronize the wristband with the My Fitness Plus APP. The wristband will
turn into the upgrade interface, if there is a new firmware for the wristband. When
you get the information about a new wristband updated make sure that your
Smartphone and your wristband are connected via Bluetooth and stay connected
for the upgrade procedure.
2. If upgrade fails the wristband will show a “failed” icon.
3. If upgrade is successful the time interface will be shown again.
17 APP use (function desciption)
17.1 Login, registration, installation and general information
When starting the APP “My Fitness Plus” you see following pictures below. Sign
up or Login!
Sign up if it is the first time of using the My Fitness Plus APP. To Login put in your
email address & password.
To sign up fill out all required fields. See the right picture below.
17
Page 18

You forgot your password? Then reset your password by pressing “Forgot Your
Password”. Fill in your email address you signed up with and press on “Forgot Your
Password”. You will receive a new password. Do not forget to customize the
password again afterwards!
1. After successful registration you see the left picture below. Select “TX-81”.
2. Activate Bluetooth like the picture in the middle tells you (or you already
enabled it). Then press the button with the check symbol.
3. Now activate your wristband screen. Your wristband should show the same
icon like in the right picture (first installation automatically). If the icon is not
shown on your wristband automatically do the following: Activate wristband
with double tap, slide till you see APPS, tap one more to enter the menu.
Slide to setting icon and tap on it. Slide through the icons until you see
the screen in the right picture. Press the button with the check symbol in APP.
1. 2. 3.
18
Page 19

4. Select your wristband like the list of the left picture below shows you. The
number shown in the APP should be the same like in the wristband screen.
5. The picture in the middle below tells you what to do. Look on your wristband
and confirm the pairing with your Smartphone by tapping on the check sign
shown on the Smartphone. Under iOS you maybe have to
check the pairing as well. A pop up window will show up.
6. The wristband should show now date & time. The APP shows the right picture
below. Then the pairing was successful.
4. 5. 6.
19
Page 20

If the pairing has failed the left picture below will show. Try the steps above again.
OR
If Bluetooth device is not found, go to the Bluetooth settings of your Smartphone
and disable / enable the Bluetooth connection. If still no Bluetooth device is found,
try the steps above again.
OR
If Bluetooth device cannot be found go to the Bluetooth settings of your
Smartphone and disconnect the wristband, delete it from your Bluetooth list. Now
try the steps of connecting above again.
OR
Close and kill the process of My Fitness Plus APP and reopen it.
Pairing has failed Daily overview
Tap on , in the right picture above to synchronize your wristband with the
Smartphone. Now you can track your progress on your Smartphone. The graphic
on the right above shows your daily achieved activities.
20
Page 21

Heart Rate Steps Calories
The heart rate timeline shows your heart rate as graph during the day. Steps,
calories, sleep, distance covered and activity can be switched between weekly
and monthly timeline. The daily achievements will be shown at the daily
overview.
Sleep Distance Activity
21
Page 22

17.2 Main menu
By pressing on in the top left corner on the daily overview will open the
main menu. There you can select from the following settings: Pair device,
Reminders, Find Friends, Goals, Settings and Account.
17.2.1 Pair device
Under “Pair Device” you find the option to unpair the current connected device.
Under Debug Info you will see the IMEI of the wristband and the software version
of the wristband.
Note: Upgrades of the wristband are shown here as well
Main menu Pair Device Reminders
22
Page 23

17.2.2 Reminders
To add a new reminder press on “Add new Reminder”, right picture above. Now
you can choose from a list of prefabricated reminders: Break Time, Sleep, Meal
Time, Medicine, Wake up or Custom. Select one and start to customize it, by
setting the weekday and the time you need to be reminded.
Note: For custom reminders you can type in your own subject name of the
reminder. Just click on the word custom, the keyboard will open and you can type
in a customized subject.
Max. 20 Latin letters, numbers or additional characters, you can also mix them.
Reminder type Set weekday and time Added reminder
23
Page 24

17.2.3 Find Friends
Add your friends by searching for their e-mail address. You can compare your
daily goals (steps, calories and distance) and get better by comparing each other.
Note: Invitations from friends are under leader board on the daily overview listed.
Find Friends Goals Settings
17.2.4 Goals
Customize your daily goals. Press save to synchronize with your wristband.
17.2.5 Settings
Change the factory settings and customize them for your use. You can set the
Units, Auto-Sync, Quick View, Camera, Heart rate, Notifications, Inactivity Alert,
Preset Sleep, Time format, Vibration and Reset. Find the current APP version
here. Under About Us you find Impressum and Declaration.
Under settings you can setup following two options directly:
Enable Auto-Sync the APP and the Smartphone will synchronize automatically
assuming the Bluetooth connection is enabled and you are in the Bluetooth
range and the APP is open on your Smartphone.
24
Page 25

Enable Quick View the wristband will automatically turn on when you move your
wrist to look at the wristband. It shows the last activated option used on the
wristband.
Camera
Open the Smartphone camera over that setting and take selfies within the
Bluetooth range triggered by the wristband. See chapter 12.4.
Camera Set heart rate Notifications
Heart Rate
You can manually measure your heart rate by pressing on the heart on your
wristband. It is recommended to only activate this option during your workouts
because it is using a lot of battery power.
Enable Auto Track and set the frequency. The wristband will take your heart rate
every set minute and saves it until you synchronize with Smartphone.
25
Page 26

Notifications
Enable All Notifications or adjust the setting as you wish.
Calls will show you an incoming call (number or name) on your wristband.
Missed calls shows you calls (number or name) of calls you missed. Information
of an incoming SMS can be seen in the wristbands main screen or can be read.
Therefore see chapter 11.
For Email you will only see the mail icon and the amount of email income on the
main screen of the wristband.
Social Media can display messages from e.g. Twitter, Facebook or Whatsapp
which can be read on the wristband under Notifications.
Calendar Events just show up in the main screen of the wristband to remind you
of arranged meetings or dates, no name will be displayed just the Calendar
Event icon.
Inactivity Alert
Enable and customize the settings for inactivity alert. This function will remind
you to move. E.g.: Take every 15 minutes, 50 steps. See the left picture below.
Inactivity Alert How to use preset sleep Set preset sleep
26
Page 27

Preset Sleep
Enable Auto Sleep and insert your Bed Time as well as your Awake Time. Now
the wristband can detect when you fall asleep during your preset sleep
automatically. The graph of light sleep and deep sleep will be shown in your daily
overview.
Time Format
Adjust the most suitable time format for your wristband. Press on the desired
time format. After that you will asked to synchronize with wristband. Confirm to
synchronize.
Vibration
Adjust the strength of vibration to comfort you. The APP My Fitness Plus has to
synchronize with the wristband after your selection.
Reset
Reset the wristband. All achieved data that was not synchronized with the
Smartphone gets lost. Before you reset the wristband make sure all data was
synchronized with the APP My Fitness Plus.
Time Format Vibration Reset
27
Page 28

About Us
Find a link to our homepage. Impressum you can find our service telephone
number as well as our address. The Declaration shows to you which data is used
to run My Fitness Plus.
About Us User Account
17.2.6 User Account
Under Account is the data stored you inserted while registration. If something has
changed weight or height you can adjust it here. Also you can Log out from your
account to sign in or register a new account.
18 Warnings
Charge the device promptly when it shows low power and please use our
standard charging clip. Do not leave the device in damp environment or
expose it to liquid when charging. Do not expose the device to extreme
temperature. Do not expose the device to direct sunlight place for long
duration. Do not place the device in vicinity of a fire. Avoid contact between
the device and any sharp object. Do not misuse the device, falling, dismantling,
dissembling, pressing, puncturing, baking, burning, etc. Do not clean the
device with an abrasive cleaner. Keep it out of reach of infants and children as
small parts may cause choking.
28
Page 29

19 Troubleshooting
19.1 APP failed to synchronize data
1. Check if your phone network and Bluetooth settings are turned on or not.
Both the phone network and Bluetooth need to be ON at the same time for data
synchronization.
2. Check if your wristband is near your phone. The connection distance is
within 10 meters.
3. Make sure that your wristband had been connected with your devices.
19.2 APP failed to connect with the band
1. Check if your phone network and Bluetooth settings are turned ON or not.
Both the phone network and Bluetooth need to be ON at the same time.
2. Check if your band is near your phone. The connection distance is within 10
meters.
3. Make sure that the band is not connected to other account.
Hints for Environment Protection: Packages materials
are raw materials and can be recycled. Do not disposal
old devices or batteries into the domestic waste.
Cleaning: Protect the device from contamination and
pollution (use a clean drapery). Avoid using rough,
coarse-grained materials or solvents/aggressive cleaner.
Wipe the cleaned device accurately. Distributor:
Technaxx Deutschland GmbH & Co.KG, Kruppstr. 105,
60388 Frankfurt a.M., Germany
29
 Loading...