

Page 1
TL-SSF-TESTK-1
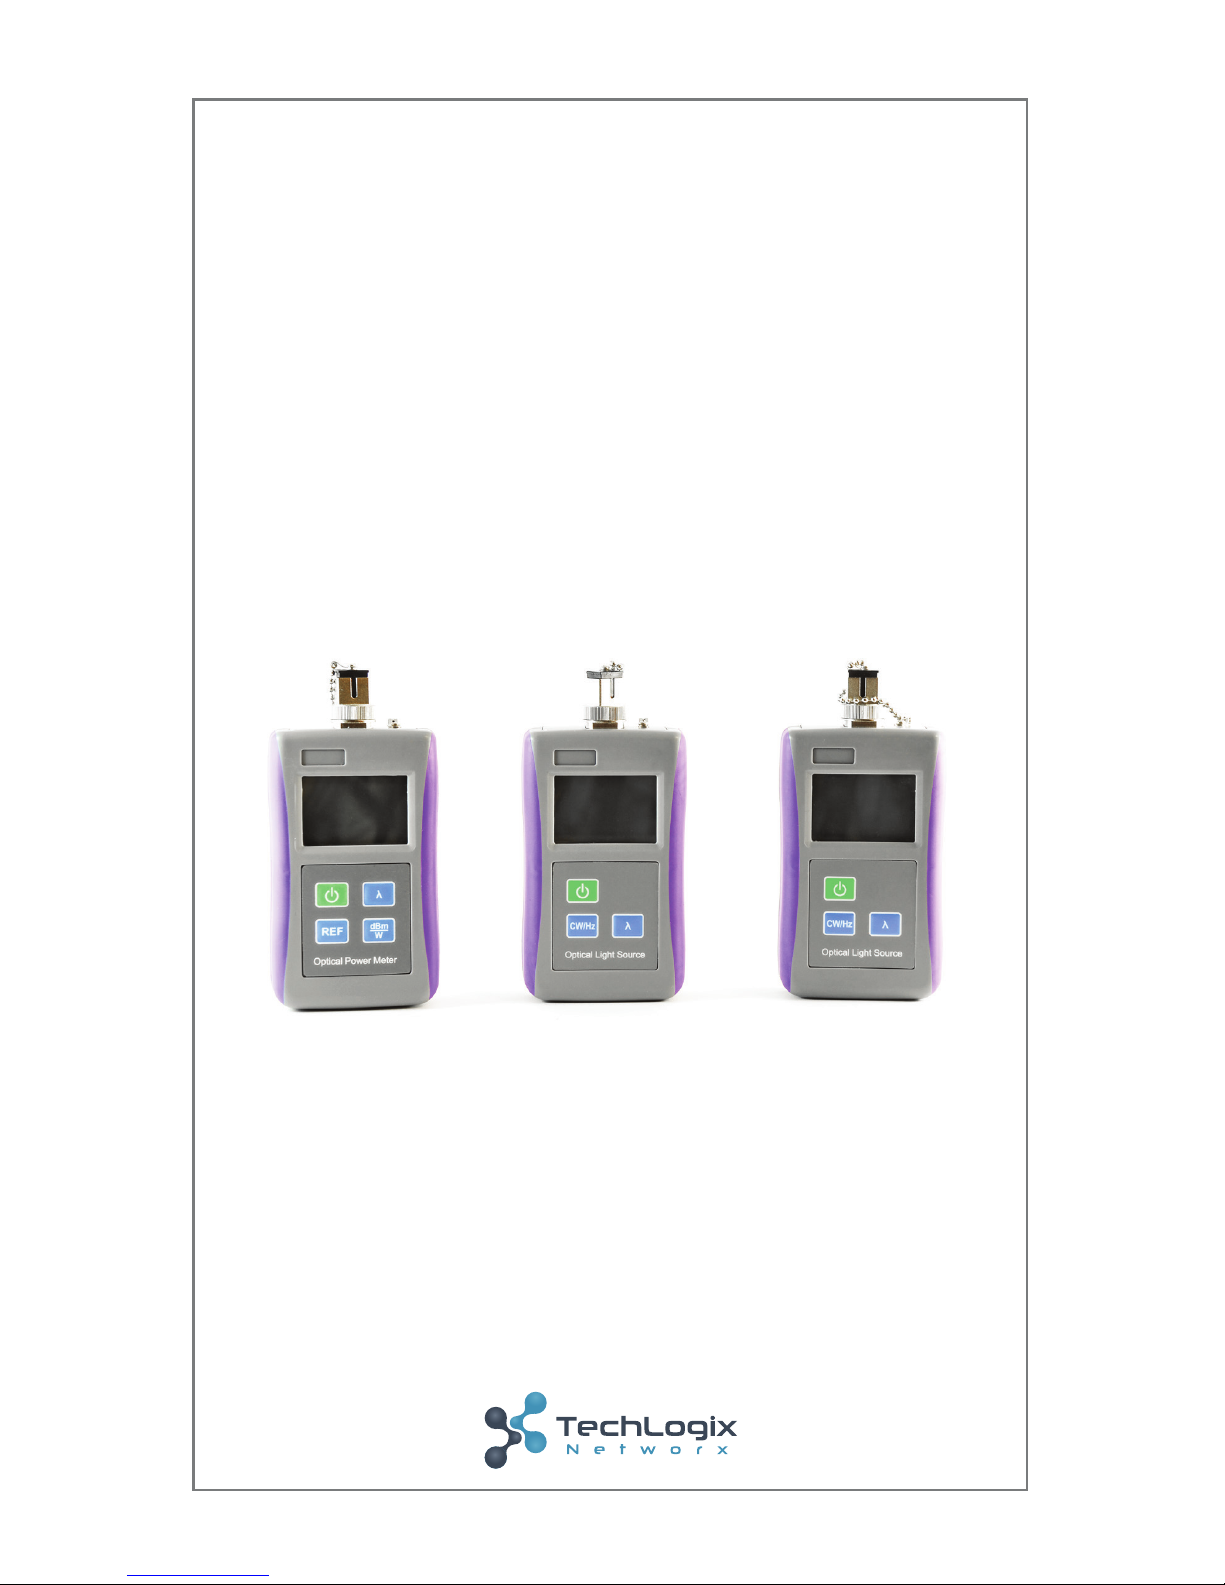
SSF™ Fiber Test Kit
Manual
Page 2

Warning
To avoid risk of eye damage, do not look into the laser
when unit is on. Laser does not operate at visible
wavelength. Light will not be visible when laser is active.
Page 3

Contents
Handheld Optical Light Source
Overview 5
Functions 7
Maintenance and Troubleshooting 10
Warranty 11
Handheld Optical Power Meter
Overview 12
Specications 14
Functions 15
Maintenance and Troubleshooting 17
Warranty 18
Page 4

Handheld Optical Light Source
4
Each unit meets the declared specication.
Technical parameters are subject to change without notice.
1. Do not look into the laser beam when unit is on.
2. To prevent damage to the instrument, do not use under high
temperature, high pressure, wet, or other prohibited conditions.
3. Do not attempt to take apart or repair the instrument.
WARNING
Quality Assurance
Note:
SSF™ Single Mode Optical Light Source
SSF™ Multimode Optical Light Source
Page 5

5
Handheld Optical Light Source
Overview
The SSF™ Single Mode optical light source provides single to tri
wavelength output, including 1310/1550nm wavelengths for single
mode ber.
The SSF™ Multimode optical light source provides single to tri
wavelength output, including 850/1300nm wavelengths for
multimode ber.
Together with the SSF™ power meter, the optical light source
provides an accurate test solution for single mode and/or
multimode optical ber networks.
`
• Single to tri-wavelength combination
• Continuous and modulated signal
• Real time display of battery level and low power indication
• Back light function
• Auto shut-off function
• Alkaline battery operation
Model: SSF™ Single Mode Light Source
Wavelength: 1310/1550nm
Output Power: ≥ -7dBm
Model: SSF™ Multimode Light Source
Wavelength: 850/1300nm
Output Power: ≥ -7dBm
Page 6

Handheld Optical Light Source
6
Specications
Type SSF™ Single Mode Light Source
Wavelength (nm) 1310 / 1550
Emitter Type FP-LD
Output Power (dBm) ≥-7dBM @1310 / 1550nm
Output Power ±0.04 @ 20°C @ 15 min
Modulation CW/270Hz/1KHz/2KHz @ others
Fiber Type SM
Connector SC
Power Supply AAA 1.5V (3pcs batteries)
Operating Temperature
(°C)
-10 - +50, 0 to 95% RH (no condensation)
Storage Temperature (°C) -25 - +70, 0 to 95% RH (no condensation)
Battery Life (h) 40
Dimension (mm/in) 125x65x29 / 4.92x2.56x1.14
Weight (g/oz) 160 / 3.74
Type SSF™ Multimode Light Source
Wavelength (nm) 850 / 1300
Emitter Type FP-LD
Output Power (dBm) ≥-7dBM @850/ 1300nm
Output Power ±0.04 @ 20°C @ 15 min
Modulation CW/270Hz/1KHz/2KHz @ others
Fiber Type MM
Connector SC
Power Supply AAA 1.5V (3pcs batteries)
Operating Temperature
(°C)
-10 - +50, 0 to 95% RH (no condensation)
Storage Temperature (°C) -25 - +70, 0 to 95% RH (no condensation)
Battery Life (h) 40
Dimension (mm/in) 125x65x29 / 4.92x2.56x1.14
Weight (g/oz) 160 / 3.74
Page 7

7
Handheld Optical Light Source
1
SM/
MM
Label Area: Light Source will read SM (Single Mode)
or MM (Multimode) depending on model. Choose
SM for single mode testing (1310/1550nm) or MM
for multimode testing (850/1300nm).
2
Power On/Off: Press and hold for 1 second to turn
the unit on or off.
Auto Shut-Off Selection: While unit is on, press this
key quickly to turn the auto shut-off function on or
off. When auto shut-off is active the unit will automatically shut off after ten minutes idle.
3
Wavelength Selection: Press this key to change
the wavelength, shown in top left corner of screen.
4
Modulation: Press this key to switch modulation
between continuous and modulated light.
Modulated light frequency: 0.27, 1.00, 2.00 KHZ.
Continuous light mode displays --- KHz (0 KHz).
Functions
2
1
3
4
Page 8

Handheld Optical Light Source
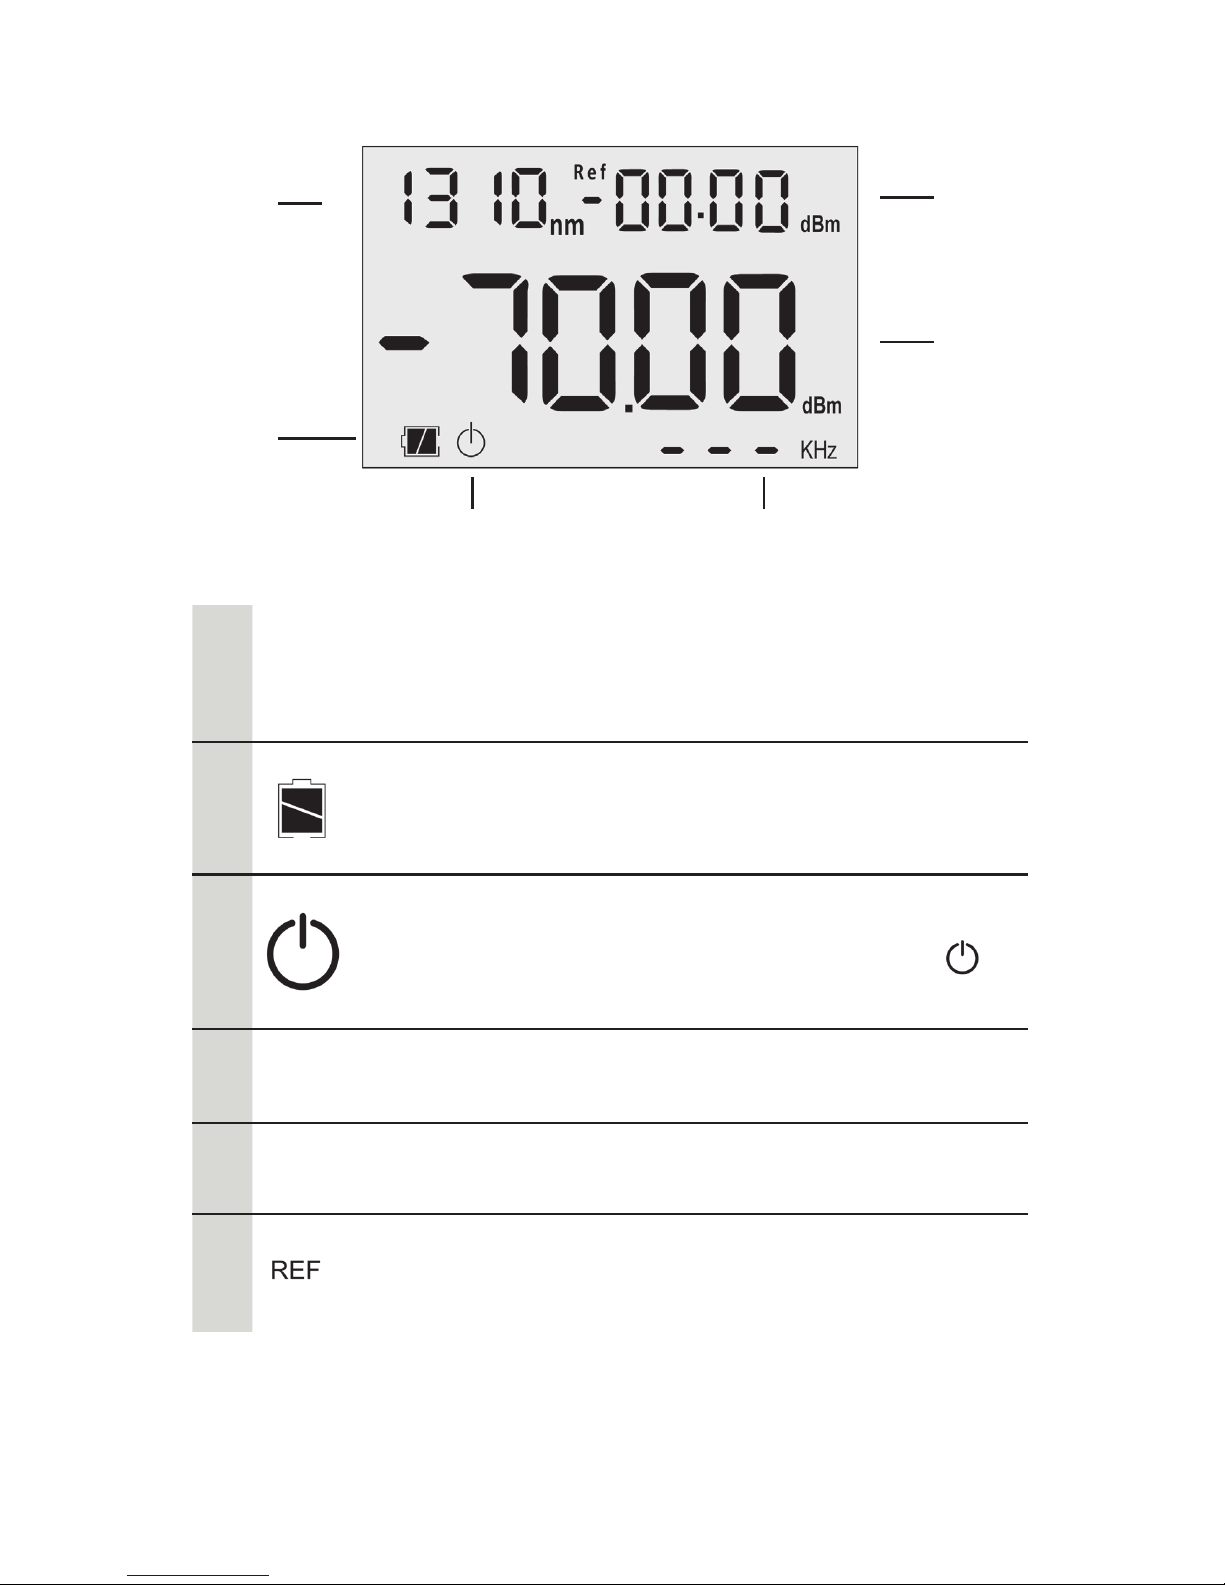
8
1
nm
Wavelength: (nm)
1310/1550: Single mode ber testing (SSF-LS100SM)
850/1300: Multimode ber testing (SSF-LS100MM)
2
Battery Indicator: displays when battery power in
use. The capacity shown will decrease with battery
power. Replace batteries as needed.
3
Auto Shut-off: The light source will automatically
shut off when idle for ten minutes. Press power
button (
) quickly to turn Auto-Off function on
or off.
4
KHz
Frequency: (KHz)
0.27, 1.00, or 2.00 KHz. Dashed line indicates
Continuous Wave Mode (CW)
5
dBm
Output Power: (dBm)
1
2
5
3 4
Page 9

9
Handheld Optical Light Source
Operation
1. Press and hold for 1 second to turn on the unit. Press and
hold for two seconds to power off the light source.
2. To turn the auto shut-off function on or off, with the light source
turned on press
.
3. The unit’s automatic backlight will be enabled when the light
source is turned on. It will turn off after 1 minute of inactivity.
Press any key to reactivate.
1. If the battery level is low, turn off the unit immediately and
replace the batteries.
2. Remove the batteries if light source is not in use for an extended
period of time.
Turning the Unit On/Off
Battery Replacement
1. Press to choose wavelength.
2. Press
to select modulation.
3. The light source will output the desired laser settings.
Laser Output
Warning
1. Do not look into the laser beam when unit is on. Light emitted
is infrared and not visible to the human eye. To avoid the risk
of eye damage, do not look into the laser at any time when the
unit is active.
Page 10

Handheld Optical Light Source
10
Maintenance and Troubleshooting
1. Always keep the connector ports of the light source clean.
2. Use the regulated optical connector for testing.
3. Shut off the power and cover laser with dust-proof cap after use.
4. Plug in/remove adapters carefully.
5. Regularly clean the connector.
6. Remove the batteries when light source not in use for extended
periods of time.
Troubleshooting
Issue Possible Reason Solution
Faint screen display/
No backlight
Low battery power
Replace the
batteries.
Unit fails to turn on
Low battery power
or battery inserted
incorrectly
(A) Replace the
battery
(B) Re-insert the
battery
Display fails to
appear
Low battery
Restart or replace
batteries
LCD screen will not
change
Low battery Replace batteries
No laser power Laser is off Adjust CW/Hz
1. Ensure the connector is clean before testing.
2. Do not look into the laser beam when unit is on.
3. Cover with laser with dust-proof cap when not in operation.
Warning
Page 11

11
Handheld Optical Light Source
Warranty
Caution: Do not attempt to repair as doing so will void warranty.
This Optical Light Source is covered by an 18 month warranty
1. We warrant that this power meter will be free from defects in
material and workmanship for 18 months. Should the device
fail at any time during this warranty period, we will, at our sole
discretion, replace and repair or refund the purchase price of
the product. The worth of the repair or replacement will not be
higher than purchasing price of this unit.
2. If device issues cannot be solved by the troubleshooting
methods, please contact us or the local distributor directly.
3. We will repair or replace the unit free of charge in case of
defects in production, workmanship or material. This warranty
only applies to the unit under normal operation without any
damage or misuse/abuse.
4. The shipping costs incurred by repair or replacement for the
unit under warranty will be shared by both parties.
Page 12

Handheld Optical Power Meter
12
SSF™ Optical Power Meter
1. When using light source with power meter, do not look into
the laser beam when unit is on. Light emitted is infrared and
not visible to the human eye. To avoid the risk of eye damage,
do not look into the laser at any time when the unit is active.
Warning
Page 13

Handheld Optical Power Meter
13
Overview
The SSF™ optical power meter is a handheld optical power meter
which can be used for absolute optical power measurements and
relative loss measurements on both single mode and multimode
bers.
Features
• High measurement accuracy and display resolution
• Quick response and measurement; real-time display of
output power
• Wide measurement range (80dB)
• Six calibrated wavelengths
• Absolute and relative power measurements
• Real-time monitoring and display of batter level
• Auto shut-off function
• Backlight function
• Alkaline battery operation
Model
Wavelength: 850, 1300, 1310, 1490, 1550, 1625nm
Measurement Range: -70 - +10dBm
Page 14

Handheld Optical Power Meter
14
Specications
Wavelength (nm) 800 - 1650nm
Detector Type InGaAs
Measurement Range (dBm) -70 - +10 -50 - +26
Accuracy <±3% (-10dBm, 22°C)
Calibrated Wavelength
(nm)
850, 1300, 1310, 1490, 1550, 1625
Resolution (dB) Linearity: 0.1%, Non-linearity: 0.01 dBm
Optical Connector SC, LC with Adapters
Power Supply Alkaline Battery (3 AAA 1.5V batteries)
Battery Operating Time 120 h (without backlight)
Operating Temperature
(°C)
-10 - +50
Storage Temperature (°C) -20 - +70
Relative Humidity 90% (+30°C)
Dimension (mm / in) 125x65x29 / 4.92x2.56x1.14
Weight (g / oz) 160 / 5.64
Page 15

Handheld Optical Power Meter
15
1
Power On/Off: Press and hold for 2 seconds to turn
the unit on or off.
Auto Shut-Off Selection: Press this key quickly to
turn the auto shut-off function on or off. When auto
shut-off is active the unit will automatically shut off
after ten minutes idle.
2
REF: Press and hold this key to store current power
value as the reference value.
Quickly press this key to enter the relative
measurement mode. This mode compares the
current power with the reference power and shows
the relative power value in dB.
3
Measurement Setting: Press this key to switch
between the absolute measurement (dBm) and
relative measurement (nW) of the optical power.
4
Wavelength Selection: Press this key to select one of
the 6 calibrated wavelengths
Functions
1
2
3
4
Page 16
Handheld Optical Power Meter
16
1
nm
Wavelength: (nm)
850/1300: Multimode ber testing
1310/1550: Single mode ber testing
2
Battery Indicator: displays when battery power in
use. The capacity shown will decrease with battery
power. Replace batteries as needed.
3
Auto-off: the power meter will automatically shut off
when idle for ten minutes. Press power button ( )
quickly to turn Auto-Off function on or off.
4
KHz
Frequency: (KHz)
0.27, 1.00, or 2.00 KHz.
5
Power Value: (dBm, nW, dB)
6
Reference Power Value: (dbm)
1
2
6
5
3 4
Page 17

Handheld Optical Power Meter
17
Operation
1. Press and hold for 1 second to turn on the unit. Press and
hold for two seconds to power off the power meter.
2. To turn the auto shut-off function on or off, with the light source
turned on press the
.
3. The unit’s automatic backlight will be enabled when the light
source is turned on. It will turn off after 1 minute of inactivity.
Press any key to reactivate.
Turning the Unit On/Off
1. Place appropriate reference cable (LC or SC and either single
mode or multimode) between units. If using an LC reference
cable, install appropriate adapters and then connect cable.
2. Turn on both devices. Allow power meter to stabilize for 1-2
minutes.
3. Match the wavelength on the power meter to the light source by
pressing . For multimode, 850nm is recommended. For single
mode, 1310nm is recommended.
4. Press to choose the power display unit (dBm or nW). Set to
dBM.
5. The power meter will then display the tested power value on the
center of the screen. Set this as the reference value by pressing
and holding
for two seconds. The screen will then read
0.00dBM
Absolute Power Measurement (Setting Reference Value)
1. Perform steps above to set reference value.
2. Unplug reference cable from power meter side only.
3. Attach female to female adapter for connector type under test
to reference cable.
4. Plug cable to be tested between female adapter and power
meter.
5. The screen will display the loss in dB for cable under test.
Optical loss will appear as a negative value (i.e. -0.57 dB).
6. Press
to review to review the current reference power
value.
Relative Power Testing (Finding Loss Value)
Page 18

Handheld Optical Power Meter
18
Maintenance and Troubleshooting
1. Always keep the connector ports of the power meter clean.
2. Use the regulated optical connector for testing.
3. Shut off the power and cover laser with dust-proof cap after use.
4. When using AC adapter, ensure power supply is within the
required voltage range.
5. Remove the batteries when power meter not in use for
extended periods of time
1. If the battery level is low, turn off the unit immediately and
replace the batteries.
2. Remove the batteries if light source is not in use for an extended
period of time.
Battery Replacement
Troubleshooting
Issue Possible Reason Solution
Faint screen display/
No backlight
Low battery power
Replace the
batteries.
Unit fails to turn on
Low battery power
or battery inserted
incorrectly
(A) Replace the
battery
(B) Re-insert the
battery
Display fails to
appear
Low battery
Restart or replace
batteries
LCD screen will not
change
Low battery Replace batteries
No laser power Laser is off Adjust CW/Hz
Page 19

Handheld Optical Power Meter
19
Warning
1. Ensure the connector is clean before testing.
2. Do not look into the laser beam when unit is on.
3. Cover laser with dust-proof cap when not in operation.
Warranty
Caution: Do not attempt to repair as doing so will void warranty.
This Optical Power Meter is covered by an 18 month warranty
1. We warrant that this power meter will be free from defects in
material and workmanship for 18 months. Should the device
fail at any time during this warranty period, we will, at our sole
discretion, replace and repair or refund the purchase price of
the product. The worth of the repair or replacement will not be
higher than purchasing price of this unit.
2. If device issues cannot be solved by the troubleshooting
methods, please contact us or the local distributor directly.
3. We will repair or replace the unit free of charge in case of
defects in production, workmanship or material. This warranty
only applies to the unit under normal operation without any
damage or misuse/abuse.
4. The shipping costs incurred by repair or replacement for the
unit under warranty will be shared by both parties.
 Loading...