

Page 1

TechGrow | Innovative Growing Solutions
Ballast Basic Micro
Handleiding | User Manual | Manuel | Manual | Manuell
www.techgrow.nl
Page 2

____________________________________________________________________________________________________________________________
TechGrow | Innovative Growing Solutions 2
Inhoud | Contents | Contenu | Contenido | Inhalt
Inhoud van de doos ______________________________________________________________________________________________ 5
Eigenschappen ____________________________________________________________________________________________________ 5
Technische specificaties __________________________________________________________________________________________ 5
1. Installatie van de Ballast Basic Micro ________________________________________________________________________ 6
2. Werking van de Ballast Basic Micro __________________________________________________________________________ 6
2.1 Asynchrone tijdklok _______________________________________________________________________________________ 6
2.2 Inschakelbeveiliging _______________________________________________________________________________________ 6
3. Welke sensoren kunt u aansluiten op de Ballast Basic Micro? _____________________________________________ 6
4. Betekenis leds __________________________________________________________________________________________________ 6
5. Bedienen en instellen van de Ballast Basic Micro via het hoofdmenu_____________________________________ 6
5.1 Instellen datum en tijd ____________________________________________________________________________________ 6
5.2 Selecteren van klokken (en timer) ________________________________________________________________________ 7
5.3 Instellen timer ______________________________________________________________________________________________ 7
5.4 Instellen opstartvertraging ________________________________________________________________________________ 8
5.5 Hardwaretest _______________________________________________________________________________________________ 8
5.6 Fabrieksinstellingen herstellen ___________________________________________________________________________ 8
6. Snelmenu _______________________________________________________________________________________________________ 8
6.1 Snel naar datum en tijd____________________________________________________________________________________ 9
6.2 Snel naar timer _____________________________________________________________________________________________ 9
6.3 Uitschakelen van de relais (HANDMATIG) _______________________________________________________________ 9
Box contents _____________________________________________________________________________________________________ 10
Features __________________________________________________________________________________________________________ 10
Technical specifications _________________________________________________________________________________________ 10
1. Installation of the Ballas Basic Micro________________________________________________________________________ 11
2. Operation of the Ballast Basic Micro ________________________________________________________________________ 11
2.1 Asynchronous timer ______________________________________________________________________________________ 11
2.2 Switch-on delay ___________________________________________________________________________________________ 11
3. Which sensors can be connected to the Ballast Basic Micro? _____________________________________________ 11
4. Meaning LEDs _________________________________________________________________________________________________ 11
5. Control and set the Ballast Basic Micro via the Main Menu _______________________________________________ 11
5.1 Set date and time _________________________________________________________________________________________ 11
5.2 Clock/Timer selection ____________________________________________________________________________________ 12
5.3 Set timer ___________________________________________________________________________________________________ 12
Page 3

____________________________________________________________________________________________________________________________
TechGrow | Innovative Growing Solutions 3
5.4 Set startup delay __________________________________________________________________________________________ 13
5.5 Hardware test _____________________________________________________________________________________________ 13
5.6 Reset to factory defaults _________________________________________________________________________________ 13
6. Quick menu ___________________________________________________________________________________________________ 13
6.1 Shortcut to date and time ________________________________________________________________________________ 13
6.2 Shortcut to timer__________________________________________________________________________________________ 14
6.3 Switch of the relays (MANUALLY) _______________________________________________________________________ 14
Contenu de la boîte _____________________________________________________________________________________________ 15
Caractéristiques __________________________________________________________________________________________________ 15
Spécifications techniques _______________________________________________________________________________________ 15
1. Installation du Ballast Basic Micro __________________________________________________________________________ 16
2. Fonctionnement du Ballast Basic Micro_____________________________________________________________________ 16
2.1 Minuterie asynchrone ____________________________________________________________________________________ 16
2.2 Délai de mise en marche _________________________________________________________________________________ 16
3. Quels capteurs peuvent être connectés au Ballast Basic Micro ? _________________________________________ 16
4. Signification des LED _________________________________________________________________________________________ 16
5. Contrôlez et configurez le Ballast Basic Micro via le menu principal _____________________________________ 16
5.1 régler la date et l'heure __________________________________________________________________________________ 16
5.2 Sélection horloge / minuterie ____________________________________________________________________________ 17
5.3 Régler la minuterie _______________________________________________________________________________________ 17
5.4 Définir le délai de démarrage ____________________________________________________________________________ 18
5.5 Test du matériel ___________________________________________________________________________________________ 18
5.6 Réinitialisation aux paramètres d'usine _________________________________________________________________ 18
6. Menu rapide ___________________________________________________________________________________________________ 18
6.1 Date et heure abrégées ___________________________________________________________________________________ 19
6.2 Raccourci au minuteur____________________________________________________________________________________ 19
6.3 Commutation des relais (MANUELLEMENT) ____________________________________________________________ 19
Contenido de la Caja ____________________________________________________________________________________________ 20
Características ___________________________________________________________________________________________________ 20
Especificaciones Técnicas _______________________________________________________________________________________ 20
1. Instalación del Ballast Basic Micro __________________________________________________________________________ 21
2. Operación del Ballast Basic Micro ___________________________________________________________________________ 21
2.1 Temporizador asíncrono _________________________________________________________________________________ 21
2.2 Retraso del prendido _____________________________________________________________________________________ 21
3. ¿Qué sensores pueden ser conectados al Ballast Basic Micro? ____________________________________________ 21
4. Significado de los LEDs _______________________________________________________________________________________ 21
5. Control y configuración del Ballast Basic Micro a través del menú principal ____________________________ 21
Page 4

____________________________________________________________________________________________________________________________
TechGrow | Innovative Growing Solutions 4
5.1 Estableciendo fecha y hora _______________________________________________________________________________ 21
5.2 Selección del Reloj/Temporizador _______________________________________________________________________ 22
5.3 Estableciendo el temporizador __________________________________________________________________________ 22
5.4 Establezca el retraso del prendido _______________________________________________________________________ 23
5.5 Prueba de hardware ______________________________________________________________________________________ 23
5.6 Reestablecer la configuración de fábrica _______________________________________________________________ 23
6. Menú rápido __________________________________________________________________________________________________ 23
6.1 Atajos para la fecha y hora _______________________________________________________________________________ 24
6.2 Atajo al temporizador ____________________________________________________________________________________ 24
6.3 Activando los relés (MANUALMENTE) __________________________________________________________________ 24
Inhalt der Box ____________________________________________________________________________________________________ 25
Funktionen _______________________________________________________________________________________________________ 25
Technische Daten ________________________________________________________________________________________________ 25
1. Installation des Ballast Basic Micro__________________________________________________________________________ 26
2. Bedienung des Ballast Basic Micro __________________________________________________________________________ 26
2.1 Asynchroner Timer ________________________________________________________________________________________ 26
2.2 Einschaltverzögerung _____________________________________________________________________________________ 26
3. Welche Sensoren können an den Ballast Basic Micro angeschlossen werden? __________________________ 26
4. Bedeutung der LEDs __________________________________________________________________________________________ 26
5. Steuern und Einstellen des Ballast Basic Micro über das Hauptmenü ____________________________________ 26
5.1 Datum und Uhrzeit einstellen ____________________________________________________________________________ 26
5.2 Auswahl von Uhr/Timer __________________________________________________________________________________ 27
5.3 Timer einstellen ___________________________________________________________________________________________ 27
5.4 Einschaltverzögerung einstellen _________________________________________________________________________ 28
5.5 Hardware-Test ____________________________________________________________________________________________ 28
5.6 Zurücksetzen auf die Werkseinstellungen ______________________________________________________________ 28
6. Schnellmenü __________________________________________________________________________________________________ 29
6.1 Tastenkombination zu Datum und Uhrzeit _____________________________________________________________ 29
6.2 Tastenkombination zum Timer __________________________________________________________________________ 29
6.3 Schalten der Relais (MANUELL) __________________________________________________________________________ 29
Page 5

____________________________________________________________________________________________________________________________
TechGrow | Innovative Growing Solutions 5
__________________________________________________________________________________________________________
Bedankt voor het aanschaffen van de Ballast Basic Micro. Deze digitaal gestuurde relaiscontroller kan
2 x 600 W schakelen en beschikt over een digitale tijdklok en een helder display. Bovendien is de Ballast Basic
Micro makkelijk instelbaar.
Inhoud van de doos
1. Ballast Basic Micro
2. Bevestigingskit
3. Handleiding
Eigenschappen
• Geschikt voor 2 x 600 W
• Digitaal display
• Maakt geen schakelgeluid
• Keuze uit 2 digitale klokken (24-uurs/asynchroon)
• Instelbare inschakelvertraging tot 300 minuten
Technische specificaties
• Stroomverzorging: 100 tot 240 V
• Netfrequentie 50 tot 60 Hz
• Opname: 3 W
• Schakelvermogen: 1200 W/10 A
• Per stopcontact kan maximaal 4 A geschakeld worden
• Netsnoer: 3 x 1,5 mm
Ballast Basic Micro
Digitale relaiscontroller
Page 6

____________________________________________________________________________________________________________________________
TechGrow | Innovative Growing Solutions 6
1. Installatie van de Ballast Basic
Micro
1. Monteer de Ballast Basic Micro aan de wand met de
meegeleverde bevestigingskit.
2. Plug eerst de stekkers van de lampen in de
stopcontacten van de Ballast Basic Micro.
3. Plug daarna de stekker van de Ballast Basic Micro
in een 230 V stopcontact (minimaal 10 A).
4. Klaar!
LET OP: Indien u stekkers wisselt als de relais
aanstaan, kunnen de relais beschadigen. Schakel
daarom de relais uit via de “maintenance mode” (zie
paragraaf 6.3) voordat u stekkers van lampen
aansluit of verwijdert. Op de relais van de Ballast
Basic Micro wordt geen garantie gegeven.
2. Werking van de Ballast Basic Micro
De Ballast Basic Micro is bedoeld voor het
gecontroleerd in- en uitschakelen van 2 lampen (2 x
600 W).
2.1 Asynchrone tijdklok
De Ballast Basic Micro heeft 2 verschillende tijdklokken:
een 24-uursklok en een asynchrone tijdklok. Met de
asynchrone tijdklok kunt u de 24-uurscyclus verlengen
of verkorten.
2.2 Inschakelbeveiliging
In het geval van stroomonderbreking kan de controller
het inschakelen vertragen. U kunt dit zelf instellen. Er is
keuze uit vertragingstijden tot 300 minuten.
3. Welke sensoren kunt u aansluiten
op de Ballast Basic Micro?
U kunt geen sensoren aansluiten op de Ballast Basic
Micro.
4. Betekenis leds
Light (2x): de led brandt rood als het relais is
ingeschakeld.
In geval van een storing zal de led uit
zijn en zal het stopcontact aanstaan.
Neem in dat geval contact op met de
verkoper van de Ballast Basic Micro.
5. Bedienen en instellen van de
Ballast Basic Micro via het
hoofdmenu
Alle instellingen kunt u voltooien met de Druk-enDraai-Knop (voortaan DDK).
Om het hoofdmenu te bereiken drukt u tijdens het
(opnieuw) opstarten van de Ballast Connect Micro en
het zien van het volgende scherm 5 seconden op de
DDK:
U komt in het hoofdmenu, dat bestaat uit de volgende
onderdelen:
• Set clock
• Timer mode
• Set timer
• Startup delay
• Hardware test
• Reset2factory
• Continue (hiermee komt u in het hoofdscherm)
Aan de linkerkant van het display verschijnt in het
desbetreffende menu een pijltje als u aan de DDK
draait. U bevestigt uw keuze/ingestelde waarde door de
DDK in te drukken.
Opmerking: Indien u een startup delay heeft ingesteld,
verschijnt bij het opnieuw opstarten van de Ballast Basic
Micro na de vertragingsperiode automatisch het
hoofdmenu. U hoeft hiervoor niet de DDK in te drukken
tijdens de opstartprocedure.
5.1 Instellen datum en tijd
Selecteer in het hoofdmenu “Set clock”.
Druk op de DDK.
BallastBasic
20181101a
Set clock
Timer mode
=> Set clock
Timer mode
Page 7

____________________________________________________________________________________________________________________________
TechGrow | Innovative Growing Solutions 7
Stel datum en tijd in. In het scherm verschijnt ok.
Draai aan de DDK om de gegevens te wijzigen of druk
op de DDK om te bevestigen. U keert terug naar het
hoofdmenu.
5.2 Selecteren van klokken (en timer)
U bent in het hoofdmenu. Selecteer “Timer mode” en
druk op de DDK.
Kiest u voor 24 hour, druk dan op de DDK.
Stel de gewenste schakeltijden in. Druk daarna op de
DDK om terug te keren naar het hoofdscherm.
LET OP: Na het opslaan van deze instellingen begint
de controller altijd met de “On”-periode.
In het hoofdscherm ziet u nu:
De schakeltijden worden weergegeven met + (on) en –
(off).
U kunt ook kiezen voor de asynchrone timer:
Bevestig door op de DDK te drukken en stel de
gewenste schakeltijden in (on for/off for).
Druk op de DDK om te bevestigen. U komt in het
hoofdscherm.
LET OP: Na het opslaan van deze instellingen begint
de controller altijd met de “On”-periode.
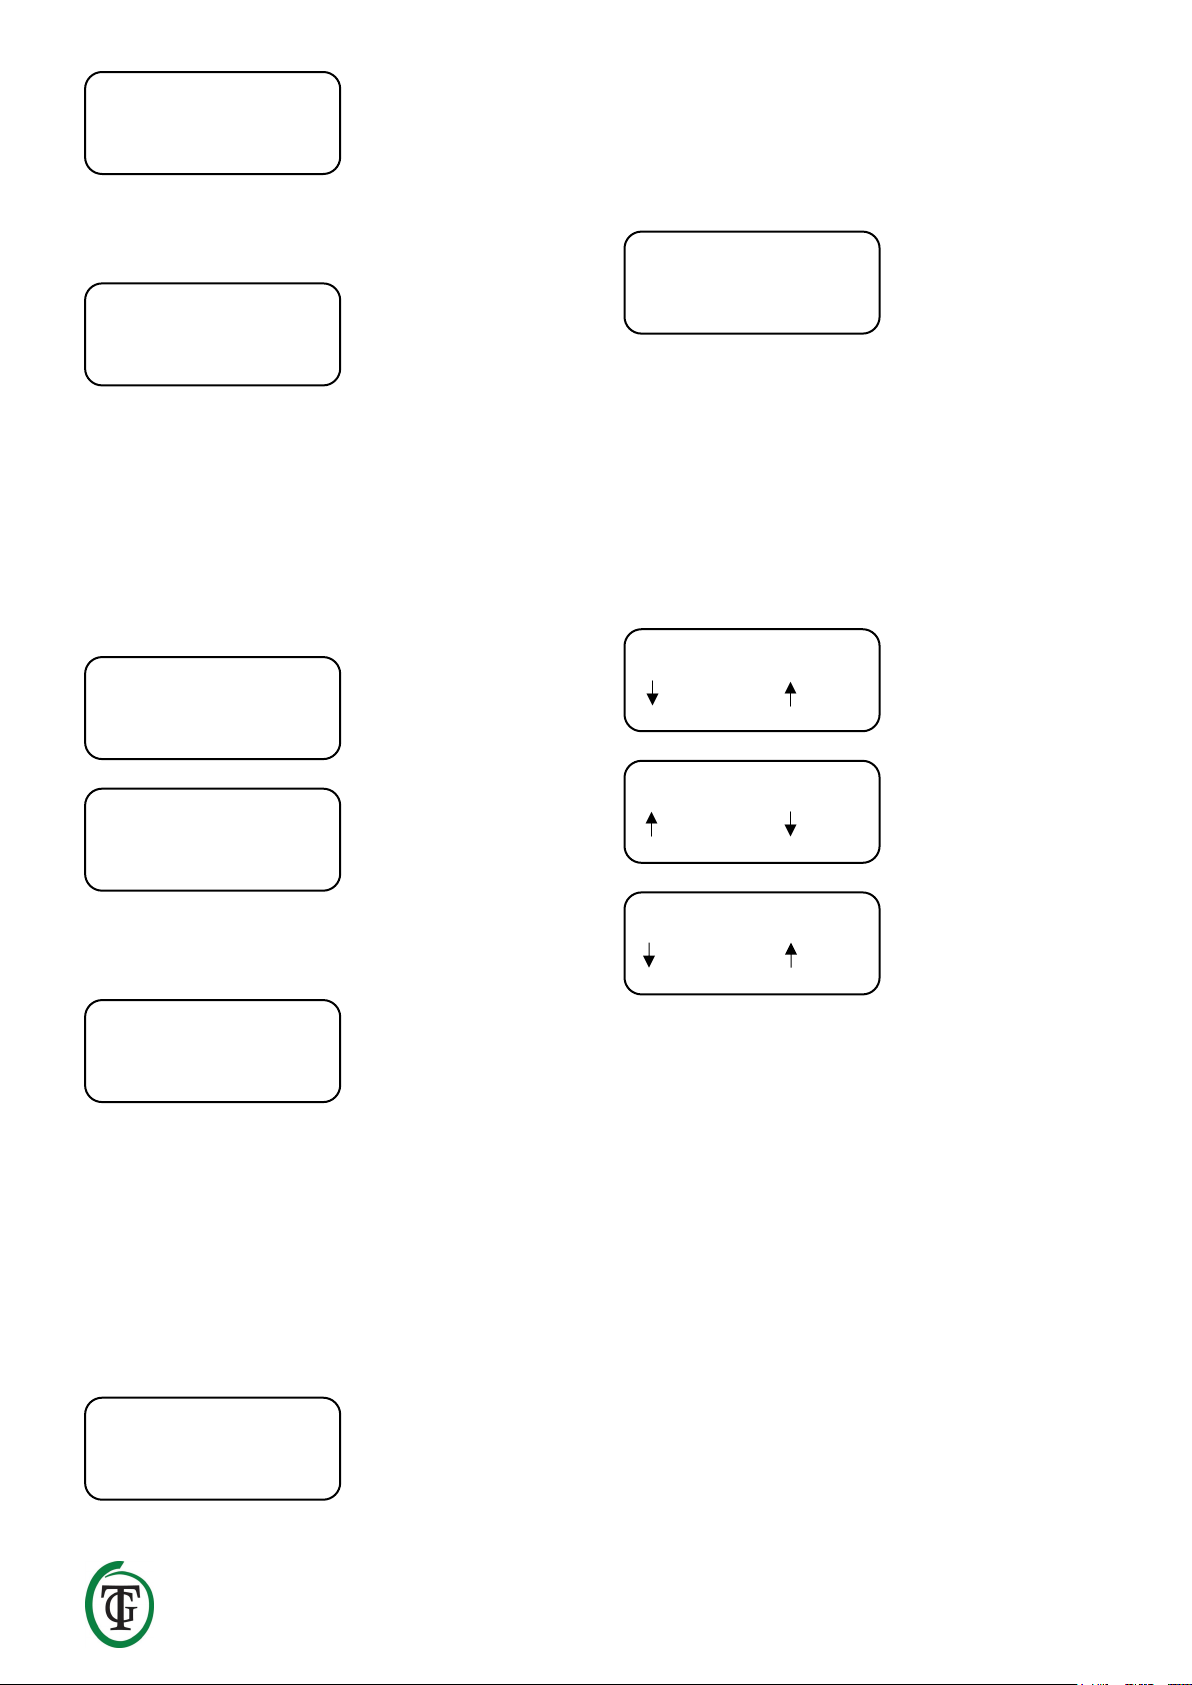
De cyclus duurt in voorgaand voorbeeld in totaal 10 uur
en 5 minuten: de relais gaan afwisselend 10 uur aan en
5 minuten uit.
De relays beginnen met de “on”-periode en gaan na 10
uur uit: om 12:30 uur. De relays zijn vijf minuten uit en
gaan weer aan om 12:35 uur. Dan zijn ze 10 uur aan
tot 22:35 uur, enzovoort.
5.3 Instellen timer
U bent in het hoofdmenu. (Herstart zo nodig de Ballast
Basic Micro om hier te komen.)
Selecteer “Set timer” en druk op de DDK.
24-uursmodus:
Date 01-01-20000
Time 00:00:00
Date 01-01-2019
Time 15:24:00 ok
Set clock
=> Timer mode
Set timer mode
24 hour
On at 00:00
Off at 00:00
24-03 19:56:33
- 05:00 + 18:30
Set timer mode
Asynchronous
24-03 02:30:24
12:30 12:35
24-03 12:31:15
12:35 22:35
24-03 12:35:01
22:35 22:40
Timer mode
=> Set timer
Page 8

____________________________________________________________________________________________________________________________
TechGrow | Innovative Growing Solutions 8
Asynchrone modus:
Afhankelijk van de ingestelde klok, ziet u On at/Off at
(24-uurs) of On for/Off for (asynchrone timer).
Stel de gewenste schakeltijden in. Druk op de DDK om
terug te keren naar het hoofdscherm.
5.4 Instellen opstartvertraging
U bent in het hoofdmenu. (Herstart zo nodig de Ballast
Basic Micro om hier te komen.)
Selecteer “Startup delay”.
Stel het aantal minuten in (tot 300 minuten) of selecteer
“Off” en druk op de DDK om te bevestigen.
U keert terug naar het hoofdscherm.
Alleen indien u een startup delay instelt (in dit voorbeeld
5 minuten), ziet u bij het opnieuw opstarten van de
Ballast Basic Micro het volgende scherm:
De Ballast Basic Micro telt 5 minuten af. Indien u deze
vertraging wilt overslaan, drukt u 5x op de DDK.
5.5 Hardwaretest
U bent in het hoofdmenu. (Herstart zo nodig de Ballast
Connect om hier te komen.)
Selecteer “Hardware test” om de hardware van de
Ballast Basic Micro te testen.
U keert automatisch terug naar het hoofdscherm.
5.6 Fabrieksinstellingen herstellen
U bent in het hoofdmenu. (Herstart zo nodig de Ballast
Connect om hier te komen.)
Selecteer “Reset2factory” en druk op de DDK om de
Balast Basic Micro terug te zetten naar de
fabrieksinstellingen.
U keert automatisch terug naar het hoofdscherm.
6. Snelmenu
Vanuit het hoofdscherm komt u in het snelmenu door
de DDK 5 seconden in te drukken.
Het snelmenu bestaat uit:
• Set clock
On at 00:00
Off at 00:00
On for 00:00
Off for 00:00
Set timer
=> Startup delay
Startup delay:
.. minutes
Startup delay
00:04:59
Push 5x to skip
00:04:59
Startup delay
=> Hardware test
00:00:01 # 0
Hardware test
=> Reset2factory
Resetting …
24-03 19:56:33
- 05:00 + 18:30
Page 9

____________________________________________________________________________________________________________________________
TechGrow | Innovative Growing Solutions 9
• Set timer
• Relays off
• << BACK << (hiermee keert u terug naar het
hoofdscherm)
6.1 Snel naar datum en tijd
Selecteer “Set clock” en druk op de DDK.
Stel datum en tijd in. In het scherm verschijnt ok.
Draai aan de DDK om de gegevens te wijzigen of druk
op de DDK om te bevestigen. U keert terug naar het
snelmenu.
6.2 Snel naar timer
Selecteer “Set timer” en druk op de DDK.
24-uursmodus:
Asynchrone modus:
Afhankelijk van de ingestelde klok, ziet u On at/Off at
(24-uurs) of On for/Off for (asynchrone timer).
Stel de gewenste schakeltijden in. Druk op de DDK om
terug te keren naar het hoofdscherm.
6.3 Uitschakelen van de relais (HANDMATIG)
Als u tussentijds de relais wilt uitschakelen, omdat u
een stekker wilt verwisselen, doorloopt u de volgende
stappen.
Selecteer “Relays off”. Druk op de DDK.
U ziet het volgende scherm:
De relais worden uitgeschakeld en de leds gaan uit. Als
beide relais uitgeschakeld zijn, is het veilig om de
stekkers te verwisselen.
Druk na het verwisselen 3x op de DDK om te relais weer
in te schakelen. Na het inschakelen van de relais keert u
automatisch terug naar het hoofdscherm.
=> Set clock
Set timer
Date 01-01-20000
Time 00:00:00
Date 01-01-2019
Time 15:24:00 ok
Set clock
=> Set timer
On at 00:00
Off at 00:00
On for 00:00
Off for 00:00
Set timer
=> Relays off
Maintenance mode
Push 3x to exit
Page 10

____________________________________________________________________________________________________________________________
TechGrow | Innovative Growing Solutions 10
_____________________________________________________________________________________________________________________
Thank you for purchasing the Ballast Basic Micro. This digitally controlled relay controller can switch 2 x 600W.
The Ballast Basic Micro has a digital timer, a clear display, and is easy to use.
Box contents
1. Ballast Basic Micro
2. Mounting kit
3. Manual
Features
• Switching capacity 2 x 600W
• Digital display
• Silent switching
• 2 digital clocks (24-hour/asynchronous)
• Adjustable switch-on delay up to 300 minutes
Technical specifications
• Power supply: 100V – 240V
• Mains frequency: 50Hz – 60Hz
• Consumption: 3W
• Switching capacity: 1200W/10A
• Switching capacity per outlet: maximum 4A
• Power cord: 3 x 1,5mm
Ballast Basic Micro
Digital relay controller
Page 11
____________________________________________________________________________________________________________________________
TechGrow | InnovativeGrowingSolutions 11
1. Installation of the Ballas Basic
Micro
1. Mount the Ballast Basic Micro on the wall using the
supplied mounting kit.
2. First put the plugs of the lamps in the outlets of the
Ballast Basic Micro.
3. After that, connect the plug of the Ballast Basic
Micro to a 230V outlet (minimum 10A).
4. Ready!
ATTENTION: If you change plugs when the relays are
on, the relays can be damaged. Therefore, switch off
the relays via the "maintenance mode" (see section
6.3) before connecting or removing the plugs of
lamps. The relays of the Ballast Basic Micro are not
covered by warranty.
2. Operation of the Ballast Basic
Micro
The Ballast Basic Micro is intended for the controlled
switching “on” and “off” of 2 lamps (2 x 600W).
2.1 Asynchronous timer
The Ballast Basic Micro has 2 different time clocks: a 24hour timer and an asynchronous timer. The
asynchronous timer allows you to extend or shorten the
24-hour cycle.
2.2 Switch-on delay
In the event of a power failure, the controller can delay
switch-on. You can select delay times up to 300 minutes.
3. Which sensors can be connected to
the Ballast Basic Micro?
You can not connect any sensors to the Ballast Basic
Micro.
4. Meaning LEDs
Light (2x): the red LED indicates that the relay is
switched on.
In the event of a malfunction, the LED
will be off and the outlet will be on.
In that case, contact the seller of the
Ballast Basic Micro.
5. Control and set the Ballast Basic
Micro via the Main Menu
You can complete all settings with the Push-and-Turn
Knob (from now on PTK).
Press the PTK for 5 seconds during the next startup
screen (reboot screen) to enter the main menu:
The main menu consists of the following items:
• Set clock
• Timer mode
• Set timer
• Startup delay
• Hardware test
• Reset2factory
• Continue (go to the main screen)
When you turn the PTK, an arrow appears on the left
side of the display. Confirm by pressing the PTK.
Note: If you have set a startup delay, the main menu will
automatically appear after the reboot of the Ballast Basic
Micro after the delay period. You do not have to press the
PTK during the startup procedure.
5.1 Set date and time
Select “Set clock” in the main menu.
Press the PTK.
Set date and time. “ok” is displayed in the screen.
BallastBasic
20181101a
Set clock
Timer mode
=> Set clock
Timer mode
Date 01-01-20000
Time 00:00:00
Page 12

____________________________________________________________________________________________________________________________
TechGrow | InnovativeGrowingSolutions 12
Turn the PTK to cancel and adjust or press the PTK to
confirm. You return to the main menu.
5.2 Clock/Timer selection
You are in the main menu. Select “Timer mode” and
press the PTK.
If you opt for 24 hour, press the PTK.
Set the desired switching times. Press the PTK to return
to the main screen.
ATTENTION: After saving these settings, the Ballast
Basic Micro always starts with the “On” period.
The main screen displays:
The switching times are displayed with + (on) and – (off).
You can also opt for the asynchronous timer:
Press the PTK to confirm. Set the desired switching times
(on for/off for).
Press the PTK to confirm. You enter the main screen.
ATTENTION: After saving these settings, the Ballast
Basic Micro always starts with the “On” period.
In the previous example the cycle lasts 10 hours and 5
minutes: the relays alternately go on for 10 hours and
off for 5 minutes.
The controller starts with the “on”-period. The relays will
be switched off after 10 hours, at 12:30. The relays will
be off for 5 minutes until 12:35. At 12:35 the relays will
be on for 10 hours again, until 22:35, and so on.
5.3 Set timer
You are in the main menu. (If necessary, reboot the
Ballast Basic Micro to get here.)
Select “Set timer” and press the PTK.
24-hour mode:
Asynchronous mode:
Date 01-01-2019
Time 15:24:00 ok
Set clock
=> Timer mode
Set timer mode
24 hour
On at 00:00
Off at 00:00
24-03 19:56:33
- 05:00 + 18:30
Set timer mode
Asynchronous
24-03 02:30:24
12:30 12:35
24-03 12:31:15
12:35 22:35
24-03 12:35:01
22:35 22:40
Timer mode
=> Set timer
On at 00:00
Off at 00:00
On for 00:00
Off for 00:00
Page 13

____________________________________________________________________________________________________________________________
TechGrow | InnovativeGrowingSolutions 13
Depending on the selected time clock the on/off times
are displayed with On at/Off (24-hour timer) or On
for/Off for (asynchronous timer). Set the desired
switching times.
5.4 Set startup delay
You are in the main menu. (If necessary, reboot the
Ballast Basic Micro to get here.)
Select “Startup delay”.
Set the amount of minutes (up to 300 minutes) or select
“Off”. Press the PTK to confirm.
You return to the main screen.
Only if you set a startup delay (in this example 5
minutes), you will see the following screen when
rebooting the Ballast Basic Micro:
The Ballast Basic Micro counts down to zero. If you want
to skip this 5-minute delay, press the PTK 5 times.
5.5 Hardware test
You are in the main menu. (If necessary, reboot the
Ballast Basic Micro to get here.)
Select “Hardware test” to test the hardware of the Ballast
Basic Micro.
When the test is completed, you automatically return to
the main screen.
5.6 Reset to factory defaults
You are in the main menu. (If necessary, reboot the
Ballast Basic Micro to get here.)
Select “Reset2factory” and press the PTK to reset all
settings to factory defaults.
You automatically return to the main screen.
6. Quick menu
When in the main screen, press the PTK for 5 seconds to
enter the Quick Menu.
The quick menu consists of the following items:
• Set clock
• Set timer
• Relays off
• << BACK << (back to the main screen)
6.1 Shortcut to date and time
Set timer
=> Startup delay
Startup delay:
.. minutes
Startup delay
00:04:59
Push 5x to skip
00:04:59
Startup delay
=> Hardware test
00:00:01 # 0
Hardware test
=> Reset2factory
Resetting …
24-03 19:56:33
- 05:00 + 18:30
=> Set clock
Set timer
Page 14

____________________________________________________________________________________________________________________________
TechGrow | InnovativeGrowingSolutions 14
Select “Set clock” and press the PTK.
Set date and time. “ok” is displayed in the screen..
Turn the PTK to cancel and adjust or press the PTK to
confirm. You return to the quick menu.
6.2 Shortcut to timer
Select “Set timer” and press the PTK.
24-hour mode:
Asynchronous mode:
Depending on the selected time clock the on/off times
are displayed with On at/Off (24-hour timer) or On
for/Off for (asynchronous timer).
Set the desired switching times. Press the PTK to return
to the main screen.
6.3 Switch of the relays (MANUALLY)
If you want to switch off all relays, because you want to
change plugs, go through the following steps:
Select “Relays off”. Press the PTK.
The next screen is displayed:
The relays will be switched off and the LEDs go off.
When both relays are off, it is safe to change the plugs.
After changing the plugs, press the PTK three times to
switch on the relays. You automatically return to the
main screen.
Date 01-01-20000
Time 00:00:00
Date 01-01-2019
Time 15:24:00 ok
Set clock
=> Set timer
On at 00:00
Off at 00:00
On for 00:00
Off for 00:00
Set timer
=> Relays off
Maintenance mode
Push 3x to exit
Page 15

____________________________________________________________________________________________________________________________
TechGrow | InnovativeGrowingSolutions 15
_____________________________________________________________________________________________________________________
Merci d’avoir acheté le Ballast Basic Micro. Ce contrôleur de relais à commande numérique peut commuter 2 x
600W. Le Ballast Basic Micro possède une minuterie numérique, un affichage clair et est facile à utiliser.
Contenu de la boîte
1. Ballast Basic Micro
2. Kit de montage
3. Manuel
Caractéristiques
• Capacité de commutation 2 x 600W
• Affichage numérique
• Silent Switching
• 2 horloges numériques (24 heures / asynchrone)
• Délai d'allumage réglable jusqu'à 300 minutes
Spécifications techniques
• Alimentation : 100V - 240V
• Fréquence principale : 50Hz - 60Hz
• Consommation : 3W
• Capacité de commutation : 1200W / 10A
• Capacité de commutation par sortie : maximum 4A
• Cordon d'alimentation : 3 x 1,5mm
Ballast Basic Micro
Contrôleur de relais
Page 16
____________________________________________________________________________________________________________________________
TechGrow | Innovative Growing Solutions 16
1. Installation du Ballast Basic Micro
1. Fixez le Ballast Basic Micro au mur à l’aide du kit de
montage fourni.
2. Placez d'abord les fiches des lampes dans les prises
du Ballast Basic Micro.
3. Ensuite, branchez la fiche du Ballast Basic Micro à
une prise 230V (minimum 10A).
4. Prêt !
ATTENTION : Si vous changez de fiche alors que les
relais sont activés, les relais peuvent être
endommagés. Par conséquent, désactivez les relais
via le « mode maintenance » (voir section 6.3) avant
de brancher ou de débrancher les fiches des lampes.
Les relais du Ballast Basic Micro ne sont pas couverts
par la garantie.
2. Fonctionnement du Ballast Basic
Micro
Le Ballast Basic Micro est conçu pour l’allumage et l’arrêt
contrôlés de 2 lampes (2 x 600W).
2.1 Minuterie asynchrone
Le Ballast Basic Micro dispose de 2 horloges différentes :
une minuterie de 24 heures et une minuterie
asynchrone. Le minuteur asynchrone vous permet de
prolonger ou de raccourcir le cycle de 24 heures.
2.2 Délai de mise en marche
En cas de panne de courant, le contrôleur peut retarder
la mise en marche. Vous pouvez sélectionner des délais
allant jusqu’à 300 minutes.
3. Quels capteurs peuvent être
connectés au Ballast Basic Micro ?
Vous ne pouvez connecter aucun capteur au Ballast
Basic Micro.
4. Signification des LED
Lumière (2x) : le voyant rouge indique que le relais est
activé.
En cas de dysfonctionnement, le
voyant sera éteint et la prise sera
allumée. Dans ce cas, contactez le
vendeur du Ballast Basic Micro.
5. Contrôlez et configurez le Ballast
Basic Micro via le menu principal
Vous pouvez effectuer tous les réglages avec le bouton
Push-and-Turn (à partir de maintenant sur PTK).
Appuyez sur le bouton PTK pendant 5 secondes lors de
l’écran de démarrage suivant (écran de redémarrage)
pour accéder au menu principal :
Le menu principal comprend les éléments suivants :
• Réglage de l'horloge
• mode minuterie
• Régler la minuterie
• Délai de démarrage
• test du matériel
• Reset2factory
• Continuer (aller à l'écran principal)
Lorsque vous tournez le PTK, une flèche apparaît à
gauche de l'écran. Confirmez en appuyant sur le PTK.
Remarque : Si vous avez défini un délai de démarrage, le
menu principal apparaîtra automatiquement après le
redémarrage du Ballast Basic Micro après la période de
délai. Il n'est pas nécessaire d'appuyer sur le PTK
pendant la procédure de démarrage.
5.1 régler la date et l'heure
Sélectionnez « Set clock » dans le menu principal.
Appuyez sur le PTK.
BallastBasic
v1.01
Set clock
Timer mode
=> Set clock
Timer mode
Date 01-01-20000
Time 00 :00 :00
Page 17

____________________________________________________________________________________________________________________________
TechGrow | Innovative Growing Solutions 17
Définir la date et l'heure. « Ok » est affiché à l'écran.
Tournez le PTK pour annuler et ajuster ou appuyez sur le
PTK pour confirmer. Vous revenez au menu principal.
5.2 Sélection horloge / minuterie
Vous êtes dans le menu principal. Sélectionnez « Mode
minuterie » et appuyez sur le PTK.
Si vous optez pour 24 heures, appuyez sur le PTK.
Définissez les heures de commutation souhaitées.
Appuyez sur le PTK pour revenir à l’écran principal.
ATTENTION : Après avoir enregistré ces paramètres,
le Ballast Basic Micro commence toujours par la
période « On ».
L'écran principal affiche :
Les heures de commutation sont affichées avec +
(activé) et - (désactivé).
Vous pouvez également opter pour le timer asynchrone
:
Appuyez sur le PTK pour confirmer. Définissez les heures
de commutation souhaitées (on / off).
Appuyez sur le PTK pour confirmer. Vous entrez dans
l'écran principal.
ATTENTION : Après avoir enregistré ces paramètres,
le Ballast Basic Micro commence toujours par la
période « On ».
Dans l'exemple précédent, le cycle dure 10 heures et 5
minutes : les relais fonctionnent alternativement
pendant 10 heures et s'éteignent pendant 5 minutes.
Le contrôleur démarre avec la période « marche ». Les
relais seront désactivés après 10 heures, à 12h30. Les
relais seront éteints pendant 5 minutes jusqu'à 12h35. À
12h35, les relais seront réactivés pendant 10 heures,
jusqu'à 22h35, et ainsi de suite.
5.3 Régler la minuterie
Vous êtes dans le menu principal. (Si nécessaire,
redémarrez le Ballast Basic Micro pour vous y rendre.)
Sélectionnez « Set timer » et appuyez sur le PTK.
Mode 24 heures :
Date 01-01-2019
Time 15 :24 :00 ok
Set clock
=> Timer mode
Set timer mode
24 hour
On at 00 :00
Off at 00 :00
24-03 19 :56
:33
- 05 :00 + 18
Set timer mode
Asynchronous
24-03 02 :30 :24
12 :30 12 :35
24-03 12 :31 :15
12 :35 22 :35
24-03 12 :35 :01
22 :35 22 :40
Timer mode
=> Set timer
Page 18
____________________________________________________________________________________________________________________________
TechGrow | Innovative Growing Solutions 18
Mode asynchrone :
En fonction de l'horloge sélectionnée, les heures
d'activation / désactivation sont affichées avec Activé /
désactivé (minuterie 24 heures) ou Activé / désactivé
pour (minuterie asynchrone). Définissez les heures de
commutation souhaitées.
5.4 Définir le délai de démarrage
Vous êtes dans le menu principal. (Si nécessaire,
redémarrez le Ballast Basic Micro pour vous y rendre.)
Sélectionnez « Délai de démarrage ».
Définissez le nombre de minutes (300 minutes
maximum) ou sélectionnez « Off ». Appuyez sur le PTK
pour confirmer.
Vous revenez à l'écran principal.
Si vous définissez un délai de démarrage (dans cet
exemple, 5 minutes), l'écran suivant s'affiche lors du
redémarrage de Ballast Basic Micro :
Le Ballast Basic Micro compte à zéro. Si vous souhaitez
ignorer ce délai de 5 minutes, appuyez 5 fois sur le PTK.
5.5 Test du matériel
Vous êtes dans le menu principal. (Si nécessaire,
redémarrez le Ballast Basic Micro pour vous y rendre.)
Sélectionnez « Test du matériel » pour tester le matériel
du Ballast Basic Micro.
Une fois le test terminé, vous revenez automatiquement
à l'écran principal.
5.6 Réinitialisation aux paramètres d'usine
Vous êtes dans le menu principal. (Si nécessaire,
redémarrez le Ballast Basic Micro pour vous y rendre.)
Sélectionnez « Reset2factory » et appuyez sur le PTK
pour rétablir tous les paramètres par défaut.
Vous revenez automatiquement à l'écran principal.
6. Menu rapide
On at 00 :00
Off at 00 :00
On for 00 :00
Off for 00 :00
Set timer
=> Startup delay
Startup delay :
. minutes
Startup delay
00 :04 :59
Push 5x to skip
00 :04 :59
Startup delay
=> Hardware test
00 :00 :01 # 0
Hardware test
=> Reset2factory
Resetting …
24-03 19 :56
:33
- 05 :00 + 18
Page 19

____________________________________________________________________________________________________________________________
TechGrow | Innovative Growing Solutions 19
Lorsque vous vous trouvez dans l’écran principal,
appuyez sur le PTK pendant 5 secondes pour accéder au
menu rapide.
Le menu rapide comprend les éléments suivants :
• Réglage de l'horloge
• Régler la minuterie
• Relais éteints
• << BACK << (retour à l'écran principal)
6.1 Date et heure abrégées
Sélectionnez « Set clock » et appuyez sur le PTK.
Définir la date et l'heure. « Ok » est affiché à l'écran.
Tournez le PTK pour annuler et ajuster ou appuyez sur le
PTK pour confirmer. Vous revenez au menu rapide.
6.2 Raccourci au minuteur
Sélectionnez « Set timer » et appuyez sur le PTK.
Mode 24 heures :
Mode asynchrone :
En fonction de l'horloge sélectionnée, les heures
d'activation / désactivation sont affichées avec Activé /
désactivé (minuterie de 24 heures) ou Activé / désactivé
pour (minuterie asynchrone).
Définissez les heures de commutation souhaitées.
Appuyez sur le PTK pour revenir à l’écran principal.
6.3 Commutation des relais (MANUELLEMENT)
Si vous souhaitez éteindre tous les relais et changer de
fiche, procédez comme suit :
Sélectionnez « Relais désactivés ». Appuyez sur le PTK.
L'écran suivant est affiché :
Les relais seront désactivés et les voyants s'éteignent.
Lorsque les deux relais sont éteints, vous pouvez
changer les fiches en toute sécurité.
Après avoir changé les connecteurs, appuyez trois fois
sur le PTK pour activer les relais. Vous retournez
automatiquement à l'écran principal.
=> Set clock
Set timer
Date 01-01-20000
Time 00 :00 :00
Date 01-01-2019
Time 15 :24 :00 ok
Set clock
=> Set timer
On at 00 :00
Off at 00 :00
On for 00 :00
Off for 00 :00
Set timer
=>Relays off
Maintenance mode
Push 3x to exit
Page 20

____________________________________________________________________________________________________________________________
TechGrow | Innovative Growing Solutions 20
_____________________________________________________________________________________________________________________
Le agradecemos por haber comprado el Ballast Basic Micro. Este relé controlado digitalmente puede cambiar
2 x 600W. El Ballast Basic Micro tiene un temporizador digital, una pantalla y es muy fácil de usar.
Contenido de la Caja
1. Ballast Basic Micro
2. Kit de montaje
3. Manual
Características
• Capacidad de cambio 2 x 600W
• Pantalla digital
• Cambio silencioso
• 2 temporizadores digitales (24-horas/asíncrono)
• Interruptor ajustable de retraso hasta por 300 minutos
Especificaciones Técnicas
• Fuente de poder: 100V – 240V
• Frecuencia principal: 50Hz – 60Hz
• Consumo: 3W
• Capacidad de cambio: 1200W/10A
• Capacidad de cambio por salida: máximo 4A
• Cable de poder: 3 x 1,5mm
Ballast Basic Micro
Controlador de relé
Page 21

____________________________________________________________________________________________________________________________
TechGrow | Innovative Growing Solutions 21
1. Instalación del Ballast Basic Micro
1. Monte el Ballast Basic Micro a la pared utilizando el
kit de montaje incluido.
2. Primero ponla los enchufes en las lámparas en las
salidas del Ballast Basic Micro.
3. Después de eso, conecte el enchufe del Ballast
Basic Micro a una salida de 230V (mínimo 10A).
4. ¡Listo!
ATENCIÓN: Si usted cambia los enchufes cuando se
encuentra prendido el relé, el relé puede resultar
dañado. Por lo tanto, siempre apague el relé usando
el “modo de mantenimiento” 8vea sección 6.3) antes
de conectar o desconectar los enchufes de las
lámparas. Los relés del Ballast Basic Micro no están
cubiertos por la garantía.
2. Operación del Ballast Basic Micro
La función del Ballast Basic Micro es la de controlar el
prendido y apagado de 2 lamparas (2 x 600W).
2.1 Temporizador asíncrono
El Ballast Basic Micro tiene 2 temporizadores distintos:
uno de 24 horas y un temporizador asíncrono. El
temporizador asíncrono le permite extender o acortar el
ciclo de 24 horas.
2.2 Retraso del prendido
En caso de que haya un apagón, el controlador puede
retrasar el prendido. Usted puede seleccionar un retraso
de hasta 300 minutos.
3. ¿Qué sensores pueden ser
conectados al Ballast Basic Micro?
Usted no podrá conectar sensores al Ballast Basic Micro.
4. Significado de los LEDs
Luz (2x): La luz LED de color rojo, indica que el
relé está prendido
En caso de un fallo, el LED estará
apagado y el enchufe seguirá
prendido. En ese caso, póngase en
contacto con el vendedor del Ballast
Basic Micro.
5. Control y configuración del Ballast
Basic Micro a través del menú
principal
Usted puede completar todas las opciones con la perilla
rotatoria (a la que llamaremos PTK de ahora en
adelante).
Presione el PTK por 5 segundos durante la siguiente
pantalla de inicio (pantalla de reinicio) para ingresar al
siguiente menú:
El menú principal contiene las siguientes opciones:
• Establecer la hora
• Modo del temporizador
• Configurar el temporizador
• Retraso del prendido
• Prueba del hardware
• Reestablecer la configuración de fábrica
• Continuar (ir a la pantalla de menú principal)
Cuando usted gire el PTK, aparecerá una flecha en la
parte izquierda de la pantalla. Confirme presionando el
PTK.
Nota: Si usted estableció un retraso del prendido, el menú
principal aparecerá automáticamente después del reinicio
del Ballast Basic Micro después del periodo de retraso. No
tiene que presionar el PTK durante el procedimiento de
inicio
5.1 Estableciendo fecha y hora
Seleccione “Set clock” en el menú principal
Presione el PTK.
BallastBasic
v1.01
Set clock
Timer mode
=> Set clock
Timer mode
Page 22

____________________________________________________________________________________________________________________________
TechGrow | Innovative Growing Solutions 22
Establezca la fecha y hora. Aparecerá un “ok” en la
pantalla
Gire el PTK para cancelar y ajustar o presione el PTK para
confirmar. Usted regresará al menú principal.
5.2 Selección del Reloj/Temporizador
Usted se encontrará en el menú principal. Seleccione
“Timer mode” y presione el PTK.
Si elige usar el modo de 24 horas, presione el PTK.
Establezca los horarios deseados de activación. Presione
el PTK para regresar al menú principal.
ATENCIÓN: Después de guardar las opciones, el
Ballast Basic Micro siempre comenzará con el
periodo “On”.
La pantalla principal mostrará:
Los tiempos de activación aparecerán con un + (on) y –
(off).
O también puede elegir el temporizador asíncrono:
Presione el PTK para confirmar. Establezca los tiempos
de activación deseados (on for/off for).
Presione el PTK para confirmar. Usted regresará al menú
principal.
ATENCIÓN: Después de guardar estas opciones, el
Ballast Basic Micro siempre comenzará con el
periodo “On”.
En el ejemplo anterior el ciclo dura 10 horas y 5 minutos:
los relés de forma alternada se prenderán por 10 horas y
se apagarán por 5 minutos.
El controlador empieza con el periodo de “on”. El relé se
apagará después de 10 horas a las 12:30. Los relés se
apagarán por 5 minutos hasta que den las 12:35. A las
12:35 los relés se mantendrán prendidos por 10 horas
de nuevo, hasta las 22:35.
5.3 Estableciendo el temporizador
Usted debe estar en el menú principal. (Si es necesario,
reinicie el Ballast Basic Micro para llegar aquí)
Seleccione “Set timer” y presione el PTK.
Modo de 24-horas:
Date 01-01-20000
Time 00:00:00
Date 01-01-2019
Time 15:24:00 ok
Set clock
=> Timer mode
Set timer mode
24 hour
On at 00:00
Off at 00:00
24-03 19:56:33
- 05:00 + 18:30
Set timer mode
Asynchronous
24-03 02:30:24
12:30 12:35
24-03 12:31:15
12:35 22:35
24-03 12:35:01
22:35 22:40
Timer mode
=> Set timer
Page 23

____________________________________________________________________________________________________________________________
TechGrow | Innovative Growing Solutions 23
Modo asíncrono:
Dependiendo del temporizador seleccionado los
tiempos de prendido y apagado serán mostrado en
modo de 24 horas o en modo asíncrono. Elija los
tiempos de activación deseados.
5.4 Establezca el retraso del prendido
Usted debe estar en el menú principal. (Si es necesario,
reinicie el Ballast Basic Micro para llegar aquí)
Seleccione “Startup delay”.
Establezca la cantidad de minutos (hasta 300 minutos) o
seleccione “Off”. Presione el PTK para confirmar.
Usted regresará al menú principal.
Sólo si usted establece un retraso en el prendido (en este
ejemplo son 5 minutos), usted verá la siguiente pantalla
al reiniciar el Ballast Basic Micro:
El Ballast Basic Micro contará hasta cero. Si quiere
saltarse este retraso de 5 minutos, presione el PTK 5
veces.
5.5 Prueba de hardware
Usted debe estar en el menú principal. (Si es necesario,
reinicie el Ballast Basic Micro para llegar aquí).
Seleccione “Hardware test” para poner a prueba el
hardware del Ballast Basic Micro.
Cuando se complete la prueba, usted regresará
automáticamente al menú principal.
5.6 Reestablecer la configuración de fábrica
Usted debe estar en el menú principal. (Si es necesario,
reinicie el Ballast Basic Micro para llegar aquí)
Seleccione “Reset2factory” y presione el PTK para
reestablecer la configuración por defecto de fábrica.
Usted regresará automáticamente al menú principal.
6. Menú rápido
On at 00:00
Off at 00:00
On for 00:00
Off for 00:00
Set timer
=> Startup delay
Startup delay:
.. minutes
Startup delay
00:04:59
Push 5x to skip
00:04:59
Startup delay
=> Hardware test
00:00:01 # 0
Hardware test
=> Reset2factory
Resetting …
24-03 19:56:33
- 05:00 + 18:30
Page 24

____________________________________________________________________________________________________________________________
TechGrow | Innovative Growing Solutions 24
Cuando se encuentre en el menú principal, presione el
PTK por 5 segundos para entrar al Menú Rápido.
El menú rápido contiene las siguientes opciones:
• Configurar reloj
• Configurar temporizador
• Relés apagados
• << BACK << (regresar al menú principal)
6.1 Atajos para la fecha y hora
Seleccione “Set clock” y presione el PTK.
Establezca la fecha y hora. Aparecerá un “ok” en la
pantalla.
Gire el PTK para cancelar y ajustar o presione el PTK para
confirmar. Usted regresará al menú rápido.
6.2 Atajo al temporizador
Seleccione “Set timer” y presione el PTK.
Modo de 24-horas:
Modo asíncrono:
Dependiendo del temporizador seleccionado los
tiempos de prendido y apagados serán plasmados con
un reloj de 24 horas o un temporizador asíncrono.
Establezca los tiempos de activación deseados. Presione
el PTK para regresar a la pantalla principal
6.3 Activando los relés (MANUALMENTE)
Si quiere apagar los relés, porque quiere cambiar los
enchufes, siga estos pasos:
Seleccione “Relays off”. Presione el PTK.
Aparecerá la siguiente pantalla
Los relés se apagarán como también los LEDs. Cuando
los dos relés se apaguen, es seguro cambiar los
enchufes.
Después de cambiar los enchufes, presione el PTK tres
veces para prender los relés. Automáticamente regresará
a la pantalla principal.
=> Set clock
Set timer
Date 01-01-20000
Time 00:00:00
Date 01-01-2019
Time 15:24:00 ok
Set clock
=> Set timer
On at 00:00
Off at 00:00
On for 00:00
Off for 00:00
Set timer
=> Relays off
Maintenance mode
Push 3x to exit
Page 25

____________________________________________________________________________________________________________________________
TechGrow | Innovative Growing Solutions 25
_____________________________________________________________________________________________________________________
Vielen Dank, dass Sie sich für das Ballast Basic Micro entschieden haben. Diese digital gesteuerte
Relaissteuerung kann 2 x 600W schalten. Das Ballast Basic Micro verfügt über einen digitalen Timer, eine
übersichtliche Anzeige und ist einfach zu bedienen.
Inhalt der Box
1. Ballast Basic Micro
2. Befestigungssatz
3. Handbuch
Funktionen
• Schaltleistung 2 x 600W
• Digitalanzeige
• Geräuschloses Schalten
• 2 Digitaluhren (24 Stunden/asynchron)
• Einstellbare Einschaltverzögerung bis zu 300 Minuten
Technische Daten
• Stromversorgung: 100V - 240V - 240V
• Netzfrequenz: 50Hz - 60Hz
• Verbrauch: 3W
• Schaltleistung: 1200W/10A
• Schaltleistung pro Ausgang: maximal 4A
• Netzkabel: 3 x 1,5mm x 1,5mm
Ballast Basic Micro
Relaissteuerung
Page 26

____________________________________________________________________________________________________________________________
TechGrow | Innovative Growing Solutions 26
1. Installation des Ballast Basic Micro
1. Montieren Sie das Ballast Basic Micro mit dem
mitgelieferten Befestigungssatz an der Wand.
2. Stecken Sie zunächst die Stecker der Lampen in die
Steckdosen des Ballast Basic Micro.
3. Schließen Sie anschließend den Stecker des Ballast
Basic Micro an eine 230V-Steckdose an (mindestens
10A).
4. Bereit!
ACHTUNG: Wenn Sie die Stecker wechseln, während
die Relais eingeschaltet sind, können die Relais
beschädigt werden. Schalten Sie daher die Relais
über den "Wartungsmodus" (siehe Abschnitt 6.3)
aus, bevor Sie die Stecker der Lampen anschließen
oder entfernen. Die Relais des Ballast Basic Micro
sind nicht von der Garantie abgedeckt.
2. Bedienung des Ballast Basic Micro
Der Ballast Basic Micro ist für das kontrollierte Ein- und
Ausschalten von 2 Lampen (2 x 600W) vorgesehen.
2.1 Asynchroner Timer
Der Ballast Basic Micro verfügt über 2 verschiedene
Zeitmesser: einen 24-Stunden-Timer und einen
asynchronen Timer. Mit dem asynchronen Timer
können Sie den 24-Stunden-Zyklus verlängern oder
verkürzen.
2.2 Einschaltverzögerung
Im Falle eines Stromausfalls kann die Steuerung das
Einschalten verzögern. Sie können Verzögerungszeiten
bis zu 300 Minuten wählen.
3. Welche Sensoren können an den
Ballast Basic Micro angeschlossen
werden?
Sie können keine Sensoren an das Ballast Basic Micro
anschließen.
4. Bedeutung der LEDs
Licht (2x): die rote LED zeigt an, dass das Relais
eingeschaltet ist.
Im Falle einer Fehlfunktion ist die
LED aus und der Ausgang
eingeschaltet. Wenden Sie sich in
diesem Fall an den Verkäufer des
Ballast Basic Micro.
5. Steuern und Einstellen des Ballast
Basic Micro über das Hauptmenü
Mit dem Druck- und Drehknopf können Sie alle
Einstellungen vornehmen (ab sofort PTK).
Drücken Sie den PTK während des nächsten
Startbildschirms (Neustartbildschirm) 5 Sekunden lang,
um in das Hauptmenü zu gelangen.:
Das Hauptmenü besteht aus folgenden Punkten:
• Uhr einstellen
• Timer-Modus
• Timer einstellen
• Anlaufverzögerung
• Hardware-Test
• Reset2factory
• Weiter (zum Hauptbildschirm gehen)
Wenn Sie den PTK drehen, erscheint auf der linken Seite
der Anzeige ein Pfeil. Bestätigen Sie dies durch Drücken
der PTK-Taste.
Hinweis: Wenn Sie eine Startverzögerung eingestellt
haben, erscheint das Hauptmenü automatisch nach dem
Neustart des Ballast Basic Micro nach der
Verzögerungszeit. Während der Inbetriebnahme müssen
Sie den PTK nicht drücken.
5.1 Datum und Uhrzeit einstellen
Wählen Sie im Hauptmenü " Set clock ".
Drücken Sie die PTK-Taste.
BallastBasic
v1.01
Set clock
Timer mode
=> Set clock
Timer mode
Page 27
____________________________________________________________________________________________________________________________
TechGrow | Innovative Growing Solutions 27
Datum und Uhrzeit einstellen. "ok" wird auf dem
Bildschirm angezeigt.
Drehen Sie den PTK, um abzubrechen und einzustellen,
oder drücken Sie den PTK, um zu bestätigen. Sie
gelangen zurück zum Hauptmenü.
5.2 Auswahl von Uhr/Timer
Sie befinden sich im Hauptmenü. Wählen Sie "Timer
Mode" und drücken Sie die PTK-Taste.
Wenn Sie sich für 24 Stunden entscheiden, drücken Sie
die PTK-Taste.
Stellen Sie die gewünschten Schaltzeiten ein. Drücken
Sie die PTK-Taste, um zum Hauptbildschirm
zurückzukehren.
ACHTUNG: Nach dem Speichern dieser
Einstellungen beginnt der Ballast Basic Micro immer
mit der Periode "Ein".
Das Hauptbild zeigt:
Die Schaltzeiten werden mit + (ein) und - (aus)
angezeigt.
Sie können sich auch für den asynchronen Timer
entscheiden:
Drücken Sie zur Bestätigung die PTK-Taste. Stellen Sie
die gewünschten Schaltzeiten ein (ein für/aus für).
Drücken Sie zur Bestätigung die PTK-Taste. Sie
gelangen auf das Hauptbild.
ACHTUNG: Nach dem Speichern dieser
Einstellungen beginnt der Ballast Basic Micro immer
mit der "Ein"-Phase.
Im vorherigen Beispiel dauert der Zyklus 10 Stunden
und 5 Minuten: Die Relais gehen abwechselnd 10
Stunden lang an und 5 Minuten lang aus.
Die Steuerung beginnt mit der "on"-Periode. Die Relais
werden nach 10 Stunden, um 12:30 Uhr, ausgeschaltet.
Die Relais sind 5 Minuten lang bis 12:35 Uhr
ausgeschaltet. Um 12:35 Uhr werden die Relais wieder
für 10 Stunden eingeschaltet, bis 22:35 Uhr, und so
weiter.
5.3 Timer einstellen
Sie befinden sich im Hauptmenü. (Falls erforderlich,
starten Sie das Ballast Basic Micro neu, um hierher zu
gelangen.)
Wählen Sie "Timer einstellen" und drücken Sie die PTKTaste.
Date 01-01-20000
Time 00:00:00
Date 01-01-2019
Time 15:24:00 ok
Set clock
=> Timer mode
Set timer mode
24 hour
On at 00:00
Off at 00:00
24-03 19:56:33
- 05:00 + 18:30
Set timer mode
Asynchronous
24-03 02:30:24
12:30 12:35
24-03 12:31:15
12:35 22:35
24-03 12:35:01
22:35 22:40
Page 28

____________________________________________________________________________________________________________________________
TechGrow | Innovative Growing Solutions 28
24-Stunden Modus:
Asynchroner Modus:
Abhängig von der gewählten Zeitschaltuhr werden die
Ein-/Ausschaltzeiten mit On at/Off (24-Stunden-Timer)
oder On for/Off for (asynchroner Timer) angezeigt.
Stellen Sie die gewünschten Schaltzeiten ein.
5.4 Einschaltverzögerung einstellen
Sie befinden sich im Hauptmenü. (Falls erforderlich,
starten Sie das Ballast Basic Micro neu, um hierher zu
gelangen.)
Wählen Sie "Anlaufverzögerung".
Stellen Sie die Anzahl der Minuten (bis zu 300 Minuten)
ein oder wählen Sie "Aus". Drücken Sie zur Bestätigung
die PTK-Taste.
Sie gelangen zurück zum Hauptbildschirm.
Nur wenn Sie eine Startverzögerung einstellen (in diesem
Beispiel 5 Minuten), sehen Sie beim Neustart des Ballast
Basic Micro den folgenden Bildschirm:
Das Ballast Basic Micro zählt bis auf Null. Wenn Sie diese
5-minütige Verzögerung überspringen möchten, drücken
Sie die PTK 5-mal.
5.5 Hardware-Test
Sie befinden sich im Hauptmenü. (Falls erforderlich,
starten Sie das Ballast Basic Micro neu, um hierher zu
gelangen.)
Wählen Sie "Hardwaretest", um die Hardware des
Ballast Basic Micro zu testen.
Wenn der Test abgeschlossen ist, kehren Sie
automatisch zum Hauptbildschirm zurück.
5.6 Zurücksetzen auf die Werkseinstellungen
Sie befinden sich im Hauptmenü. (Falls erforderlich,
starten Sie das Ballast Basic Micro neu, um hierher zu
gelangen.)
Wählen Sie "Reset2factory" und drücken Sie die PTKTaste, um alle Einstellungen auf die Werkseinstellungen
zurückzusetzen.
Timer mode
=> Set timer
On at 00:00
Off at 00:00
On for 00:00
Off for 00:00
Set timer
=> Startup delay
Startup delay:
.. minutes
Startup delay
00:04:59
Push 5x to skip
00:04:59
Startup delay
=> Hardware test
00:00:01 # 0
Hardware test
=> Reset2factory
Page 29
____________________________________________________________________________________________________________________________
TechGrow | Innovative Growing Solutions 29
Sie kehren automatisch zum Hauptbildschirm zurück.
6. Schnellmenü
Wenn Sie sich im Hauptbildschirm befinden, drücken
Sie die PTK 5 Sekunden lang, um in das Schnellmenü zu
gelangen.
Das Schnellmenü besteht aus den folgenden Punkten:
• Uhr einstellen
• Timer einstellen
• Relais aus
• <<< Zurück <<< (zurück zum Hauptbildschirm)
6.1 Tastenkombination zu Datum und Uhrzeit
Wählen Sie "Uhr stellen" und drücken Sie die PTK-Taste.
Datum und Uhrzeit einstellen. "ok" wird auf dem
Bildschirm angezeigt.
Drehen Sie den PTK, um abzubrechen und einzustellen,
oder drücken Sie den PTK, um zu bestätigen. Sie
gelangen zurück zum Schnellmenü.
6.2 Tastenkombination zum Timer
Wählen Sie "Timer einstellen" und drücken Sie die PTKTaste.
24-Stunden-Modus:
Asynchroner Modus:
Abhängig von der gewählten Zeitschaltuhr werden die
Ein-/Ausschaltzeiten mit On at/Off (24-Stunden-Timer)
oder On for/Off for (asynchroner Timer) angezeigt.
Stellen Sie die gewünschten Schaltzeiten ein. Drücken
Sie die PTK-Taste, um zum Hauptbildschirm
zurückzukehren.
6.3 Schalten der Relais (MANUELL)
Wenn Sie alle Relais ausschalten möchten, weil Sie den
Stecker wechseln wollen, gehen Sie wie folgt vor:
Wählen Sie "Relais aus". Drücken Sie die PTK-Taste.
Der nächste Bildschirm wird angezeigt:
Die Relais werden ausgeschaltet und die LEDs
erlöschen. Wenn beide Relais ausgeschaltet sind, ist es
sicher, die Stecker zu wechseln.
Nach dem Austausch der Stecker drücken Sie den PTK
dreimal, um die Relais einzuschalten. Sie kehren
automatisch zum Hauptbildschirm zurück.
Resetting …
24-03 19:56:33
- 05:00 + 18:30
=> Set clock
Set timer
Date 01-01-20000
Time 00:00:00
Date 01-01-2019
Time 15:24:00 ok
Set clock
=> Set timer
On at 00:00
Off at 00:00
On for 00:00
Off for 00:00
Set timer
=> Relays off
Maintenance mode
Push 3x to exit
 Loading...