

Page 1
Owner's Manual
WARNINGS
•Attempting to repair this unit is not recommended and may void its warranty.
•Missing or altered serial numbers automatically void the warranty. For your own
protection, be sure the serial number labels on the unit and exterior box are intact.
ONE-YEAR LIMITED WARRANTY
Manufacturer warrants unit to be free from defects in materials and workmanship for
a period of one (1) year from the date of purchase. This warranty does not include
damage resulting from accident, misuse, abuse, alteration, or incorrect current or
voltage. If unit becomes defective within warranty period, Tech 21, Inc. will elect to
repair or replace it free of charge. After warranty period expires, manufacturer will
repair defective unit for a fee.
PROOF OF PURCHASE IS REQUIRED FOR ANY REPAIR
For residents of the U.S. and Canada, please call Tech 21’s main headquarters for
shipping instructions and a Return Authorization Number. Tech 21 will not accept
packages without prior authorization, pre-paid freight (UPS preferred), and proper
insurance.
FOR PERSONAL ASSISTANCE & INQUIRIES
Contact Tech 21, Inc., weekdays from 10:00 AM to 5:00 PM, Eastern Standard Time.
DESIGNED AND MANUFACTURED IN THE U.S.A.
333 West 52nd Street, New York, NY 10019
Tel: 212-315-1116 / Fax: 212-315-0825
E-Mail: info@tech 21nyc.com
Website: www.tech21nyc.com
© 1999 Tech 21, Inc.
Fill in the following information for future reference:
Serial Number______________________________________
Dealer’s Name _____________________________________
Dealer’s Address ___________________________________
Date of Purchase ___________________________________
Page 2

Tech 21, the Company
Tech 21, Inc., was formed by a guitarist possessing the unusual combination
of a trained ear and electronics expertise. In 1989, B. Andrew Barta incorporated Tech 21 and made his invention commercially available to players and
studios around the world.
SansAmp™
pioneered Tube Amplifier Emulation in
professional applications for recording direct and performing live, and created an entirely new category of signal processing. While there have since
been many entries into this niche, SansAmp continues to maintain its
reputation as the industry standard.
After developing a variety of SansAmp models, Tech 21 expanded its offerings to include effect pedals; a compact, battery operable MIDI footcontroller, the
MIDI Mouse
;
as well as “traditional” style amplifiers for guitar and
bass. Each product is thoughtfully and respectfully designed with the player
in mind. Our goal is to provide you with flexible, versatile tools to cultivate,
control, refine and redefine your own individual sound. Tech 21 takes great
pride in delivering consistent professional quality sound, studio to studio,
club to club, arena to arena.
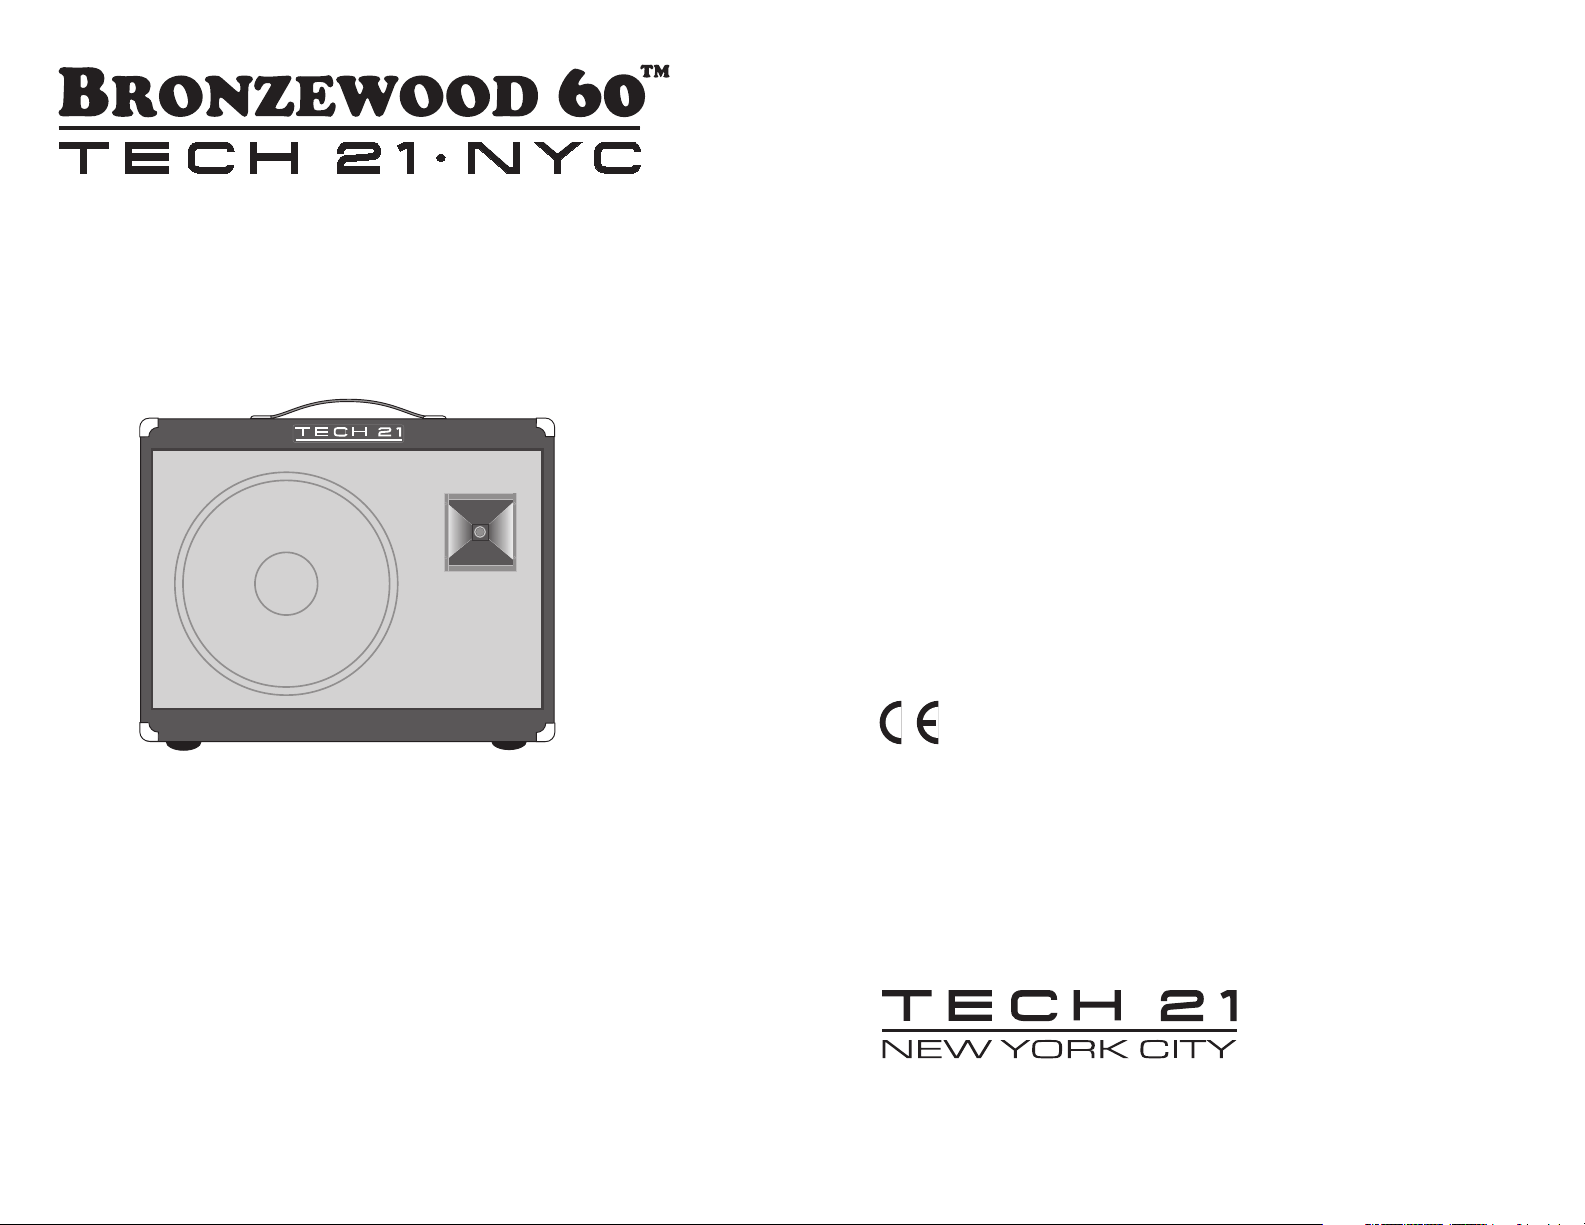
Bronzewood 60, an Overview
Tech 21’s proprietary, 100% analog circuitry has been adapted from its
SansAmp configuration into a dual-channel, 60-watt combo amp format
specifically for the acoustic player. Our exclusive technology removes the
harsh harmonics associated with piezo pickups and delivers a natural
warmth and presence for which Tech 21 is known.
Compact and lightweight, the Bronzewood 60 is loaded with exceptionally
extensive features, including a compressor and a top-of-the-line full-length,
Accutronics™ 3-spring reverb. The distinctive brown crocodile embossed
vinyl covered cabinet is complemented by a custom grill covering and
decorative piping detail.
For live and studio applications, our highly-acclaimed SansAmp Tube/
Microphone Emulation technology enables you to go straight into the mixer
of a PA system or recording console via the XLR direct output.
With the Bronzewood 60, you get a lot of sound in an affordable, costeffective
38 lb.
package.
IMPORTANT SAFETY INSTRUCTIONS
The Bronzewood 60 is powered by potentially hazardous voltage. Therefore, observe
the following safety precautions:
WARNING: To avoid the risk of fire, electric shock or injury, do not expose this unit
to moisture. Do not remove the chassis from its cabinet, or remove metal covering
from chassis parts. Removing the chassis from its cabinet exposes extremely dangerous high voltages. There are no user-serviceable parts inside. Hazardous voltages
are present inside the chassis. Refer all servicing to qualified personnel.
CAUTION: Never modify the power cord. If the original power cord becomes damaged, refer your amplifier for servicing.
WARNING: Attempting to repair this unit is not recommended and may void its
warranty. NOTE: In the U.S. and Canada, servicing is performed at factory only. In
other countries, please refer repairs to the local Tech 21 authorized distributor.
ADDITIONAL PRECAUTIONS:
1. Do not allow liquids or objects to penetrate unit.
2. When in use, provide proper ventilation at top and back of unit.
3. During heavy use, chassis may get hot to the touch. Handle with care.
4. Protect unit from strong impact.
5. Do not locate near heat.
6. This unit must be earth grounded.
QUICK START INSTRUCTIONS
Here’s how you can get your Bronzewood 60 up and running before you read the
entire manual. Note: By not reading the manual, you’ll miss out on how to get the
most out of your new investment!
1. Plug your instrument into the top-panel Guitar input jack (on the left side).
2. Plug the AC cord into a wall socket.
3. Turn on the Bronzewood 60.
4. Use the Start-Up Sample Setting on page 11.
5. Play your guitar and you should hear a sound coming through the amp. If not, check
that your guitar’s volume control is turned up, recheck your connections, and be sure
your cable isn’t faulty. If there is still no sound, refer to factory or qualified technician.
2
1
Page 3
TOP PANEL
The Bronzewood 60 is designed with
active
tone controls, which cut and boost,
rather than traditional passive controls which only cut. This gives you greater control
over a larger range of adjustability. As you experiment and become familiar with the
controls’ interrelationships, you’ll easily be able to dial up the best sounds for you.
It should be noted that you need not necessarily set everything at max to
obtain maximum results.
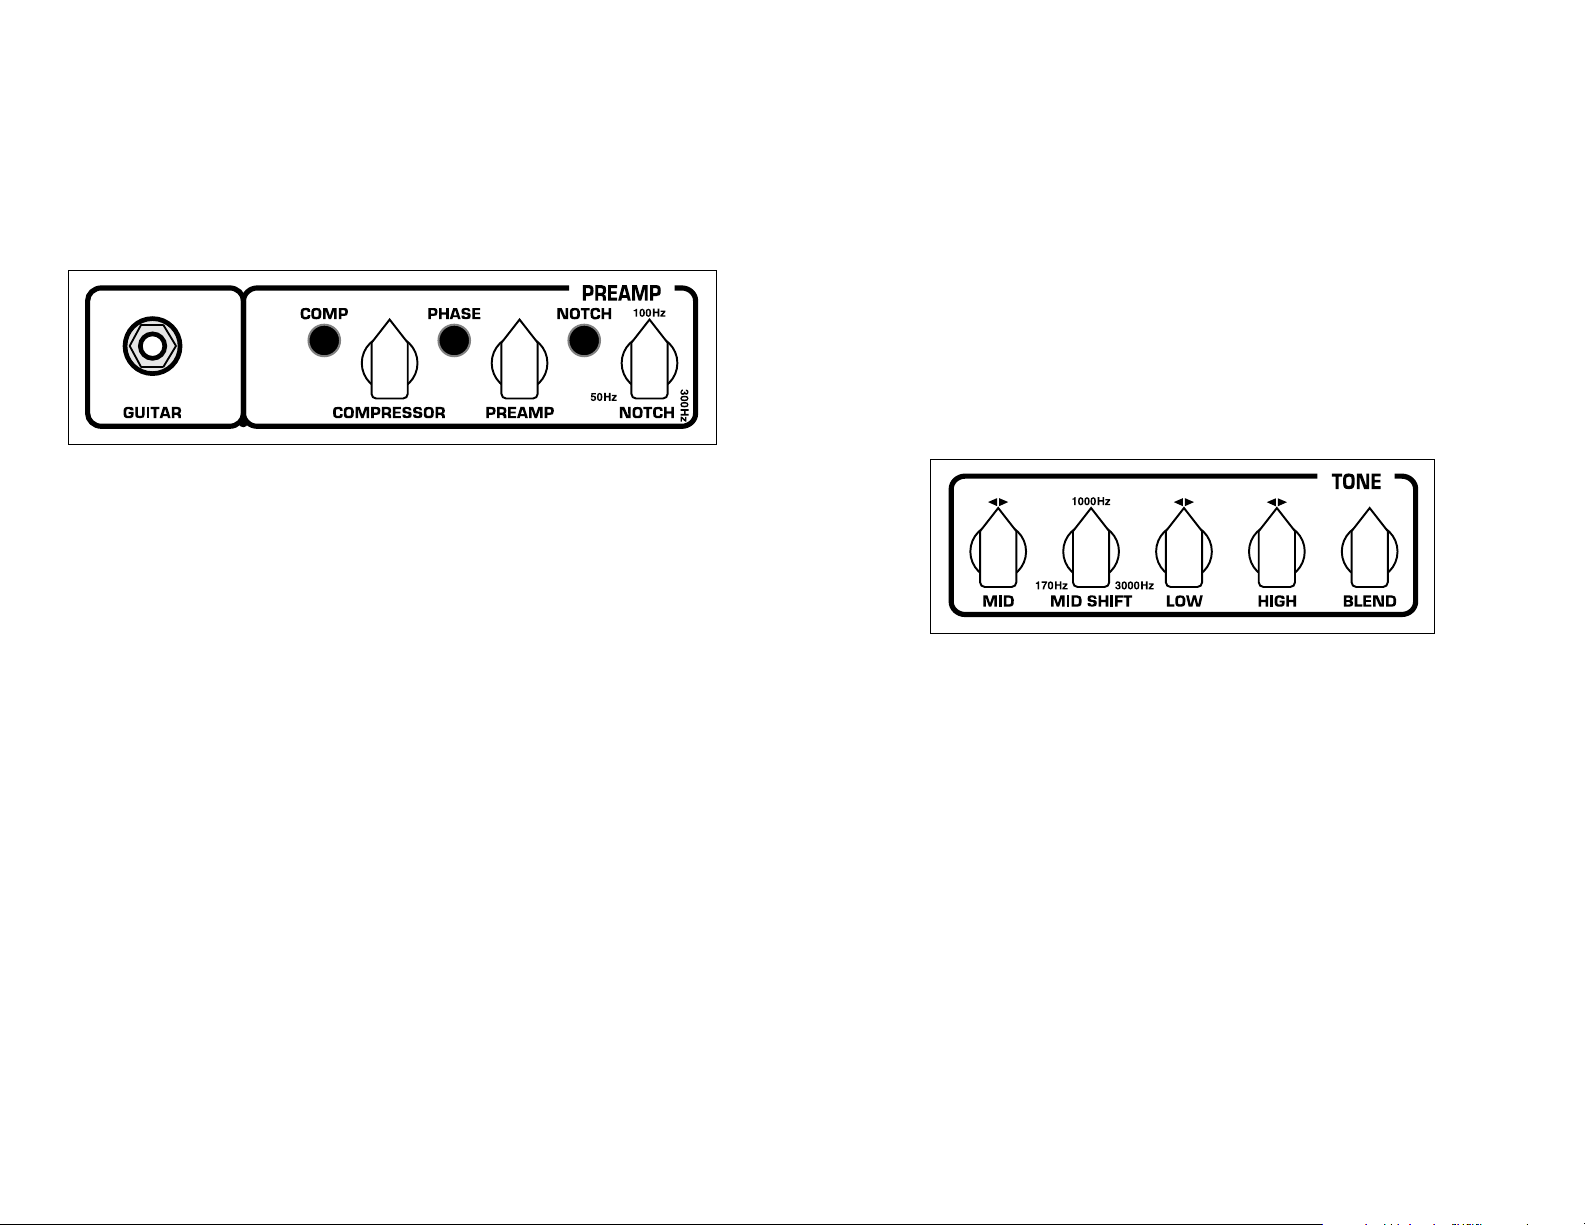
GUITAR CHANNEL
GUITAR Input Jack
Input is 1/4”, 4.7meg , instrument level. The unusually high impedance was designed
with piezo pickups in mind to provide maximum output and dynamics. It is also compatible with low impedance input signals, should your guitar have a built-in preamp.
PREAMP SECTION:
COMP Switch
Activates the Compressor function.
COMPRESSOR
Controls the amount of compression, ranging from 1:1 at minimum to 5:1 at maximum. We recommend using this effect sparingly, as too much may cause acoustical
feedback problems. (See
Noteworthy Notes, #5
, on page 9.)
PHASE Switch
Reverses the input of the guitar signal to help combat feedback. When
out
, the out-
put (of the speaker) is in phase with the input. When
in
, the output (of the speaker) is
reversed. If your instrument feeds back, try positioning the switch
in
to reverse the
phase. If the feedback remains, return the Phase switch to the
out
position before
proceeding with diagnosing the cause. (See
Noteworthy Notes, #5
, on page 9.)
PREAMP
Controls the amount of gain of the preamp. We recommend starting with this control
at 12 o’clock. If you have a weak pickup, try 2-3 o’clock. If you have a hot pickup,
3
decrease to 10-11 o’clock. Of course, rely on your ears to determine the most
appropriate setting for your instrument.
NOTCH Switch
Activates the notch filter.
NOTCH
Notch filter is sweepable from 50Hz to 300Hz. It is designed to diminish the sensitivity for feedback, caused by the resonating, low acoustical frequency of your guitar.
Effective, yet gentler than most notch filters, it should not adversely alter the tone.
For an average size and weight acoustic guitar, a setting of 150Hz, as shown in the
Start-Up Sample Setting (on page 11), should be adequate. Different models and
sizes, however, may require further adjustment.
TONE SECTION:
MID SHIFT and MID
These sweepable, semi-parametric EQ controls range from 170Hz to 3kHz, ±16dB,
respectively. With the Mid Shift control, you can select the center frequency of the
mid-range control (Mid). Note: If you set Mid Shift at 1kHz, Mid operates as a
traditional mid-range control.
LOW and HIGH
Specifically voiced for acoustic guitar, these active EQ controls set the tonal balance
of the amp relative to your environment. Boost or cut ±12dB by turning from the center point (12 o’clock).
BLEND
Allows you to blend the direct instrument signal of your guitar with the SansAmp
Tube/Microphone Emulation circuitry. It is designed to gently round off the top end of
the signal and is particularly useful for older style piezos. Newer, more sophisticated
piezos may need less, or none at all. NOTE: At minimum, the SansAmp circuitry is
bypassed and all other controls remain active.
4
Page 4

MIC CHANNEL
MIC Input Jack
XLR mic level female input.
PHANTOM Switch
Activates 24V phantom power through the Mic input to power a condenser microphone, or any other phantom powerable product of your choice (perhaps a SansAmp
Acoustic DI?).
GAIN
Controls the amount of gain for optimal signal-to-noise ratio. While you should have
the best results at 12 o’clock, you can simply decrease as necessary should you
encounter any distortion.
LOW, MID, HIGH
Active EQ controls boost or cut ±12dB from the center point (12 o’clock).
REVERB MIX
Controls the balance of reverb between the Guitar and Mic channels. For instance, at
12 o’clock, the reverb is equally distributed through both channels. At 7 o’clock, the
reverb is heard only through the Guitar channel. Conversely, at 5 o’clock, the reverb
is heard only through the Mic channel.
LEVEL
Adjusts the volume level of the Mic channel.
MASTER SECTION:
REVERB
Controls the overall amount of reverb for both channels. (Refer to
Mic Channel, Reverb Mix
control,
above.) The top-of-the-line, full-length
Accutronics™ 3-spring reverb can be remotely activated via any alternating (a.k.a., latching, on/off)
footswitch. An optional factory footswitch is available:
Tech 21 Model #FSWA. Inquire through
your local dealer
or contact Tech 21 directly for more information.
5
LEVEL
Adjusts the overall volume level of the Guitar and Mic channels. It also affects the
XLR direct output, allowing you to block the signal to the audience or recording console when you want to tune or unplug your guitar.
REAR PANEL
Fuse
Replace with similar type and same value: 3A/110-120V; 1.6A/220-250V.
Headphone
The Headphone output overrides the speaker for undisturbed (and non-disturbing)
practicing, which is especially useful with solid body electric/acoustic guitars. The
Headphone output can also be used as a 1/4" direct out, should an XLR input not be
available on your recorder. You can then use headphones through your mixer.
Speaker
By incorporating Tech 21’s exclusive technology with our special design 12” speaker,
the Bronzewood 60 gives you true full range response.
If an external speaker cabinet is preferred, simply plug in the speaker cable from the
external cabinet. This will defeat the internal speaker. For best results, the speaker
cabinet should be rated at 8 , 60W minimum, preferably with a horn for full frequency
response. We do not recommend using a speaker rated at less than 8 , as a 4
speaker could cause distortion and potentially overheat the amp. Using a 16 speaker may result in a loss of power. Note: The Bronzewood 60’s speaker is specifically
designed to complement our specialized circuitry. Therefore, using a standard speaker cabinet may change the sound. For recommendations, please contact Tech 21’s
technical support department.
6
Page 5

You may want to consider Tech 21’s matching 1x12, 60-watt powered cabinet with
horn, the
Power Engine 60T (Model #PW60T). This will double your output to 120
watts. When space permits, you can position the amp and Power Engine 60T on
either side of the stage for wider sound disbursement. (Refer to diagram on page 11.)
Inquire through your local dealer or contact Tech 21 directly for more information.
Horn
Tech 21’s special design 60-watt, 8 horn extends the high frequency capability of
the Bronzewood 60. If desired, the horn can be disconnected without harming the
circuitry. If you don’t want the horn at all, simply remove the black wire between the
horn and the speaker. If you just want to disconnect it occasionally, pull the black
wire off the horn and tape the end.
SansAmp™Direct Out
For recording at home or in a commercial studio, the SansAmp XLR output is like having a built-in direct box. The SansAmp Tube/Microphone Emulation circuitry gives
you a warm, gentle saturation to limit dynamic peaks, and removes the harsh harmonics associated with piezo pickups. It provides a smooth, even response, as would be
achieved by miking your guitar through a tube preamp. NOTE: You can adjust the
desired amount of SansAmp circuitry by using the Blend control.
With the SansAmp Direct Out, you can plug straight into the board and get the same
sound that comes out of the Bronzewood 60 directly onto tape. If you need to consider family and neighbors, you can defeat the internal speaker by plugging a dummy
cable either into the Speaker jack or the Headphone jack. You can then use headphones through your mixer.
For live gigs, you can use this output directly into the PA system and then you won’t
need a microphone in front of the amp. In larger venues, you’ll be able to utilize the
PA monitors to supplement your stage volume.
7
Ground Lift
Connects or disconnects the ground circuits between the XLR output of the amp and
the mixer. We recommend starting with the ground lifted. If necessary, connect the
ground by pushing the button in.
Effect Loop
The Effect Loop allows you to connect external effects between the pre-amp and
power amp section of the Bronzewood 60. You can then keep the effect(s) either on
top of the amp for easy access, or stashed neatly in the back of the amp.
Connect the input of your effect to Send; output of your effect to Return. We recommend that time-based (i.e., chorus or delay) effects be inserted in the Effect Loop and
external distortion/wah pedals be placed between the guitar and the Bronzewood 60.
On page 12, you’ll find helpful Effect Loop diagrams for adding a remote volume
control and hooking up your Bronzewood 60 with a Power Engine 60T for stereo.
Footswitch
The Footswitch jack accepts any alternating (a.k.a., latching, on/off) type footswitch
to control the Reverb function. An optional factory footswitch is available:
Tech 21
Model #FSWA
. Inquire through your local dealer or contact Tech 21 directly for
more information.
NOTEWORTHY NOTES & CONSIDERATIONS
1) Begin with the Start-Up Sample Setting provided in this manual! Just
as its title implies, it is a good starting point to make adjustments to your taste.
2) Guitars with on-board preamps. Set the tone controls on the guitar flat and
set the guitar’s volume level halfway. Then balance the guitar’s volume with the
Bronzewood 60’s Preamp control. Be aware that if the output of your guitar is too
high, it can cause distortion. If your guitar is at full volume and the Bronzewood 60’s
Preamp is set low and you encounter distortion, you should back off the volume of
the guitar and then bring up the Preamp as needed. If you still have distortion and
you want to avoid smacking yourself in the head when you call us, don’t forget to
check the battery in the preamp of the guitar!
8
Page 6

3) Compression. If the output of your guitar is very high, even low compression
settings will sound very compressed. Also, be aware that higher settings can contribute to feedback. (See #5.)
4) EQ and Distortion. Be mindful that when Mid is in a high boost position, it can
contribute to distortion. For a cleaner sound, try cutting back on the Mid control.
5) Reverb. Too much reverb can contribute to feedback. We recommend using just
enough to give you a fuller sound, but not so much that you lose definition.
6) Feedback Checkpoints.
a) After you’ve set the tone controls to your liking, turn up the amp’s volume incr-
mentally. If feedback starts to creep in before you reach the desired level, push
the Phase switch in to reverse the phase. If that doesn’t correct the problem,
return the Phase switch to the out position
.
b) Engage the Notch switch and turn the Notch control from low to high to find the
spot where the offending frequency ceases. Then increase your volume as
desired.
c) Check the Compressor setting. Since higher settings can contribute to feed-
back, disengage the Compressor to see if it stops. Re-engage and decrease the
setting until the feedback stops. To eliminate the problem before it starts, you
can artificially generate compression feedback and use the Notch filter to
locate the frequency; then decrease the Compressor as desired.
d) Check the Reverb setting. Again, higher settings can contribute to feedback.
7) Acoustic guitars, not unlike their owners, are very demanding. The
controls of the Bronzewood 60 are designed to help you achieve the best possible
sound in any circumstance. For best results, take the time to listen, learn the function
of each control, and how they interact.
8) Enjoy your new amp!
BRONZEWOOD 60 SPECIFICATIONS
Note: With on-going product development and improvements, specifications and/or
the cosmetic appearance of this unit may change without prior notice.
Model Number: BW60
Input Impedance (Guitar): 4.7M
Input Impedance (Mic): 3.3k
Nominal Input Level: -20dBm
Optimal Output Load: 8
Power Output: 60W
Effect Loop Input Impedance: 1M
Effect Loop Input Level: approx. -10dBm
Effect Loop Output Impedance: 1k
Effect Loop Output Level: approx. -10dBm
Maximum Power Consumption: 120W
AC Input Power (Factory set): 100V, 117V, 220V, 230V, 240V
Cycles: 50/60 Hz
NOTE: AC power cannot be switched.
See authorized dealer/distributor for voltage
modification information.
Speaker: Model #2112-A, Special design 12” / 100W - 8
Horn: Model #2125-H, Special design / 60W - 8
Dimensions: 20”w x 17”h x 11”d
Weight: 38 lbs.
Matching Extension Cabinet: Power Engine 60T, powered 60W 1x12 open-
back cabinet with special design 12” speaker
and horn
Optional Accessories: •Black vinyl cover with white logo
•Flight case with hammered aluminum finish,
lock and casters
•Footswitch
Accessories and replacement parts (i.e., knobs, grill panel, speaker, horn, logo plate,
etc.) are available through your authorized dealer, distributor or Tech 21, Inc.
9 10
Page 7

11 12
START-UP SAMPLE SETTING
REMOTE VOLUME CONTROL HOOK-UP
GUITAR CHANNEL
= OFF
MIC CHANNEL
Sample setting is based upon using an average size and weight acoustic guitar
and intended as a starting point only.
For your convenience, blank charts are provided on page 13 so you
can keep a record of your favorite settings.
CHAINING THE BRONZEWOOD 60
with the Power Engine 60
doubles, triples, etc., your stage volume
T*
= ON
INPUT
OUTPUT
SENDINPUT
RETURN
STEREO HOOK-UP
with the Power Engine 60
T*
INPUT
SANSAMP XLR
DIRECT OUT
BRONZEWOOD 60
XLR
OUT
POWER ENGINE 60
XLR
IN
XLR
OUT
XLR
IN
T POWER ENGINE 60T
*Tech 21's Power Engine 60T is a matching 1x12, 60-watt powered extension cabinet
with horn. You can chain one or more with the Bronzewood 60 to increase your
output to 120 watts, 180 watts, etc. You can position the Bronzewood 60 and
the Power Engine 60T on either side of the stage for wider sound disbursement.
INPUT
RETURN
SEND
INPUT
BRONZEWOOD 60
L R
STEREO EFFECTS
PROCESSOR
INPUT
POWER ENGINE 60
T
Page 8

13
FAVORITE SETTINGS CHARTS
GUITAR CHANNEL
= OFF
= ON
MIC CHANNEL
GUITAR CHANNEL
MIC CHANNEL
GUITAR CHANNEL
NOTES:
______________________
____________________________
NOTES:
______________________
____________________________
NOTES:
______________________
MIC CHANNEL
GUITAR CHANNEL
MIC CHANNEL
____________________________
NOTES:
______________________
____________________________
 Loading...