

TEC EM1-31071, TEC EM1-31071GE, SL-9000-LSB Series, SL-9000-30M-LSB-US, SL-9000-15M-LSB-CA Owner's Manual
...Page 1
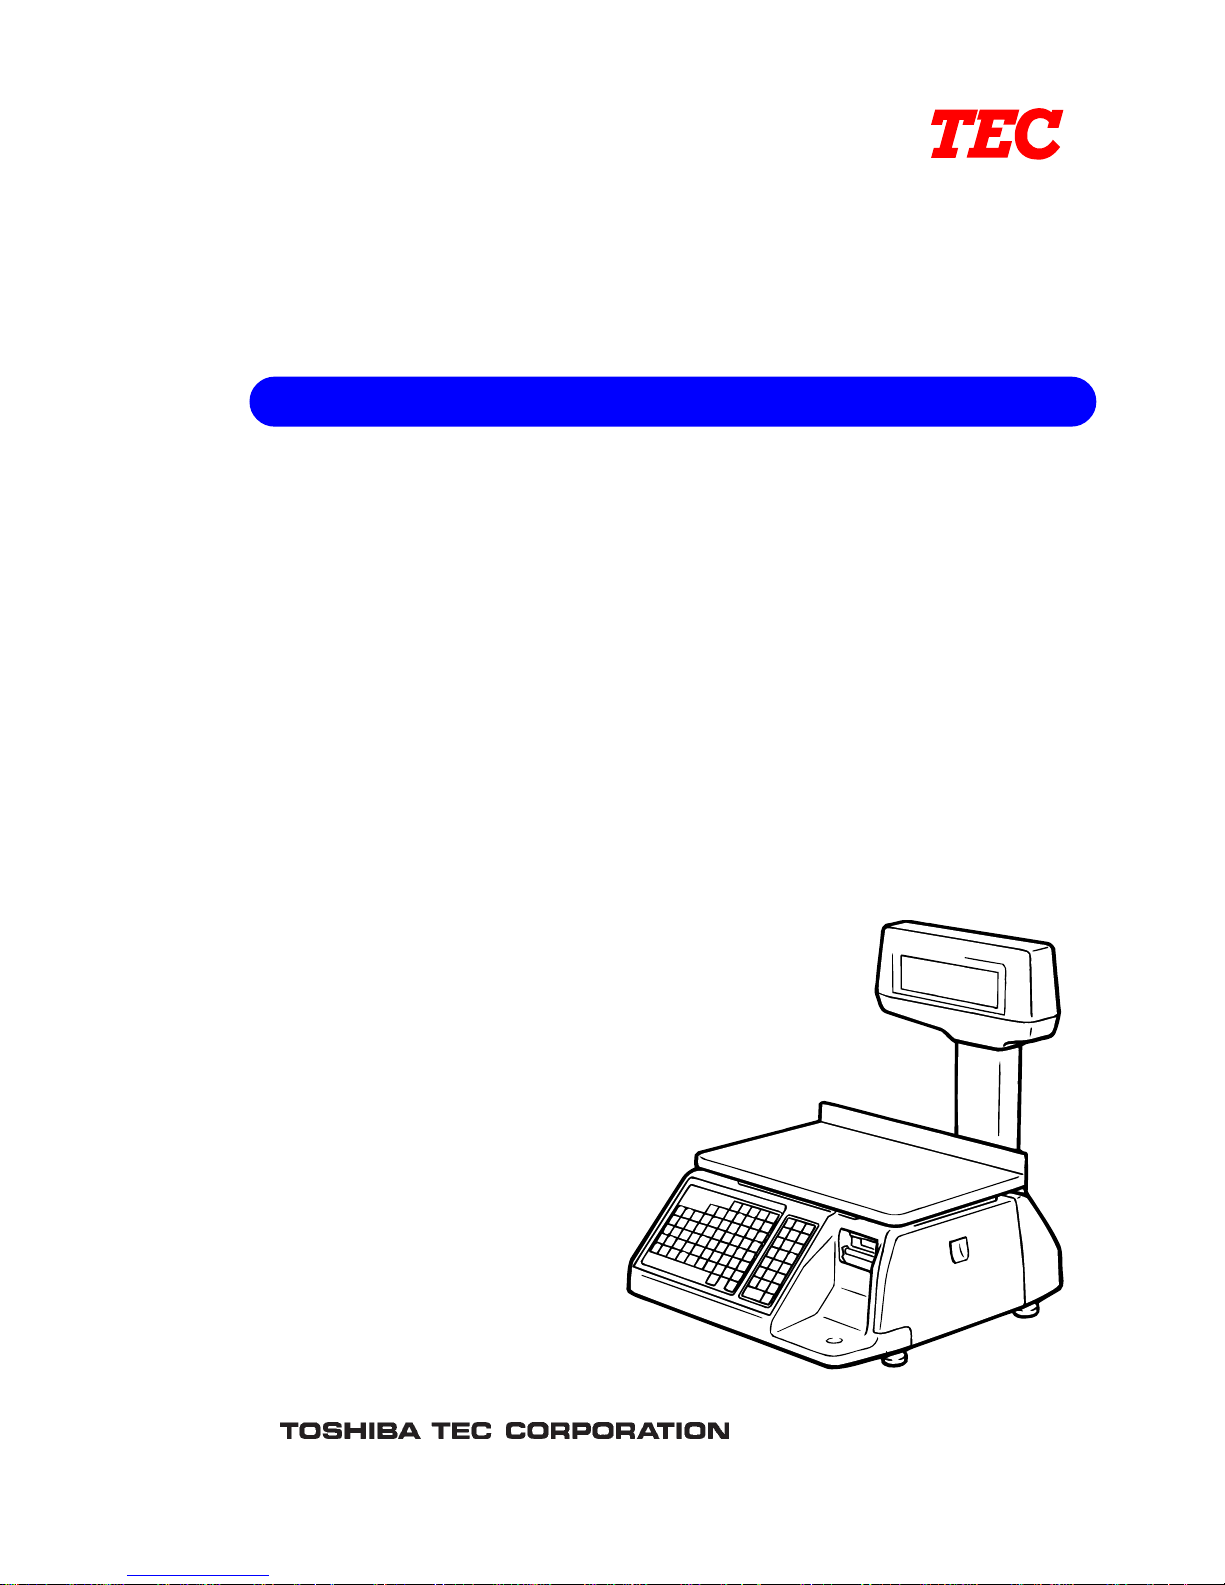
TEC Electronic Computing Scale
SL-9000-LSB SERIES
Owner’s Manual
Page 2

Page 3
(i)
Safety Summary
Safety Summary
Personal safety in handling or maintaining the equipment is extremely important. Warnings and Cautions
necessary for safe handling are included in this manual. All warnings and cautions contained in this
manual should be read and understood before handling or maintaining the equipment.
Do not attempt to effect repairs or modifications to this equipment. If a fault occurs that cannot be rectified
using the procedures described in this manual, turn off the power, unplug the machine, then contact your
authorized TOSHIBA TEC representative for assistance.
Meanings of Each Symbol
This symbol indicates warning items (including cautions).
Specific warning contents are drawn inside the symbol.
(The symbol on the left indicates a general caution.)
This symbol indicates prohibited actions (prohibited items).
Specific prohibited contents are drawn inside or near the symbol.
(The symbol on the left indicates “no disassembling”.)
This symbol indicates actions which must be performed.
Specific instructions are drawn inside or near the symbol.
(The symbol on the left indicates “disconnect the power cord plug from the outlet”.)
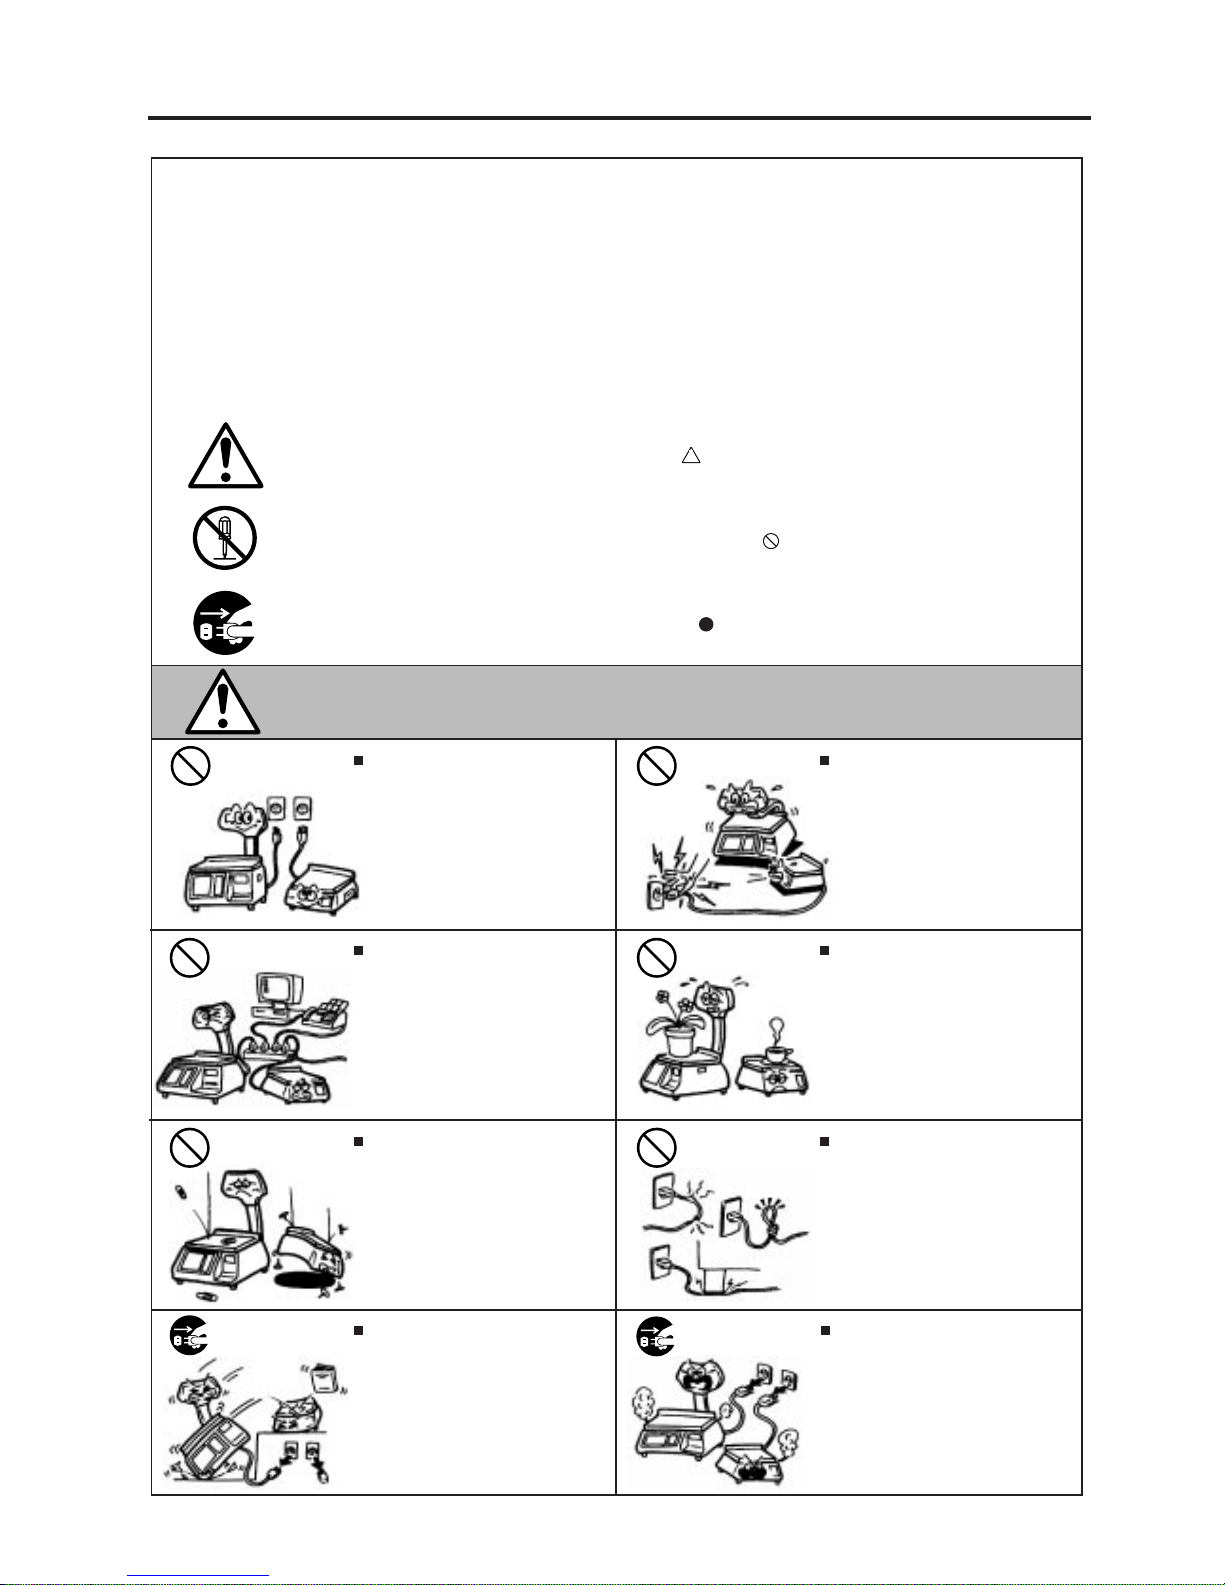
Do not use voltages other than the
voltage (AC) specified on the rating
plate, as this may cause fire or
electric shock.
Any other than the
specified AC voltage
is prohibited.
WARNING
This indicates that there is the risk of death or serious injury if the
machines are improperly handled contrary to this indication.
Prohibited
Do not plug in or unplug the power
cord plug with wet hands as this may
cause electric shock.
Do not place metal objects or
water-filled containers such as flower
vases, flower pots or mugs, etc. on
top of the machines. If metal objects
or spilled liquid enter the machines,
this may cause fire or electric
shock.
If the machines share the same
outlet with any other electrical
appliances which consume large
amounts of power, the voltage will
fluctuate widely each time these
appliances operate. Be sure to
provide an exclusive outlet for the
machine as this may cause the
machines to malfunction.
Do not insert or drop metal,
flammable or other foreign objects into
the machines through the ventilation
slits, as this may cause fire or electric
shock.
Prohibited
Prohibited
Prohibited
Do not scratch, damage or modify
the power cords. Also, do not place
heavy objects on, pull on, or excessively bend the cords, as this may
cause fire or electrical shock.
Prohibited
Continued use of the machines in an
abnormal condition such as when the
machines are producing smoke or
strange smells may cause fire or elec-
tric shock. In these cases, immediately turn off the power switches and
disconnect the power cord plugs from
the outlet. Then, contact your authorized TOSHIBA TEC representative for
assistance.
Disconnect
the plug.
If the machines are dropped or their
cabinets damaged, first turn off the
power switches and disconnect the
power cord plugs from the outlet, and
then contact your authorized
TOSHIBA TEC representative for
assistance. Continued use of the
machine in that condition may cause
fire or electric shock.
Disconnect
the plug.
Page 4
(ii)
Safety Summary
CAUTION
This indicates that there is the risk of personal Injury or damage to
objects if the machines are improperly handled contrary to this indication.
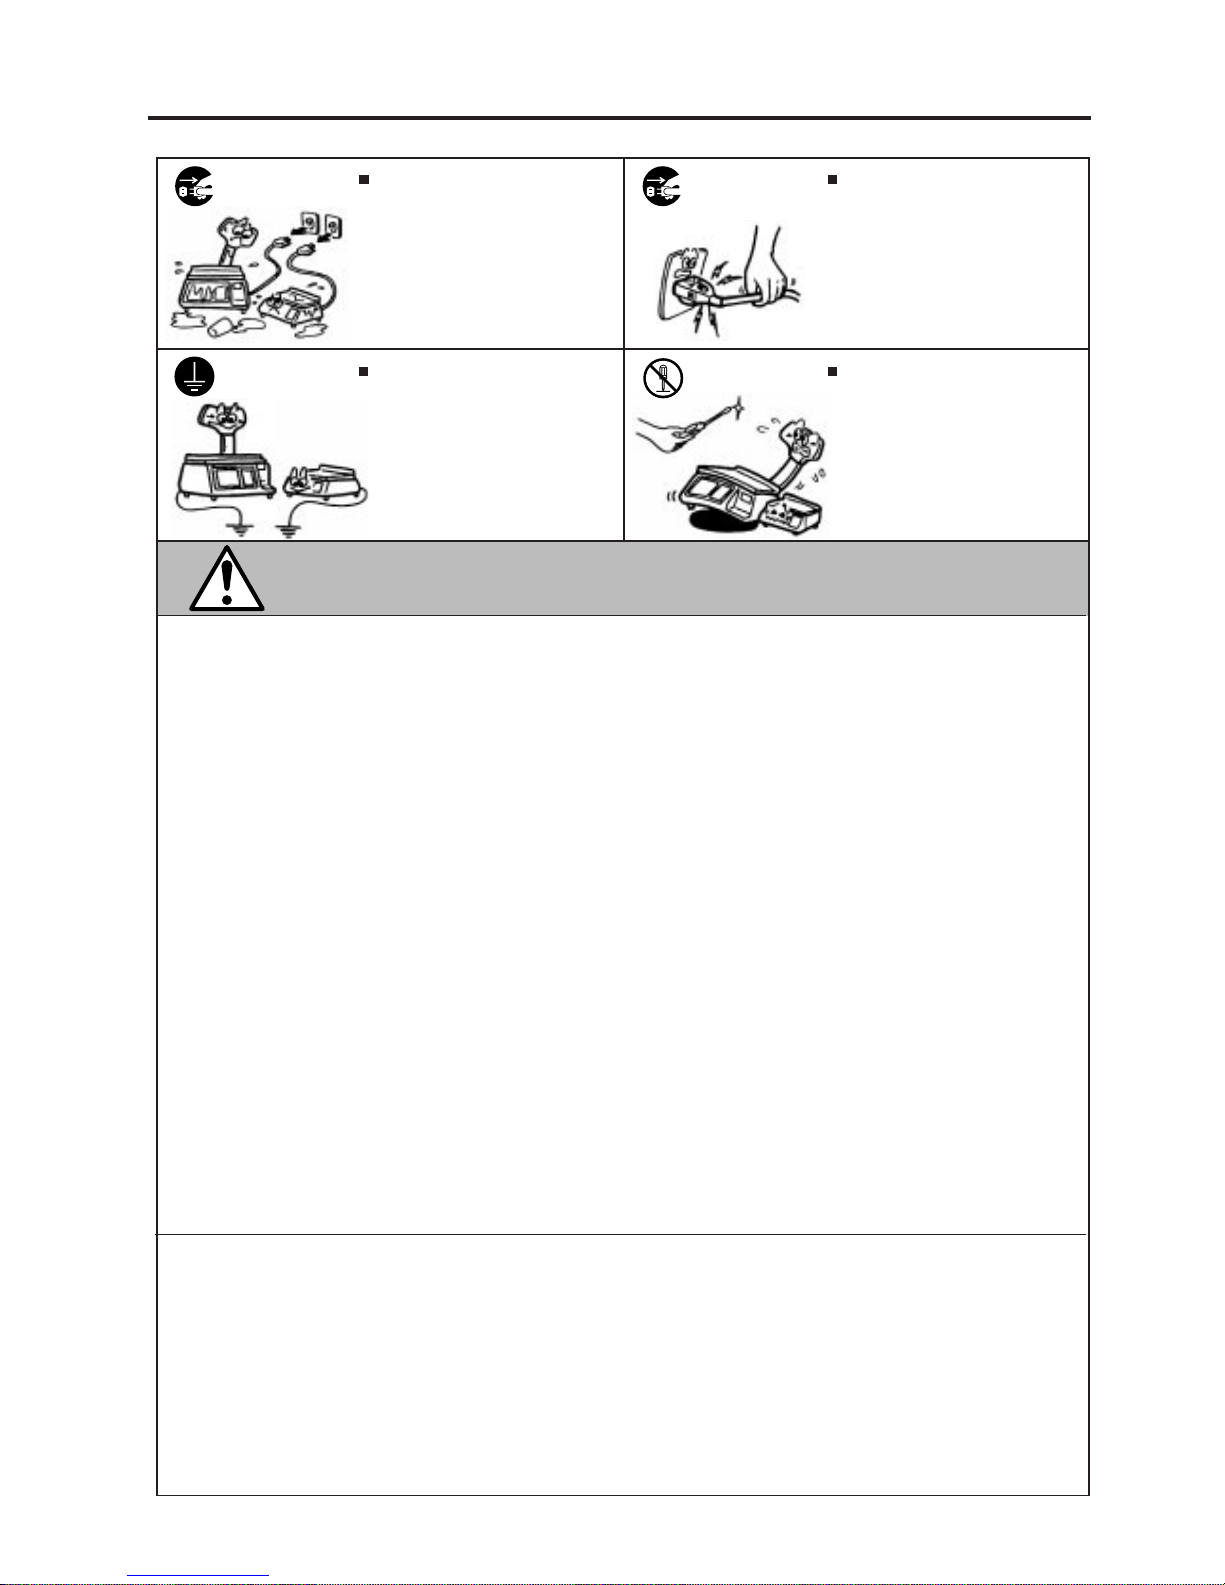
If foreign objects (metal fragments,
water, liquids) enter the machines,
first turn off the power switches and
disconnect the power cord plugs from
the outlet, and then contact your
authorized TOSHIBA TEC representative for assistance. Continued
use of the machine in that condition
may cause fire or electric shock.
Disconnect
the plug.
Do not remove covers, repair or
modify the machine by yourself. You
may be injured by high voltage, very
hot parts or sharp edges inside the
machine.
No disassembling.
Ensure that the equipment is
properly grounded. Extension cables
should also be grounded. Fire or
electric shock could occur on
improperly grounded equipment.
Connect a
grounding
wire.
When unplugging the power cords,
be sure to hold and pull on the plug
portion. Pulling on the cord portion
may cut or expose the internal wires
and cause fire or electric shock.
Disconnect
the plug.
Precautions
The following precautions will help to ensure that this machine will continue to function correctly.
• Try to avoid locations that have the following adverse conditions:
* Temperatures out of the specification * Direct sunlight * High humidity
* Shared power source * Excessive vibration * Dust/Gas
• Do not subject the machine to sudden shocks.
• Do not press the keys too hard. Keys will operate correctly if they are touched lightly.
• Clean the cover and keyboard, etc. by wiping with a dry cloth or a cloth soaked with detergent and wrung out
thoroughly. Never use thinner or other volatile solvent for cleaning.
• To ensure that the scale is operating correctly, place a known weight on the platter and check it for correct
weight measurement. This should be done every morning before starting normal operations.
• When moving the machine, take hold of the case and lift the machine. Never hold the remote unit.
• Do not place the machines on unstable or slanted surfaces, as they may drop or fall and cause injury.
• USE ONLY TOSHIBA TEC SPECIFIED paper.
• DO NOT STORE the paper or ribbons where they might be exposed to direct sunlight, high temperatures, high
humidity, dust, or gas.
• Ensure the machine is operated on a level surface.
• Any data stored in the memory of the machine could be lost during a machine fault.
• Try to avoid using this equipment on the same power supply as high voltage equipment or equipment likely to
cause mains interference.
• Unplug the machine whenever you are working inside it or cleaning it.
• Keep your work environment static free.
• Do not place heavy objects on top of the machines, as these items may become unbalanced and fall causing
injury.
• Do not block the ventilation slits of the machines, as this will cause heat to build up inside the machines and
may cause fire.
• Do not lean against the machine. It may fall on you and could cause injury.
• Care must be taken not to injure yourself with the printer paper cutter.
• Unplug the machine when it is not used for a long period of time.
Request Regarding Maintenance
• Utilize our maintenance services.
After purchasing the machine, contact your authorized TOSHIBA TEC representative for assistance once a
year to have the inside of the machine cleaned. Otherwise, dust will build up inside the machines and may
cause a fire or a malfunction. Cleaning is particularly effective before humid rainy seasons.
• Our preventive maintenance service performs the periodic checks and other work required to maintain the
quality and performance of the machines, preventing accidents beforehand.
For details, please consult your authorized TOSHIBA TEC representative for assistance.
• Using insecticides and other chemicals
Do not expose the machines to insecticides or other volatile solvents. This will cause the cabinet or other parts
to deteriorate or cause the paint to peel.
Page 5

Page 6

Page
TABLE OF CONTENTS
1.INTRODUCTION ............................................................................................. 1-1
1.1 APPLICABLE MODEL........................................................................... 1-2
1.2 ACCESSORIES .................................................................................... 1-2
2.SPECIFICATION ............................................................................................. 2-1
2.1 SCALE................................................................................................... 2-1
2.2 OPTION................................................................................................. 2-2
3.APPEARANCE................................................................................................3-1
4.DISPLAY.......................................................................................................... 4-1
4.1 US TYPE ............................................................................................... 4-1
4.2 CA TYPE ............................................................................................... 4-1
4.3 QR TYPE............................................................................................... 4-2
4.4 AU TYPE ............................................................................................... 4-3
5.KEY LAYOUT .................................................................................................. 5-1
5.1 PROGRAMMING KEYBOARD ............................................................. 5-1
5.2 OPERATION KEYBOARD AND SPEED KEYBOARD.......................... 5-3
5.3 SELF SERVICE KEYBOARD................................................................ 5-5
6.PROCEDURE BEFORE OPERATION ............................................................ 6-1
7.INSTALLATION PROCEDURE ....................................................................... 7-1
8.LEVEL ADJUSTMENT .................................................................................... 8-1
9.REMOVAL AND REPLACEMENT OF MEDIA ................................................ 9-1
10.OUTLINE OF OPERATION ............................................................................. 10-1
11.PROGRAMMING PROCEDURES .................................................................. 11-1
11.1 UNIT PRICE CHANGE.......................................................................... 11-4
11.2 PLU DATA SETTING ............................................................................ 11-5
11.3 INGREDIENT MESSAGE ..................................................................... 11-7
11.4 NUTRITION FACTS .............................................................................. 11-8
11.5 PLU VERIFYING LABEL....................................................................... 11-12
11.6 ADDRESS SETTING ............................................................................ 11-13
11.7 SPECIAL INFORMATION ..................................................................... 11-14
11.8 GRADE LINE......................................................................................... 11-14
11.9 SPEED KEY SETTING ......................................................................... 11-15
11.10 PRINT FORMAT.................................................................................... 11-16
11.11 DATE/TIME SETTING........................................................................... 11-18
11.12 CMT/PL-3 .............................................................................................. 11-18
11.13 IN-LINE/LOCAL ..................................................................................... 11-21
11.14 LON SYSTEM ....................................................................................... 11-22
11.15 BAR CODE FORMAT ........................................................................... 11-24
11.16 TITLES .................................................................................................. 11-26
11.17 TRANSFERRING LOGO DATA ............................................................ 11-27
11.18 IDIOM SETTING.................................................................................... 11-28
11.19 VENDOR SETTING .............................................................................. 11-28
11.20 FREE FORMAT SETTING .................................................................... 11-29
Page 7

CAUTION:
1. This manual may not be copied in whole or in part without prior written permission of TOSHIBA TEC.
2. The contents of this manual may be changed without notification.
3. Please refer to your local Authorized Service representative with regard to any queries you may
have in this manual.
Page
12.PROGRAMMED DATA VERIFICATION REPORTS ....................................... 12-1
13.PASSWORD SECURITY ................................................................................. 13-1
13.1 SETTING PASSWORD AND PROTECT MENU................................... 13-1
13.2 CALLING MENU BY ENTERING PASSWORD .................................... 13-3
14.OPERATING PROCEDURES ......................................................................... 14-1
14.1 WEIGHING OPERATION...................................................................... 14-2
14.2 FIX PRICE OPERATION (FOR US TYPE ONLY)................................. 14-3
14.3 BY COUNT OPERATION...................................................................... 14-4
14.4 PRINT COUNT OPERATION................................................................ 14-6
14.5 ISSUING LABELS WITH NET WEIGHT STATEMENT
(FOR US TYPE ONLY) ......................................................................... 14-9
14.6 TARE/SAVE FUNCTION PROCEDURES ............................................ 14-11
14.7 CALLING AND PRINTING GRADE LINES ........................................... 14-12
14.8 CALLING AND PRINTING LOGOS ...................................................... 14-13
14.9 SELECTING PRINT ITEM AND ADJUSTING
THE LCD BRIGHTNESS....................................................................... 14-14
14.10 DATE CHANGE .................................................................................... 14-15
14.11 BATCH PRINT MODE (with 30 Items Run Assignment)....................... 14-16
14.12 FLOATING VENDOR ............................................................................ 14-19
15.TOTAL OPERATION ....................................................................................... 15-1
15.1 HOURLY TOTAL REPORT................................................................... 15-2
15.2 GRAND TOTAL REPORT..................................................................... 15-2
15.3 PLU TOTAL REPORT........................................................................... 15-2
15.4 VENDOR TOTAL REPORT................................................................... 15-3
16.ERROR MESSAGE TABLE............................................................................. 16-1
17.CLEANING THE PRINT HEAD ....................................................................... 17-1
18.TROUBLESHOOTING..................................................................................... 18-1
Copyright © 2001
by TOSHIBA TEC CORPORATION
All Rights Reserved
570 Ohito, Ohito-cho, Tagata-gun, Shizuoka-ken, JAPAN
Page 8

1-1
1. INTRODUCTION
1. INTRODUCTION
Thank you for purchasing the TEC SL-9000-LSB Series electronic computing scale. As you will discover,
the TEC SL-9000-LSB series has many features and functions designed for user friendliness as well as
complete customer satisfaction.
The 7-segment fluorescent display which indicates transaction information such as weights, unit prices,
total prices, etc. and the liquid crystal display used to display commodity names and programming
messages are provided with the scale. The 140 speed keys realize a higher degree of operability, and
the 3 inch/sec. print speed ensures fast and clear printing.
Password security prevents unauthorized access to the PROG., M.DOWN, REWRAP, READ and
RESET mode. The latest high speed in-line system, Local Operation Network (LON), allows easy
system configuration and greater throughput.
Various options, including a TMCC interface, RS-232C interface, etc., are options available depending
on your needs.
We believe that your needs will now be fully satisfied, and you will have total reliability in price
calculations. Should you have any questions concerning the scale, please refer to this manual. Be sure
to keep this manual for future reference.
This equipment has been tested and found to comply with the limits for a Class A digital device, pursuant
to Part 15 of the FCC Rules. These limits are designed to provide reasonable protection against harmful
interference when the equipment is operated in a commercial environment. This equipment generates,
uses, and can radiate radio frequency energy and, if not installed and used in accordance with the
instruction manual, may cause harmful interference to radio communications. Operations of this
equipment in a residential area is likely to cause harmful interference in which case the user will be
required to correct the interference at his own expense. (for USA only)
Changes or modifications not expressly approved by manufacturer for compliance could void the user’s
authority to operate the equipment.
“This Class A digital apparatus meets all requirements of the Canadian Interference-Causing Equipment
Regulations.”
“Cet appareil numéique de la classe A respecte toutes les exigences du Rèlement sur le matériel
brouilleur du Canada.”
(for CANADA only)
Some procedures described in this manual may be illegal in various state jurisdictions. When there are
optional settings to enable various functions or to disable functions. Please ensure that the optional
settings for scale operation meet the local requirements of weights and measures. If you are uncertain
of specific items, contact the state or county office of weights and measures for clarification.
Page 9

1-2
1. INTRODUCTION
1.1 APPLICABLE MODEL
1.1 APPLICABLE MODEL
• SL-9000-30M-LSB-US
• SL-9000-15M-LSB-CA
• SL-9000-15M-LSB-QR
• SL-9000-15M-LSB-AU
The description of the model number is as follows.
S L - 9 0 0 0 - 3 0 M - L S B - U S
Destination Code
ex.) US, CA, QR, AU etc.
Keyboard Type
B: Built-in keyboard
Display Type
LS: Liquid Crystal Display and 7 segment Display
Max. Capacity
30M: 30 lbs (decimal
pound/multi-interval)
15M: 15 Kg (multi-interval)
1.2 ACCESSORIES
Owner's Manual
(EM1-31071)
Remote Display Speed Key Sheet
Quality Control Report
(US type only)
Print Head Cleaner
(24089500013)
Remote Blind Plate
Sealing Lead
Stranded Wire
Remote Display Sticker
(QR Type only)
Remote Display Sheet
(CA Type only)
Lead Plate
(AU Type Only)
NOTE:Check that there are no missing or incorrect parts in the accessories.
Page 10
2-1
2. SPECIFICATION
2. SPECIFICATION
2.1 SCALE
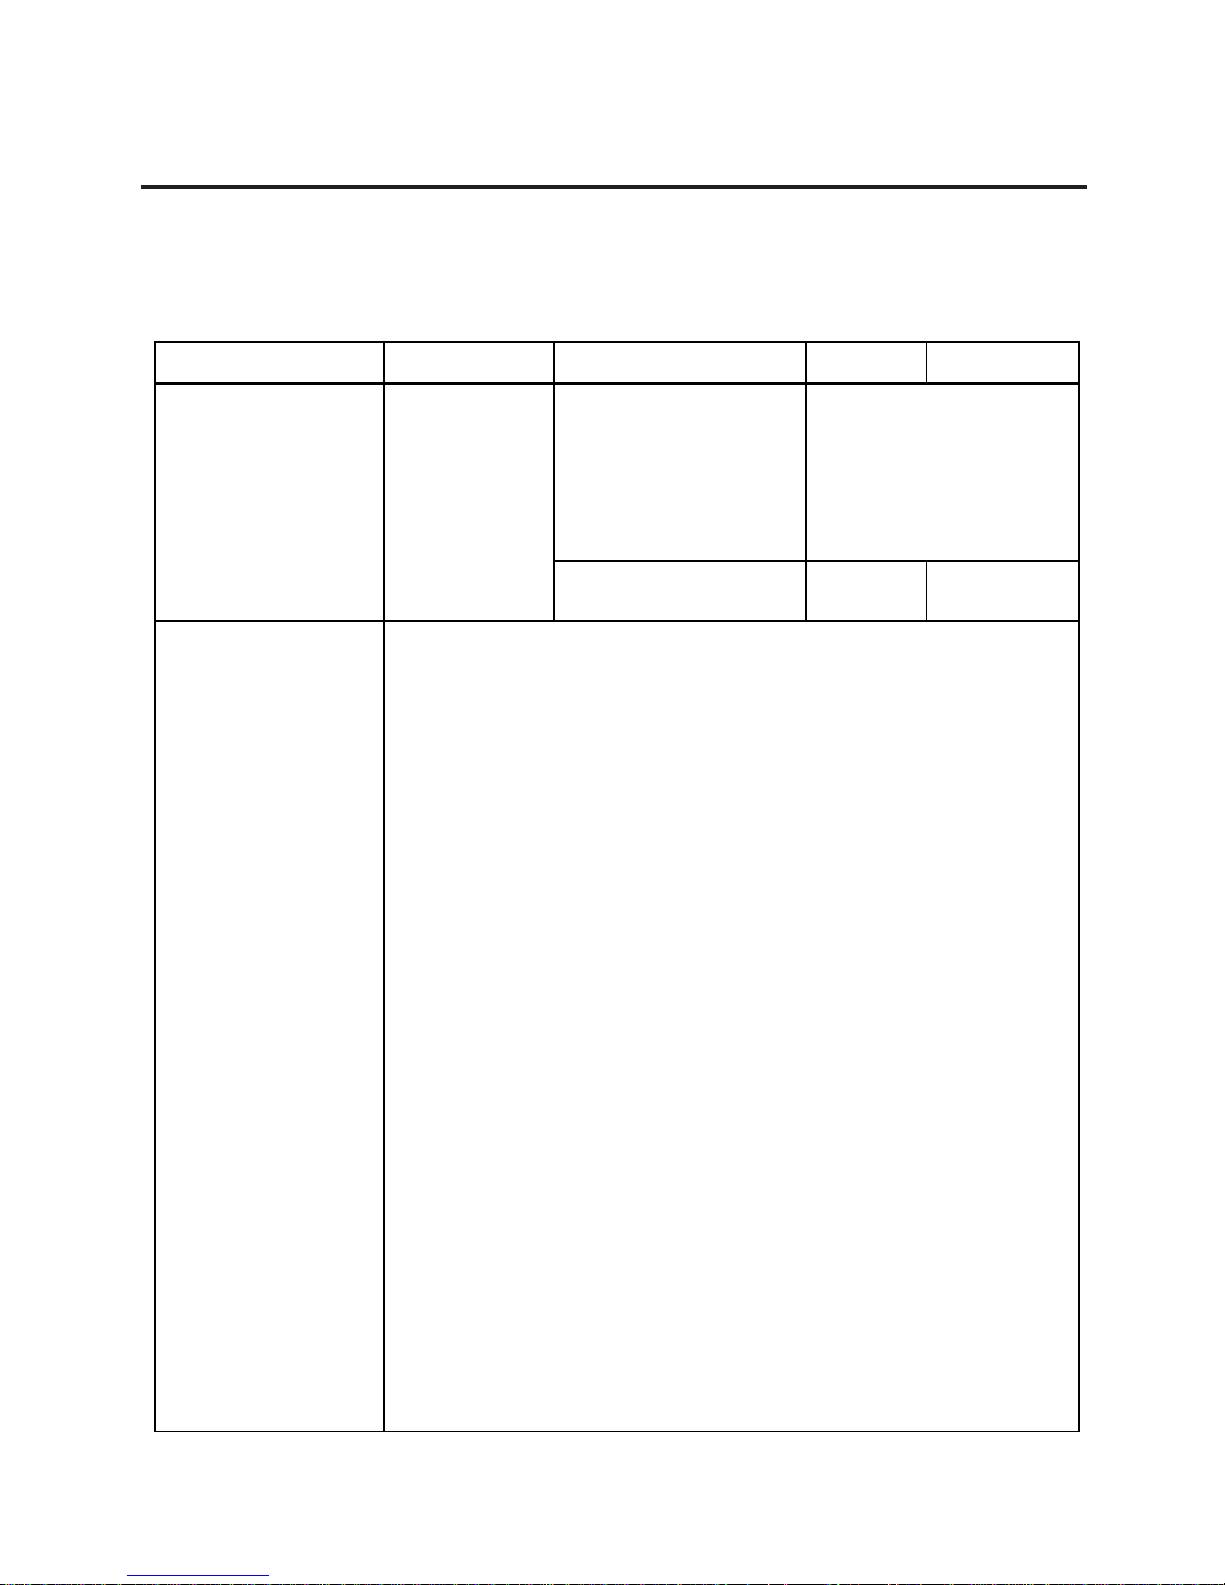
Item US CA QR AU
Maximum Capacity 30 lb 15 Kg (30 lb) 15 Kg
Minimum Scale Division 0.005 lb (0~15 lb) 0.002 Kg (0 ~ 6 Kg) 0.002 Kg (0 ~ 6 Kg)
0.005 Kg (6 ~ 15 Kg) 0.005 Kg (6 ~ 15 Kg)
0.01 lb (15~30 lb) 0.005 lb (0 ~ 15 lb)
0.01 lb (15 ~ 30 lb)
Maximum Tare 2.000 lb 1.000 Kg (2.205 lb) 1.000 Kg
Display Range 0 ~ 30.05 lb 0 ~ 15.025 Kg (0 ~ 30.05 lb) 0 ~ 15.025 Kg)
Unit Price Presettable $0.01 ~ 99.99 $0.01 ~ 99.99 0 ~ 99999 $ 0.01 ~ 999.99
Minimum Price Display $0.01 $0.01 1 $0.01
Power Requirement AC 120 V ± 10%, 60 Hz (US/CA type)
AC 220 V ± 10%, 50/60 Hz (QR type)
AC 240 V + 10%, -15%, 50 Hz (AU type)
Power Consumption US/CA: 70 W, 1 A (Standby: 25 W, 0.4 A)
QR: 70 W, 0.66 A (Standby: 25 W, 0.3 A)
AU: 79 W, 0.5 A (Standby: 29 W, 0.2A)
Temperature Limits 32°F ~ 104°F (0°C ~ 40°C)
Relative Humidity 35% ~ 85% (No condensation)
Message Display Remote display: 18 digits 7 segments Fluorescent display
Liquid Crystal Display: 5x7 dots 16 characters 1 line LCD
Weight 5 digits (US/CA type), 5 digits (QR/AU type)
Unit Price 4 digits (US/CA type), 5 digits (QR/AU type)
Total Price 5 digits (US/CA type), 6 digits (QR/AU type)
Remote Display Mode Dual sides
Capacity of PLU Memory 560 PLUs (Standard), 240 PLUs when LOGO is available.
3120 PLUs max. (Option)
Print Head Thermal Print Head (2 inch wide)
Media Issue Method On-demand/Batch
Dot Density 193 dots/inch (7.6 dots/mm)
Print Speed 3 inch/sec. (76.2 mm/sec.)
Available Printing Width 1.89 inch (48 mm), 2.24 inch (57 mm)
Recommended Media
Thermal Label VHTS, VLTB (OSP)/Outer diameter: Ø93 mm (Max.)
Variable Length Label VHTS, VLTB (OSP)/Outer diameter: Ø90 mm (Max.)
Thermal Receipt 120 FC (RICOH)/Outer diameter: Ø81 mm (Max.)
Interface CMT/PL-3 interface (Program Loader)
LON interface (RS-485)
PC-AT KEY interface (Option)
TMCC interface (Option)
RS-232C interface: 2 channel (Option)
Dimensions (approx.) 17.2 inch (width)x16.8 inch (depth) x 18.7 inch (height)
436 mm (width)x426 mm (depth) x 474 mm (height)
(The height of the AU type is 554 mm.)
Weight 33 lb (15 Kg)
2.1 SCALE
Page 11
2-2
2. SPECIFICATION
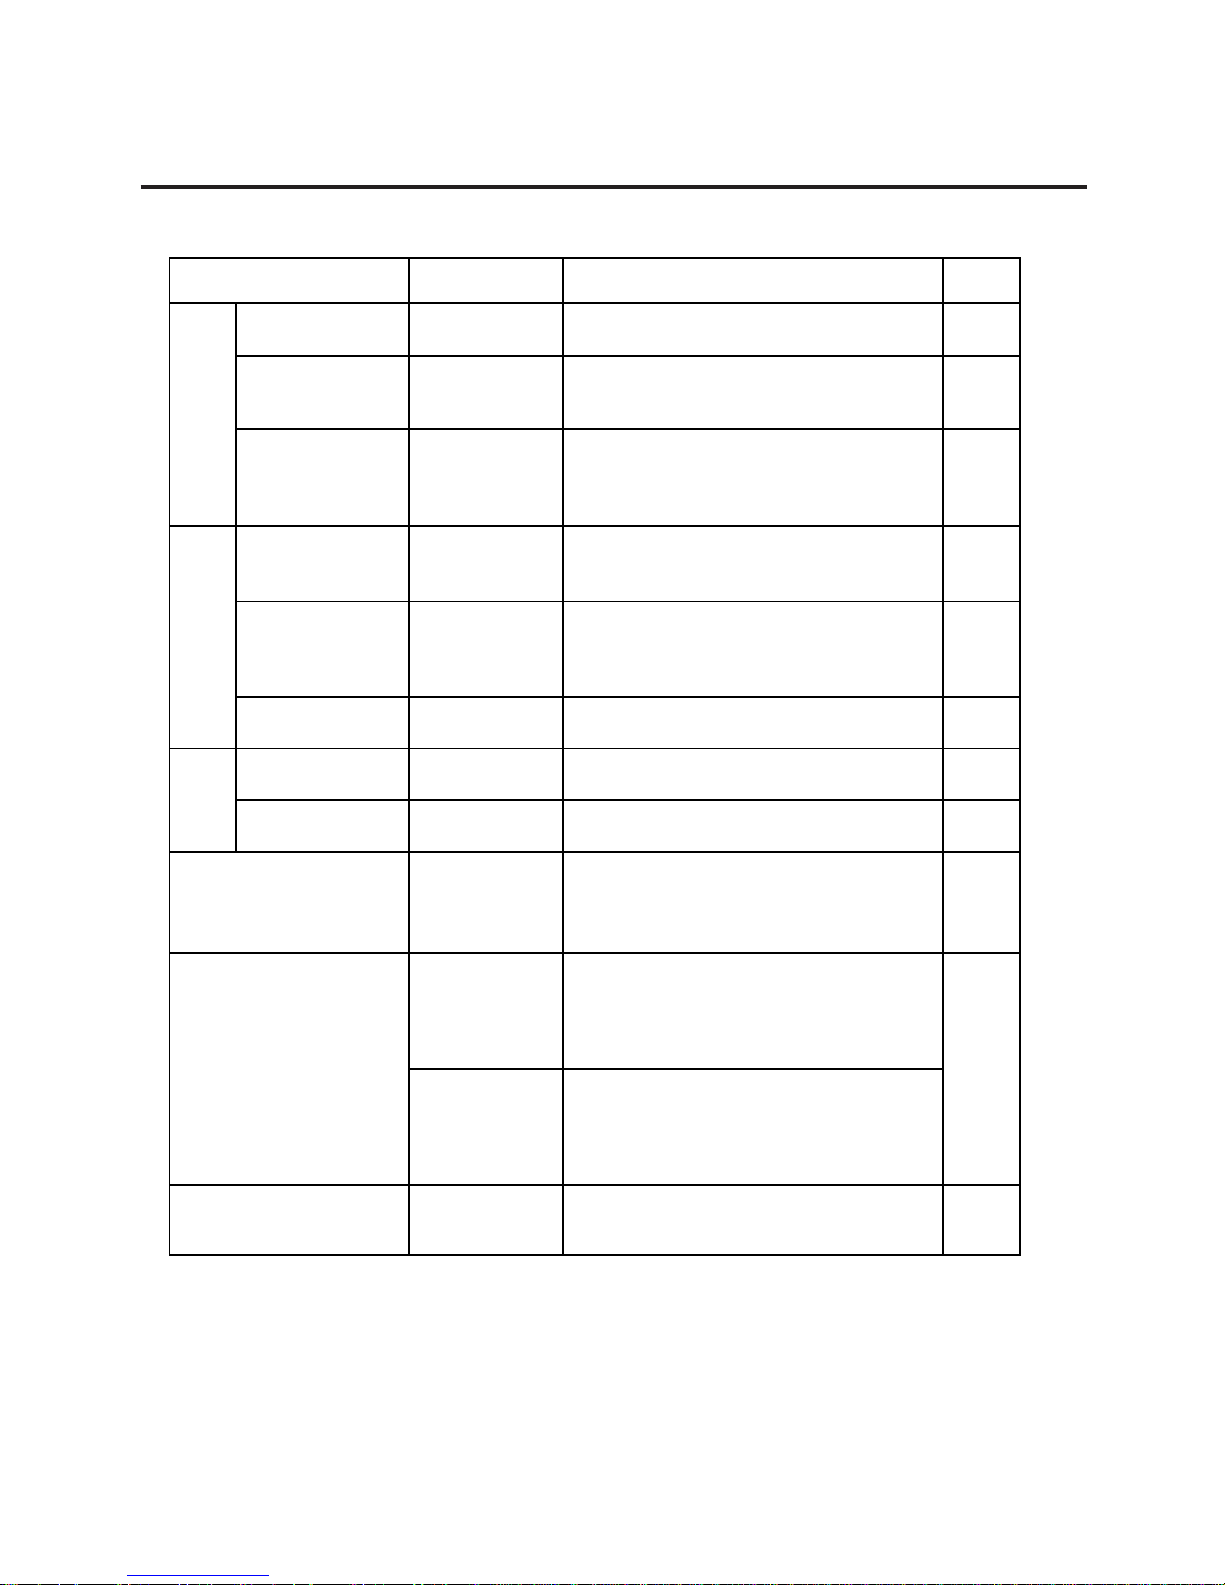
2.2 OPTION
NOTES: 1. Contact TOSHIBA TEC H.Q. or your nearest TOSHIBA TEC representative.
2. Order from TOSHIBA TEC Parts Center or purchase locally.
3. When purchasing memory modules locally, select one having the following specifications.
■
Maker: HITACHI Pseudo Static RAM (OP-9000-RAM-512KB)
HITACHI Static RAM (OP-9000-SRAM-512KB)
■
Type: HM658512ALP-8V80ns, 600mil 32-pin Plastic DIP (DP-32) (OP-9000-RAM-
512KB)
HM628512ALP-770ns, 600mil 32-pin Plastic DIP (DP-32) (OP-9000-SRAM512KB)
2.2 OPTION
Option Name
LON
LON Connector
TM8P-88P
Part No.
EAJ-0028001
See
Note 2
See
Note 2
See
Note 2
See
Note 1
See
Note 1
See
Note 1
See
Note 1
See
Note 1
See
Note 1
See
Note 1
and 3
See
Note 1
Part No.
EAJ-0029001
Part No.
10319100003
OP-9000-IOEC-B
OP-9000-IOB
LON Terminal
Resistor 285D-8P
LON Cable
S-STLAN-2P
(200 m/roll)
External Connector
Box
I/O PC Board
OP-9000-IOCNTMCC
TMCC Cable Kit
OP-9000-IOCN232CL
RS-232CL Cable
Kit
OP-9000-IOCN232CS
OP-9000PIGGYBACK
OP-9000PIGGYBACK-S/F
OP-9000-RAM512KB
OP-9000-SRAM512KB
OP-9000CASSETTE
RS-232CS Cable
Kit
TMCC
RS232C
MEMO PC Board
Memory Module
Label Cassette
Description Source
Model No.
or Part No.
A modular connector used to connect scales
to each other in a LON configuration.
A modular resistor attached to the scales
connected at both ends of the LON
configuration.
An 8-pin telephone cable used with the LON
connectors attached to both ends of the
cable. This cable connects scales to each
other in a LON configuration.
A junction box to which the TMCC kit is
attached. It is also used with the RS-232
CL/CS kit.
An I/O board equipped with the TMCC
interface and an RS-232C interface (2 ch)
ports. It is used to construct a TMCC and
RS-232C systems.
A cable kit for the TMCC interface
Cable kit for the RS-232C interface including
a D-sub 9-pin female PC connector.
Cable kit for the RS-232C interface including
a D-sub 9-pin male PC connector.
This board is used to expand the PLU
memory to 4MB by installing the memory
module.
DIP type PS-RAM to be installed on the
MEMO PC board (OP-9000-PIGGYBACK) for
memory expansion.
When expanding the memory, install the two
modules as one set.
DIP type S-RAM to be installed on the MEMO
PC board (OP-9000-PIGGYBACK-S/F) for
memory expansion.
When expanding the memory, install the two
modules as one set.
In is covenient to change several kinds of
labels.
Page 12
3-1
3. APPEARANCE
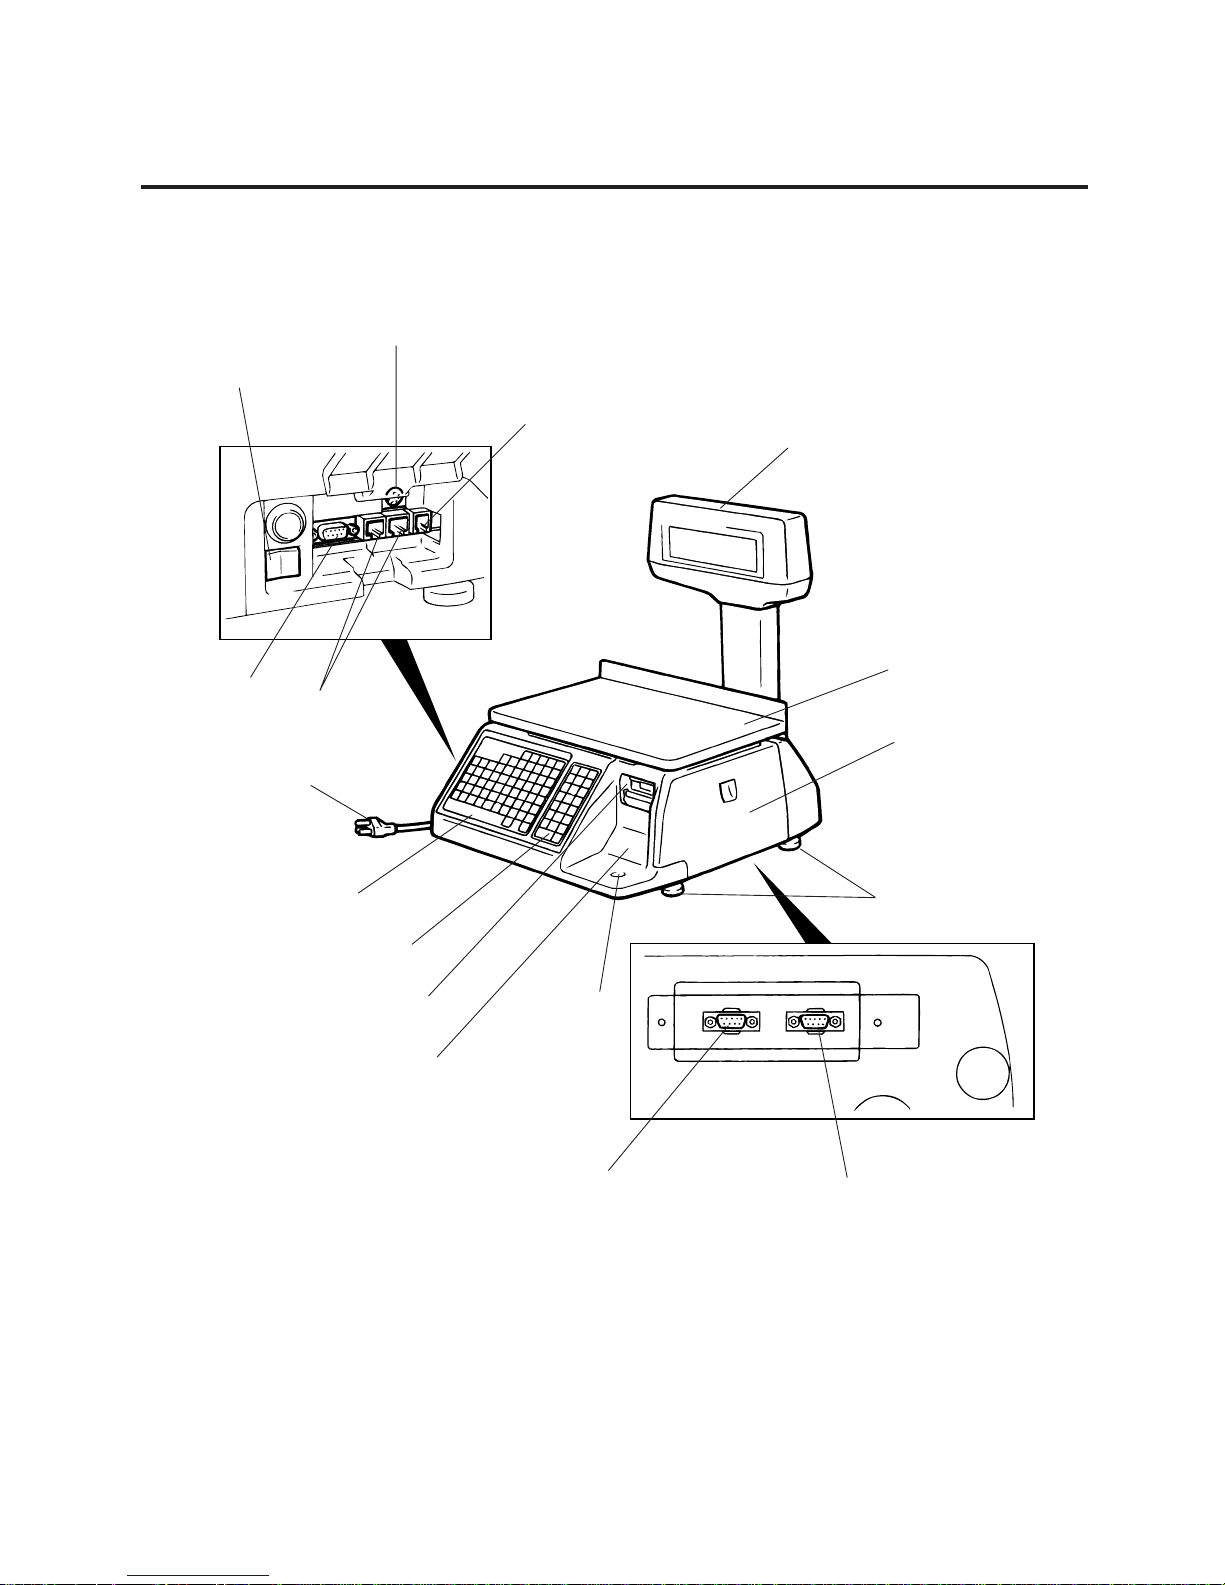
3. APPEARANCE
3. APPEARANCE
PC-AT Key Board I/F
(Option)
Drawer I/F
(Unused)
Remote Display
Meat Platter
Right Cover
Adjustable Legs
RS-232 I/F: MALE (Option)
TMCC I/F: MALE (Option)
RS-232 I/F: FEMALE (Option)
Level Gauge
Liquid Crystal Display
Print Head
Operation Keyboard
Speed Keyboard and
Programming Keyboard
Power Cord
LON I/F
CMT/PL-3 I/F
Main Power Switch
Page 13
4-1
4. DISPLAY
4. DISPLAY
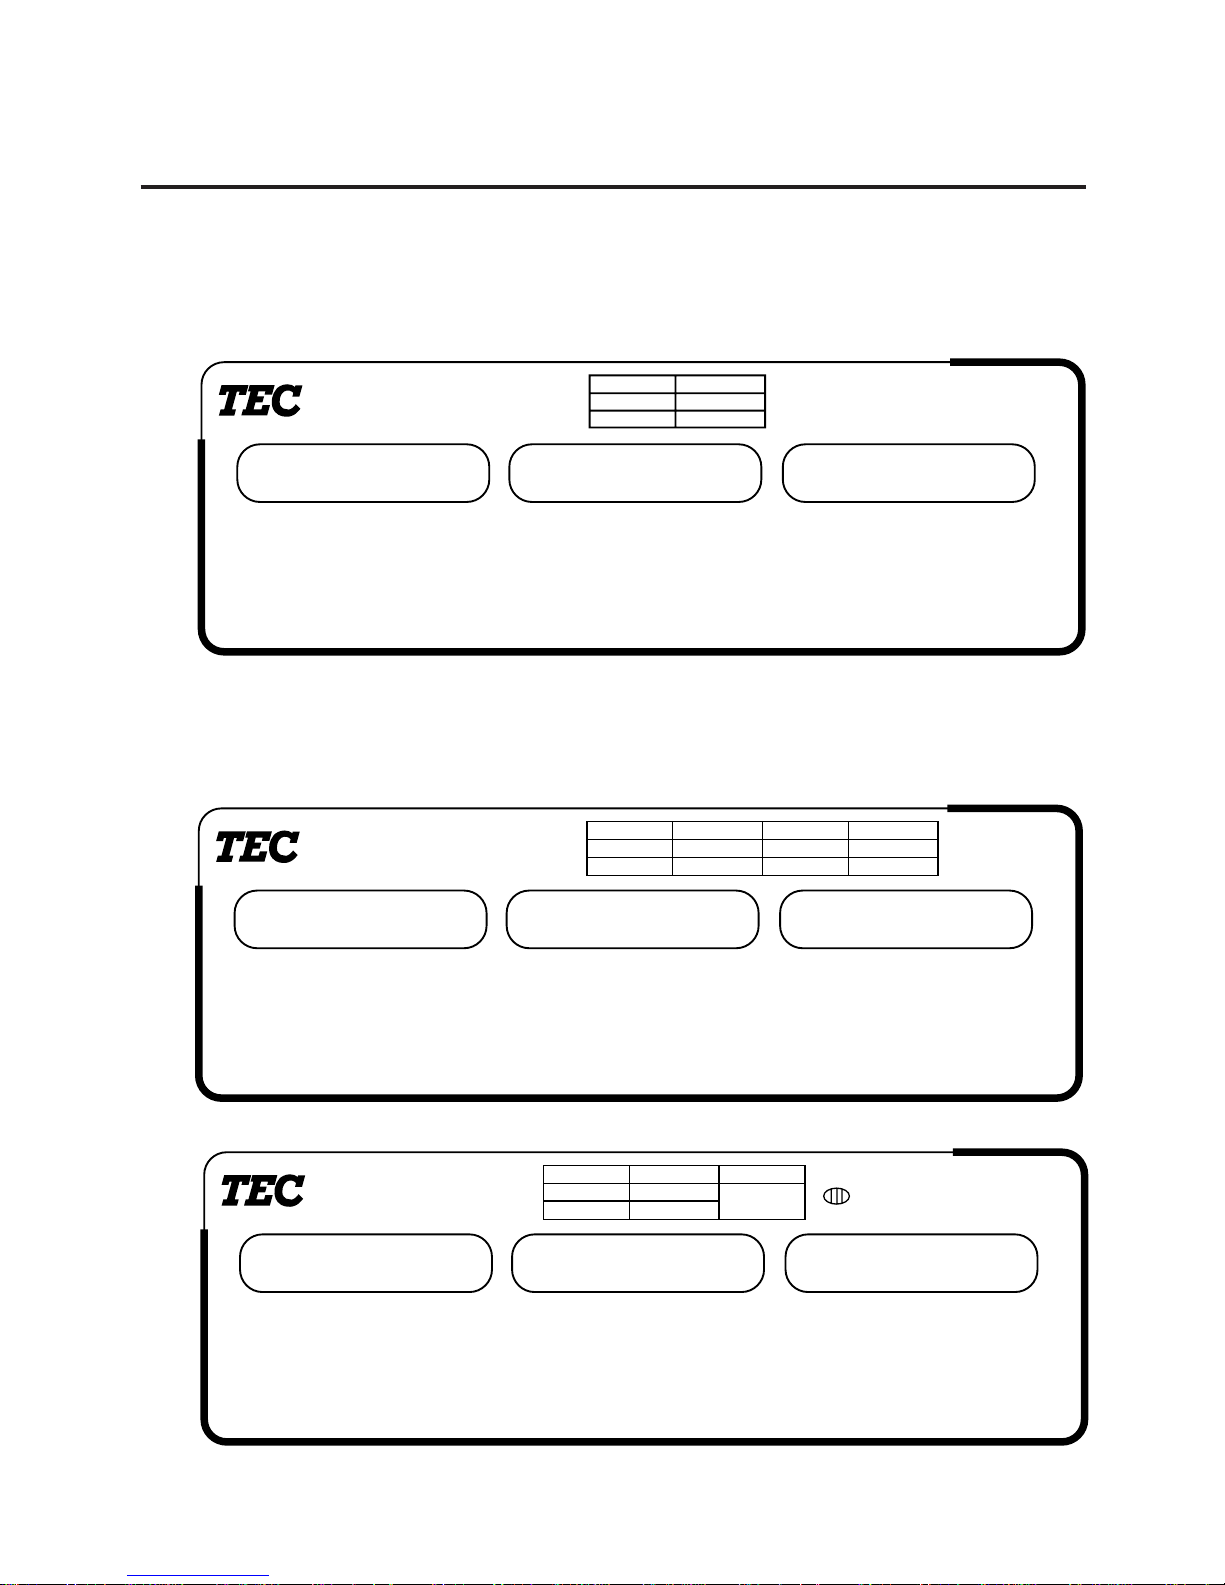
4.1 US TYPE
• US (UNITED STATES)
4.1 US TYPE
SL-9000
WEIGHT lb
%/T NET REG. M/D R/W PREPACK X Z LON INLINE ERROR
PRICE/lb $ TOTAL PRICE $
WEIGHT
0 ~ 15 lb
15 ~ 30 lb
e=d
0.005 lb
0.01 lb
CAPACITY
4.2 CA TYPE
Since the following two remote display sheets are enclosed with the CA machine, select one and
affix it to the remote display. (Refer to Section 7 How to affix the remote display sheet.)
• CA (CANADA)
SL-9000
WEIGHT/POIDS
ZERO/ %/T NET kg lb
ZERO
REG. M/D R/W 100g PREPACK/
PRE-EMBALLE ERREUR
X Z LON INLINE ERROR/
PRICE/PRIX $ TOTAL $
WEIGHT
0 ~ 16 Kg
6 ~ 15 Kg
e=d
0.002 Kg
0.005 Kg
WEIGHT
0 ~ 15 lbs
15 ~ 30 lbs
e=d
0.005 lbs
0.01 lbs
CAPACITY
CAPACITÉ
• MX (MEXICO)
SL-9000
CERO NETO REG. M/D R/W 100g FIJO X Z LON LINEA ERROR
PRECIO UNITARIO $/kg
PESO kg PRECIO TOTAL $
WEIGHT
0 ~ 6 Kg
6 ~ 15 Kg
e=d
0.002 Kg
0.005 Kg
Max. 15 Kg
Min 0.04 Kg
TARE
T=-1 Kg
Page 14

4-2
4. DISPLAY
4.3 QR TYPE
4.3 QR TYPE
A
B
SL-9000
WEIGHT
0 ~ 6 Kg
6 ~ 15 Kg
e=d
0.002 Kg
0.005 Kg
Max. 15 Kg
Min 0.04 Kg
TARE
T=-1 Kg
For the QR machine, the following multi-linqual display stickers are provided to adapt machines to
use in various countries. Select one of them and affix it to positions A and B on the remote
display. (Refer to Section 7 How to affix the remote display sheet.)
• AG/CL (ARGENTINA/CHILE)
• BN/SG (BRUNEI/SINGAPORE)
• IN (INDONESIA)
• MY (MALAYSIA)
• PH (PHILIPPINES)
• SD (SAUDI ARABIA)
• TH (THAILAND)
• ZA (SOUTH AFRICA)
PESO kg
CERO NETO REG. M/D R/W 100g FIJO X Z LON LINEA ERROR
PRECIO TOTAL $
PRECIO UNITARIO $/kg
WEIGHT kg UNIT PRICE $/kg
ZERO NET REG. M/D R/W 100g FIX X Z LON INLINE ERROR
TOTAL PRICE $
WEIGHT kg UNIT PRICE Rp/kg
ZERO NET REG. M/D R/W 100g FIX X Z LON INLINE ERROR
TOTAL PRICE Rp
WEIGHT kg UNIT PRICE RM/kg
ZERO NET REG. M/D R/W 100g FIX X Z LON INLINE ERROR
TOTAL PRICE RM
WEIGHT kg UNIT PRICE PHP/kg
ZERO NET REG. M/D R/W 100g FIX X Z LON INLINE ERROR
TOTAL PRICE PHP
WEIGHT kg UNIT PRICE S.R./kg
ZERO NET REG. M/D R/W 100g FIX X Z LON INLINE ERROR
TOTAL PRICE S.R.
WEIGHT kg UNIT PRICE BT/kg
ZERO NET REG. M/D R/W 100g FIX X Z LON INLINE ERROR
TOTAL PRICE BT
WEIGHT kg UNIT PRICE R/kg
ZERO NET REG. M/D R/W 100g FIX X Z LON INLINE ERROR
TOTAL PRICE R
Affix to position A
Affix to position B
A
B
A
B
A
B
A
B
A
B
A
B
A
B
Page 15
4-3
4. DISPLAY
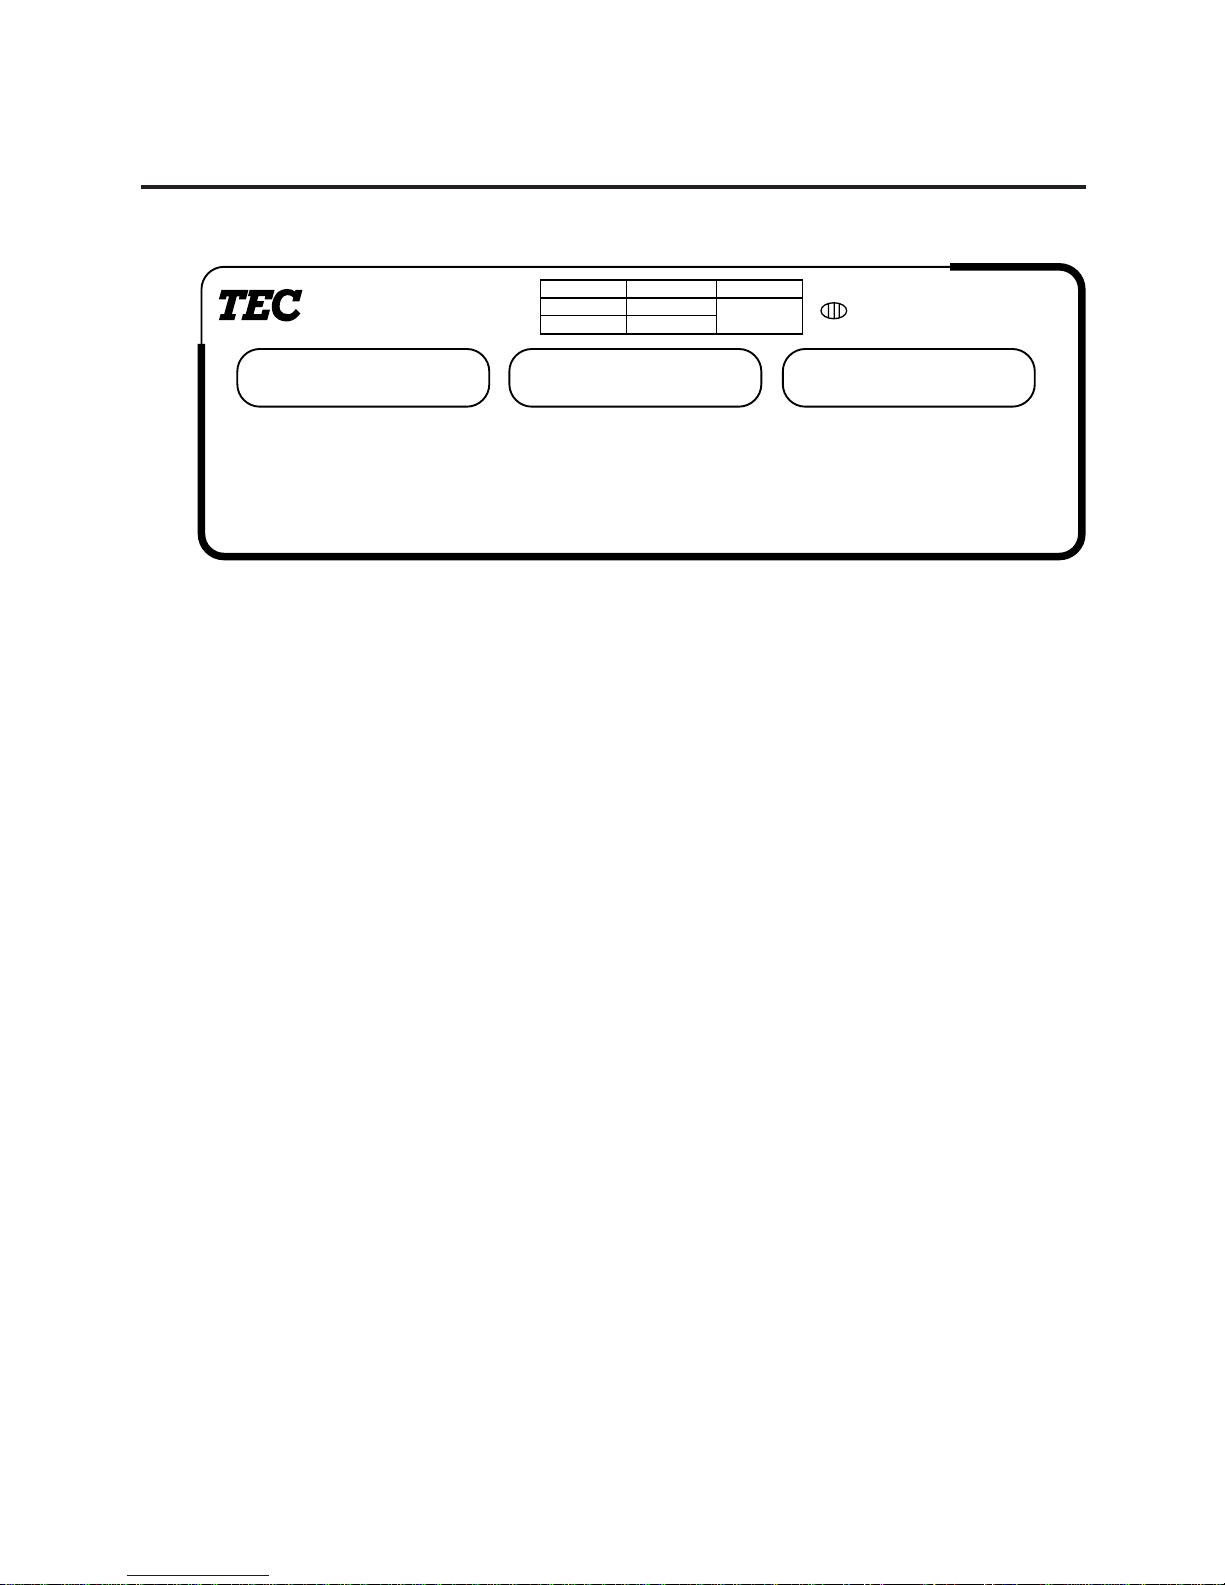
4.4 AU TYPE
4.4 AU TYPE
SL-9000
CERO NET REG. M/D R/W 100g FIX X Z LON INLINE ERROR
WEIGHT kg UNIT PRICE $/kg TOTAL PRICE $
WEIGHT
0 ~ 6 Kg
6 ~ 15 Kg
e=d
0.002 Kg
0.005 Kg
Max. 15 Kg
Min 0.04 Kg
TARE
T=-1 Kg
Page 16

5-1
5. KEY LAYOUT
5. KEY LAYOUT
5.1 PROGRAMMING KEYBOARD
5.1 PROGRAMMING KEYBOARD
AUTO
CODE
FEED
@
0
>
P
.
>
-
RETURN
1/4
DELETE
(B)
NEXT
PLU
?
9
=
O
~
L
,
DELETE
PLU
INSERT
1
SET
NEXT
ZERO
`
8
<
|
}
K
↑
SPACE
CHANGE
PLU
DELETE
(A)
SHIFT
´
7
;
U
↓
M
J
--
↓
→
CLEAR
&
6
:
Y
←
N
{
H
↑
←
%
5
/
T
→
B
-
G
RECEIVE
TEST
$
4
)
R
Ê
V
ˆ
F
SEND
-
#
3
(
E
Â
C
]
D
ENTER
!
1
*
Q
È
Z
[
A
PROG.
"
2
+
W
É
X
\
S
1/2
NOTE: Blank keys have no function.
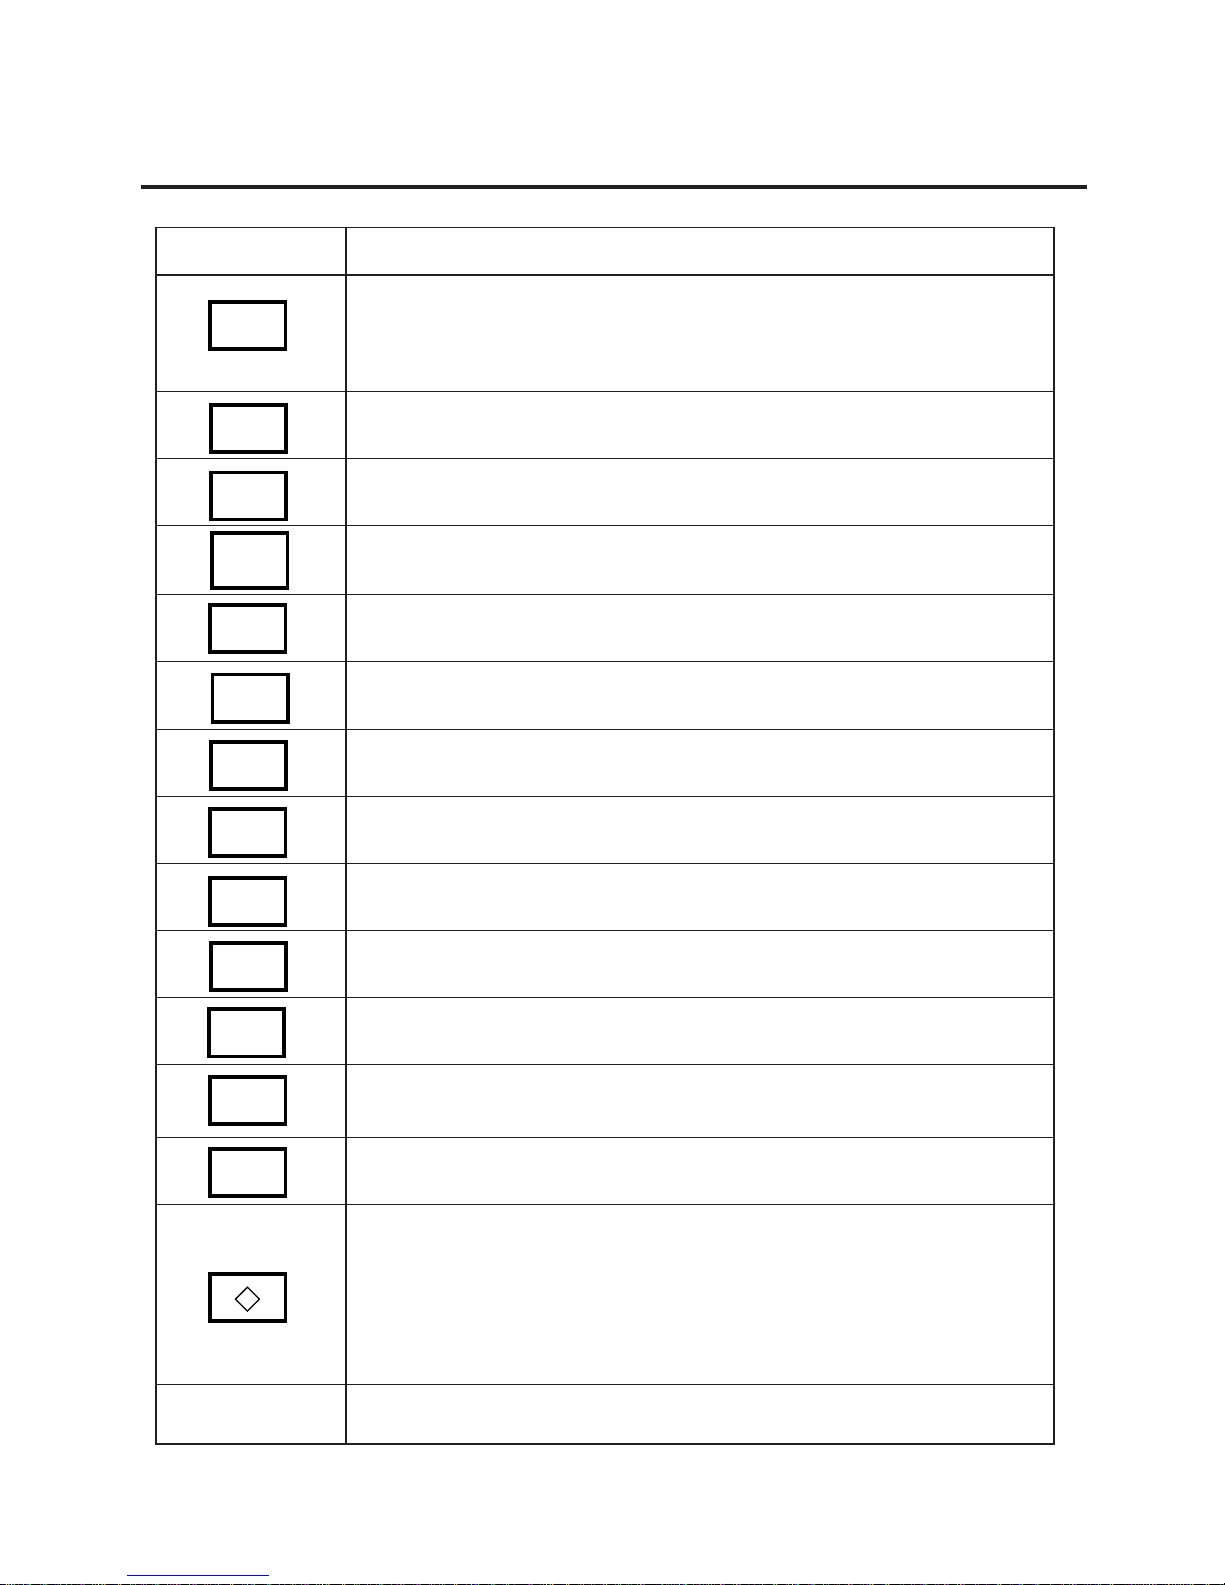
Programming Keyboard Function
Function
1. Clears preceding numeric data.
2. Releases the scale from the error mode.
Toggles between the upper characters or lower characters.
Calls the next PLU data item.
Sets the media transarency on the sensor.
1. Calls the next PLU #.
2. Selects a programming item.
Sets "AUTO CODE."
Changes the PLU # currently called.
Deletes PLU.
Prints data set in the currently called PLU.
Inputs data to the SL-9000 system during programming.
Name of Key
CLEAR
SHIFT
SET
NEXT
NEXT
PLU
AUTO
CODE
CHANGE
PLU
DELETE
PLU
TEST
ENTER
Page 17
5-2
5. KEY LAYOUT
Function
1. Displays the preceding PLU data.
2. Used to set an auto code.
3. Calls the preceding label format # when setting the print position.
4. Selects a prgramming item.
Moves the cursor to the left.
Moves the cursor to the right.
1. Deletes a selected character when setting commodity names.
2. Sets a unit price per 1/2 lb.
1. Inserts a space when setting a commodity name.
2. Toggles between 100 g and Kg, or used to select Lb when setting unit price.
Deletes all characters on the selected line when setting commodity names.
1. Displays the next line when setting the ingredient.
2. Sets a unit price per 1/4 lb.
Inserts a blank space in descriptors.
Stores "Ingredient data" in the temporaty memory.
Calls "ingredient data" from the temporaty memory.
Sets the preceding item when setting PLU and nutrition information.
Sets the following item when setting PLU and nutrition information.
Returns to the programming menu.
1. Selects programming menu group.
2. Toggles between capitals and small letters.
3. Sorts the file when setting PLU data, ingredient data and nutrition data.
4. Sets a block PLU # using the confirmation label procedure.
5. Toggles between the scrolling message and fixed message.
6. Calls the second half of the speed keys and sets a department #.
7. Toggles between In-line and Local or in-line and off-line of LON system.
The other 39 keys are used to set the character.
Name of Key
_
←
→
DELETE
(A)
1/2
INSERT
1
DELETE
(B)
RETURN
1/4
↑
SPACE
SEND
RECEIVE
↑
PROG.
Other Keys
5.1 PROGRAMMING KEYBOARD
↓
Page 18

5-3
5. KEY LAYOUT
5.2 OPERATION KEYBOARD AND SPEED KEY BOARD
5.2 OPERATION KEYBOARD AND SPEED KEYBOARD
NOTE: 1. The numbers 1~70 indicate the speed key layout, but the actual keys have no number.
Pressing the
key enables another 70 PLUs assignment.
2. The functions of the 3 and 4 keys can be changed according to the initial settings
as follows.
1
10
19
28
37
46
55
64
2
11
20
29
38
47
56
65
3
12
21
30
39
48
57
66
4
13
22
32
40
49
58
67
5
14
23
32
41
50
59
68
6
15
24
33
42
51
60
69
7
16
25
34
43
52
61
70
8
17
26
35
44
53
62
9
18
27
36
45
54
63
PRESET
COUNT
GRADE
LINE
LOGO
ST
FEED
ESC.
NEXT
PLU
PROG.
VOID
POWER
SAVE FOR DT/TM
789
456
123
0
PLU PRT/*
TC
TESTZERO
GROUP#
3
1
1
2
2
US type
1/2
1/4
CA, QR, AU
type
100 g
LB/kg
1
2
Primary function
Secondary function
4
Initial Setting #
8-7
0
0
1
1
12-8
0
1
0
1
Speed key #
69 (4)
Speed key #69
Speed key #69
Speed key #69
AUTO/MANUAL key
70 (3)
Speed key #70
AUTO/MANUAL key
Tare % key
Tare % key
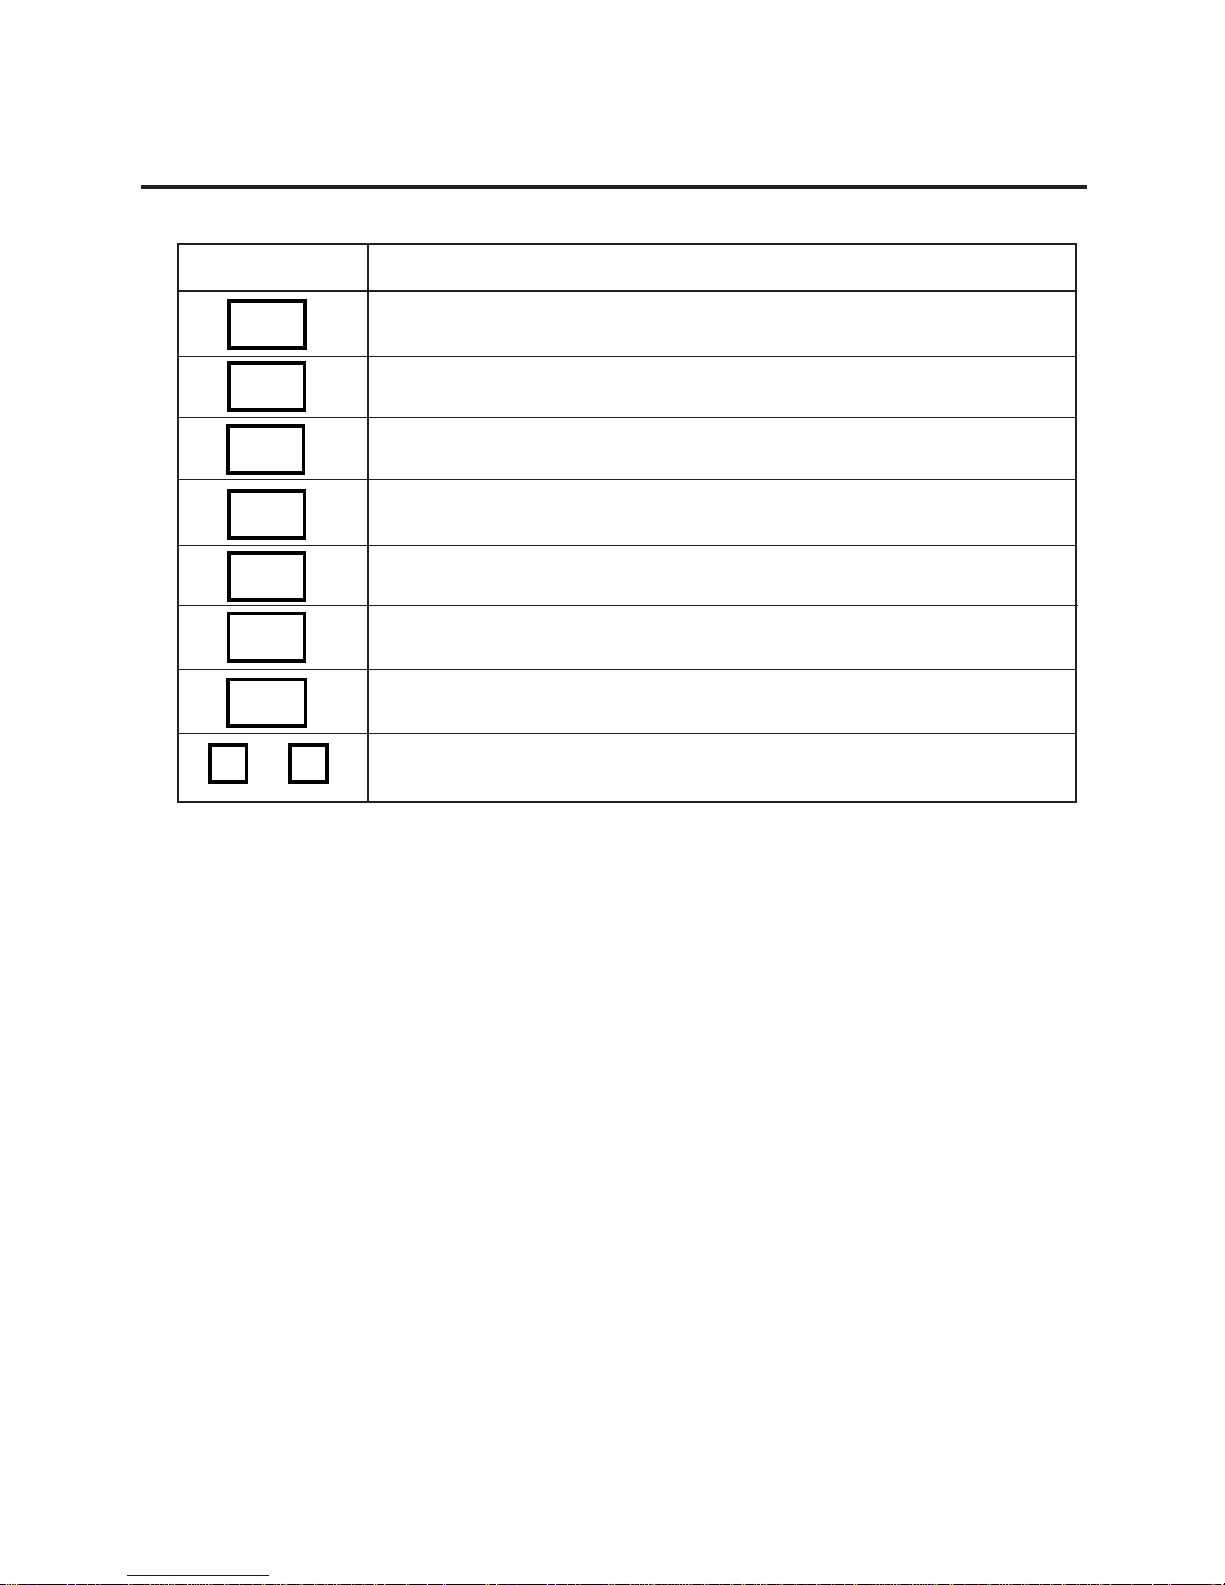
Operation Keyboard Function
Function
Enters numeric data such as PLU #, unit price and tare.
1. Clears numeric entries.
2. Releases the scale from error mode.
3. Releases the scale from SAVE mode.
Subtracts tare.
Name of Key
0
9
C
T
to
3. The
100g
key (1) has no function on the AU type.
4. The
LB/kg
key (2) has no function on the QR and AU types.
Page 19

5-4
5. KEY LAYOUT
Operation Keyboard Function
Function
Calls a PLU or clears displayed PLU.
Prints the customer label.
Saves tare and unit price after taking off the commodity from a platter.
Sets the quantity of commodity in "BY COUNT" mode.
Displays the date.
1. Selects the item for change Print/OFF.
2. Selects a programming item and a main menu.
1. Cancels preceding data.
2. Selects a programming item and a main menu.
1. Enables calling the other 70 speed keys.
2. Selects the function for change Print/OFF.
3. Selects a menu group.
Returns to the main menu.
Accesses print item, auto message timer, print format and issue mode
selection mode.
Turns the display on/off when the scale power is on.
Changes between 1/2 lb and 1/4 lb (US type only).
Changes the unit of measure to 100g (CA/QR type only).
Changes the unit of measure between lb and kg (CA type only).
Sets the number of labels to print.
Prints a grade line.
Calls a logo.
Name of Key
DT/TM
NEXT
PLU
VOID
ESC.
PROG.
POWER
1/4
100g
LB/kg
PRESET
COUNT
GRADE
LINE
LOGO
1/2
5.2 OPERATION KEYBOARD AND SPEED KEYBOARD
PLU
PRT/*
SAVE
FOR
Page 20
5-5
5. KEY LAYOUT
Function
No function
No function
This key is used for item or subtotal discount by entering a percentage.
(Optional key by initial setting)
Feeds the label.
Issues a test label.
Adjusts the zero point.
Changes the label issue mode between Automatic issue and manual
issue. (Optional key by initial setting)
Calls the PLU frequently used.
AUTO/
MANUAL
ZERO
5.2 OPERATION KEYBOARD AND SPEED KEYBOARD
Name of Key
GROUP
#
ST
FEED
TEST
%
1
70
to
Page 21

6-1
6. PROCEDURE BEFORE OPERATION
6. PROCEDURE BEFORE OPERATION
1. Unpack the accessories and scale from the carton.
2. Install the remote display on the scale. (See Page 7-1.)
3. Refer to Safety Precautions in this manual and set up the scale in a proper location.
4. Load the label or receipt. (See Page 9-1.)
5. Be sure to insert the power cord plug into an AC outlet.
6. Adjust the level gauge. (See page 8-1.)
7. Connect a PC-AT keyboard if necessary.
8. Turn the power on and then press the power key. (See page10-1.)
9. Set the following program menus:
6. PROCEDURE BEFORE OPERATION
Menu Group ITEM No. Programming Name
2 0 PRINT FORMAT
2 1 DATE/TIME SETTING
1 1 PLU DATA SETTING
If necessary, set the following program menus:
10. Call a PLU to be sold in weighing mode, and place a weight on the platter to check a correct price
is displayed.
11. The scale is ready to issue labels.
Menu Group ITEM No. Programming Name
1 2 INGREDIENT MESSAGE
1 3 NUTRITION SETTING
1 5 ADDRESS SETTING
1 7 SPECIAL INFORMATION
1 8 GRADE LINE
1 9 SPEED KEY SET
Page 22
7-1
7. INSTALLATION PROCEDURE
7. INSTALLATION PROCEDURE
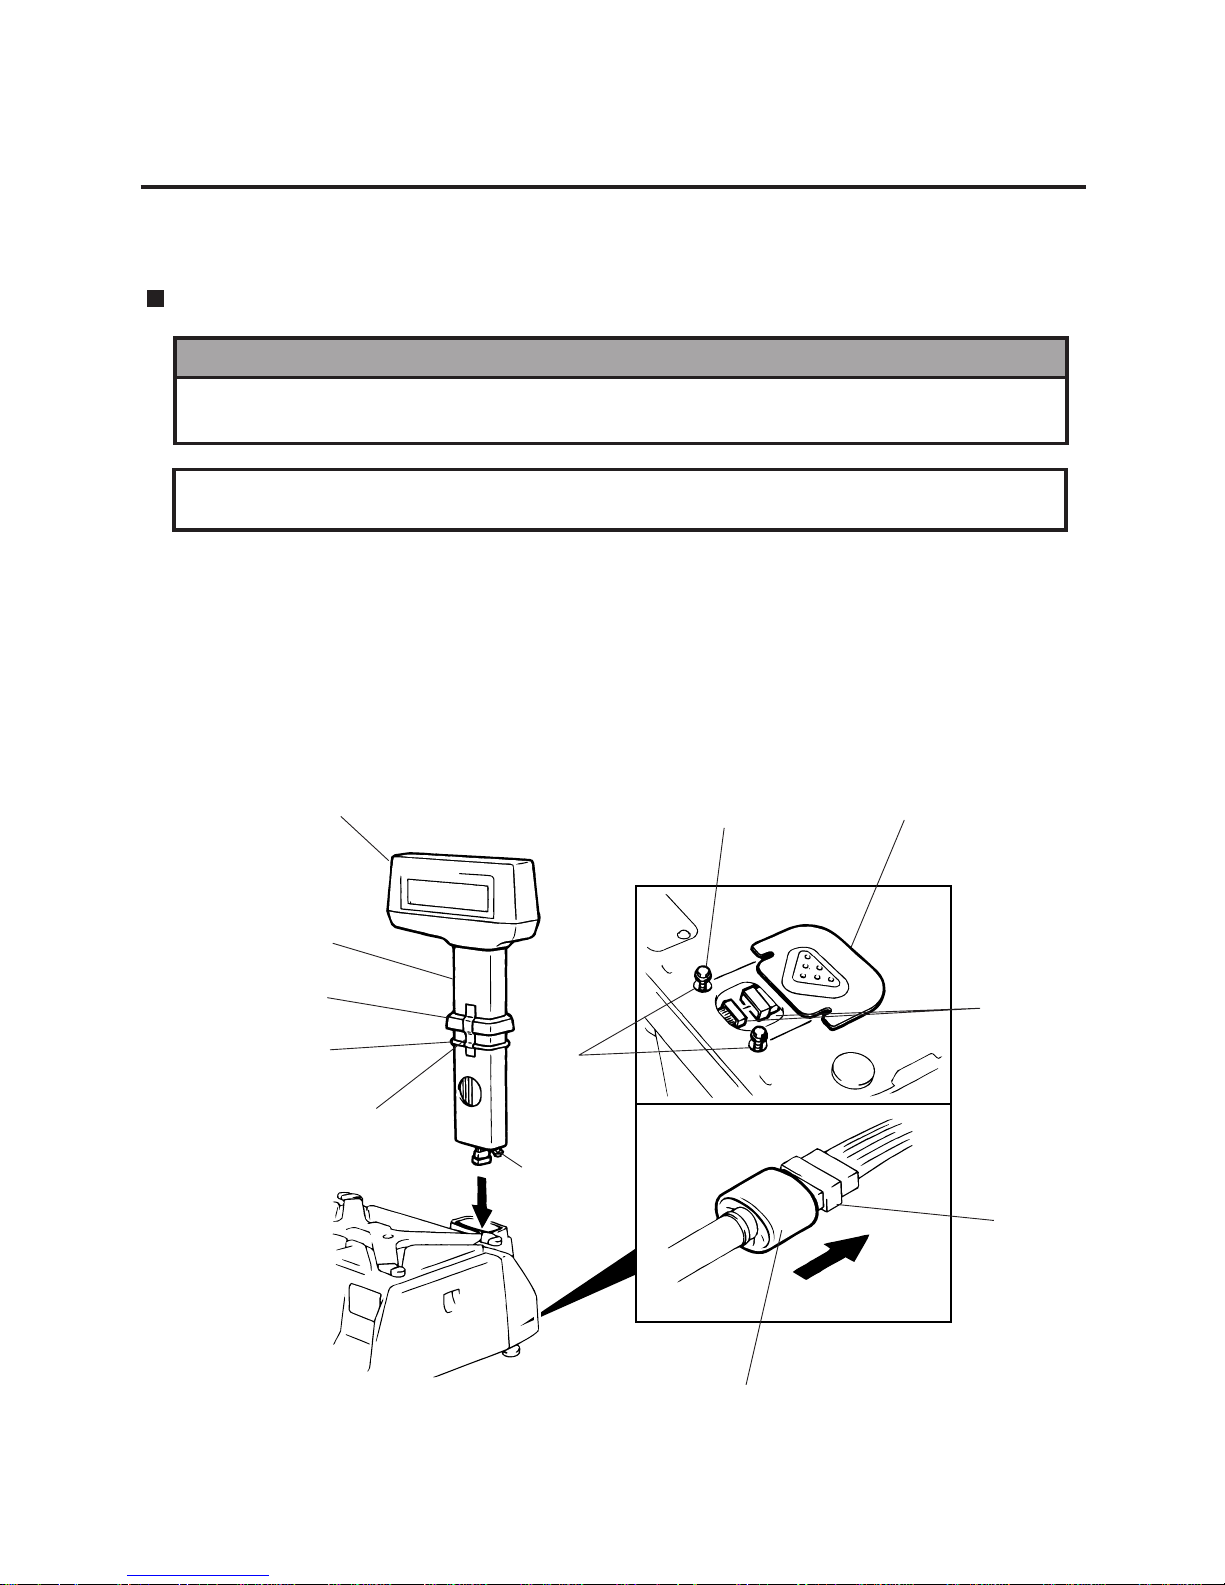
Remote Display
CAUTION: Never place the scale upside down. Doing so will cause a malfusction.
1. To install the remote display, insert the two screws on the bottom of the remote pipe into
the holes provided on the scale base.
2. Connect the connectors, pull down the connector cover, and install the remote blind plate.
Then tighten the screws to secure the remote display.
3. Remove the tape from the remote packing and remote cap and lower to fit them to the
scale.
7. INSTALLATION PROCEDURE
Remote Display
Remote Pipe
Remote Cap
Remote Packing
Tape
Hole
Screw
Screw
Remote Blind Plate
Connector
Connector
Connector Cover
WARNING!
Be sure to cover the connectors with the connector cover because of high voltage and
current. If the connectors are exposed to water, a leakage may result.
Page 23
7-2
7. INSTALLATION PROCEDURE
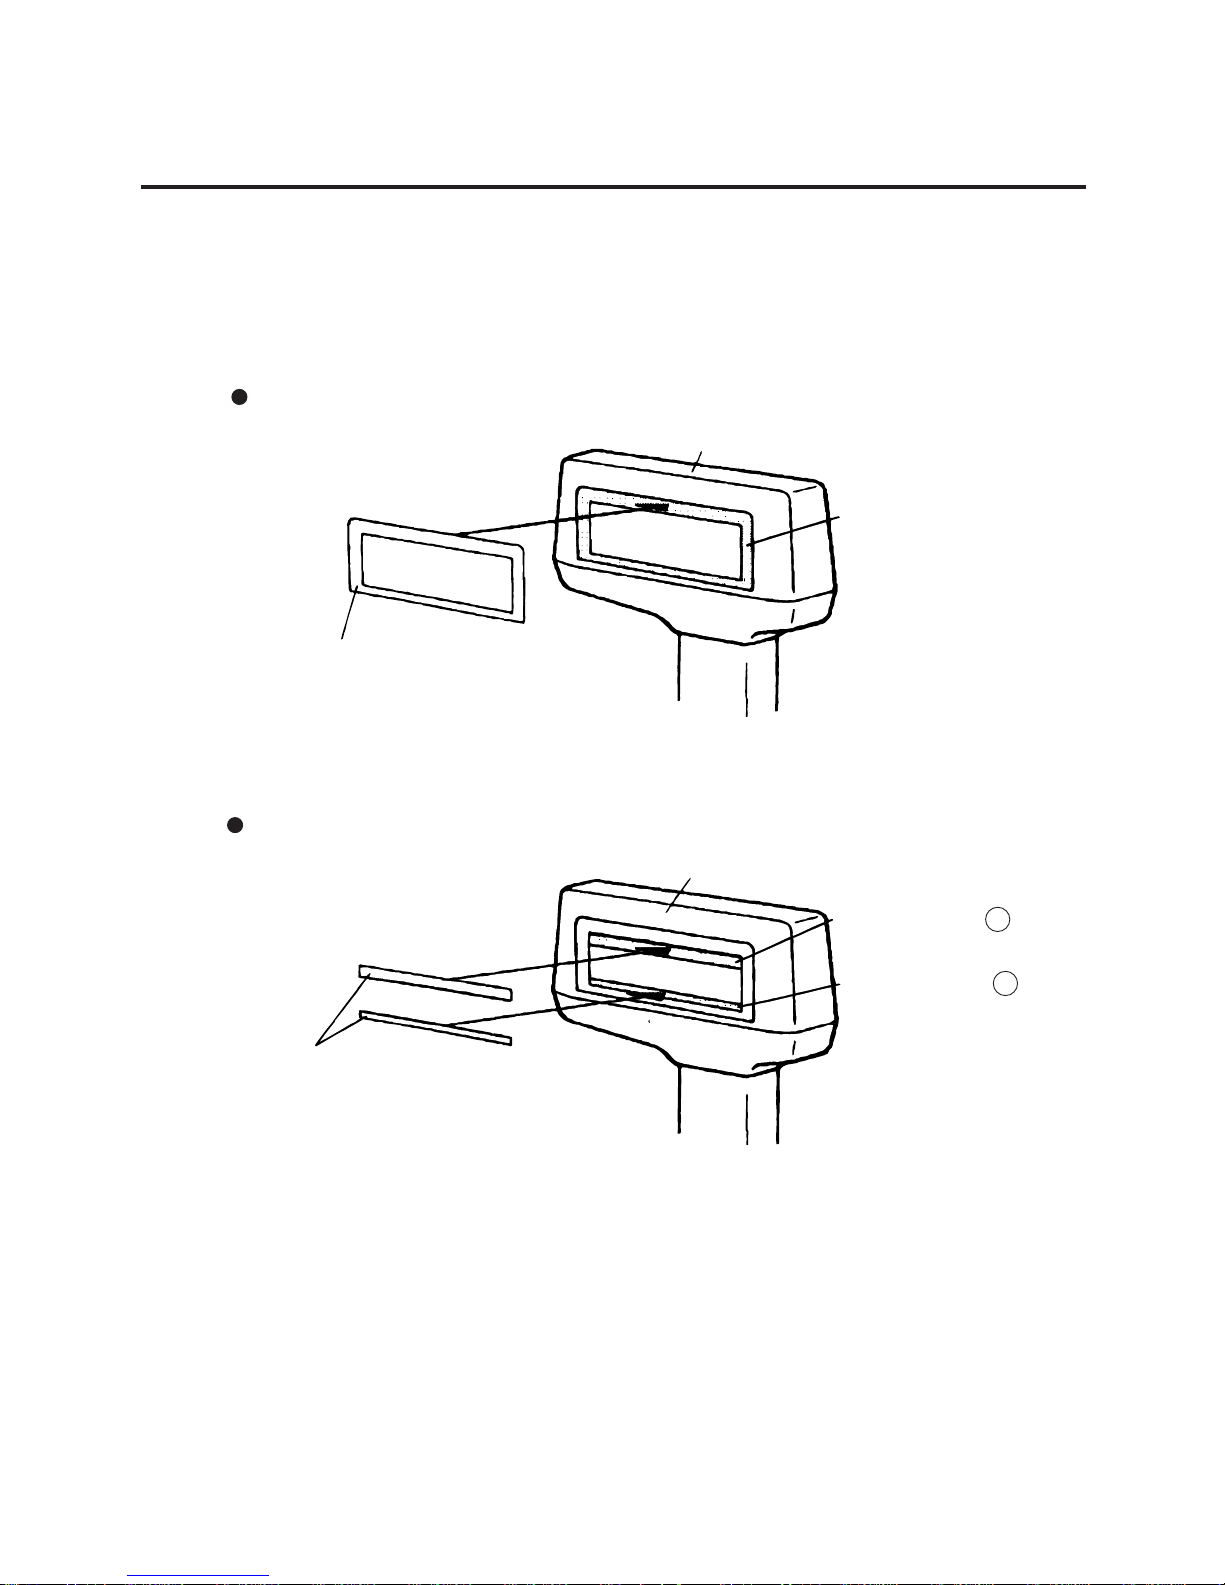
4. For the CA type, affix the remote display sheets to the remote display.
For QR type, affix the remote display sticker to the blank remote display sheet which is preinstalled on the scale. Be sure to wipe the remote display surface clean before affixing the
sheet or sticker.
CA Type
Affix the remote display sheets to the depressed area of the remote display on both sides.
(Operator side and customer side)
QR Type
Affix the remote display stickers to the inner edge of the remote display sheet. (The sticker
should be affixed on both the operator side and customer side)
Remote Display
Affix here.
Remote Display Sheet
Remote Display
Remote Display Sticker
Affix to position A
Affix to position B
7. INSTALLATION PROCEDURE
Page 24
8-1
8. LEVEL ADJUSTMENT
8. LEVEL ADJUSTMENT
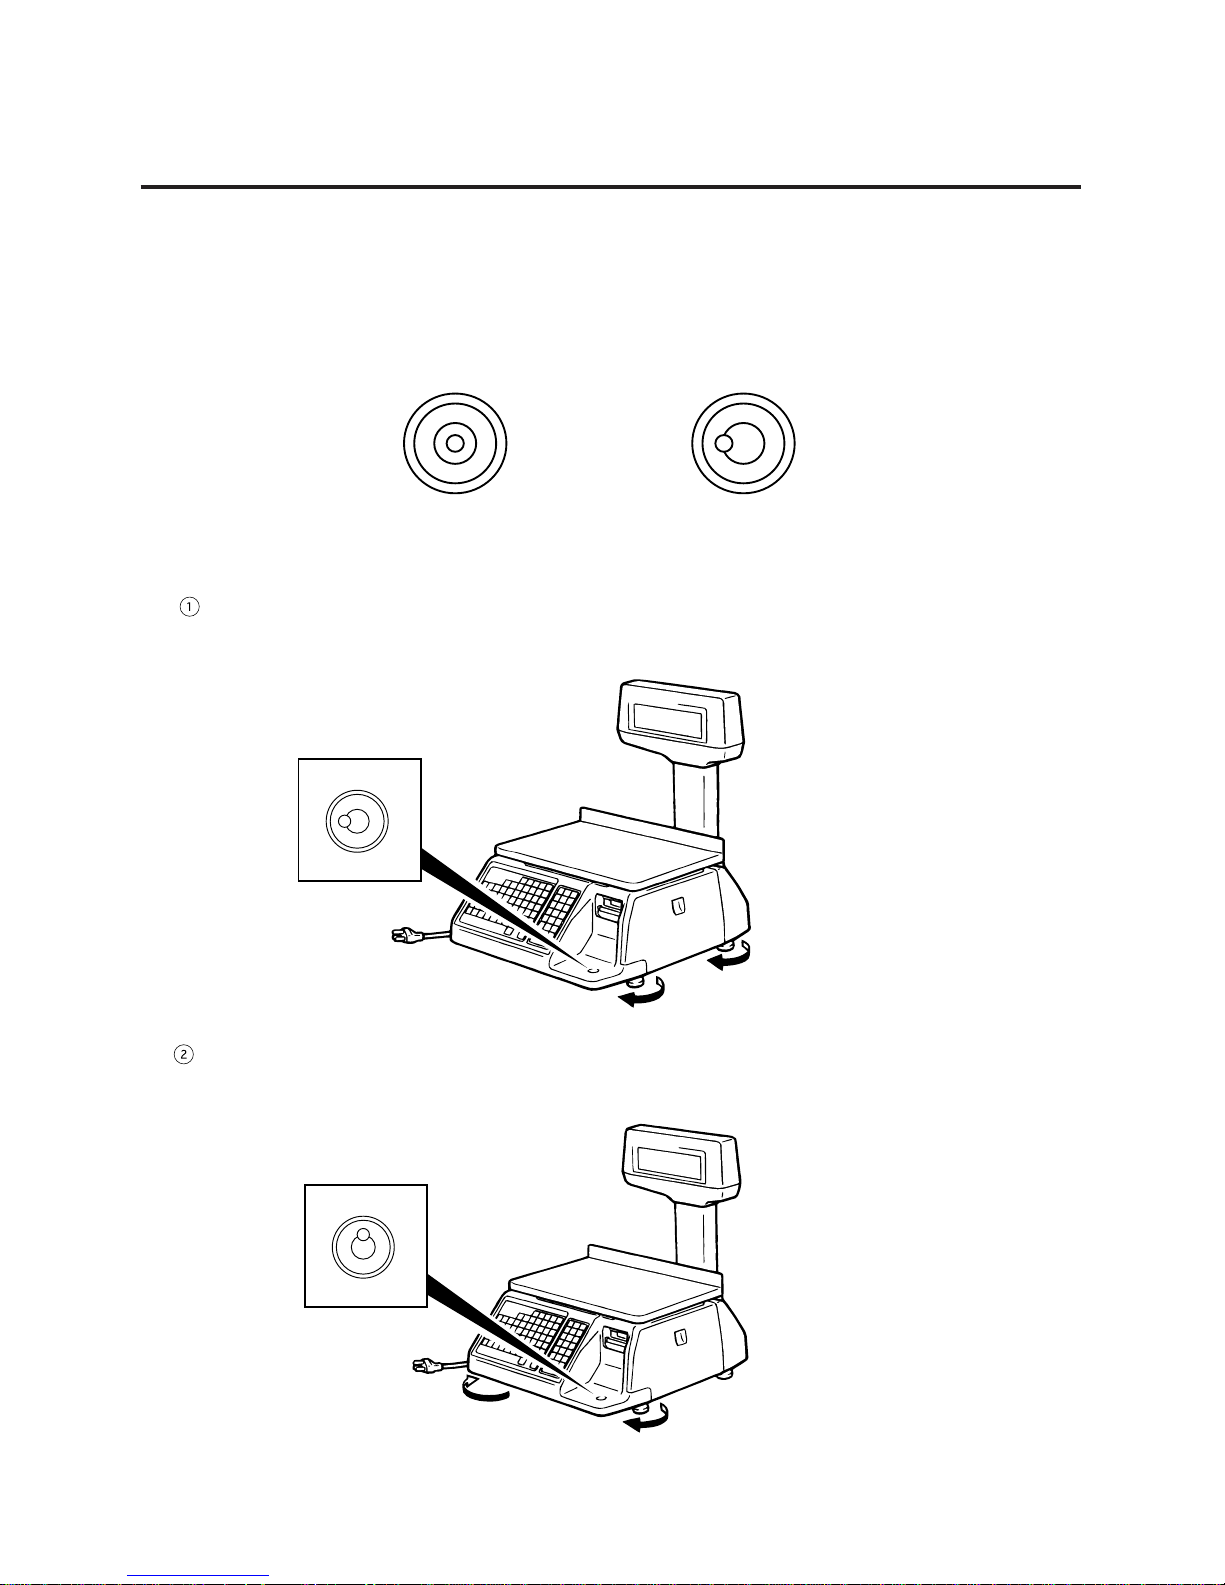
1. Level Gauge
Set the scale on a stable and level surface. Level the scale by turning the adjustable legs so
that the air bubble is inside the center circle.
8. LEVEL ADJUSTMENT
2. Adjustment Procedure
When the air bubble moves toward the left side, turn the right adjustable legs clockwise.
When the air bubble moves toward rear, turn the front adjustable legs clockwise.
Correct
Incorrect
Page 25

9-1
9. REMOVAL AND REPLACEMENT OF MEDIA
9. REMOVAL AND REPLACEMENT OF MEDIA
9. REMOVAL AND REPLACEMENT OF MEDIA
1. Open the right cover. Then push the head-up lever in the direction indicated by the arrow.
A
Head-up Lever
2. Pull out the label cassette.
3. Pull out the roll stopper and the backing paper stopper, and remove the media core with
backing paper.
Label Cassette
Roll Stopper
Backing Paper Stopper
Backing Paper
NOTE: When removing the backing paper, loosen the paper by turning the paper winding shaft
counterclockwise.
WARNING!
Since there is a cutter at the paper outlet, be careful not to injure your fingers when
replacing media.
CAUTION:
Do not hold the label cassette by the portion A. Doing so may deform the label
cassette, causing damage when setting it in position. Please be sure to hold
the label cassette as the following figure shows.
Page 26

9-2
9. REMOVAL AND REPLACEMENT OF MEDIA
9. REMOVAL AND REPLACEMENT OF MEDIA
4. Loosen the P-2.6x6 screw and move the label guide plate according to the media width.
5. Secure the label guide plate with the P-2.6x6 screw.
NOTE: After replacing the media, press the feed key to confirm that the media is issued correctly.
*Use of other model’s label cassette in the SL-9000 may cause a label skew.
NOTE: Ensure that the label guide plate aligns with the dowel.
6. Refer to the figure below and set the media on the label cassette.
7. Insert the roll stopper into the media core fully.
8. Set the backing paper stopper in the proper orientation.
9. Assemble the label cassette to the scale and remove slack of the media.
Push down the print head, and close the right cover.
Screw (P-2.6x6)
Label Guide Plate
48-mm label dowel
57-mm label dowel
Label or Report Paper
Roll Stopper
Label
Roll Stopper
Backing Paper Stopper
Page 27
10-1
10. OUTLINE OF OPERATION
NOTES:
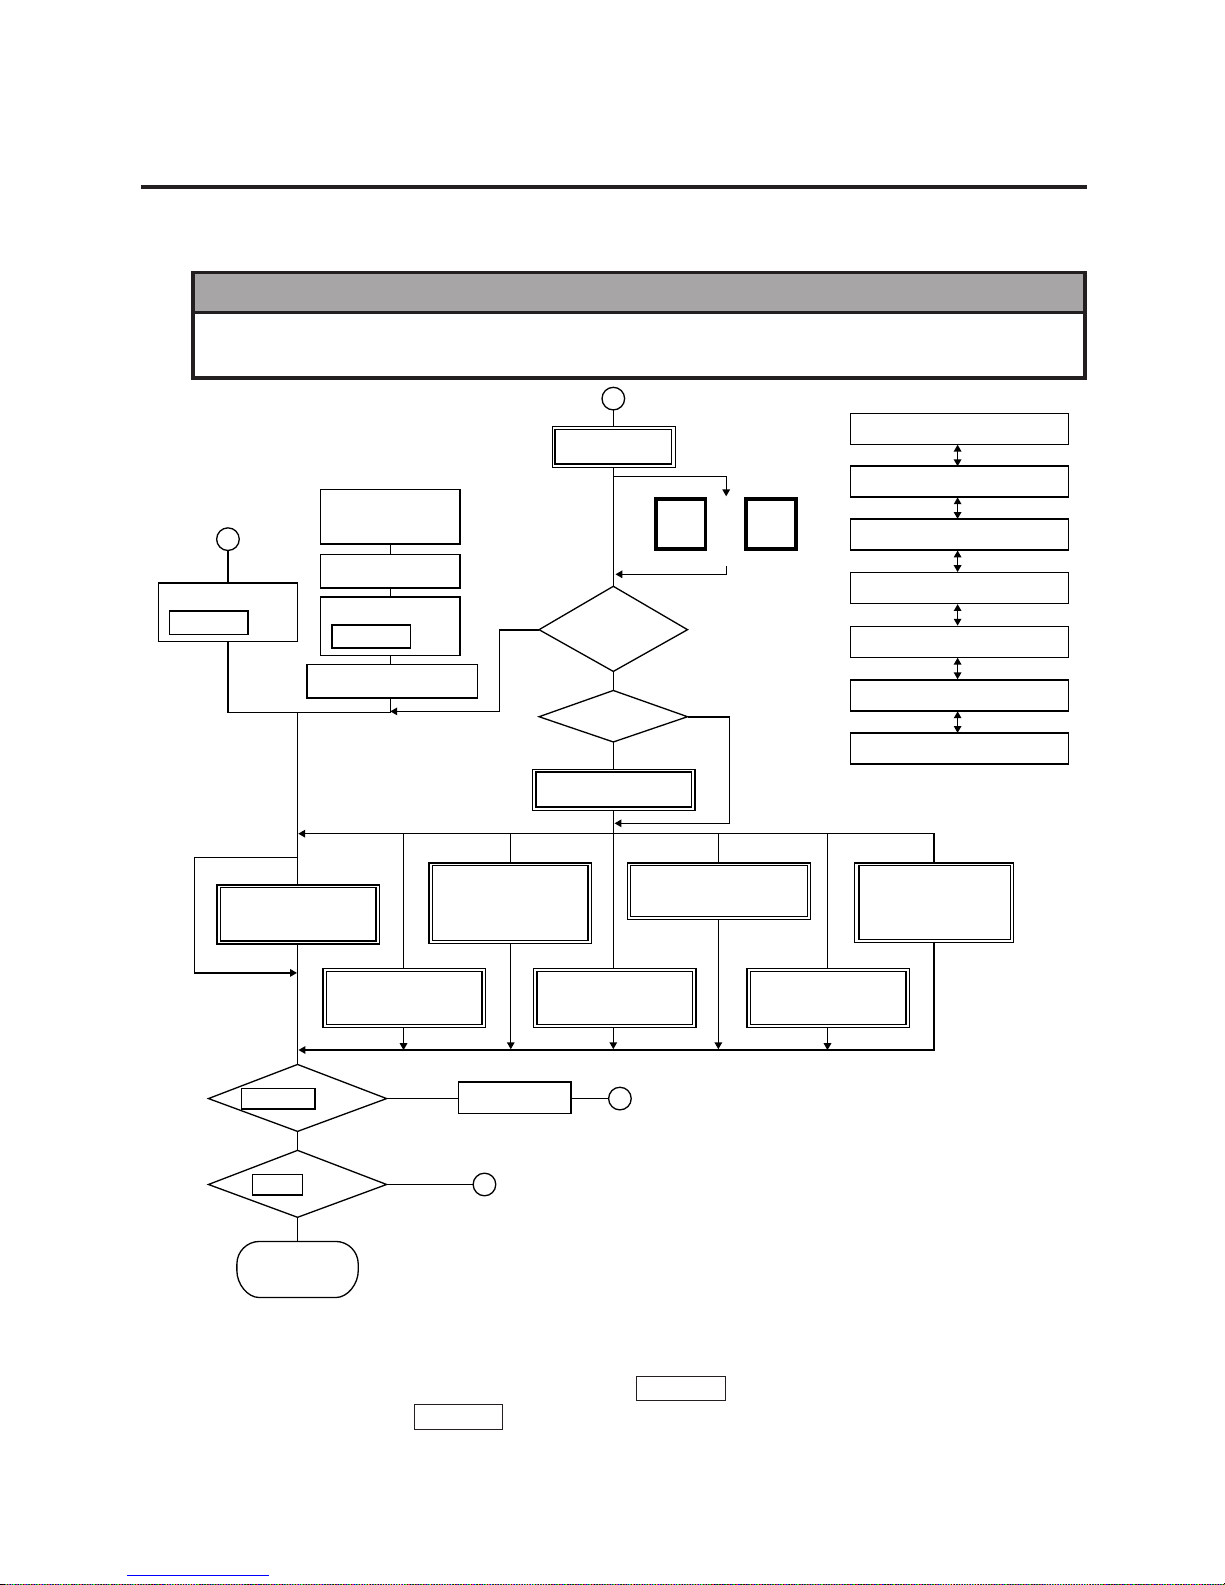
1. You can register a password to prohibit unauthorized access to each menu expect for REG.
menu.
2. To avoid wasteful use of the display, press the POWER key to turn the display off while being
unused. Pressing the POWER key again allows you to enter REG. mode without scanning.
3. Refer to respective sections for explanation each menu enclosed by a double rectangle.
10. OUTLINE OF OPERATION
10. OUTLINE OF OPERATION
2
1
1
2
Main Menu
Main Power
Switch ON
Display OFF
Scanning Display
Display OFF
Press the
POWER key
Password Input
REG Menu
(Refer to Section 14)
or
Increment
Other than Menu #1.
Unnecessary
Menu #1
Necessary
Press
Press
No Press
No Press
Menu No. 1
REWRAP Menu
(Refer to Section 14)
Menu No. 3
RESET Menu
(Refer to Section 15)
Menu No. 6
PROG Menu
(Refer to Section 11)
Menu No. 0
MARK DOWN
Menu
(Refer to Section 14)
Menu No. 2
READ Menu
(Refer to Section 12, 15)
Menu No. 5
SECURITY
Menu
(Refer to Section 13)
Menu No. 4
Decrement
NEXT
PLU
Select the
Menu #
Password
POWER key
ESC. key
Return to
each mode
VOID
Press the
POWER key
PROG. 0
Menu selection
REG. 1
MARK DOWN 2
REWRAP 3
SECURITY 4
READ 5
RESET 6
WARNING!
Since there is a cutter at the paper outlet, be careful not to injure your fingers when
issuing labels.
Page 28

11-1
11. PROGRAMMING PROCEDURES
11. PROGRAMMING PROCEDURES
How to access the Programming Menu
How to access the Programming Menu
Increment
Item # selection
Select an item No.
(See next page.)
Select the
programming
menu group.
or
Decrement
ENTER
00 9
~
Enter the
Password
neccesary
unnecessary
Enter a
menu number
Password
ESC.
Programming
starts
Programming
completes
PROG.
NEXT
PLU
VOID
NOTES: 1. When the selected menu ( 0 ) is protected from an access, refer to Section 13.2 and
enter the password.
2. In Sections 11.1, 11.2 and 11.3, items which have been sold on that day cannot be
called unless they are reset or the Initial Setting #1-4 is set to 1.
How to Select Menu and Item No.
NEXT
PLU
VOID
0
9
or
~
NEXT
PLU
VOID
0
9
or
~
NEXT
PLU
VOID
0
1
or
< Menu Group 1>
<Item No.>
TITLE
Item No.
Liquid Crystal Display
< Menu Group 2>
< Menu Group 3>
~
PLU DATA EDIT 0
@@@
PRT LOCATION 0
VENDOR 0
PLU DATA EIDT 0
PLU DATA 1
INGREDIENT 2
NUTRITION 3
ADRESS 5
SPECIAL INFO. 7
GRADE LINE 8
SPEED KEY SET 9
CONF. LABEL 4
<Item No.>
PRT LOCATION 0
DATE TIME 1
<Item No.>
VENDOR NAME 0
FREE FORMAT 1
CMT 2
ON-LINE/LOCAL 3
LON SYSTEM 4
INITIAL SET 5
BAR CODE FORM. 6
TITLE 7
LOGO 8
IDIOM 9
Page 29
11-2
11. PROGRAMMING PROCEDURES
How to access the Programming Menu
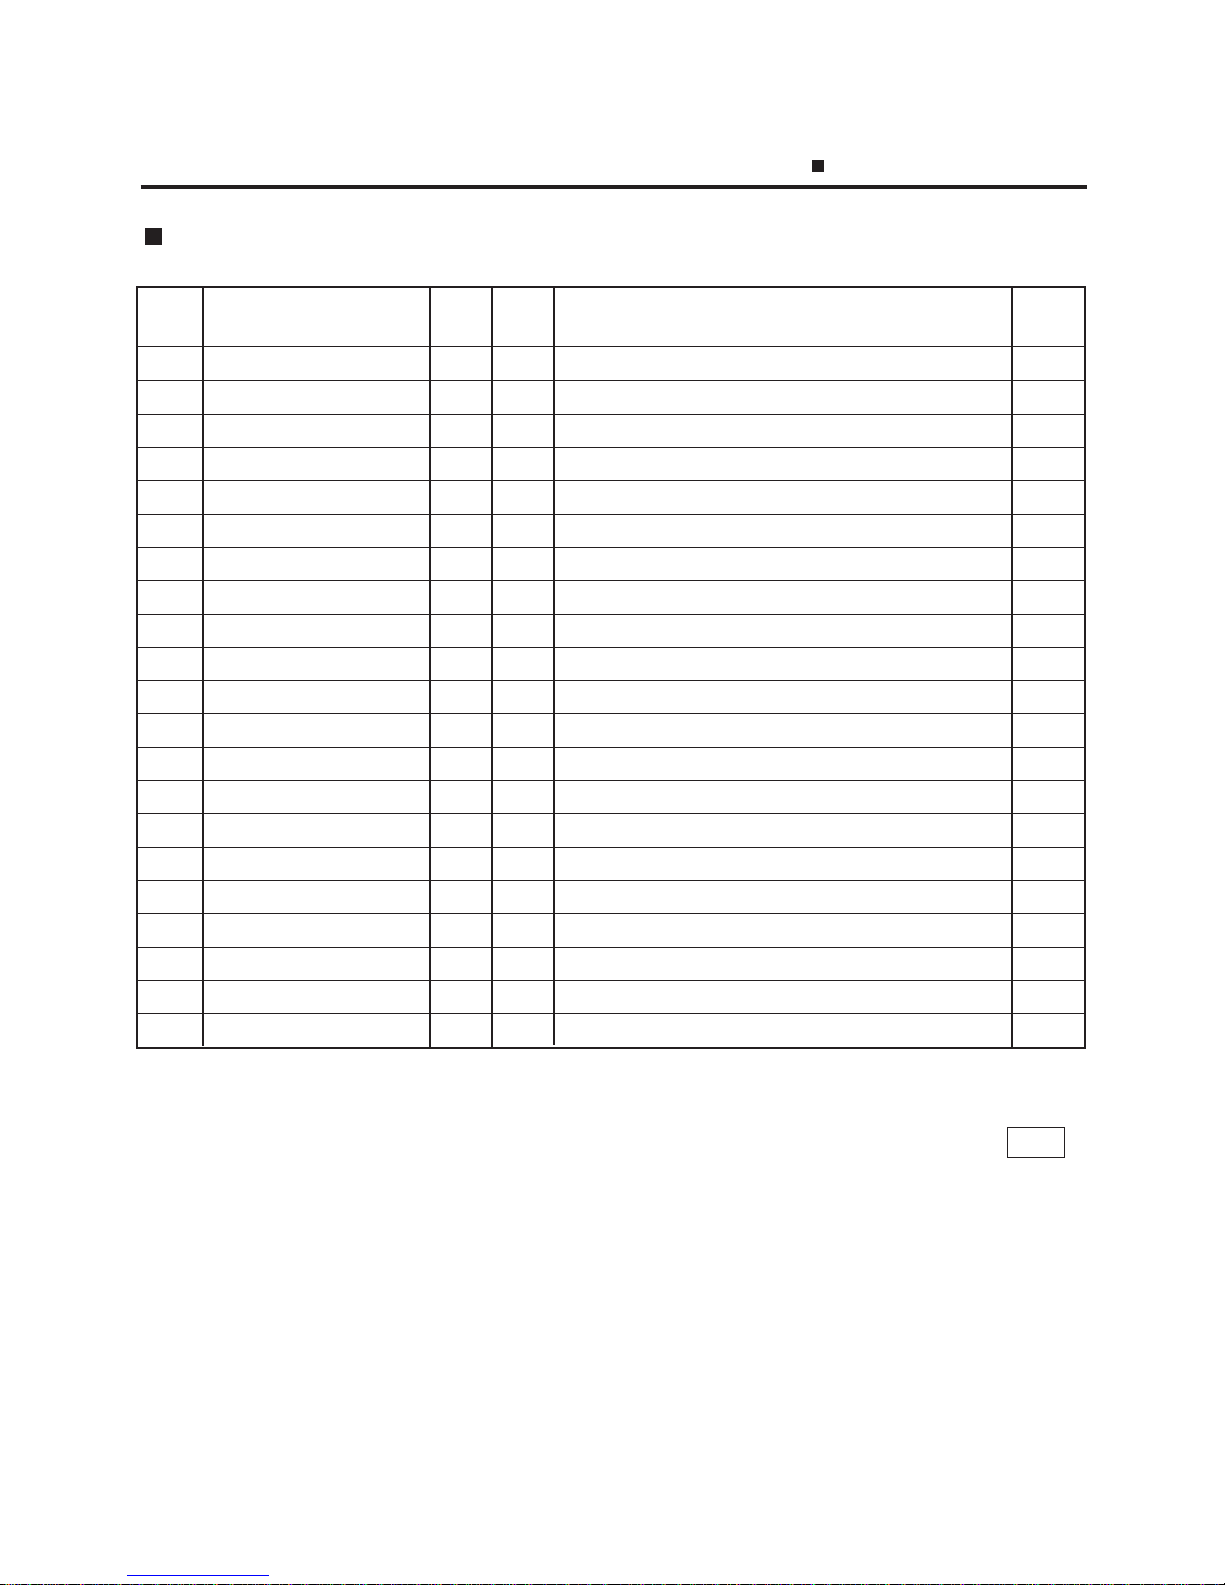
Table 1: Title and Contents of Programming Menu
NOTE: Menu No. 15 is program for use of dealers. Connect a TOSHIBA TEC representative if
you desire to use them. When you enter one of these menus by mistake, press ESC.
key to return to Main Menu.
NO. TITLE MENU ITEM CONTENTS Page
GROUP No.
1 PLU DATA EDIT 1 0 CHANGE UNIT PRICE 11-4
2 PLU DATA 1 1 PROGRAM/CHANGE/DELETE PLU 11-5
3 INGREDIENT MESSAGE 1 2 PROGRAM/CHANGE INGREDIENT 11-7
4 NUTRITION FACTS 1 3 PROGRAM/CHANGE NUTRITION FACTS TABLE 11-8
5 CONFIRMATION LABEL 1 4 VERIFY THE PROGRAMMING DATA OF PLU 11-12
6 ADDRESS SETTING 1 5 PROGRAM ADDRESS 11-13
7 SPECIAL INFO. 1 7 PROGRAM SPECIAL INFORMATION 11-14
8 GRADE LINE 1 8 PROGRAM GRADE LINE 11-14
9 SPEED KEY SETTING 1 9 ASSIGN COMMON PLU TO SPECIFIC SPEED KEY 11-15
10 PRT LOCATION 2 0 SELECT LABEL FORMAT AND ADJUST 11-16
11 DATE/TIME SETTING 2 1 PROGRAM DATE/TIME/MACHINE #/STORE CODE 11-18
12 CMT/PL-3 2 2 BACK-UP /LOAD DATA OF PLU/ING/NUTRI./SPEED KEY 11-18
13 IN-LINE/LOCAL 2 3 SET PARAMETERS FOR TMCC 11-21
14 LON SYSTEM 2 4 SET PARAMETERS FOR LON 11-22
15 INITIAL SET 2 5 SET INITIAL PARAMETERS 16 BAR CODE FORMAT 2 6 PROGRAM BARCODE FORMAT 11-24
17 TITLE 2 7 PROGRAM/CHANGE TITLE ON DISPLAY/PRINT 11-26
18 LOGO 2 8 SEND/RECIEVE LOGO DATA 11-27
19 IDIOM 2 9 PROGRAM IDIOM 11-28
20 VENDOR 3 0 VENDOR NAME 11-28
21 FREE FORMAT 3 1 PROGRAM FREE FORMAT 11-29
Page 30
11-3
11. PROGRAMMING PROCEDURES
How to enter characters
How to enter characters
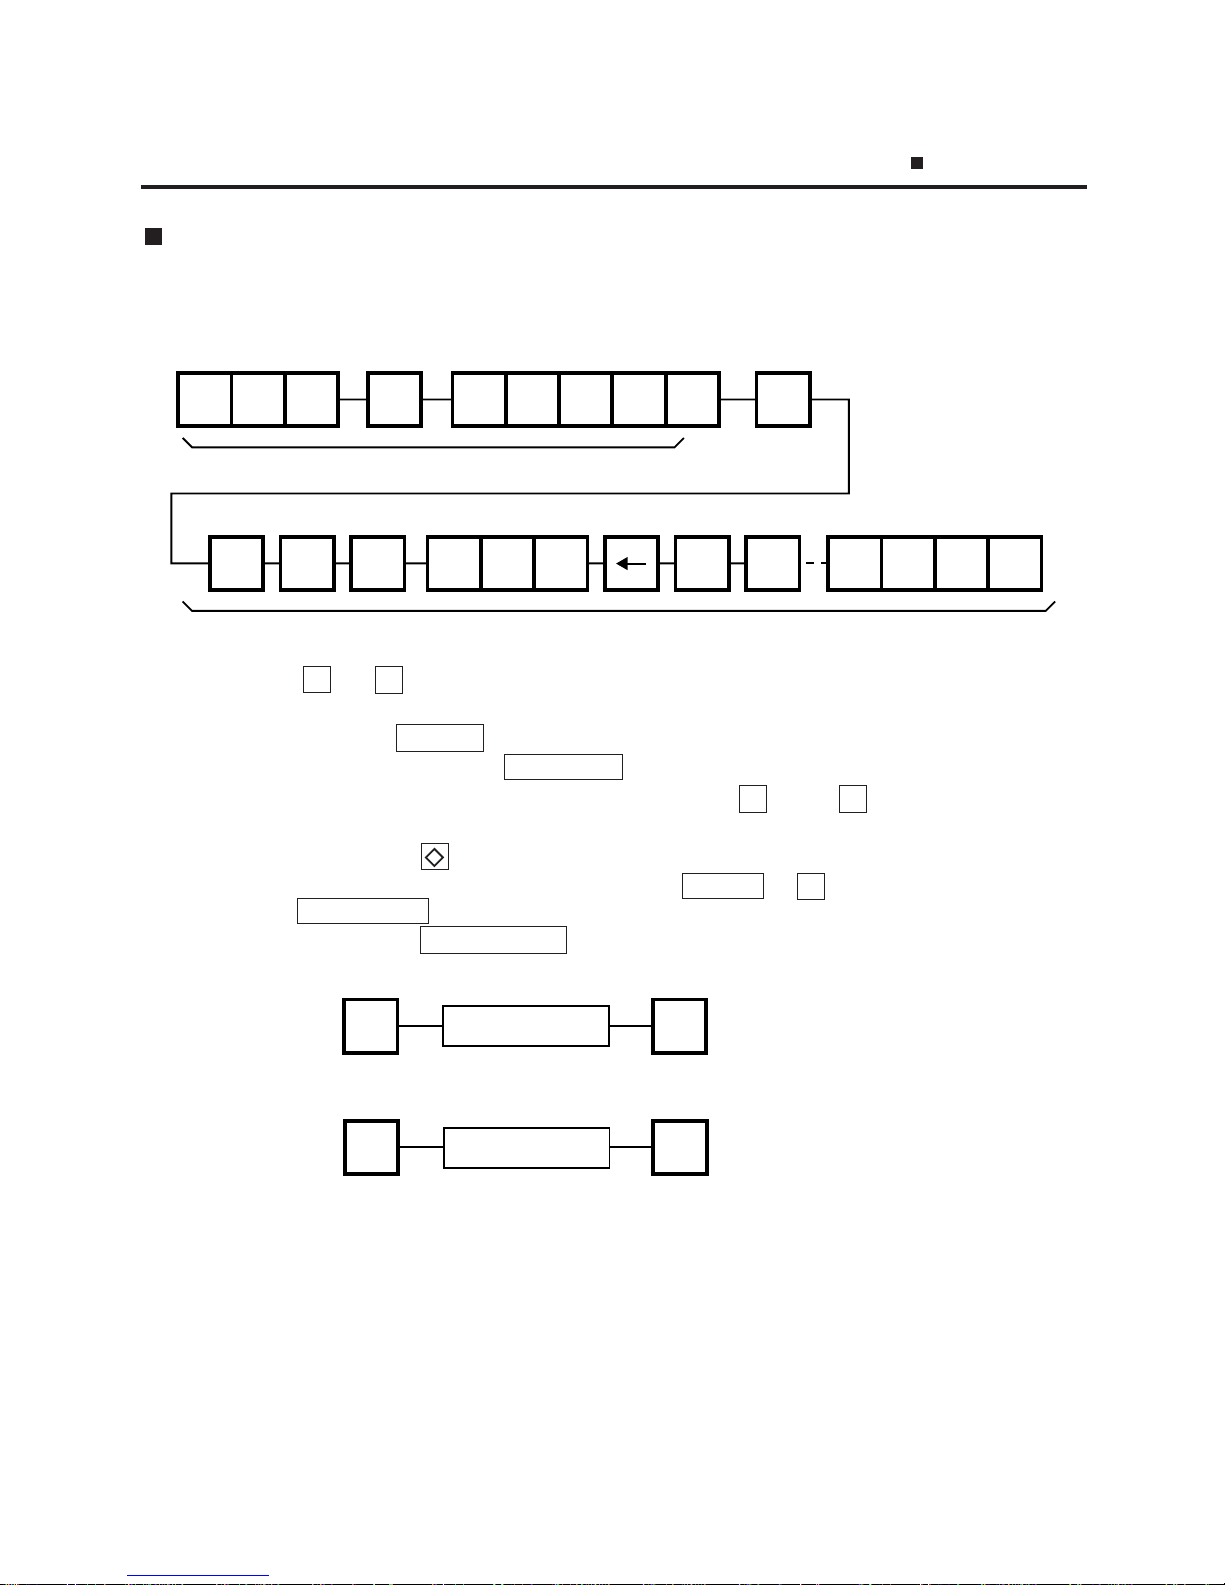
Use the following procedure to enter a commodity name, address and ingredient message.
Example) 1st line: TEC STORE
2nd line (TEL) 0123-45-6789
SHIFT
T
TEE 6789
EC
SPACE
1st line content
2nd line content
STOR
RETURN
1/4
SHIFT (
DELETE
(A) 1/2
L
E
NOTES: 1. ← and
→
keys are the cursor keys.
2. To insert a space, move the cursor to the next character to the space to be inserted,
and press
INSERT
key.
3. To delete a line, press
DELETE (B)
key.
4. To move the cursor to the preceding line, press - key, or
↑
key when entering a
commodity name.
5. Pressing the
key toggles between capitals and small letters.
6. When entering a commodity name, press
ENTER
or
↓
key instead of the
RETURN 1/4
key to return.
7. Pressing the
CHANGE PLU
key toggles the type font between normal and boldface.
8. To call a preset ingredient message idiom, follow the procedure below:
9. To skip a line when entering an ingredient message, follow the procedure below:
NEXT
PLU
RETURN
1/4
Enter the idiom #.
SET
NEXT
RETURN
1/4
Enter the line #.
Page 31

11-4
11. PROGRAMMING PROCEDURES
11.1 UNIT PRICE CHANGE
11.1 UNIT PRICE CHANGE
Menu Group: 1
Item No.: 0
Unit prices stored in PLU can be changed under this menu.
In this procedure, use the operation keys (except when calling a PLU by using a speed key).
NEXT
PLU
VOID
TEST
PROG.
ESC.
0
or
Enter the PLU #.
Enter the Speed key #
Speed key
1st half 2nd half
PRT
*
PRT
*
<MENU>
Group 1
<MENU>
Group 1
Main
<MENU>
Change the unit price
(max. 4 digit)
a
a
NOTES: 1. Calling a PLU# that has not been stored in the PLU file results in an error.
2. Under this Menu (Menu No. 0), “open-price” PLU’s price cannot be changed.
Page 32
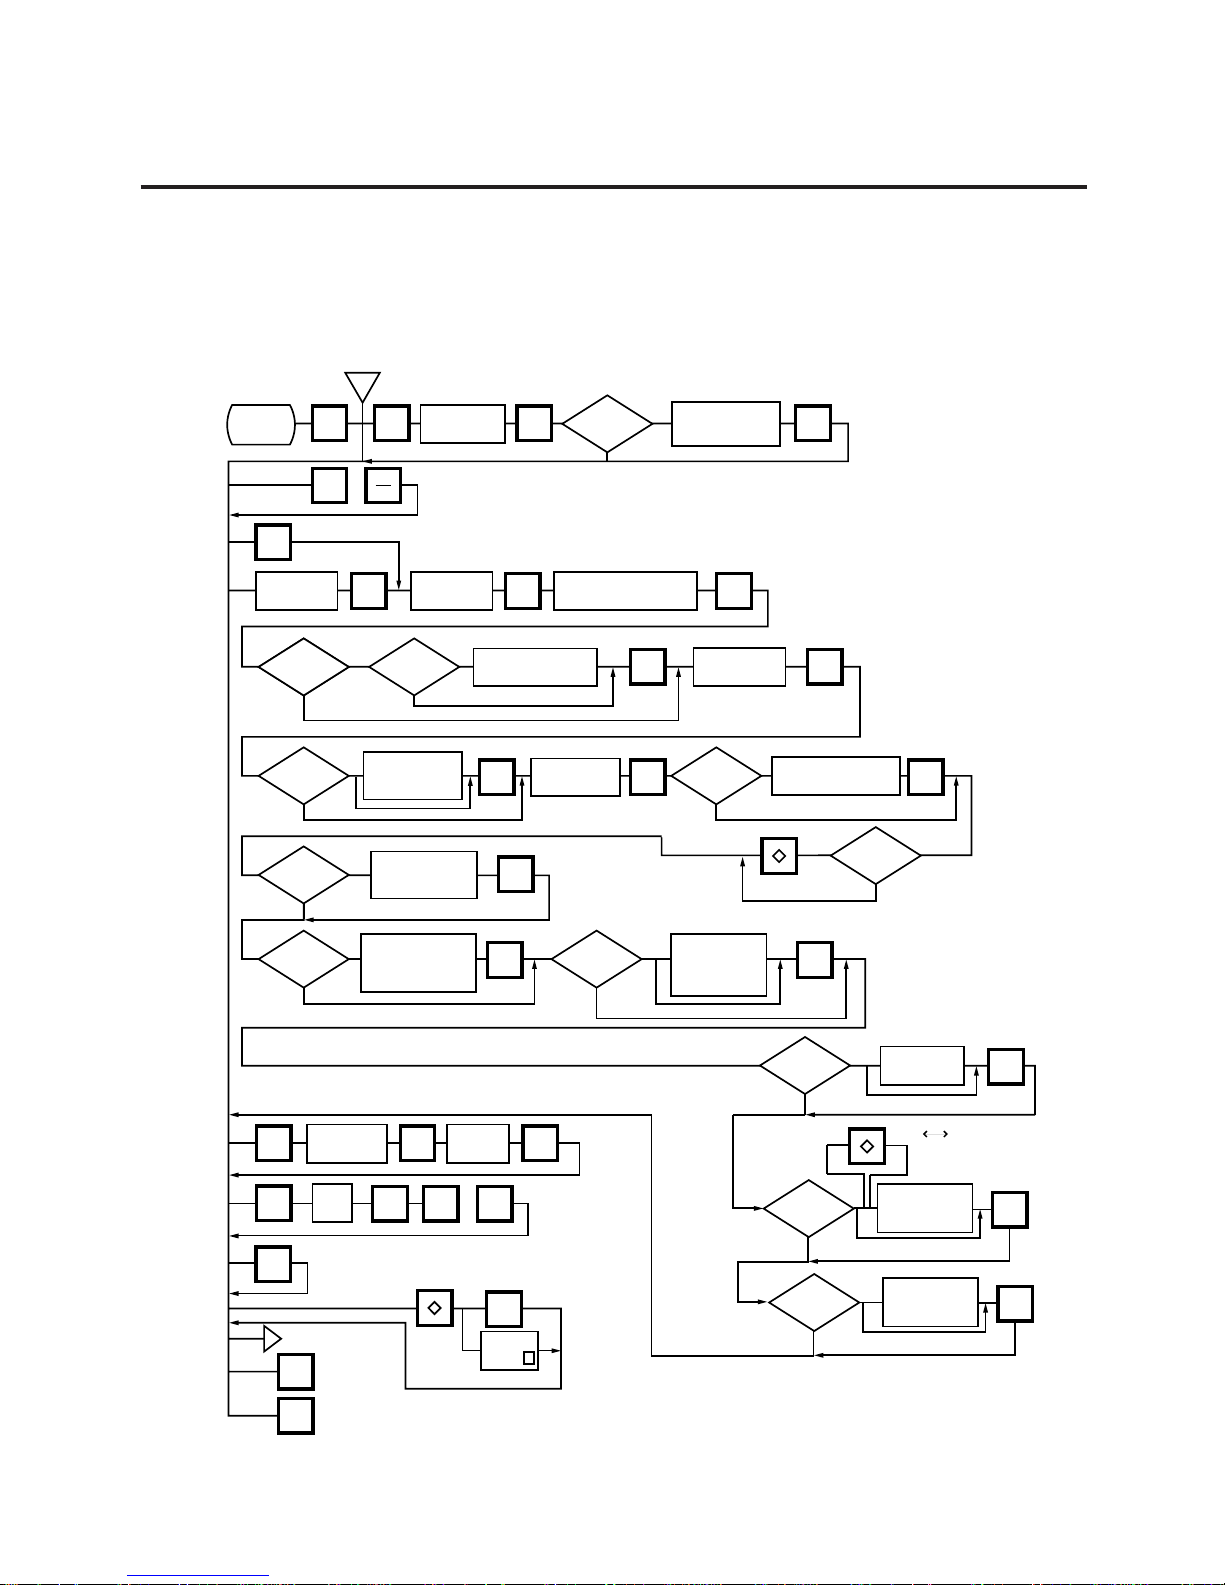
11-5
11. PROGRAMMING PROCEDURES
11.2 PLU DATA SETTING
11.2 PLU DATA SETTING
Menu Group: 1
Item No.: 1
Setting or changing the contents of PLU (PLU#, UPC#, Commodity Name, etc.).
0
1
BY COUNT
WEIGH
or FIX
1
1
0
0
or
The setting label is issued.
Select
compulsory tare
(Sorting)
(Not Sorting)
The memory file is sorted
when a memory full error
occurs.
SET
NEXT
Is status
of initial set
#1-5?
Is status
of initial set
#10-5?
Is status
of initial set
#8-7?
Y N
1
0
1
0
1
0
<MENU>
Group 1
<MENU>
Group1
Main
<MENU>
1
AUTO
CODE
or
Set auto code
for the UPC#
ENTER
Is status
of initial set
#8-2?
0
1
0
1
Max. 2 lb (US)
Max. 1Kg/2.205 lb (CA)
Set tare limit.
ENTER
NEXT
PLU
Enter PLU#
(max. 6 dig.)
ENTER ENTER
Enter commodity name.
(max. 32 chars.x4 lines)
ENTER
Is status
of initial set
#7-8?
0 or 1
2
Is status
of initial set
#8-1?
In what
mode is PLU
used?
Is status
of initial set
#1-6?
Enter UPC#
(max. 6 dig.)
Is status
of initial set
#26-4?
ENTER
Enter quantity for that
price. (Max. 2 dig.)
Enter flag of
unit price.
(Refer to NOTE4)
ENTER
Enter unit price.
(max. 4 dig)
ENTER
ENTER
Enter shelf life.
(Max. 3 dig.)
ENTER
Enter PERIOD OF
RELISH (Max. 3 dig.)
Is status
of initial set
#23-1?
Max. 2 lb (US)
Max. 1Kg/2.205 lb (CA)
Enter tare weight.
ENTER
Selection Mode Flag
0: Weight
1: By Count
2: Fix Price
ENTER
Set tare %
(Max. 99.9%)
ENTER
TEST
ENTER
CHANGE
PLU
DELETE
PLU
Enter current
PLU#
Enter new
PLU#
ENTER
Enter
PLU#
ENTER
b
Y
PROG.
ESC.
Safe Handing
Instruction
0: Non Print
1: Print
ENTER
b
Any key
except Y
Is status
of initial set
#12-4?
2
0 or 1
Enter discount
price or rate.
(Price: Max. 5 digit
Rate: Max. 3 digit)
ENTER
Is status
of initial set
#9-4?
1
0
Enter LOGO #.
(#0 - 26)
ENTER
(Price %)
Page 33

11-6
11. PROGRAMMING PROCEDURES
NET WT.
SELL BY
PACKED ON
PRICE lb
T1.000
T15.0%
C
11.2 PLU DATA SETTING
Pressing the
↓
key instead of the ENTER key proceeds to the next menu. Pressing the
↑
key returns to the preceding menu.
Verification label of PLU data
NOTES:
1. A UPC code is made up of a combination of an entered code and an AUTO CODE. Be sure
to add some - characters to the end of the AUTO CODE, or all entered codes will be
ignored and an AUTO CODE will become an UPC code (see ex. 1).
ex. 1) enter code: 456 ex. 2) enter code 4567 ex. 3) enter code: 123456
AUTO CODE: 123.... AUTO CODE: 123.... AUTO CODE: 987
code#: 123456 code#: 123567 code#: 987
2. When there is no area to store PLU data, an error occurs when pressing the ENTER key.
3. Changing a PLU# to number to which other PLU data is set will result in an error.
4. Unit price flag may be selected as follows:
1) In case of lb scale
a. INSERT1 key : $ per lb
b. DELETE (A) 1/2 key : $ per 1/2 lb
c. RETURN 1/4 key : $ per 1/4 lb
2) In case of kg scale
a. INSERT 1 key : $ per 100 g or Kg (CA/QR type only)
5. Tare limit should be a multiple of 5 (5, 10, 15...), up to 2.000 lb for US type and a mutiple of 2
(2, 4, 6, 8...), up to 1.000 Kg for CA/QR/AU type.
6. Safe handing instructions can be printed on 57-mm wide labels only. Safe handing
instructions are printed on labels formatted for ingredient messages. Only ingredient
message labels with 13 or more lines can be used to print safe handling instructions.
Available print formats are as follows:
13 (63), 15 (65), 16 (66), 23 (73), 25 (75), 26 (76), 33 (83), 35 (85), 36 (86), 41, 42, 43, 48
and 49.
7. Tare % indicates a percentage of tare in gross weight, which is available when the Initial
Setting #8-7 is set to 1.
8. When setting open price in the count mode (Initial Setting #1-6: 1), set zeros as quantity and
unit price.
↓
↓
↓
Commodity Name
Compulsory Tare
Shelf Life
Price
UPC#
Quantity
PLU#
Preset Tare
Mode Flag
Preset % Tare
TEC STORE
(TEL) 0123-45-6789
Page 34
11-7
11. PROGRAMMING PROCEDURES
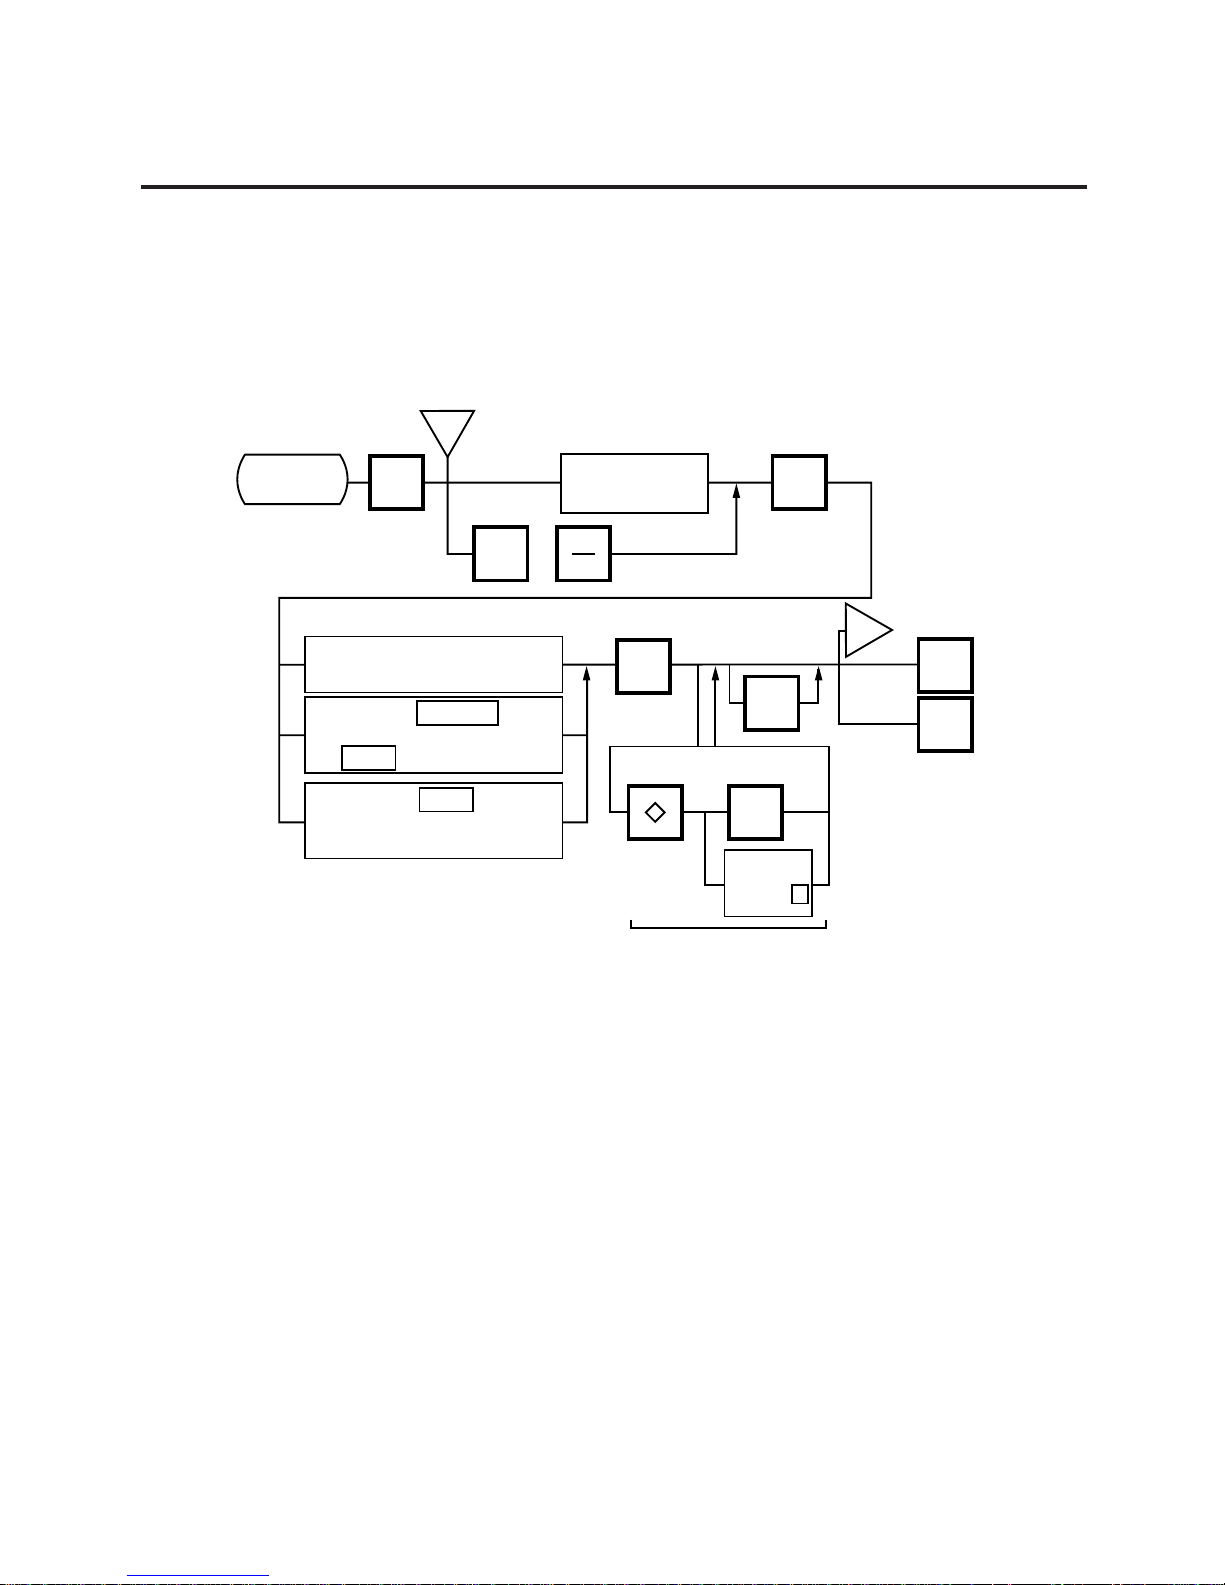
11.3 INGREDIENT MESSAGE
11.3 INGREDIENT MESSAGE
Menu Group: 1
Item No.: 2
Ingredient messages can be printed on a label with a maximum of 54 characters per line in small
letters or 32 characters per line in boldfaced small letters, by up to 38 lines.
C
The memory file
is sorted when a
memory full error
occurs.
TEST
PROG.
ESC.
Sorting
Not Sorting
Any key
except Y
<MENU>
Group 1
<MENU>
Group 1
Main
<MENU>
2
ENTER
or
NEXT
PLU
Enter the PLU#
(max. 6 dig.)
Enter the ingredient message
(Refer to Page 11-3.)
Pressing the key
calls data stored by pressing
the key.
Pressing the key
temporarily stores data into
the work buffer.
RECEIVE
SEND
SEND
ENTER
Y
C
NOTES: 1. When no data is programmed for the PLU, ingredient cannot be set.
2. When a selected PLU is not stored in the PLU file, a “PLU NOT FOUND” error occurs.
3. Once you exit this menu and enter again, data stored in the work buffer is cleared.
4. When there is no area to store ingredient data, a “MEMORY FULL” error occurs.
5. PLUs cannot share ingredient data. (PLU and ingredient data are in pairs.)
Page 35

11-8
11. PROGRAMMING PROCEDURES
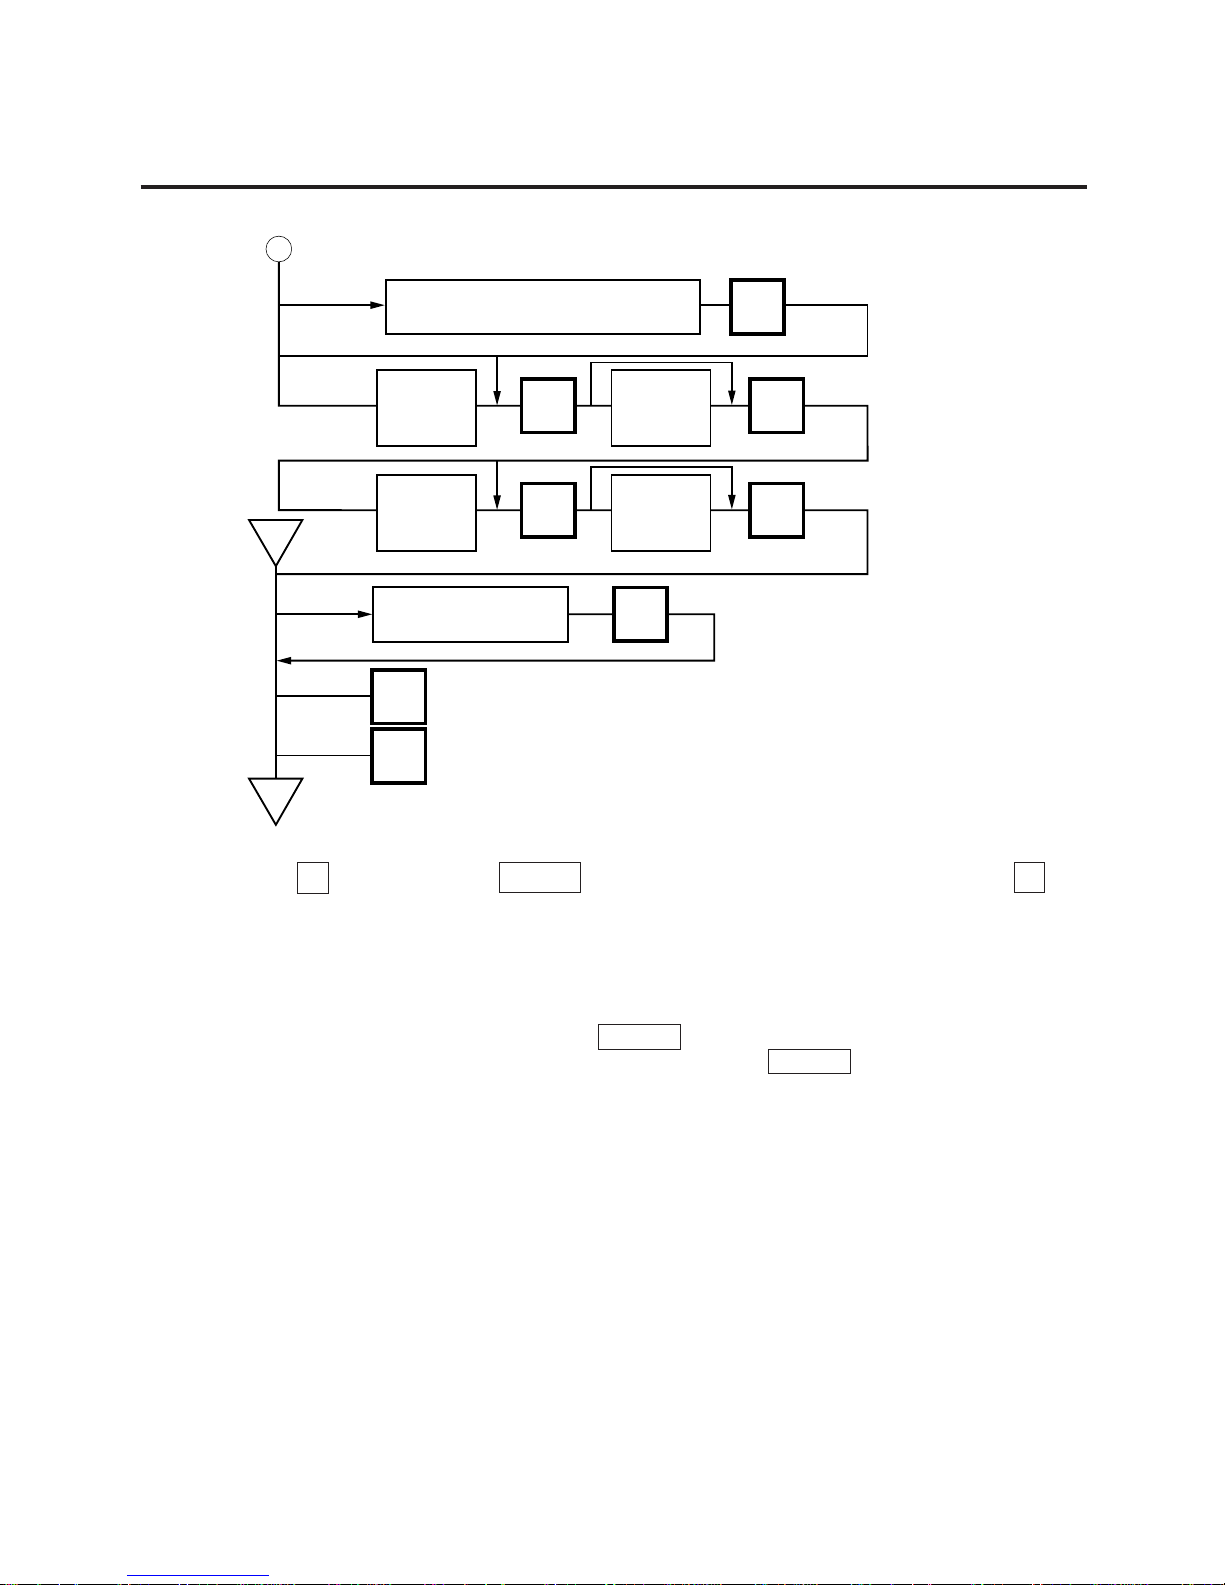
11.4 NUTRITION FACTS
11.4 NUTRITION FACTS
Menu Group: 1
Item No.: 3
Using the following procedure, nutrition information and caloric intake can be set.
Serving Size and Servings Per Container consist must of maximum of a 18 characters. However,
total number of characters including title characters must not exceed 30.
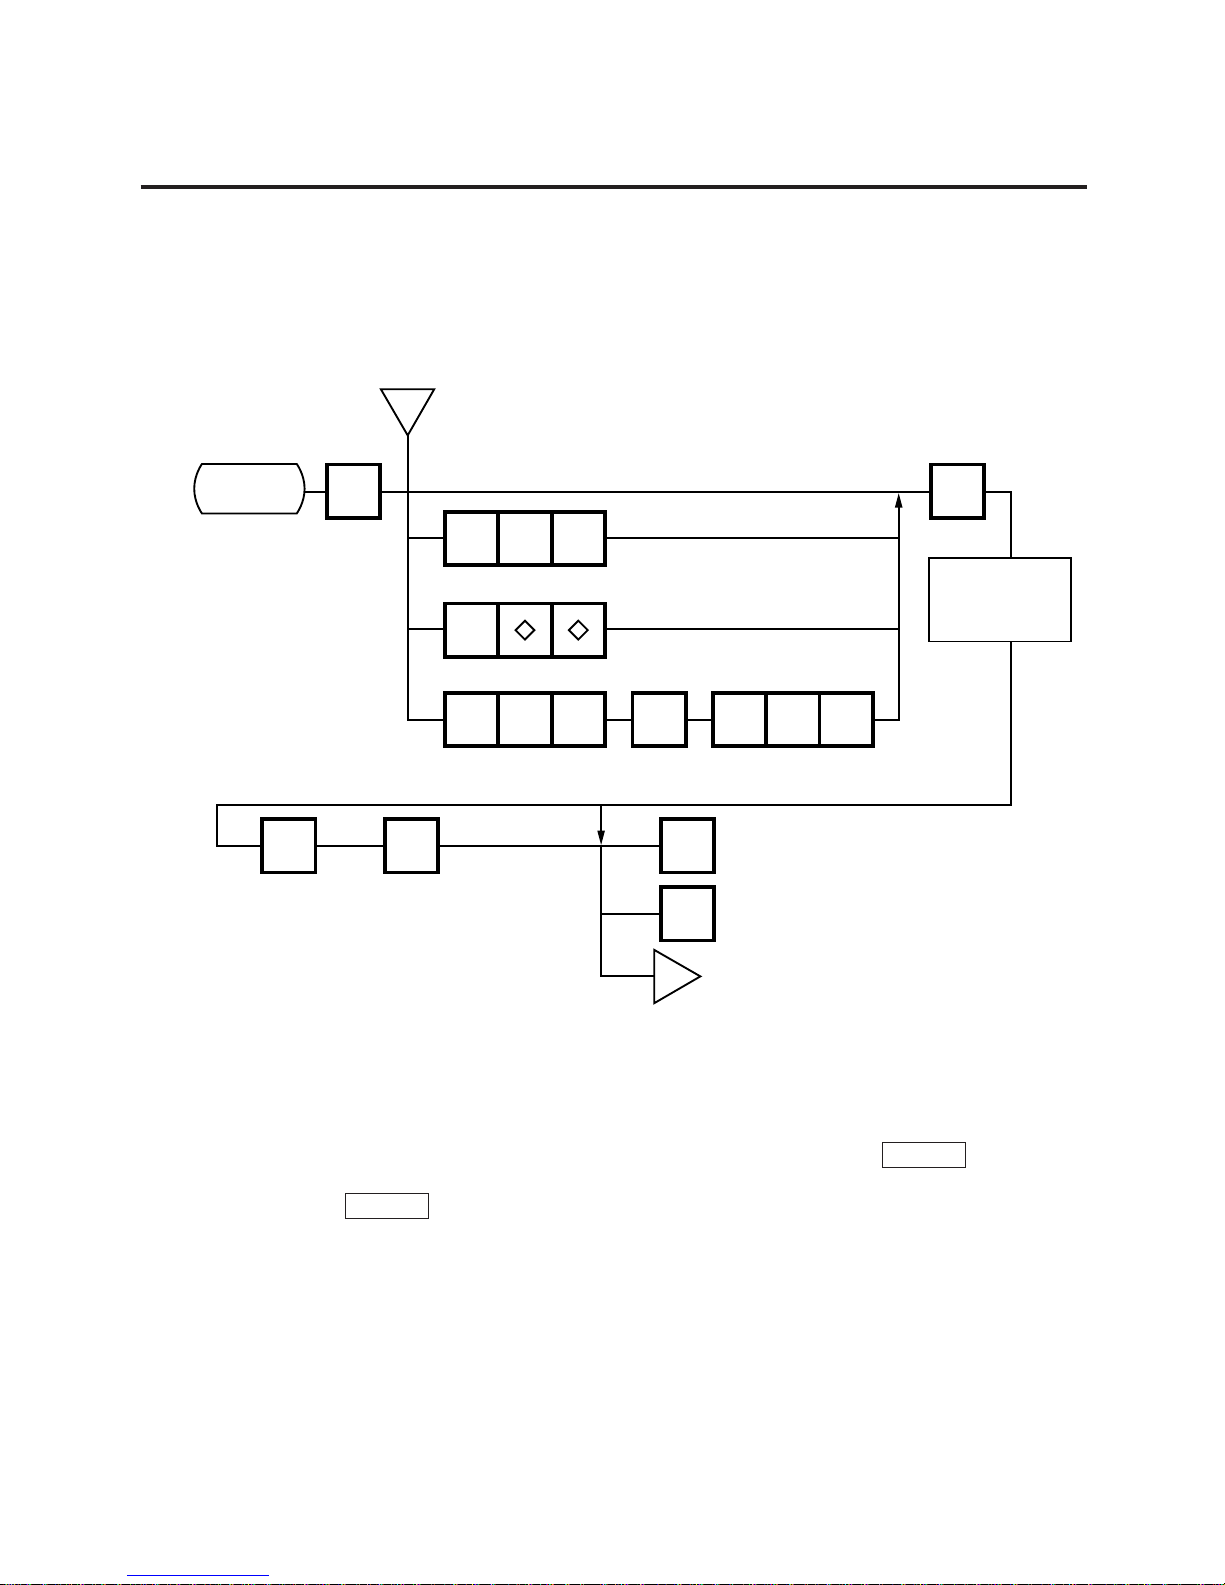
NEXT
PLU
3
or
ENTER
ENTER
ENTER
Enter the PLU#
(max. 6 dig.)
Enter the Servings
Per Container.
Enter the
Serving Size.
Enter the Calories.
(0~9999)
ENTER ENTER
Enter the Total Fat.
(0~99999 or 0.0~999.9)
Enter the Saturated Fat.
(0~99999 or 0.0~999.9)
Additional Information.
Area 1 (0~9999)
Enter the Calories
from Fat.
(0~9999)
ENTER ENTER
Enter the cholesterol.
(0~99999 or 0.0~999.9)
Enter the Sodium.
(0~99999 or 0.0~999.9)
ENTER ENTER
Enter the Total
Carbohydrate.
(0~99999 or 0.0~999.9)
Enter the Dietary Fiber.
(0~99999 or 0.0~999.9)
ENTER ENTER
Enter Sugar.
(0~99999 or 0.0~999.9)
Enter Protein.
(0~99999 or 0.0~999.9)
ENTER
A
<MENU>
Group 1
ENTER
ENTER
f
d
Page 36
11-9
11. PROGRAMMING PROCEDURES
11.4 INUTRITION FACTS
NOTES: 1. When a selected PLU# is not stored in the PLU file, an error occurs.
2. Nutrition file is input each time the ENTER key is pressed. Thus, if you quit the
procedure on the way, data entered without pressing ENTER key is not stored.
3. The additional information can be used only when its title has been registered in Section
11.16.
Pressing the ↓ key instead of the ENTER key proceeds to the next menu. Pressing the ↑
returns to the preceding menu.
A
ENTER ENTER
ENTER
Additional Information Area 2~6.
(0~99999 or 0.0~999.9)
Enter the
Vitamin A.
(0~999)
Enter the
Vitamin C.
(0~999)
ENTER
ENTER
ENTER
Enter the
Calcium.
(0~999)
Enter the
Iron.
(0~999)
PROG.
ESC.
Additional Information
Area 7~12 (0~999)
<MENU>
Group 1
Main
<MENU>
e
f
Page 37

11-10
11. PROGRAMMING PROCEDURES
11.4 INUTRITION FACTS
• Set th e Daily Value Table
e
AUTO
CODE
ENTER ENTER
ENTER ENTER
ENTER ENTER
ENTER
Enter the
Basic Calories.
(Content No. 1)
Enter the Basic
Saturated Fat.
(Content No. 3)
Enter the
Basic Sodium.
(Content No. 5)
Enter the
Basic Total Fat.
(Content No. 2)
Enter the
Basic Cholesterol.
(Content No. 4)
Enter the Basic
Total Carbohydrate.
(Content No. 6)
Enter the Basic
Dietary Fiber.
(Content No. 7)
d
e
NOTES:
1. DAILY VALUE (Max. 8 digits)
1) The contents of daily value
No. 1
No. 2
No. 3
No. 4
No. 5
No. 6
No. 7
Contents
upper 4 digits
lower 4 digits
Necessary daily intake of
Calories
Necessary daily intake of
Total Fat
Necessary daily intake of
Saturated Fat
Necessary daily intake of
Cholesterol
Necessary daily intake of
Sodium
Necessary daily intake of
Total Carbohydrate
Necessary daily intake of
Dietary Fiber
Percentage of necessary daily intake of
Calories
Percentage of necessary daily intake of
Total Fat
Percentage of necessary daily intake of
Saturated Fat
Percentage of necessary daily intake of
Cholesterol
Percentage of necessary daily intake of
Sodium
Percentage of necessary daily intake of
Total Carbohydrate
Percentage of necessary daily intake of
Dietary Fiber
2) The necessary daily intake of calories can be changed by changing the above table data,
and percentage will be changed accordingly.
2. Percentage of daily intake
1) Percentage data are printed in right justified 3 digits with zero suppression.
2) On the following conditions, an error occurs and data will be printed as ‘--- %’.
Percentage data exceeds 3 digits (999%).
Data is entered improperly.
Other than xxxxx or xxx.x
Other than numberals (0 to 9) and a point ‘.’
3. Calculation
(input data) / (necessary daily intake) x 100 = Percentage of daily value
(round the obtained data to one decimal place)
Page 38
11-11
11. PROGRAMMING PROCEDURES
• Deleting Nutrition Data
d
ENTER
Enter the PLU#.
(max. 6 dig.)
DELETE
PLU
e
• Memory file sort
The memory file is sorted when a memory full error occurs.
d
Any key
except Y
Y
Sorting
Not Sorting
e
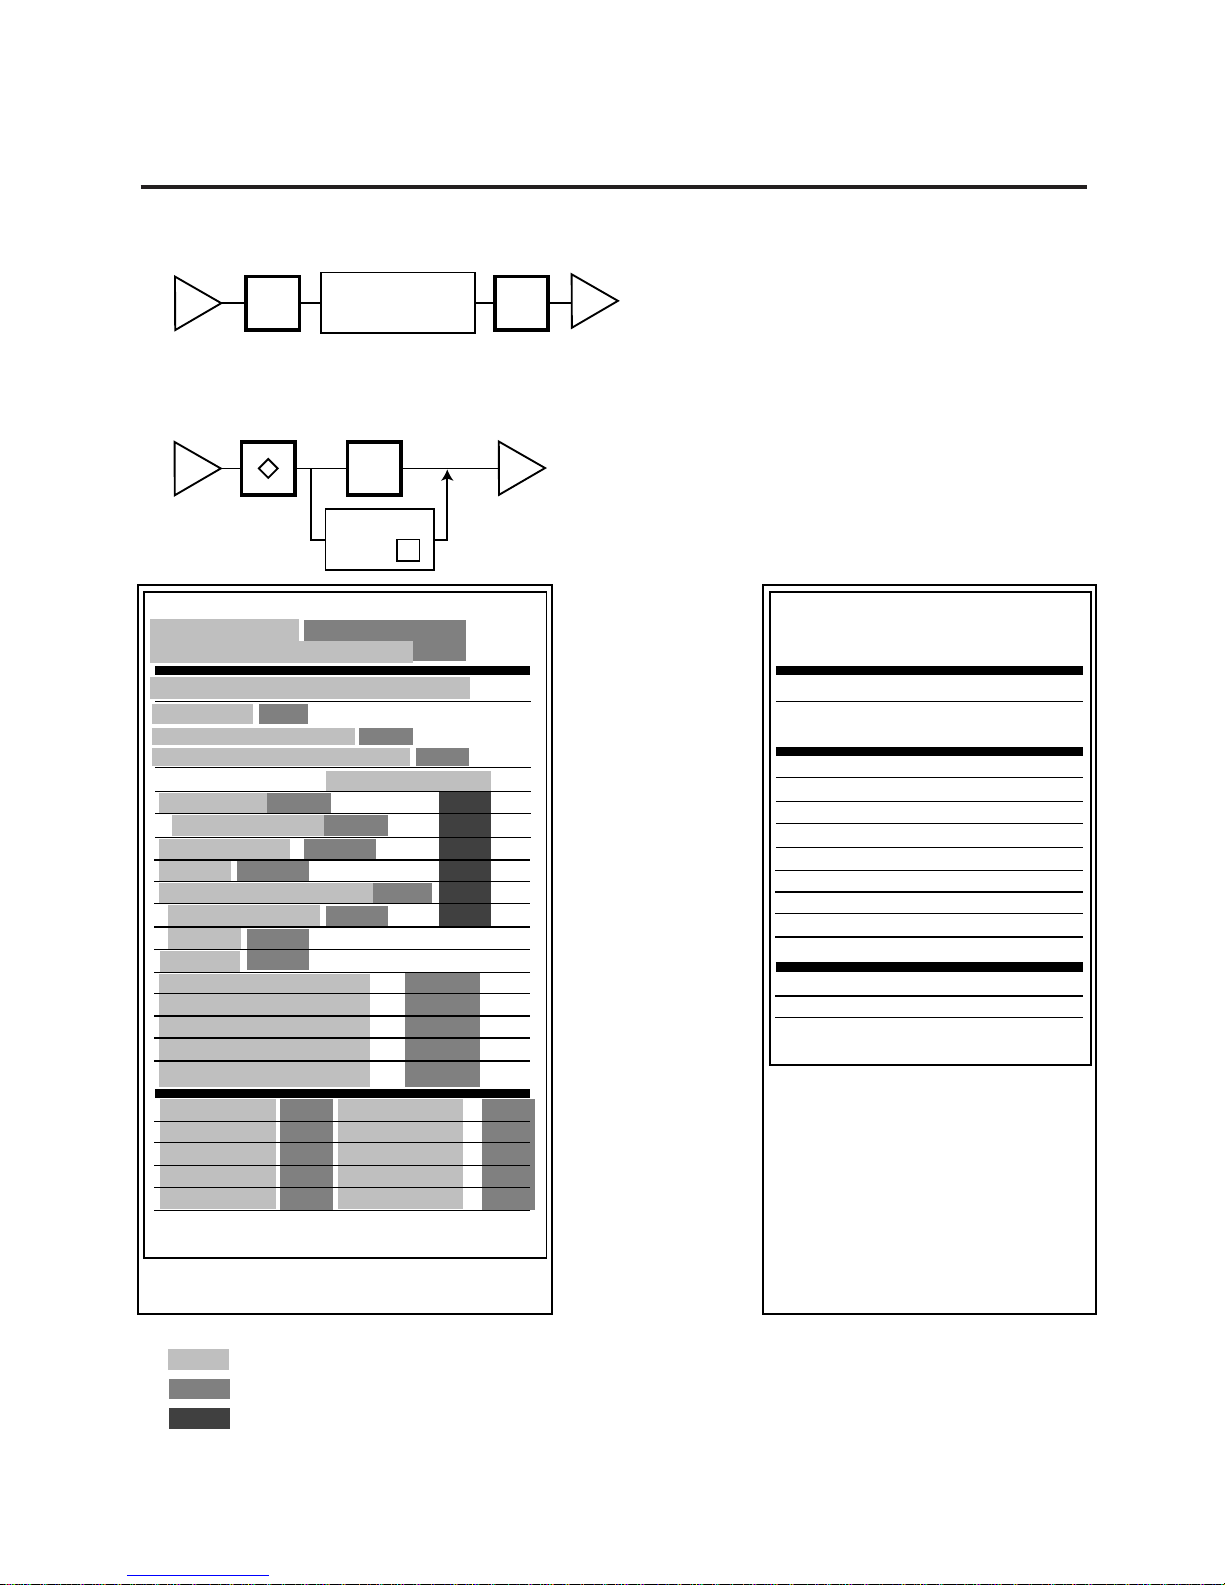
(Sample label)
11.4 INUTRITION FACTS
Nutrition Facts
Serving Size xxxCUP (xxxxg)
Servings Per Container xxx
Amount Per Serving
Calorier xxxx
Calories from Fat xxxx
xxxxxxxxxxxxxxxxxxxxxx xxxx
% Daily Value*
Total Fat xxxxg xxx%
Saturated Fat xxxxg xxx%
Cholesterol xxxxmg xxx%
Sodium xxxxmg xxx%
Total Carobohydratexxxxg xxx%
Dietary Fiber xxxxg xxx%
Sugers xxxxg
Protein xxxxg
xxxxxxxxxxxxxxxxxx xxxxxx
xxxxxxxxxxxxxxxxxx xxxxxx
xxxxxxxxxxxxxxxxxx xxxxxx
xxxxxxxxxxxxxxxxxx xxxxxx
xxxxxxxxxxxxxxxxxx xxxxxx
Vitamin A xxx% Vitamin C xxx%
Calcium xxx% Irom xxx%
xxxxxxxxxx xxx% xxxxxxxxxx xxx%
xxxxxxxxxx xxx% xxxxxxxxxx xxx%
xxxxxxxxxx xxx% xxxxxxxxxx xxx%
* Percent Daily Values are based on a 2,000
calorie diet.
1 st Address - - - - - - - - - - - - - 2 nd Address - - - - - - - - - - - - - -
Nutrition Facts
Serving Size 1234567890123
Servings Per Container 223
Amount Per Serving
Calories 3
Calories from Fat 4
Vitamin A 13%.Vitamin C 14%
Calcium 15%.Iron 16%
* Percent Daily Values are based on a 2,000
calorie diet.
1-0000000000000000000000-1
2-0000000000000000000000-2
Additional information area 1
Additional information area 2
Additional information area 3
Additional information area 4
Additional information area 5
Additional information area 6
Additional information area 7,8
Additional information area 9,10
Additional information area 11,12
% Daily Value*
Total Fat 5g 8%
Saturated Fat 6g 30%
Cholesterol 7mg 2%
Sodium 8mg 0%
Total Carbohydrate 9g 3%
Dietary Fiber 10g 40%
Sugars 11g
Protein 12g
Area for titles
Area for entry data: Set in this menu (Nutrition Setting procedure.)
Area for data: Calculated on the basis of the entered data in Menu Page 1/Item
No. 3
Page 39
11-12
11. PROGRAMMING PROCEDURES
11.5 PLU VERIFYING LABEL
11.5 PLU VERIFYING LABEL
Menu Group: 1
Item No.: 4
PLU data stored in the scale are verified in the following procedure.
NOTES:
1. Labels are printed in both batch mode and on-demand mode.
2. When no PLU is stored in the selected range, an error occurs when the ENTER key is
pressed.
3. Pressing the CLEAR key releases the scale from the error mode and returns to the initial
status of this menu.
4. After clearing a paper jam error, the scale will wait for an entry of PLU# again.
1 0 0
1
1 0 0 1 0 8
4
<MENU>
Group 1
NEXT
PLU
ENTER
CLEAR
PROG.
ESC.
ENTER
The
confirmation
label is issued.
<MENU>
Group 1
Main
<MENU>
g
g
Set the entire PLU#.
Set the individual PLU#. (Ex. PLU #100)
Set the block PLU#. (Ex. PLU #100~199)
Set the zone PLU#. (Ex. PLU #100~108)
To interrupt
label issue.
To resume label issue
which has been interrupted.
Page 40

11-13
11. PROGRAMMING PROCEDURES
11.6 ADDRESS SETTING
11.6 ADDRESS SETTING
Menu Group: 1
Item No.: 5
Store addresses and receipt header printed on label can be set within the following character
limits.
Address: 32 characters x 2 lines
Receipt Header: 24 characters on the 1st/2nd line and 48 characters in the 3rd line
5 0
9
<MENU>
Group 1
PROG.
ESC.
ENTERENTER
Enter a store address
or receipt header.
(Refer to Page 11-3)
<MENU>
Group 1
Main
<MENU>
h
h
Store Address
Receipt Header
Page 41

11-14
11. PROGRAMMING PROCEDURES
11.7 SPECIAL INFORMATION
11.7 SPECIAL INFORMATION
Menu Group: 1
Item No.: 7
When the Net Weight Statement label is selected, 3 lines (32 characters/line) of special
information can be printed on the label position where the net weight data is to be printed. The
special information can be printed in the weigh and By Count mode. In the Fix mode, the net
weight data is printed.
7
TEST
ENTER ENTER
PROG.
ESC.
<MENU>
Group 1
Main
<MENU>
<MENU>
Group 1
Enter the special
information.
(Refer to page 11-3.)
11.8 Grade Line
Menu Group: 1
Item No.: 8
You can set the maximum 49 kinds of grade lines (max. 32 characters/line), and call one of them
to print it on the label.
8
ENTER ENTER
PROG.
ESC.
<MENU>
Group 1
Main
<MENU>
<MENU>
Group 1
Enter the grade
line#. (1~49)
Enter characters.
(max. 32 chars./line)
(Refer to NOTE 2)
NOTES: 1. Print position of grade line can be changed by initial setting.
2. Refer to page 11-3, for information regarding how to enter the Grade Line.
Page 42
11-15
11. PROGRAMMING PROCEDURES
11.9 SPEED KEY SETTING
11.9 SPEED KEY SETTING
Menu Group: 1
Item No.: 9
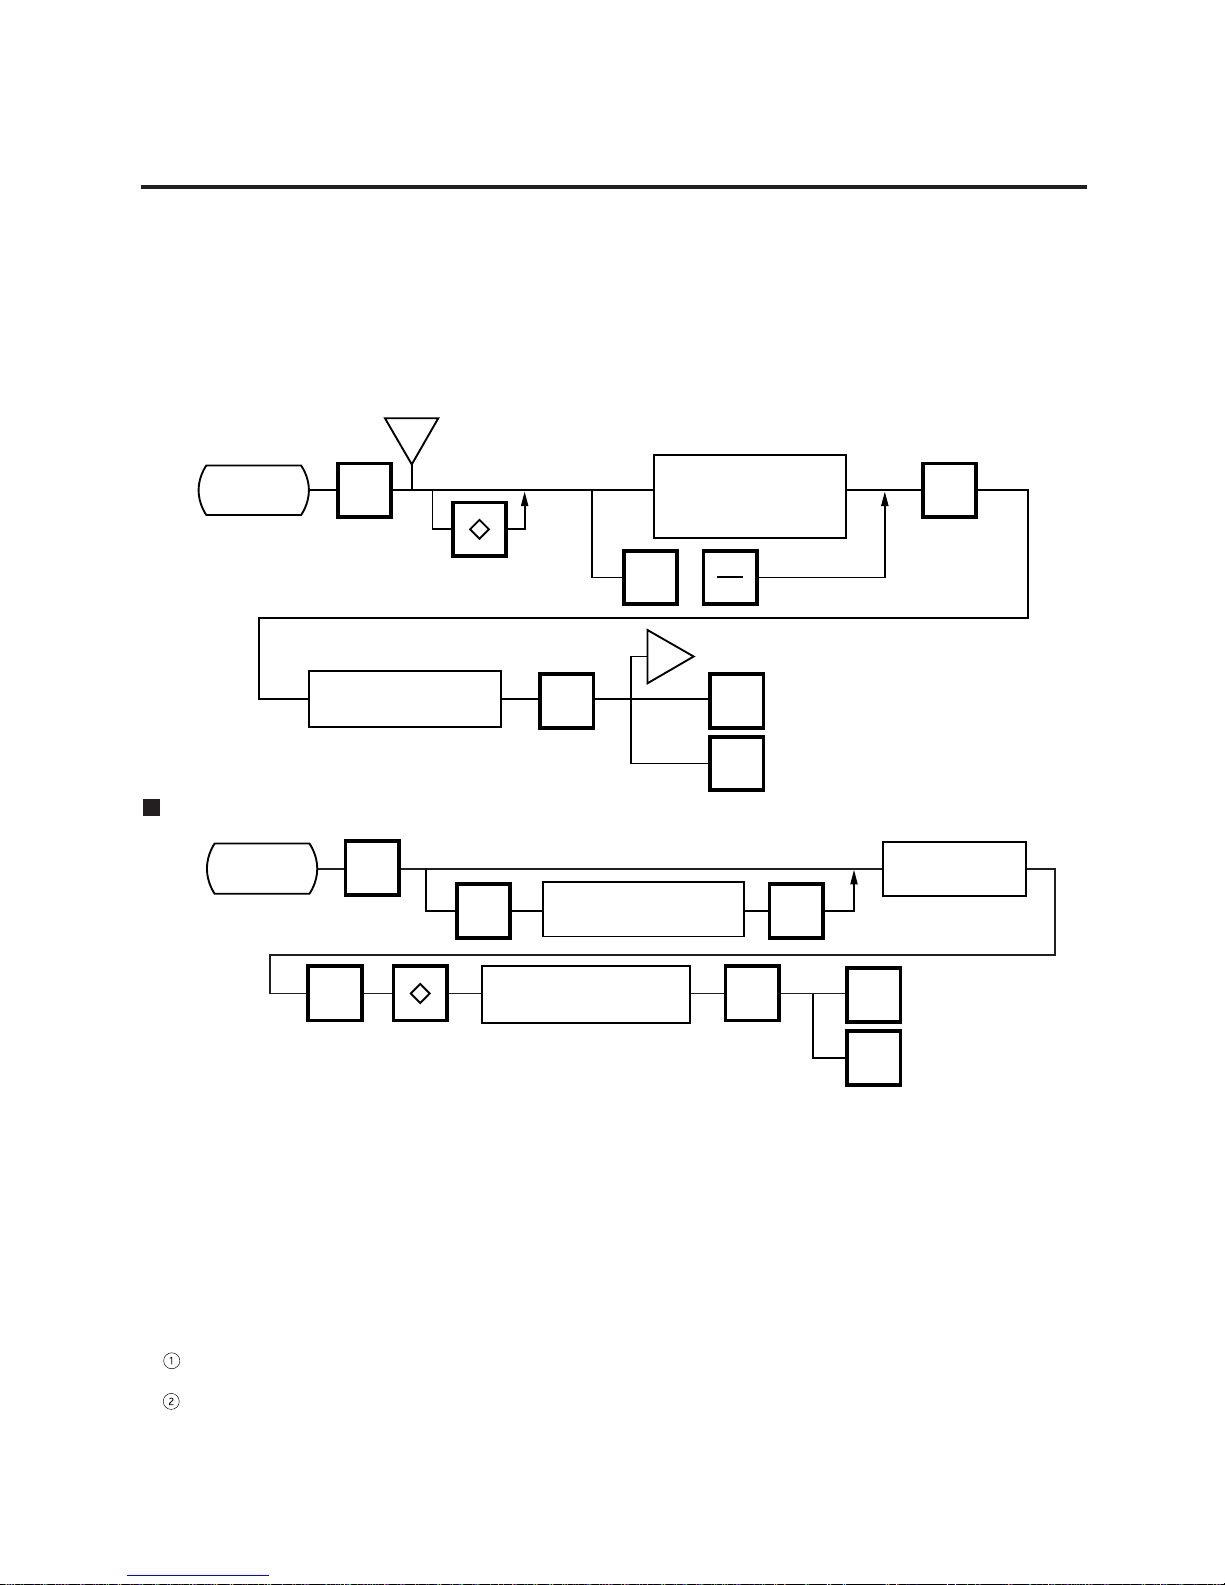
The SL-9000 has a maximum of 70x2 speed keys which are very convenient to call PLUs quickly.
(Refer to page 5-3 regarding the Key Layout.)
i
9
ENTER
PROG.
ESC.
<MENU>
Group 1
Main
<MENU>
i
NEXT
PLU
or
ENTER
<MENU>
Group 1
Enter the PLU#.
(max. 6 dig.)
Enter the Speed
Key number
(# 1~70 X 2)
Select the 1st half or the
2nd half of the speed keys.
Setting Department/Vendor Number
9
PROG.
ESC.
<MENU>
Group 1
Main
<MENU>
<MENU>
Group 1
AUTO
CODE
Enter a default
department #. (1~99)
ENTER
ENTER ENTER
Enter the department #
or vendor #. (1 ~ 99)
Enter the speed
key number.
Selecting items to be
assigned to speed keys.
(PLU #/VENDOR #/DEPT #)
• Department Number
When initial set #10-6 is set to “1”, the six-digit PLU# is divided into two; the upper two digits are assigned to department #,
and the lower four digits to PLU.
The department # is automatically added in front of four-digit PLU# and treated as a six-digit PLU#.
In case of “PROG.”, “Report”, and “Reset” modes, PLU# is treated as a six-digit number. So the upper two digits are not
treated as department #. Consequently the four-digit PLU# is available only in “REG.”, “M.DOWM”, and “REWRAP”
modes.
NOTE: The default Dept. No. is two-digit serial number ranging from 0 to 99. Entering a “0” clears a Dept. No.
• Vendor Number
Vendor numbers can be set when the Initial Setting #11-1 is set to 1.
Vendor numbers are assigned to the speed keys in two ways:
Individual vendor number: 00-39
Vendor# is assigned to the speed keys one by one.
Group vendor number: 0-, 1-, 2- and 3Maximum 10 vendor numbers can be assigned to one speed key, resulting in 4 speed keys in total. When assigning
group vendor numbers to the speed keys, enter the first digit of the vendor key (0, 1, 2 or 3) plus a bar (-).
Vendor numbers can be called whichever half of the speed keys are selected.
Page 43
11-16
11. PROGRAMMING PROCEDURES
11.10 PRINT FORMAT
11.10 PRINT FORMAT
Menu Group: 2
Item No.: 0
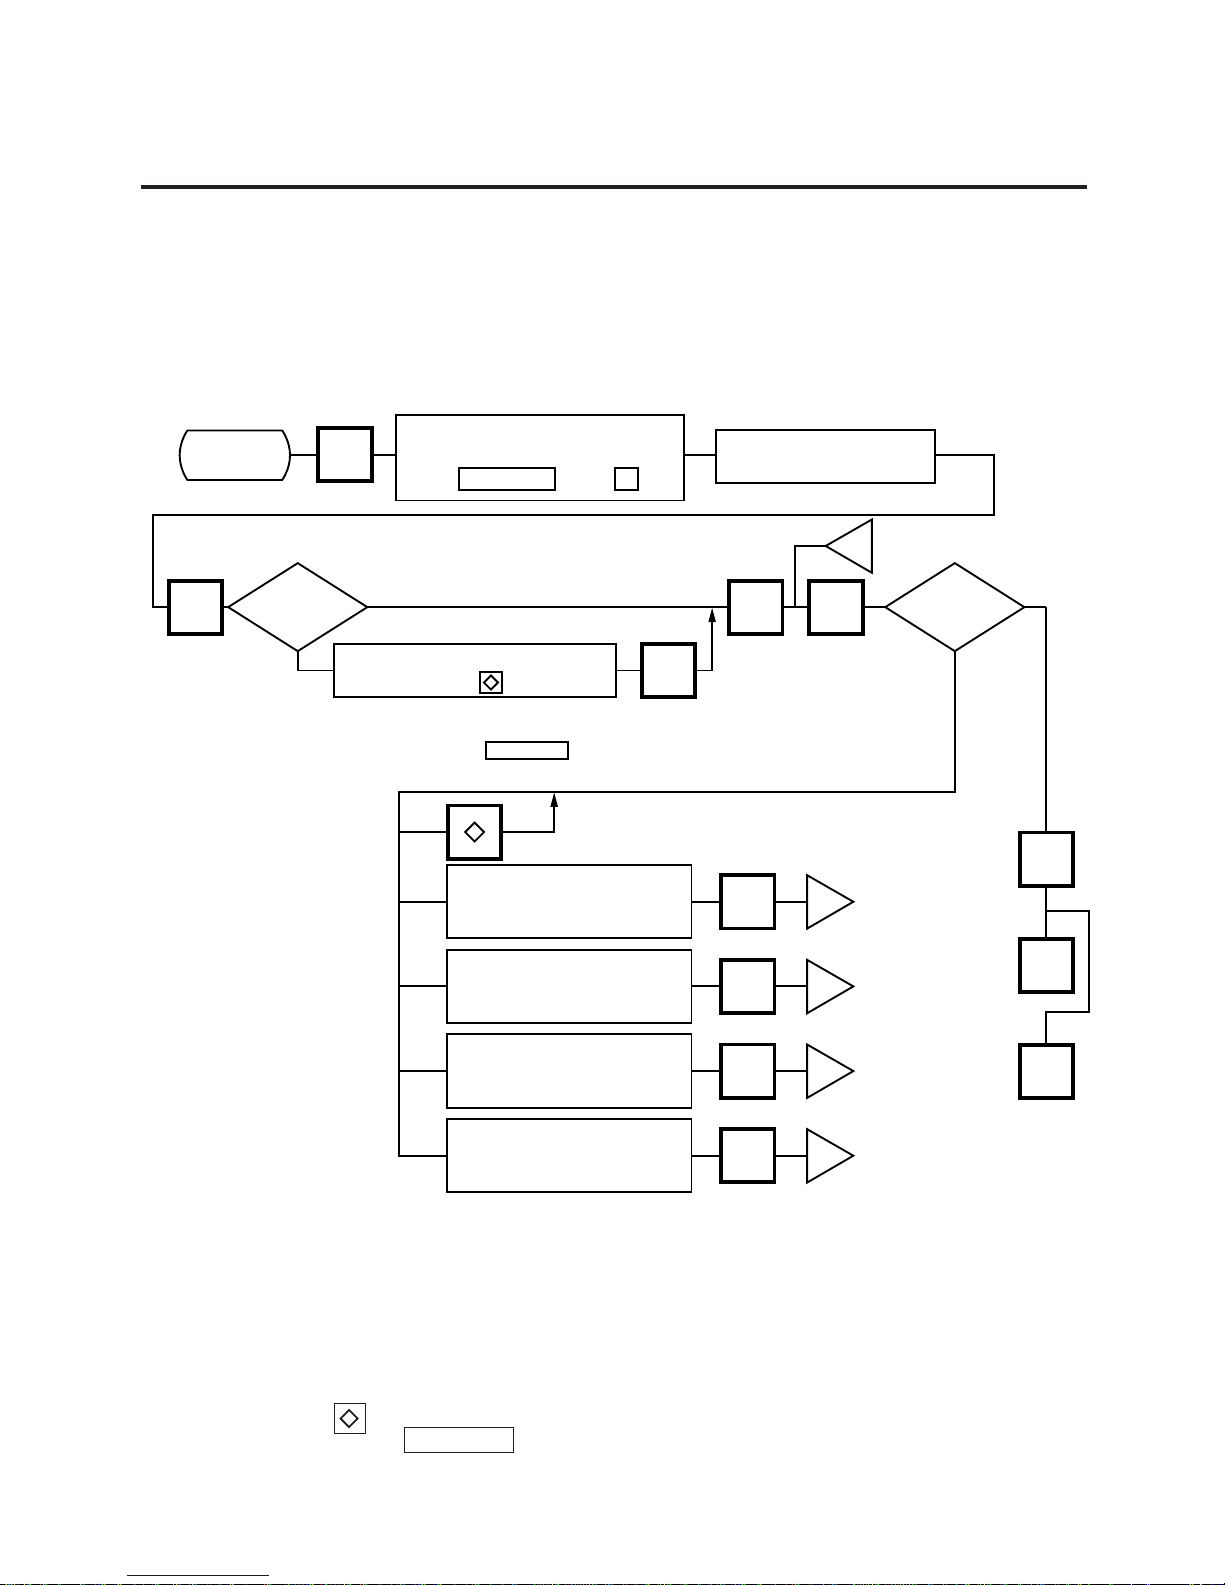
The SL-9000 can memorize 5 different print formats. After print formats are set, you can call
them by entering the print format number.
CHANGE
PLU
TESTFEED
SET
NEXT
PROG.
ESC.
j
j
j
j
j
Issue method
Is print
position
correct?
<MENU>
Group 2
0
Select the print format # which
allocates the label format #
by the key or key.NEXT PLU
–
SET NEXT
Enter the label format #.
(Refer to Table 2)
Select "SENSIBILITY ADJUST"
by pressing the key.
When Batch Printing with backing paper is
selected, the sensitivity of the label sensor will
be set by pressing the key before
issuing label.
Correct
Incorrect
On-demand
Batch
Enter the correct label feed
value.
(Range: 0~199)
Enter the correct value for
commodity name position.
(Range: 0~9)
Enter the correct value for
address position.
(Range: 0~15)
Enter the correct value for
pre-feed area.
(Range: 0~65)
ENTER
ENTER
ENTER
ENTER
CHANGE
PLU
<MENU>
Group 2
Main
<MENU>
Select the Item for adjustment.
1 gradation
= 0.154mm (1 dot)
1 gradation
= 0.462mm (3 dots)
1 gradation
= 0.462mm (3 dots)
Only when using the bar code
change label with pre-feed area.
(This adjustment cannot be made
for the Variable Length Label.)
NOTES:
1. When a commodity name position is adjusted, an address position will move automatically.
2. When entering the other label format #, fine adjust values are initialized.
3. Selecting label format numbers other than those provided in Table 2 results in an error.
4. When selecting a variable length label format, rectangles are printed instead of print items
when test printing.
5. Pressing the
key allows you to select a print format number from 1 to 5.
6. Be sure to press the
SET NEXT
key when a label format for batch printing with backing paper
is selected.
Page 44
11-17
11. PROGRAMMING PROCEDURES
11.10 PRINT FORMAT
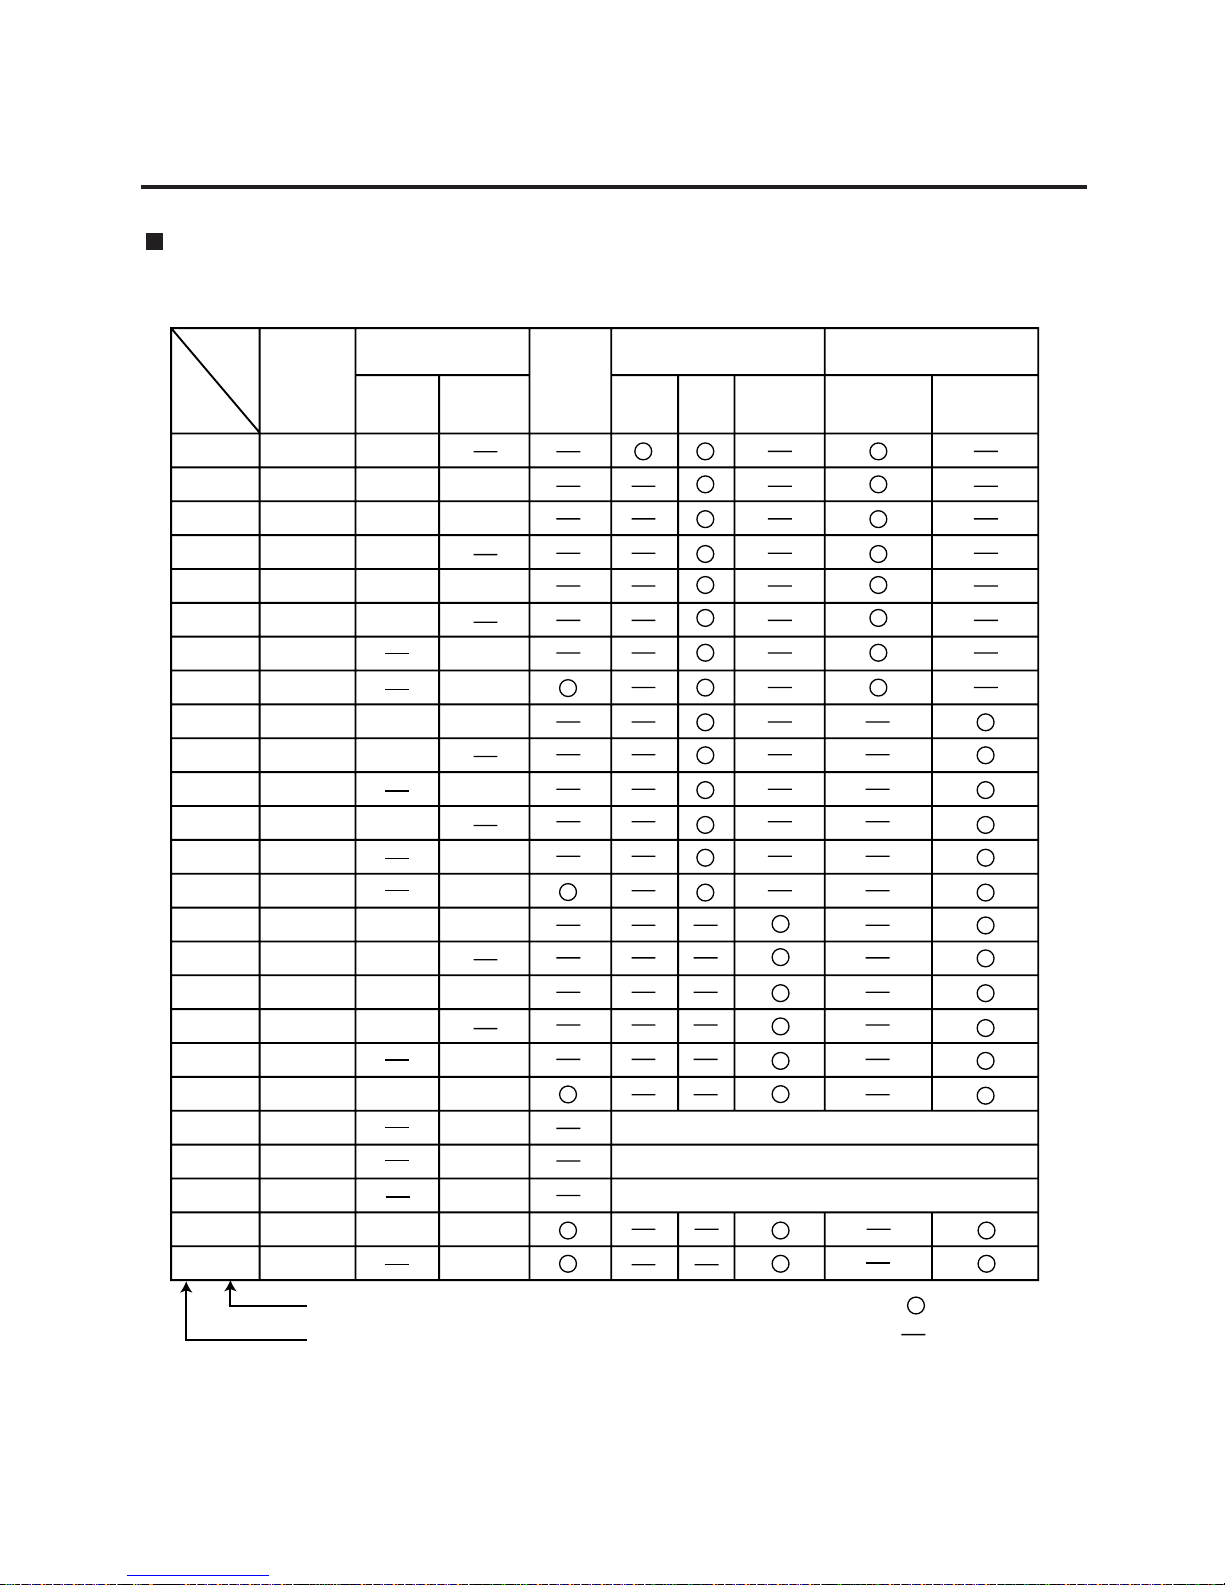
Table 2: Label Format Number Table
Select the format # for the label to be used by referring to the table below.
1) The width of label is selected by INITIAL SETTING.
2) The number of commodity lines depends on label width.
48 mm width: 2 lines
57 mm width: 4 lines
Item
Ingredient
Line
0
0
6
12
18
22
38
37
6
12
18
22
38
38
6
12
18
22
38
22/38
VARIABLE
21
(ROTATION)
Programmable
Programmable
Programmable
Programmable
Programmable
Programmable
Nutrition
Printing
Label length (mm)
48 mm
width
30.0
40.0
54.0
68.8
82.6
92.0
69.9
84.1
106.4
76.2
90.5
104.8
112.7
112.7
Variabe
Length
57 mm
width
Print of the NET WT.
statement
Impossible Possible
Kind of label
NON-
POS
label
Bar code
change
label
POS
label
Label
Format #
00 (50)
10 (60)
11 (61)
12 (62)
13 (63)
14 (64)
15 (65)
16 (66)
21 (71)
22 (72)
23 (73)
24 (74)
25 (75)
26 (76)
31 (81)
32 (82)
33 (83)
34 (84)
35 (85)
36 (86)
41 (91)
batch printing method
on-demand printing method
: possible
: impossible
42 (92)
43 (93)
48
49
49.2
63.5
92.8
85.7
138.1
138.1
112.7
96.8
158.7
158.7
123.8
171.4
Free Format (Refer to section 11.20)
Free Format (Refer to section 11.20)
Free Format (Refer to section 11.20)
171.4
Variabe
Length
Variabe
Length
Page 45
11-18
11. PROGRAMMING PROCEDURES
11.11 DATE/TIME SETTING
11.11 DATE/TIME SETTING
Menu Group: 2
Item No.: 1
Date, time, machine number, and store code are set in this procedure.
NOTES:
1. Express the time in a 24-hour military format.
2. The SL-9000 will check details of date (time) input, and any wrong date (time) will result in an
error. Then the correct date (time) should be re-entered and press the
CLEAR
key.
3. Even when the initial Setting # 8-4, 8-5 or 8-6 is set to the “Julian Date” the way to enter the
date in the date setting operation is the same in the ordinary case.
4. The date display method can be changed by the initial setting.
ENTER
ENTER ENTER
ENTER
k
k
<MENU>
Group 2
1
Set the date.
(Month, Day, Year)
Set the time.
(Hour, Minute)
Set the machine No.
(max. 6 dig.)
Set the store No.
(max. 5 dig.)
PROG.
ESC.
<MENU>
Group 2
Main
<MENU>
11.12 CMT/PL-3
Menu Group: 2
Item No.: 2
CMT OPERATIONS
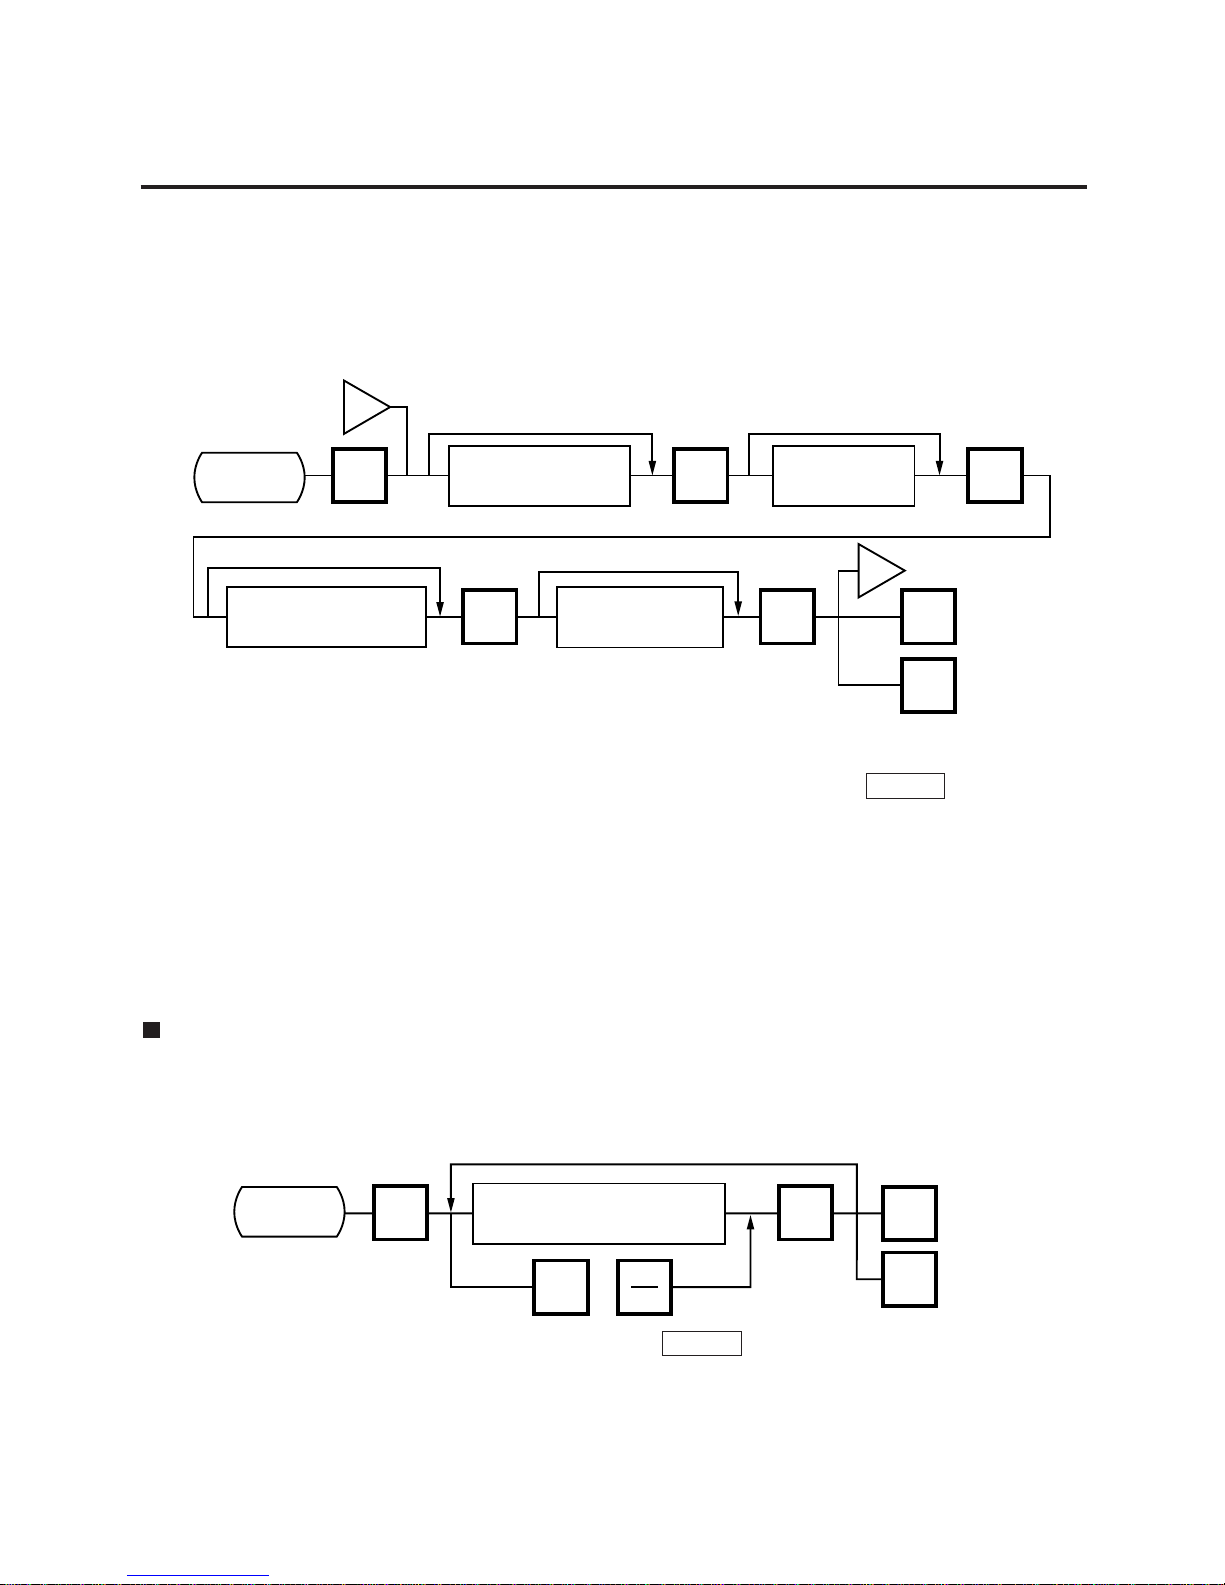
SL-9000 is designed to interface with a Cassette Magnetic Tape loader. This loader allows the
transfer of the entire PLU file, ingredient file and other data from the SL-9000 to tapes. This can
be accomplished in number of operation steps.
In turn, information from the tape can also be transferred to another SL-9000 scale.
NOTES:
1. The error mode can be released by pressing the
CLEAR
key, and operated again through the
above steps.
2. Use the metal cassette tape which is commercially available and has a capacity of 45 or 60
minutes recording.
3. For operations of the CMT loader, refer to the instruction manual provided with the CMT loader.
ENTER
2
PROG.
ESC.
<MENU>
Group 2
Main
<MENU>
<MENU>
Group 2
Set the transmission items.
(Refer to table 4)
NEXT
PLU
or
Page 46
11-19
11. PROGRAMMING PROCEDURES
11.12 CMT/PL-3
PL-3 Operation
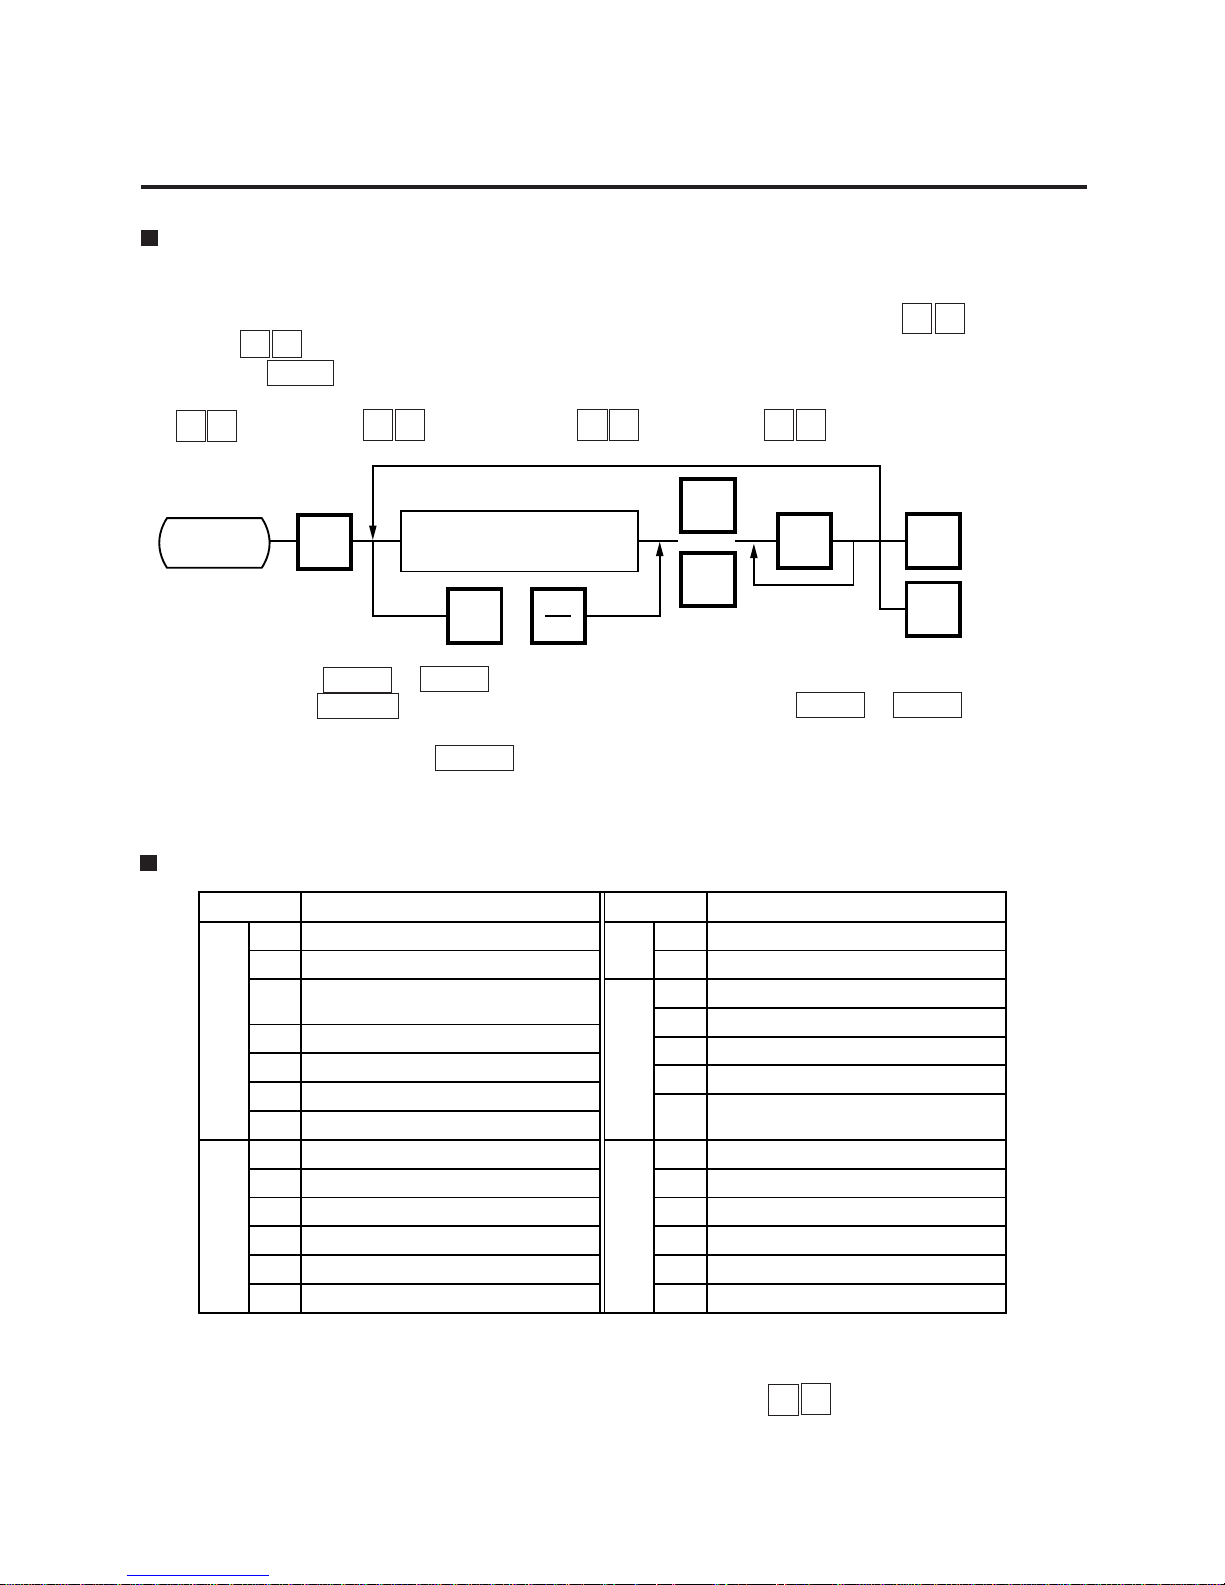
Connect the PL-3 to the SL-9000 by using RS-232C Cable, then turn on the power of the SL9000 and the PL-3.
Insert a data disc into the PL-3 and adjust the transmission rate to the SL-9000 ( 7 2 : 4800
BPS or 7 3 : 2400 BPS) by using the rotary switch.
Press the SAVE key of the PL-3, then check whether the SAVE LED is on.
Program the file number of the data disc by using the rotary switch.
( 4 1 : File No. 1, 4 2 : File No. 2, ..... 4 8 : File No. 8, 4 9 : File No. 9)
ENTER
2
PROG.
ESC.
<MENU>
Group 2
Main
<MENU>
SAVE
LOAD
or
NEXT
PLU
or
<MENU>
Group 2
Set the transmission item.
(Refer to table 4)
NOTES: 1. Press SAVE or LOAD key on the PL-3.
2. If the ENTER Key is not pressed within 10 seconds after SAVE or LOAD key is
pressed, a time out error will occur.
3. After pressing the ENTER key, the operation ends when “00” appears in the 7 seg.
display and LAMP goes off. Remove the data disc and turn the power off.
4. Be sure to start the PL-3 before the main operation.
Table 3: Error code during PL-3 operation
1) When the error code in FF, this system enters stop status. (Turn the power off/on for
release.)
2) When the error code is F2 or FE, perform the status clear ( 9 9 ).
3) If an error occurs, refer to the PL-3 Owner’s Manual and solve the problem.
Error Code Error Message
1
3
0
1
2
FDC ERROR
FDK MISINSERTION ERROR
UNAVAILABLE FDK INSERTION
ERROR
VOL. LABEL UNMATCH ERROR
FDK MEMORY FULL ERROR
WRITE PROTECT ERROR
NO SEARCH FILE ERROR
TIME OUT ERROR
LOAD ERROR
FDK ERROR
BUSY STATUS
POWER FAIL ERROR
OVERRUN ERROR
3
4
5
6
1
2
3
4
5
6
Error Code Error Message
7
3
8
7
8
0
FRAMING ERROR
PARITY ERROR
DESIGNATED SELECT KEY
ERROR
DATA ERROR
STATUS ERROR
TIME OUT ERROR
FDK READ/WRITE ERROR
RAM READ/WRITE ERROR
ROM CRC ERROR
RAM BACK UP BATTERY ERROR
FDC DIAG LEVEL 0 ERROR
SYSTEM FDK LOADING ERROR
SYSTEM ERROR
1
2
3
F
0
1
2
3
E
F
Page 47

11-20
11. PROGRAMMING PROCEDURES
11.12 CMT/PL-3
Table4 : Transmission Item List
NOTE: When transferring data with the PL-3, required FDK varies depending on the amount of ING.
Be careful of the following when changing a FDK.
a: During write operation, replace the FDK with a formatted one.
b: Verify and read data in the same order as write.
To cancel FDK change, press the
CLEAR
key.
ITEM # Contents of Transmission CMT PL-3
Title on the Display
Liquid Crystal Display 7 seg.
2 VERIFY PLU & ING 2 COMPARE PLU & ING. IN OLD FORMAT
READ PLU & ING 3 READ PLU & ING. IN OLD FORMAT
WRITE PLU TO CMT 4 SAVE PLU IN NEW FORMAT
VERIFY PLU = CMT 5 COMPARE PLU IN NEW FORMAT
READ PLU FM CMT 6 READ PLU IN NEW FORMAT
WRITE ING TO CMT 7 SAVE ING. IN NEW FORMAT
VERIFY ING = CMT 8 COMPARE ING. IN NEW FORMAT
READ ING FM CMT 9 READ ING. IN NEW FORMAT
WRITE NUTRITION 10 SAVE NUTRITION IN NEW FORMAT
VERIFY NUTRITION 11 COMPARE NUTRITION IN NEW FORMAT
READ NUTRITION 12 READ NUTRITION IN NEW FORMAT
WRITE SPEED KEY 13 SAVE SPEED KEY IN NEW FORMAT
VERIFY SPEED KEY 14 COMPARE SPEED KEY IN NEW FORMAT
READ SPEED KEY 15 READ SPEED KEY IN NEW FORMAT
3
4
5
6
7
8
9
10
11
12
13
14
15
: operable, : inoperable
Page 48
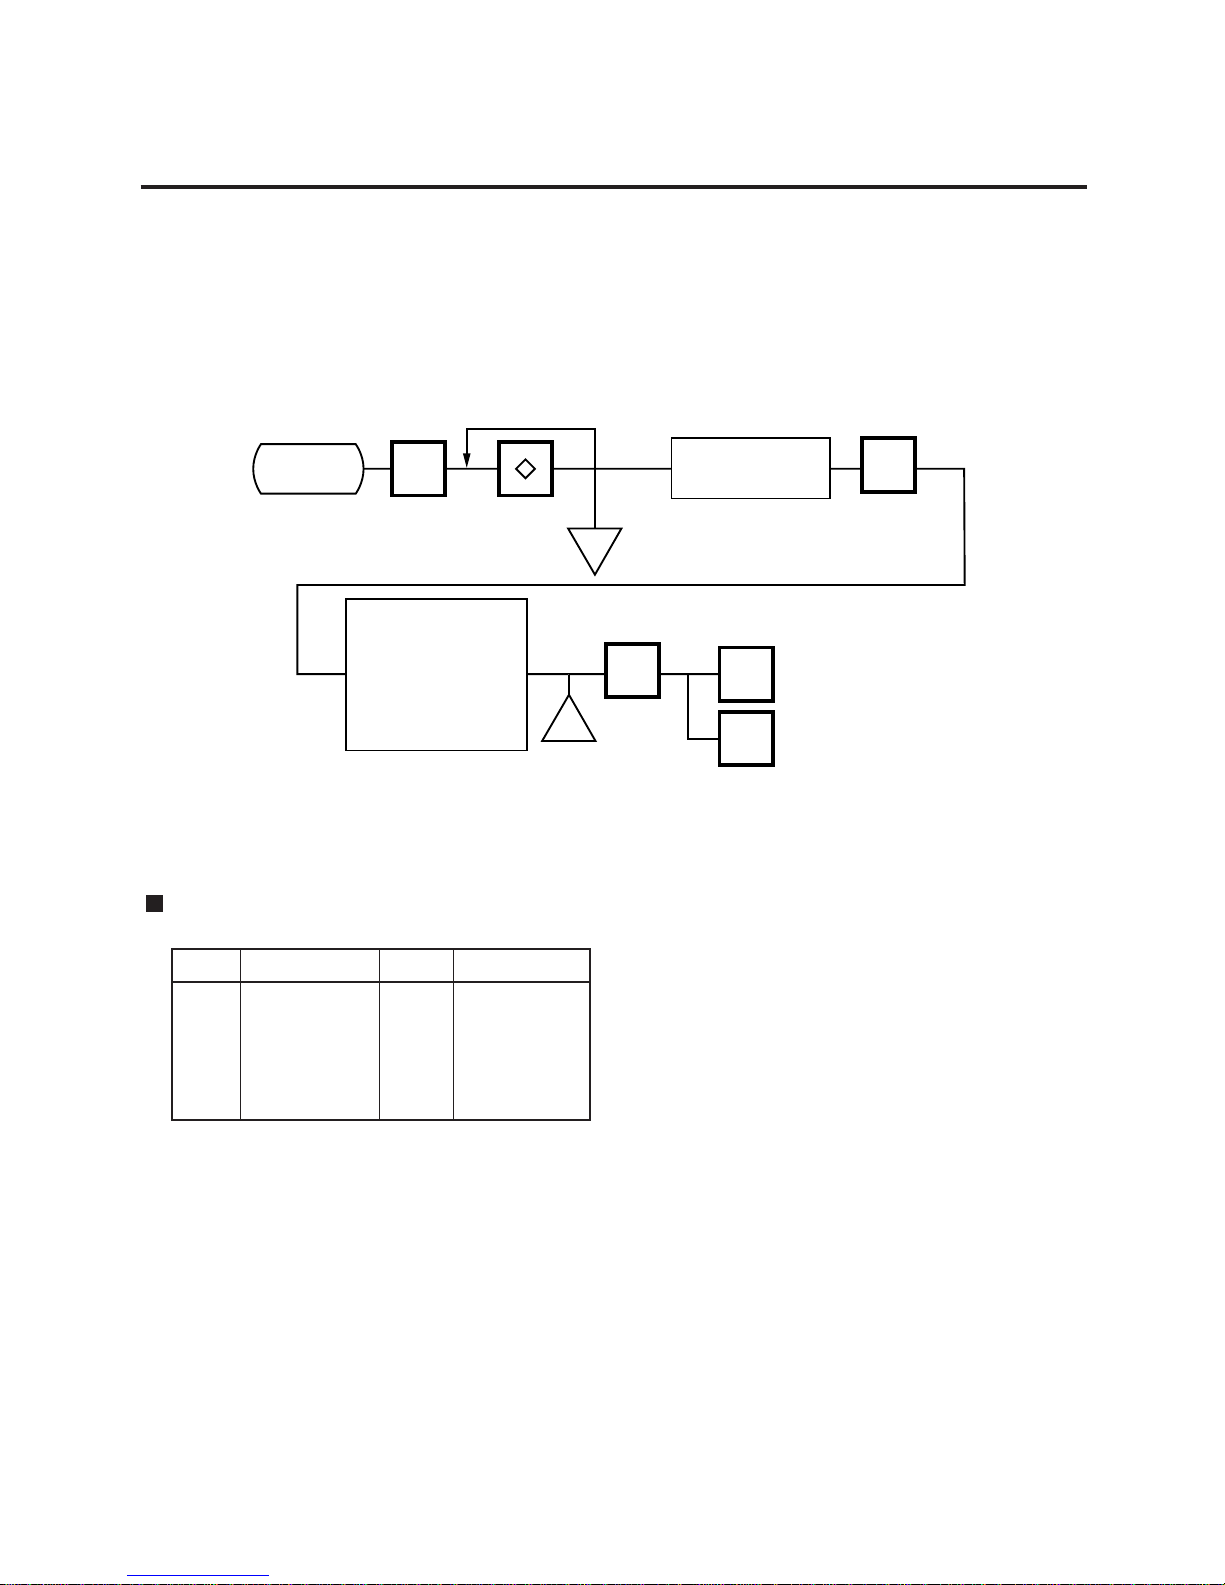
11-21
11. PROGRAMMING PROCEDURES
11.13 IN-LINE/LOCAL
11.13 IN-LINE/LOCAL
Menu Group: 2
Item No.: 3
When the SL-9000 is used as a satellite in an in-line system, the “ID #” and “Transmission delay
time” can be set by the following procedure.
PROG.
ESC.
<MENU>
Group 2
Main
<MENU>
The transmission
delay time can be
set when in-line
system is selected
for TMCC.
(Refer to Table 5)
l
l
<MENU>
Group 2
3
Select mode
TMCC
OFF-line
Set ID numbers
(Range: 0~255)
ENTER
ENTER
NOTES: 1.
The TMCC baud rate is fixed to 9600 BPS.
2.
After setting the ID #, turn the power switch OFF and ON again.
Table 5: Transmission Delay Time Table
1 20~39 6 120~139
2 40~59 7 140~159
3 60~79 8 160~179
4 80~99 9 180~199
5 100~119
The default is 3.
TR-Time (ms)
TR-Time (ms)
Page 49
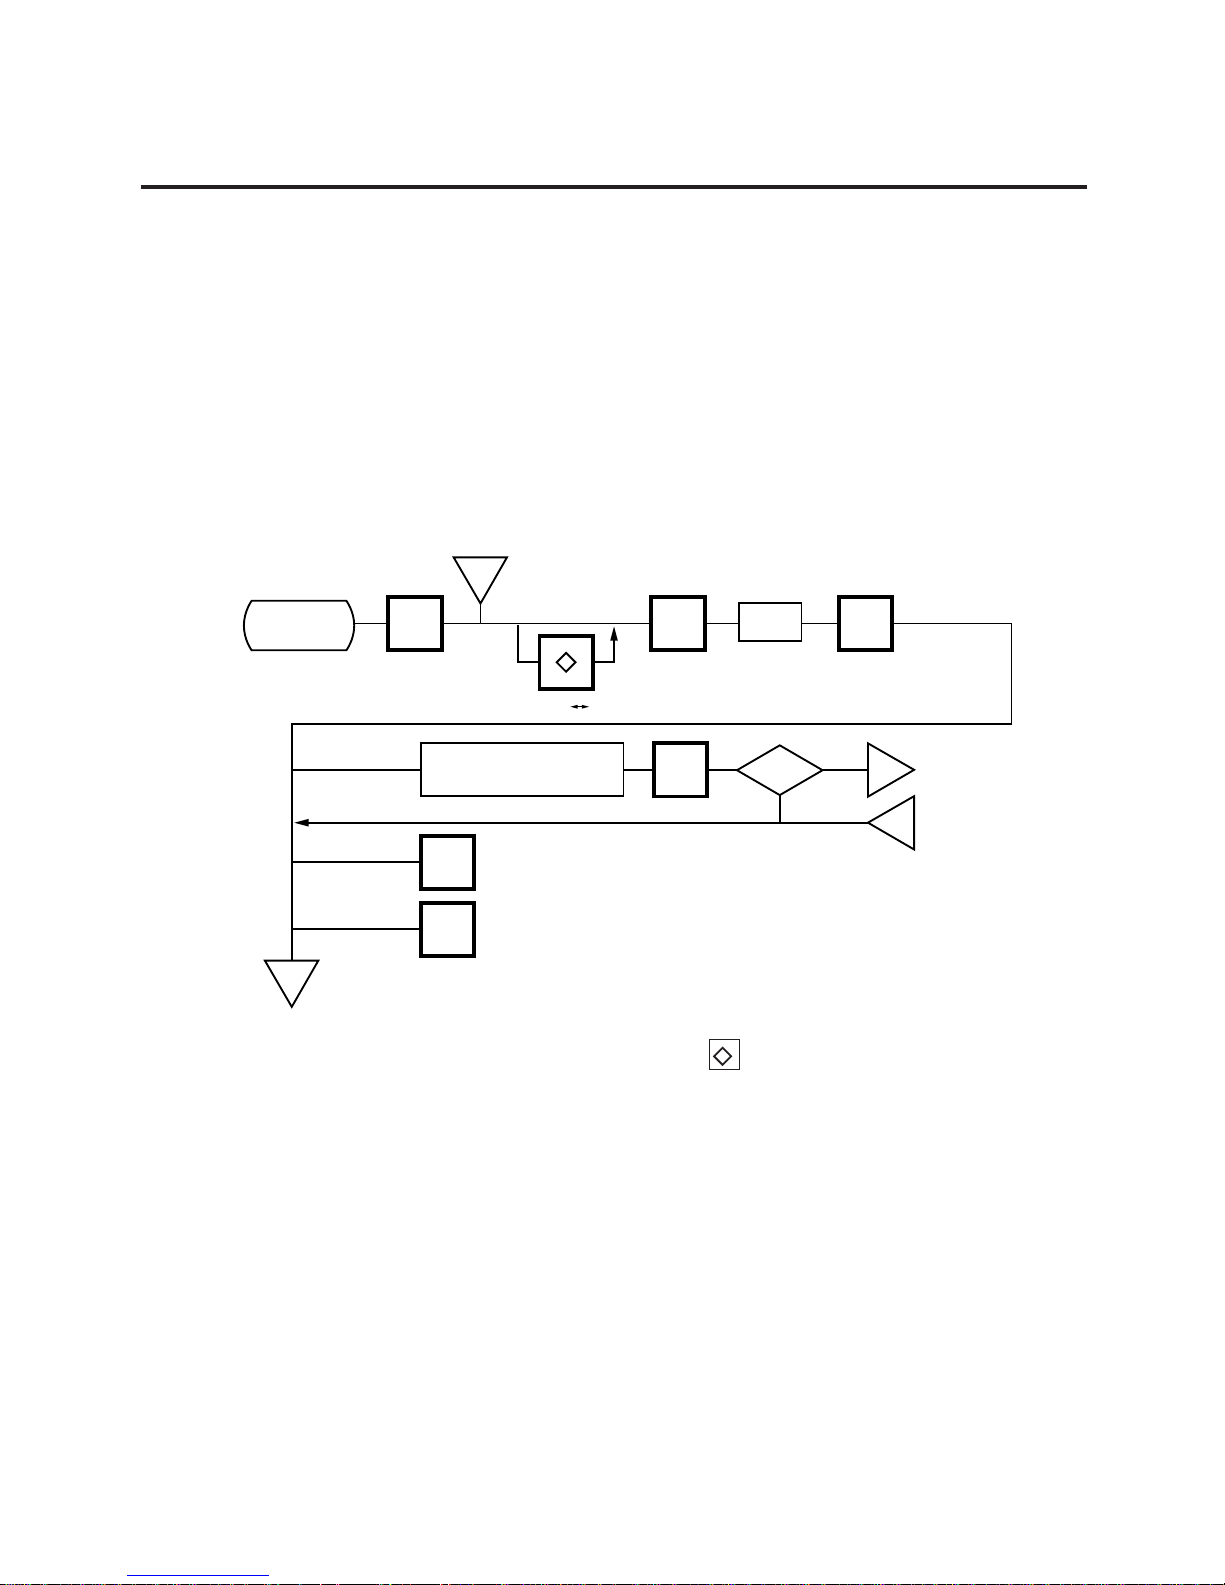
11-22
11. PROGRAMMING PROCEDURES
11.14 LON SYSTEM
11.14 LON SYSTEM
Menu Group: 2
Item No.: 4
The SL-9000 scales which consist of a master, satellites, and a backup master are connected
each other by the LON cable to transmit data such as PLU, ING., NUTRI, etc.
ID# 1 is reserved for the master terminal.
ID# 2 is reserved for the backup master terminal or satellite terminal.
ID# 3 to 32 are for satellite terminals.
Setting numbers other than the above results in an error.
NOTES: 1. Before starting the above procedure, press the key and enter IN-LINE mode.
2. When installing the backup master terminal, set the master scale’s initial status of #9-1 to
1.
3. Set ID # to all scales connected by LON cable.
4. When the display power is turned on, a satellite terminal is ready to receive data from
the master terminal.
5. After setting the ID #, turn the power switch OFF and ON again.
CHANGE
PLU
PROG.
ESC.
<MENU>
Group 2
Main
<MENU>
m
m
ENTER
ENTER
IN-LINE OFF-LINE
4
<MENU>
Group 2
ID #
DLL?
Yes
No
Set the number of
scales in the system.
ID#: 1
n
p
Page 50
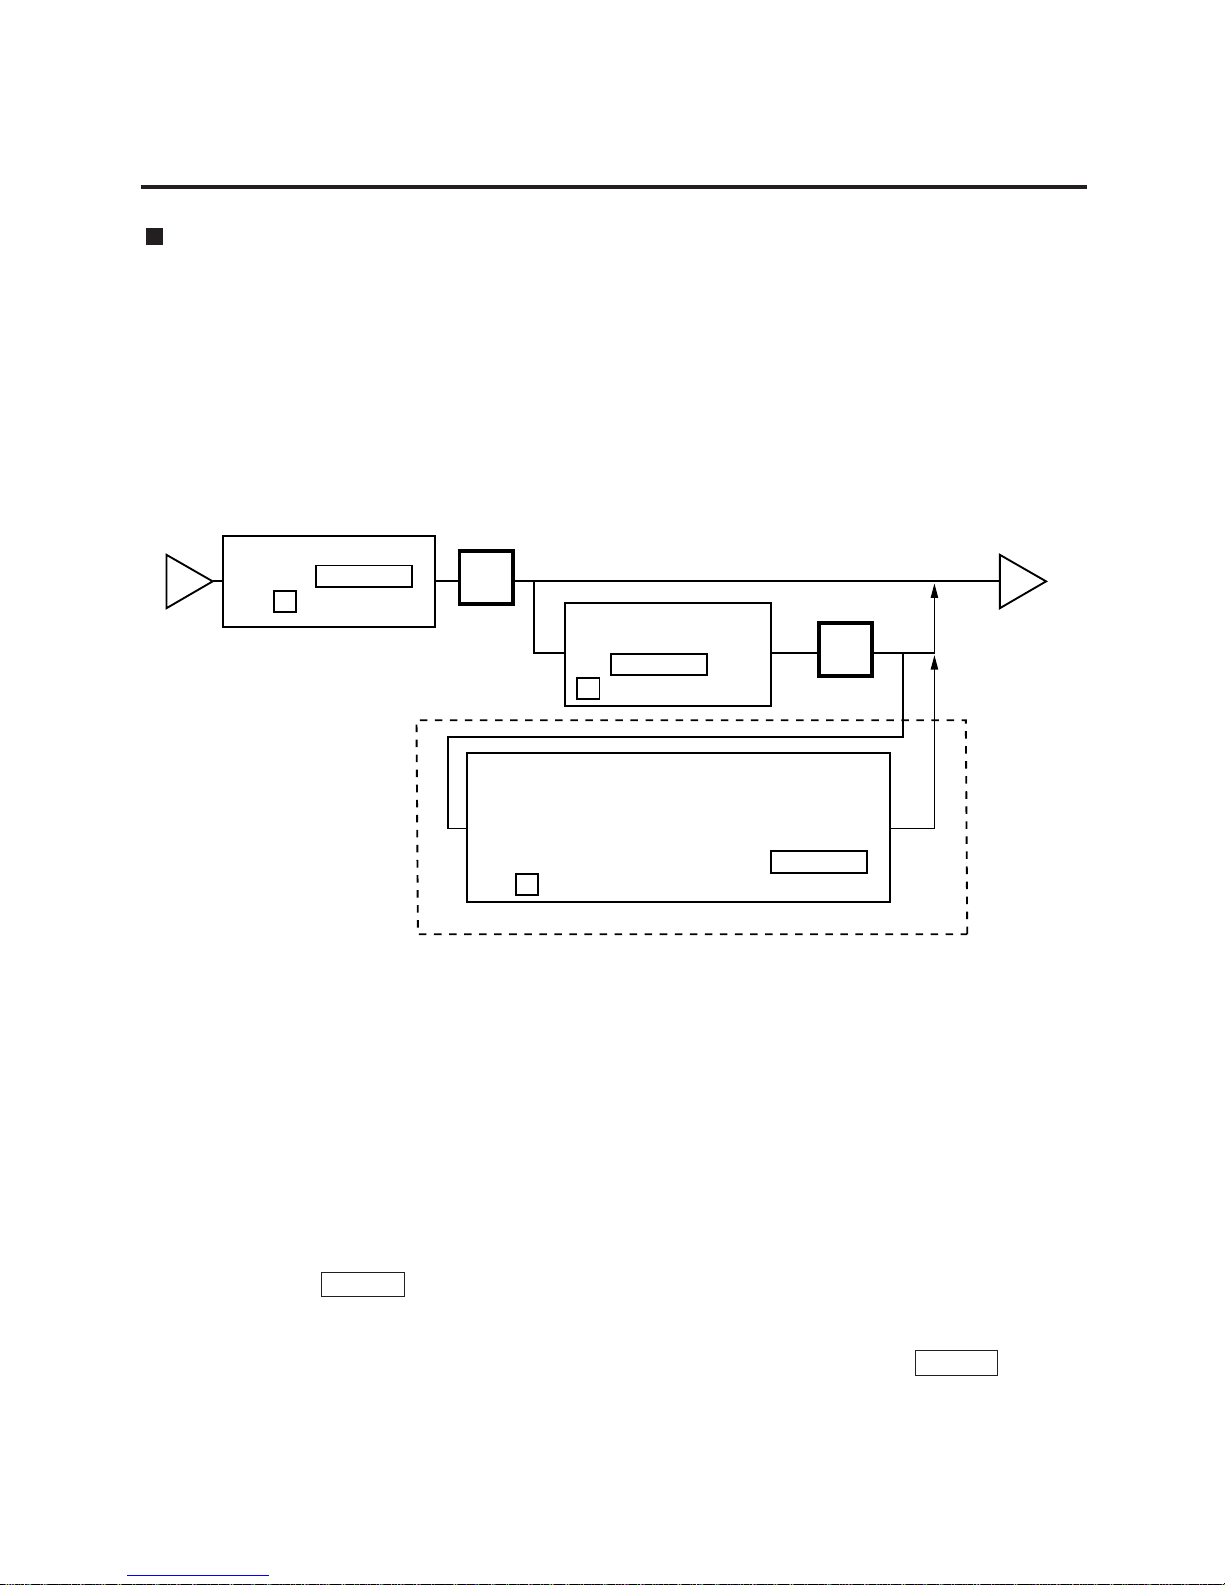
11-23
11. PROGRAMMING PROCEDURES
11.14 LON SYSTEM
Data Transmission
The following data are down-line-loaded.
Page 1: (0). All (PLU+ING+NUTRI) Page 2: (0). SPEED KEY
(1). PLU (1). LOGO
(2). ING. (2). VENDOR
(3). NUTRITION (3). FREE FORMAT
(4). U. PRICE (9). CHANGE PAGE
(5). DATE/TIME
(7). LOCK SCALE (Check the LON cable)
(8). OPEN SCALE (Release the lock after checking the LON cable.)
(9). CHANGE PAGE
The error terminal
ID# is displayed. Use
the and
keys.
Select one of the above using the
and keys.
Release the scale from the error.
0: CANCEL
1: RETRY
2: CONTINUE
Select a DLL data
using the
and keys.
Release the scale
from the error.
LOCK SCALE method
NEXT PLU
NEXT PLU
NEXT PLU
–
–
–
ENTER
CLEAR
pn
Errorous terminal
# is displayed.
NOTE: DLL is performed automatically in the following two ways. It is selectable by the Initial
Settings #0-6 and #0-7.
(1) LOCK SCALE method
Step 1: “LOCK SCALE” is sent. (*1)
Step 2: Selected data is sent. (*2)
Step 3: “OPEN SCALE” is sent.
*1: If an error occurs during step 1, the error terminal ID# is indicated. Select
“cancel”, “retry” or “continue” to release the terminal from an error.
cancel: Quits the operation after sending “OPEN SCALE”
retry: Tries to send “LOCK SCALE” again.
continue: Ignores the error terminal and starts DLL.
*2 If an error occurs during step 2, the error terminal ID# is indicated. Press the
CLEAR key to return to the DLL data selection menu.
(2) Background DLL
Step 1: Selected data is sent. (*3)
*3 If an error occurs, the error terminal ID# is indicated. Press the CLEAR key to
return to the DLL data selection menu.
Page 51
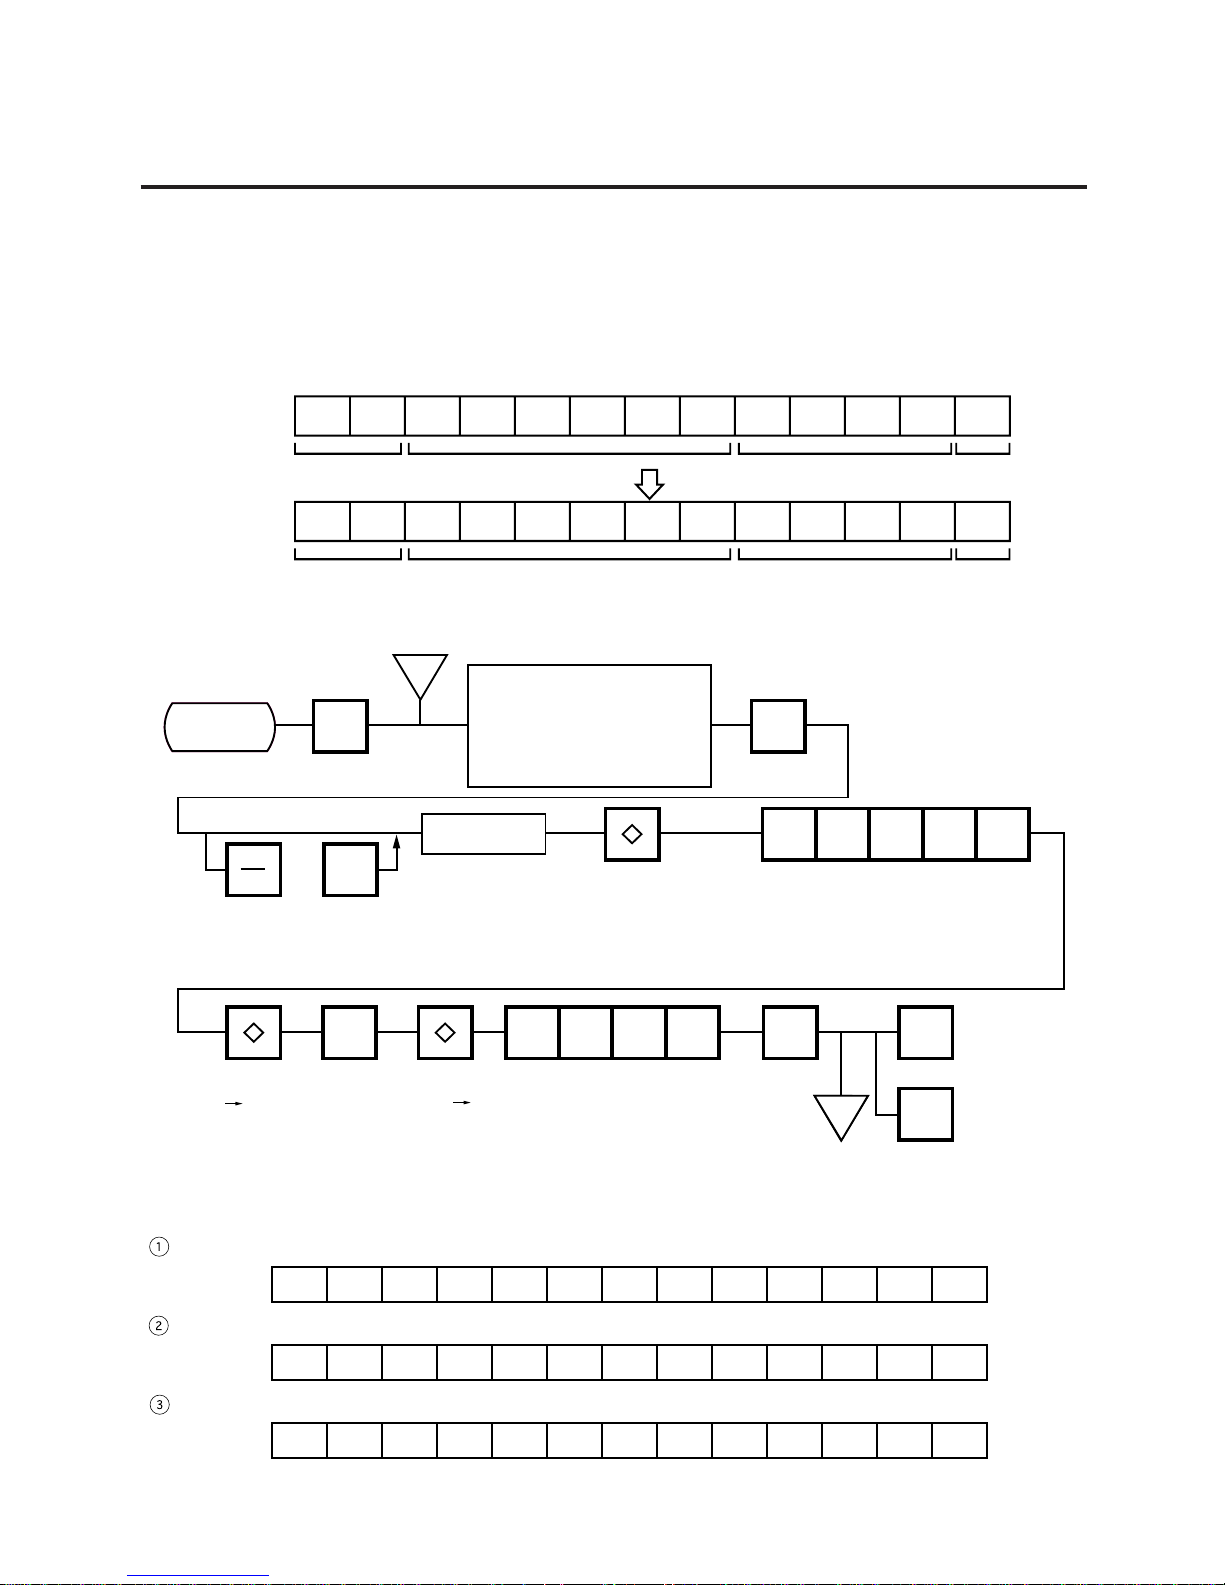
11-24
11. PROGRAMMING PROCEDURES
11.15 BAR CODE FORMAT
11.15 BAR CODE FORMAT
Menu Group: 2
Item No.: 6
With the SL-9000 scale, four kinds of bar code formats are available. These formats can be
changed freely.
Example)
Current format
Changed format
When changing the above example format into the weigh format described in NOTE 1, use the
following procedure.
C6C5C4C3C220
C/D
P4P3P2P1
PC/D
C5C4C3C2C192
C/D
P5P4P3P2C6
Flag UPC #
UPC #
Price Total check digit
Total check digit
Flag Price check digit or
weight check digit.
<MENU>
Group 2
ENTER
ENTER
1 1 2 3 4
2 3 4 5 6
6
or
NEXT
PLU
q
q
ESC.
PROG.
<MENU>
Group 2
Main
<MENU>
Set the flag.
(Left) (Right)
Enter a price
Enter an UPC #.
(Move the cursor to
the column to be set.)
Switch over the setting
item.(refer to NOTE 8)
ex)Press the key twice to
select UPC # as a setting
item.
Select the format #.
Format #1:WEIGH
Format #2:BY COUNT
Format #3:FIX PRICE
Format #4:RECEIPT
Switch over
UPC # PC/D
Set price
chech digit
Switch over
PC/D UPC #
ex)Enter "02"
NOTES: 1. In this printer, the previously set bar code format is initialized to the following default by
RAM clear.
Default Bar Code Format:
Weight or Fix Price Format
Bar Count Format
Receipt Format
C6C5C4C3C220
C/D
P4P3P2P1
PC/D
C5C4C3C2000
C/D
C60000
PC/D
000020
C/D
P5P4P3P2P1
Page 52

11-25
11. PROGRAMMING PROCEDURES
2. When the ENTER key is passed, bar code format is checked. An error occurs in the
following cases.
Check digit (C/D) is at other than digit-13.
Price check digit (PC/D) cannot be calculated. (Price is other than 4 or 5 digits.)
Price is not set serially beginning from P1 to P4, or P1 to P5).
Weight is not set serially beginning from W1 (W1 to W5).
3. The usable keys to set the column are as follows:
11.15 BAR CODE FORMAT
PLU # 123456
Display HHHHHH
123456
FLAG 0 ~ 9
PLU # 1 ~ 6
UPC# 1 ~ 6
PC/D 1
PRICE 1 ~ 6
WEIGHT 1 ~ 6
C/D 1
4. Digits and display of PLU# 5. Digits and display of UPC#
6. Digits and display of price
UPC # 123456
Display CCCCCC
123456
7. Display of weight Digits
8. Setting Items
PLU # $ 1 2 . 3 4
Display P P P P
12 34
$ 1 2 3 . 4 5
PPP PP
123 45
Weight 1 2 . 3 4 5 lb
Display W W W W W
12 345
Weight 1 2 . 3 4 5 kg
Display W W W W W
12 345
Flag PLU# UPC# PC/D
C/D Weight Price
1
2
3
4
5
6
7
Page 53
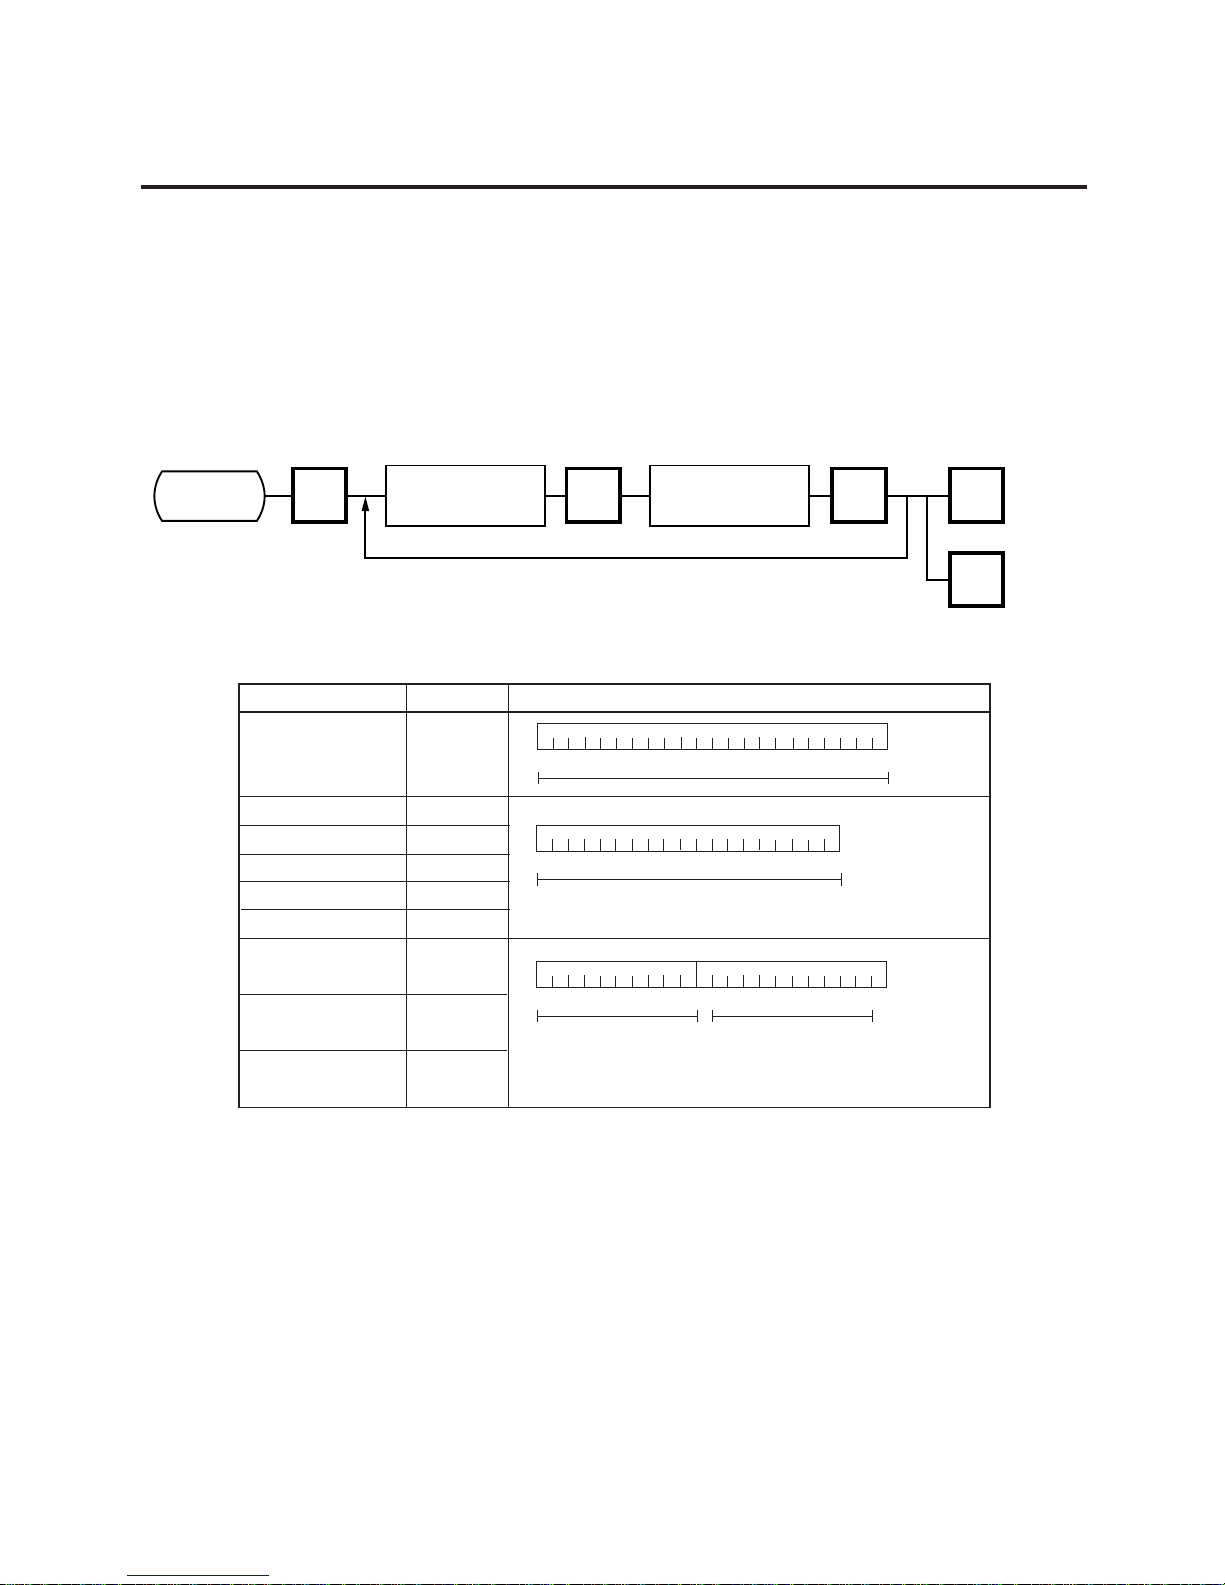
11-26
11. PROGRAMMING PROCEDURES
11.16 TITLES
11.16 TITLES
Menu Group: 2
Item No.: 7
You can register and change displayed/printed titles of the additional information area for nutrition
facts using the following procedure. Registered or changed title are stored in the RAM. When
ALL clear or RAM clear is executed, these titles will be cleared and the initial titles will resume.
Before starting this operation, set the initial setting #7-3 to 1.
<MENU>
Group 2
ENTER ENTER
7
ESC.
PROG.
<MENU>
Group 2
Main
<MENU>
Enter the title #.
(See NOTE.)
Enter the title.
(See NOTE.)
NOTE: Title No. and format of the additional information area
Item
Additional 1
Additional 2
Additional 3
Additional 4
Additional 5
Additional 6
Additional 7,8
Additional 9,10
Additional 11,12
Title No.
221
231
232
233
234
235
238
239
240
Format
Max. 22-character title
:mg or g
Max. 19-character title
Max. 10-character title
Max. 10-character title
(Two different titles can be set in one area)
Space
Page 54
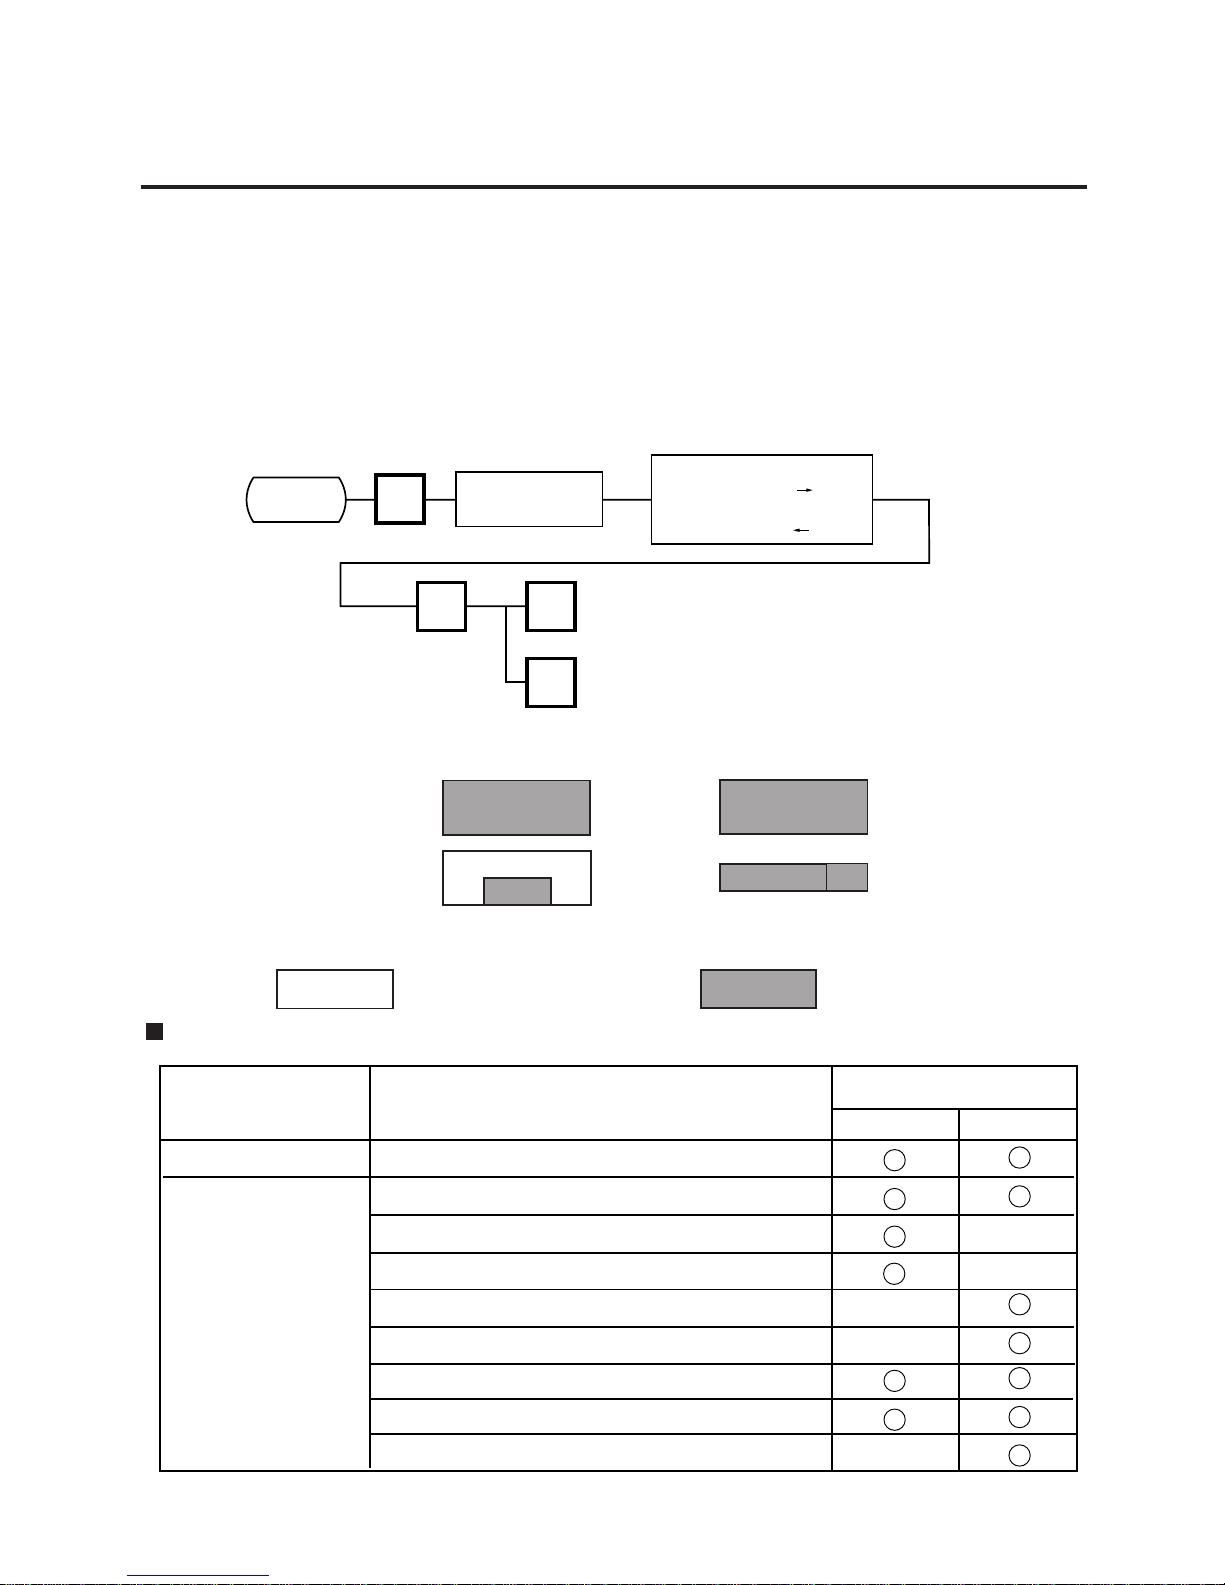
11-27
11. PROGRAMMING PROCEDURES
11.17 TRANSFERRING LOGO DATA
11.17 TRANSFERRING LOGO DATA
Menu Group: 2
Item No.: 8
Logo data is created on a PC and stored into RAM through the CMT interface. Two different
sizes of logos, 320x118 dots and 256x64 dots, are available on the SL-9000 series. 64KB of
RAM area is secured for logo data, in which the maximum of 13 logos (320x118 dots) or 26 logos
(256x64 dots) can be stored. Before starting the following operation, set the initial setting #10-7
to 1.
<MENU>
Group 2
ENTER
8
ESC.
PROG.
<MENU>
Group 2
Main
<MENU>
Load the tape into
the CMT Loader
Select a transmission item.
1: SAVE(SL-9000 CMT)
2:VERIFY(SL-9000=CMT)
3:LOAD(SL-9000 CMT)
Table 6: Error message during data transmission
Error message
Cause
Error position
Header text Data text
TIME OUT ERROR
DATA ERROR
Timeout
Incorrect segment
Incorrect logo size
Incorrect number of logos
Incorrect logo number
Incorrect number of dots to be printed.
Parity error
Framing error
Overrun error
320x118-dot size logo
The logo is printed at the lower
center of the print area.
NOTE: Two sizes of logos are printed differently as follows:
256x64-dot size logo
<Label> <Receipt>
A whole Logo #1 and a half of
logo #2 area printed.
: Print area for logo : Logo
Page 55
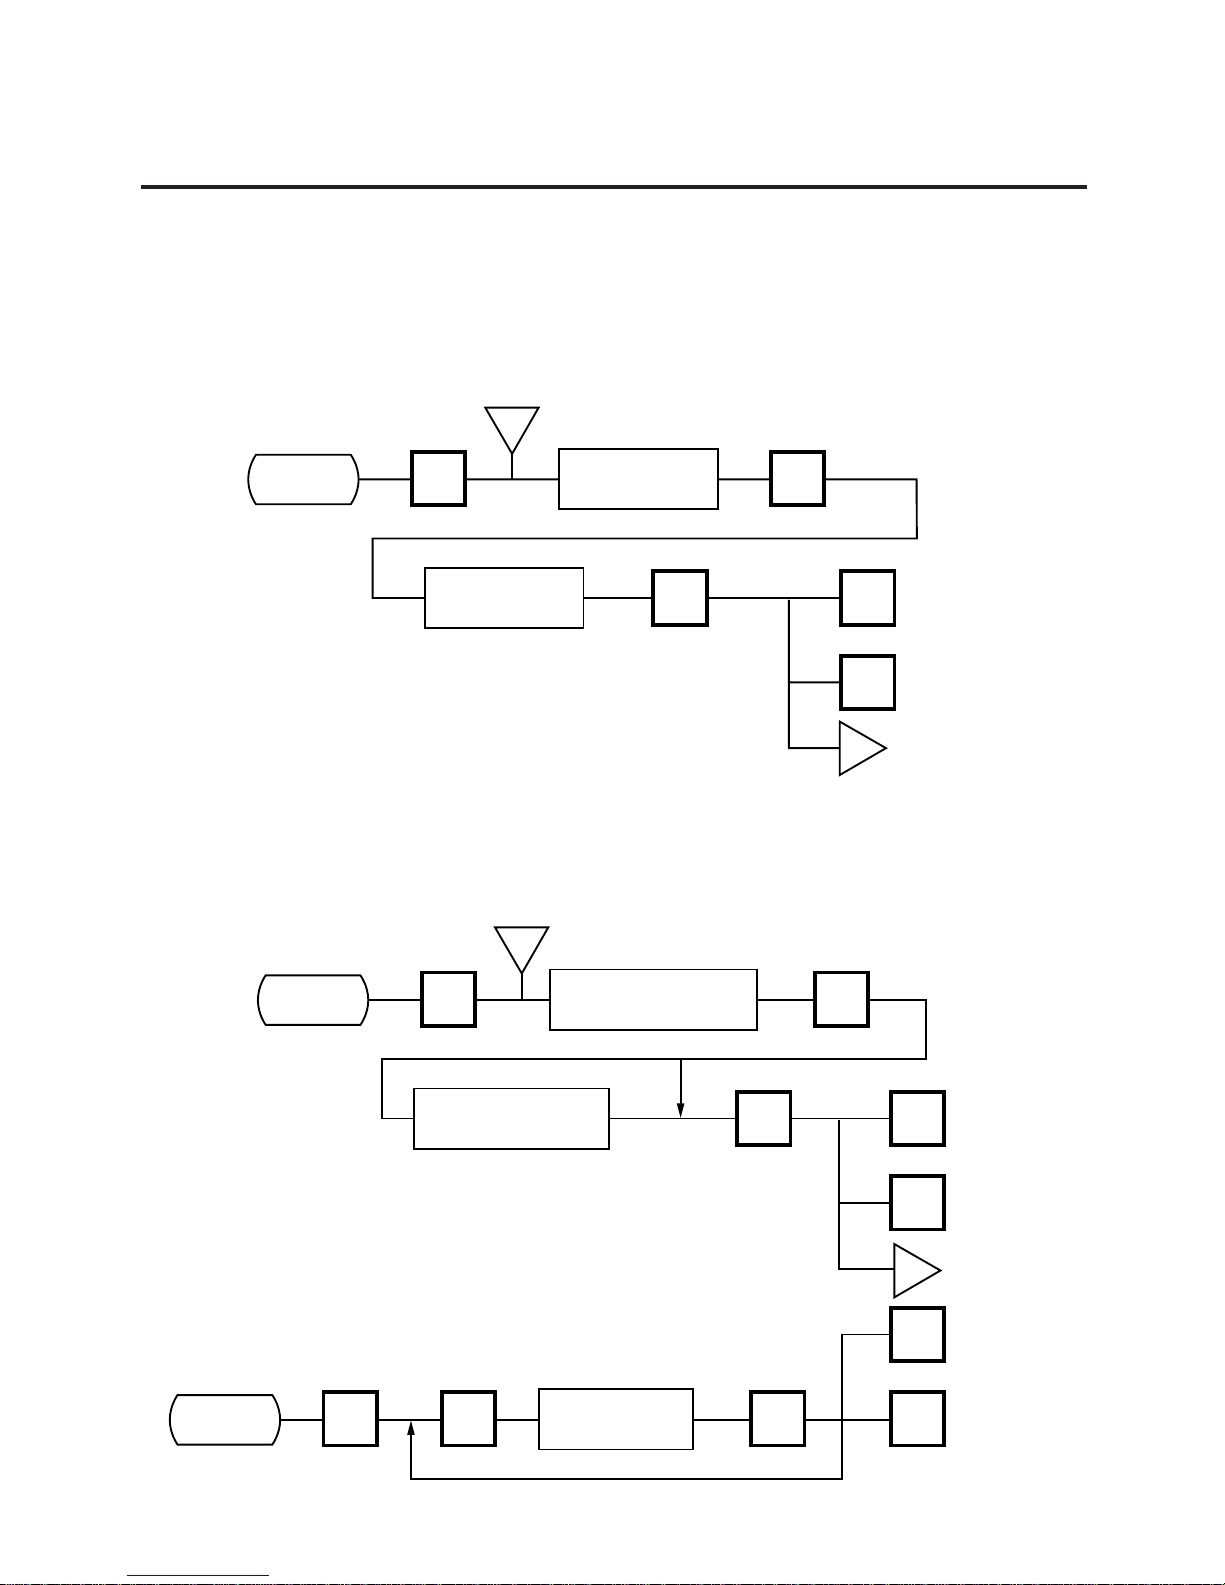
11-28
11. PROGRAMMING PROCEDURES
11.18 IDIOM SETTING
11.18 IDIOM SETTING
Menu Group: 2
Item No.: 9
Up to 50 terms frequently appearing in ingredient messages can be preset using the following
procedure. The idiom number must be set from 1 to 50 in order. One idiom can contain a
maximum of 20 characters.
<MENU>
Group 2
ENTER
ENTER
9
ESC.
r
r
PROG.
<MENU>
Group 2
Main
<MENU>
Enter an idiom.
(Max. 20 charas.)
Set an idiom #.
(#1~50)
11.19 VENDOR SETTING
Menu Group: 3
Item No.: 0
Up to 40 vendors can be registered using the following procedure. The vendor number must be
set from 0 to 39 in order. One vendor name can contain a maximum of 12 characters.
• Deleting a vendor number
<MENU>
Group 3
ENTER
ENTER
0
s
s
ESC.
PROG.
<MENU>
Group 3
Main
<MENU>
Enter a vendor name.
(Max. 12 charas.)
Set a vendor number.
(#0~39)
<MENU>
Group 3
ENTER
0
DELETE
PLU
ESC.
PROG.
<MENU>
Group 3
Main
<MENU>
Enter a vendor
number.
Page 56
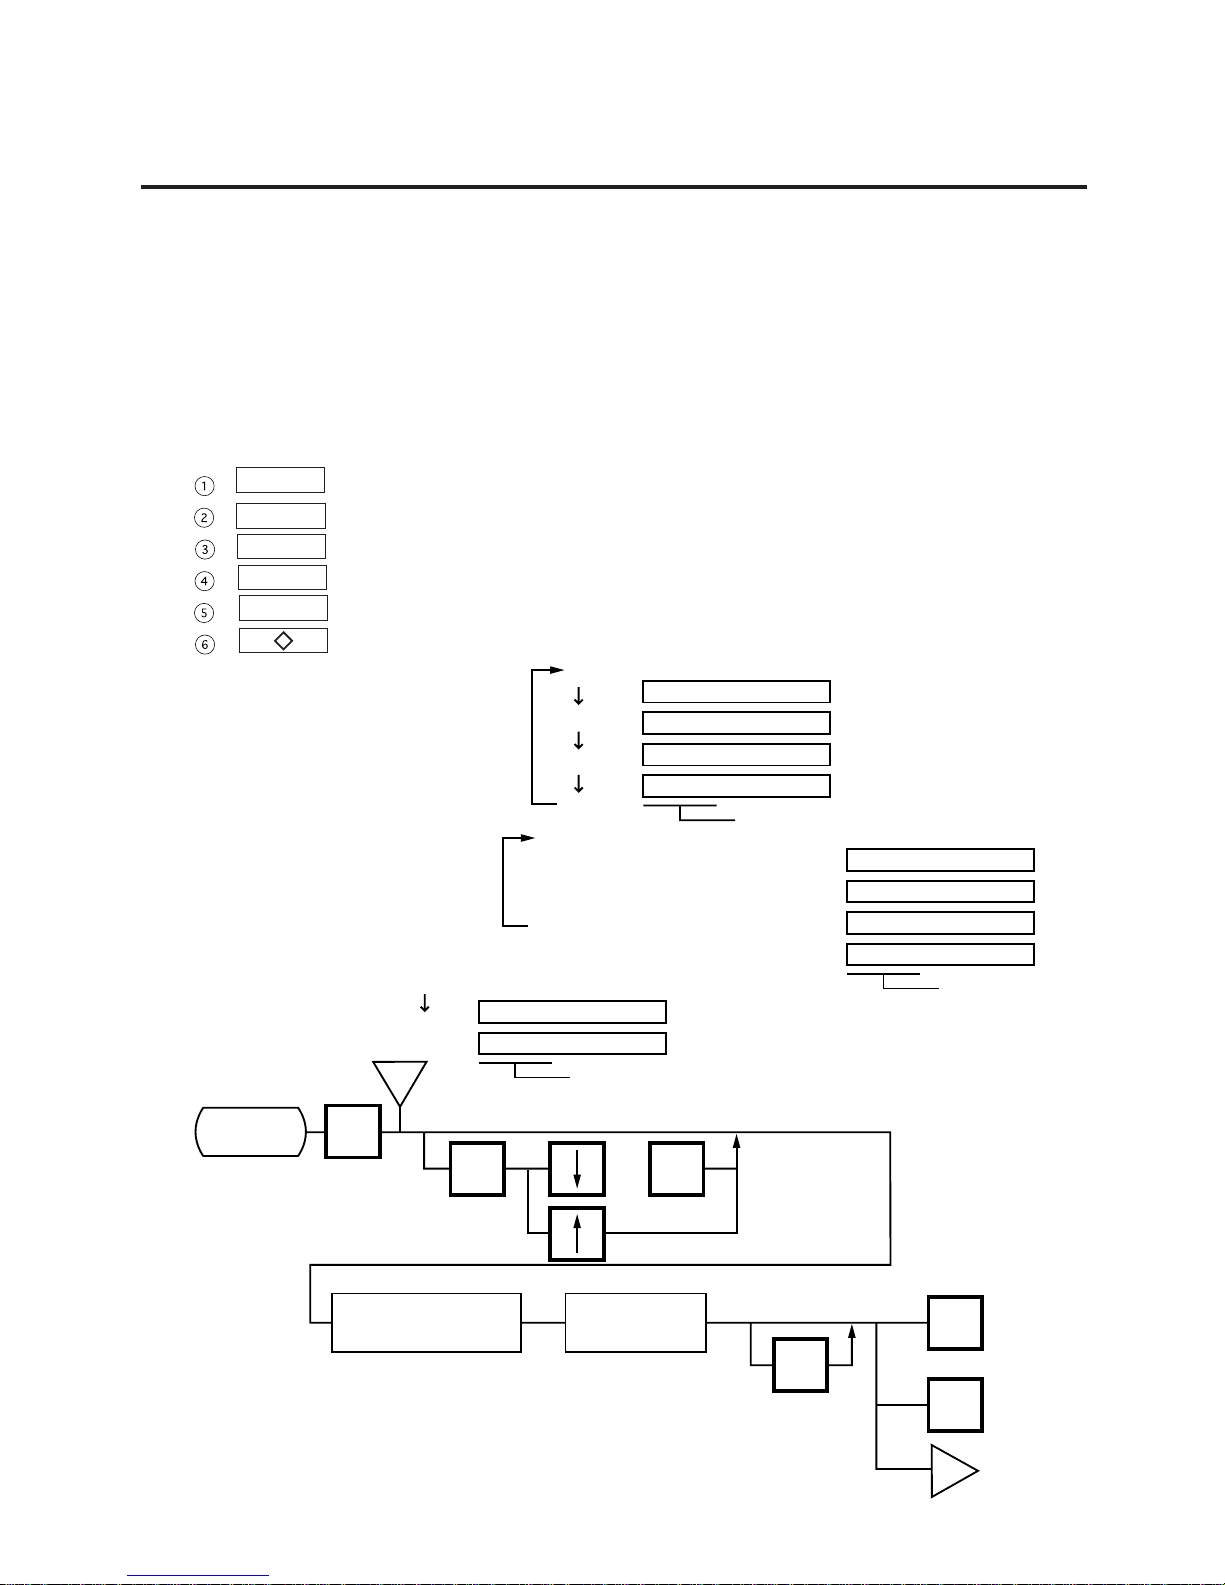
11-29
11. PROGRAMMING PROCEDURES
11.20 FREE FORMAT SETTING
11.20 FREE FORMAT SETTING
Menu Group: 3
Item No.: 1
When using 57-mm wide labels, up to three print formats can be changed freely. Moreover,
characters can be rotated and magnified, and print items are salectable.
Enter the coordinate of each print item’s lower left corner using the lower left corner of a label as
the origin. When a print item is located beyond the label width, an error will occur.
Key functions
: Moves downward (Data is stored.)
: Moves downward (Data is stored.)
: Moves upward (Data is stored.)
: Moves to the right
: Moves to the left
: Selects a setting
a. ROT (Rotation) :
0
90
180
270
0R
90R
180R
270R
Printing Item
Liquid Crystal Display
t
<MENU>
Group 3
1
1
ENTER
Select data format
Tset print
or
TEST
PROG.
ESC.
t
Select a print item
to be re-located.
Change the
coordinate.
<MENU>
Group 3
Main
<MENU>
ENTER
↑
→
←
↓
b. MAG (Magnification) :
Printing Item
Liquid Crystal Display
ONP
OFFP
ON
OFF
Printing Item
Liquid Crystal Display
0M
1M
2M
3M
0: normal
1: X2 (width)
2: X2 (height)
3: X4 (width: X2, height: X2)
c. PRT (Print) :
(See NOTE 5)
Page 57

11-30
11. PROGRAMMING PROCEDURES
11.20 FREE FORMAT SETTING
NOTES: 1. The following print items cannot be magnified.
1
LOGOs
2
Safe handing precautions
3
Ingredient messages
4
Bar code
2. The following items cannot be rotated.
1
LOGO
2
Safe handling precautions
3
Bar code
3. Base label format numeric data is shown automatically.
X coordinate:0-383 dots (1 dot = 0.132 mm)
Y coordinate:0-1300 dots (1 dot = 0.154 mm)
Format data beyond the effective print area results in an error.
4. Each format data must be set in the following range:
1
Free Format# (FREE FMT#): 1-3 (Free format# 1-3 correspond to the label
format 41-43 or #91-93.)
2
Base label format (BASE LBL#): 57-mm wide label
On-demand: 10, 11, 13, 15, 16, 21, 23, 25, 26, 31, 33, 35 and 36
3
Length: 30-200 mm
4
Number of ingredient message lines: 0-38 lines
5
Bar code height: 0-39 mm
5. Each print item should be printed in the following range.
No.
1
2
3
4
5
6
7
8
9
10
11
12
13
14
15
16
17
18
19
20
21
22
384
384
84
70
84
70
106
105
140
105
138
105
212
12
100
34
384
84
232
320
384
384
94
*1
20
13
20
13
20
13
20
13
32
13
*2
20
20
13
48
20
14
118
194
32
94
*1
20
13
20
13
20
13
20
13
32
13
20
20
13
48
20
14
32
416
438
92
78
92
78
112
112
147
112
147
112
12
107
38
416
92
252
416
Commodity name (4 line)
Ingredient
Packed ON
Packed ON (title)
Sell BY
Sell BY (title)
Weight
Weight (title)
Unit price
Unit price (title)
Price
Price (title)
Barcode
*1. Line count x 15 dots
*2. height/0.154 (dot)
Mark (M/R)
Tare
Tare (title)
SP-INFO/NET WT
Relish
Relish (title)
LOGO
Safe Handling
Address
Print Item
Print area size
Rotation
Note
Normal
XY
XY
Page 58
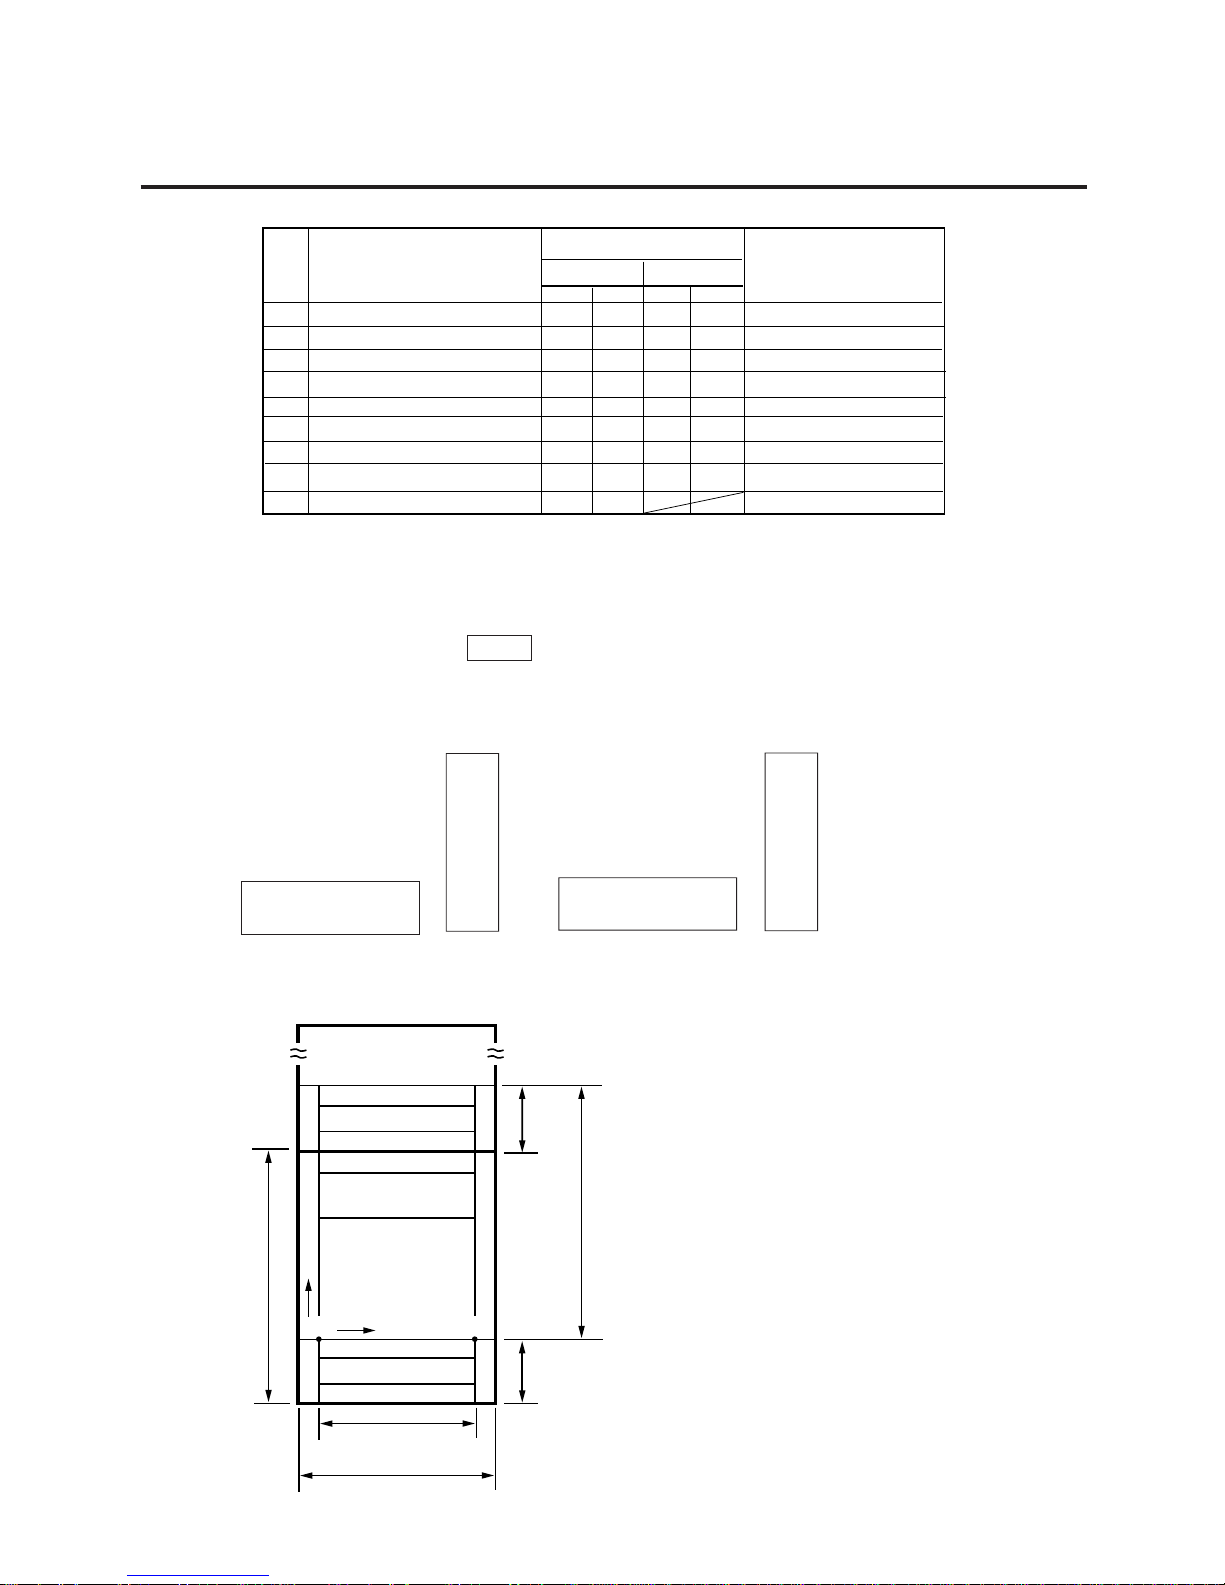
11-31
11. PROGRAMMING PROCEDURES
11.20 FREE FORMAT SETTING
6. When pressing the TEST key, the printer issues a test label.
7. Rotated data will be printed so that the lower left corner is positioned at the designated
coordinate.
(1) 0
°
(2) 90
°
(3) 180
°
(4) 270
°
Address
Address
Commodity
(0,0) (383,0)
Label Length
384 dot
57 mm
1
1
2
Y
X
The points indicates by the arrows are the designated coordinates.
8. Print coordinate
*1 Address are printed together with the
previous label’s data. To print
addresses, use normal labels.
POS (Format #10-16): 10.0 mm
NET (Format #21-26): 10.0 mm
Bar code (Format #31-35): 8.5 mm
*2 Free format area
↑
↑
↑↑
ABCD
ABCD
ABCD
ABCD
When setting the print item positions (X and Y), an error will occur in the following cases.
1 Entered “X” point + Print size “X” > 384 dots.
2 Entered “Y” point + Print size “Y” > 1301 dots.
Magnified print items become double in size.
No.
23
24
25
26
27
28
29
30
31
138
105
140
105
106
105
138
105
320
32
13
20
13
20
13
32
13
118
32
13
20
20
13
32
13
146
120
147
112
120
146
120
(F) Prince
(F) Price (title)
(F) Unit price
(F) Unit price (title)
(F) Weight
(F) Weight (title)
(F) Price
(F) Price (title)
(F) LOGO
Print Item
Print area size
Rotation
Note
Normal
XY
XY
13 120
Page 59
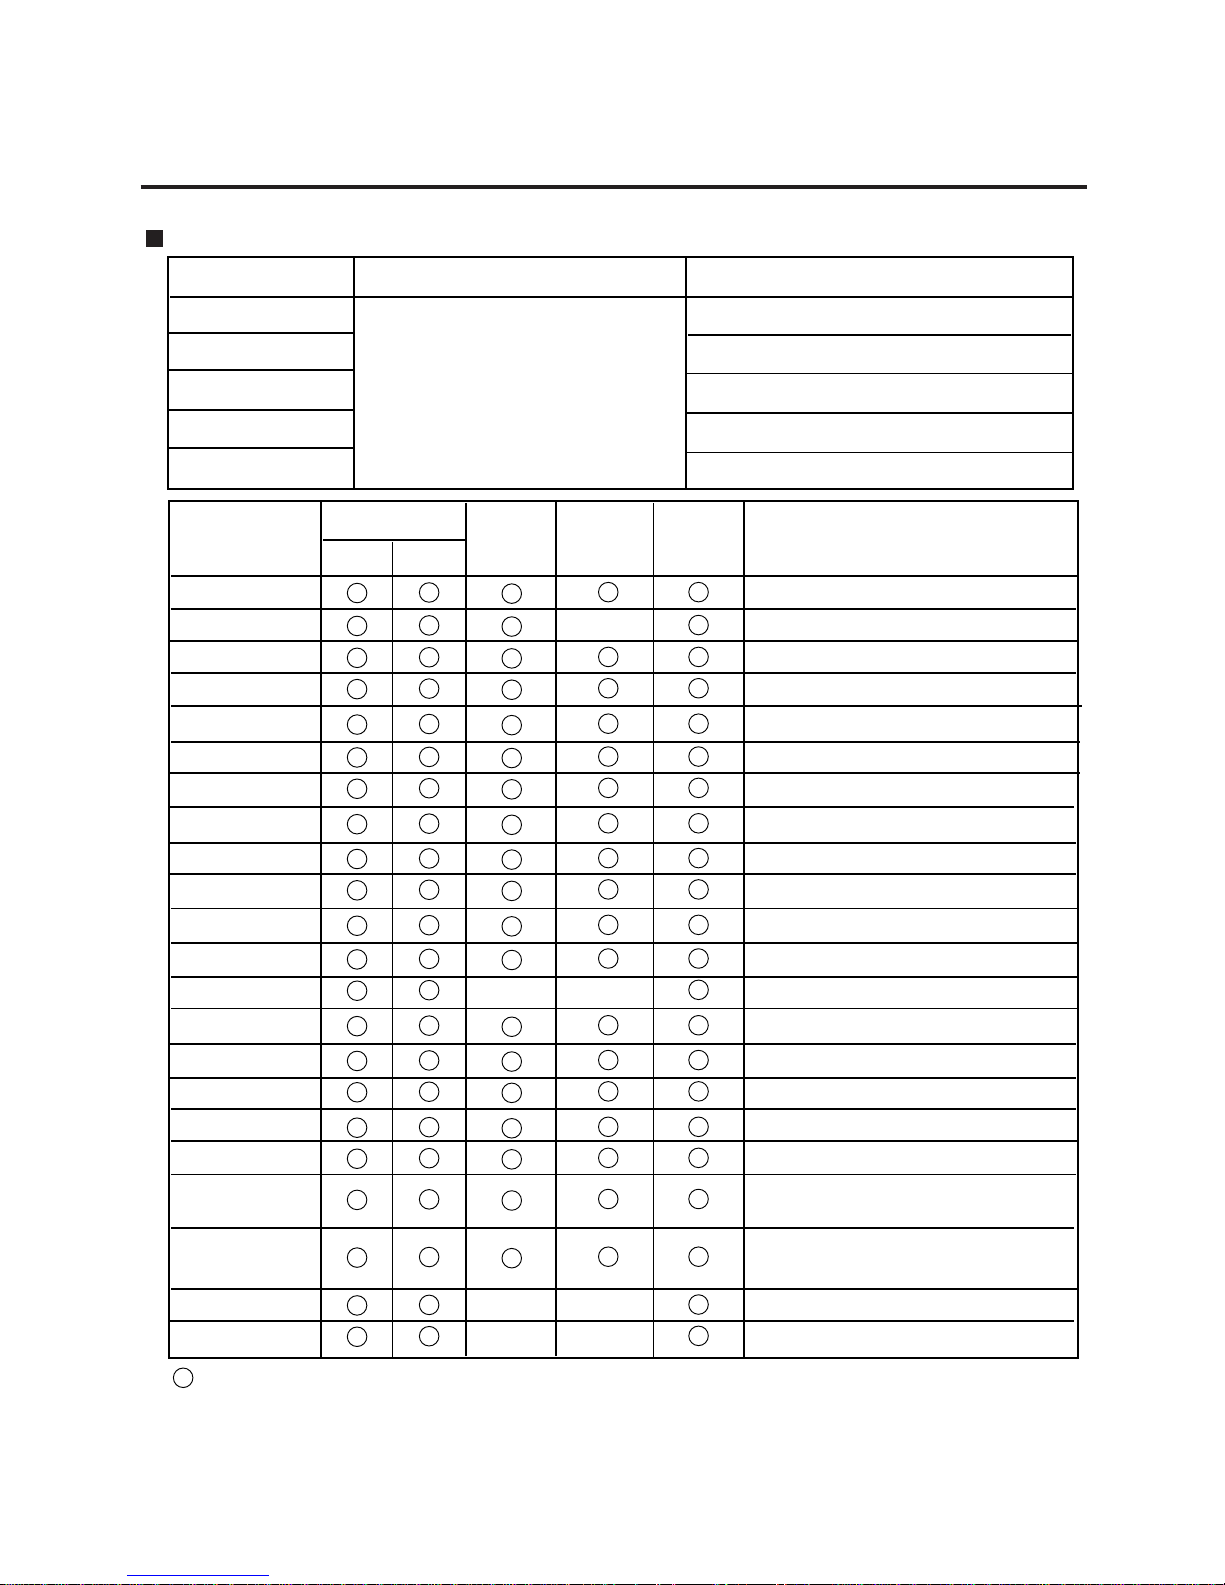
11-32
11. PROGRAMMING PROCEDURES
11.20 FREE FORMAT SETTING
Available format and print items for free format
For the print area size, refer to NOTE 5 on page 11-30.
Print Item
FREE FMT#
BASE LBL#
LENGTH /mm
CT. LINE/ING
H. BCODE /mm
FREE FORMAT NUMBER
BASE LABEL NUMBER
LABEL LENGTH
NUMBER OF INGREDIENT LINES
BARCODE HEIGHT
Format Data
Refer to NOTE 4, page 11-30
Description
Print Item
COMMODITY
INGREDIENT
PACKED ON
(T) PACKED
SELL BY
(T) SELL BY
WEIGHT
(T) WEIGHT
U. PRICE
(T) U. PRICE
PRICE
(T) PRICE
BARCODE
ADDRESS
TARE
(T) TARE
RELISH
(T) RELISH
S. INF/N. WT
MARK (M/R)
LOGO
S. HANDLING
: Available
: Not available
COMMODITY NAME
INGREDIENT MESSAGE
PACKED ON DATE
TITLE OF PACKED ON DATE
SELL BY DATE
TITLE OF SELL BY DATE
WEIGHT
TITLE OF WEIGHT
UNIT PRICE
TITLE OF UNIT PRICE
TOTAL PRICE
TITLE OF TOTAL PRICE
BARCODE
ADDRESS
TARE
TITLE OF TARE
COOKED BY DATE
TITLE OF COOKED BY DATE
SPECIAL INFORMATION or NET
WEIGHT STATEMENT
MARK OF MARK DOWN or
REWRAP
LOGO
SAFE HANDLING INSTRUCTION
XY
Description
Print Area Size
ROT
(Rotation)
MAG
(Magnification)
PRT
(Print)
X
X
X
X
X
X
X
X
Page 60

12-1
12. PROGRAMMED DATA VERIFICATION REPORTS
12. PROGRAMMED DATA VERIFICATION REPORTS
The programmed data can be printed on journal paper. Before issuing these reports, load the journal paper.
The programmed data verification reports cannot be issued with any label. The keys to be used in the
following procedures are those on the numeric key pad, which is framed in black in the figure on page 51, but not on the programming keyboard.
■ How to access the READ menu
Press the ESC. key to access the following display. Enter “5”, and the scale will enter the READ menu.
If the READ menu is protected, enter “5” and a password. (Refer to section 13)
Liquid Crystal Display
Menu: READ
v
u
u
u
50
51
52
53
54
55
56
PRT
*
Set the table menu #.
PLU programmed data
Commodity description
Speed key programmed data
Grade lines
Vendor name
Idiom
(See the next page)
READ 5
12. PROGRAMMED DATA VERIFICATION REPORTS
Page 61

12-2
12. PROGRAMMED DATA VERIFICATION REPORTS
Table 7
Menu #
50
51
52
53
54
55
56
Contents
All the preset PLU data are listed in the PLU # order
(from small to large #).
All the preset commodity names are listed in the PLU
# order (from small to large #).
The PLU # and the commodity name preset on each
speed key is listed.
All the presets commodity names and ingredient
messages are listed in the PLU # order (from small to
large #).
All the preset grade line contents are listed.
All preset vendor names are listed.
All preset idioms are listed.
Report Name
PLU programmed data report
Commodity description report
Speed key programmed data
report
Commodity and ingredient
description report
Grade line report
Vender name report
Idiom report
• Set the data range of each programmed data verification report
u v
PRT
*
PRT
*
1
3
00
100 108
FOR
Set the individual PLU #.
Set the individual PLU #. (Ex. PLU #100)
Set the block PLU #. (Ex. PLU #30 ~ 39)
Set the zone PLU #. (Ex. PLU #100 ~ 108)
12. PROGRAMMED DATA VERIFICATION REPORTS
Page 62
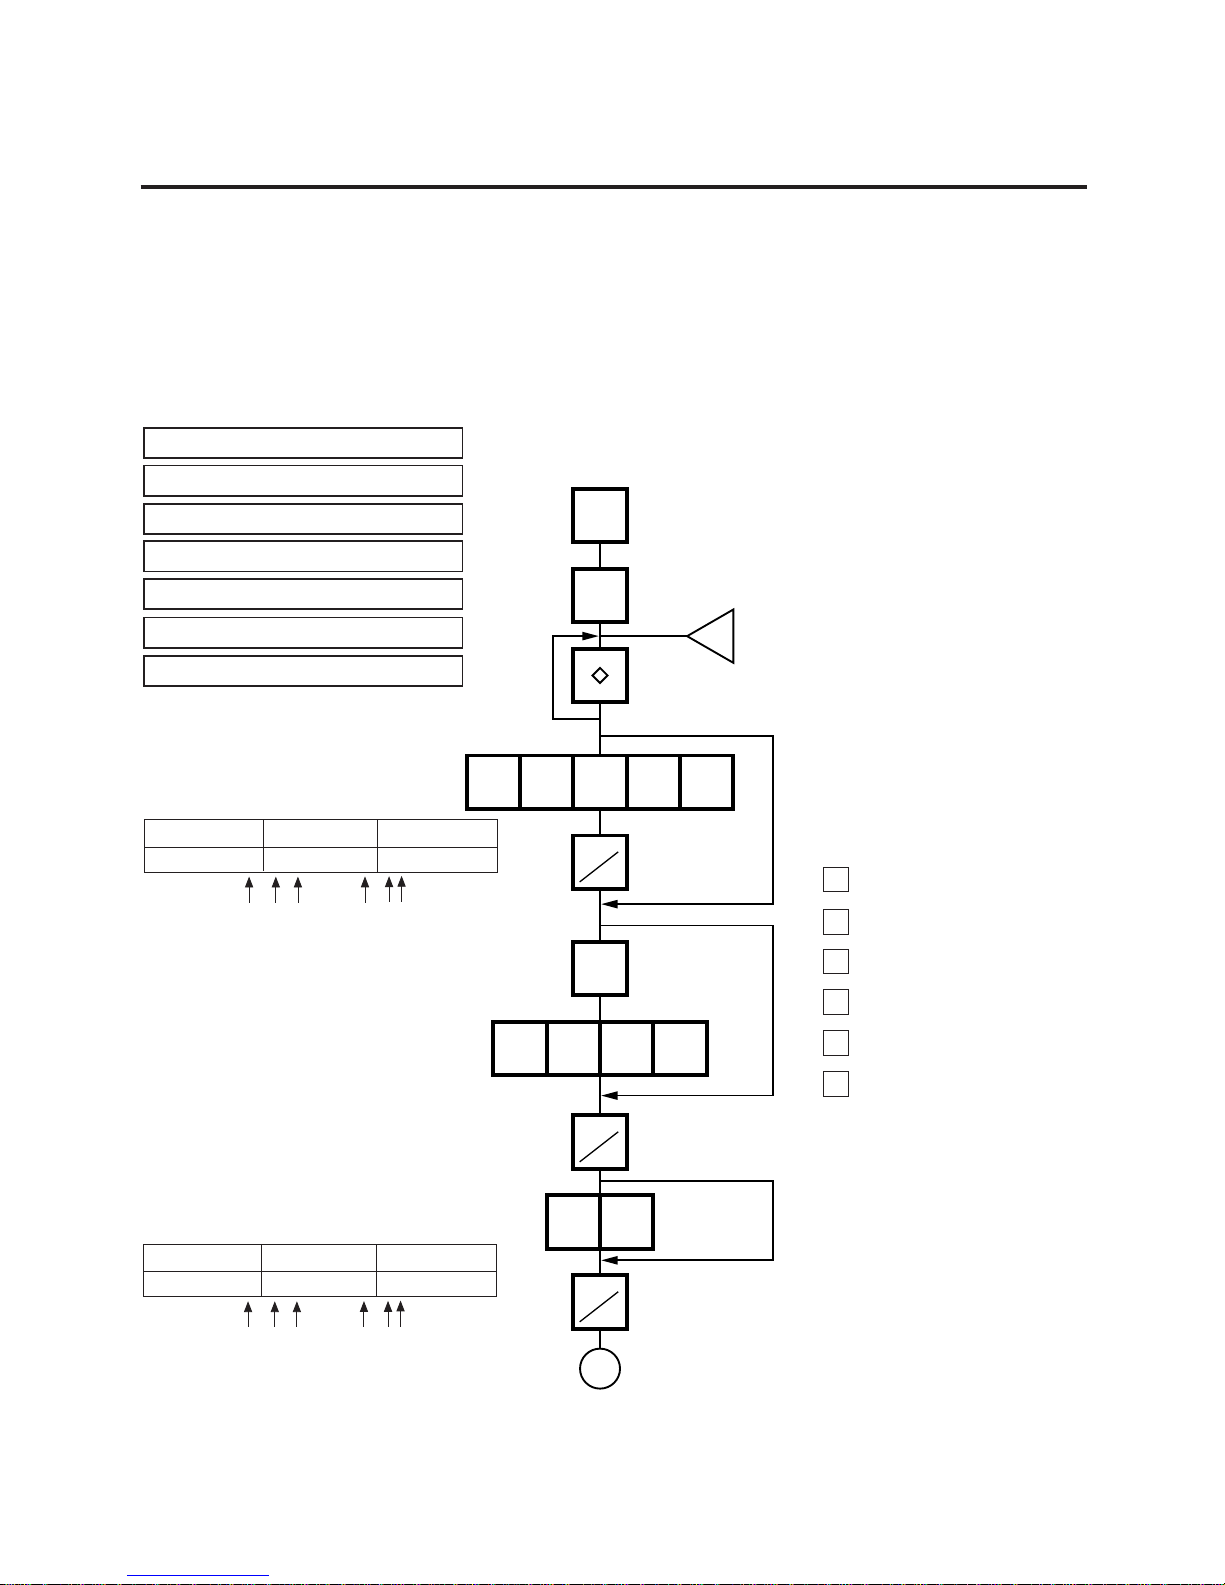
13-1
13. PASSWORD SECURITY
13.1 SETTING PASSWORD AND PROTECT MENU
13. PASSWORD SECURITY
You can protect all menus (except REG. menu) and set two step passwords for access to protected menus.
13.1 SETTING PASSWORD AND PROTECT MENU
ESC.
4
0234
0001
04
B
6
w
PRT
*
PRT
*
PRT
*
NEXT
PLU
PROG. 0
REG. 1
MARK DOWN 2
REWRAP 3
SECURITY 4
READ 5
RESET 6
Liquid Crystal Display
Select menus to be protected.
Remote display
WEIGHT UNIT PRICE TOTAL PRICE
10000-0
P
MR SXZ
0: Protected (Accessible with a password entry)
-: Unprotected
Exclude menus the password A cannot access.
Remote display
Enter password A as 4 digits.
WEIGHT UNIT PRICE TOTAL PRICE
11001-0
PMR SXZ
0: Valid
1: Invalid
-: Unnecessary
The following numeric keys
represents each menu. Enter
the following numbers when
selecting menus to be
protected.
Note that REG. menu (1)
cannot be protected.
0 : P (PROG. Menu)
2 : M (M. DOWN Menu)
3 : R (REWRAP Menu)
4 : S (SECURITY Menu)
5 : X (REPORT Menu)
6 : Z (RESET Menu)
Page 63

13-2
13. PASSWORD SECURITY
13.1 SETTING PASSWORD AND PROTECT MENU
ESC.
B
12
26
34
PRT
*
PRT
*
w
Exclude menus the password B cannot access.
Remote display
WEIGHT UNIT PRICE TOTAL PRICE
11101-1
PMR SXZ
0: Valid
1: Invalid
-: Unnecessary
Enter password B as 4 digits.
NOTES: 1. Select validity of the password by pressing the key.
2. When the same password is entered for password A and B, password A has priority over the
password B.
3. Be careful if you exclude the same menu from the accessible menus with both password A
and B, as you will not be able access the menu.
Page 64

13-3
13. PASSWORD SECURITY
ESC.
ESC.
1
C
260
Enter a menu No.
0 ~ 6
NEXT
PLU
VOID
or
~
,
PRT
*
Enter the 4-digit Password.
Operation
PRT
*
13.2 CALLING MENU BY ENTERING PASSWORD
NOTE: When the password is unknown, enter “HELP” instead, and you can access only security menu.
13.2 CALLING MENU BY ENTERING PASSWORD
Liquid Crystal Display
PROG. 0
REG. 1
MARK DOWN 2
REWRAP 3
SECURITY 4
READ 5
RESET 6
Accessible without the
password
Accessible with the password
(REG.)
Non protect menu
Protect menu
Password NG
Accessible menu with the password
Password OK
Page 65
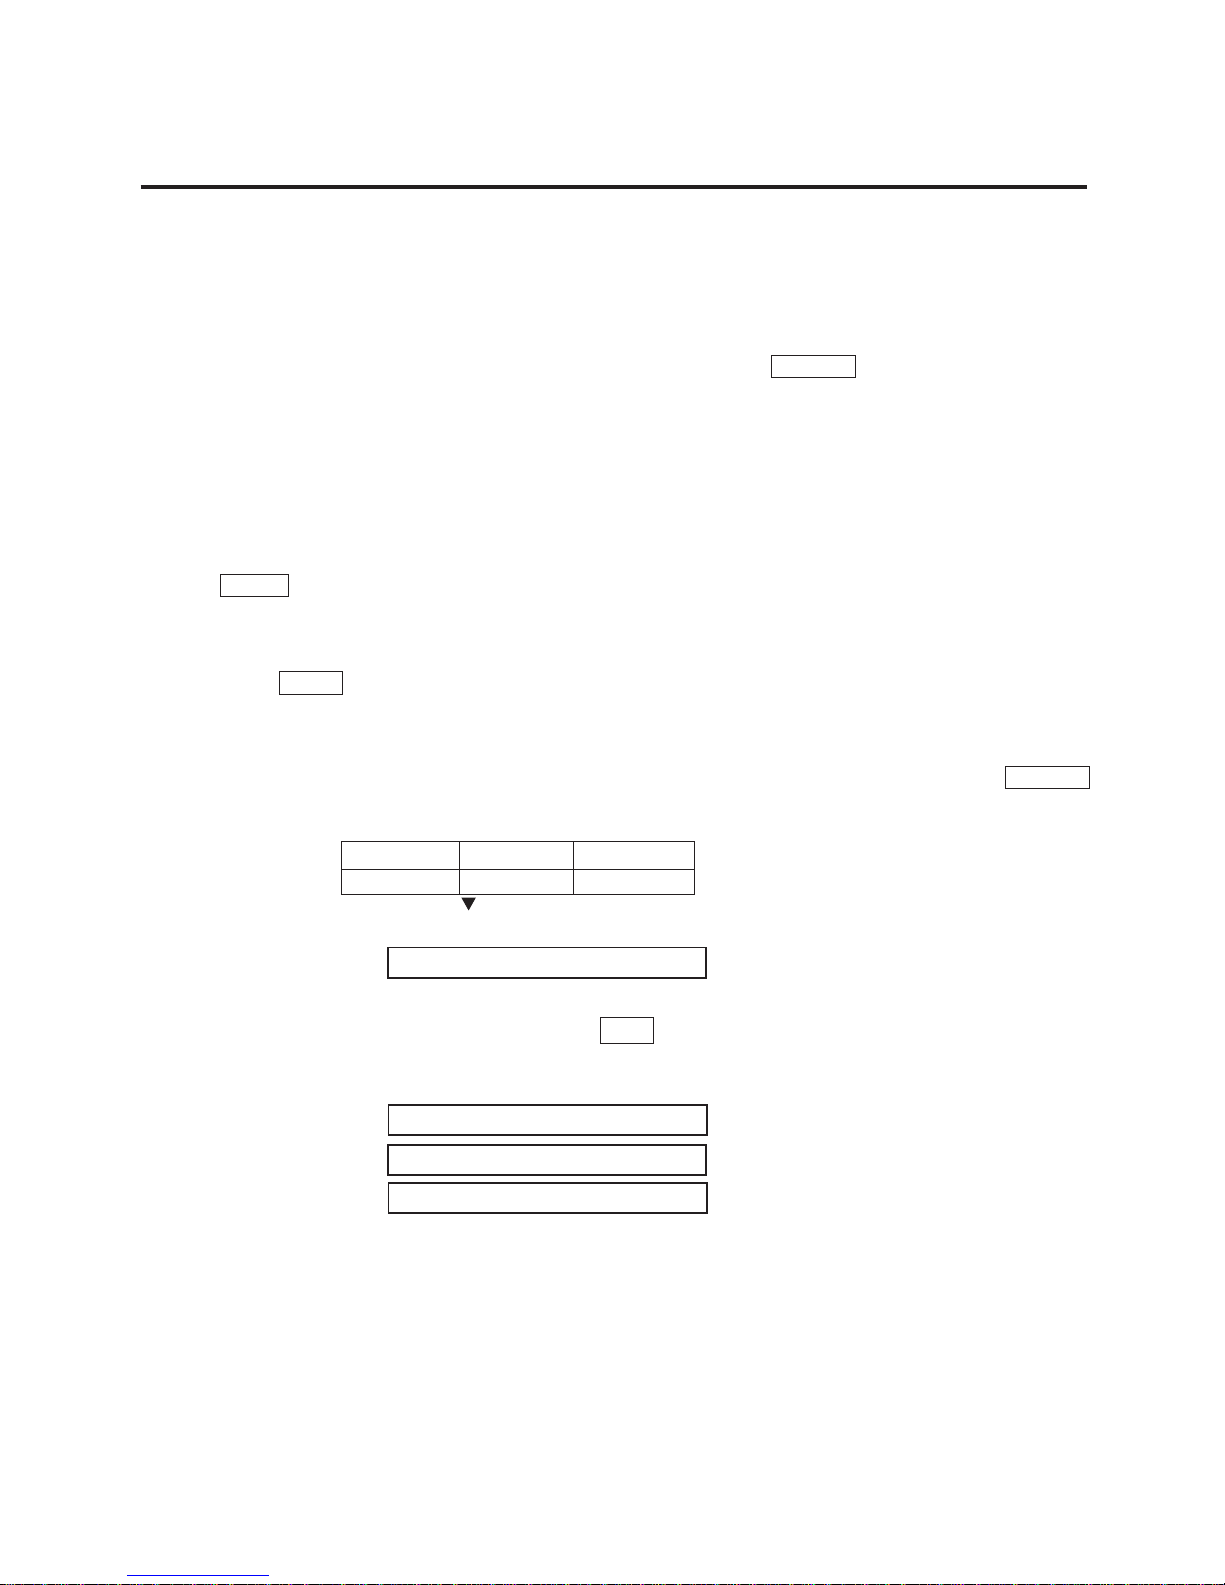
14-1
14. OPERATING PROCEDURES
n NOTES BEFORE STARTING OPERATION
14. OPERATING PROCEDURES
■ NOTES BEFORE STARTING OPERATION
(1) Insert the power plug into the AC outlet and turn the power ON.
(2) A sixteen-second scanning will be performed after pressing the POWER key.
(3) Do not move the scale while it is in operation. Should it become necessary to move it at any time, turn
the power switch to the OFF position and be sure to reajust the level indicator after relocating the scale.
(4) Should a power failure occur during operation, remove the commodity from the platter and insert the
power plug into an AC outlet again when power is restored.
(5) If the scale is used with an unrated power source, inaccurate scaling or other errors may occur.
(6) If the zero point has shifted during scaling, and no tare is displayed, adjust the zero point by depressing
the ZERO key.
(7) Check the date of the scale before operation every day.
(8) Make a test print before operation every day.
Press the TEST key, and the test label is issued.
■ How to access the REG., M.DOWN, or REWRAP menu
The following display is the REG. menu display. When this display is shown after pressing the POWER
key, you can start the REG. operation right away.
Remote Display
WEIGHT UNIT PRICE TOTAL PRICE
0.000 P 000000
Liquid Crystal Display
ENTER THE PLU #
REG
To access a menu from other menus, press the ESC. key to show the Main menu and enter the menu
No. When the M.DOWN and REWRAP menus are protected, enter the menu No. and then the
password.
REG. 1
MARK DOWN 2
REWRAP 3
Liquid Crystal Display
Page 66
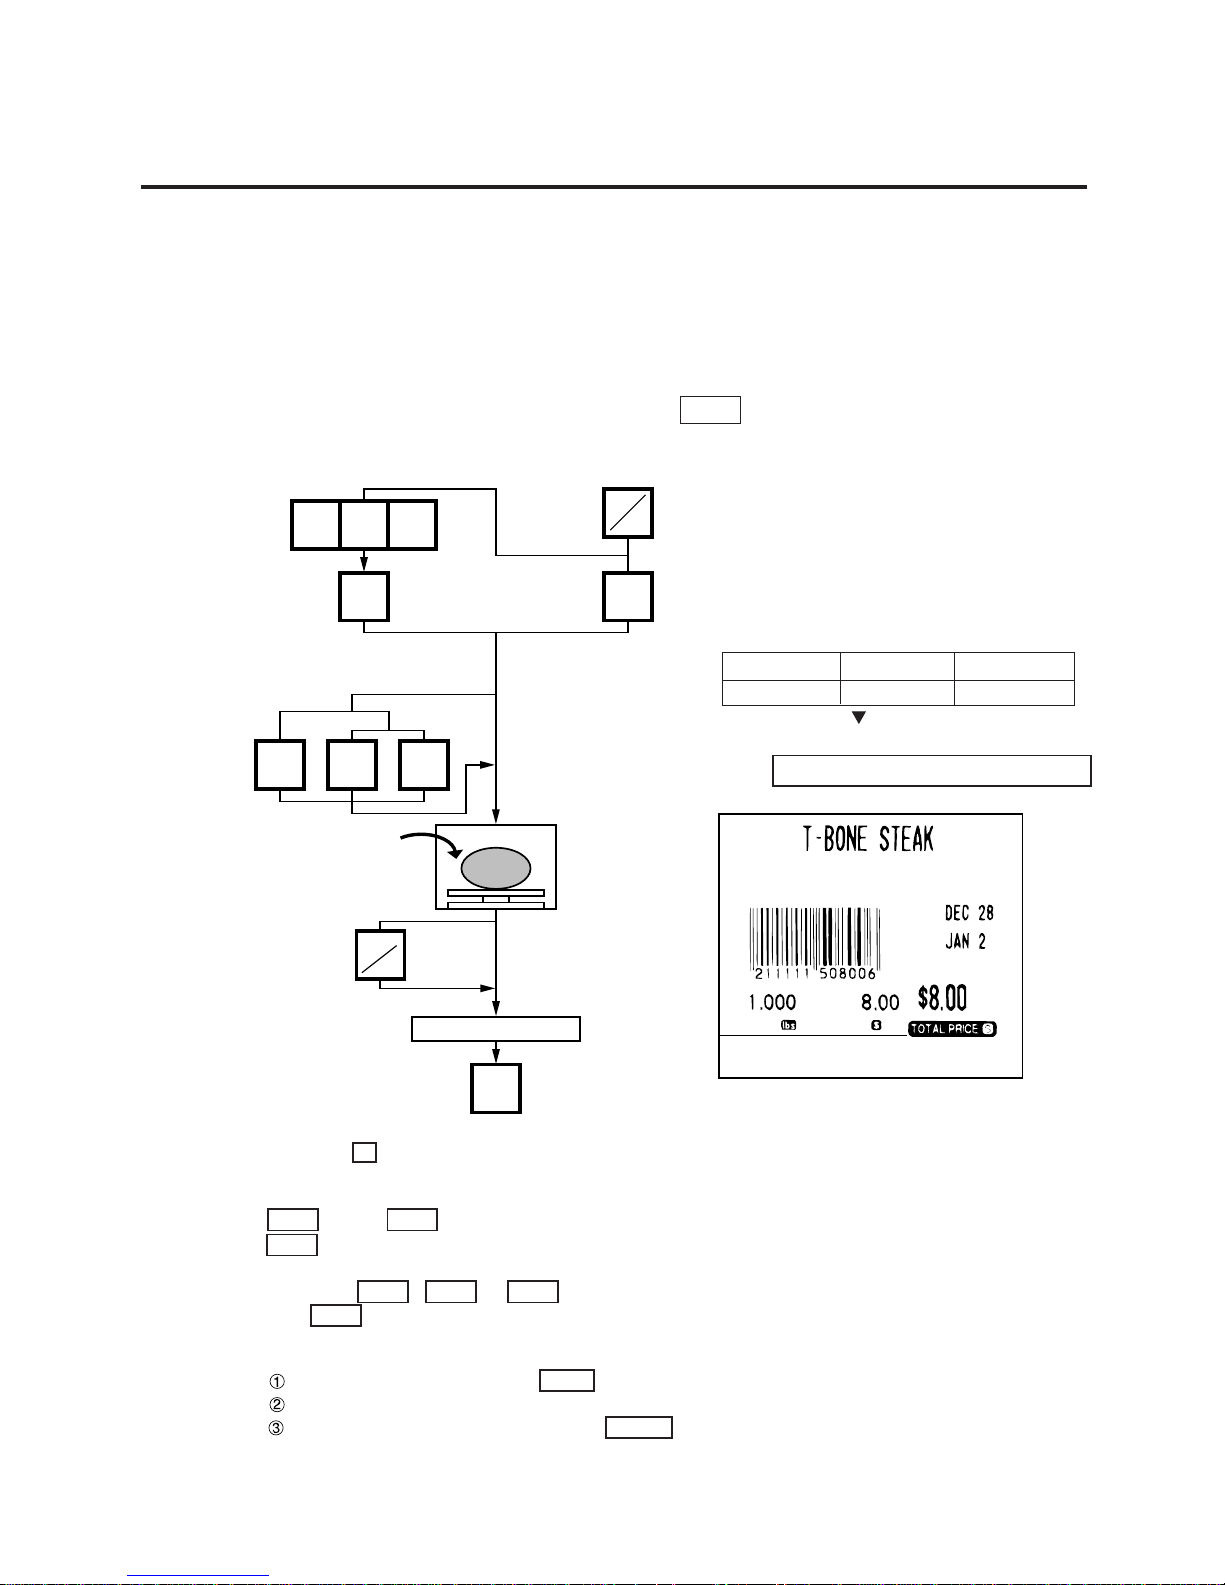
14-2
14. OPERATING PROCEDURES
14.1 WEIGHING OPERATION
14.1 WEIGHING OPERATION
Menu: REG., M. DOWN, or REWRAP
Mode: WEIGH
The weigh mode is used to weigh a commodity and to issue the label. The label contains data such as a
weigh, unit price (price per weight) and total price (calculated as a result of the weighing operation).
The following is a basic operation seen at the sales floor of a store or at a back room where different kinds
and weights of commodities are repacked. Pressing the VOID key subtracts the last entry from the
memory.
Example) When PLU #100 and an unit price of $8.00 are set in the speed key #12.
1
100 g
1/4 1/2
00
PLU
PRT
*
The label is issued.
VOID
LB
kg
12
Enter the PLU #.
Press:
Press the
speed key.
The unit of measure can be changed
for CA model only.
LB ↔ kg
Available only when the initial
setting # 5-6 is set to 1.
kg scale
lb scale
Place a commodity
on the platter.
(Ex. 1.000 lb.)
MANUAL:
: AUTO
Press when canceling
the last sales.
WEIGHT UNIT PRICE TOTAL PRICE
1.000 8.00 8.00
Liquid Crystal Display
T-BONE STEAK
REG
Remote Display
NET WT.
SELL BY
PACKED ON
PRICE lb
(Sample label)
NOTES: 1. Pressing a speed key to which no PLU data has been assigned will result in an error. In this case,
press the C key, then press a speed key to which PLU data has been assigned.
2. To change between AUTO and MANUAL, follow the procedure provided in section 14.9.
3. If a unit price exceeding 4 digits is obtained by multiplying by 2 or 4 (when pressing the
1/2 lb
key or
1/4 lb
key), the unit price will be 0.
4.
100 g
key is available only when the scale is a kg scale or operated on kg base.
This key, however, has no function on the AU type.
5. When the
1/2 lb , 1/4 lb
or
100 g
key is pressed, the unit price will change on the display.
The
100 g
key, however, has no function on the AU type.
6. When the “compulsory tare” is selected, a tare must be subtracted in a weighing operation, otherwise
an error message “TARE REQUIRED” will be displayed when the following operation has been done:
Manual mode: Pressing the
PRT/*
key
Auto mode: Placing a commodity on the platter.
Floating vendor mode: Pressing the
Vendor
key.
When a “TARE REQUIRED” is displayed, refer to Section 14.6 to follow the proper weighing
procedure.
TEC STORE
(TEL) 0123-45-6789
Page 67
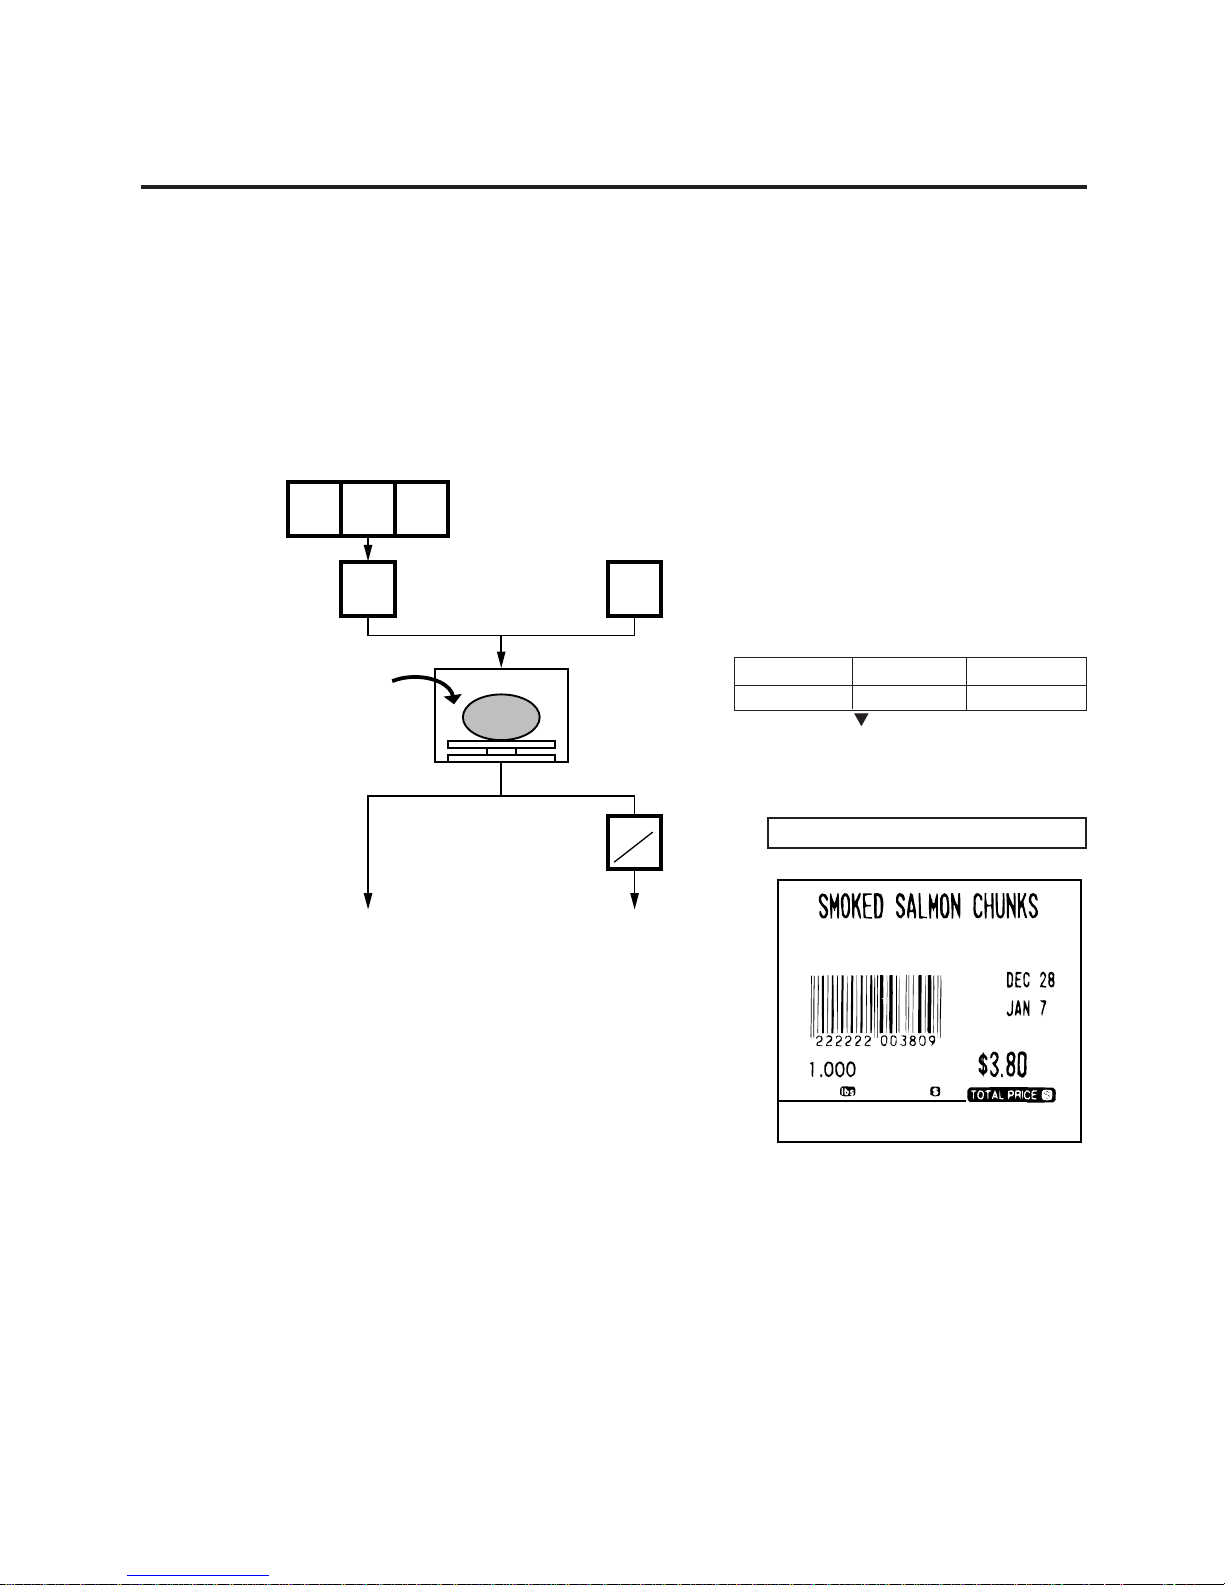
14-3
14. OPERATING PROCEDURES
14.2 FIX PRICE OPERATION (FOR US TYPE ONLY)
14.2 FIX PRICE OPERATION (FOR US TYPE ONLY)
The FIX mode (Fix Price Mode ) is used to issue a label for a commodity of a fixed price PLU (i.e. the price
determined by the store), the weight of which may vary from commodity to commodity. In this mode, the
Unit Price of the commodity looked up from the PLU file will be printed as the Total Price regardless of its
actual weight, and the weight is also printed on the label.
Menu: REG., M.DOWN, or REWRAP
Mode: FIX
Example) In the case of PLU #636 of fixed price $3.80 which is assigned to speed key #7.
636
PLU
7
PRT
*
The label is issued. The label is issued.
Enter the PLU #.
Press:
Press the
speed key.
Place the commodity
on the scale platter.
(Ex. 1.000 lb.)
AUTO:
MANUAL:
WEIGHT UNIT PRICE TOTAL PRICE
0.000 3.80
Liquid Crystal Display
SMOKED SALMON CH
REG
Remote Display
NET WT.
SELL BY
PACKED ON
PRICE lb
(Sample label)
TEC STORE
(TEL) 0123-45-6789
Page 68

14-4
14. OPERATING PROCEDURES
14.3 BY COUNT OPERATION
14.3 BY COUNT OPERATION
The BY-COUNT mode is used to issue the label of commodities of the same kind in a package (or may not
be packed). The whole package quantity (or a certain quantity) and the whole package price (or the price
per the quantity) are usually preset. Thus, it is not necessary to weigh the commodities by the scale in such
cases.
Menu: REG., M.DOWN, or REWRAP
Mode: BY-COUNT
Example) In case of purchasing 10 DONUTS for $1.50 of price for 4 DONUTS. (When a price of $1.50/
4 DONUTS is set for PLU #33.)
33
10
PLU
PRT
*
PRT
*
Single label is issued.
The label is issued in
succession after peeling it.
C
C
PLU
Enter the PLU #.
Enter the quantity of
purchase
(Max. 2 digits)
Press to suspend label
issue temporarily.
Press to cancel label
issue.
The display returns to
the initial screen.
Press to
resume label
issue.
AUTO MANUAL
WEIGHT UNIT PRICE TOTAL PRICE
----- P 10 3.76
Liquid Crystal Display
DONUTS
REG
Remote Display
NET WT.
SELL BY
PACKED ON
PRICE lb
NET WT.
SELL BY
PACKED ON
PRICE lb
(Sample label for US type)
(Sample label for CA and QR type)
TEC STORE
(TEL) 0123-45-6789
TEC STORE
(TEL) 0123-45-6789
Page 69

14-5
14. OPERATING PROCEDURES
14.3 BY COUNT OPERATION
Example) An open price item can be sold as below:
1 piece at 15 dollars
15 pieces at 10 dollars
15 pieces sold at 0.5 dollars per 10 pieces
Enter the PLU #.
Press:
Press:
Press:
Enter quantity
Enter quantity
Enter total price
ex.) 3
ex.) 2
51
15
50
10 10
15
PLU
FOR
FOR
PRT
*
ex.) 1
Enter price
Enter price
Page 70

14-6
14. OPERATING PROCEDURES
14.4 PRINT COUNT OPERATION
14.4 PRINT COUNT OPERATION
With this procedure, a specified number of the same labels can be issued.
Menu: REG., M.DOWN, or REWRAP
Mode: WEIGH, FIX or BY-COUNT
Example A) When operating in Weigh mode.
PRESET
COUNT
50
3091
PRT
*
PLU
SAVE
PRT
*
The label is issued.
The labels are issued with
the backing paper attached.
When all the specified numbers
of the labels are being issued.
C
C
C
Remove the commodity.
PRT
*
NOTES: 1. A batch issue means to print labels continuously with the backing paper attached.
On-demand issue means to print label one by one.
2. To check the remaining number, press the
PLU
and the
PRESET COUNT
keys.
Press:
Set the number of labels.
(Max. 99 labels)
Press:
Enter the PLU #.
Press:
PLU data is saved.
Place a commodity on
the platter.
(Ex. 0.700 lb.)
MANUAL: :AUTO
Batch
On-demand
Press:
Clear the preset count.
Page 71

14-7
14. OPERATING PROCEDURES
14.4 PRINT COUNT OPERATION
Example B) When operating in Fix or By Count mode.
Press:
Set the number of labels.
(Max. 99)
Press:
PRESET
COUNT
25
15
PRT
*
PLU
SAVE
PRT
*
The label is issued.
The labels are issued with
the mount paper attached.
Remove the commodity
from the platter.
C
PRT
*
PRT
*
PRT
*
SPLIT PRICE operation
The specified numbers
of labels are issued in
succession with the
backing paper attached.
The next label is
issued after removing
the current label.
When all the specified numbers
of labels are being issued.
C
C
PRT
*
PRT
*
Enter the PLU #.
Press:
Press, to save the PLU
data:
[BY COUNT]
[FIX]
Place a commodity
on the platter.
(Ex. 1.320 lb.)
: AUTO
MANUAL :
Batch
On-demand
When the last label
is issued:
Repeat until the specified
number of labels are
issued, alternating the
commodity placed on the
platter.
Press, to clear the
Preset Count.
Suspend the
batch printing.
Resume the
label issue.
Batch On-demand
Clear the
preset count.
Press:
Press, to regain the
initial status.
Page 72
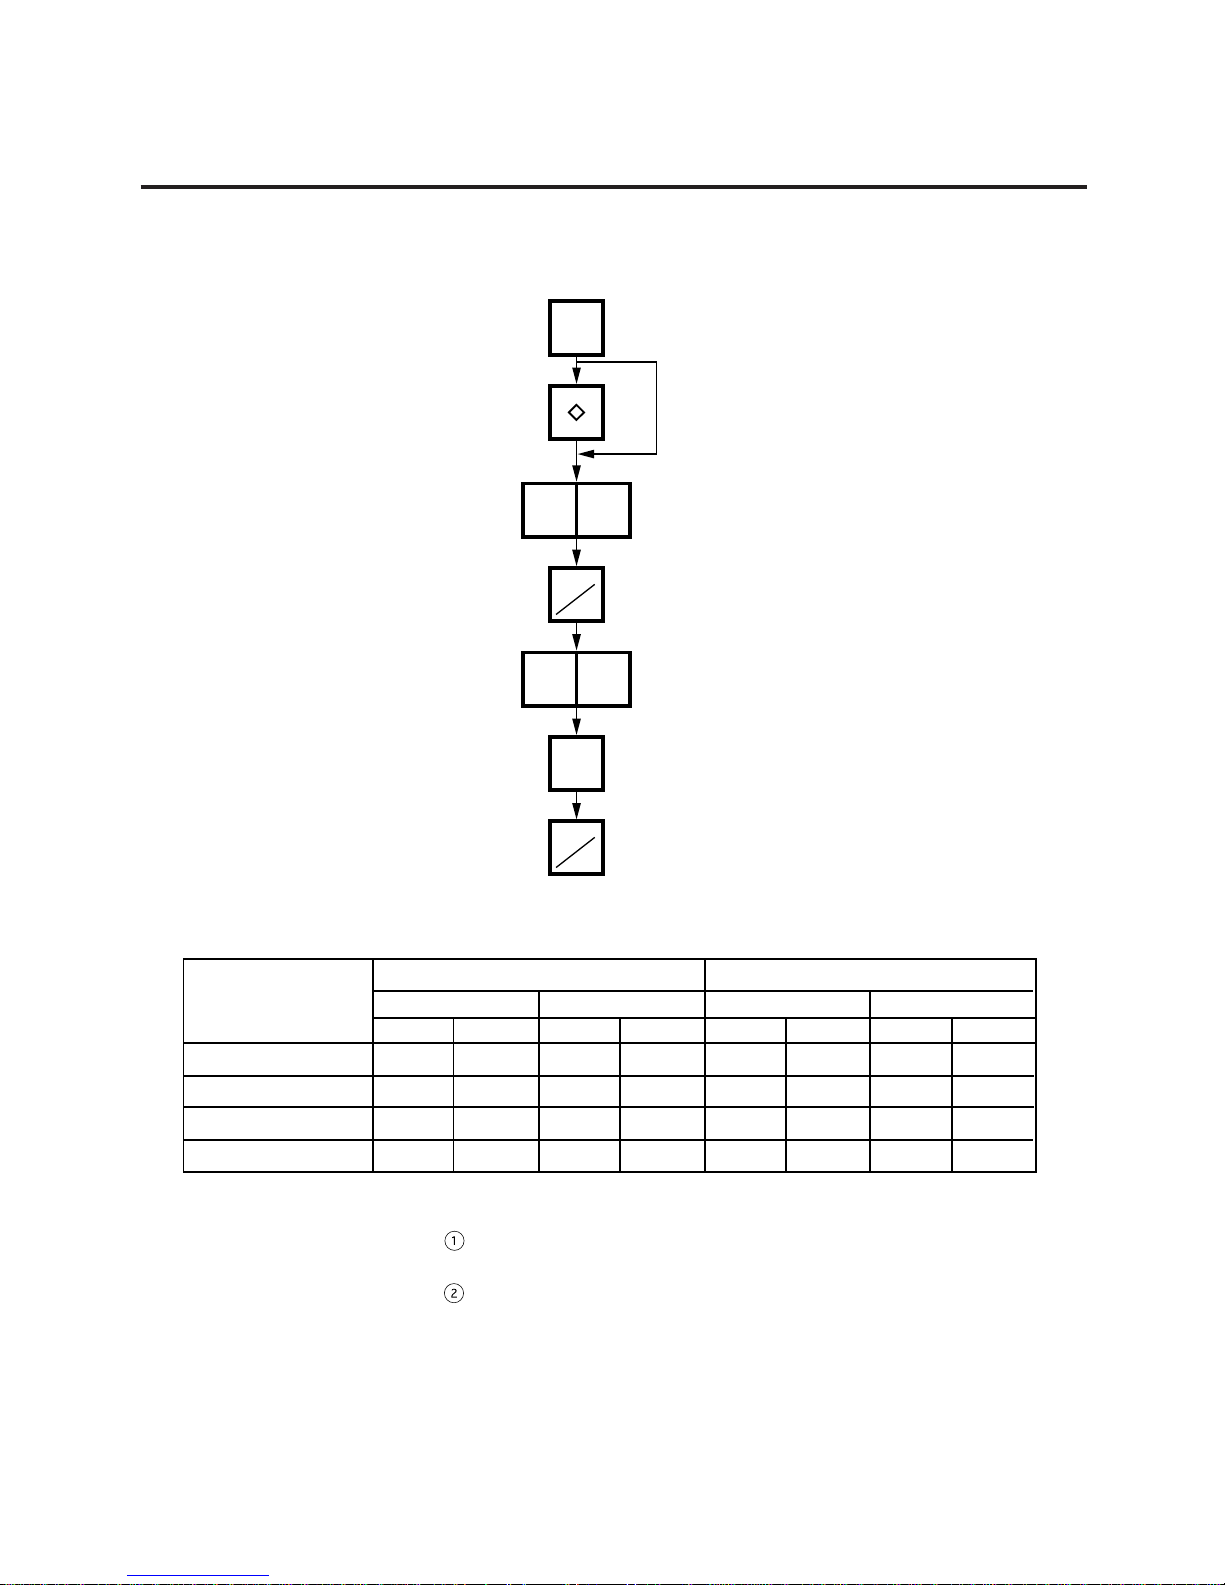
14-8
14. OPERATING PROCEDURES
14.4 PRINT COUNT OPERATION
Example C) When issuing only the nutrition information label. Note that nutrition information can be
printed only on several types of label. Refer to page 11-19.
PRESET
COUNT
99
39
PRT
*
PRT
*
PLU
Select basic data and
nutrition information labels
or a nutrition information
label by pressing this key.
Set the number of labels.
(Max. 99 labels)
Enter the PLU #.
Table 8
The nutrition information labels are issued in the following methods.
Issue mode
Weigh
Fix (Weight/price)
Fix (Net weight)
By count
Manual issue
On-demand
Pre=0
1
1
1
1
1
1
1
1
1
1
1
1
1
1
1
1
1
1
1
1
1
1
1
1
1
1
1
1
1
1
2
2
Pre>=1 Pre=0 Pre>=1 Pre=0 Pre>=1 Pre=0 Pre>=1
Batch
On-demand Batch
Auto issue
Pre : Preset count
1 : Issue method
After a basic data label is issued, a nutrition information label will be issued.
2 : Issue method
After the specified number of basic data labels are continuously issued, the same
number of nutrition information labels will be issued. The number of labels can be
specified with the preset count setting.
Page 73

14-9
14. OPERATING PROCEDURES
14.5 ISSUING LABELS WITH NET WEIGHT STATEMENT (FOR US TYPE ONLY)
14.5
ISSUING LABELS WITH NET WEIGHT STATEMENT (FOR US TYPE ONLY)
Menu: REG., M.DOWN, or REWRAP
Mode: FIX
When the initial settings #1-7 and #1-8 are set to 1, a Net Weight Statement is printed on the label.
A unit price and a tare registered in each PLU are printed as a price and a net weight.
Example) The preset Price is $2.10 and the preset Net Weight is 12 oz. The store knows that the actual
Net Weight of this commodity is 19 oz. and decides to sell it at $2.00.
Enter the PLU #.
816
2
19
3
00
PLU
PRT
*
FOR
PRT
*
The label is issued.
The label is issued. (Labels of identical
print data will automatically be issued
consecutively by peeling the label off the
backing paper.)
PLU
CC
Press:
Enter the new price.
Press:
Enter the new weight.
(unit of weight: oz
displayed in the incremental
display method, i.e., the data
is shifted to the left as each
digit value is entered.)
Press:
Enter the quantity.
Press:
AUTO
MANUAL
Initial set #7-1: 1
Initial set #1-7: 0
Press, to return the PLU data to the
PLU file.Press, to cancel label
issue temporarily.
Press, to cancel
label issue.
Initial set #7-1: 0
Initial set #7-1: 1
Page 74

14-10
14. OPERATING PROCEDURES
14.5 ISSUING LABELS WITH NET WEIGHT STATEMENT (FOR US TYPE ONLY)
NOTES: 1. To print NET WT. data. from the FIX mode, load a label which has an area to print a NET WT
Statement.
2. The quantity sold number and price data in NET WT. statement operation will be accumulated
in the memory. No weight data will be accumulated.
3. The position of the decimal point is adjustable and a comma or period is selectable by the
initial setting.
4. Weight data is shifted to the left.
5. Weight data exceeding 480 oz results in an error.
6. Unit price calculation system
(Step 1) Weight data is calculated from royal lb into decimal lb.
(Round off the data to two decimal places.)
ex.) 21 oz
→
1.3125 lb
→
round
→
1.31 lb
(Step 2) Price is divided by the value obtained above.
(Round off the data to two decimal places.)
ex.) 1.5$/1.31 lb = 1.145
→
round
→
$1.15/lb
This data is printed.
7. When the unit price is less than $0.01/lb or either the weight or price is 0, the unit price will
not be printed.
8. Multiplication registration of NET WT statement
The maximum quantity, of a commodity is 99.
In the following cases, an error occurs when pressing the
PRT/*
key to issue the label.
(1) Quantity = 0
(2) Price x quantity > max. price
Weight x pieces > max. tare (30 lb scale: 480 oz, 15 Kg scale: 9.995 Kg)
(Sample label)
Page 75

14-11
14. OPERATING PROCEDURES
14.6 TARE/SAVE FUNCTION PROCEDURES
14.6 TARE/SAVE FUNCTION PROCEDURES
Menu: REG., M.DOWN, or REWRAP
Mode: WEIGH or FIX (Tare % function is available in WEIGH mode only.)
There are two kinds of tare subtraction procedures, one is “Direct tare”, the other is “Preset tare”. The
SAVE key is used to save the tare, unit price, and PLU data after taking a commodity from the platter.
0.200 lb
T
T
%
%
%
C
100
100
0
T
200
100
PLU
SAVE
PRT
*
C
Remove the commodity
together with the container.
Remove the commodity
together with the container.
The label is issued.
PLU
PLU
NOTES: 1. Tare subtraction is available up to 2.000 lb. for US type, and up to 1.000kg (2.205lb) for the CA/
QR/AU type. When tare subtraction is in operation, however, the scalable range for net weight
becomes less by the amount of the tare. (Net weight = Gross weight-Tare)
2. Preset tare must be a multiple of 2 g for CA/QR/AU type (Kg scale) and a multiple of 0.005 lb
for US/CA type (Lb scale).
3. The tare % function is available when the Initial Setting #8-7 is set to 1. The speed key #70
will function as the % key (Refer to page 5-3). Set a tare % within the range from 0.0 to 99.9.
4. When a commodity is placed on the platter and the calculated tare exceeds the maximum, a
“TARE WEIGH OVER” error will occur.
Place a container on
the platter.
(Ex. 0.200 lb)
Press:
Enter the PLU #.
Press:
The PLU data and tare
are saved.
Place a commodity on
the platter. (Ex. 1.000 lb)
MANUAL:
Press:
:AUTO
Tare %
Press:
Tare %
Press:
Press:
Place a container on
the platter
Press:
Press:
Press:
CA type
US type
Page 76
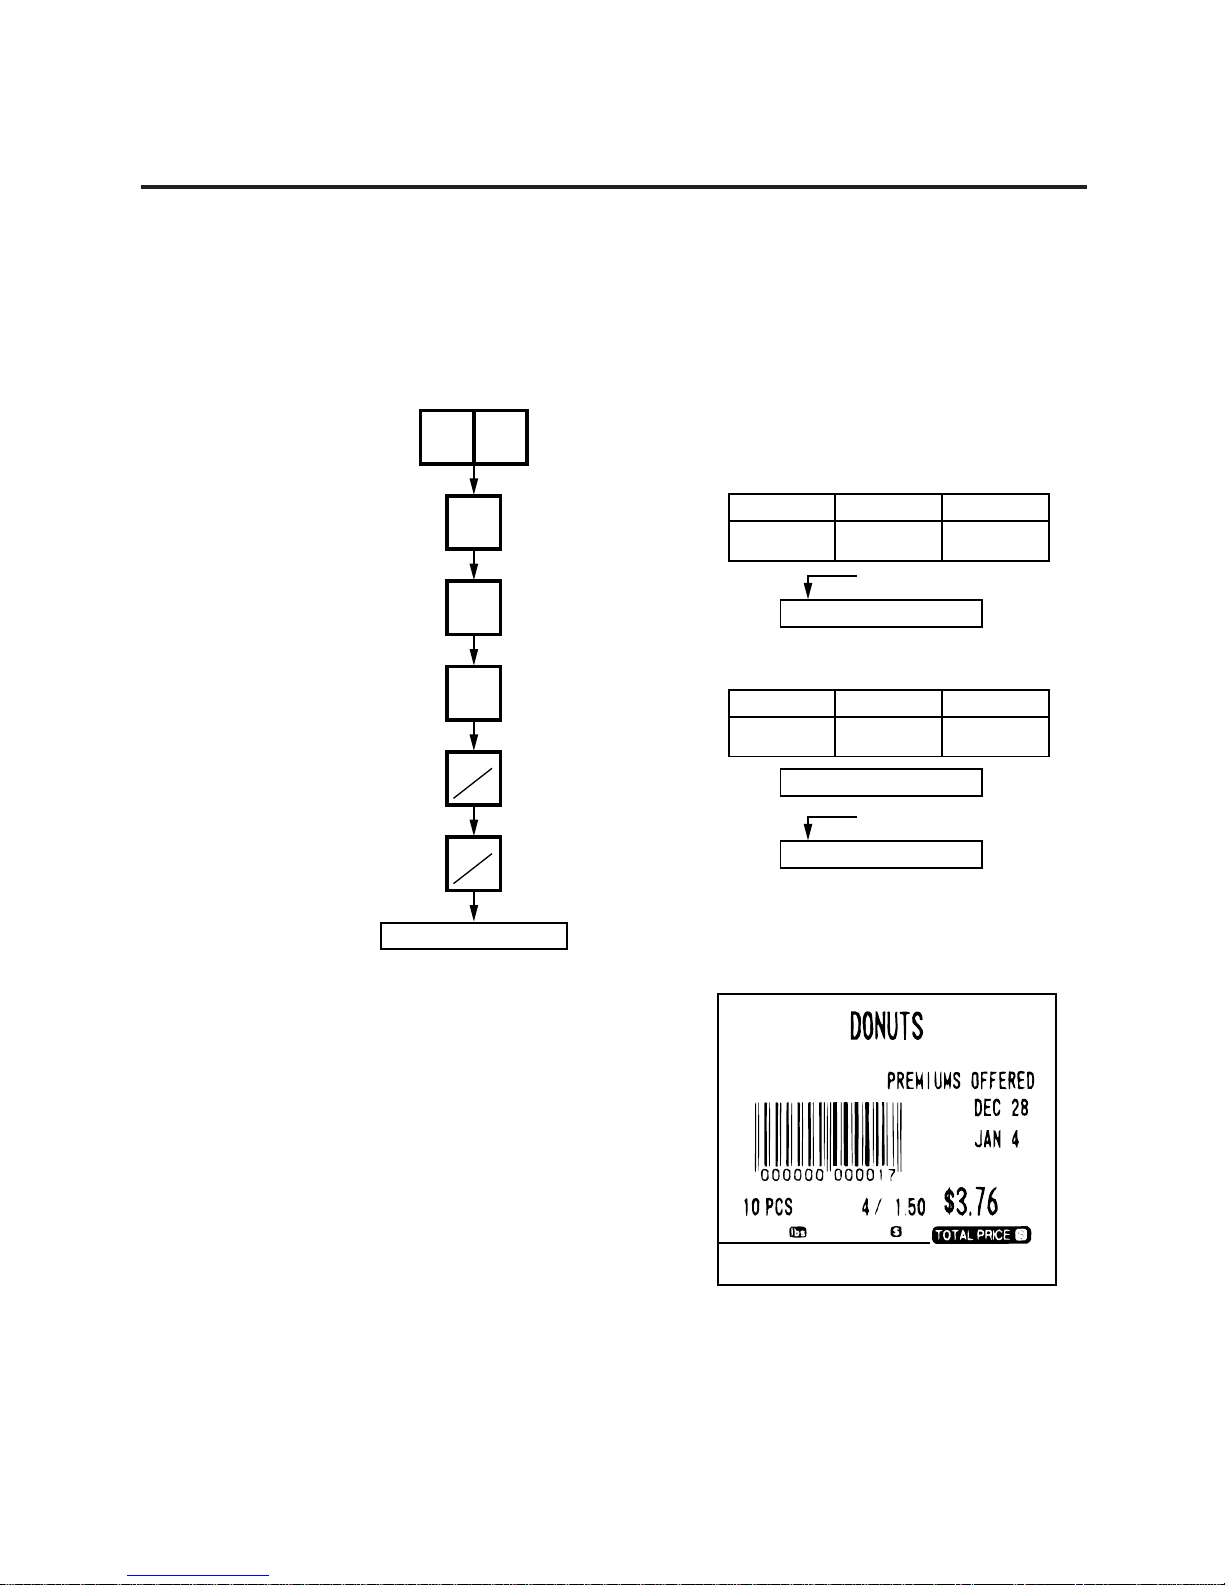
14-12
14. OPERATING PROCEDURES
14.7 CALLING AND PRINTING GRADE LINES
14.7 CALLING AND PRINTING GRADE LINES
A grade line is a short message added to a commodity name.
A grade line can be selected from maximum of 49 programmed grade lines and printed on the label.
Menu: REG., M.DOWN, or REWRAP
Mode: WEIGH or FIX, or BY COUNT
WEIGHT
Remote Display
Liquid Crystal Display
Commodity Name
DONUTS
UNIT PRICE
TOTAL PRICE
----- P 4 3.76
WEIGHT
Remote Display
Liquid Crystal Display
ENTER THE G.LINE
Liquid Crystal Display
Grade Line
PREMIUMS OFFERED
UNIT PRICE
TOTAL PRICE
5
3
5
1
PLU
G.LINE
PRT
*
PRT
*
The label is issued.
NET WT.
SELL BY
PACKED ON
PRICE lb
(Sample label)
Enter the PLU #.
Press:
Press:
Enter the G.LINE #.
(1 to 49)
Press:
Press:
TEC STORE
(TEL) 0123-45-6789
Page 77
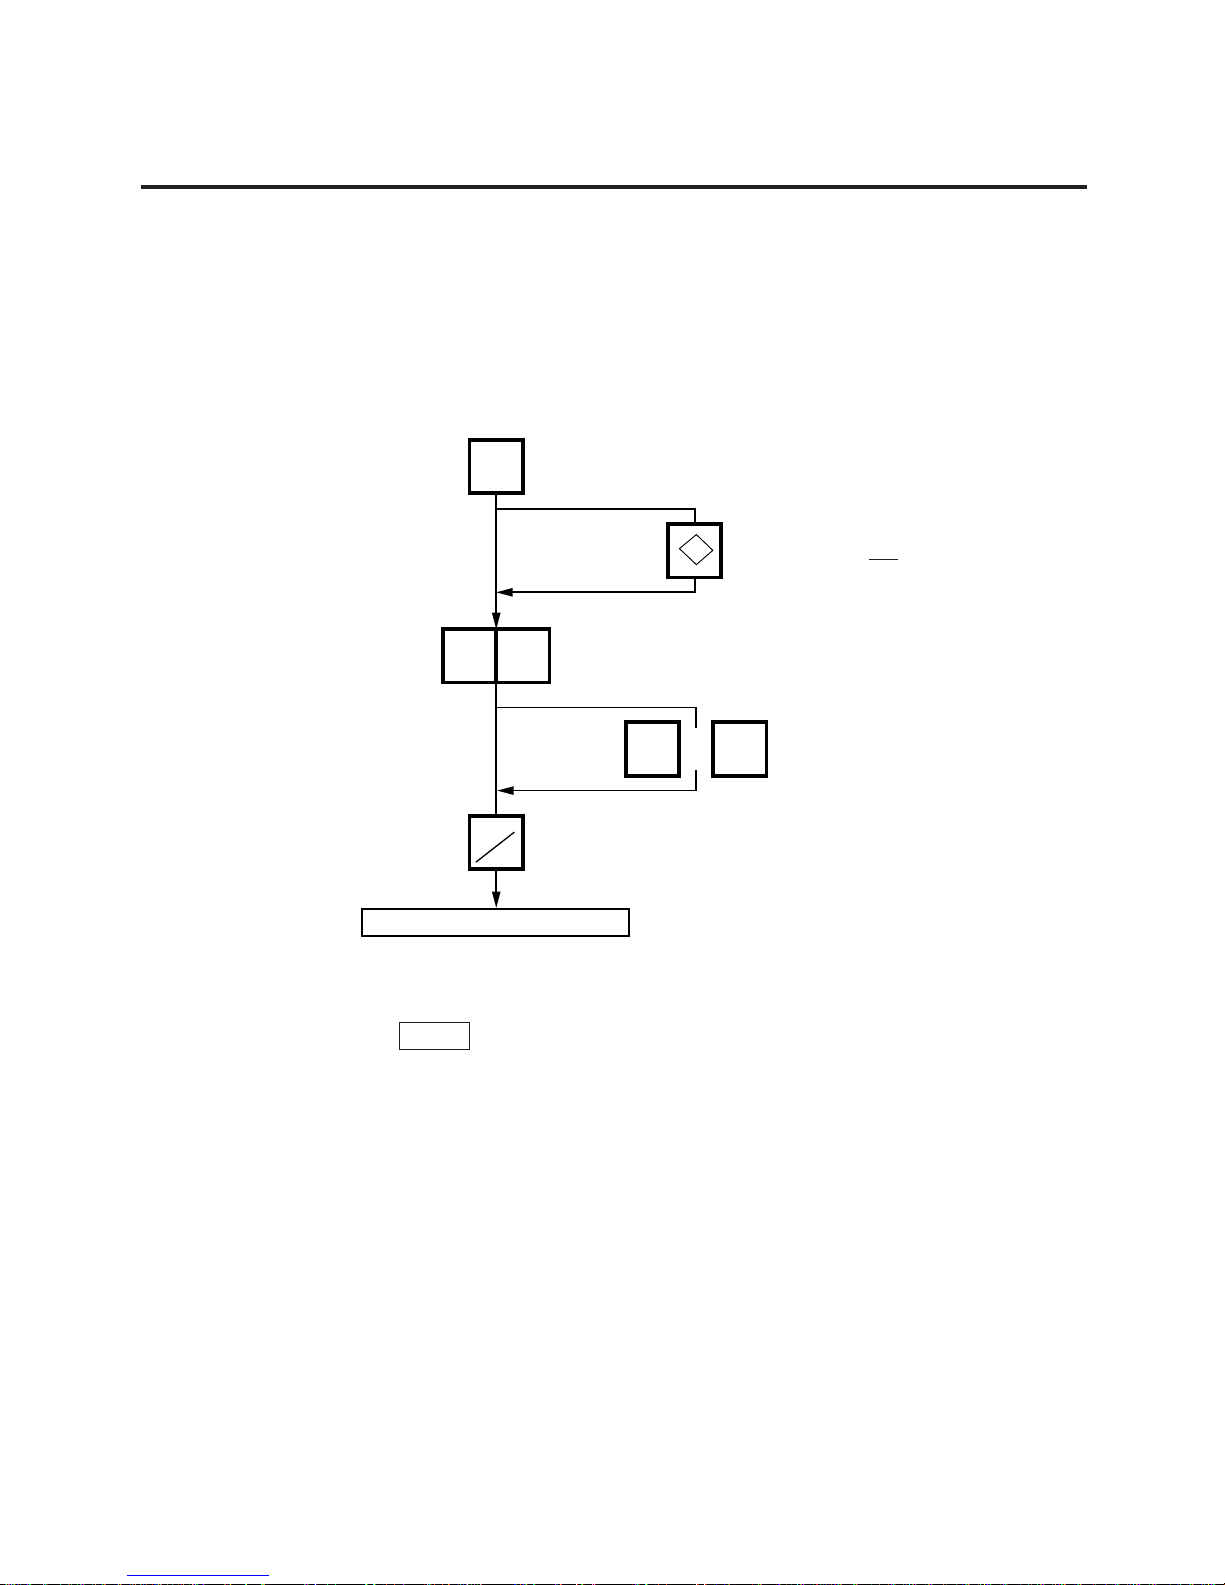
14-13
14. OPERATING PROCEDURES
14.8 CALLING AND PRINTING LOGOS
14.8 CALLING AND PRINTING LOGOS
When the initial setting #10-7 is set to “1”, a logo containing a picture, a mark, a POP message etc.,
can be printed on the ingredient label having 12 lines or more for printing ingredient message.
Logo data is created on the PC and stored into the memory through the CMT/PL-3 interface.
Menu: REG., M.DOWN, or REWRAP
Mode: WEIGH, FIX, or BY COUNT
Press:
LOGO
10
0C
PRT
*
or
Start the label issue operation.
Enter the logo #.
(1 to 26)
Press:
Clear the entered
logo #.
NOTES: 1. The logo # will be effective until it is changed or deleted.
(Logo # is still effective after turning power off and/or changing mode.)
2. Pressing the
PRT/*
key returns the display to the initial display of Weight mode.
This clears the unit price and tare data.
3. LOGOs will not be printed together with a safe handling instruction on a label.
4. LOGOs will be printed in the center of a label.
Select the LOGO type
(Normal F.Shopper).
<
>
Page 78
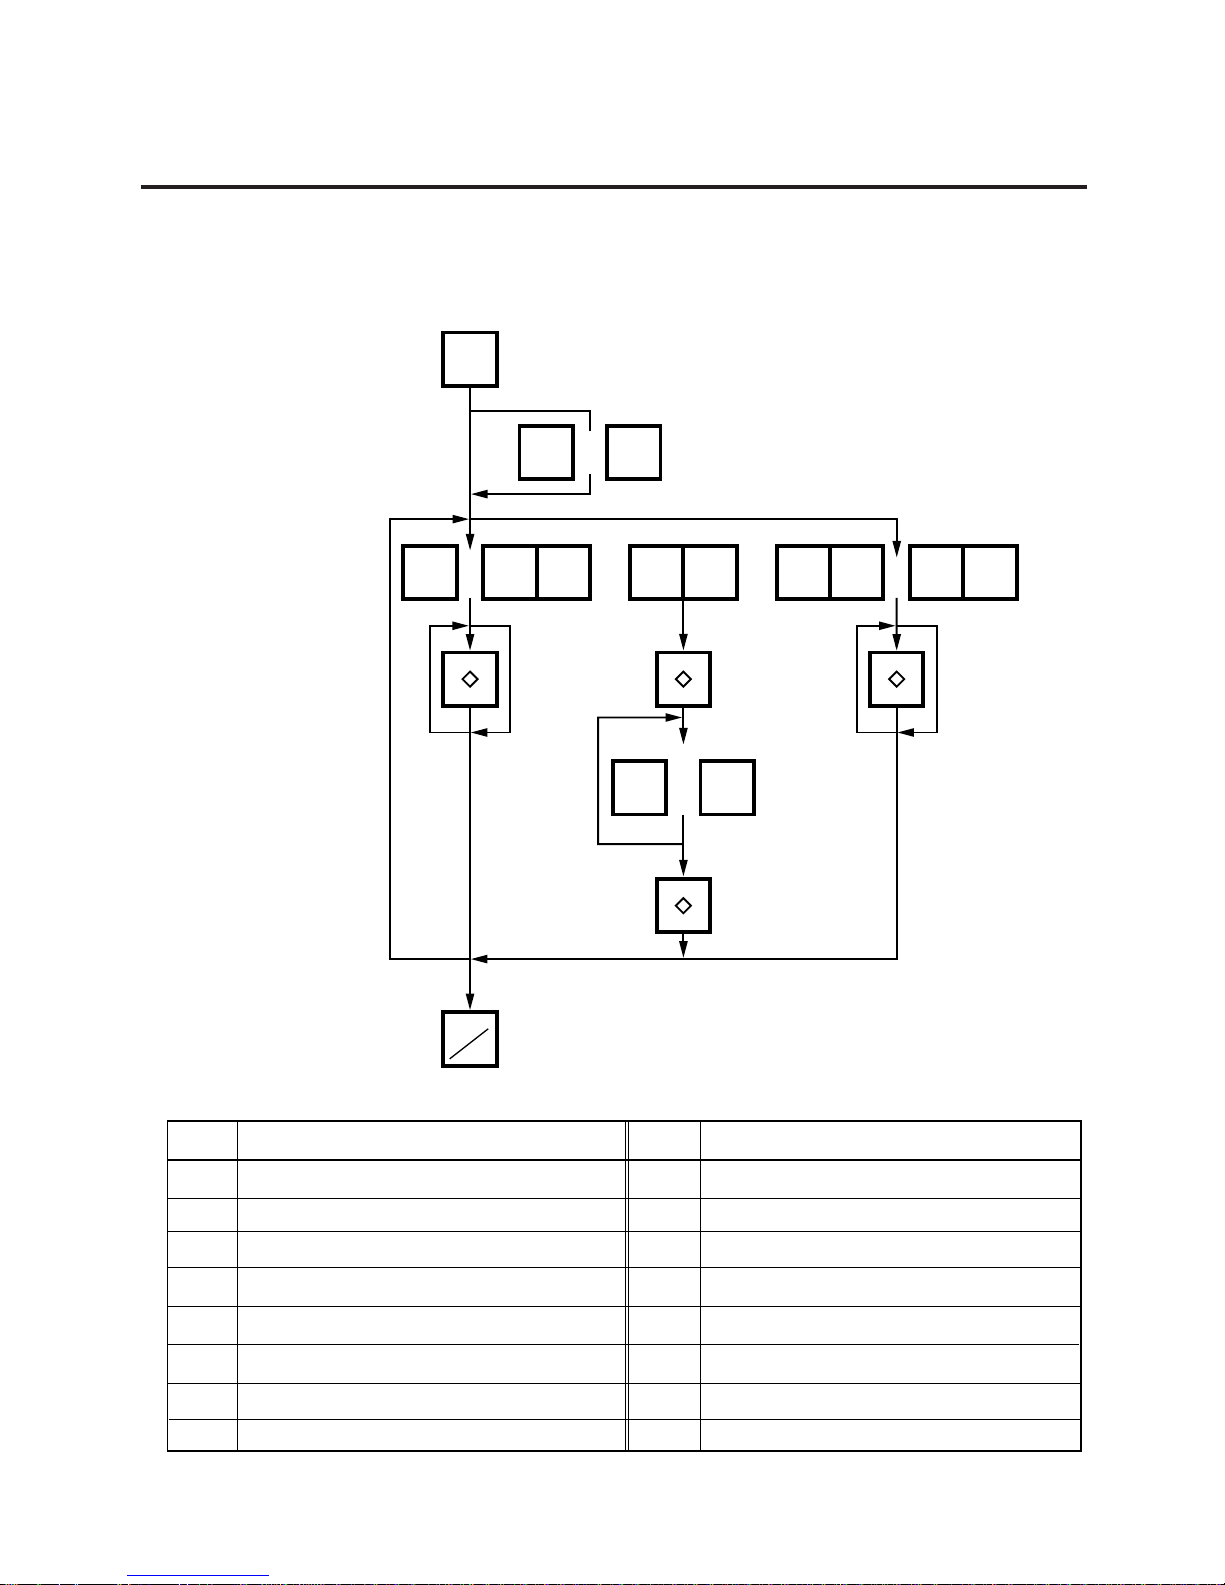
14-14
14. OPERATING PROCEDURES
14.9 SELECTING PRINT ITEM AND ADJUSTING THE LCD BRIGHTNESS
14.9 SELECTING PRINT ITEM AND ADJUSTING THE LCD BRIGHTNESS
Menu: REG, M.DOWN, or REWRAP
Mode: WEIGH, FIX, or BY COUNT
PROG.
‘‘
NEXT
PLU
VOID
or
NEXT
PLU
VOID
or
111192730
PRT
*
Press:
Select an item.
(Refer to Table. 9)
Print
←→ Non print
1: Print
0: Non print
Press:
Table 9
Darken
Lighten
Entry
1
2
3
4
5
6
7
8
Packed on date Print/Non Print
Sell by date Print/Non Print
Commodity name Print/Non Print
Weight Print/Non Print
Unit price Print/Non Print
Total price Print/Non Print
Barcode Print/Non Print
Ingredient Print/Non Print
Piece count Print/Non Print
Cooked by date Print/Non Print
SP/Info./Net Wt. Print/Non Print
LCD brightness adjustment
Media selection Label/Receipt
Print format Format No. Selection
Mode (2) Weigh/Fix/By count
Mode (1) Auto/Manual
9
10
11
19
27
28
29
30
Entry
Item
Item
Page 79

14-15
14. OPERATING PROCEDURES
14.9 SELECTING PRINT ITEM AND ADJUSTING THE LCD BRIGHTNESS
NOTES:1. A store code can be printed in place of a ‘packed on date’ and ‘sell by date’ by changing
the initial settings #6-5 and #6-6.
To print a store code, select ‘packed on date’ or ‘sell by date’ as a print item using the
above procedure.
2. Setting data will not be changed by turning the power off, changing the mode or calling a
PLU.
3. The 0 key has no function.
4. Pressing the
C
key allows you to return to the step of selecting the ‘packed on date’.
5. The range of idle time = 0 to 99 seconds. A setting ‘0’ prohibits display of an auto
message.
6. Item 29 is operable only when the initial setting #1-5 is set to ‘0’.
7. Be sure to press the
FEED
key after the
PRT/*
key when changing the label format.
14.10 DATE CHANGE
The date can be changed temporarily.
Menu: REG., M.DOWN, or REWRAP
Mode: WEIGH, FIX, or BY COUNT
DT/TM
1
2
1
8
9
4
PRT
*
Press:
Enter the new date.
(Ex. Dec. 18, 1994)
Month
Day
Year
NOTE: The scale will check the details of the date input. An invalid date will result in an error.
Liquid Crystal Display
DONUTS 121894
Page 80
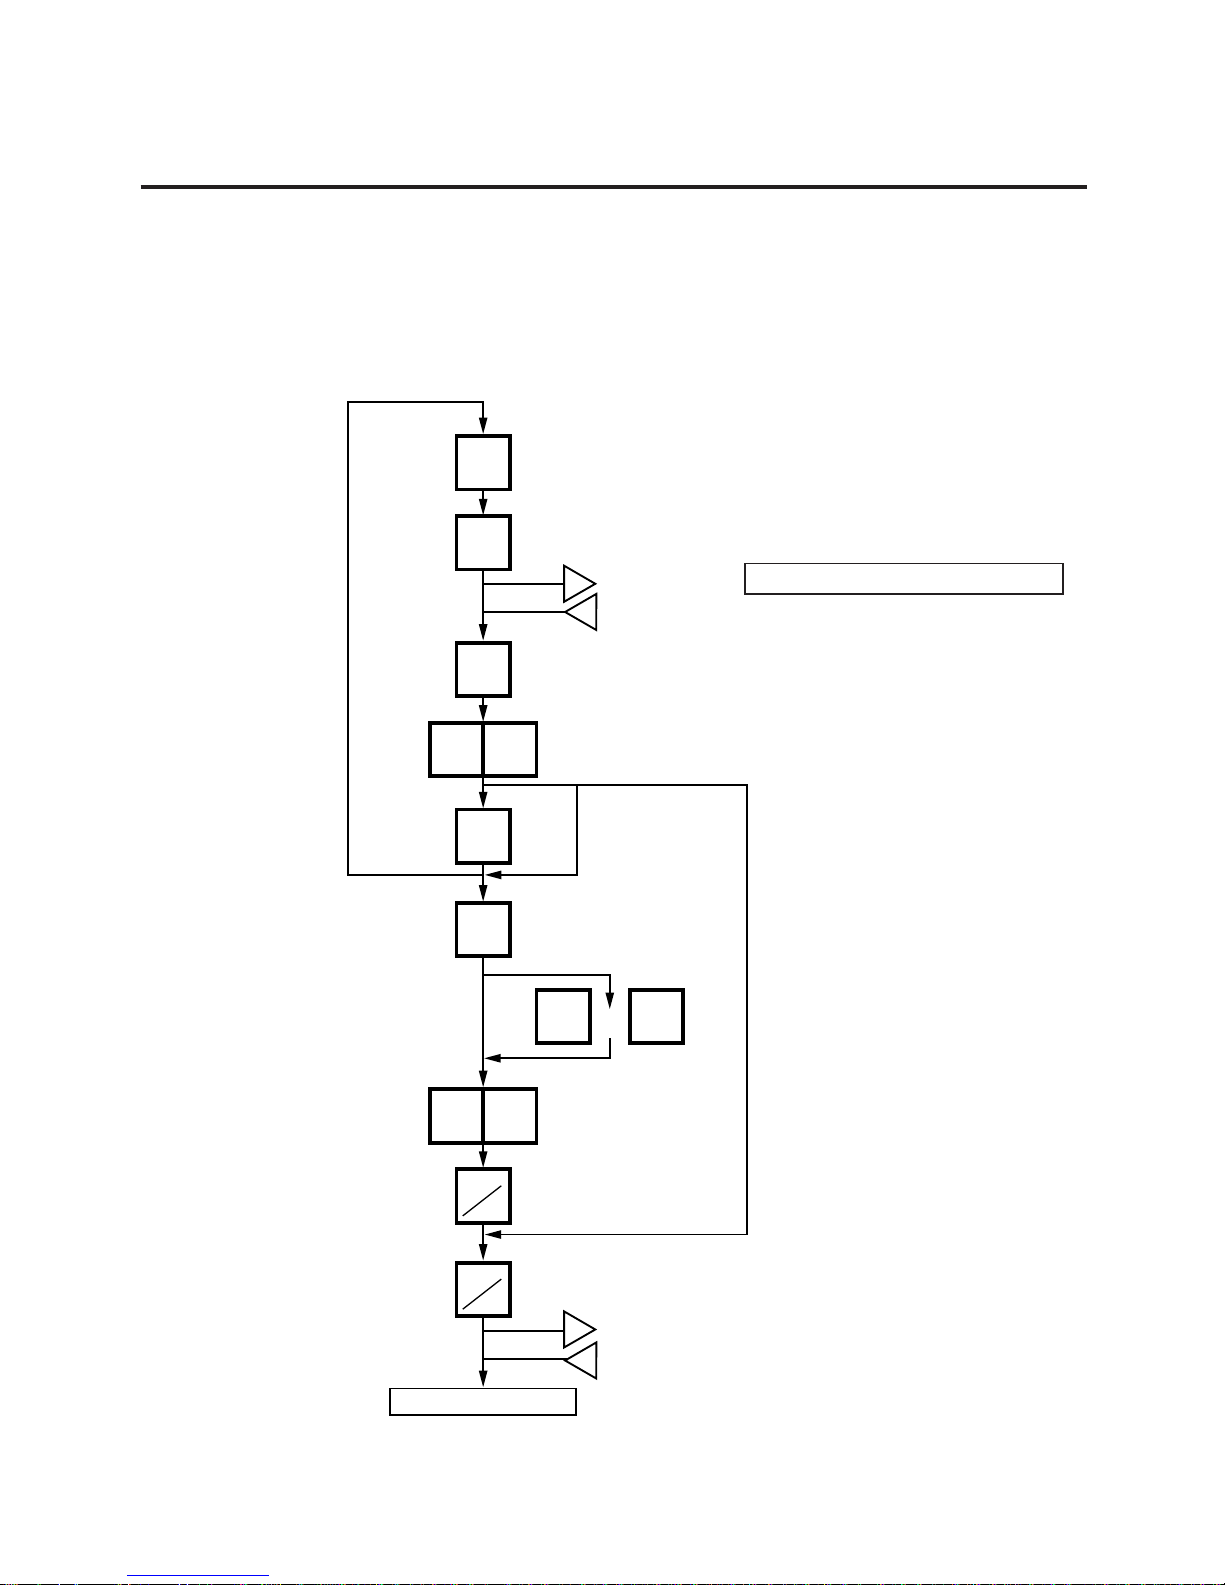
14-16
14. OPERATING PROCEDURES
14.11 BATCH PRINT MODE (with 30 Items Run Assignment)
14.11 BATCH PRINT MODE (with 30 Items Run Assignment)
Menu: REG., M.DOWN, or REWRAP
Mode: FIX, or BY COUNT
Up to 99 label per PLU can be issued in non-scale mode. Up to 30 items can be preset. (However, 0
is preset, issuing will be canceled.)
1
PLU
x
y
PRESET
COUNT
31
NEXT
PLU
NEXT
PLU
FOR
or
VOID
1 0
PRT
*
PRT
*
z
A
The label is issued.
Enter the PLU #.
Press:
Press:
Enter the number of
labels to be issued
(max. 99)
Register next preset
item
Change or cancel the number
of labels to be printed (not
functions when an item is not
registered.)
Next PLU:The next PLU is
recalled.
VOID: The previous
PLU is recalled.
Change the number of labels
to be issued (max.99).
Press:
Press:
(The labels are issued in the
order of programmed PLU.)
Item # (1 to 30)
Preset number of labels
Liquid Crystal Display
#01/000001: C=0
↑
↑
Page 81
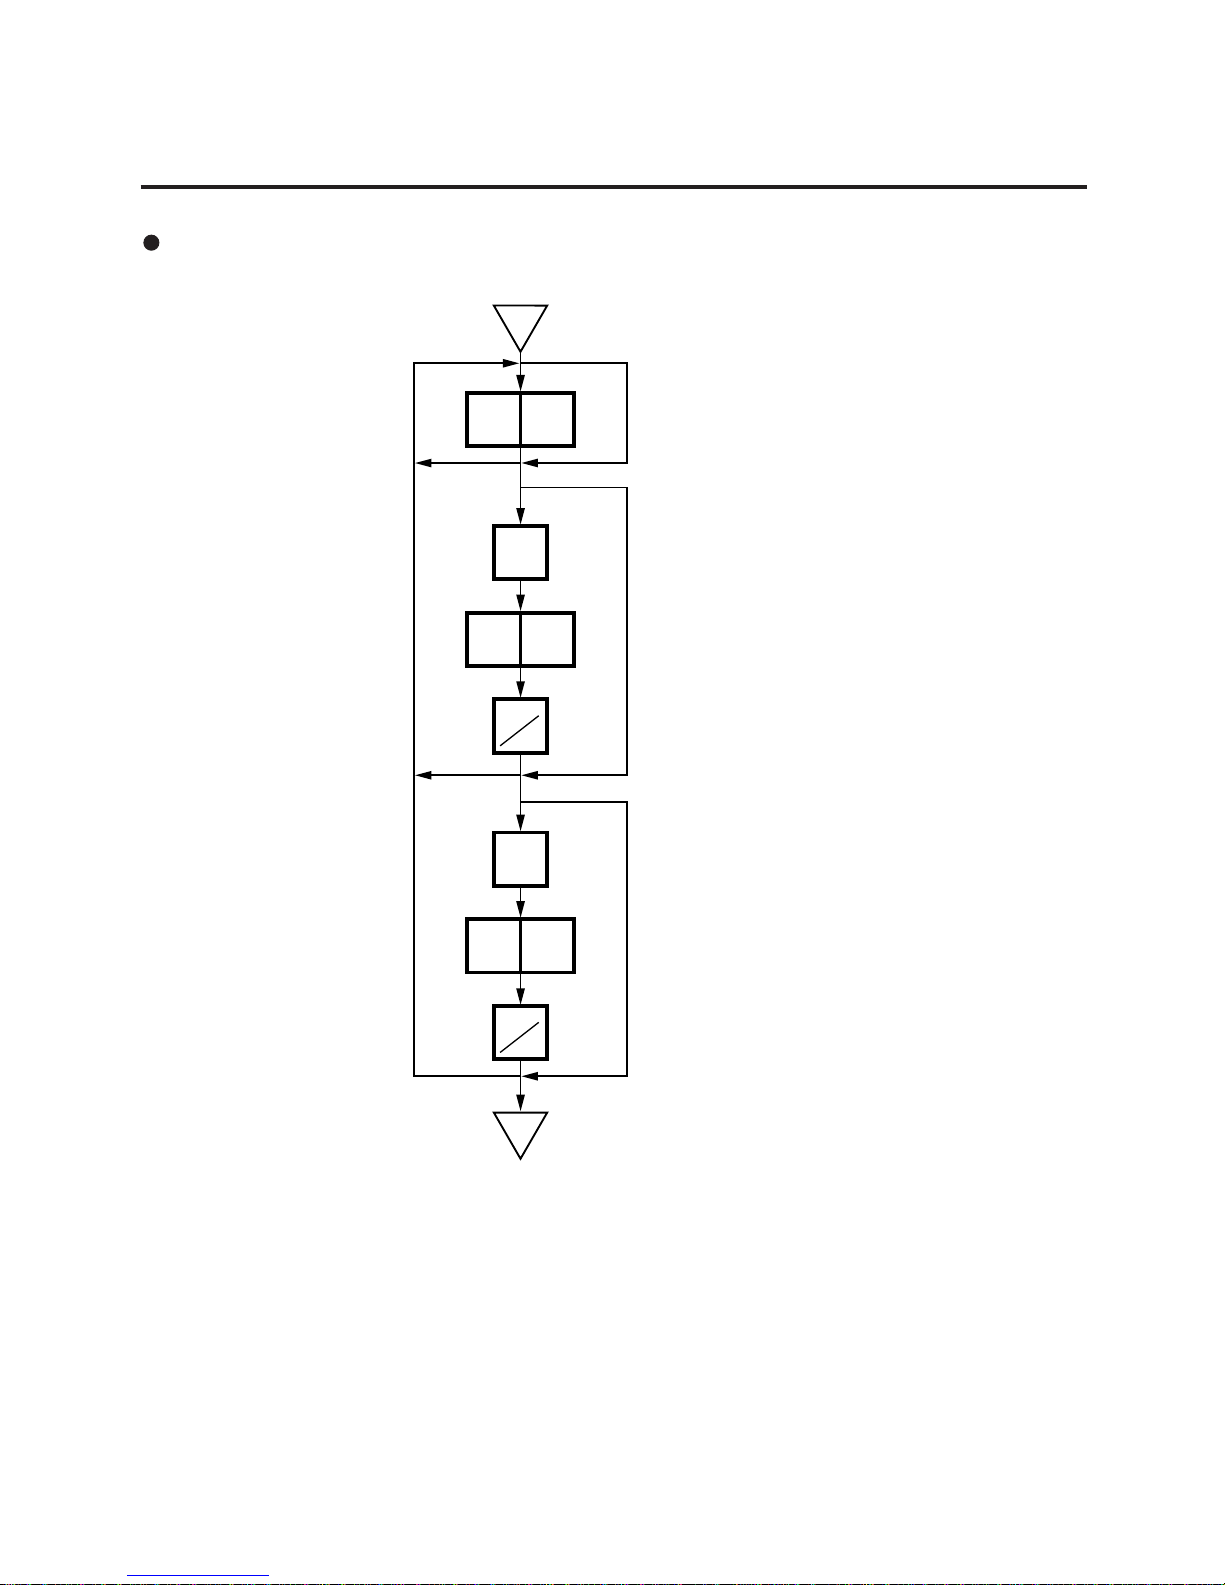
14-17
14. OPERATING PROCEDURES
14.11 BATCH PRINT MODE (with 30 Items Run Assignment)
Changing a Unit Price and Calling G.Line/LOGO
x
y
30
12
10
GRADE
LINE
PRT
*
PRT
*
LOGO
Enter the quantity.
Call the Grade Line.
Enter the required Grade
Line# (1 to 49).
Press:
Call PLU designation
LOGO. (*1)
Enter the required
LOGO# (1 to 26).
Press:
*1 By calling the PLU designation LOGO, the LOGO can be designated per PLU and printed.
When the PLU does not designate the LOGO, the LOGO programmed before entering Batch
Print Mode is printed.
Page 82

14-18
14. OPERATING PROCEDURES
14.11 BATCH PRINT MODE (with 30 Items Run Assignment)
Stopping or Canceling Label Issue
z
C
C
A
Completed
VOID
PRT
*
Clear an error or stop
label issuing.
Cancel output
Press:
Stop issuing the labels and
cancel PLUs which have
not been output
NOTES: 1. When the label for NET. WT statement is not selected, pressing the
PRESET COUNT
key in FIX mode results in an error.
2. Programmed items are reset when:
the power is off.
changing the menu. (PROG./REG)
changing the mode. (weigh/by count/fix)
batch printing has been finished.
3. Pressing the
PRESET COUNT
key to preset the 31st item results in an error.
4. The LOGO and Grade Line called per PLU cannot be changed.
5. The label issued in Batch Print Mode cannot be corrected using the
VOID
key.
6. “TOTALS OVERFLOW” error occurs when the
PRINT
key is pressed to issue each
PLU label.
Page 83
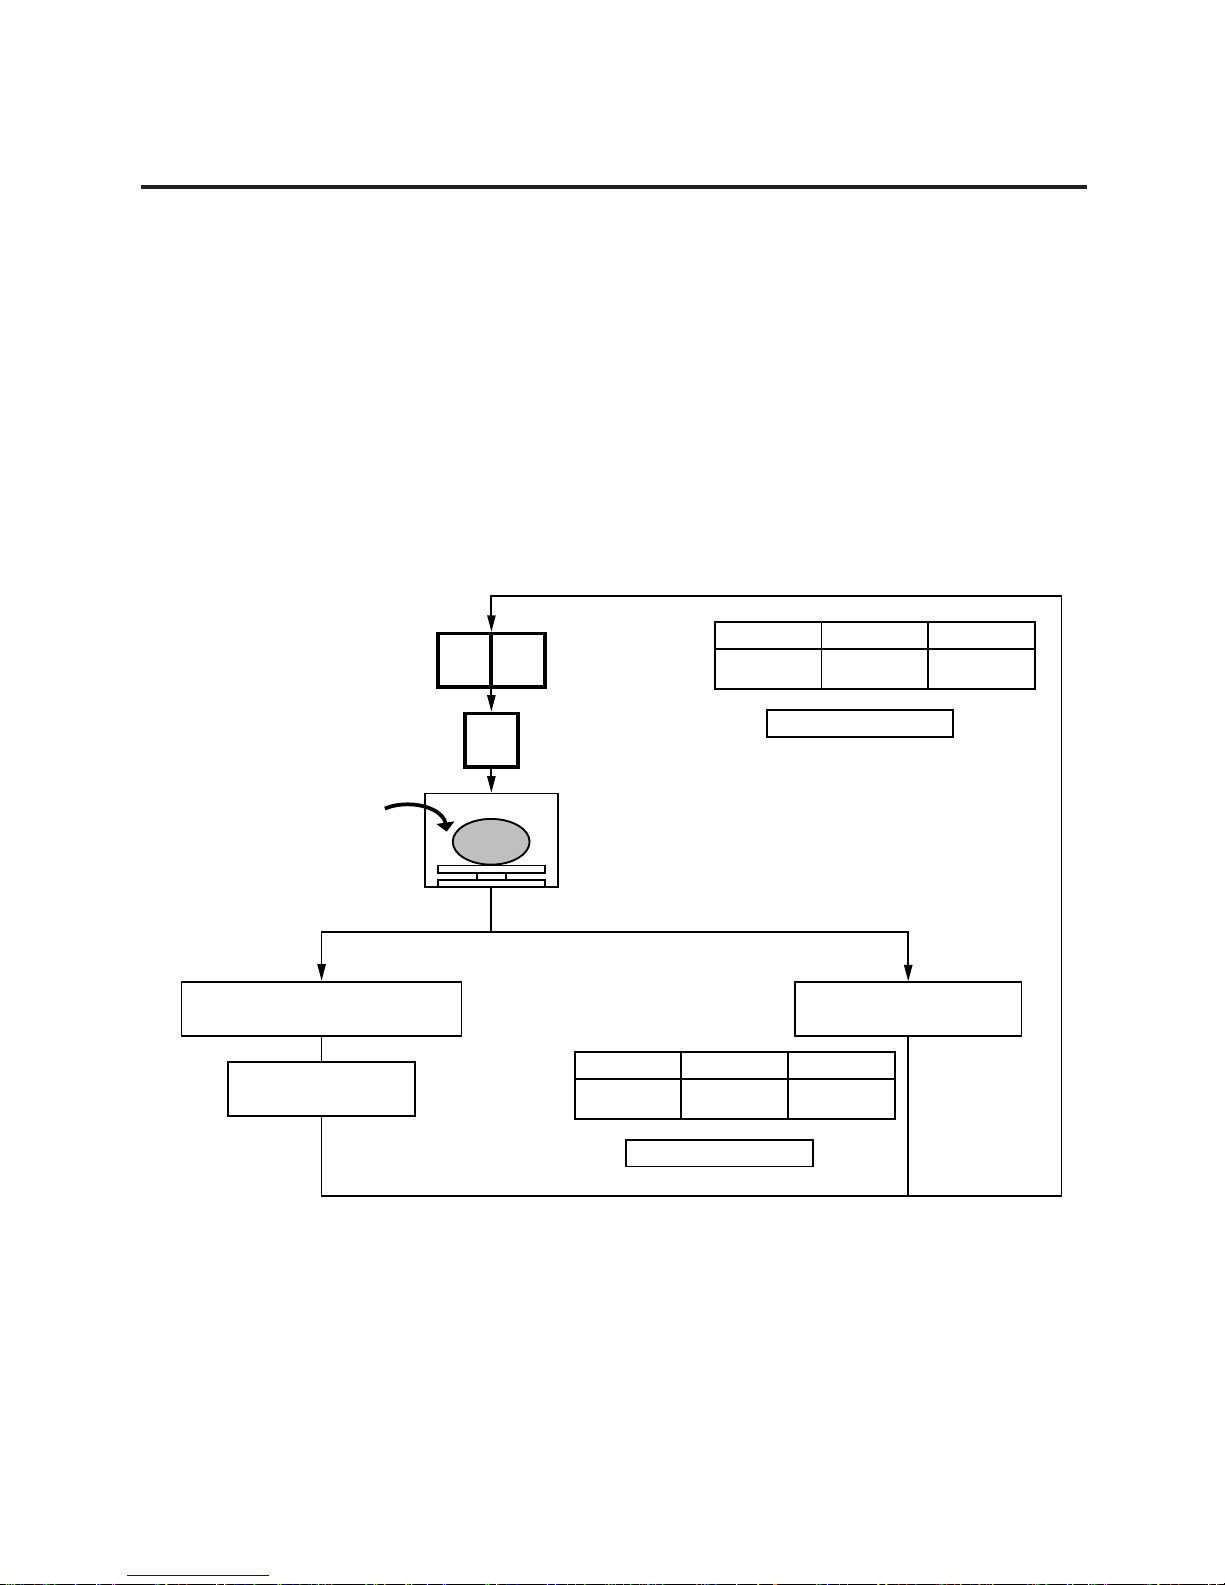
14-19
14. OPERATING PROCEDURES
14.12 FLOATING VENDOR
14.12 FLOATING VENDOR
Menu: REG
Mode: WEIGH, FIX, or BY COUNT
Floating vendor function allows you to register different commodities sales together. This function is
available when the Initial Setting #11-1 is set to 1 and using a receipt.
Be sure to select IN-LINE in Section 11.14 LON SYSTEM even if no scale is connected, then enter the
ID# 1, turn the power off and then on.
Maximum number of registerable commodities
One scale: 200 commodities
One vendor: 99 commodities
NOTE: Print format varies depending on the settings of the Initial Setting #11-1, 11-2, 11-3, 11-4
and 11-7.
Enter the PLU#
20
PLU
Press the speed key the group
vendor # is assigned to.
Press the speed key the
vendor # is assigned to.
Enter the last digit
of the number.
WEIGHT
Remote Display
Liquid Crystal Display
APPLE
UNIT PRICE
TOTAL PRICE
1.000 1.00 1.00
WEIGHT
Remote Display
Liquid Crystal Display
PRESS VENDOR# 1-
UNIT PRICE
TOTAL PRICE
0.000 P 000000
Press:
Place a commodity on
the platter.
Group Vender
Direct Vendor
Page 84
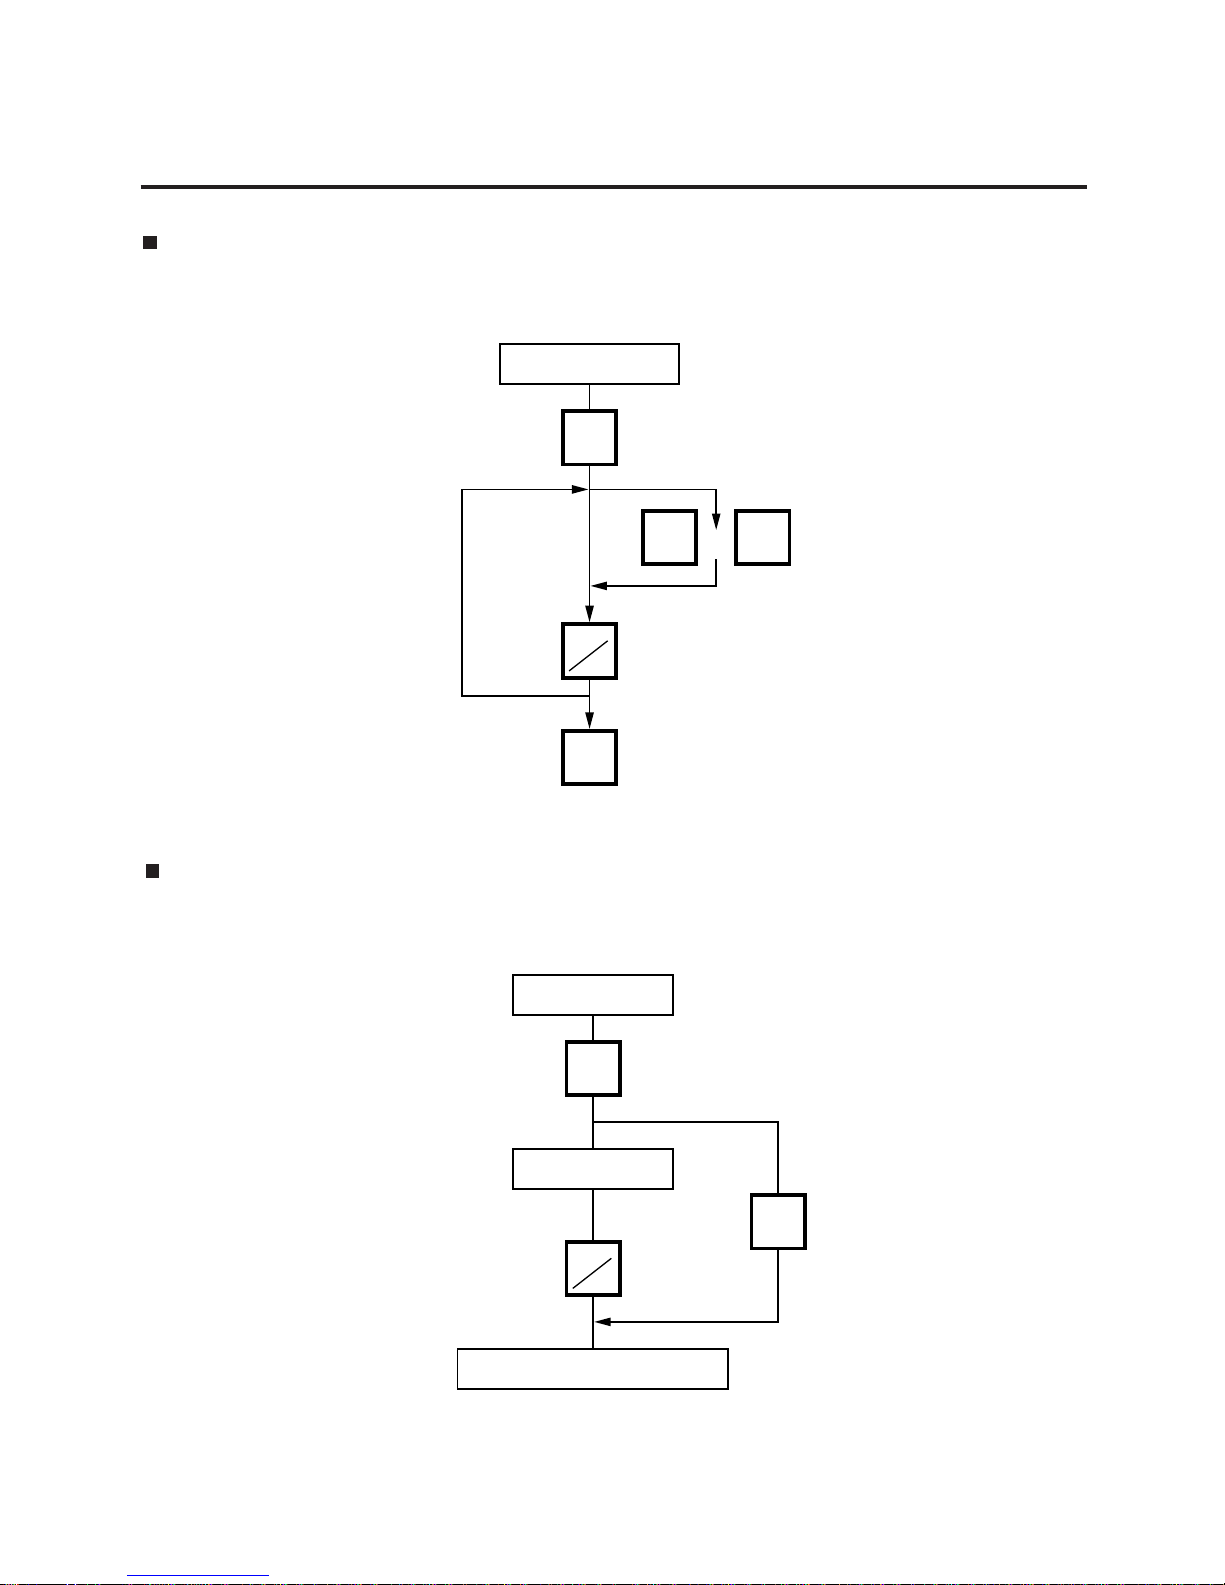
14-20
14. OPERATING PROCEDURES
14.12 FLOATING VENDOR
Price deletion
Prices already registered can be deleted in the following procedure.
Enter vendor #.
VOID
VOID
NEXT
PLU
or
PRT
*
C
Subtotal
The following procedure will sum up all of the registered items.
Enter vendor #.
Enter prices.
A receipt will be issued.
ST
C
PRT
*
Enter the deletion mode.
Press:
NEXT PLU: the next item
VOID: the previous item
Delete a registered price.
Exit the deletion mode.
Press:
Press:
(Cancel)
Page 85

15-1
15. TOTAL OPERATION
15. TOTAL OPERATION
In Read or Reset mode you can issue a sales report or reset report with either label or journal paper.
Menu: READ or RESET
READ
The totals will not be cleared after they are printed on labels or journal paper.
RESET
The totals will be cleared after they are printed on labels or journal paper.
15. TOTAL OPERATION
ESC.ESC.
56or
Issue each Report
No.
0
1
2
3
HOURLY TOTAL
GRAND TOTAL
PLU TOTAL
VENDOR TOTAL
ITEM REPORT RESET JOURNAL LABEL
How to access the READ or RESET menu
The following main menu is displayed after pressing the ESC. key. Enter ‘5’ to enter the READ menu
or ‘6’ to enter the RESET menu. When those menus are protected, enter the menu No. and the
password.
Liquid Crystal Display
READ 5
RESET 6
Label ←→ Journal
Page 86

15-2
15. TOTAL OPERATION
15.1 HOURLY TOTAL REPORT
15.1 HOURLY TOTAL REPORT
Ex.) REPORT Menu
NOTES:1. When issuing an hourly report, hours with no sales are not printed.
2. An hourly report is printed as follows:
1) Label: Issued sequentially in on-demand mode.
2) Journal paper: Issued with journal paper.
3) Label with backing paper: Issued sequentially in batch mode.
3. If the C key is pressed during issuance, the hourly report being printed will complete, then
the total report will be issued. If this is done in Reset mode, the print data is cleared to zero.
15.2 GRAND TOTAL REPORT
PRT
*
0
15.3 PLU TOTAL REPORT
PRT
*
PRT
*
11
2
3
PRT
*
PRT
*
PRT
*
1
2
1
2
2
3
Individual Total
A
Block Total
Zone Total
Entire PLU Total
B
C
D
Total memory
Total memory
: Day total
: Mark Down total
: Rewrap total
1
2
3
Search Code
: PLU#
: UPC#
1
2
Total memory
Search Code
Page 87
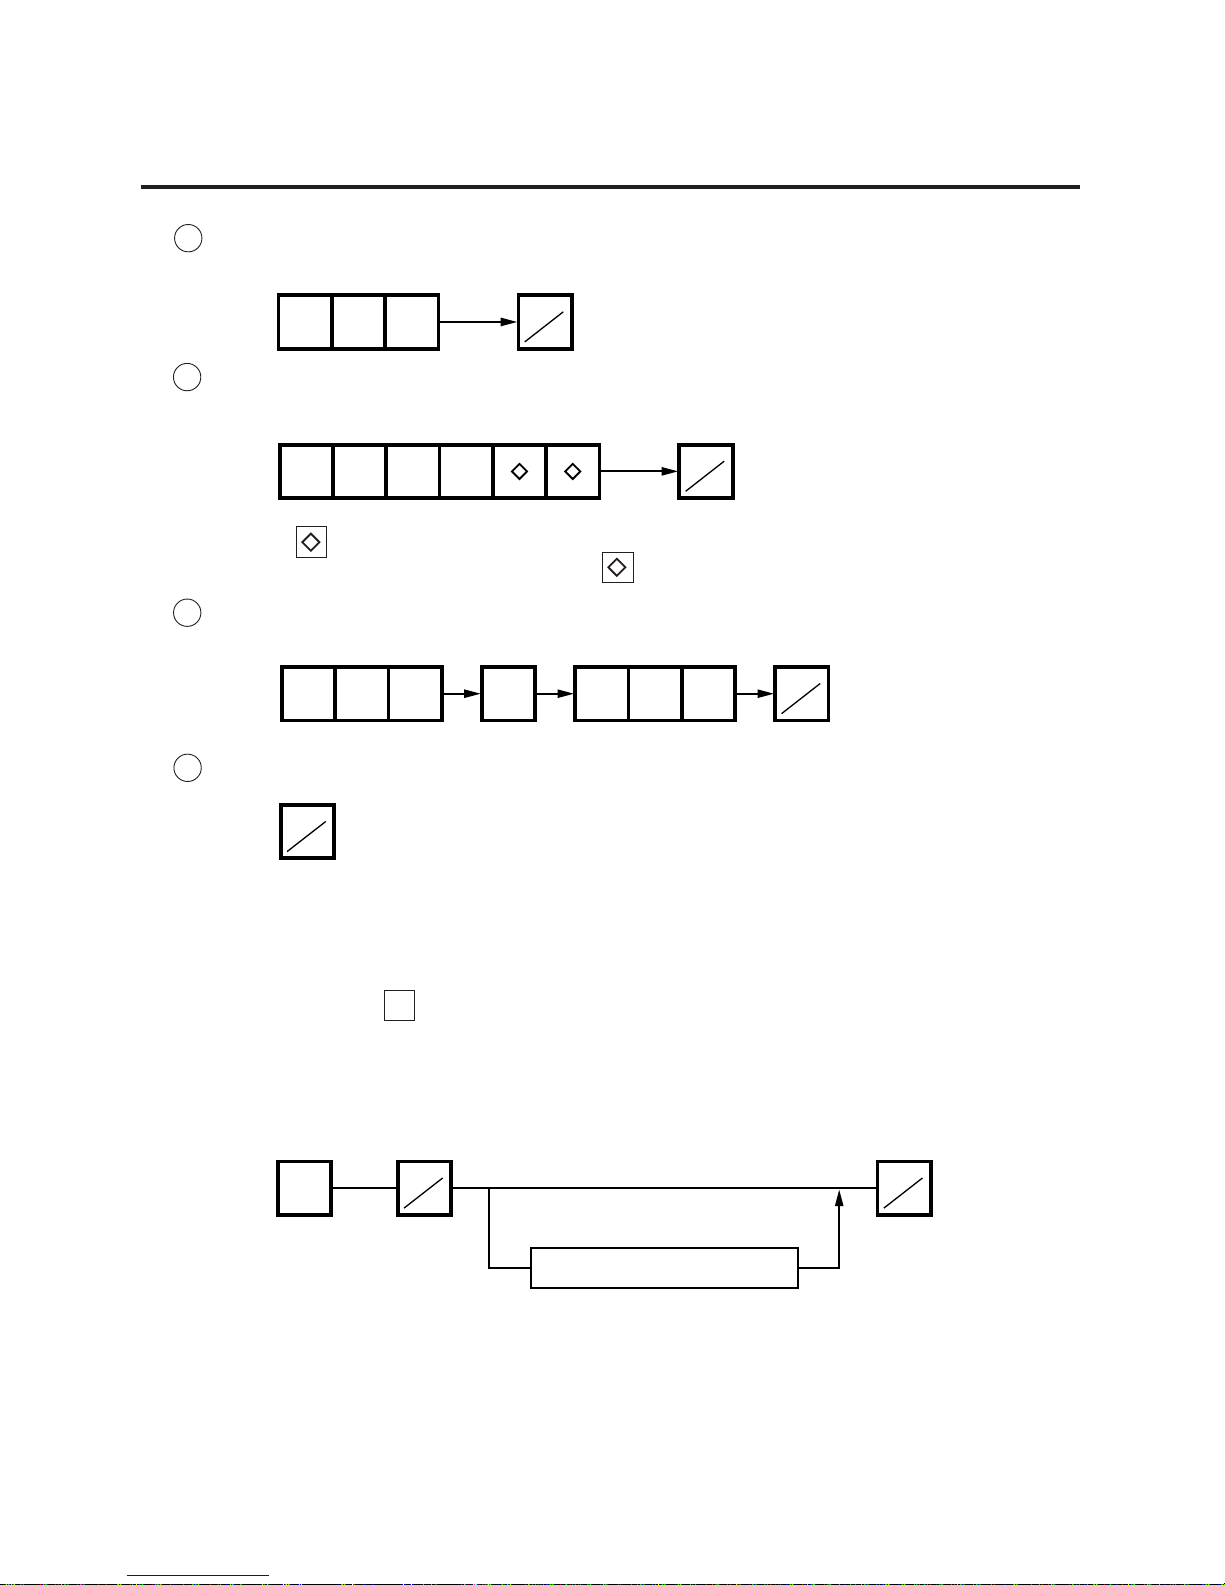
15-3
15. TOTAL OPERATION
15.3 PLU TOTAL REPORT
A Individual Total
Ex.) Individual PLU Total (PLU #100)
NOTES:1. When setting the PLU zone, it is not necessary to enter a beginning number which is smaller
than an end number.
2. When issuing a block or a zone total report, a PLU with no sales record is not printed. If all
PLUs of the block or zone have no sales record, only the total is printed.
3. Pressing the
C
key in the middle of issuing a reset report stops printing and data is not
cleared.
15.4 VENDOR TOTAL REPORT
PRT
*
PRT
*
3
Enter an individual vndor #.
(All)
(Individual)
NOTE: The key represents 0 through 9. The most significant digit in the starting number is
followed by an appropriate number of keys.
B Block Total
Ex.) UPC Block Total (UPC #100100~100199)
C Zone Total
Ex.) PLU Zone Total (PLU #100~107)
D Entire PLU Total
PRT
*
100
PRT
*
1001
PRT
*
100 107PLU
PRT
*
Page 88
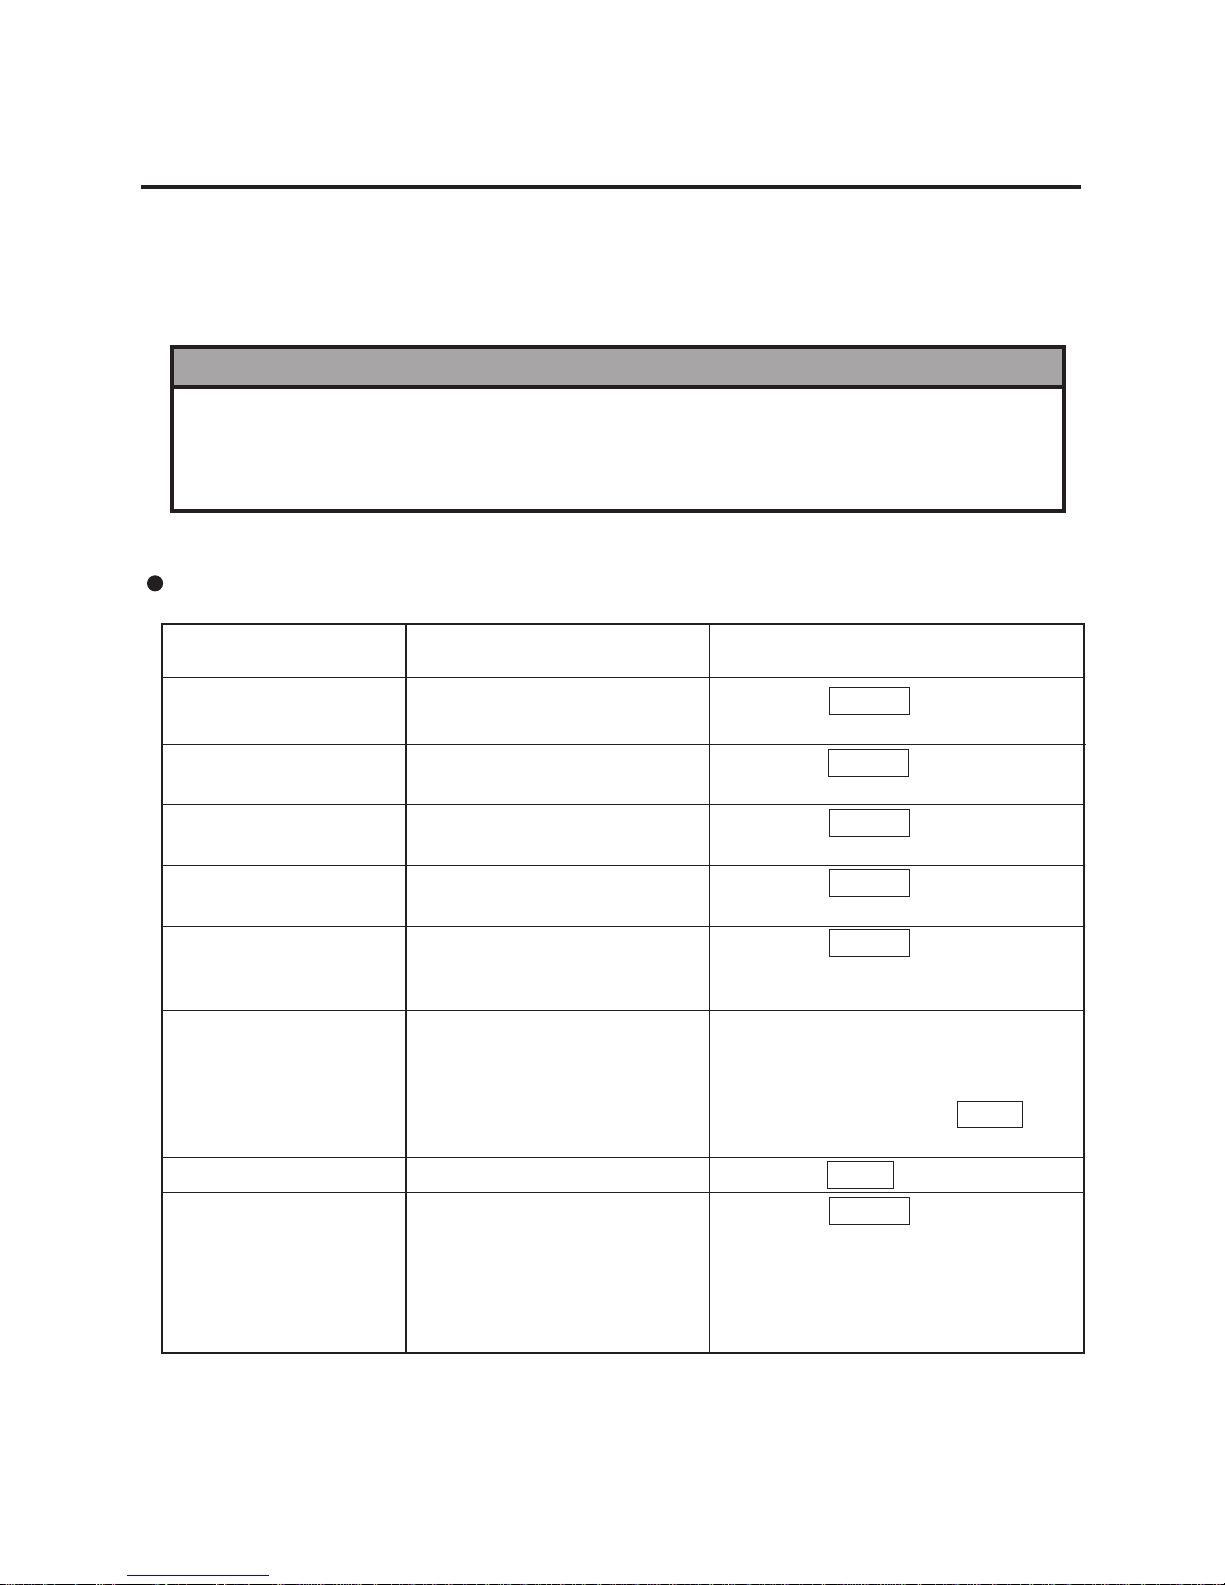
16-1
16. ERROR MESSAGE TABLE
16. ERROR MESSAGE TABLE
16. ERROR MESSAGE TABLE
Take the following action if an error message has appeared on the commodity name display along with
the buzzer sounding.
Programming Mode
Message
Cause
Solution
DATA ENTRY ERROR
MEMORY FULL
DUPLICATE PLU
PLU NOT FOUND
CHAR. OVERRUN
PRT FAILURE
LABEL OVERRUN
RESTORE THE PLUS
Error in key input.
No memory space to set PLU.
The PLU # being changed is
already registered.
The PLU # being called is not
registered.
Attempt is made to set more
than max. allowed number of
characters.
Printer trouble.
Label overruns.
The capacity of RAM was
changed with the ingredient
data stored.
Press the CLEAR key, and reinput the right data.
Press the CLEAR key, and
delete unnecessary PLUs.
Press the CLEAR key, and
check the PLU.
Press the CLEAR key, and set
the data to free PLU#.
Press the CLEAR key, and reinput the right data.
1.Check that the label and print
head are set correctly.
2.If the label home position is
misaligned, press the FEED
key.
Press the FEED key.
Press the CLEAR key and save
the ingredient data. Then delete
the data from the memory of the
unit. After that change the capacity
of RAM and load the data to the
unit.
WARNING!
If you cannot solve the problem with the following solution instruction, do not attempt
further trouble shooting, by yourself. Turn the power off, unplug the printer, then contact
TOSHIBA TEC Authorized Service representative for assistance.
Do not attempt to repair or adjust alone, because electrical equipment is dangerous
Page 89
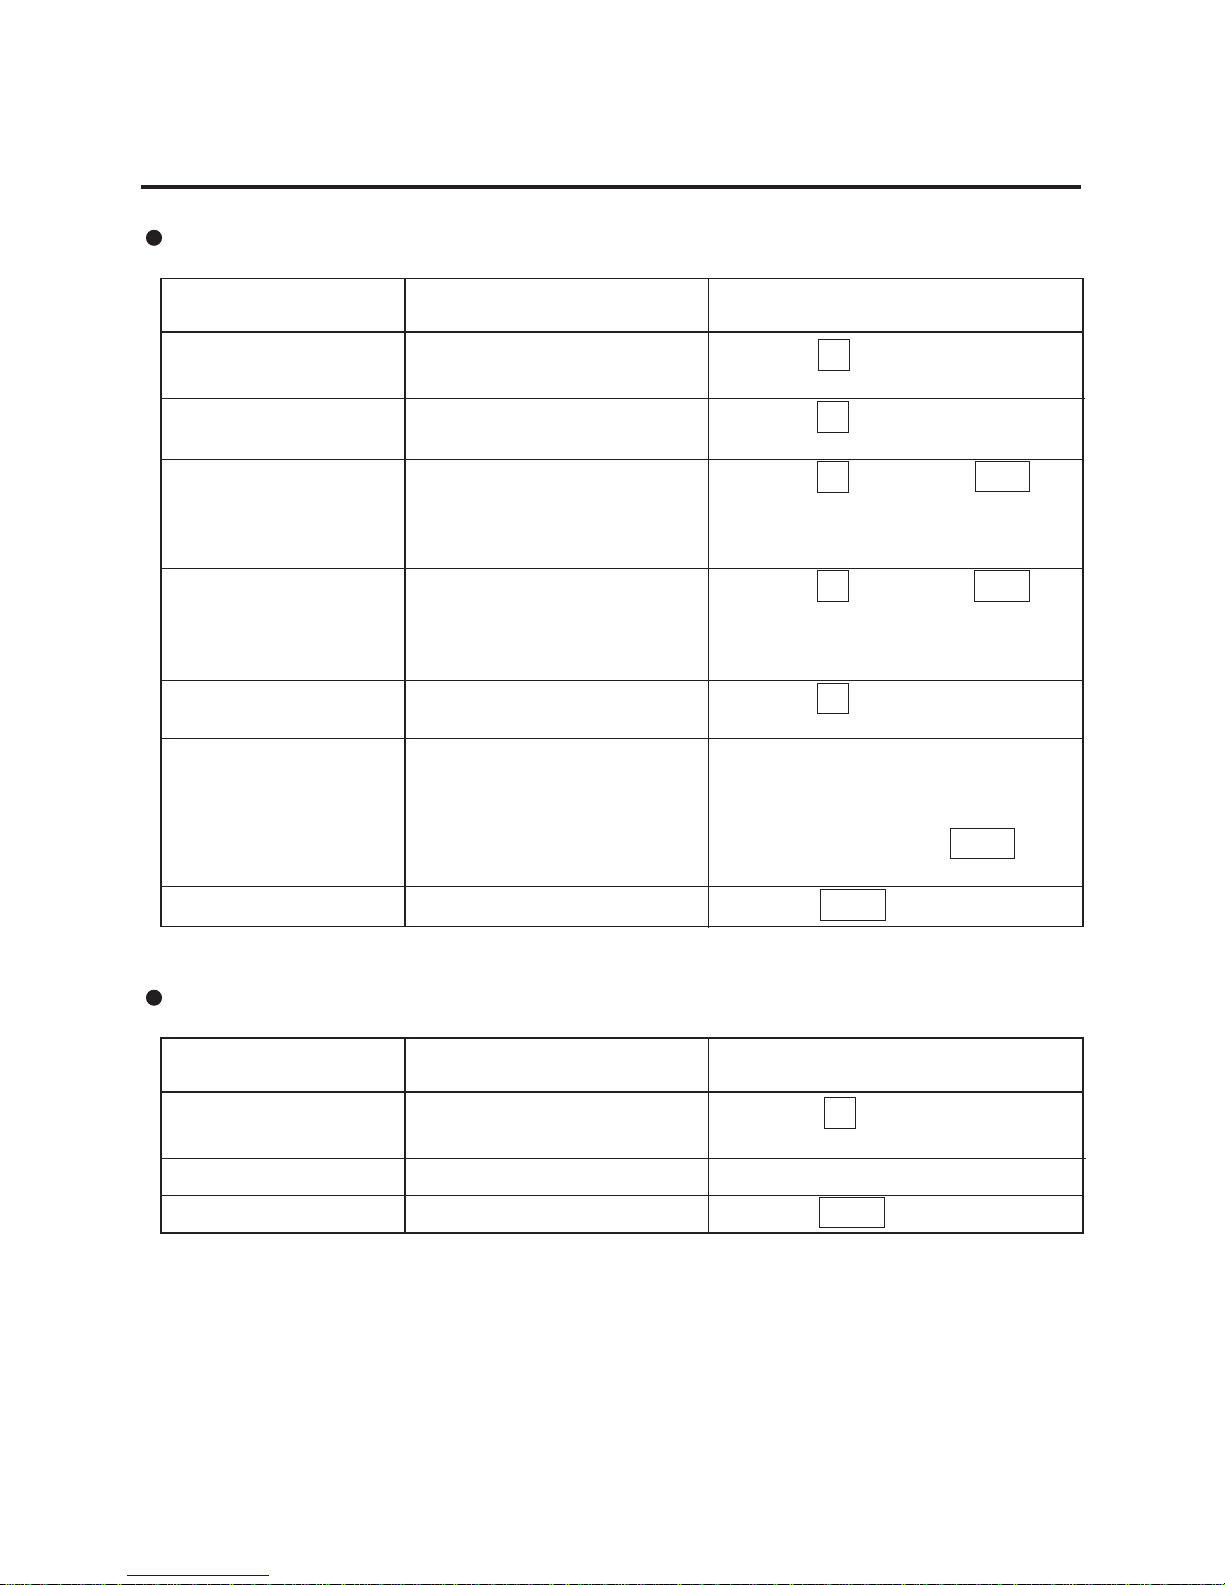
16-2
16. ERROR MESSAGE TABLE
16. ERROR MESSAGE TABLE
Label Issue Mode
Message
Cause
Solution
DATA ENTRY ERROR
PLU NOT FOUND
TOTALS OVERFLOW
MEMORY WILL FULL
PLU DATA ERROR
PRT FAILURE
LABEL OVER RUN
Error in key input.
The PLU # being called is not
registered.
GRAND TOTAL or PLU TOTAL memory has been exceeded at the time of issuing a
label.
The machine judges the
memory is full before designated number of media are
printed in Batch mode.
Error in the PLU data.
Printer trouble.
Media end.
Label overruns.
Press the C key, and re-input the
right data.
Press the C key, and check the
PLU #.
Press the C key, then the ESC.
key and select ‘RESET’. Then sum
up the exceeded memory.
Press the C key, then the ESC.
key and select ‘RESET’. Then sum
up the exceeded memory.
Press the C key, and reprogram
PLU data.
1.Check that the label and print
head are set correctly.
2.If the label home position is
misaligned, press the FEED
key.
Press the FEED key.
Read and Reset Mode
Message
Cause
Solution
PLU NOT FOUND
PRT FAILURE
LABEL OVER RUN
Corresponding PLU # is not
registered.
Printer trouble.
Label overruns.
Press the C key, and enter the
correct PLU #.
Same as in the label issue mode.
Press the FEED key.
Page 90

16-3
16. ERROR MESSAGE TABLE
16. ERROR MESSAGE TABLE
Press the CLEAR key.
CMT Operation Mode
Message
Cause
Solution
MISMATCH SPEC.
Mismatch of the model type.
Mismatch of the base unit.
Mismatch of the VERSION.
Mismatch of the TRANS-
MITTING DATA.
Mismatch of the scale
capacity.
Parity error
Framing error
Overrun error
Data error
Two or More Hardware error
Time out error
Press the CLEAR key.
Press the CLEAR key.
BAD TAPE OR CMT
TIME OUT ERROR
LON System Mode
Error message
Cause
Solution
COMMUNI.
ERROR
SEQUENCE
ERROR
SEQUENCE #
ERROR
MASTER BUSY
BM NOT RESET
TEXT ERROR ##
1. The power of the master or backup
master scale is not turned ON.
They are not connected with each
other or in off-line state.
2. LON cable is broken.
The power was not turned OFF and
ON again after setting ID #.
Text data number is incorrect.
Registration job is performed on a
satellite scale while reset job is performed on the master scale.
The backup master does not have
same PLU with the mater scale.
1. Error text is found.
02: Sequence No. error
05: LRC error
08: Text error
09: Command error
2. The master scale differs from other
scale in ROM version.
1. Turn the power of the master
or backup master scale ON.
Connect them with each other
or turn the scale in-line.
2. Call your authorized service
representative.
Turn the power switch OFF and
ON again.
Call your authorized service
representative.
1. Quit reset job on the master
scale.
2. Quit registration job on the
satellite scale.
Down load PLU from the master
to the backup master scale.
Then run the reset operation
again.
Call the TOSHIBA TEC authorized service representative.
B
BM/S
M: Master scale BM: Backup master scale S: Satellite scale
Page 91
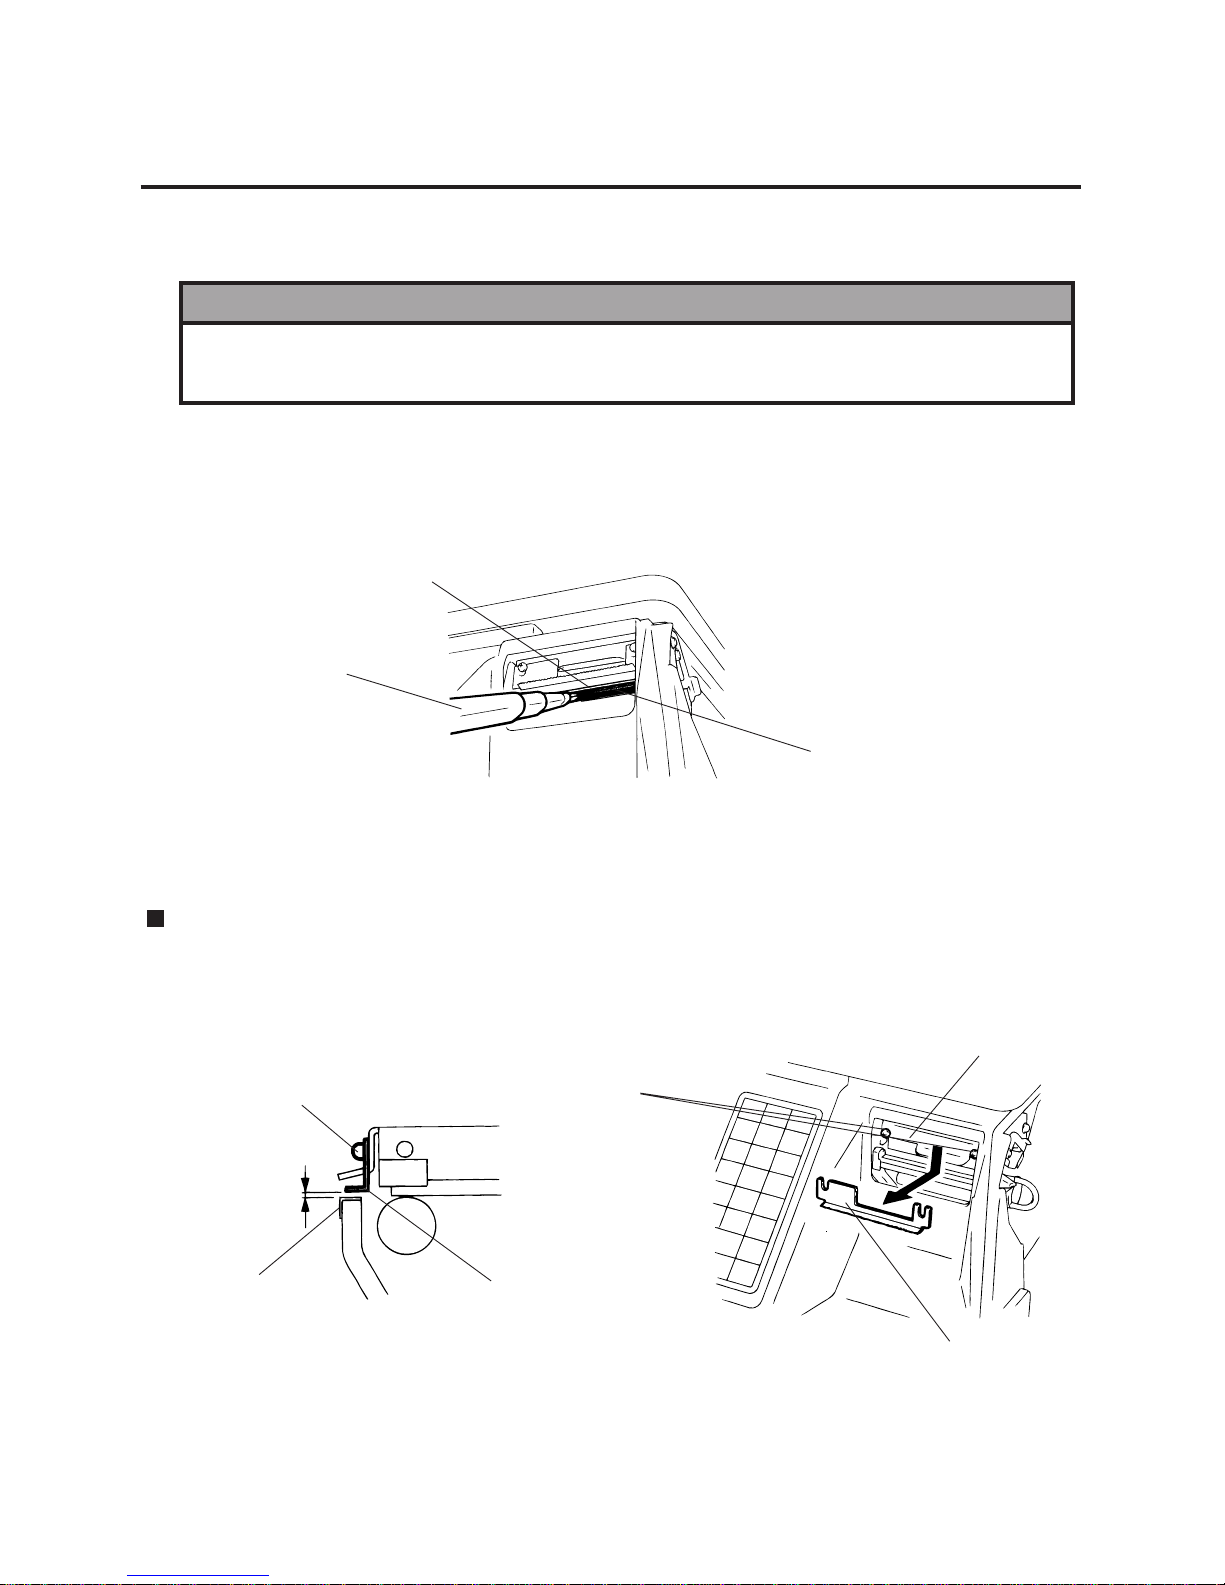
17-1
17. CLEANING THE PRINT HEAD
17. CLEANING THE PRINT HEAD
17. CLEANING THE PRINT HEAD
If the print head is dirty, printing will not be clear. The print head should be cleaned with a print head
cleaner everyday before use, according to the following procedure:
1. Open the label cover and remove the label cassette. (See page 9-1)
2. Clean the print head element with the print head cleaner.
3. Clean the print head element with the print head cleaner.
NOTE: Be careful not to damage the print head when cleaning.
4. If any label paste is found on the label on the cutter, wipe off paste with alcohol.
After removing the label cutter, reattach it using the following procedure.
1. Install an unloaded label cassette on the scale.
2. Install the label cutter, aligning the cutter notches with the screw holes.
3. Secure the cutter with the screw (FL-3x6) so the bottom of the cutter is 0.5~0.8 mm above
the peel-off plate.
NOTE: If the cutter is scratching labels during printing, increase the clearance between the cutter
and peel-off plate.
Print Head
Print Head Cleaner
Element
Screw (FL-3x6)
Clearance
0.5~0.8 mm
Peel-off Plate
Label Cutter
Screw (FL-3x6)
Head Holder
Label Cutter
WARNING!
Since there is a cutter at the paper outlet, be careful not to injure your fingers when
cleaning the print head and cutter.
Page 92

18-1
18. TROUBLESHOOTING
18. TROUBLESHOOTING
18. TROUBLESHOOTING
Before You Call for Service
It is our primary concern to give you full satisfaction and better service. If, however, any problem arises
in connection with the operation of this scale, please check the following points before calling for
service:
A) Is the power plug fully plugged into an AC outlet?
B) Is the power turned ON?
C) Is AC power being properly supplied to the outlet? (Check it using another electric appliance.)
D) Check the circuit breaker.
E) Has there been a power failure of any sort?
F) Has the operation been carried out in the correct order?
Was the power turned ON when something was on the platter?
→ Make sure nothing is on the platter and turn the power on
again.
Is the platter mounted correctly?
→ Mount the platter correctly and turn the power on again.
Is anything touching the platter?
→ If so, remove it.
Is the machine in a windy location?
→ Avoid locations subject to the wind.
1. Check that the media is loaded correctly.
2. Check whether the print head is set correctly or not.
Dirty print head. → Clean the print head.
Call the TOSHIBA TEC Authorized Service representative if
necessary.
1. Dirty print head. → Clean the print head.
2. Poor media quality. → Change media type.
1. Plug power cord into an AC socket.
2. Check the circuit breakers or fuses.
3. Plug another appliance into the AC socket to check if there is
power supplied.
Call the TOSHIBA TEC Authorized Service representative if necessary.
1. Clean the cutter blades.
2. The blades are worn. → Call the TOSHIBA TEC Authorized
Service representative.
“----” is displayed at
power on.
Problems
Solution
Display unstable.
No print.
Dots missing in the print.
Unclear (or blurred)
printing.
Power does not come
on.
WARNING!
This scale has been manufactured under strict quality control. If you have any trouble,
however, DO NOT ATTEMPT TO FIX IT BY YOURSELF. Pull the power plug out of
the outlet, and contact the TEC Authorized Service representative.
You see a raised nap
where the media has
been cut.
Page 93

Page 94

PRINTED IN SINGAPORE
EM1-31071G
E
 Loading...