

Page 1

User Manual v.4.1
English
This manual covers all the details and explanations of the TEASI models:
TEASI ONE, TEASI ONE3, TEASI ONE3 eXtend, TEASI PRO, TEASI VOLT, TEASI VOLT BT
The specific sections of the devices are easy to identify.
Affects: TEASI ONE, TEASI ONE 3, TEASI ONE 3 X, TEASI PRO, TEASI VOLT, TEASI VOLT BLUETOOTH, All models
Page 2

Table of Content
1. Getting to know your device................................................................................................... 5
2. Starting the device ................................................................................................................ 11
2.1 First Startup............................................................................................................................ 11
2.2 Easy Mode – Full Mode .......................................................................................................... 12
2.3 Full Menu – Custom Menu..................................................................................................... 13
2.4 Second and further startup .................................................................................................... 13
2.5 Connection to E-Bike .............................................................................................................. 13
2.5.1 Setting up E-Bike account ...................................................................................................... 14
2.5.2 Troubleshooting for E-Bikes with Brose systems ................................................................... 16
3. Main Menu ............................................................................................................................ 17
3.1 Map ........................................................................................................................................ 19
3.1.1 Ski Map ................................................................................................................................... 24
3.1.2 Sea Map ................................................................................................................................. 24
3.1.2.1 Blue Target Arrow .................................................................................................................. 25
3.1.2.2 Projection Line ....................................................................................................................... 25
3.1.2.3 Near interesting & Most Important Buoy (M.I.B.) ................................................................. 25
3.1.3 Recursive Height Analysis (RHA) ............................................................................................ 26
3.1.4 Suggested Assist Level Popup ................................................................................................ 26
3.1.5 Assist level suggestion based on Heart Rate (HR).................................................................. 27
3.1.6 Navigation Popup ................................................................................................................... 28
3.2 Memory .................................................................................................................................. 28
3.2.1 My Tours ................................................................................................................................ 30
3.2.2 Favorites ................................................................................................................................. 31
3.2.2.1 Manual alert for Favorite in Boat profile ............................................................................... 33
3.2.3 Importing Data & TEASI Tour ................................................................................................. 33
3.2.3.1 Imported Tours ...................................................................................................................... 33
3.2.3.2 TEASI Tour .............................................................................................................................. 36
3.2.3.3 Imported POIs ........................................................................................................................ 38
3.2.4 Statistics ................................................................................................................................. 39
3.3 Fitness .................................................................................................................................... 40
3.4 Fitness (with HR) .................................................................................................................... 43
3.4.1 Fitness based on HR Zones .................................................................................................... 45
3.5 Race Training .......................................................................................................................... 47
Page 3

3.6 Destination ............................................................................................................................. 50
3.6.1 Address .................................................................................................................................. 50
3.6.2 Extended POI Search .............................................................................................................. 58
3.6.2.1 Ski POI Categories .................................................................................................................. 60
3.6.2.2 Sea POI Categories ................................................................................................................. 60
3.6.3 Favorites ................................................................................................................................. 61
3.6.4 Map Point ............................................................................................................................... 61
3.6.5 Coordinates ............................................................................................................................ 62
3.6.6 Tours ...................................................................................................................................... 62
3.6.7 Multiple Destinations ............................................................................................................. 63
3.6.8 Ski Destination ....................................................................................................................... 66
3.6.9 Boat Destination .................................................................................................................... 66
3.7 Plan ........................................................................................................................................ 67
3.7.1 Draw a Route ......................................................................................................................... 69
3.7.2 U2U-Routing .......................................................................................................................... 70
3.8 Computer ............................................................................................................................... 70
3.8.1 E-Bike Computer with Gear Recommendation ...................................................................... 70
3.8.1.1 E-Bike Light Management ...................................................................................................... 70
3.8.1.2 Gear Recommendation .......................................................................................................... 71
3.8.2 Dashboard .............................................................................................................................. 71
3.8.2.1 List of Available Teasi Computers .......................................................................................... 72
3.8.3 Speedometer ......................................................................................................................... 75
3.8.4 Sun Compass .......................................................................................................................... 75
3.8.5 Compass ................................................................................................................................. 76
3.8.6 Weather Forecast .................................................................................................................. 76
3.8.7 Tide Computer ....................................................................................................................... 77
3.8.7.1 Selecting Reference Point ...................................................................................................... 77
3.9 Settings................................................................................................................................... 78
3.9.1 Maps & Clean Up Maps ......................................................................................................... 78
3.9.2 System .................................................................................................................................... 80
3.9.2.1 Easy Mode - Full Mode .......................................................................................................... 80
3.9.3 System & Full menu – Custom menu ..................................................................................... 82
3.9.3.1 Full menu - Custom menu ...................................................................................................... 82
3.9.4 Accounts ................................................................................................................................. 83
3.9.4.1 Bike Pairing and Configuration .............................................................................................. 85
3.9.4.1.1 Additional Bike settings ......................................................................................................... 87
Page 4

3.9.4.2 Heart Rate Settings ................................................................................................................ 87
3.9.4.3 Accounts in Easy Mode .......................................................................................................... 88
3.9.4.4 Ski Account ............................................................................................................................. 88
3.9.4.5 Boat Account .......................................................................................................................... 91
3.9.5 Sensors ................................................................................................................................... 92
3.9.5.1 Compass ................................................................................................................................. 94
3.9.5.2 Barometer .............................................................................................................................. 94
3.9.5.3 E-Bike ..................................................................................................................................... 95
3.9.5.4 Heart Rate Sensor Settings .................................................................................................... 96
3.9.5.5 Speed and Cadence (SAC) sensor Settings ............................................................................. 97
3.9.5.6 Setting Wheel Size ................................................................................................................. 99
3.9.6 Language .............................................................................................................................. 100
3.9.7 Date & Time ......................................................................................................................... 100
3.9.8 Sound ................................................................................................................................... 102
3.9.9 Screen .................................................................................................................................. 102
3.9.10 GPS Status ............................................................................................................................ 103
3.9.11 Info ....................................................................................................................................... 103
3.9.11.1 Share Diagnostics Screen ..................................................................................................... 103
3.9.12 E-Bike Info ............................................................................................................................ 104
4. Connect Teasi to your Computer / TAHUNA Tool .............................................................. 106
4.1 Troubleshooting for connecting Teasi devices with Mac OS X 10.11 (El Capitan)............... 108
5. Declaration of Conformity .................................................................................................. 109
Page 5
1. Getting to know your device
TEASI PRO
Teasi Pro has 3 hardware buttons. Two of them are placed on the left side of the device, one is on
the bottom, below the display.
The lower button is responsible for switching on and off the device and for locking the screen.
The upper button allows you to have a quick access to the most important screens of your Teasi Pro
device: check Settings – System to see which screens can be set for quick access.
The button at the front of your device is responsible for getting back in the menus or getting to an
upper level of the menu system.
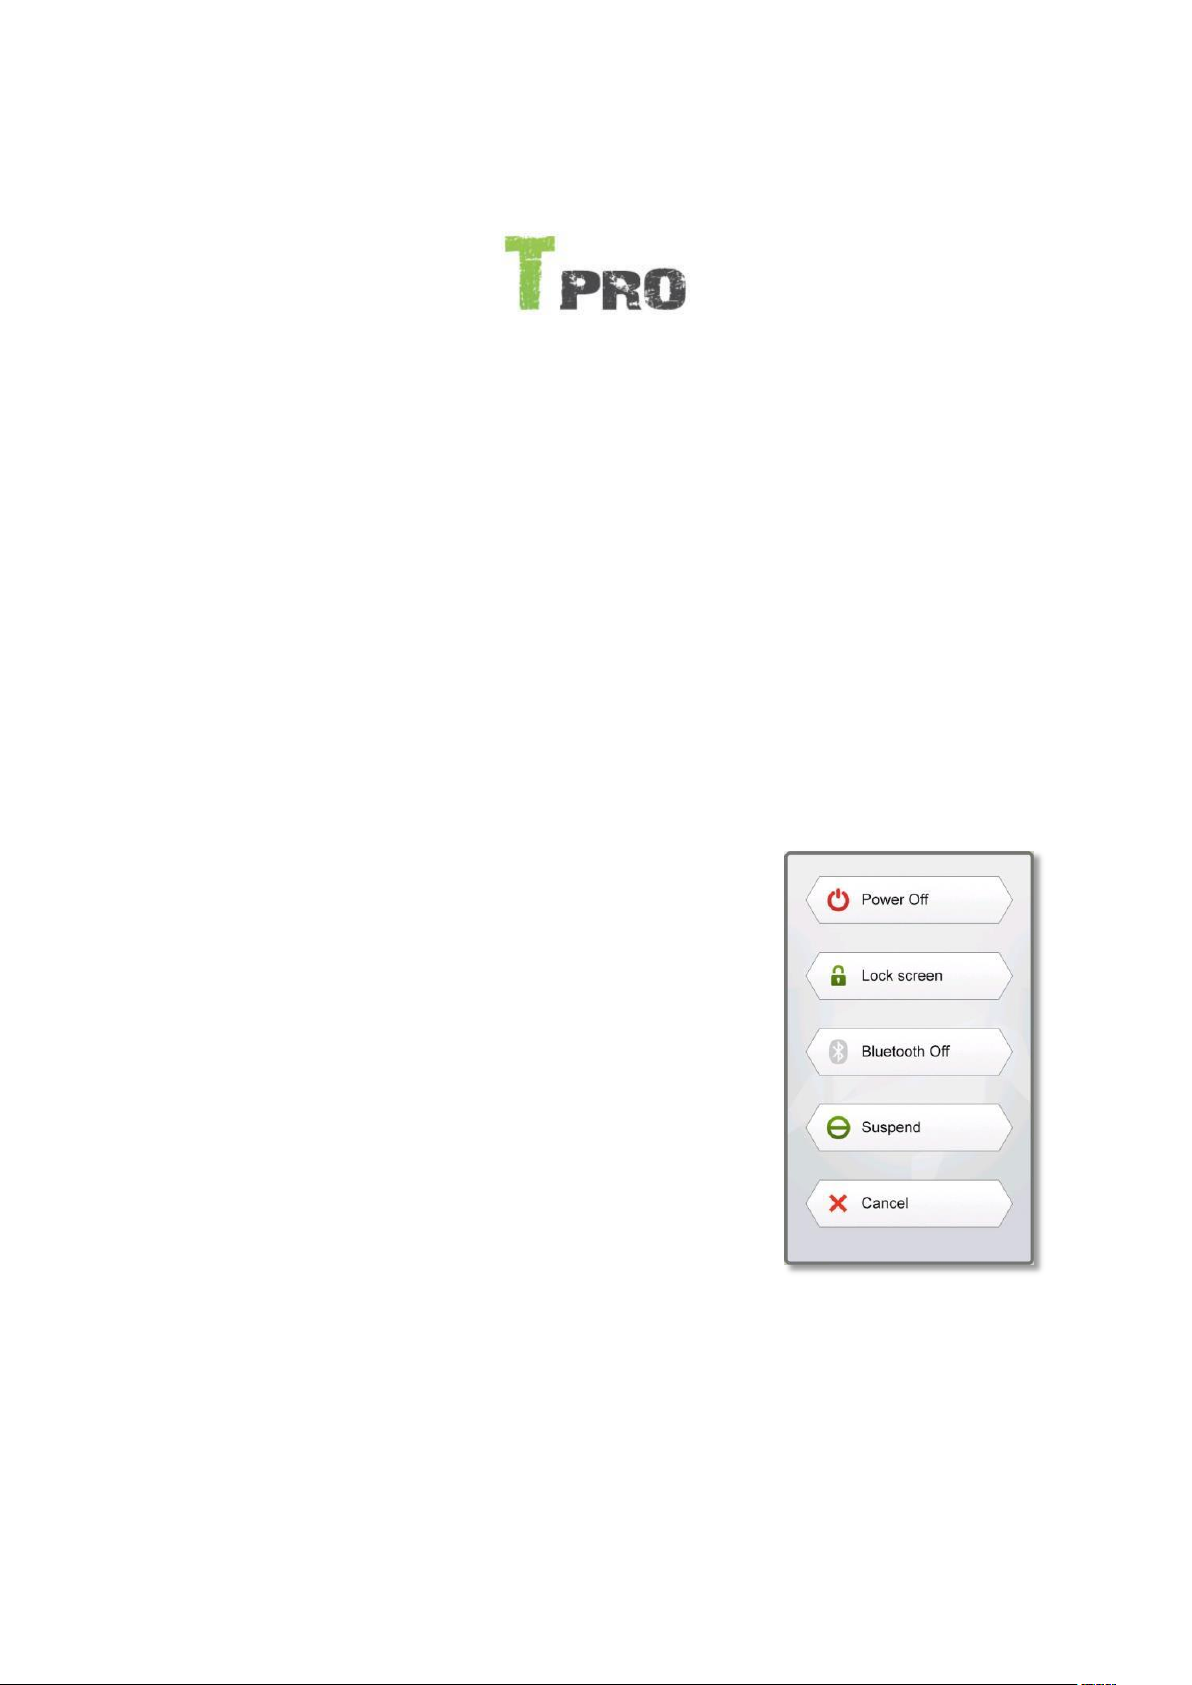
The menu will pop up by pressing the lower button long, allowing
the locking or the powering on or off and switching off Bluetooth
(when on).
5
Page 6
TEASI ONE & TEASI VOLT & TEASI VOLT BT &
TEASI ONE3 & TEASI ONE3X
Teasi One, Teasi Volt and Teasi One3 has 2 hardware buttons on the side of the devices.
The lower button is responsible for switching on and off the device and for locking the screen.
The upper button is responsible for getting back in the menus or getting to an upper level of the
menu system.
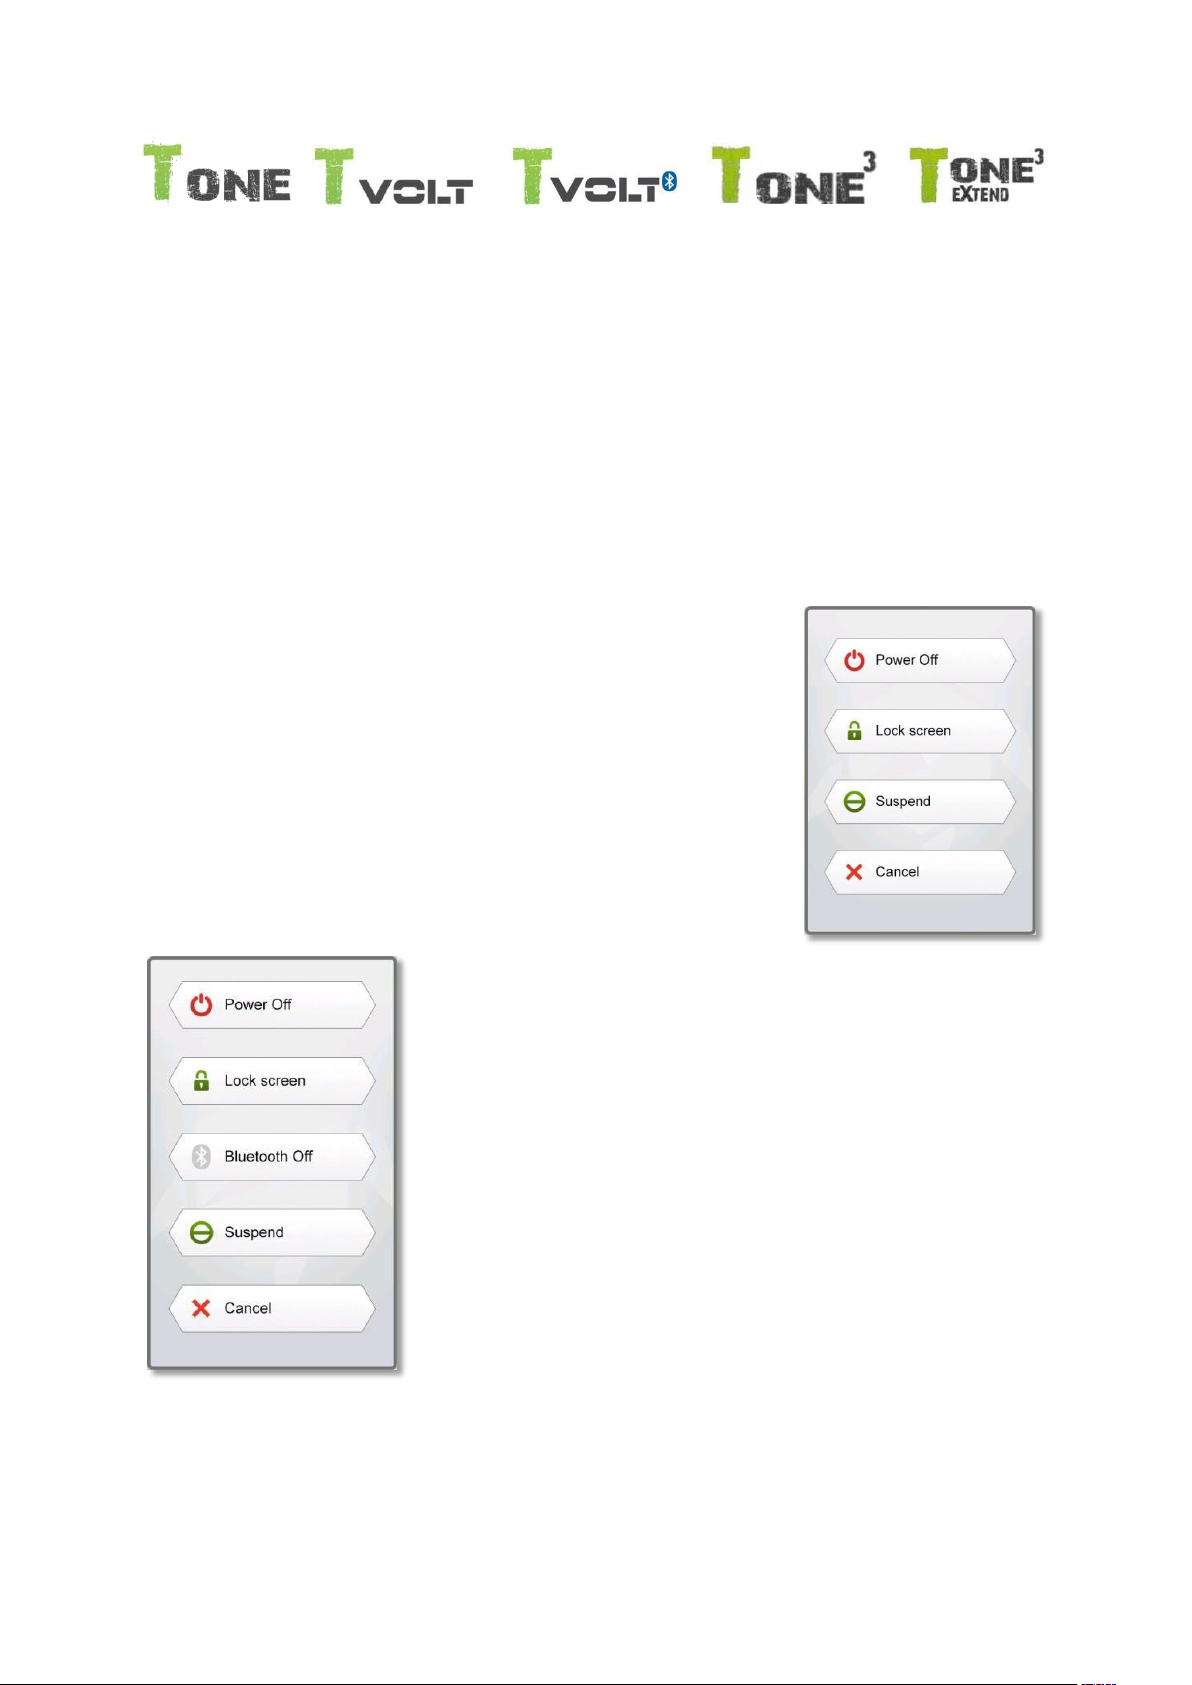
In case of Teasi One, the menu will pop up by pressing the lower
button long, allowing the locking or the powering on or off.
In case of Teasi Volt, Teasi Volt BT, Teasi One3 and Teasi One
Extend, the menu will pop up by pressing the lower button long,
allowing the locking or the powering on or off and switching off
Bluetooth (when on).
3
To reset your device, press and hold power button for at least 15
seconds, until the screen is completely black. After device is turned
off, it can be turned on again.
When the screen is locked, no input can be taken besides pressing
the power button again to unlock the screen or switch the device off. Under locked screen, every
navigation and process continues to run.
Most of the application flow is handled directly on the screen.
6
Page 7
Affects all models
Direct selectors
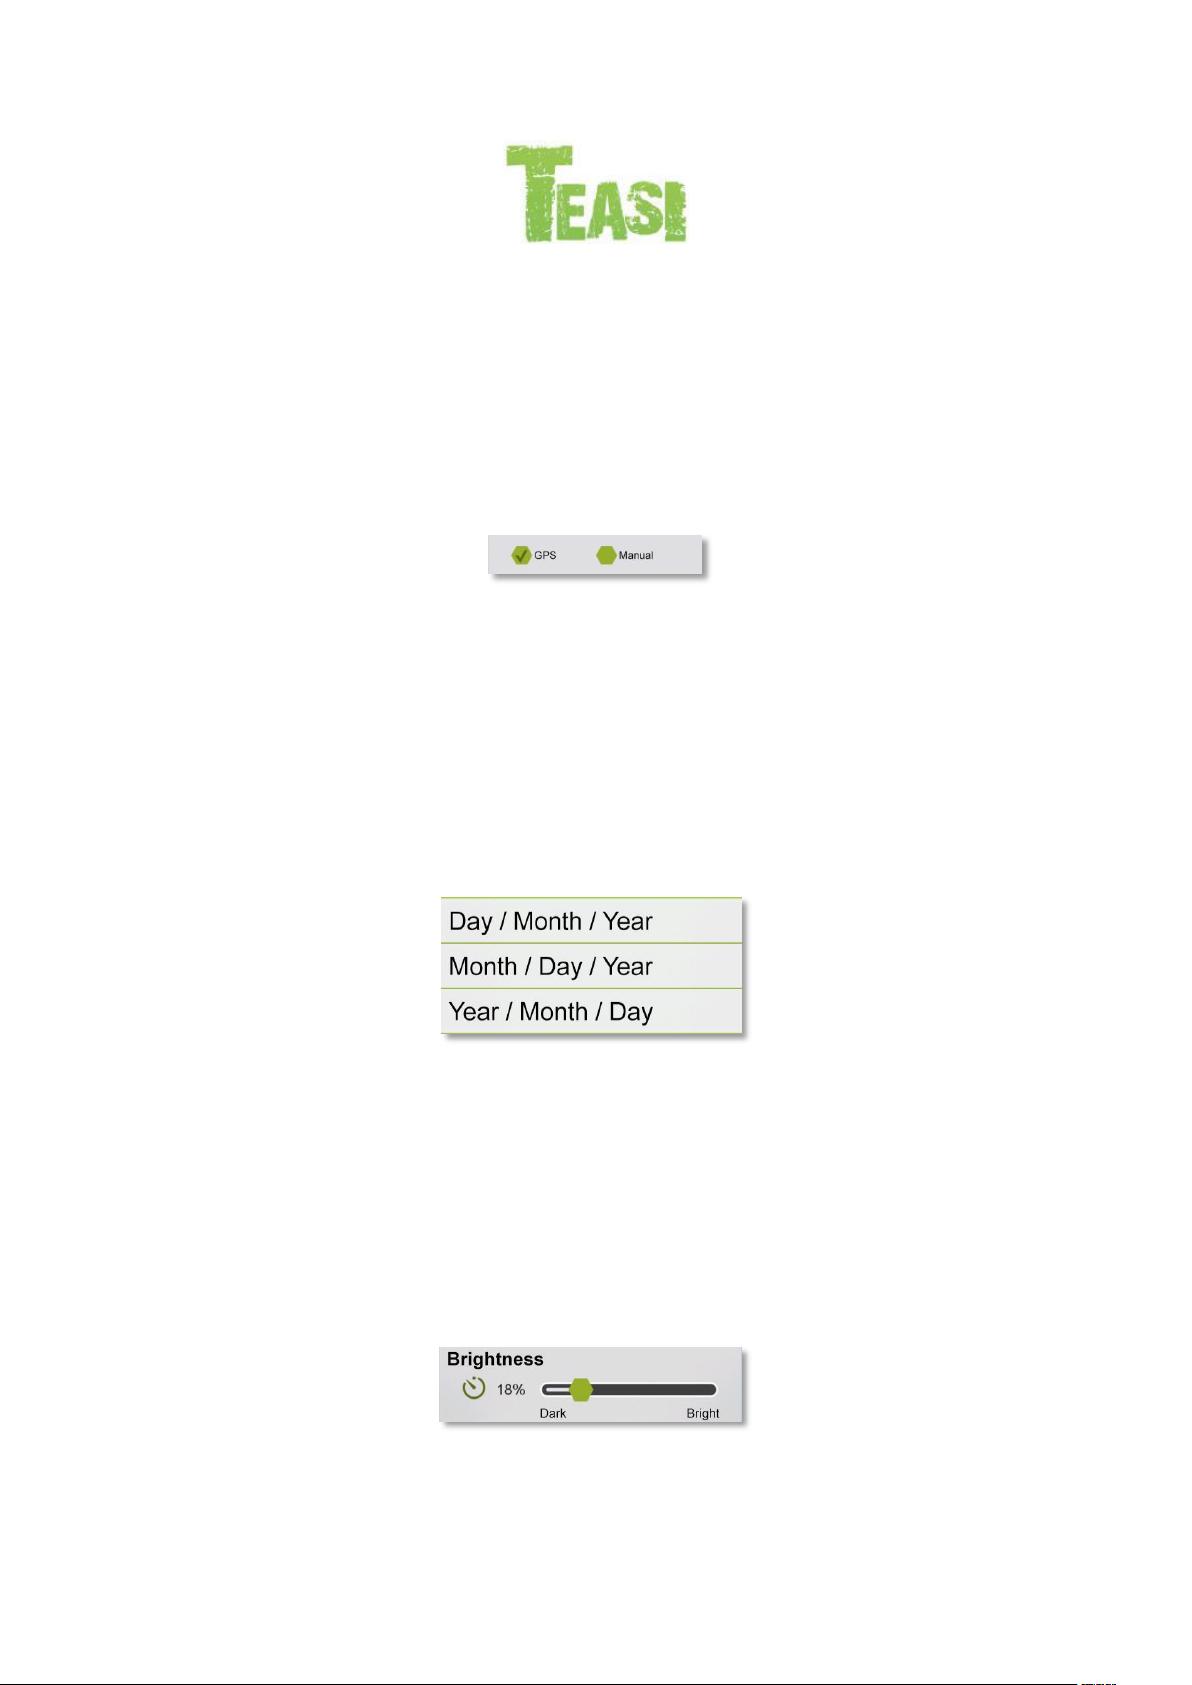
Some of the settings can be chosen from only a few options. If the values can be described
graphically or shortly enough, all values are available on the screen.
For example, the ‘From GPS / Manual settings’ is a direct selector.
Tap one of the fields to choose the desired value.
List selectors
When more options are available, only the actual value is shown; the current value can be changed
by tapping on it. When tapped, a list will appear with the available options.
List selector:
Tap on one option to select it.
Sliders
When a feature can have values that can be assigned to a scale, the software will show sliders
that look like analogue potentiometers to set the desired value.
Slider:
If the values are not shown, the values are increasing from the left to the right. You can select the
right value by dragging the slider directly to the desired value.
7
Page 8
Checkbox switches
When a function can only be enabled or not, a switch is used. The field contains the name of the
setting and there is a tick on the right to show, whether the function is active or not.
Checkbox switch:
When the tick mark is not shown, then the function is disabled. When it is displayed, the function is
enabled. Tap on the field to change the status.
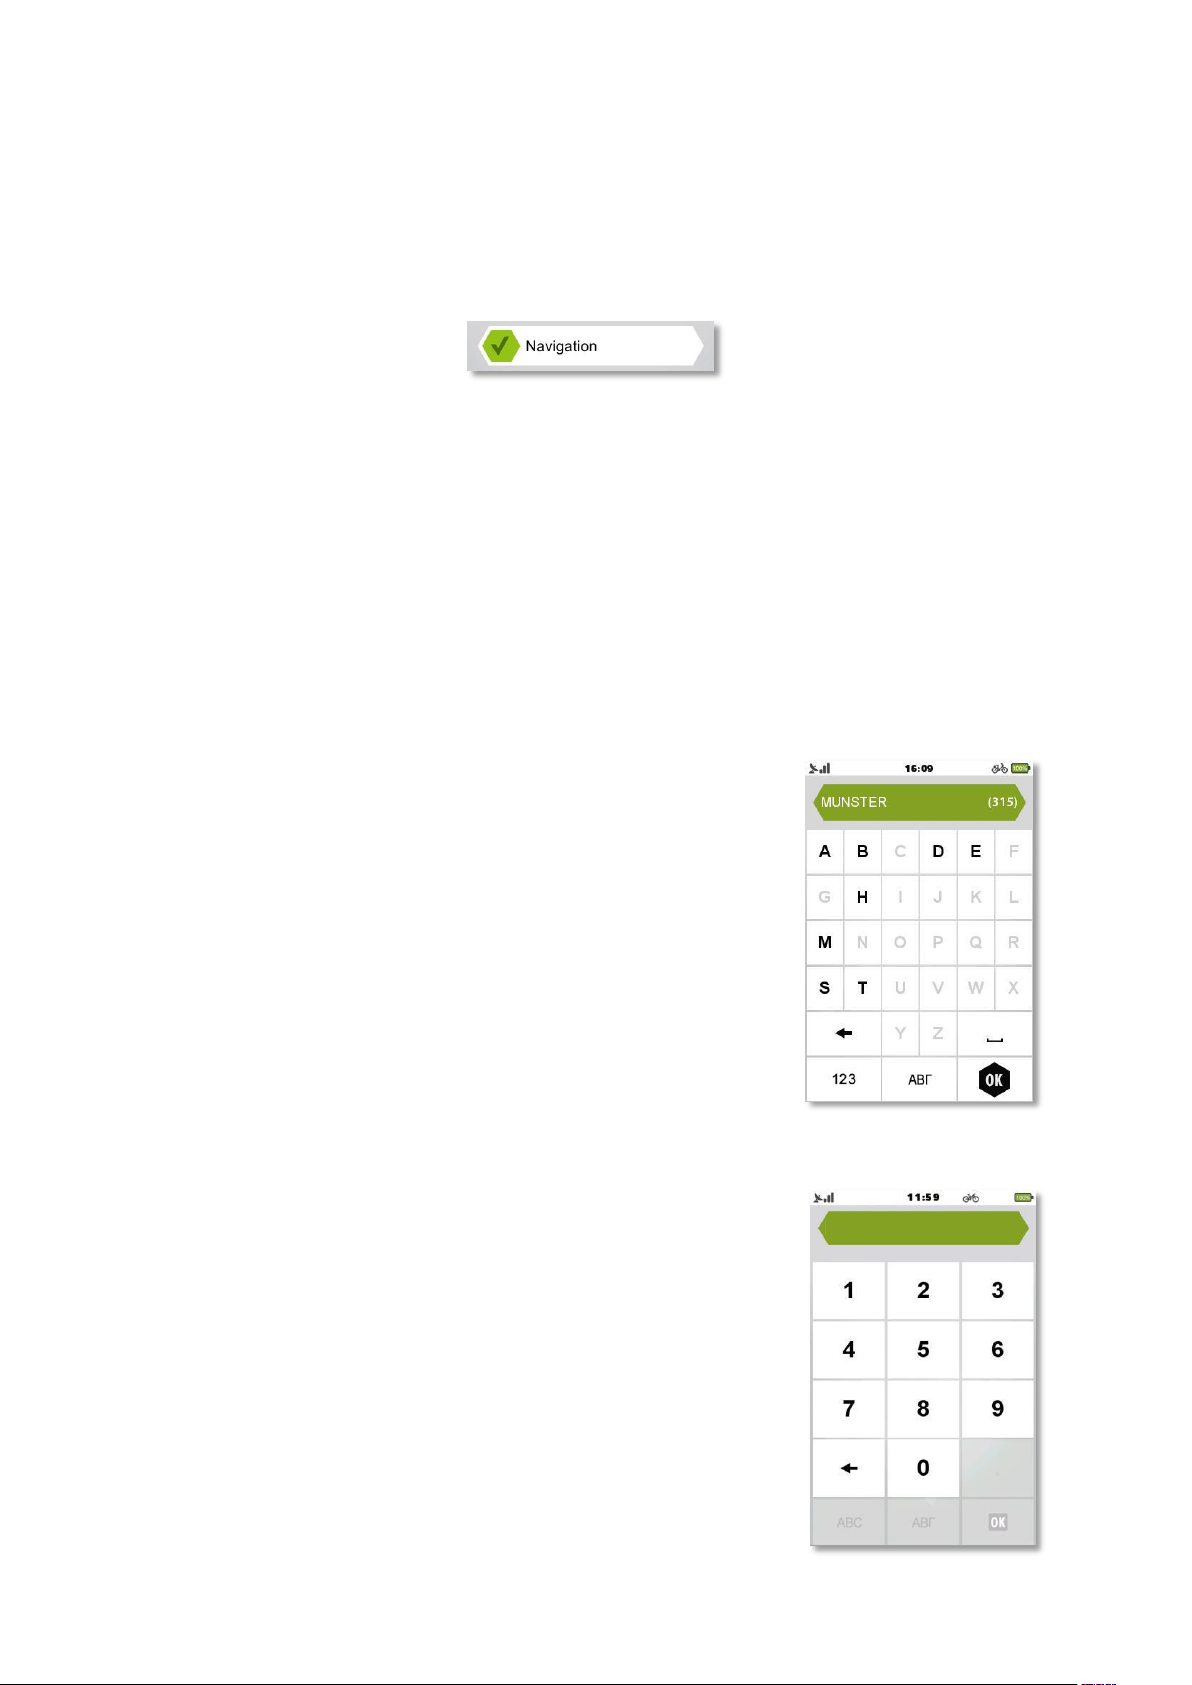
Virtual keyboards and numeric pads
As mentioned earlier, the main input method is via the touch screen. This means that an on-screen
keyboard (OSK) and numeric pad is needed for proper input possibilities.
ABC keyboard
The keyboard is for any letter-based input. The alphabetic keyboard in
the software does not contain special characters, but they can be
substituted with their simple versions.
This means that if you want to search for the city of ‘Münster’, you can
simply type ‘Munster’ to find it.
The keyboard only allows possible characters to be tapped.
Numeric Pad
Entering numbers is possible via the numeric pad.
It is also available from the ABC keyboard by the button ‘123’.
8
Page 9
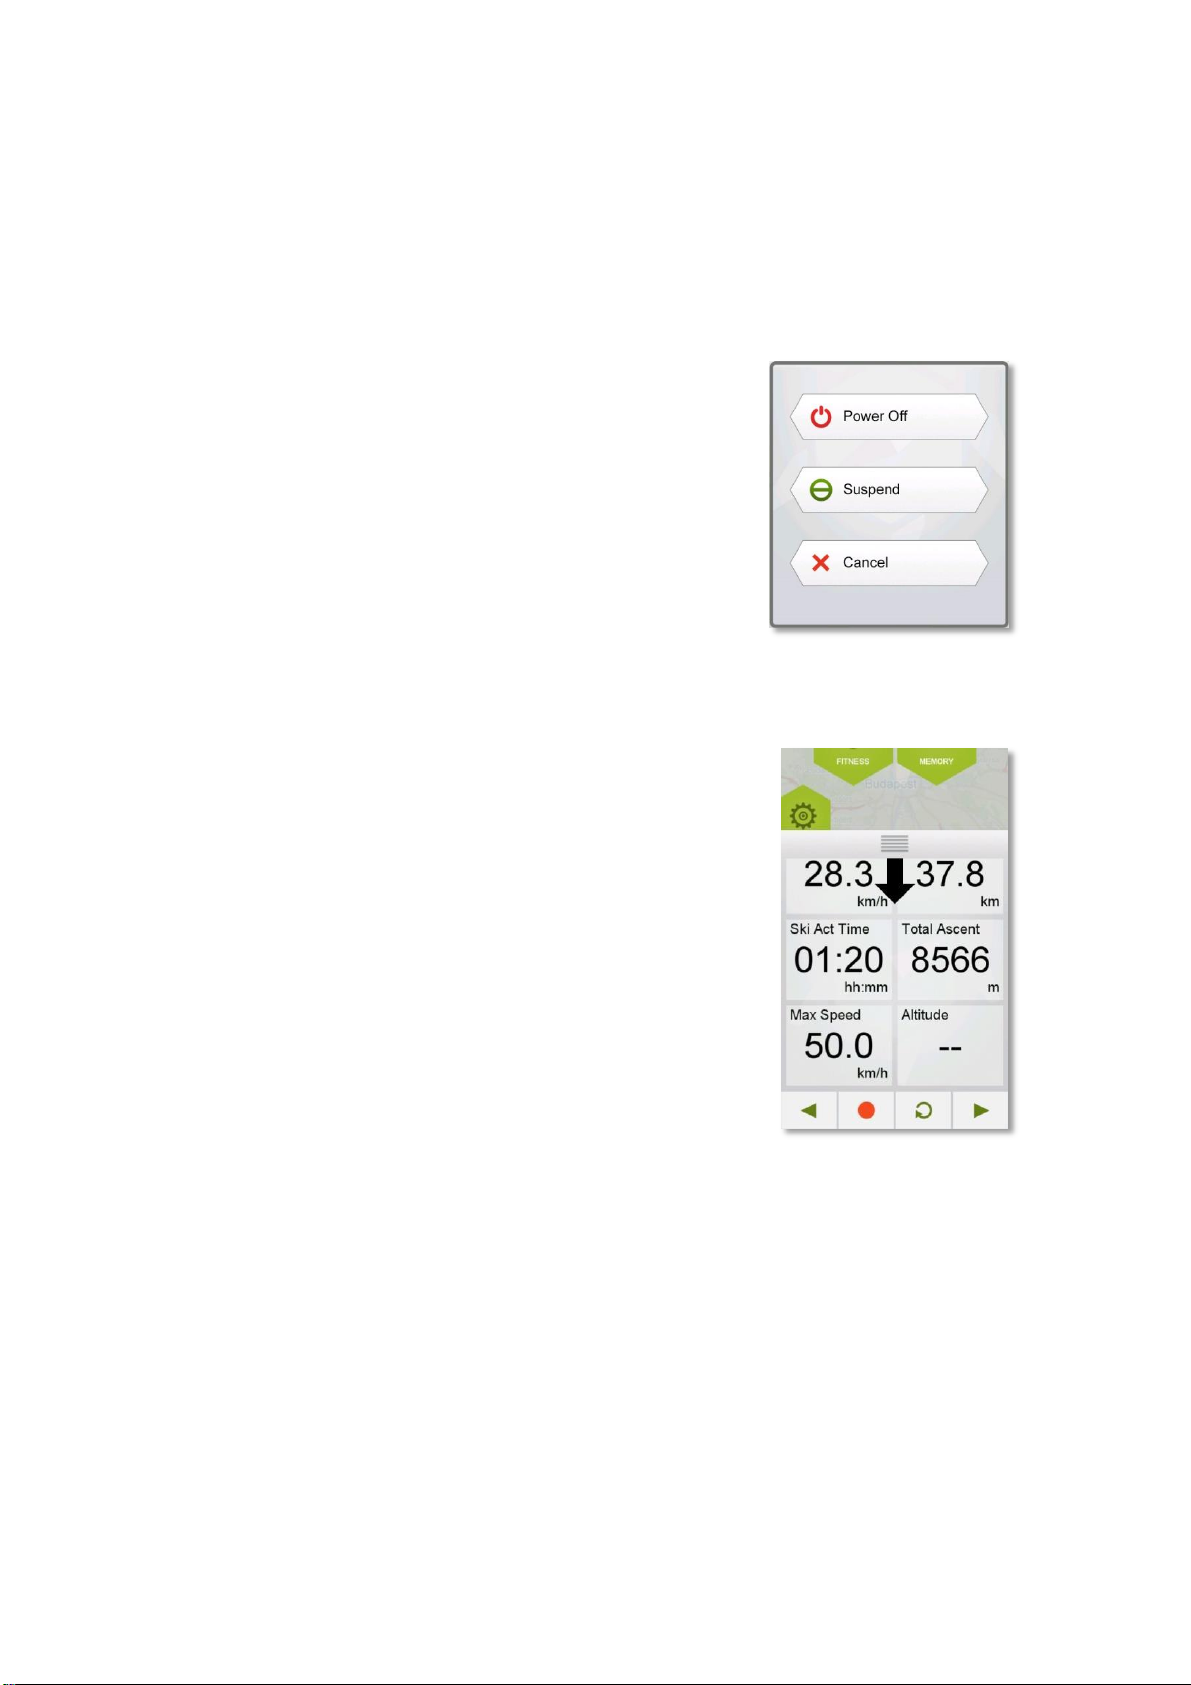
Power management
Power management is for saving power for the device. If no movement is detected and there is
no ongoing recording, the device will ask whether to suspend or power off after the set time
(default is 10 minutes).
Suspend popup:
If suspend is chosen, the device will go to sleep mode, so that the
ongoing recordings and processes will be paused, but they can be
continued by waking up the device via the power button. If power
off is selected, these processes will be ended, for example a
recorded track will be saved with and end point where the device
has been turned off.
Swipe function
Swipe function is the right tool for fast and accurate navigation
inside our software. This function allows the user to get back to
previous screen(s) easily.
The method is to tap on the top of the screen and with a pulling
move, move down until previous screen is reached.
Swipe function is by pulling down the previous screen from the top.
If you decide to stay on the same screen, just don’t finish but
reverse the movement.
Note: This function is disabled on the main screen.
Page 10

Page 11
2. Starting the device
2.1 First Startup
After the boot of the device and the initialization process have completed, the language
selection screen appears.
Tap on a language to choose your own language, then tap the OK button ( ) on the
bottom to move to the next screen.
Supported languages are: Czech, Danish, Dutch, English, Finnish, French, German, Italian,
Hungarian, Romanian, Norwegian, Polish, Portuguese, Slovenian, Spanish and Swedish.
See 3.9.6 Language for details.
After selecting a language, the End-User License Agreement will be shown.
After reading and accepting the EULA by pressing OK ( ) on the bottom of the screen,
date & time screen will be shown.
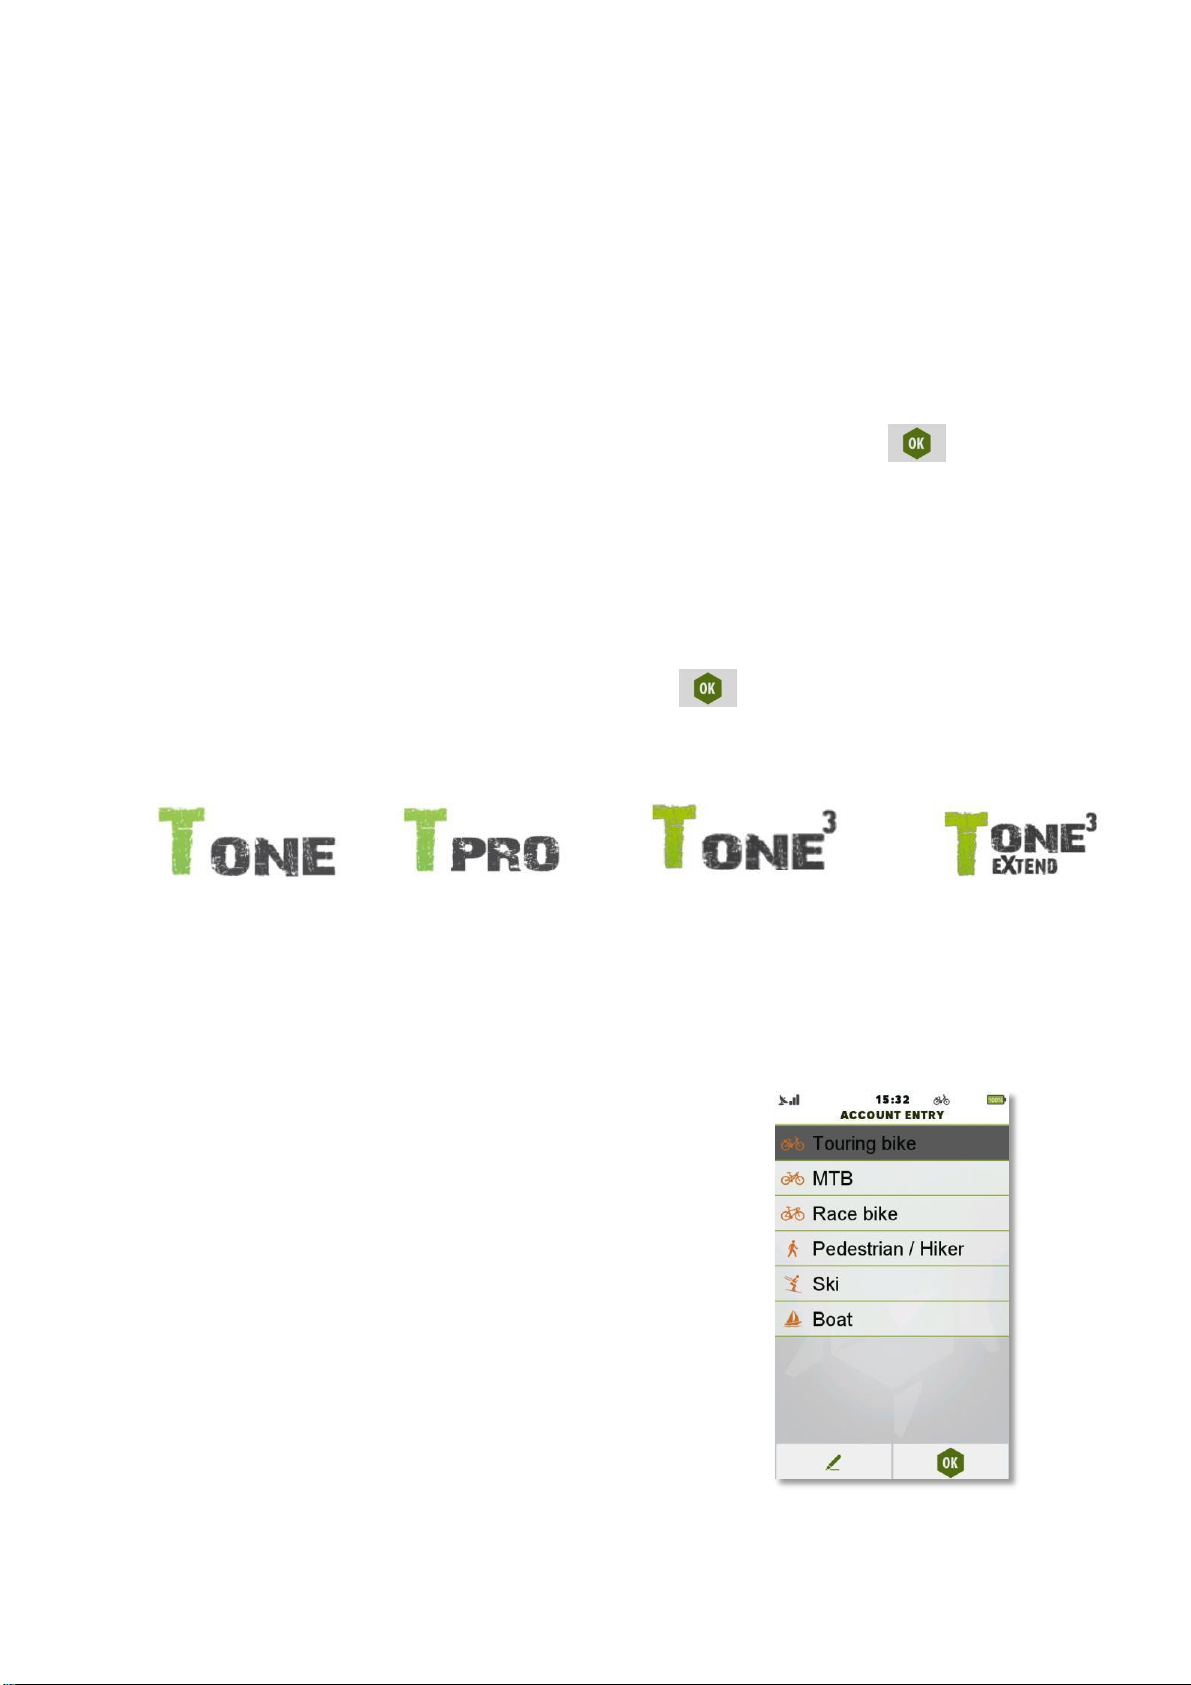
TEASI ONE & TEASI PRO & TEASI ONE3 & TEASI ONE3X
It is also essential to set up your own Profile or select a preset
one, so Teasi will be able to navigate using the most preferable
roads for you.
Preset Profiles:
See 3.9.4 Accounts for details.
Page 12
Affects all models
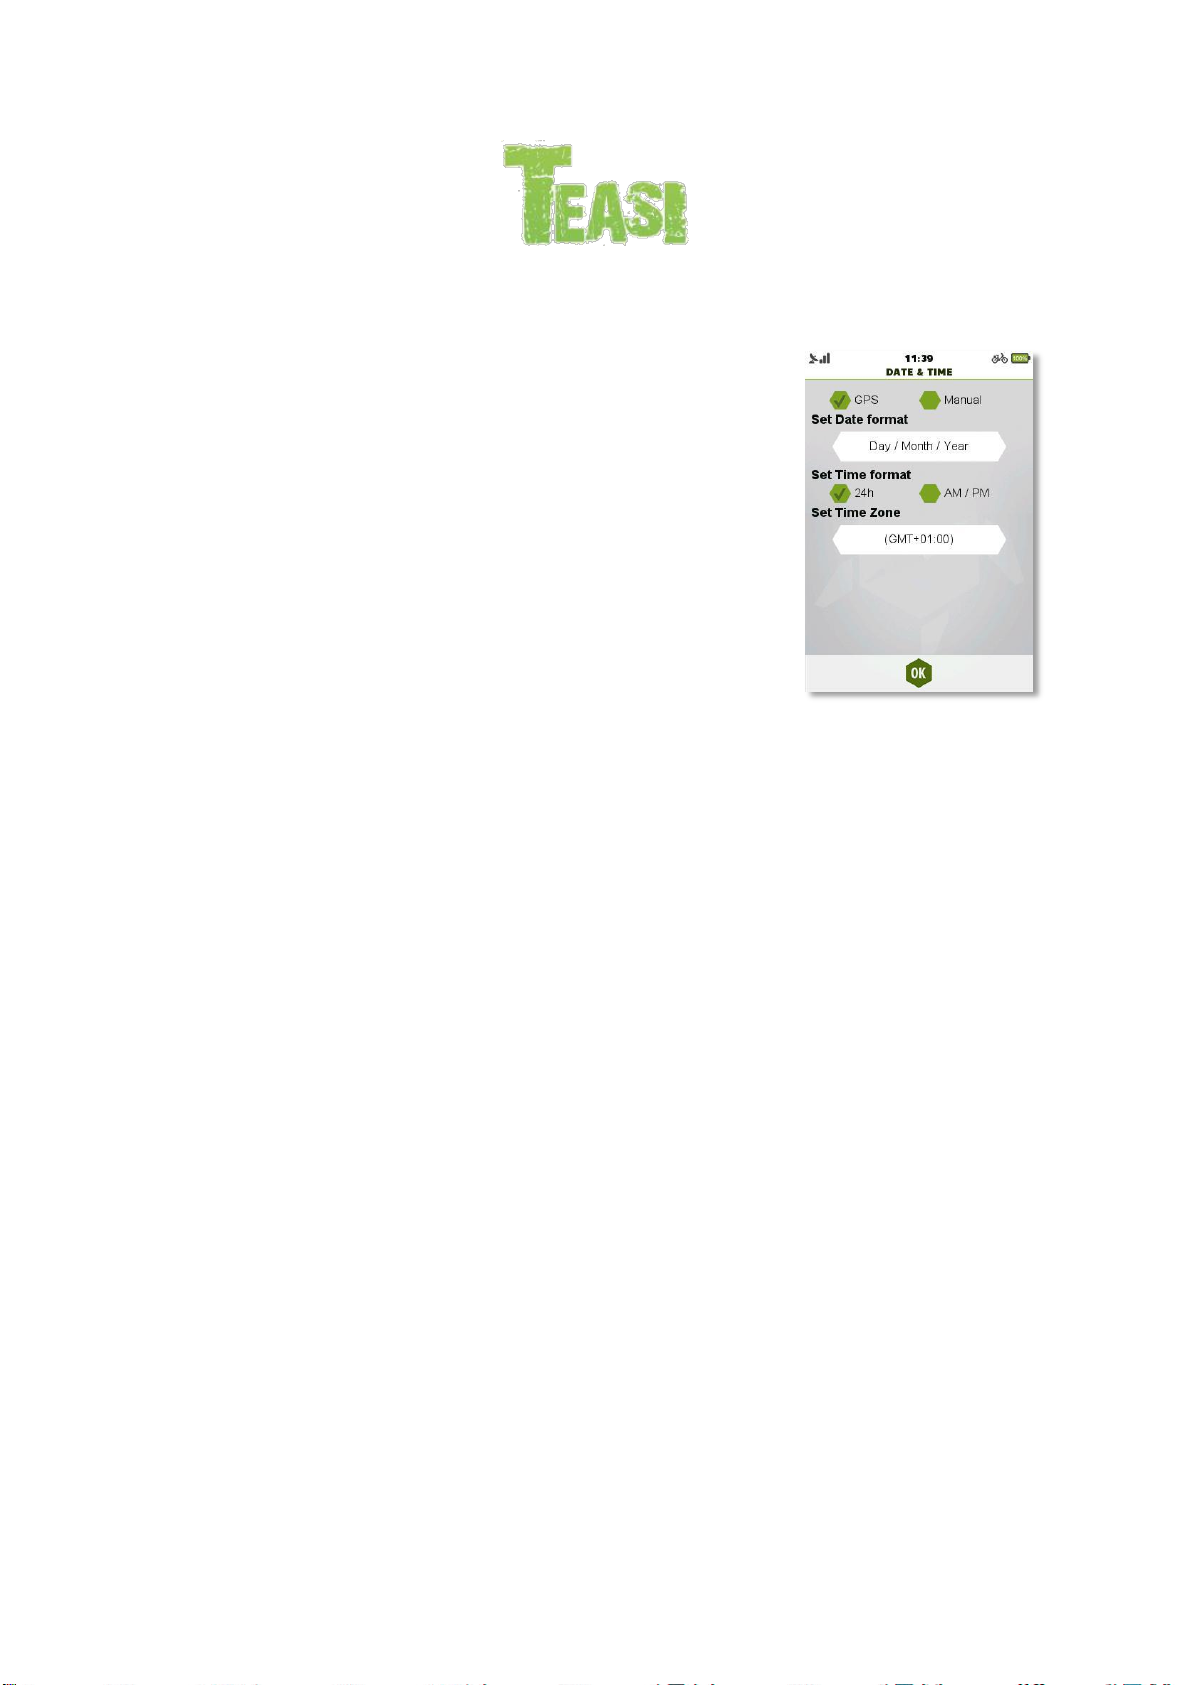
In the next step, Date and Time format and value can be set by
tapping on the fields.
Time and Date can be automatically set using the GPS signal.
Select your preferred Date (Day / Month / Year, Month / Day / Year, or
Year / Month / Day) and Time (AM/PM or 24 hours) format and if
manual settings are chosen, set the Date and Time.
2.2 Easy Mode – Full Mode
TEASI ONE & TEASI PRO & TEASI ONE3 & TEASI ONE3X
At the end of the first startup, operating mode can be selected. The options are Easy mode and Full
mode.
The Easy mode is a compact layout with the essential features of the Teasi software, which makes
the device a simpler, yet more effective and more comfortable tool to use. Within this mode, you
can access only Map, Search, Memory (and some limited, easier Settings) features.
Full mode contains all the features which can be set again by selecting Full mode in the ‘Settings –
System’ menu.
In search, the Coordinates and Tours features are disabled as the most complex destination modes.
Tour navigation can still be started from Memory My Tours, or Imported Tours.
When startup procedure is completed, the main menu will welcome you, with a clock, a GPS signal
icon and battery strength indicator on the top of the screen.
Page 13
2.3 Full Menu – Custom Menu
TEASI PRO
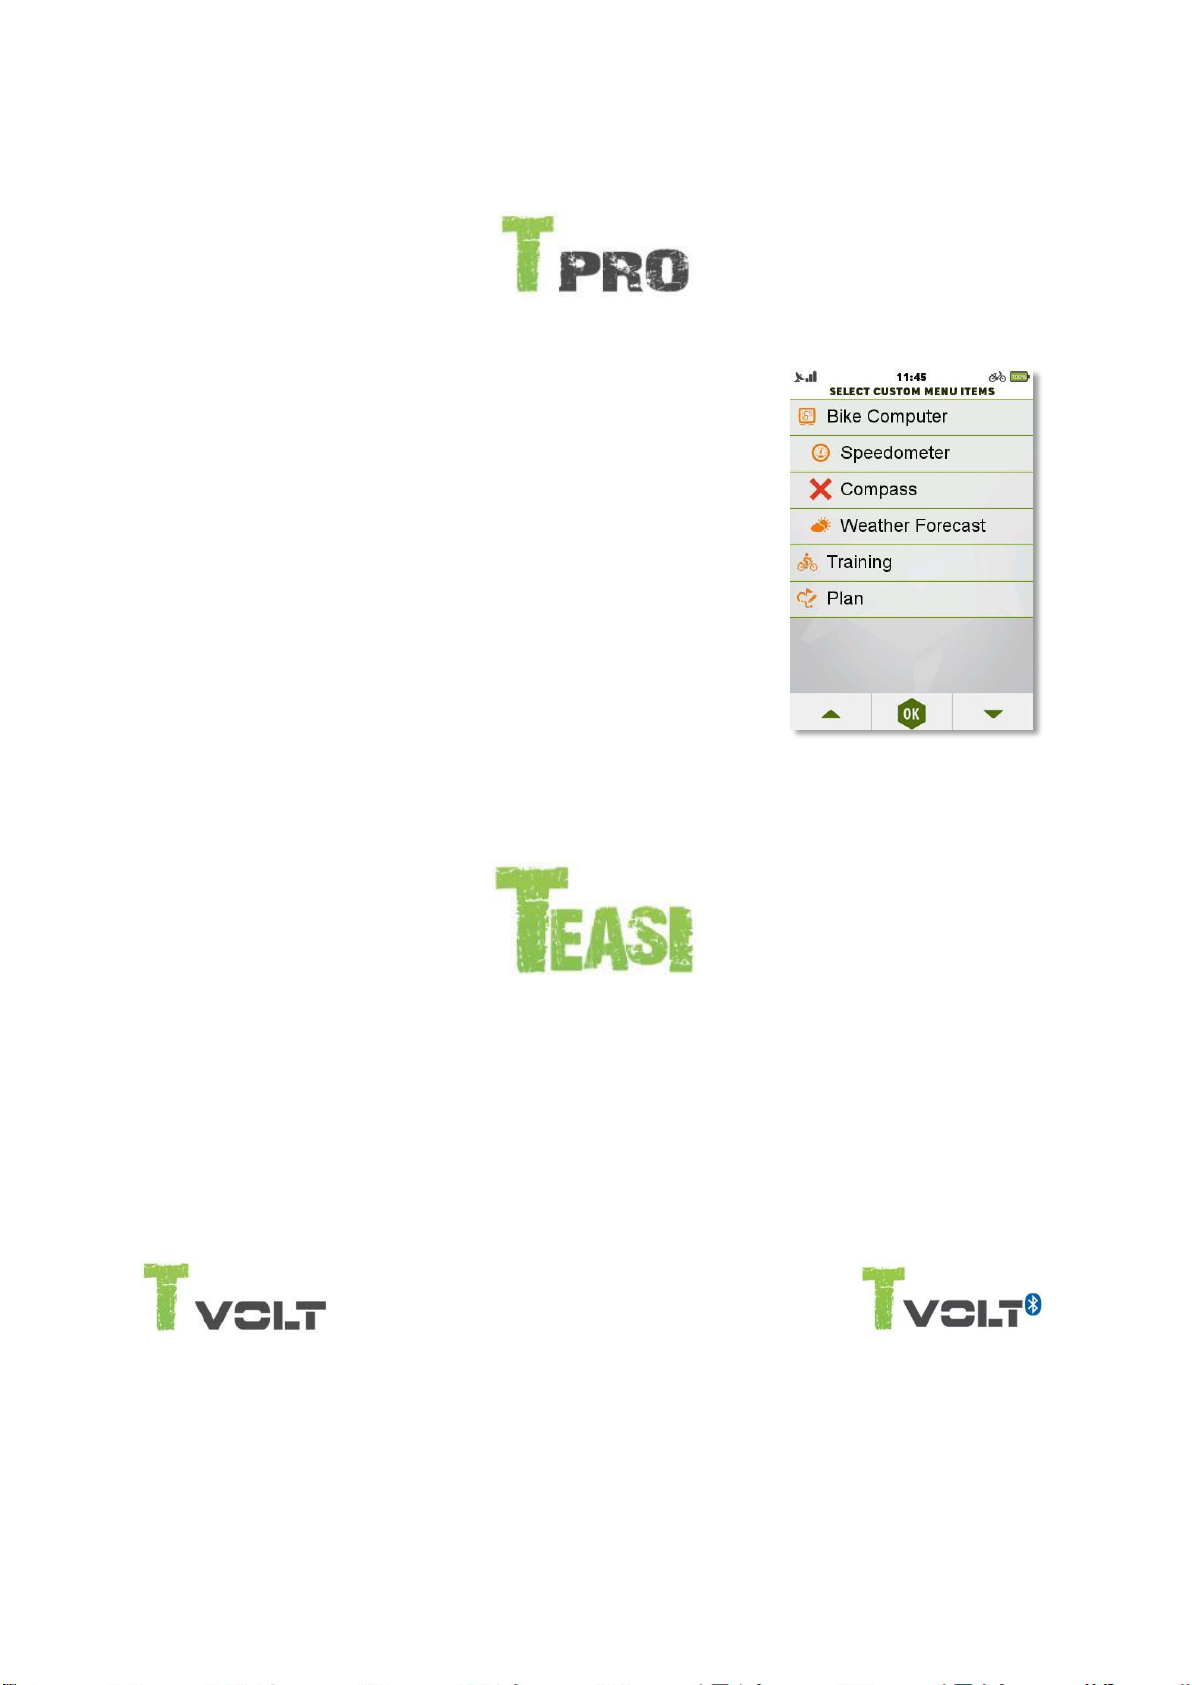
At the end of initial startup and in System settings, you can change
between Full menu and Custom menu. Full menu contains all
available features on the device and Custom menu can be set to show
only the essentials, thus gaining speed and comfort in everyday use of
the device.
Select ‘Enable Custom Menu’ by ticking it, then tapping on ‘Select
Menu Items’. By default, Custom mode contains all available features.
Tap on a menu item to select / unselect it. If a red ‘X’ is shown next to a
feature, then it will be hidden in the Main Menu.
2.4 Second and further startup
Affects all models
After the initial startup, the device boots directly into the main menu.
You can change the values set in the first startup in the settings submenu, covered later in the
manual.
2.5 Connection to E-Bike
TEASI VOLT & TEASI VOLT BT
Since Teasi Volt and Teasi Volt BT are especially made to work with connections with E-Bikes, menu
behavior is set to adapt to both connected and not connected situations.
In addition to changing the main menu, the status bar is also changed in style and provided
information.
Page 14
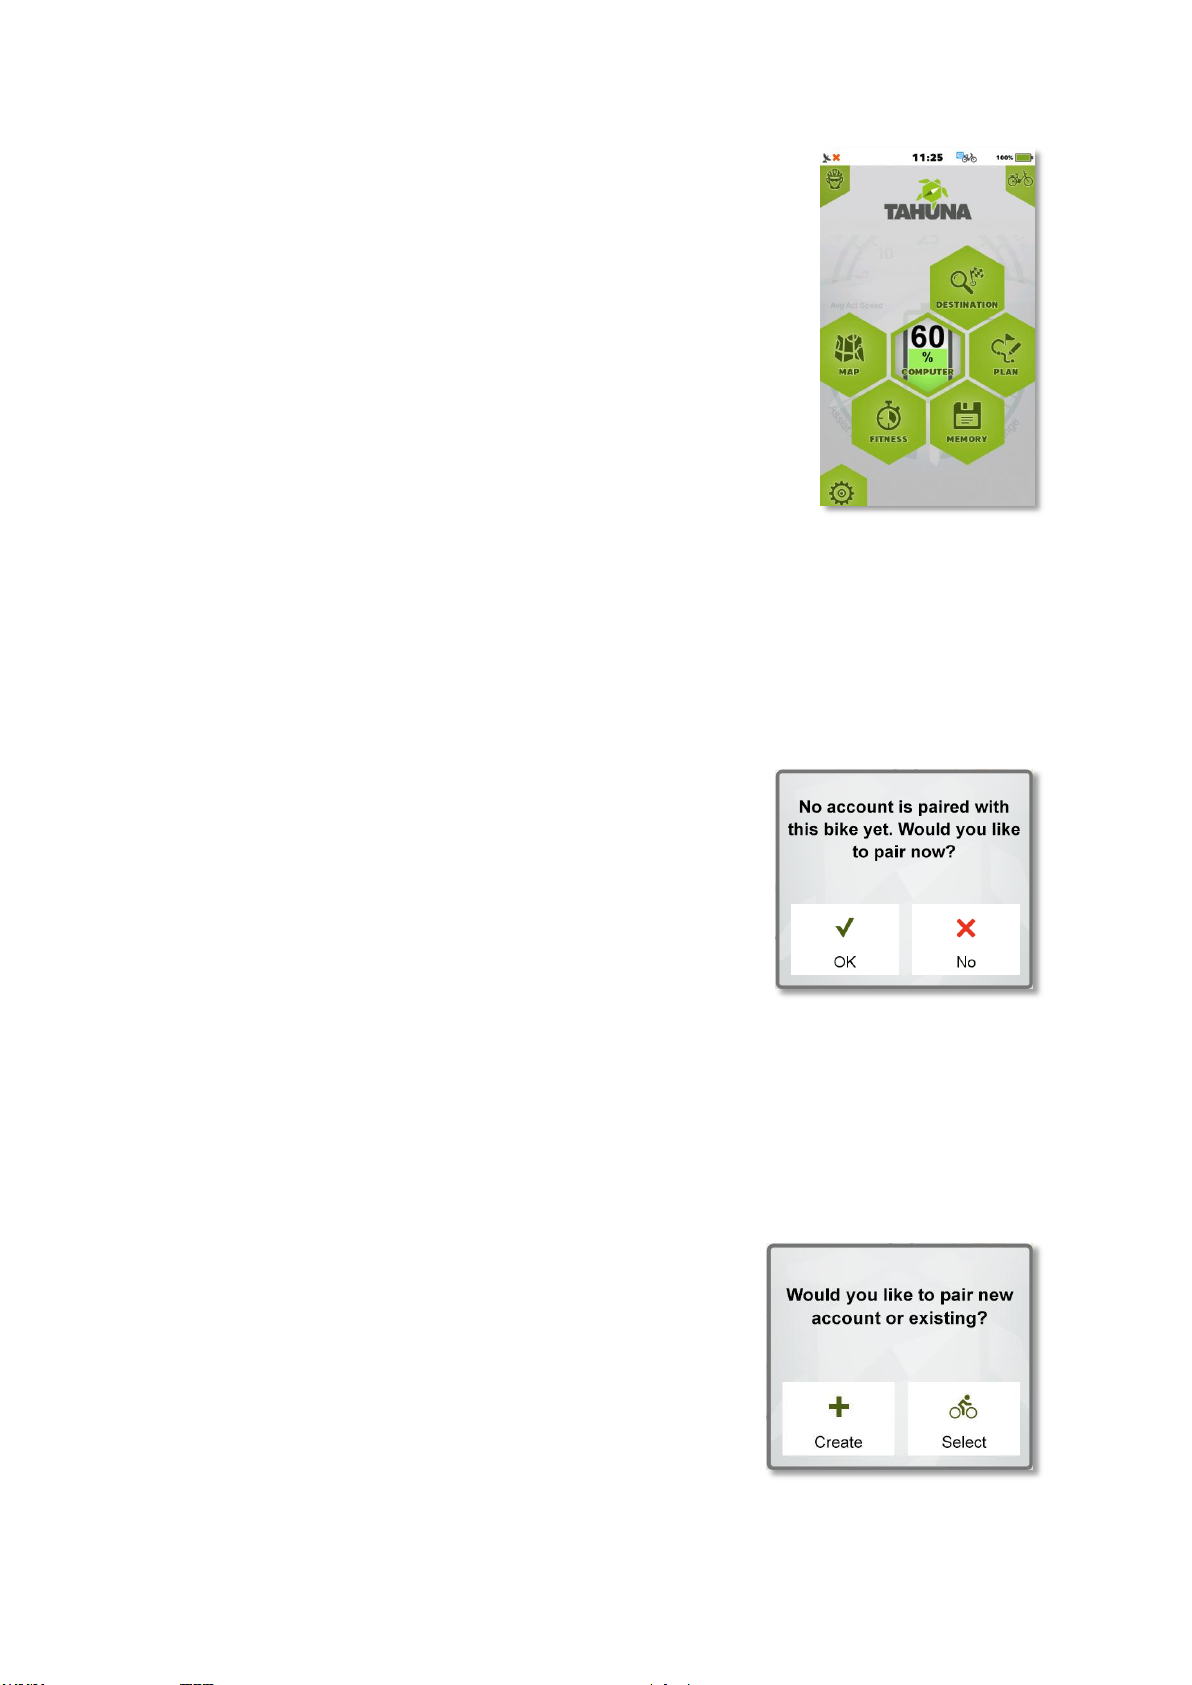
Menu, status bar and Computer info with connected E-Bike:
On the status bar, the E-Bike profile icon is shown and the battery
percentage shows the E-Bike battery status, not the status of the device.
Note: Teasi Volt device is charging while connected to E-Bike.
Computers are also expanded to handle E-Bike related information – explained in section 3.8
Computer.
2.5.1 Setting up E-Bike account
When E-Bike is connected to Teasi Volt for the first time, device will
notify that this E-Bike is not currently paired to any profile.
No Account paired:
Selecting ‘No’ will not pair any account to this E-Bike.
In this scenario, E-Bike pairing can be done by pressing in ‘Pair’ under the preferred bike account in
Settings Accounts.
Selecting ‘Yes’ there will be two options:
Create or Select Account to be paired.
Pressing ‘Create’ will create a new bike account and automatically
pair the connected E-Bike to it.
After the account is created, its attributes can be edited. When
account is configured, press ‘OK’ to save the changes.
Pressing ‘Select’ will show the accounts that can be used for
pairing the currently connected E-Bike.
Page 15
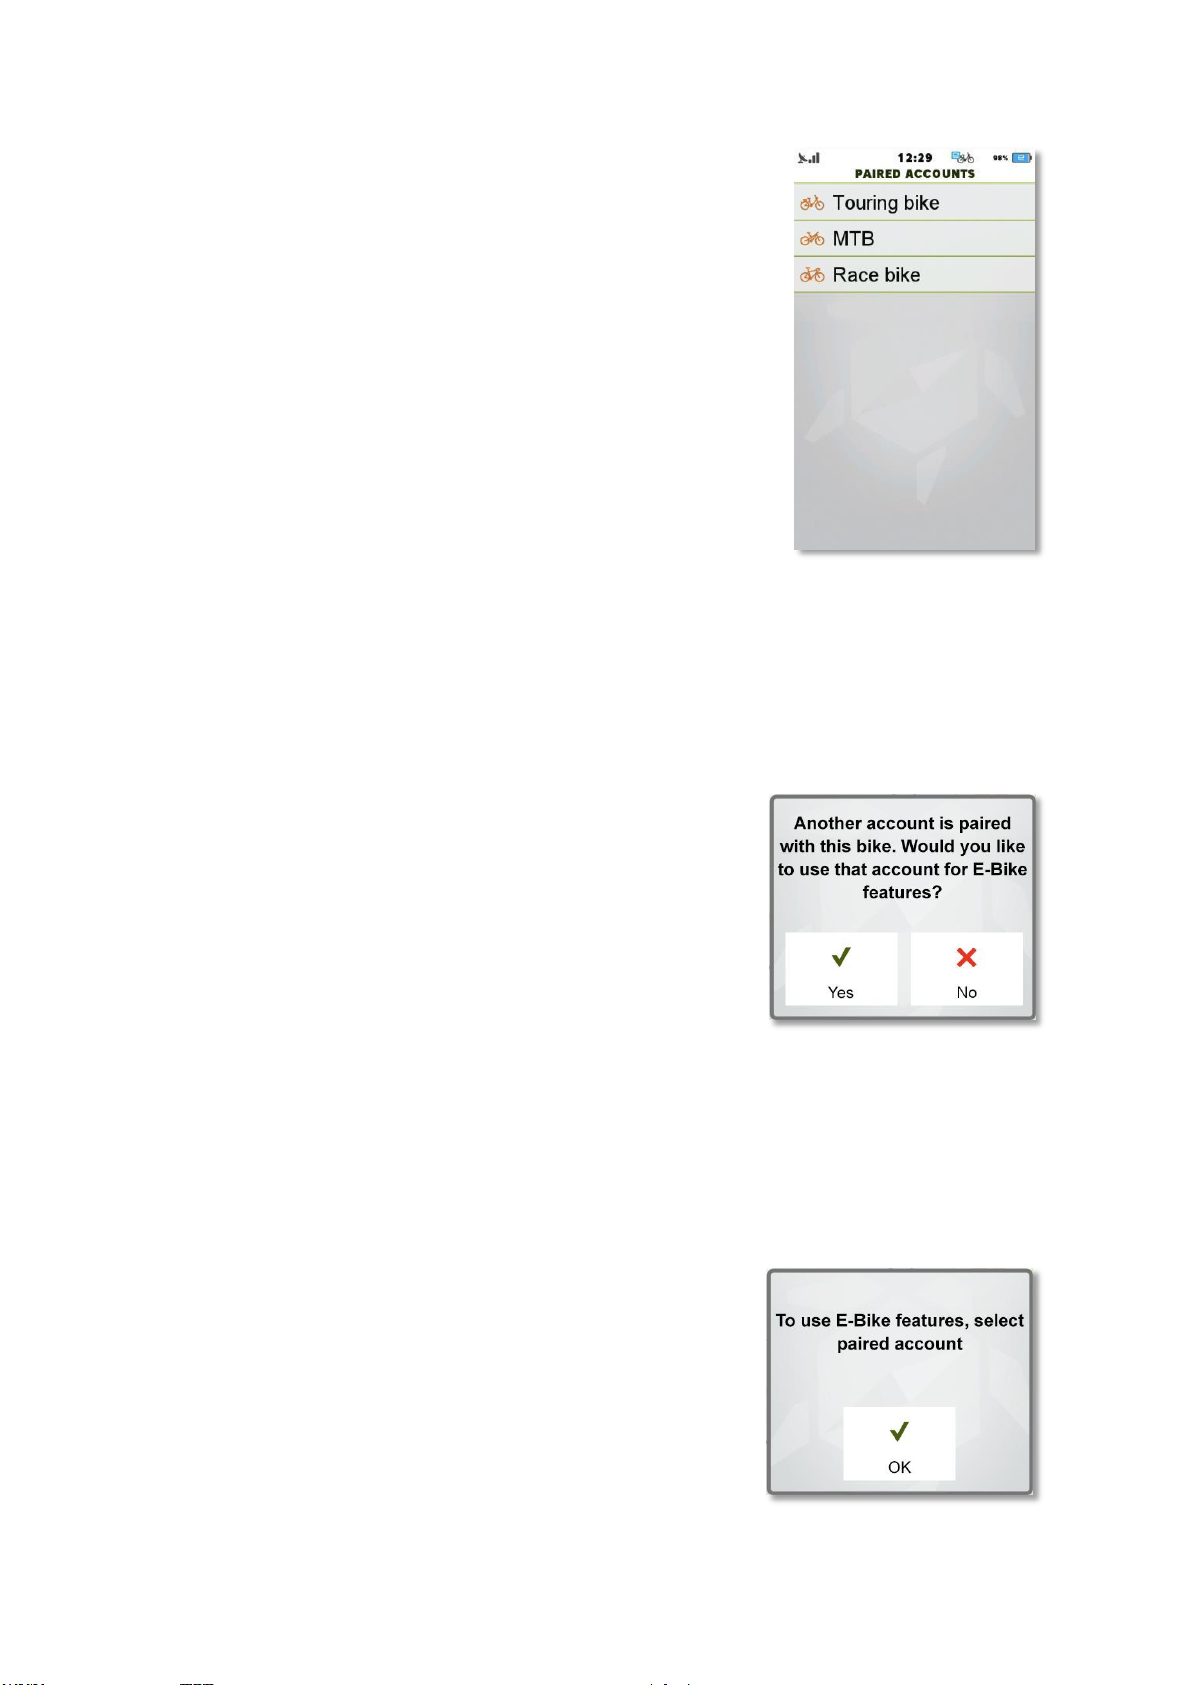
Available accounts for pairing E-Bike:
When account is selected, Teasi will pair it with the current E-Bike.
From this point on, bike will be recognized and Teasi will offer paired profile for use. When a
different account is already paired to Teasi Volt when connecting the E-Bike, the device will inform
about this.
Another account is paired:
When there are multiple accounts that are paired with the bike, a list will be shown with all paired
accounts.
When only 1 account is paired and ‘Yes’ is selected, Teasi will change to that account.
Selecting ‘No’ will keep the current functioning. Teasi will inform to use paired account for E-Bike
functionality.
Select paired account:
Page 16
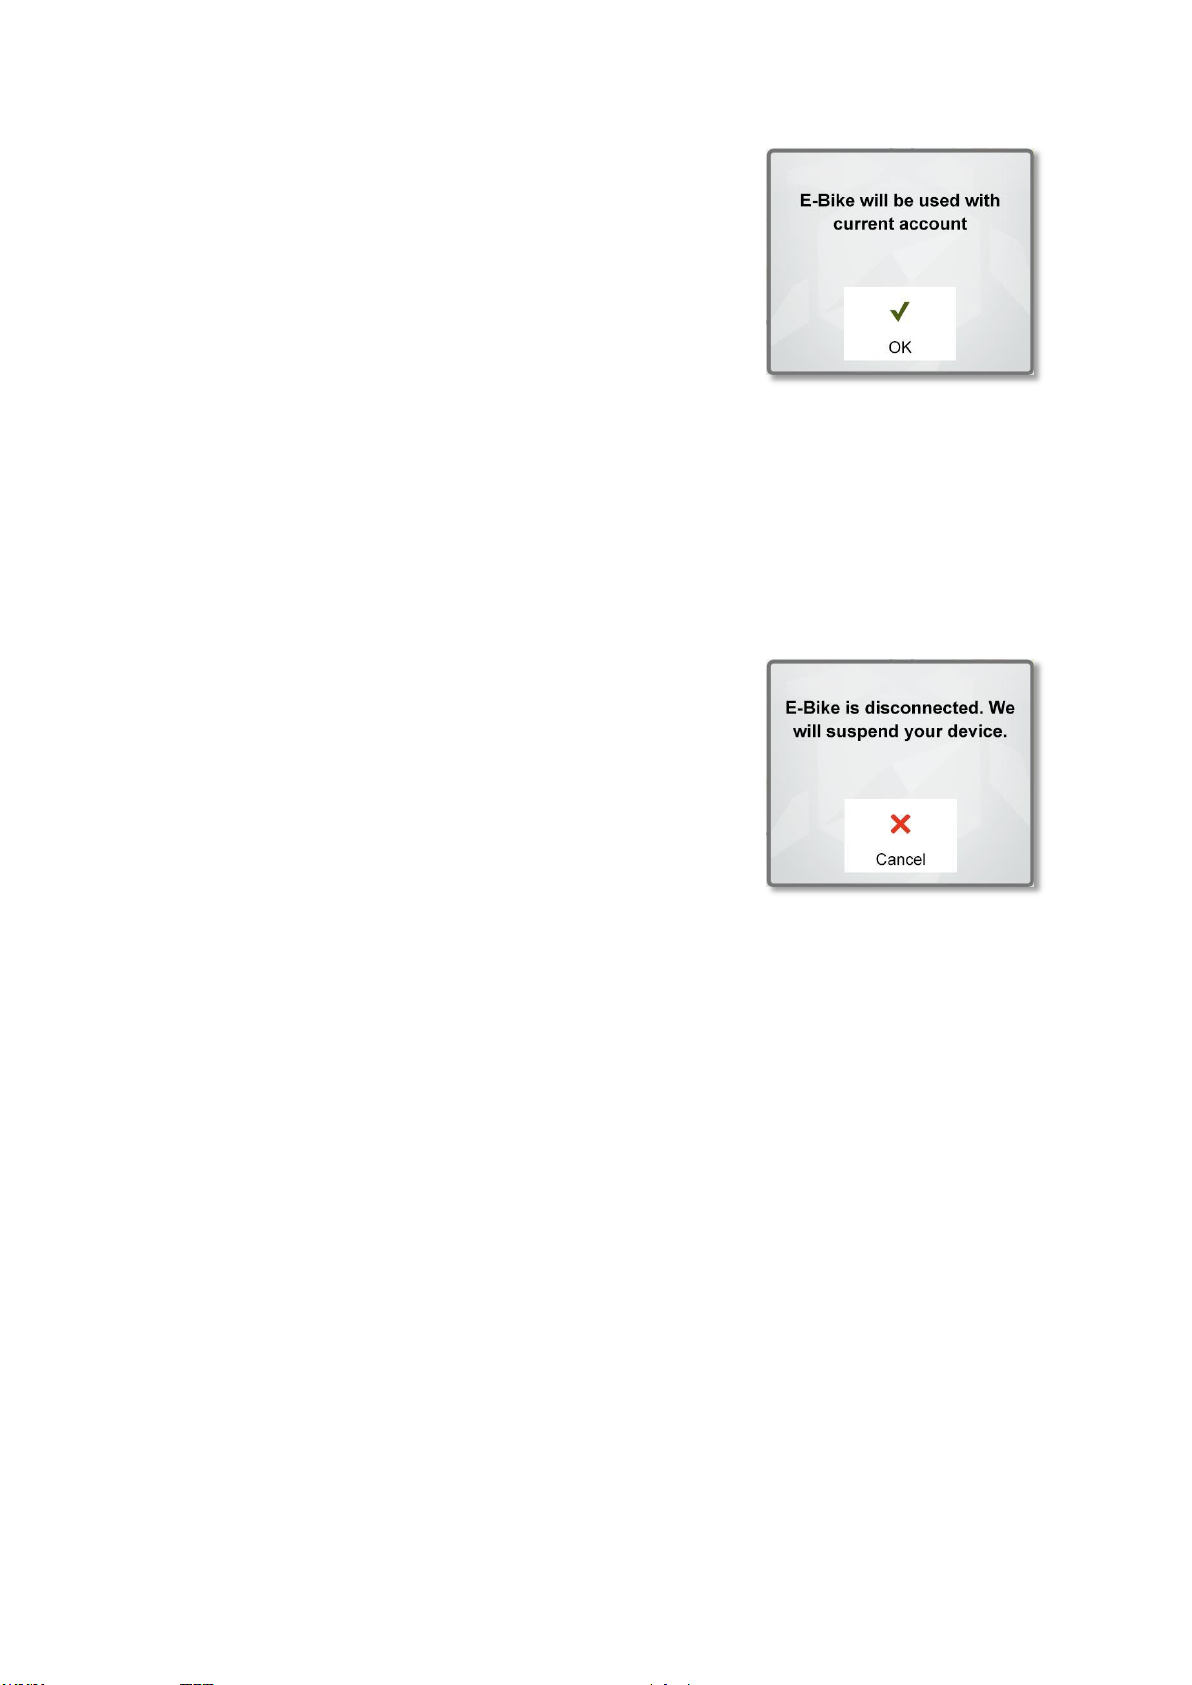
When paired, profile is in use and bike is connected, or Teasi
changed to the correct profile, Teasi will inform in a pop-up.
E-Bike connected and functioning correctly:
This pop-up can be dismissed by pressing ‘OK’, or it is dismissed
automatically after 10 seconds.
2.5.2 Troubleshooting for E-Bikes with Brose systems
In some cases, it may happen that the Teasi Volt is unable to connect with an E-Bike, building Brose
systems, especially if the Teasi Volt is connected before the bike is turned on.
E-Bike connection was not successful:
The problem usually can be recognized, because the bike lamp is starting to flash with high
frequency when the connection should be established.
In this case, please:
1. Remove Teasi Volt from cradle.
2. Power off Brose bicycle by long pressing the Power button on battery unit.
3. Power on Brose bicycle by pressing the Power button on battery unit.
4. Put Teasi Volt back on Brose bike.
5. Connection should be set up successfully.
Page 17
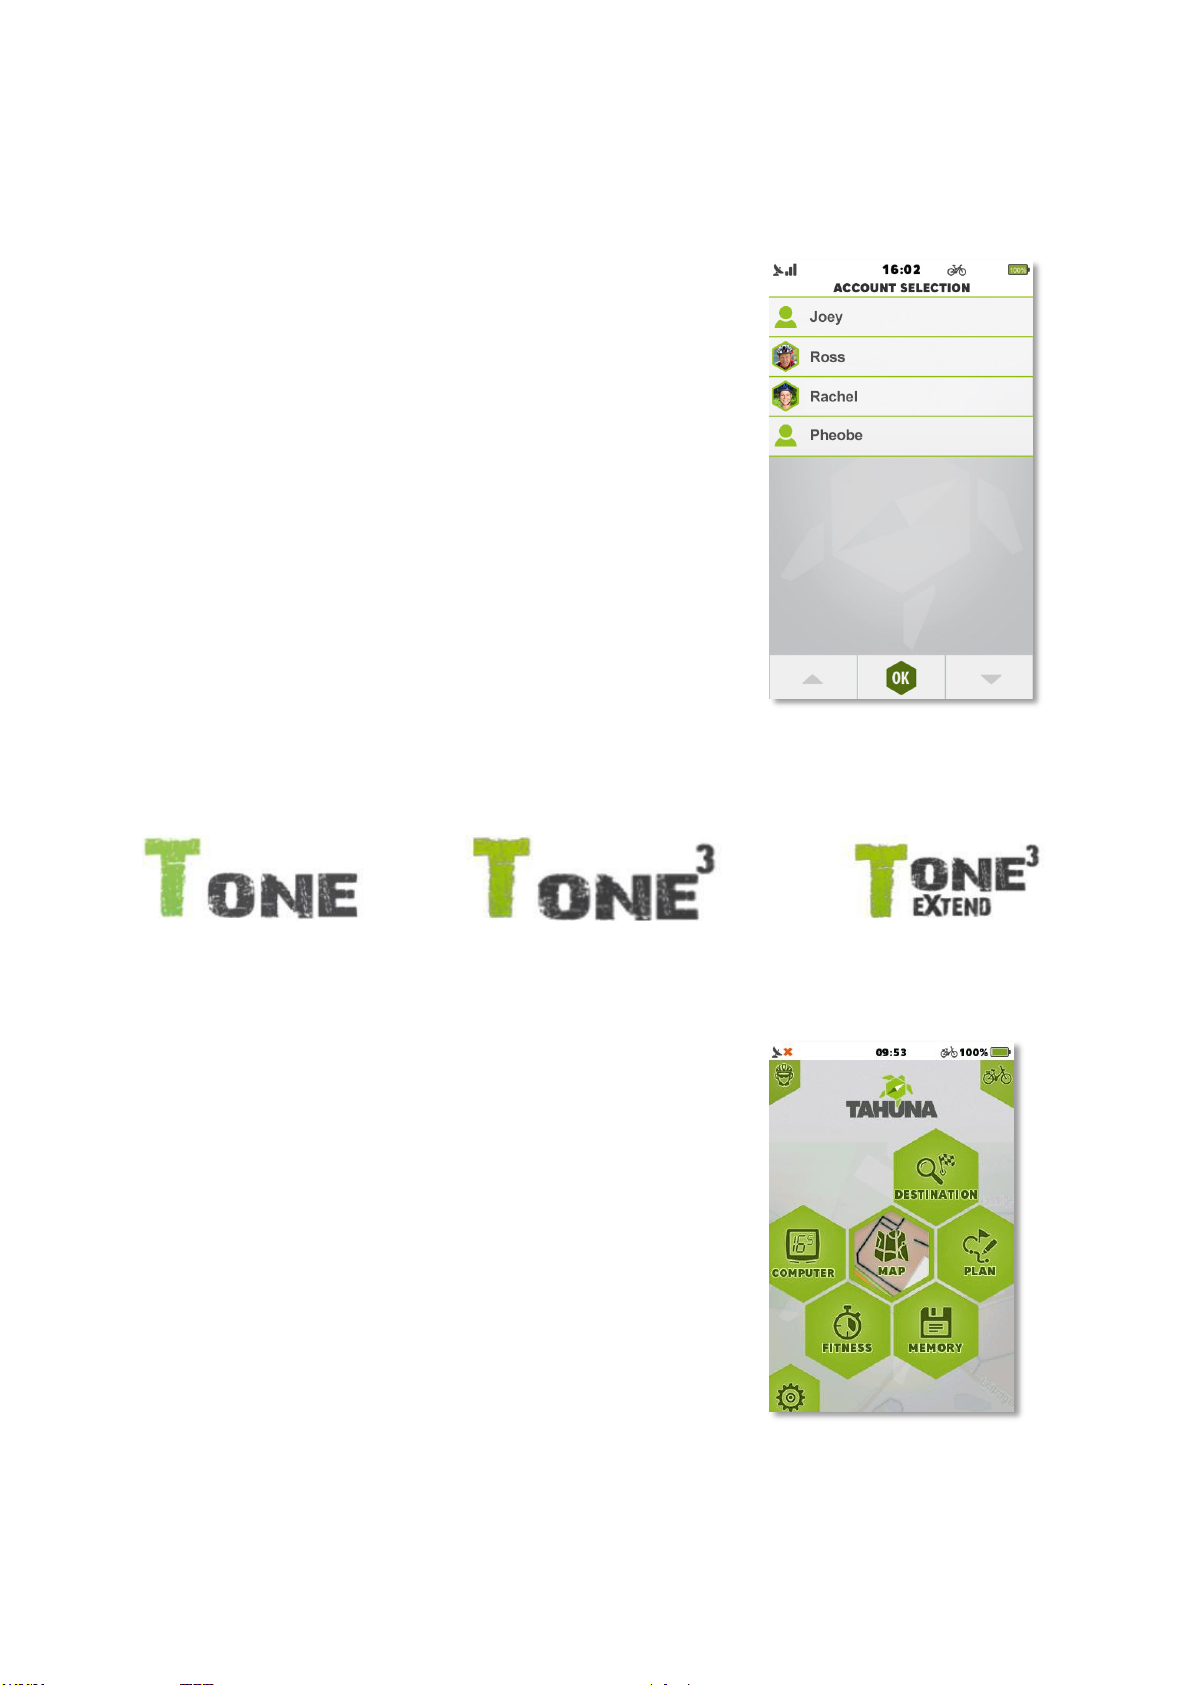
3. Main Menu
From the Main Menu, you are able to access every feature of Teasi.
Quick profile selection can be reached from the upper right corner
of the screen. Pressing Tahuna logo will open up an info screen
about the device’s version number and the developer company.
You can also change the account on the Tahuna device, which
helps to connect your device with the whole Tahuna World,
including Tahuna Smartphone Apps and Tahuna Tool for further
options and services, like sharing your Tours online.
On the Tool, you can view, copy and delete your Tours from the
cloud storage and into your device account. This feature will help
you also to share your tracks with other users.
You can create remove new accounts through the Tahuna Tool
and the Tahuna Smartphone Apps.
TEASI ONE & TEASI ONE3 & TEASI ONE3X
Main Menu of Teasi One:
Page 18
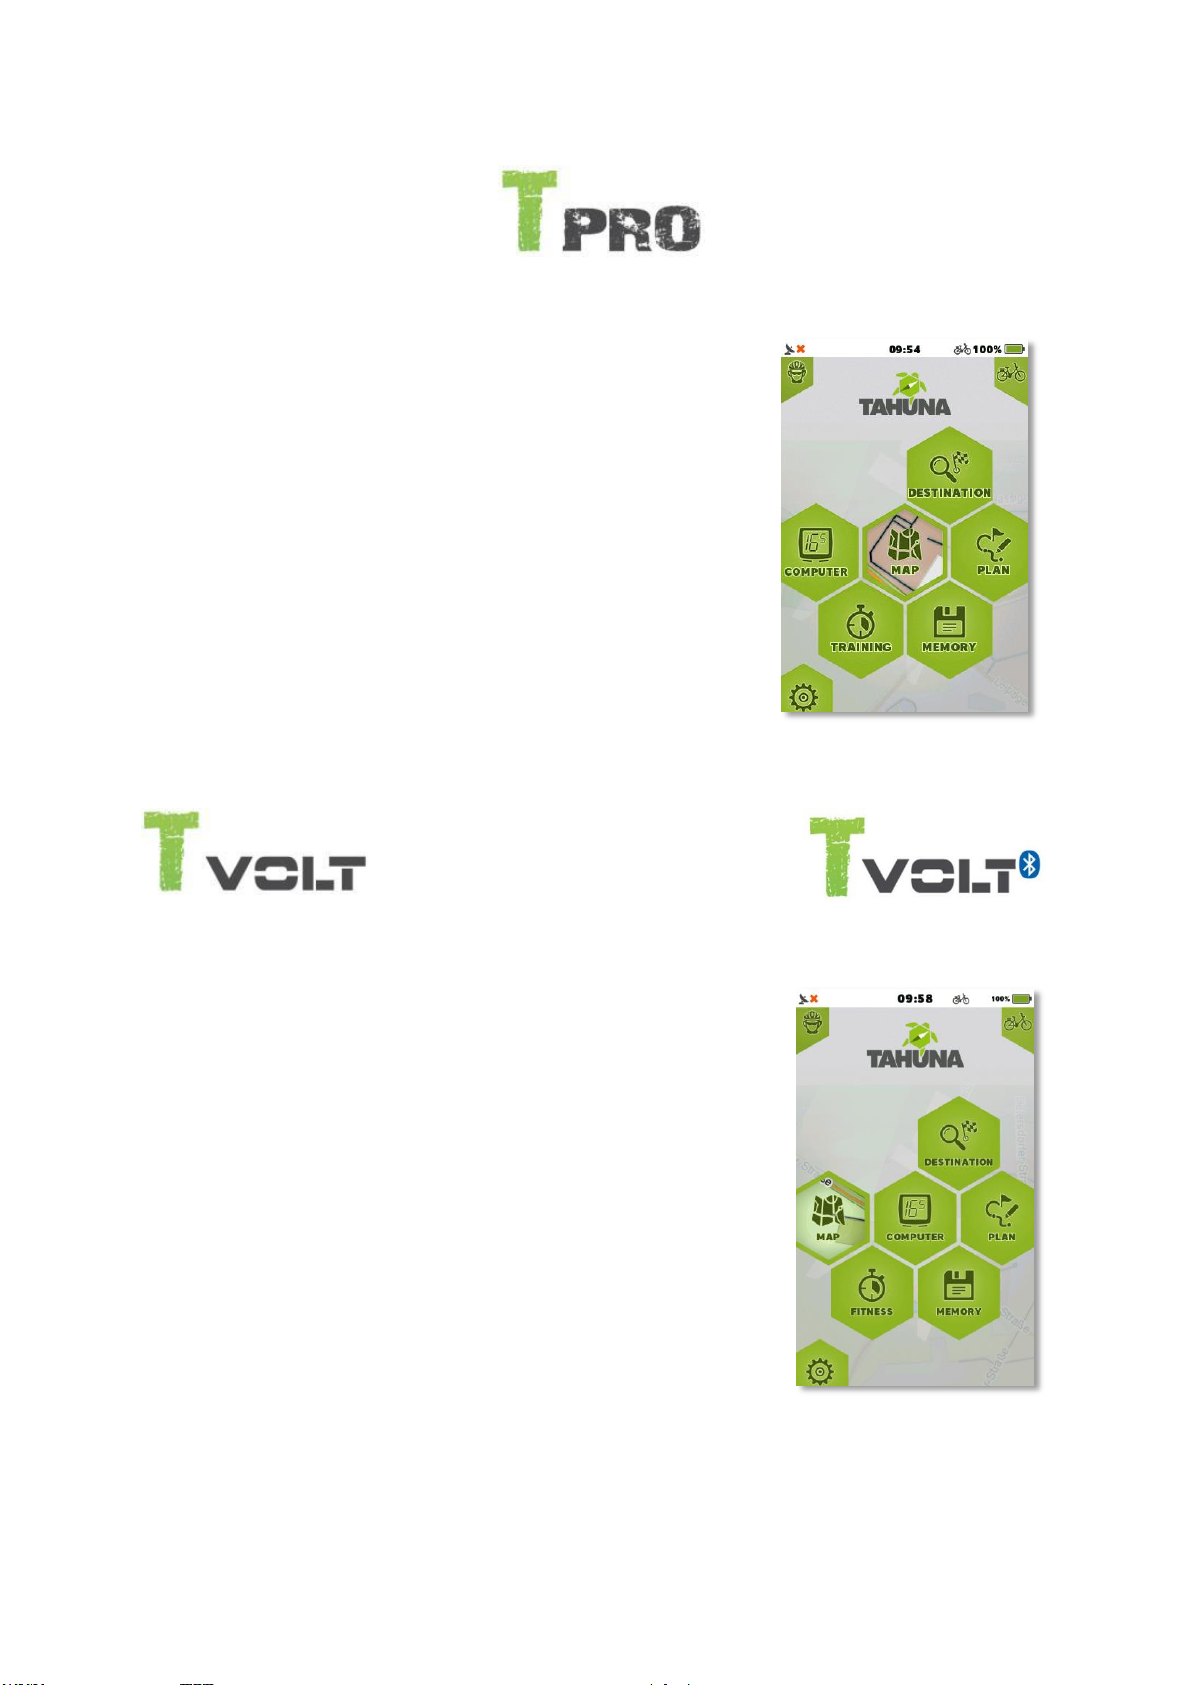
Main Menu of Teasi Pro:
TEASI PRO
TEASI VOLT & TEASI VOLT BT
Main menu in Teasi Volt is displayed in 2 different ways:
When there is no connection with E-Bike, the map button will be
transparent, displaying the underlying map of current location for
easier orientation.
Page 19
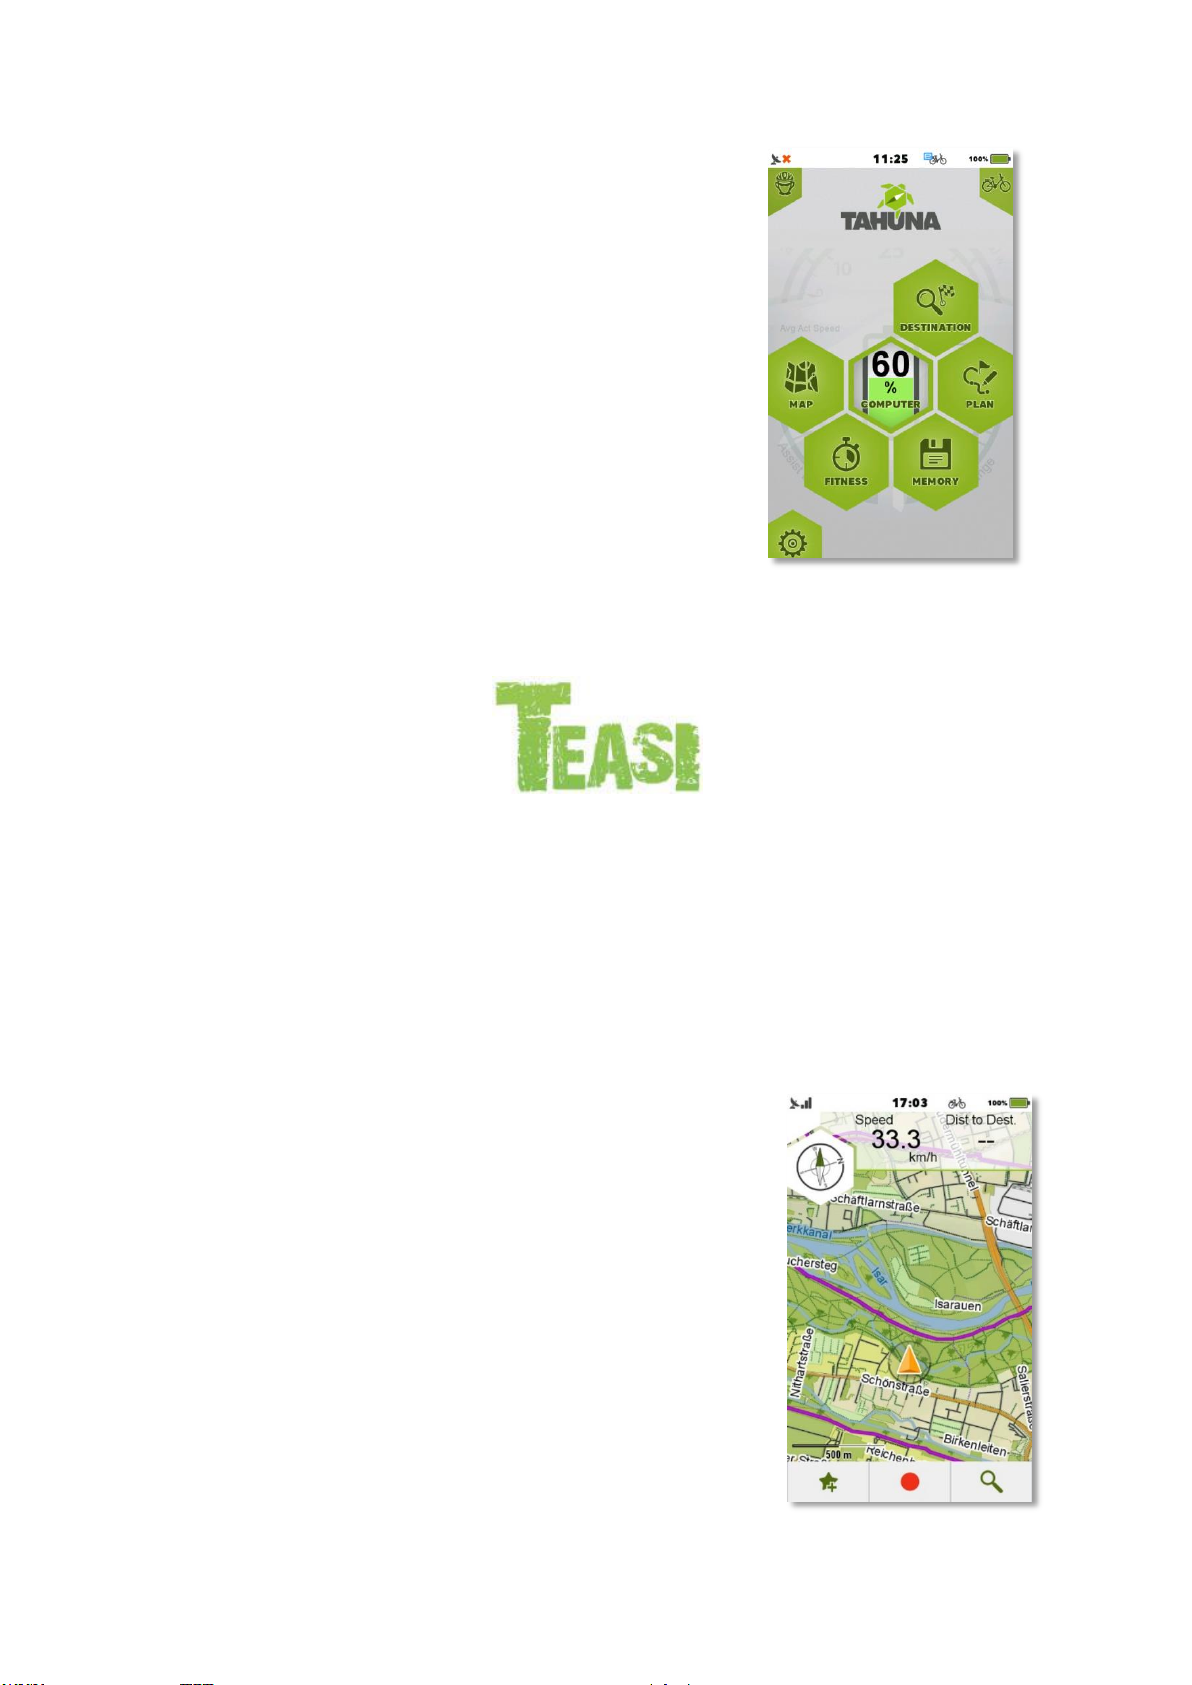
When there is a connected E-Bike transmitting data, the main
menu changes to provide information about the status of the EBike. In this case, the bike computer is transparent so battery
information of E-Bike is visible from the main menu.
Affects all models
In the next sections, you will be able to learn what you are able to do with this device and have the
most beautiful experience during your outdoor activity.
3.1 Map
Map is the core of Teasi, displaying the road network and your
current location on this map.
It also gives you basic information about your tour and during the
navigation, it shows you all the details about your routing.
When there is no on-going navigation, you can find a compass on
the top of the screen and two changeable fields: by default, they are
‘Speed’ and ‘Distance to Destination’ (They can be easily changed
by tapping on them and choosing from the upcoming list of available
computers.
Page 20
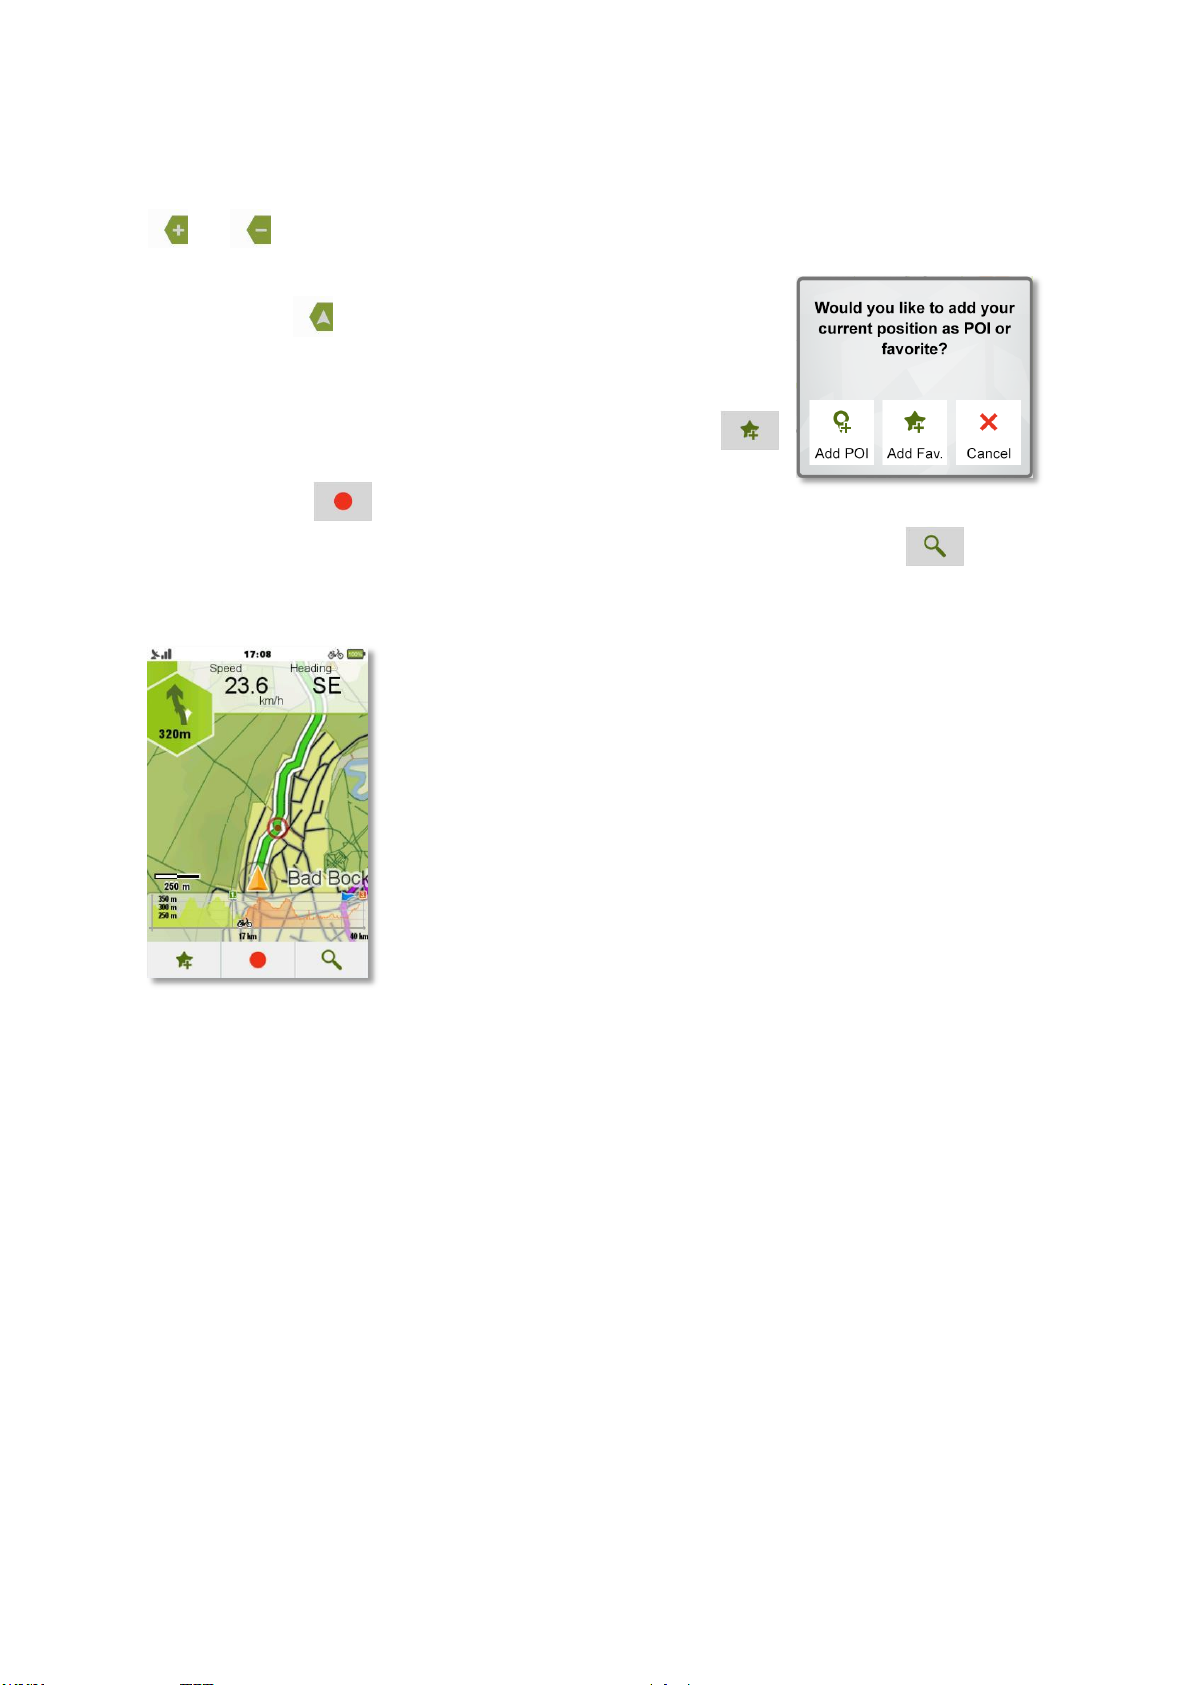
Map can be panned by tapping on it and zoomed in and out via the zoom buttons
( and ).
Jumping back to the current location is possible by the current
location button ( ). These buttons will disappear after a while; they
can be brought back by tapping on the screen again. At the bottom of
this screen there are additional buttons:
your current location can be stored as favorite ( )
(this button will prompt whether to save as a favorite), you can start to
record your tour ( - when you are moving, a red line will show
your recorded path) and you can open the Search menu also from the Map screen ( ). When
there is an ongoing recording, a point can also be saved as POI, not only as a favorite. This way, it
will be attached to the track and can be opened through the track itself (Memory My Tours).
In the upper left corner, you will get the next turning instruction to be
followed, with the distance to the turning point.
Page 21

Page 22
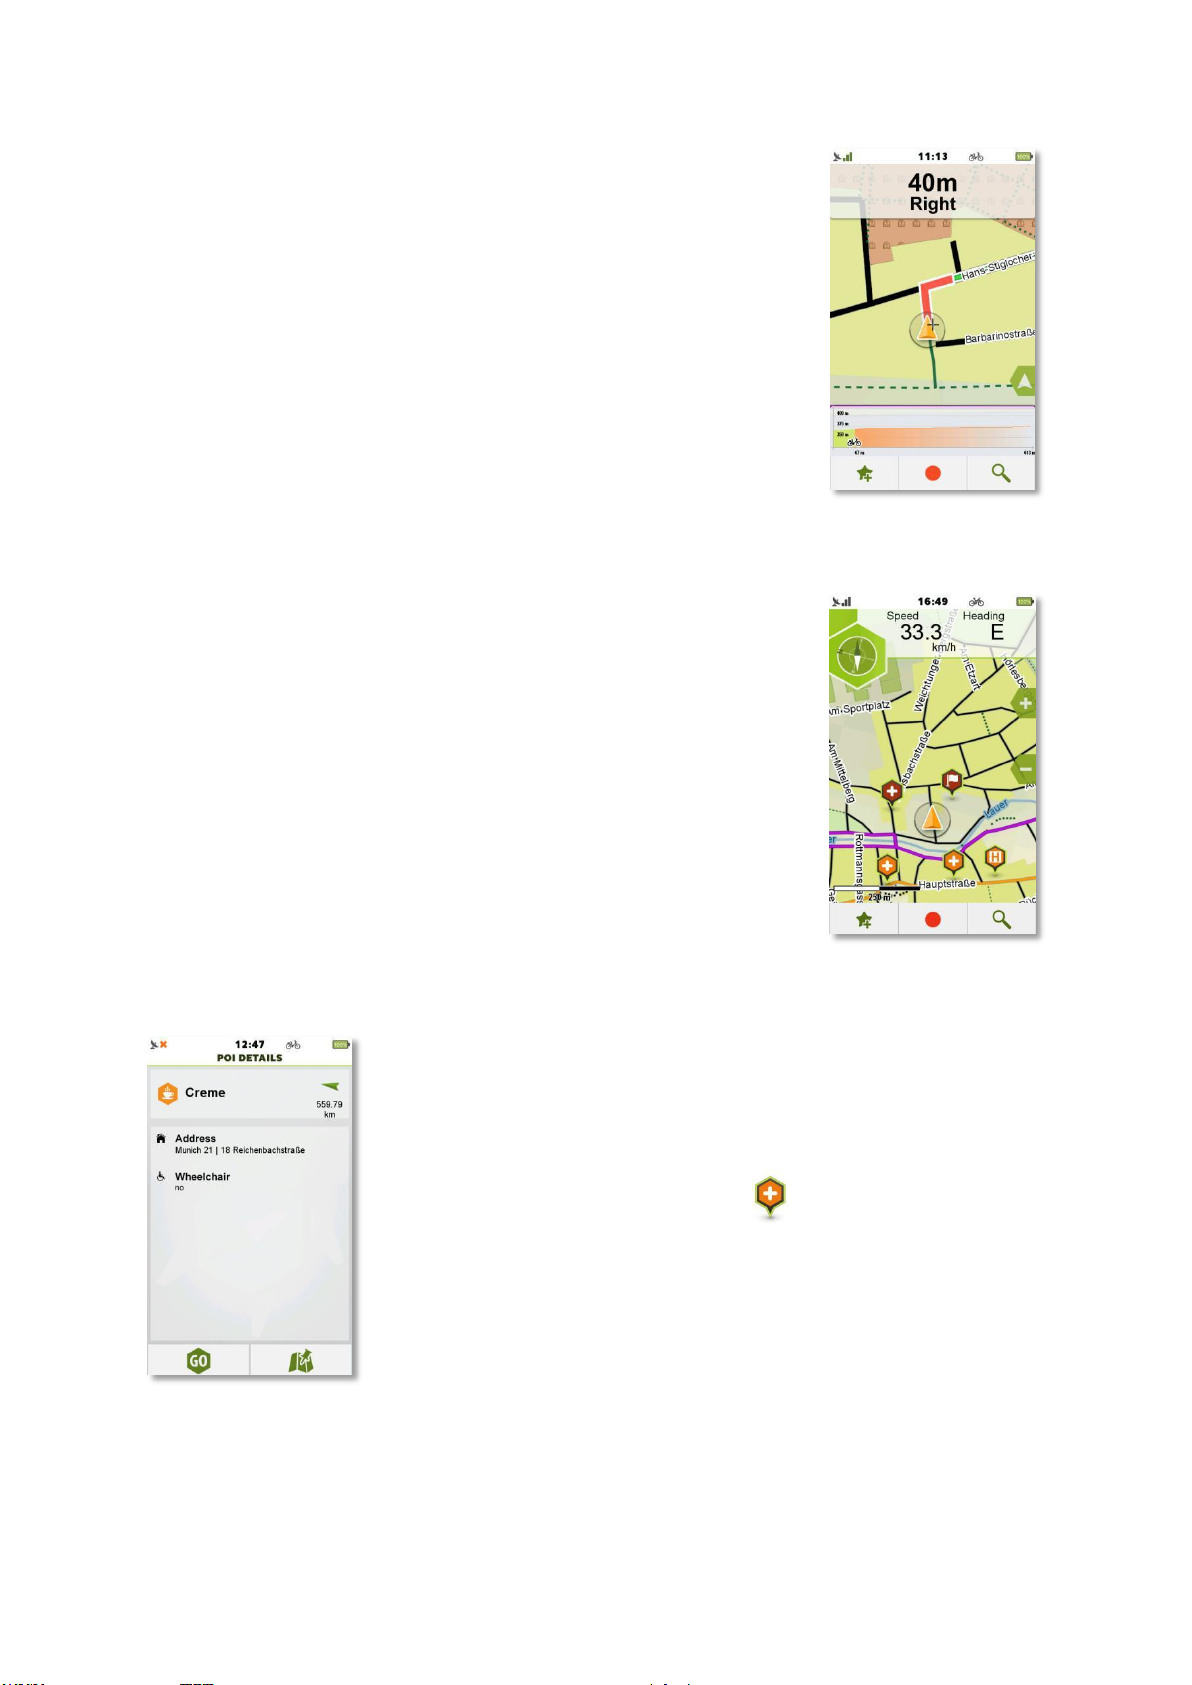
Next to it, there are still the two bike computers that provide information
about your activity. They can be easily changed by tapping on them and
choosing from the upcoming list of available computers.
During navigation, when a turn is approaching, it is displayed in a fullscreen manner, so the turn can be simple and obvious. When the turn is
taken, Teasi will get back to normal mode.
The map can still be panned and zoomed.
At the bottom of the screen, you can see the altitude graph of your
route.
You will be able to see your current position on the graph and also
showing the parts which are still ahead. You can hide the altitude graph
by dragging on the left of the screen or tap back to show it again.
Points of Interests, alias POIs can be displayed and selected on the map.
The POIs will be shown on map when the right settings are used (this is
better explained in Settings - Maps chapter).
Map Screen with POIs. To select POI on map, tap on a POI indicated
visually by its category icon.
POI Details. This way the POI Details screen is opened, showing useful
information (name, address, direction) about the POI. Tap on ‘Go’ icon to
start navigating and tap on ‘Map’ icon to show on map.
When more POIs are close to each other, they are visually grouped with
this sign:
Tapping on this icon will open the Multiple POI selection screen.
Page 23
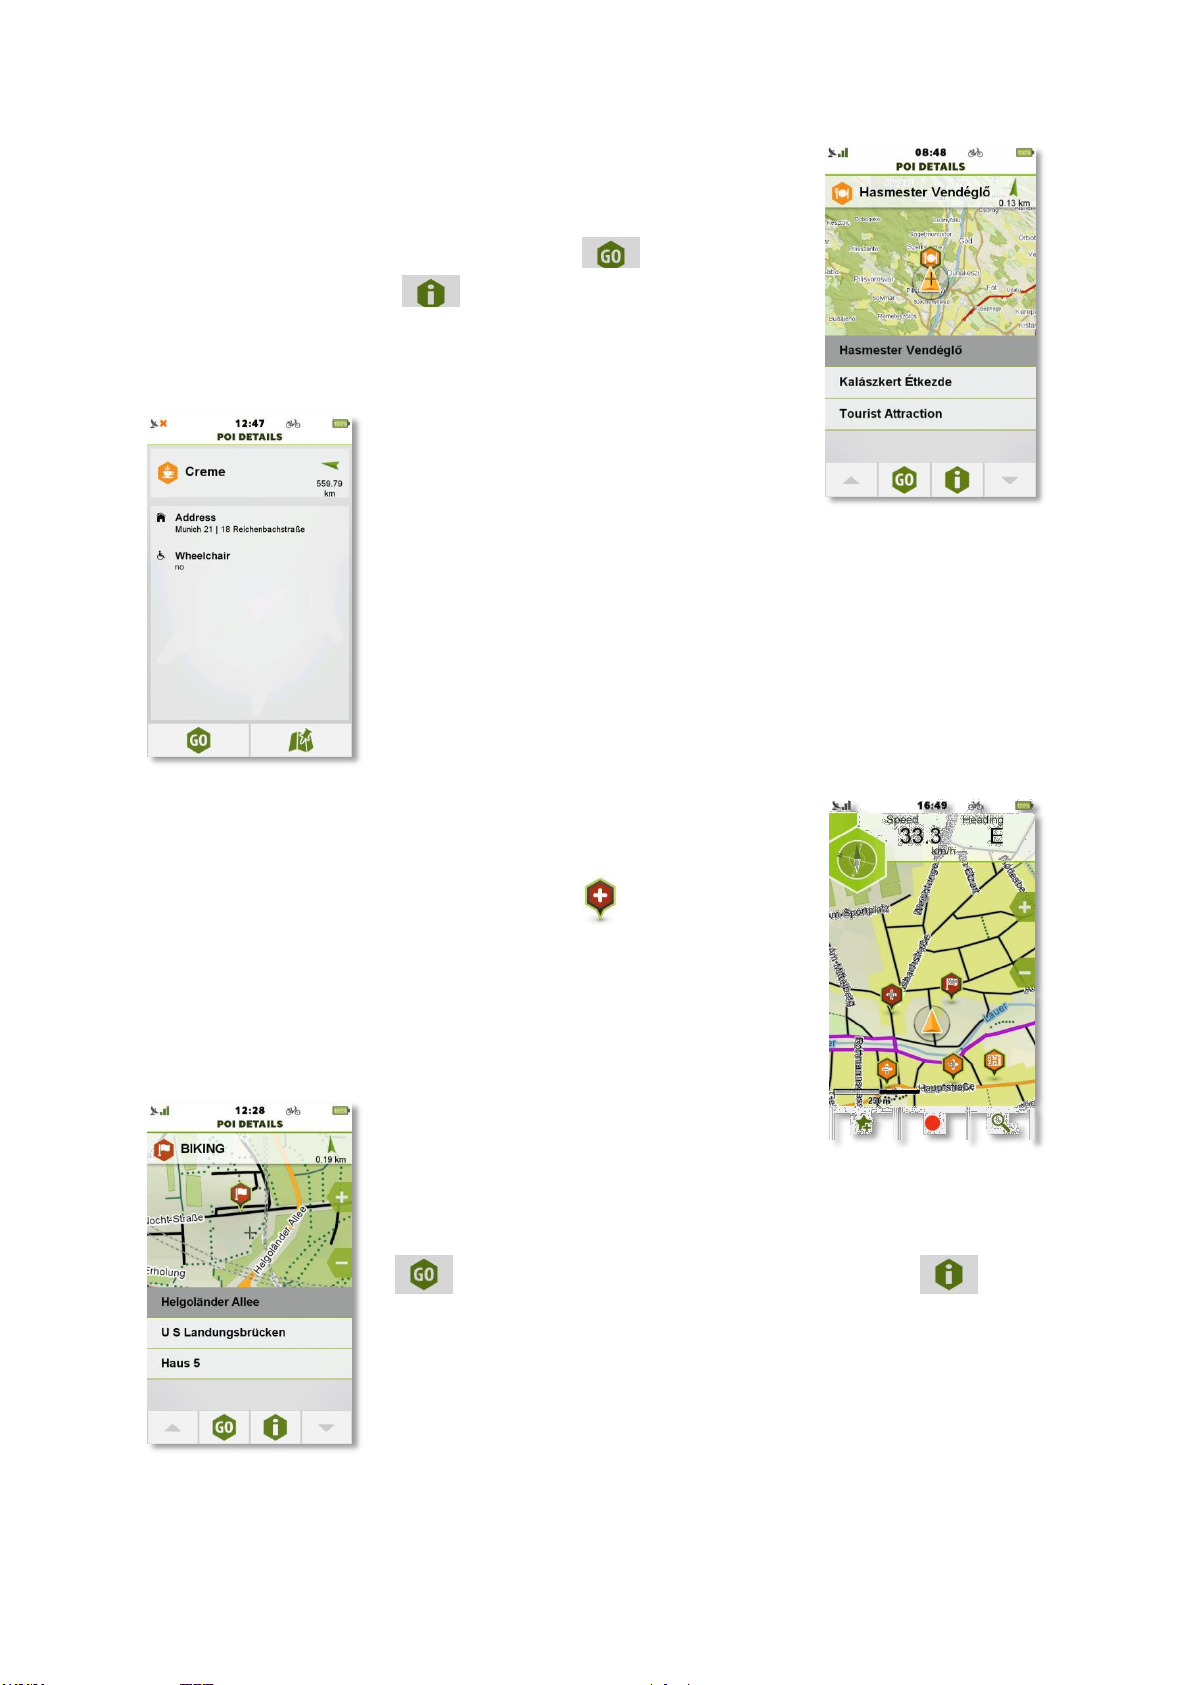
This screen lists the POIs available in the vicinity of the tapped area.
Tapping on one of them will bring the map over the location of the
desired POI.
When the right POI is selected, tapping on ‘Go’ ( ) will start routing
and tapping on information ( ) will bring up the POI Details screen.
Note: POIs without name will show their category as a name (for example
‘Café/Pub’). To separate POIs with same name you can use their address,
or direction.
The favorites will be shown on map, if the right settings are used (this is
better explained in Settings – Maps chapter). The favorites can also be
grouped when they would fit next to each other.
A group of favorites will be shown by the sign:
Tapping on it will result in a list, containing nearby favorites.
This screen lists the Favorites available in the
vicinity of the tapped area. Tapping on one of
them will bring the map over the location of the
desired Favorite.
When the right Favorite is selected, tapping on ‘Go’
( ) will start routing and tapping on information ( ) will
bring up the Favorite POI Details screen.
When a track is saved as a favorite, navigating through map will
navigate to the start point of track. To navigate not just to the track,
but also on the track, select it from the Favorites in Memory.
Page 24
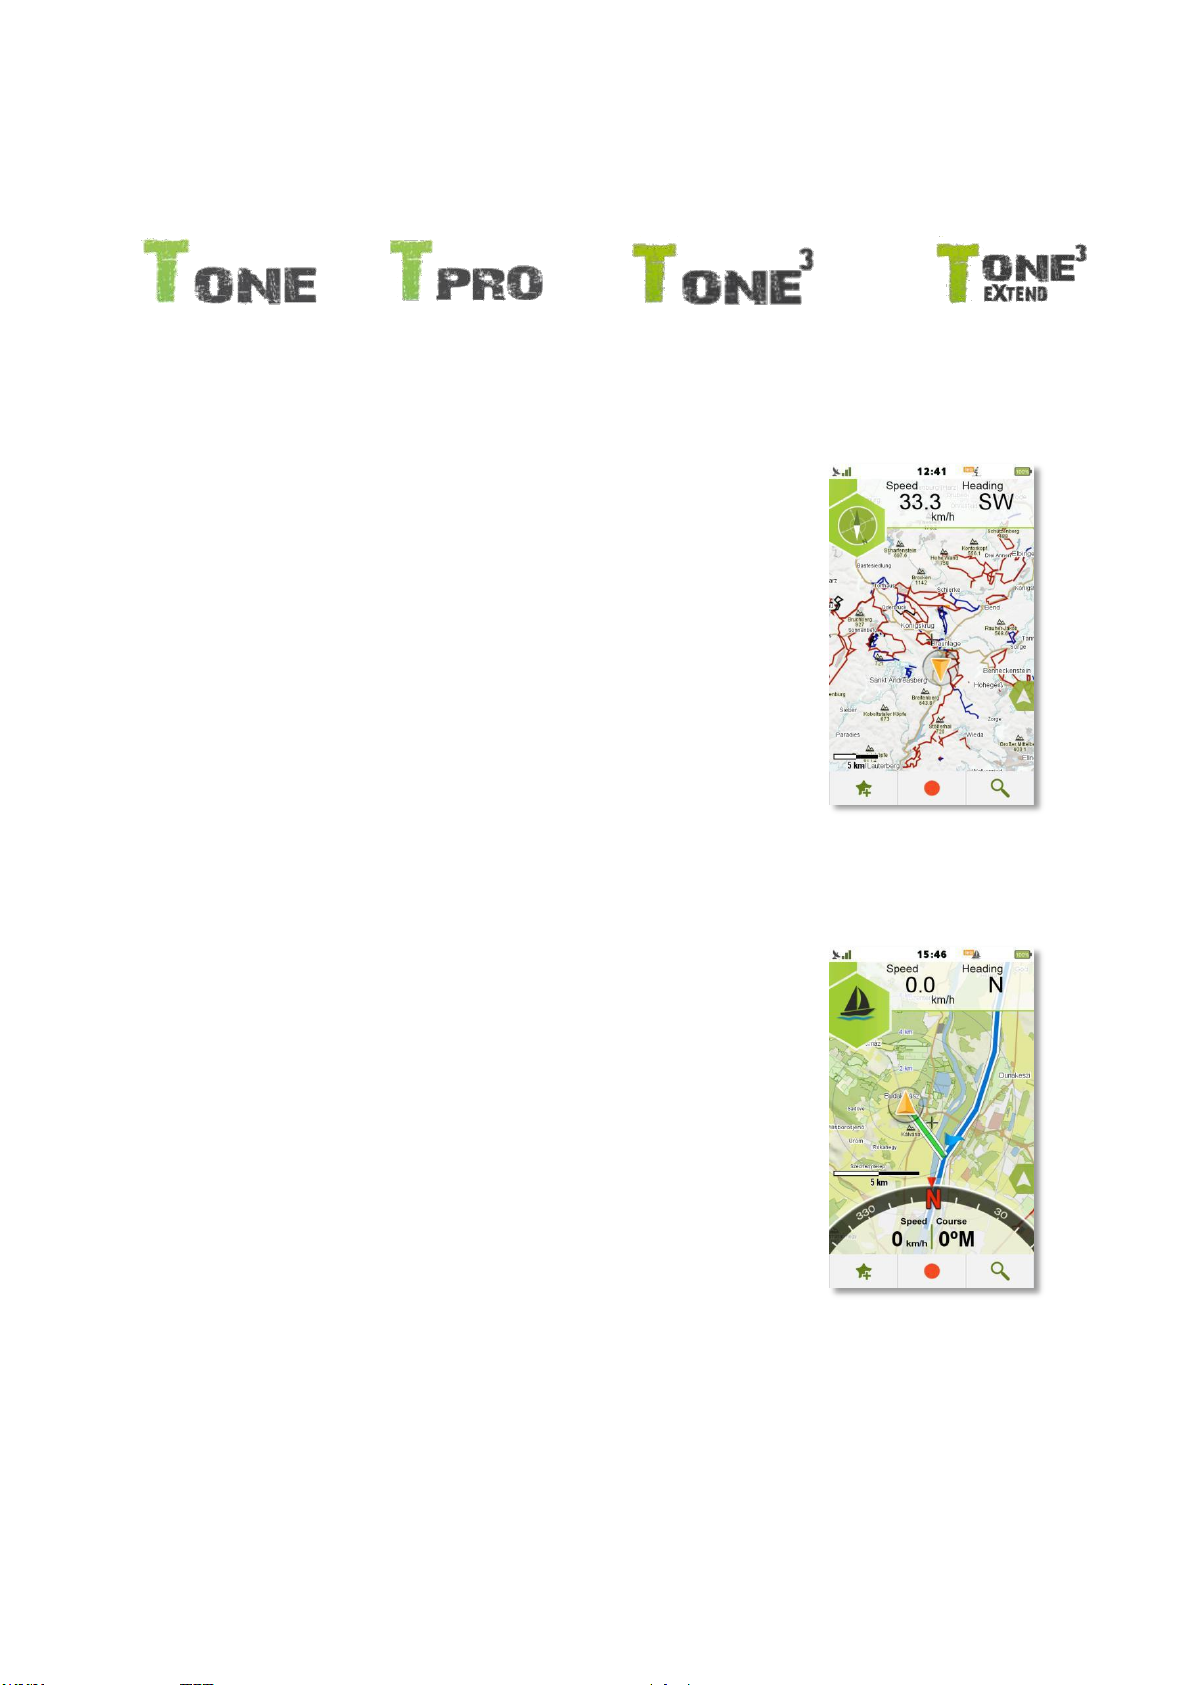
3.1.1 Ski Map
TEASI ONE & TEASI PRO & TEASI ONE3 & TEASI ONE3X
Ski map with Ski Pistes and Winter Skin:
When Ski account is used, map screen also changes to ski mode. In
addition to winter skin, the ski pistes are shown. A ski piste number is also
shown next to the piste when available.
Ski lifts are represented as POIs and can be disabled when not working.
Piste difficulties are also displayed via the color of the pistes.
When there is no official difficulty, Teasi calculates a difficulty based on
the characteristics of official difficulties. In this case, a warning icon
informs the user about this.
3.1.2 Sea Map
When a Boat type account is selected, map screen also changes into boat
mode. Instead of the elevation profile, a compass is displayed on the
bottom of the map screen.
The picture shows this Sea Map with Compass. The compass represents
the current direction the device is heading. Compass can be hidden by
tapping on it. Tap on the arrow on the side to display the compass again.
This account’s computer has 2 set computers: Speed and Course.
‘Speed’ will show current speed in used unit
(Metric/Imperial/ or Nautical - if set under Boat Account).
‘Course’ will display current course, where 0° (or 360°) is heading to
North.
In addition to map scale, range circles have also been introduced to make estimations easier during
sea navigation. Distance from each circle is presented on the circles themselves.
Page 25
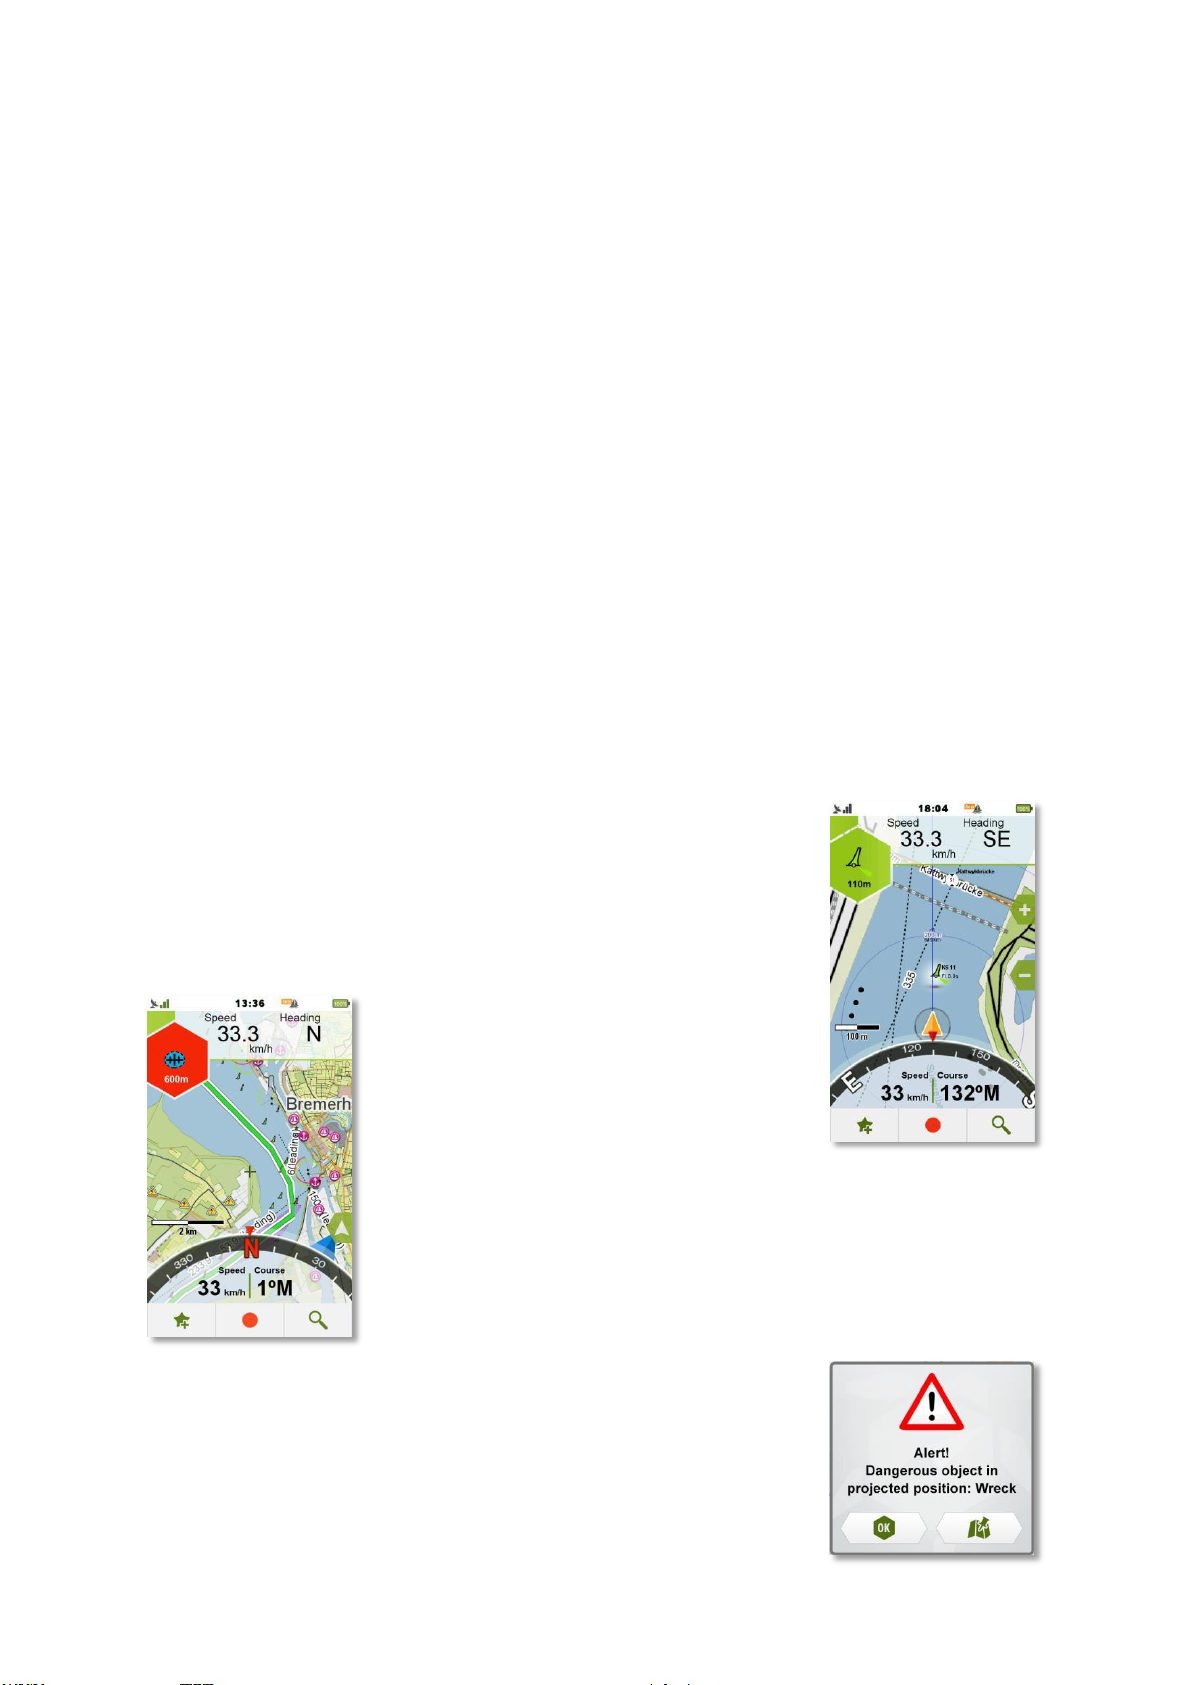
3.1.2.1 Blue Target Arrow
When there is an ongoing navigation, a blue arrow is also placed on the compass.
This arrow shows the direction to the next set destination, based on current heading.
To reach the next destination, keep the blue arrow in the middle of the screen, so that it covers the
GPS cursor.
3.1.2.2 Projection Line
Based on current speed and heading, a small blue projection line is also displayed for better
orientation.
Also, this line serves as a basis for Most Important Buoy feature that alerts the user when heading
to any dangerous or restricted situation.
3.1.2.3 Near interesting & Most Important Buoy (M.I.B.)
Sea Map with highlighted near interesting Buoy:
During boat mode, in the top-left corner the nearest interesting objects
are shown (e.g. notice marks, buoys, harbors and alerts).
On the Map Screen, the currently shown item is highlighted in white.
This is the most Important Buoy Alert.
When dangerous or restricted objects are nearby, the top-left corner
will become red to indicate the possible danger or restriction.
And this is the most important Buoy Alert Pop-up.
When user is not on map screen, alert is shown in a Pop-up. Pressing ‘OK’
will ‘snooze’ that alert category for 30 seconds.
To disable alert pop-ups, uncheck ‘Navigation Pop-up’ option in
SettingsMaps.
Page 26
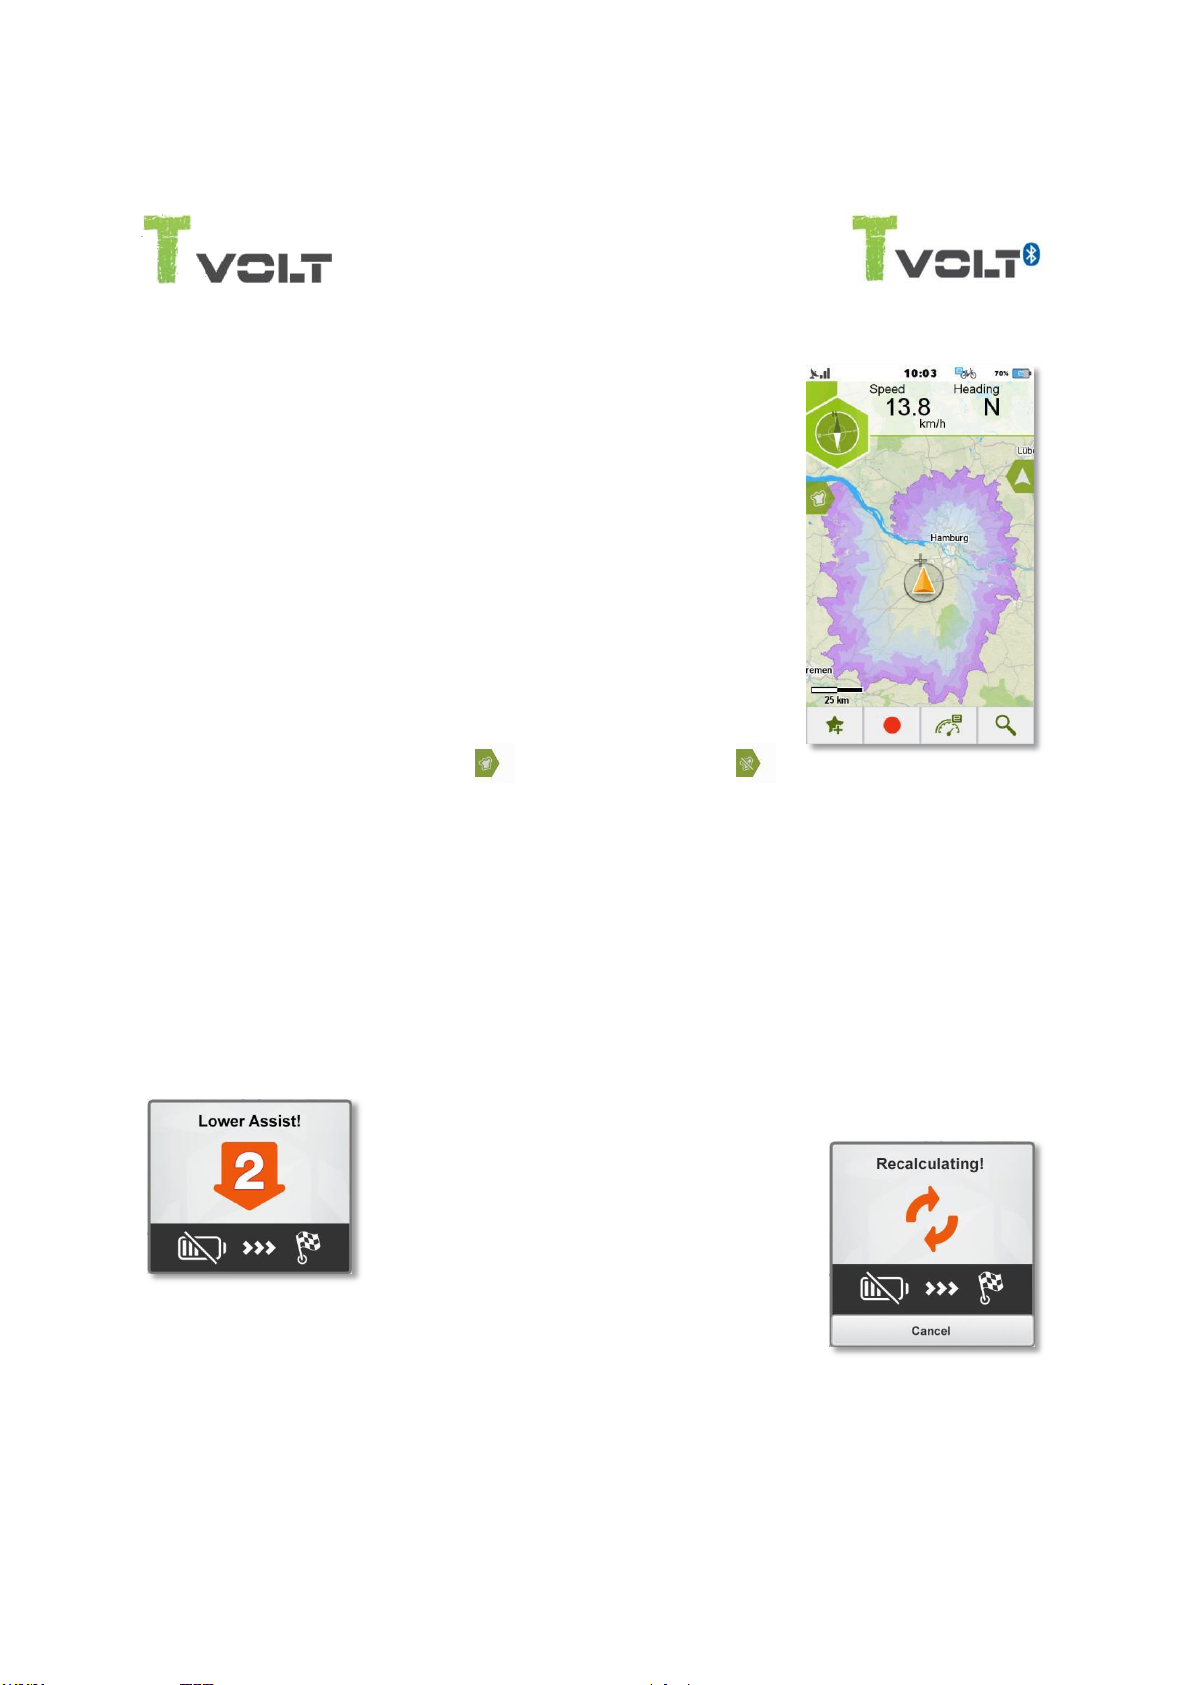
3.1.3 Recursive Height Analysis (RHA)
TEASI VOLT & TEASI VOLT BT
Teasi Volt uses Recursive Height Analysis (RHA) for accurate E-Bike
range calculation and display.
In this way, the areas that can be reached with current battery level are
presented on map screen.
The area covered by the RHA darkens as getting further from current
location. These areas can also be reached, however more battery will
be drained during the process.
Locations outside the RHA area cannot be reached with the current
charge available in the battery and the current assist level in use.
RHA calculation can be turned on ( ) or can be turned off ( )
inside the Map Screen.
Calculation of RHA area is also indicated on this button, when calculation is over, the RHA layer is
displayed.
3.1.4 Suggested Assist Level Popup
When current assist level is too high, based on battery capacity and remaining distance to
destination, Teasi Volt will notify about this problem and offer a new assist level that is calculated
to be sufficient for finishing the route.
Warning to lower assist level for reaching destination.
If there is no assist level that lets the user
finish the route, a recalculation will be started
for a route that can be finished with currently
remaining battery level.
If there is no possible route that can be
completed with the current battery level, the
application will warn:
‘Not enough battery power to reach the destination.
You still have power for the next X km/miles at the lowest assist level’
where X is calculated based on the current available battery.
Page 27
3.1.5 Assist level suggestion based on Heart Rate (HR)
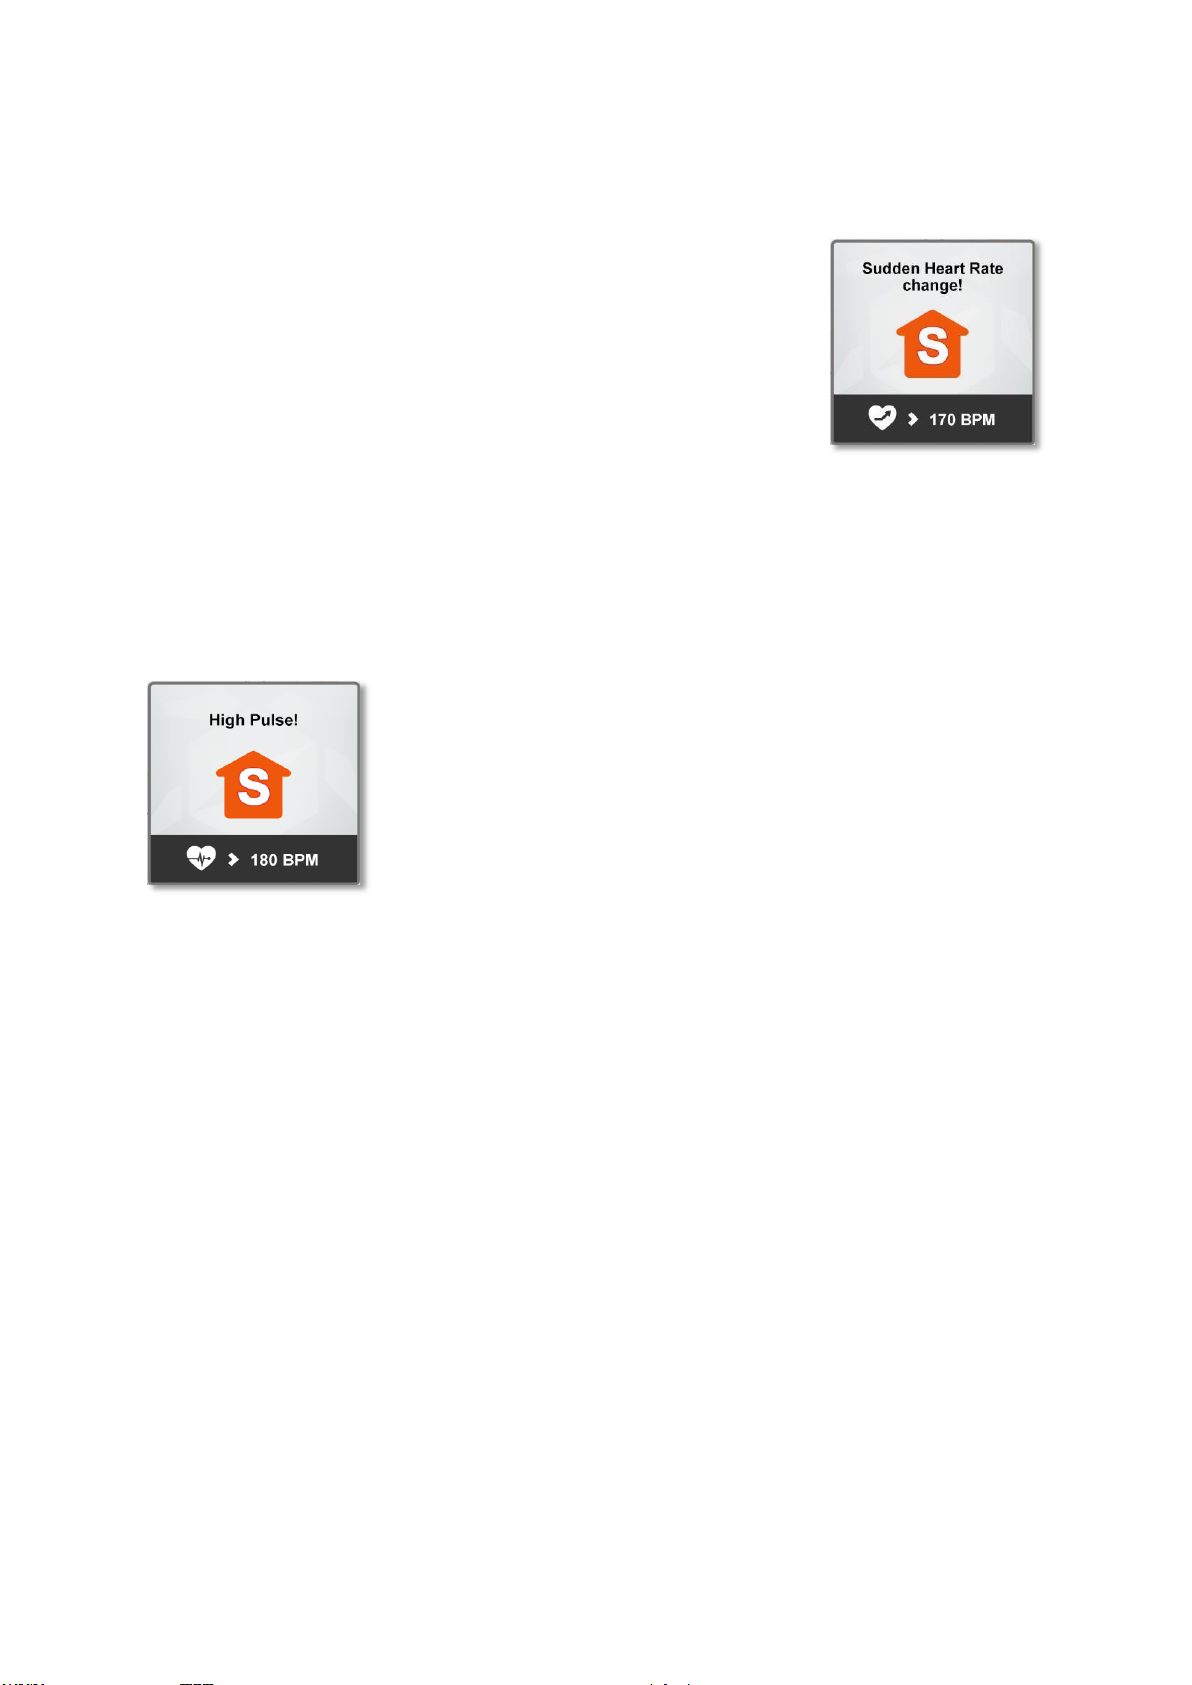
During exercise, Teasi constantly monitors the current Heart Rate value,
if you are connecting to a heart rate monitor. If there is a sudden rise in
heart rate, Teasi will alert you.
Teasi will also alert, if this value tends to get too close to the setting of
‘Maximum Heart Rate’ to increase the assist level.
If this does not provide the eligible support and heart rate keeps rising, Teasi will suggest a ‘full
stop’ for the exercise.
To calibrate this feature, go to:
SettingsAccount SettingsHeart Rate Settings.
Set an Age and Gender for preset HR values and modify the HR values,
if needed. Teasi will alert, if the Maximum of the training HR zone is
close to be reached.
Page 28
3.1.6 Navigation Popup
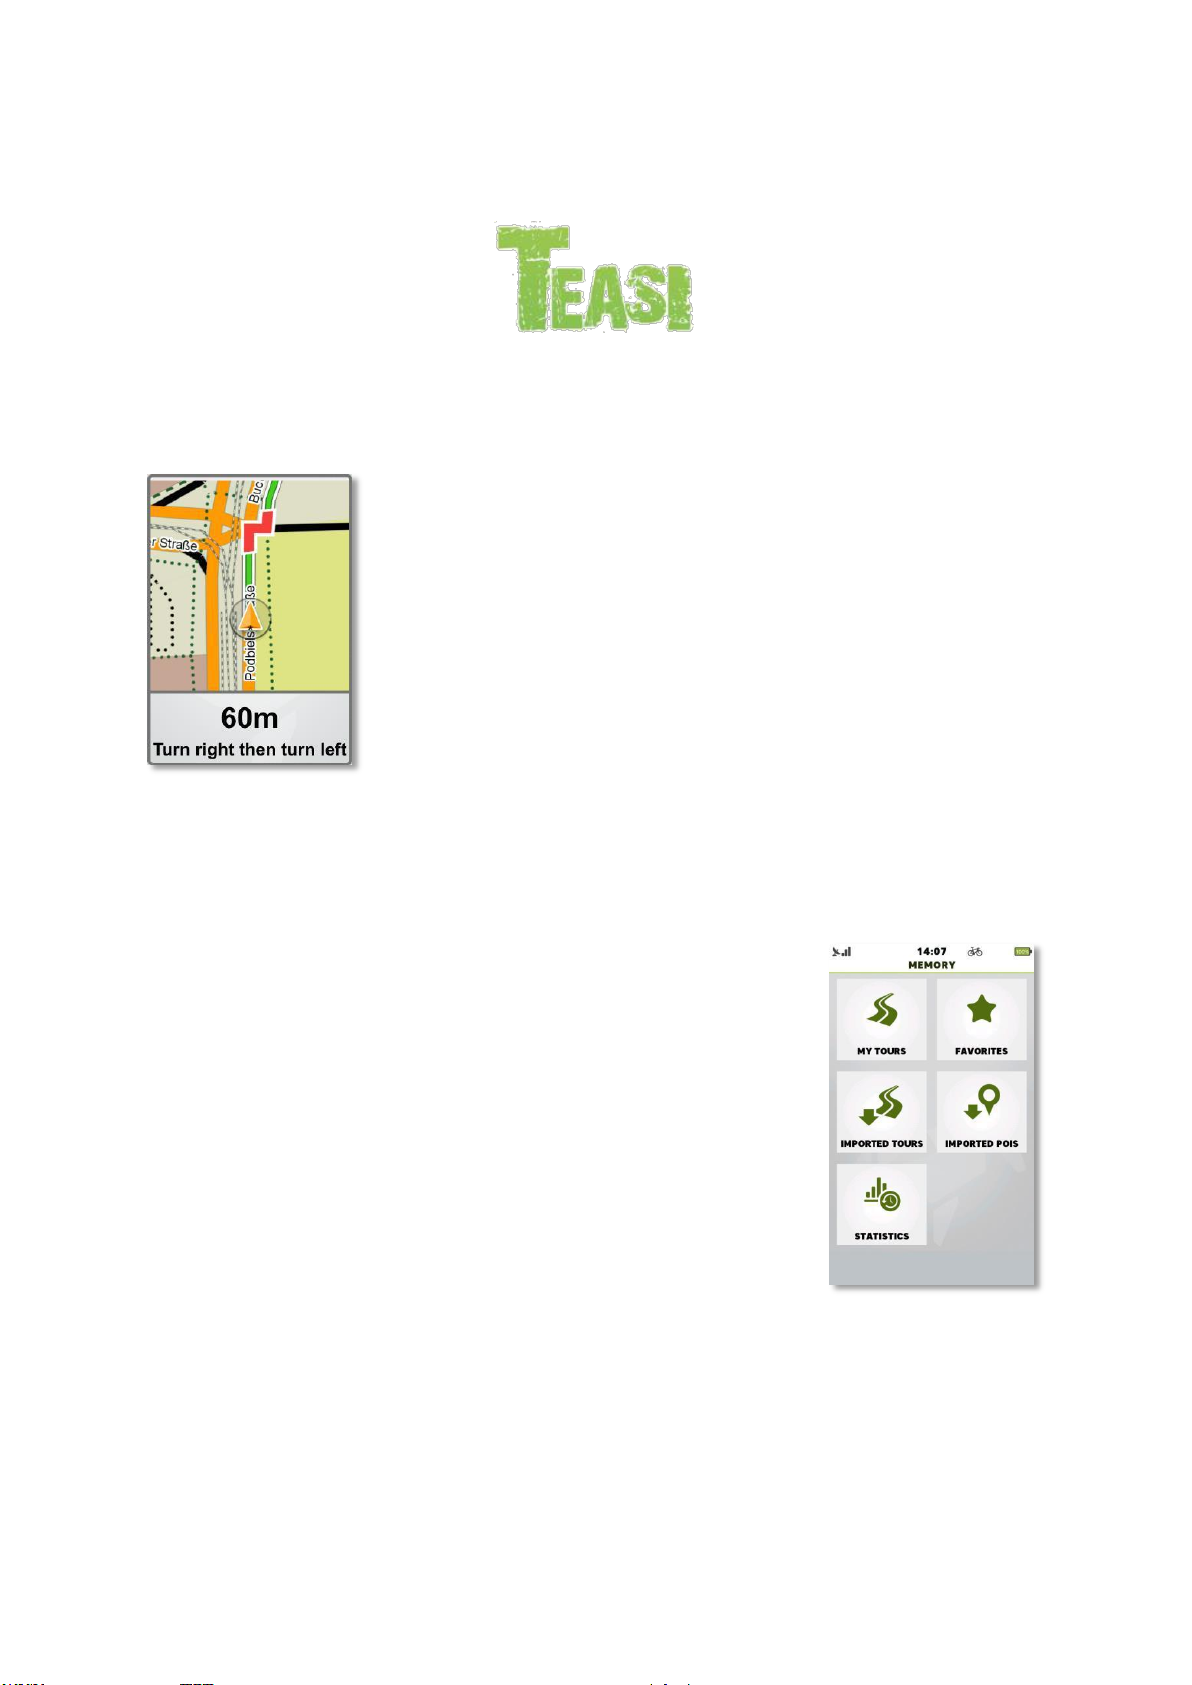
Affects all models
If you have an ongoing navigation, but the device is not on the map
screen and a turning instruction is approaching, the device will show a
popup message with the related instruction.
If you tap on the instruction itself, the map screen will be displayed to
show the details of the navigation.
If you tap outside of the popup, it will just fade away and you will
return to your previous screen.
3.2 Memory
Memory is the menu where you can reach your own Tours and Favorite
places you have stored on Teasi.
Opening this menu, you have the possibility to choose between ‘My
Tours’, ‘Favorites’, ‘Imported Tours’, ‘Imported POIs’ and ‘Statistics’
submenus.
Page 29

Page 30
3.2.1 My Tours
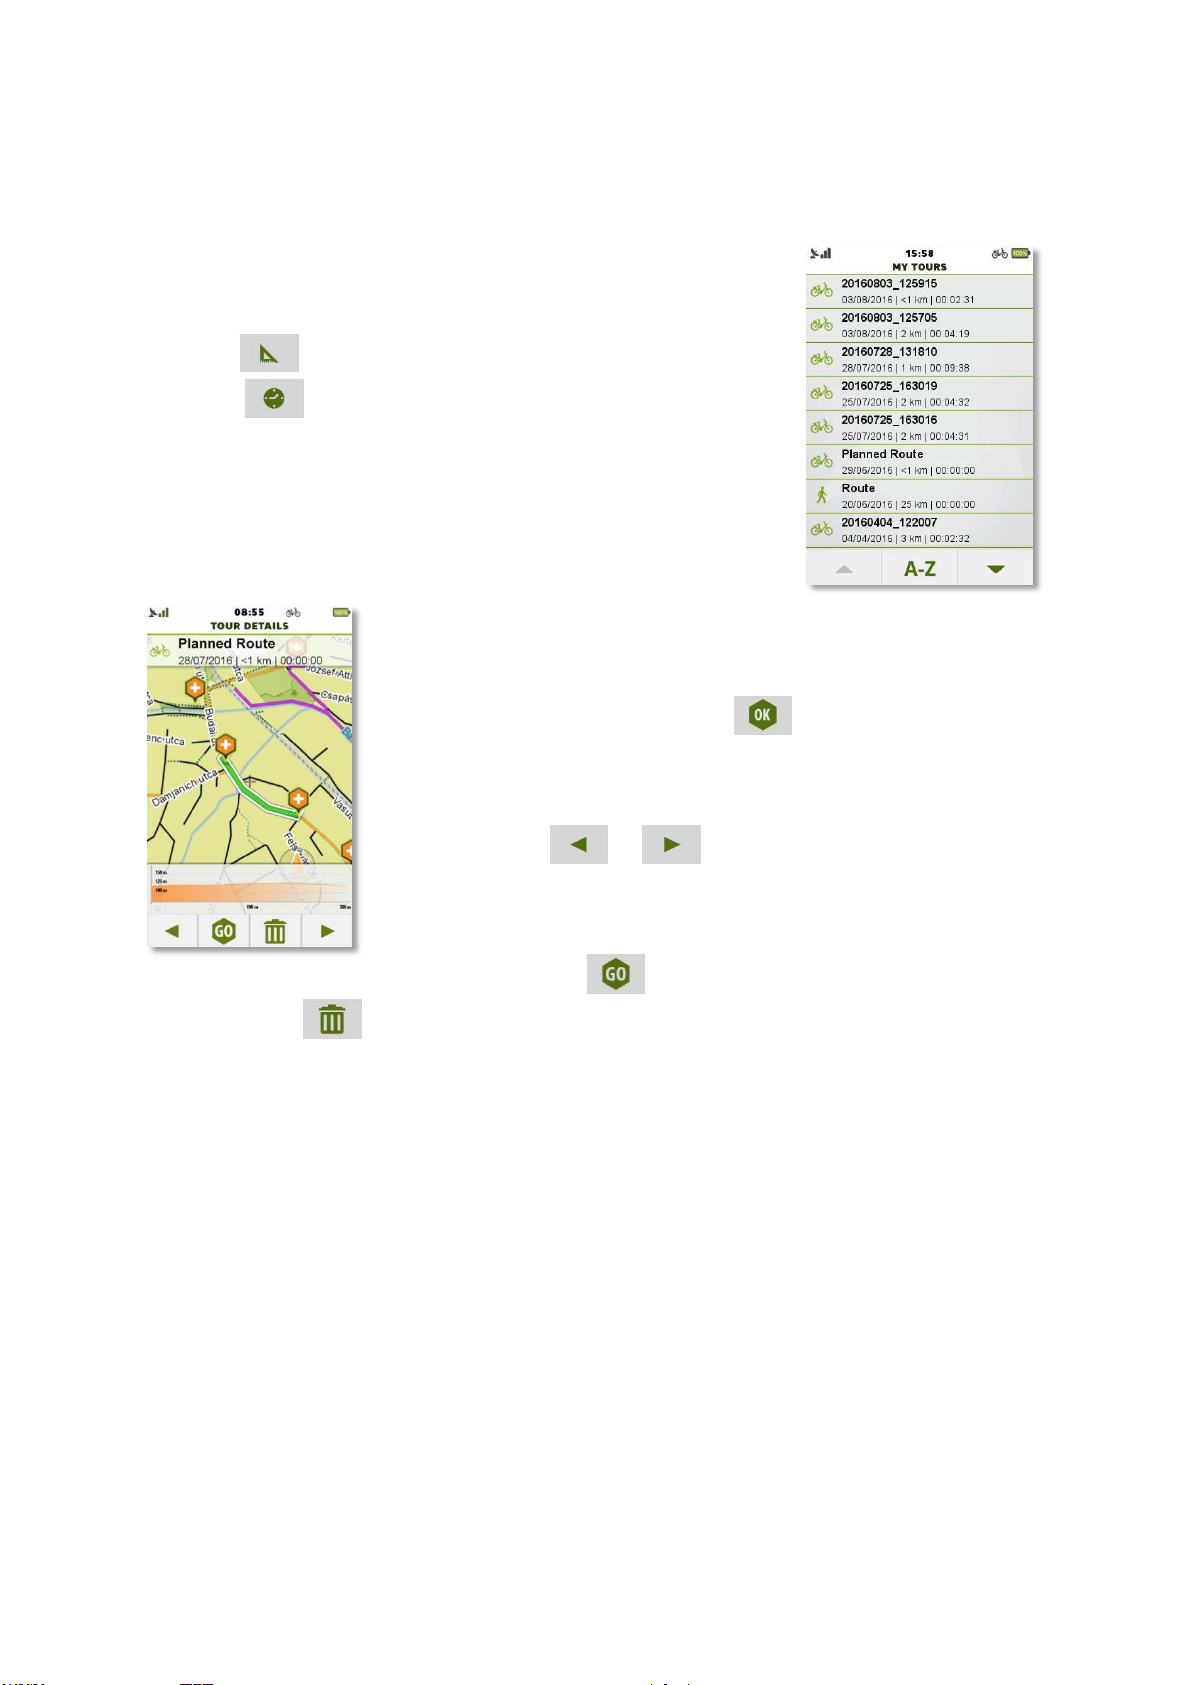
My Tours contains all your tours recorded with the Teasi device or the
routes you have planned and saved.
On the bottom of the screen, you can choose to order the tours by
distance ( ) (this way the shortest tour will be on top),
or by time ( ) (this way the latest tour will be on top).
You can browse the list via the up and down arrows that are only
available if the list contains at least 9 items. The tours are recorded
with the timestamp as a name, so they can be easily identified later.
Tap on a tour to see its details and modify it. It will be shown on the map,
on the first tap. To change its name and type, tap on the name on the
top of the screen.
After changing the values, press OK ( ) to commit your changes.
On the bottom of the details screen there are additional options.
With the arrows ( and ) you can see further data about the
track, altitude and speed graphs are available.
With the ‘Go’ button ( ) you can start navigation to the track and
with the bin icon ( ) you can erase the track from your device.
The tours are saved in GPX and FIT format and can be drag and dropped to computer or
bikemap.net account via Teasi Tool. Tracks can be: Imported, Exported, Uploaded and back up can
be made of tours recorded by the user.
Further information about connecting Teasi device to computer can be found in Chapter 4.
Page 31
3.2.2 Favorites
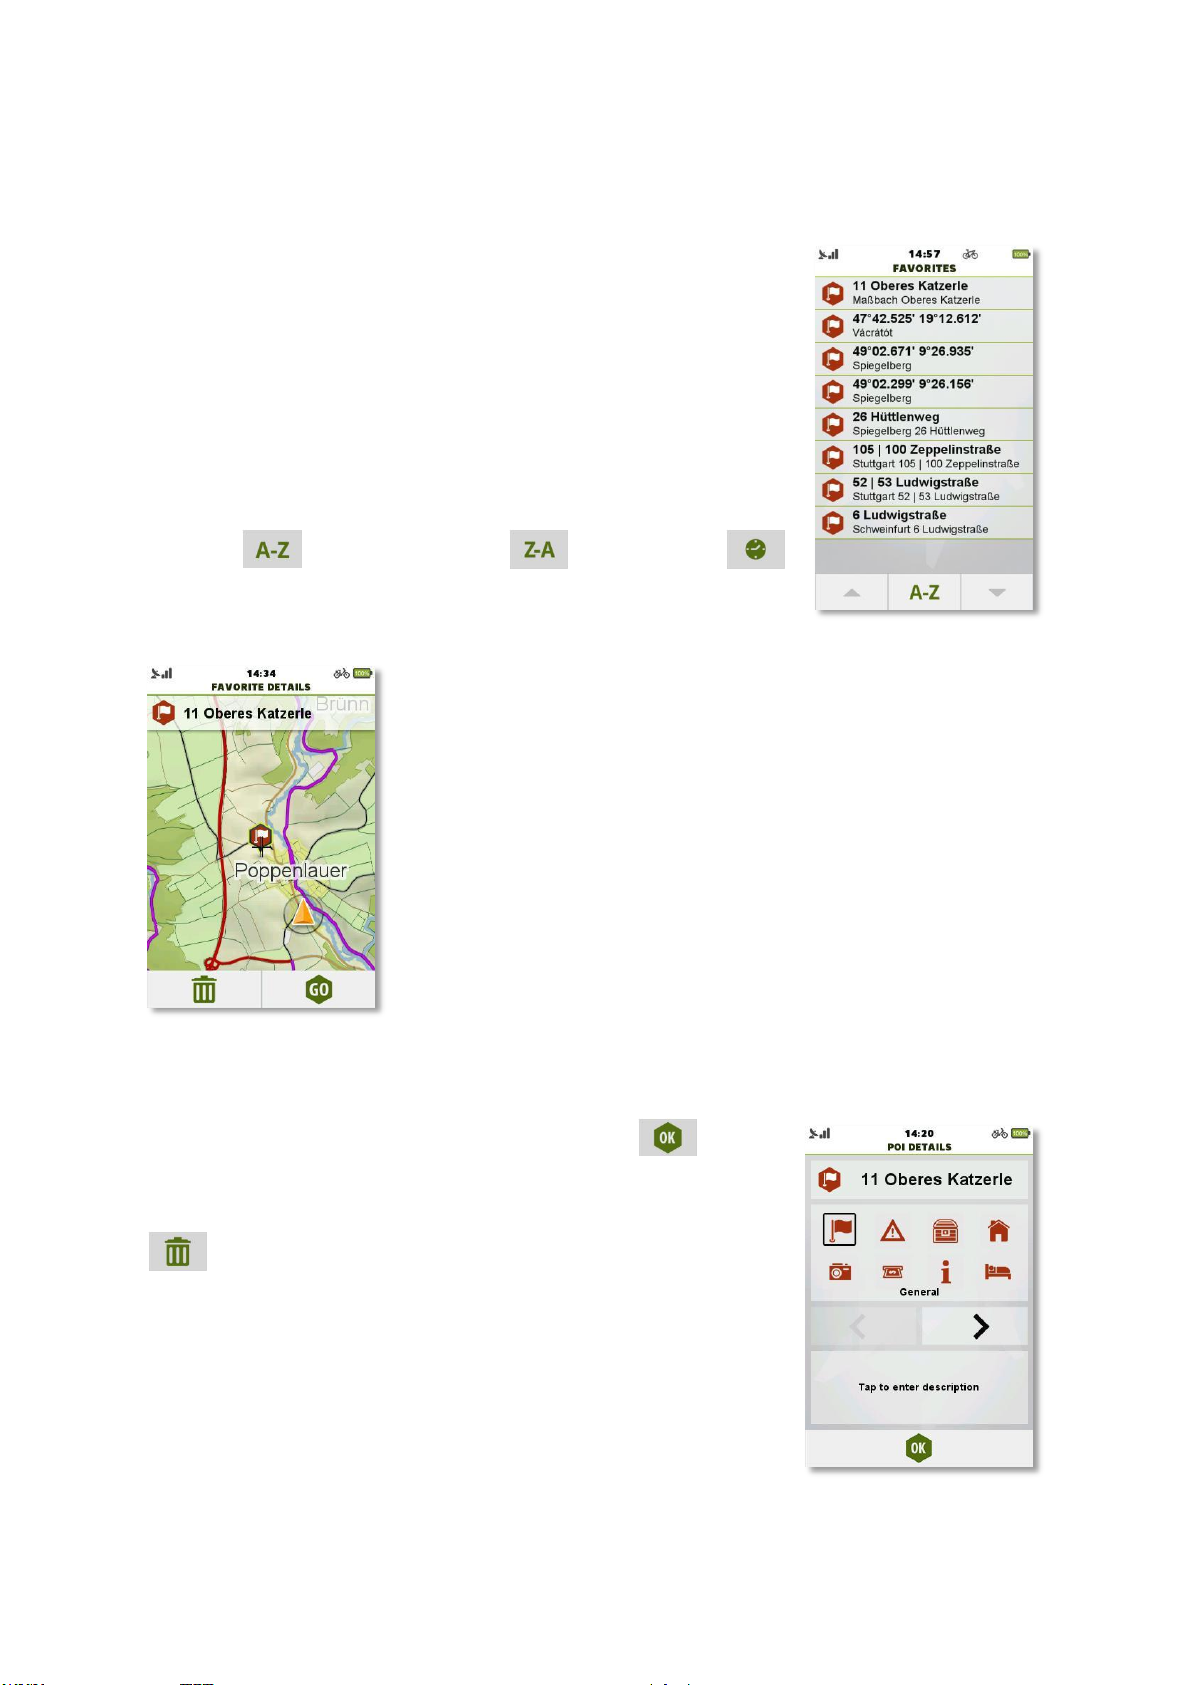
'Favorites' shows your favorite places that you have stored on Teasi.
This can be achieved in three ways:
You can save your positions from the Map.
You can store Point Of Interests (POIs), Addresses or coordinates as a
favorite also.
The third way is to add a tour to favorites. The track will be copied into
favorites.
On the bottom of the screen you can choose the sorting method by
alphabet ( ), reverse alphabet ( ), or by time ( )
(this way the latest favorite will be on top).
You can browse the list via the up and down arrows that are only
available if the list contains at least 9 items.
Tap on a favorite to see its details and modify it.
On the first tap it will be shown on the map.
To change its name and type, tap on the name on the top of the
screen.
After changing the values, OK commits your changes. ( )
On the bottom of the details screen, there are additional options. You
can start navigation to the favorite item and with the bin icon
( ) you can erase it.
Note: Erasing a track from favorites doesn’t erase the track itself.
Page 32

Page 33
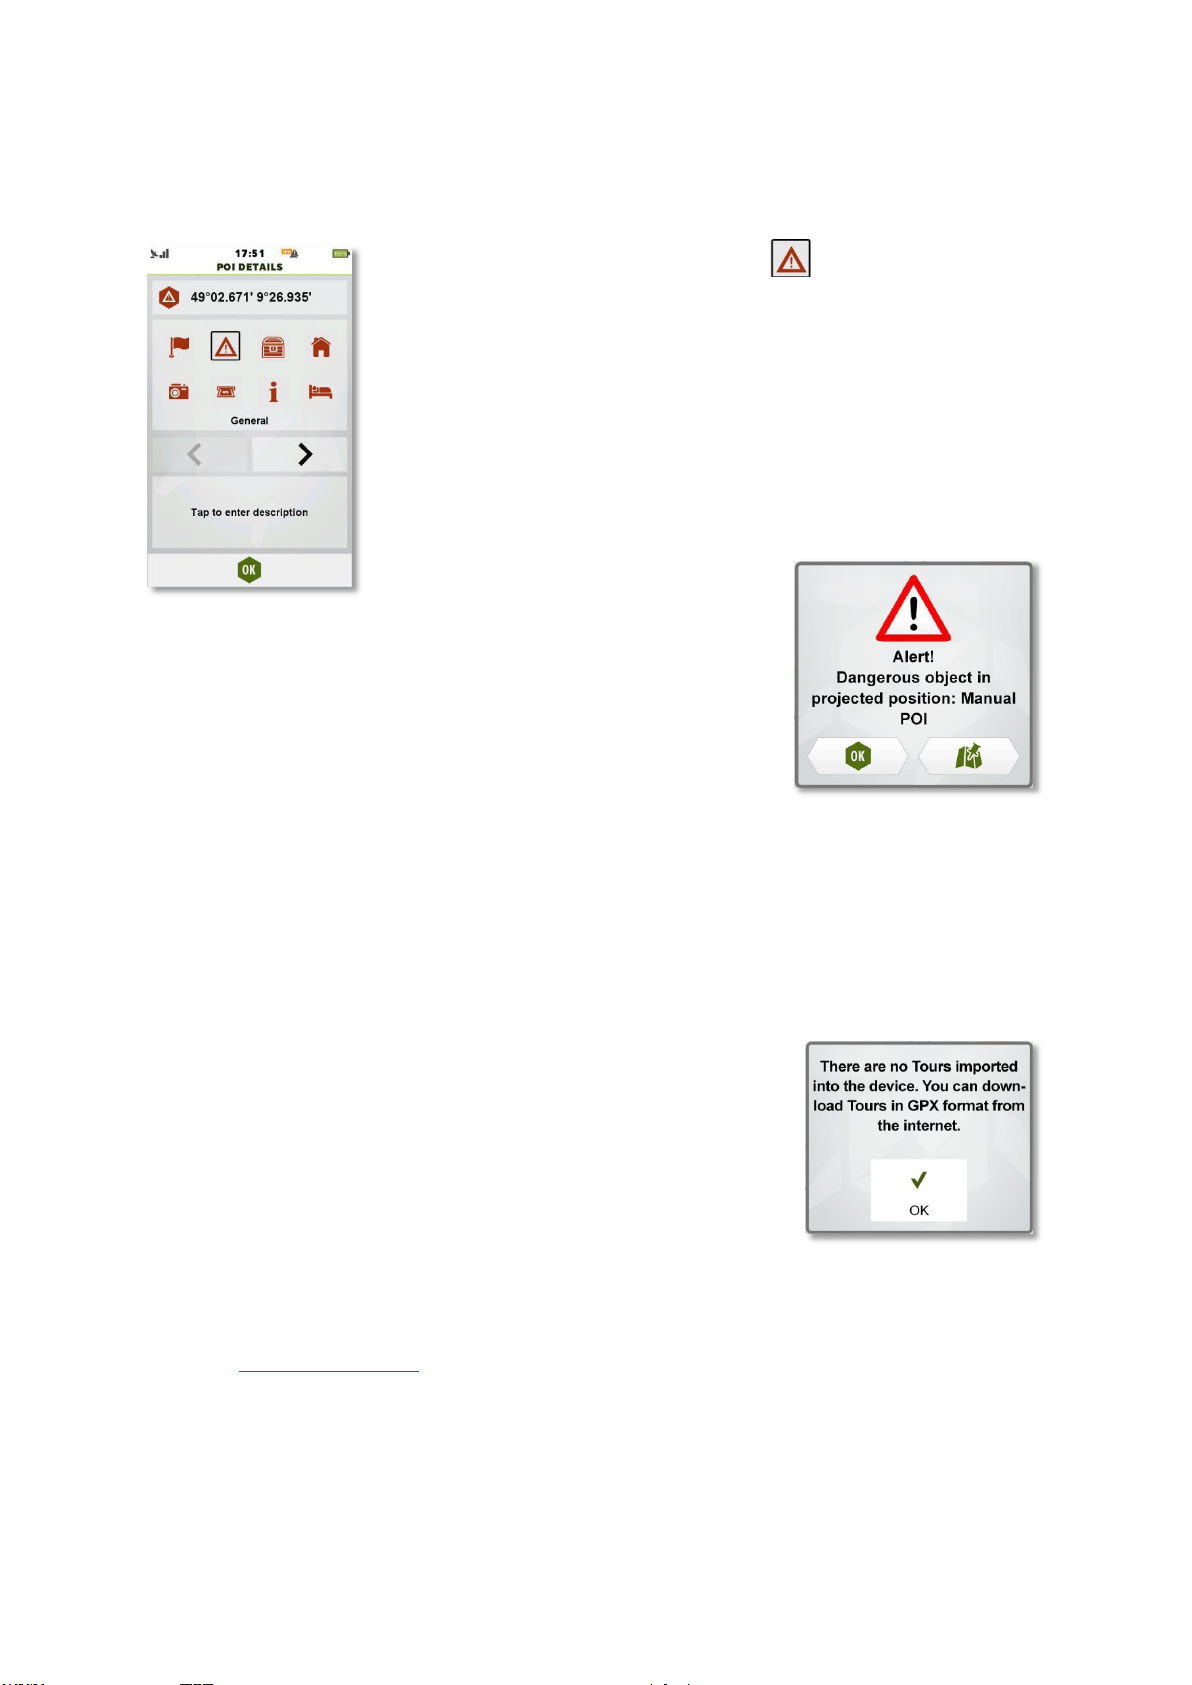
3.2.2.1 Manual alert for Favorite in Boat profile
For Manual alert, select the ‘danger’ icon ( ).
When location of Manual alert is in the
projected position, device will alert via pop-up (or via red top-left right
alert when on map screen).
3.2.3 Importing Data & TEASI Tour
3.2.3.1 Imported Tours
Imported Tours contains the tracks that weren’t recorded on your
device but created elsewhere and imported via computer. If you don’t
have any yet, the device will notify you. You can download GPX tracks
to the device.
To import tours:
The simplest and easiest way for importing tours is connecting the device to computer via Teasi
Tool. With Teasi Tool, tracks can easily be drag and dropped or copied to and from the device,
even from https://bikemap.net/ directly.
Usage of Teasi Tool is explained in Chapter 4.
Page 34

Page 35
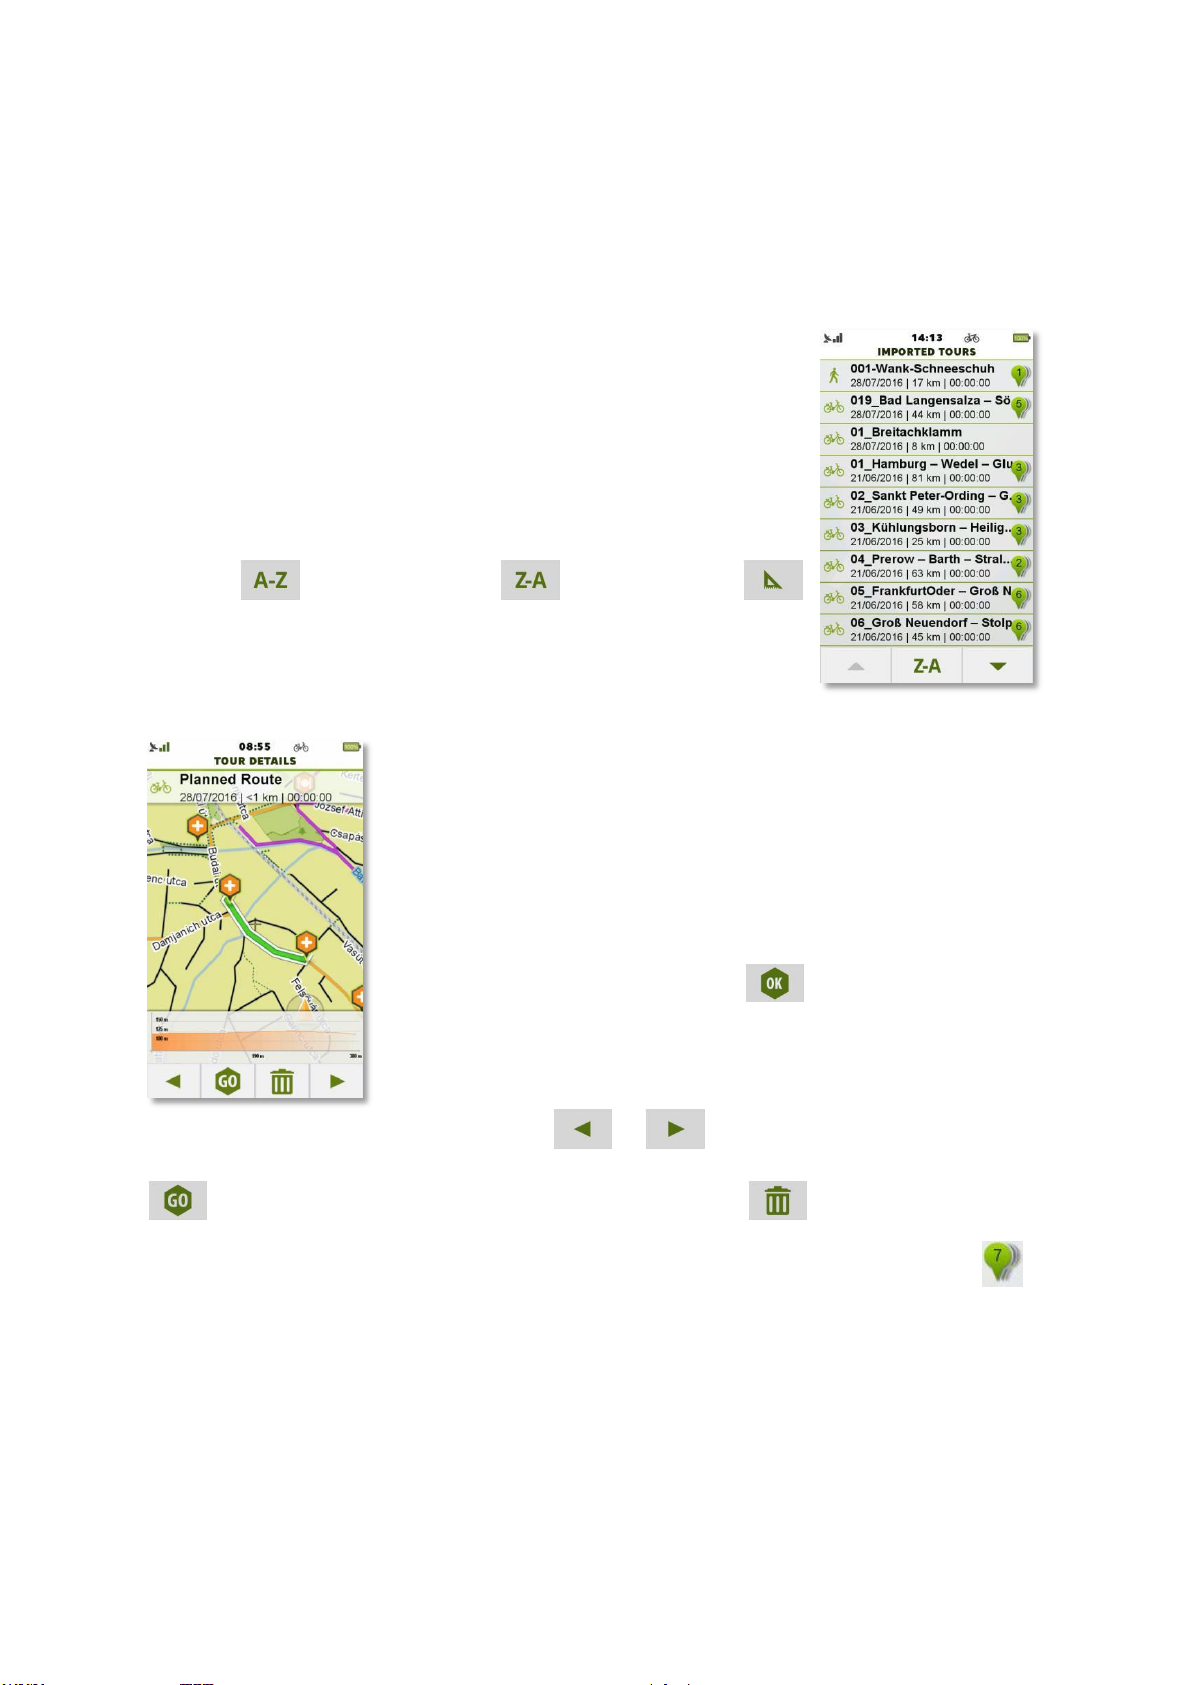
How to import tours manually:
Connect the Teasi device to a computer. Create a folder on the device inside the BikeNav folder
called ‘ImportedTrips’, if not already existing. All imported tours must be placed here
(‘BikeNav\ImportedTrips’) to be able to see them on the Teasi device.
How to import tours from SD card:
Open the SD card on your computer. Create a folder on the SD card inside
the BikeNav folder called ‘ImportedTrips’, if not already existing. All
imported tours must be placed here (‘BikeNav\ImportedTrips’) to be
able to see them on the Teasi device.
On the bottom of the screen you can choose the sorting method by
alphabet ( ), reverse alphabet ( ), or by distance ( )
(this way the shortest route will be on top).
You can browse the list via the up and down arrows that are only
available if the list contains at least 9 items.
The tours are recorded with the timestamp as a name, so they can be
easily identified later.
Tap on a tour to see its details and modify it. On the first tap, it will be
shown on the map.
To change its name and type, tap on the name on the top of the
screen. After changing the values OK ( ) commits your changes.
On the bottom of the details screen there are additional options.
With the arrows ( and ) you can see further data about the
track, with the ‘Go’ button
( ) you can start navigation to the track and with the bin icon ( ) you can erase the track.
When an imported track is presented with an icon with a green number on it ( ),
it means the track is a TEASI Tour track, that contains additional data compared to a regular track,
such as POIs with Pictures and descriptions.
Page 36
3.2.3.2 TEASI Tour
TEASI Tour tracks are extended tours based on regular GPX files, but they may contain numerous
additional features such as:
- Track description,
- Track picture,
- TEASI Tour POIs with picture and description.
Teasi also has an integrated connection with https://bikemap.net/ and https://wandermap.net/
websites, therefore any track created or stored on those sites can be easily imported to any Teasi
device via Teasi Tool. It can be downloaded from https://www.teasi.eu/ website.
Inside Teasi Tool, select: ‘Tours’
register to bikemap.net.
You can visit https://www.bikemap.net/ to manage your tracks or to add already existing ones to
your favorites.
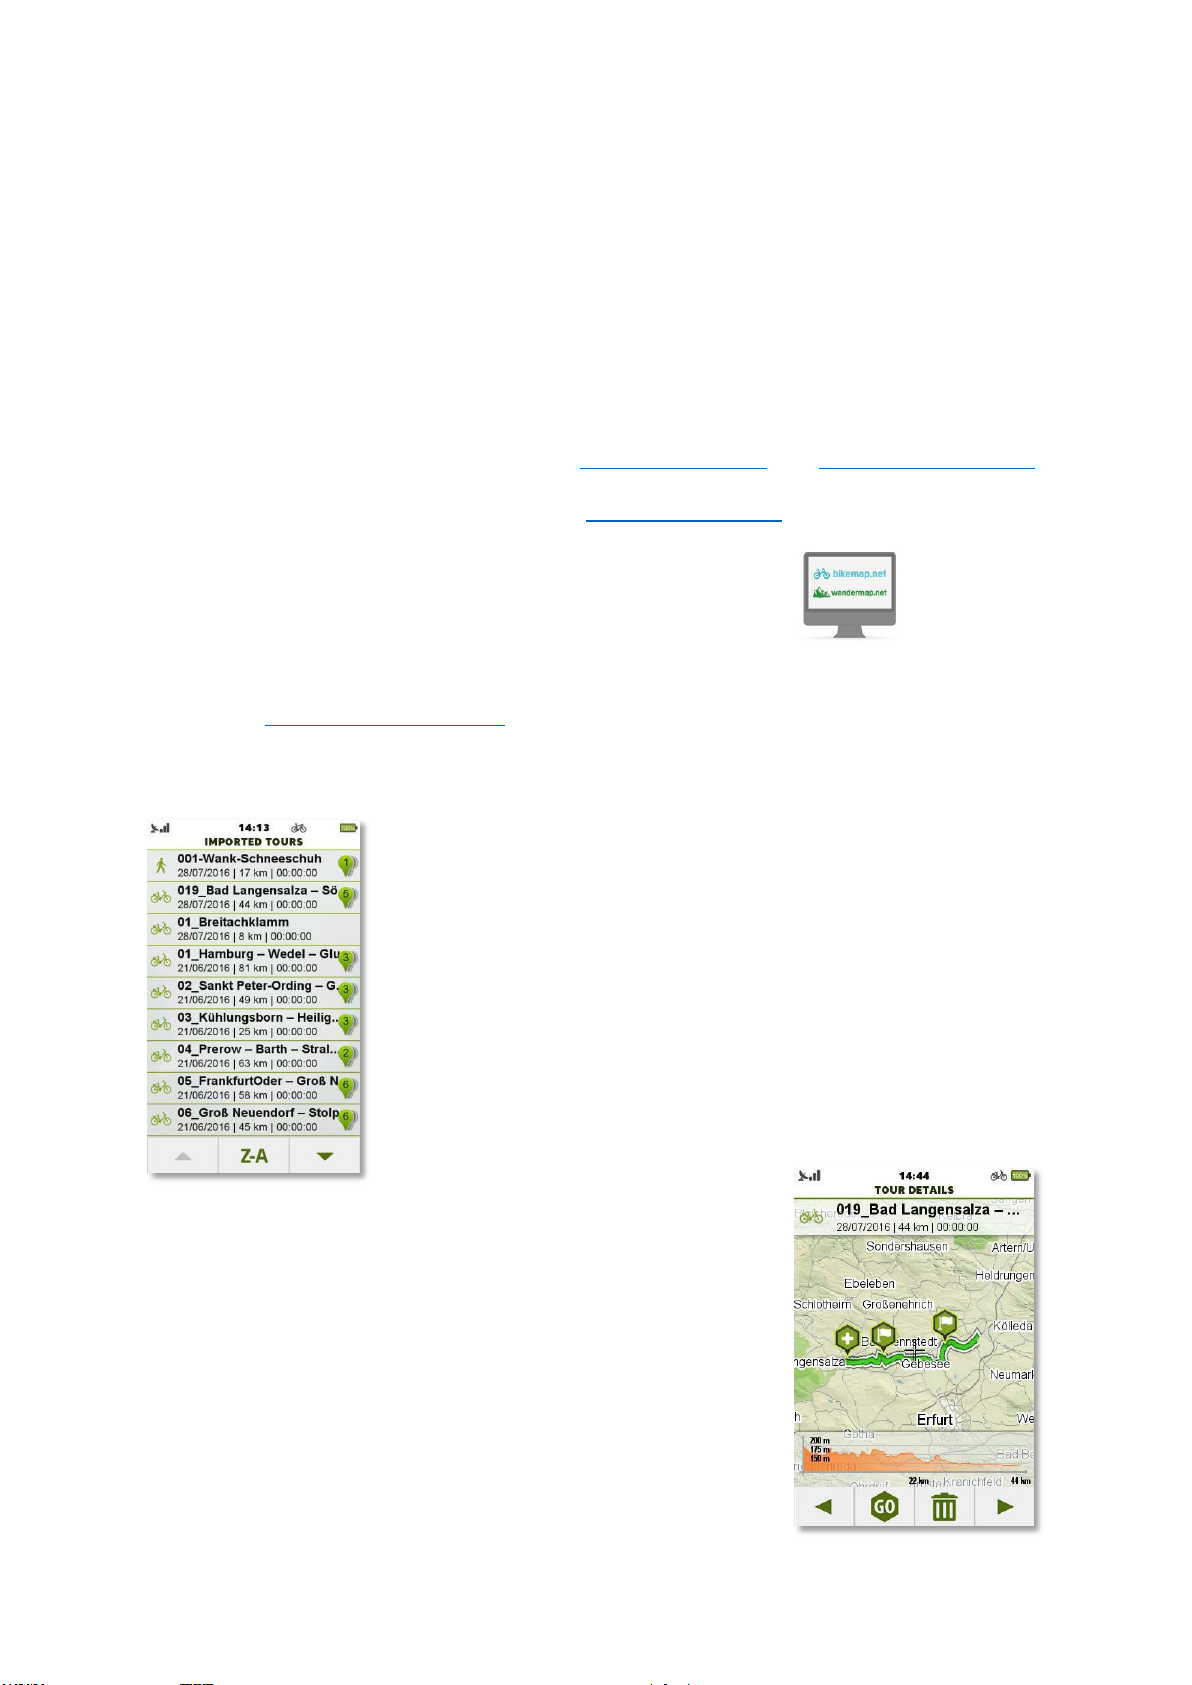
After importing on device, open ‘Memory Imported Tours’ to see TEASI Tour tracks.
Here is a picture of the imported Tours containing TEASI Tour tracks
with pictures and POIs.
‘Bikemap.net/Wandermap.net’ ( ) to log in or
Tap on the track to see its overview of TEASI Tour track.
Page 37
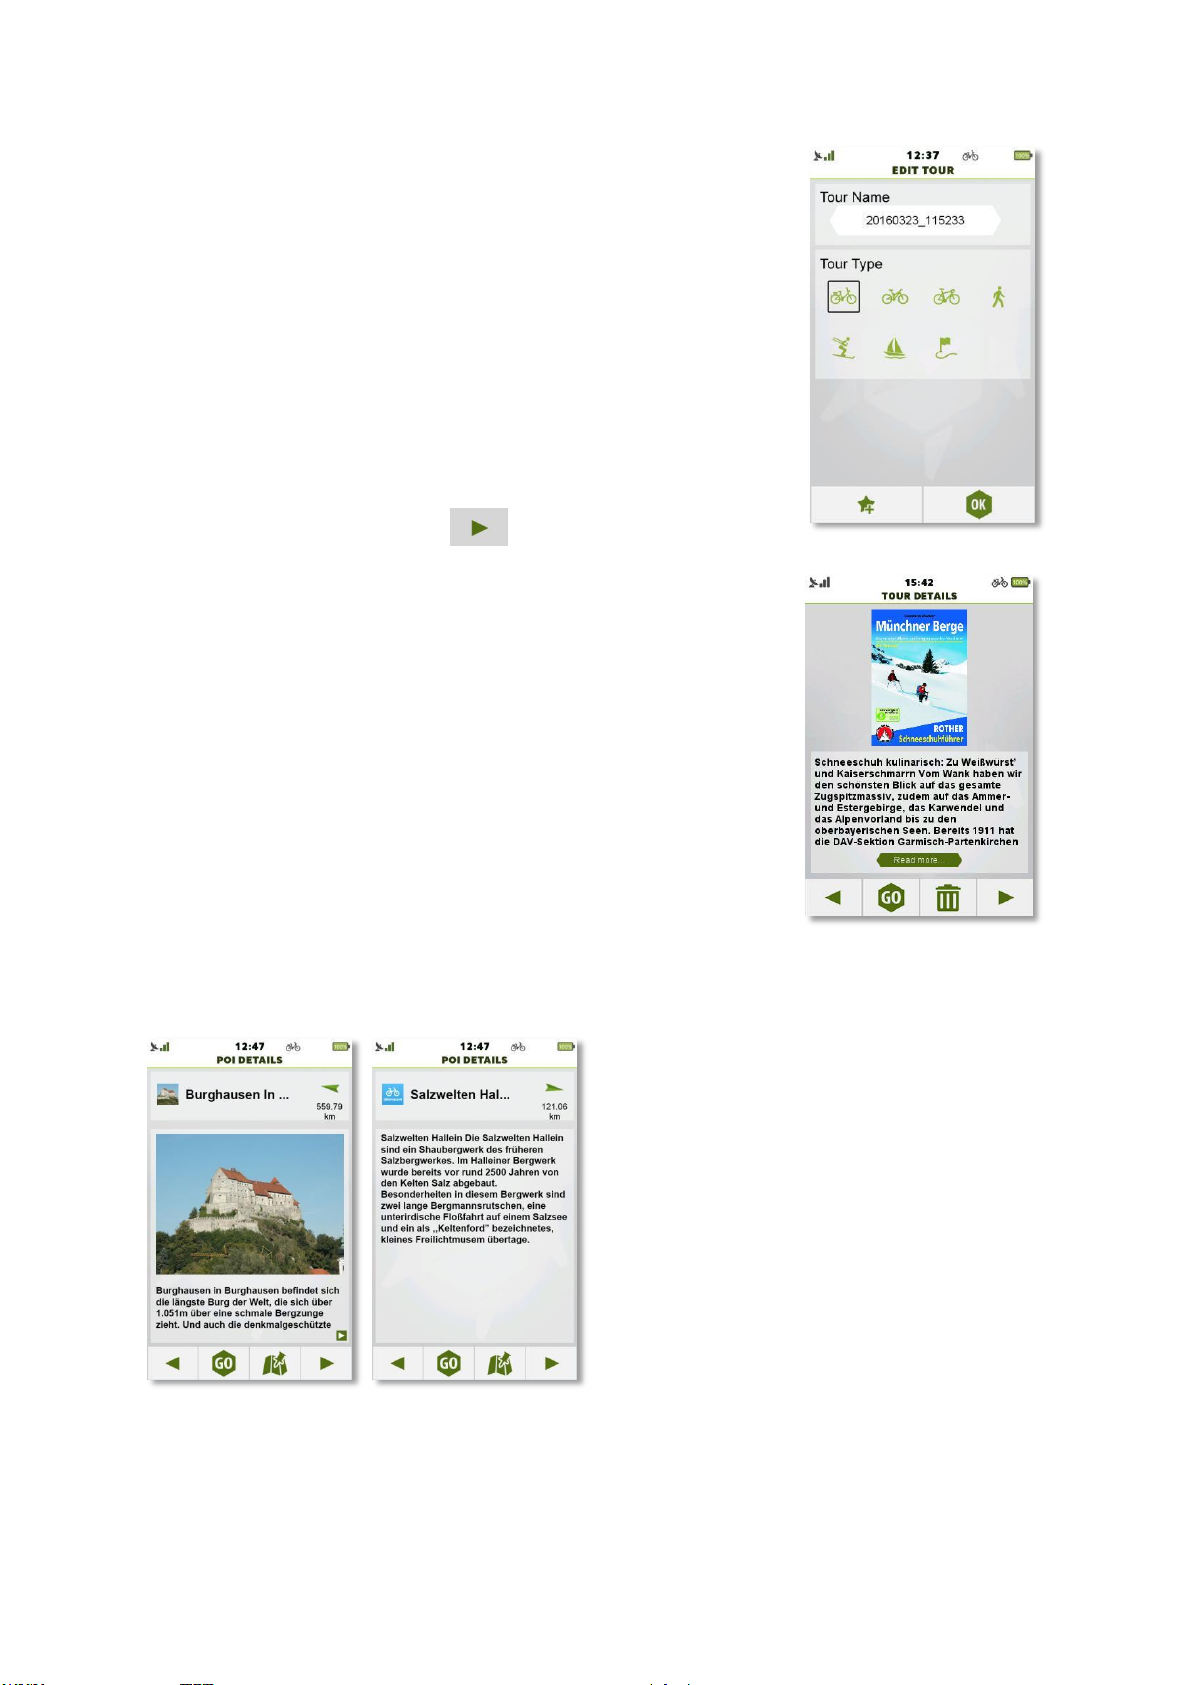
Tracks can be renamed by tapping on name of the track.
Press right arrow on Tour Details ( ) for tour details.
Press ‘Read more…’ for more description if present.
On the overview, tap onto a POI, or group of POI then info button to see its details.
TEASI Tour POIs in track (the second screen contains only description).
Page 38
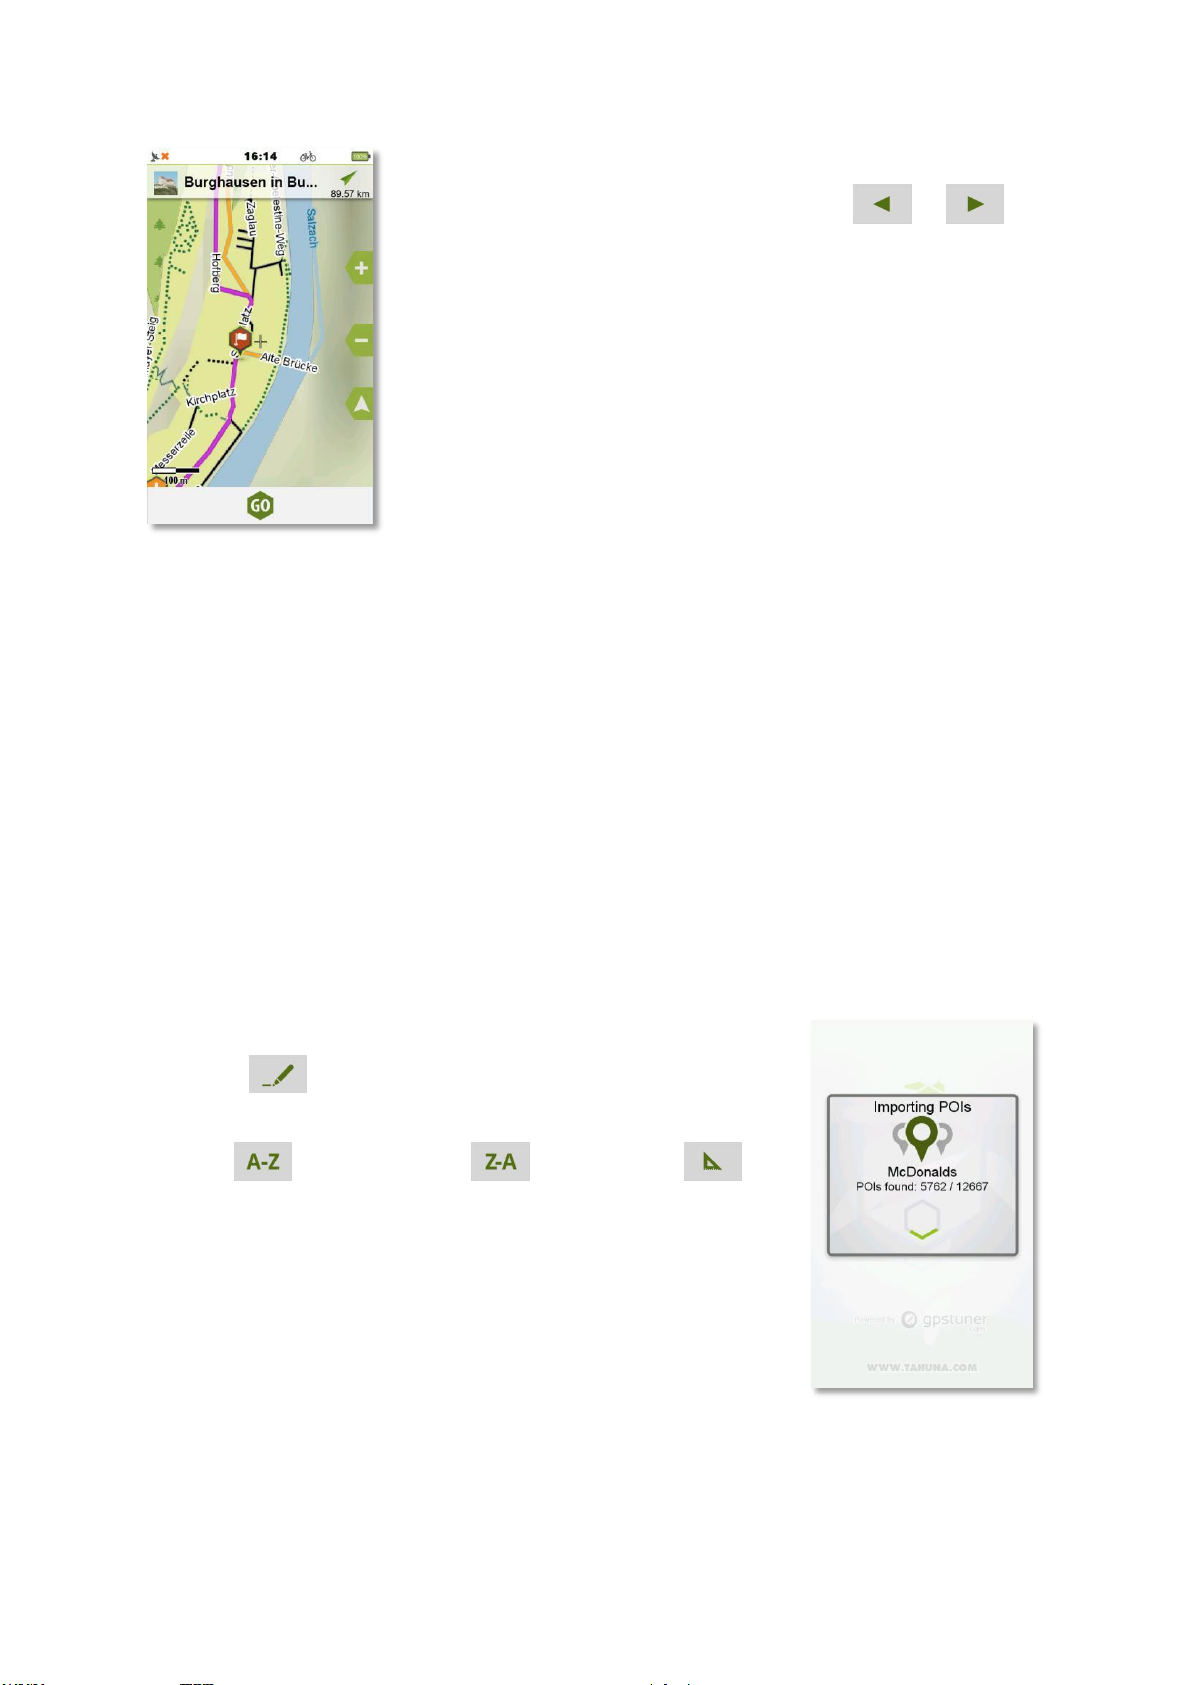
To preview a POI on map, press the map icon.
On the tour overview, select left or right arrow ( and ) to
see additional details of the track.
3.2.3.3 Imported POIs
Imported POIs contains the POI categories that weren’t already on this device but created
elsewhere and imported via computer.
To import POIs:
1. Connect the Teasi device to a computer.
2. Create a folder on the device inside the BikeNav folder called ‘ImportedPOIs’, if not
already existing.
3. All imported POIs must be placed here (‘BikeNav\ImportedPOIs’) to be able to see them
on the Teasi device.
The import started successfully when the following screen appears on next startup:
When you have imported POIs, these will be shown inside this area.
Tapping on , edits the selected Category’s icon.
On the bottom of the screen you can choose the sorting method by
alphabet ( ), reverse alphabet ( ), or by distance ( )
(this way the closest POI will be on top).
You can browse the list via the up and down arrows that are only
available, if the list contains at least 9 items.
Page 39
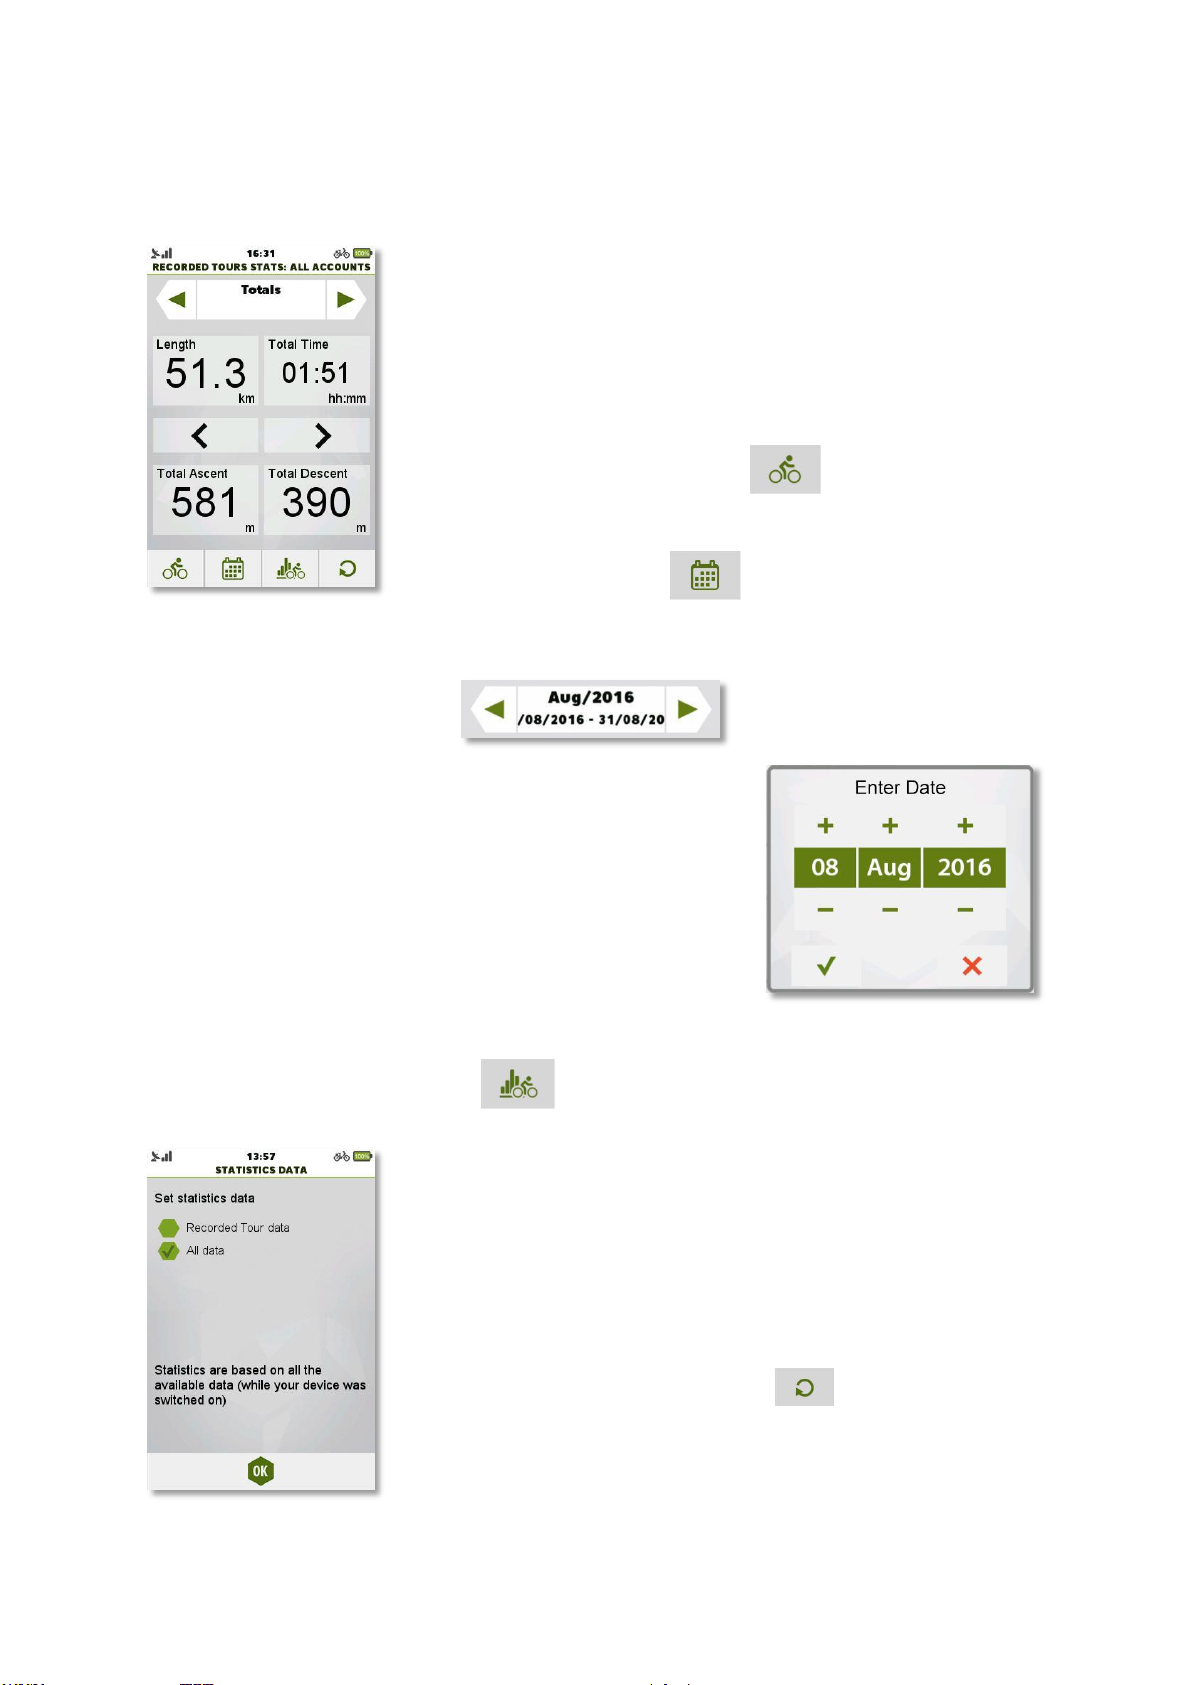
3.2.4 Statistics
Statistics is the tool that shows you a summary of your activity.
Statistics can summarize all user related data based on profiles,
time and only on-track (recorded tours) or off-track data included
(all information since first power up / last reset).
By default, the device shows the totals of recorded track on all
profiles. These settings can be changed in 3 different ways:
Tapping on the Profile button ( ) each profile can be
selected for examination or ‘All’ covers every value of each profile
aggregated.
Tapping on the calendar ( ) different time intervals can be
chosen (Totals / Year / Month / Week / Day). When a time interval is selected, it will be shown on
the top of the screen.
Tapping on this field results a date selector window, where the
needed date can be selected.
You can increase with plus, decrease with minus sign.
Accept the changes with tick sign, cancel with ‘X’.
The upper text matches the unit of the selected time interval
(for example, 1/2014 gives the first week of 2014)
and the lower one tells the exact interval.
Tapping on the data source selector ( ), two different sources can be selected:
Recorded track data shows the aggregated values of the recorded
tracks on the device.
All data informs about all collected data since the device was first
powered on / was reset.
Select by tapping on the radio button next to the desired option.
Changing between different screens with different fields can be done
by tapping on the arrow to the left or to the right.
Values can be reset by the reset button ( ).
Page 40
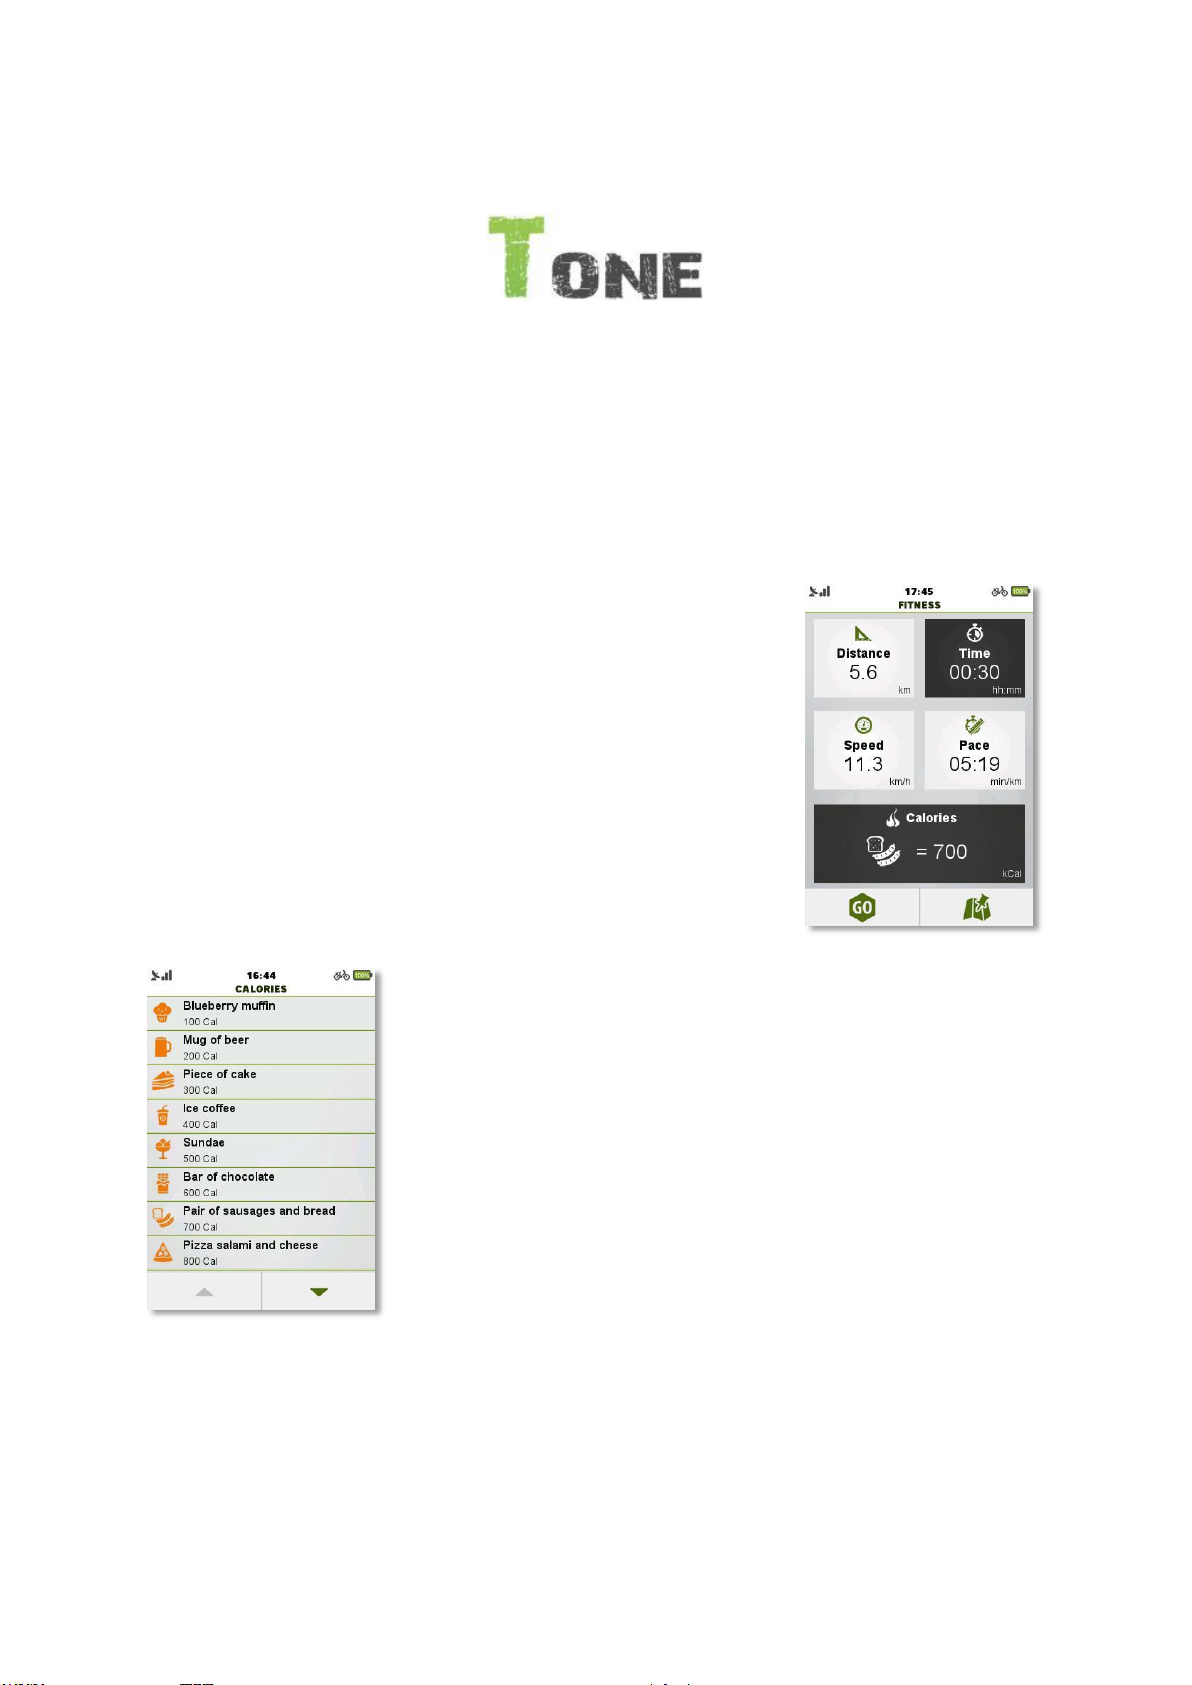
3.3 Fitness
TEASI ONE
Fitness option allows you to set a route, based on some parameter you would like to put the
emphasis on. These parameters can be divided into two sections.
You can set for how long do you want to train or you can set the intensity of your training. Two
different parameters can be chosen, giving flexible and customizable interface for best user
experience.
The guidelines of the training will be set based on the two parameters
set manually. To change the initial numbers on a parameter, tap on it
and set the desired value. The other parameters will change
correspondingly. For example, setting a higher Speed will result in
lower Pace, higher Distance and Calories values.
Calories can also be set by selecting an item from a list of foods and
beverages. Tapping on ‘Calories’ makes the list to appear.
Tap on an item to select its Calorie content as a target value for your
Fitness training.
When the values are set, three different methods can be selected for
training. Pressing ‘Go’ starts the training without any additional
navigation. The route of the training depends only on the user.
You can also plan a route with the given parameters, by selecting the
‘Plan route’ option.
Note: Fitness mode also starts a recording to store the progress of the
user.
Parameters based on how long should the training last are Distance,
Time and Calories.
Page 41

Page 42
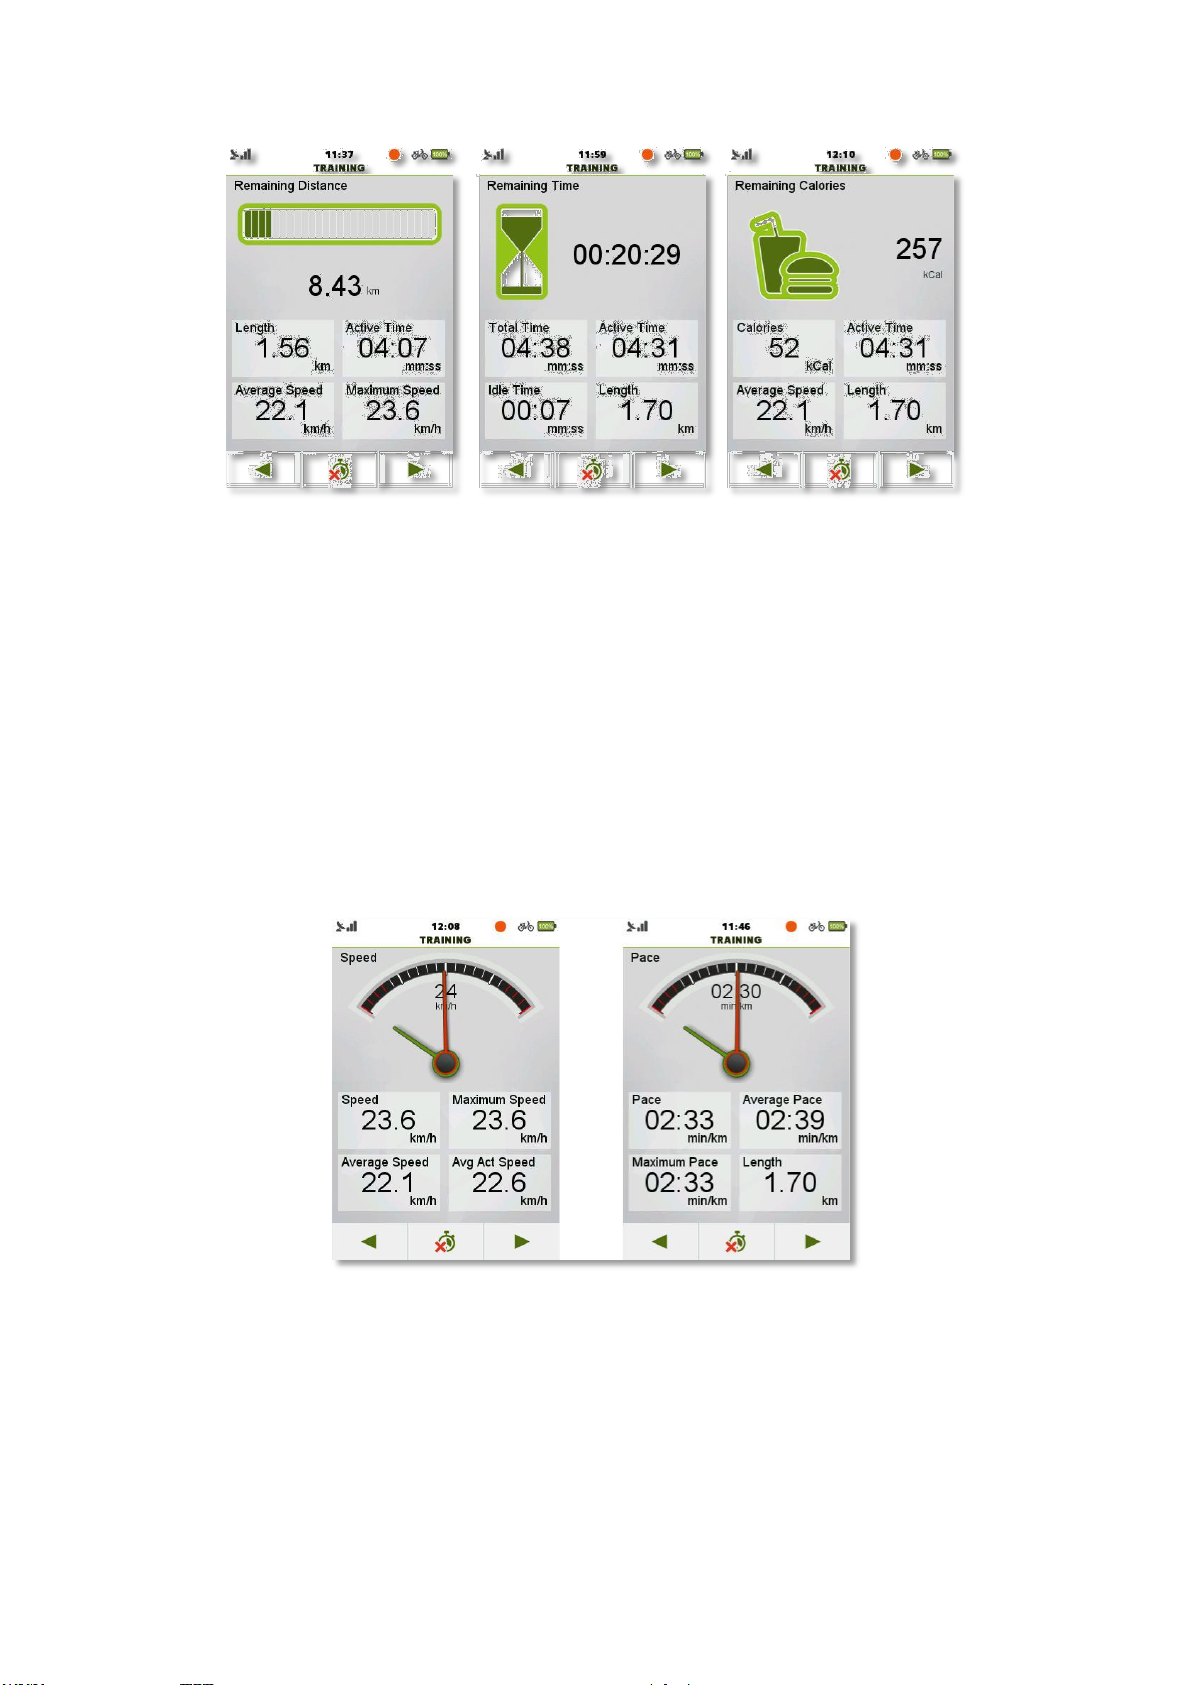
Training by Distance Training by Time Training by Calories
On these screens, the upper half of the screen is responsible for displaying the remaining units
from the training, with visual aids indicating the estimated progress of the workout.
For example, on ‘Remaining Distance’ screen the orange part indicates the progress already made
and the white part shows the distance still to be covered.
On ‘Remaining Time’ screen, the upper orange part shows the remaining part and on the
‘Remaining Calories’ screen, the orange part shows the calories still to be burned.
Placed lower on the screen, there are the computers. Tap on a computer to access the list of the
available tour computers to customize the training screens, to be as informative as it gets.
Training by Speed Training by Pace
The upper half of these screens shows the current intensity of your training. The value displayed in
the center is the currently set target.
Speed and Pace screens also show the average speed/pace on the short hand, so it can be easily
compared to the current values indicated by the long hand. The computer tours on the lower half
on the screen are also changeable by tapping on them.
Page 43
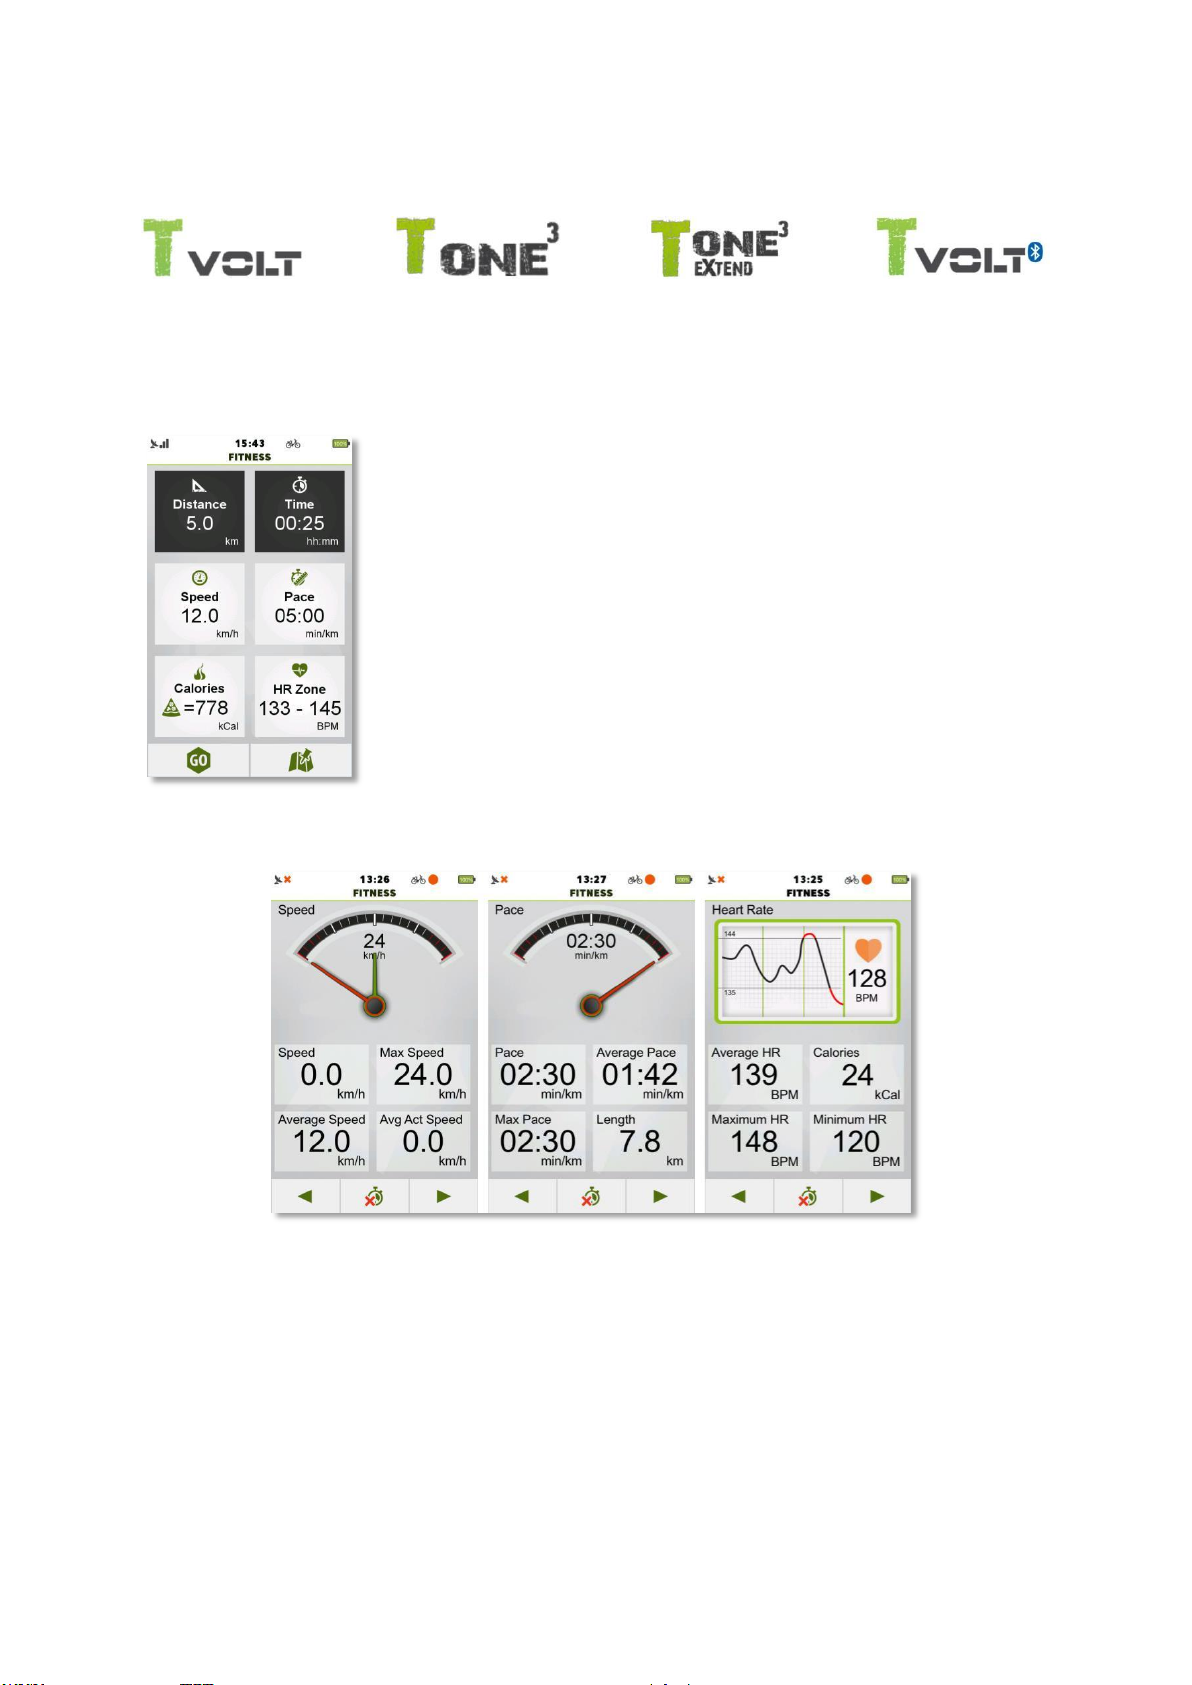
3.4 Fitness (with HR)
TEASI VOLT & TEASI VOLT BT & TEASI ONE3 & TEASI ONE3X
Fitness by Distance, Time, Speed, Pace and Calories with HR Zone.
Calories can also be set by selecting an item from a list of foods and
beverages.
Tapping on ‘Calories’ makes the list appear.
Training by Speed Training by Pace Training by HR Zone
The upper half of these screens shows the current intensity of your training. Speed and Pace screens
also show the average speed/pace on the short hand, so it can be easily compared to the current
values indicated by the long hand.
On the HR Zone screen the Heart Rate Monitor is shown with the previously recorded data. The
computer tours on the lower half on the screen are also changeable by tapping on them.
The fitness computers on the lower half on the screen are also changeable by tapping on them.
Page 44

Page 45
3.4.1 Fitness based on HR Zones
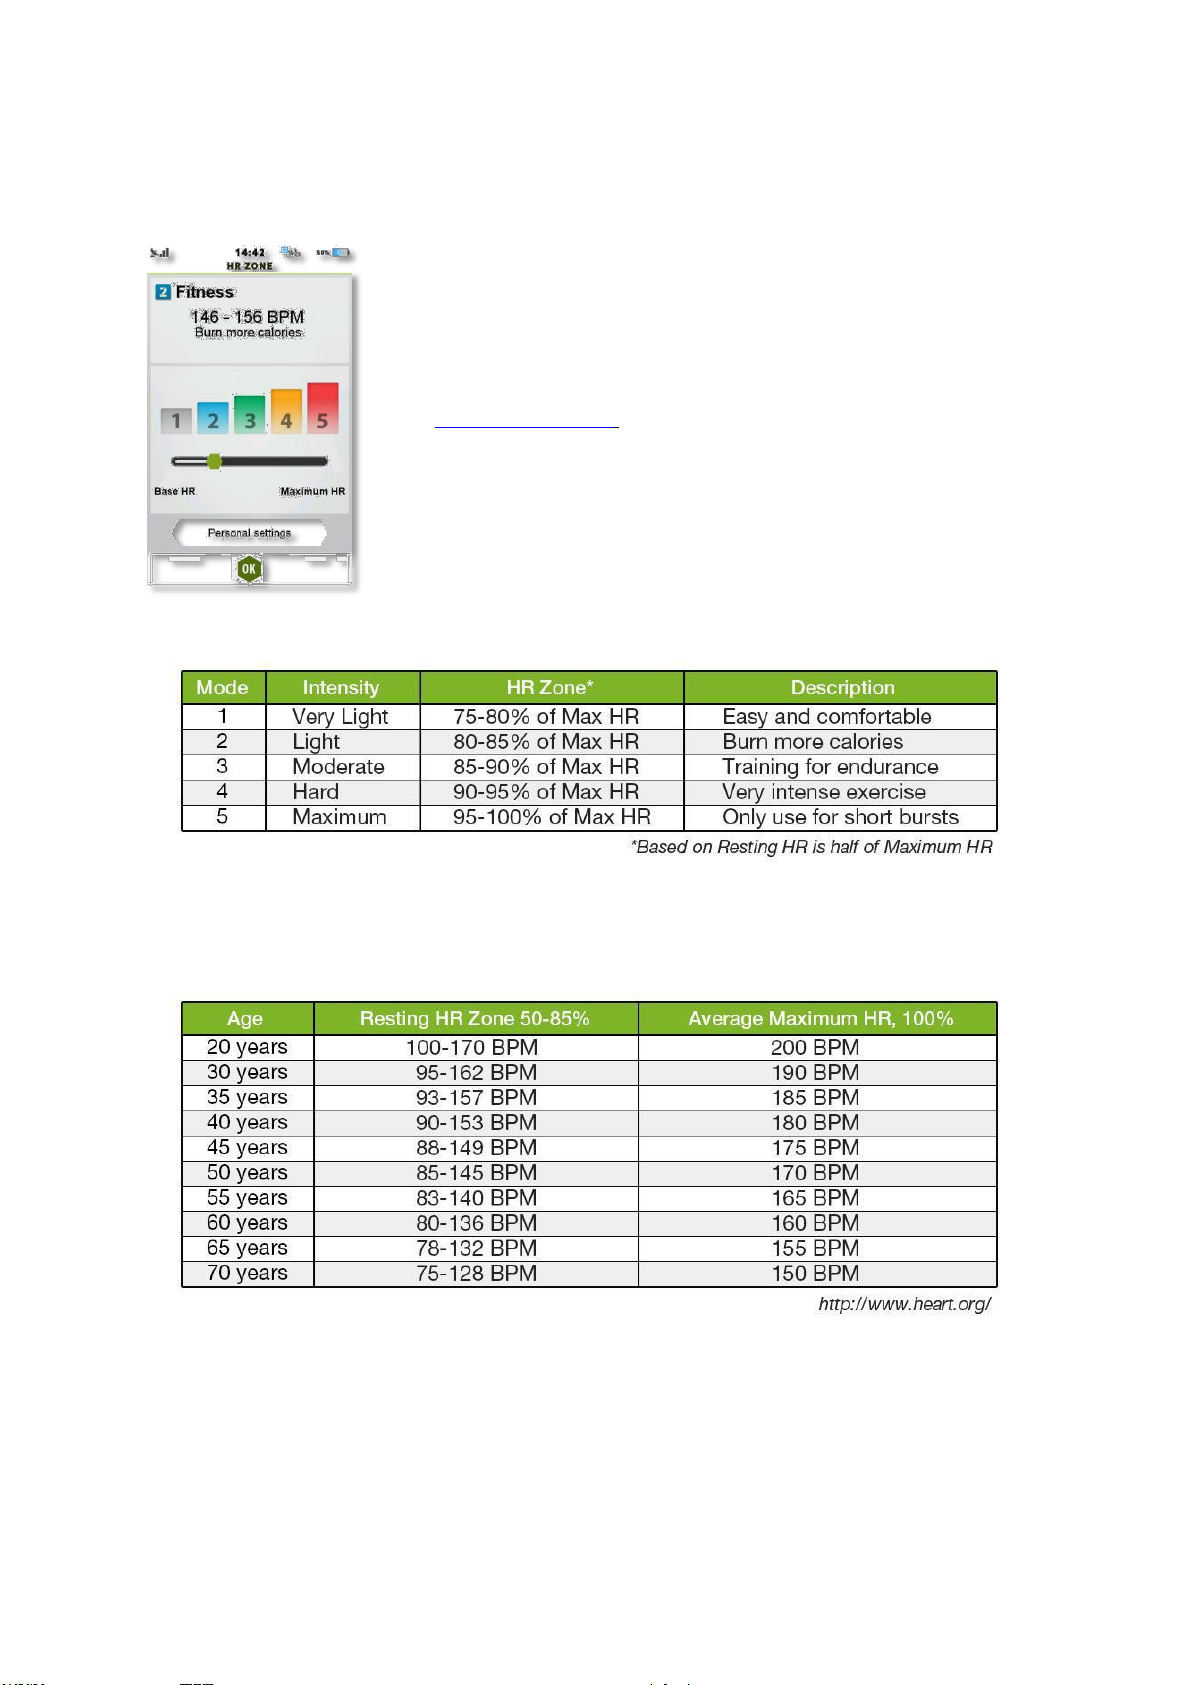
5 different zones are available for settings different intensity.
Zones are based on Resting and Maximum Heart Rate. These values
can be set by tapping ‘Personal Settings’, or in Settings Accounts
Heart Rate Settings.
The following table gives a short insight about the 5 different zones.
For setting up the ideal Resting and Maximum Heart Rates by Age, please refer to the following
table.
Page 46

Page 47
3.5 Race Training
TEASI PRO & TEASI ONE3 & TEASI ONE3x
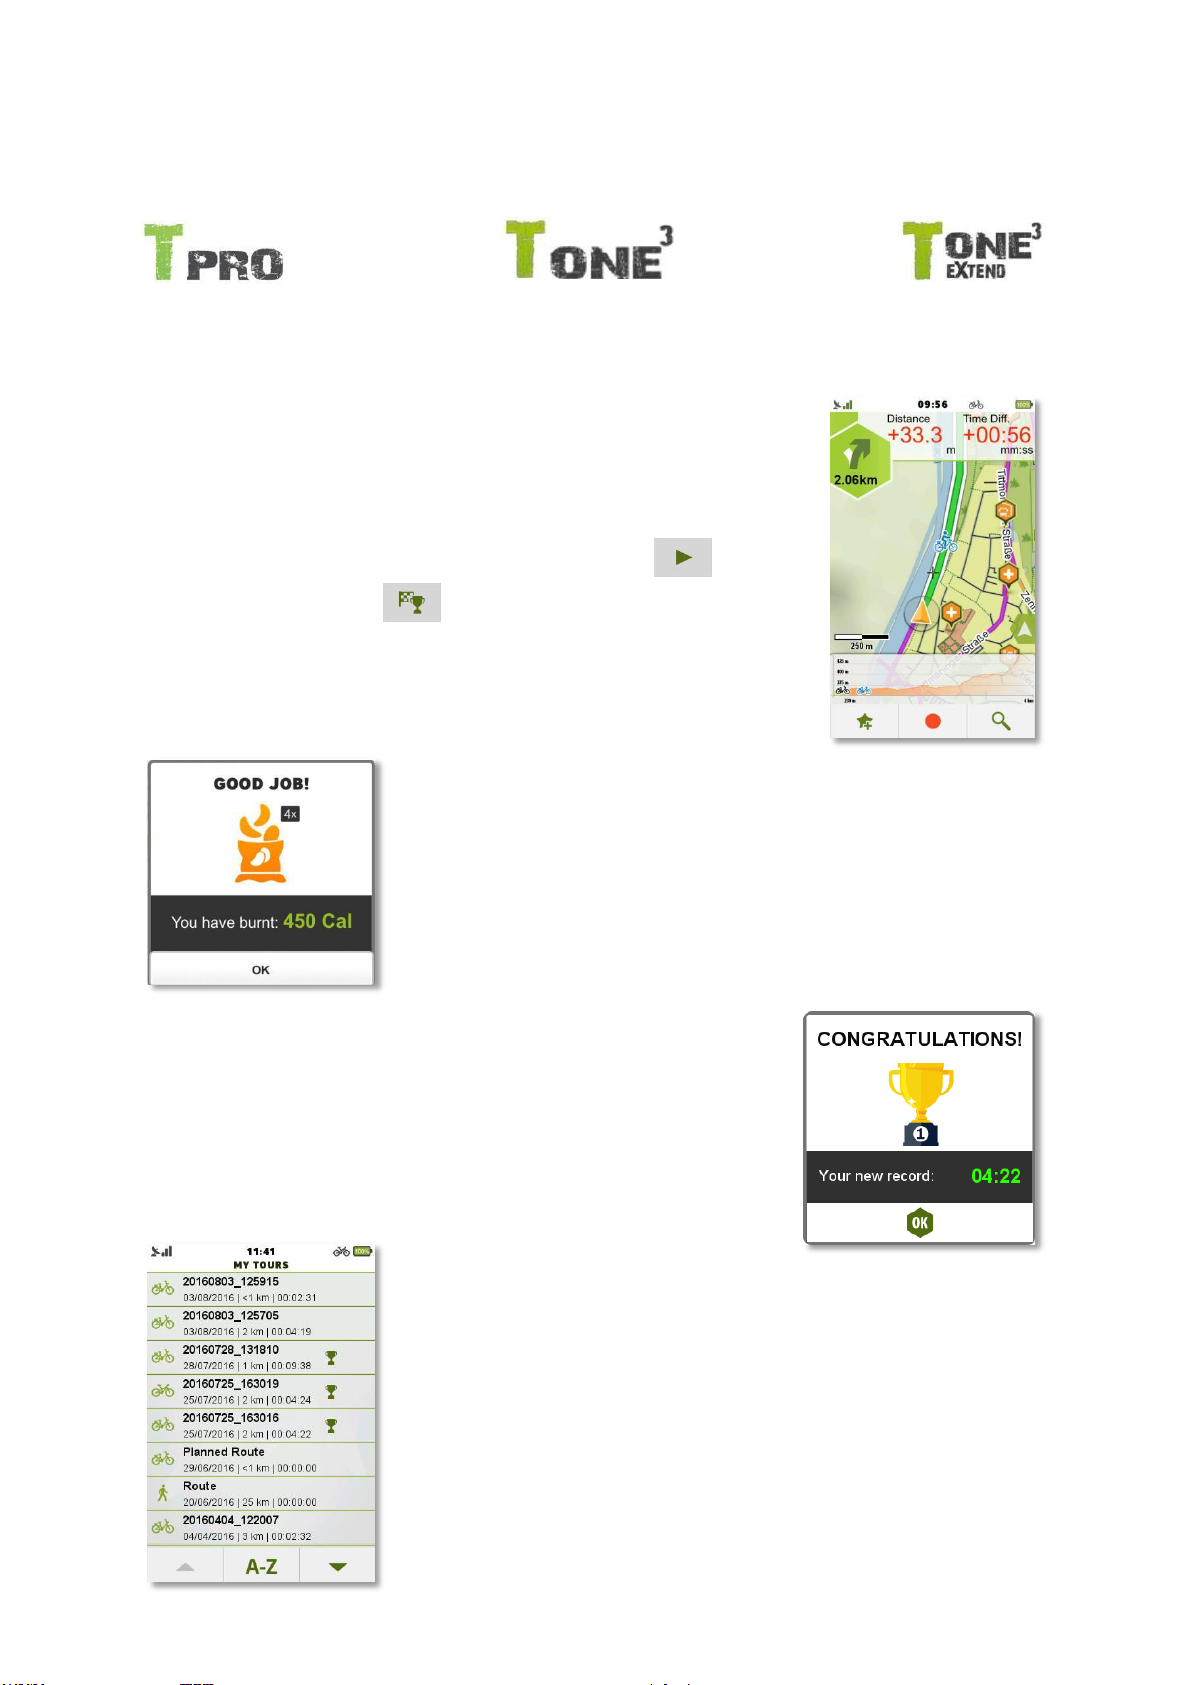
It is also possible to start race on a previously recorded training. This way
a ‘ghost racer’ will be shown during navigation, displaying the progress
from the previous recording. The actual difference is shown in time and in
distance also.
To reach race training function select a track from track list in training.
Press the right button on the bottom of the screen ( ), select a
track, then tap on ‘Race’ ( ). After the race started, the device will
guide through the recorded track, showing the position compared to the
opponent.
At the end of the race, the results are shown.
Race results when new record is set.
On the ’My Tours’ list it is indicated if there is any previous race record
for a tour.
Page 48
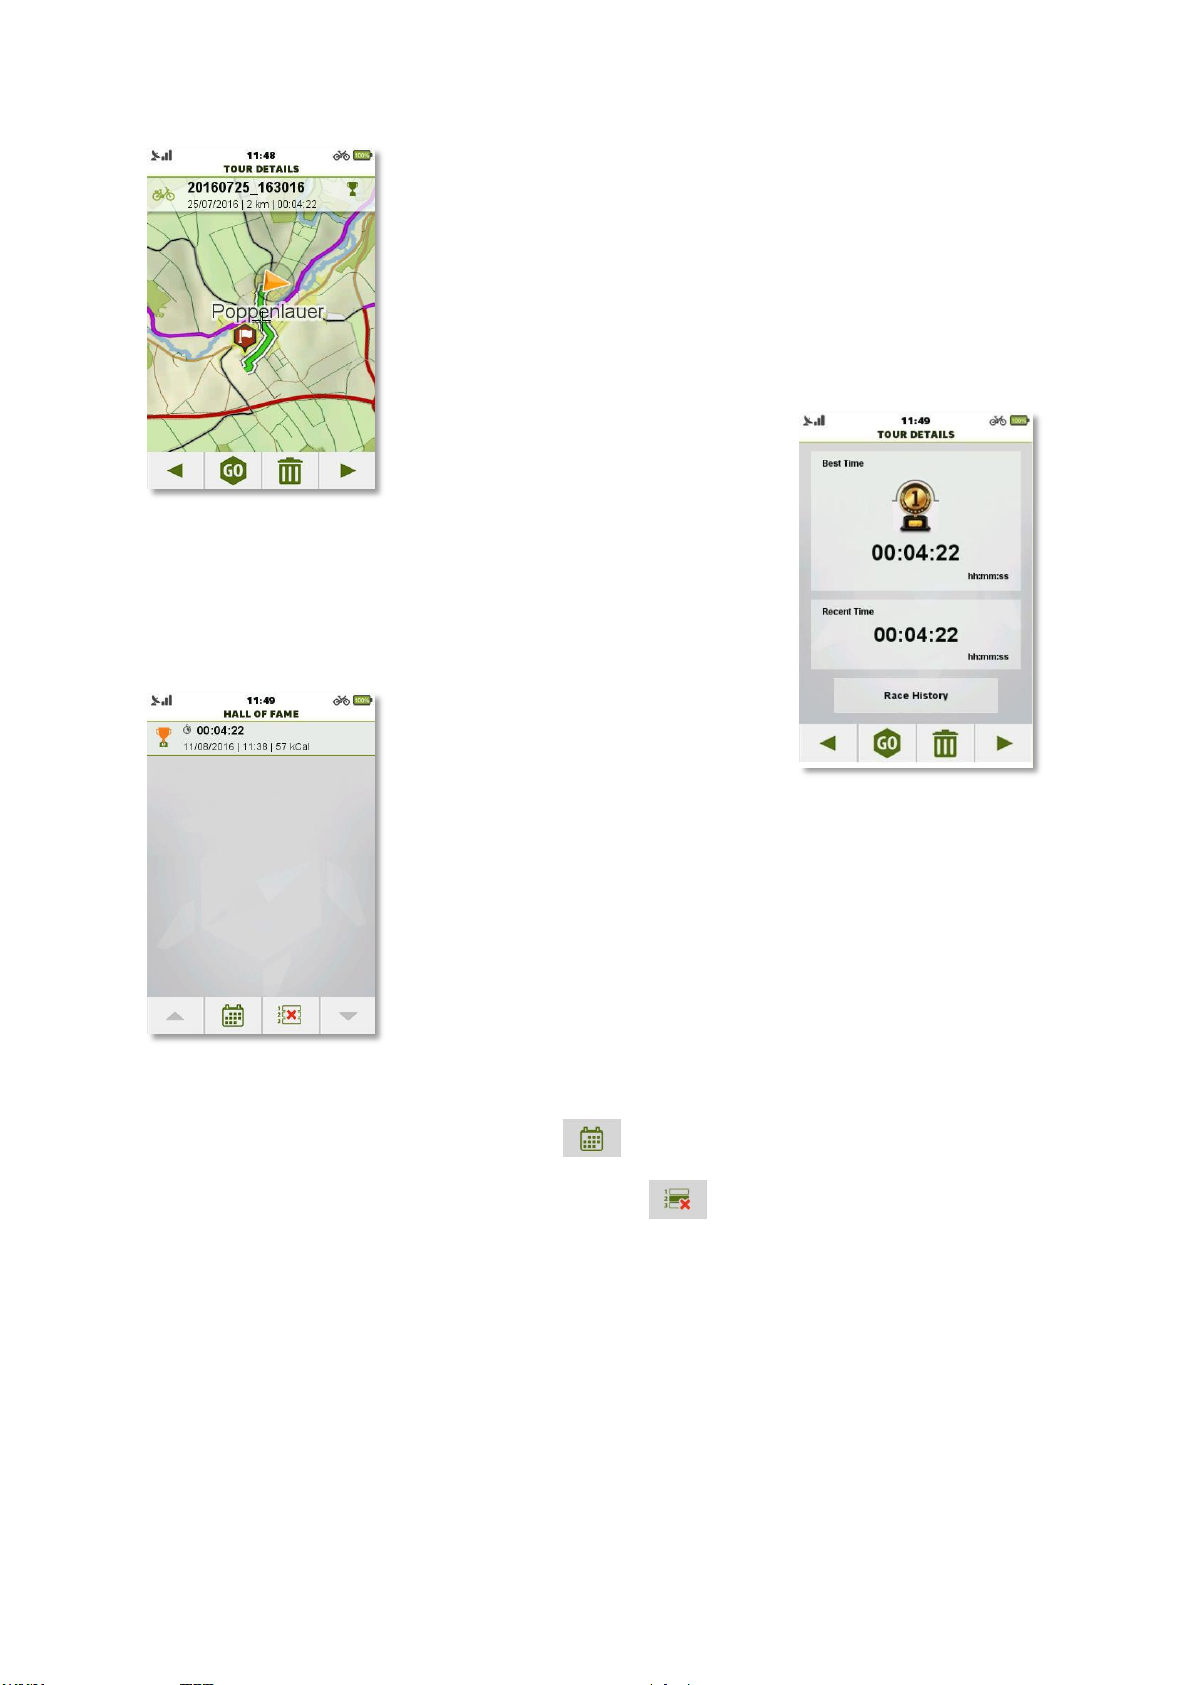
When a Tour is opened that contains race data, it will be indicated
also on Tour Details. A little cup will be shown on Tour details next
to Tour Name, informing that there is valid race data for this Tour.
On this screen the best and the latest race times are shown for this
Tour.
Previous Races on this Tour can be displayed by pressing ‘Race
History’.
Race history is displayed on ‘Hall of Fame’ screen. History can be ordered two ways: ‘Latest first’,
or ‘Fastest first’. Pressing the calendar button ( ) will change between the two modes.
Race history can also be erased by pressing the button: ( ).
Page 49

Page 50
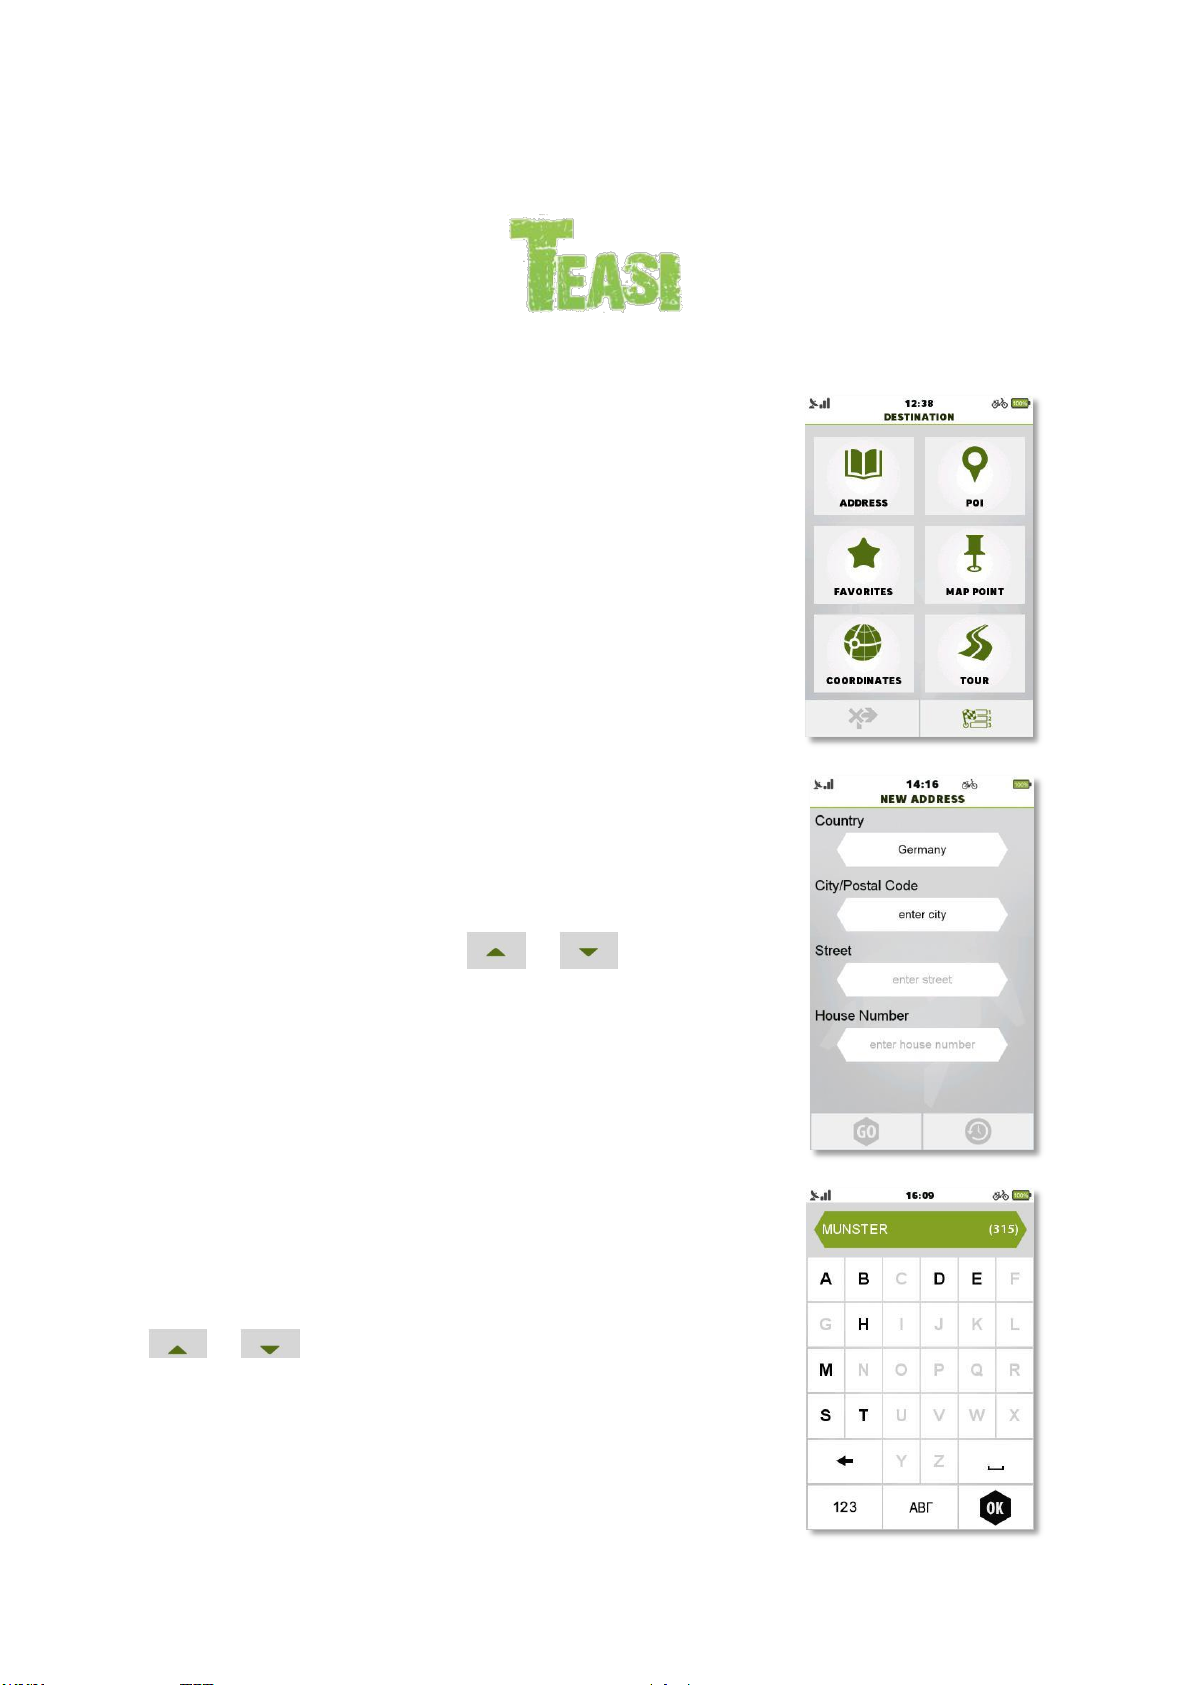
3.6 Destination
Affect all models
Destination menu is implemented in a complex, yet simply
understandable way to make finding any particular address or location
in an easy way.
3.6.1 Address
Address search is to find a location by its postal address. You can
specify each detail to find the location you are looking for.
New address selection has a simple method:
First, Country has to be chosen. Tap on the button to change and
browse the available
countries with the up/down arrows ( and ).
Next step: select City/Postal code. You can enter your City name in
Address Search.
By tapping the field under the city/postal code the virtual ABC
keyboard will appear. You can start typing the city you are looking for
and only the possible next characters will be available on the keyboard,
thanks to the predictive input engine.
In the text field on the right you can find a number in brackets that
shows the number of the available cities that match the entered
characters. If the number is fewer than 500, the list button appears and
by clicking on it the list of available cities is shown.
You can move up and down in the list with the up and down icons
( and ) if there is more than 8 cities in the list.
If less than 8 items are left, the list pops up automatically.
You can also select the city by postal code.
Whenever you need to enter a digit instead of a character, you can
switch to the numerical keypad by pressing the ‘123’ keyboard button.
Page 51
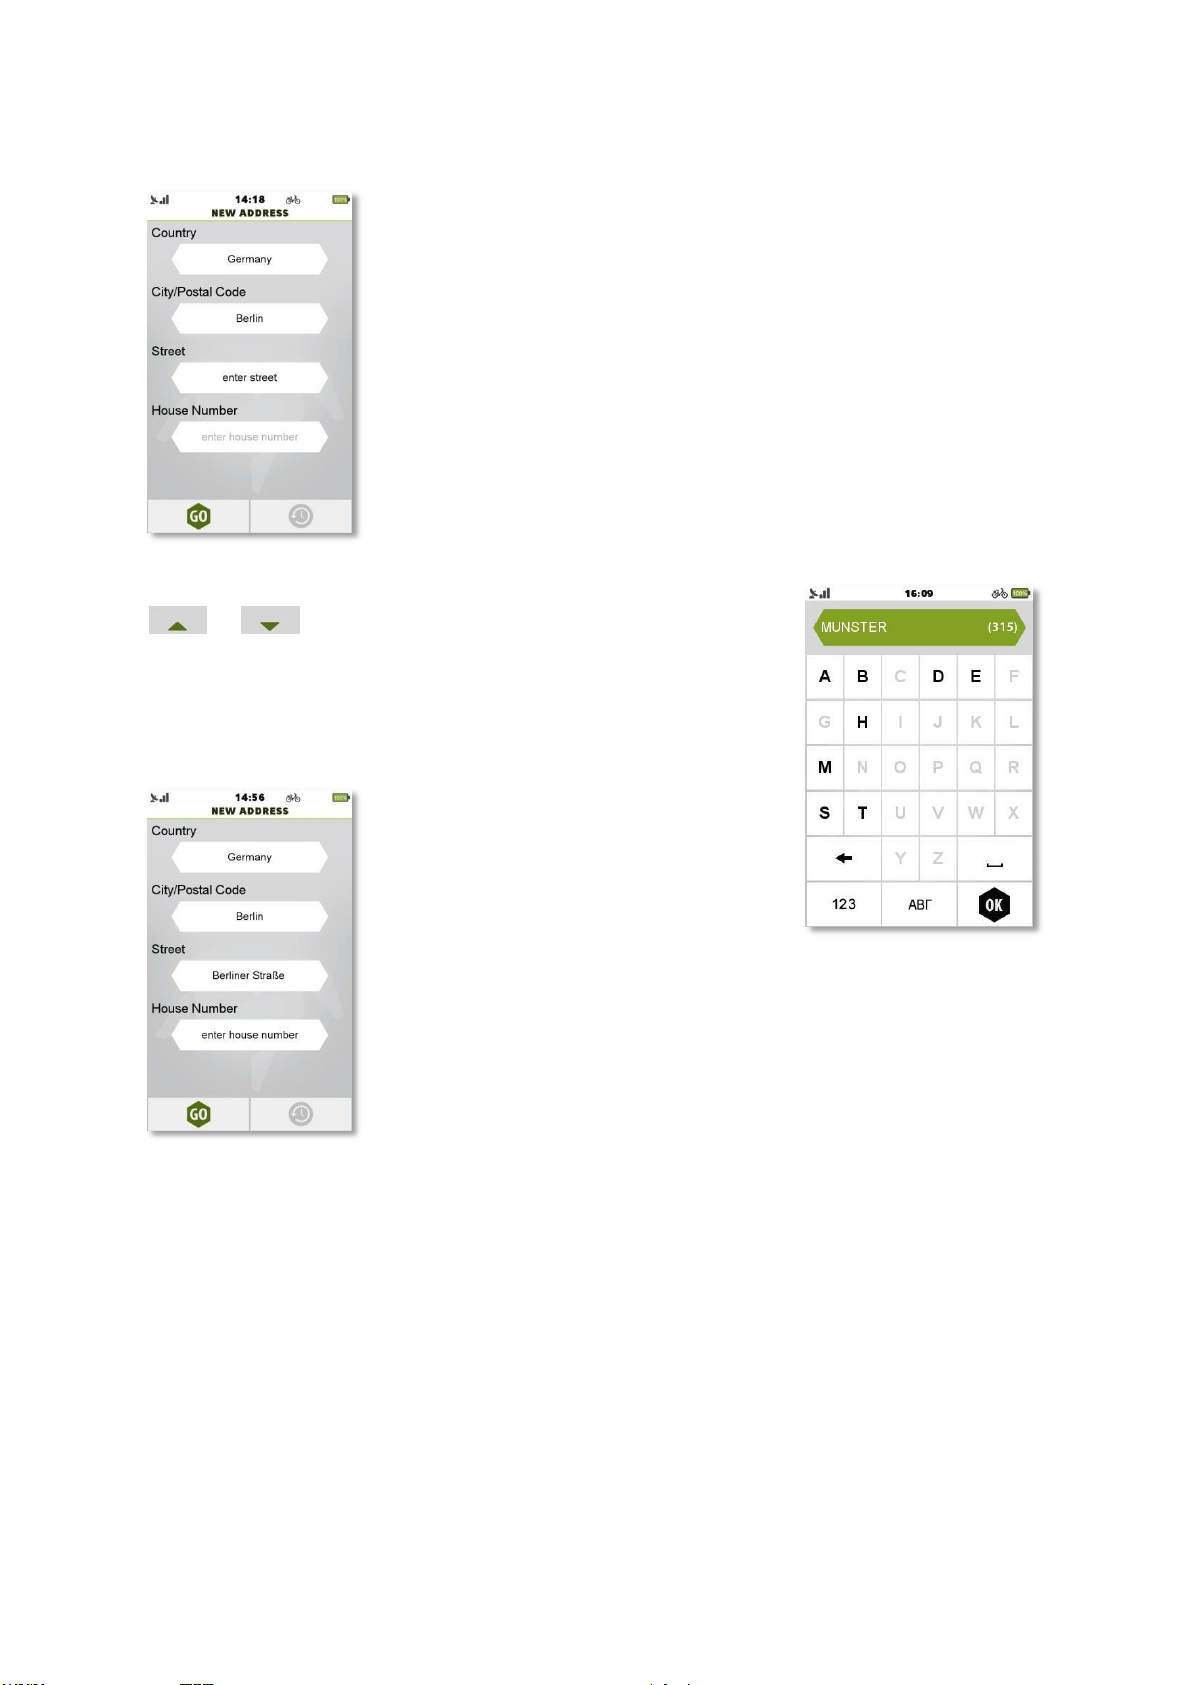
Tap in the list the selected City.
Next step: select Street. Same routine applies here, the ABC keyboard
will appear when tapping the name starts. The predictive input engine
will help here also.
In the text field, on the right, you can find a number in brackets that
shows the number of the available streets that match the entered
characters. If the number is fewer than 500, the list button appears
and by clicking on it, the list of available streets is shown.
Note: Some small cities have only their City Center available, thus not
containing any street information. In these cases, the City Center of the
city will be used as the destination point.
You can move up and down in the list with the up and down icons
( and ), if there are more than 8 streets in the list.
If less than 8 items are left, the list pops up automatically.
Tap in the list the selected Street.
Next and final step is the house number.
When tapping on the house number field the
virtual numeric keypad activates.
On this keypad, you can enter the house
number you are looking for.
If the house number is not valid, the device will ask whether it should
target the center of the street itself.
Note: You don’t need to enter all the details. Without house number the
center of the street will be used and without given street name, then the
center of the city will be used (the latter may not work in smaller cities).
Page 52
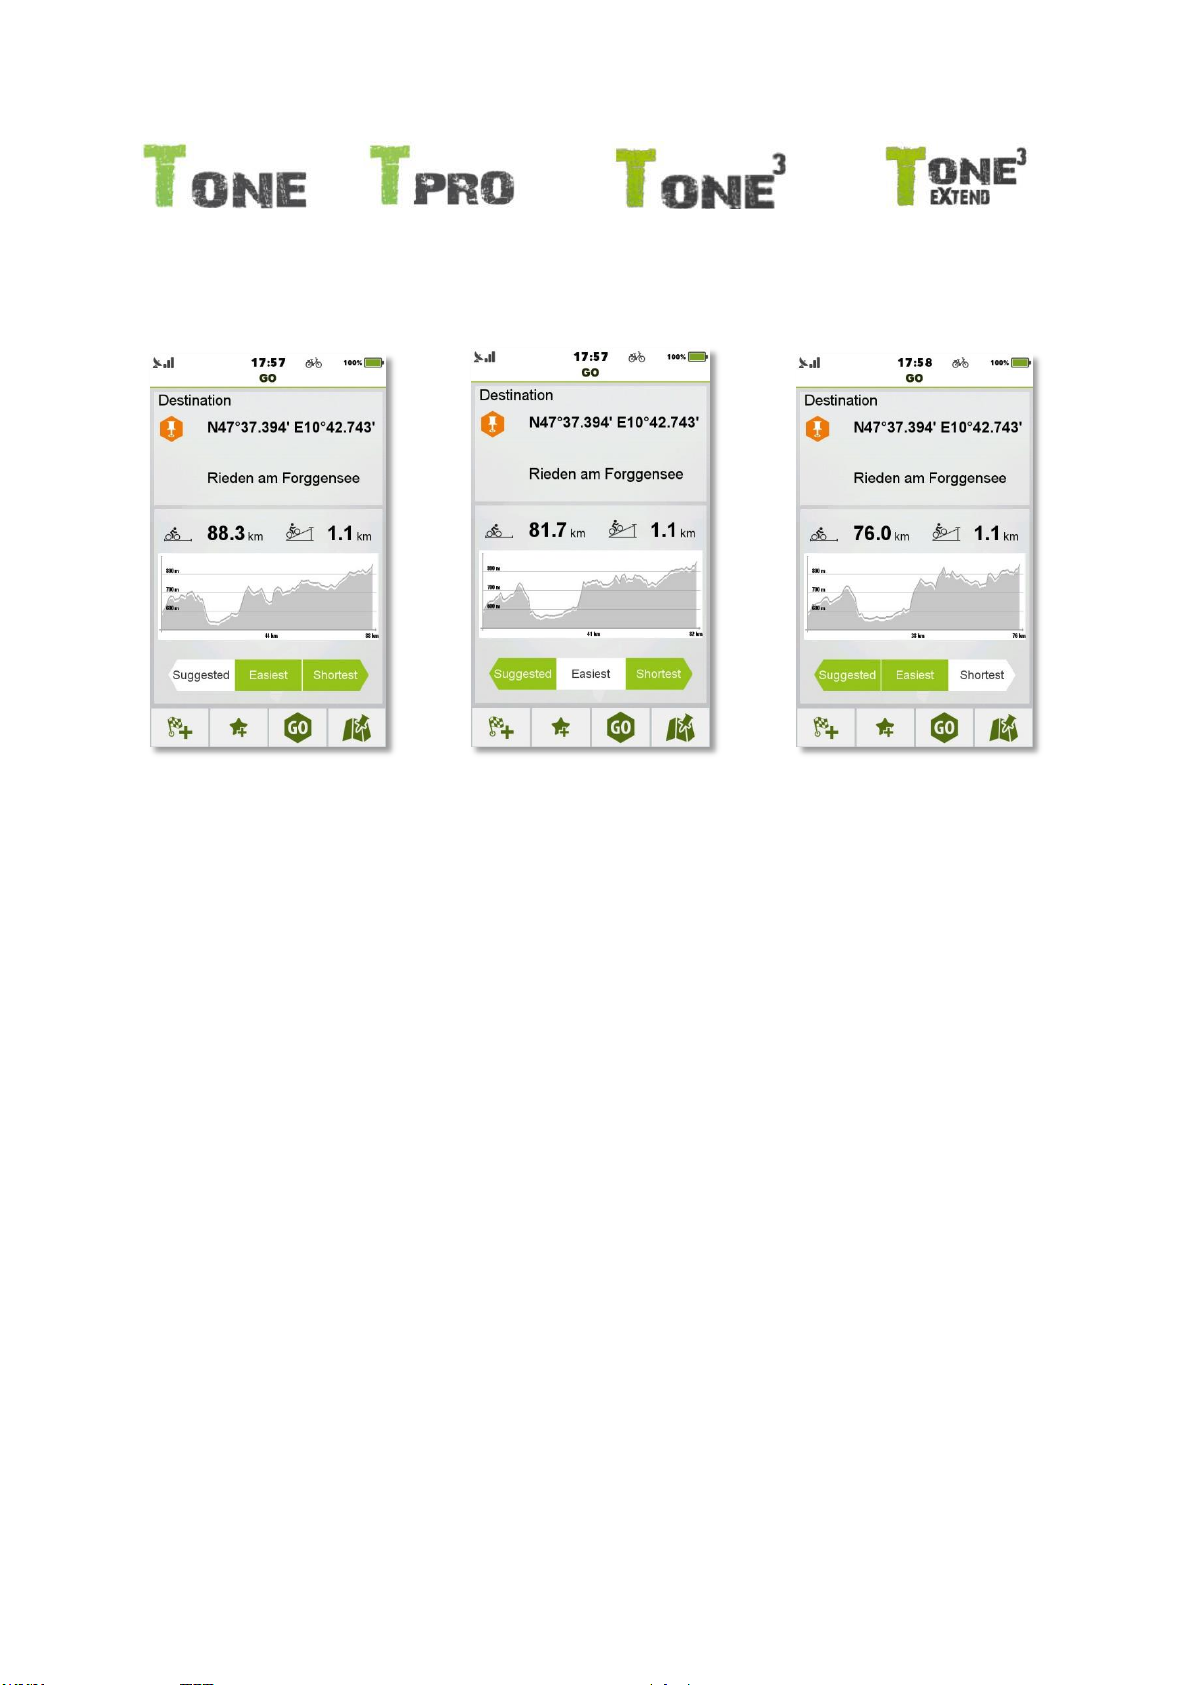
TEASI ONE & TEASI PRO & TEASI ONE3 & TEASI ONE3X
After the address is selected, ‘Start navigation’ screen will appear.
On the upper side of the screen the selected address and the distance is calculated. Until the
distance is calculated the beeline distance is displayed.
A graph with the altitude outline will be shown after calculation.
Note: Teasi is able to calculate routes that are far not more than 300 km (beeline) from your current
position. If the beeline distance is above 300 km, then you will be warned.
Page 53

Page 54
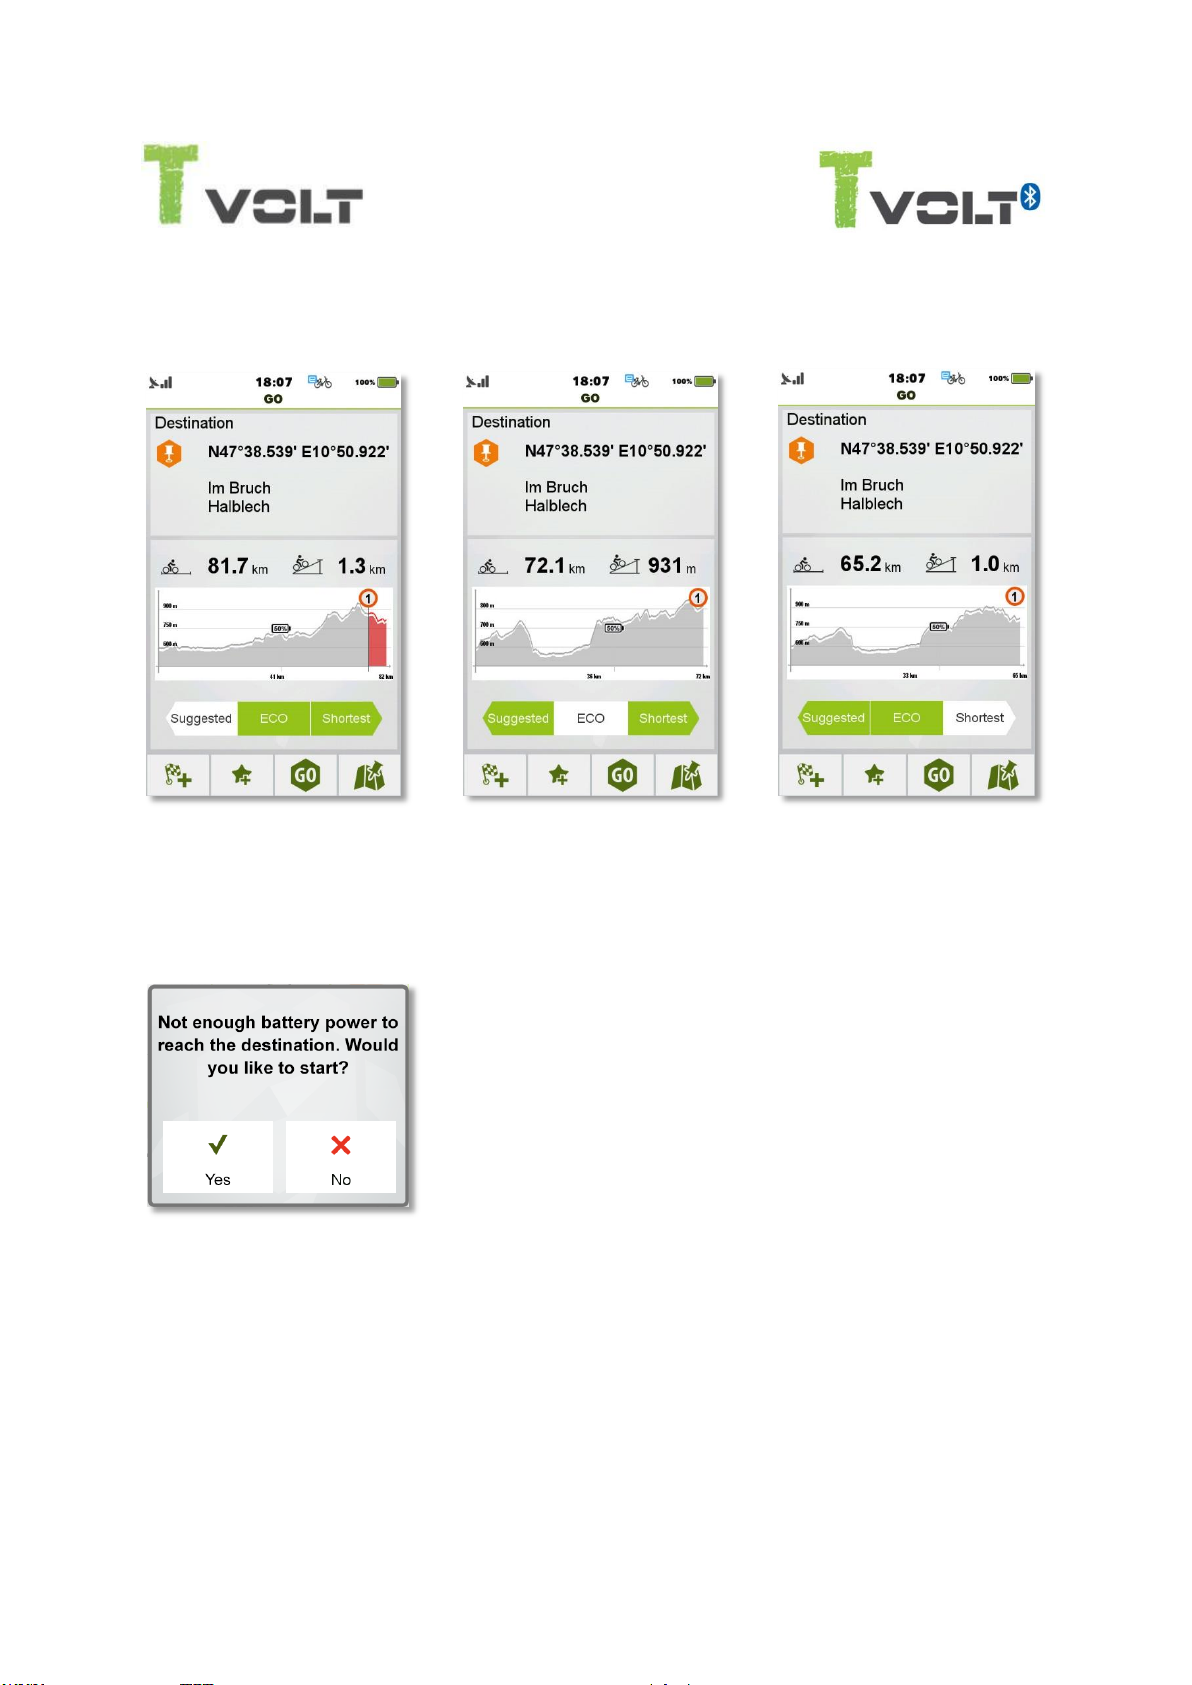
TEASI VOLT & TEASI VOLT BT
When the desired address is selected, a Destination - GO screen is displayed with preliminary route
information and Current Assist Level - the base of this calculation. When Current Assist Level is
changed, the new calculated route is shown with the changed assist level.
A colored line under the altitude graph will display the battery charge evolution during the course
of the navigation.
When Destination cannot be reached with current battery level,
the unreachable part of the elevation graph will be shown in red,
with an empty battery icon as indication. If you still press ‘Go’, you
will be warned to have problems reaching your destination:
Selecting ‘Yes’ will start navigation and selecting ‘No’ will make
new destination selection available. On the upper side of the
screen, the selected address and the distance is calculated. Until
the distance is calculated the beeline, distance is displayed. A
graph with the altitude outline will be shown after calculation.
Note: Teasi is able to calculate routes that are far not more than 300 km (beeline) from your current
position. If the beeline distance is above 300 km, then you will be warned.
Teasi application proposes three alternative routes.
Page 55
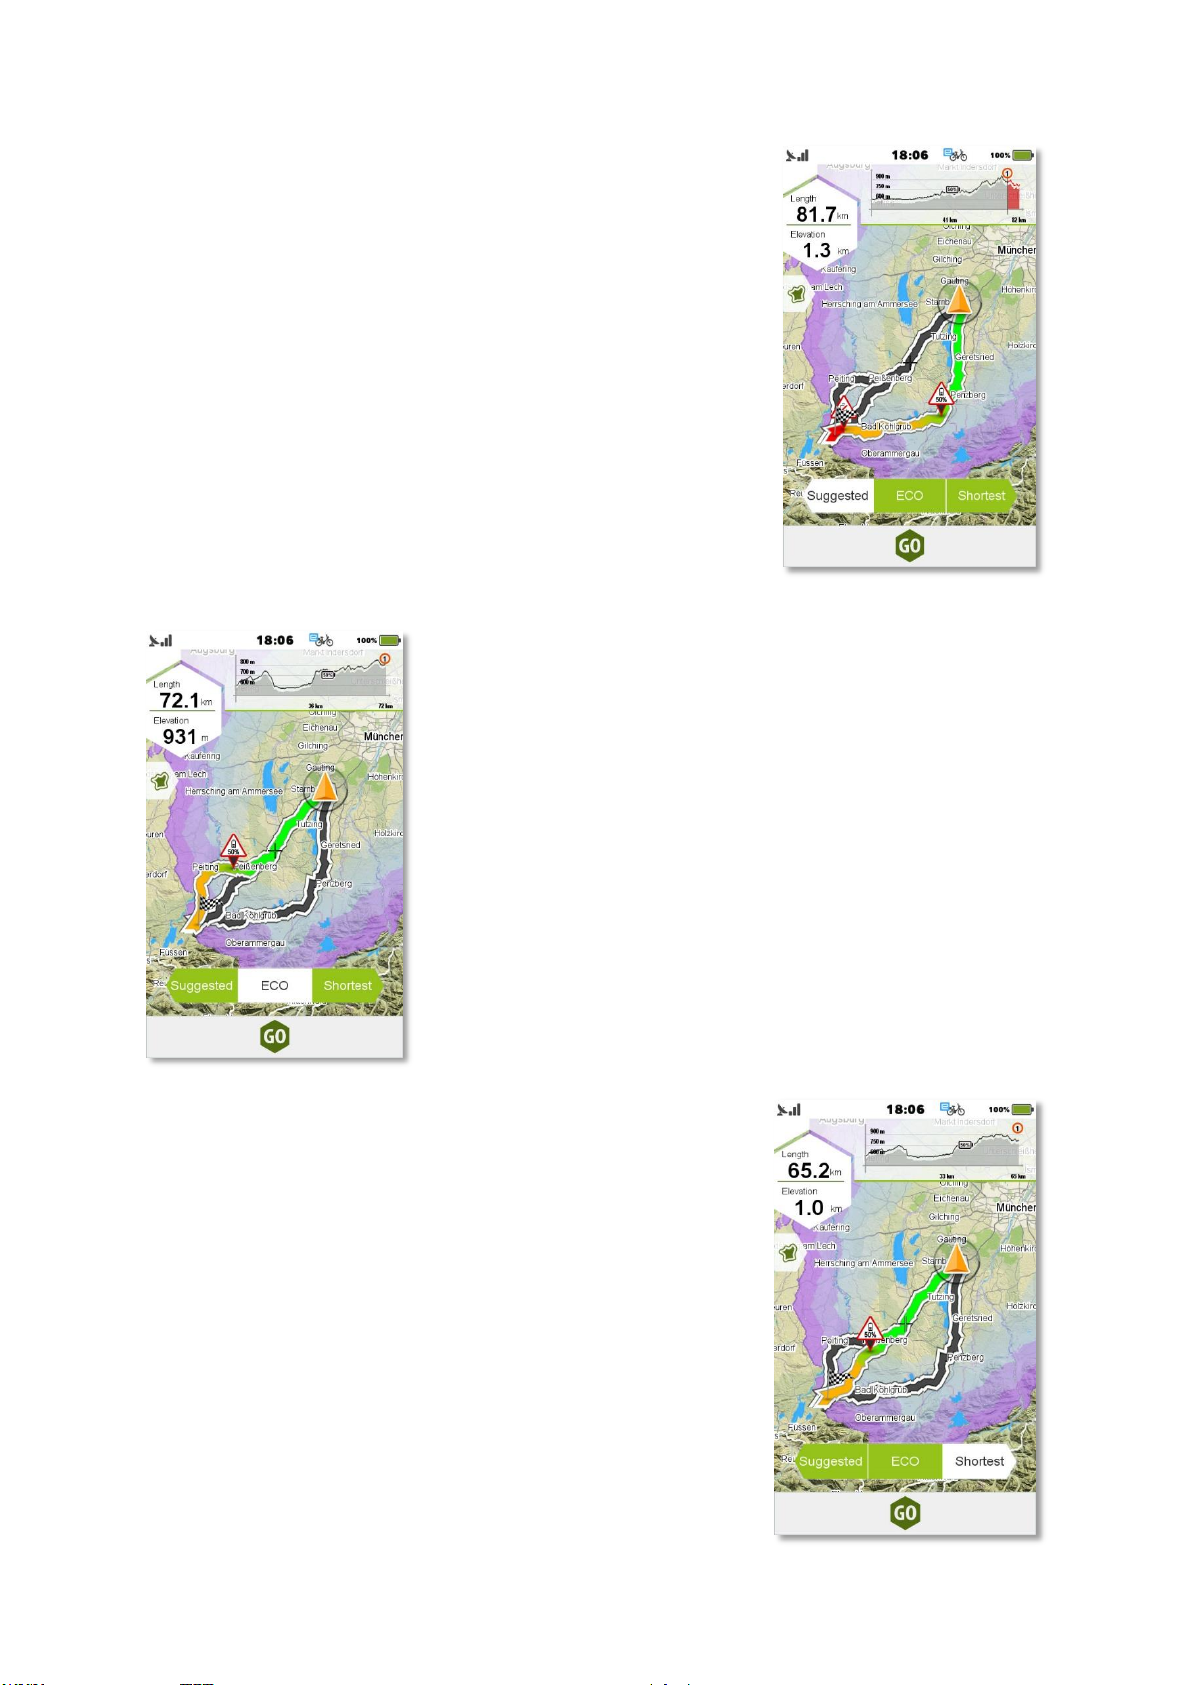
The ‘Suggested’ path gives the best combination of roads, paying
attention to optimize the type of roads (based on user profile),
hardness and length of the route.
‘ECO’ mode calculates routes that use the least amount of energy.
Therefore trying to make your E-Bike battery to last as much as
possible.
The ‘Shortest’ option will take the user to the destination using
the shortest available path, regardless of the difficulty of the route.
Page 56
TEASI ONE & TEASI PRO & TEASI ONE3 & TEASI ONE3X
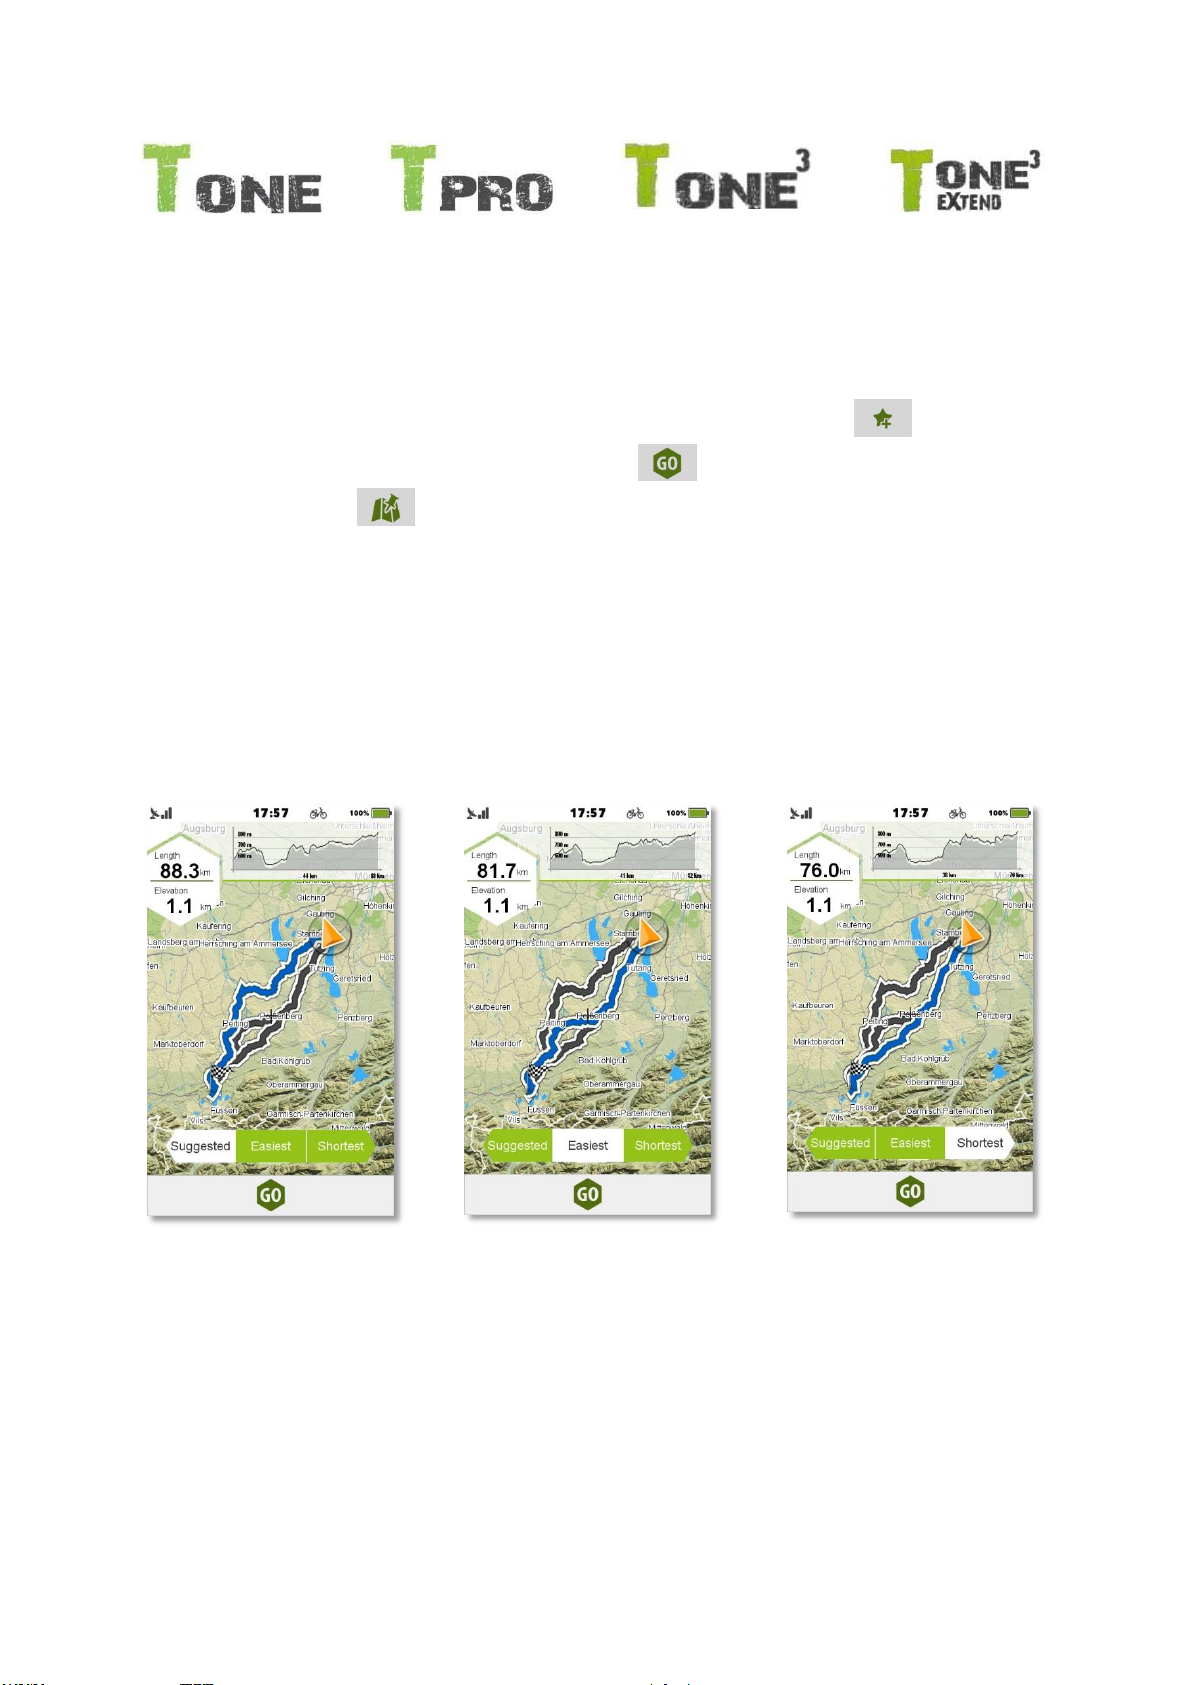
By tapping on one of the three possibilities, the device will show the route which belongs to that
option. When on the Details screen, the Altitude profile will be shown and on Map Preview, the
map of the calculated route itself is available.
At the bottom of this screen there are 3 buttons. By tapping the ‘Star’ button ( ), the address
is added to favorites. By tapping the ‘Go’ button ( ) navigation starts immediately. By
selecting the map icon ( ) the map will show with the preview of the calculated route.
If you are in preview mode, you can see a colored preview of the calculated route. Also on this
screen, it is possible to choose an alternative route.
The ‘Suggested route’ gives the best combination of the route, optimizing it based on the
difficulty and length of the route.
The ‘Easiest route’ calculates routes that have the lowest altitudes to climb.
The ‘Shortest route’ will take the user to the destination using the shortest available path,
regardless of the difficulty of the route.
Page 57

Page 58
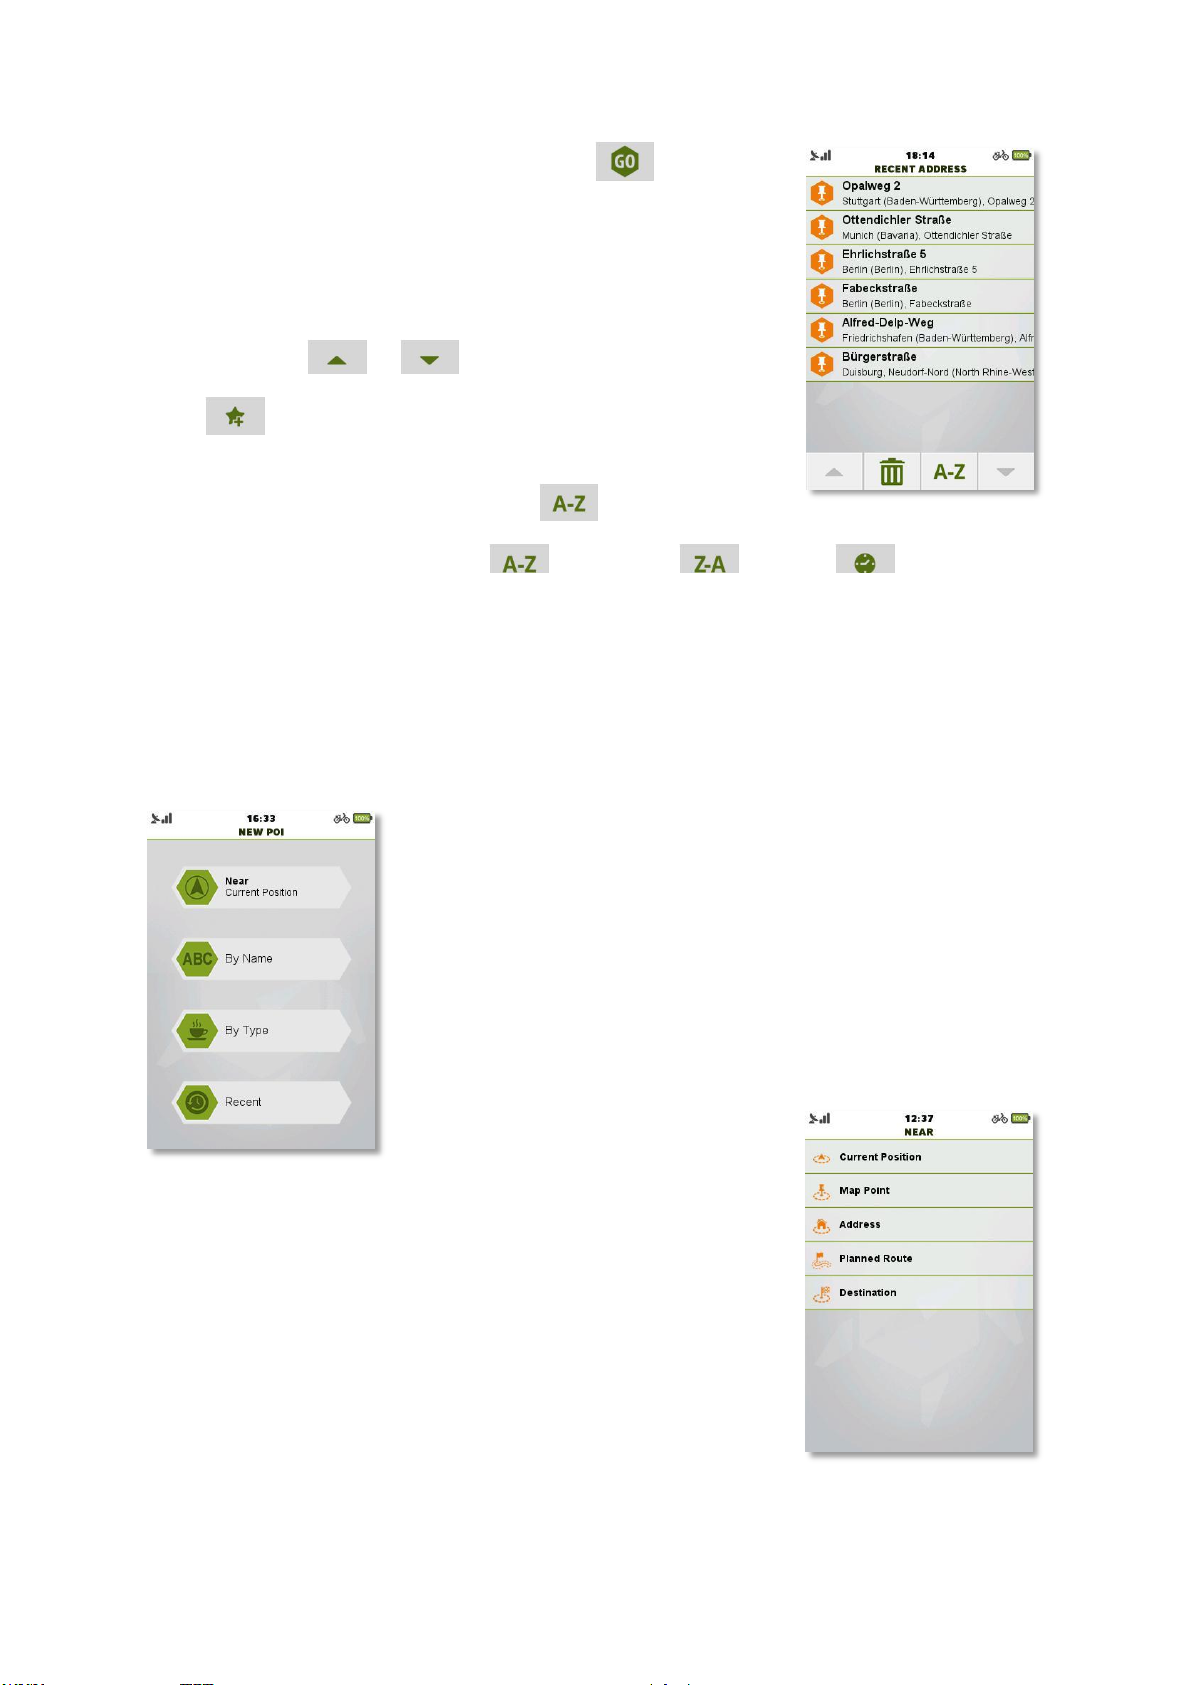
If you want to start navigation, just press the ‘Go’ ( ) button.
If you want to get back to the previous screen, press the back button.
A list of the previous address searches can be reached by tapping on
the recent addresses button on the bottom of the screen.
If there are more than 8 addresses, you can go through them by the
up/down buttons ( and ).
A star ( ) means that the address has been saved as a favorite
too.
You can sort the list with the ‘AZ’ button ( ).
The ordering options are: from A to Z ( ), from Z to A ( ), or Time ( )
(most recent searches on the top).
With the bin icon, the recent addresses can be cleared after a prompt question.
3.6.2 Extended POI Search
You can also search for POIs, by tapping the POI icon inside the
Search menu. Extended POI search further expands the capabilities
of regular POI searching, by giving new base locations for POI
search.
You can search by Name, by Type or you can browse the recent POI
searches with ‘Near...’ search location can be set.
When ‘Near…’ is pressed, the base options for searching are
presented.
‘Near…’ categories are: Current Position, Map Point, Address, Planned
Route and Destination.
Note: Planned Route and Destination are only present if currently
available!
Page 59
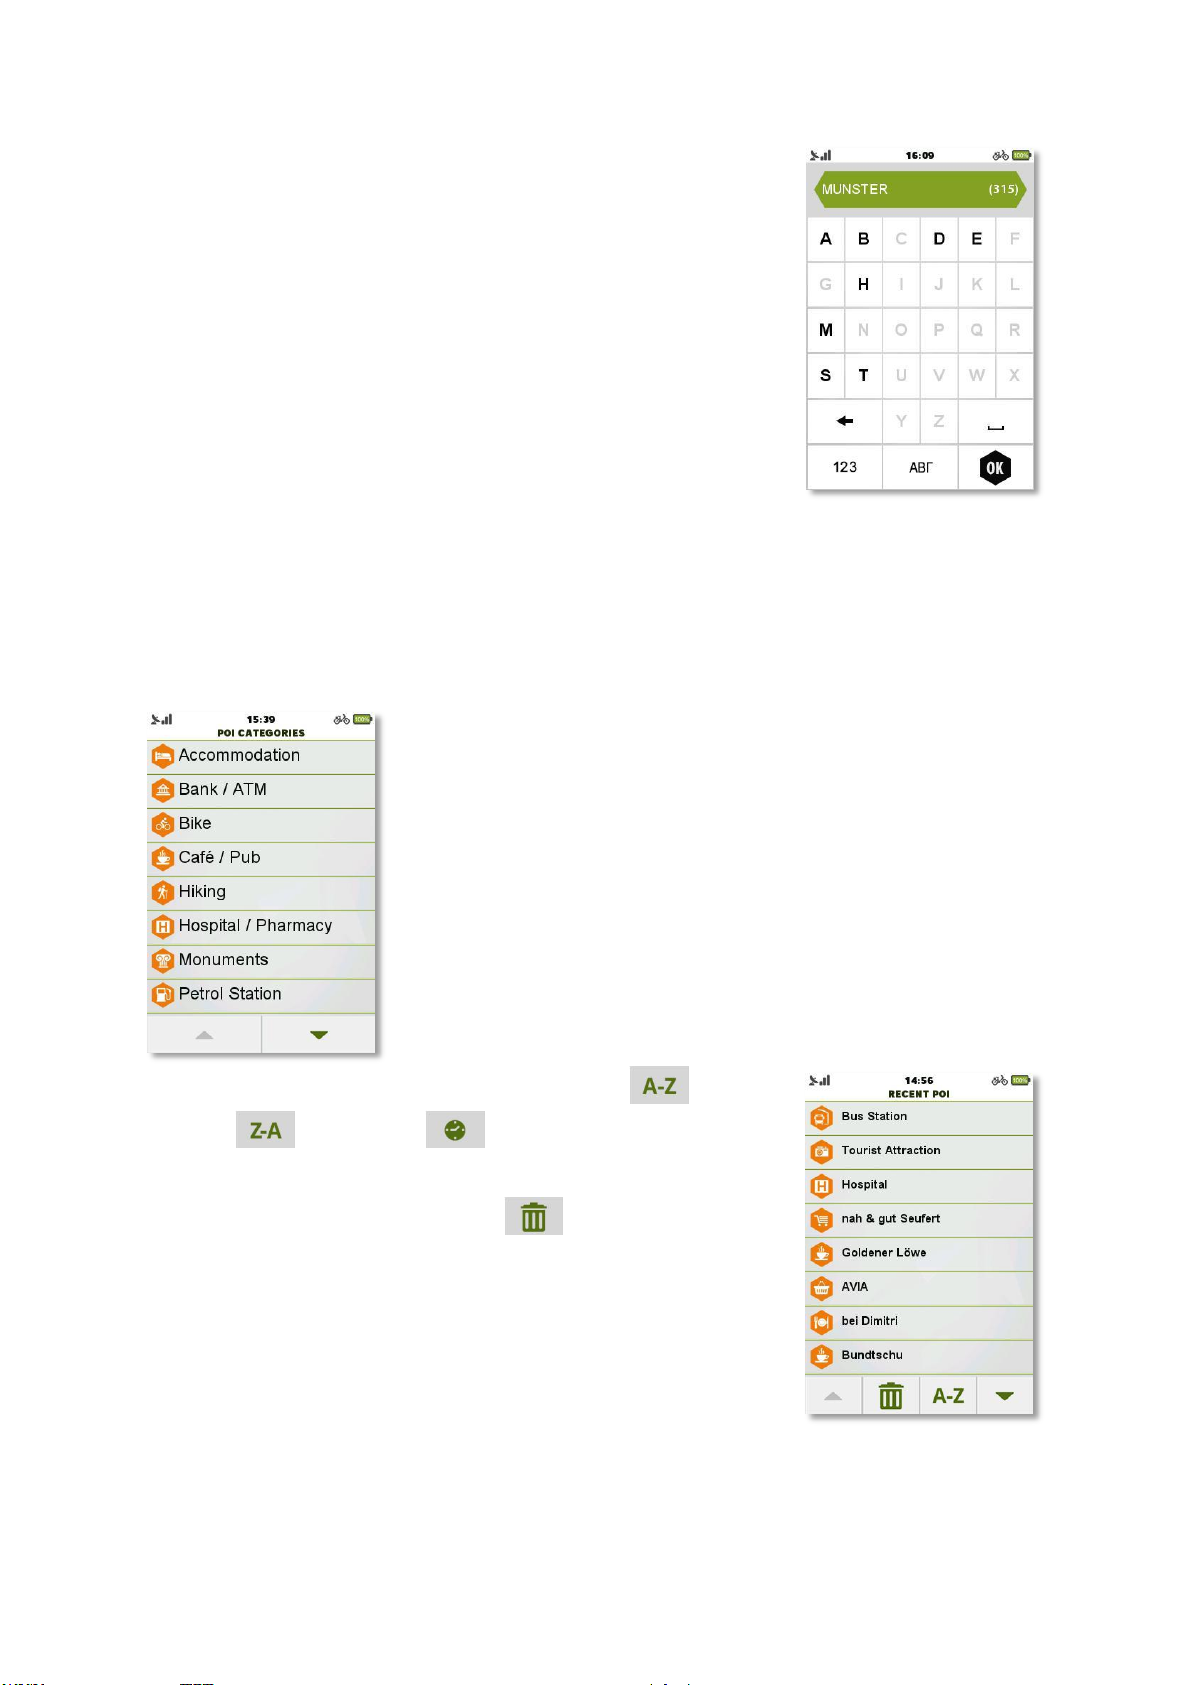
Use ‘Current Position’ for default POI search - using actual location as a
base.
Map Point and Address search ‘Near…’ categories work exactly the
same way as in destination selection.
After ‘Near...’ is set, POI Search should be started by selecting search
mode.
You can search by Name, by Type, or you can browse the recent POI
searches.
Searching by name, the name or part of it has to be inserted via the
ABC keyboard. Input method is similar to what already described for
Address Search.
Searching by Type, a list will show the available categories and the desired one should be
selected.
Also, Categories from Imported POIs will be listed here.
Recent searches can be ordered by alphabet ( ), reverse
alphabet ( ), or by time ( ) (most recent search will be on
top).
They can be also erased by the bin icon ( ).
POIs are always searched around your current position and when you
will get a list of the matching items, you will get the beeline distance
from the POI.
When you have selected your desired item, then the ‘Start Navigation’
screen will be displayed, as already explained inside the Address
Search.
Page 60
TEASI ONE & TEASI PRO & TEASI ONE3 & TEASI ONE3X
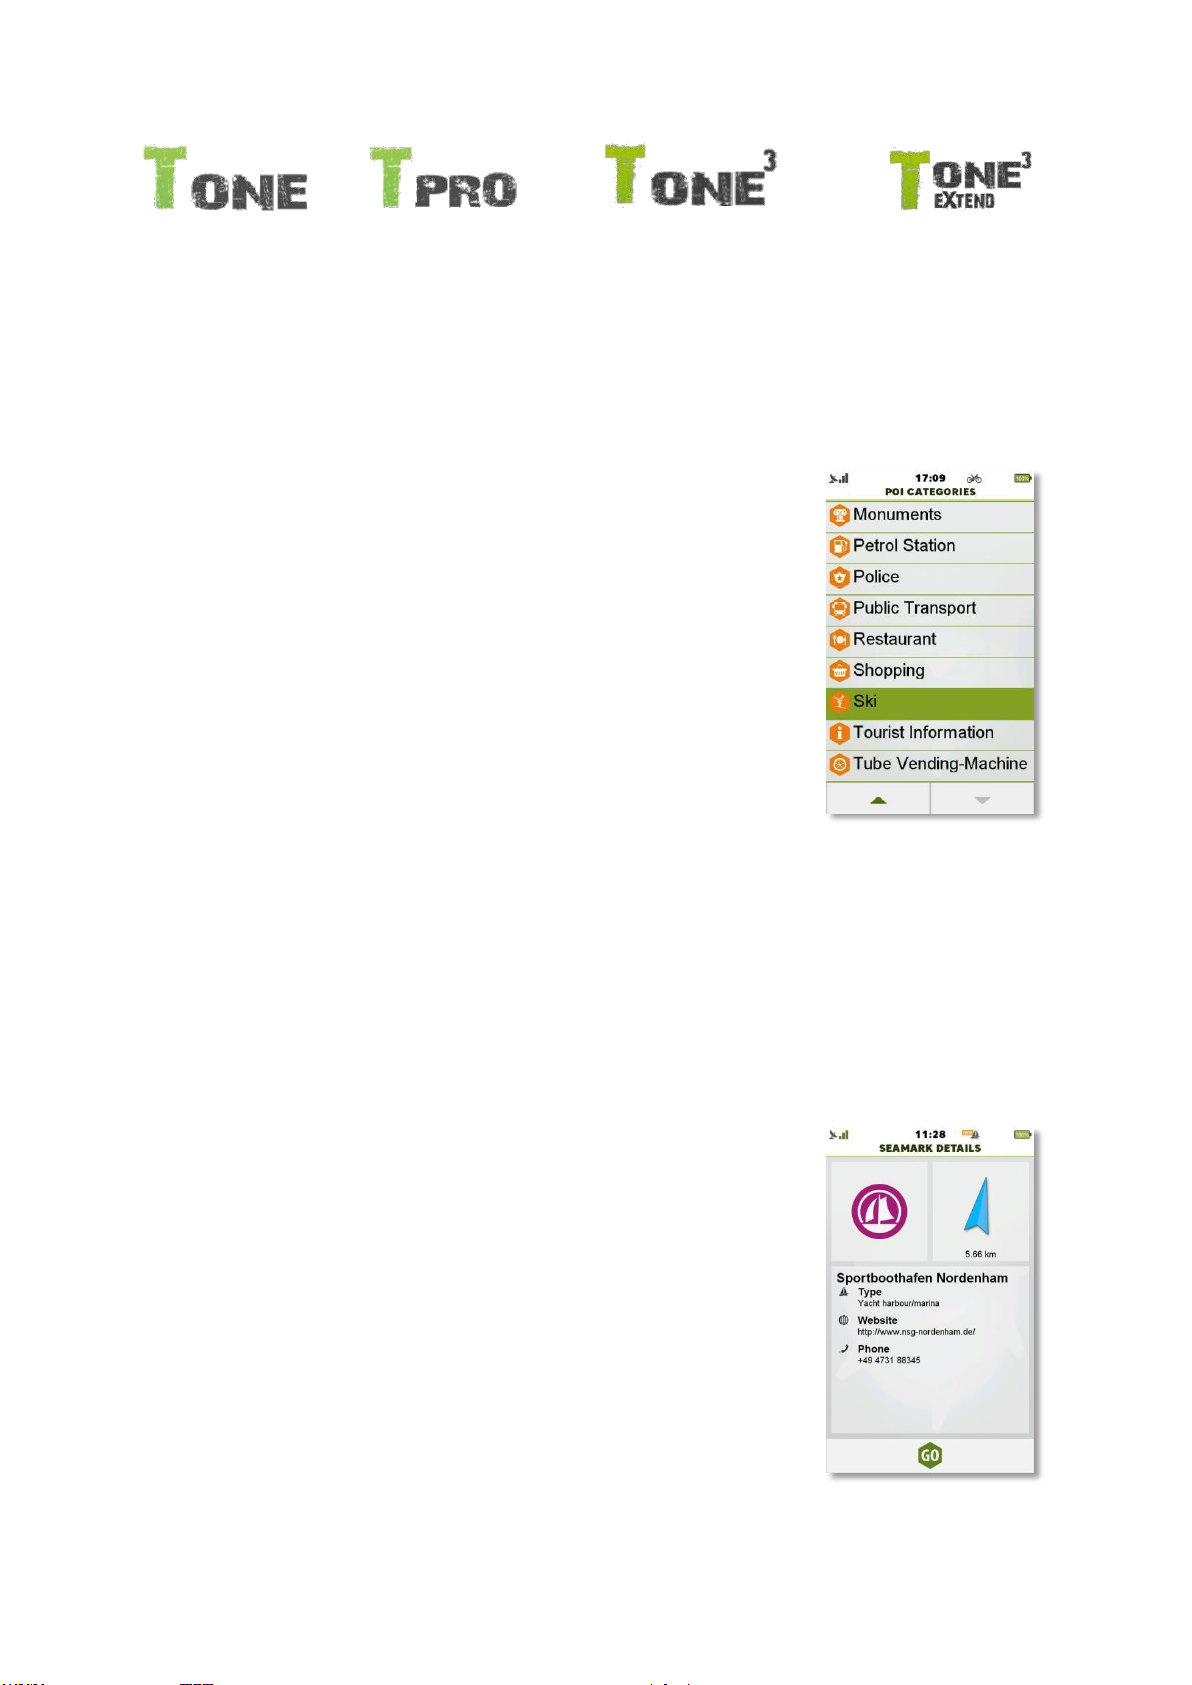
3.6.2.1 Ski POI Categories
For easier navigation in any Ski Resort, Teasi comes with additional Ski
related POIs. These categories are: Ski Lifts, Ski Schools and Ski Shelters.
Select Ski category to browse the near Ski venues.
3.6.2.2 Sea POI Categories
Several maritime POIs have been introduced to make navigation even more useful and
comfortable.
Sea POIs divide into two categories:
Tappable: POI details are revealed when pressed.
o Lighthouse
o Light objects
o Mooring
o Rock
o Platform
o Signal Station Traffic / Warning o Bridge
o Wreck
o Radio Station
o Notice marks
o Production Area Center
Page 61
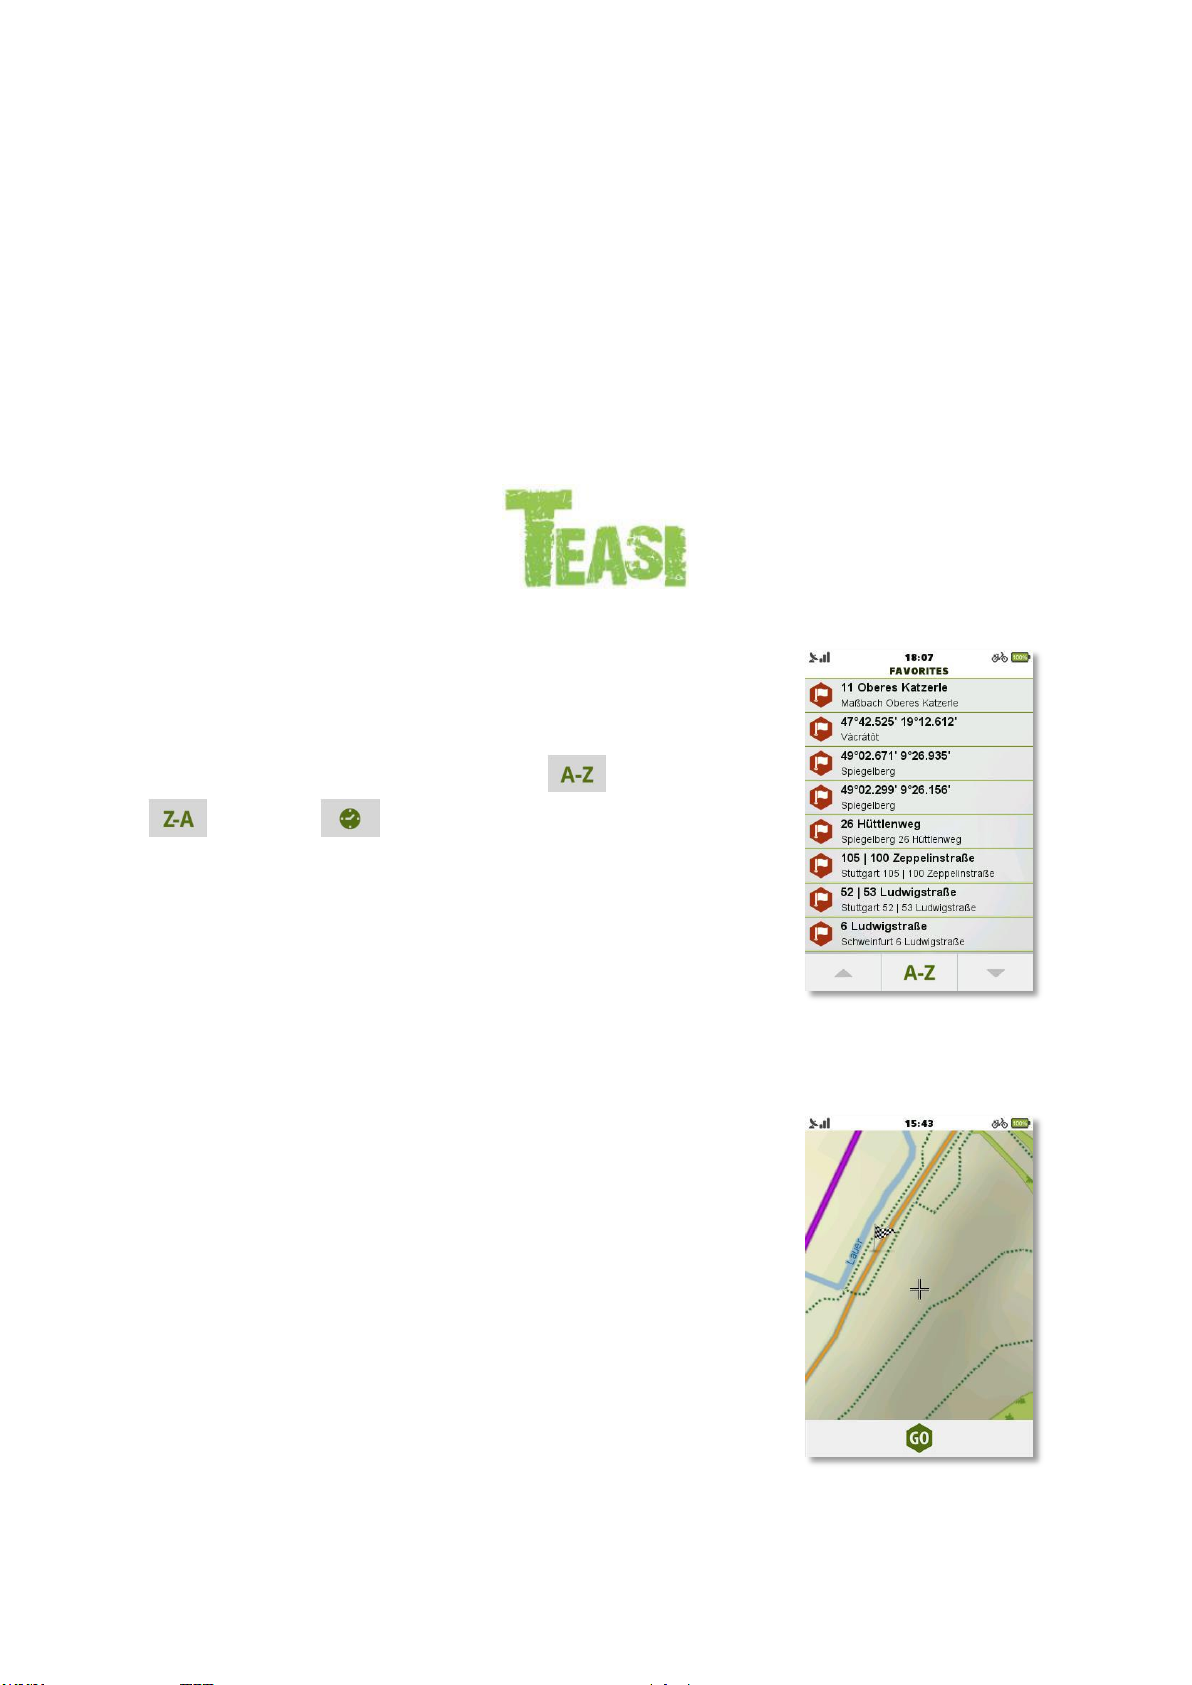
Searchable: POIs can also be tapped, but can also reached by DestinationExtended POI search.
o Harbour
o Landmarks
o Small Craft Facilities
Several detailed sea POI attributes can be displayed by tapping for details. POI attributes are
based on the OpenSeaMap database.
3.6.3 Favorites
Affects all models
You can also search your Favorites, by selecting the Favorites icon in
Search.
A list will appear with your saved locations.
Favorites can be ordered by alphabet ( ), reverse alphabet
( ) or by time ( ) (most recent search will be on top).
When you have selected your desired item, then the ‘Start Navigation’
screen will be displayed, as already explained inside the Address Search.
3.6.4 Map Point
Search based on a Map Point is also available.
This option will bring up a map that can be panned and zoomed.
Tap on the map to select your target destination. A checkered flag will
be displayed.
If the point is right, then just press ‘Go’ to move to the ‘Start
Navigation’ screen, as already explained inside the Address Search.
Destination point can be replaced by tapping elsewhere on the map.
Page 62
3.6.5 Coordinates
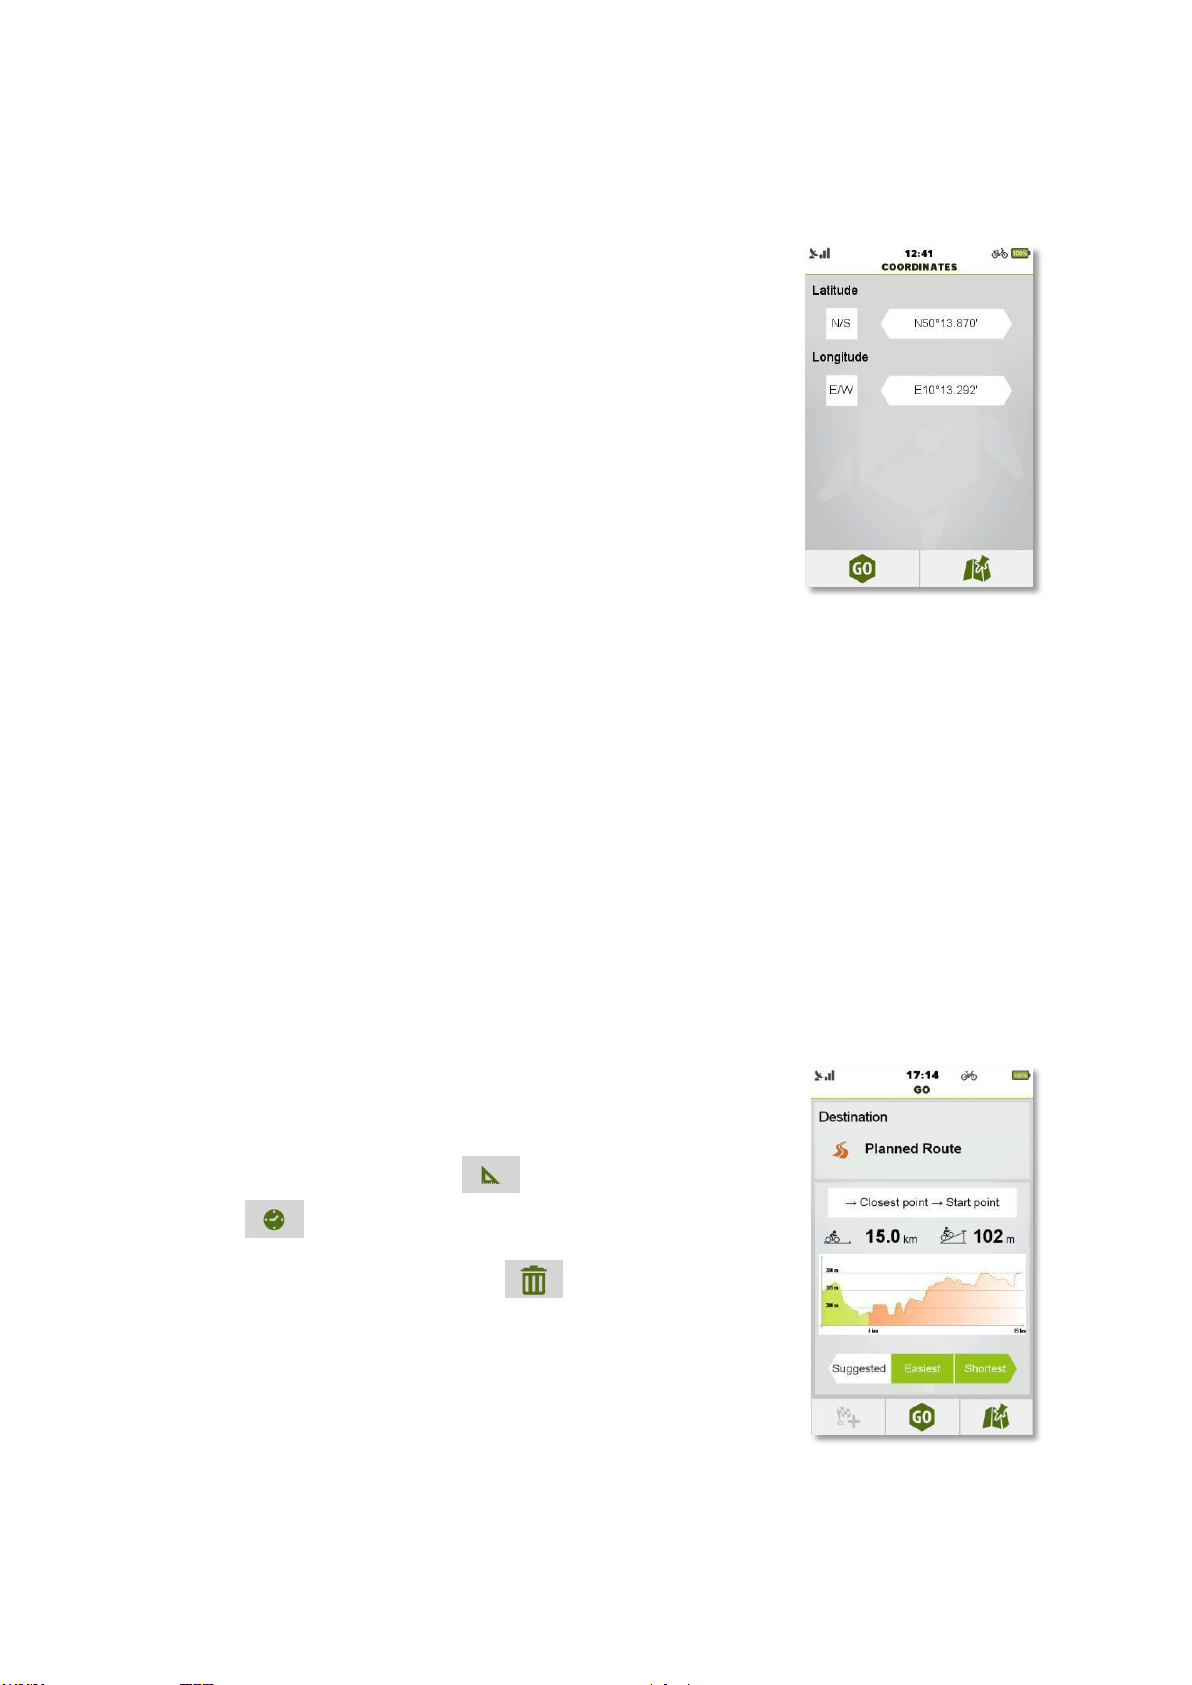
In the Coordinates menu, you can manually insert the coordinates of
your target destination.
Enter the Latitude coordinate inside the ‘Latitude’ field.
You can change between North and South with the ‘N/S’ button.
Enter the Longitude coordinate to the ‘Longitude’ field.
You can change between East and West with the ‘E/W’ button.
Multiple coordinate formats can be inserted:
Degrees, minutes, seconds: 40° 25’ 46” N 79° 56’ 56” W
Degrees, decimal minutes: 40° 25.767’ N 79° 56.933’ W
Decimal degrees: 40.256° N 76.962° W
Coordinates can be entered in one of the three formats. Virtual keyboard will adapt to the format
during the input.
For example, if decimal degrees are to be used, use punctuation after the degrees and ° as closing
item for the coordinate.
If you want to add the minutes or seconds instead of fraction of degrees, ’ (after minutes) and ”
(after seconds) should be used.
When you have entered the coordinates, the ‘Start Navigation’ screen will be displayed, as already
explained inside the Address Search.
3.6.6 Tours
You can also search your Tours, by selecting the Tours icon inside the
Search menu.
A list will appear with your saved tours, both local and imported ones.
Tours can be ordered by distance ( ) (the shortest will be on top),
or by time ( ) (most recent search will be on top).
They can be also erased by the bin icon ( ).
When you have selected your desired item, the ‘Start Navigation’ screen
will be displayed, as already explained inside the Address Search, but
with some further possibilities to customize the tour.
Page 63
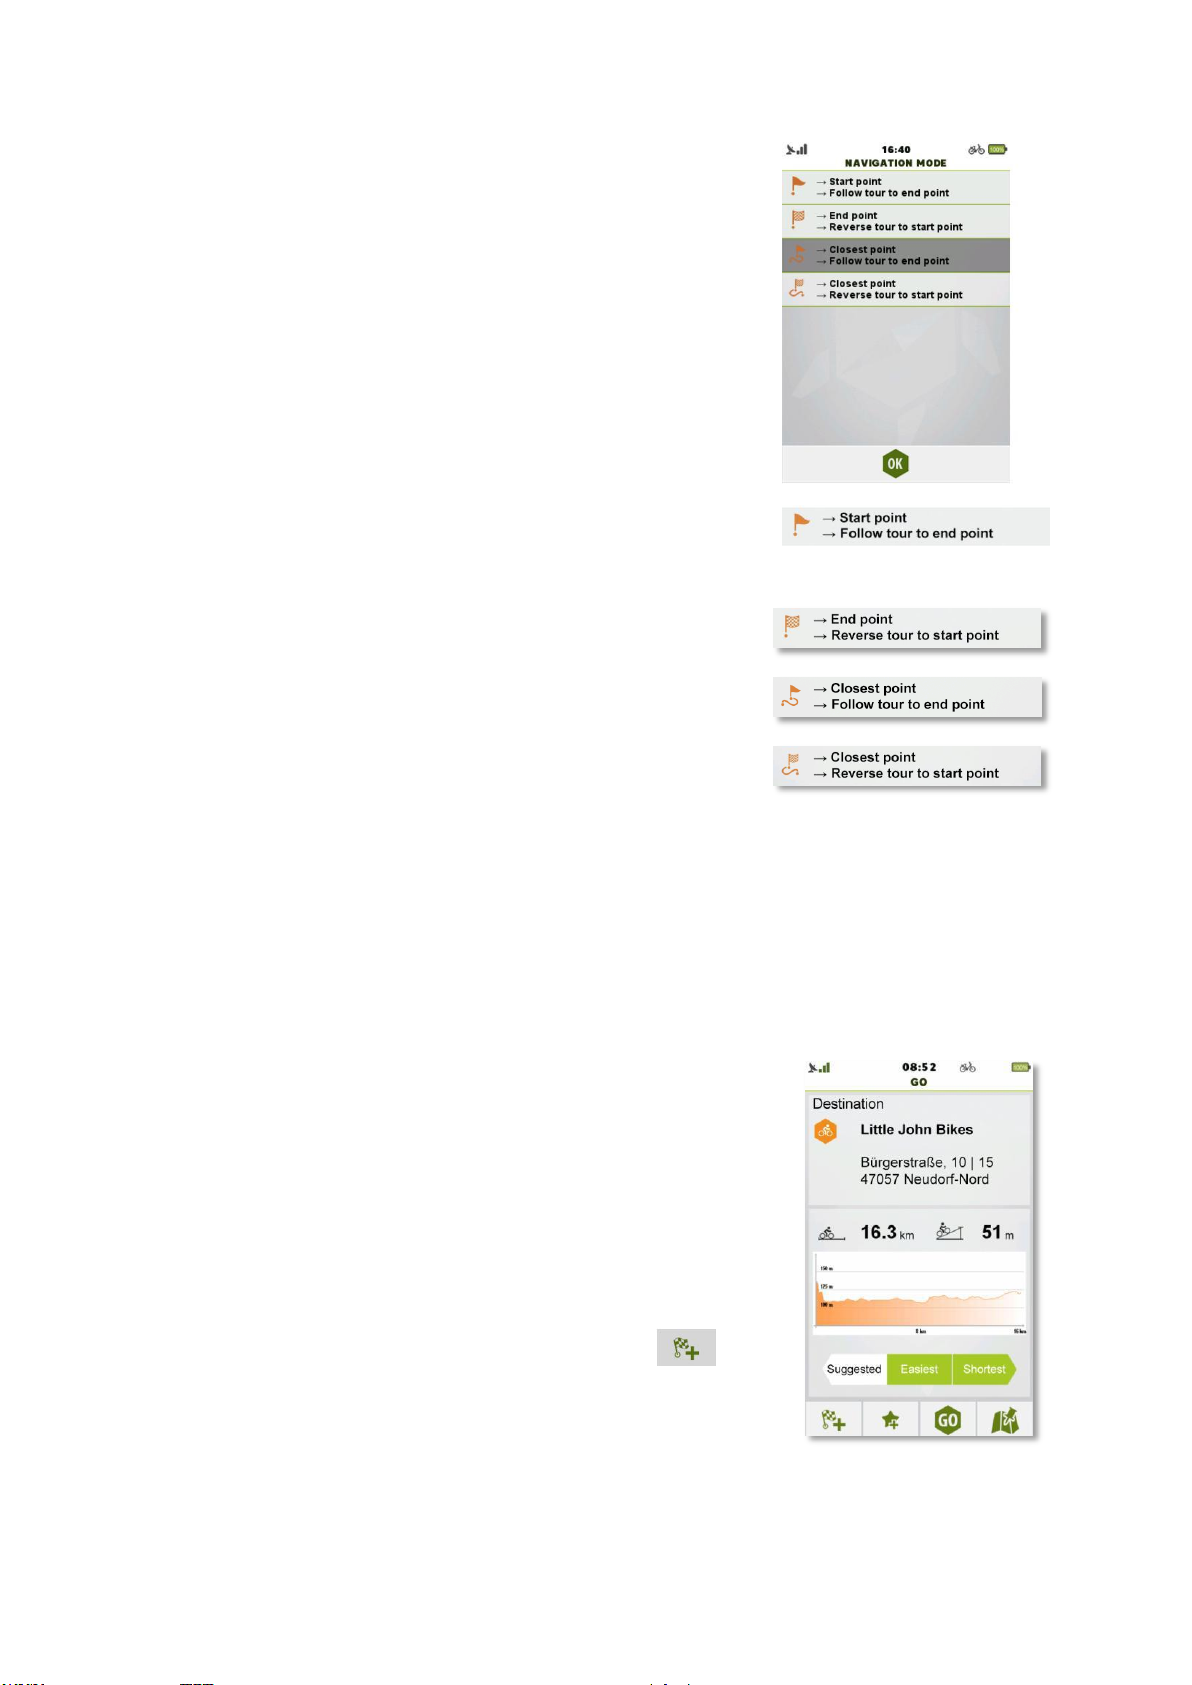
Additional options are present, based on the tour details (location,
direction) and current location:
Selecting this option allows routing from the current location to the
start point of the desired track, so navigation will be continued on
the tour until its end point.
This option reverts the navigation, going first to the end point of
the tour, then guiding till the original start point.
This option guides the device to the closest point from current
location of the selected tour, then navigates to the end.
The last option is for getting to the closest point from current
location, then navigating the tour in reverse mode to the original
start point of the tour.
Selection of suggested/easiest/shortest route and previewing on the map works as in all the other
navigation cases.
3.6.7 Multiple Destinations
Multiple Destinations feature makes several locations available to be
added to one route.
This way, navigation will route through the multiple points added as
targets to be reached.
This list can be saved, edited, new points can be added, points can be
moved and deleted during navigation.
Adding more than one destination can be done in several ways.
When a single destination is selected, further target locations can be
added by tapping on the ‘add next destination button’ ( ) on the
bottom left of Destination - Go screen.
Page 64
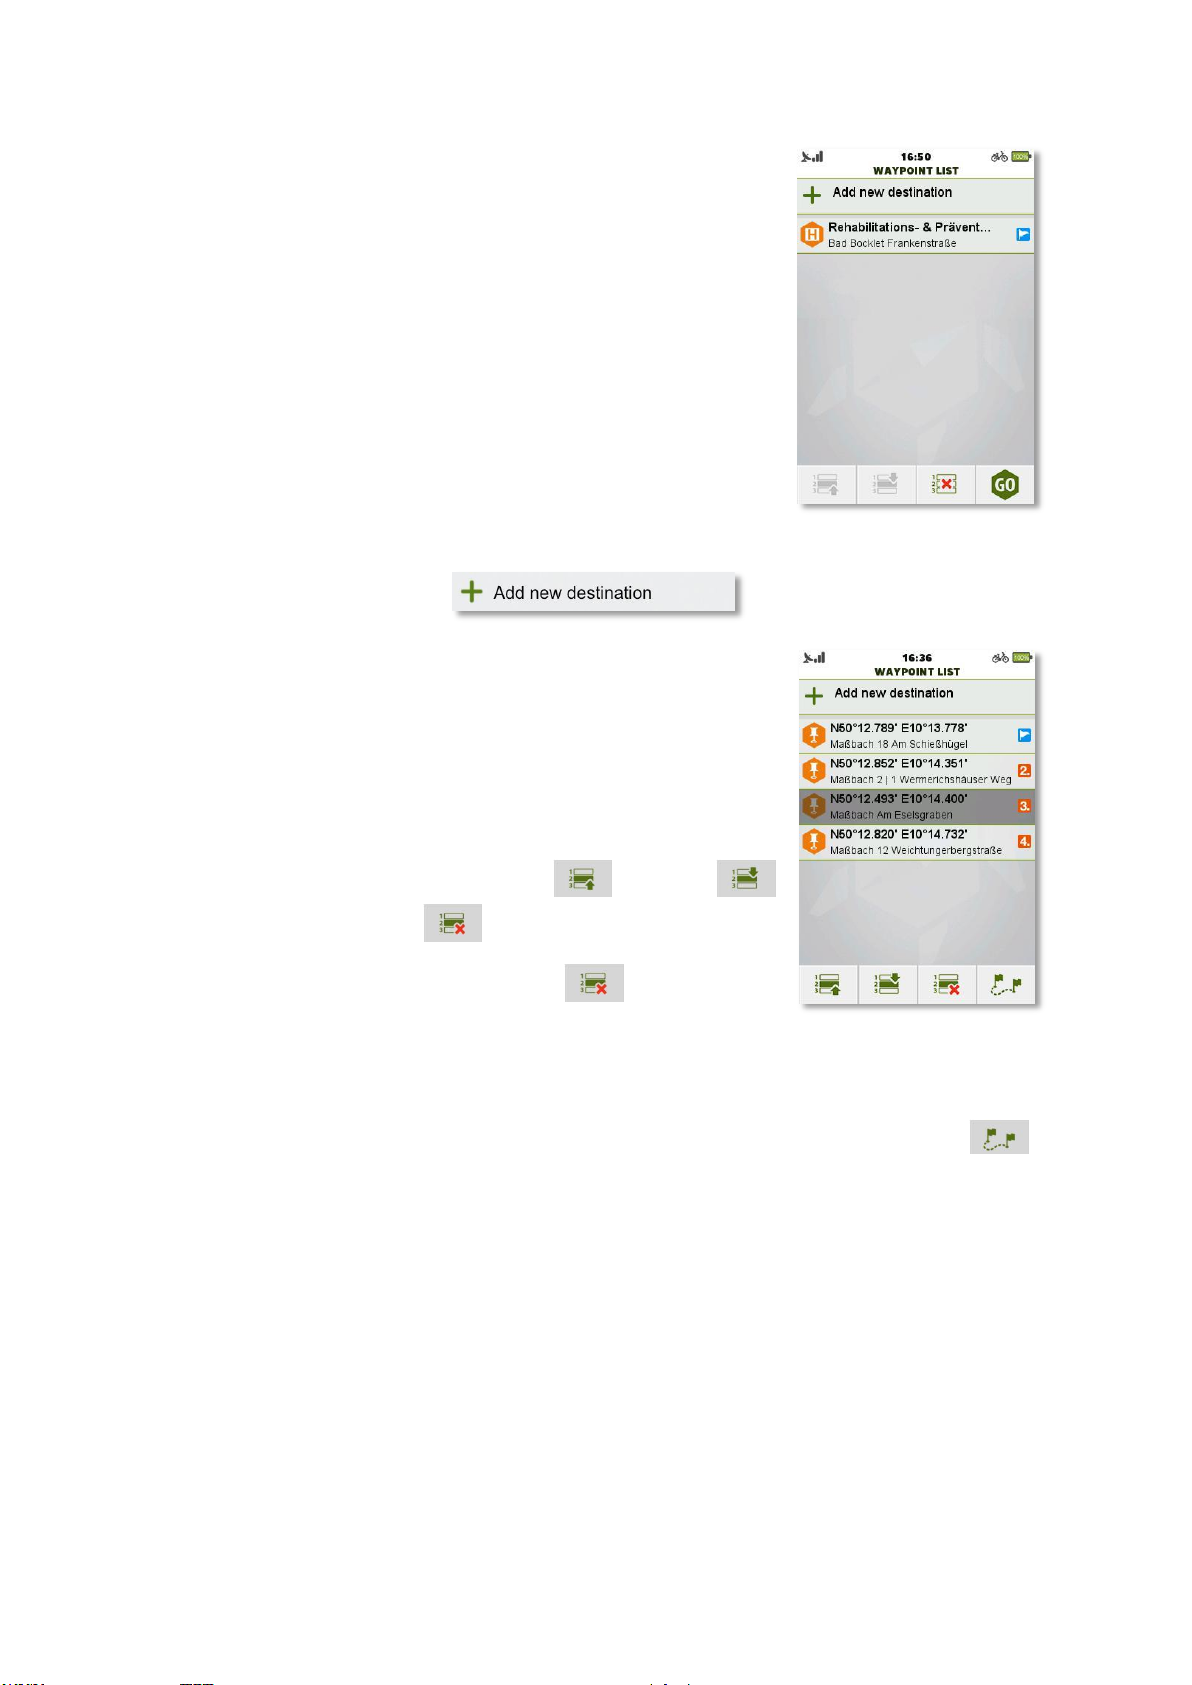
When the ‘Add another destination’ button is pressed, the Waypoint
list is shown with the previously set destination as first item of the list
(thus the first destination to reach).
Any further destination will be added to the waypoint list. This way,
the list will contain all set destination in a manageable way.
Another destination can be added by tapping on this button:
This will bring up the Destination screen again. Any type of target
location selected will be added to the list as next item and routing
(if there was an ongoing navigation) will now be calculated further,
navigating to the new endpoint.
Note: Adding route to Multiple Destination is not supported. Currently up
to 7 items can be added to Multiple Destinations. Tapping on an item will
select it for manipulation in the list.
The selected destination can be moved up ( ) or down ( )
or can be deleted from the list ( ).
If there is no destination selected and ‘Delete’ ( ) is pressed, the
list will be emptied.
If there was an ongoing navigation first it will be stopped, the list can be cleared.
Note: Already reached destinations cannot be manipulated.
When there is more than one destination point in the waypoint list, the ‘calculate route’ ( )
button is present. Pressing this button will show the calculated route between the first and the last
point.
Page 65
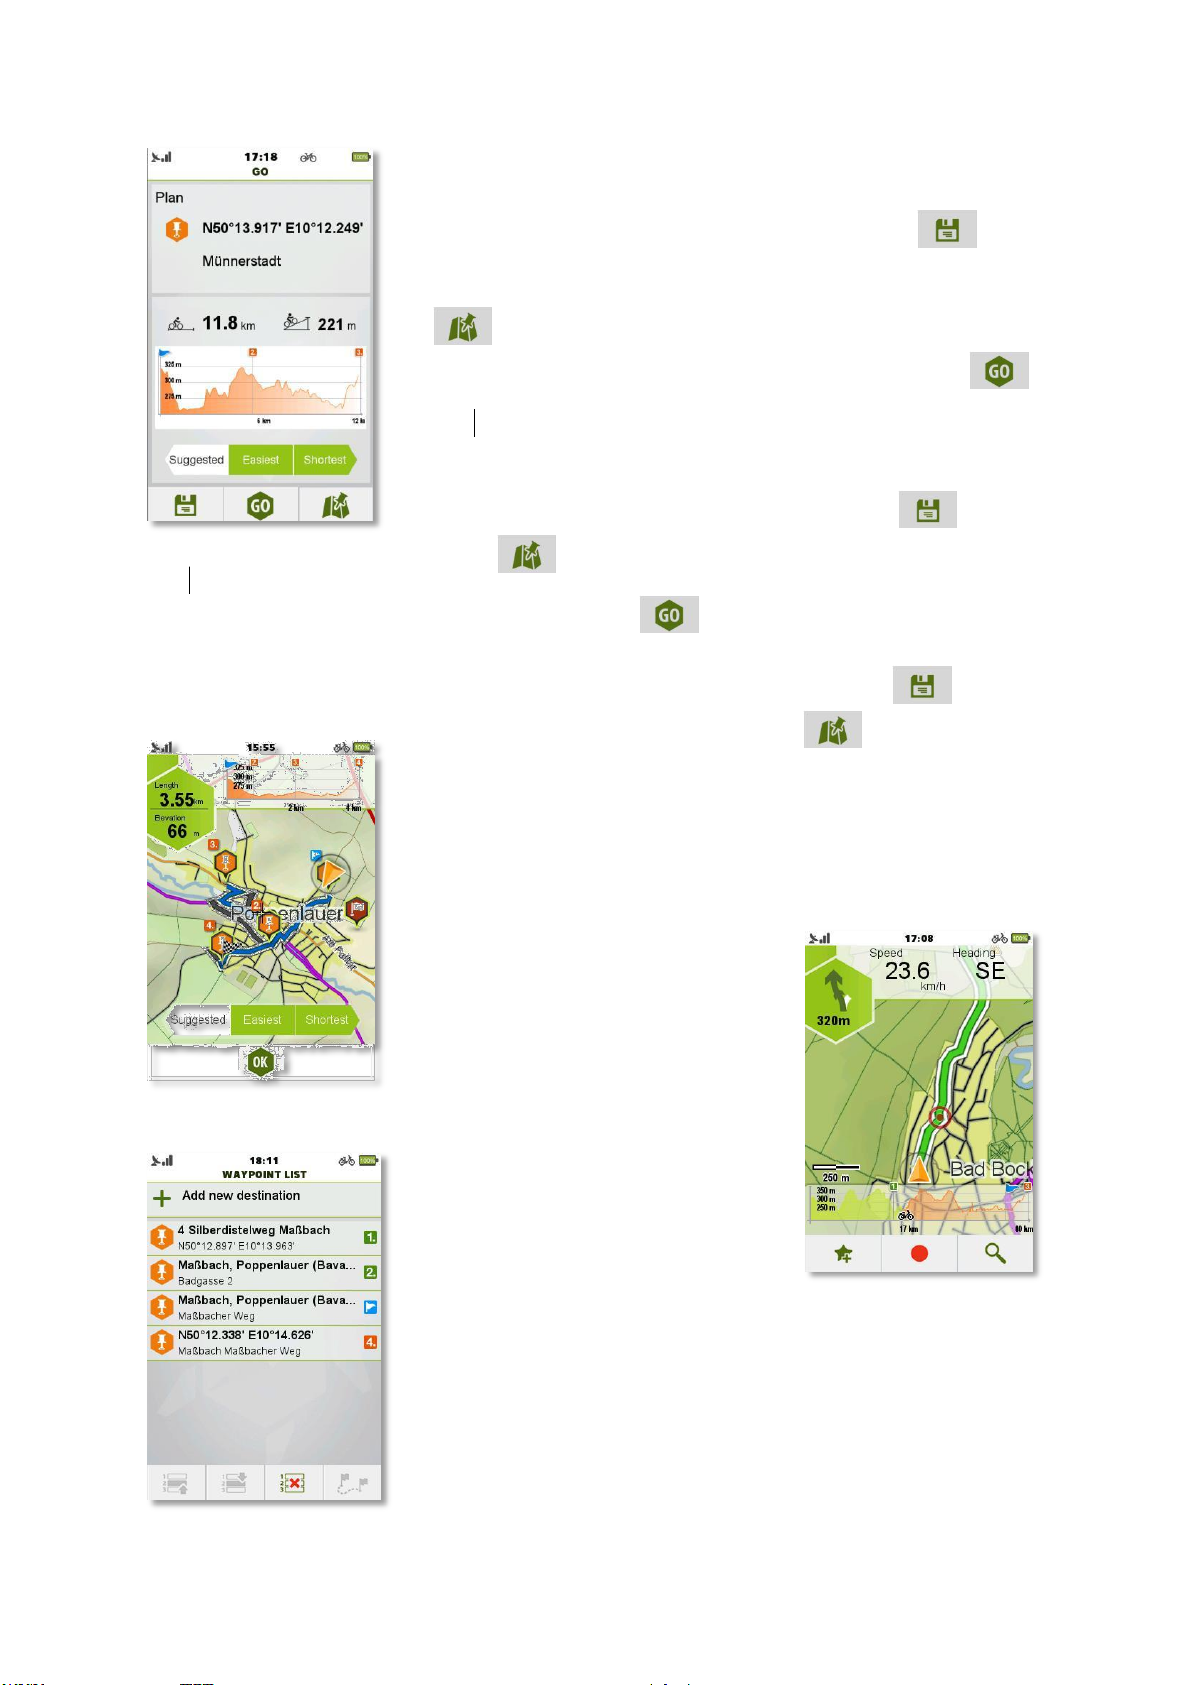
Note: This calculation does not include current location. This feature is
to save the tracks for future use.
To save the track, just press the ‘Save’ button ( ). The
application will inform whether the save was successful. To see the
route on the map before any other operation, press ‘Map Preview’
( ).
To use the calculated route immediately, just press ‘Go’ ( )
on this next screen again.
This will give a new calculation that contains routing from current
location to the first point of Multiple Destinations route. This route
can also be saved by tapping on the ‘Save’ button ( ), can be
previewed by selecting ‘Map Preview’ ( ).
To use the calculated route immediately, press ‘Go’ ( ) on this next screen again. This will
give a new calculation which contains routing from current location to the first point of Multiple
Destinations route. This route can also be saved by tapping on the ‘Save’ button ( ) and can
be previewed by selecting ‘Map Preview’ ( ).
Press ‘Go’ for starting the navigation either on Map Preview or on
Multiple Destination.
Progress of destinations being reached
will be shown on map screen on the
altitude graph:
The already passed destinations will be green in the waypoint list.
Page 66
TEASI ONE & TEASI PRO & TEASI ONE3 & TEASI ONE3X
3.6.8 Ski Destination
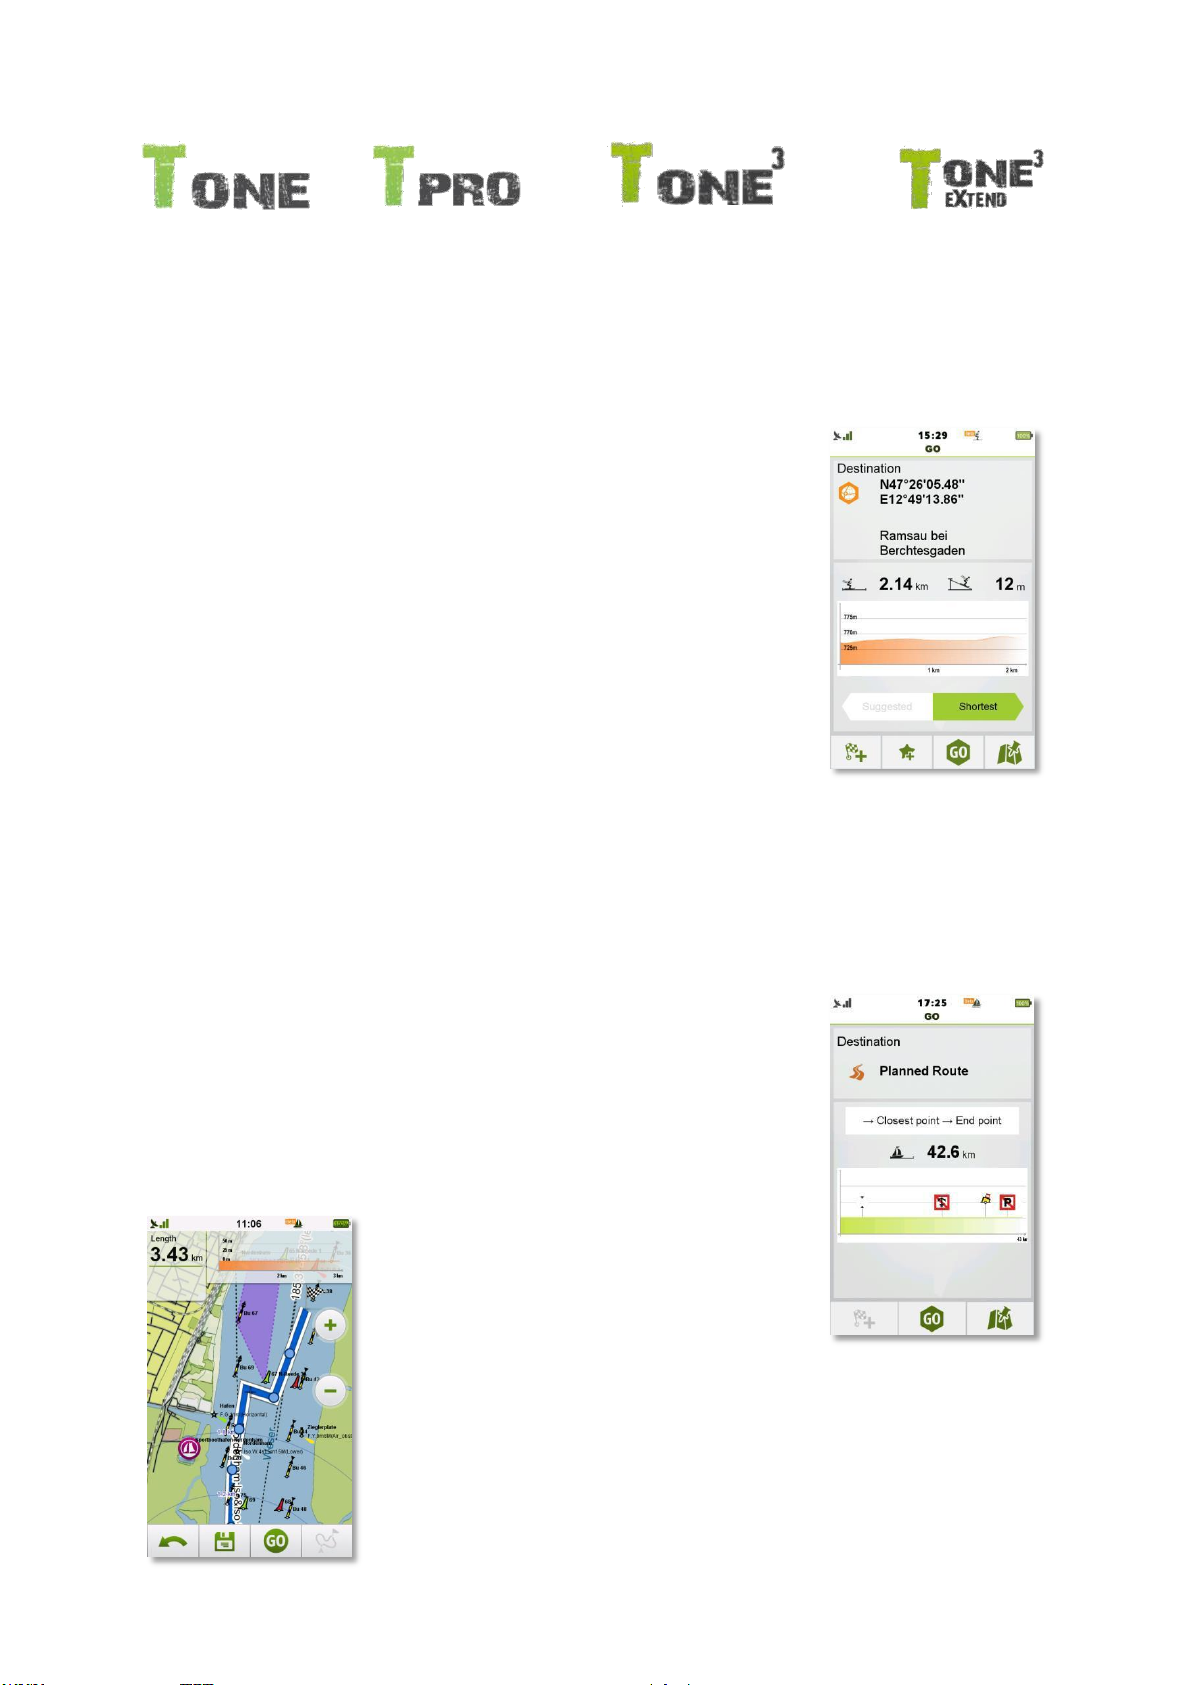
Route calculation in Ski mode offers the possibility to navigate onto and
between pistes and ski lifts.
Ski destination can be used with 2 different routing methods:
Suggested (default) route will use only pistes that are available based on
your route settings (min. – max. experience level)
Shortest will use every piste that not exceeds the max experience level
set for the current profile.
Note: Routing will only happen when correct settings are used! Not only
experience level, but proper ski type has to be used.
For example: Downhill profile will not route on Ski Tour and Nordic pistes.
If route calculation is not possible, the altitude graph will be empty and on map preview the beeline
to the target point will be shown.
3.6.9 Boat Destination
Boat Navigation is happening in beeline mode.
In Boat Destination, the alerts are also shown, so limitations are known
before the trip Destinations are available custom-tailored for boat
navigation:
For POI search the Sea POIs are available.
Instead of Address search, Point-by-point feature is available: by
tapping on the map, multiple points can be selected for beeline
navigation on a fine-tuned route. For Multiple Destination targets, the
following categories can be used: Sea POIs, Favorites, Map Point and
Coordinates.
Page 67
3.7 Plan
Affects all models
Plan is our unique feature to create individual tracks in real time on your Teasi device.
You can easily create your routes with a few steps:
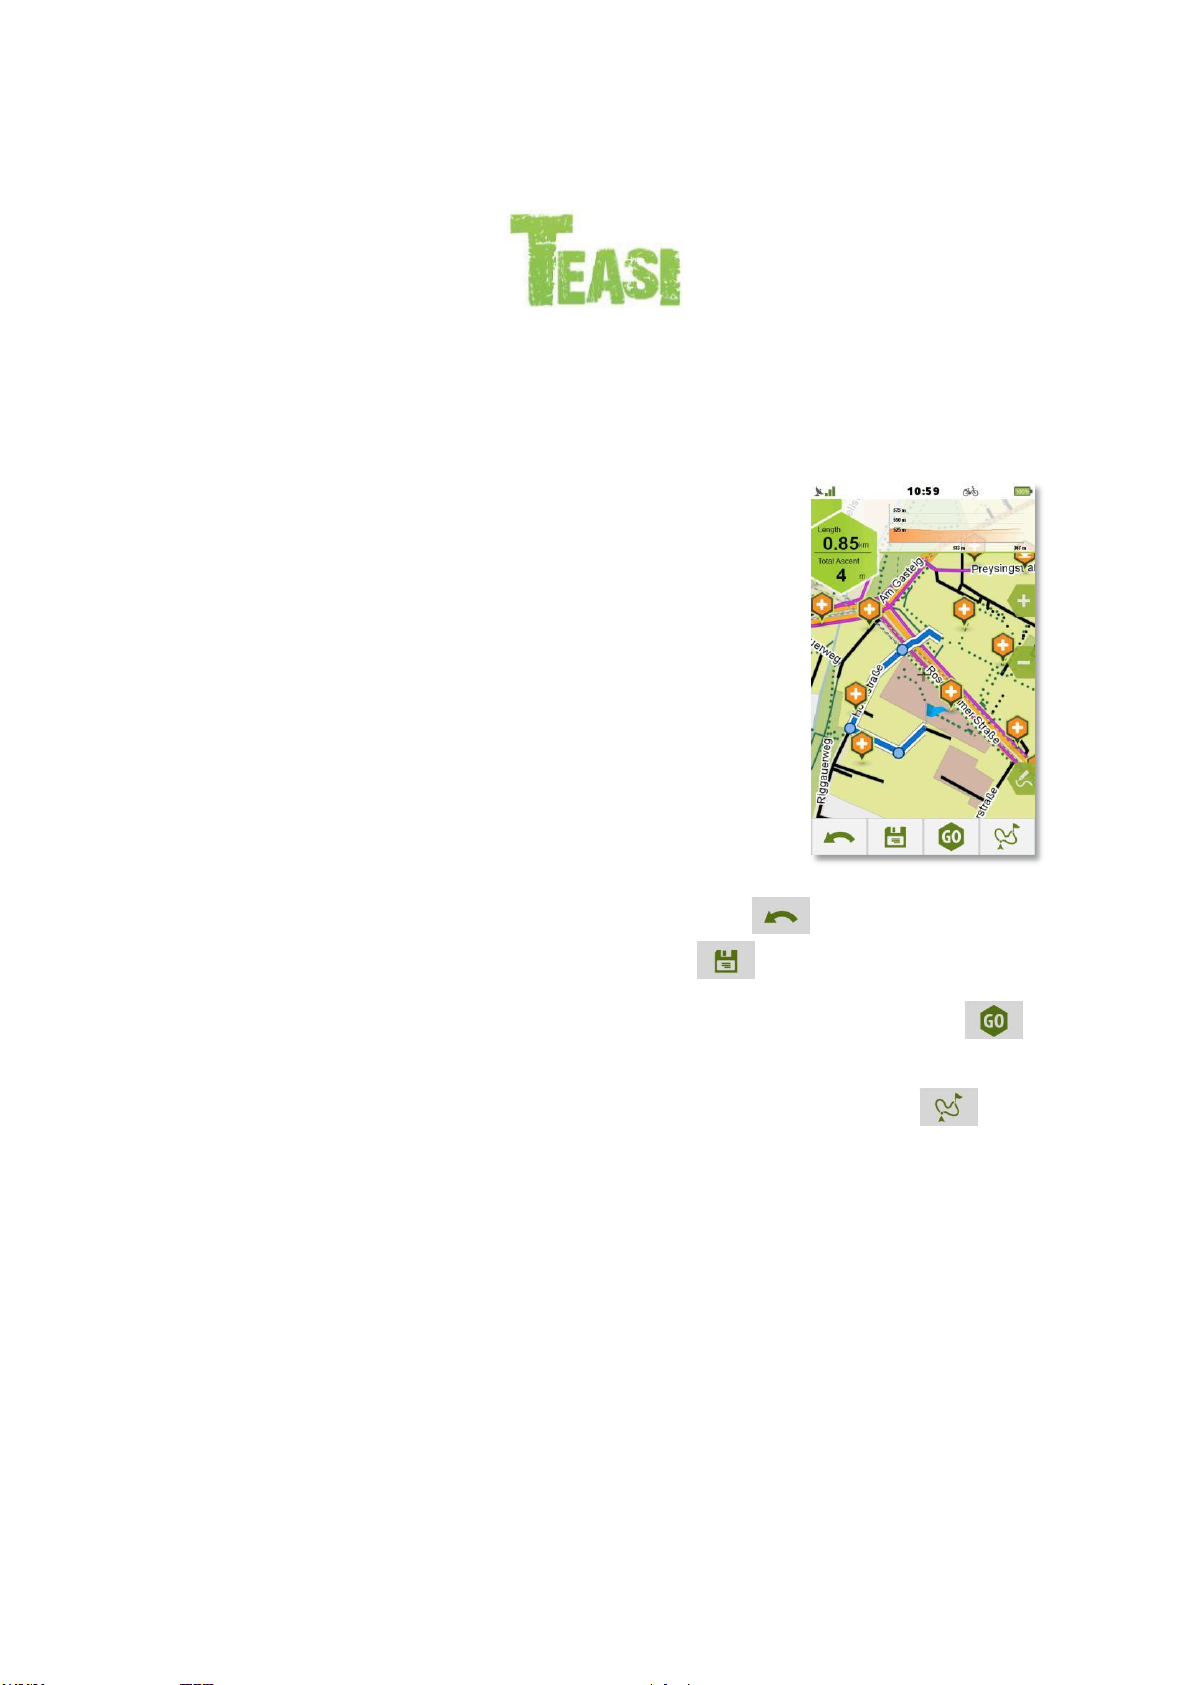
When you select this option from the Main Menu, a map will be
displayed. Tap on the screen to create a start point for the track. You
can pan and zoom to choose the preferred location.
If you tap the screen inside the circle that identifies your current
location, the starting point will be automatically set to your current
location.
Start point will be displayed on the map with a blue flag. Tap on the
map to select additional waypoints and to customize your track.
If you want to make a circular route that ends on your starting point,
just tap the screen close to the blue flag and Teasi will automatically
calculate a circular route.
There are additional options on the bottom of the screen:
- Last entered waypoint can be removed by the back button ( ).
- The created track can be saved via the floppy button ( ).
Navigation on the planned route can be started with the ‘Go’ button ( ).
(or to the first point of the route, if the start point is not the same than current location.)
- Alternative routes can be generated by tapping on the alternate route button ( ).
On the top of the screen, an altitude graph is available to see the altitude outline during the route.
On the left, you can see the length of the calculated route and the total ascent of the track. This
last field is changed to ‘Remaining distance’ when the Route was started from inside the Fitness
menu.
When you start the Route planning from the Fitness menu, this function has also some other
characteristics: your current position will be the start point of your route and you will see the blue
flag on your GPS location.
Also, a blue circle will be displayed around the last entered waypoint to show approximately how
far the route can go to fulfill the fitness requirements you set.
Page 68

Page 69
3.7.1 Draw a Route
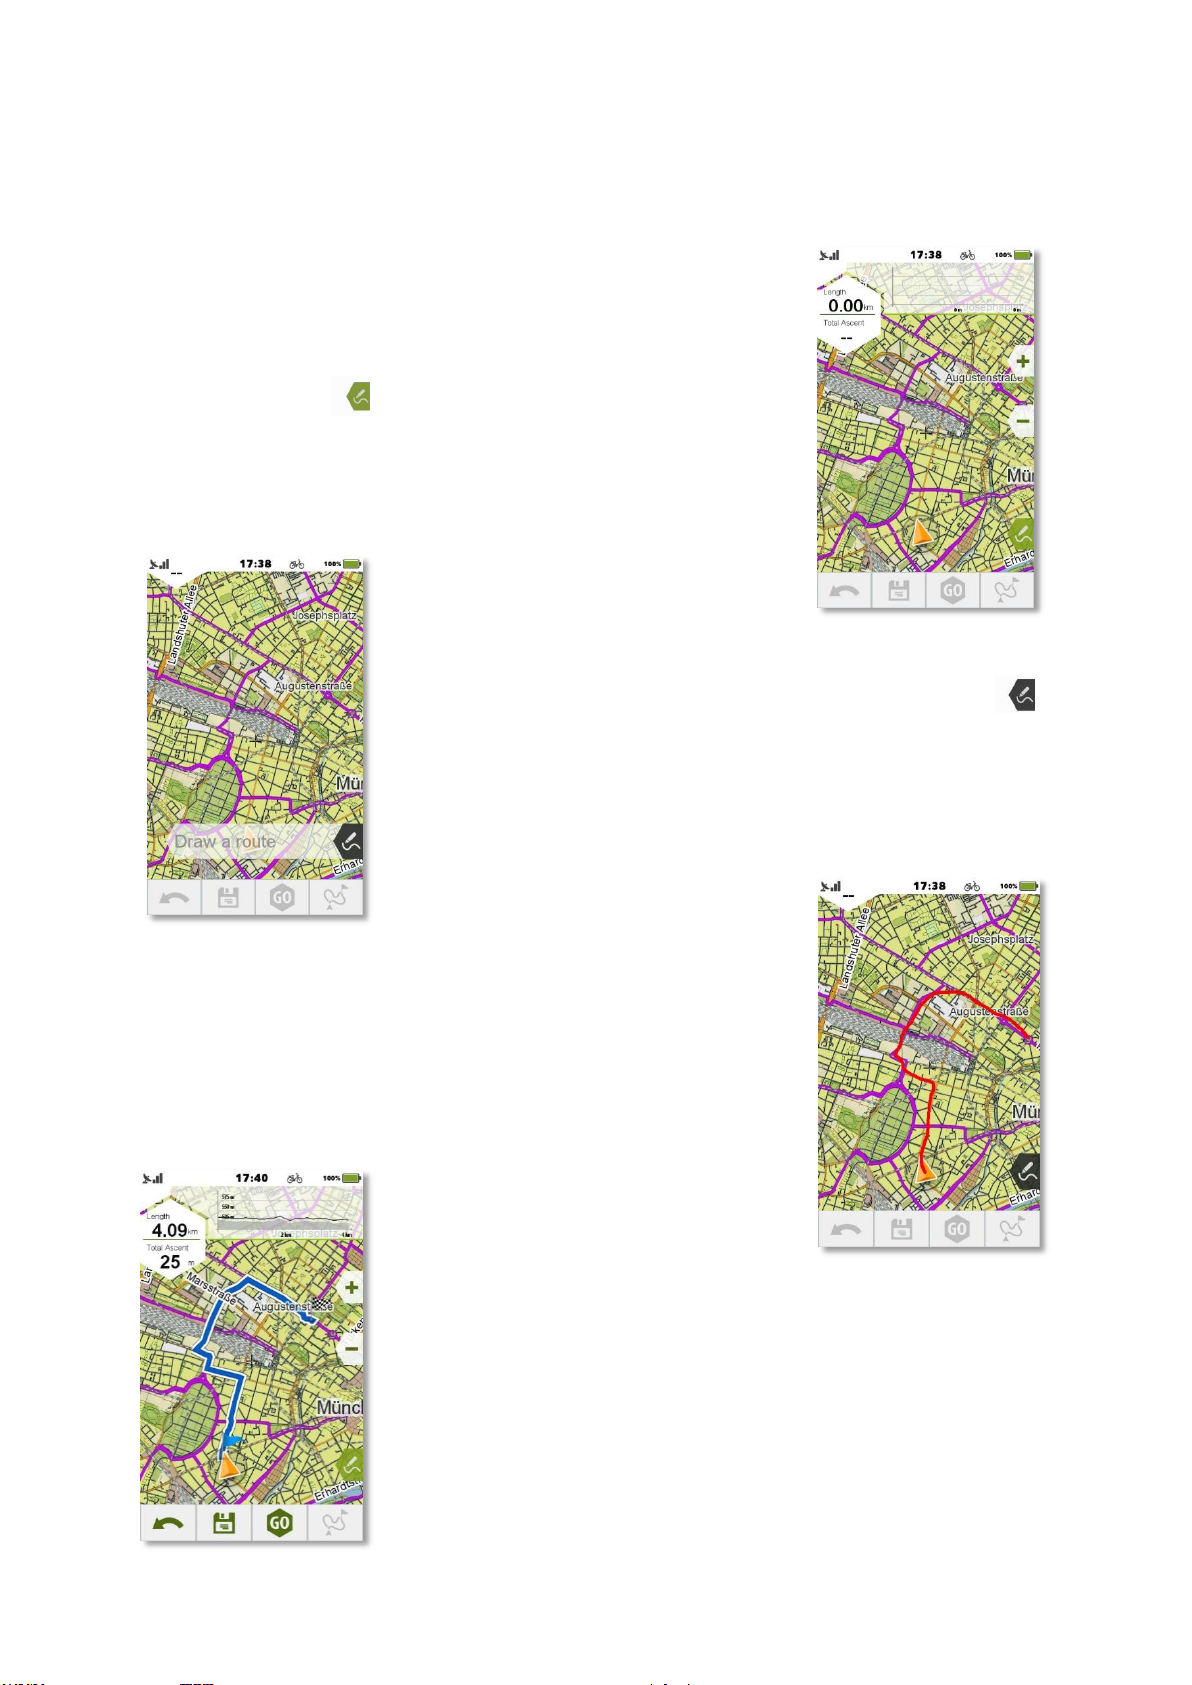
Additionally, to the point-by-point planning, Teasi also gives the
possibility to draw freehand routes. With it, routes with a freeform
shape on the map can be created/extended.
When Draw button ( ) is pressed, freehand draw mode is activated.
Teasi will inform to draw a route.
During this mode, the following icon is indicating freehand mode (
). After route is drawn, Teasi switches back to point-by-point mode.
For draw a route further, please press the draw button again.
Teasi in Draw mode - route is being drawn:
Drawn Route is calculated, Teasi is in Point-by-Point Plan mode.
Page 70
3.7.2 U2U-Routing
As an addition to the routing algorithm based on the personal preferences, Teasi also uses
‘Heatmaps’ (powered by Bikemap), which collect the biking traces of millions of kilometers from
real users. This way, our routing algorithm is also tuned by the users themselves, preferring the
paths that are often travelled by majority of cyclists.
3.8 Computer
3.8.1 E-Bike Computer with Gear Recommendation
TEASI VOLT
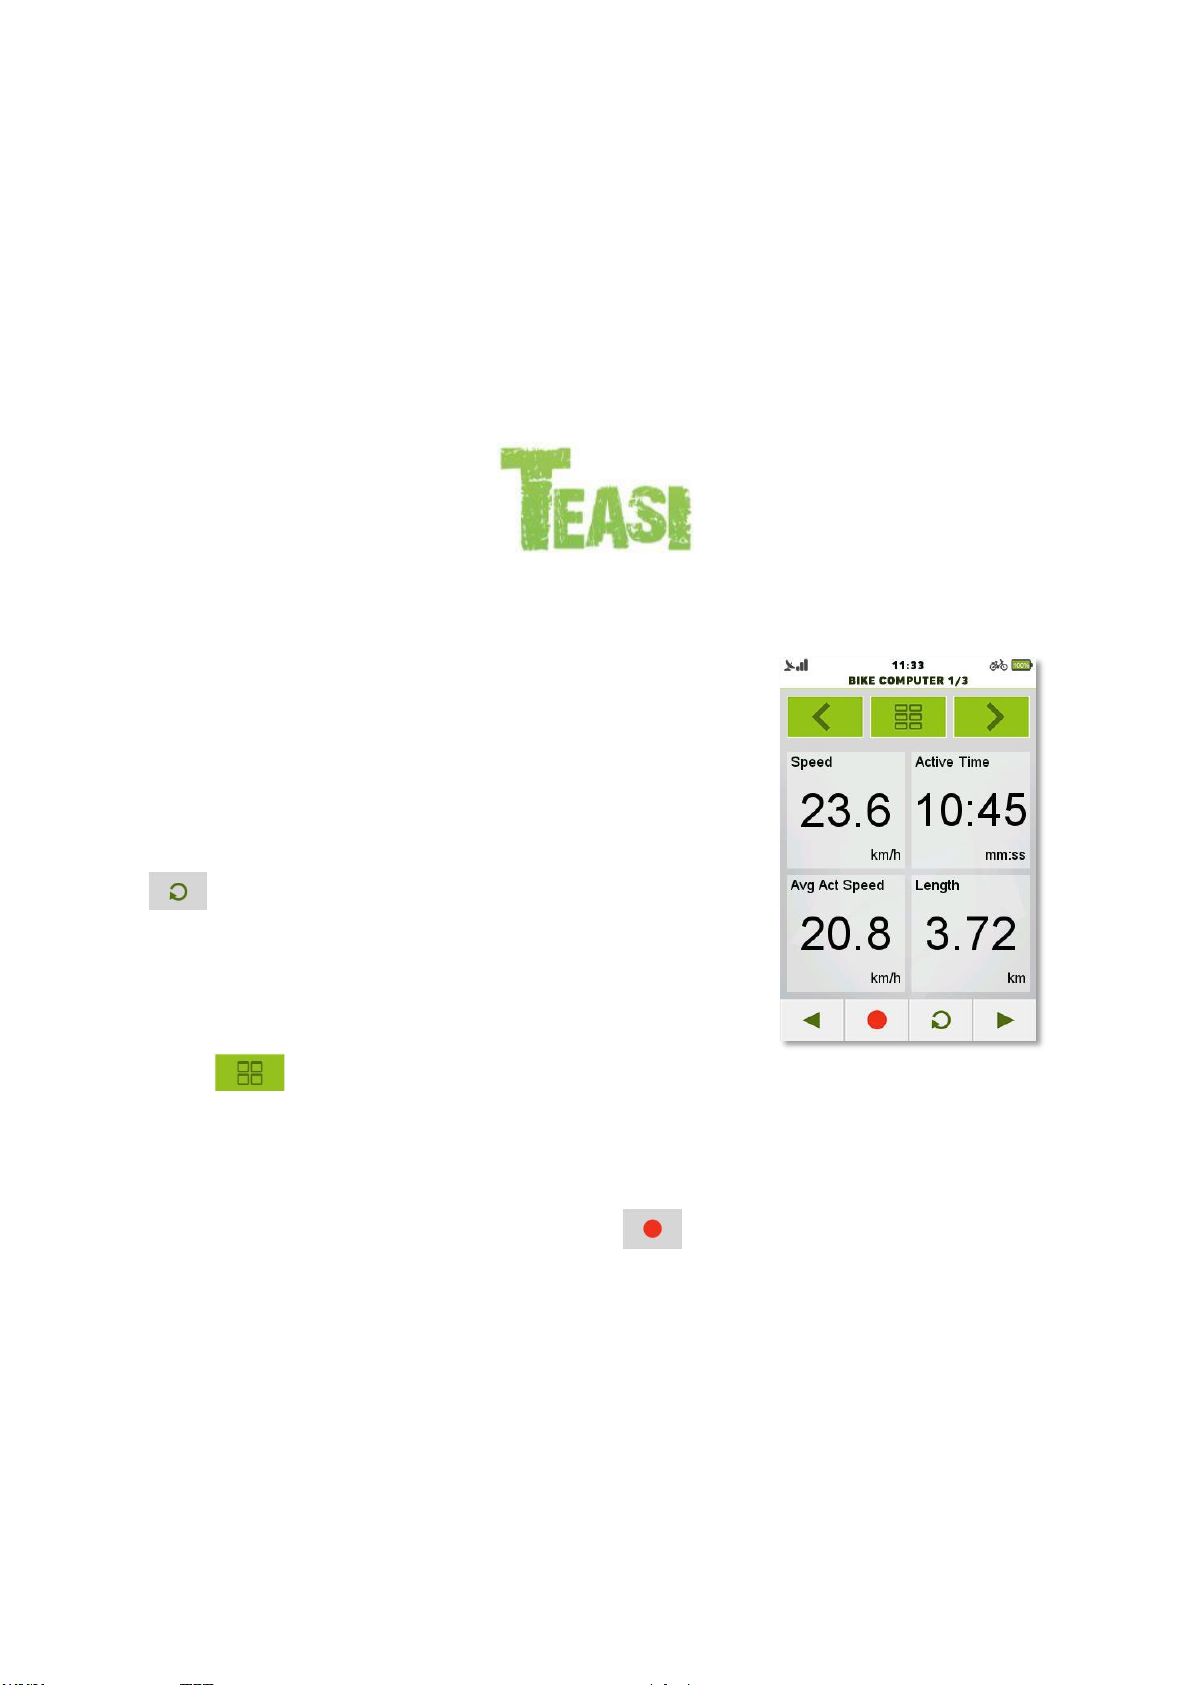
Teasi Volt comes with a special computer screen that contains the most
valuable information for E-Bike: Battery, Range, Engine Power, Assist
level and Current Speed of E-Bike.
The centerpiece of the screen is an interchangeable element that can
display battery in percentage or range in distance.
E-Bike Computer screen also shows the power input from E-Bike and
also from user. The arc shape on top shows the power input from 0W to
500W.
The green part of the scale is the human effort and the orange part is the
power given by the E-Bike.
Tap on the centerpiece to change between range and battery display.
3.8.1.1 E-Bike Light Management
On compatible bike types, Teasi can also manage the switching of the
headlight on the bike on and off.
Pressing the button will turn on/off the light on the bicycle.
Additionally, long pressing the hardware back button on Teasi Volt will
turn on/off the light on the bicycle.
Page 71
3.8.1.2 Gear Recommendation
Teasi Volt also provides gear recommendation based on speed and cadence of the user.
An upwards triangle shows when to change gear up and a downwards triangle shows when to
change gear down. Please set up the Gear Settings under E-Bike Account to have appropriate Gear
Recommendations.
3.8.2 Dashboard
Affects all models
Computer is a configurable tool that displays useful data since the
device was first powered on / reset.
In general, two kind of data are available:
the aggregated ones (max speed, all distance covered, etc.)
and the momentary ones (current speed, altitude, etc.).
The aggregated values can be reset by tapping the reset button
( ).
Two, three or six bike computer screens are built inside this
function, depending on the chosen layout. Changing between them
is possible with the arrows on the top of the screen.
The layout settings can also be changed by tapping on the layout
button ( ).
These 12 fields can be changed by tapping on them. You can browse the list via the up and down
arrows. By tapping on the new item, the field will change accordingly. With the buttons at the
bottom of the screen, you can reach other options of this function:
you can start/stop recording with the recording icon ( ), or move to the Speedometer and the
Compass screen by selecting the arrow buttons.
Page 72

Active Time
Time spent moving when recording
Altitude
Height of position compared to sea-level
Arrival Time
Your estimated arrival time
Average Active Speed
Your average speed based on time spent moving
Average Pace
Your average pace (time to ride one kilometer or mile)
Average Speed
Your average speed (including pauses)
Calories
Calories burnt
Climb left
Remaining uphill climb on current navigation route.
Daily Length Computer
Calculating the daily ridden route
Device Battery
Battery percentage left
Distance to Destination
Distance to Destination (needs ongoing navigation)
Distance to Next Turn
Distance to Next Turn (needs ongoing navigation)
Distance to Tour
Distance to reach your loaded Tour (needs ongoing
navigation to Tour)
Grade
Degree of inclination of the road
Heading
The course or direction in which the device is moving
Latitude
Your Latitude position
Length
Distance covered
Longitude
Your Longitude position
Maximum Altitude
The highest Altitude reached by the device
Maximum Pace
The maximum reached value of Pace
Maximum Speed
The maximum reached value of Speed
Pace
Current pace (time to ride one kilometer or mile)
Speed
Current speed
Sunrise
Time of Sunrise of the current day
Sunset
Time of Sunset of the current day
Time of Day
Current time
Time to Destination
Estimated time to destination (needs ongoing navigation)
Time to Next Turn
Estimated time to next turn (needs ongoing navigation)
Total Ascent
The sum of all vertical units of those parts of the track that
ascent.
Total Descent
The sum of all vertical units of those parts of the track that
descent.
Total Time
Time since training started.
3.8.2.1 List of Available Teasi Computers
Page 73
Skiing Length
The length of your skiing, without considering the parts spent
on lifts.
Skiing Active Time
The active time of your skiing, without considering the parts
spent on lifts.
Skiing Average Speed
Your average speed based on the time spent skiing down.
Cadence
The number of revolutions of the crankset per minute
Heart Rate
The number of heart beats per minute
Average Cadence
The average of recorded cadences over time.
Average Heart Rate
The average of recorded heart rates over time.
Maximum Cadence
The maximum reached number of revolutions of the crankset
per minute
Maximum Heart Rate
The maximum reached number of heart beats per minute
Pressure
Air Pressure
TEASI ONE & TEASI PRO & TEASI ONE3 & TEASI ONE3X
Downhill Ski related Computers:
TEASI PRO & TEASI ONE3 & TEASI ONE3X
Sensor related Computers:
Page 74

Heart Rate
The number of heart beats per minute
Average Heart Rate
The average of recorded heart rates over time.
Maximum Heart Rate
The maximum reached number of heart beats per minute
E-Bike related Computers:
Assist Level
Current assist level of connected E-Bike
Cadence*
The number of revolutions of the crankset per minute
Average Cadence*
The average of recorded cadences over time.
Maximum Cadence*
The maximum reached number of revolutions of the crankset
per minute
Current
Actual current used by bike in mA
E-Bike Battery
Current battery percentage of E-Bike
Gear*
Recommended Shifting of E-Bike (and Current Gear if available)
Human Power
Power applied to the bike by the biker in Watt
Motor Power
Power applied to the bike by the E-Bike motor in Watt
Odometer*
All distance covered by E-Bike
Remaining Battery at
Destination
Estimated Remaining Battery percentage of E-Bike when destination is
reached
Remaining Range at
Estimated Remaining Range of E-Bike when destination is
Destination
reached
Torque*
Force in Kilograms applied to the pedals by the biker
Voltage
Voltage of Battery in mV
Sensor related Computers:
TEASI VOLT & TEASI VOLT BT
*Not available for all bike models.
Page 75
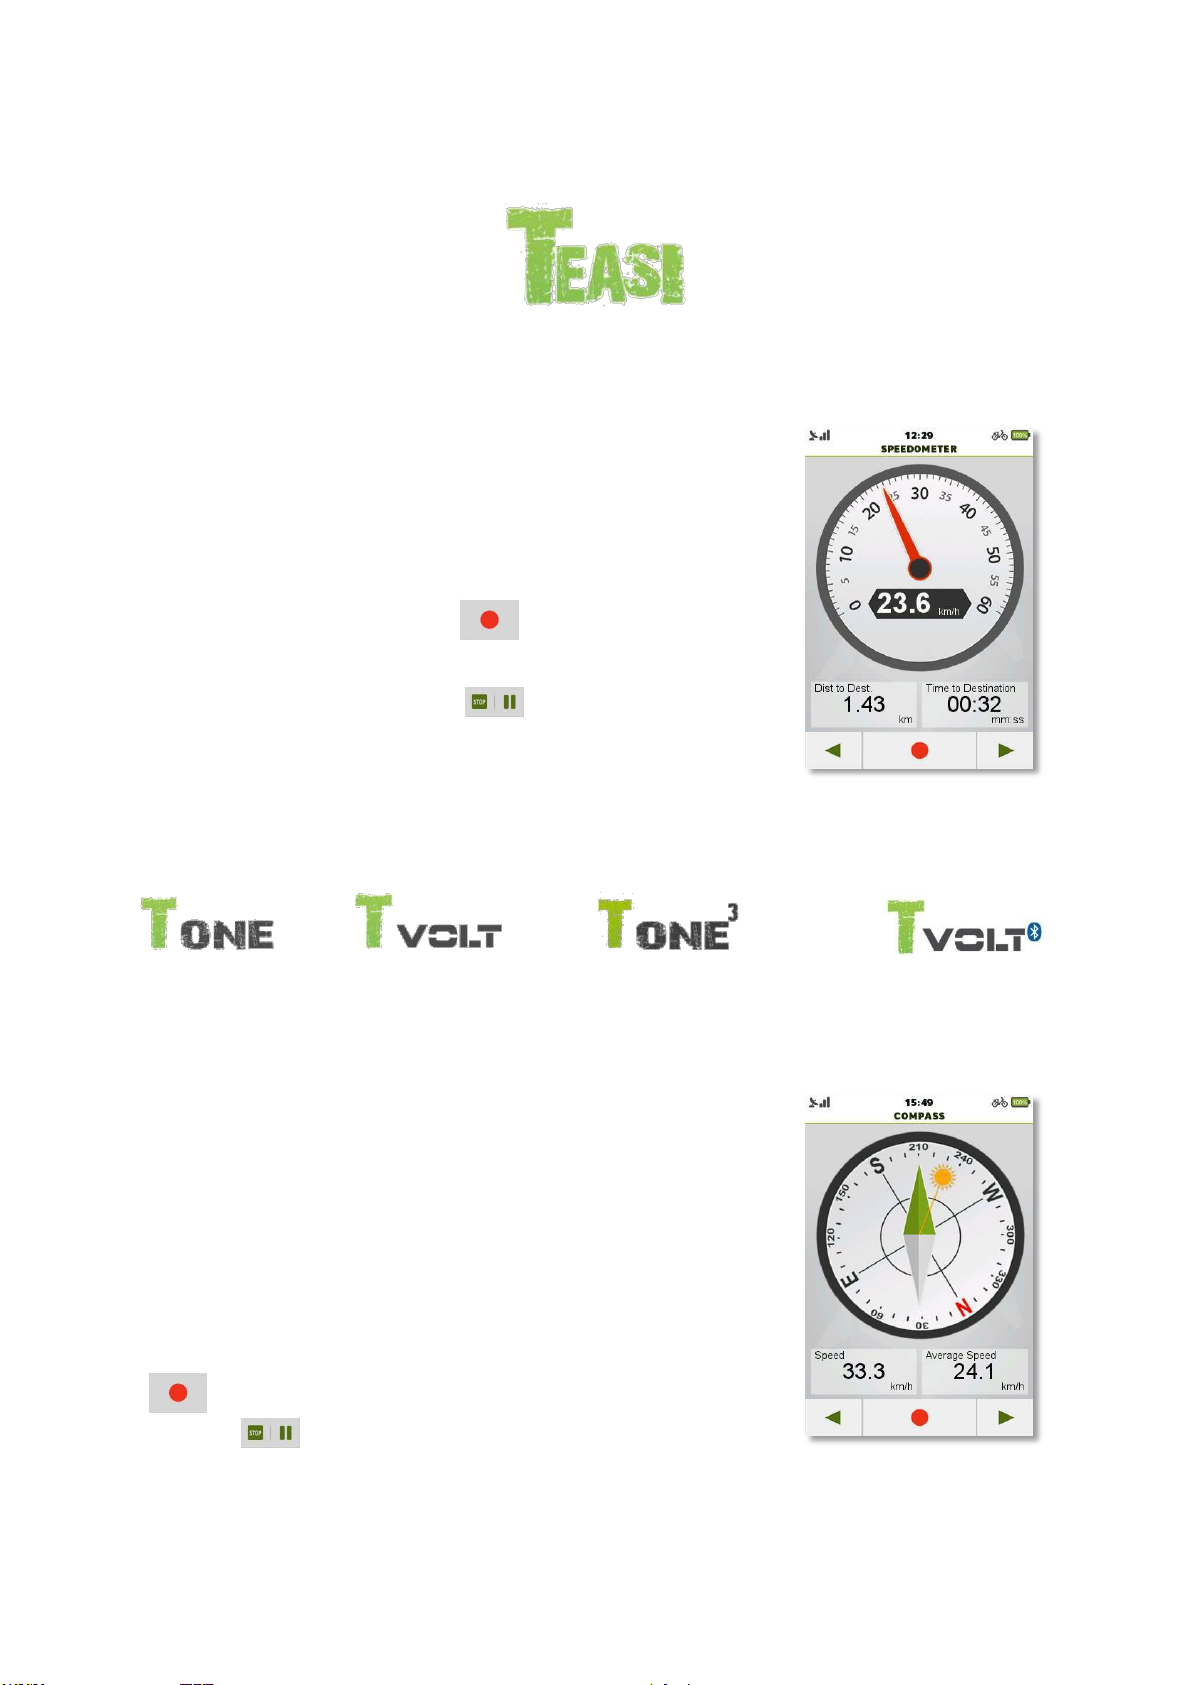
3.8.3 Speedometer
Affects all models
The Speedometer screen shows your current speed, scaled for the
bicycle/pedestrian type that is chosen for the selected profile.
Under the speedometer, there are also two changeable computers that
can be set by tapping on them.
Recording can also be started from here.
Just press the record button ( ) and select ‘Record’ when
prompted.
For pausing or stopping, select the ( ) button.
3.8.4 Sun Compass
TEASI ONE & TEASI VOLT & TEASI VOLT BT & TEASI ONE3
The Compass screen shows the direction to north, based on heading
displayed on Teasi device. The compass can detect direction changes
only when GPS satellites are caught and when moving.
An icon with the sun is displayed on the compass. If you know the
direction of the sun when you are standing, direct the Teasi with the
sun icon to the sun and you will now the direction on the compass.
Under the compass, there are also two changeable computers that can
be set by tapping on them.
Recording can also be started from here. Just press the record button
( ) and select ‘Record’ when prompted. For pausing or stopping
select the ( ) button.
Page 76
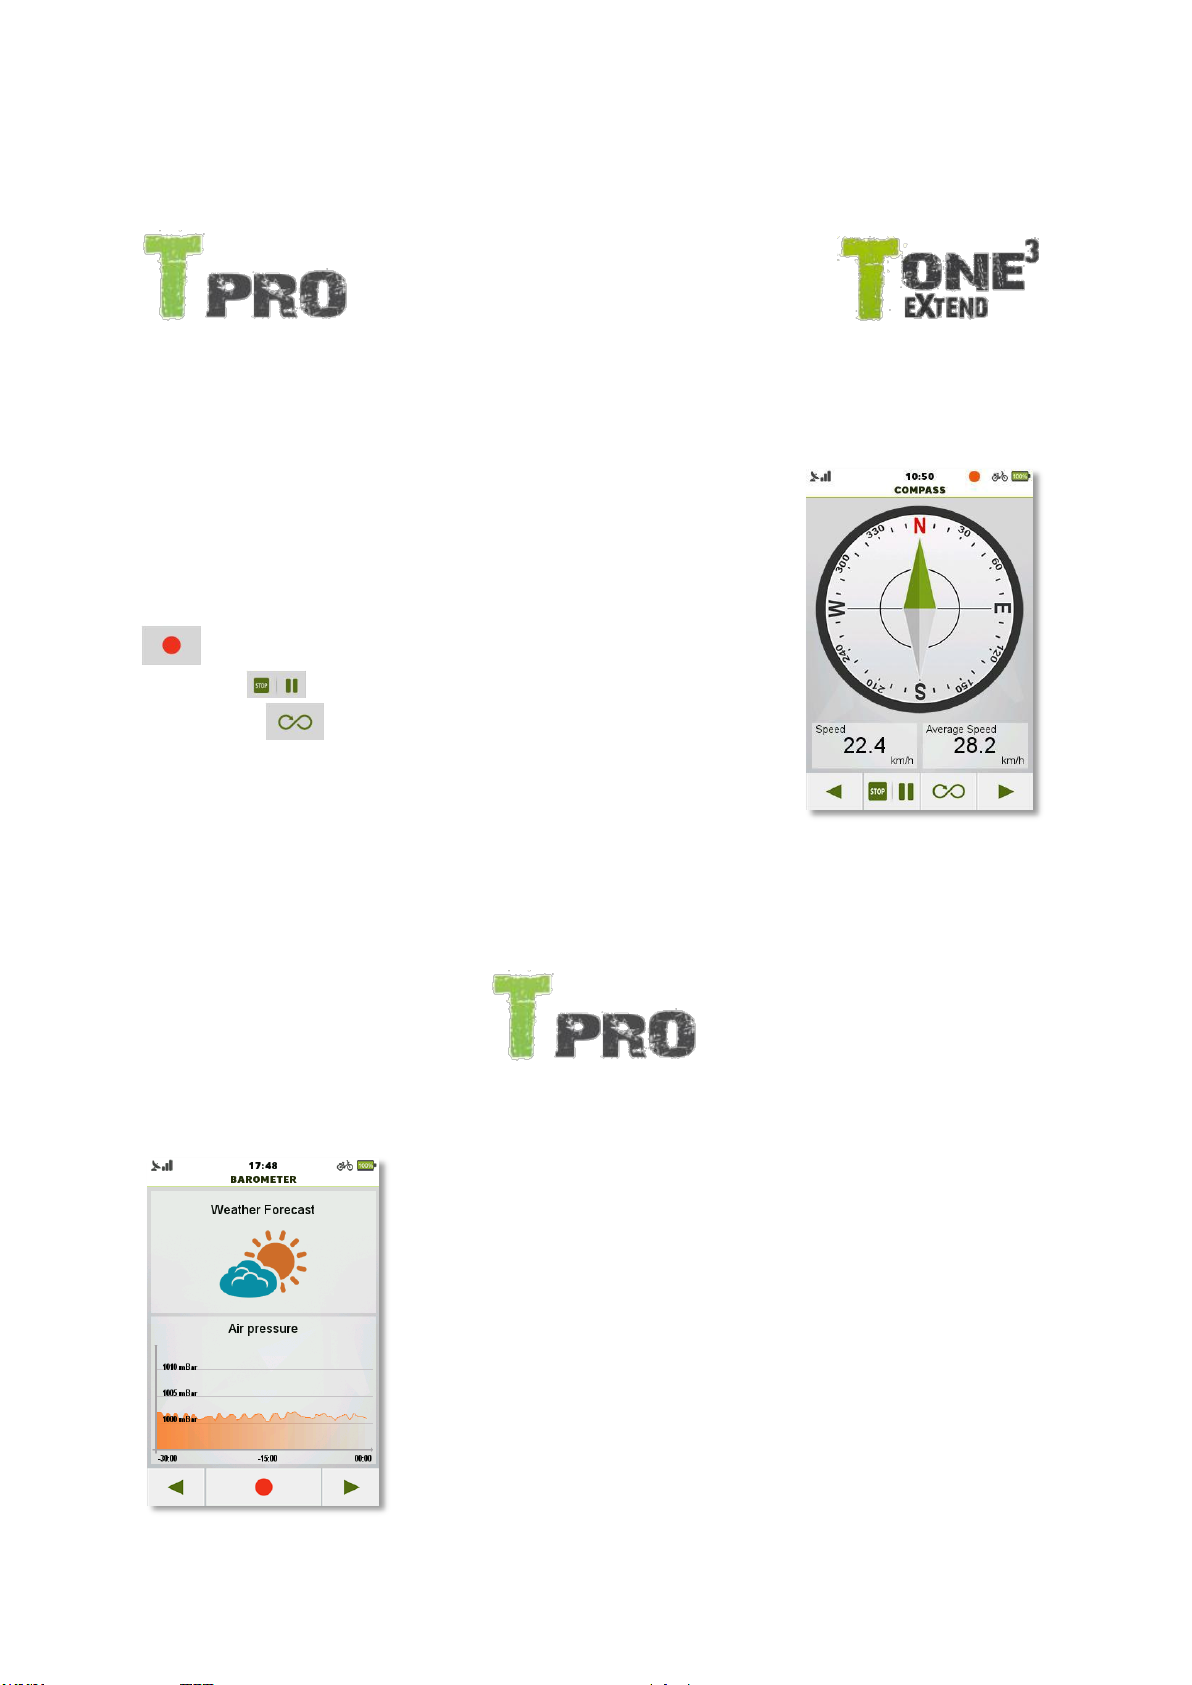
3.8.5 Compass
TEASI PRO & TEASI ONE3X
The Compass screen shows the direction to north, through the built-in
compass available inside the Teasi device.
Under the compass, there are also two changeable computers that can
be set by tapping on them.
Recording can also be started from here. Just press the record button (
) and select ‘Record’ when prompted. For pausing or stopping
select the ( ) button. Recalibration can be initiated by pressing
‘Recalibrate’ ( ).
3.8.6 Weather Forecast
TEASI PRO
This is the tool to forecast the changes in the weather, based on the
changes of the air pressure.
The upper half of the screen displays a forecast for the expected
weather, based on your location and the air pressure changes.
The lower half of the screen contains a graph with the changing
values of the air pressure, that were recorded by the built-in
barometer of the device.
Page 77
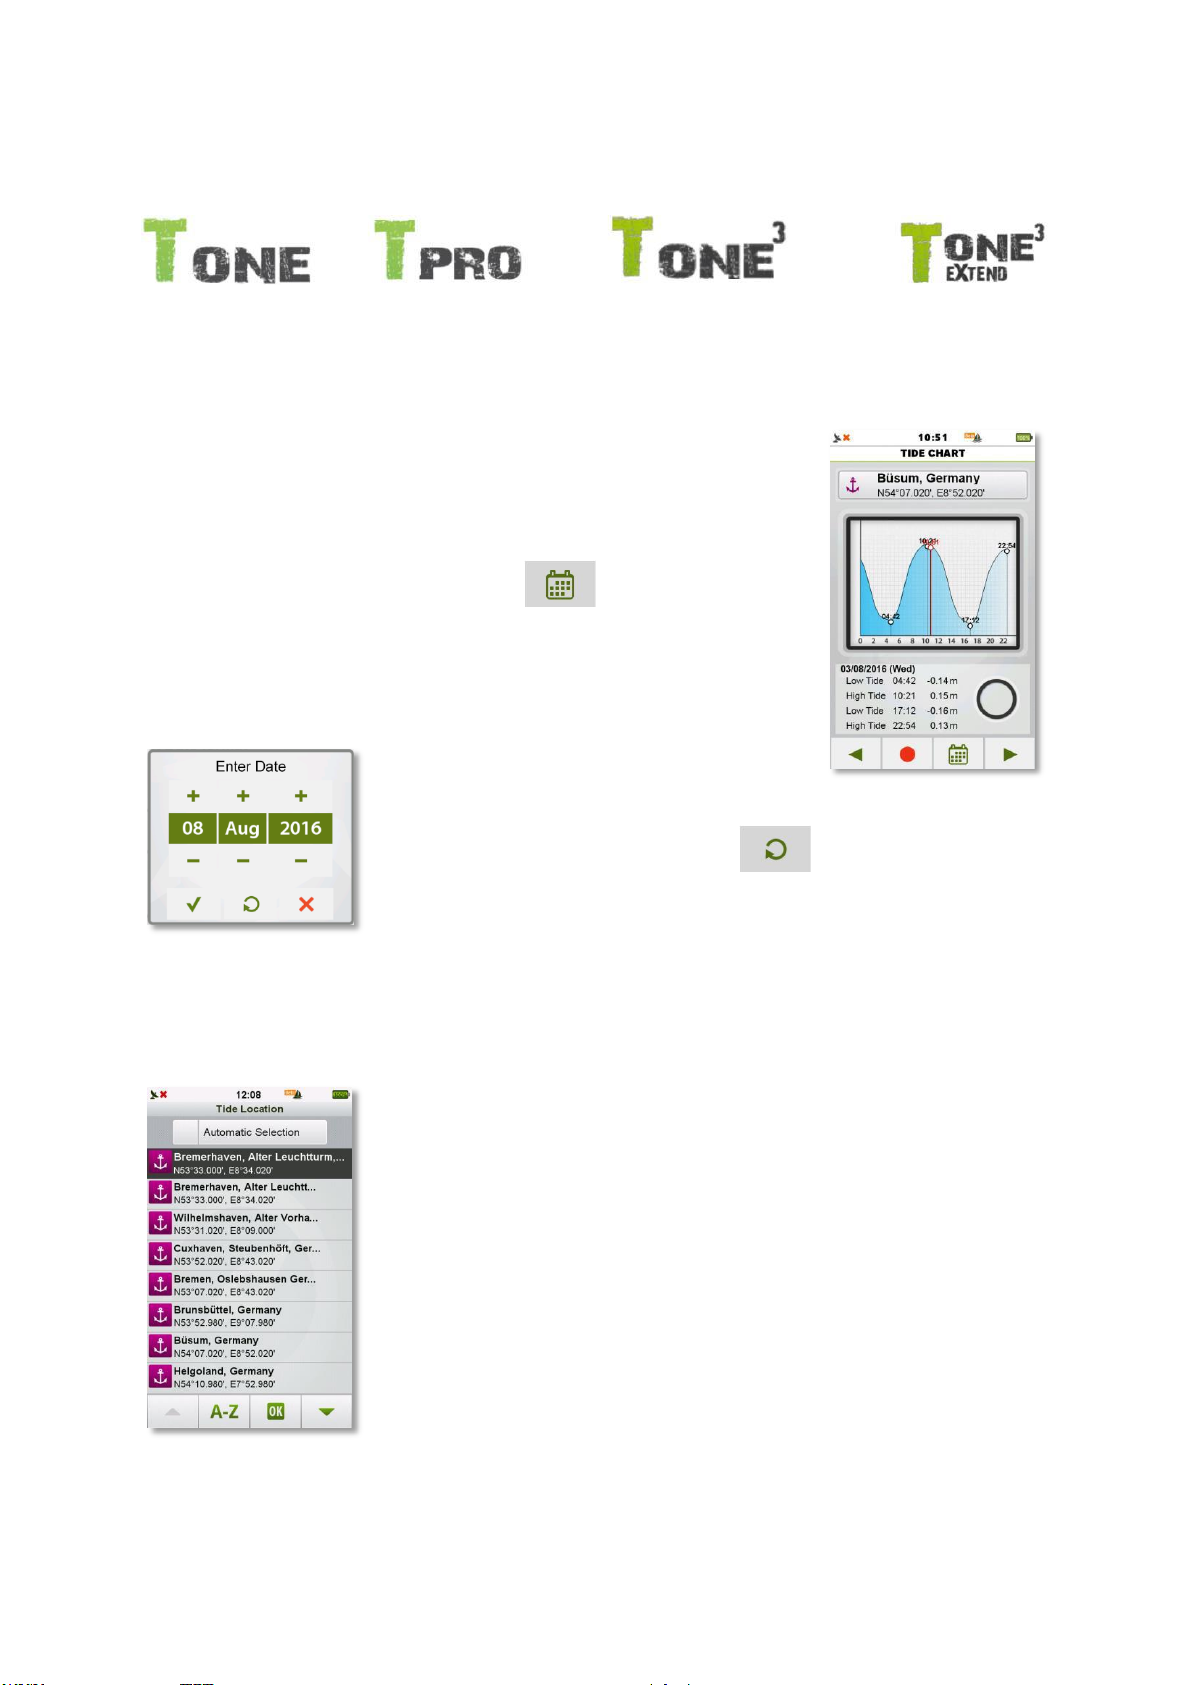
3.8.7 Tide Computer
TEASI ONE & TEASI PRO & TEASI ONE3 & TEASI ONE3X
When boat mode is active, in computers there will be a tide chart shown.
This chart will show the high and low tides for current place and current
time.
To change time, press the calendar icon ( ) and select a different
day.
To reset the day, press the reset icon ( ) on the calendar.
3.8.7.1 Selecting Reference Point
Tapping on current Tide reference point, Teasi will show Tide Location
list.
When Automatic Selection is checked, Teasi will always select the
closest reference point.
When Automatic Selection is not checked, every known reference
point is available for use and display.
Select list item to make it first in the list, this way after ‘OK’, Teasi will
show tide chart always for the item on the top of the list.
Page 78
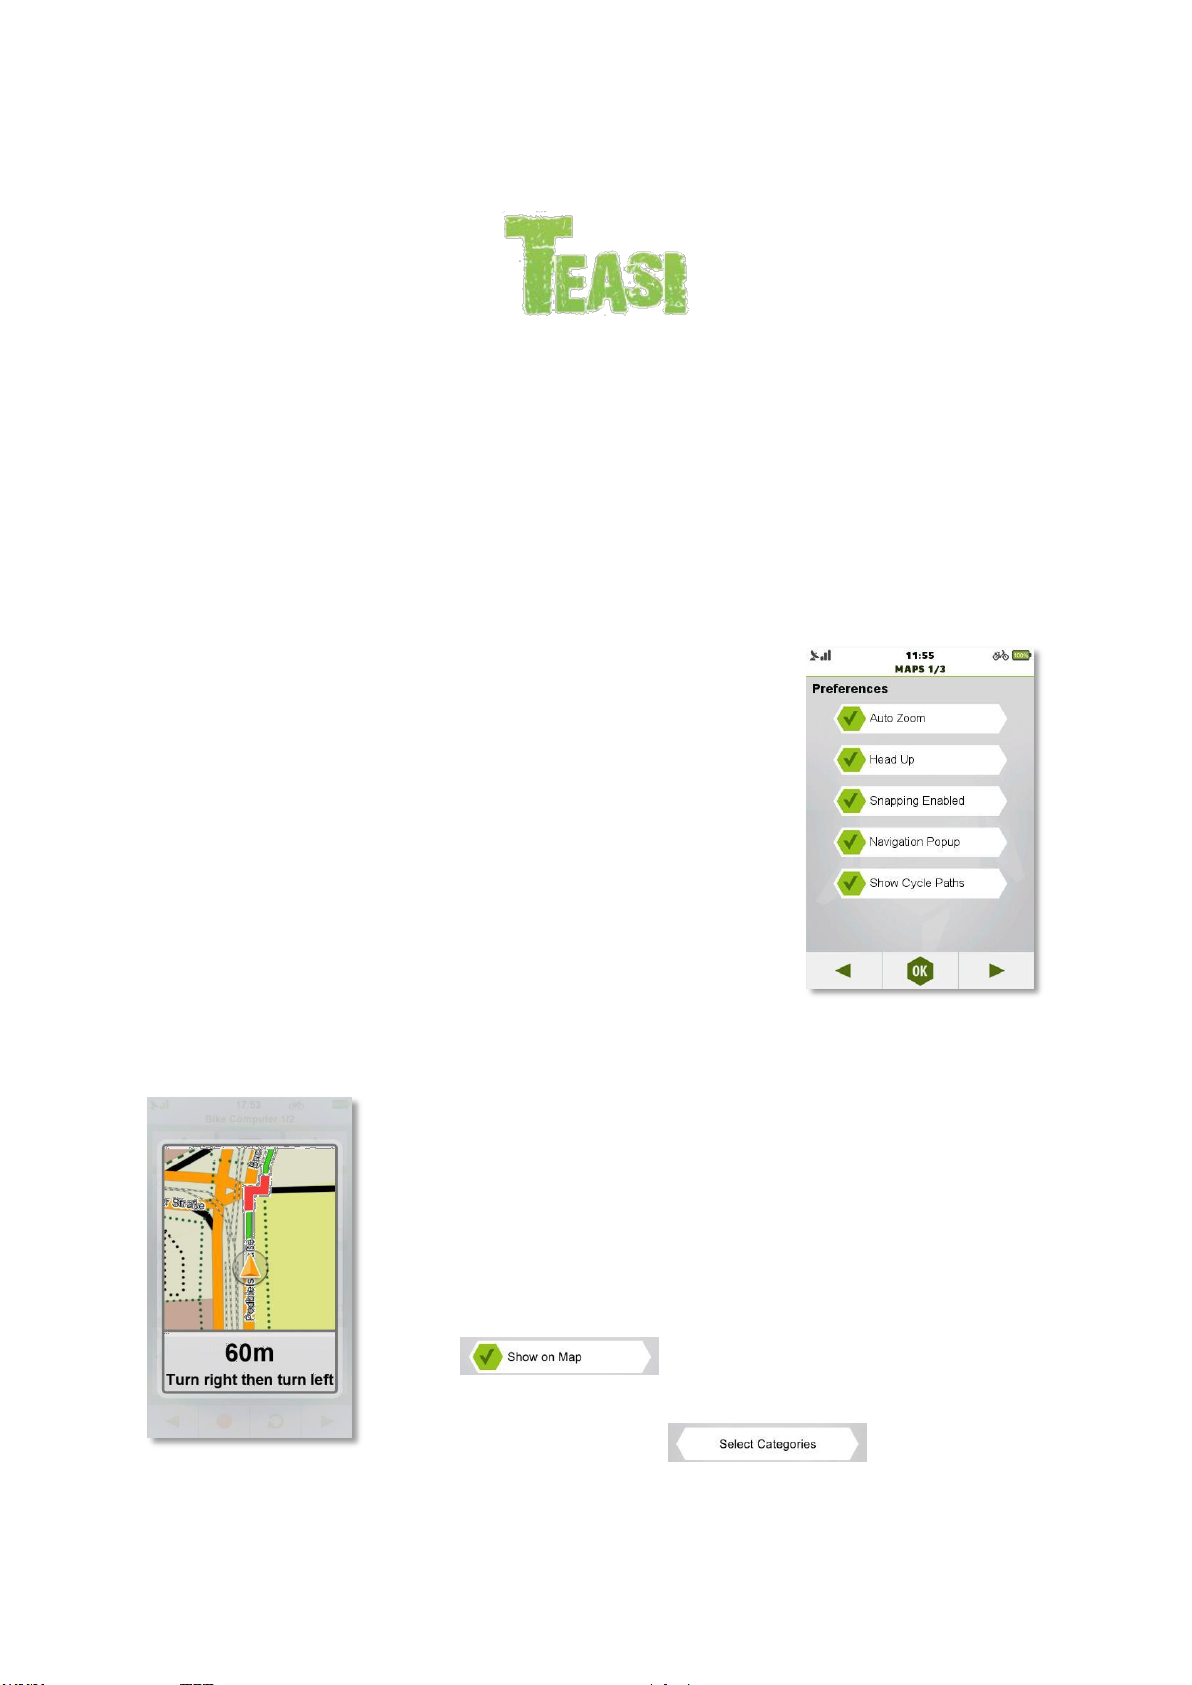
3.9 Settings
Affects all models
Inside the Settings menu you have the possibility to choose your preferred configuration to live the
best experience with your Teasi device.
3.9.1 Maps & Clean Up Maps
In Maps, three pages of features can be fine-tuned for efficient
optimization.
The first page contains settings regarding zoom and orientation.
The ‘Auto Zoom’ can be turned on or off, thus enabling automatic
zoom.
Orientation can also be decided: Checking ‘Head up’ allows the device
to always turn the map to the heading, while unchecking it keeps the
map with north on the top of the screen.
When snapping is enabled, the cursor will be snapped to the track in
the event of navigation on a track. This way the noise of the signal is
reduced on the GUI so progress can be seen in a more demonstrative
way.
Note: The recording itself would contain the original signals, so the movement of the location cursor
and the red line of recording might differ.
To see the unfiltered position, disable the snapping feature.
Navigational pop-up informs about next turn when map screen is not
visible.
To disable these pop-ups, uncheck the option in the menu.
On the second page of map settings are placed the settings of
displaying favorites and POIs.
The display of each item can be set by its individual ‘Show on map’
button ( ).
For Map and Imported POIs the shown categories are also selectable by
the ‘Select Categories’ button ( ).
Page 79
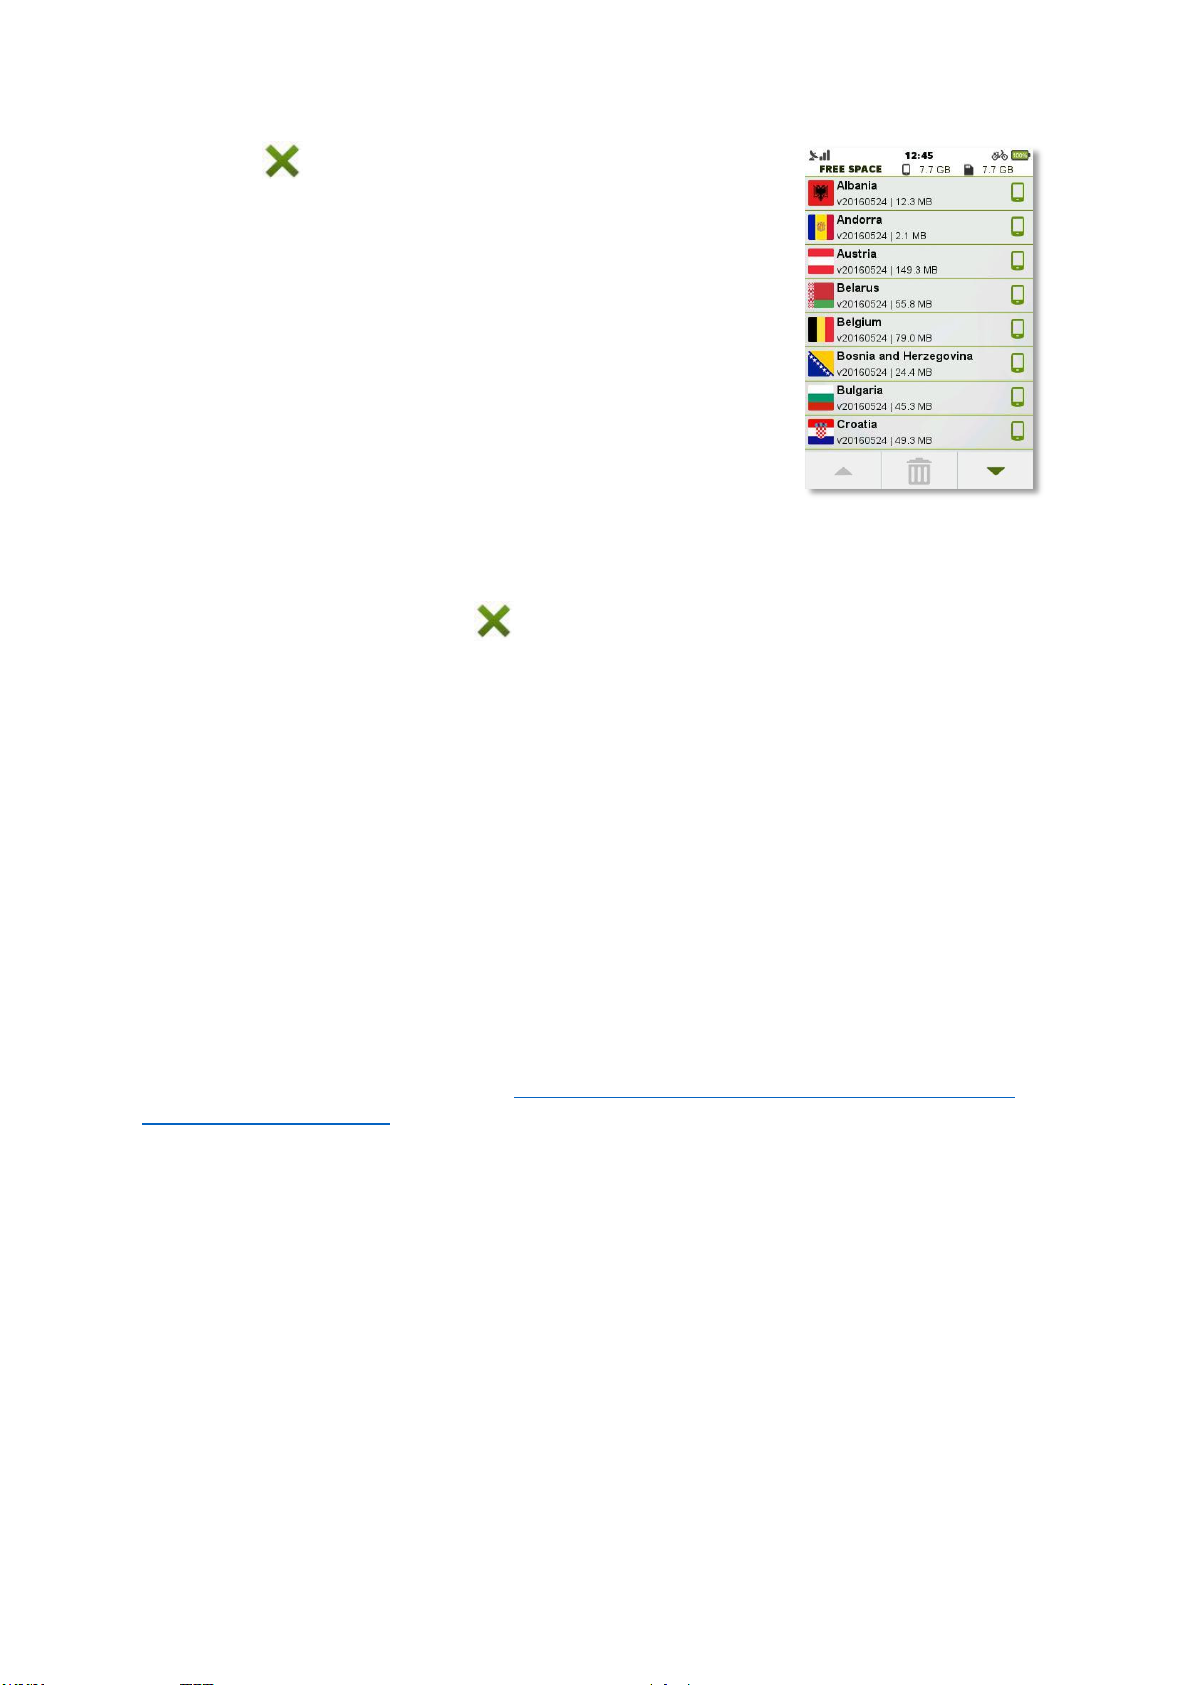
When an ‘X’ ( ) is shown next to a category, it will not be displayed
on map.
Third and last page contains Clean up Maps and Raster map feature.
Clean Up Maps is a feature to delete maps on the device, making free
space for any needs on the go.
Under the status bar, on the top of the screen is the free space
presented both on device and memory card.
Under the free space indicator, you can find a list of installed countries.
Select the countries to be deleted by tapping them once. If the bin is enabled on the bottom of the
screen, the countries marked by ‘X’ ( ) will be deleted after a prompt question in a pop-up box.
Select yes on the box to confirm deletion. At least one country has to be present, therefore it will
not be possible to remove all the countries.
Raster maps can be used by checking the ‘Use Raster Maps’ checkbox and by selecting valid
sources. Open ‘Select Sources’ and select a raster map to be used (selected maps are dark gray).
Pan on map screen to the affected area to see the difference made by the feature.
Note: Raster maps on SD card will be loaded on Software startup. If SD is inserted, but raster maps
are not visible, please restart the device! Supported Raster Map format is MBTiles. Quality raster
maps are provided by KOMPASS and MagicMaps.
For creating own raster maps, please visit: http://www.teasi.eu/fileadmin/redaktion/mbtiles/Teasi-
Tech-Tipp-MOBAC_EN.pdf
Page 80
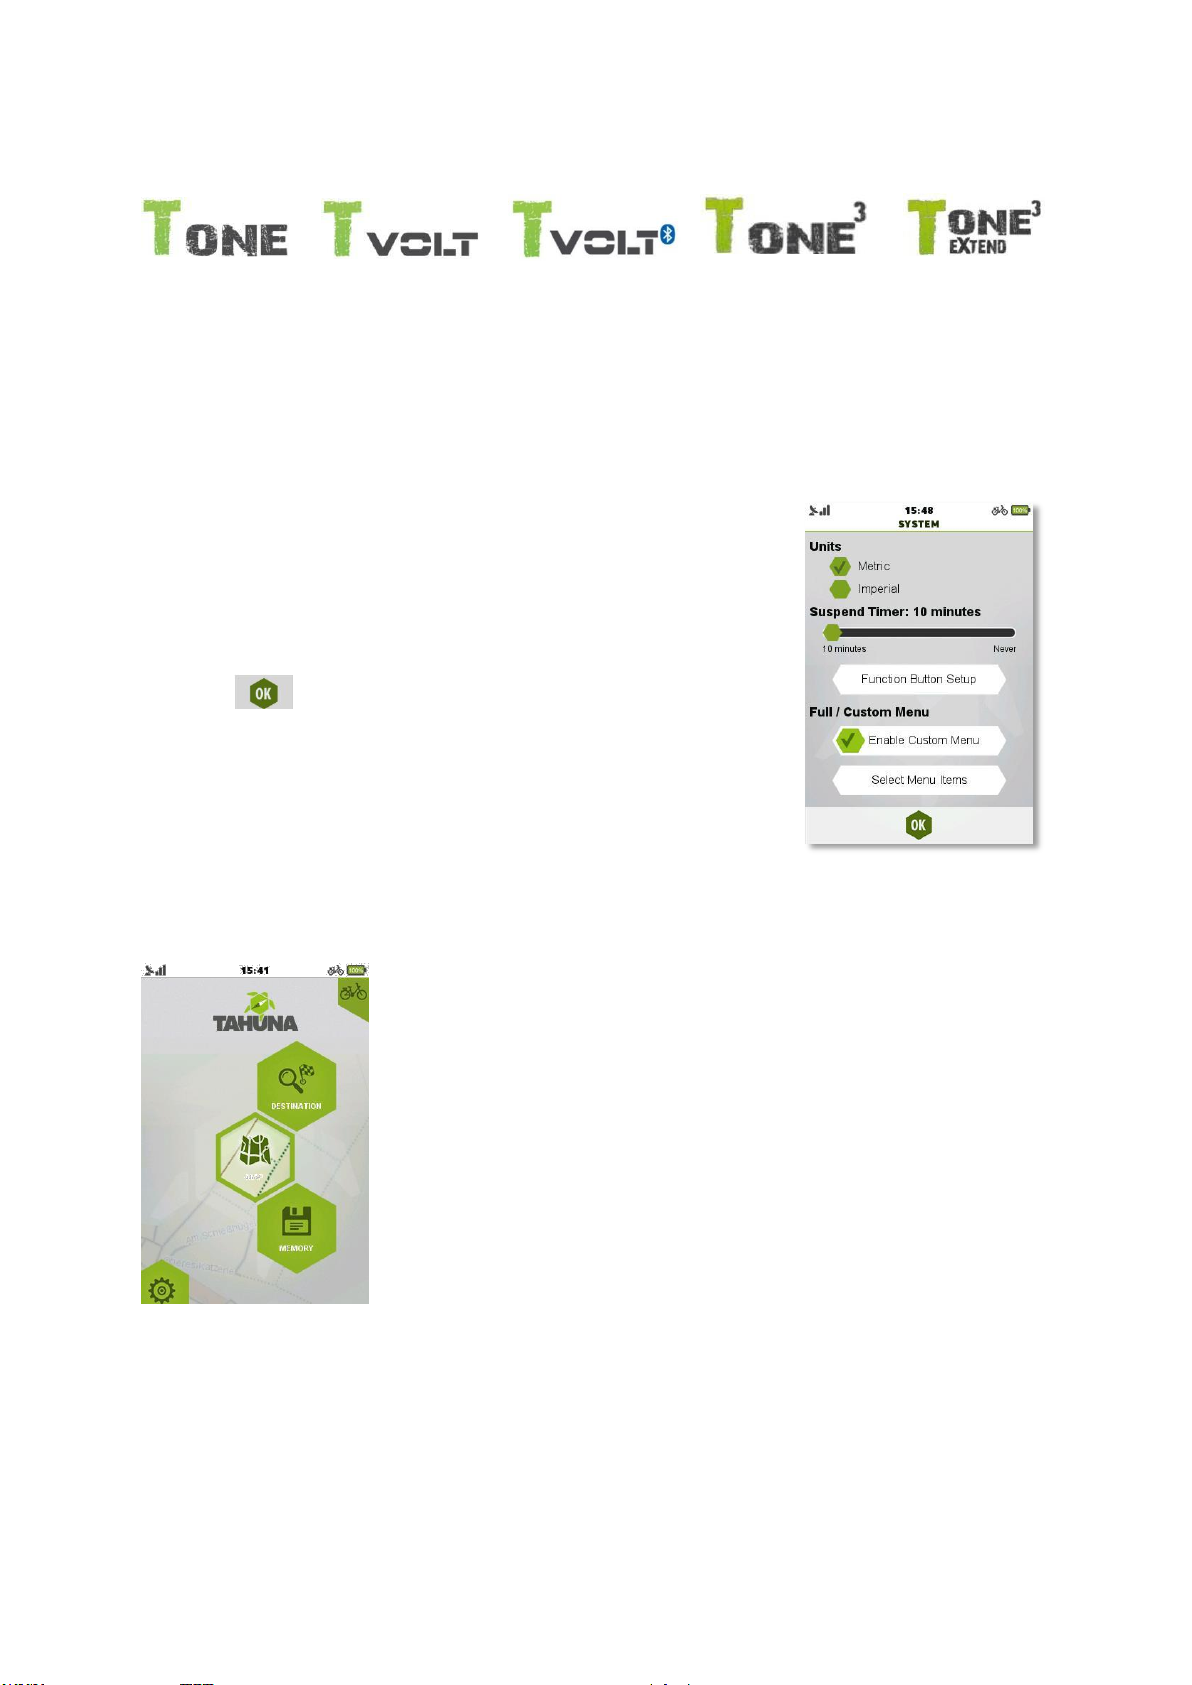
3.9.2 System
TEASI ONE & TEASI VOLT & TEASI VOLT BT &
TEASI ONE3 & TEASI ONE3X
In System, the units can be changed.
Tap on ‘Metric’ to use metric system and tap on ‘Imperial’ to use the
imperial.
The timer for Suspend mode can also be set here:
tap on the slider and move it to the desired value,
press OK ( ) button to accept the changes.
Note: If Units settings are disabled, Nautical settings are in use. To disable
nautical settings and enable Metric / imperial, go to Account Settings.
3.9.2.1 Easy Mode - Full Mode
Easy mode contains only the essential features: Map, Destination,
Memory and Settings (where full mode can be set).
Easy mode can be selected by ‘Change to Easy Mode’ when device is set
to Full Mode and Full mode can be set by tapping ‘Change to Full Mode’
when device is set to Easy mode.
Full mode contains all features of the Teasi One device.
Note: When easy mode is selected, new profiles cannot be added and
existing profiles cannot be deleted.
If Create and Edit options are not enabled in ‘Accounts’, Normal mode should be reactivated in
Settings System ‘Change to normal mode’.
Page 81

Page 82
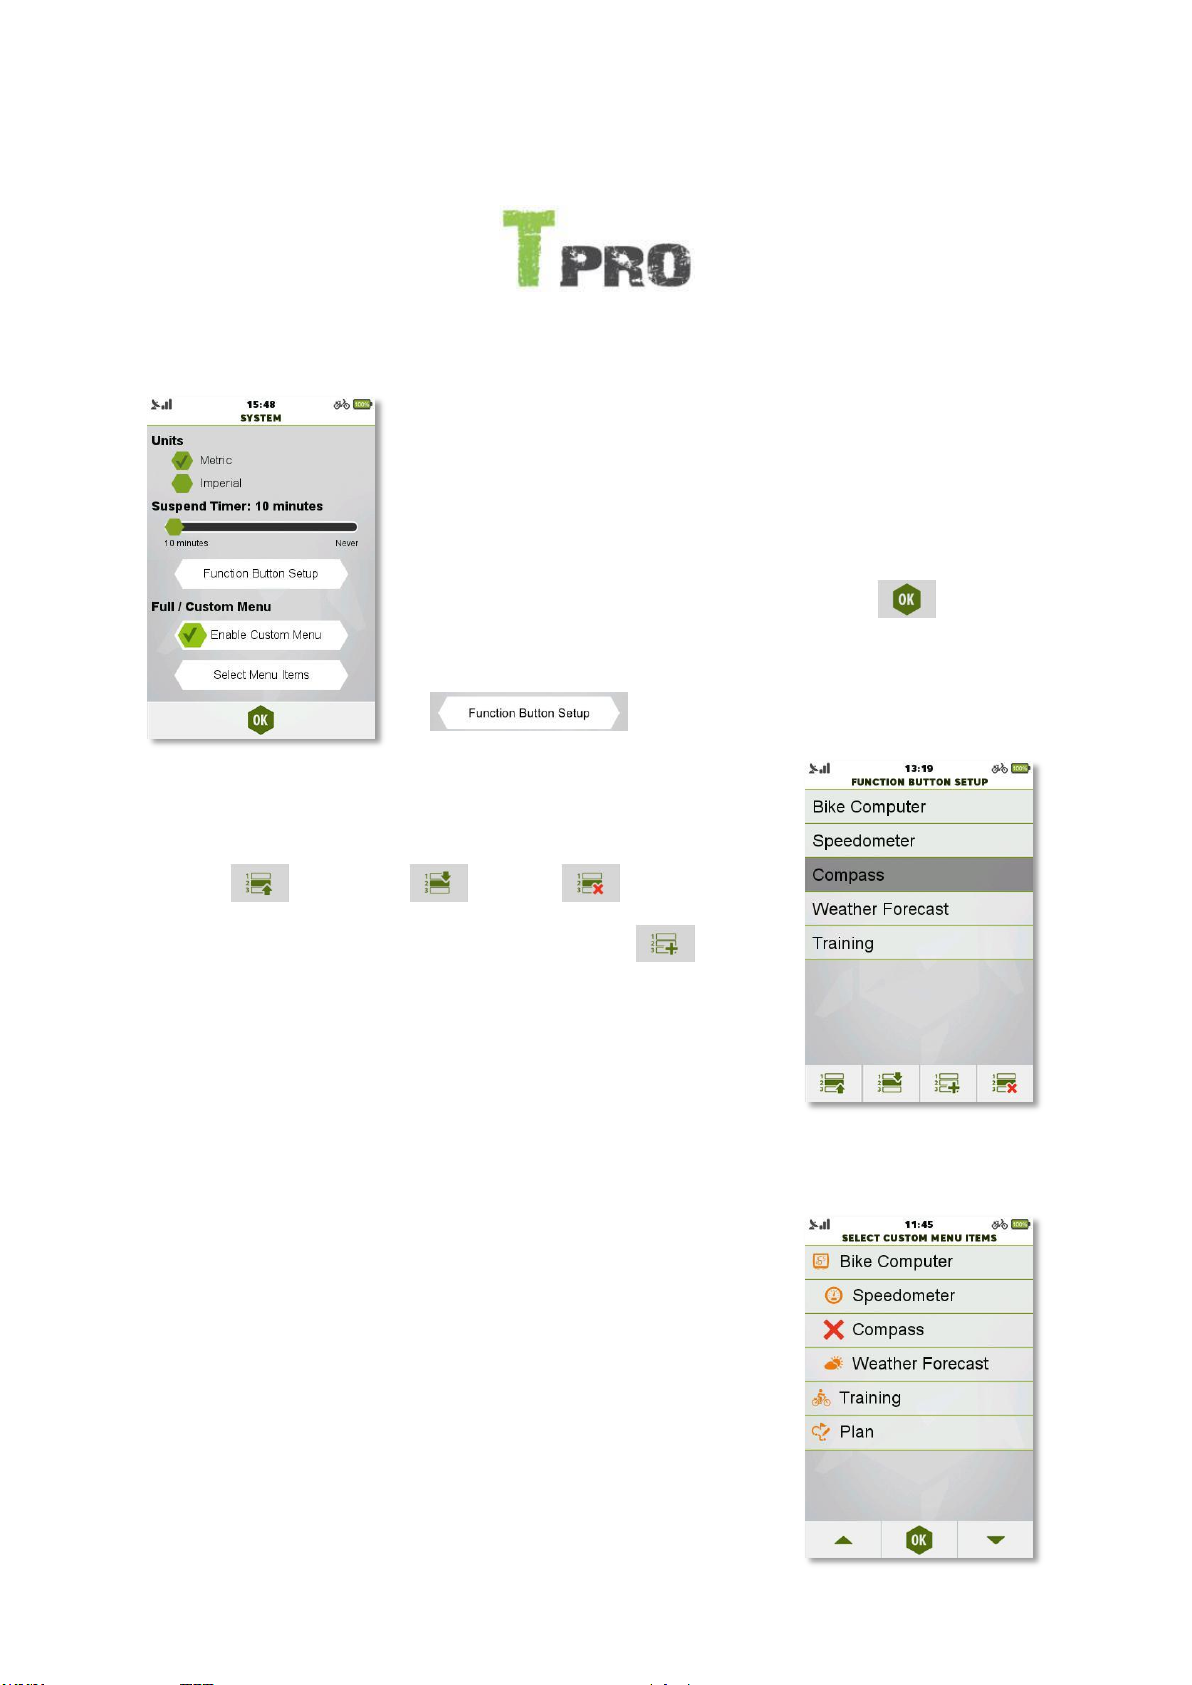
3.9.3 System & Full menu – Custom menu
TEASI PRO
In System, the units can be selected. Tap on the circle next to the
desired unit system
Note: If Units settings are disabled, nautical settings are in use. To
disable Nautical settings and enable Metric / Imperial, go to Account
Settings.
The timer for Suspend mode can also be set here: tap on the slider
and move it to the desired value, then press OK ( ) button to
accept the changes.
The function button can also be set from here by tapping
( ).
When function button is pressed, the order set in Function Button
Setup will be rotated on every press.
Tap on an item to execute a task on it:
Move up: Move down: Unselect: .
Unselected functions can be re-selected by tapping on .
3.9.3.1 Full menu - Custom menu
In System settings, you can change between Full menu and Custom
menu. Full menu contains all available features on the device and
Custom menu can be set to only show the essentials, thus gaining
speed and comfort in everyday use of the device. Select ‘Enable
Custom Menu’ by ticking it, then tap on ‘Select Menu Items’.
By default, Custom mode contains all available features.
Tap on a menu item to select / unselect it. If a red ‘X’ is shown next to a
feature, then it will be hidden in the Main Menu.
Page 83
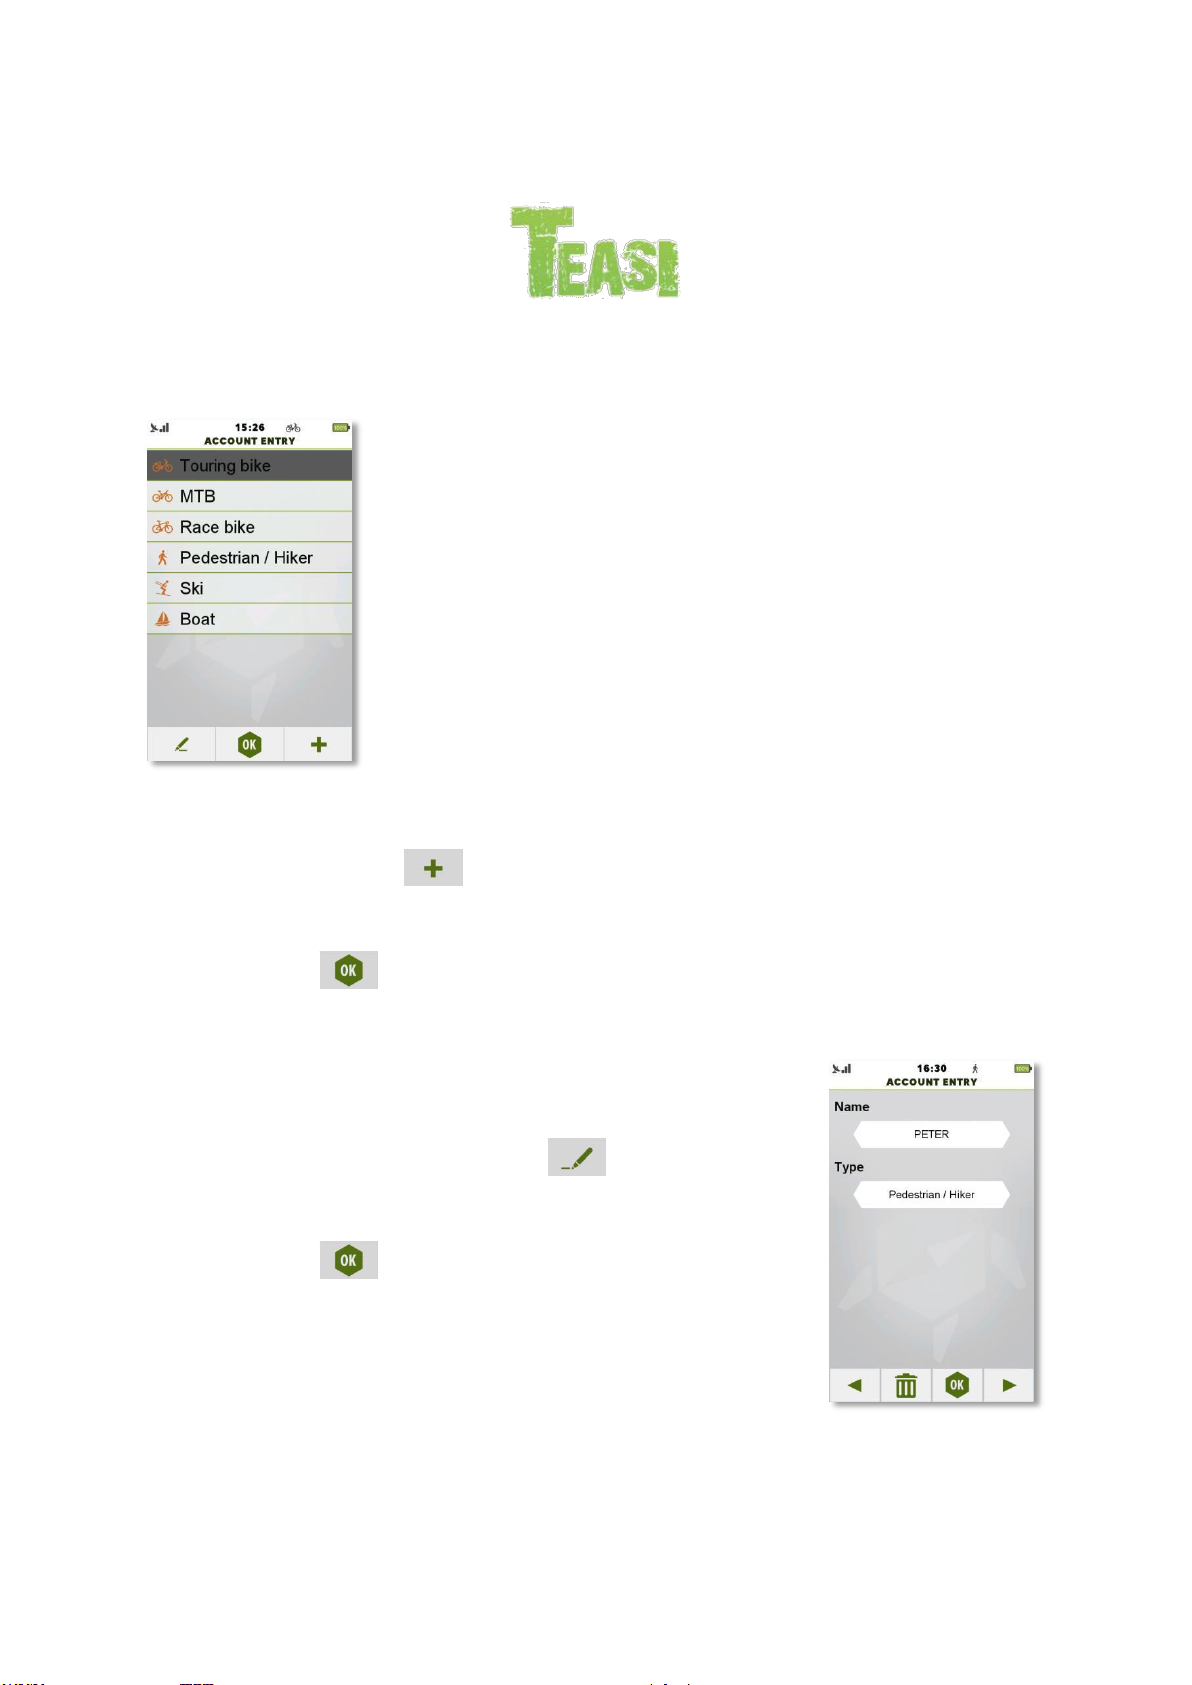
3.9.4 Accounts
In Accounts, you are able to create up to 8 user profiles. Existing profiles
can also be edited or removed.
Profile selection can be also reached from the upper right corner of the
main menu screen.
Affects all models
To create a profile (only if less than 8 profiles exist):
1. Tap on the plus sign ( ).
2. Tap on the details you want to change from the default values.
3. Tap on OK ( ) when finished.
To edit a profile:
1. Tap on the profile.
2. Select the Pen button to edit profile ( ).
3. Tap on the details you want to change.
4. Tap on OK ( ) when finished.
Page 84

Page 85
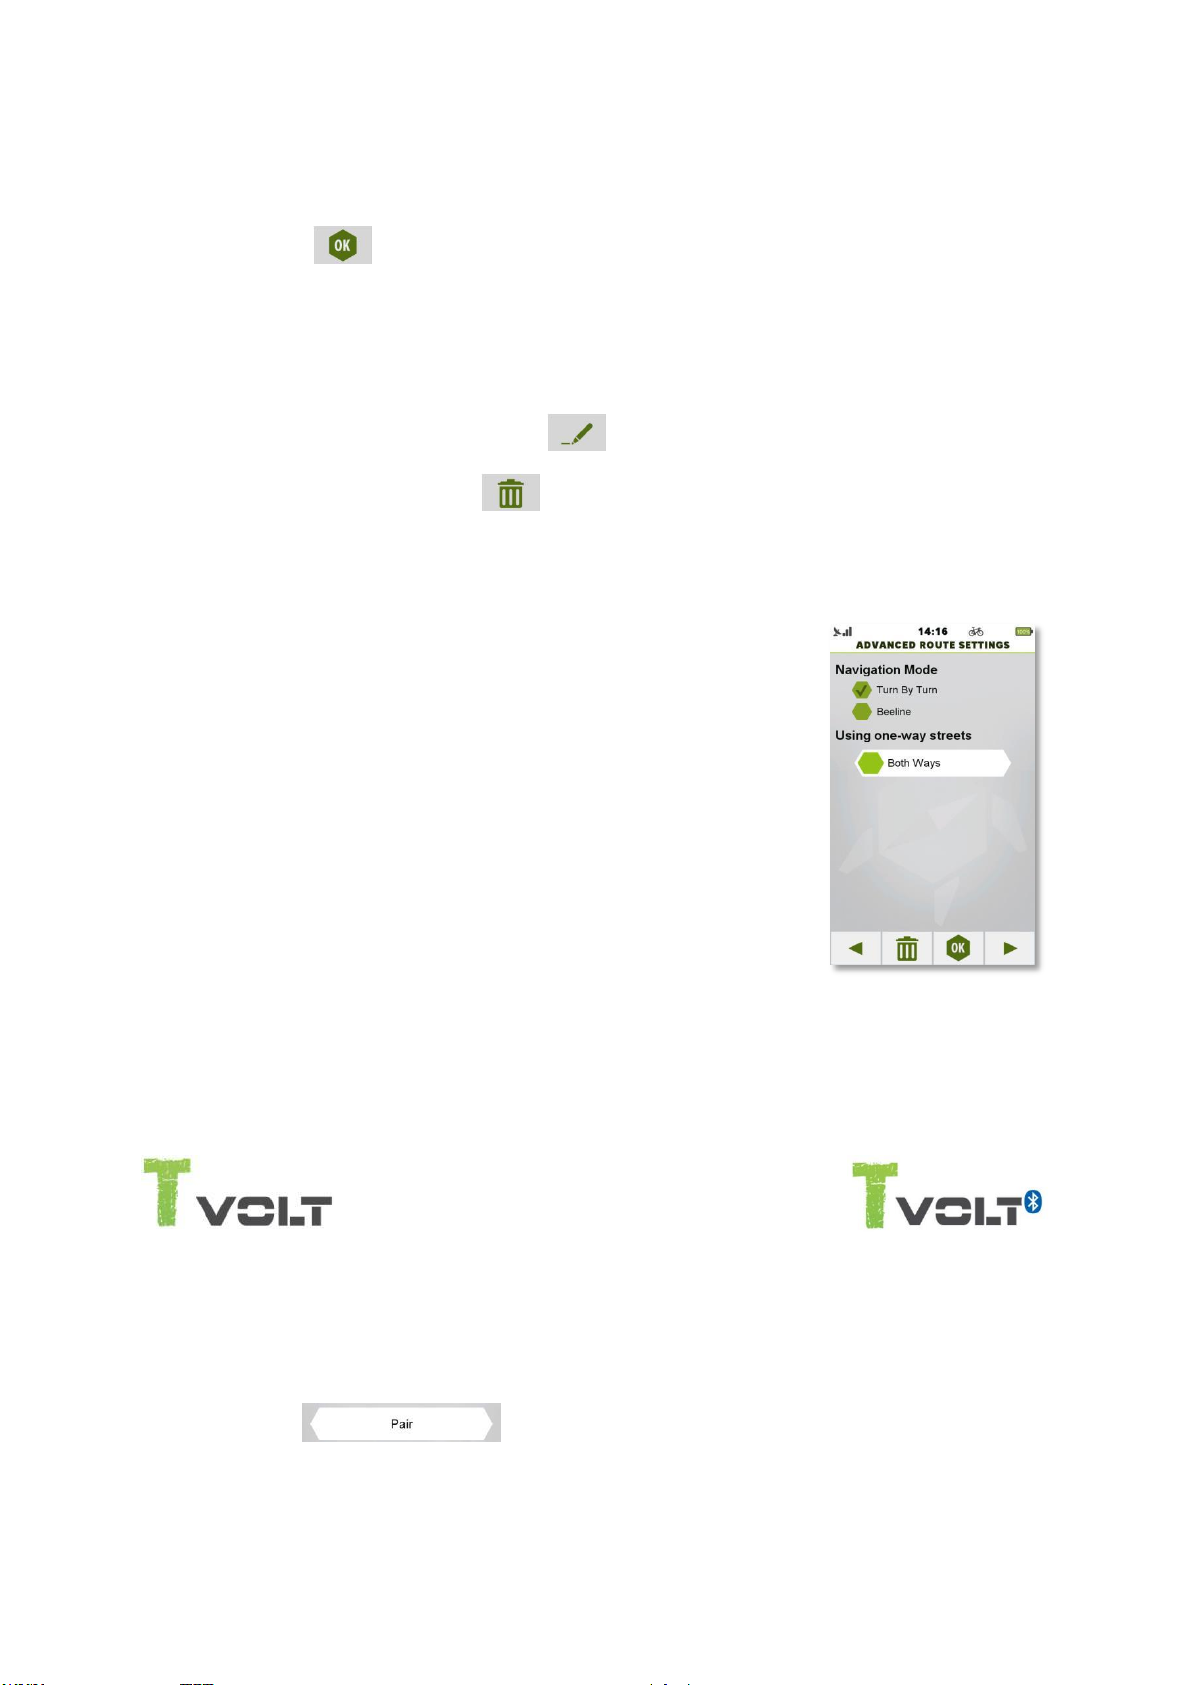
5. To activate a profile:
1. Tap on the profile.
2. Select OK ( ) to close the screen.
To delete a profile:
1. Tap on the profile.
2. Select the Pen button to edit profile ( ).
3. Tap on the bin icon to delete ( ).
4. Select ‘Yes’ in the upcoming confirmation query.
For each profile, you can set a Name, Weight, Bike Weight,
bicycle/pedestrian type by tapping on each field.
Pressing arrow buttons, you can define other parameters for your
account, like the road preferences you would like to be used when a route
is calculated.
Furthermore, advanced routing settings can be done in the last page of
this menu on ‘Advanced Route settings’:
In Advanced Route Settings, the navigation mode can be selected Turn By Turn, or Beeline. Turn by turn gives the normal navigation, where
every turn is instructed and beeline shows the direction straight to the
destination.
Also, one-way streets can be used by bicycle. For this, select ‘Both ways’.
3.9.4.1 Bike Pairing and Configuration
TEASI VOLT & TEASI VOLT BT
Pairing E-Bike to an account happens under SettingsAccounts.
When E-Bike is connected and pairing has not happened yet, pairing can be started by pressing the
following button:
E-Bike configuration can be done under AccountsBike Configuration. In this menu, gear and
speed sensor settings of the E-Bike can be calibrated.
Page 86
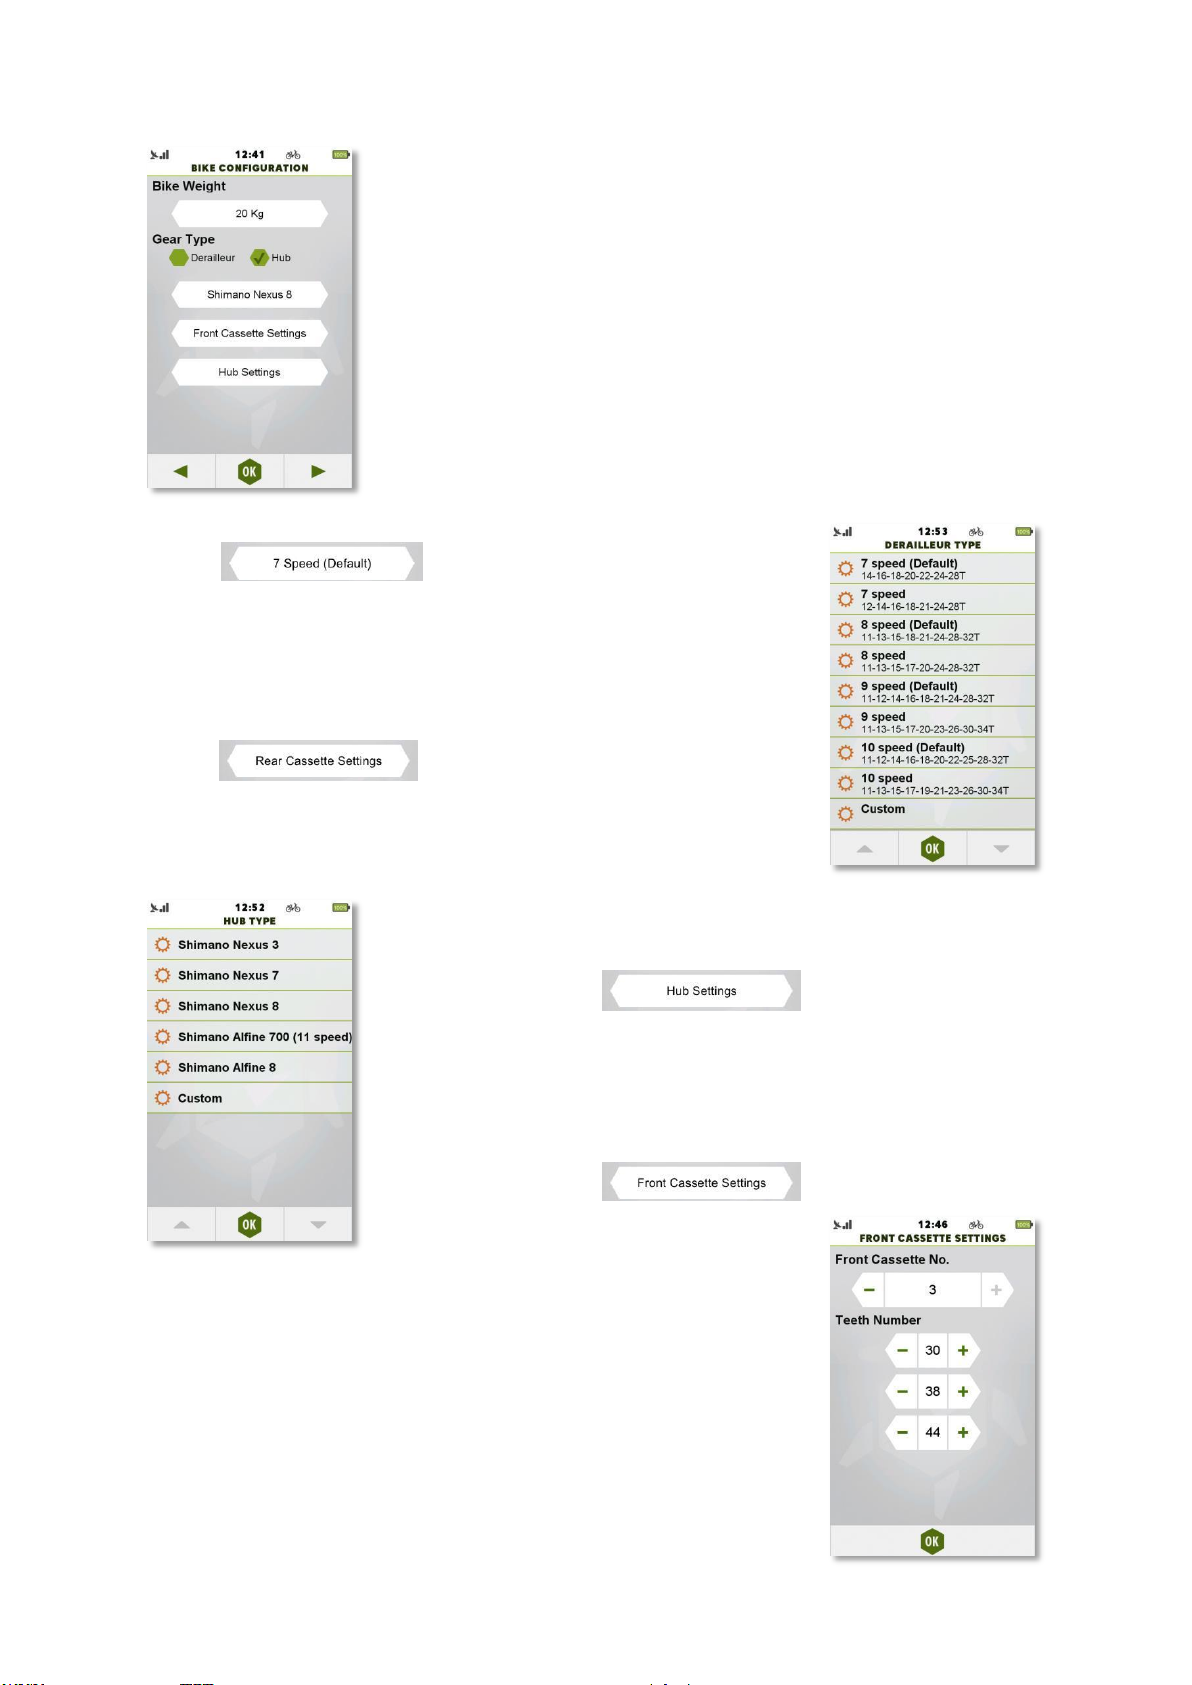
In this screen, Bike Weight can be set and gear settings can be
configured.
Derailleur and hub gears are both available. If using e-bike with
derailleur, select ‘Derailleur’. If using e-bike with hub gear (such as
Shimano Nexus 7 and 8) select ‘Hub’.
When Derailleur settings are in use, Derailleur type can be changed by
tapping . This will show the available Derailleur
types (based on the number of rear cassettes).
Selecting a type will set the rear cassette settings described under the list
element.
Cassette teeth numbers can also be adjusted one by one by tapping:
When rear cassette settings are modified, the Derailleur type will be set
to ‘Custom’.
Selecting a type will set the hub settings described under the list
element. Gear ratios can also be adjusted one by one by tapping:
When hub settings are modified, the Derailleur type will be set to
‘Custom’. In cases of both types (Hub and Derailleur), also the front
cassette number and the individual teeth number for cassettes can be
set by tapping:
When there are multiple front cassettes (available only with derailleur, the
cassettes should be configured so that the smallest teeth number comes
as first, the biggest comes last.
Page 87
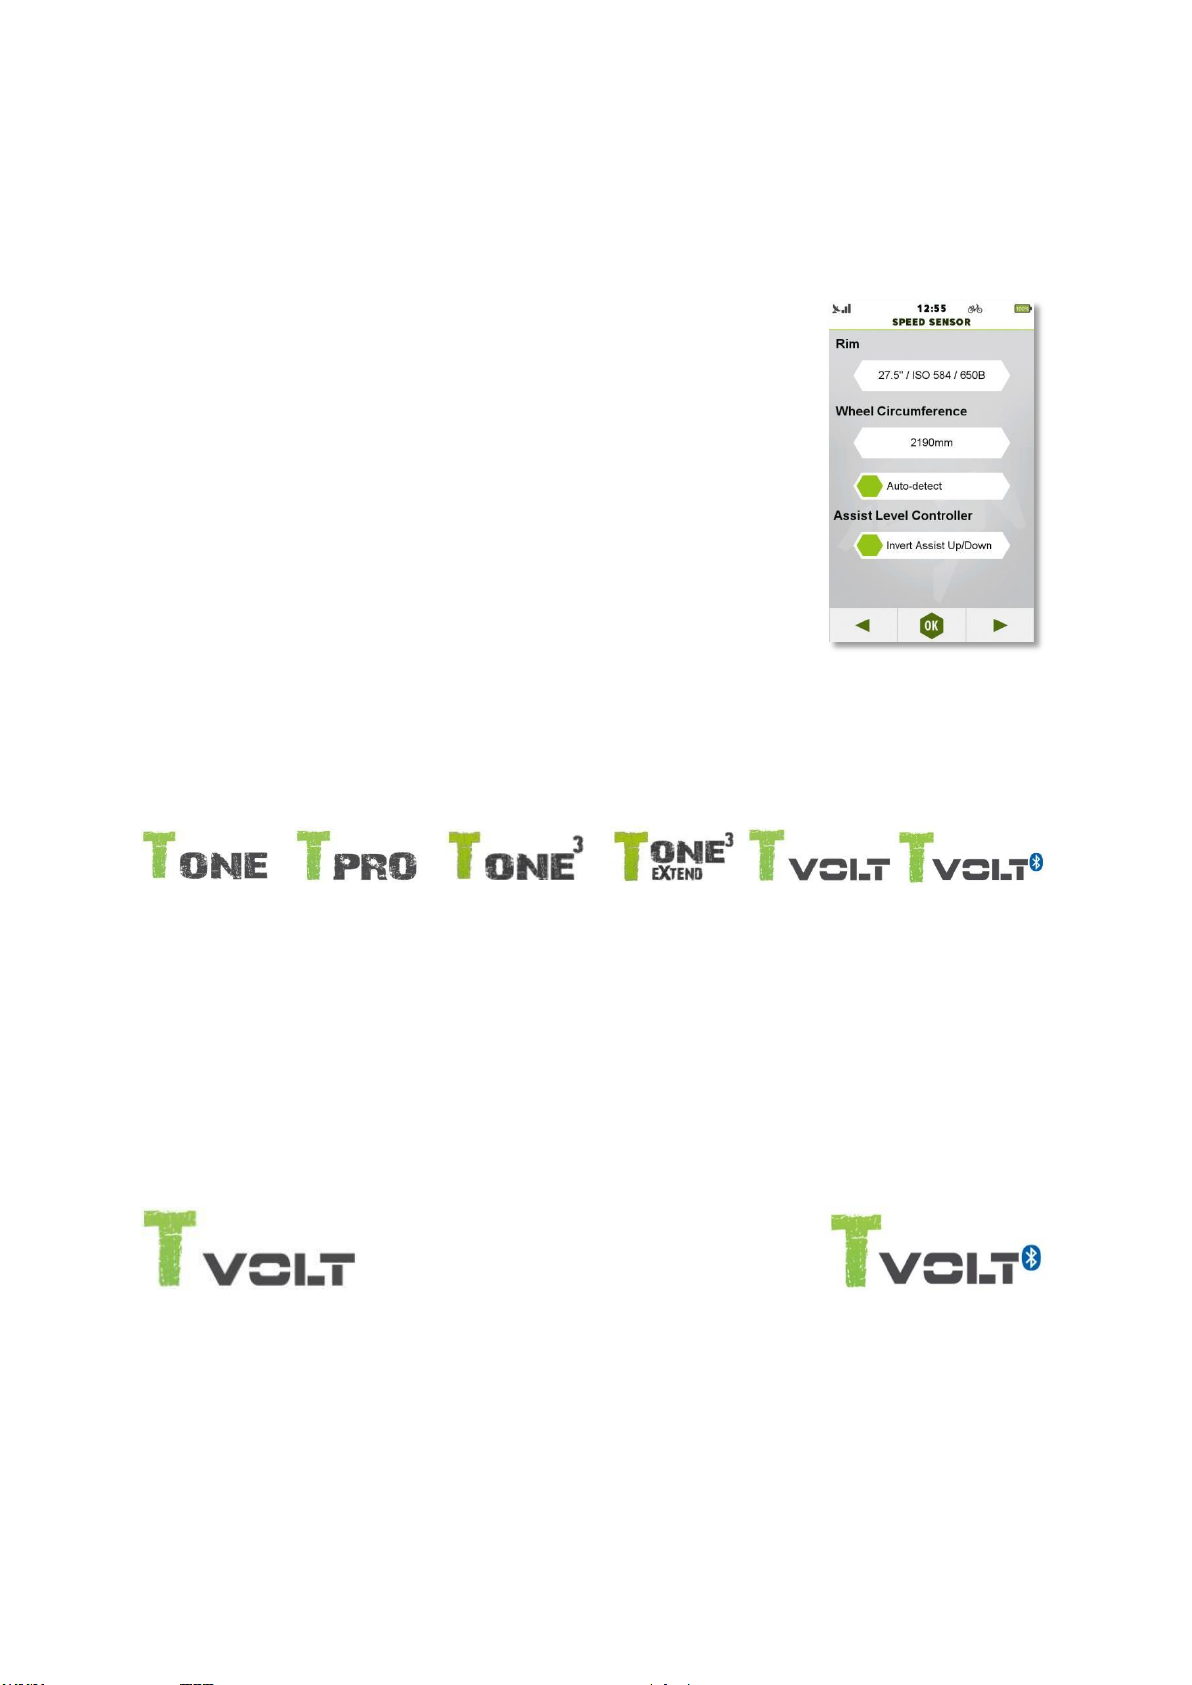
3.9.4.1.1 Additional Bike settings
Wheel settings for Speed sensor can also be set in ‘Bike Configuration’.
For setting up Rim and Wheel circumference, please see Setting Wheel
Size. Auto-detection of the wheel circumference is also possible by
checking the ‘Auto-detect’ option.
This will use the wheel rotation and GPS data to set the correct wheel
circumference. When ‘auto-detect’ is checked, movement with valid GPS
signal is necessary for Teasi to auto-detect the wheel size.
Invert Assist level controller should be checked when bike assist level does
not function correctly (up button shifts down, down button shifts up).
When checked, controls will be inverted, so up will change assist level to a
higher value, while down button will decrease the assist level.
Note: ‘Wheel circumference auto detection’ and ‘Invert Assist level’ are not
available with all E-Bike types.
3.9.4.2 Heart Rate Settings
TEASI ONE & TEASI PRO & TEASI ONE3 & TEASI ONE3X
& TEASI VOLT & TEASI VOLT BT
You can find into the settings screen for heart rate related options among the Accounts pages.
In this screen, the recommended maximum and resting heart rate is set based on user age and
gender. These heart rate values can also be changed by tapping on them and inserting the desired
numbers manually.
TEASI VOLT & TEASI VOLT BT
These set heart rate values will be the base for ‘Assist level suggestion based on Heart Rate’
feature.
Page 88
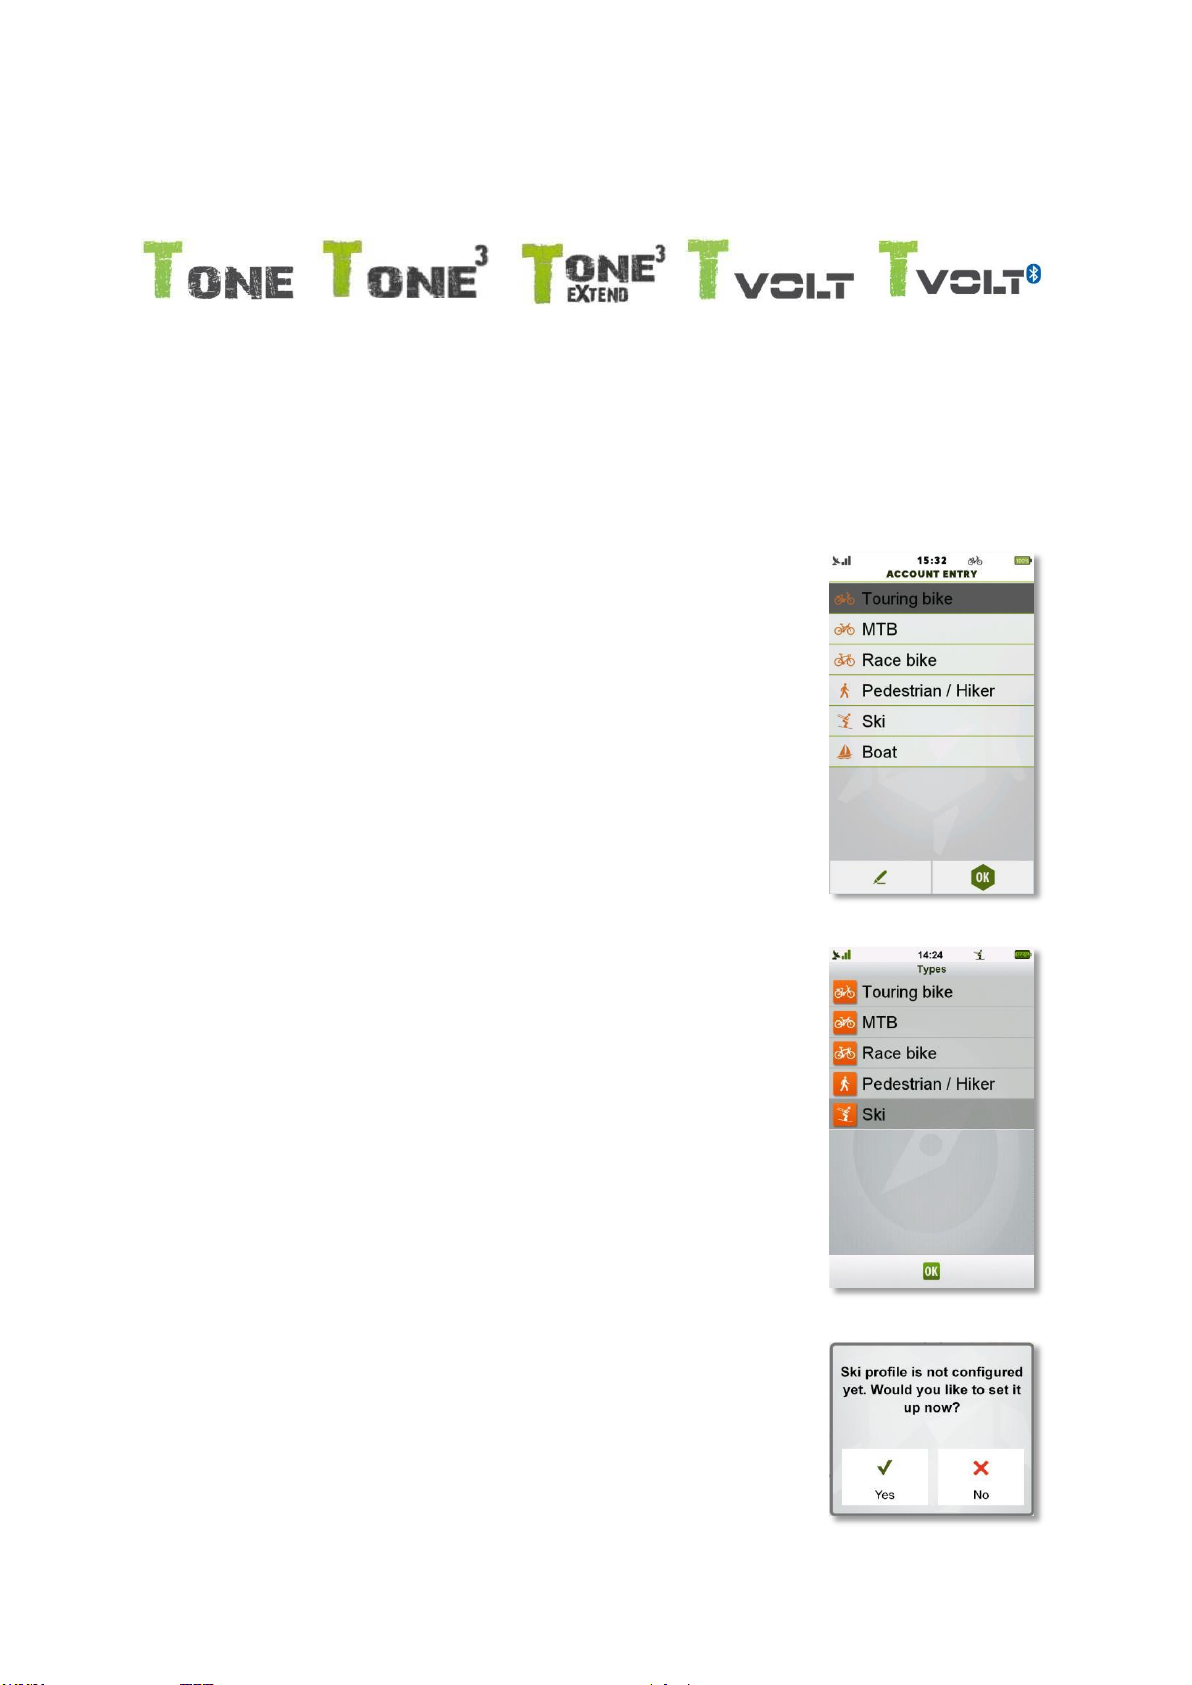
3.9.4.3 Accounts in Easy Mode
TEASI ONE & TEASI ONE3 & TEASI ONE3X
& TEASI VOLT & TEASI VOLT BT
When easy mode is selected, new profiles cannot be added and existing profiles cannot be deleted.
Profile settings can still be edited.
3.9.4.4 Ski Account
Teasi supports creating Ski accounts. This account type enables the
features for skiers, such as displaying and routing on pistes, ski lifts, skirelated POI. Record your runs, set up a meeting point, route to it! Ski runs
and ski performances are measured and can be read later on.
When the Ski account is selected, the device displays ski pistes, ski lifts and
all ski-related POIs such as Ski Schools and Ski Rentals. Device will use
these ski pistes and lifts for routing, so every skier is able to navigate on
the pistes and record his exact runs.
For activating Ski features, select an account where type ‘Ski’ is set or
create a new account with the type set to ‘Ski’.
If the Ski account is not yet configured, you will be asked to make proper
configuration for it: ‘Set up Ski account now?’
If ‘No’ is selected, the default parameters will be used (Downhill with
Novice-Easy pistes).
Page 89

Page 90
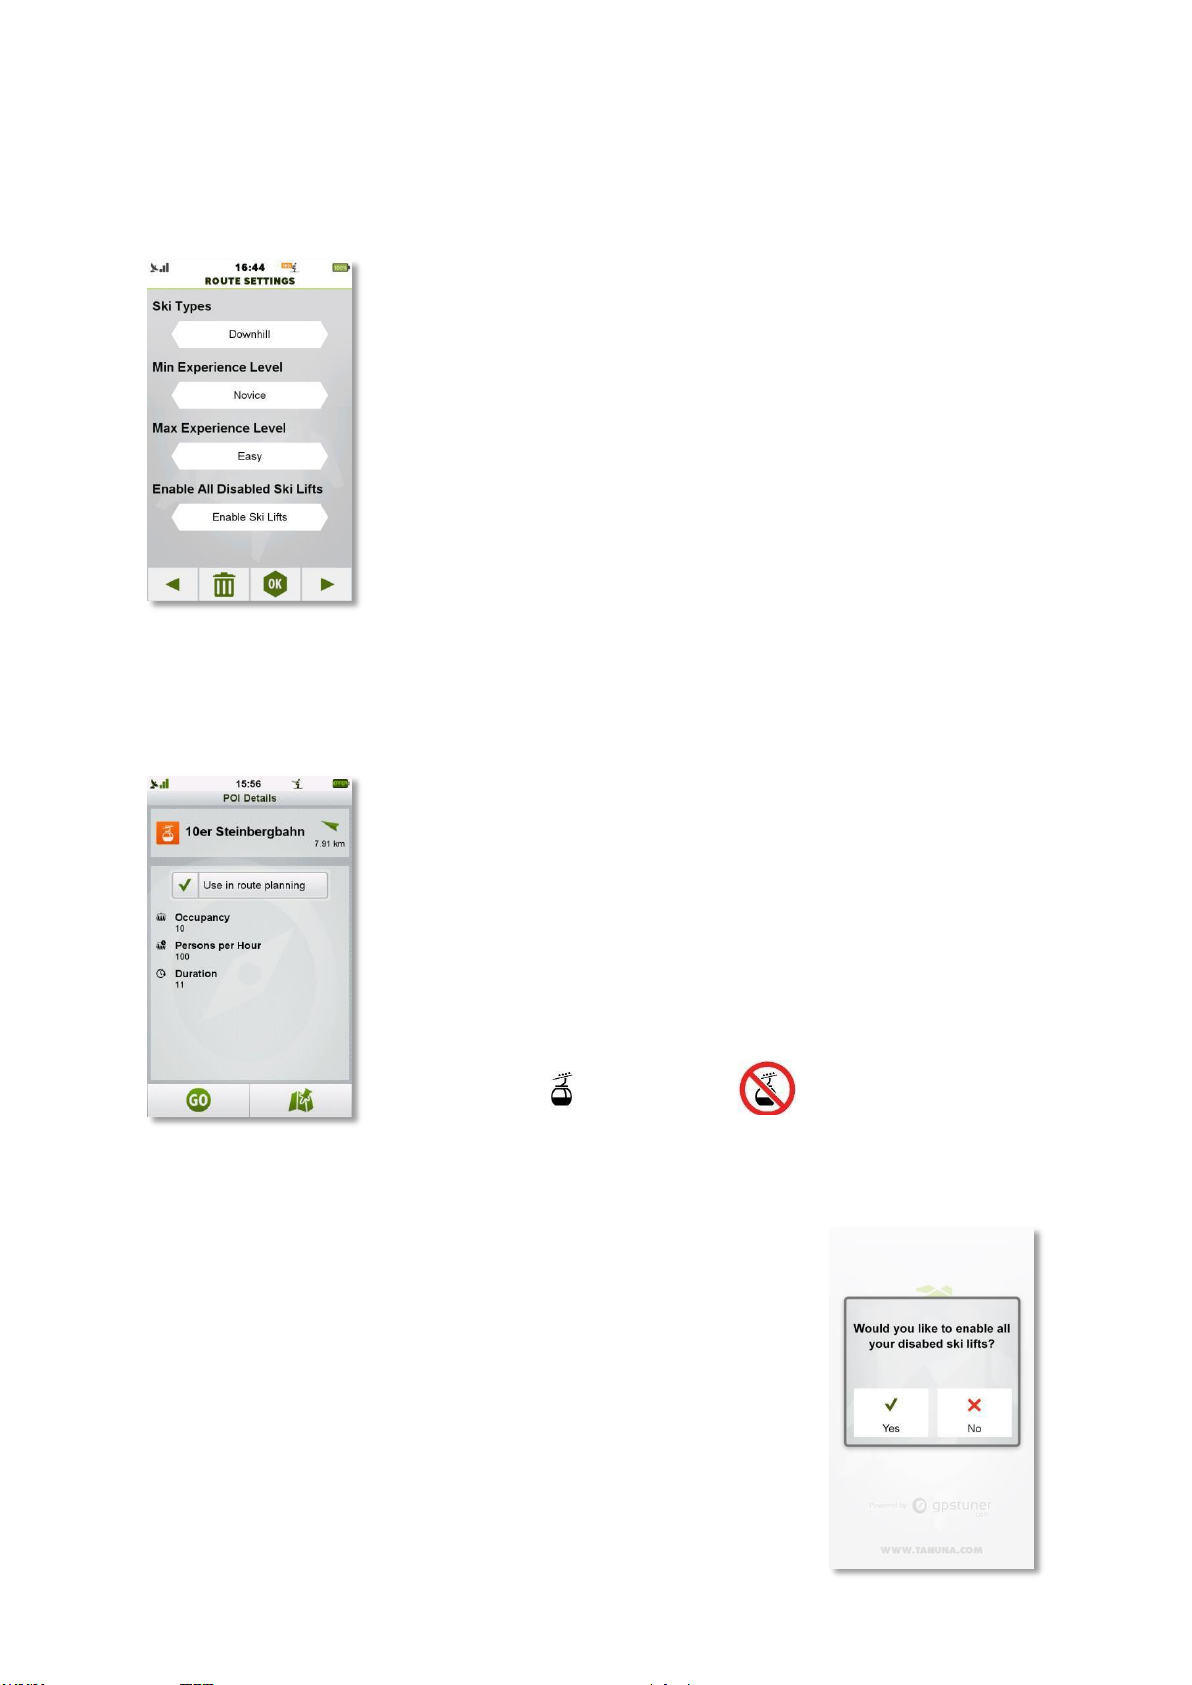
If ‘Yes’ is selected, the Route Options are shown for ski account settings:
on this page the route settings such as experience level and type of ski can be set.
Here you can select the type of the skiing: Downhill, Nordic, Ski Tour.
Experience level can be set, so that you will be routed only on the
preferred types of pistes.
NoviceGreen slopes allowed
EasyBlue slopes allowed
IntermediateRed slopes allowed
AdvancedBlack slopes allowed
ExtremeExtreme (yellow and expert) slopes are allowed
For example: If the user sets the minimum experience level to ‘Easy’ and the maximum to
‘Advanced’, then only blue, red and black pistes will be considered.
If the user sets both levels to ‘Intermediate’, then only red pistes will be considered.
Not only pistes, but ski lifts can be taken out of routing (for example ski
lift is not working currently because of weather issues / seasonal
reasons).
For this, POI details of a Ski lift should be opened and ‘Use in route
planning’ should be unchecked.
On map screen the POI will change when disabled:
Ski lift enabled: Ski lift disabled: .
Every day, after first startup from power off / suspend, if there were
disabled ski lifts present, the device asks, whether Ski Lifts should be reenabled:
If ‘Yes’ is selected, every disabled ski lift is enabled again.
If ‘No’ is selected, the previous settings are kept.
Enabling Ski Lifts again can be done from ‘Route Options’ menu also.
Page 91
‘Enable Ski Lifts’ button is enabled, when there is at least 1 disabled ski
lift.
After pressing ‘Enable Ski Lifts’, select ‘Yes’ to re-enable all Ski lifts.
Pressing ‘No’ closes the pop-up with previous settings kept.
3.9.4.5 Boat Account
When Boat type is selected, boat settings are displayed.
Under ‘Type’ the nautical units settings will appear: during boat mode, this setting will overwrite
the settings in ‘Units’.
To use nautical units, check this box, to keep previous settings, keep this box unchecked.
Another screen also becomes available - Boat Settings.
Here, the type of the boat can be set: Sailboat / Motorboat / Rowing boat / Canoe / Kayak
For Sailboat and Motorboat, Length, Width, Height and Draft can be set.
For manual boats, instead of Draft, Weight can be set for Calorie calculation purposes.
Dimensions of boat are used for alerting the user when projected position indicates any danger,
based on these physical attributes of the boat (for example, low bridges, narrow port entrances).
These alerts are based on the OpenSeaMap database.
Page 92
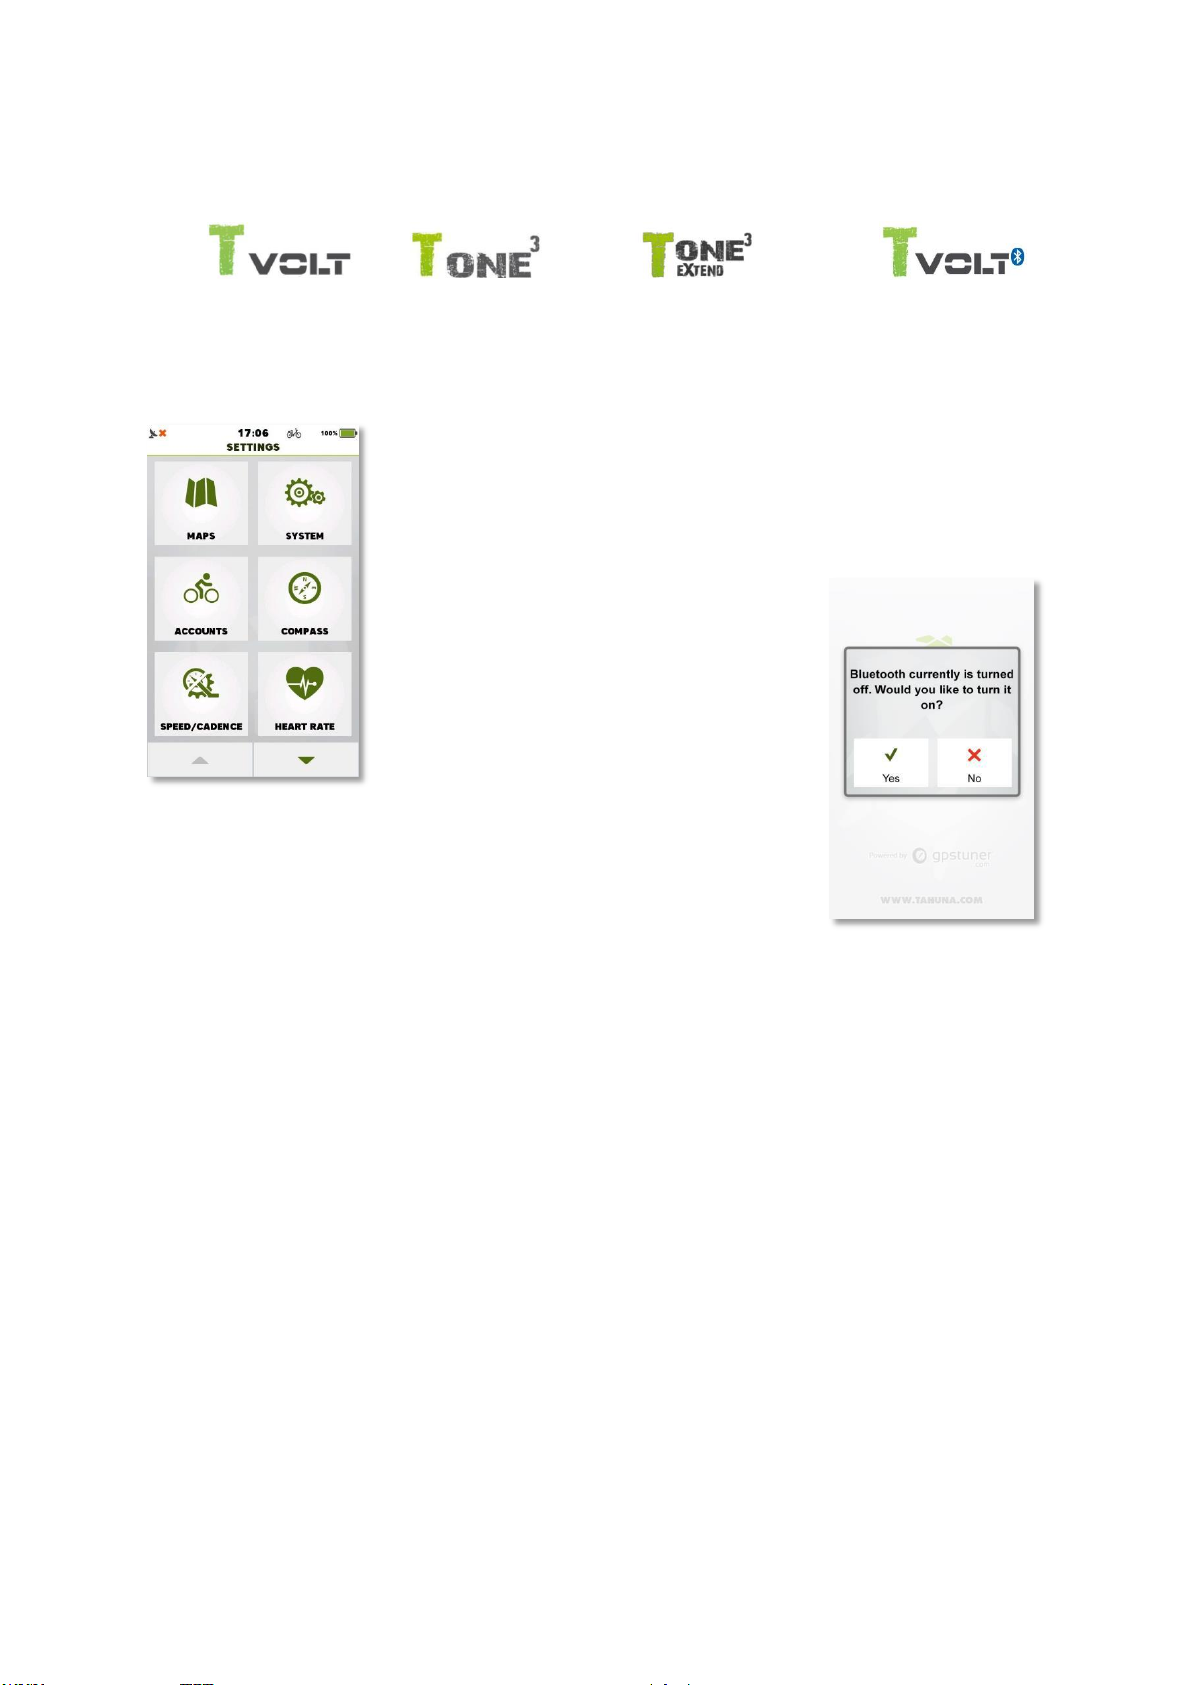
3.9.5 Sensors
TEASI VOLT & TEASI VOLT BT & TEASI ONE3 & TEASI ONE3X
In Teasi, the Bluetooth sensor can be turned on in settings by tapping
Speed/Cadence or Heart Rate sensor buttons.
When BLE is turned off and sensor buttons are tapped, Teasi will ask,
if BLE should be turned on.
Page 93
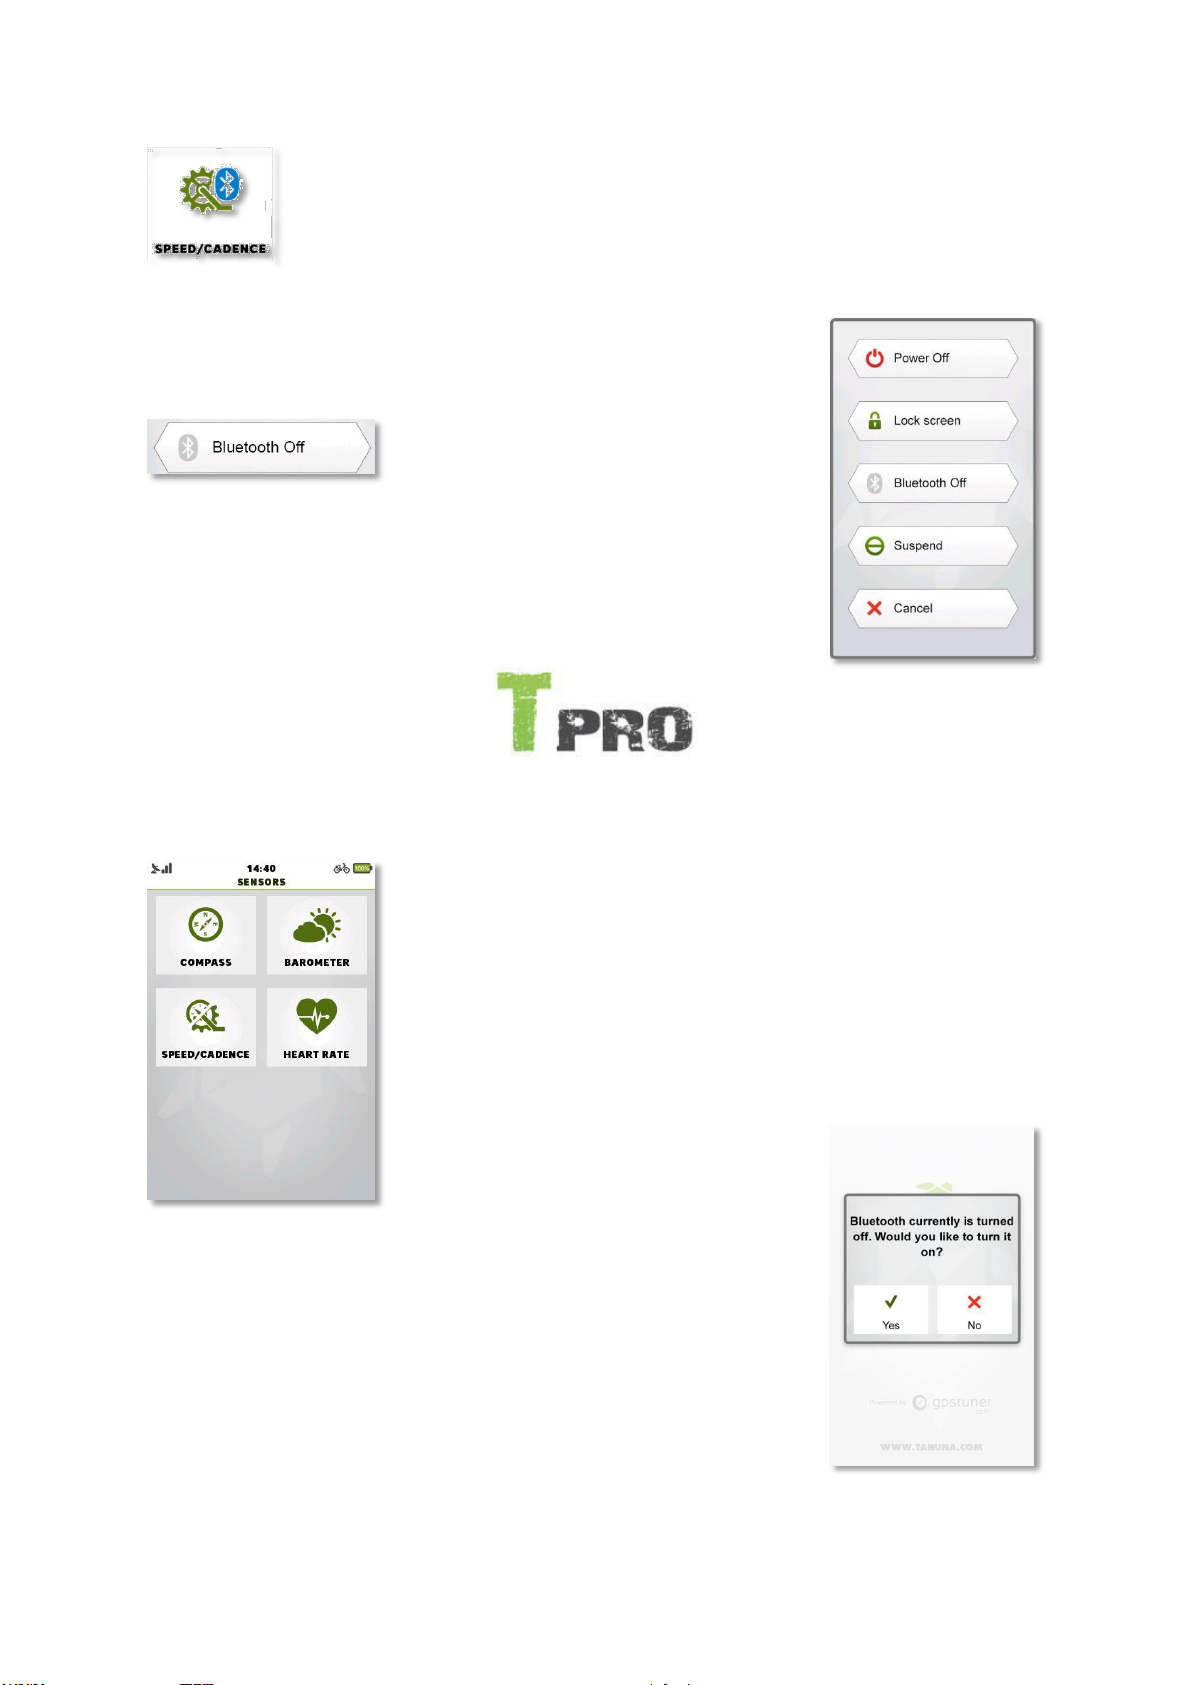
BLE is turned on.
Bluetooth can be turned off in the power menu, by pressing the
‘Bluetooth off’ after pressing the lower button long on the side of the
device.
TEASI PRO
The sensors setting screen covers all possible hardware sensor
related features. When BLE is turned off and sensor buttons are
tapped, Teasi will ask if BLE should be turned on.
When BLE is turned on, it will be shown on the sensor icons. It can be
turned off in the power menu, by pressing the ‘Bluetooth off’ by long
pressing the lower button on the side of the device.
Page 94
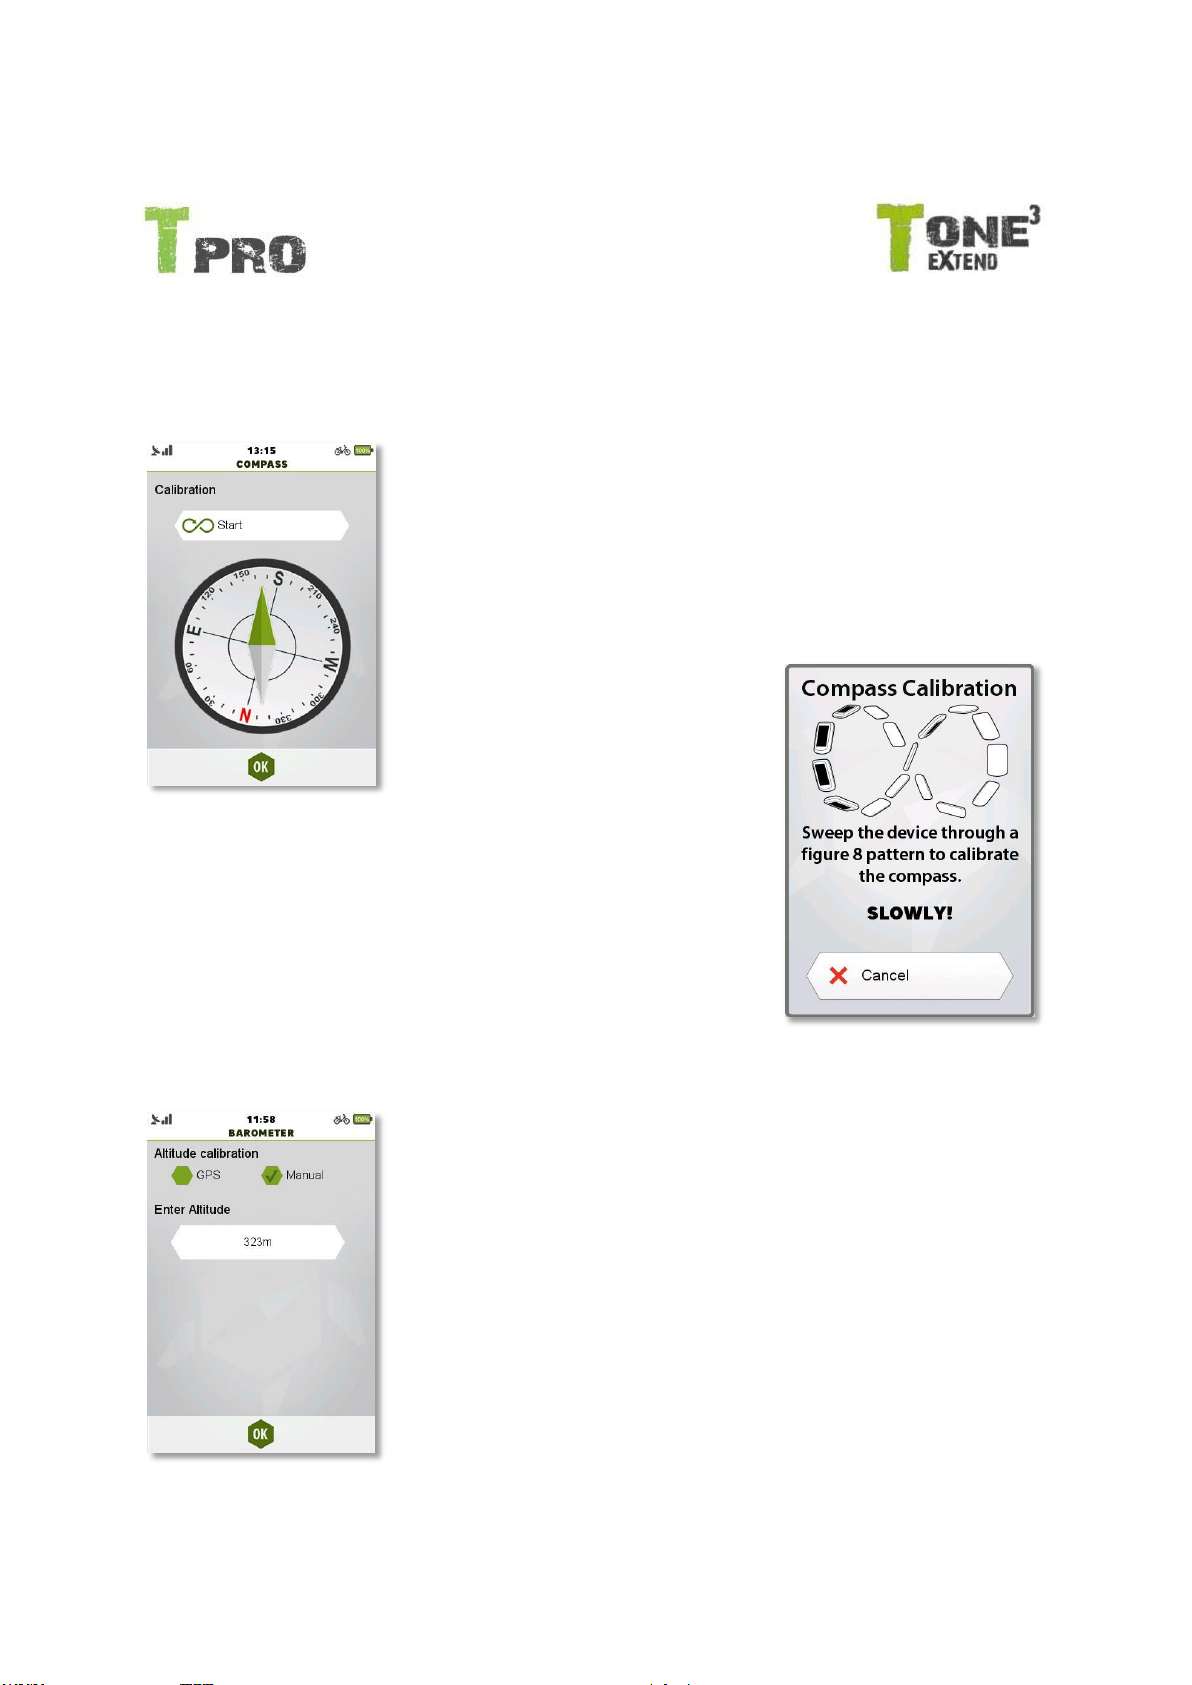
3.9.5.1 Compass
TEASI PRO & TEASI ONE3X
The compass screen shows the built-in compass of the device.
Recalibration is also possible by pressing the ‘Start’ button under
‘Calibration’.
When compass calibration is started,
sweep the device through a figure 8
pattern to calibrate the compass.
During sweep, also rotate the device
so its screen is faced to the center of
the movement.
The device signals, if the calibration was successful or not.
Note: The compass calibration might not succeed at the first attempt.
Please, try to repeat the operation whenever you have the impression
that the compass is not orientated correctly.
3.9.5.2 Barometer
The built-in Barometer sensor is used to provide you information
about the altitude variations during your activity.
This sensor needs to be calibrated, setting an initial altitude value
that might come from the GPS or it can be set manually, if you know
the exact altitude of the place where you are.
When the sensor is calibrated, ‘Calibrated’ text will notify you.
Recalibration can be achieved by pressing the ‘Reset button’.
Note: Any change to the weather means a change to the air pressure,
which can lead to a change to the current altitude. The reference value
in the barometer settings is used every time the user switches the Teasi
on, which means the barometer must be recalibrated every time after
Teasi has been turned off then on, or position has been changed.
If you want to enter the altitude manually, select ‘Manual’, then press the height button
(default: ‘0m’) and insert the desired value.
Page 95
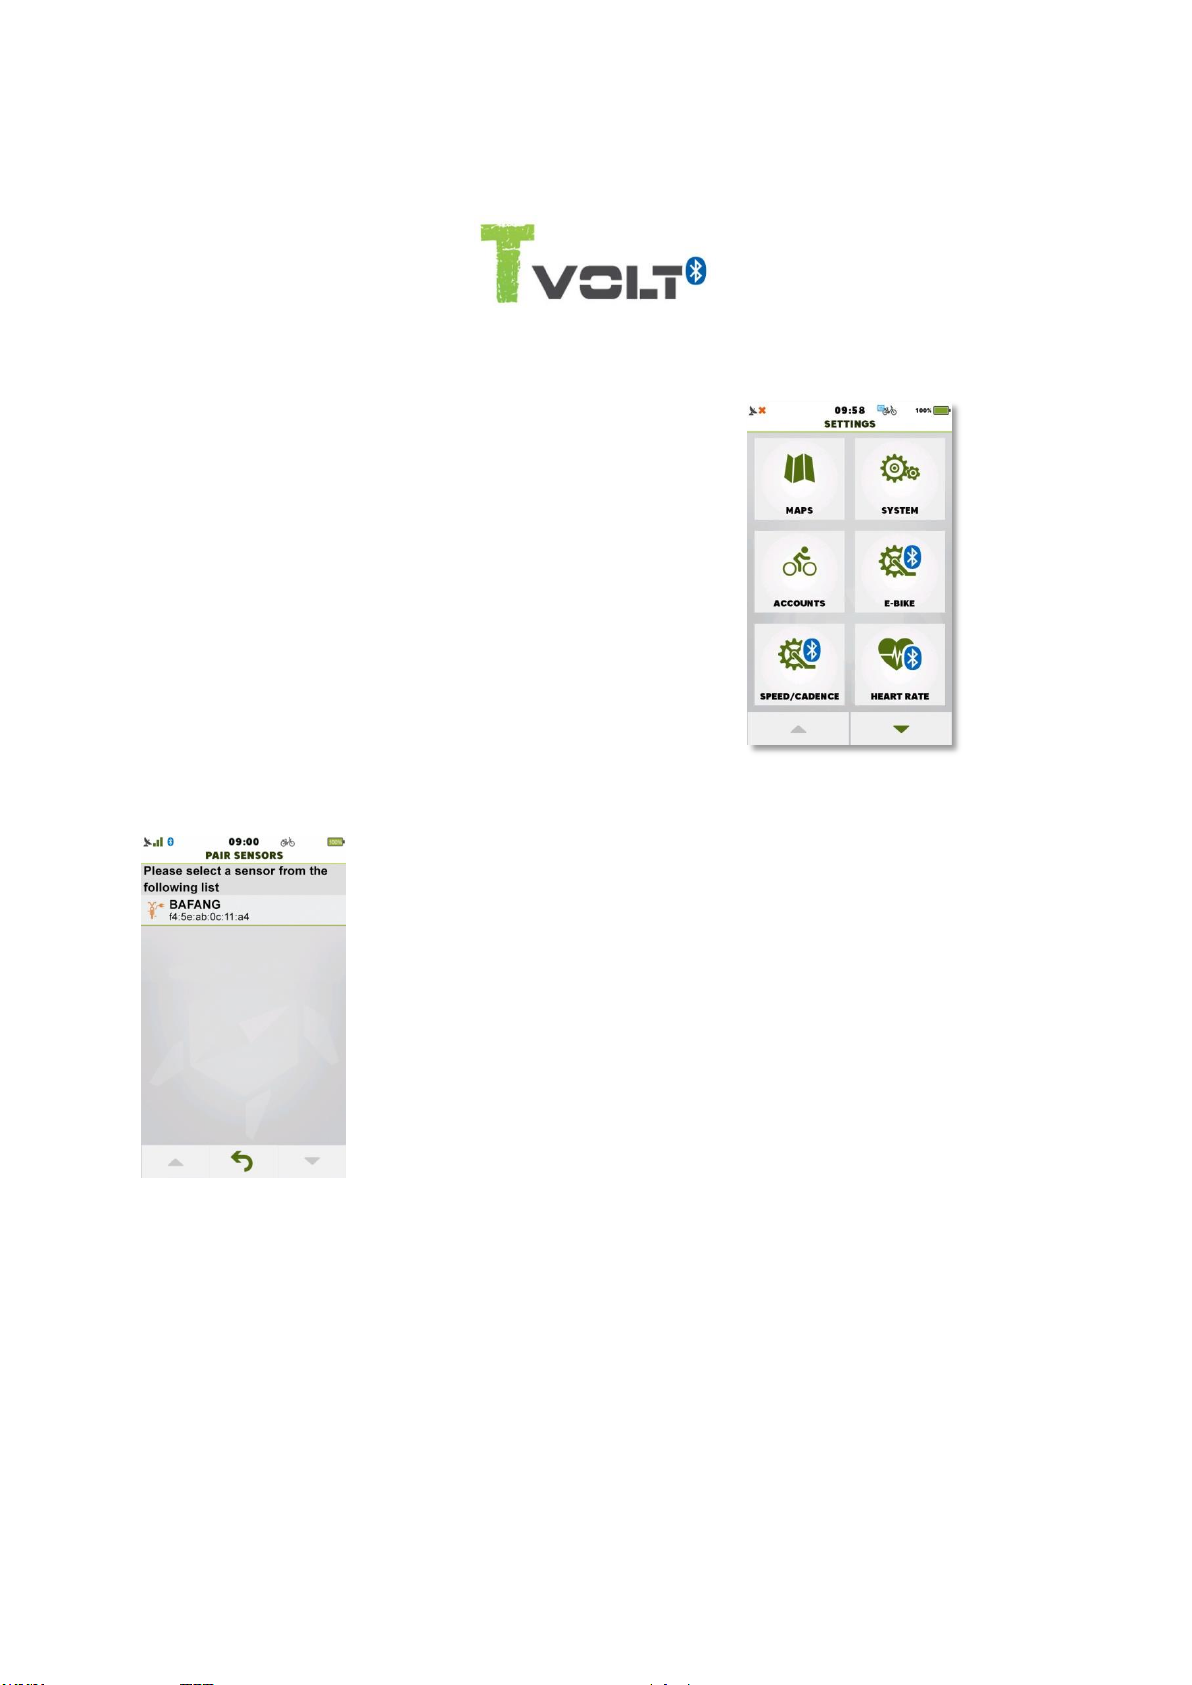
3.9.5.3 E-Bike
TEASI VOLT BT
Teasi Volt Bluetooth allows you to connect to your E-Bike via
Bluetooth.
Tapping on ‘E-Bike’ in Settings will show a list with the previously paired
bicycles.
Note: if Bluetooth or E-Bikes were disabled, the device will notify the user
and prompt if settings should be changed for an enabled Bluetooth and
sensor feature.
This list is grouped and ordered based on the range of the E-Bikes and
their last known connection date.
The first item would be a connected and present E-Bike. If there is no
connected E-Bike, the E-Bikes in range will be shown and under them the
E-Bikes that are paired with the device, but are not in range.
These list items will be further ordered by the date of last connection, so the latest E-Bike will be
found at the top.
If there is not any paired E-Bike yet, new ones can be connected by tapping the plus sign on the
bottom of the screen.
After tapping the plus sign, the available E-Bikes in range will be shown.
Note: an E-Bike that is not in range during the attempt, will not be shown in the list, thus pairing won’t
be available.
In E-Bike settings, the icon next to the sensors name is to indicate the status of the connection to
the E-Bike.
Page 96
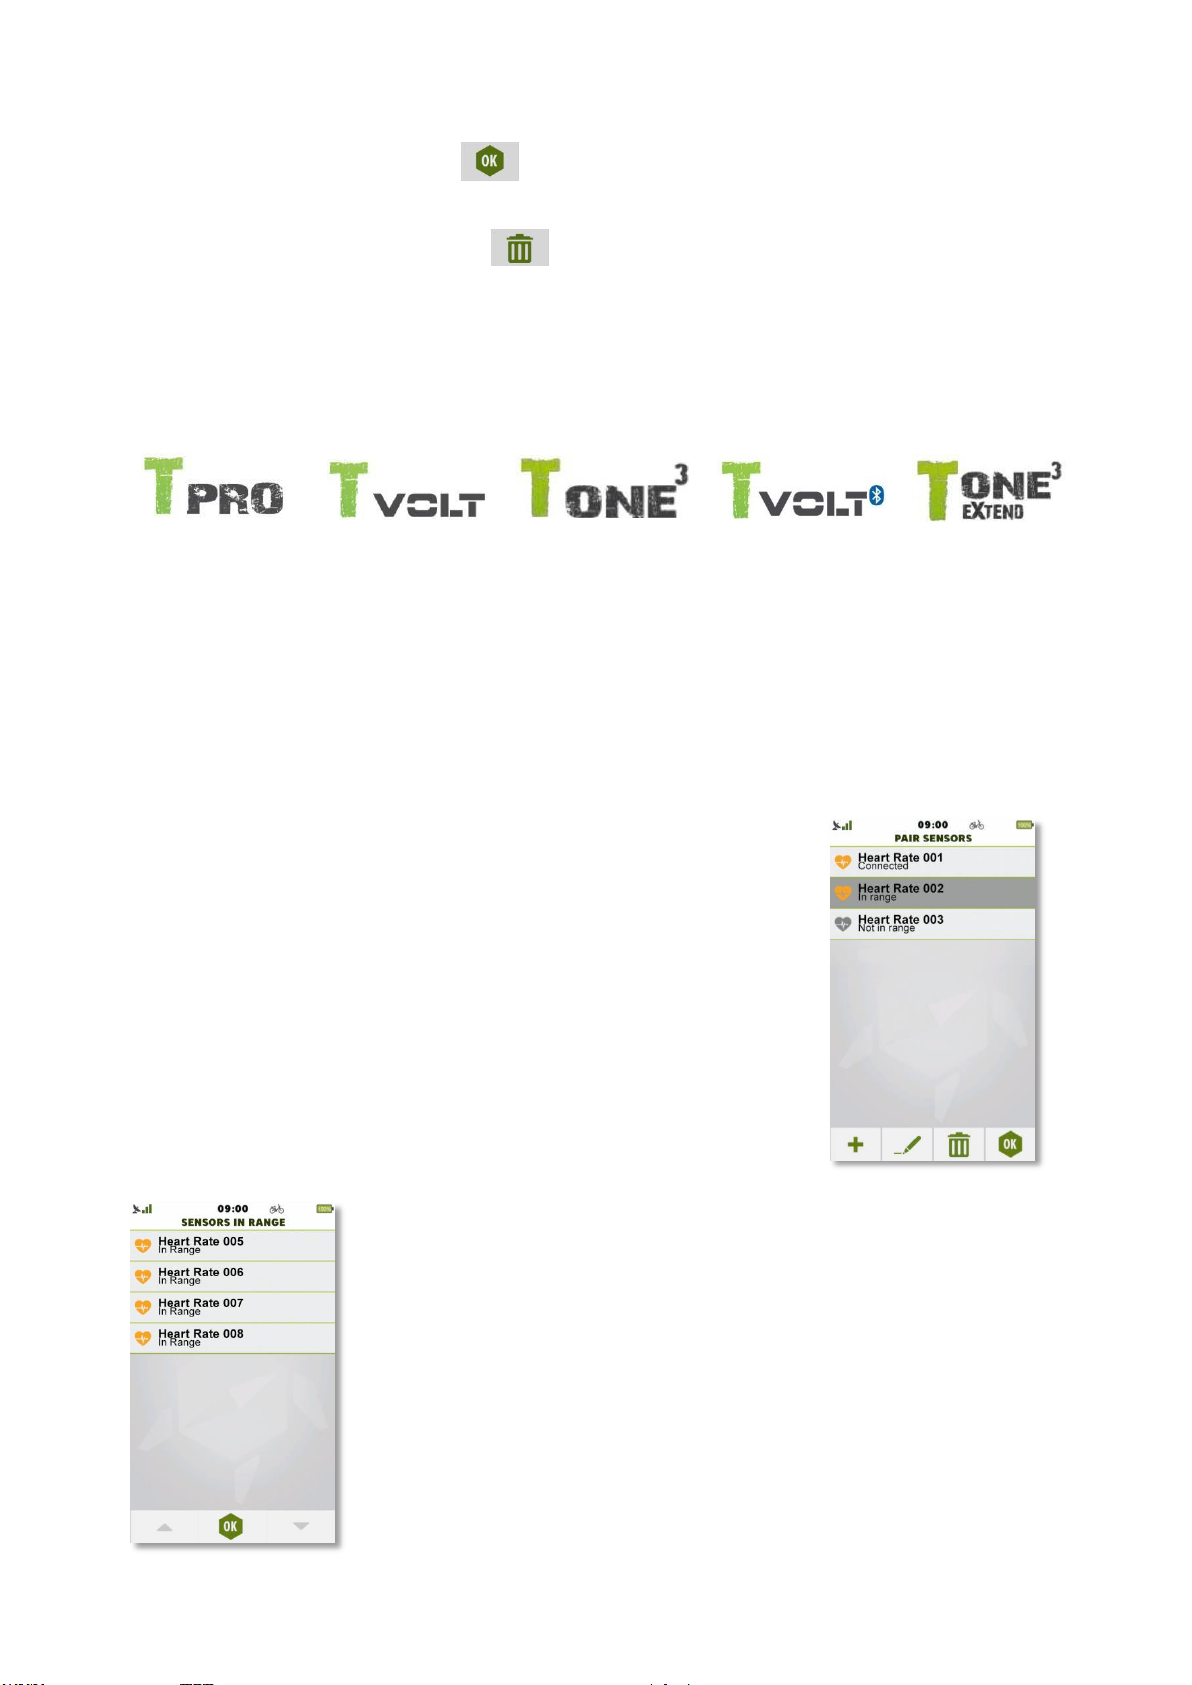
Tap on an E-Bike, then select ‘OK’ ( ) from the popup dialog to connect and select ‘No’ to just
select it.
Tap on an E-Bike, then select bin icon ( ) to forget the E-Bike.
3.9.5.4 Heart Rate Sensor Settings
TEASI PRO & TEASI VOLT & TEASI VOLT BT
& TEASI ONE3 & TEASI ONE3X
Tapping on ‘Heart Rate’ in Settings will show a list with the previously paired sensors.
Note: If Bluetooth or Heart Rate category sensors were disabled, the device will notify the user and
prompt, if settings should be changed for an enabled Bluetooth and sensor feature.
This list is grouped and ordered based on the range of the sensor and its
last known connection date.
The first item would be a connected and present sensor. If there is no
connected sensor, the sensors in range will be shown and under them the
sensors that are paired with the device, but are not in range.
These list items will be further ordered by the date of last connection, so
the latest sensor will be found at the top.
If there are not any paired sensors yet, new ones can be connected by
tapping the plus sign on the bottom of the screen.
After tapping the plus sign, the available sensors in range will be shown.
Note: a sensor that is not in range during the attempt, will not be shown in
the list, thus pairing won’t be available.
Page 97
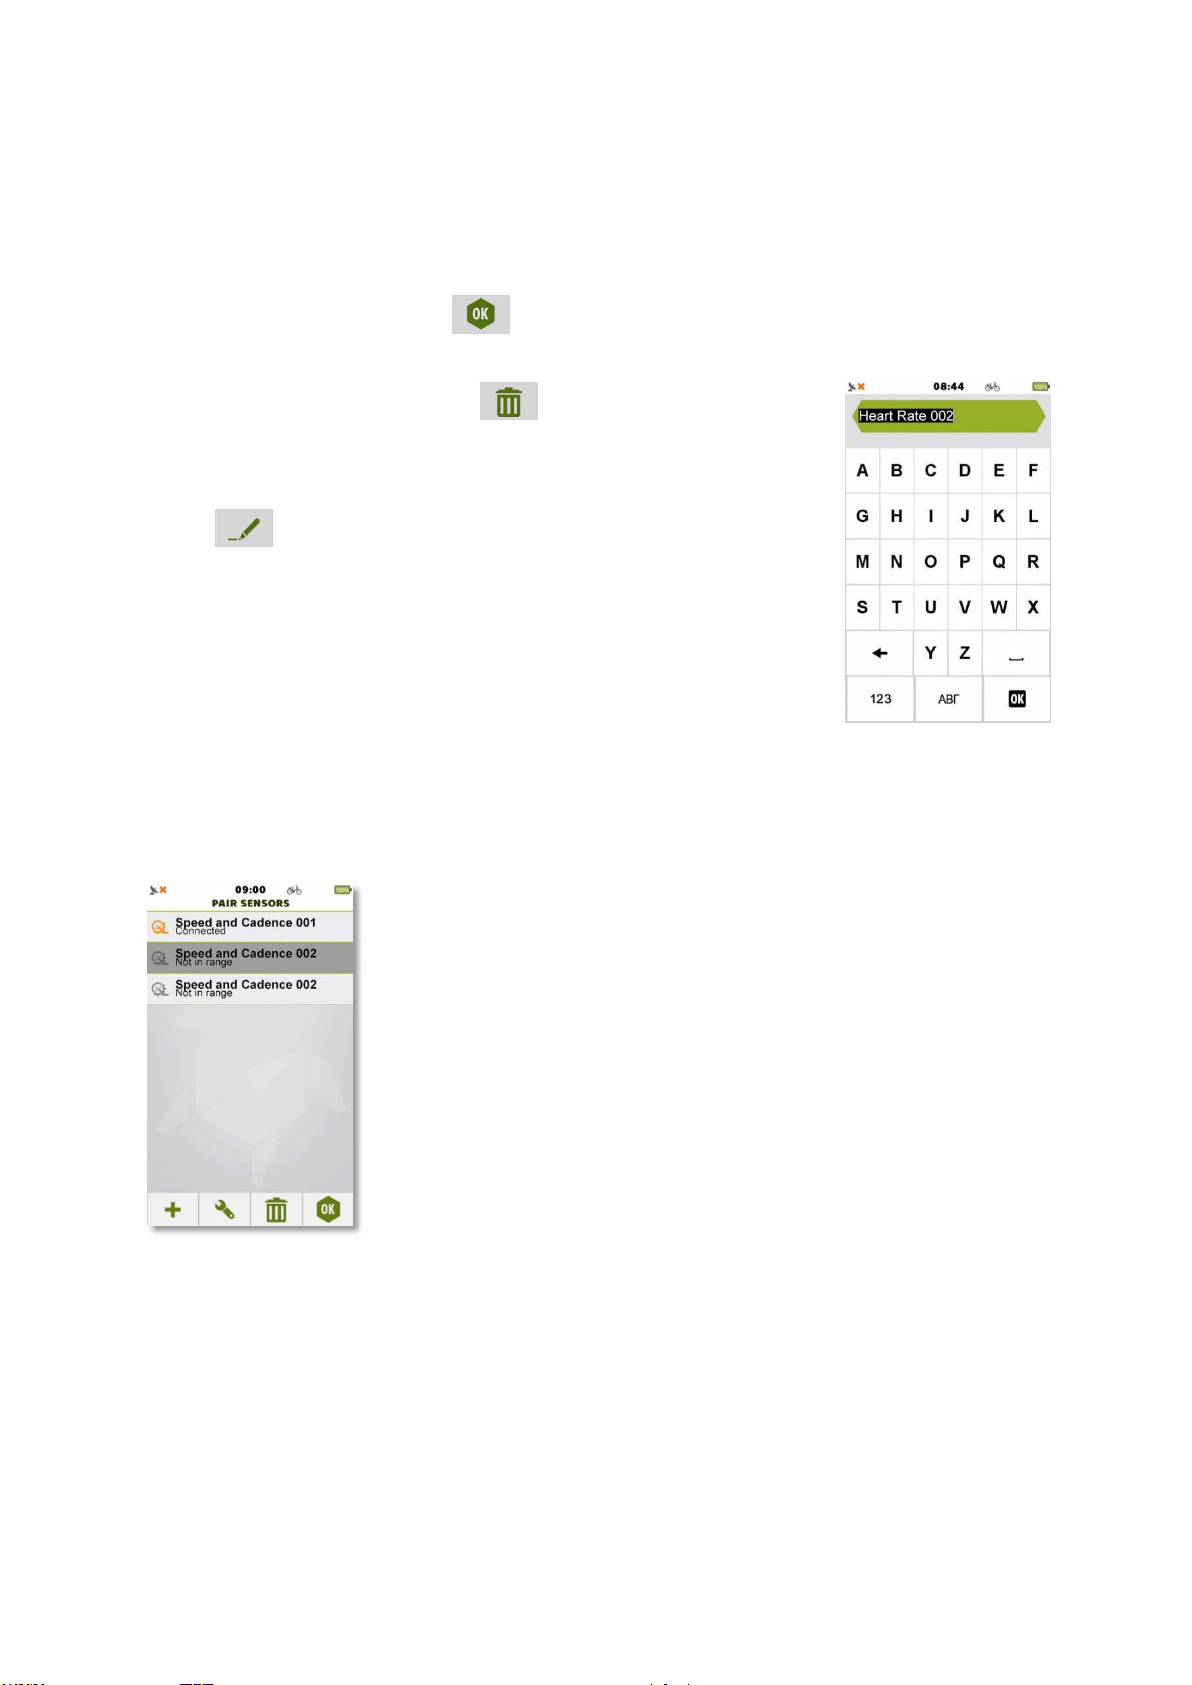
In HR settings, the icon next to the sensors name is to indicate the status of the connection to the
sensor.
Tap on a sensor, then select ‘OK’ ( ) from the popup dialog to connect and select ‘No’, to just
select it.
Tap on a sensor, then select bin icon ( ) to forget the sensor.
Sensors can be renamed by tapping on the sensor, then tapping on the edit
button ( ).
3.9.5.5 Speed and Cadence (SAC) sensor Settings
Tapping on ‘SAC’ in Settings will show a list with the previously paired
sensors.
Note: if Bluetooth or SAC category sensors were disabled, the device will
notify the user and prompt if settings should be changed for an enabled
Bluetooth and sensor feature.
This list is grouped and ordered based on the range of the sensor and
its last known connection date.
The first item would be a connected and present sensor. If there is no
connected sensor, the sensors in range will be shown and under them
the sensors that are paired with the device, but are not in range.
These list items will be further ordered by the date of last connection,
so the latest sensor will be found at the top.
If there is not any paired sensor yet, new ones can be connected by tapping the plus sign on the
bottom of the screen.
After tapping the plus sign, the available sensors in range will be shown.
Note: a sensor that is not in range during the attempt, will not be shown in the list, thus pairing won’t
be available.
Page 98
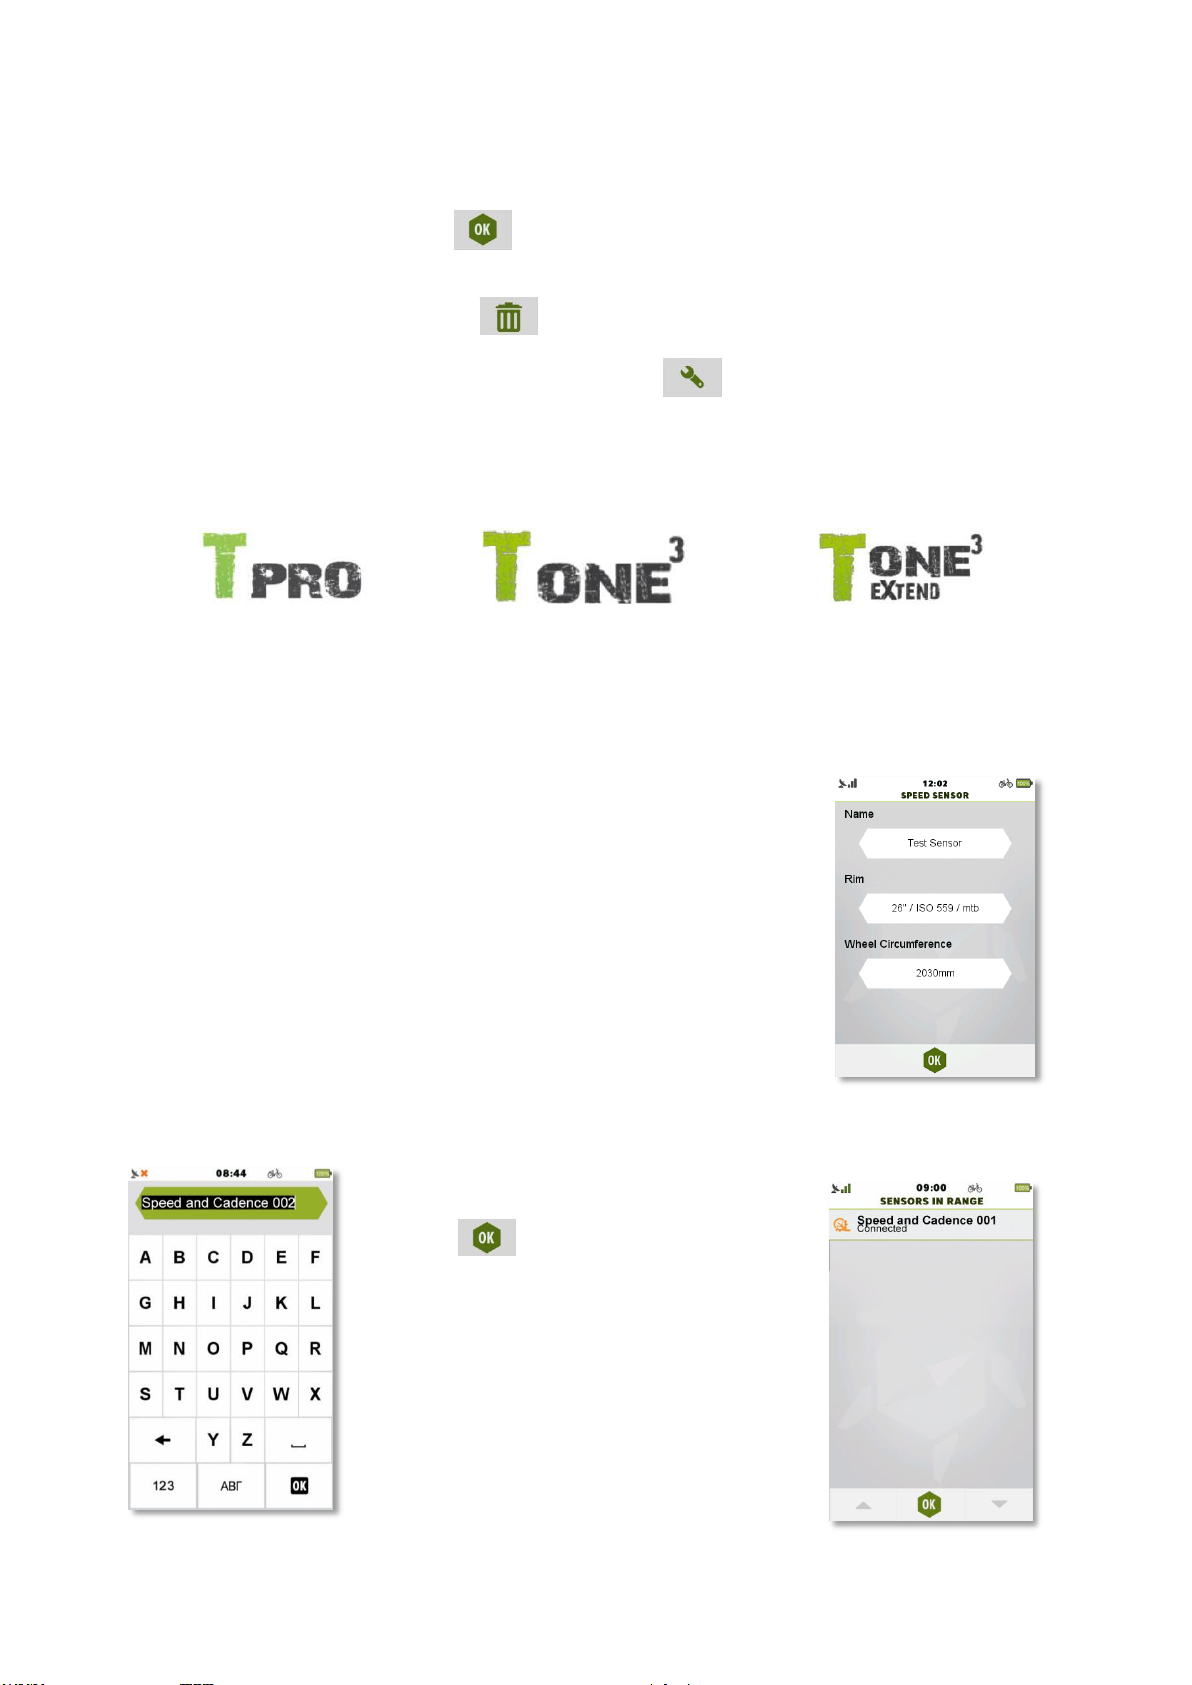
In Speed and Cadence settings, the icon next to the sensors name is to indicate the status of the
connection to the sensor.
Tap on a sensor, then select ‘OK’ ( ) from the popup dialog to connect and select ‘No’ to just
select it.
Tap on a sensor, then select bin icon ( ) to forget the sensor.
Selecting a sensor and tapping on the settings button ( ) will bring up the settings menu.
This menu contains options for changing the name of the sensor.
TEASI PRO & TEASI ONE3 & TEASI ONE3X
SAC – Speed Sensor Calibration. In this menu, also the wheel settings can
be calibrated. Tap on the name of the sensor to rename it and on the rim /
wheel circumference to set them.
The ‘Rim’ button gives you the possibility to select a standard rim, which
will set an average value for the wheel circumference. You can still adjust
the correct size of the circumference, by manually enter the exact value
inside the ‘Wheel Circumference’ field.
‘Wheel Circumference’ is used to calculate correctly the speed from your
Speed sensor.
Renaming the sensor:
Tap ‘OK’ ( ) to set the new name or back
button to cancel.
Page 99
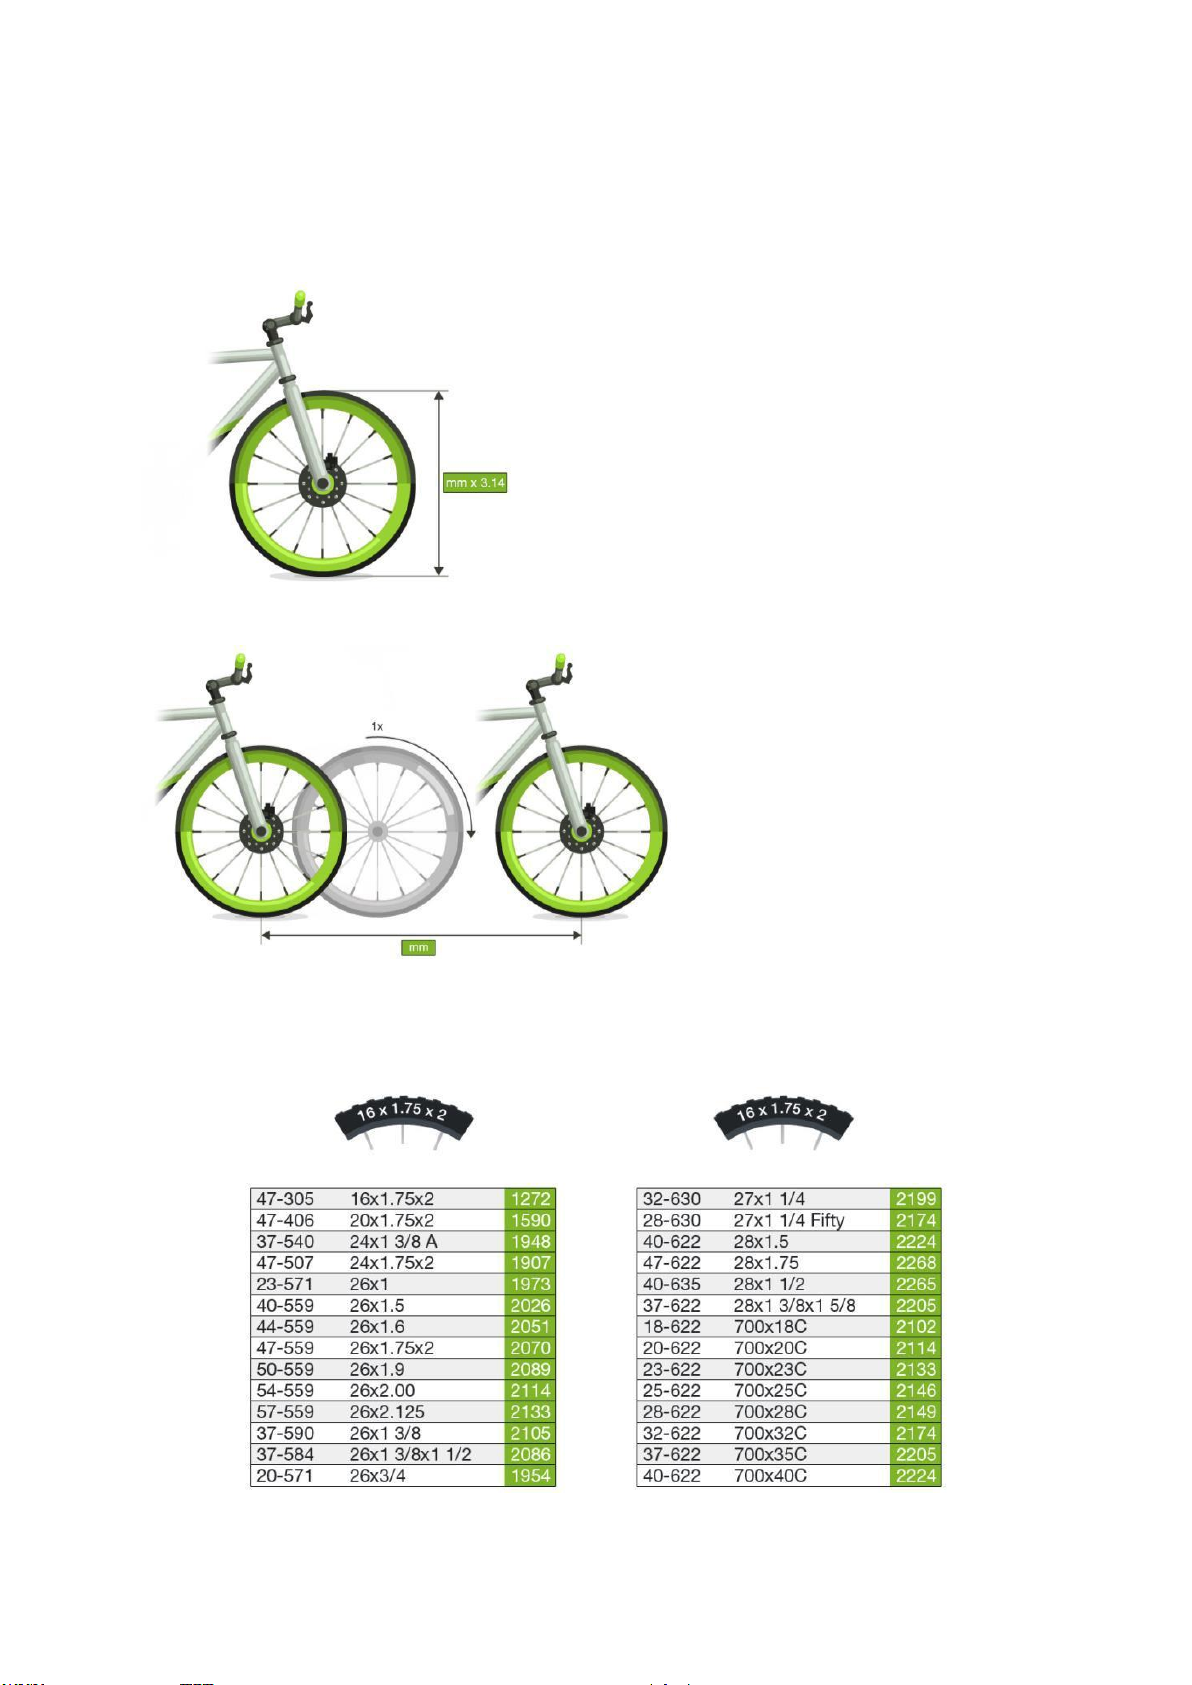
3.9.5.6 Setting Wheel Size
Wheel Size can be calculated, measured or can be gathered from wheel size table.
Wheel size in mm can be calculated, if the height
(diameter) of the wheel is known.
Wheel size is = diameter (mm) * 3.14.
Wheel size is equivalent to one full
rotation of the wheel. Measuring the
distance covered by one full rotation
will result in wheel size.
Wheel Size Table
If the tire type is known, this table will contain the Wheel size values in mm in the green field.
Page 100
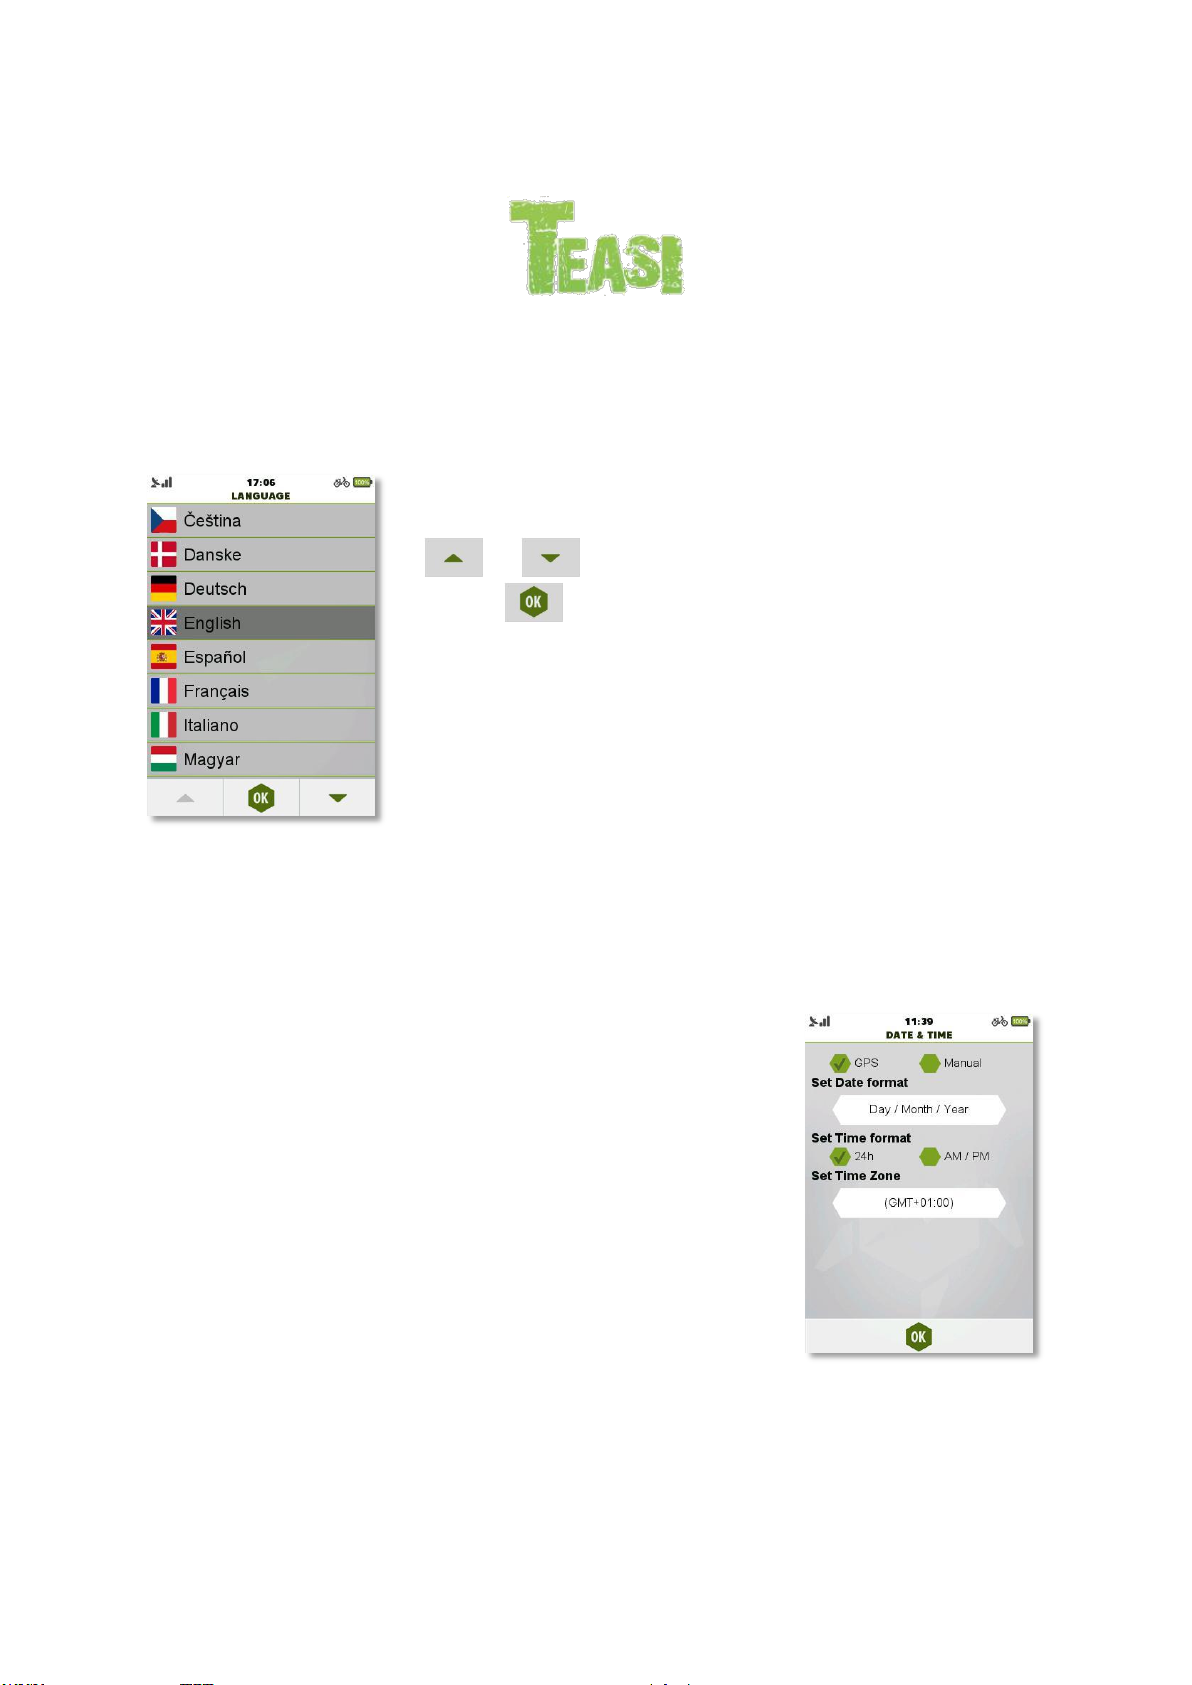
3.9.6 Language
In Language, you can select the language for the user interface.
Affects all models
Browse the languages with the up and down arrows
( and ), tap on the desired language to select,
then OK ( ) to accept the change.
3.9.7 Date & Time
In Date & Time the automatic (from GPS), or manual (Manual) setting
can be chosen.
You can also change the Date & Time format.
Date can be ‘Day / Month / Year’, ‘Month / Day / Year’, or ‘Year / Month /
Day’.
Time can be AM/PM or 24 hours.
When Automatic time is chosen, you need to set your own Time Zone.
When Manual setting is chosen, Date and Time can be set.
 Loading...