

Page 1
TEAM PRODUCTS INTERNATIONAL INC. Limited Warranty
Questions?/¿Preguntas?
in U.S. : 1-888-231-4022
WHAT IS COVERED: Any defect in materials and workmanship.
FOR HOW LONG: Two (2) years from the date of original purchase.
WHAT WE ASK YOU TO DO: Team Products will replace the defective product within the
two (2) years from the date of original purchase. The product must first be returned with
your sales receipt to the retailer. If the retailer’s return policy has expired, Team Products
will replace the defective product. The customer is responsible for the shipping charges to
Team Products, but TPI will incur the shipping charges on the replacement. When sending
your product include your name, address, phone number, copy of proof of date of purchase
(receipt), and a description of the operating problem. After receiving your product, we will
ship a replacement to your home or office within four weeks. Please return the defective
product to the following address:
TEAM PRODUCTS INTERNATIONAL INC.
Attn: Customer Service Returns
35 A Continental Drive
Wayne, NJ 07470 U.S.A.
WHAT WE WILL DO: If your product is defective and was not able to be returned within
the in store return policy date, but within two (2) years of the original purchase date we will
replace it at no charge to you. We suggest that you retain your original packing material in
the event you need to ship your product.
When we replace your product, we may replace it with a new or reconditioned one of the
same or similar product. The replacement will only be warranted two (2) years from the
original date of purchase.
WHAT THIS WARRANTY DOES NOT COVER: AMONG OTHER THINGS THIS WARRANTY DOES NOT COVER DEFECTS RESULTING FROM ACCIDENTS, DAMAGE WHILE
IN TRANSIT TO OUR SERVICE LOCATION, ALTERATIONS, UNAUTHORIZED REPAIR,
FAILURE TO FOLLOW INSTRUCTIONS, MISUSE, FIRE, FLOOD, WAR, AND ACTS OF
GOD. IF YOUR PRODUCT IS NOT COVERED BY OUR WARRANTY, CALL OUR CUSTOMER SERVICE DEPARTMENT AT (888) 231-4022 TO DISCUSS FURTHER OPTIONS.
THIS LIMITED WARRANTY IS THE ONLY ONE WE GIVE ON YOUR PRODUCT, AND IT
SETS FORTH ALL OUR RESPONSIBILITIES REGARDING YOUR PRODUCT. THERE
ARE NO WARRANTIES WHICH EXTEND BEYOND THE DESCRIPTION SET FORTH
ABOVE.
LIMITATIONS: IMPLIED WARRANTIES, INCLUDING THOSE OF FITNESS FOR A
PARTICULAR PURPOSE AND MERCHANTABILITY (AN UNWRITTEN WARRANTY THAT
THE PRODUCT IS FIT FOR ORDINARY USE), ARE LIMITED TO TWO (2) YEARS FROM
ORIGINAL DATE OF PURCHASE. WE WILL NOT PAY FOR LOSS OF TIME, INCONVENIENCE, LOSS OF USE OF YOUR PRODUCT OR PROPERTY DAMAGE CAUSED BY
YOUR PRODUCT OR ITS FAILURE TO WORK, OR ANY OTHER INCIDENTAL OR CONSEQUENTIAL DAMAGES INCLUDING PERSONAL INJURY.
SOME STATES DO NOT ALLOW LIMITATIONS ON HOW LONG AN IMPLIED WARRANTY
LASTS OR THE EXCLUSION OR LIMITATION OF INCIDENTAL OR CONSEQUENTIAL
DAMAGES, SO THE ABOVE EXCLUSIONS OR LIMITATIONS MAY NOT APPLY TO YOU.
STATE LAW RIGHTS: This warranty gives you specific legal rights and you may also have
other rights which may vary from state to state.
QUESTIONS? If you have any questions about this product, please contact our
Customer Service Department at (888) 231-4022, 9 am to 5 pm EST, Monday – Friday
or visit our website at: www.colemanpower.com.
CM9130090706-222
19.2 Volt Drill
Taladro de 19.2 Voltios
Owner’s Manual
Manuel de Usuario
Models/Modelos
CM9130
©2006 The Coleman Company, Inc. All rights reserved.
COLEMAN® and are registered trademarks of The Coleman Company, Inc., used under license.
Designed in the USA and custom-manufactured in China for Team Products International Inc. Distributed by Team Products International Inc.,
Mountain Lakes, NJ 07046 U.S.A.
©2006 The Coleman Company, Inc. Todos derechos reservados.
COLEMAN® y son marcas registradas de The Coleman Company, Inc., usada bajo licencia.
Diseñada en los EUA y fabricada especificamente en China para Team Products International Inc.
Distruibuida por Team Products International Inc., Mountain Lakes, NJ 07046 U.S.A.
Page 2

Models/Modelos
CM9130
Owner’s Manual
Manuel de Usuario
Welcome
This COLEMAN® product has been carefully engineered and manufactured to
give you dependable operation. Please read this manual thoroughly before
operating your new COLEMAN® product, as it contains the information you
need to become familiar with its features and obtain the performance that will
bring you continued enjoyment for many years. Please keep this manual on file
for future reference.
GENERAL SAFETY RULES - FOR ALL BATTERY OPERATED TOOLS
WARNING! READ AND UNDERSTAND ALL INSTRUCTIONS.
Failure to follow all instructions listed below, may result in electric shock, fire
and/or serious personal injury.
SAVE THESE INSTRUCTIONS.
Work Area
1. Keep your work area clean and well lit. Cluttered benches and dark areas
invite accidents.
2. Do not operate power tools in explosive atmospheres, such as in the
presence of flammable liquids, gases, or dust. Power tools create sparks which
may ignite the dust or fumes.
3. Keep bystanders, children, and visitors away while operating a power tool.
Distractions can cause you to lose control.
Electrical Safety
1. Do not abuse the cord. Never use the cord to carry the tool. Keep cord away
from heat, oil, sharp edges, or moving parts. Replace damaged cords
immediately. Damaged cords may create a fire.
Applies only to tools with a separable battery pack.
2. A battery operated tool with integral batteries or a separate battery pack
must be recharged only with the specified charger for the battery. A charger that
may be suitable for one type of battery may create a risk of fire when used with
another battery.
3. Use battery operated tool only with specifically designated battery pack. Use
of any other batteries may create a risk of fire.
1 2
Personal Safety
1. Stay alert, watch what you are doing, and use common sense when operating a power tool. Do not use tool while tired or under the influence of drugs,
alcohol, or medication. A moment of inattention while operating power tools
may result in serious personal injury.
2. Dress properly. Do not wear loose clothing or jewelry. Contain long hair. Keep
your hair, clothing, and gloves away from moving parts. Loose clothes, jewelry,
or long hair can be caught in moving parts.
3. Avoid accidental starting. Be sure switch is in the locked or off position before
inserting battery pack. Carrying tools with your finger on the switch or inserting
the battery pack into a tool with the switch on invites accidents.
4. Remove adjusting keys or wrenches before turning the tool on. A wrench or
a key that is left attached to a rotating part of the tool may result in personal
injury.
5. Do not overreach. Keep proper footing and balance at all times. Proper
footing and balance enable better control of the tool in unexpected situations.
6. Use safety equipment. Always wear eye protection. Dust mask, non-skid
safety shoes, hard hat, or hearing protection must be used for appropriate
conditions.
Tool Use and Care
1. Use clamps or other practical way to secure and support the work piece to a
stable platform. Holding the work by hand or against your body is unstable and
may lead to loss of control.
2. Do not force tool. Use the correct tool for your application. The correct tool
will do the job better and safer at the rate for which it is designed.
3. Do not use tool if switch does not turn it on or off. A tool that cannot be
controlled with the switch is dangerous and must be repaired.
4. Disconnect battery pack from tool or place the switch in the locked or off
position before making any adjustments, changing accessories, or storing the
tool. Such preventive safety measures reduce the risk of starting the tool
accidentally.
5. Store idle tools out of reach of children and other untrained persons. Tools are
dangerous in the hands of untrained users.
6. When battery pack is not in use, keep it away from other metal objects like:
paper clips, coins, keys, nails, screws, or other small metal objects that can
make a connection from one terminal to another. Shorting the battery terminals
together may cause sparks, burns, or a fire.
7. Maintain tools with care. Keep cutting tools sharp and clean. Properly
maintained tools with sharp cutting edge are less likely to bind and are easier to
control.
Page 3
Models/Modelos
CM9130
Owner’s Manual
Manuel de Usuario
8. Check for misalignment or binding of moving parts, breakage of parts, and
any other condition that may affect the tool’s operation.
9. Use only accessories that are recommended by the manufacturer for your
model. Accessories that may be suitable for one tool may create a risk of injury
when used on another tool.
Service
1. Tool service must be performed only by qualified repair personnel.
2. When servicing a tool, use only identical replacement parts. Follow
instructions in the Maintenance section of this manual. Use of unauthorized
parts or failure to follow Maintenance Instructions may create a risk of shock or
injury.
3. WARNING: This product contains chemicals, including lead, known to the
State of California to cause cancer, and birth defects or other reproductive harm.
SPECIFIC SAFETY RULES AND/OR SYMBOLS
1. Hold tool by insulated gripping surfaces when performing an operation where
the cutting tool may contact hidden wiring. Contact with a “live” wire will also
make exposed metal parts of the tool “live” and shock the operator.
2. Keep hands clear of moving parts.
3. Do not touch moving parts. Allow the power tool accessories (bit and blades
etc.) to cool before touching them. They can become extremely hot during use
and can burn your skin.
IMPORTANT SAFETY INSTRUCTIONS FOR BATTERY CHARGER:
1. This manual includes important safety instructions for the battery charger.
Fully read all instructions and warning labels before using the battery or battery
charger.
2. Do NOT expose the battery or battery charger to rain or moisture.
3. Use of any attachment not recommended in this manual may result in the risk
of fire, electric shock or injury to person and will void the warranty.
4. To reduce the risk of damaging the battery charger power cord, be sure to
pull the plug rather then the cord when disconnecting it from the power supply.
Always position the cord so it will not be stepped on or tripped over. This will
prevent damage to the cord.
3 4
5. An extension cord should not be used unless absolutely necessary. Use of an
improper extension cord can result in risk of fire or electric shock. If using an
extension cord make sure that:
A) The pins on the plug of the extension cord are the same number, size and
shape as those on the plug on the charger.
B) The extension cord is properly wired and in good working condition.
C) The wire size is the same or larger than the ones specified below:
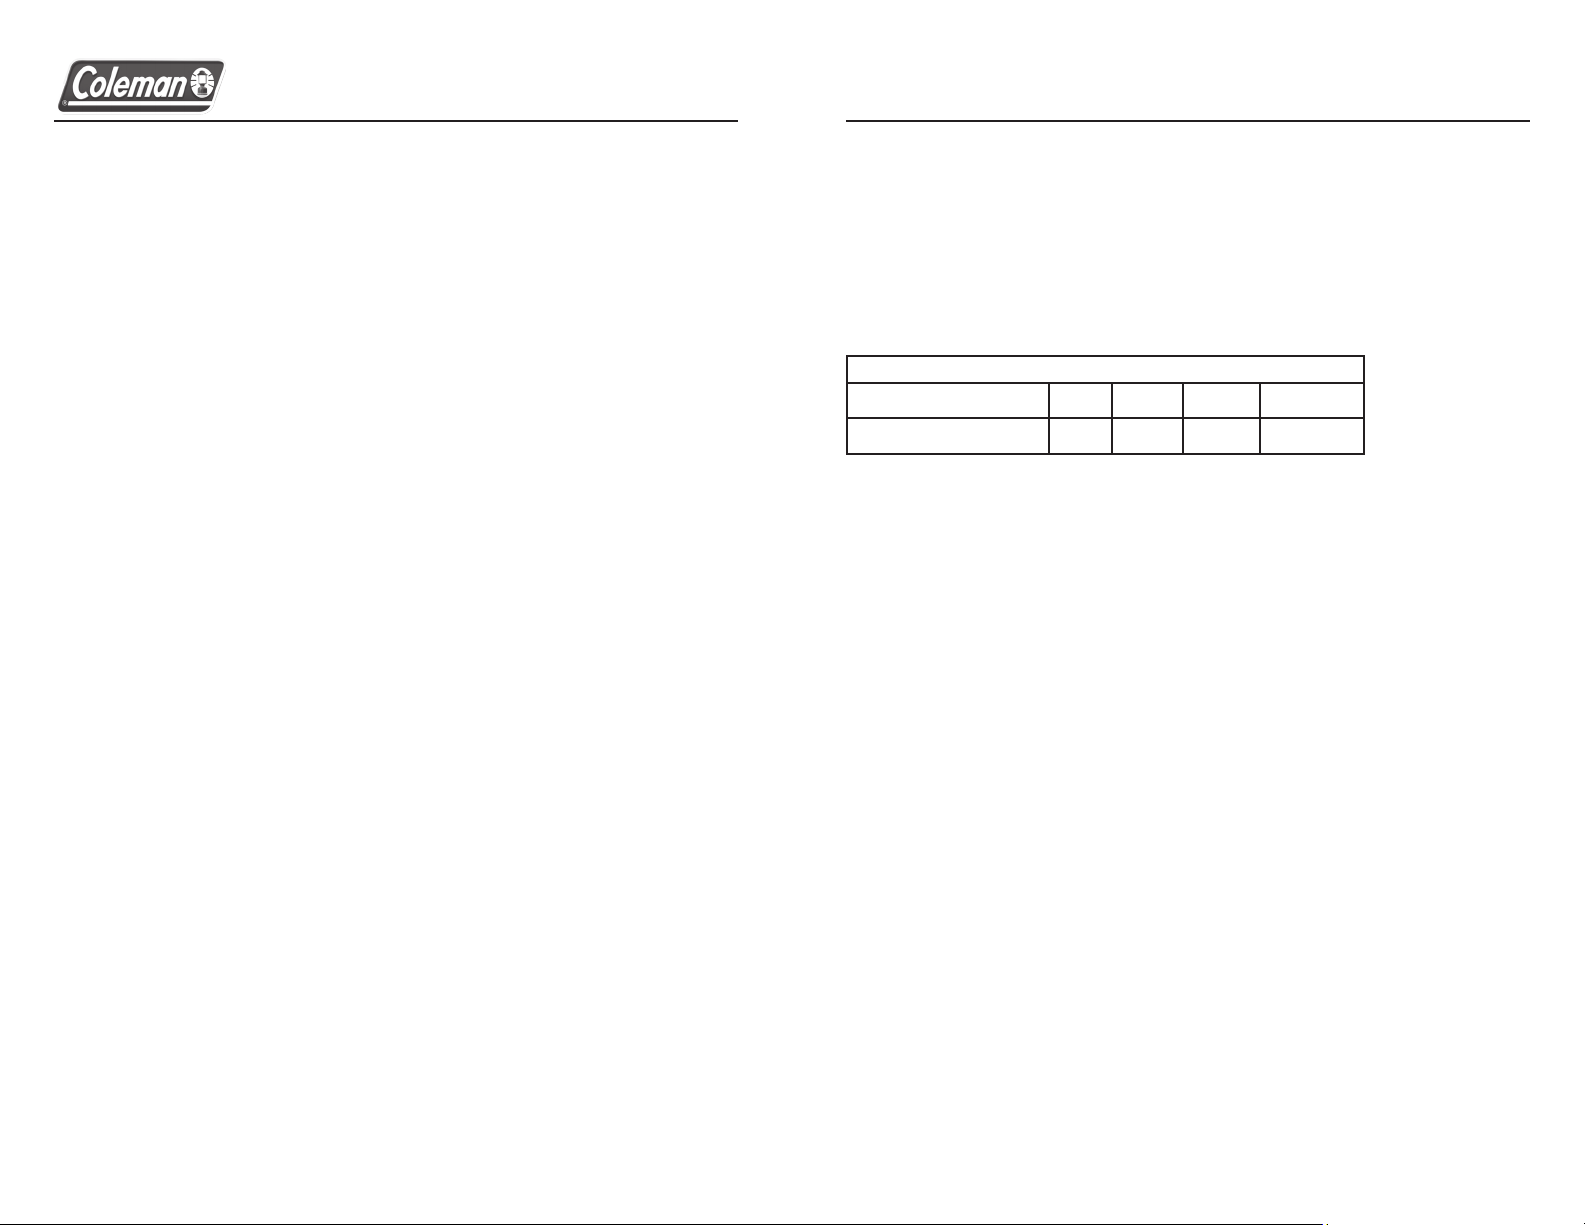
Recommended size of Extension Cord for Battery Charger
Length of Cord (Feet) 25 50 100 150
AWG Size of Cord* 18 18 16 14
* The smaller the AWG (American Wire Gauge) number of the extension cord,
the higher the capacity of the cable for conducting current to ensure proper usage of the tool.
6. Do not operate charger with a damaged cord or plug.
7. Do not operate the charger if it has received a sharp blow, been dropped or
damaged in any other way.
8. Do not open the drill, battery or battery charger. There are no user serviceable
parts. Opening the unit will void the warranty.
9. Unplug the charger from its power source when not in use.
10. Do not touch the terminals inside the battery charger with any other metal
object such as nails or coins. This can short the charger.
11. Do not store the unit in areas where the temperature can exceed 120°F.
12. Do not throw the battery or battery charger in fire.
This can cause an explosion.
13. WARNING: Batteries vent hydrogen gas and may explode in the presence of
a source of ignition, such as a pilot light. To reduce the risk of serious personal
injury, never use any cordless product in the presence of an open flame.
An exploded battery can propel debris and chemicals. If exposed, flush with
water immediately for a minimum of 10 minutes and seek medical attention.
14. During extreme conditions, the battery may leak. This does not indicate a
battery failure. However, if the liquid gets on your skin, immediately wash with
soap and water, neutralize the area with a mild acid such as lemon juice or
vinegar. If the liquid gets into your eyes, flush them with clean water immediately for a minimum of 10 minutes and seek medical attention.
Page 4
Models/Modelos
CM9130
Owner’s Manual
Manuel de Usuario
Ni-Cd
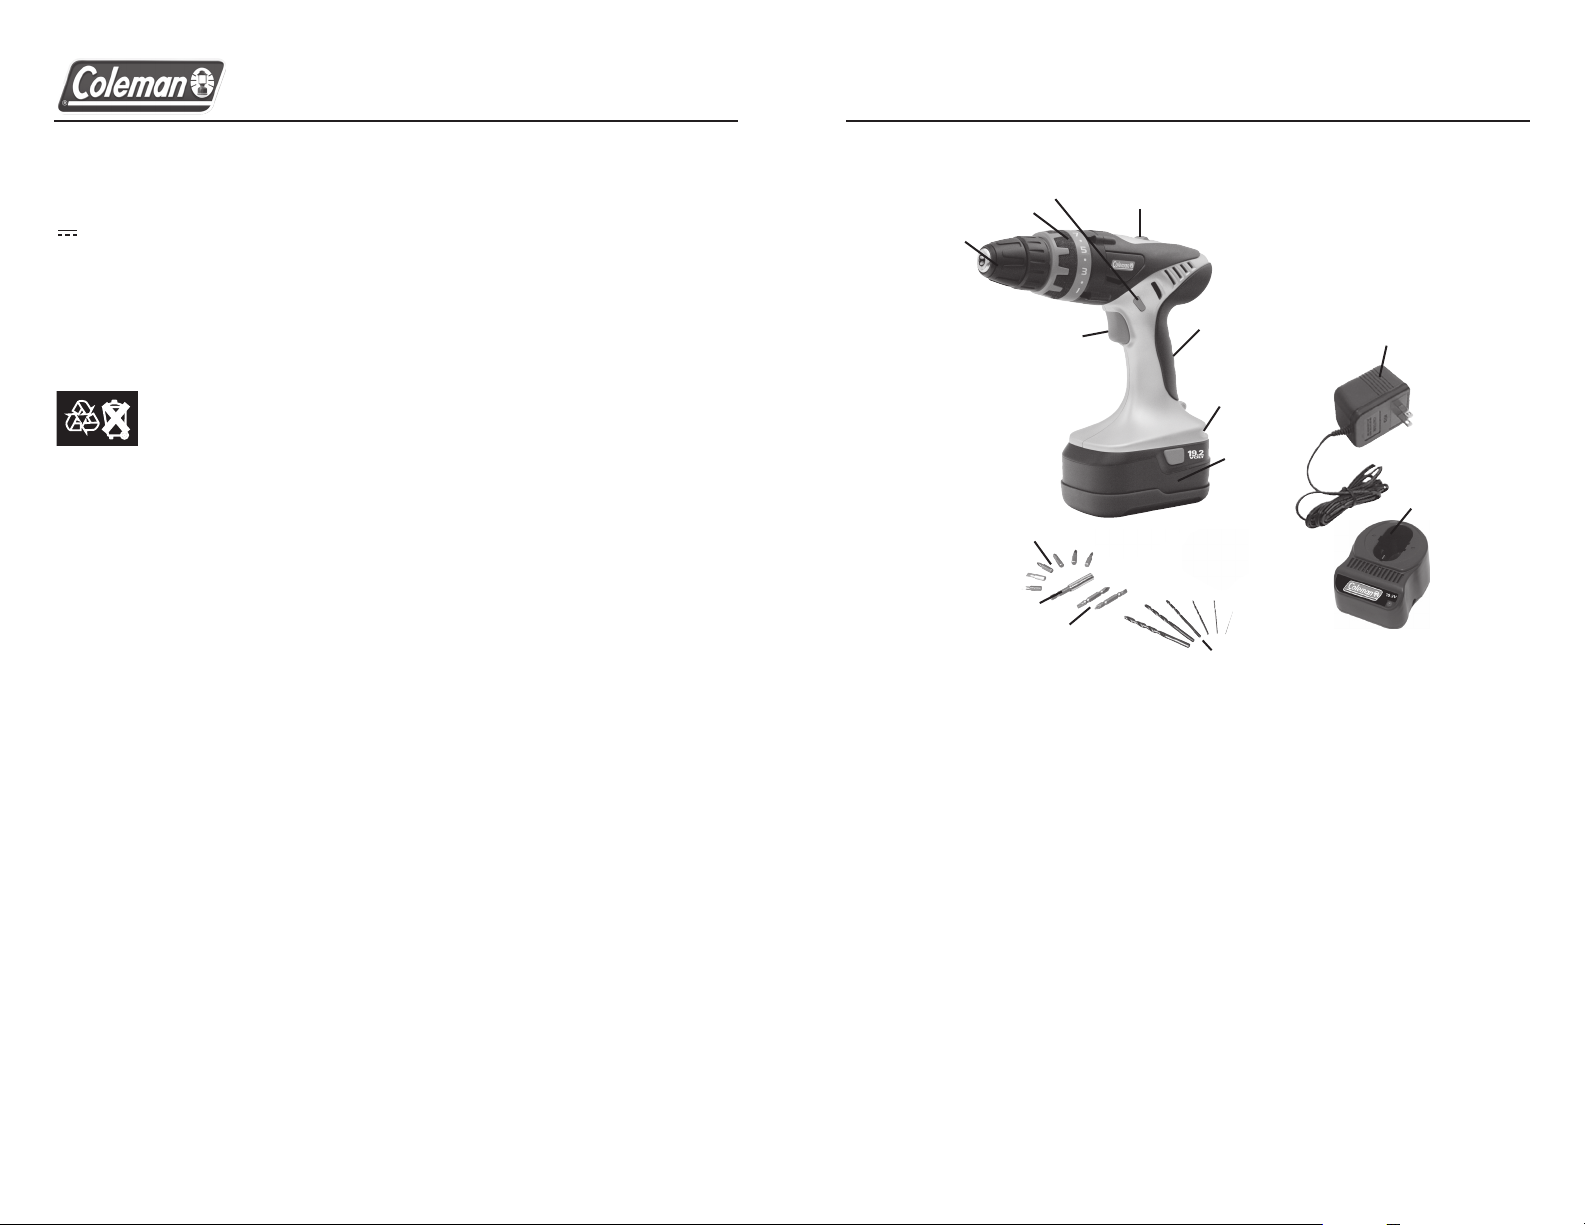
Controls and Components:Symbols:
V ……................................................ volts
.............................................. direct current
n0 ……............................................... no load speed
.../min ................................................ revolutions or reciprocation per minute
Hz ……...............................................Frequency
Ø ……..................................................Diameter
.................................Contains non-spillable nickel-cadmium battery.
Battery must be recycled or disposed of properly.
FUNCTIONAL DESCRIPTION
SPECIFICATIONS
Voltage 19.2V
Speed 1 0-400RPM
Speed 2 0-1,200RPM
Torque Settings 23 + Drill
Chuck Capacity up to 3/8”
Charger Input 120V AC 60Hz
Charging Time Approx 3-5 hours
Battery Type Ni-Cd
6
5
7
4
10
8
9
1
11
12
13
14
Batteries and AC Charger
1. Battery with Release Buttons On Each Side
2. 120V AC Adaptor
3. Charging Stand with LED Charging Indicators
Drill:
4. 3/8” Jacobs Keyless Chuck
5. 24 Adjustable Torque Settings Control Ring
6. Forward/Lock/Reverse Switch
7. High/Low Speed Switch
8. Variable Speed Trigger Switch
9. Accessory/Bit Holder
10. Comfort Rubber Grip
Accessories:
11. 6 Various Screwdriver Bits
12. 2” Extension Bar
13. 2 Double Ended Screwdriver Bits
14. 6 Various Drill Bits
2
3
(Each Drill comes with a storage case.)
5 6
Page 5

Models/Modelos
CM9130
Owner’s Manual
Manuel de Usuario
OPERATION
INSTRUCTIONS FOR USE:
Charging The Battery
THE BATTERY(IES) MAY NOT BE FULLY CHARGED FROM THE FACTORY.
READ ALL INSTRUCTIONS THOROUGHLY PRIOR TO FIRST USE.
Using the Battery Charger
NOTE: Before inserting or removing the battery from the charging base, always
ensure that the base is not plugged into a 120V power source.
1. To begin charging, remove the battery pack from the tool by pressing on the
battery release buttons on either side of the battery pack and pulling down.
2. Plug the battery pack into the battery charger making sure the positive (+) and
negative (-) poles of the battery match the positive (+) and negative (-) poles of
the battery charger.
NOTE: The battery will only fit into the battery charger and the tool one way.
3. Plug one end of the 120 Volt AC Adaptor into the battery charger and the other
end into any standard 120 Volt wall outlet. The RED LED indicator on the battery
charger will illuminate to indicate that the battery is charging.
4. Full charging will take between 3 to 5 hours.
NOTE: While the battery is placed in the charger, the RED LED indicator light
will remain on. If charging more than one battery, wait at least 15 minutes
between each charge. Use only the battery charger that is supplied with this
tool. Using another charger may cause damage to the battery. To increase the
life of your battery, do not leave the battery charging for more than 8 hours.
Battery Warnings
• Your Drill comes complete with a rechargeable battery, we recommend that
you fully charge before the first use.
• Your Drill battery must be charged prior to first use.
• Your battery should be recharged when the drill does not operate up to its
normal performance level. Do not continue to operate the drill in this depleted
capacity. Recharge the battery immediately.
• Over time, if the drill is not used, the battery will lose capacity. For maximum
performance, recharge the battery after prolonged storage or non-use periods.
• If charging more than one battery, wait at least 15 minutes between each
charge.
7
• Use only the battery charger that is supplied with this tool. Using another
charger may cause damage to the battery.
• Always remove the battery from the charging base after 3-5 hours.
Do not leave battery in charging base for extended periods of time.
WARNING: Never charge a battery pack again immediately after it has been
fully charged. This can give rise to the battery pack being overcharged and a
reduced battery life. Length of service of your battery will depend on the type
of work you are doing. The batteries in this tool have been designed to provide
maximum, trouble-free life. However, like all batteries, it will eventually wear
out. Do not disassemble battery pack and attempt to replace the batteries.
To make your batteries last as long as possible, we suggest the following:
1. Store and charge your batteries in a cool area. Temperatures above or below
normal room temperatures will shorten battery life.
2. Never store batteries in a discharged condition. Recharge them immediately
after they are discharged.
3. All batteries gradually lose their charge. The higher the temperature the
quicker they lose their charge. If you store your tool for long periods of time
without using it, recharge the batteries every month or two. Getting into this
habit will prolong battery life.
Using The Drill
CAUTION: Always make sure that the tool is switched
OFF and the battery pack is removed from the drill
before changing any bits.
Loosen the keyless chuck by holding the ring and
turning the sleeve counter clockwise. Select the drill bit
or screwdriver you want to use and place it in the
keyless chuck. Twist the sleeve of the keyless chuck
clockwise to tighten it, making sure the drill bit remains
in the center of the keyless chuck’s teeth.
Twist the 24 setting torque control ring to the desired
setting. Lower settings are better for light work such as
driving screws into soft materials. Higher settings are
recommended for drilling into harder surfaces.
When properly adjusted, the clutch will slip at
its present torque setting to prevent driving the
screw too deep or to prevent damage to the tool.
To operate the drill in forward setting,
simply keep the Forward/Lock/Reverse switch flat
against the side of the drill as shown. To change
8
Page 6

Models/Modelos
CM9130
Owner’s Manual
Manuel de Usuario
to reverse setting, move the Forward/Lock/Reverse switch until it is flat against
the opposite side of the drill. Keeping the Forward/Lock/Reverse switch in the
center position locks the drill and prevents unintentional use. It is recommended
that the Drill is in the locked position when it is not in use or is being stored.
CAUTION: Always check the direction of the rotation before using the drill.
The speed of the drill is increased by the amount of pressure you place on the
ON/OFF trigger switch. The less pressure you put on the trigger switch, the
slower the drill will go.
Your drill comes with an automatic braking function that quickly stops the chuck
from turning when the trigger switch is released.
Screwdriver Operation
Place the point of the screwdriver bit into the head of
the screw and apply slight pressure to the tool. Press
the trigger switch slightly and then gradually increase
the drill speed. Release the trigger switch as soon as
the clutch engages.
Note: Starting the drill at too high of a speed can
damage the drill bit or reduce the life of the bit.
Make sure that the driver bit is inserted straight in the
screw head or the screw may become damaged or will
not be inserted properly. When driving wood screws,
pre-drill pilot holes into the surface to make driving
easier. This will also prevent the wood from splitting.
Note: When drilling, the drill bit can become stuck.
If this happens, a very high torque will be produced. Always take care to hold
the drill firmly to prevent possible damage or injury.
Maintenance
Clean the Drill regularly. Before cleaning, remove the battery pack and any
accessories (bits etc.). To clean, use ONLY a mild soap and damp cloth on the
housing. Never immerse drill in any kind of fluid. Do not use any solvents or
harsh abrasives on the drill housing as this may cause damage to the unit.
Always keep the ventilation openings clear.
NOTE: All bearings in these tools are lubricated with a sufficient amount of
high-grade lubricant for the life of the unit under normal operating conditions.
No further lubrications required.
CAUTION: DO NOT keep the trigger switch pressed in with tape or any other
permanent means or the circuit will not function properly. A malfunction may
result, possibly causing overheating or damage to the unit.
Do not open the drill, battery or battery charger. There are no user serviceable
parts. Opening the unit will void the warranty.
ACCESSORIES
Please refer to section “Accessories”
TROUBLESHOOTING TIPS:
DRILL DOES NOT WORK?
• Recharge the battery
CHARGING INDICATOR LED NOT ILLUMINATED DURING RECHARGING?
• Check that battery pack is properly connected to the charger
• Check that the Charger is properly connected at both ends
9 10
Page 7

Models/Modelos
CM9130
Owner’s Manual
Manuel de Usuario
Garantía limitada de TEAM PRODUCTS INTERNATIONAL INC.
QUÉ CUBRE: Todo defecto en materiales o mano de obra.
POR CUÁNTO TIEMPO: Dos (2) años a partir de la fecha de compra original.
QUÉ PEDIMOS QUE HAGA: Hasta dos (2) años a partir de la fecha de compra original,
Team Products reemplazará todo producto defectuoso. Primero se debe regresar al
vendedor detallista el producto junto con el recibo de venta. Si la póliza del vendedor
detallista ha expirado, Team Products reemplazará el producto defectuoso. El cliente es
responsable de los cargos de envío hacia Team Products, pero TPI pagará los cargos
de envío del reemplazo. Al enviar el producto incluya su nombre, dirección, número de
teléfono, una copia de la prueba de la fecha de compra (el recibo) y una explicación del
problema de funcionamiento. Luego de recibir su producto, le enviaremos el reemplazo a
su hogar u oficina dentro de cuatro semanas. Sírvase regresar el producto defectuoso a
la siguiente dirección:
TEAM PRODUCTS INTERNATIONAL INC.
Attn: Customer Service Returns
35 A Continental Drive
Wayne, NJ 07470 U.S.A.
QUÉ HAREMOS: Si su producto tiene un defecto y no lo pudo regresar dentro de la
fecha de la póliza para regreso a la tienda, pero no han transcurrido dos (2) años a partir
de la fecha de compra original, lo reemplazaremos sin cargo para usted. Le sugerimos
guardar el paquete original en caso de necesitar enviar el producto.
Al reemplazar el producto, lo haremos por uno nuevo o reacondicionado igual o similar.
El reemplazo estará garantizado solamente por dos (2) años a partir de la fecha de
compra original.
QUÉ NO CUBRE ESTA GARANTÍA: ENTRE OTRAS COSAS, ESTA GARANTÍA NO
CUBRE DEFECTOS QUE RESULTEN DE ACCIDENTES, DAÑOS DURANTE EL
TRANSPORTE HACIA NUESTROS TALLERES DE SERVICIO, ALTERACIONES,
REPARACIONES NO AUTORIZADAS, FALTAS AL SEGUIR LAS INSTRUCCIONES,
ABUSO, INCENDIOS, INUNDACIONES, GUERRAS Y ACTOS DE FUERZA MAYOR.
SI SU PRODUCTO NO ESTÁ CUBIERTO POR NUESTRA GARANTÍA, LLAME A
NUESTRO DEPARTAMENTO DE SERVICIO AL CLIENTE AL (888) 231-4022 PARA
ESTUDIAR OTRAS OPCIONES.
ESTA GARANTÍA LIMITADA ES LA ÚNICA QUE OTORGAMOS AL PRODUCTO Y EN
ELLA SE DESCRIBE TODA NUESTRA RESPONSABILIDAD CON RESPECTO AL
PRODUCTO. NO HAY NINGUNA OTRA GARANTÍA QUE SE EXTIENDA MÁS ALLÁ DE
LO ANTERIORMENTE DESCRITO.
LIMITACIONES: LAS GARANTÍAS IMPLÍCITAS, INCLUYENDO AQUELLAS DE
ADECUACIÓN PARA UN PROPÓSITO EN PARTICULAR Y LAS DE
COMERCIALIZACIÓN (GARANTÍAS NO ESCRITAS DE QUE EL PRODUCTO ES APTO
PARA USO GENERAL) ESTÁN LIMITADAS A DOS (2) AÑOS A PARTIR DE LA FECHA
DE COMPRA ORIGINAL. NO PAGAREMOS EN CONCEPTO DE TIEMPO PERDIDO,
INCONVENIENCIA, PÉRDIDA DE USO DEL PRODUCTO NI DAÑOS A LA PROPIEDAD DEBIDO A NUESTRO PRODUCTO O A SU FALLA DE FUNCIONAMIENTO, NI
TAMPOCO CUALQUIER OTRO DAÑO INCIDENTAL O CONSECUENTE INCLUYENDO
LESIONES PERSONALES.
ALGUNOS ESTADOS NO PERMITEN LAS LIMITACIONES AL TIEMPO DE DURACIÓN
DE LAS GARANTÍAS IMPLÍCITAS NI LA EXCLUSIÓN O LIMITACIÓN DE LOS DAÑOS
INCIDENTALES O CONSECUENTES, POR LO QUE LAS EXCLUSIONES Y LIMITACIONES ANTERIORES PODRÍAN NO SER APLICABLES A USTED.
DERECHOS POR LEYES ESTATALES: Esta garantía le otorga derechos legales
específicos y además podría gozar de otros, que pueden variar de un estado a otro.
¿PREGUNTAS? Si tiene cualquier pregunta acerca de este producto, sírvase contactar
a nuestro departamento de servicio al cliente al (888) 231-4022,
entre 9 AM y 5 PM hora estándar del este, de lunes a viernes o visite nuestro sitio
web en: www.colemanpower.com.
FELICITACIONES
Este producto COLEMAN® ha sido cuidadosamente diseñado y fabricado para
proporcionar un funcionamiento confiable. Sírvase leer completamente este
manual antes de operar su nuevo producto COLEMAN® ya que contiene la
información necesaria para familiarizarse con sus características y obtener el
desempeño que brindará satisfacción continua por muchos años. Por favor
guarde este manual para consultarlo en el futuro.
REGLAS GENERALES DE SEGURIDAD. PARA TODA HERRAMIENTA OPERADA POR BATERÍAS
¡ADVERTENCIA! LEA Y COMPRENDA TODAS LAS INSTRUCCIONES.
El no obedecer todas las instrucciones listadas a continuación podría resultar en
choques eléctricos, incendio o lesiones personales serias.
GUARDE ESTAS INSTRUCCIONES.
Área de trabajo
1. Mantenga el área de trabajo limpia y bien alumbrada. Los bancos de trabajo
desordenados y las áreas a obscuras promueven accidentes.
2. No opere herramientas eléctricas en entornos explosivos, tales como aquellos
que contienen líquidos, gases o aserrín inflamables. Las herramientas eléctricas
generan chispas que podrían encender el aserrín o los vapores.
3. Mantenga alejados a los espectadores, los niños y los visitantes mientras opera herramientas eléctricas. Las distracciones podrían hacerle perder el control.
Seguridad con la electricidad
1. No haga uso inapropiado del cordón. Nunca use el cordón para transportar la
herramienta. Aleje el cordón del calor, aceite, bordes cortantes y elementos móviles. Reemplace los cordones dañados inmediatamente. Los cordones dañados
pueden provocar incendios.
Aplicable solamente a las herramientas con paquetes de baterías separables.
2. Las herramientas de baterías con baterías integradas o paquetes separables
deben recargarse solamente con los cargadores especificados para esas baterías. Un cargador adecuado para un tipo de baterías podría crear un riesgo de
incendio si se le usa con otro tipo de baterías.
3. Use la herramienta sólo con el paquete de baterías específicamente diseñado
para ella. Usar cualquier otra batería podría crear riesgo de incendio.
11 12
Page 8

Models/Modelos
CM9130
Owner’s Manual
Manuel de Usuario
Seguridad personal
1. Manténgase alerta, enfóquese en lo que está haciendo y use el sentido
común al operar herramientas eléctricas. No use herramientas si está cansado
o bajo la influencia de drogas, alcohol o medicamentos. La falta de atención
momentánea mientras se operan herramientas eléctricas podría resultar en
lesiones personales serias.
2. Vístase apropiadamente No use vestimentas o joyas flojas. Amárrese el cabello largo. Aleje el cabello, la ropa y los guantes de los elementos móviles. La
ropa, joyería floja y el cabello largo podrían atraparse en los elementos móviles.
3. Evite los arranques accidentales. Antes de insertar el paquete de baterías,
asegúrese de que el interruptor se encuentre en la posición de bloqueo o
apagado. Portar herramientas con los dedos en el gatillo o insertar paquetes de
baterías en herramientas que tengan el interruptor en la posición de encendido
promueve accidentes.
4. Antes de encender la herramienta quite las llaves y las chavetas. Una llave
o una chaveta que se deje acoplada a un elemento rotativo de la herramienta
puede provocar lesiones.
5. No extienda su cuerpo más allá de su alcance natural. Manténgase siempre bien parado y balanceado apropiadamente. El mantenerse bien parado y
balanceado permite un mejor control de la herramienta en situaciones inesperadas.
6. Use el equipo de seguridad. Use siempre protección para los ojos. En las
situaciones apropiadas se deben usar máscaras para el polvo, zapatos de seguridad antideslizantes, cascos de seguridad y protección para los oídos.
Uso y cuidado de herramientas
1. Use sujetadores o cualquier otra forma práctica de asegurar y apoyar las
piezas de trabajo sobre plataformas estables. Sujetar las piezas con la mano o
apoyarlas contra el cuerpo es inestable y podría hacer que se pierda el control.
2. No presione la herramienta. Use la herramienta correcta para su situación.
Las herramientas adecuadas hacen su trabajo mejor y de forma más segura a la
proporción para la cual se les diseñó.
3. No use la herramienta si el interruptor no funciona al encender o apagar. Una
herramienta que no pueda ser controlada mediante su interruptor es peligrosa y
se le debe reparar.
4. Antes de efectuar cualquier ajuste, cambiar accesorios o almacenar la herramienta, desconecte el paquete de baterías o lleve el interruptor a la posición de
apagado o cerrado. Esas medidas preventivas de seguridad reducen el riesgo de
arrancar accidentalmente las herramientas.
5. Almacene las herramientas inactivas fuera del alcance de los niños y de otras
personas sin experiencia. Las herramientas en manos de usuarios sin experien-
cia son peligrosas.
6. Cuando no use el paquete de baterías, manténgalo alejado de otros objetos
metálicos tales como: sujetadores de papel, monedas, llaves, clavos, tornillos
y otros objetos metálicos pequeños que puedan crear una conexión entre las
terminales. Poner en corto los terminales de las baterías puede generar chispas,
quemaduras e incendios.
7. Cuide y dé mantenimiento a las herramientas. Mantenga afiladas y limpias las
herramientas para cortar. Las herramientas apropiadamente mantenidas y con
bordes para corte afilados tienen una menor probabilidad de trabarse y son más
fáciles de controlar.
8. Compruebe que no haya falta de alineamiento o agarrotamiento en los
elementos móviles, elementos rotos o cualquier otra condición que pudiera
afectar el funcionamiento de la herramienta.
9. Use solamente accesorios recomendados por el fabricante de su modelo. Los
accesorios que pueden ser adecuados para una herramienta podrían provocar
riesgos de lesiones si se usan con otras herramientas.
Reparaciones
1. La reparación de herramientas debe efectuarla solamente personal calificado.
2. Al reparar una herramienta use solamente repuestos idénticos. Siga las
instrucciones que aparecen en la sección de mantenimiento de este manual. El
uso de repuestos no autorizados y el no obedecer las instrucciones de mantenimiento puede crear riesgos de choque o lesiones.
3. ADVERTENCIA: Este producto contiene químicos, incluyendo plomo, que
de acuerdo al Estado de California se sabe que provocan cáncer y defectos de
nacimiento u otros daños reproductivos.
REGLAS Y SÍMBOLOS ESPECÍFICOS DE SEGURIDAD
1. Sostenga la herramienta por su área con aislamiento al efectuar operaciones
en que la herramienta para cortar pudiera entrar en contacto con alambres
escondidos. El contacto con alambres que transmiten electricidad hace que
también transmitan electricidad los elementos de metal sin aislamiento de la
herramienta y que se provoquen choques eléctricos a los operadores.
2. Mantenga las manos alejadas de los elementos móviles.
3. No toque los elementos móviles. Antes de tocarlos, deje que los accesorios
de las herramientas eléctricas (barrenas, hojas, etc.) se enfríen. Éstas podrían
calentarse en extremo durante el uso y pueden quemar la piel.
13 14
Page 9

Models/Modelos
CM9130
Owner’s Manual
Manuel de Usuario
Ni-Cd
INSTRUCCIONES DE SEGURIDAD IMPORTANTES PARA CARGADORES
DE BATERÍAS:
1. En este manual se incluyen instrucciones de seguridad importantes para
cargadores de baterías. Antes de usar las baterías o el cargador de baterías, lea
completamente todas las instrucciones y las viñetas de advertencia.
2. NO exponga las baterías o el cargador de baterías a la lluvia o la humedad.
3. El usar accesorios que no se recomiendan en este manual podría provocar
riesgos de incendios, choques eléctricos o lesiones a las personas y además
anula la garantía.
4. Para reducir el riesgo de dañar el cordón eléctrico del cargador de baterías al
desconectarlo de la fuente de alimentación asegúrese de tirar del enchufe y no
del cordón. Coloque siempre el cordón de tal manera que no se le pueda pisar o
tropezar con él. Con eso se evita que se le dañe.
5. No se deben usar cordones de extensión a menos que sea absolutamente
necesario. El uso inapropiado de cordones de extensión puede resultar en
riesgo de incendio o choques eléctricos. Si ha de usar un cordón de extensión,
asegúrese de que:
A) Las clavijas del enchufe del cordón de extensión sean del mismo número,
tamaño y configuración que el enchufe del cargador.
B) El cordón de extensión esté apropiadamente acoplado y en buenas condiciones de trabajo.
C) El tamaño del alambre es el mismo o mayor que los que se especifican a continuación:
Tamaño recomendado para los cordones de extensión de cargadores de baterías
Longitud del cordón (en pies) 25 50 100 150
Tamaño AWG del cordón* 18 18 16 14
11. No almacene la unidad en donde la temperatura pudiera exceder los 49°C
(120°F).
12. No tire al fuego las baterías o el cargador de baterías. Podría provocarse una
explosión.
13. ADVERTENCIA: Las baterías sueltan hidrógeno el cual podría explotar si entra en contacto con una fuente de ignición tal como una luz piloto. Para reducir
el riesgo de lesiones personales serias, nunca use productos a baterías cuando
haya llamas presentes. Las baterías que explotan podrían tirar escombros y
químicos. Si entra en contacto con ellos, enjuáguese inmediatamente con agua
durante 10 minutos por lo menos y luego obtenga atención médica.
14. Las baterías podrían desarrollar fugas bajo condiciones extremas. Ello no
indica que las baterías han fallado. Sin embargo si el líquido le cae en la piel,
lávese inmediatamente con agua y jabón, neutralice el área con un ácido suave
tal como jugo de limón o vinagre. Si el líquido entra en contacto con los ojos,
enjuáguelos inmediatamente con agua limpia durante 10 minutos por lo menos
y luego obtenga atención médica.
Símbolos:
V ……................................................ voltios
.............................................. corriente directa
n0 ……............................................... velocidad sin carga
.../min ................................................ revoluciones o alternación por minuto
Hz ……...............................................Frecuencia
Ø ……..................................................Diámetro
……...........................................Contiene baterías de níquel y cadmio que no se
derraman. Las baterías deben ser recicladas o
desechadas apropiadamente.
* Entre menor es el número de la American Wire Gauge (Calibración de alambres de EE.UU.) o AWG del cordón de extensión, más alta es la capacidad del
cable para conducir corriente garantizando el uso apropiado de la herramienta.
6. No opere el cargador si tiene el cordón o el enchufe dañado.
7. No opere el cargador si se le ha golpeado fuertemente, si se ha caído o si se
ha dañado de cualquier otra forma.
8. No abra el taladro, las baterías o el cargador de baterías. No contienen elementos que deban recibir servicio. El abrir la unidad anula la garantía.
9. Cuando no se le esté usando, desenchufe el cargador de la fuente de alimentación.
10. No toque los terminales dentro del cargador de baterías con cualquier otro
objeto metálico tal como clavos o monedas. Se podría crear un corto circuito.
15 16
DESCRIPCIÓN DE LAS FUNCIONES
ESPECIFICACIONES
Voltaje 19.2V
Velocidad 1 0-400RPM
Velocidad 2 0-1200RPM
Posición para torsión Taladro 23 +
Capacidad del mandril hasta 3/8 de pulg.
Entrada del cargador 120 V CA 60Hz
Tiempo de carga Aproximadamente 3 a 5 horas
Tipo de baterías Níquel y cadmio
Page 10

Models/Modelos
CM9130
Owner’s Manual
Manuel de Usuario
Controles y componentes:
6
5
4
7
10
8
9
1
11
12
13
14
Baterías y cargador de CA
1. Batería con seguros en cada costado
2. Adaptador de 120VCA.
3. Base para el cargador con luces de diodo indicadoras de carga.
Taladro:
4. Mandril Jacobs de 3/8” sin llave.
5. Anillo selector de torque de 24 posiciones.
6. Control de Avance/Seguro/Reversa
7. Selector de velocidad alta/baja
8. Gatillo de velocidad variable.
9. Porta Accesorio/Brocas
10. Agarradera cómoda de caucho
Accesorios
11. 6 mechas surtidas para entornillar.
12. 1 Barra de extensión de 5cm (2”)
13. 2 mechas de doble punta para entornillar.
14. 6 brocas surtidas para taladrar.
(Cada taladro viene con su estuche)
FUNCIONAMIENTO
INSTRUCCIONES PARA SU USO:
Cómo cargar las baterías
PODRÍA SER QUE LAS BATERÍAS NO ESTÉN COMPLETAMENTE CAR-
GADAS DE FÁBRICA. ANTES DE USARLAS POR PRIMERA VEZ, LEA
2
COMPLETAMENTE TODAS LAS INSTRUCCIONES.
Cómo usar el cargador de baterías
3
NOTA: Antes de insertar o remover las baterías de la base para carga,
asegúrese siempre que la base no esté enchufada en la fuente de alimentación
de 120 voltios.
1. Para comenzar a cargar, quite el paquete de baterías de la herramienta
presionando los botones para liberación de las baterías en ambos lados del
paquete y tirando hacia abajo.
2. Coloque el paquete de baterías en el cargador asegurándose de que los polos
positivo (+) y negativo (-) correspondan con los polos positivo (+) y negativo (-)
del cargador de baterías.
NOTA: Las baterías encajan en el cargador y en la herramienta solamente de
una manera.
3. Enchufe un extremo del adaptador para CA de 120 voltios en el cargador de
baterías y el otro extremo en cualquier tomacorriente estándar de 120 voltios.
El indicador LED ROJO del cargador de baterías se ilumina indicando que las
baterías se están cargando.
4. Una carga completa se toma entre 3 y 5 horas.
NOTA: La luz indicadora LED ROJA permanece encendida mientras las baterías
se encuentran en el cargador. Si desea cargar más de un paquete de baterías,
espere por lo menos 15 minutos entre una carga y otra. Use solamente el cargador de baterías que se suministra con esta herramienta. El usar otro cargador
podría dañar las baterías. Para aumentar la vida útil de sus baterías, no las deje
cargando más de 8 horas.
17 18
Page 11

Models/Modelos
CM9130
Owner’s Manual
Manuel de Usuario
Advertencias sobre las baterías
• Su taladro viene completo con baterías recargables, recomendamos que las
cargue completamente antes de usarlas por primera vez.
• Debe cargar las baterías de su taladro antes del primer uso.
• Se deben volver a cargar las baterías cuando el taladro no se desempeña a
nivel normal. No continúe usando el taladro cuando se encuentre en tal estado
de capacidad agotada. Vuelva a cargar las baterías inmediatamente.
• Si no se usa el taladro, con el tiempo las baterías pierden su capacidad. Para
lograr un desempeño máximo, vuelva a cargar las baterías luego de períodos
de almacenamiento o falta de uso prolongados.
• Si desea cargar más de un paquete de baterías, espere por lo menos 15 minutos entre una carga y otra.
• Use solamente el cargador de baterías que se suministra con esta herramienta.
El usar otro cargador podría dañar las baterías.
• Quitar siempre la batería de la base de carga después de 3-5 horas. No dejar la
batería en la base de carga por períodos del tiempo extendidos.
ADVERTENCIA: Nunca cargue un paquete de baterías inmediatamente
después de que se le haya cargado completamente. Ello podría hacer que se
sobrecargue el paquete y se reduzca la vida de las baterías. La duración del
servicio de las baterías depende del tipo de trabajo que se esté haciendo. Las
baterías de esta herramienta han sido diseñadas para suministrar el máximo de
vida útil sin problemas. Sin embargo, igual que todas las baterías, con el tiempo
se desgastan. No desarme los paquetes para tratar de reemplazar las baterías.
Para hacer que las baterías duren lo más posible se sugiere lo siguiente:
1. Almacene y cargue las baterías en un área fresca. La temperatura arriba o
abajo de la ambiental normal acorta la vida útil de las baterías.
2. Nunca almacene las baterías cuando estén descargadas. Vuelva a cargarlas
inmediatamente luego de que se descarguen.
3. Todas las baterías gradualmente pierden su carga. Entre más alta la temperatura más rápido pierden su carga. Si almacena la herramienta por largos períodos sin usarla, recargue las baterías cada mes o dos. El tener ese hábito alarga
la vida de las baterías.
Al usar el taladro
PRECAUCIÓN: Antes de cambiar cualquier barrena
asegúrese siempre de que la herramienta esté apagada
y que se ha sacado el paquete de baterías del taladro.
Afloje el mandril sin llaves sosteniendo el anillo y
girando la camisa en el sentido contrario al de las
agujas del reloj. Seleccione la barrena para taladrar o
para destornillar que desee usar y colóquela en el
mandril sin llaves. Gire la camisa del mandril sin llaves
en el sentido de las agujas del reloj para apretarla,
asegurándose de que la barrena para taladrar
permanece en el centro de los dientes del mandril sin
llaves.
Gire el anillo para control de la torsión de 24 posiciones
a la posición deseada. Las posiciones más bajas
son mejores para trabajos livianos tales como
colocar tornillos en materiales suaves. Las
posiciones más altas se recomiendan para
taladrar en superficies más duras.
Cuando se le ajusta apropiadamente,
el embrague se desliza en la posición de torsión
presente para evitar meter los tornillos muy a
fondo o para evitar dañar la herramienta.
Para operar el taladro en la posición hacia delante, simplemente mantenga
el interruptor para control hacia delante, bloqueo o atrás plano contra el lado
del taladro como se muestra. Para cambiar a la posición hacia atrás, mueva el
interruptor para control hacia delante, bloqueo o atrás hasta que esté plano
contra el lado opuesto del taladro. Si se mantiene el interruptor para control
hacia delante, bloqueo o atrás en la posición central se bloquea el taladro y se
evita el uso accidental. Se recomienda dejar el taladro en la posición de bloqueo
cuando no se le use y al almacenarlo.
PRECAUCIÓN: Antes de usar el taladro, verifique siempre la dirección de
rotación.
La velocidad del taladro aumenta debido al monto de presión que se haga al
Interruptor de gatillo para encendido y apagado. Entre menos presión se haga
en el Interruptor de gatillo, menor será la velocidad del taladro.
El taladro posee una función de freno automático que detiene rápidamente el
mandril cuando se suelta el Interruptor de gatillo.
19
20
Page 12

Models/Modelos
CM9130
Owner’s Manual
Manuel de Usuario
Funcionamiento como desatornillador
Coloque la punta de la barrena con desatornillador
en la cabeza del tornillo y presione un poco la herramienta. Presione un poco el Interruptor de gatillo y luego aumente gradualmente la velocidad del
taladro. Suelte el Interruptor de gatillo tan pronto
como el embrague entre en funcionamiento.
Nota: Cuando se hace que el taladro comience
a funcionar a una velocidad muy alta se puede
dañar la barrena para taladrar o reducir la vida útil
de la barrena.
Asegúrese de que la barrena con desatornillador esté colocada de forma recta
en la cabeza del tornillo o éste podría dañarse o no se podrá insertar apropiadamente. Al colocar tornillos para madera, taladre antes agujeros piloto para
facilitar su inserción. Esto también evita que la madera se raje.
Nota: Al taladrar se podría trabar la barrena.
Si eso pasa, se produce una torsión muy alta. Sostenga siempre el taladro
firmemente para evitar posibles daños o lesiones.
CONSEJOS PARA LA RESOLUCIÓN DE AVERÍAS:
¿NO FUNCIONA EL TALADRO?
• Vuelva a cargar las baterías
¿LA LÁMPARA LED INDICADORA DE CARGA NO SE ENCIENDE DURANTE LA
RECARGA?
• Compruebe que el paquete de baterías está conectado apropiadamente al cargador
• Compruebe que el cargador está conectado apropiadamente en ambos extremos
Mantenimiento
Limpie el taladro con regularidad. Antes de limpiarlo, saque el paquete de
baterías y todos los accesorios (barrenas, etc.) Para la limpieza use SOLAMENTE
jabón suave y un paño húmedo en la carcaza. Nunca sumerja el taladro en cualquier tipo de fluido. No use ningún solvente o abrasivo fuerte en la carcaza del
taladro ya que ello podría dañar la unidad.
Mantenga siempre las aperturas para ventilación abiertas.
NOTA: Todos los cojinetes de esta herramienta tienen una cantidad suficiente
de lubricante de alto grado para la vida útil de la unidad bajo condiciones de
operación normales.
No se necesita lubricación adicional.
PRECAUCIÓN: NO mantenga presionado el interruptor de gatillo con una
cinta o de cualquier otra forma permanente o el circuito no funcionará apropiadamente. Podría suceder un mal funcionamiento, posiblemente provocando
sobrecalentamiento en la unidad.
No abra el taladro, las baterías o el cargador de baterías. No contienen elementos que deban recibir servicio. El abrir la unidad anula la garantía.
ACCESORIOS
Por favor vea la sección titulada “Accesorios”.
21 22
 Loading...