

Page 1
Eco Clean - User Guide
Box contents
Fast Disc Cleaning Machine
The Eco Clean is a fast disc cleaning machine, designed to take the pain out
of cleaning ngerprints and dirt from your bundles of discs.
It is a great companion to a disc repair machine where the discs come out
with polish on, but also as a cleaning tool for discs that have simply been
handled and need a clean.
Within just a few moments you can set up your Eco Clean machine and
start cleaning discs.
You will nd the following items present:
• Eco Clean Fast Disc Cleaner
• AC/DC Power Supply (DC12V 3.3A)
• Cable for the AC/DC Power Supply
• Cleaning Fluid for 1000 disc cleans
• Key card for 1000 disc cleans (Installed in card slot)
• Cleaning Roller for 1000 discs (Installed in machine)
• Priming assist foam tool
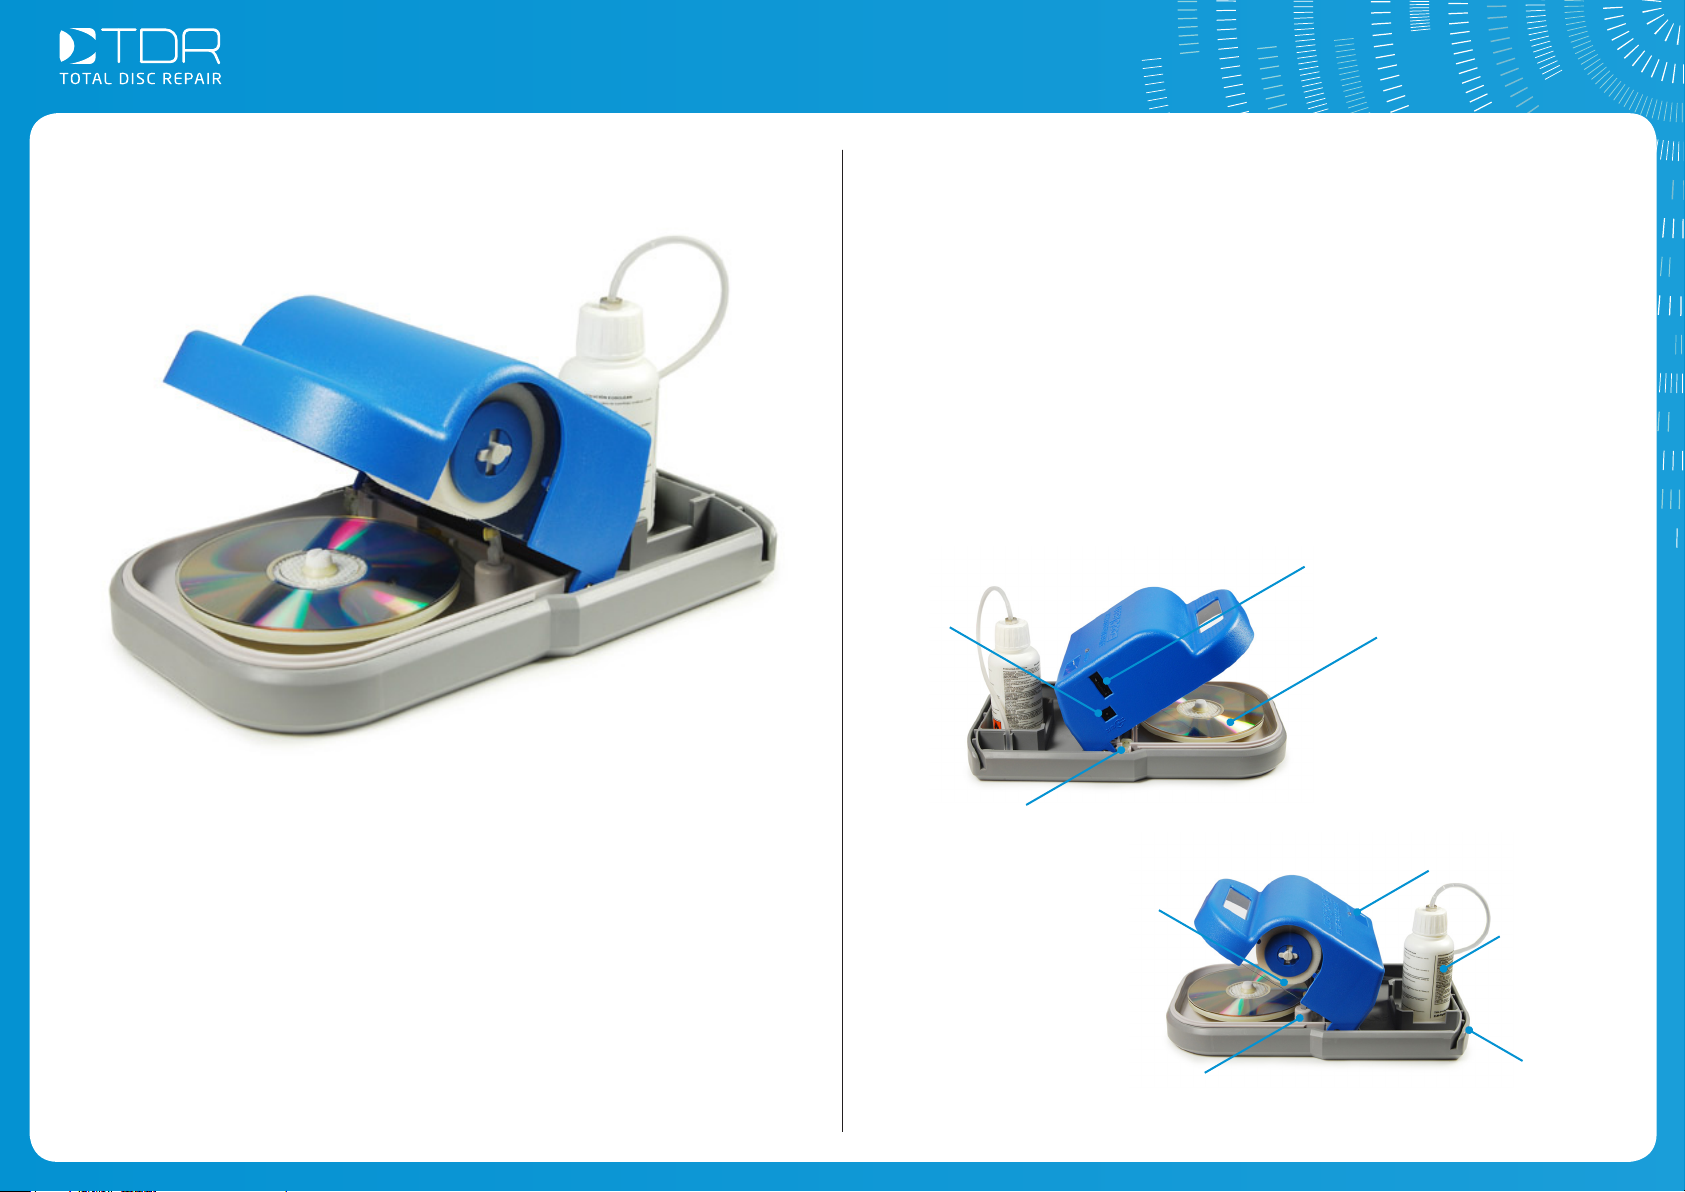
Parts of the machine
Keycard Slot
AC Power
Socket
Cleaning Fluid
Tube Connector
Cleaning
Roller
Turntable
Status LED
Cleaning
Solution
If you have any questions about the operation of this machine, you can call
our Technical Support Team, Mon-Fri, 9am-5pm on Freephone:
0800 412 5424
©Total Disc Repair | www.totaldiscrepair.co.uk | Technical Support: 0800 412 5424 - [email protected] | Sales: 01202 489 500 - [email protected]
Cleaning Fluid
Spray Nozzle
Power Cable
Holder
Page 2
Installation Operation
1. Choose a suitable at working surface for the machine, with enough
room around the machine to work. Do not connect the power supply
until all other steps have been completed.
2. Remove the Eco Clean machine from the protective bag and peel o
the tape on the front of the lid. Then remove the polystyrene block
from between the lid and the turntable.
3. Remove the cap from the cleaning uid bottle and replace it with the
special cap with tubing connected to the machine. Check the tubing
reaches the bottom of the bottle. The bottle should now be placed in
the tray area at the back of the machine.
4. With the AC/DC Power Supply still disconnected.
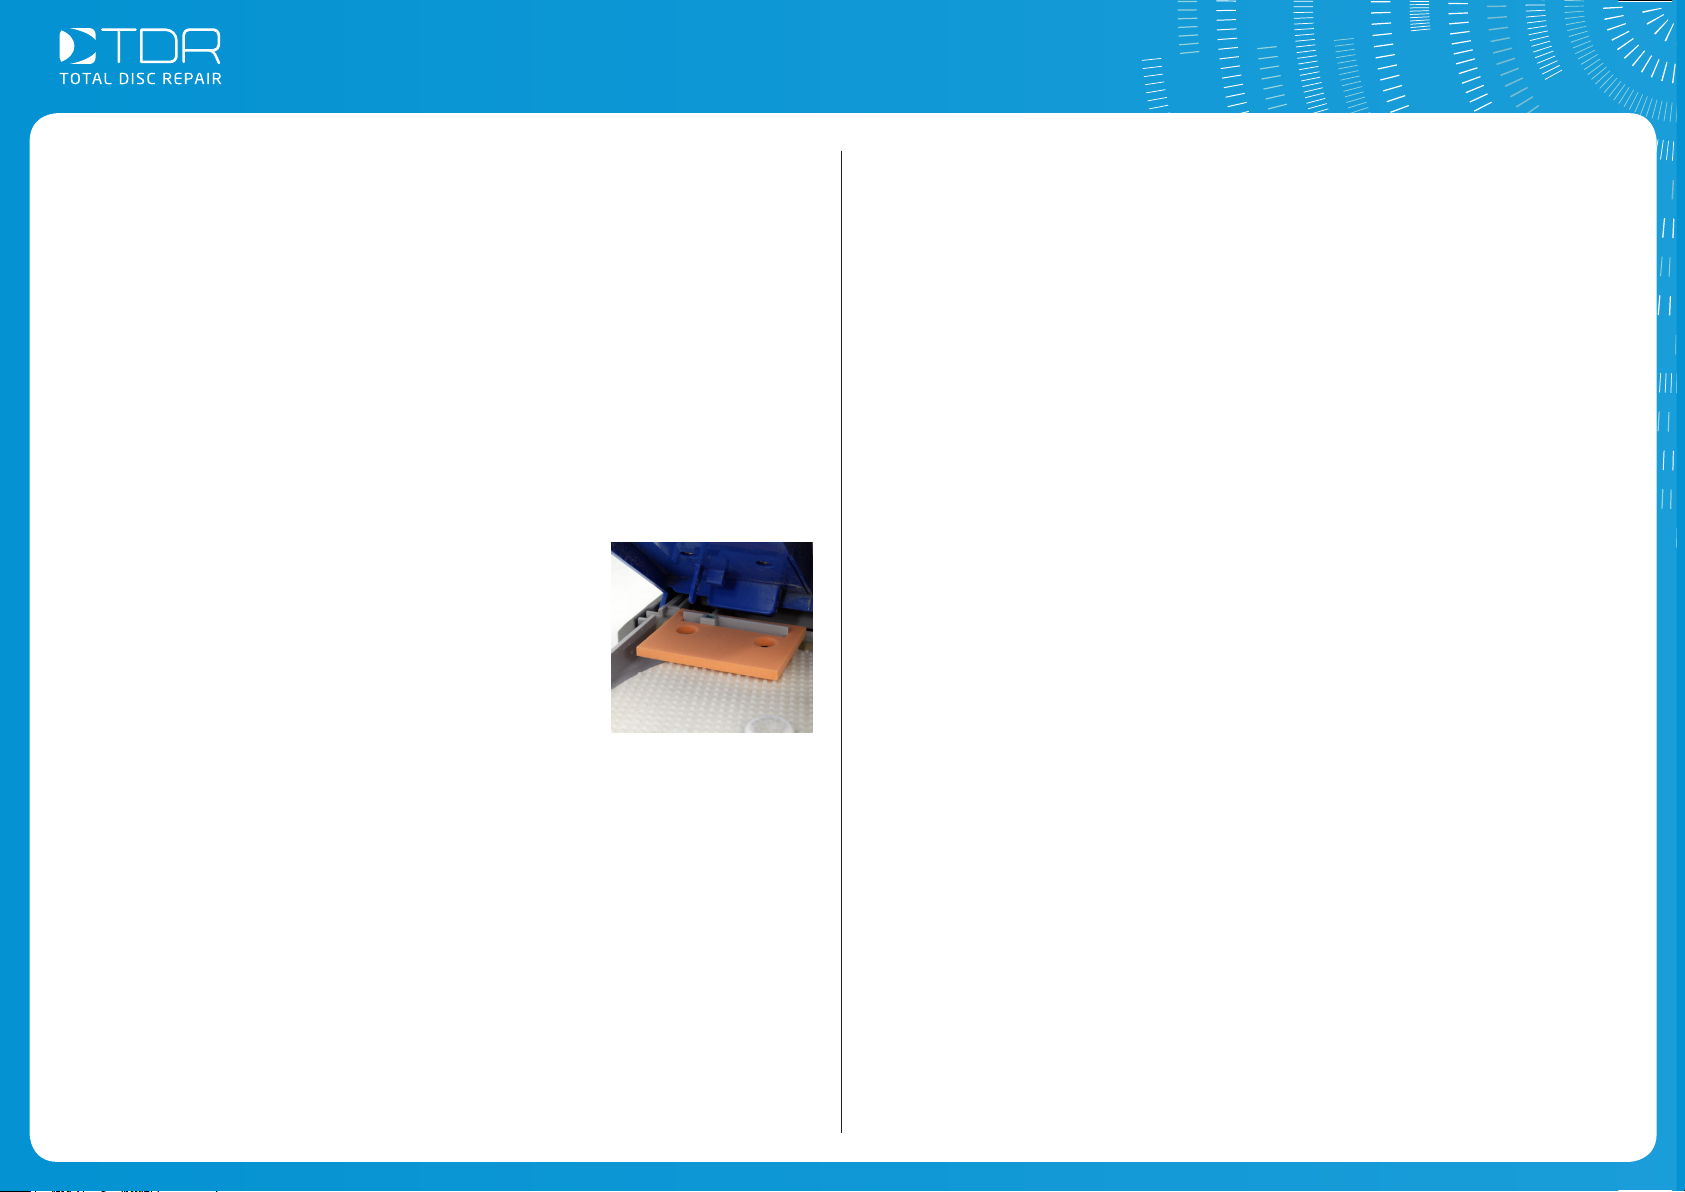
Prime the Cleaning Fluid tubes and Pump by rst
placing the priming assist foam over the slot in
the back. Then repeatedly open and close the
cover until cleaning uid is sprayed from the
nozzle onto the turntable. Then wipe the
turntable to remove any excess cleaning uid
and remove the priming assist foam tool.
5. The key card is already installed in the card slot on the side of the
machine so there is no need to touch it at this stage. The card will
activate the machine for 1000 disc cleans.
6. The Cleaning Roller is already installed in the machine so there is no
need to touch it at this stage. The Cleaning Roller is ready to be used
for 1000 disc cleans.
7. Finally unwrap the AC/DC Power Supply and the Cable for the AC/DC
Power Supply and connect it to the DC input on the side of the machine. Then plug into the mains and switch on.
1. First place the disc to be cleaned on the turntable with the shiny side
up and the label side down.
2. To operate the machine just close the lid and the Eco Clean begins
cycle automatically, keep holding the lid down.
3. Initially the LED turns red then after just 2 or 3 seconds the led will
turn orange indicating the cleaning process is nished.
4. Immediately release the lid to remove a completely clean and dry disc.
LED status indicator
With the machine idle:
Continuously Green = Ready for cleaning
Flashing Red and Amber = Invalid key card inserted
Continuously Amber = No key card inserted
Flashing Green = 3001 - 3000 cleans remaining
Flashing Amber = 1001 - 2000 cleans remaining
Flashing Red = 1 - 1000 cleans remaining
Flashing Red, Amber and Green = No cleans remaining
With the machine running:
Continuously Red = Cleaning in progress
Continuously Amber = Cleaning complete
Flashing Red = Motor overloaded
8. The LED should be green indicating that your Eco Clean is now ready
to use!
©Total Disc Repair | www.totaldiscrepair.co.uk | Technical Support: 0800 412 5424 - [email protected] | Sales: 01202 489 500 - [email protected] ©Total Disc Repair | www.totaldiscrepair.co.uk | Technical Support: 0800 412 5424 - support@totaldiscrepair.co.uk | Sales: 01202 489 500 - sales@totaldiscrepair.co.uk
Page 3

Installing replacement consumables Operating hints and care advice
Replacing the key card:
1. Make sure the power supply is disconnected. The key card can be
removed by gently pressing down on the small tab on the top of the
card whilst pulling it out of the card slot.
2. When inserting the new card the label side of the key card should face
the front and it should be inserted in the direction of the arrow on the
card. This will activate the machine for 1000 more disc cleans.
Removing and replacing the cleaning roller and cleaning bottle:
1. Remove the clear plastic safety cover by pushing it outwards and
pulling down as illustrated.
2. Remove the roller retaining disc by holding the roller and rotating the
disc 90 degrees.
3. Remove the used roller from the shaft.
4. Slide the new roller onto the shaft making sure that it is all the way on.
5. Replace the roller retaining disc by holding the roller and rotating the
disc 90 degrees.
• After several cycles, some uid may accumulate in the machine. If this
happens, wipe the disc cleaning camber with a dry and soft cloth.
• Some residue may appear on hard coated discs after cleaning. With such
discs simply hold the cover down for a few seconds longer after the led
turns to orange to remove the residue by dry bung.
• Dust or dirt could contaminate the cleaning roller which may cause light
scratches. If the Cleaning Roller is dirty, it should be washed or replaced.
• When necessary, remove the Cleaning Roller from the machine and clean
it in a mild detergent. Be sure that it is completely dry before using the
Roller again.
• Disconnect the power supply before inserting or removing the key card
Failure to do this will cause the key card to fail.
• If the machine has not been used for some time conrm that Cleaning
Fluid ows out from the spray nozzle by closing and opening the cover
with the power supply disconnected.
• Do not close the Cover with the power connected unless you are cleaning
a disc. Damage could be caused to the cleaning roller and the number of
disc cleans in the programmed key card would be reduced.
6. Replace the clear plastic safety cover by inserting the top rst and
pushing into place.
7. Replacing the cleaning bottle and prime as described in the installation
section.
8. Reconnect the power supply and your EcoClean is ready for a further
1000 cleans.
©Total Disc Repair | www.totaldiscrepair.co.uk | Technical Support: 0800 412 5424 - [email protected] | Sales: 01202 489 500 - [email protected]
• When you have nished cleaning discs for the day, we recommend that
you disconnect the power supply from the wall outlet.
• If your EcoClean becomes dirty, clean it using a mild detergent and dry
it with a soft cloth. Do not use strong cleaners or solvents which could
damage the nish of the machine.
• If the EcoClean sits idle for a long period of time, the cleaning uid in
the tubes can evaporate. In this case, you will need to prime the uid
lines and the pump again.
 Loading...