

TCL TWC-15CR/UH (ES), TWC-18CR2/UH (ES), TWC-22CR2/UH (ES), TWC-24CR2/UH (ES) Operating Instructions Manual
Page 1

TWC-15CR/UH (ES)
TWC-18CR2/UH (ES)
TWC-22CR2/UH (ES)
TWC-24CR2/UH (ES)
Page 2

Page 3

INTRODUCTION
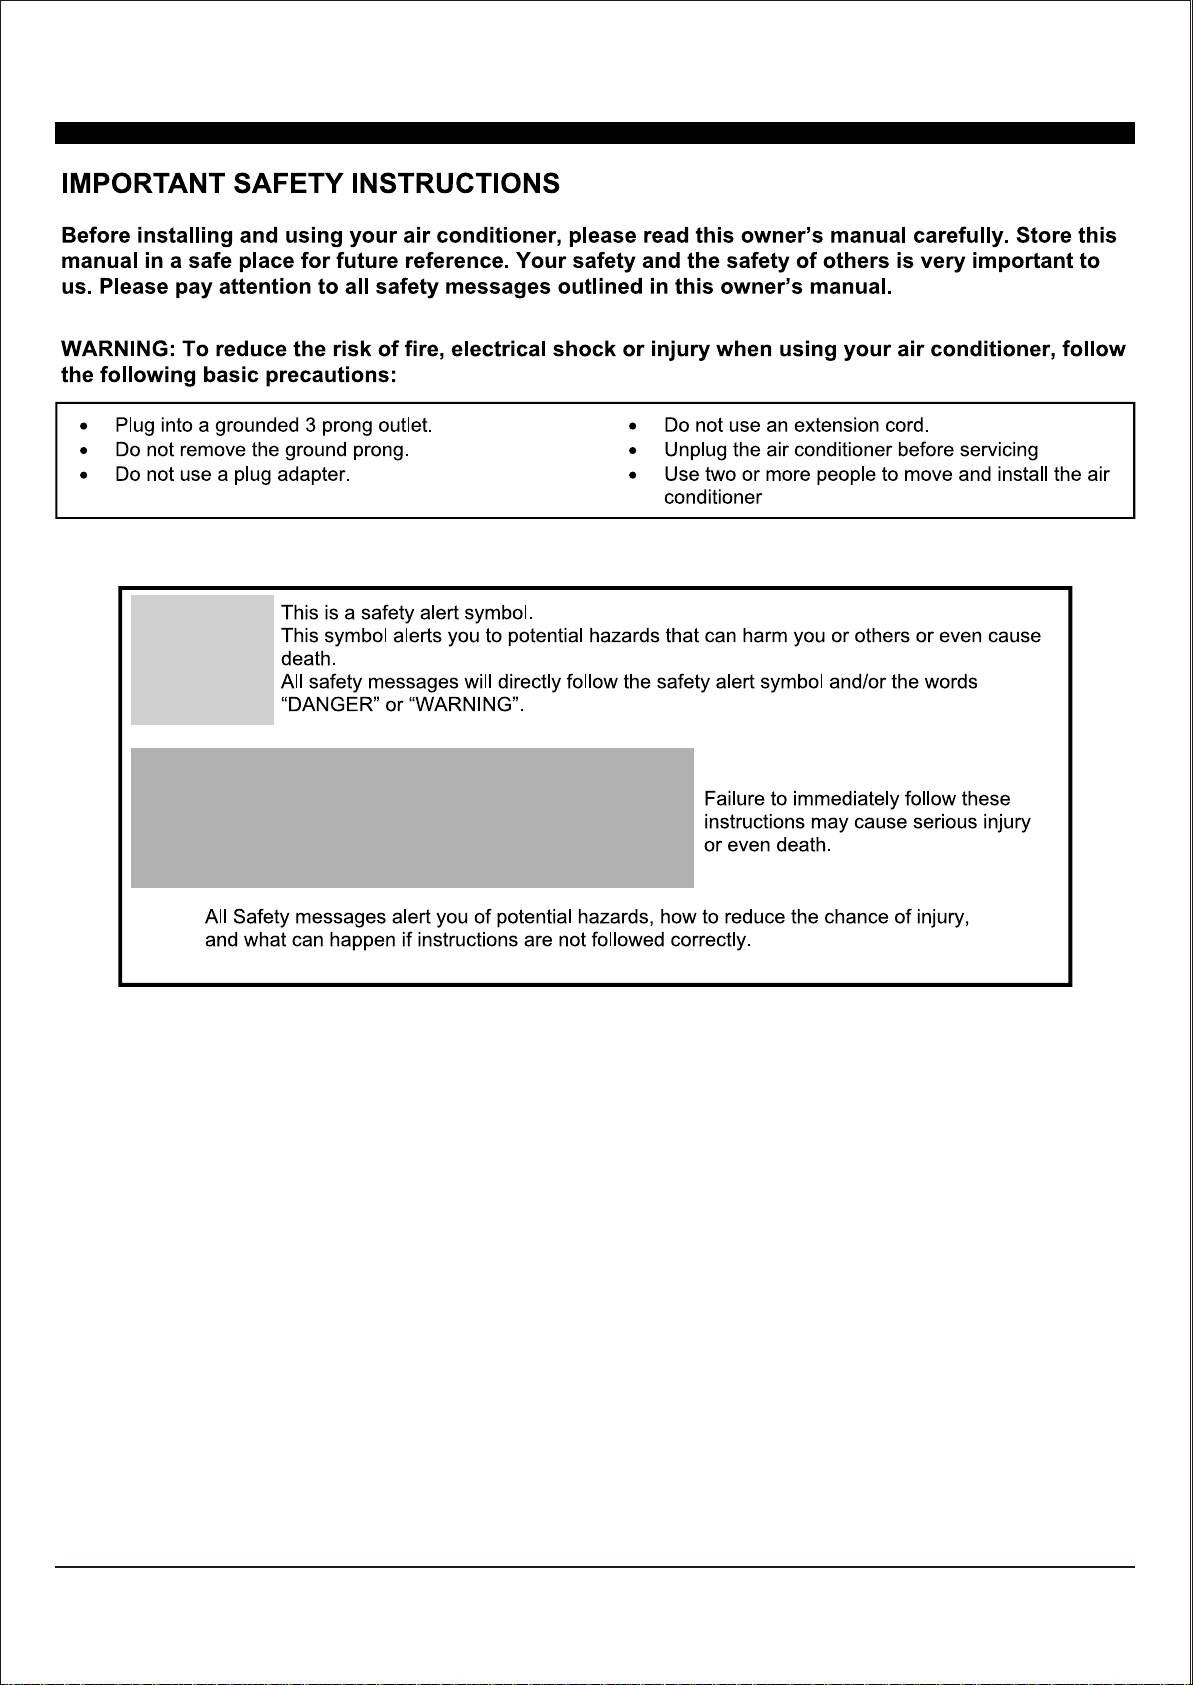
IMPORTANT SAFETY INSTRUCTION ...........................................................................
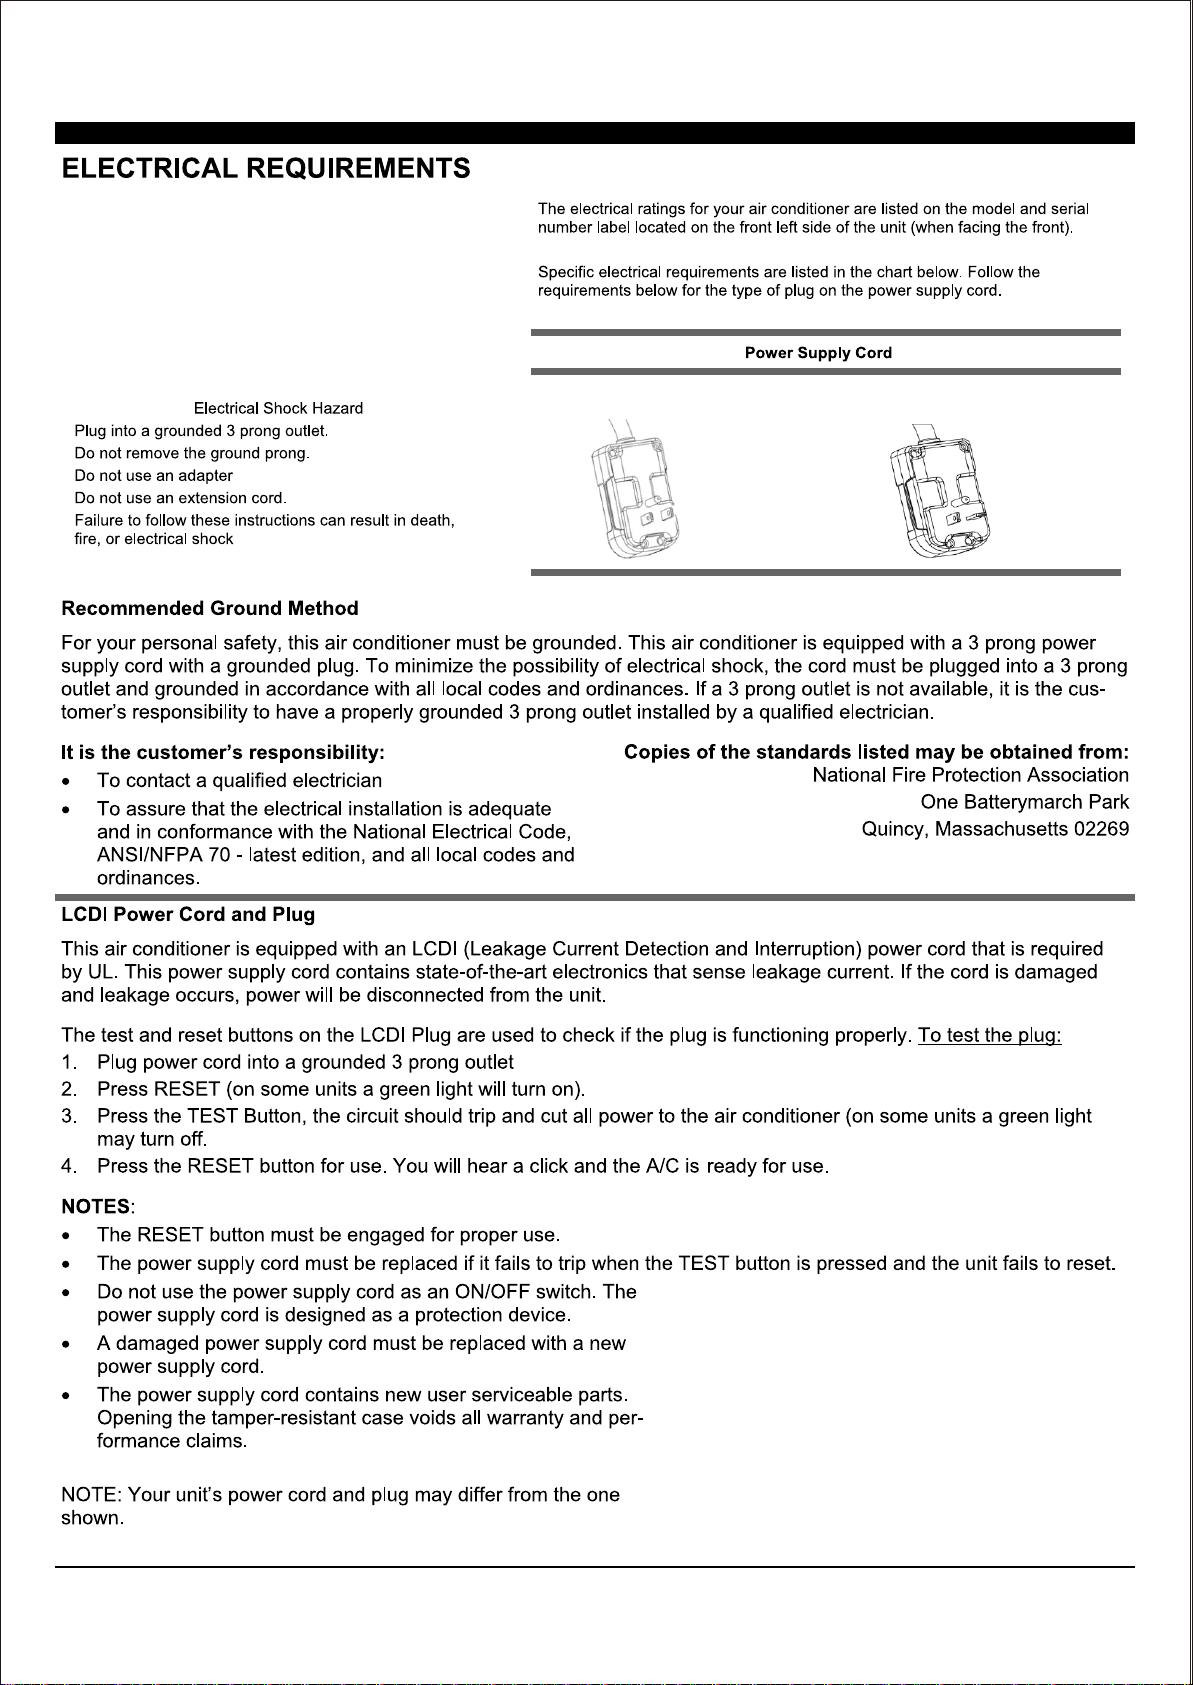
ELECTRICAL REQUIREMENTS
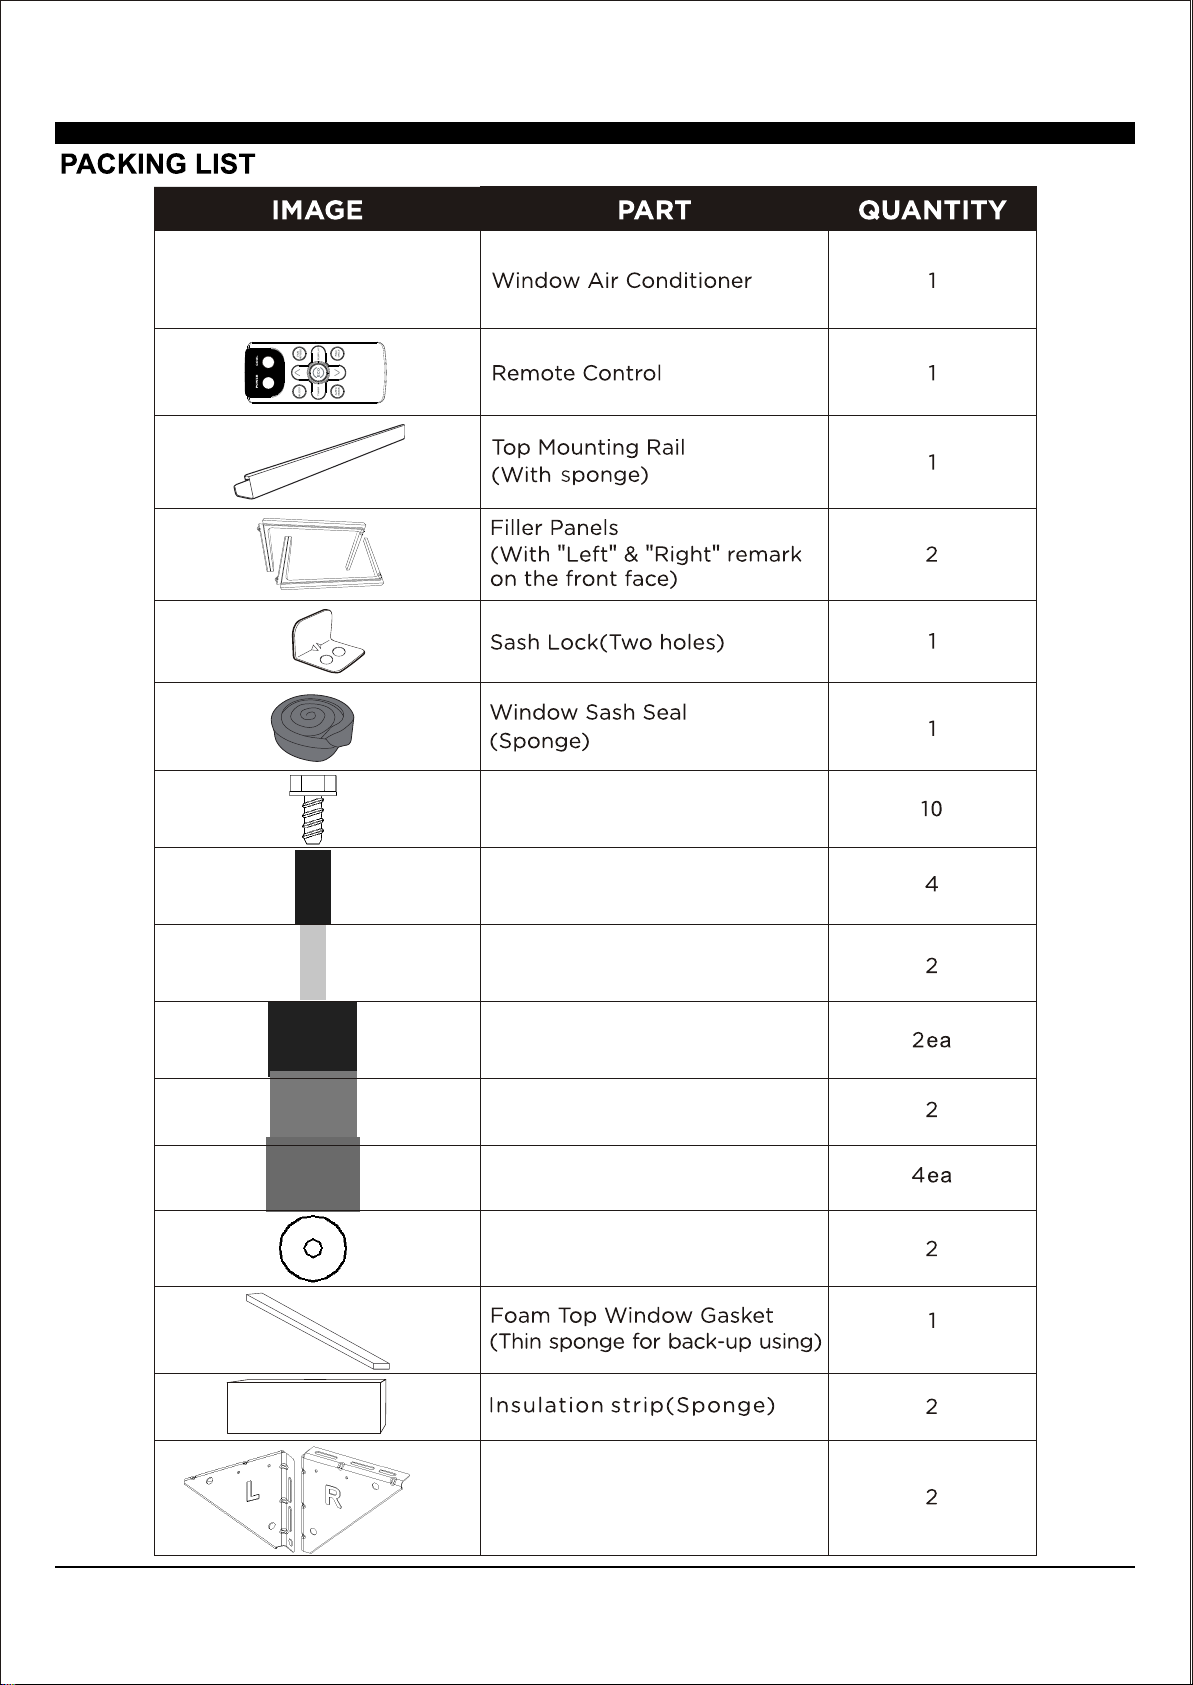
PACKING LIST ............................................................................................................
INSTALLATION & ASSEMBLY INSTRUCTIONS ..............................................................
USING YOUR AIR CONDITIONER ................................................................................
OPERATING YOUR AIR CONDITIONER
CARE AND CLEANING ................................................................................................
TROUBLESHOOTING .................................................................................................
...................................................................................
........................................................................
1
2
3
4
13
15
16
17
Page 4
1
Page 5
15K 18K/22K/24K
2
Page 6
5/16" Long Hex-head Screw
5/8" Long Hex-head Screw
1/2" Long Hex-head Screw
5/8" Long Flat Head Bolt and
Locknut
Sill Angel Bracket
1/2" Long Flat Head Bolt and
Locknut
Gasket
Support Bracket(with R and L
remark)
3
Page 7
15K/18K
17.91 18.625
23.625 26.50
19.00 19.50
28.00 30.00
41.00 41.00
4
22K/24K
Page 8

(15K/18K See FIG.1/FIG.2 ; 22K/24K See FIG.3/FIG.4).
FIG.1
FIG.3
SASH
19 MIN
1/2 MIN
Storm Window Frame or Obstruction
SASH
19 1/2 MIN
1/2 MIN
FIG.2
1/2 MIN
Storm Window Frame
or Obstruction
1/2 MIN
FIG.4
1/2 MIN
1/2 MIN
SASH
19 MIN
SASH
19 1/2 MIN
Storm Window Frame or Obstruction
Storm Window Frame
or Obstruction
5
Page 9
FIG.5
FIG.6
FIG.5
FIG.7
FIG.7 & 8
FIG.6
FIG.9
FIG.9
FIG.8
6
Page 10

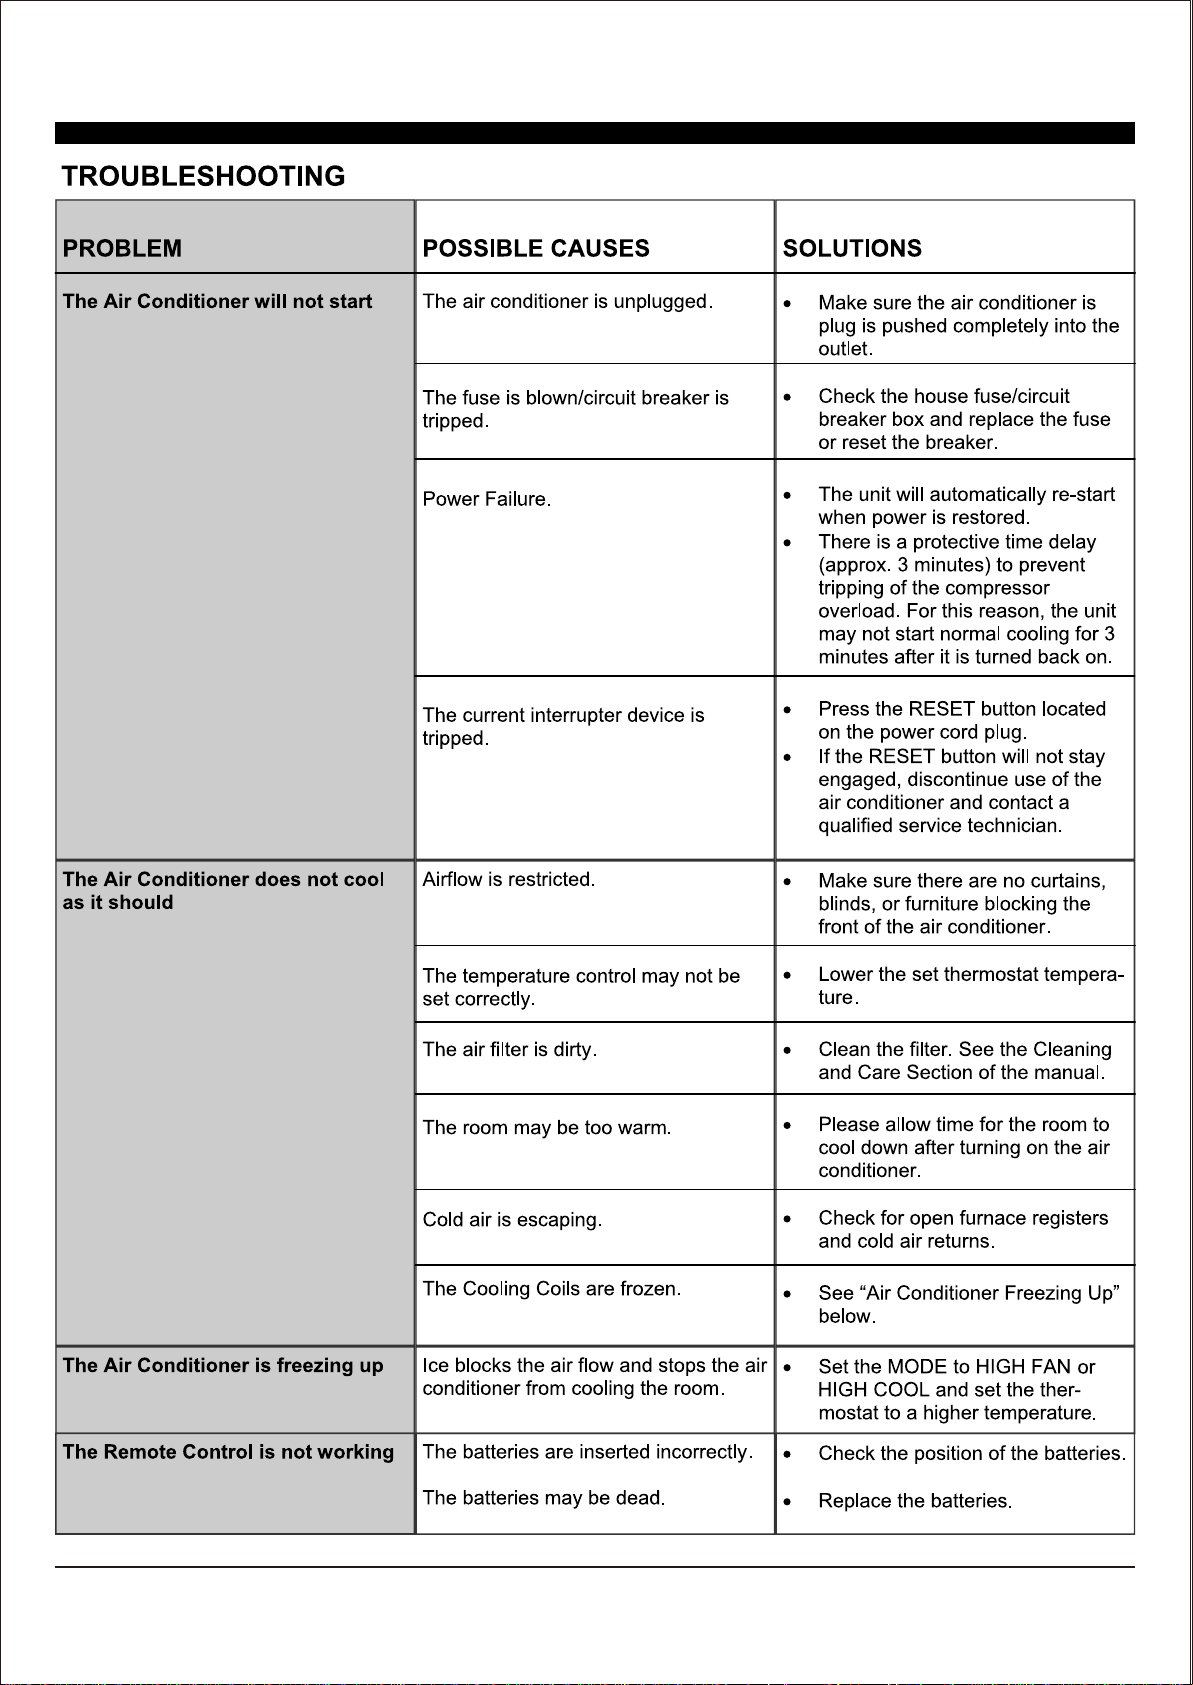
6.Remove the six screws from the cabinet.( ) (FIG.10)There are two screws on the top, left and right.
FIG.10
FIG.11
FIG.11
Do not
pull or
lift in
this
area
This may
result in
damage.
8. (FIG.12).Remove the shipping block for the 24K
FIG.12
7
Page 11
5/16
Long
Hex-head
Screw
FIG.13a
FIG.13a
(FIG.13b-14).
FIG.13b
5/16" Long
Hex-head Screw
FIG.14
()It is suggested to keep a downward angle so
accumulated rain water can drain out from the
backside of the unit.
8
Page 12
(It should set on the gasket for 22K/24K)
Long Flat head
Bolt and Locknut
5/8" Long Flat Head Bolt
5
Long
Flat head Bolt
and Locknut
5/8" Long
Hex-head Screw
Gasket
5/8" Long
Hex-head Screw
1/2" Long
Hex-head Screw
9
Page 13

sash lock
Sash Lock
5/8" Long
Hex-head Screw
FIG.15
10
Page 14
15K/18K
22K/24K
18 1/4 (46.4 cm)
23 7/8 (60.6 cm)
19 1/2 (49.5 cm)
26 9/10 (68.3 cm)
FIG.16
Y
(Page 6 and 7)
11
FIG.17
FIG.18
Page 15
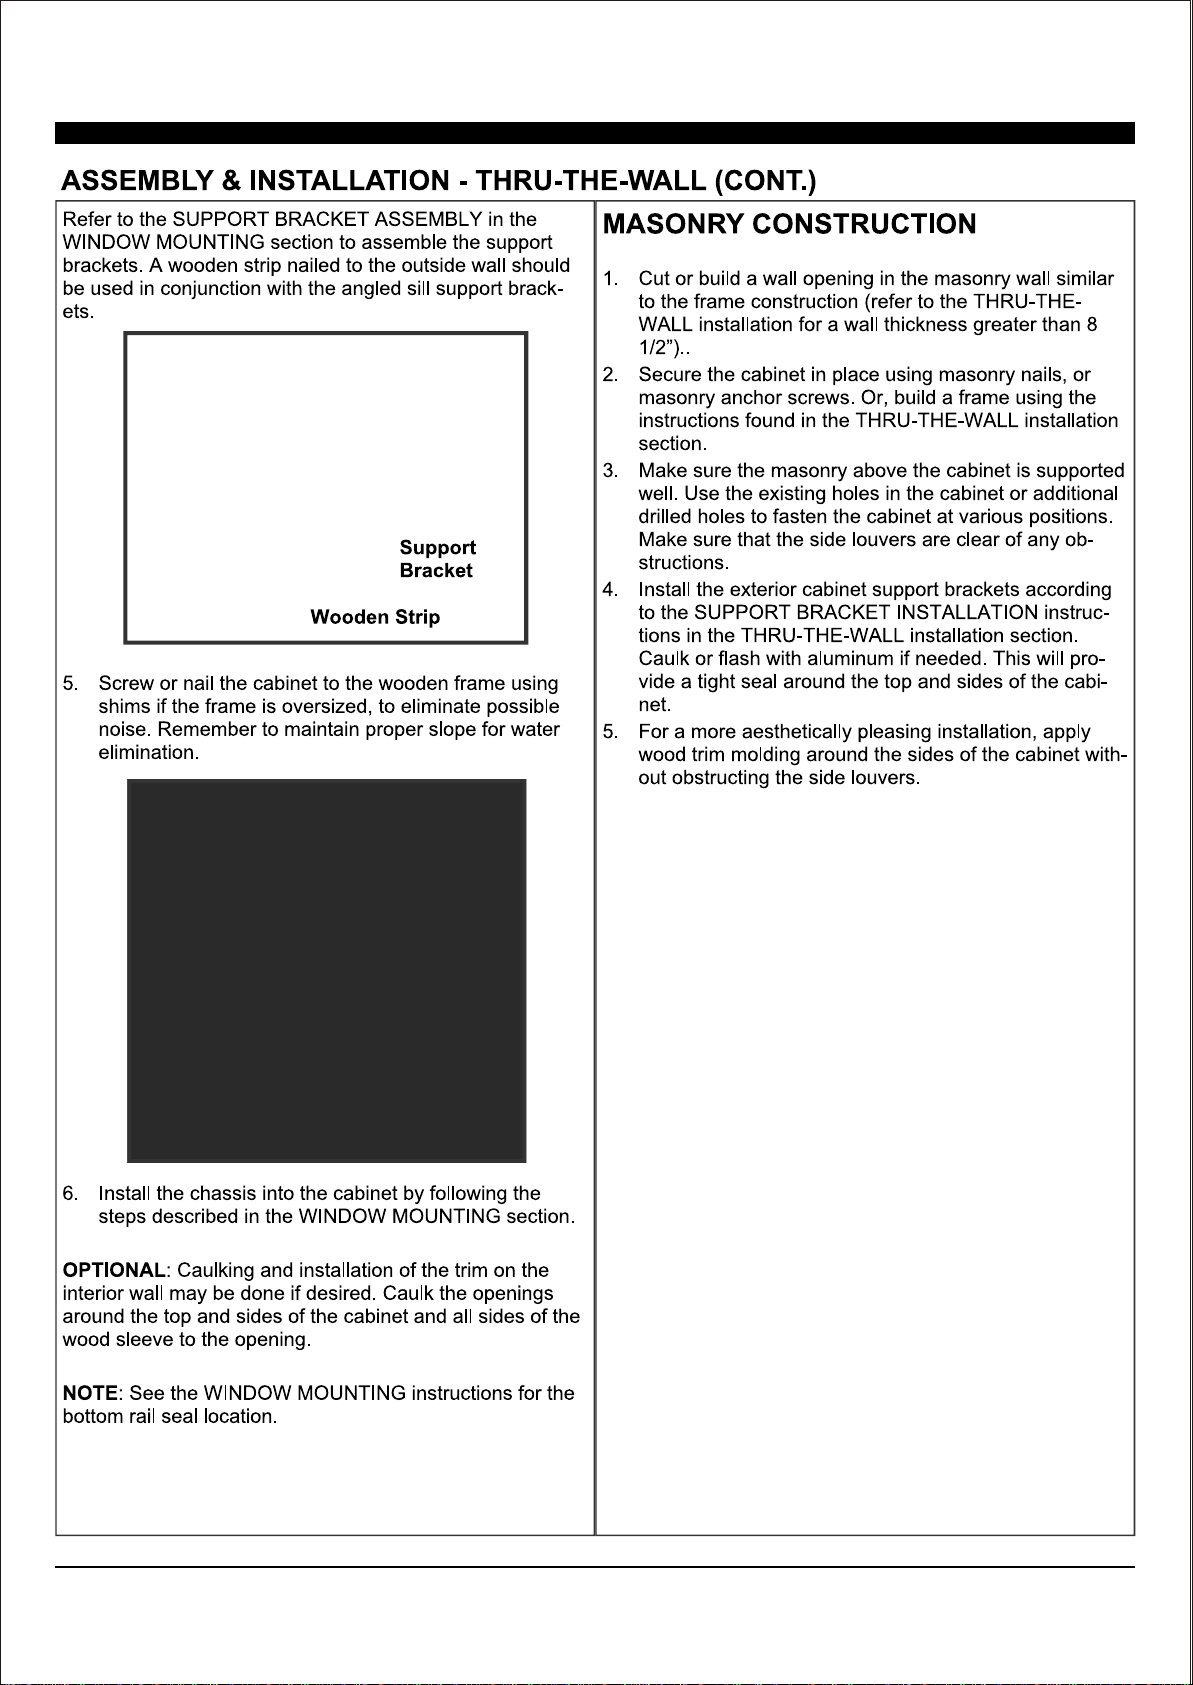
FIG.19
FIG.20
12
Page 16

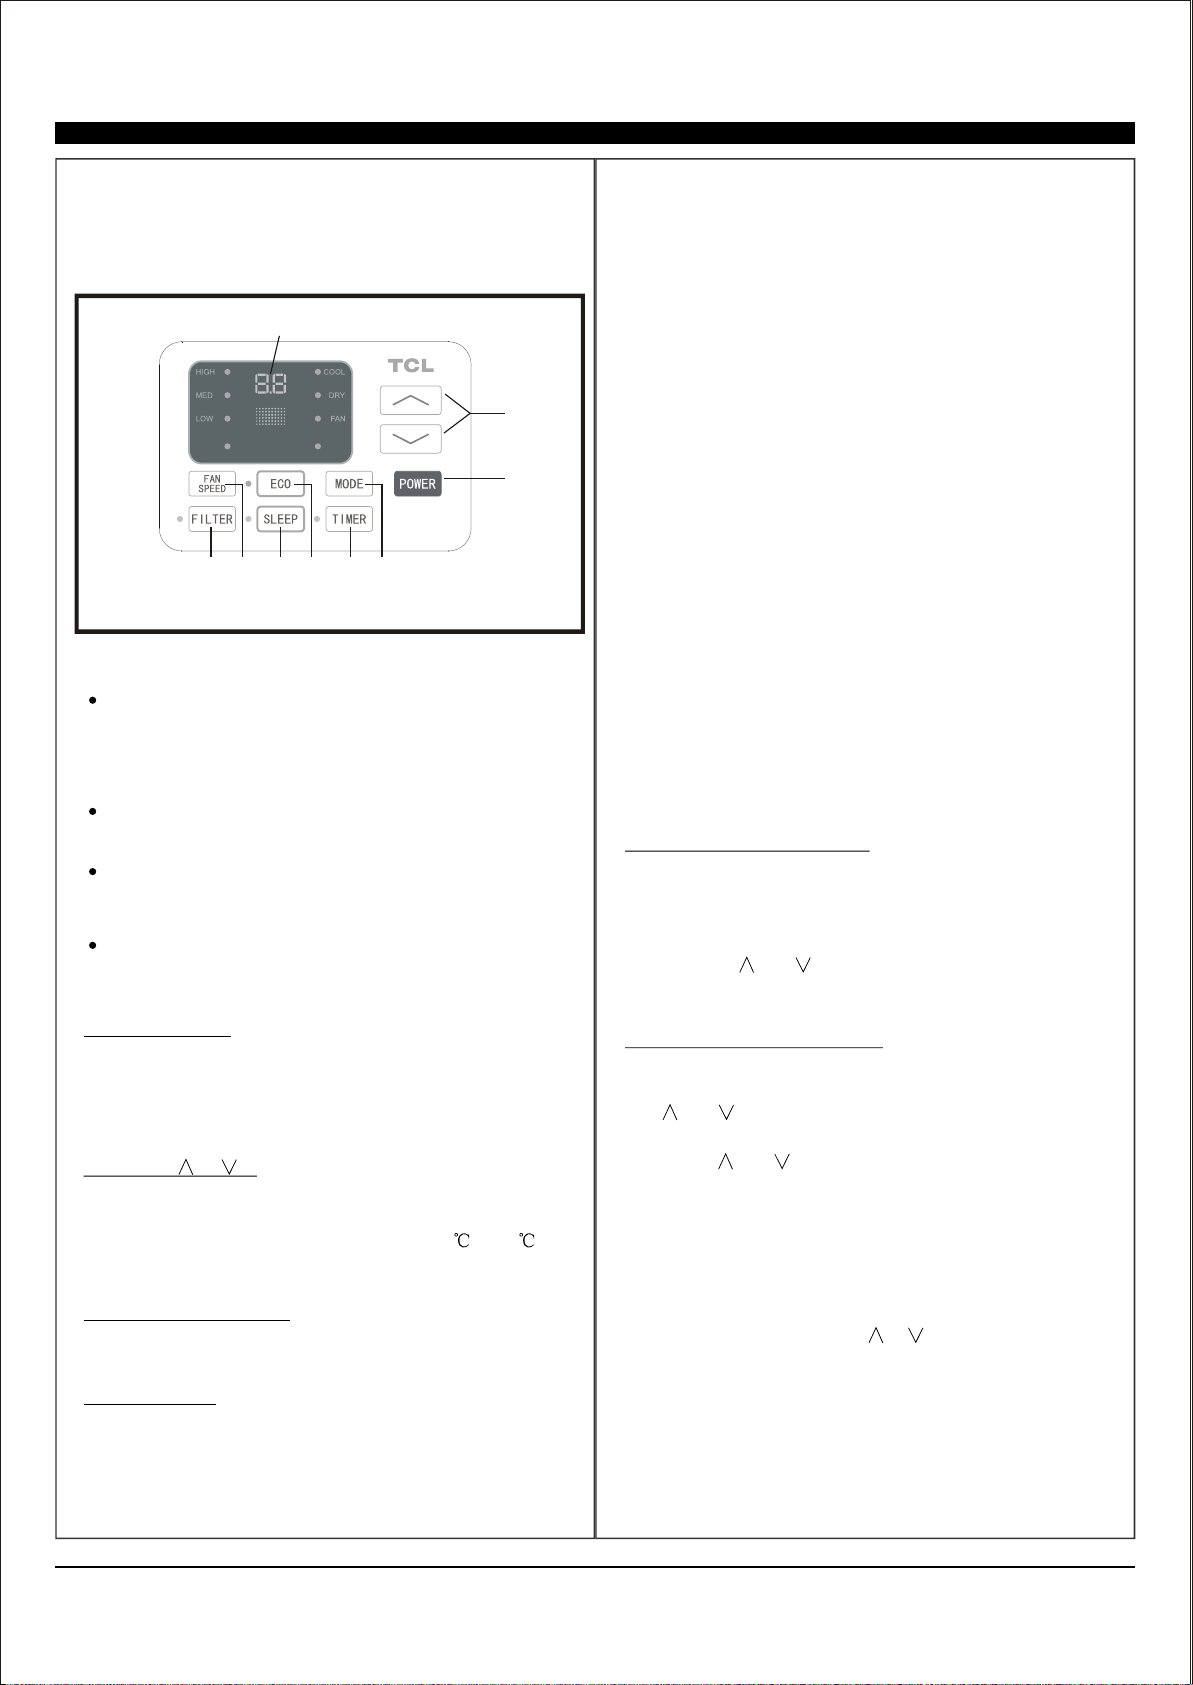
1
2
AUTO
SPEED
AUTO
MODE
3
9
1. Without timer setting,the
Digital Display:
7
8
operation mode is Cooling,Dry, Fan and Auto,and
the set temperature will be displayed.
Time will be displayed under timer setting.
and Button:2. Use these buttons on the
control panel and remote to increase or decrease
the Set Temperature or Timer.
Temperature range: 61 ~88 or 16 ~31 .
3. Turn the air conditioner on and
Power Button:
off.
Press the mode button to cycle
4. Mode Button:
through the various modes: Cool, Dry, Fan and
Auto.
5
6
4
Cool Mode: The cooling function allows the air
conditioner to cool the room and at the same time
reduces Air . Press the MODE button to
humidity
activate the cooling function. To optimize the
function of the air conditioner, adjust the
temperature and the speed by pressing the button
indicated.
Dry Mode: This function reduces the humidity of
the air to make the room more comfortable. Press
MODE button to set the DRY mode. An automatic
function of alternating cooling cycles and air fan
is activated.
Fan Mode: The conditioner works in only
ventilation. Press MODE button to set the FAN
mode. With pressing FAN SPEED button the
speed changes in the following sequence: Hi, Med
and Lo in FAN mode. The remote control also
stories the speed that was set in the previous
mode of operation.
Auto Mode: In AUTO mode the unit automatically
chooses the fan speed and the mode of operation
(COOL,DRY or FAN).In this mode the fan speed
and the temperature are set automatically
according to the room temperature (tested by the
temperature sensor which is incorporated in the
indoor unit.).
5. Timer Button:
Use these buttons on the control
panel and remote to set the Timer.
Timer Off: The timed stop is programmed by
pressing TIMER button. Set the rest time by
pressing the button or until the rest
time displayed is to your demand then press
TIMER button again.
Timer On: When the unit is off, press TIMER
button at the first time, set the temperature with
pressing the button or . Press TIMER
button at the second time, set the rest time with
pressing the button or . Press TIMER
button at the third time, confirm the setting,
will automatically switch on and show on the
display.
Note: It can be set to automatically turn off or on
in 0.5-24 hours. Each press of the
buttons will increase or decrease the timer. The
Timer can be set in 0.5 hours increment below 10
hours and 1 hour increment for 10 hours or above.
The SET light will turn on while setting.
To cancel the set function, press the TIMER
button again.
then it
13
Page 17
When the unit is in ECO mode, the
6. Eco Button:
light will turn on. In ECO mode, the unit will
turn off once the room is cooled to the user set
temperature. The fan will also be off at this point.
The unit will turn back on when the room
temperature rises above the user set temperature.
Before the compressor starts, the fan motor will
run for a while, then it will stop for a while, and will
repeat to provide a much more comfortable feeling
and save energy.
Press the SLEEP button, the Sleep
7. Sleep Button:
Light will be on , and
display lights will turn off.
for 10 seconds then all of the
In SLEEP mode, the airconditioner will automatically adjust the temperature and fan speed to make the room more comfortable during the night. The set temperature will
automatically raise by 1 every 30-60 minutes
.8
and at most change six times until the set
temperature is .
82.4
10.
To direct the airflow,
Directional Louvers:
use the
direction, control the
horizontal wheel to control the horizontal
and use the air deflectors to
vertical direction.
horizontal wheelair deflector air deflector
Press the FAN SPEED button
8. Fan Speed Button:
to choose the fan speed options. You can choose
Hi, Med, Lo or auto speed in COOL mode and
choose Hi, Med, Lo in FAN mode.
9.
When the Filter Check light is off,
Filter Button:
it is useless to press the Filter Check button. When
the Filter Check light is on, it can turn off the light
by pressing the Filter Check button. After the
fan motor works for 500 total hours, the Filter
Check light will turn on to remind the user to clean
the filter.
14
Page 18
1
3
4
5
6
3
2
7
8
9
10
Use these buttons on the control panel
5. Timer:
and remote to set the Timer.
Timer Off: The timed stop is programmed by
pressing TIMER button. Set the rest time by
pressing the button or until the rest
time displayed is to your demand then press
TIMER button again.
Timer On: When the unit is off, press TIMER
button at the first time, set the temperature with
pressing the button or . Press TIMER
button at the second time, set the rest time with
pressing the button or . Press TIMER
button at the third time, confirm the setting, then
the rest time to next automatical switching-on
could be read on the display of the machine.
Note: It can be set to automatically turn off or on
in 0.5-24 hours. Each press of the
buttons will increase or decrease the timer. The
Timer can be set in 0.5 hours increment below
10 hours and 1 hour increment for 10 hours or
above. The SET light will turn on while setting.
To cancel the set function, press the TIMER
button again.
1. Turn the air conditioner on and off.Power:
2. Press the COOL button to COOL mode.Cool:
and :3. Use these buttons on the control
panel and remote to increase or decrease the
Set Temperature or Timer . T emperature range:
61 ~88 or 16 ~31 .
Press the SLEEP button, the Sleep
4. Sleep:
Light will be on , and
display lights will turn off.
conditioner will automatically adjust the temperature and fan speed to make the room more comfortable during the night. The set temperature will
automatically raise by 1 every 30-60 minutes
and at most change six times until the set
temperature is .
for 10 seconds then all of the
In SLEEP mode, the air-
.8
82.4
In AUTO mode the unit automatically
6. Auto Mode:
chooses the fan speed and the mode of operation
(COOL,DRY or FAN).In this mode the fan speed
and the temperature are set automatically according
to the room temperature (tested by the temperature
sensor which is incorporated in the indoor unit.).
Press the FAN SPEED button to
7. Fan Speed:
choose the fan speed options. You can choose
Hi, Med, Lo or auto speed in COOL mode and
choose Hi, Med, Lo in FAN mode.
To press the DISPLAY button, it can
8. Display:
switch off/on all lights or LED display.
When the unit is in ECO mode, the light
9.
Eco:
will turn on. In ECO mode, the unit will turn off
once the room is cooled to the user set
temperature. The fan will also be off at this
point. The unit will turn back on when the room
temperature rises above the user set
temperature.Before the compressor starts, the fan
motor will run for a while, then it will stop for a while,
and will repeat to provide a much more comfortable
feeling and save energy.
15
Fan Only:
Press the Fan Only button to FAN
10.
ONLY mode.
Page 19
FIG.21
FIG.21
16
Page 20
17
Page 21
18
Page 22

http://tclusa.com
Page 23

Modelos
TWC-15CR/UH (ES)
TWC-18CR2/UH (ES)
TWC-22CR2/UH (ES)
TWC-24CR2/UH (ES)
Acondicionador de aire de ventana electr nica
Instrucciones de funcionamiento
Page 24

Page 25

INSTRUCCIÓN
INSTRUCCIÓN DE SEGURIDAD IMPORTANTE
REQUISITOS ELÉCTRICOS
LISTA DE EMBALAJE
INSTRUCCIONES DE INSTALACIÓN Y MONTAJE
USANDO SU ACONDICIONADOR DE AIRE
FUNCIONAMIENTO DE SU ACONDICIONADOR DE AIRE
CUIDADO Y LIMPIEZA
SOLUCIÓN A PROBLEMAS
....................................................................................................
.................................................................................................
.........................................................................................
..........................................................................................
.............................................................
..........................................................
....................................................................
..............................................
1
2
3
4
13
15
16
17
Page 26

INSTRUCCIONES IMPORTANTES DE SEGURIDAD
Antes de instalar y usar su acondicionador de aire, por favor lea cuidadosamente este manual del
propietario. Guarde este manual en un lugar seguro para futuras consultas. Su seguridad y la
seguridad de los demás son muy importantes para nosotros. Por favor preste atención a todos los
mensajes de seguridad descritos en este manual del propietario.
ADEVETENCIA: Para reducir el riesgo de incendio, choque eléctrico o lesiones al usar su
acondicionador de aire, siga las siguientes precauciones básicas:
Enchúfelo en un tomacorriente de 3 terminales con
conexión a tierra.
No retire la clavija de tierra.
No utilice un adaptador de enchufe.
Este es un símbolo de alerta de seguridad.
Este símbolo le alerta sobre posibles peligros que pueden perjudicarle a usted o
a otros o incluso causar la muerte.
Todos los mensajes de seguridad seguirán directamente el símbolo de alerta de
seguridad y/o las palabras "peligro" o "ADVERTENCIA".
Todos los mensajes de seguridad le alertan de los peligros potenciales, cómo reducir la
posibilidad de lesiones, y lo que puede suceder si no se siguen las instrucciones
correctamente.
No utilice un alargador.
Desconecte el acondicionador de aire antes de
dar servicio.
Utilice dos o más personas para mover e instalar
el acondicionador de aire
No seguir inmediatamente estas
instrucciones puede causar
lesiones graves o incluso la muerte.
1
Page 27

REQUISITOS EL?CTRICOS
Las clasificaciones eléctricas para su acondicionador de aire se enumeran
en la etiqueta del número de modelo y de serie situada en el lado delantero
izquierdo de la unidad (al frente).
Los requisitos eléctricos específicos se enumeran en la tabla abajo. Siga
los siguientes los requisitos para el tipo de enchufe del cable de
alimentación.
Cable eléctrico
Peligro de Choque Eléctrico
conectada a un tomacorriente de 3 terminales con conexión
a tierra.
No retire la clavija de tierra.
Do not use an adapter
No utilice un alargador.
No seguir estas instrucciones puede resultar en muerte,
incendio o descarga eléctrica
15K 18K/22K/24K
Método de la Conexión a tierra recomendado
Para su seguridad personal, este acondicionador de aire debe estar conectado a tierra. Este acondicionador de aire está
equipado con un cable de alimentación de 3 puntas con un enchufe conectado a tierra. Para minimizar la posibilidad de
una descarga eléctrica, el cable debe enchufarse en un tomacorriente de 3 clavijas y conectarse a tierra de acuerdo con
todos los códigos y ordenanzas locales. Si un tomacorriente de 3 clavijas no está disponible, es responsabilidad del cliente
tener un tomacorriente de 3 clavijas debidamente conectado a tierra instalado por un electricista calificado.
Es responsabilidad del cliente: Las copias de las normas enumeradas pueden obtenerse de:
Para contactar a un electricista calificado.
Para asegurar que la instalación eléctrica es
adecuada y en conformidad con el código eléctrico
Asociación Nacional de protección contra incendios
Un Parque de batterymarch
Quincy, Massachusetts 02269
nacional, ANSI/NFPA 70-última edición, y todos los
códigos y ordenanzas locales.
Cable de alimentación y enchufe de LCDI
Este acondicionador de aire está equipado con un cable de alimentación de LCDI (detección e interrupción de la corriente
de fuga) requerido por UL. Este cable de alimentación contiene una electrónica de última generación que detecta la
corriente de fuga. Si el cable está dañado y se produce una fuga, se desconectará la alimentación de la unidad.
Los botones de prueba y restablecimiento del enchufe LCDI se utilizan para comprobar si el enchufe funciona correctamente.
Para probar el enchufe:
1. Enchufe el cable de alimentación en un tomacorriente de 3 clavijas con conexión a tierra.
2. Presione RESET (en algunas unidades se encenderá una luz verde).
3. Presione el botón de PRUEBA, el circuito debe disparar y cortar toda la energía al acondicionador de aire (en algunas
unidades una luz verde puede apagarse.
4. Pulse el botón RESET para utilizarlo. Oirá un clic y el A/C no está listo para su uso.
NOTAS:
El botón de reinicio debe estar enganchado para un uso adecuado.
El cable de alimentación debe ser sustituido si no se dispara cuando se presiona el botón de prueba y la unidad no se
reinicia.
No utilice el cable de alimentación como interruptor de encendido/apagado.
El cable de alimentación está diseñado como un dispositivo de
protección.
Un cable de alimentación dañado debe ser sustituido por un nuevo
cable de alimentación.
El cable de alimentación contiene nuevas piezas que se deben reparar
al usuario. La apertura del estuche resistente a la manipulación anula
todas las reclamaciones de garantía y rendimiento.
Nota: el cable de alimentación y el enchufe de su unidad pueden diferir del
que se muestra.
A.Botón REINICIAR
B.Botón PRUEBA
2
Page 28

LISTA DE EMBALAJE
IMAGEN PARTE CANTIDAD
Acondicionador de aire
de ventana
Control remoto
Carril de montaje superior
(con la esponja)
Paneles de relleno
(con la observación "izquierda" y
“derecha" en la cara frontal)
Cerradura del marco
(dos agujeros)
Sello del marco de la ventana
(esponja)
5/16 "Tornillo largo de
hexágono - cabeza
5/8" Tornillo largo de
hexágono - cabeza
1/2" Tornillo largo de
hexágono - cabeza
5/8" Perno de cabeza plana y
contratuerca largos
Soporte del ángel del travesaño
1/2" Perno de cabeza plana y
contratuerca largos
Empaque
Junta superior de la ventana de la
espuma (esta esponja se usa
como respaldo)
Tira del aislamiento (esponja)
Soporte (con la observación
de R y de L)
3
Page 29

Denegación de responsabilidad
oda la información y las especificaciones técnicas
presentadas en este manual de usuario son la
presentación del fabricante.
Evite el peligro de incendio o la
descarga eléctrica. No utilice un alargador o un
enchufe adaptador. No retire ninguna clavija del
cable de alimentación.
Tipo de conexión a tierra receptáculo
de pared
No corte, quite ni desvíe
la clavija de conexión a
tierra bajo ninguna
circunstancia.
Cable de alimentación con
enchufe de conexión a tierra
de 3 clavijas y dispositivo de
detección de corriente.
Instrucciones de Instalación y Montaje
IPreparación de la ventana
Por favor lea todas las instrucciones antes de instalar su acondicionador de aire. Se recomienda a dos personas instalar
este producto. Si se requiere una nueva toma de corriente eléctrica, instale la toma de corriente por un electricista
calificado antes de instalar la unidad.
Antes de instalar la unidad, verifique las dimensiones de su ventana para asegurarse de que el acondicionador de aire se
adapte. Esta unidad se hace para caber dentro de una ventana doble-colgada estándar. Asegúrese de que la ventana
esté en buen estado y que pueda sujetar firmemente los tornillos necesarios. Si no es así, haga las reparaciones antes
de instalar la unidad.
Modelo
Altura de la unidad (pulgadas)
Anchura de la unidad (pulgadas)
Abertura mínima de la
ventana (véase la Fig l) (pulgadas)
Anchura mínima de la ventana (pulgadas)
Anchura máxima de la ventana (pulgadas)
15K/18K
22K/24K
17.91 18.625
23.625 26.50
19.00 19.50
28.00 30.00
41.00 41.00
4
Page 30

Requisitos de ventana de tormenta
Un marco de la ventana de la tormenta no permitirá que el acondicionador de aire se incline correctamente que a su vez
mantendrá el drenaje correctamente. Para ajustar para esto, fije una tabla o una pieza de madera al alféizar. El tablero o
la pieza de madera deben tener una profundidad de por lo menos 1/2 ". Asegúrese de que el tablero o la pieza de madera
sea aproximadamente 1/2 "más alto que el marco de la ventana de tormenta. Esto permitirá que el acondicionador de aire
se incline lo suficiente para un drenaje adecuado.(15K/18K VerFIG.1/FIG.2 ; 22K/24KVer FIG.3/FIG.4).
FIG.1
SASH
19 MIN
1/2 MIN
Marco o obstrucción de la ventana de tormenta
FIG.3
SASH
19 1/2 MIN
1/2 MIN
FIG.2
SASH
19 MIN
1/2 MIN
Marco o obstrucción de la ventana de tormenta
1/2 MIN
El tablero o la pieza de madera debe ser
aproximadamente 1/2 "más alto que el
marco de la ventana de la tormenta para
el drenaje apropiado
FIG.4
SASH
19 1/2 MIN
1/2 MIN
1/2 MIN
El tablero o la pieza de madera
debe ser aproximadamente 1/2 "
más alto que el marco de la v
entana de la tormenta para el
drenaje apropiado
Marco o obstrucción de la ventana de tormenta
Marco o obstrucción de la
ventana de tormenta
Requisitos de ventana de tormenta
1. Compruebe si hay algo que pueda bloquear el flujo de aire. Revise el área fuera de la ventana para ver si hay cosas
como arbustos, árboles o toldos. Revise el área interior para asegurarse de que las cortinas o persianas no prevengan
el flujo de aire adecuado.
2. Revise el tomacorriente eléctrico disponible. La fuente de alimentación debe ser la misma que se muestra en la placa
de identificación de serie de la unidad (situada en el lado izquierdo de la unidad, cerca de la placa frontal). Asegúrese
de que el tomacorriente esté lo suficientemente cerca para que el cable de alimentación pueda alcanzar.
3. Desembale cuidadosamente el acondicionador de aire. Retire todo el material de empaque y asegúrese de que el
piso esté protegido al quitarlo. Debido al gran tamaño de este acondicionador de aire, dos personas deben mover la
unidad juntos.
PRECAUTIÓN
Al manipular la unidad, tenga cuidado de evitar cortes
de los bordes afilados de metal y las aletas de aluminio
en las bobinas delantera y trasera.
5
Page 31

Instrucciones de Instalación y Montaje-Montaje de la Ventana
Quitar chasis
1. Tire panel frontal hacia abajo y extraiga el filtro
(FIG.5 a continuación).
2. Levante el panel delantero hacia arriba para quitarlo y
colóquelo al costado.
FIG.5
4. Después de retirar los tornillos, tire suavemente de la
placa frontal del gabinete del acondicionador de aire
(FIG.7 y 8).
3. Ubique los cuatro tornillos de la placa frontal y quítelos.
Estos tornillos deberán volver a instalarse antes de
montar el acondicionador de aire (FIG.6 encima).
FIG.6
5. Retire el tornillo de un panel de control del panel frontal
(FIG.9).
FIG.7
FIG.9
FIG.8
6
Page 32

INSTALLATION & ASSEMBLY INSTRUCTIONS - WINDOW MOUNTING
Instrucciones de Instalación y Montaje-Montaje de la Ventana
Quitar chasis
6. Retire los seis tornillos del gabinete. (cada lado para la tapa, la izquierda y la derecha tiene dos tornillos.) (FIG.10)
FIG.10
PARTE DELANTERA
7. Sostenga los gabinetes mientras tira de la manija de la base para quitar cuidadosamente la unidad. No tire ni
levante cerca de la parte superior de la (FIG.11).
8. Tome el algodón de la perla para 24K (FIG.12).
FIG.11
No tire ni levante
en esta área, de
lo contrario,
dañará la
unidad como
resultado.
PARTE DELANTERA
FIG.12
7
Page 33

Montaje y Instalación(CONT.)
Instalación del riel superior y del soporte
lateral
El riel superior debe ensamblarse antes de
instalar el aire.
Herramientas necesarias: Destornillador de Phillips.
5/16
Tornillo largo
hexagon-cabeza
Fijación del riel superior al acondicionador de aire.
1. Retire el acondi cionador de aire
de la caja y
colóquelo sobre
una superficie
plana y dura.
de
Riel
superior
Caja inferior
Riel superior
5. Deslice la sección "I" del panel de la ventana en el
soporte lateral del gabinete (Fig. 13a). Haga esto para
ambos lados.
FIG.13a
Panel de relleno de
ventana
Retenedor lateral
RELLENO DE
VENTANA
Retenedor lateral
6. Inserte las patas superior e inferior del marco del panel
de relleno de la ventana en el canal en el ángulo superior
y el riel inferior. Hacer ambas partes. Instale el retén
lateral en el gabinete como se muestra.(FIG 13b-14).
PLASTIC
FRAME
FIG.13b
2. Retire el riel
superior de la
parte inferior del
material de
empaque como se
muestra en la
Fig. A.
3. Fije el riel superior
a la unidad con los
tornillos de 5/16 "
como se muestra
en la Fig.B.
Junta de espuma y riel de
ángulo superior
Nota: por razones de seguridad,
los 4 tornillos deben ser usados
para fijar el riel superior.
Panel de relleno
5/16" Tornillo de
hexagon-cabeza
FIG.14
Vista Superior
de ventana
Acondicionador
de Aire
Sección “I”
Cabinete
Agujero del
tornillo de
fijación
PANEL DE
RELLENO
DE
VENTANA
Colocación del gabinete dentro de la ventana
1. Abra la ventana y coloque el gabinete en el centro del
alféizar de la ventana.
2. Asegúrese de que el riel inferior esté asentado sobre el
alféizar de la ventana como se muestra abajo. Baje la
ventana temporalmente detrás del riel angular superior
para mantener el gabinete en su lugar. (sugiera
mantener un oblicuo hacia abajo, para dejar drenar el
agua acumulada de la lluvia del lado trasero de la parte
inferior de la unidad hacia fuera.)
8
Page 34

Izquierda
1/2” Perno de cabeza plana
y contratuerca largos
UMBRAL
ÁNGEL
DEL
TABURETE
3. Fije el gabinete al alféizar de la ventana usando dos
tornillos de cabeza redonda de 5/8 ". Perfore
previamente los orificios si es necesario. Agregue el
sello del riel inferior sobre los tornillos. (debe fijar en la
Junta para 22K/24K).
Fondo
Sello ferroviario
Contratuerca
Soporte
angular
umbral
5/8” Perno de cabeza plana largo
Derecha
2 requerido
para cada soporte
2. Ensamble los soportes angulares del travesaño a los
soportes de soporte en la posición marcada como se
muestra arriba. Apriete a mano, pero no todo el camino
para cualquier cambio que pueda necesitar ser hecho más
tarde durante la instalación.
3. Instale los soportes (con los soportes angulares del umbral
conectados) a la parte inferior del gabinete, como se
muestra a continuación.
4. Apriete bien los 6 pernos.
1/2” Perno de
cabeza plana y
contratuerca
largos
5/8” Tornillo largo de la
hexágono -cabeza
Empaque
Instale los soportes
1. Sujete cada soporte de soporte a ras contra el exterior
del alféizar de la ventana. Apriete cada soporte a la parte
inferior del gabinete como se muestra abajo. Marque los
soportes en la palanca superior del alféizar de la ventana
y luego quítelos.
MARCA
Extienda los paneles de acordeón
1. Levante con cuidado la ventana para exponer el panel
de acordeón y el marco del panel. Afloje los tornillos de
fijación de manera que los paneles de acordeón se
deslicen fácilmente.
5/8” Tornillo largo
de la hexágono - cabeza
1/2” Tornillo largo de
la hexágono - cabeza
2. Extienda cada panel para llenar completamente el ancho
de la ventana. Apriete los tornillos de fijación cuando los
paneles estén completamente extendidos.
9
Page 35

Montaje y Instalación (CONT.)
Instale la cerradura de la ventana y el sello
del marco.
1. Recorte el sello de la hoja para ajustar el ancho de la
ventana. Inserte el sello de la hoja en el espacio entre
las fajas superior e inferior.
Sello del marco de la ventana
2. Attach the right angle sash lock as shown below.
Cerradura del saco
5/8” Perno de cabeza
plana largo
Instalación del chasis en el gabinete
1. Equipo elevador (dos personas) el chasis del
acondicionador de aire y deslícelo cuidadosamente en
el gabinete. Deje que el frente del acondicionador de
aire cuelgue aproximadamente 6 ".
2. PRECAUCIÓN: no empuje los controles ni las bobinas
con aletas.
3. Asegúrese de que el chasis esté firmemente asentado
en la parte posterior del gabinete.
4. Inserte todos los tornillos removidos durante la
instalación de la ventana y vuelva a colocar la placa
frontal, el panel frontal y el filtro de aire. Utilice las
instrucciones de Remover Chassis y las figuras 5-11
para referencia.
INSTALACIÓN A TRAVÉS DE LA PARED
Nota: Consulte los códigos locales de construcción antes
de la instalación y/o un carpintero calificado.
Seleccione la ubicación de la pared.
Este acondicionador de aire tiene un chasis deslizable, de
modo que pueda ser instalado a través de una pared
exterior según lo especificado abajo:
Grueso Máximo de la Pared: 8”
IMPORTANTE: Las persianas laterales nunca deben ser
bloqueadas.
NOTA: Todas las piezas necesarias para la instalación a
través de la pared se proporcionan, excepto un marco de
madera, cuñas, y 10 tornillos de madera (10-1 "de largo
mínimo). Seleccione una superficie de pared que:
Este acondicionador de aire tiene un chasis deslizable, de
modo que pueda ser instalado a través de una pared
exterior según lo especificado abajo:
1. No soporta las cargas estructurales importantes como la
construcción del bastidor en los extremos de las
ventanas, y en los puntos de soporte de cerchas, etc.
2. No tiene plomería ni cableado adentro.
3. Se encuentra cerca de los tomacorrientes eléctricos
existentes, o donde se puede o se instalará otra salida.
4. No tiene objetos que bloqueen las ventilaciones que
limitan el enfriamiento
5. Permite el flujo de aire desbloqueado desde la parte
posterior y los lados del acondicionador.
Preparar la pared
1. Prepare la pared en la construcción del armazón
(incluyendo la chapa de ladrillo y estuco). Trabajando
desde el interior de la habitación, localice el montante
de pared que está más cerca del centro del área de
instalación.
2. Corte un orificio a cada lado del perno central.
3. Mida entre los bordes interiores de cada otro espárrago
como se muestra a continuación.
FIG.15
10
Page 36

INSTALACIÓN A TRAVÉS DE LA PARED (CONT.)
Mida y corte cuidadosamente una abertura con las
siguientes dimensiones dependiendo de su modelo.
ANCHURA "X" = interior modelo más el doble del espesor
del material de encuadre utilizado.
ALTURA "Y" = altura del modelo interior más el doble del
espesor del material de encuadre utilizado.
Modelo
Altura interior del
bastidor
Anchura interior del
bastidor
15K/18K
18 1/4 (46.4 cm)
23 7/8 (60.6 cm)
22K/24K
19 1/2 (49.5 cm)
26 9/10 (68.3 cm)
FIG.16
Y
Altura
interior
del bastidor
4. Construya un marco de madera con las dimensiones
interiores de su modelo enumerado arriba (mida dos
veces). La profundidad del bastidor debe ser la misma
que el espesor de la pared. Llene el espacio adicional de
la abertura a los pernos prisioneros con los espaciadores
de madera como se muestra abajo.
5. Clave los espaciadores a los postes. Deben ser rasantes
con la pared seca.
Marco
interior
Espaciadores del clavo a los
pernos prisioneros
NOTA: If wall thickness is 8-1/2" or more, add aluminum
flashing over the bottom of the frame opening to assure
water is unable to enter the area between the inner and
outer wall.
Calafateo según
sea necesario
Aluminio intermitente
sobre la parte inferior
del marco
Más de
81/2”
Prepare e instale el gabinete
1. Deslice el chasis del gabinete. Consulte las instrucciones
de remoción del chasis (página 6 y 7) en la sección de
montaje de la ventana.
2. Coloque el gabinete en la abertura con el riel inferior
apoyado firmemente en el tablero inferior del marco de
madera.
3. Coloque el gabinete de modo que esté inclinado
apropiadamente para remover el agua como se ve abajo.
3/4”MásAjuste el espesor,
5/16”
A
3/8”
NIVEL
consulte el parámetro 5
FIG.17
NIVEL
4. Fije el riel inferior al bastidor de madera con dos tornillos
grandes de madera de 1 "(2.5 cm) de largo, como se
muestra a continuación.
FIG.18
1” Tornillo de madera largo
11
Page 37

MONTAJE Y INSTALACIÓN A TRAVÉS DE LA PARED (CONT.)
Consulte el ensamblaje del soporte de soporte en la sección
de montaje de la ventana para ensamblar los soportes de
soporte. Una tira de madera clavada a la pared exterior se
debe utilizar conjuntamente con los soportes angulares de
la ayuda del travesaño.
FIG.19
Soporte
Tira de Madera
5. Atornille o enclave el gabinete en el marco de madera
usando cuñas si el armazón está sobredimensionado,
para eliminar posibles ruidos. Recuerde mantener la
pendiente apropiada para la eliminación del agua.
Construcción de Mampostería
1. Corte o construya una abertura de pared en la pared de
mampostería similar a la construcción del armazón
(consulte la instalación a través de la pared para un
espesor de pared superior a 8 1/2 ").
2. Asegure el gabinete en su lugar usando clavos de
mampostería o tornillos de anclaje de mampostería. O,
construya un marco usando las instrucciones que se
encuentran en la sección de instalación a través de la
pared.
3. Asegúrese de que la mampostería sobre el gabinete esté
bien apoyada. Utilice los orificios existentes en el
gabinete o los orificios taladrados adicionales para fijar el
gabinete en varias posiciones.
4. Instale los soportes del gabinete exterior de acuerdo con
las instruc-ciones de instalación del soporte de soporte en
la sección de instalación a través de la pared. Calafatee o
destellar con aluminio si es necesario. Esto proporcionará
un sello hermético alrededor de la parte superior y los
lados del gabinete
5. Para una instalación más agradable estéticamente,
aplique molduras de madera alrededor de los lados del
gabinete sin obstruir las persianas laterales.
FIG.20
6. Instale el chasis en el gabinete siguiendo los pasos
descritos en la sección de montaje de la ventana.
Opcional: El calafateo y la instalación del guarnecido en la
pared interior pueden hacerse si se desea. Calafatee las
aberturas alrededor de la parte superior y los lados del
gabinete y todos los lados del manguito de madera hasta la
abertura.
Nota: Vea las Instrucciones de Montaje de la ventana para
la ubicación del sello del riel inferior.
12
Page 38
USANDO SU ACONDICIONADOR DE AIRE
Panel de control electrónico y control remoto
Nota: Esta pantalla muestra siempre la temperatura ambiente en el
modo de ventilador, excepto cuando se ajusta la temperatura
programada o el cronometrador.
1
2
AUTO
SPEED
9
8
Controllador de Acondicionador de Aire
Sonidos normales de funcionamiento
Usted puede escuchar un ruido de golpeteo causado
por el agua que golpea el condensador, en días
lluviosos, o cuando la humedad es alta. Esta
característica de diseño ayuda a eliminar la humedad
y mejorar la eficiencia.
Usted puede oír el chasquido del termostato cuando
el compresor se enciende y se apaga.
El agua se acumulará en la bandeja base durante la
lluvia o días de alta humedad. El agua puede rebosar
y gotear de la parte exterior de la unidad.
El ventilador puede funcionar incluso cuando el
compresor no está encendido.
1. Pantalla digital: sin ajuste del temporizador, el modo de
operación se está enfriando, seco, ventilador y auto, y se
mostrará la temperatura establecida.
El tiempo se demostrará en el ajuste del cronometrador.
2. Butón de o : Utilice estos botones en el panel de
control y el control remoto para aumentar o disminuir la
temperatura de ajuste o el cronometrador.
Alcance de temperaturas: 61°F-88°F o 16 ~ 31 .
AUTO
MODE
3
7
5
6
4
Modo de Enfriar: la función de enfriamiento permite que
el acondicionador de aire enfríe la habitación y al mismo
tiempo reduce el humidificador de aire. Pulse el botón
MODE para activar la función de refrigeración. Para
optimizar la función del acondicionador de aire, ajuste la
temperatura y la velocidad presionando el botón indicado.
Modo de Secar: Esta función reduce la humedad del aire
para hacer el cuarto más cómodo. Pulse el botón MODO
para ajustar el modo de Secar. Una función automática
de alternar ciclos de enfriamiento y ventilador de aire se
activa.
Modo de Ventilador: el acondicionador funciona sólo en
ventilación. Pulse el botón MODE para ajustar el modo
Fan. Con presionar el botón de velocidad del ventilador la
velocidad cambia en la secuencia siguiente: Hola, Med y
lo en el modo de ventilador. El control remoto también
narra la velocidad que se estableció en el modo de
operación anterior.
Modo de Auto: En el modo automático, la unidad elige
automáticamente la velocidad del ventilador y el modo de
funcionamiento (enfriar, secar o ventilador). En este modo
la velocidad del ventilador y la temperatura se ajustan
automáticamente según la temperatura ambiente
(probada por el sensor de temperatura que se incorpora
en la unidad interior.).
5. Botón de Cronometrador: Utilice estos botones en el
panel de control y el mando a distancia para ajustar el
Cronometrador. Cronometrador apagado: la parada
temporizada se programa pulsando el botón de
Cronometrador. Ajuste el tiempo de descanso pulsando
el botón de " " o " " hasta que el tiempo de descanso
mostrado sea su demanda y luego presione el botón
Cronometrador nuevamente.
Cronometrador encendido: cuando la unidad está
apagada, presione el botón de Cronometrador en la
primera vez, ajuste la temperatura presionando el botón
de " " o " ". Pulse el botón de Cronometrador en la
segunda vez, ajuste el tiempo de reposo pulsando el
botón de " " o " ". Presione el botón del contador de
tiempo en la tercera vez, confirme el ajuste, después el
tiempo de descanso a la conmutación automática
siguiente se podría leer en la exhibición de la máquina.
3. Botón de Encendido: Encienda y apague el
acondicionador de aire.
4. Botón MODO: Presione el botón MODO para recorrer
los diferentes modos: enfriar, secar, ventilador y auto.
Nota: puede ajustarse para que se apague o encienda
automáticamente en 0.5-24 horas. Cada vez que se
presionan los botones de " " " " aumentará o
disminuirá el cronometrador. El cronometrador puede
ajustarse en un incremento de 0.5 horas por debajo de
10 horas y un incremento de 1 hora durante 10 horas o
más. La luz de ajuste se encenderá durante el ajuste.
Para cancelar la función programada, pulse de nuevo el
botón Timer
13
Page 39

USANDO SU ACONDICIONADOR DE AIRE
Panel de control electrónico y control remoto
7. Botón de ECO:Lorsque le climatiseur est en mode ECO,
le voyant s'illuminera. En mode ECO, l'appareil s'arrêtera
une fois que la température de la pièce atteint la
température réglée; le ventilateur s'arrêtera également.
L'appareil se remettra en marche une fois que la
température ambiante sera plus élevée que le réglage de
température. Avant que le compresseur ne se mette en
marche, le moteur du ventilateur fonctionnera pendant un
certain temps, puis s'arrêtera. Il fonctionnera ainsi de
façon intermittente pour plus de confort et pour une
économie d'énergie.
7. Botón del Sleep: Presione el botón del Sleep, la luz del
sueño estará encendido después de 10s, y todas las
luces izquierdas estarán apagadas. En el modo de Sleep,
el acondicionador de aire ajustará automáticamente la
temperatura y la velocidad del ventilador para que la
habitación se sienta más cómoda durante la noche. La
temperatura ajustada aumentará automáticamente 1 °C
cada 30-60 minutos y a lo sumo cambiará seis veces
hasta que la temperatura ajustada sea 28 °C. Y cada
tiempo de funcionamiento depende de la temperatura
fijada.
10. Persianas Direccionales: Para dirigir el flujo de aire,
rueda horizontal para controlar la dirección horizontal,
el deflector aéreo para controlar la dirección vertical.
Rueda horizontalDeflector de aire Deflector de aire
8. Botón de Velocidad del Ventilador: Presione el botón
de velocidad del ventilador para elegir las opciones de
velocidad del ventilador. Usted puede elegir la velocidad
de Alta, Media, Baja o Auto en el modo de Enfriar y elegir
Alta, Media, Baja en el modo de ventilador.
9. Botón Filtro: Cuando la luz de verificación del filtro está
apagada, es inútil presionar el botón de verificación del
filtro. Cuando la luz de verificación del filtro está
encendida, puede apagar la luz presionando el botón de
verificación del filtro. Después de que el motor del
ventilador funcione durante 500 horas totales, la luz de
verificación del filtro se encenderá para recordar al
usuario que debe limpiar el filtro.
14
Page 40

Funcionamiento del Acondicionador de Aire
Control Remoto
1
3
4
5
6
3
2
7
8
9
10
5. Cronometrador: Utilice estos botones en el panel de
control y el control remoto para ajustar el cronometrador.
Cronometrador apagado: la parada temporizada se
programa pulsando el botón Cronometrador. Ajuste el
tiempo de descanso pulsando el botón " " o " " hasta
que el tiempo de descanso mostrado sea su demanda y
luego presione el botón de Cronometrador nuevamente.
Cronometrador encendido: cuando la unidad está
apagada, presione el botón de Cronometrador en la
primera vez, ajuste la temperatura presionando el botón
" " o " ". Pulse el botón de Cronometrador en la segunda
vez, ajuste el tiempo de reposo pulsando el botón " " o " ".
Presione el botón del contador de tiempo en la tercera vez,
confirme el ajuste, después el tiempo de descanso a la
conmutación automática siguiente se podría leer en la
exhibición de la máquina.
Nota: puede ajustarse para que se apague o encienda
automáticamente en 0,5-24 horas. Cada vez que se
presionan los botones " " " ", se aumentará o se
disminuirá la hora. El Cronometrador puede ajustarse en un
incremento de 0.5 horas por debajo de 10 horas y un
incremento de 1 hora durante 10 horas o más. La luz de
ajuste se encenderá durante el ajuste. Para cancelar la
función programada, pulse de nuevo el botón de
Cronometrador.
1. Encendido: Encienda y apague el acondicionador de
aire.
2. Enfriar: Presione el botón de Enfriar para enfriar el
modo.
3. y : Utilice estos botones en el panel de control y el
control remoto para aumentar o disminuir la temperatura
de ajuste o el cronometrador.
Gama de temperaturas: 61°F-88°F o 16 ~ 31 .
4. Sleep: Presione el botón de Sleep, la luz de Sleep estará
encendido después de 10s, y todas las luces izquierdas
estarán apagadas. En el modo de reposo, el
acondicionador de aire ajustará automáticamente la
temperatura y la velocidad del ventilador para que la
habitación se sienta más cómoda durante la noche. La
temperatura ajustada aumentará automáticamente 1 °C
cada 30-60 minutos y a lo más cambios de seis veces
hasta que la temperatura ajustada sea 28 °C. Y cada
tiempo de funcionamiento depende de la temperatura
fijada.
6. Modo de Auto: en el modo de Auto, la unidad elige
automáticamente la velocidad del ventilador y el modo de
funcionamiento (Enfriar, secar o ventilador). En este modo
la velocidad del ventilador y la temperatura se ajustan
automáticamente según la temperatura ambiente (probada
por el sensor de temperatura que se incorpora en la unidad
interior.).
7. Velocidad del ventilador: Presione el botón de velocidad
del ventilador para elegir las opciones de velocidad del
ventilador. Usted puede elegir Alta, Media, Baja o la
velocidad automática en modo de Enfriar y elige Alta,
Media, Baja en modo del Ventilador.
8. Exhibir: Para presionar el botón de la exhibición, puede
apagar/en todas las luces o la exhibición de LED.
7. ECO:Lorsque le climatiseur est en mode ECO, le voyant
s'illuminera. En mode ECO, l'appareil s'arrêtera une fois
que la température de la pièce atteint la température réglée;
le ventilateur s'arrêtera également. L'appareil se remettra
en marche une fois que la température ambiante sera plus
élevée que le réglage de température. Avant que le
compresseur ne se mette en marche, le moteur du
ventilateur fonctionnera pendant un certain temps, puis
s'arrêtera. Il fonctionnera ainsi de façon intermittente pour
plus de confort et pour une économie d'énergie.
10. Sólo Ventilador: Presione el botón de Sólo Ventilador al
modo del ventiador.
Tamaño de la batería: AAA-Nota: no mezcle baterías viejas y nuevas o diferentes tipos de baterías AAA.
15
Page 41

Cuidado y Limpieza
Limpie su acondicionador de aire para mantenerlo
buscando nuevo y para minimizar la acumulación de polvo.
Limpieza del Filtro de Aire
El filtro de aire debe ser revisado por lo menos una vez
cada mes para ver si necesita limpieza. Las partículas
atrapadas y el polvo pueden acumularse en el filtro y
pueden disminuir el flujo de aire, así como hacer que las
bobinas de enfriamiento acumulen escarcha.
1. Retire el filtro tirando de las muescas de la puerta del
filtro en la parte delantera de la unidad. (Ver FIG. 21)
2. Lave el filtro usando jabón líquido para platos y agua
tibia. Enjuague bien el filtro. Agite suavemente el filtro
para eliminar el exceso de agua.
3. Deje que el filtro se seque completamente antes de
colocarlo en el acondicionador de aire.
4. Si no desea lavar el filtro, puede aspirar el filtro para
eliminar el polvo y otras partículas.
Limpieza de Gabinetes
Para limpiar el gabinete del acondicionador de aire:
Desconecte el acondicionador de aire para evitar un
choque o un riesgo de incendio. El gabinete y el panel
frontal del acondicionador de aire pueden ser
espolvoreados con un paño sin aceite o lavados con un
paño humedecido en una solución de agua tibia y jabón
líquido suave. Enjuague bien con un trapo húmedo y
séquelo.
Nunca use limpiadores ásperos, cera o pulimento en el
frente del gabinete.
Asegúrese de exprimir el exceso de agua del paño antes
de limpiarlo alrededor de los controles. El exceso de
agua dentro o alrededor de los controles puede causar
daños al acondicionador de aire.
Winter Storage Almacenaje en Invierno
Para guardar el acondicionador de aire cuando no esté en
uso durante un período prolongado de tiempo, extráigalo
cuidadosamente de la ventana de acuerdo con las
instrucciones de instalación y cúbrala con plástico o
colóquelo en la caja original.
A.Mellas
FIG.21
Desgaste
Para minimizar el desgaste del acondicionador de aire,
siempre espere por lo menos 3 minutos antes de cambiar
los modos. Esto ayudará a evitar que el compresor se
recaliente y el disyuntor se tropiece.
16
Page 42

SOLUCCIÓN A PROBLEMAS
PROBLEMBA CAUSAS POSIBLES SOLUCCIONES
El acondicionador de aire no se
enciende.
El acondicionador de aire no enfría
como debe ser.
El acondicionador de aire está
desenchufado
El fusible está fundido/el disyuntor se
dispara.
Desconexión de encendido
El dispositivo de interrupción actual se
dispara.
El flujo de aire está restringido.
Cerciórese de que el acondicionador
de aire sea enchufe se empuja
completamente en el enchufe.
Revise la caja de fusibles/disyuntores
de la casa y reemplace el fusible o
restablezca el disyuntor.
La unidad volverá a arrancar automáticamente cuando se restablezca la
energía.
Hay un retraso de tiempo de protección (aprox. 3 minutos) para evitar el
tropiezo de la sobrecarga del
compresor. Por esta razón, es posible
que la unidad no inicie la refrigeración
normal durante 3 minutos después de
volver a encenderla.
lPresione el botón de REINICIAR
ubicado en el enchufe del cable de
alimentación.
Si el botón de Reiniciar no permanecerá activado, deje de usar el
acondicionador de aire y póngase en
contacto con un técnico de servicio
calificado.
Asegúrese de que no haya cortinas,
persianas o muebles que bloqueen la
parte frontal del acondicionador de aire.
El acondicionador de aire se está
congelando.
El Control remoto no funciona.
El control de la temperatura no se
puede fijar correctamente.
El filtro de aire está sucio.
La habitación puede ser demasiado
caliente.
El aire frío se escapa.
Las bobinas de enfriamiento se
congelan.
El hielo bloquea el flujo de aire y detiene
el aire acondicionado de enfriar la
habitación
Las baterías se colocan
incorrectamente.
Las baterías pueden estar muertas
incorrectly.
Baje la temperatura ajustada del
termostato.
Limpie el filtro. Consulte la sección de
limpieza y cuidado en el manual.
Por favor deje que la habitación se
enfríe después de encender el
acondicionador de aire.
Comprobar los registros de hornos
abiertos y las devoluciones de aire
frío.
Ver "el Acondicionador de Aire se
está congelando".
Fije el modo al ventilador alto o alto
refresqúese y fije el termóstato a una
temperatura más alta.
Compruebe la posición de las pilas.
Reemplace las baterías.
17
Page 43

SOLUCCIÓN A PROBLEMAS
PROBLEMBA CAUSAS POSIBLES SOLUCCIONES
El agua está goteando afuera. Clima cálido y húmedo.
El agua está goteando dentro de la
habitación.
El agua recoge en la bandeja de la
base.
Se puede leer "E1", "E2" en la
pantalla digital.
El acondicionador de aire no está
correctamente inclinado hacia afuera.
La humedad quitada del aire está
drenando en la cacerola de la base.
Un sensor ha fallado.
Esto es normal.
Para un drenaje adecuado del agua,
asegúrese de que el acondicionador
de aire esté ligeramente inclinado
hacia abajo desde la parte delantera
de la unidad hacia atrás.
Esto es normal por un período corto
en áreas con baja humedad y normal
durante un período más largo en
áreas con alta humedad.
Contacte con servicio al cliente,
18
Page 44

Esta instrucción tiene un formato alternativo y se puede obtener de la página
web: http://tclusa.com
Page 45

Modèles
TWC-15CR/UH (ES)
TWC-18CR2/UH (ES)
TWC-22CR2/UH (ES)
TWC-24CR2/UH (ES)
Climatiseur à fenêtre électronique
Manuel des Opérations
Page 46

Page 47

PREAMBULE
INSTRUCTION IMPORTANTE DE SÉCURITÉ................................................................
EXIGENCES ÉLECTRIQUES........................................................................................
LISTE D’EMBALLAGE .................................................................................................
INSTRUCTIONS D'INSTALLATION ET D'ASSEMBLAGE................................................
UTILISATION DE VOTRE CONDITIONNEUR D'AIR ......................................................
FONCTIONNEMENT DE VOTRE CONDITIONNEUR D'AIR.............................................
ENTRETIEN ET NETTOYAGE.......................................................................................
DÉPANNAGE...............................................................................................................
1
2
3
4
13
15
16
17
Page 48

INSTRUCTION IMPORTANTE DE SÉCURITÉ
Avant d'installer et d'utiliser votre climatiseur, s’il vous plaît lire attentivement ce manuel. Conservez ce manuel dans un endroit sûr
pour référence ultérieure. Votre sécurité et la sécurité d'autrui sont très importantes pour nous. S’il vous plaît payer attention à tous les
messages de sécurité décrits dans ce manuel du propriétaire.
AVERTISSEMENT: Pour rédui re le risque d'incendie, de choc électrique ou de blessures lors de l'utilisation de votre climatiseur,
suivez les précautions de base suivantes.
Brancher la prise de terre à 3 broches.
Ne retirez pas la broche de terre.
N'utilisez pas l'adaptateur secteur
Il s'agit d'un symbole d'alerte de sécurité.
Ce symbole vous informe des dangers potentiels qui peuvent nuire à vous ou à d'autres
personnes, voire causer la mort.
Tous les messages de sécurité suivront directement le symbole d'alerte de sécurité et / ou
les mots "DANGER" ou "WARNING".
PELIGRO
ADVERTENCIA
Tous les messag es de sécurité vous alertent sur les dangers potentiels, la façon de réduire les risques
de blessures et ce qui peut arriver si les instructions ne sont pas suivies correctement.
N'utilisez pas une rallonge.
Débrancher le climatiseur avant l'entretien
Utiliser deux personnes ou plus pour
déplacer et installer le climatiseur
Le fait de ne pas suivre
immédiatement ces instructions peut
causer des blessures graves ou même
la mort.
1
Page 49

EXIGENCES ÉLECTRIQUES
ADVERTENCIA
Les cotes électriques de votre climatiseur sont indiquées sur le modèle e l'étiquette
du numéro de série situé sur le côté avant gauche de l'appareil (face àl'avant).
Les exigences électriques spécifiques sont listées dans le tableau ci - dessous.
Suivez les exigences ci - dessous pour le type de fiche du cordon d'alimentation.
Cordon d'alimentation
Peligro descarga eléctrica
Enchufe a un tomacorriente de tres extremidades con
salida a tierra.
No retire la extremidad de conexión a tierra.
No utilice un adaptador.
No utilice un cable de extensión.
Si no se sigue estas instrucciones, se podría causar
lesiones graves o hasta la muerte.
15K 18K/22K/24K
Méthode de la mise à la terre recommandée
Pour votre sécurité personnelle, ce climatiseur doit être mis à la terre. Cet appareil de
avec prise de terre. Pour
conformément à tous les codes et ordonnances locaux. Si une sortie à 3 broches n'est pas disponible, il incombe au client d'avoir une prise à 3
broches correctement connectée par un électricien qualifié.
C'est la responsabilité du client:
• Contacter un électricien qualifié.
• Pour assurer que l'installation électrique est adéquate et
conforme au National Electrical Code, ANSI / NFPA 70 dernière édition, et tous les codes et ordonnances locaux.
minimiser la possibilité de choc électrique, le cordon doit être branché sur une prise à 3 broches et mis à la terre
Des exemplaires des normes énumérées peuvent être obtenus
climatisation est équipé d'un cordon d'alimentation à 3 broches
auprès de:
Association de protection nationale contre les incendies
Un parc Batterymarch
Quincy, Massachusetts 02269
Cordon et fiche d'alimentation LCDI
Ce climatiseur est équipé d'un cordon d'alimentation LCDI (détection et interrompre de courant de fuite) requis par UL. Ce cordon d'alimentation
contient de l'électronique de pointe qui détecte le courant de fuite. Si le cordon est endommagé et que des fuites se produisent, l'alimentation sera
déconnectée de l'appareil.
Les boutons de test et de réinitialisation de la prise LCDI sont utilisés pour vérifier si la fiche fonctionne correctement. Pour tester la prise:
1. Brancher le cordon d'alimentation dans une prise de terre à 3 broches.
2. Appuyer RESET (sur certaines unités, un voyant vert s'allume).
3. Appuyer le bouton TEST, le circuit doit déclencher et couper toute l'alimentation du climatiseur (sur certaines unités, un feu vert peut s'éteindre) .
4. Appuyer le bouton RESET pour l'utiliser. Vous entendrez un clic et l'A/C n'est pas prêt à l'utilisation.
REMARQUES:
• Le bouton RESET doit être activé pour une utilisation correcte.
• Le cordon d'alimentation doit être remplacé s'il ne parvient pas à déclencher lorsque vous appu yer la touche TEST et que l'appareil ne réinitialise
pas.
• N'utilisez pas le cordon d'alimentation comme interrupteur ON/OFF. Le cordon
d'alimentation est conçu comme un dispositif de protection.
• Un cordon d'alimentation endommagé doit être remplacé par un nouveau cordon
d'alimentation.
• Le cordon d'alimentation contient de nouvelles pièces pouvant être réparées par
l'utilisateur.L'ouverture du boîtier inviolable annule toutes les garanties et les
réclamations de performance.
REMARQUE: Le cordon d'alimentation et la fiche de votre appareil peuvent
différer de celle affichée.
2
Page 50

LISTA DE EMPAQUE
IMAGE PARTIE QUANTITÉ
Climatiseur à fenêtre
Télécommande
Rail de montage supérieur
(avec éponge)
Panneaux de remplissage
(avec la remarque "Gauche" et
"Droite" sur la face avant)
Sash Lock (deux trous)
Sceau de fenêtre (Sponge)
5/16” Vis à tête hexagonale
longue
5/8” Vis à tête hexagonale
longue
1/2” Vis à tête hexagonale
longue
5/8” Boulon à tête plate longue
et contreécrou
Sill Angel Support
1/2” Boulon à tête plate longue
et contreécrou
Joint d'étanchéité
Joint de fenêtre en mousse
(éponge mince pour
sauvegarde en utilisant)
Bande isolante (éponge)
Support Bracket
(avec remarque R et L)
3
Page 51

DECLARATION
TOUTES LES INFORMATIONS ET LES SPÉCIFICATIONS
TECHNIQUES PRESENTES DANS LE MANUEL DE
L'UTILISATEUR SONT LA PRÉSENTATION DU FABRICANT.
Évitez les risques d'incendie
ou d'électrocution. N'utilisez pas de rallonge
ou de prise d'adaptateur. Ne retirez pas les
doigts du cordon d'alimentation.
Prise murale au murmise à la terre
Ne pas, en aucun cas,
couper, retirer ou
contourner la broche de
mise à la terre.
Cordon d'alimentation
avec fiche de mise à la
terre à 3 broches et
dispositif de détection de courant.
INSTRUCTIONS D'INSTALLATION ET D'ASSEMBLAGE
Préparation de fenêtre
S’il vous plaîlire toutes les instructions avant d'installer votre climatiseur. Deux personnes sont invitées à installer ce produit.
Si une nouvelle prise électrique est requise, la sortie doit être installée par un électricien qualifié avant d'installer l'appareil.
Avant d'installer l'appareil, vérifiez les dimensions de votre fenêtre pour vous assurer que le climatiseur sera adapté. Cette
unité est conçue pour s'adapter à une fenêtre standard à double accrochage. Assurezvous que la fenêtre est en bonne
forme et capable de maintenir fermement les vis nécessaires. Sinon, effectuez des réparations avant d'installer l'appareil.
Modèle
Hauteur unitaire (pouces)
Largeur de l'unité (pouces)
Min. Ouverture de la fenêtre
(voir FIG 1) (pouces)
Min. Largeur de fenêtre
(pouces)
Largeur maximale de la
fenêtre (pouces)
15K/18K
17.91 18.625
23.625 26.50
19.00 19.50
28.00 30.00
41.00 41.00
22K/24K
4
Page 52

Exigences de la fenêtre de tempête
Un cadre de fenêtre anti tempête ne permettra pas au climatiseur de s'incliner correctement, ce quilui empêchera de
s'écouler correctement. Pour régler cela, attachez une planche ou un morceau de bois au seuil. Le panneau ou la pièce
en bois doit avoir une profondeur d'au moins 1/2 ". Assurez vous que la planche ou le morceau de bois est d'environ 1/2"
plus haut que le cadre de la fenêtre de tempête. Cela permettra au climatiseur de s'incliner suffisamment pour un drainage
correct. (15K / 18K Voir FIG.1 / FIG.2; 22K / 24K Voir FIG.3 / FIG.4)
FIG.1
CEINTURE
19 MIN
1/2 MIN
Cadre ou obstruction de la fenêtre d'orage
FIG.3
CEINTURE
19 1/2 MIN
1/2 MIN
FIG.2
CEINTURE
19 MIN
1/2 MIN
Cadre ou obstruction de la fenêtre d'orage
1/2 MIN
Le panneau ou la pièce en bois doit
être d'environ 1/2 "plus haut que le
cadre de la fenêtre d'orage pour le
drainage correct.
FIG.4
CEINTURE
19 1/2 MIN
1/2 MIN
1/2 MIN
Le panneau ou la pièce en bois
doit être d'environ 1/2 "plus haut
que le cadre de la fenêtre d'orage
pour un drainage correct.
Cadre ou obstruction de la fenêtre d'orage
Cadre ou obstruction de la
fenêtre d'orage
Avant d'installer le climatiseur
1. Vérifier tout ce qui pourrait bloquer le flux d'air. Vérifier la zone située à l'extérieur de la fenêtre pour des choses telles
que des arbustes, des arbres ou des auvents. Vérifier la zone intérieure pour vous assurer que les rideaux, rideaux ou
stores empêchent le flux d'air approprié.
2. Vérifier la prise électrique disponible. L'alimentation doit être identique à celle indiquée sur la plaque signalétique de
l'unité (située sur le côté gauche de l'appareil, près de la façade avan Assurer que la prise soit suffisamment proche
pour que le cordon d'alimentation atteigne.
3. Déballer soigneusement le climatiseur. Retirer tout le matériau d'emballage et assurer que le sol est protégé lors de
l'enlèvement. En raison de la grande tail le de ce climatiseur, deux personnes devraient déplacer l'unité ensemble.
MISE EN GARDE
Lors de la manipulation de l'appareil, veillez à éviter les
coupures des bords métalliques tranchants et des
ailettes en aluminium sur les bobines avant et arrière.
5
Page 53
INSTRUCTIONS D'INSTALLATION ET D'ASSEMBLAGE - MONTAGE DE FENÊTRE
RETIRER LE CHASSIS
1. Tirer vers le bas du panneau avant et retirer le filtre
(FIG.5 ci-dessous).
2. Soulevez le panneau avant vers le haut pour enlever
et placer sur le côté.
FIG.5
4. Après avoir retiré les vis, retirez délicatement la façade
de l'armoire de conditionnement d'air (FIG.7 et 8).
3. Localiser les quatre vis de la plaque avant et retirez.
Ces vis devront être réinstallées avant de monter le
climatiseur (FIG.6 ci-dessous).
FIG.6
5.
Retirer
avant (FIG.9)
les vis du panneau de commande du panneau
FIG.7
FIG.9
FIG.8
6
Page 54

INSTRUCTIONS D'INSTALLATION ET D'ASSEMBLAGE - MONTAGE DE FENÊTRE
RETIRER LE CHASSIS
6. Retirer les six vis de l'armoire (Chaque côté pour le haut, à gauche et à droite comporte deux vis.) (FIG.10).
FIG.10
7. Tenir l'armoire en tirant sur la poignée de base pour enlever soigneusement l'appareil. Ne tirez pas ou ne remontez
pas près du haut de l'appareil (FIG.11).
8. Prendre le coton perlé pour 24K (FIG.12).
FIG.11
Ne tirez pas ou
ne vous
élevez pas
dans
cette zone.
Les
dommages
causés à
l'appareil
peuvent en
résulter.
Avant
FIG.12
7
Page 55

ASSEMBLAGE ET INSTALLATION (SUITE)
Installation de top rail et support latéral
Le top rail doit être assemblé avant d'installer le
climatiseur dans la fenêtre.
Outils nécessaires: Tournevis cruciforme.
Top Rail Hardware
5/16” Vis à
tête hexagonale
longue
Fixation du top rail au climatiseur
1. Retirer le climatiseur
de la boîte et placez le sur une surface
plate et dure.
Boîte de fond
Rail
supérieur
5. Glisser la section "I" du panneau de fenêtre da ns le
support latéral de l'armoire (FIG.13a). Faites cela pour
les deux côtés.
FIG.13a
PANNEAU DE NETTOYAGE DE
FENÊTRE
Côté Retenue
PANNEAU DE
NETTOYAGE DE FENÊTRE
Côté Retenue
6. Insérer les pattes supérieure et inférieure du cadre du
panneau de remplissage des fenêtres dans le canal
dans l'angle supérieur et le rail inférieur. Faites les de
ux côtés. Installez la retenue latérale sur l'armoire
comme indiqué(FIG.13b-14).
CADRE PLASTIQUE
FIG.13b
2. Enlevez le top rail du
fond du matériau
d'emballage comme
indiqué sur la FIG. A.
3. Fixer le rail de pointe
à l'unité avec les vis
5/16" comme indiqué
sur la FIG.B.
Joint en mousse et rail
d'angle supérieur
REMARQUE: pour des raisons de
sécurité, toutes les 4 vis doivent
être utilisées pour fixer le top rail.
Côté Retenue
PANNEAU DE
5/16" Vis à tête
hexagonale longue
FIG.14
VUE
SUPÉRIEURE
CABINE DE
CONDOMONATEU
RD'AIR
"T" SECTION
NETTOYAGE
DE FENÊTRE
PANNEAU DE
NETTOYAGE
DE FENÊTRE
CADRE
PLASTIQUE
Trou de
vis en
verrouillage
Placer le cabinet à l'intérieur de la fenêtre
1. Ouvrir la fenêtre et placer l'armoire au milieu du seuil
de la fenêtre.
2. Assurer que le rail inféri eur est assis sur le seuil de la
fenêtre comme indiqué ci-dessous. Faites descendre
la fenêtre temporairement derrière le rail d'angle
supérieur pour maintenir l'armoire en place.
(Suggérer de garder un oblique vers le bas, laisser
l'eau de pluie accumulée s'écouler, de l'arrière du
fond de l'unité).
8
Page 56
Gauche
1/2" Boulon à tête plate
et contre-écrou
SEUIL
ANGLE DE
STOOL
3. Fixer l'armoire au seuil de la fenêtre à l'aide de deux vis
Round-Head 5/8 ". Pré-percez les trous si nécessaire.
Ajoutez le joint de rail inférieur sur les vis. (Il doit être
fixé sur le joint pour 22K/24K).
Joint de rail
inférieur
Écrou de
blocage
Ensemble d'angles
d'attelle
Droite
2 chaque requête
pour chaque
support
2. Assembler les supports angulaires du seuil aux supports
de support à la position marquée comme indiqué ci dessus. Serrez à la main, mais pas tout le chemin pour
les modifications qui pourraient être nécessaires plus
tard lors de l'installation.
3. Installer les supports (avec des supports angulaires
attachés) au bas de l'armoire comme indiqué ci-dessous.
4. Serrer tous les 6 boulons de manière sécurisée.
1/2" Boulon
à tête plate
et contreécrou
5/8" Vis à tête
hexagonale longue
Joint
d'étanchéité
Installer les supports
1. Tenir chaque support de fixation à l'avant de l'extérieur
du seuil de la fenêtre. Serrer chaque support au bas de
l'armoire comme indiqué ci-dessous. Marquer les
supports au levier supérieur du seuil de la fenêtre, puis
retirez-les.
Étendre les panneaux d'accordéon
1. Lèvez soigneusement la fenêtre pour exposer le
panneau d'accordéon et le cadre du panneau.
Desserrez les vis de blocage les panneaux d'accordéon
glissent facilement.
5/8" Vis à tête
hexagonale longue
Tornillo hexagonal
de 1/2 'de largo
2. Étendre chaque panneau pour remplir complètement la
largeur de la fenêtre. Serrez les vis de blocage lorsque
les panneaux sont complètement étendus.
9
Page 57

ASSEMBLAGE ET INSTALLATION (SUITE)
Installer le Verrouillage de Fenêtre et le Sash
Sceau
1. Ajuster le joint de châssis à la largeur de la fenêtre.
Insérer le joint de châssis dans l'espace entre les c
hâssis supérieur et inférieur.
JOINTE DE FENÊTRE
2. Fixer le verrouillage du châssis à angle droit comme
indiqué ci-dessous.
Sangle verrouillé
5/8" Vis à tête
hexagonale longue
INSTALLATION DE THRU-THE-WALL
REMARQUE: Consulter les codes de construction locaux
avant l'installation et/ou un charpentier qualifié.
Sélectionner l'emplacement du mur.
Ce climatiseur dispose d'un châssis coulissant, de sorte
qu'il peut être installé à travers un mur extérieur tel que
spécifié ci-dessous:
ÉPAISSEUR MAXIMALE: 8"
IMPORTANT: Les parois latérales ne doivent jamais être
bloquées.
REMARQUE: Toutes les pièces nécessaires à l'installation
de Thru-The-Wall sont fournies, à l'exception d'un châssis
en bois, des cales et 10 vis à bois (10-1"minimum long).
Sélectionnez une surface murale qui:
1. Ne supporte pas les charges structurelles majeures telles
que la construction du châssis aux extrémités des
fenêtres, et sous les points d'armature, etc.
2. N'a pas de plomberie ou de câblage à l'intérieur.
3. Est-ce qu'il se trouve près des prises électriques
existantes, ou lorsqu'une autre sortie peut ou sera
installée.
4. Les objets ne bloquent pas les bouches d'aération qui
limitent le refroidissement.
5. Permet un flux d'air non bloqué de l'arrière et des côtés
du climatiseur.
Installation du châssis dans l'armoire
1. Élever l'équipe (deux personnes) du châssis du
climatiseur etle faire glisser délicatement dans l'armoire.
Laisser l'avant du climatiseur traîner environ 6 ".
2. MISE EN GARDE: NE PISSEZ PAS SUR LES
COMMANDES OU LES BOBINES FINISES.
3. Assurer que le châssis est bien fixé à l'arrière de
l'armoire.
4. Insérer toutes les vis retirées lors de l'installation de la
fenêtre et reliez la plaque frontale, le panneau avant et l
e filtre à air. Utilisez les instructions REMOVE CHASSIS
et les figures 5-11 pour référence.
Préparer le mur
1. Préparer le mur dans la construction de châssis (y
compris le placage de brique et de stuc). Travailler à
partir de l'intérieur de la pièce, trouver le mur qui est le
plus proche du centre de la zone d'installation.
2. Couper un trou de chaque côté du goujon central.
3. Mesurer entre les bords intérieurs de chaque autre
goujon comme indiqué ci-dessous.
FIG.15
10
Page 58

ASSEMBLAGE ET INSTALLATION-THRU-THE-WALL(SUITE)
Mesurer soigneusement et couper une ouverture avec les
dimensions su ivantes selon votre modèle.
LARGEUR "X" = modèle intérieur plus deux fois l'épaisseur
du matériau d'encadrement utilisé.
HAUTEUR "Y" = hauteur intérieure du modèle plus deux
fois l'épaisseur du matériau d'encadrement utilisé.
REMARQUE: Si l'épaisseur de la paroi est de 8-1/2 "ou
plus, ajouter l'aluminium clignotant sur le bas de l'ouverture
du cadre pour s'assurer que l'eau est incapable d'entrer
dans la zone entre la paroi intérieure et extérieure.
Modèle
Hauteur du cadre
intérieur
Largeur du cadre
15K/18K
18 1/4”(46.4 cm)
23 7/8”(60.6 cm)
22K/24K
19 1/2”(49.5 cm)
26 9/10”(68.3 cm)
intérieur
FIG.16
Y
À l'intérieur
Cadre
Hauteur
4. Créer un cadre en bois avec les dimensions
INTÉRIEURES de votre modèle ci-dessus (Mesurer
deux fois). La profond eur du cadre doit être identique à
l'épaisseur de la paroi. Remplissez un espace
supplémentaire de l'ouverture aux goujons avec des
entretoises en bois comme indiqué ci-dessous.
5. Clouer les entretoises aux goujons. Ils devraient être
alignés avec le mur sec..
À l'intérieur
Cadre
Largeu
ASCENSEURS À GLISSES
À STUDS
Jusqu'à
8-1 / 2 "
CAULK COMME
REQUIS
FLASH EN ALUMINIUM
SUR LE BAS DU CADRE
PLUS DE
8-1/2 "
Préparer et installer l'armoire
1. Glisser le châssis à partir de l'armoire. Reportez vous à
(Page 6 et 7) dans la SECTION DE MONTAGE DE
FENÊTRE.
2. PlaceR l'armoire dans l'ouverture avec le rail inférieur
reposant fermement sur la planche inférieure du cadre
en bois.
3. Locate l'armoire de sorte qu'elle soit incliné correctement
pour l'élimination de l'eau comme on le voit ci-dessous.
ÉPAISSEUR DE 3/4"
PLUS VOIR PARTIE 5
5/16
"à
3/8"
NIVEAU
FIG.17
NIVEAU
4. Fixer le rail inférieur sur le cadre en bois avec deux
grandes vis à bois de 1”(2.5 cm) de long, comme in
diqué ci-dessous.
FIG.18
1" VIS À BOIS LONG
11
Page 59

ASSEMBLAGE ET INSTALLATION-THRU-THE-WALL (SUITE)
Reportez-vous à l'ASSEMBLAGE DU SUPPORT dans la
section FIXATION DE FENÊTRE pour assembler les
supports. Une bande de bois clouée sur le mur extérieur
doit être utilisée conjointement avec les supports angulaires
du parement du seuil.
FIG.19
Support en
bande de bois
Tira de madera
5. Visser ou clouer l'armoire sur le cadre en bois à l'aide de
cales si le cadre est surdimensionné, pour éliminer les
bruits possibles. N'oubliez pas de maintenir une
inclinaison correcte pour l'élimination de l'eau.
CONSTRUCTION DE MAÇONNERIE
1. Couper ou construire une ouverture de paroi dans la
paroi de maçonnerie similaire à la construction du
châssis (voir l'installation THRU-THE-WALL pour une
épaisseur de paroi supérieure à 8 1/2 ").
2. Fixer l'armoire en place à l'aide de clous de maçonnerie
ou de vis de maçonnerie. Ou, créez une image en
utilisant les instructions de la section d'installation THRU THE-WALL.
3. Assurer que la maçonnerie au-dessus de l'armoire est
bien supportée. Utilisez les trous existants dans l'armoire
ou des trous supplémentaires forés pour attacher
l'armoire à diverses positions. Assurer que les volets
latéraux ne contiennent aucune obstruction.
4. Installer les supports de l'armoire extérieure selon les
instructions d'INSTALLATION DU SUPPORT dans la
section d'installation de THRU-THE-WALL. Caulk ou
flash avec de l'aluminium si nécessaire. Cela donnera un
joint étanche sur le haut et les côtés de l'armoire.
5. Pour une installation plus esthétiquement agréable,
appliquer un moulage en bois sur les côtés de l'armoire
sans obstruer les parois latérales.
FIG.20
6. Installer le châssis dans l'armoire en suivant les étapes
décrites dans la section WINDOW MOUNTING.
OPTIONNEL: Le calfeutrage et l'installation de la garniture
sur la paroi intérieure peuvent être effectués si désiré.
Calfeutrez les ouvertures autour du haut et des côtés de
l'armoire et de tous les côtés de la manche en bois jusqu'à
l'ouverture.
REMARQUE: Consulter les instructions de FIXATION DE
FENÊTRE pour l'emplacement du joint de rail inférieur.
12
Page 60

UTILISATION DE VOTRE
CONDITIONNEUR D'AIR
Panneau de commande électronique
et télécommande
REMARQUE: Cet affichage affiche toujours la température
ambiante en mode Ventilateur, sauf lors du réglage de la
température réglée ou de la minuterie.
1
Cool Mode: La fonction de refroidissement permet au
climatiseur de refroidir la pièce et, en même temps, réduit
l'humidité de l'air. Appuyer la touche MODE pour activer la
fonction de refroidissement. Pour optimiser la fonction du
climatiseur, réglez la température et la vitesse en appuyant sur
le bouton indiqué.
Dry Mode: Cette fonction réduit l'humidité de l'air pour rendre la
pièce plus confortable. Appuyer le bouton MODE pour régler le
mode DRY. Une fonction automatique des cycles de
refroidissement alternatifs et du ventilateur est activée.
2
AUTO
SPEED
WIFI
AUTO
MODE
3
9 8 7 6 5 4
Contrôles de l'air conditionné
Sons d'opération normaux
• Vous pouvez entendre un bruit de ping causé par l'eau qui
frappe le condenseur, les jours pluvieux ou lorsque l'humidité
est élevée. Cette fonction de conception permet d'éliminer
l'humidité et d'améliorer l'efficacité.
• Vous pouvez entendre le contact du thermostat lorsque le
compresseur s'allume ou s'éteint.
• L'eau se rassemblera dans le moule de base pendant la pluie
ou les jours de forte humidité. L'eau peut déborder et goutter
de l'extérieur de l'unité.
• Le ventilateur peut fonctionner même lorsque le compresseur
n'est pas allumé.
1. Affichage numérique: sans réglage de la minuterie, le mode
de fonctionnement est Cooling, Dry, Fan et Auto, et la
température réglée s'aff iche.
L'heure s'affiche sous le réglage de la minuterie.
2. et Bouton: Utiliser ces boutons sur le panneau de
commande et la télécommande pour augmenter ou diminuer la
température réglée ou la minuterie.
Plage de température: 61°F ~ 88°F ou 16°C ~31°C.
3. Bouton d'alimentation: Allumez et éteignez le climatiseur.
4. Bouton Mode: Appuyer le bouton de mode pour parcourir les
différents modes: Cool, Dry, Fan et Auto.
Fan Mode: Le conditionneur fonctionne uniquement en
ventilation. Appuyer le bouton MODE pour régler le mode FAN.
En appuyant sur la touche FAN SPEED, la vitesse change dans
l'ordre suivant: Hi, Med et Lo en mode FAN. La télécommande
indique également la vitesse réglée dans le mode de
fonctionnement précédent.
Auto Mode: En mode AUTO, l'appareil choisit automatiquement
la vitesse du ventilateur et le mode de fonctionnement (COOL,
DRY ou FAN). Dans ce mode, la vitesse du ventilateur et la
température sont réglées automatiquement en fonction de la
température ambiante (testé par le capteur de température
incorporé L'unitéintérieure).
5. Timer Button: Utiliser ces boutons sur le panneau de
commande et la télécommande pour régler la minuterie.
Timer Off: l'arrêt programmé est programmé en appuyant sur
le bouton TIMER. Réglez le temps de repos en appuyant sur la
touche "∧" ou "V" jusqu'à ce que l'heure de repos affichée
correspond à votre demande, puis appuyez de nouveau sur le
bouton TIMER.
Timer On: Lorsque l'appareil est éteint, appuyer la touche
TIMER pour la première fois, réglez la température en appuyant
sur la touche " ∧" ou "V". Appuyer la touche TIMER à la
deuxième heure, réglez la durée de repos en appuyant sur la
touche " ∧ " ou "V". Appuyer la touche TIMER à la troisième fois,
confirmez le réglage, puis la durée de repos à la prochaine mise
en marche automatique peut être lue sur l'affichage de la
machine.
Remarque: Il peut être configuré pour éteindre ou allumer
automatiquement en 0.5 - 24 heures. Chaque pression sur les
boutons "∧" "V" augmente ou dimin ue la minuterie. La
minuterie peut être réglée en 0,5 heure incrémentée en dessous
de 10 heures et 1 heure d'incrémentation pendant 10 heures ou
plus. Le voyant SET s'allume pendant le réglage. Pour annuler
la fonction réglée, appuyez à nouveau sur la tou che TIMER.
13
Page 61

UTILISATION DE VOTRE
CONDITIONNEUR D'AIR
Panneau de commande électronique
et télécommande
6. Eco Button: Lorsque l'appareil est en mode ECO, le voyant
s'allume. En mode ECO, l'appareil s'éteint une fois que la pièce
est refroidie à la températ ure réglée par l'utilisateur. Le
ventilateur sera également désactivé à ce stade. L'appareil se
remet en route lorsque la température ambiante augmente au dessus de la température réglée par l'utilisateur. Avant que le
compresseur ne soit vedette, le moteur du ventilateur
fonctionnera pendant un moment, puis il s'arrêtera pendant un
certain temps et répétera pour offrir une sensation beaucoup
plus confortable et économiser de l'énergie.
7. Sleep Button: Appuyer le bouton SLEEP, le Sleep Light
s'allume après 10s et tous les voyants de gauche seront éteints.
En mode SOMMEIL, le climatiseur ajustera automatiquement la
température et la vitesse du ventilateur pour rendre la pièce plus
confortable pendant la nuit. La température réglée augmentera
automatiquement de 1 °C toutes les 30 - 60 minutes et au plus
changera six fois jusqu'à ce que la température réglée soit de
28 °C. Et chaque temps de fonctionnement dépend de la
température réglée.
10. Directional Louvers: Pour diriger le flux d'air, roue
horizontale pour contrôler la direction horizontale, déflecteur
d'air pour contrôler la direction verticale.
Roue horizontaleDéflecteur d'air Déflecteur d'air
8. Fan Speed Button: Appuyer le bouton FAN SPEED pour
choisir les options de vitesse du ventilateur. Vous pouvez choisir
Hi, Med, Lo ou la vitesse automatique en mode COOL et choisir
Hi, Med, Lo en mode FAN.
9. Filter Button: Lorsque le voyant vérification du filtre est éteint,
il est inutile d'appuyer sur le bouton Vérifier le filtre. Lorsque le
témoin Vérificateur de filtre est allumé, il peut éteindre la lumière
en appuyant sur le bouton Vérifier le filtre. Après que le moteur
du ventilateur fonctionne pendant 500 heures totales, le témoin
de vérification du filtre s'allume pour rappeler à l'utilisateur de
nettoyer le filtre.
.
14
Page 62

FONCTIONNEMENT DE VOTRE CONDITIONNEUR D'AIR
5.
TÉLÉCOMMANDE
1
3
4
2
7
Timer: Utiliser ces boutons sur le panneau de commande et l
a télécommande pour régler la minuterie.
Timer Off: L'arrêt programmé est programmé en appuyant sur le
bouton TIMER. Réglez le temps de repos en appuyant sur la
touche "∧" ou "V" jusqu'à ce que l'heure de repos affichée
correspond à votre demande, puis appuyez de nouveau sur le
bouton TIMER.
Timer On: Lorsque l'appareil est éteint, appuyerla touche TIMER
pour la première fois, réglez la température en appuyant sur la
touche "∧" ou "V". Appuyer la touche TIMER à la deuxième heure,
réglez la durée de repos en appuyant sur la touche "∧" ou "V".
Appuyerla touche TIMER à la troisième fois, confirmez le réglage,
puis la durée de repos à la prochaine mise en marche automatique
peut être lue sur l'affichage de la machine.
5
8
9
6
10
3
1. Power: Allumeret éteigner le climatiseur.
2. Cool: Appuyer le bouton COOL en mode COOL.
3. et : Utiliser ces boutons sur le panneau de commande
et la télécommande pour augmenter ou oré L'unité diminuer la
températ ure réglée ou la minuterie.
Plage de température: 61°F - 88°F ou 16°C ~ 31°C.
Remarque: Il peut être configuré pour éteindre ou allumer
automatiquement en 0.5 - 24 heures. Chaque pression sur les
boutons "∧" "V" augmente ou diminue la minuterie. La minuterie
peut être réglée en 0.5 heure in crémentée en dessous de 10
heures et 1 heure d'incrémentation pendant 10 heures ou plus.
Le voyant SET s'allume pendant le réglage. Pour annuler la
fonction réglée, appuyez à nouveau sur la touche TIMER.
6.
Auto Mode: En mode AUTO, l'appareil choisit auto
matiquement la vitesse du ventilateur et le mode de
fonctionnement (COOL, DRY ou FAN). Dans ce mode, la vitesse
du ventilateur et la température sont réglées automatiquement en
fonction de la température ambiante (testé par le capteur de
température incorp intérieure).
7.
Fan Speed: Appuyer le bouton FAN SPEED pour choisir les
options de vitesse du ventilateur. Vous pouvez choisir Hi, Med,
Lo ou la vitesse automatique en mode COOL et choisir Hi, Med,
Lo en mode FAN.
8.
Display: Pour appuyer sur le bouton DISPLAY, il peut éteindre/
allumer toutes les lumières ou les LED.
4.
Sleep: Appuyer le bouton SLEEP, le Sleep Light s'allume
après 10s et tous les voyants de gauche seront éteints. En mode
SOMMEIL, le climatiseur ajustera automatiquement la tem
pérature et la vitesse du ventilateur pour rendre la pièce plus
confortable pendant la nuit. La température réglée augmentera
automatiquement de 1°C toutes les 30 - 60 minutes et au plus
changera six fois jusqu'à ce que la température réglée soit de
28°C. Et chaque temps de fonctionnement dépend de la
température réglée.
Taille de la batterie: AAA - REMARQUE: Ne mélangez pas les batteries usées et nouvelles ou de différents types
des batteries AAA.
9. Eco: Lorsque l'appareil est en mode ECO, le voyant s'allume.
En mode ECO, l'appareil s'éteint une fois que la pièce est refroidie
à la température réglée par l'utilisateur. Le ve ntilateur sera
également désactivé à ce stade. L'appareil se remettra en marche
lorsque la température de la pièce s'élèvera au-dessus de la
température réglée par l'utilisateur. Avant que le compresseur
n'éloigne, le moteur du ventilateur fonctionnera pendant un
moment, puis il s'arrêtera pendant un certain temps et répétera
pour offrir une sensation beaucoup plus confortable et économiser
de l'énergie.
10.
Fan Only: Appuyer le bouton Fan Only pour le mode FAN
ONLY.
15
Page 63

ENTRETIEN ET NETTOYAGE
Nettoyer votre climatiseur pour garder le regard neuf et
pour minimiser l'accumulation de poussière.
Nettoyage du filtre à air
Le filtre à air doit être vérifié au moins une fois par mois
pour voir s'il faut nettoyer. Les particules piégées et la
poussière peuvent s'accumuler dans le filtre et peuvent
diminuer le débit d'air et provoquer l'accumulation de
givre dans les bobines de refroidissement. Pour nettoyer
le filtre à air:
1. Retirer le filtre en retirant les embouts de la porte du
filtre à l'avant de l'appareil. (Voir la FIG.21).
2. Laver le filtre à l'aide de savon à vaisselle liquide et
d'eau chaude. Rincer soigneusement le filtre. Agiter
doucement le filtre pour enlever l'excès d'eau.
3. Laisser le filtre sécher complètement avant de le placer
dans le climatiseur.
4. Si vous ne souhaitez pas laver le filtre, vous pouvez
aspirer le filtre pour enlever la poussière et d'autres
particules.
Nettoyage du cabinet
Pour nettoyer l'armoire du climatiseur:
• Débrancher le climatiseur pour éviter tout risque de choc
ou d'incendie. L'armoire et le panneau avant du
climatiseur peuvent être dépoussiérés avec un chiffon
exempt d'huile ou lavés avec un chiffon imbibé dans une
solution d'eau chaude et d'un savon liquide doux. Rincer
soigneusement avec un chiffon humide et essuyer.
• N'utilisez jamais de nettoyants agressifs, de cire ou de
vernis sur le devant de l'armoire.
• Assurez-vous d'essuyer l'excès d'eau du chiffon avant
de nettoyer les commandes. L'excès d'eau dans ou autour
des commandes peut endommager le climatiseur.
Stockage d'hiver
Pour stocker le climatiseur lorsqu'il n'est pas utilisé
pendant une période prolongée, retirez-le soigneusement
de la fenêtre conformément aux instructions d'installation
et recouvrez-le avec du plastique ou placez-le dans la
boîte d'origine
FIG. 21
Usure normale
Pour minimiser l'usure de l'air conditionné, attendez au
moins 3 minutes avant de changer de mode. Cela aidera
à empêcher le compresseur de surchauffer et le circuit de
déclenchement.
16
Page 64

DÉPANNAGE
PROBLEMA POSIBLES CAUSAS SOLUCIONES
Le climatiseur ne démarre pas
Le climatiseur est débranché.
Le fusible est soufflé / le disjoncteur
est déclenché.
Panne de puissance.
L'interrupteur courant est déclenché.
• Assurer que la fiche du climatiseur est
enfoncée dans la prise de courant.
• Vérifier le fusible de la maison / boîte de
disjoncteur et remplacez le fusible ou
réinitialisez le disjoncteur.
• L'appareil redémarre automatiquement
lorsque l'alimentation est rétablie.
• Il y a un délai de protection (environ 3
minutes) pour empêcher le
déclenchement de la surcharge du
compresseur. Pour cette raison, l'appareil
peut ne pas démarrer le refroidissement
normal pendant 3 minutes après son
retour.
• Appuyer le bouton RESET situé sur la
fiche du cordon d'alimentation.
• Si le bouton RESET ne reste pas engagé,
arrêter l'utilisation du climatiseur et
contacter un technicien qualifié.
Le climatiseur ne refroidit pas
comme il se doit
L'air conditionné se gèle
La télécommande ne fonctionne
pas (si elle est incluse avec votre
climatiseur)
Le flux d'air est limité.
Le contrôle de la température peut ne
pas être réglé correctement.
Le filtre à air est sale.
La chambre peut être trop chaude.
L'air froid échappe.
Les bobines de refroidissement sont
gelées.
La glace bloque le flux d'air et arrête le
climatiseur de refroidir la pièce.
Les batteries sont insérées de manière
incorrecte.
Les batteries peuvent être mortes.
• Assurer qu'il n'y a pas de rideaux, de
stores ou de meubles qui bloquent l'avant
du climatiseur.
• Tourner la molette TEMP à un nombre
plus élevé.
ttoyer le filtre. Consulter la section
• Ne
Nettoyage et entretien du manuel.
• Veillez à laisser refroidir la pièce après
avoir allumé le climatiseur.
• Vérifier les registres de four ouvert et les
retours d'air froid.
• Voir "Air Conditioner Freezing Up" ci dessous.
• Régler la molette MODE sur HIGH FAN
ou HIGH COOL et régler la molette TEMP
sur 1 ou 2.
• Vérifier la position des batteries.
• Remplacer les batteries.
17
Page 65
DÉPANNAGE (SUITE)
PROBLÈME CAUSES POSSIBLES SOLUTIONS
L'eau coule dehors
L'eau coule dans la chambre
L'eau se rassemble dans le
moule de base
L'affichage numérique lit
"E1","E2"
Météo chaude et humide.
Le climatiseur n'est pas correctement
incliné à l'extérieur.
L'humidité retirée de l'air s'écoule dans
le moule de base.
Un capteur a échoué
• C'est normal.
• Pour un bon drainage de l'eau,
assurez-vous que le climatiseur est
légèrement incliné vers le bas de
l'avant de l'appareil vers l'arrière.
• Ceci est normal pour une courte
période dans des zones à faible
humidité et à une température normale
pendant une période plus longue dans
des zones à forte humidité.
• Contacter le service clientèle.
18
Page 66

Page 67

Page 68

Cette instruction a un autre format et vous pouvez obtenir sur le site
Web: https://tclusa.com
 Loading...