

Page 1
72-MS280G-S03AG
2013.9.10
MS28
李紫云
Page 2
液晶显示器
液晶显示器
使用显示器
显示器
显示器
使用
显示器
显示器 显示器
版本:72-MS280G-S03AG
公司维修服务部地址请咨询4008-123456
H46F3500G/H55F350 0G/H6 5F350 0G
液晶显示器使用说明书
Page 3
Page 4
Page 5
Page 6
07
08
05
01
Page 7
02
产品使用注意事项
显示器
显示器
显示器
显示器
显示器
显示器
显示器
显示器
显示器 显示器
显示器
显示器
显示器
显示器 显示器
显示器
液晶
显示器
Page 8

液晶显示器
中英文菜单
03
Page 9

/
(以H4 6F3500G为例)
(以H4 6F3500G为例)
P
P
V
V
上/下选择键
(菜单打开时有效)
/
确认键
04
Page 10

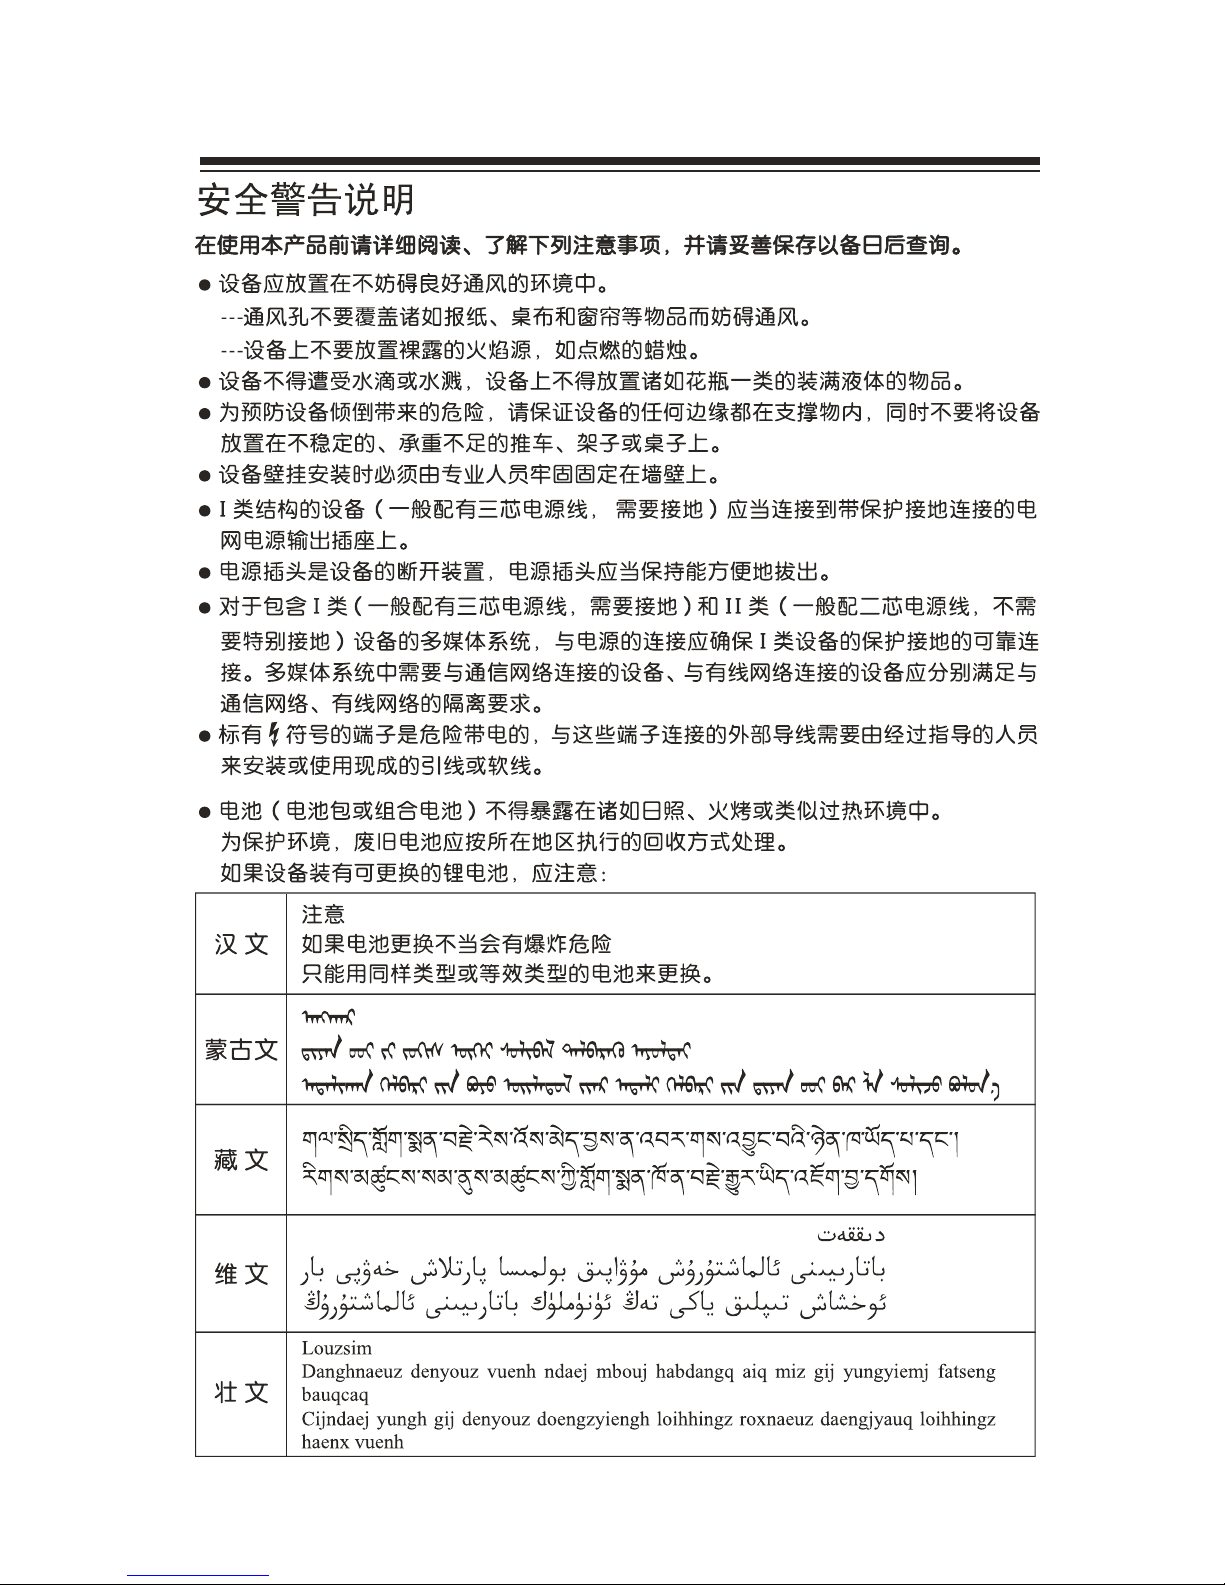
电池不得暴露在诸如日照、火烤或类似过热
环境中。
7
FORMAT
PRESETSS.EFFECT FR
EEZE
SOURCE
MENU
EXIT
INFO
显示 器
100V-240V
显示 器
显示 器
显示
器
显示 器 显示 器
显示 器 显示 器
显示 器
05
Page 11

英文
06
Page 12

H55F3 500GH65F3 500G H46F3 500G
最大工作电流:
2.3A 1.3A 1.4A
100V-240V~ 50/60Hz 100V-240V~ 50/60Hz 100V-240V~ 50/60Hz
1058.7 627.7 56.5 1250 735 59.2
14.4 2033.5
164cm
1470 864 54.1
英文
工作温 度0~40℃ ,工作 相 对湿 度20%~80%( 非冷 凝 ), 存 储温度 -20~60℃、
存储相 对湿度20%~80%(非冷凝 );
07
Page 13

信号源
信号源
信号
08
Page 14

LCD MONITOR
OPERATION MANUAL
H46F3500G/H55F3500G/H65F3500G
Page 15

Getting started
EN 1
Page 16

EN 2
Page 17

Important information
Ensure that your domestic mains supply voltage
matches the voltage indicated on the identification
sticker located at the back of your set. Where the
ma ins plug or an appli ance coupler is used a s
disconnect device, the disconnect device shall remain
readily operable.
On certain models, the light indicator is located at the
side of the set. The absence of a light indication
at the front does n ot mean that the set is fully
disconnected from the mains. To disconnect the
set completely, the mains plug must be pulled out.
The set s components are sensitive to heat. The
maximum ambient temperature should not exceed
35 Celsius. Do not cover the vents at the back or
sides of the set. Leave sufficient space around
it to allow adequate ventilation. Install the appliance
away from any source of heat (fireplace, etc.) or
appliances creating strong magnetic or electric fields.
Moisture in rooms where the set is installed should
not exceed 85% humidity. Apparatus shall not be
exposed to dripping or splashing and no objects
filled with liquids, such as vases, shall be placed
on the apparatus. Moving the set from a cold place to
a warm one can cause condensation on the screen
(and on some components inside the set). Let the
condensation evaporate before switching the set
on again.
The
or
POWER
/
button
on
the
set or the
button on the remote control can be used to switch it
on and put it into standby mode. If you are not going
to be using the set for a lengthy period of time ,
switch it off completely by removing the plug from the
mains power socket.
During thunderstorms, we recommend that you
disconnect the set from the mains and aerial so
that it is not affected by electrical or electromagnetic
surges that could damage it. For this reason, keep
the mains and aerial sockets accessible so they
can
be disconnected, if necessary.
Unplug the set immediately if you notice it giving
off a smell of burning or smoke. You must never,
under any circumstances, open the set yourself,
as you run the risk of an electric shock in doing so.
Therefore, it can break when the product is dropped
or impacted upon by other objects.
The LCD screen is a very high technology product,
giving you finely detailed pictures. Occasionally, a
few nonactive pixels may appear on the screen as
the performance of your product.
a soft cloth and mild detergent to clean the rest of the
set.
Important: Using strong detergents, alcohol-based
and abrasive products may damage the screen.
Dust the vents at the back and sides regularly. Using
solvents, abrasive or alcohol-based products could
damage the set. If a n o bj ect or l iquid enters the
appliance, unplug it immediately and have it checked
by an authorized engineer. Never open the appliance
yourself since this may put you at risk or damage the
appliance.
To ensure a safe installation, observe the following
safety notes:
Check that the wall can support the weight of the •
set and wall mount assembly.
Follow the mounting instructions provided with the •
wall mount. For certain models, make sure to screw
the hexagonal VESA wall mounting screw bosses
(and screws) provided with the set into the nuts for
the wall mount at the back of your set before your
wall mounting.
The set must be installed on a vertical wall.•
Make sure to use only screws suitable for the material •
of the wall.
Make sure that the set cables are placed so that •
there is not danger of tripping over them.
All other safety instructions about our sets are
also applicable here.
Handling the set on the table
Before setting up your set, make sure that
the surface you want to put the set on can support its
weight.
Do not place the set on an unstable surface (e.g.
moving shelf, very edge of a unit) and make sure that
the front of the set does not overhang the
surface it is standing on.
with high quality materials and components
which can be recycled and reused.
This symbol means that electrical and
electronic
equipment, at their end-of-life
,
should be disposed of separately from
lease, dispose of this equipment at your local
community
waste collection/recycling centre. In the European Union
there are separate collection systems for used electrical
and electronic product. Please, help us to conserve the
environment we live in!
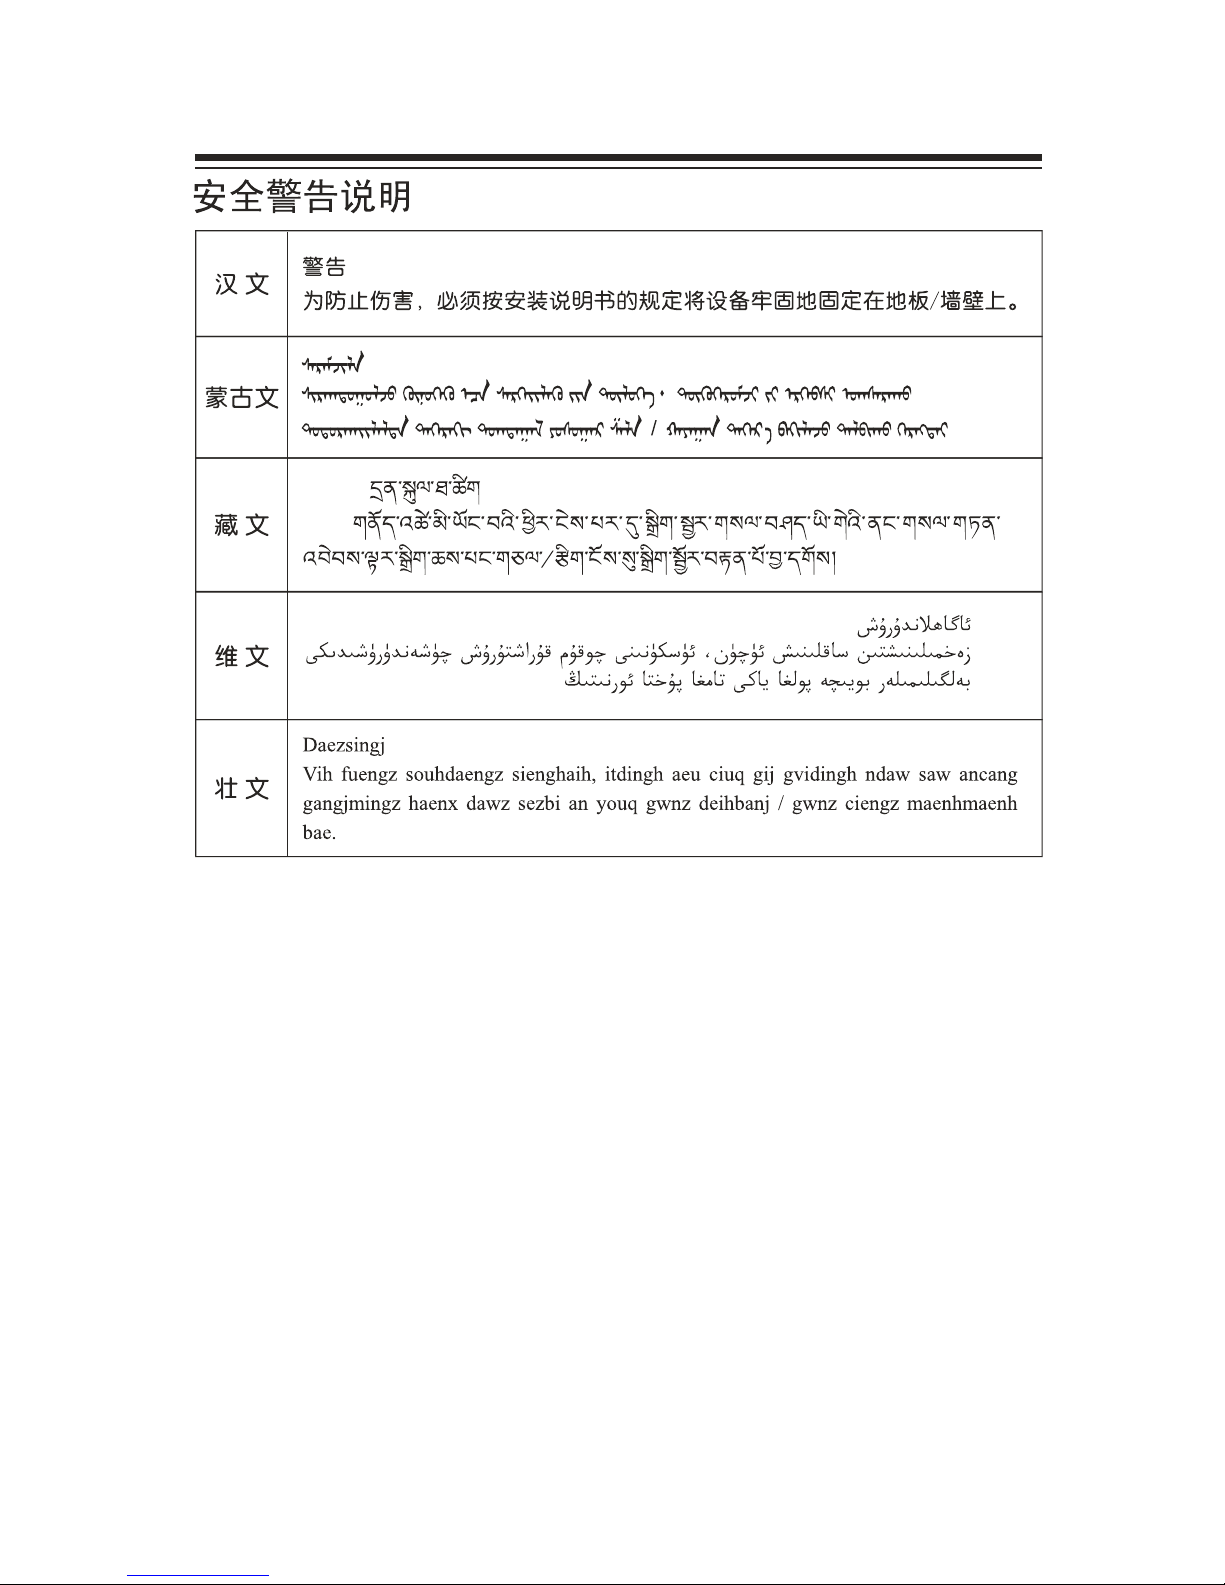
WARNING
To prevent the spread of fire, keep candles or
other open flames away from this product at
all times.
Warning: This operation requires two people.
The LCD screen used in this product is made of glass.
a fixed point of blue, green or red. This does not affect
Safety
,
。
LCD screen
Care
Getting started
EN 3
Use a glass-cleaning product to clean the screen and
This product is designed and manufactured
Hanging the set on the wall
Page 18

MENU
(
.
Brings up the main menu or press to return to the previous menu
1
. VOLUME UP/DOWN (VOL+/-)button
Increases/decreases the volume. In the menu system, they act like the right/left direction buttons on the
remote and adjust menu controls
Turns the set on or standby. (Note: for some models, the POWER button turns the set on or off.)
Note: The location and names of the function buttons and power button on the set may vary according to
the model.
SOURCE ( ) button
Press to select signal source.
Sockets
available on all models.
HDMI 1
HDMI1 and HDMI2 socket (input)
HDMI 2
or
The HDMI can be used to connect a
PC with a compatible video card installed, certain DVD players or a high-definition
compatible digital satellite decoder. This socket p
(High-Definition Multimedia Interface) socket
rovides an uncompressed digital
connection that carries both video and audio data by way of an integrated mini-plug
cable.
USB socket (input)
This socket
Note: The number of USB sockets on the set may vary according to model. set
USB
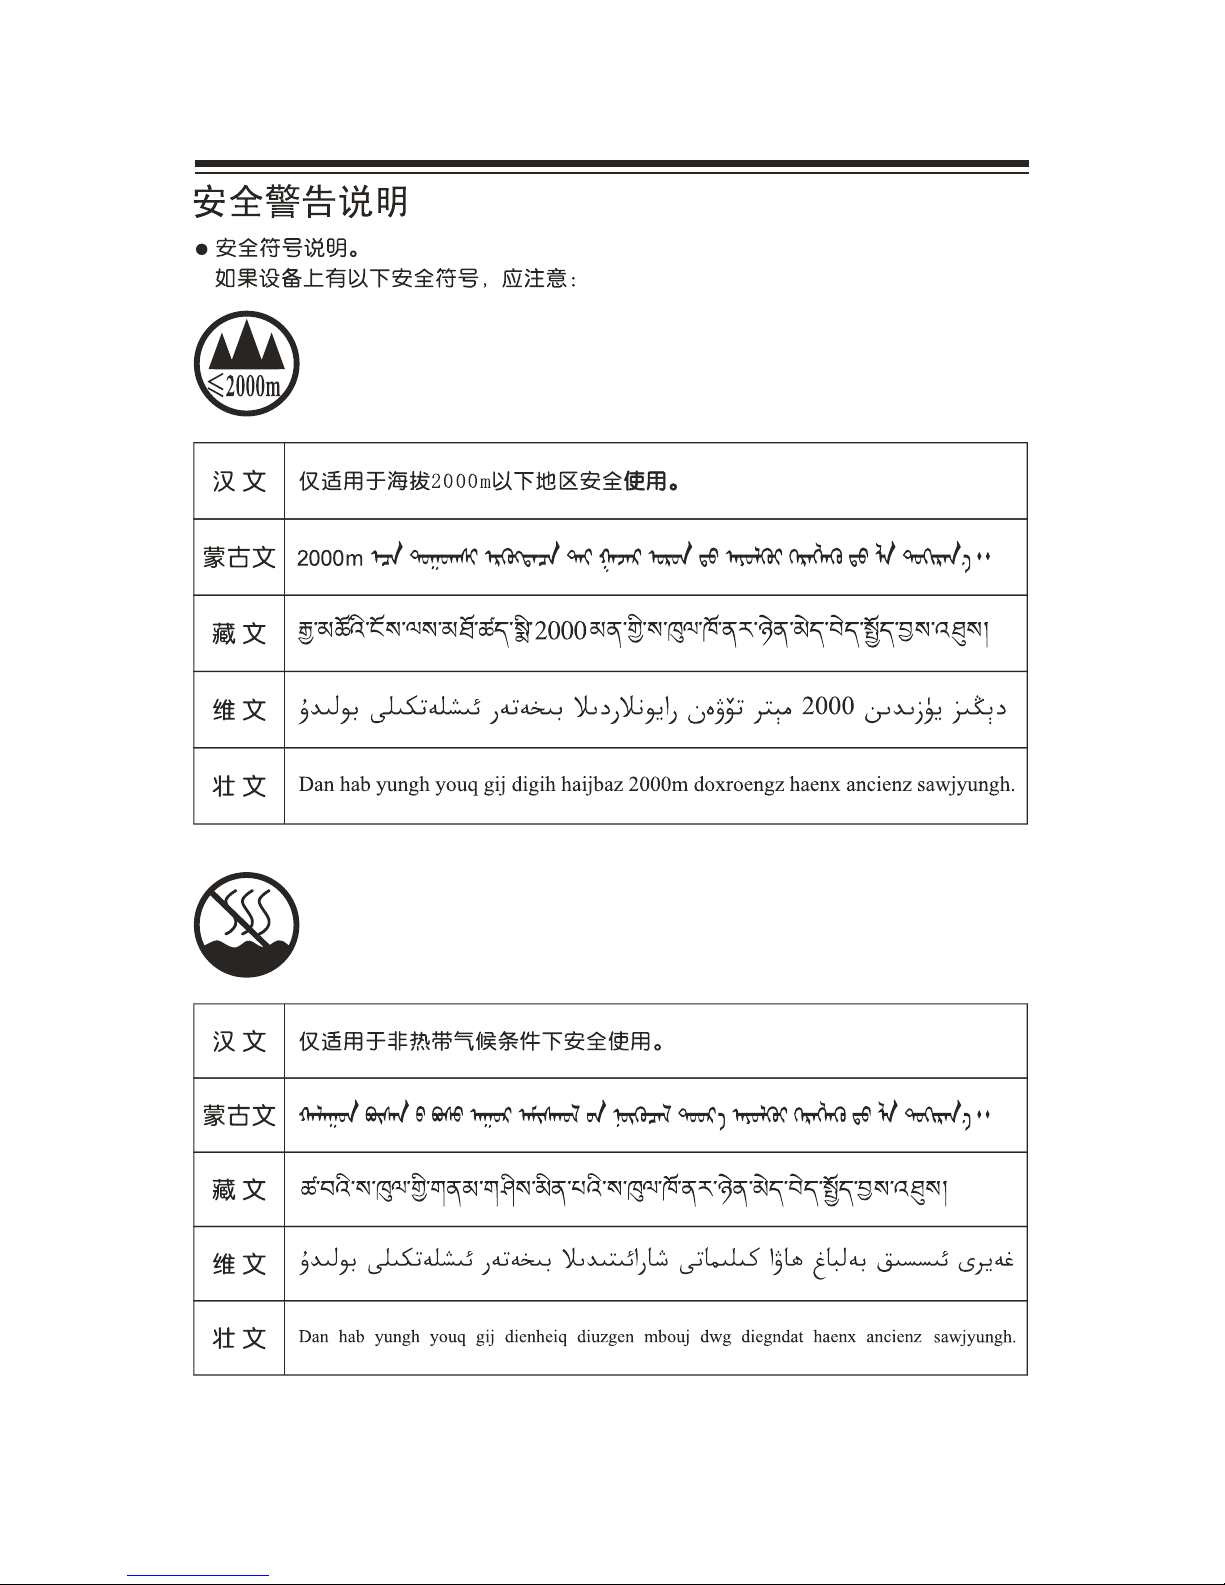
AV 1 RCA audio video sockets input
Note: AV 1 IN adapter The socket can be used to connect the attached AV adapter
cable with VIDEO and AUDIO L & R IN sockets.
R
L
AUDIO
VIDEO
AV 1 IN
The AV IN sockets can be used to connect a range of equipment, including video
recorders, camcorders, decoders, satellite receivers, DVD players, or games
consoles. The VIDEO IN1 socket provides composite video connection.
button
2
POWER ( ) button
+
(
(
can be used to connect an USB device.
set
Note: The location and names of the sockets on the set may vary according to the model, and not all sockets
Getting started
EN 4
This socket is only used to update program.
3
)
Page 19
Getting started
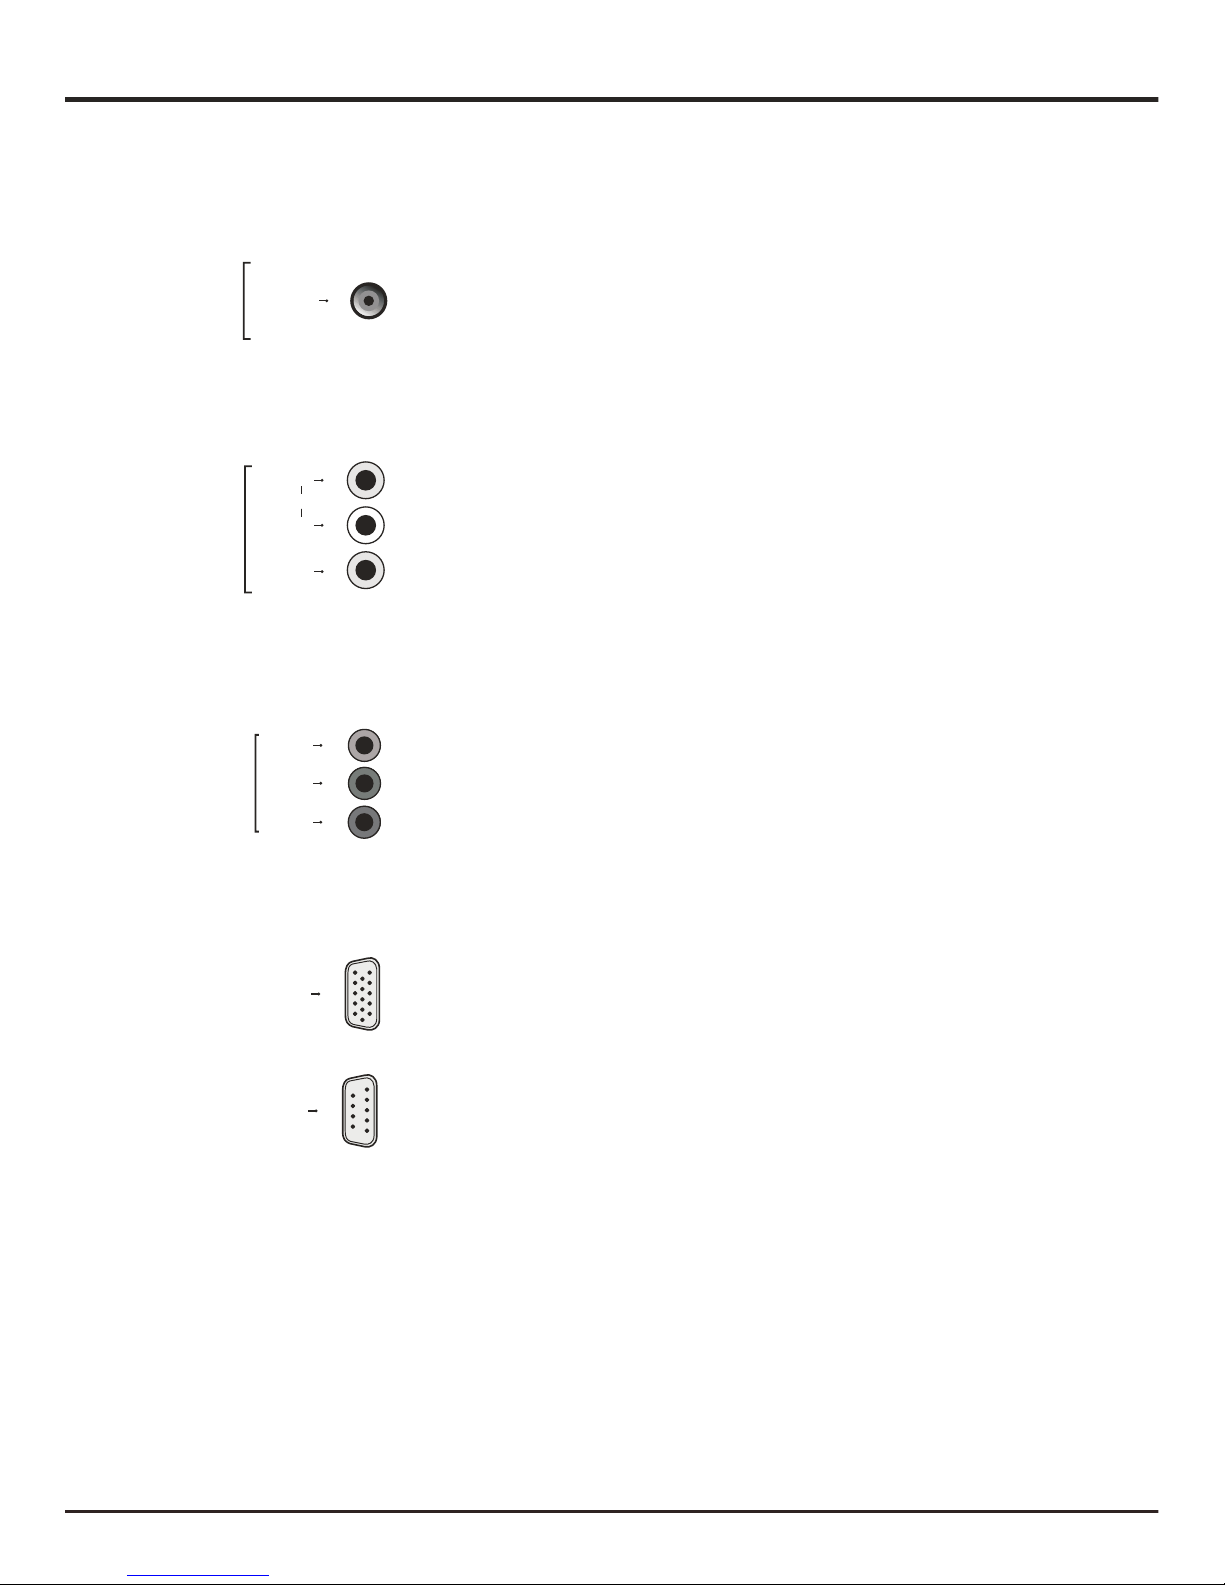
VGA socket (input)
This socket can be used to connect a computer.
VGA
AV adapter (output) socket
Note: The AV OUT adapter socket can be used to connect the attached AV
adapter cable with VIDEO and AUDIO L & R OUT sockets.
AV OUT
adapter
Note:
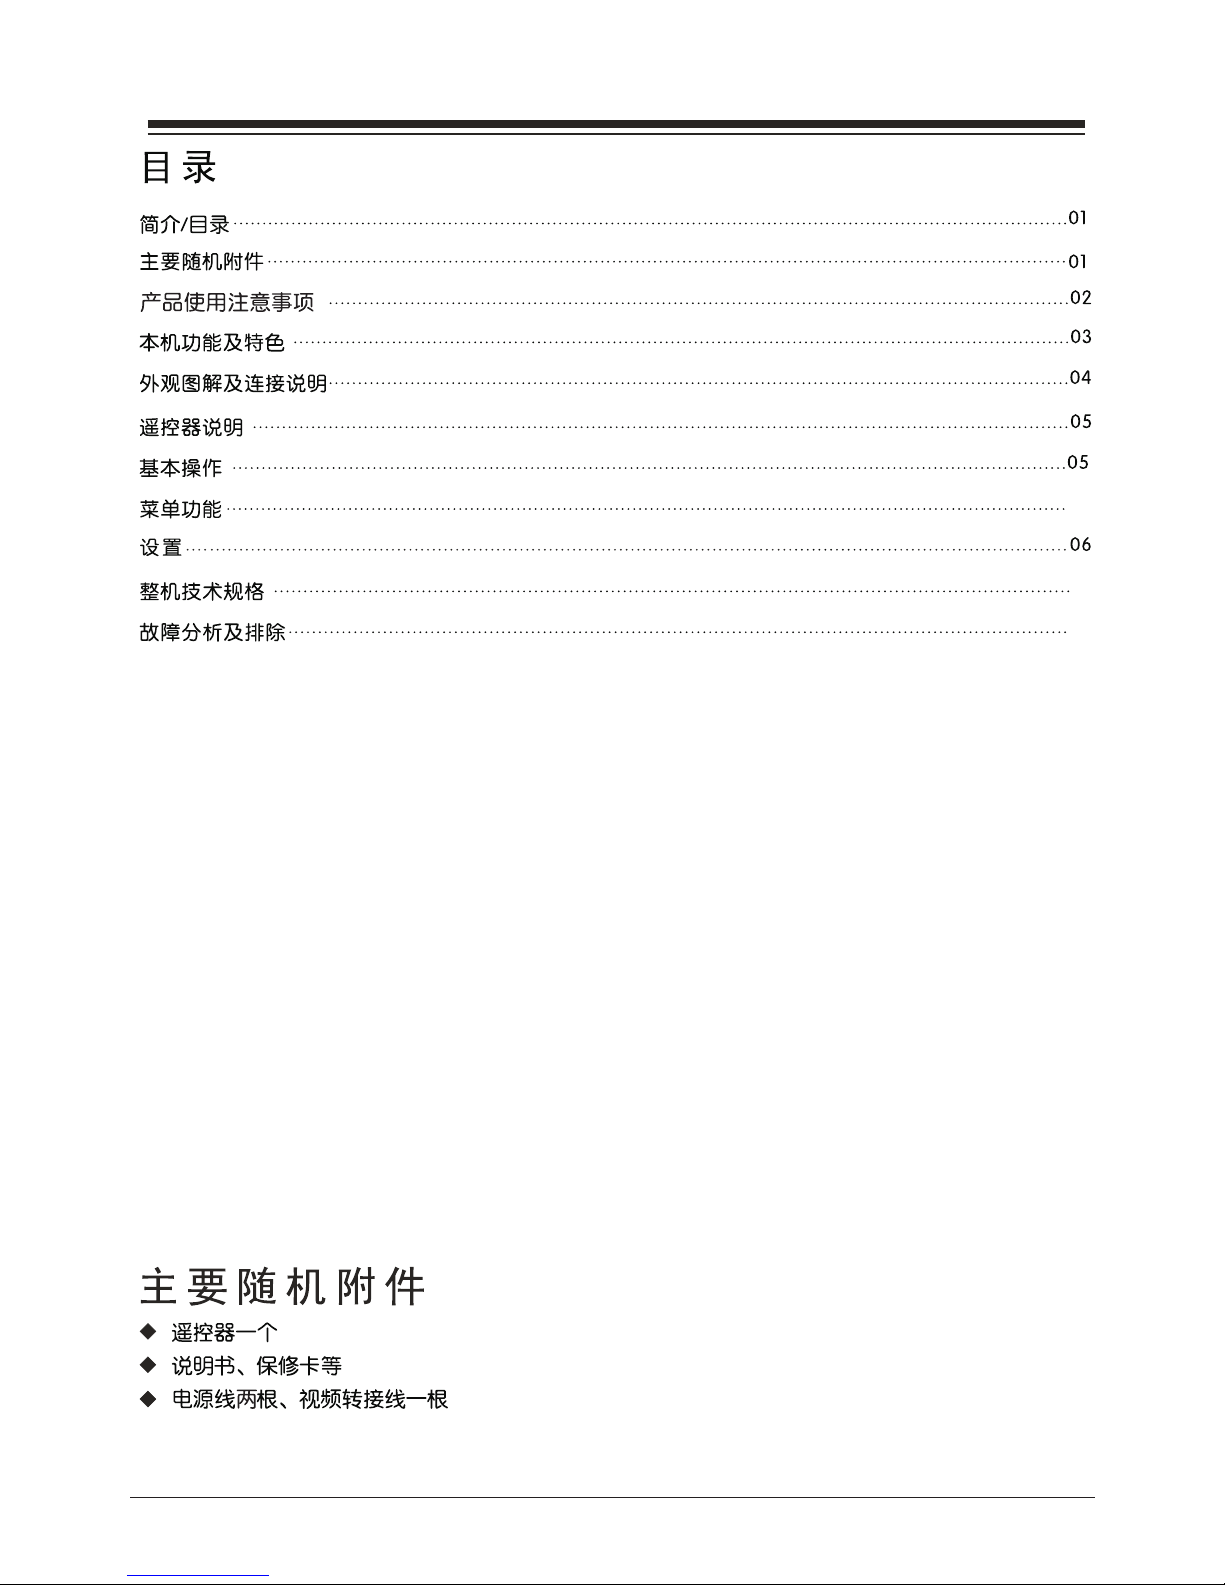
The AV IN sockets can be used to connect a range of equipment, including video
recorders, camcorders, decoders, satellite receivers, DVD players, or games
consoles. The VIDEO IN2 socket provides composite video connection.
L
AUDIO
VIDEO
AV 2 IN
R
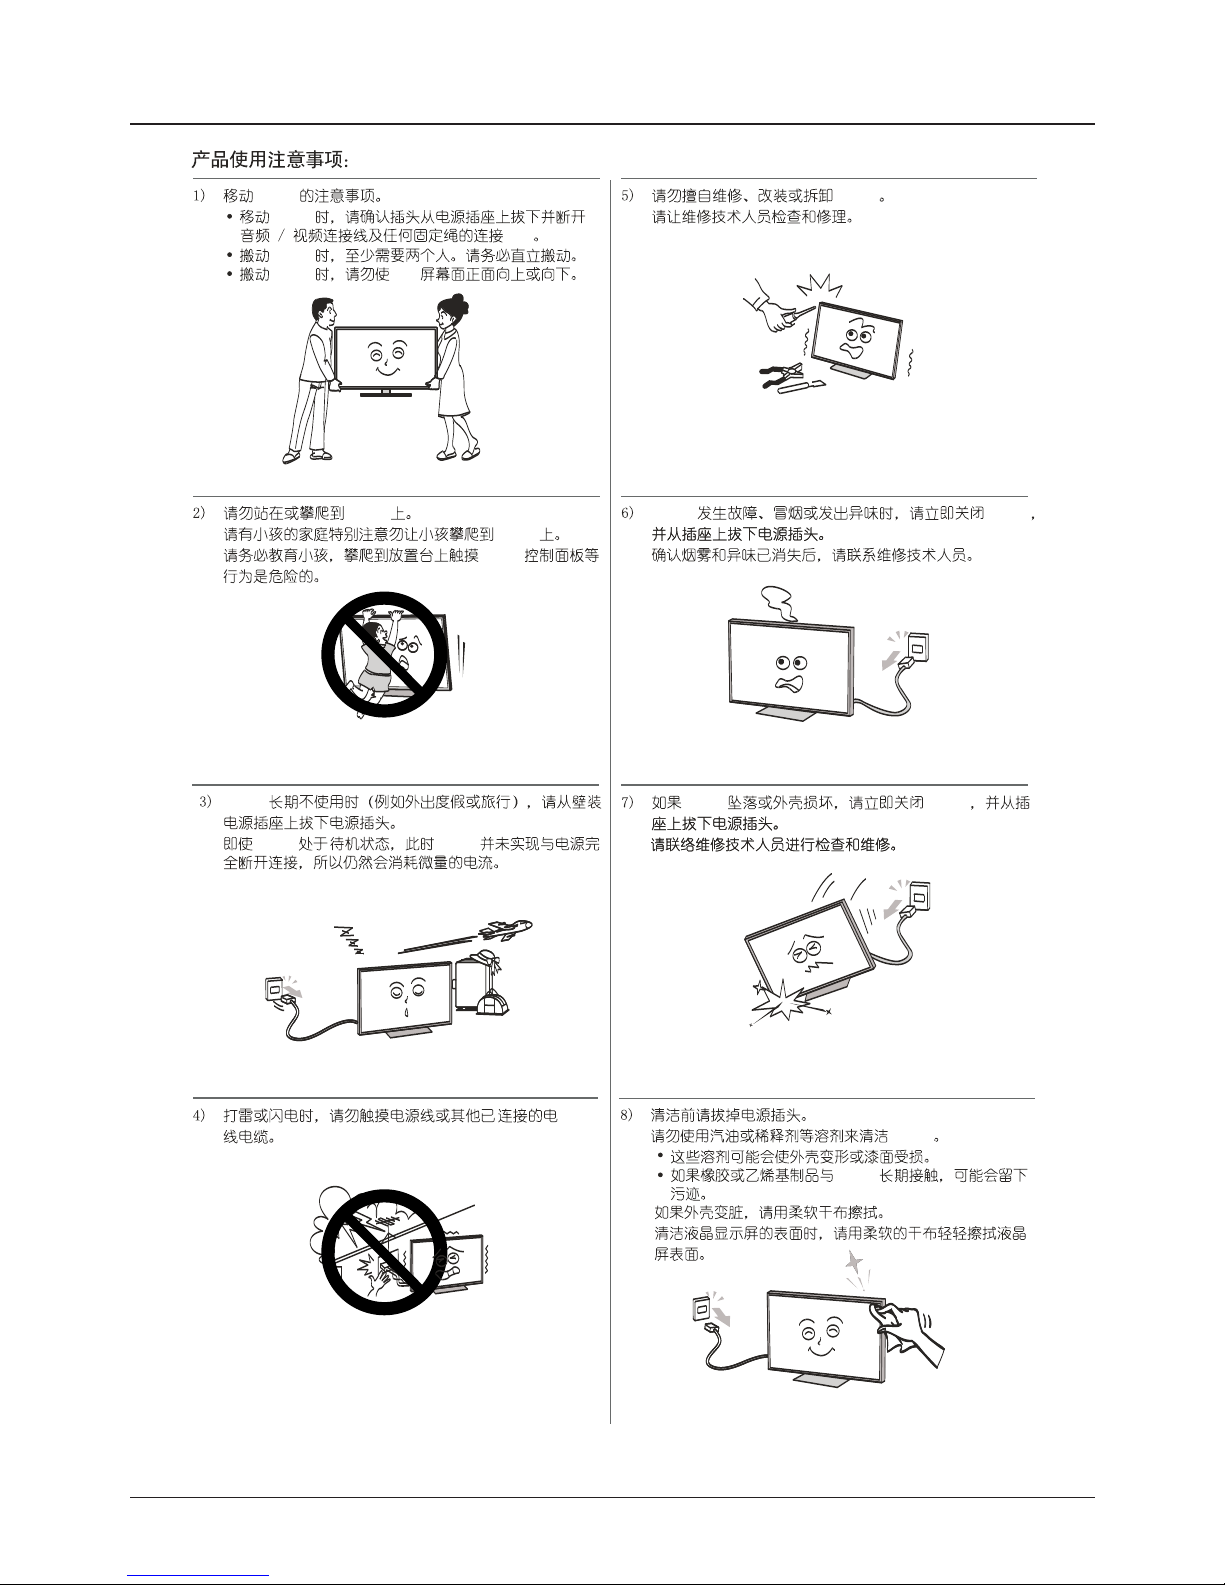
YPbPr component sockets (input)
Note:
Y
Pb/Cb
Pr/Cr
C OMPONENT
These YPbPr sockets can be used to connect a device that has component
video sockets, such as a DVD player. The component sockets can recognize if
the device you're connecting to is Y Pb Pr compatible or Y Cb Cr compatible.
The component sockets provide excellent picture quality because the video is
separated into three separate parts.
Note: The audio input port called is shareable for AV 2 IN & COMPONENT
IN(YPbPr); Video input
port is the same one as Pr/Cr of YPbPr.
Note
YPbPr is shareable.
AV 2 RCA audio + video sockets (input)
AV OUT
: Under PC signal source, the audio input port of
I N
RS232
RS232 socket
This socket can be used to control the monitor set.
EN 5
Page 20

Standby / quit standby
Alphanumeric
buttons
a digit or a symbol in some functions.
SOURCE
To select connected devices.
V+/-
To control the volume.
To switch the sound off and back on again.
display programme information, if
available.
access the main menu; to return to the
previous menu
.
confirm an entry or selection;
To navigate through the menus; to select
menu options
To navigate through the menus;
► can
also be used to open the corresponding
submenu.
* To select the picture format.
Note: You are recommended to use the full
screen mode. Do not use the display mode
with black bars on both sides of the picture
(such as 4:3) for long time; otherwise the
screen may be damaged permanently.
Important:
Batteries shall not be exposed to excessive heat such as sunshine, fire or the like. If the batteries in your remote
control are run down you can use the buttons on your set. In mode, t
hey have the same
functions as the corresponding buttons on the remote control. In the menus they have the following functions:
For models with OK button on the set: For models without OK button on the set:
VOL+,
+ or VOL ► ► VOL+, + or VOL ► ▲
VOL-,
- or VOL ◄ ◄ VOL-, - or VOL ◄ ▼
MENU or
MENU
MENU or MENU
OK or SOURCE OK
Most of your monitor's functions are available via the menus that appear on the screen. The remote control
supplied with your set can be used to navigate through the menus and to configure all the general settings.
To return to the previous channel
EXIT
exit the menu structure .
FORMAT
To select the picture format .
PRESETS
To select the picture mode .
S.EFFECT
To select the sound mode .
FREEZE
To freeze/unfreeze the picture .
Remote control functions
To enter a letter.
INFO
To
MENU
To
To
OK
To
EN 6
Getting started
MONITOR MONITOR
Page 21

Switching on
1. Insert two batteries in the remote control.
Precautions on using batteries:
- Only use the battery types specified.
- Make sure you use the correct polarity.
- Do not mix new and used batteries.
- Do not use rechargeable batteries.
-
- Remove the batteries from the remote control if you are not using it for a long
period of time.
Do not expose batteries to excessive heat such as sunshine, fire or the like,
throw them in a fire, recharge them or try to open them, as this could cause
them to leak or explode.
3. When powered on, the set will be turned on directly or be in standby.
Note: For some models, s
If the power indicator lights up, the set is in standby mode. Press the
button on the remote control or on the set to turn on the .monitor
witch the set on by pressing the power button.
2. Connect the power cable FIRST to the monitor, THEN to a mains socket.
(Note: If the power cable is connected to the , please only connect the monitor
power cable to the mains socket.)
Your set should only be connected to an AC supply. It must not be connected
to a DC supply. If the plug is detached from the cable, do not, under any
circumstances, connect it to a mains socket, as there is a risk of electric shock.
Note: The figures are for representation only. The location of the power socket
the back of the might differ depending on the model.Switching offat monitor
To put the set into standby mode, press the button on the remote control
or on the model, the set remains powered up, but with low energy consumption.
To switch off the set, unplug the mains socket from the mains outlet.
Note: For some models, press the power button to switch off the set .
Switching off
EN 7
Getting started
Page 22
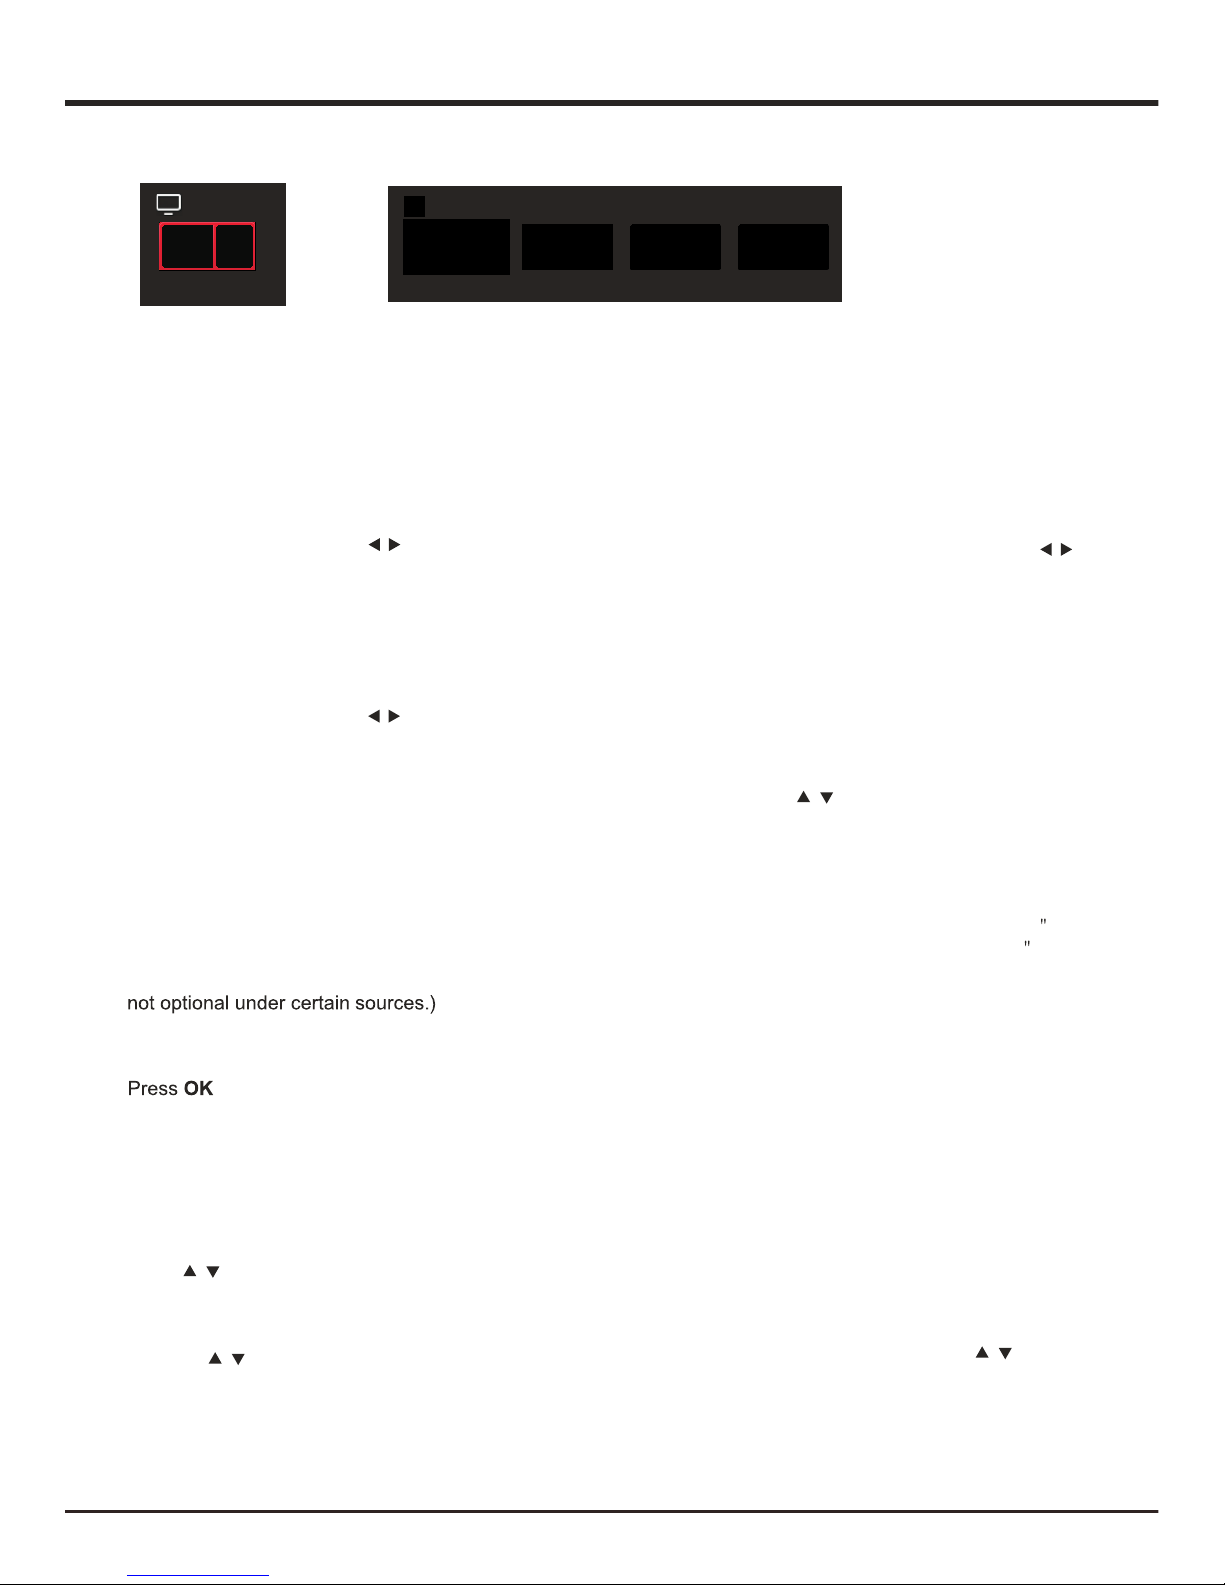
Menu Display
Input S ourc e
Input
Figure 2Figure 1
General Operation
EN 8
Pictur e
Sound Functi on Sys tem
Settin g
This main menu contains six submenus, Picture,
Sound, Function, System, Auto Show and Geometry.
U
ress to toggle among the
se sliding button or p
submenus. Press OK to confirm, and press MENU
to exit.
1. Picture
Picture Mode: includes Vivid, Normal,Mild and User.
Use sliding button or press to choose
one mode, and press OK to confirm.
Backlight: 0 ~ 100
Brightness: 0 ~ 100
Contrast: 0 ~ 100
Chroma: 0 ~ 100
Sharpness: 0 ~ 100
Tint: 0 ~ 100 (only available in NTSC system)
Col. Temp: Cool, Warm, Medium.
Natural Light: On, Off.
DCC: On, Off.
Picture Size: Normal, Full, Zoom, Expand, Cinema,
Subtitle, Native, Dot By Dot. (Note: Some modes are
Sound Mode: Normal, Music, Cinema, News.
Balance: -50 ~ +50
Auto Volume: On, Off.
Scene: HangUp Mode, DeskTop Mode.
/
/
AIS : Press OK to enter. Use sliding button
or press
to select Off, Auto switch,or Manual switch.
Dyn. Comp: Off, On. (Note: this function is not
in certain models.) available
Start Logo: Press OK to enter into it. Use sliding button
Start Music : Default, Music 1.off
Language: English.
Color System: Auto, PAL, NTSC, SECAM.
/
/
Setting
Press OK t
o display the menu items of the Picture.
to access option items of the Sound.
2.
3.Function
45 min, 60 min, 90 min, 120 min.
off time Setting:
-Current Time: Press OK and a number keyboard
appears on the screen. Press to
choose numbers, and press OK to
confirm. To delete the inputted numbers,
press DEL on the soft keyboard. Press
Finished on the soft keyboard to save
what you have inputted.
-Power Off Style : Once, Every Day, Off.
-Off Time: the operation method is the same as
Current Time.
SW Update: Press OK and use sliding button or
Press to update the software(SW)
by
U SB . After the SW updating fi le is
searched, the system automatically
begin to update SW.
Restore to Default: Press OK to enter, a prompt Does
restore to factory default?
will turn
up. Choose Yes to restore factory
default settings.
those models with network functions).
It contains Colour Demo, Grada Demo, Light Demo, and
Noise Demo.
Auto Adjust, H-Position, V-Position,Clock, and Phase.
/
/
/
: Off, 5 min, 10min, 20 min, 30 min,
: to display Software Version, User ID (only for
System
4.System
5.Auto Show
Select Setting
> Auto Show, and press OK to enter.
Note: This function is not available under VGA source.
> Geometry, and press to select
Select Setting
6.Geometry
Sleep Timer
Note: Geometry is only available under PC source.
No Signal standly: On,Off
Sound
Note: this function is only available under AV source.
(Note: this function is not available in certain models.)
Page 23

FCC Information
EN 9
CAUTION: Changes or modifications not expressly approved by the party responsible for compliance
could void the user’s authority to operate the equipment.
FCC Information
This equipment has been tested and found to comply with the limits for a Class B digital device,
pursuant to part 15 o f the FCC Rul es. These li mits a re designed to provide reasonable protect ion
against harmful interference in a residential installation. This equip ment gene rates, us es, and can
radiate radio freq uency energy and, i f not installed and used in acc ordance with the instructions,
may cause harmful interference to radio commun ication s. However, there is no guarante e that
interference will not occur in a particular installation. If this equi pment does caus e ha rmful
interference to radio or television reception, which can be determi ned by turn ing the equ ipment off
and on, the user is encouraged to try to c orrect the interference b y one or more of the
Reorient or relocate the receiving antenna.
Increase the separation between the equipment and receiver.
This Class B digital apparatus complies with Canadian ICES-003.
Pl ease do not send any pr od uc ts to the California address li st ed in this manual or on t he carton.
Th is will only add delays i n service for your product.
Figures a nd illu st rations in this User’s Guide a re prov id ed for reference only a nd may di ff er from
actual product a ppearan ce . Produ ct design and sp ec ificati on s may b e chang ed withou t notice.
following measures:
Connect the equipment into an outlet no a circuit different from that to which the receiver is connected.
Consult the dealer or an experienced radio/TV technician for help.
 Loading...