

Page 1
ALTO 9+
RAY·DANZ 3.1 Atmos Sound Bar with
Wireless Subwoofer
User manual
Page 2

Contents
1 Before you begin 3
2 Welcome 4
What’s in the box 4
Overview of the Sound Bar main unit 6
Overview of the wireless subwoofer 8
Remove the Sound Bar back cover 9
Set up your Sound Bar system 9
3 Connect, install and pair 13
Connect to your TV 13
Optional: Connect your Blu-ray player 15
Connect your Sound Bar to power supply 16
Install/replace the remote control batteries 17
Pair your wireless subwoofer to the Sound Bar 18
4 Optional connections 20
Connect with the supplied optical cable 20
Connect with the audio cable 23
Pair the Sound Bar with your Bluetooth device 24
1
Page 3

5 Use your Sound Bar system 25
Operate your Sound Bar with the top panel
Sound Bar LED display
Sound Bar Menu Operation
Set up Wi-Fi connection for music streaming
Listen to music from your Bluetooth device
Use the USB device for music playback
25
30
25
25
26
28
29
7 Notice 31
Declaration of conformity 31
Disposal of your old product and battery 31
8 Trademarks 33
9 FAQ 35
2
Page 4
1 Before you begin
• Carefully read and observe all safety instructions in the safety
leaflet.
•
This soundbar is intended for indoor use only. In case it
accidentally gets in contact with small amounts of water,
unplug immediately and use a dry cloth to remove the
water.
• Unplug the soundbar if it is not used for long periods of
time or during lightning storms.
• Make sure the soundbar is installed on a solid surface
or solidly wall-mounted below your TV for the best
experience.
• Only use AAA 1.5V non-rechargeable batteries for the
remote control.
• In case any of the cables are visibly damaged or pinched,
unplug the soundbar and replace the cable.
• Be careful not to sharply bend the HDMI and optical cable
as they may affect the performance.
• Protect your hearing by adjusting to a proper volume.
for your listening comfort.
3
Page 5
2 Welcome
Congratulations on the purchase of your new TCL Sound
Bar! After it is set up and connected, you can experience a
your home entertainment system. You are recommended
to read through this user manual which helps you set up,
connect and operate the product easily and properly.
Let’s get started.
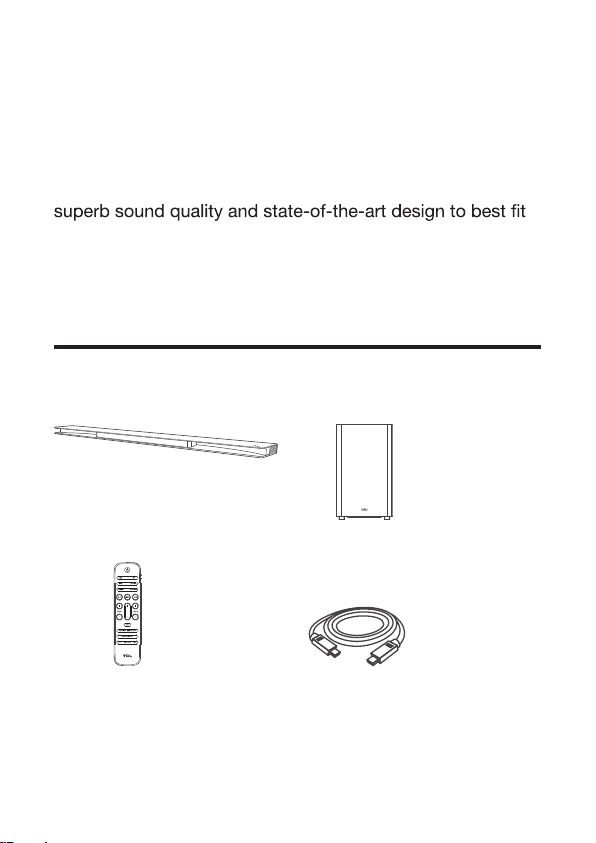
What’s in the box
Sound Bar main unit with
wireless subwoofer
Wireless subwoofer
Remote control
HDMI cable
4
Page 6
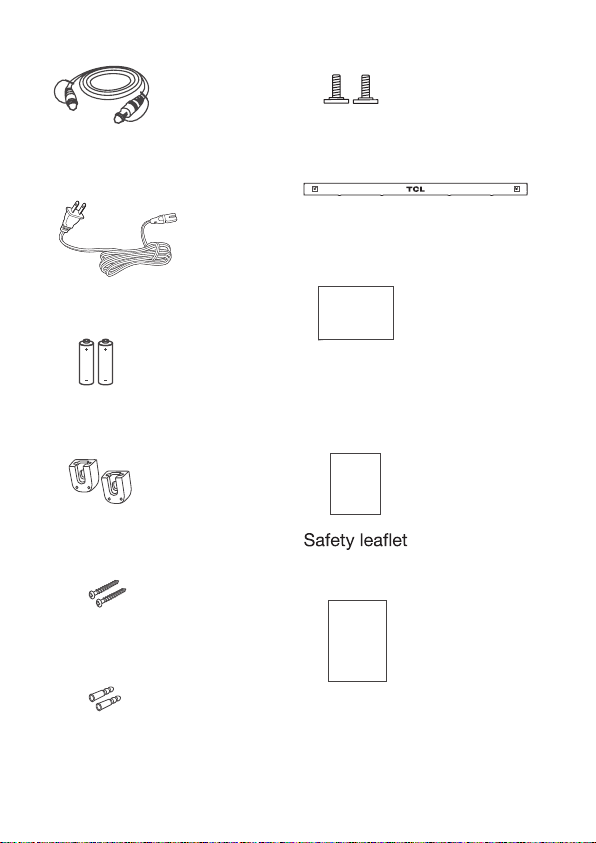
Optical cable
AC power cord x 2
Wall mounting screw x 2
Wall mount template
QSG
AAA battery x 2
Wall mount bracket x 2
Wall screw x 2
Wall anchor x 2
Quick start guide
Safety
instructions
Warranty
Warranty card
5
card
Page 7
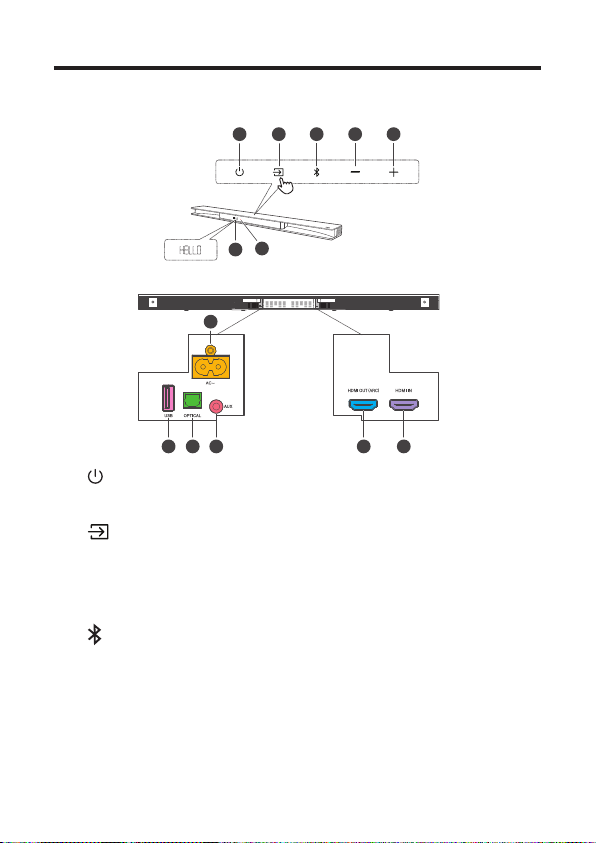
Overview of the Sound Bar main unit
1 2 3 54
9
10
12 1311
HELLO
7
6
HELLO
8
1
Press to turn the Sound Bar main unit on or off.
2
Press to switch the audio source among
AUX/Bluetooth/Optical/HDMI in/HDMI ARC/USB
modes.
3
Press to select the Bluetooth source. Press and hold to
enter pairing mode.
4
-
Press to decrease the volume level.
6
Page 8

5 +
Press to increase the volume level.
6 LED display
It indicates the Sound Bar status (e.g. volume level,
sound bar status).
Green/red LED:
7
It indicates Wi-Fi connection (e.g. Green: connected.
Red: disconnected).
AC input power connector
8
9
USB Type A connector (only for music playback)
Optical input connector
10
AUX input connector
11
HDMI OUT (ARC) connector
12
HDMI IN connector
13
7
Page 9
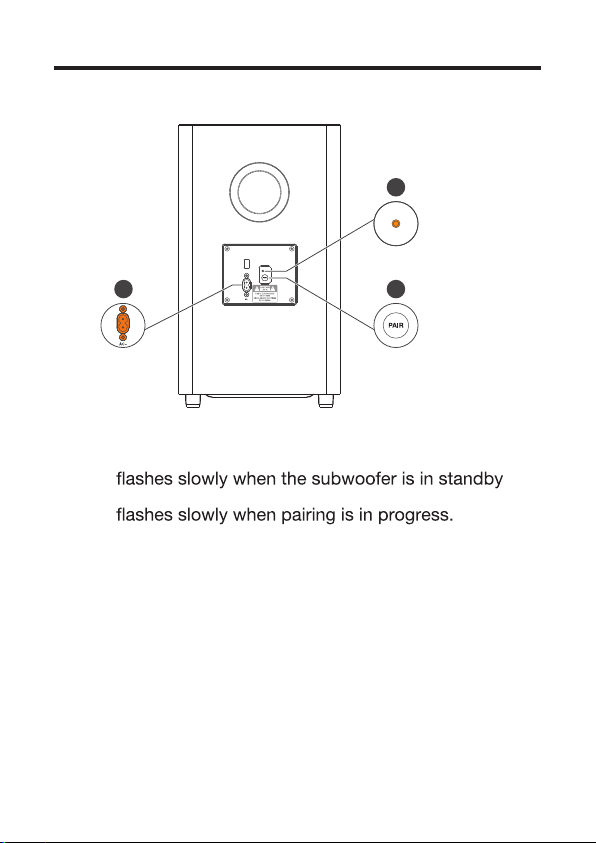
Overview of the wireless subwoofer
2
LED
1
3
1 AC input power connector
2 Amber LED indicator
•
mode.
•
• remains on solidly when pairing is successful.
3 PAIR
Press to activate pairing with the Sound Bar main unit.
Note
• The subwoofer is already paired at the factory. Manual
pairing is needed only in case of troubleshooting.
8
Page 10

Remove the Sound Bar back cover
Remove the back cover of your Sound Bar before
connecting cables.
Set up your Sound Bar system
Notes
• Make sure you read all the safety information before you
mount the Sound Bar main unit on the wall. (see ‘Before
you begin’ on page 3).
•
Make sure you use screws provided or specified by the
authorized manufacturer.
• TCL Corporation bears no responsibility for accidents or
damage caused by improper wall mounting and screws
installation or insufficient wall strength, etc.
• Additional tools (not supplied) are required for
installation.
9
Page 11
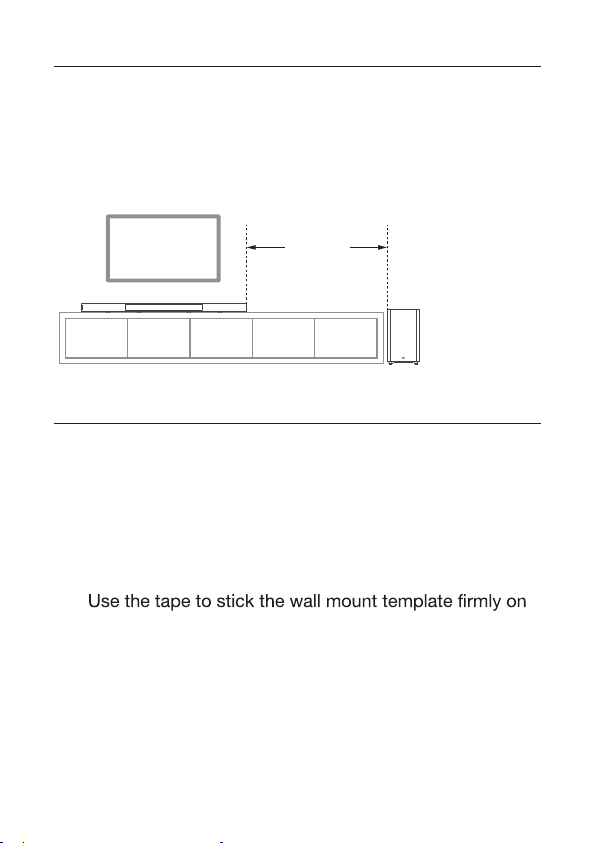
Place your Sound Bar and subwoofer
TV
You are recommended to place the Sound Bar main unit on the top
of the table and right below the center of your TV.
between the subwoofer and the Sound Bar main unit should
be less than 9.8′.
< 9.8′
The distance
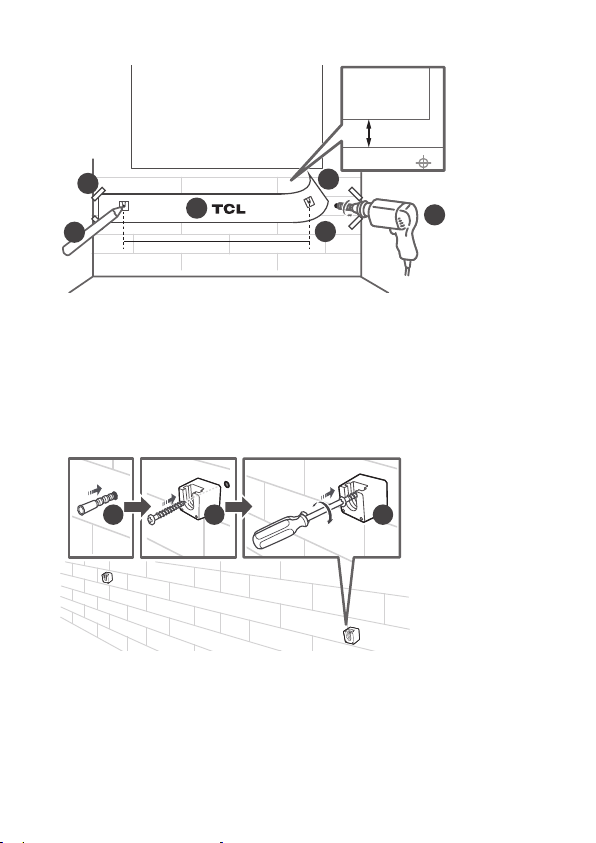
Wall mount your Sound Bar main unit
Place the supplied wall mount template on the wall.
1
Make sure the wall mount template is at least 5cm
below the center of the TV.
Use a level to make sure the Sound Bar is positioned
2
accurately.
3
the wall.
Mark on the wall using each marking on the template
4
through the mounting holes.
Take away the wall mount template.
5
Drill a screw hole at each marking on the wall.
6
10
Page 12
TV
TV
> 2″
3
1
4
Insert the supplied wall anchors into 2 screw holes on
7
the wall.
Insert the supplied wall bracket screws through the wall
8
brackets into the wall anchors.
Fix and tighten the screws on the wall.
9
7 8 9
37.4″
5
6
2
11
Page 13

Insert the supplied wall mounting screws into the screw
10
holes in the back of the Sound Bar main unit.
10
1050 mm
Hang the Sound Bar main unit on the wall mount
11
brackets.
11
Notes
• Check the installation location before you mount the
Sound Bar on the wall.
•
mounting the Sound Bar on the wall.
12
Page 14

•
Please consult your TV's User Manual on how to
of their respective companies.
3 Connect, install and
pair
you can start connecting it to your TV, installing the remote
control and pair it with the Sound Bar main unit.
Connect to your TV
Notes
• Make sure your TV or device supports the HDMI ARC
feature. For information, check the user manual of your
TV or device.
verify if HDMI-CEC (also commercially known
asT-Link,Anynet+, SimpLink, BRAVIA Link, EasyLink
or VIERA Link) is enabled.
All technology nam es mention ed are the trademarks or registered trademarks
13
Page 15

Connect one end of the supplied HDMI cable to the HDMI
input connector on your Sound Bar main unit and another
end to the HDMI ARC output connector of your TV or
device.
14
Page 16
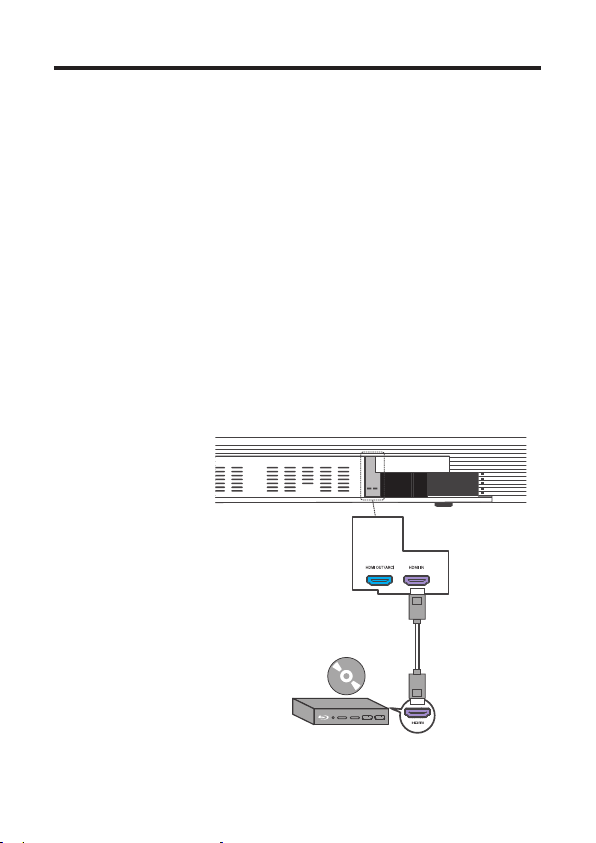
Optional: Connect your Blu-ray player
For ease of use, you are advised to connect a Blu-ray player
to the TV and enjoy the Sound Bar through HDMI-ARC.
However, in order to enjoy Dolby TrueHD based Atmos
content that not all TVs may support through HDMI-ARC,
you can optionally connect your Blu-ray player directly to
the Sound Bar using the HDMI-in port.
Notes
• The Sound Bar willl pass on the video signal to the TV. If it
is not successful, turn on the Sound Bar and try again.
• The HDMI input supports UHD (4K) and that it can also be
used for game console to enjoy Dolby Atmos audio.
15
Page 17
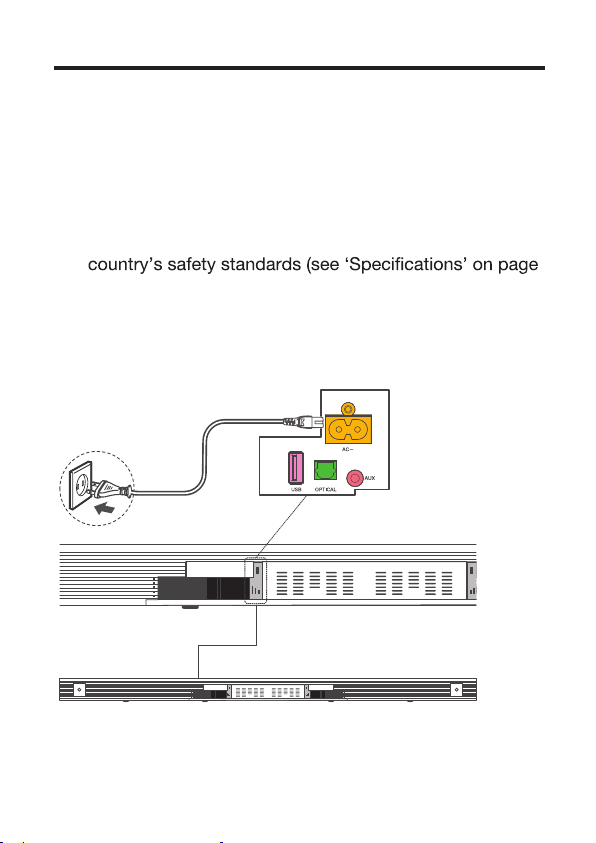
Connect your Sound Bar to power
supply
Make sure that you have completed all other
1
connections before connecting the Sound Bar to power
supply.
Make sure the power supply voltage complies with your
2
30).
Connect one end of a supplied AC power cord to the
3
AC input connector on your Sound Bar main unit and
another end to the power socket on the wall.
16
Page 18

Install/replace the remote control
batteries
Warnings
•
Replace only with same or equivalent types of batteries.
Performance may be affected when using NiMH
rechargable batteries.
Open the battery compartment, remove the old batteries
1
if necessary.
Place two new AAA batteries into the battery
2
compartment with the correct polarity (+/-).
Close the battery compartment.
3
1 42 3
Setup is complete. Your Sound Bar is ready to use. For
more information about how to access different connection
options on your Sound Bar, see the following chapter.
17
Page 19
Pair your wireless subwoofer to the
Sound Bar
When the wireless subwoofer is connected, you can enjoy
powerful deep bass sounds and a truly immersive audio
experience.
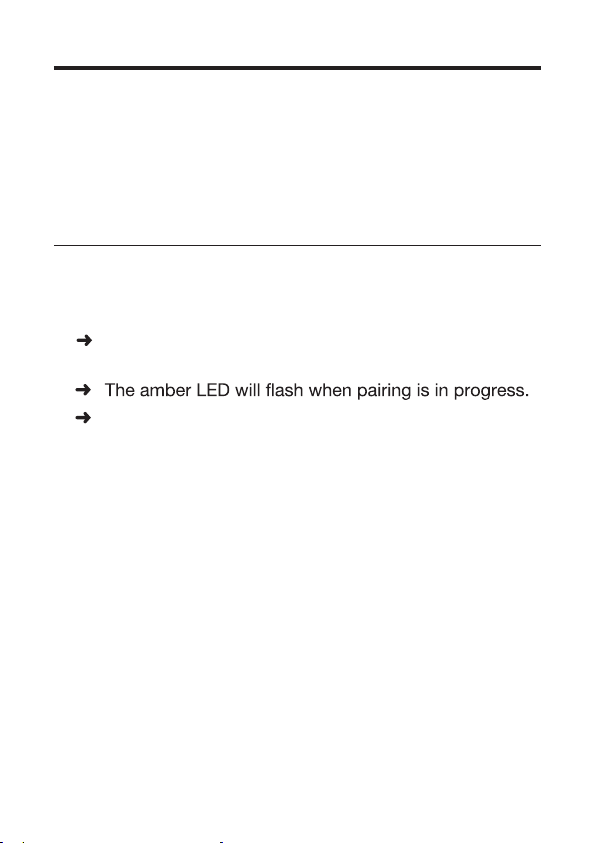
Auto pairing
Make sure both the Sound Bar and wireless subwoofer are
connected to the power supply and are turned on.
The Sound Bar will pair with the subwoofer
automatically.
The amber LED will remain on solidly when pairing is
successful.
Notes
• Do not press PAIR at the back of the wireless
subwoofer during auto pairing.
• If auto pairing is not successful, you can pair the
subwoofer with the Sound Bar manually.
18
Page 20
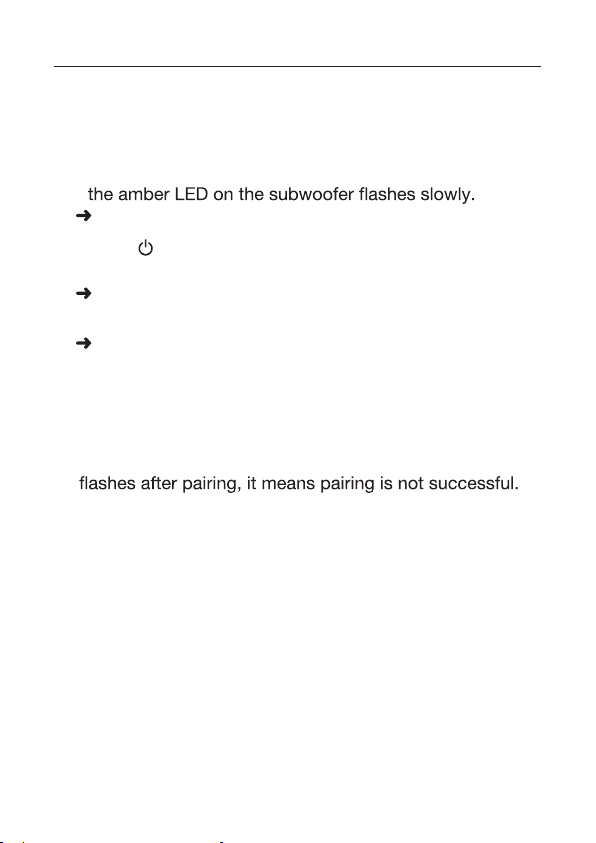
Manual pairing
Make sure the Sound Bar and wireless subwoofer are
1
properly connected to the power supply.
Press PAIR at the back of the wireless subwoofer until
2
The wireless subwoofer is ready to pair.
Press on the top panel of your Sound Bar main unit or
3
remote control to power on your Sound Bar main unit.
The Sound Bar and wireless subwoofer will pair
automatically.
Pairing is successful. The amber LED remains on
solidly.
Note
• If the amber LED at the back of the subwoofer still
Disconnect the AC power cord from the wireless
subwoofer and then connect again after 3 minutes.
Then repeat steps 1 to 3.
19
Page 21

4 Optional connections
You can also connect the Sound Bar with your TV or other
audio devices through the optical or audio cable.
Note
• The best way to connect your TCL Sound Bar to your
TV is (in order of preference): 1) HDMI-ARC; 2) Digital
optical (SPDIF); 3) AUX (audio cable); 4) Bluetooth.
Connect with the supplied optical
cable
Make sure you have muted the audio of your TV. For
1
information, check the user manual of your TV.
Make sure Sound Bar back cover is removed.
2
Remove the protective caps from the optical cable.
3
Connect one end of the optical cable to the optical input
4
connector on your Sound Bar main unit and another end
to the optical output connector of your TV or device.
20
Page 22
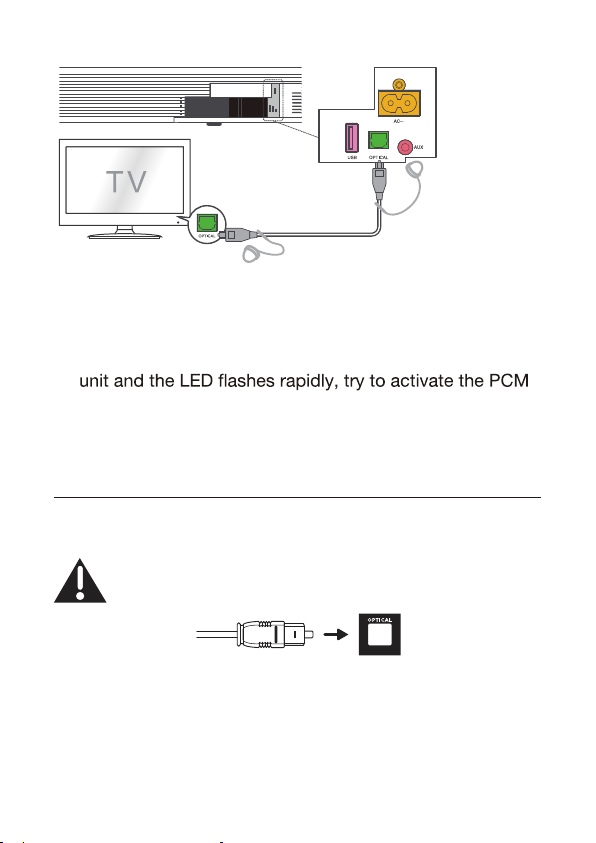
Note
• If there is no sound output from the Sound Bar main
signal output on your TV. PCM is the most common
digital audio format used and ensures compatibility.
DirectionforsettingupyourSoundBarusingan
opticalcable
Do not bend or kink the optical cable (SPDIF) as it
is fragile and can easily get damaged and broken.
21
Page 23
To get the best possible audio experience using the optical
cable:
Press the settings button on your TCL TV remote.
1
Navigate to Audio options.
2
Set TV speakers to off.
3
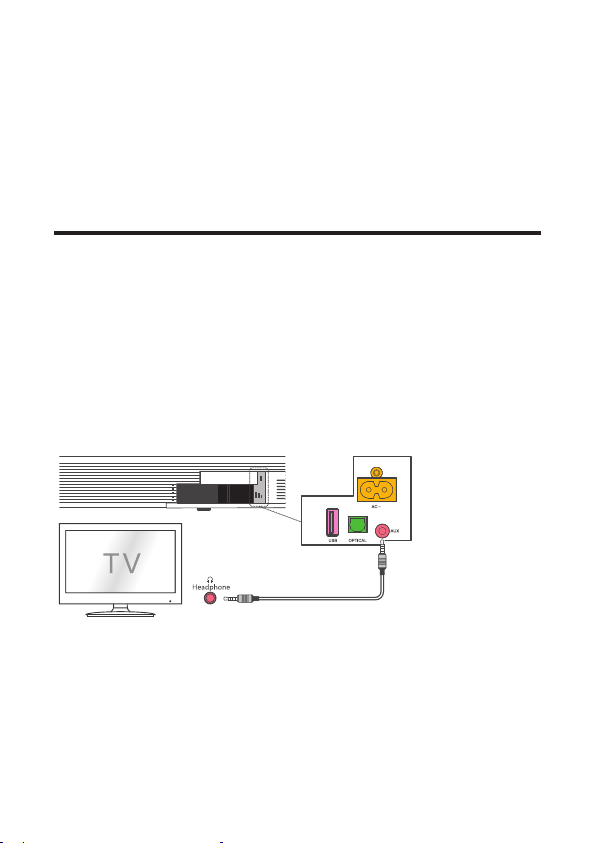
Connect with the audio cable
Make sure Sound Bar back cover is removed.
1
Connect one end of the audio cable (not supplied) to
2
the AUX input connector on your Sound Bar main unit
and another end to the headphone or audio output
connector on your TV or device. This will disable the
sound of your TV built-in speakers.
22
Page 24
Pair the Sound Bar with your Bluetooth
device
You can stream music from your mobile device through
Bluetooth connection.
Notes
• Make sure your wireless device supports the Bluetooth
function.
• The operational range between the Sound Bar main unit
and your Bluetooth device is approximately 394″(without
any obstacle between the Bluetooth device and Sound Bar
main unit).
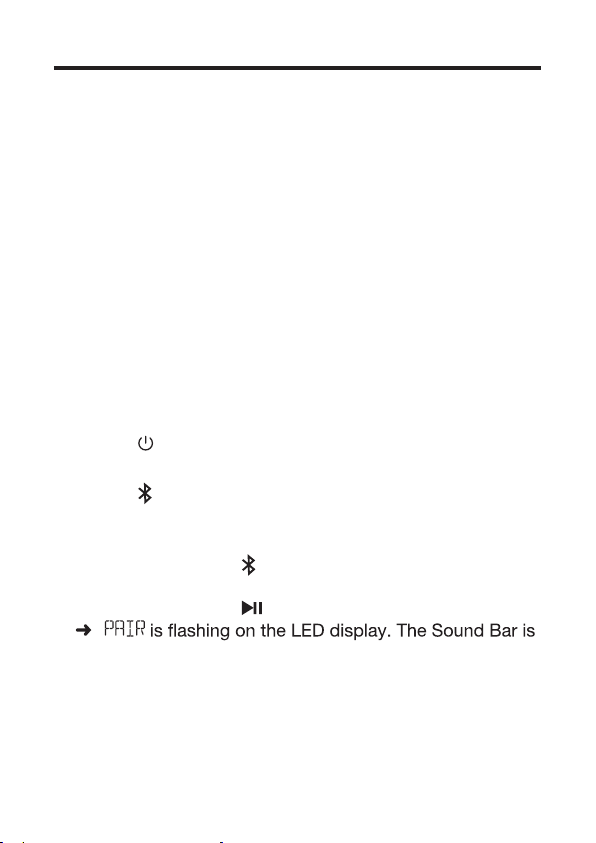
Press on the top panel of your Sound Bar main unit or
1
remote control.
Press on the top panel of your Sound Bar or BT on
2
the remote control to enter the Bluetooth mode.
There are two ways to do the pairing:
3
• Press and hold
Bar main unit; or
• Press and hold
ready to pair.
Power on your Bluetooth device and activate its
4
Bluetooth function.
on the top panel of your Sound
/OK on the remote control.
23
Page 25
Select TCL RAY-DANZ on the pairing list of your
5
Bluetooth device.
You hear a sound signal.
Pairing is successful.
Tip
• When you turn on the Sound Bar next time, it will be
reconnected to the last connected Bluetooth device.
automatically.
To disconnect the Bluetooth function, you can:
6
• press
another source; or
• disable the Bluetooth function on your device; or
• press and hold
3
RAY-DANZ on your Bluetooth device, press and
hold
main unit is entering the pairing mode.
on the Sound Bar main unit to switch to
/OK on the remote control for
/OK on the remote control. You will see
TCL
24
Page 26

5
Use your Sound Bar
system
Operate your Sound Bar with the top
panel
Make sure the Sound Bar is properly connected to
1
power supply and sources.
Press on the top panel of your Sound Bar main unit or
2
remote control to power on the Sound Bar.
Press on the Sound Bar or the source buttons on the
3
remote control to switch to the correct source.
Sound Bar LED display
The LED display on the front of the Sound Bar gives you
information about different Sound Bar status.
Sound Bar Menu Operation
In Standby mode, holding the "Play-Pause/OK" key for 5
seconds will bring you to the system settings menu. You
can navigate with VOL +/- and select options with
"Play-Pause/OK". This menu allows you to reset the system
to factory settings and may offer additional settings.
25
Page 27

Set up Wi-Fi connection for music
bar display that there is new software available (NEW SW
OK/NOT"). Please press “Play-Pause/OK” button on your
same room.
streaming
1. Power on the sound bar.
2. On an Android phone, open the Google Home app and
continue with step 3a, on an iOS device, go to Settings Wi-Fi and continue with step 3b.
3a. In the Google Home app, make sure you are signed in
and follow the on-screen instructions to complete the
setup process.
3b. In Settings - WiFi, look for "TCL RAY-DANZ" under
"SETUP AS NEW AIRPLAY SPEAKER" and complete the
setup process.
4. Once setup is complete via either 3a or 3b, you can now
enjoy both Chromecast built-in and AirPlay from any
device on the same network.
5. After this setup you may see an message on the sound
remote control to download software and upgrade your
sound bar or any other key to skip for now.
Sound bar is an individual multi-channel audio system,
6.
Pair two speakers for stereo sound is not supported for
current devices.
Speaker Pair: pair two speakers to create a wilder sound
stage for your music, to start, place both speakers in the
26
Page 28

Sound Bar status LED display
Power Power on
Power off
Standby
Source Bluetooth
Optical
HDMI IN
HDMI ARC
USB
Bluetooth Searching mode
Pairing mode
Volume control Volume level
Minimum volume reached
Maximum volume reached
Mute
Bass/Treble BASS +/-
TREBLE +/-
Vertical
surround mode
Sound modes Movie, Music, TV, BOOST
Others Unsupported format
SURROUND ON
SURROUND OFF
USB unavailable
Audio format detected
HELLO
STANDBY
•
BT
OPT
HDMI1 IN
HDMI2 ARC
USB
BT flashing
PAIR
VOL08
V MIN
V MAX
MUTE
BAS+3
TRE-3
SUR ON
SUR OFF
MOVIE MUSIC TV
BOOST
NONSUPPORT FORMAT
NO USB
PCM AUDIO / DOLBY
AUDIO /
DOLBY ATMOS
27
Page 29

Listen to music from your Bluetooth
device
Make sure that your device supports A2DP and/or
1
device.
Pair your Bluetooth device with the Sound Bar main unit
2
(see ‘Pair the Sound Bar with your Bluetooth device’ on
page 23).
Start listening to music stored in your Bluetooth device
3
through the Sound Bar.
• If your Bluetooth device supports A2DP, you can
listen to music, but you cannot control the playback.
• If your Bluetooth device supports AVRCP, you can
listen to music and control music playback with the
remote control. Press
to pause or resume music playback. Press
to skip to the previous/next track.
Note
• The operational range between the Sound Bar main unit
and your Bluetooth device is approximately 394″(without
any obstacle between the Bluetooth device and Sound Bar
main unit).
/OK on the remote control
/
28
Page 30

Use the USB device for music
playback
• Press /OK on the remote control to listen
to/pause/resume the music.
• Press
previous or next track.
• Press
Tip
• This Sound Bar can support USB devices of up to 32GB
or on the remote control to skip to the
+ or - to increase or decrease the volume level.
FLAC.
29
Page 31

6 Specifications
Sound Bar main unit
• Power supply: AC~100-240V, 50/60Hz
• Power consumption: 30 W
• Power consumption at standby mode: < 2W
• Impedance: 6 Ω
• Frequency response: 150 Hz~ 20 kHz
• Dimensions (W x D x H): 41.3 x 4.3 x 2.3 in.
• Weight: 5.7 lbs
• Operating temperature: 0°C - 45°C
Wireless subwoofer
• Power adapter: AC~100-240V, 50/60Hz
• Power consumption: 30 W
• Power consumption at standby mode: ≤ 2W
• Frequency response: 40 Hz- 150 Hz
• Frequency range: 2404.5 Mhz – 2479.5 Mhz
• Max transmitting power: -3.11 dBm
• Dimensions (W x D x H): 9.5 x 9.5 x 16.6 in.
• Weight: 12.1 lbs
Bluetooth
•
• Frequency range: 2402 Mhz – 2480 Mhz
• Max transmitting power: 9.7 dBm
Wi-Fi
• 2.4G Wi-Fi Maximum E.I.R.P: 17.0dBm
• 2.4G Wi-Fi Frequency bands: 2412 MHz ~ 2462 MHz
30
Page 32

• 5G Wi-Fi (Band 1, Band 2, Band 3) Maximum E.I.R.P:
17.99dBm
• 5G Wi-Fi (Band 4) Maximum E.I.R.P: 10.0dBm
• 5G Wi-Fi Frequency bands: 5150 MHz ~ 5350 MHz,
5470 MHz ~ 5850 MHz
Remote control
• Distance/Angle: 6m/30°
• Battery type: 1.5V AAA battery x 2, user replaceable.
7 Notice
Declaration of conformity
Hereby, TCL Corporation declares that this product is
in compliance with the essential requirements and other
relevant provisions of Directive 2014/53/EU.
31
Page 33

Disposal of your old product and
battery
Your product is designed and manufactured with high
quality materials and components, which can be recycled
and reused.
This symbol on a product means that the product is covered
by European Directive 2012/19/EU.
This symbol means that the product contains a battery
covered by European Directive 2013/56/EU which cannot be
disposed of with normal household waste. Inform yourself
about the local separate collection system for electrical
and electronic products and batteries. Follow local rules
and never dispose of the product and batteries with normal
household waste. Correct disposal of old products and
batteries helps prevent negative consequences for the
environment and human health.
32
Page 34

Remove the disposable battery
To remove the disposable batteries, see the section
‘Install/replace the remote control batteries’.
Environmental protection and sustainability
We have omitted all unnecessary packaging and make sure
it is eco-friendly and sustainable.
8 Trademarks
Bluetooth
The Bluetooth
marks owned by Bluetooth SIG, Inc. and any use of such
marks by TCL Corporation under license. Other trademarks
and trade names are those of their respective owners.
®
word mark and logos are registered trade-
Dolby Atmos
Dolby, Dolby Atmos, and the double-D symbol are registered
trademarks of Dolby Laboratories Licensing Corporation.
Manufactured under license from Dolby Laboratories. Confidential unpublished works. Copyright © 2012-2020 Dolby
Laboratories. All rights reserved.
33
Page 35

HDMI
HDMI,and HDMI logo and High-Definition Multimedia
Interface are trademarks or registered trademarks of HDMI
licensing LLC.
Apple AirPlay
To control this AirPlay 2–enabled speaker, iOS 11.4 or later is
required.
Apple, AirPlay, Apple TV, Apple Watch, iPad, iPad Air, iPad
Pro, iPhone, and Lightning are trademarks of Apple Inc.,
registered in the U.S. and other countries..
ChromeCast Built-in
Google and Chromecast built-in are trademarks of Google
LLC.
34
Page 36

Works with Hey Google
Google and Chromecast built-in are trademarks of Google
LLC.
9 FAQ
No power
• Make sure the AC power cord and AC input connector
are connected properly.
• Make sure there is power supply.
• Make sure the Sound Bar has turned on.
No sound
• Make sure the audio cable is connected to the Sound
Bar and your device.
• Make sure you have selected the correct source.
• Press
• Make sure the Sound Bar is not muted.
The remote control does not work.
• Make sure the distance of the remote control and the
• Make sure the batteries are correctly inserted.
+ to increase the volume level.
Sound Bar main unit is within operational range.
35
Page 37

I hear distorted sound.
• Make sure the cables are properly connected.
• Make sure you have selected the correct source.
• Make sure the TV is muted if you play audio from the
TV.
Bluetooth device.
• Make sure the Bluetooth function is activated on your
Bluetooth device.
• Make sure the Sound Bar has paired with your
Bluetooth device.
• Make sure the Sound Bar has unpaired with another
device.
Does this Sound Bar work with any TV?
• The Sound Bar is compatible with any TV that has one
of the these ports: 1. HDMI supporting ARC (preferred);
2. Optical audio output (TOSLink); 3. Headphone output.
When the Sound Bar and TV are both on, there’s an echo
effect.
• Simply mute the TV speaker to have the Sound Bar as
the singular source of sound.
How many sound modes are available?
Four sound modes – Movies, Music, TV and Boost.
36
Page 38

What are the subwoofer LED indicator status during pairing?
•
•
• Paired: on solidly.
How do I get the best Wi-Fi connection?
•
This soundbar supports both 2.4GHz and 5GHz Wi-Fi
frequencies. It’s generally best to use the same network
name (SSID) on your router so the product will select the
best network automatically. In case you have different
network names for the two different frequencies, try out
which one provides the best performance for you. Keep in
mind that 2.4GHz has better range which in most cases is
more important than the higher speed 5GHz offers
• If you see a lock icon, your Wi-Fi network requires a
password, so make sure you have it available.
• Ensure your Internet is working properly. Restarting your
router and modem will solve most Wi-Fi network issues.
For further support, visit www.tcl.com
37
Page 39

WE ARE
WE ARE
READY TO
READY TO
contact us first
with any questions
HELP
HELP
Copyright © 2020 TCL. All rights reserved.
TS9030_NA_EN_UM_V0.1
any questions
support.tclusa.com
support.tclcanada.com
or
 Loading...