

Page 1
L1 Service Manual TCL Communication Ltd.
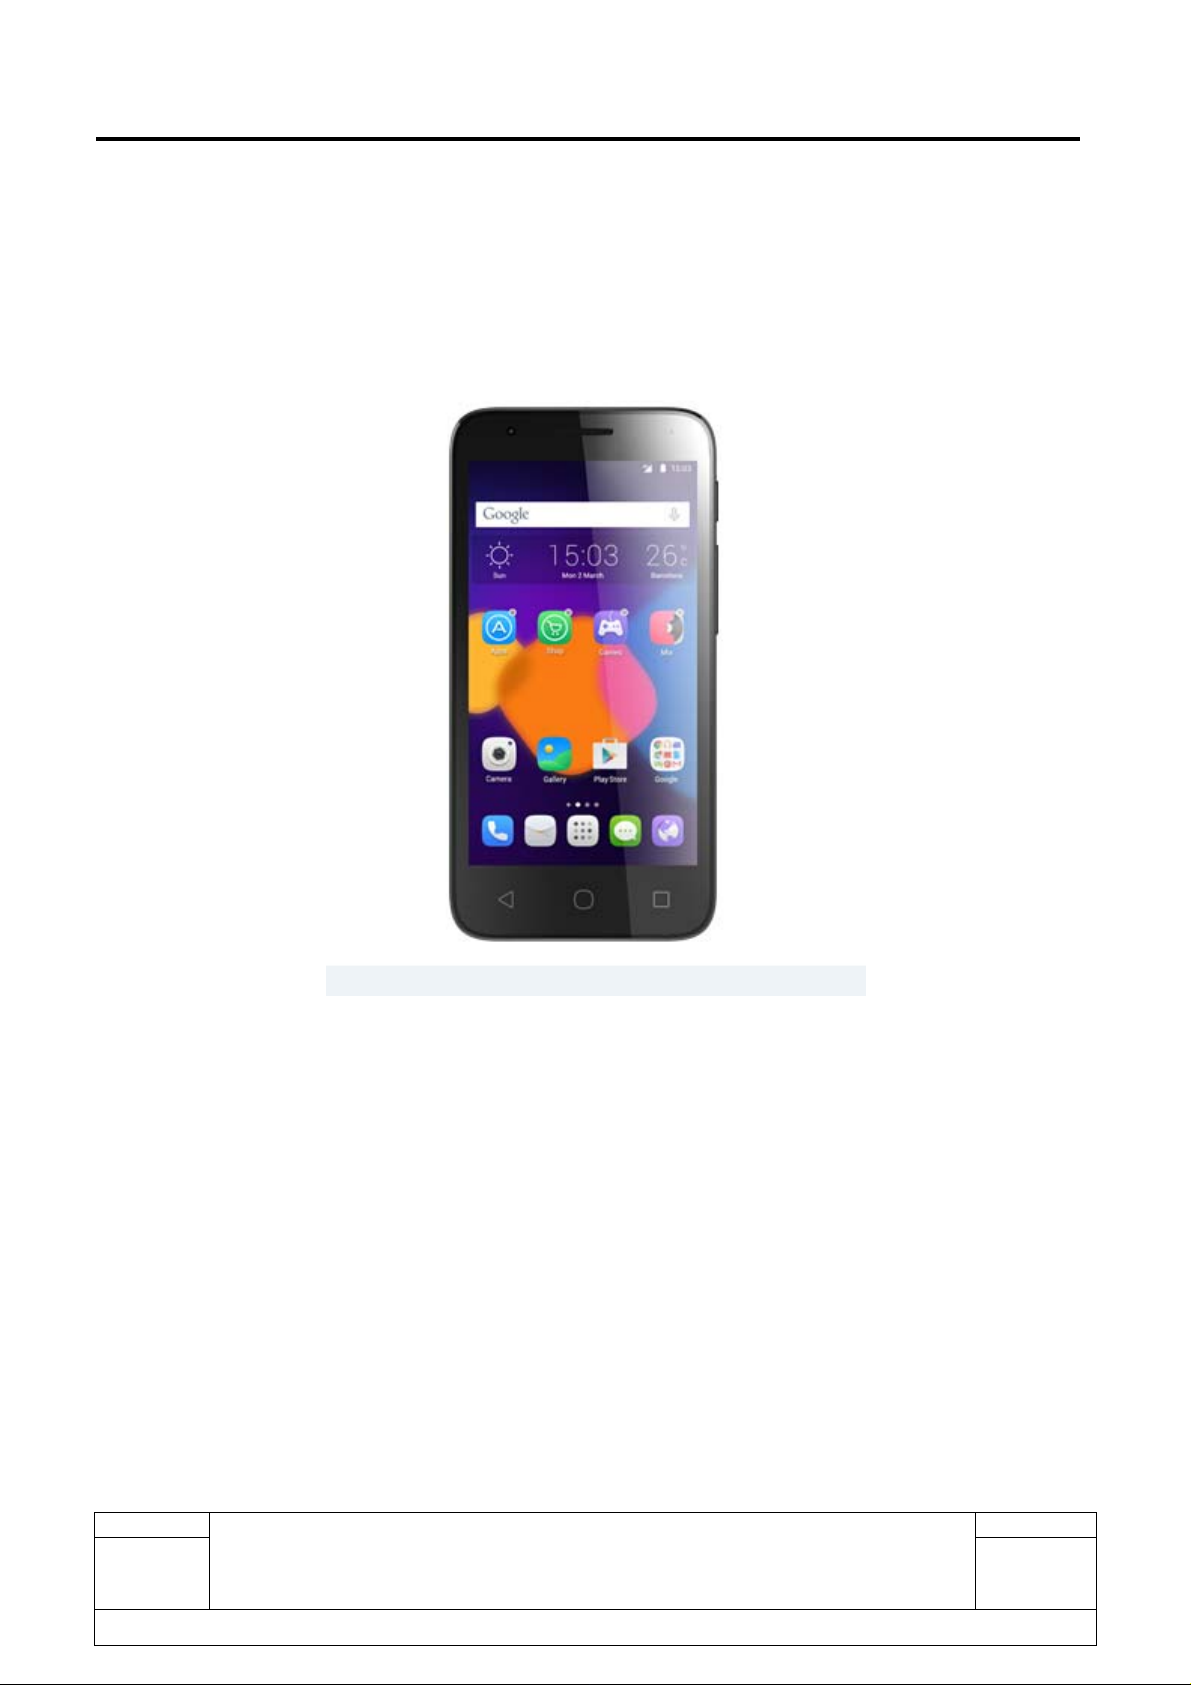
PIXI4-4.5 CRICKET
4060 O
Note: this manual is non-contractual and TCL Communication Ltd. can modify it without prior
notice on the characteristics of described equipments.
Rev.
Page
1.1
All rights reserved. Transfer, copy, use or communication of this file is prohibited without authorization.
4060 O Level 1 Service Manual
1/28
Page 2
L1 Service Manual TCL Communication Ltd.
1.1 Verify
1.1 Update
1.0 2016-06-02 Preliminary Draft Mani Lee Abby Zhou Damon Han
Rev. Date Modification description Prepared By Checked By Approved By
Rev.
1.1
4060 O Level 1 Service Manual
All rights reserved. Transfer, copy, use or communication of this file is prohibited without authorization.
Page
2/28
Page 3

L1 Service Manual TCL Communication Ltd.
Content
1. General ............................................................................................................................................. 4
2. Portable Label .................................................................................................................................. 6
2.1.Label zones ...................................................................................................................................... 6
2.2.Commercial Label Samples ........................................................................................................... 7
2.3.CU label ............................................................................................................................................ 8
2.4.L1 Spare Part List ........................................................................................................................... 8
2.5.Accessory ......................................................................................................................................... 8
2.5.1. Charger ...................................................................................................................................... 8
2.5.2. End user USB cable ................................................................................................................ 9
2.6.Maintenance policy ......................................................................................................................... 9
2.6.1. For handset: .............................................................................................................................. 9
2.6.2. For standard accessories (charger, headset and USB cable) .......................................... 9
2.6.3. If input the following codes on handset, you can: ............................................................. 10
2.6.4. User Data Format reset introduction ................................................................................... 10
2.7.Cell phone maintenance .............................................................................................................. 1 1
2.8.Invoice check ................................................................................................................................. 1 1
2.9.IMEI Check ..................................................................................................................................... 12
2.10. Humidity sensitive sticker Check ......................................................................................... 13
2.11. Visual Mechanical inspection ............................................................................................... 13
2.12. Accessories inspection .......................................................................................................... 14
2.13. Cell phone maintenance procedure .................................................................................... 15
3. Software download ....................................................................................................................... 20
3.1 Equipments requested when download: ................................................................................. 20
3.2 Handset driver installation ............................................................................................................ 20
3.3 SW download process .................................................................................................................. 24
Rev.
Page
1.1
All rights reserved. Transfer, copy, use or communication of this file is prohibited without authorization.
4060 O Level 1 Service Manual
3/28
Page 4
L1 Service Manual TCL Communication Ltd.
1. General
PIXI4-4.5 CRICKET (4060 O) is a MSM8909 Platform phone with Quad Core, @ 4x1.1GHz, and
BT/WLAN/MP3, social network service etc functions. It originally installed android M. It can work with the
2G Data GSM 850/900/1800/1900, 3G Data B2 / B4 / B5, HSPA+ (21M bit/s DL), 4G Data B2 / B4 / B5 /
B12 MFBI.
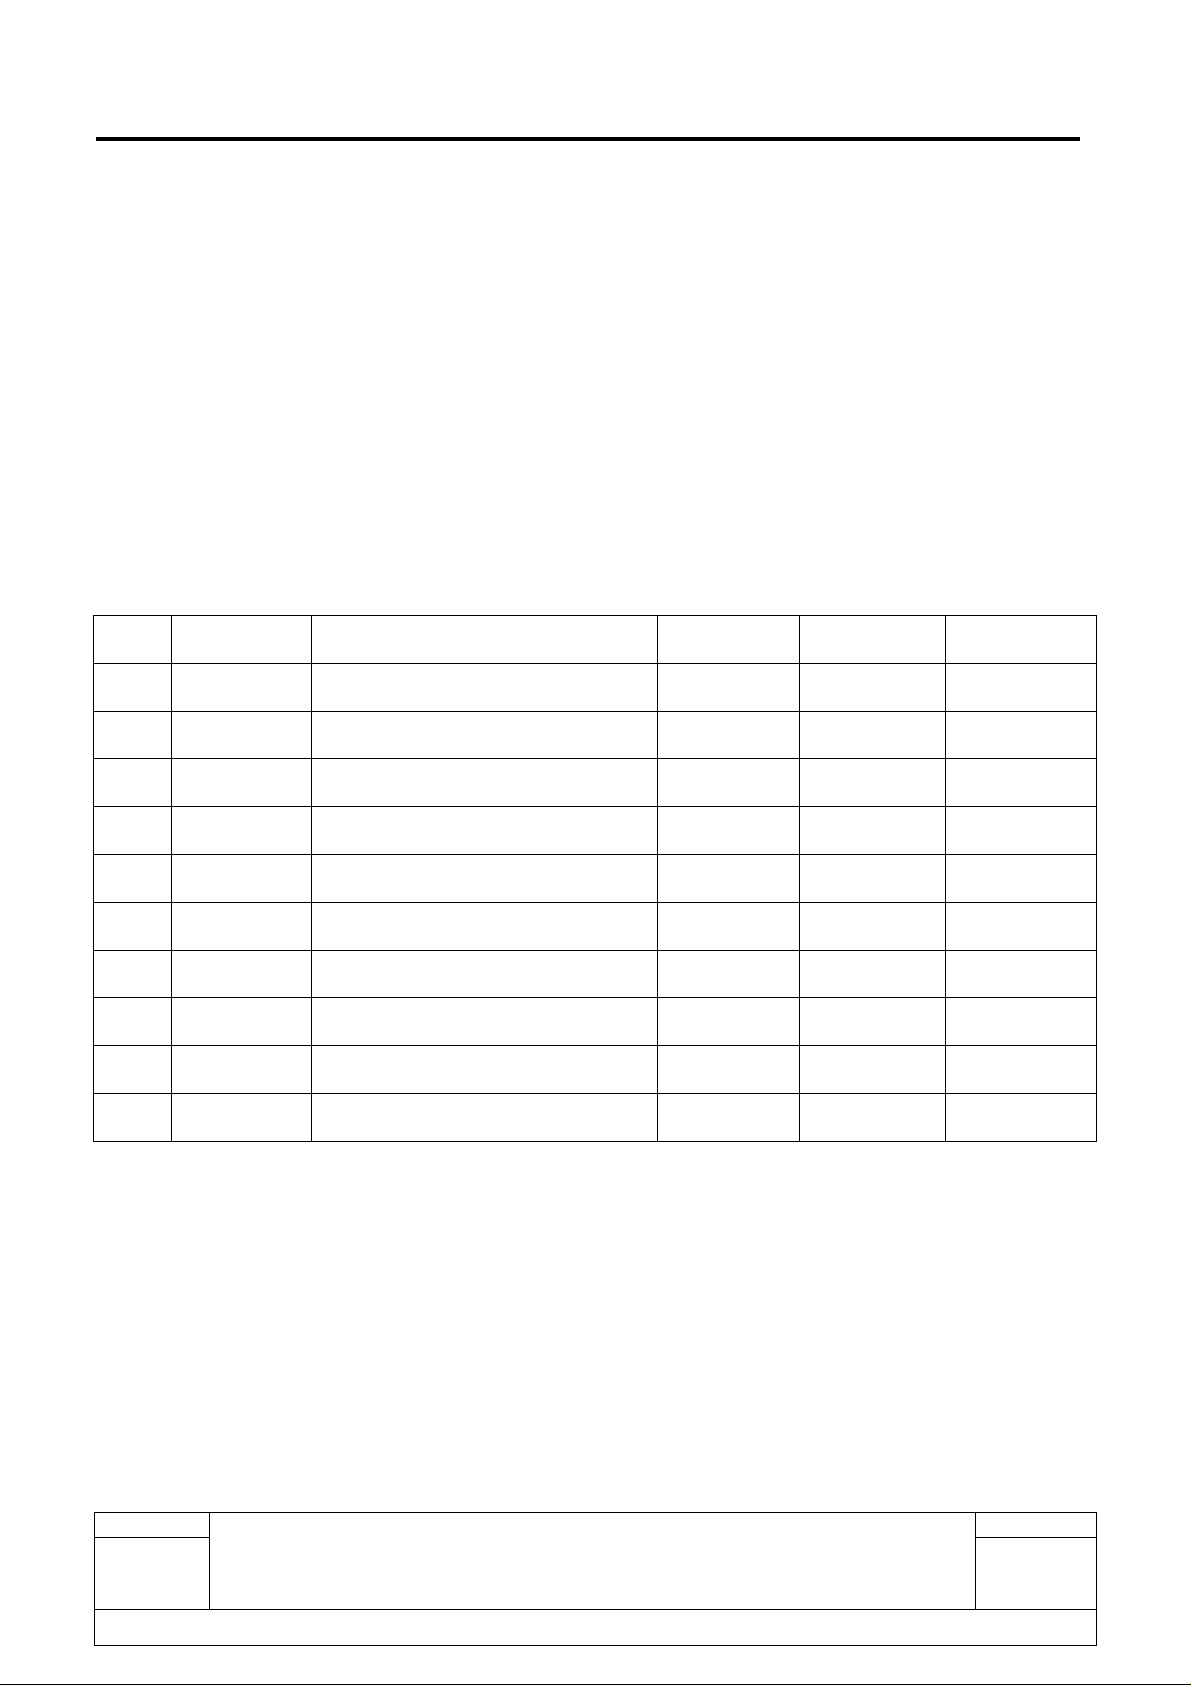
Detail features
Project Name
PIXI4-4.5 CRICKET
Commercial Name 4060 O
Platform MSM8909
Platform & OS
Design
Display
CPU frequence Quad Core, @ 4x1.1GHz
OS Android M
Dimensions (mm)
Form factor Bar
Side Keys Volume & Power Key
Removable battery cover Yes
Estimated Weight (g) 136
Main LCD Size (inch) 4.5
Main display resolution FWVGA (854×480)
LTPS -LED indicator charging indicator, events indicator
Touch technology Capacitive
Main display orientation Portrait
Touch technology Capacitive
Main LCD Type TFT
Sub-display -Oleophobic coating (Anti-finger
coating) --
132.2*65.1*10.05mm
Rev.
1.1
All rights reserved. Transfer, copy, use or communication of this file is prohibited without authorization.
4060 O Level 1 Service Manual
Page
4/28
Page 5
L1 Service Manual TCL Communication Ltd.
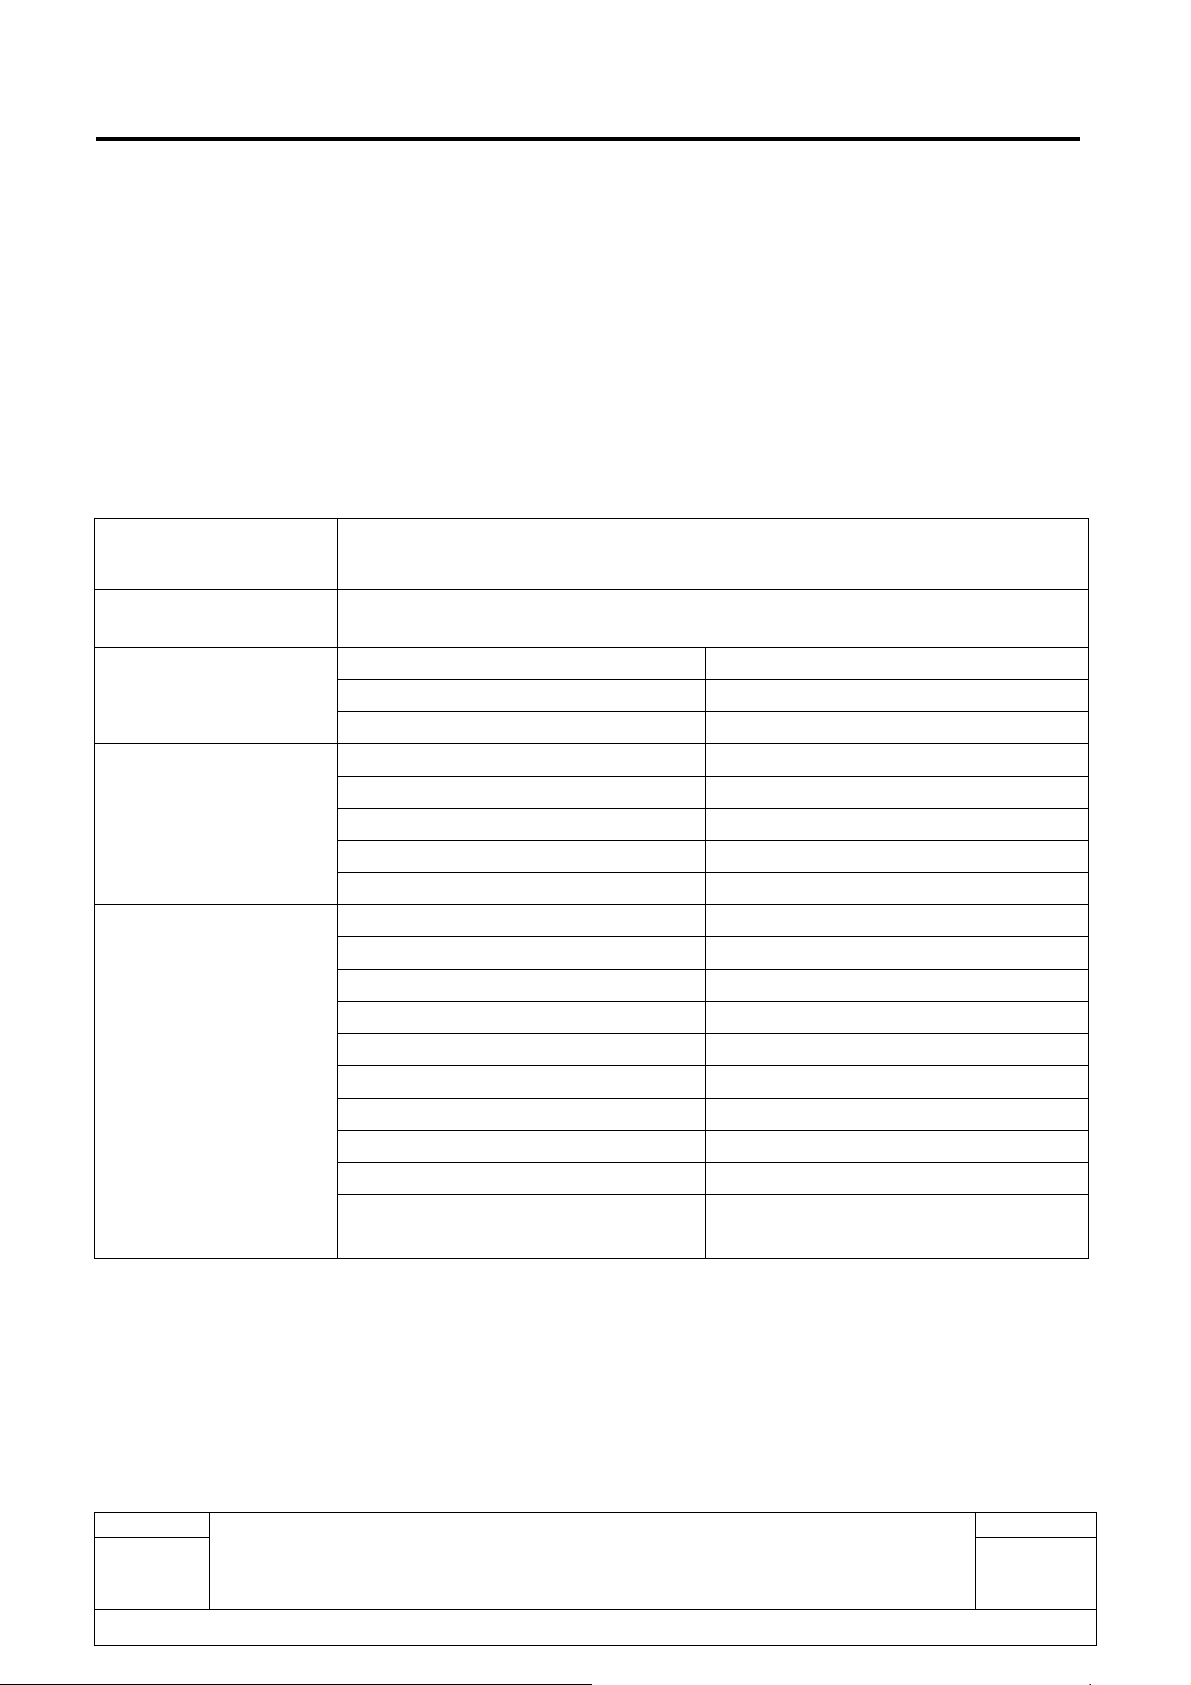
Card slot 1SIM + TF card
SIM Card Number 1
SIM Slot 1 3FF (Micro-SIM)
SIM Slot 2 --
Available Ports
Memory
Connectivity
Rear Camera
Front Camera
Rev.
SIM Slot 3 -TF card slot Yes
Hot swap No for Sim card, yes for TF card
Audio Jack 3.5mm audio jack
Multimedia Output -Charging Port Micro-USB
ROM 8GB
RAM 1GB
External storage Micro SD, up to 128GB
End User Space -Wi-Fi / WLAN 802.11b/g/n
Wi-Fi Direct Yes
Radio Yes
Wireless FM ---Bluetooth Yes
Bluetooth supported version BT 4.1
USB Data Transfer Yes
USB OTG --USB Charging Micro-USB
Others
Number of pixels 5MP
Focus FF
Image Sensor S5K5E8
Sensor Size 1/5"
Sensor Pixel size 1.12um
Lens Apeture size f/2.39
Flash type -Focus Speed -Video 720@30fps
Number of pixels 2MP
Focus FF
Image Sensor GC2355
Sensor Size 1/5"
Sensor Pixel size 1.75um
Camera Flash no
Lens Apeture size f/2.85
Flash type --
Page
1.1
All rights reserved. Transfer, copy, use or communication of this file is prohibited without authorization.
4060 O Level 1 Service Manual
5/28
Page 6

L1 Service Manual TCL Communication Ltd.
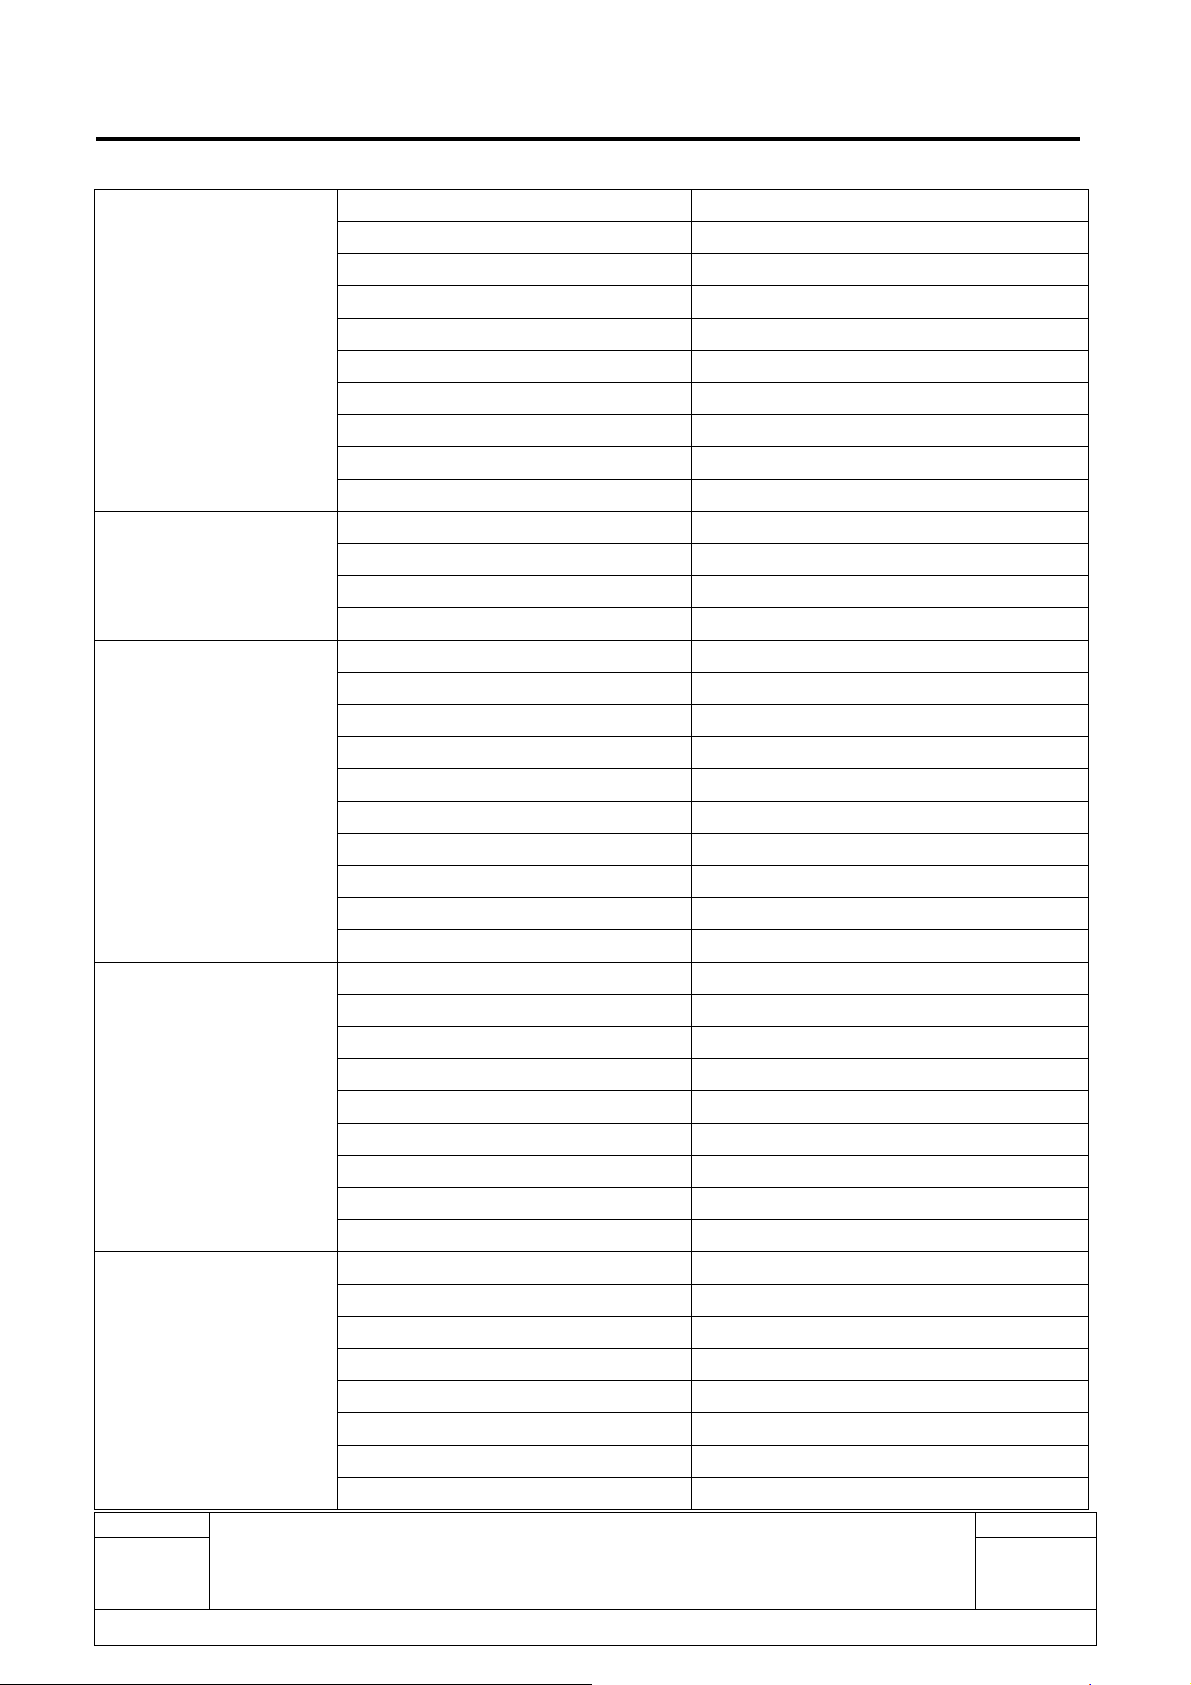
Video 720@30fps
Other features --GPS Yes, with A-GPS
Accelerometer (G sensor) Yes
SW solution by default, HW P-sensory
Sensors
Battery
Accessary
Proximity Sensor
Light sensor --E-Compass --Gyro ---Hall Switch ---Battery capacity (mAh) '1780mAh
Standby time 180h
Talking time (Hours) 5h
Charging Technology ---Battery type hardpack
Standard
Optional --
compatible
MOU 5V 1A charger
USB cable
LCD sticker
Quick Guide
Product Safety Information leaflet
2. Portable Label
2.1. Label zones
Printing zone definition (CPE000380AC0----For General 45*59)
Rev.
1.1
All rights reserved. Transfer, copy, use or communication of this file is prohibited without authorization.
4060 O Level 1 Service Manual
Page
6/28
Page 7

L1 Service Manual TCL Communication Ltd.
2.2. Commercial Label Samples
4060 O-2AAQUS0-
R1
IMEI V04
Rev.
1.1
All rights reserved. Transfer, copy, use or communication of this file is prohibited without authorization.
4060 O Level 1 Service Manual
Page
7/28
Page 8
L1 Service Manual TCL Communication Ltd.
2.3. CU label
4060 O-2AAQUS0-R1
CU V02
2.4. L1 Spare Part List
Please get the latest SPL in Forlog system.
2.5. Accessory
2.5.1. Charger
Rev.
1.1
All rights reserved. Transfer, copy, use or communication of this file is prohibited without authorization.
4060 O Level 1 Service Manual
Page
8/28
Page 9

L1 Service Manual TCL Communication Ltd.
2.5.2. End user USB cable
2.6. Maintenance policy
This chapter describes the maintenance of the 4060 O series phone authorized at L1 repair centre. The
maintenance operations can only be performed in approved repair centres.
General
Main L1 maintenance operations are as following:
2.6.1. For handset:
1) Warranty check
2) Function test
3) SW downloading
4) Replacement of the defective handset.
2.6.2. For standard accessories (charger, headset and USB cable)
1) Warranty check
Rev.
1.1
All rights reserved. Transfer, copy, use or communication of this file is prohibited without authorization.
4060 O Level 1 Service Manual
Page
9/28
Page 10

L1 Service Manual TCL Communication Ltd.
2) Functional check
3) Replacement of defective accessories
2.6.3. If input the following codes on handset, you can:
Code Description
*#06#
*#2886#
*#3228#
End user format
2.6.4. User Data Format reset introduction
How to use:
Long press Power Key + Volume up key in power off mode to enter recovery mode.
When to use: If you can’t start your handset or when you start your handset, there will be something wrong
with it, like can’t charge or can’t charge normally.
What does it do when you use End user format function: it will format end user area, and your handset
will come back to factory model, everything you save or set in the handset (except SIM card) will be lost.
Detail steps:
Display IMEI number
Enter Auto Test mode
Check current software version
Long press volume up key +power key
1. Shut down the phone.
2. Long press Power Key + Volume up key for about 8s to enter recovery mode to select “Reboot
the system now”, press power key to confirm
Rev.
1.1
All rights reserved. Transfer, copy, use or communication of this file is prohibited without authorization.
4060 O Level 1 Service Manual
Page
10/28
Page 11

L1 Service Manual TCL Communication Ltd.
2.7. Cell phone maintenance
1) Equipments for handset test.
Battery with full power.
One SIM card.
2) It is recommended the following tools:
One PC with Windows 2000/NT/XP/Windows 7.
One ampere meter for charger current test.
2.8. Invoice check
1. Check warranty status of Handset by POP (Proof of Purchase) firstly.
2. If the end user lost his POP, then consider the data code on commercial label as the purchasing day.
Rev.
1.1
All rights reserved. Transfer, copy, use or communication of this file is prohibited without authorization.
4060 O Level 1 Service Manual
Page
11/28
Page 12

L1 Service Manual TCL Communication Ltd.
Coding year
Coding month
Coding day
Note:
1 2 3 4 5 6 7 8 9 10
1 2 3 4 5 6 7 8 9 A
11 12 13 14 15 16 17 18 19 20
B C D E F G H I J K
day
21 22 23 24 25 26 27 28 29 30
L M N O P Q R S T U
31
V
1 2 3 4 5 6 7 8 9 10
E F G H I J K L M N
mouth
11 12
O P
16 17 18 19 20 21 22 23 24 25
Z A B C D E F G H I
year
26 27 28 29 30 31 32 33
J K L M N O P Q
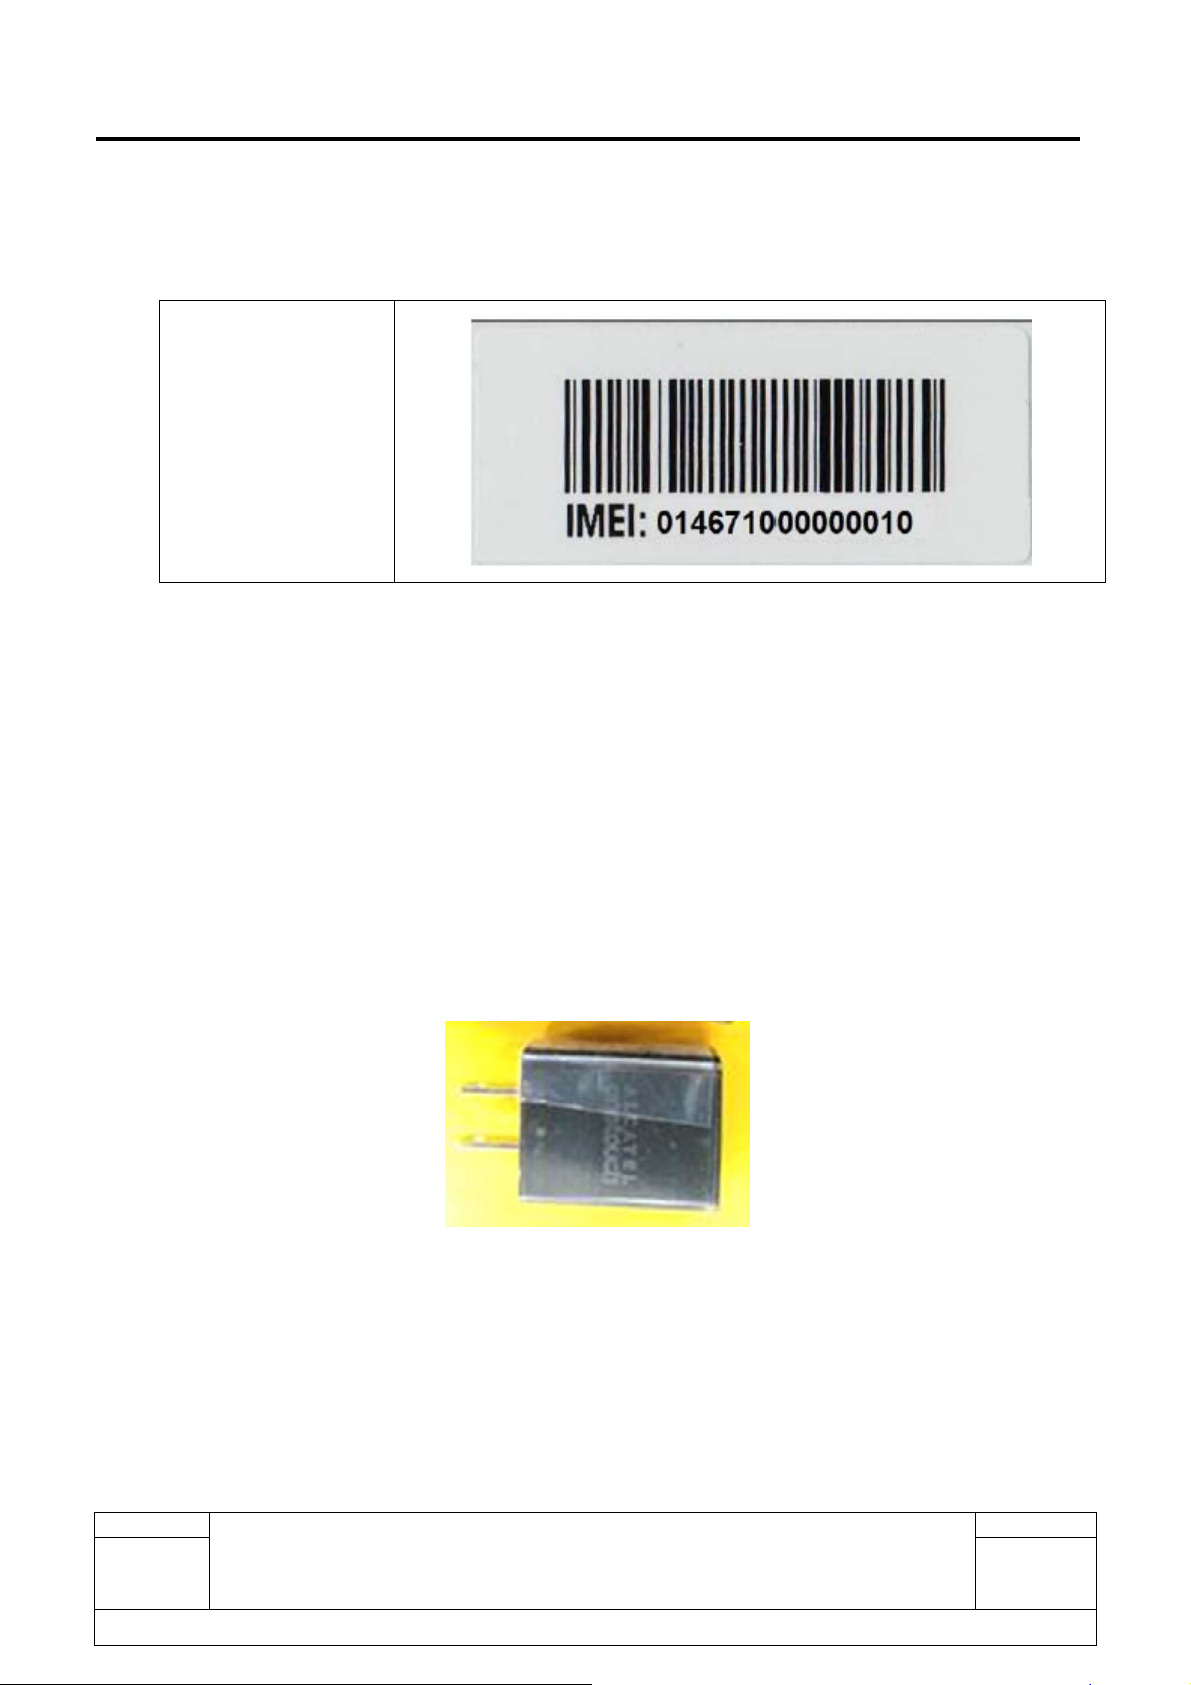
2.9. IMEI Check
1) Power on the handset, enter ”Settings” -> “About” -> “Status” ”IMEI”
Rev.
1.1
All rights reserved. Transfer, copy, use or communication of this file is prohibited without authorization.
4060 O Level 1 Service Manual
Page
12/28
Page 13

L1 Service Manual TCL Communication Ltd.
2) If the IMEI sticker in the back casing is not lost:
We should make sure that the IMEI number MUST be the same with the one on the IMEI sticker; if not,
it’s out of warranty policy.
2.10. Humidity sensitive sticker Check
If humidity sensitive label is not good, the cell phone will be considered as out of guarantee.
¾ Liquid was detected by humidity sensitive label.
¾ Positions of humidity sensitive sticker.
2.11. Visual Mechanical inspection
Mechanical warranties check items:
Rev.
1.1
All rights reserved. Transfer, copy, use or communication of this file is prohibited without authorization.
4060 O Level 1 Service Manual
Page
13/28
Page 14

L1 Service Manual TCL Communication Ltd.
1) Corrosion
Corrosion on the USB connectors, SIM connectors, and other metal surfaces
2) Hole
Holes (Diameter > 1mm) on any surface, including front casing, decorate frame, battery cover,
LCD Lens, keypad.
3) Bump
Bumps (Dia meter>1mm) on any surface, including the front casing, decor ate frame, battery cover,
LCD Lens, keypad
4) Scratch (length > 3mm)
Scratches on any surface, including the front casing, furnished frame, battery cover, LCD Lens,
keypad
5) Distortion
Bend, twisted or crushed on the h/s, cover/casing or connectors
6) Broken
LCD broken, casing broken, cover broken
7) Dropped.
Keypad tear off, LCD lens, connectors fallen off
8) Gap:
External physical damage relating to abnormal use, like front case and frame opened
9) Others:
Damage caused by disassembly like wrong part assembly, lost of components
Use in abnormal environment like too high temperature with plastic melts
2.12. Accessories inspection
Accessories warranties check items:
1) Any use in abnormal temperature, other than the one specified in the user manual. Any evidence of
plastic/casing melted.
Rev.
1.1
All rights reserved. Transfer, copy, use or communication of this file is prohibited without authorization.
4060 O Level 1 Service Manual
Page
14/28
Page 15

L1 Service Manual TCL Communication Ltd.
2) Any mark of food or liquid around the accessory or in the USB socket.
3) Any evidence of mechanical shocked which damage the enclosure of the charger or headset.
4) Any mark of tentative of disassembly the accessory
5) Any abnormal use which induce wire damage, wire broken or USB socket deformed.
2.13. Cell phone maintenance procedure
1) Check that the SIM card and SD card are set correctly.
2) Power on the cell phone.
3) If the cell phone asks to input NCK code, which means it is SIM locked, and can only be worked with
dedicated SIM card. Use the correct SIM card.
4) Enter the phone code if necessary.
5) If power on, test step by step with the auto test code:
Press *#2886# in dial screen and then you will see the interface displaying the SW version. Select
“Auto” to start the auto test, or select “MANU” to do the MMI test manually.
If one of the tests failed during “Auto” test mode, it will display “Failed: xxx, Press ‘Next’ to go on test;
Press ‘RETEST’ to retest this item; Press ‘END’ to Power off.”
Traceability
I. You can get information such as BT, CU-REF, PTH ,MMI,etc.,
II. Press “pass” key to continue.
Check Tunning
It will test automatically and display” OK” if it functions well.
TP RAW Data
I. You can see Raw data test is running;
Rev.
1.1
All rights reserved. Transfer, copy, use or communication of this file is prohibited without authorization.
4060 O Level 1 Service Manual
Page
15/28
Page 16

L1 Service Manual TCL Communication Ltd.
II. Press “pass” key to continue;
Touch Panel
I. “Please draw in the yellow area” according to instructions
II. Press “PASS” to continue.
Display
I. You will see the LCD display three colors - RED, GREEN and BLUE - if it functions well;
II. Press “Pass” to continue.
III. You will see the LCD display black if it functions well.
IV. Press “Pass” to continue.
V. You will see the LCD display greychart if it functions well.
VI. Press “Pass” to continue.
VII. You will see the LCD display white if it functions well.
VIII. Press “Pass” to continue.
IX. You will see the LCD display grey if it functions well.
X. Press “Pass” to continue.
Keyboard
I. You will see the key of the V+, V-, and power, click the corresponding key, then the key turn
gray on the screen.
II. Press “Pass” to continue.
BACKLIGHT
I. You will see the screen flash if it functions well
Rev.
1.1
All rights reserved. Transfer, copy, use or communication of this file is prohibited without authorization.
4060 O Level 1 Service Manual
Page
16/28
Page 17

L1 Service Manual TCL Communication Ltd.
II. Press “Pass” to continue.
Front Camera
I. You will see the LCD displays the picture that front camera catch if it functions well;
II. Press “Pass” to continue.
Main Camera
I. You will see the LCD displays the picture that back camera catch if it functions well;
II. Press “Pass” to continue;
Charger Led
I. It will display “Please check charge LED" if it functions well.
II. Press “Pass” to continue;
AUDIO
I. You will hear piece of record if it functions well;
II. Press ”Pass” to continue;
Vibrator
You can feel the vibration if it functions well.
Accessories
I. Insert the headset.
II. You will hear one record in left discrete;
The “Volume Down “and “Volume Up” will display grey if it functions well.
III. Press ”Pass” ,you will hear one record in right discrete;
The “Volume Down “and “Volume Up” will display grey if it functions well.
Rev.
1.1
All rights reserved. Transfer, copy, use or communication of this file is prohibited without authorization.
4060 O Level 1 Service Manual
Page
17/28
Page 18

L1 Service Manual TCL Communication Ltd.
IV. Press ”pass” to continue;
V. You will hear piece of record if it functions well;
VI. remove your headset
VII. Press ”Pass” to continue;
FM
I. You will hear the sound from on channel when you insert earphoneif it functions well;
II. Remove the ear phone then press “Pass” to continue;
USB/Charger
I. Insert USB cable according to instruction, then it will say “USB is OK” ;
II. Remove USB cable according to instruction
III. Press “Pass” to continue;
IV. Insert charger cable according to instruction, then it will say “Charger cable checked” ;
V. Press “Pass” to continue;
G-Sensor
I. Put the handset up and towards up according to instruction;
II. Put the handset towards the directions indicated by instructions; it will say “All positions
checked” after you following all the directions if it if it functions well;
III. Press “Pass” to continue;
SIM
I. Insert SIM card and the phone will detect it if functions well;
II. Press “Pass” to continue;
Rev.
1.1
All rights reserved. Transfer, copy, use or communication of this file is prohibited without authorization.
4060 O Level 1 Service Manual
Page
18/28
Page 19

L1 Service Manual TCL Communication Ltd.
SD Card
III. Insert SD card and the phone will detect it if functions well;
IV. Press “Pass” to continue;
Battery
I. It will display “Battery temperature should between: 20~50”, “current is xxx”
“Battery content should between: 30~80%”, “current is xxx”
“Battery Voltage is xxx”, “Battery Present is xxx” if it functions well;
II. Press ”Pass” to continue;
BLUETOOTH
I. Bluetooth will search automatically and it will display device address if it functions well;
II. Press ”Pass” to continue;
WIFI
I. It will search for WIFI hotspot and display searched result on the screen if it functions well;
II. Press”Pass” to continue;
GPS
I. It will run GPS and search for satellite, and then it will display info such as “PRN”, “SUR”,
etc. on the screen if it functions well;
II. Press”Pass” to continue;
Calling
I. It will automatically call the emergency call if it functions well.
II. Press “Pass” to continue;
Factory Reset
It will do the factory reset automatically if you press the item.
Rev.
1.1
All rights reserved. Transfer, copy, use or communication of this file is prohibited without authorization.
4060 O Level 1 Service Manual
Page
19/28
Page 20

L1 Service Manual TCL Communication Ltd.
Seclnfo
I. Check device is effuse or not.
II. Press “Pass” to continue;
3. Software download
It is authorized to download software for the handset which needs to be updated. This downloading
tool is called “Multi-Download QCT_SP”. Handset Software can be downloaded from TS website via it.
Thus internet access is necessary. TS Website: https://css.tclmobile.cn/.
3.1 Equipments requested when download:
⑴ A handset with full power;
⑵ PC with windows system;
⑶ A USB cable.
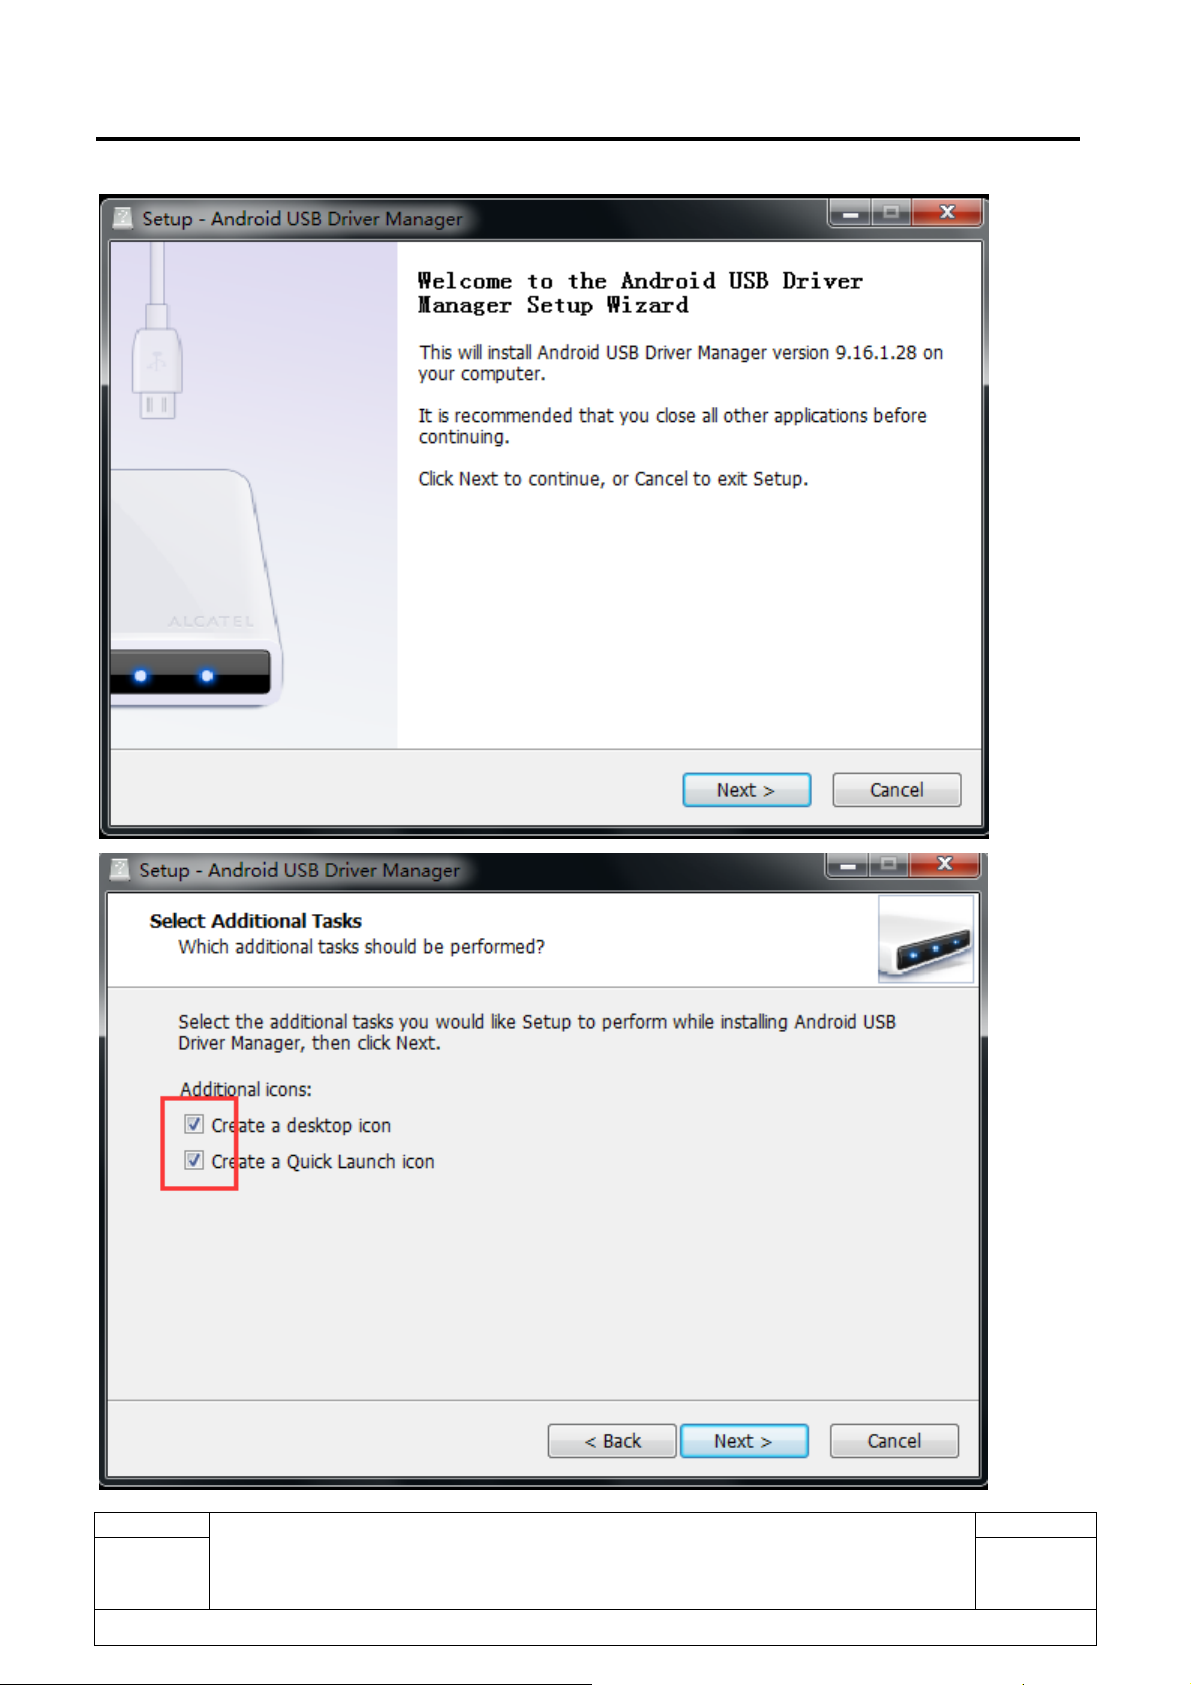
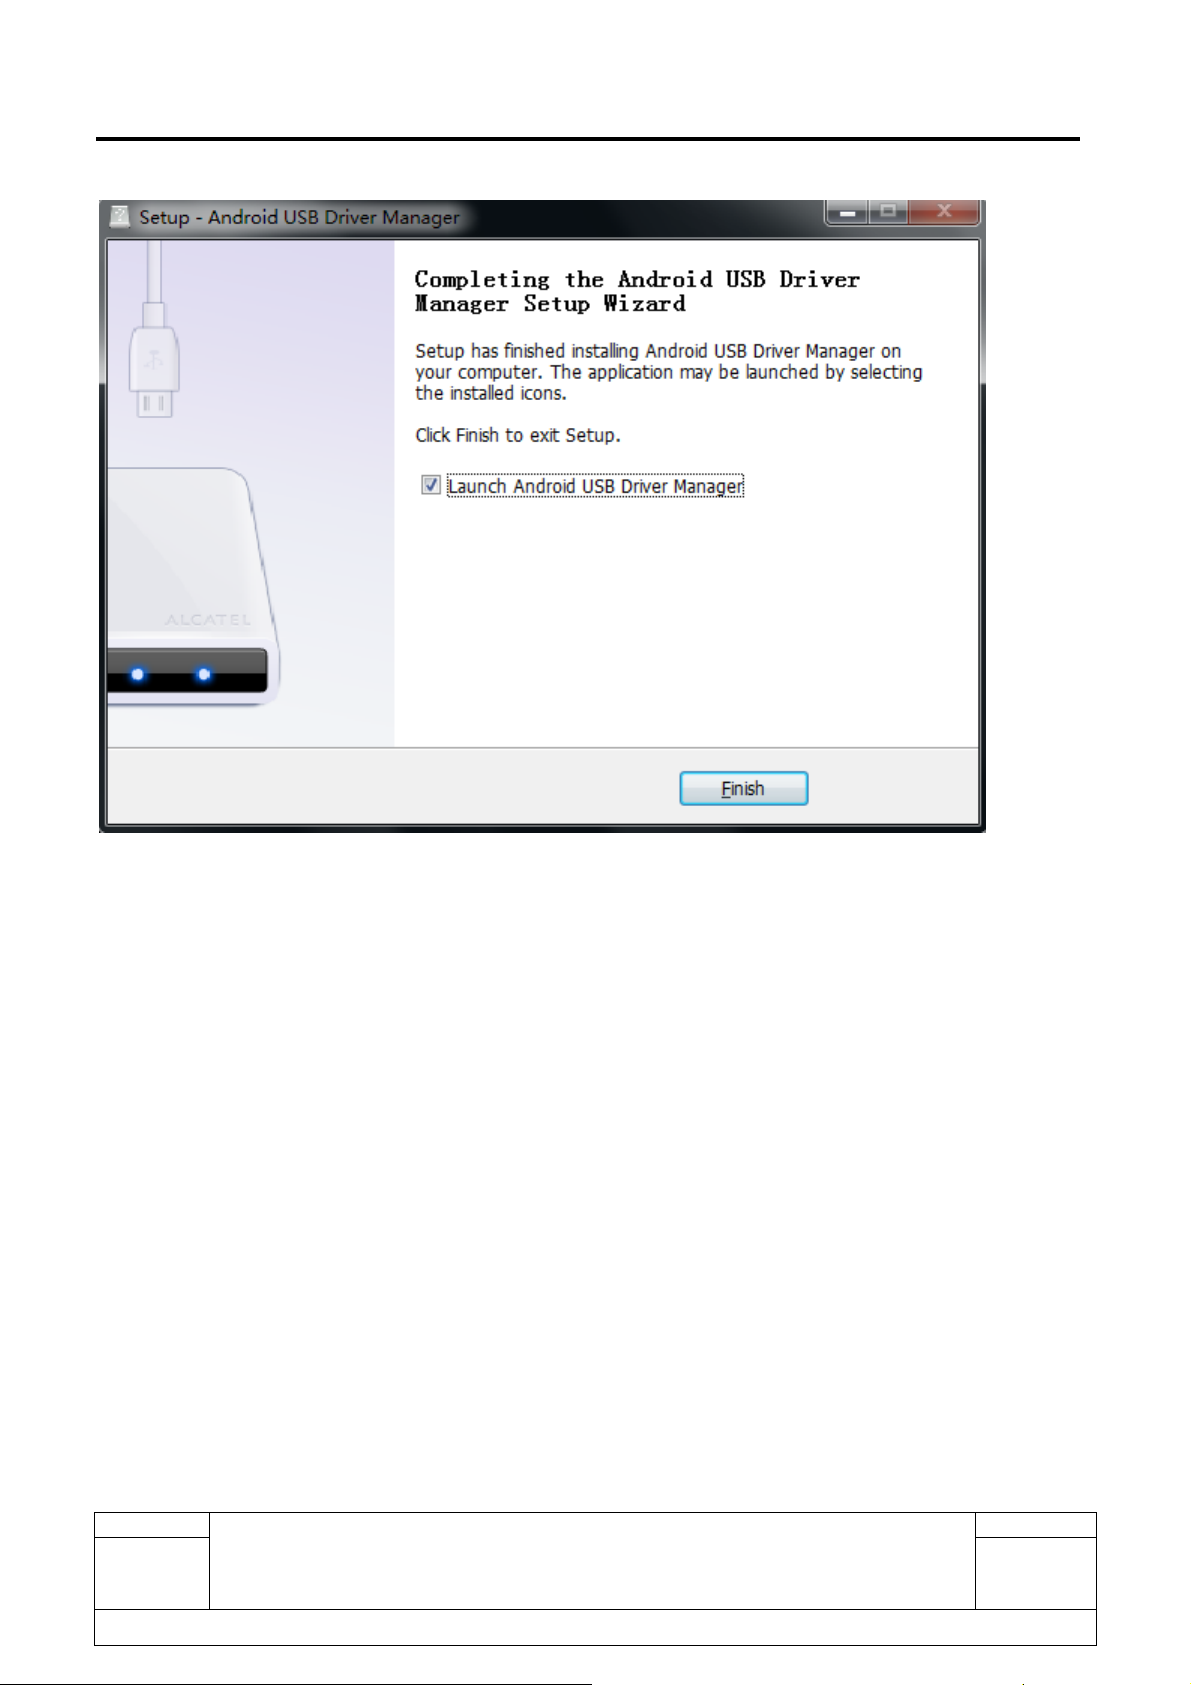
3.2 Handset driver installation
1)Android USB driver installation
Rev.
1.1
All rights reserved. Transfer, copy, use or communication of this file is prohibited without authorization.
4060 O Level 1 Service Manual
Page
20/28
Page 21
L1 Service Manual TCL Communication Ltd.
Rev.
1.1
All rights reserved. Transfer, copy, use or communication of this file is prohibited without authorization.
4060 O Level 1 Service Manual
Page
21/28
Page 22
L1 Service Manual TCL Communication Ltd.
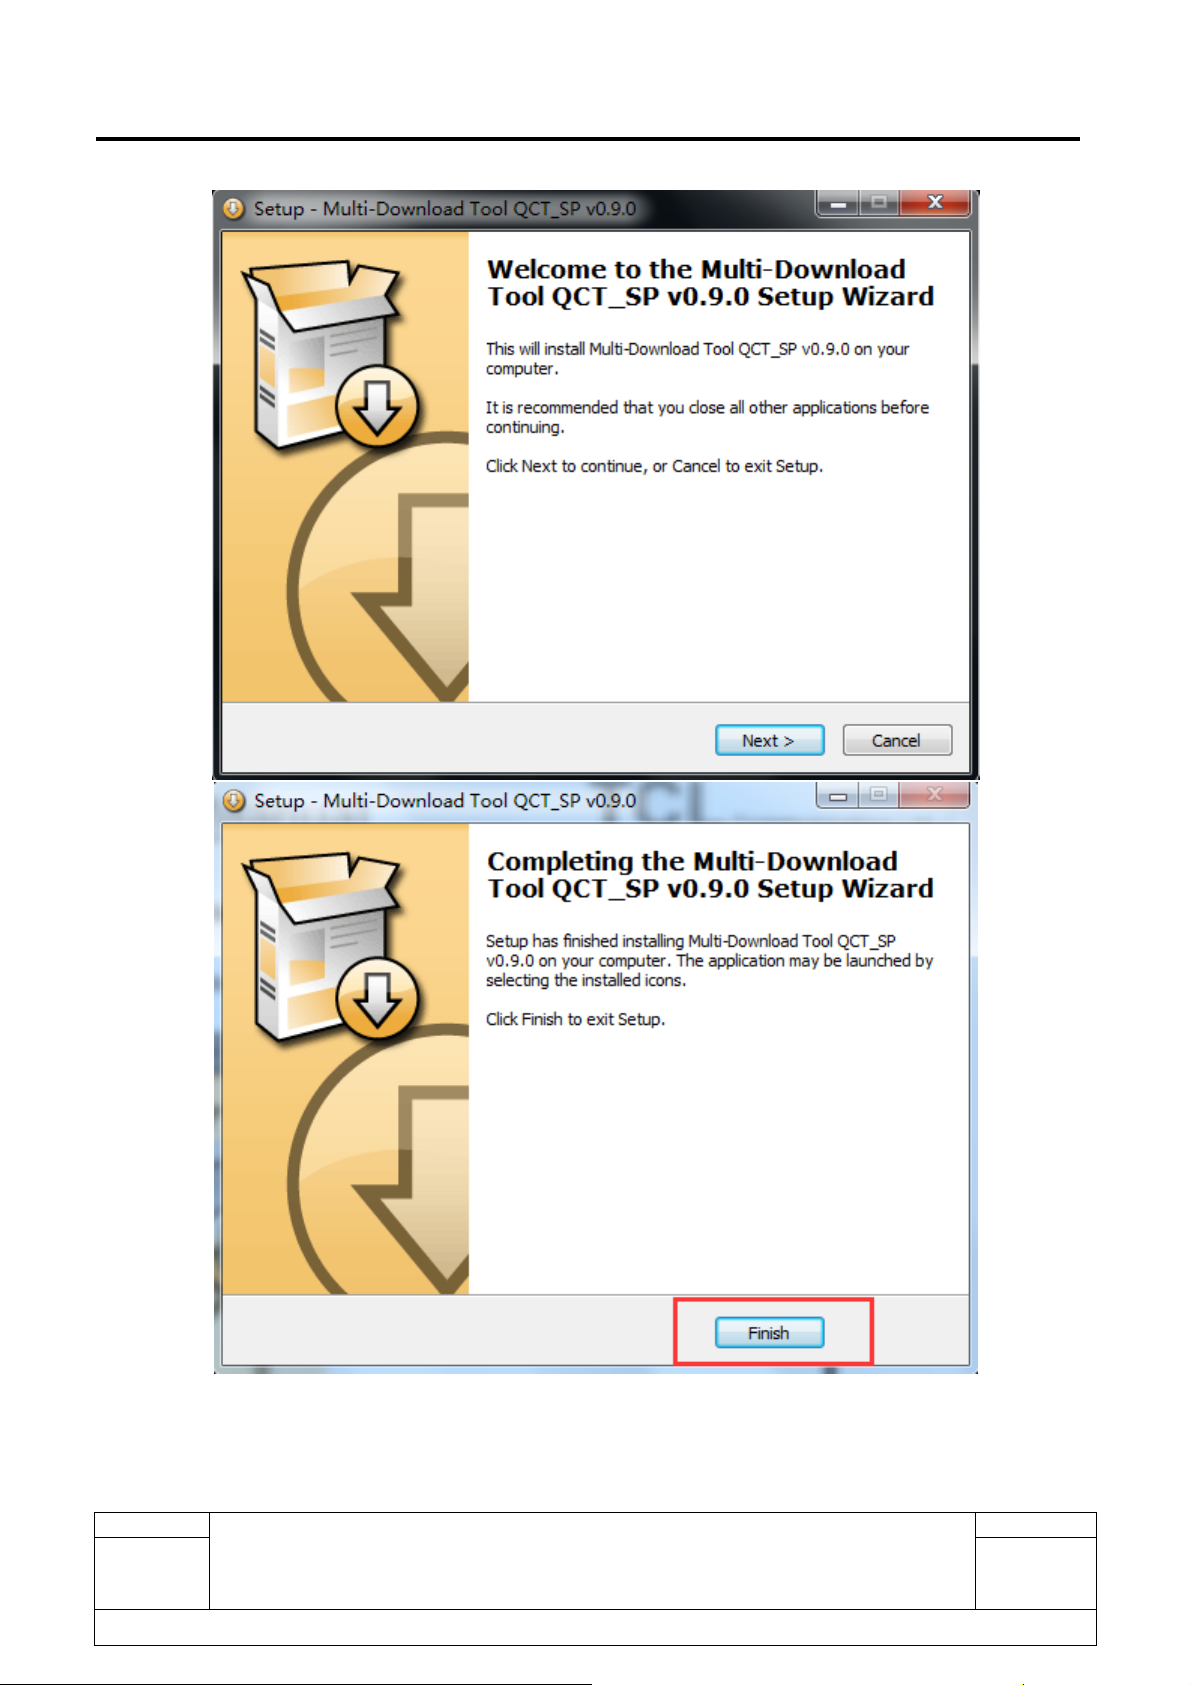
2) Double click to install the Multi-Download QCT_SP, and then select the “Install driver” check box for the
driver installation.
Rev.
1.1
All rights reserved. Transfer, copy, use or communication of this file is prohibited without authorization.
4060 O Level 1 Service Manual
Page
22/28
Page 23
L1 Service Manual TCL Communication Ltd.
Rev.
1.1
All rights reserved. Transfer, copy, use or communication of this file is prohibited without authorization.
4060 O Level 1 Service Manual
Page
23/28
Page 24

L1 Service Manual TCL Communication Ltd.
3.3 SW download process
I. Login the Multi-Download QCT_SP, then select the 4060 O model:
Note:
z upgrade during the power on status.
The upgrade Diag is disabling by default, press “###2324 #” in dial screen, then the pop up window will
display “Diag Protector OFF” which insure the COM Port can be detective by PC.
The Diag will disable when upgrade finished.
Rev.
1.1
All rights reserved. Transfer, copy, use or communication of this file is prohibited without authorization.
4060 O Level 1 Service Manual
Page
24/28
Page 25
L1 Service Manual TCL Communication Ltd.
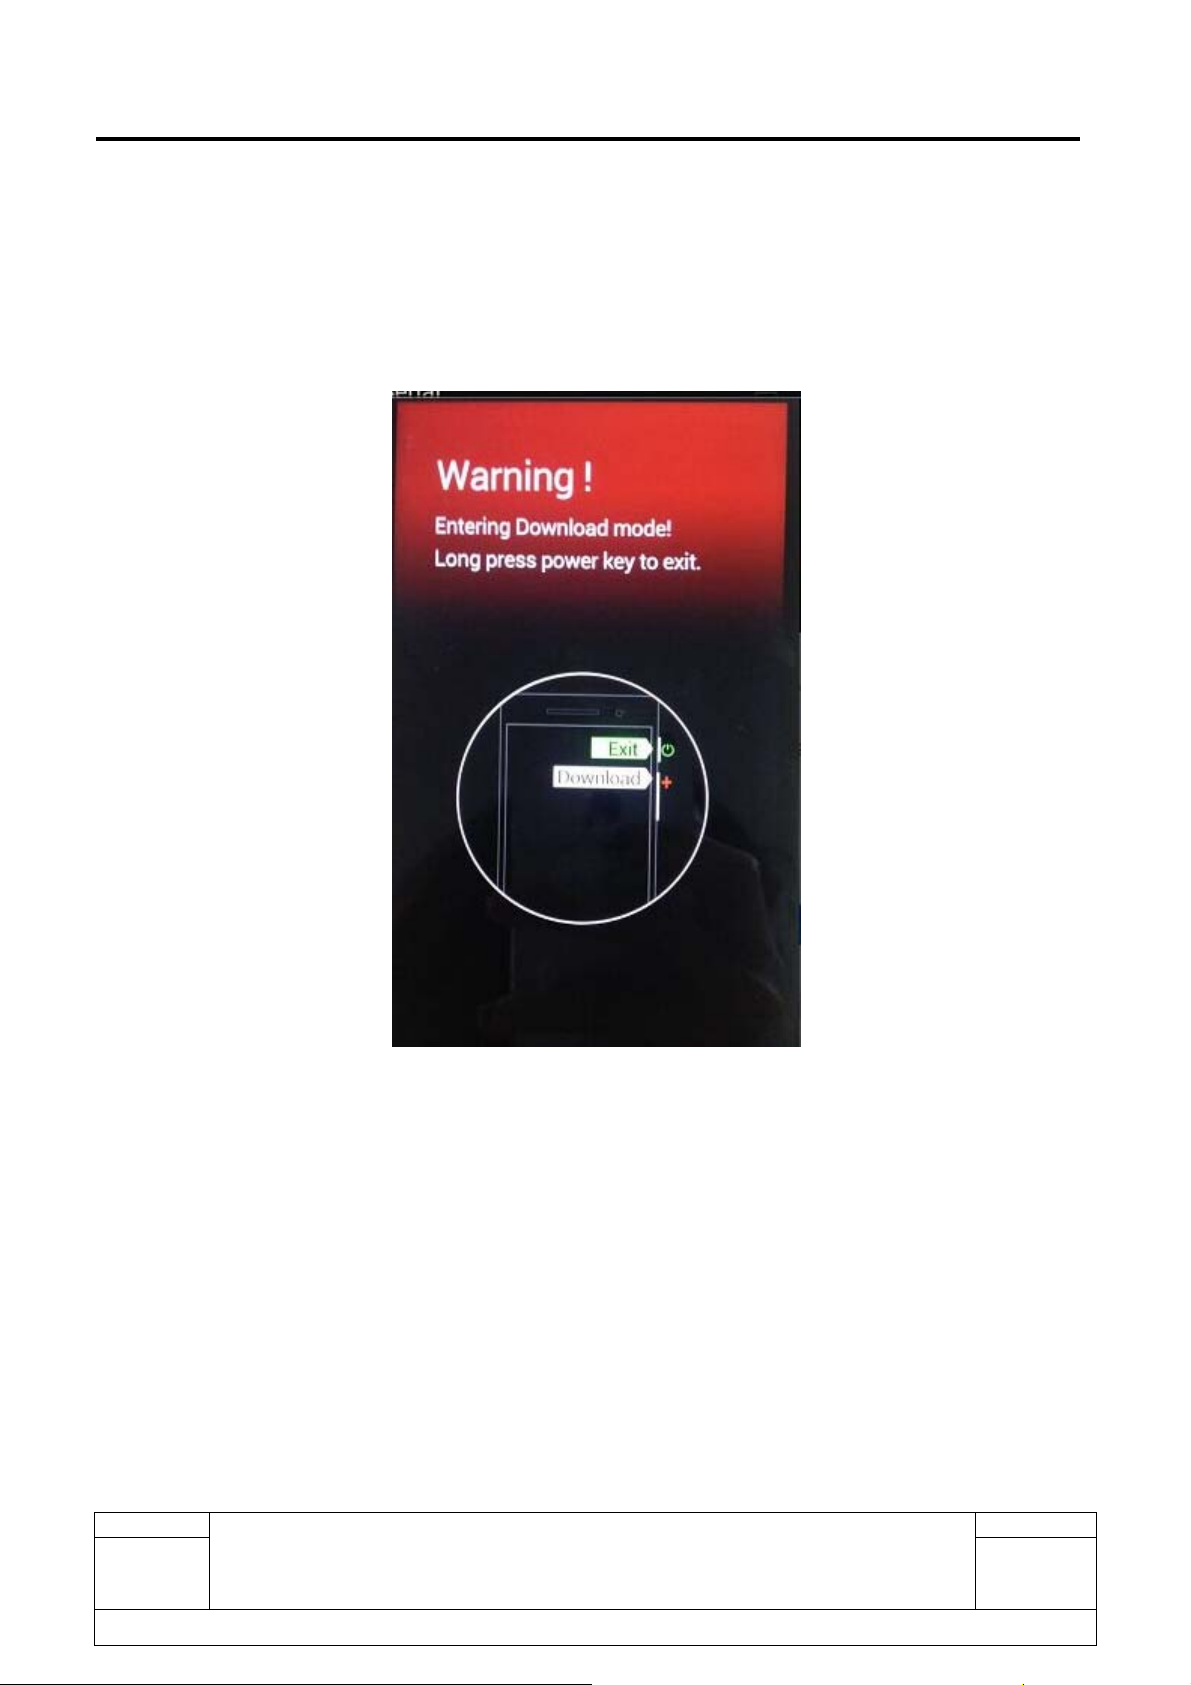
There are two upgrade mode during the power off status..
a. Insert the USB cable, and then reinstall the USB driver (You can refer to the item 3.2 for the details of
Android USB driver installation)
b. If the device cannot power off. Press volume up +volume down key in the same time (the device will
displays below interface), then press volume up key about 3s, insert the USB cable to start upgrade
process.
After the above operations, please go on proceed with the normal process.
Rev.
1.1
4060 O Level 1 Service Manual
Page
25/28
All rights reserved. Transfer, copy, use or communication of this file is prohibited without authorization.
Page 26

L1 Service Manual TCL Communication Ltd.
II. Click the ‘Download’ button, it will display the SW version , IMEI, Cu ref etc of the handset.
Rev.
1.1
All rights reserved. Transfer, copy, use or communication of this file is prohibited without authorization.
4060 O Level 1 Service Manual
Page
26/28
Page 27

L1 Service Manual TCL Communication Ltd.
III. Upgrade finished:
Rev.
1.1
All rights reserved. Transfer, copy, use or communication of this file is prohibited without authorization.
4060 O Level 1 Service Manual
Page
27/28
Page 28

L1 Service Manual TCL Communication Ltd.
If you have any question or problem, please feel free to contact us.
Thanks for your cooperation.
TCL Communication Ltd.
Global Customer Service TS Dept.
th
June,02
, 2016
Rev.
1.1
All rights reserved. Transfer, copy, use or communication of this file is prohibited without authorization.
4060 O Level 1 Service Manual
Page
28/28
 Loading...