

Tauris CMW297 Installation Guide
CMW - 297
Professional Installer Highly Recommended - The bracket manufacturer will not warrant any faulty installations, and damage to panels or any other fixtures / fittings as a result of incorrect installation.
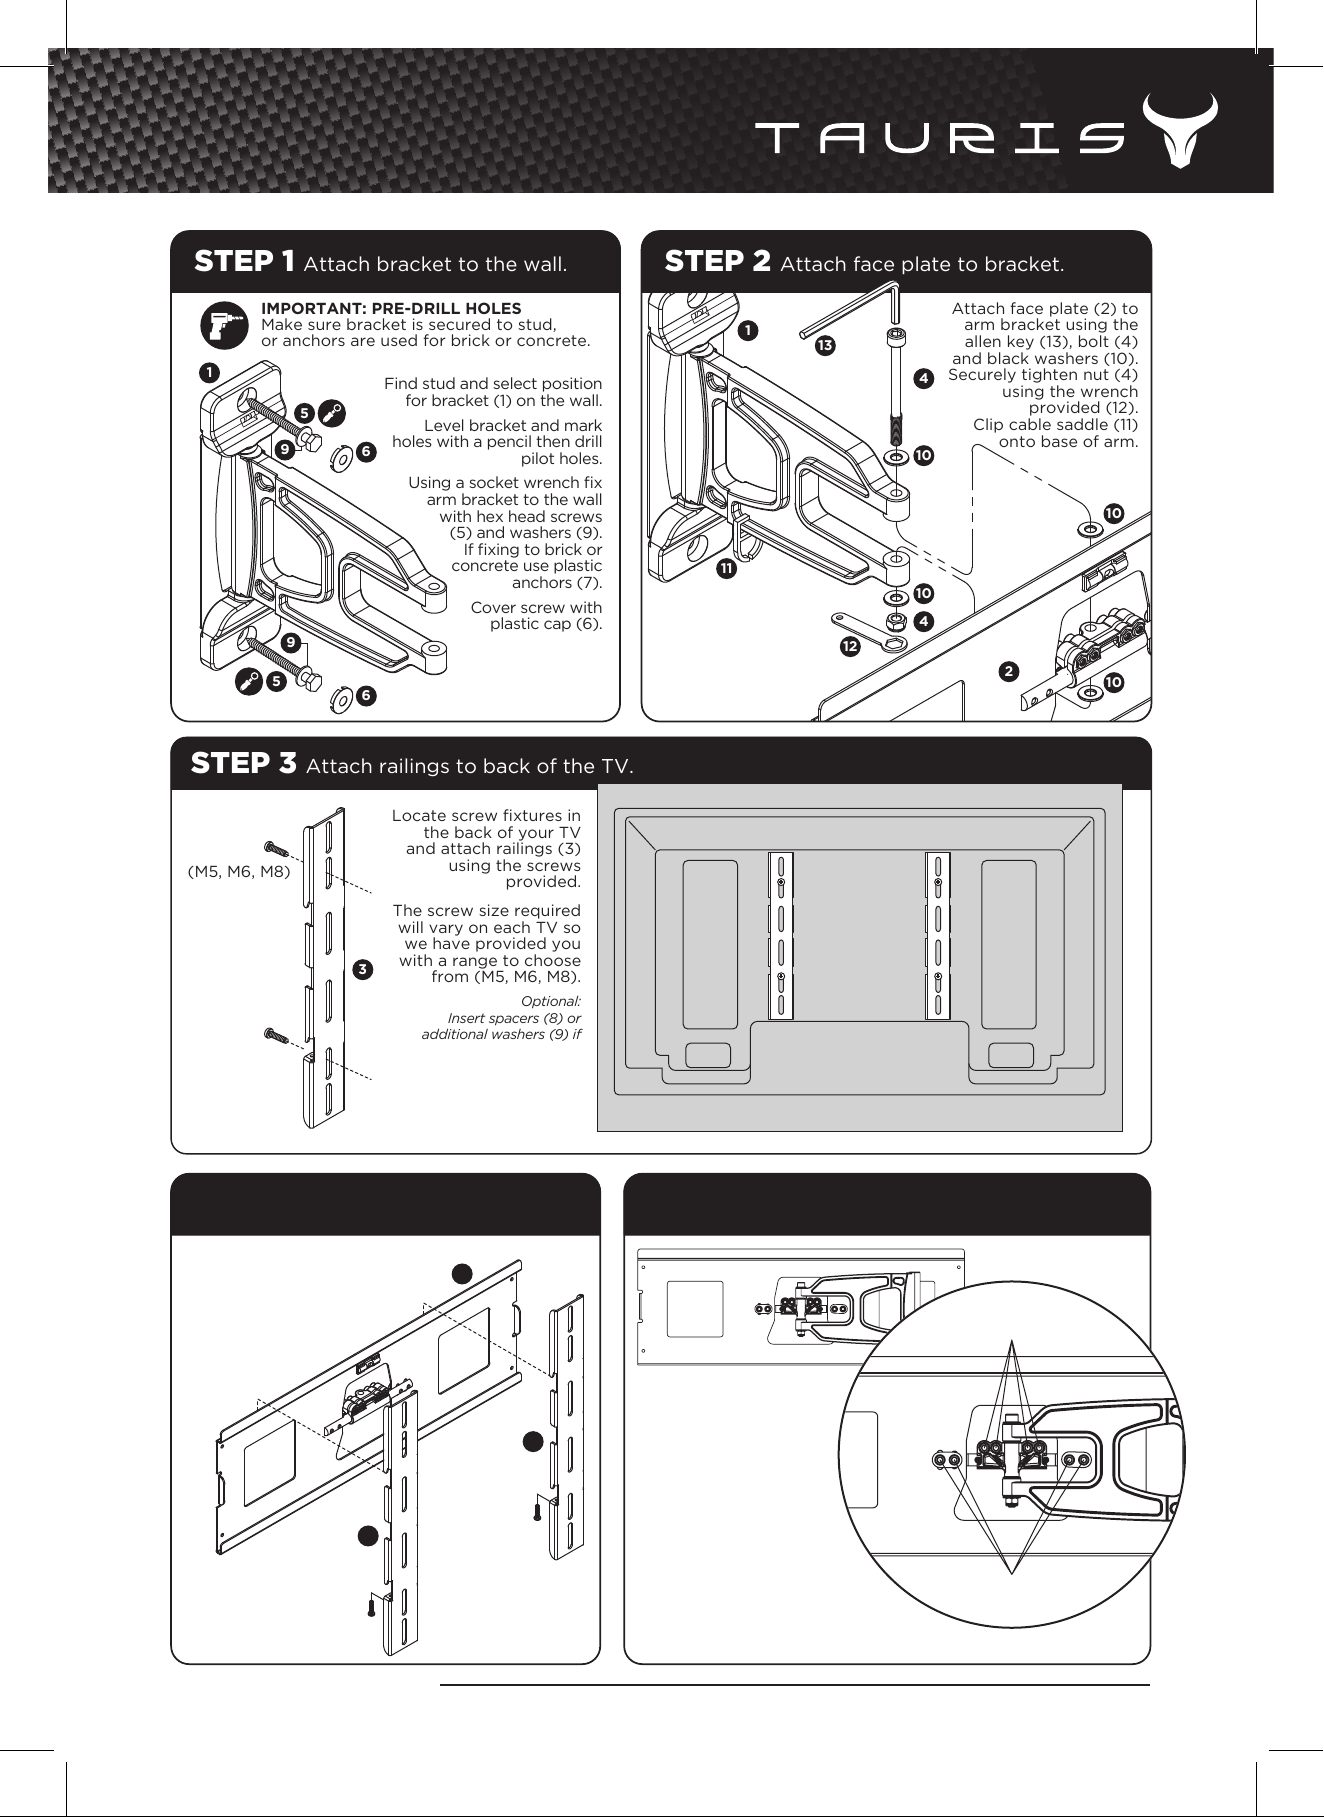
STEP 1 Attach bracket to the wall.
IMPORTANT: PRE-DRILL HOLES
Make sure bracket is secured to stud,
or anchors are used for brick or concrete.
1
5
9
9
5
Find stud and select position
for bracket (1) on the wall.
Level bracket and mark
holes with a pencil then drill
6
Using a socket wrench fix
arm bracket to the wall
with hex head screws
(5) and washers (9).
If fixing to brick or
concrete use plastic
6
pilot holes.
anchors (7).
Cover screw with
plastic cap (6).
STEP 3 Attach railings to back of the TV.
Locate screw fixtures in
the back of your TV
and attach railings (3)
(M5, M6, M8)
3
(M5, M6, M8)
using the screws
provided.
The screw size required
will vary on each TV so
we have provided you
with a range to choose
from (M5, M6, M8).
Optional:
Insert spacers (8) or
additional washers (9) if
back of TV is not a flat.
STEP 2 Attach face plate to bracket.
Attach face plate (2) to
1
11
13
12
arm bracket using the
allen key (13), bolt (4)
and black washers (10).
Securely tighten nut (4)
4
10
10
4
using the wrench
provided (12).
Clip cable saddle (11)
onto base of arm.
2
10
10
STEP 4 Hook TV onto face plate STEP 5 Adjusting tilt and roll.
Once the railings (3) are firmly
attached to the TV, hook
the railings onto the face
plate (2) and secure
into place using
locking screws
provided.
3
www.tauris.com.au
DISTRIBUTED BY RVM AUSTRALIA t: (08) 9417 9944 e: sales@rvm.com.au
2
You can easily adjust
the tilt and roll of the TV
3
by simply loosening the
bolts in the centre of
the face plate with the
allen key provided (14).
Secure bolts tightly for
a fixed position or leave
slightly loosened for an
adjustable platform.
Note: Make sure all screws are firmly tightened after adjusting tilt and roll.
ADJUST TILT HERE
ADJUST ROLL HERE
Mar 2012
CMW - 297
4. 12.5. 7. 11.
13. 14.
10.
8.6.
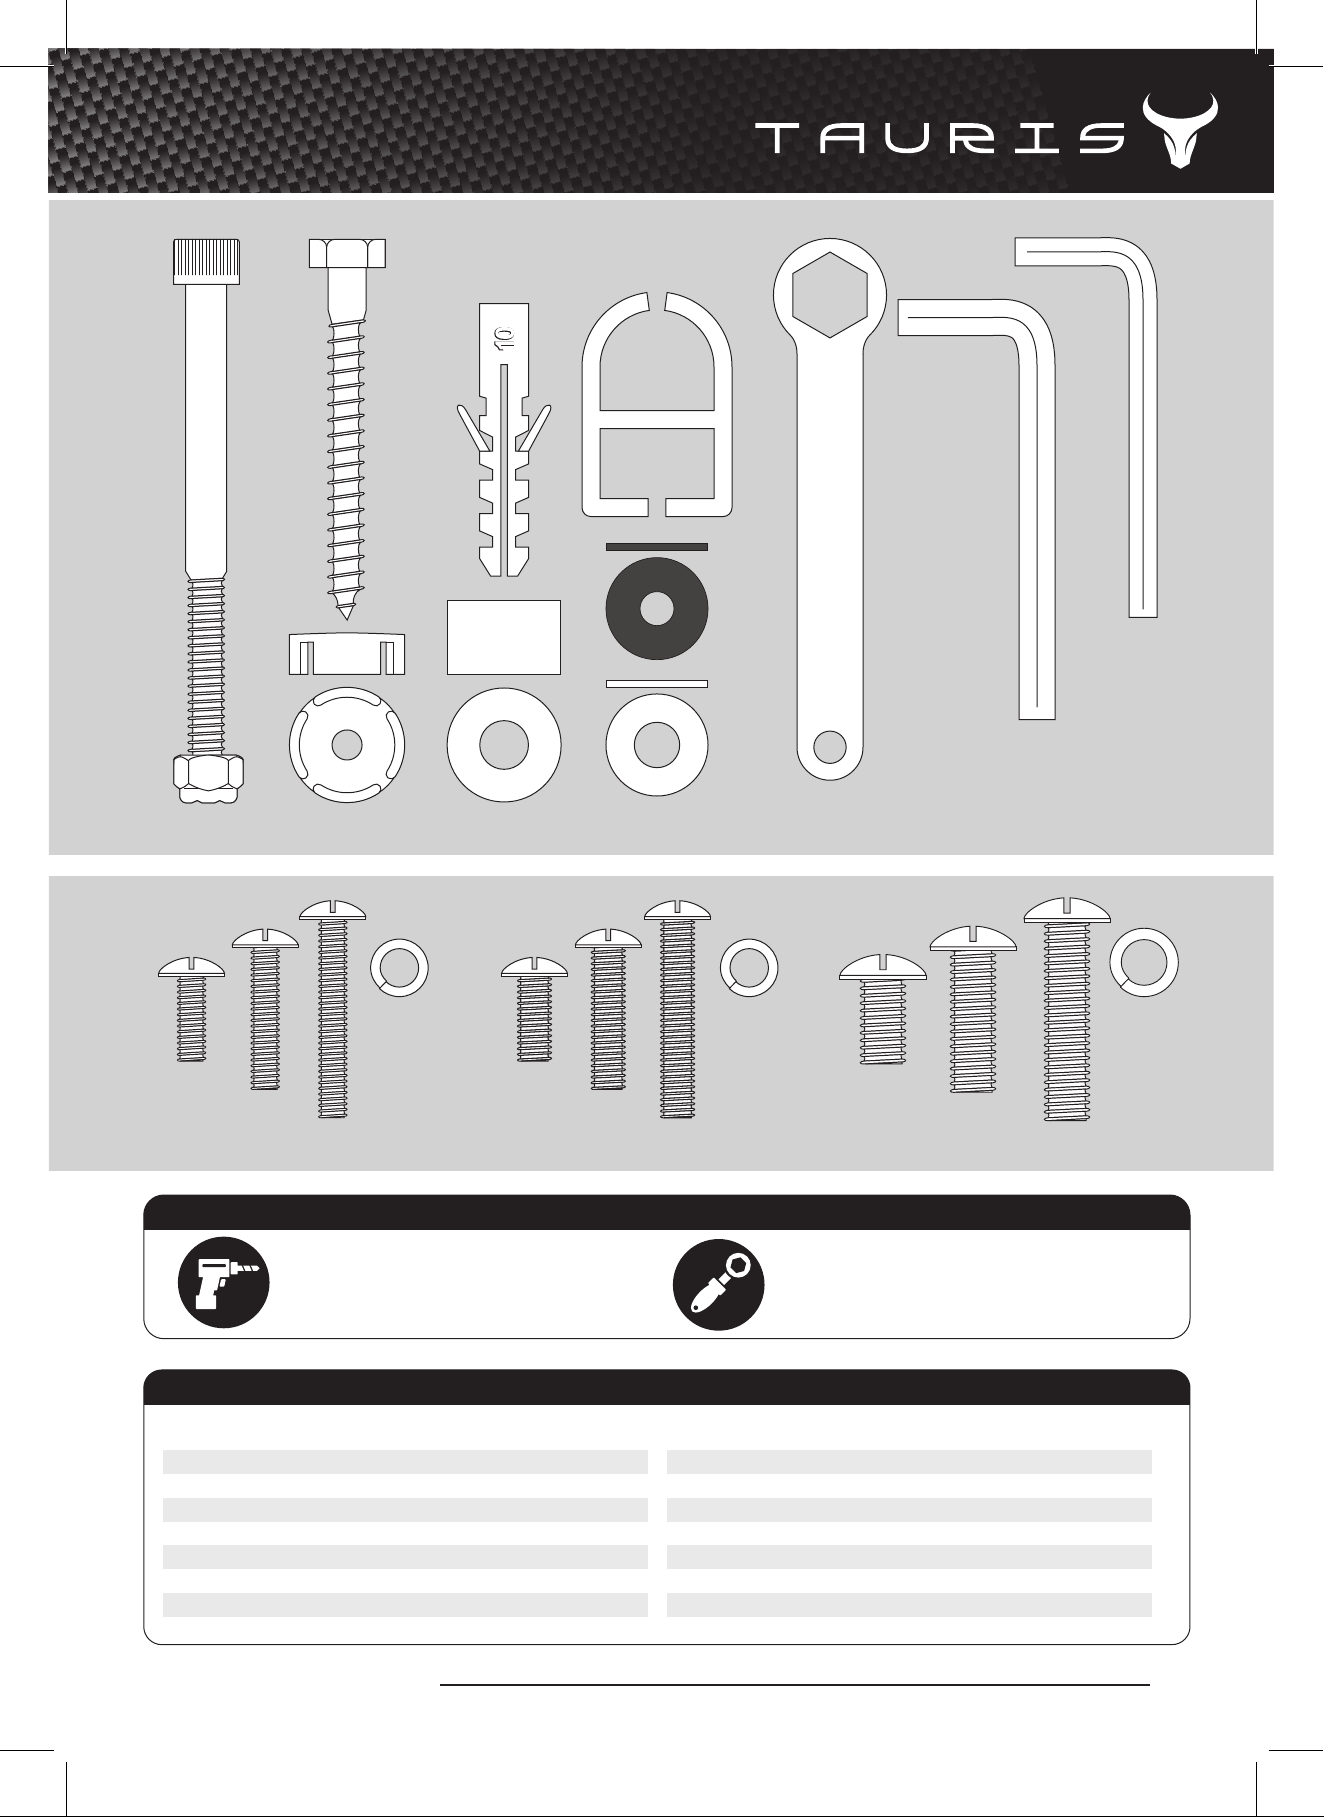
Spring
Washer
x4 x4 x4
NOTE: Use spring washers when securing bolts. This will reduce the risk of bolts coming loose.
ADDITIONAL TOOLS REQUIRED
A drill will be required to drill pilot holes
for the arm bracket.
Masonry Wall - 9mm bit
Studded Wall - 5mm bit
M6
9.
Spring
Washer
PARTS DRAWN TO SCALE 1:1
M8M5
A socket wrench will be required wherever
you see this icon.
Hex Socket - 13mm or 1/2”��
Spring
Washer
PARTS LIST
No. Part Qty
1 Wall Bracket With Arm 1
2 Face Plate 1
3 Railings 2
4 Pivot Bolt & Nut 1
5 Hex Screw 2
6 Plastic Cap 2
7 Masonry Anchors 2
www.tauris.com.au
DISTRIBUTED BY RVM AUSTRALIA t: (08) 9417 9944 e: sales@rvm.com.au
No. Part Qty
8 Plastic Spacer L12.5 4
9 Washer Silver ø8 ø18 10
10 Washer Black ø6 ø18 4
11 Cable Saddle 2
12 Wrench 1
13 Allen No. 6 1
14 Allen No. 5 1
Mar 2012
 Loading...