

Page 1
Tablet PC
User Guide
Page 2

FEDERAL COMMUNICATIONS COMMISSION
INTERFERENCE STATEMENT
This equipment has been tested and found to comply with the limits for a Class B
digital device, pursuant to Part 15 of the FCC Rules. These limits are designed
to provide reasonable protection against harmful interference in a residential
installation. This equipment generates, uses and can radiate radio frequency
energy and, if not installed and used in accordance with the instructions, may
cause harmful interference to radio communications. However, there is no
guarantee that interference will not occur in a particular installation. If this
equipment does cause harmful interference to radio or television reception,
which can be determined by turning the equipment off and on, the user is
encouraged to try to correct the interference by one or more of the following
measures:
-- Reorient or relocate the receiving antenna.
-- Increase the separation between the equipment and receiver.
-- Connect the equipment into an outlet on a circuit different from that to which
the receiver is connected.
-- Consult the dealer or an experienced radio/TV technician for help.
CAUTION:
Any changes or modifications not expressly approved by the grantee of this
device could void
the user's authority to operate the equipment.
FCC RF Radiation Exposure Statement
This equipment complies with FCC RF radiation exposure limits set forth for an
uncontrolled environment. This equipment should be installed and operated with
a minimum distance of 20cm between the radiator and your body.
Page 3
Tablet PC Desktop
Start Button Taskbar
System Tray
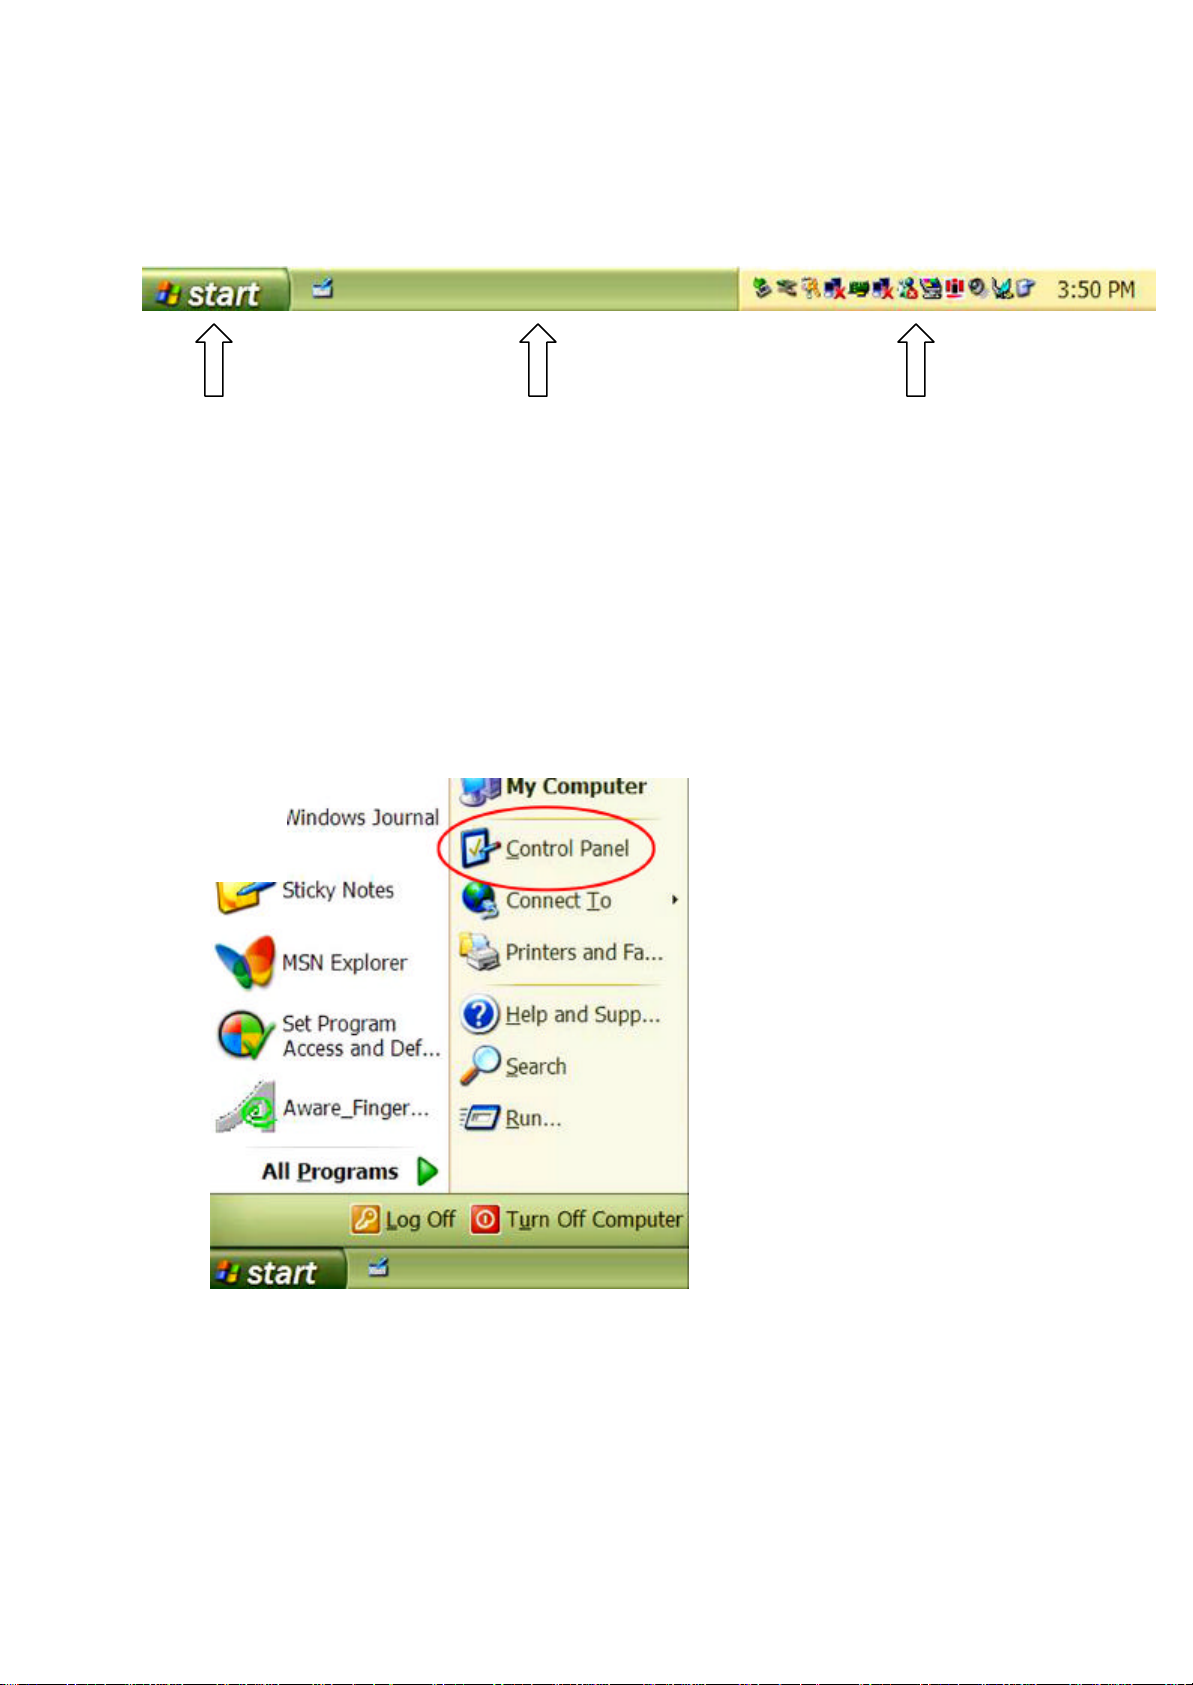
Control Panel Views
You can view the Control Panel in 2 views, Category and Classic. To select the view most
appropriate for you, follow the steps below.
1
○
Go to Start > Control Panel.
Page 4
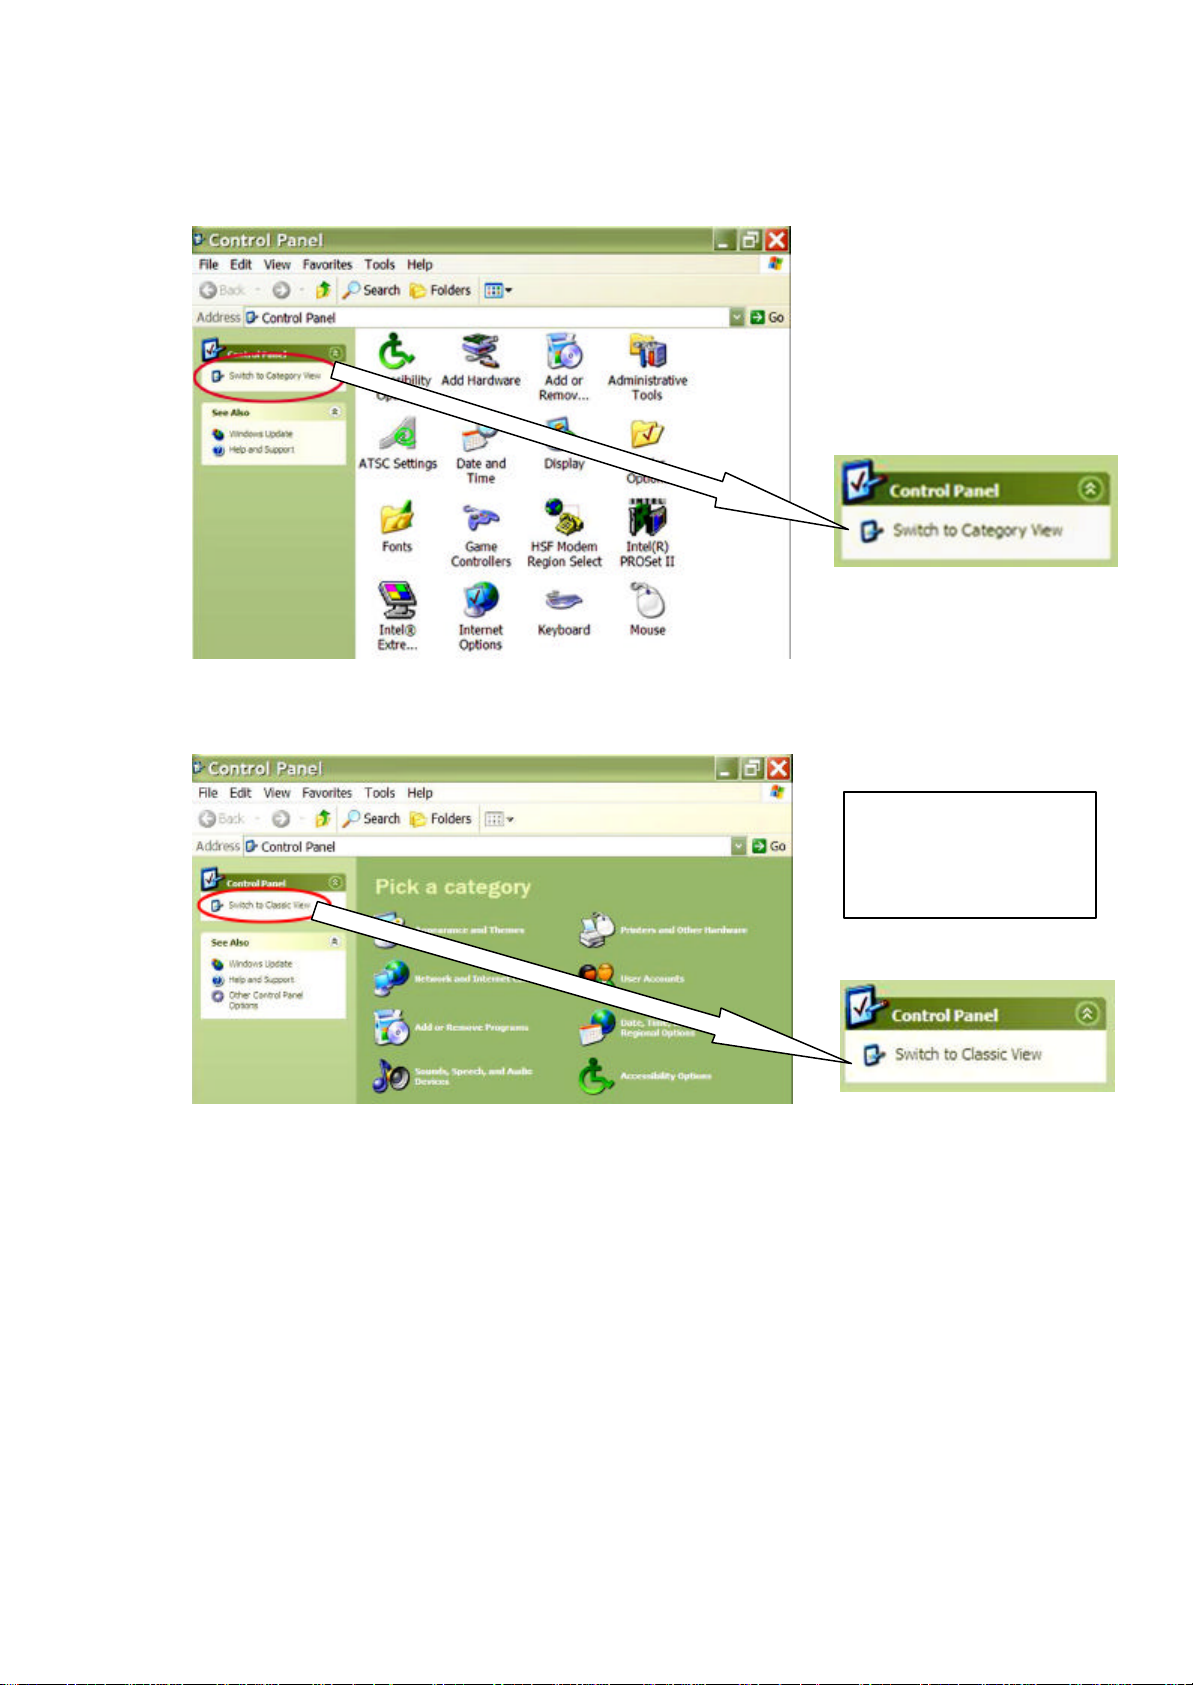
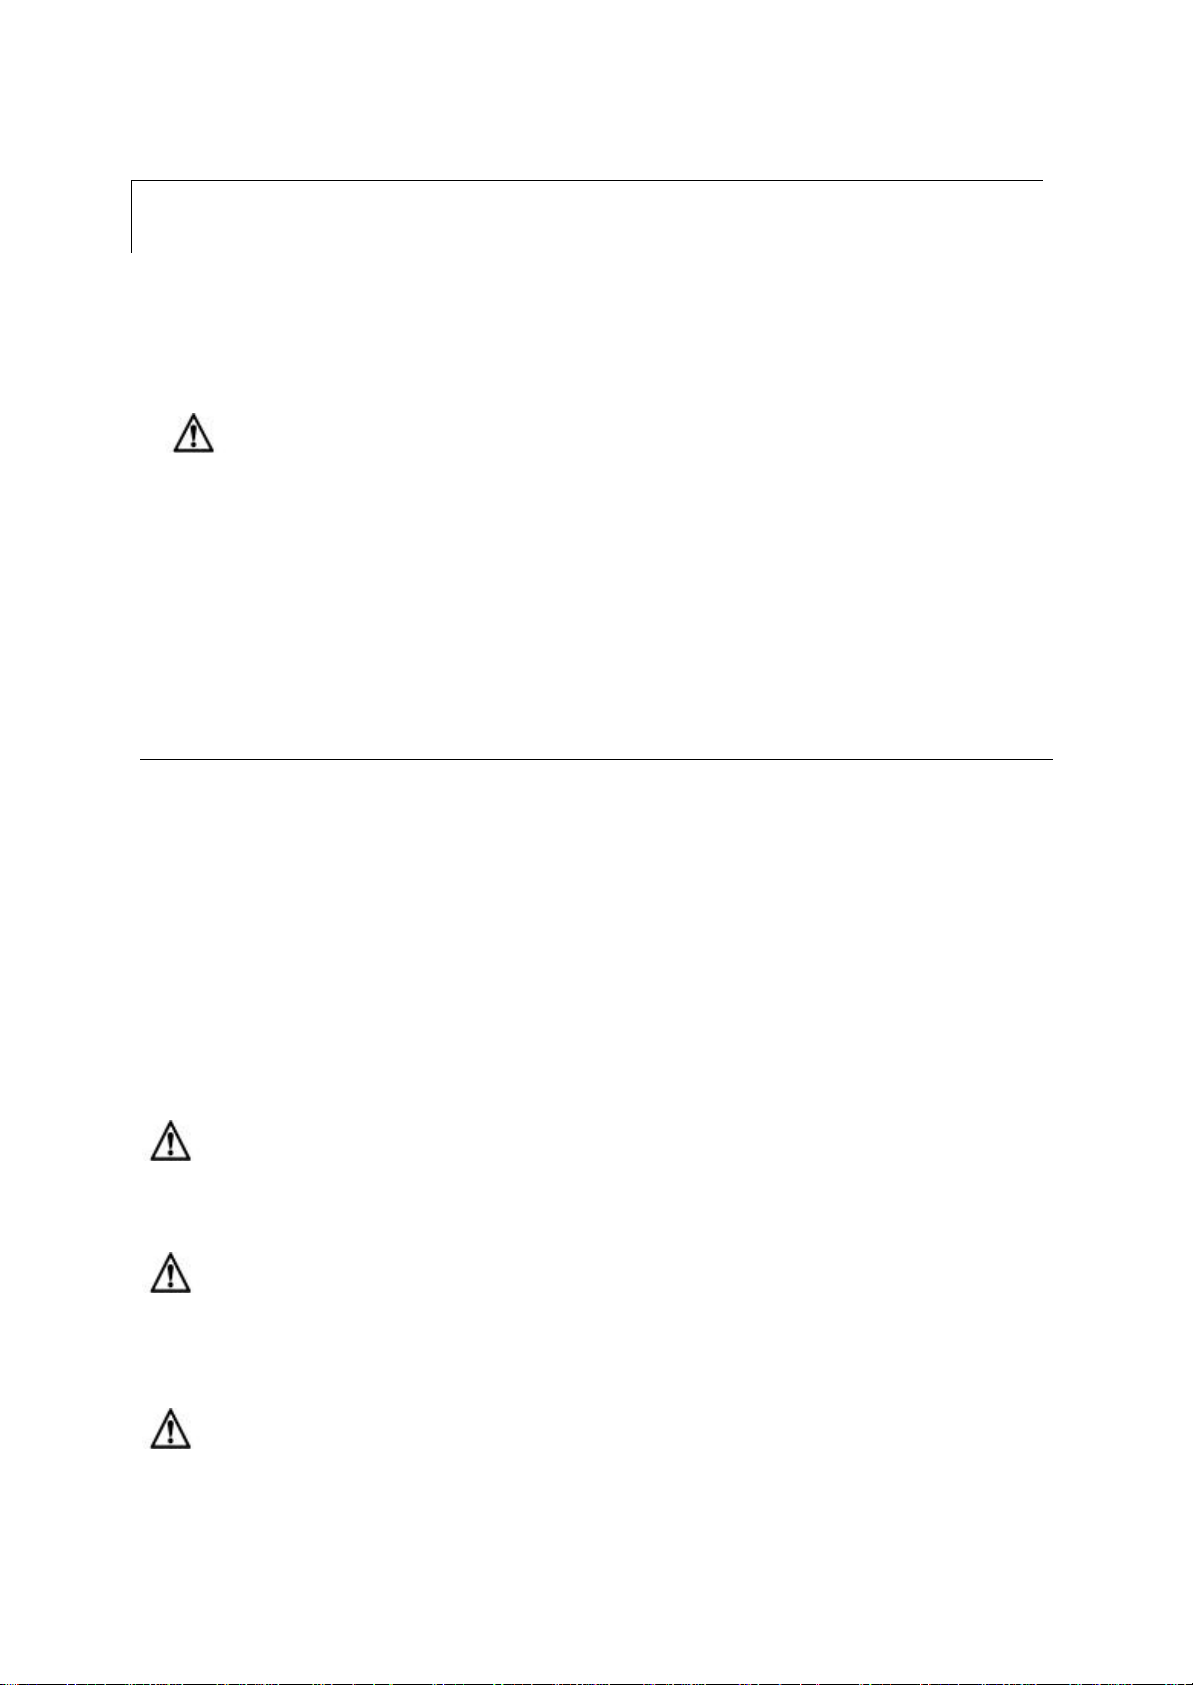
2
○
Tablet PC Appearance
To increase your Tablet PC visual friendliness, you may change its color scheme, and increase
its font size and icon size. Follow the steps below.
Page 5

Table of Contents
Chapter 1 Introducing the Tablet PC
Product Overview
Safety Information
Inventory Checklist
Chapter 2 Seeing the Tablet PC
Different types of Tablet
Front View of the Tablet
Back View of the Tablet
Topside View of the Tablet
Bottom Side View of the Tablet
Right Side View of the Tablet
Chapter 3 Setting up the Tablet PC
Charging Tablet PC Battery
Using Stylus
Turning On/Off the Tablet
Putting the Tablet in Standby Mode
Changing New Battery (Hot Swap Tim e Process)
Calibrating Screen for Stylus Accuracy
Adjusting Screen Brightness
Selecting Screen Orientation
Changing the Time
Projecting Materials on Screen
Adjusting Audio Properties
Changing New Battery
Chapter 4 Defining the PC Function Keys
Introducing Tablet Button Functions
How to Activate Secondary Button Functions?
Button Functions in the Logon Process
Page 6

Button Functions When Desktop Icons Appear
Button Configuration
Chapter 5 Protecting the Tablet PC
Cleaning the Screen
Chapter 6 Troubleshooting
Useful Tutorials
Help and Support
Hardware Problems and Solutions
Before Contacting COMPANY
Contact COMPANY
Appendix
Safety Notices
Limited Warranty
Regulatory Compliance
Copyright Notice
Page 7

Chapter 1 Introducing the Tablet PC
Product Overview
Tablet PC combines the versatility of a pen and tablet with the functionality of a laptop to
bring you a truly mobile tool for your work and personal use. This lightweight, page -size
PC gives you easy access for retrieving and entering information using the latest
Widows-based applications.
Congratulations on your new purchase! Now, you may start enjoying a few of the vast
amount of benefits Tablet PC has to offer you right away. They are:
n The spacious and user-centered design of the PC gives you the convenience of
resting your hand on the screen while writing.
n Highly advanced speech recognition system in the PC turns it into a dictation
machine that converts your voice into text.
n The lightweight PC allows you to conduct business wherever you go and increase
your work productivity.
n No more hassle with entering information into your PC! With your stylus, yo u can
scribble directly on the Tablet PC screen and your handwriting is instantly
transferred into text.
Page 8
Safety I nformation
Be aware of the following 2 symbols used in this user manual. Each symbol denotes
important and helpful information that will benefit you while using the computer.
Warning!
This symbol informs you that improper use of equipment or failure to follow
instructions may cause property damage or bodily injury.
*
Note!
This symbol offers advice that helps you to take full advantage of the Tablet
PC.
To preserve your Tatung Tablet PC in the best possible condition, you should follow the safety
measures below.
* Note!
You need to view the PC screen from 15” to 18” away for best viewing.
* Note!
For comfortable viewing and glare reduction, keep the PC screen away from direct
sunlight.
Warning!
Never touch the screen with your fingers, because skin oils are hard to remove.
Warning!
Never remove the rear cover of the PC, because some PC parts contain high
voltage.
Warning!
Keep the PC screen away from direct sunlight and other powerful light source.
Page 9

Warning!
Avoid putting heavy objects on the screen and any PC wire parts.
Warning!
Avoid operating the PC in outdoor environments of extreme cold, dampness and
wetness.
Page 10
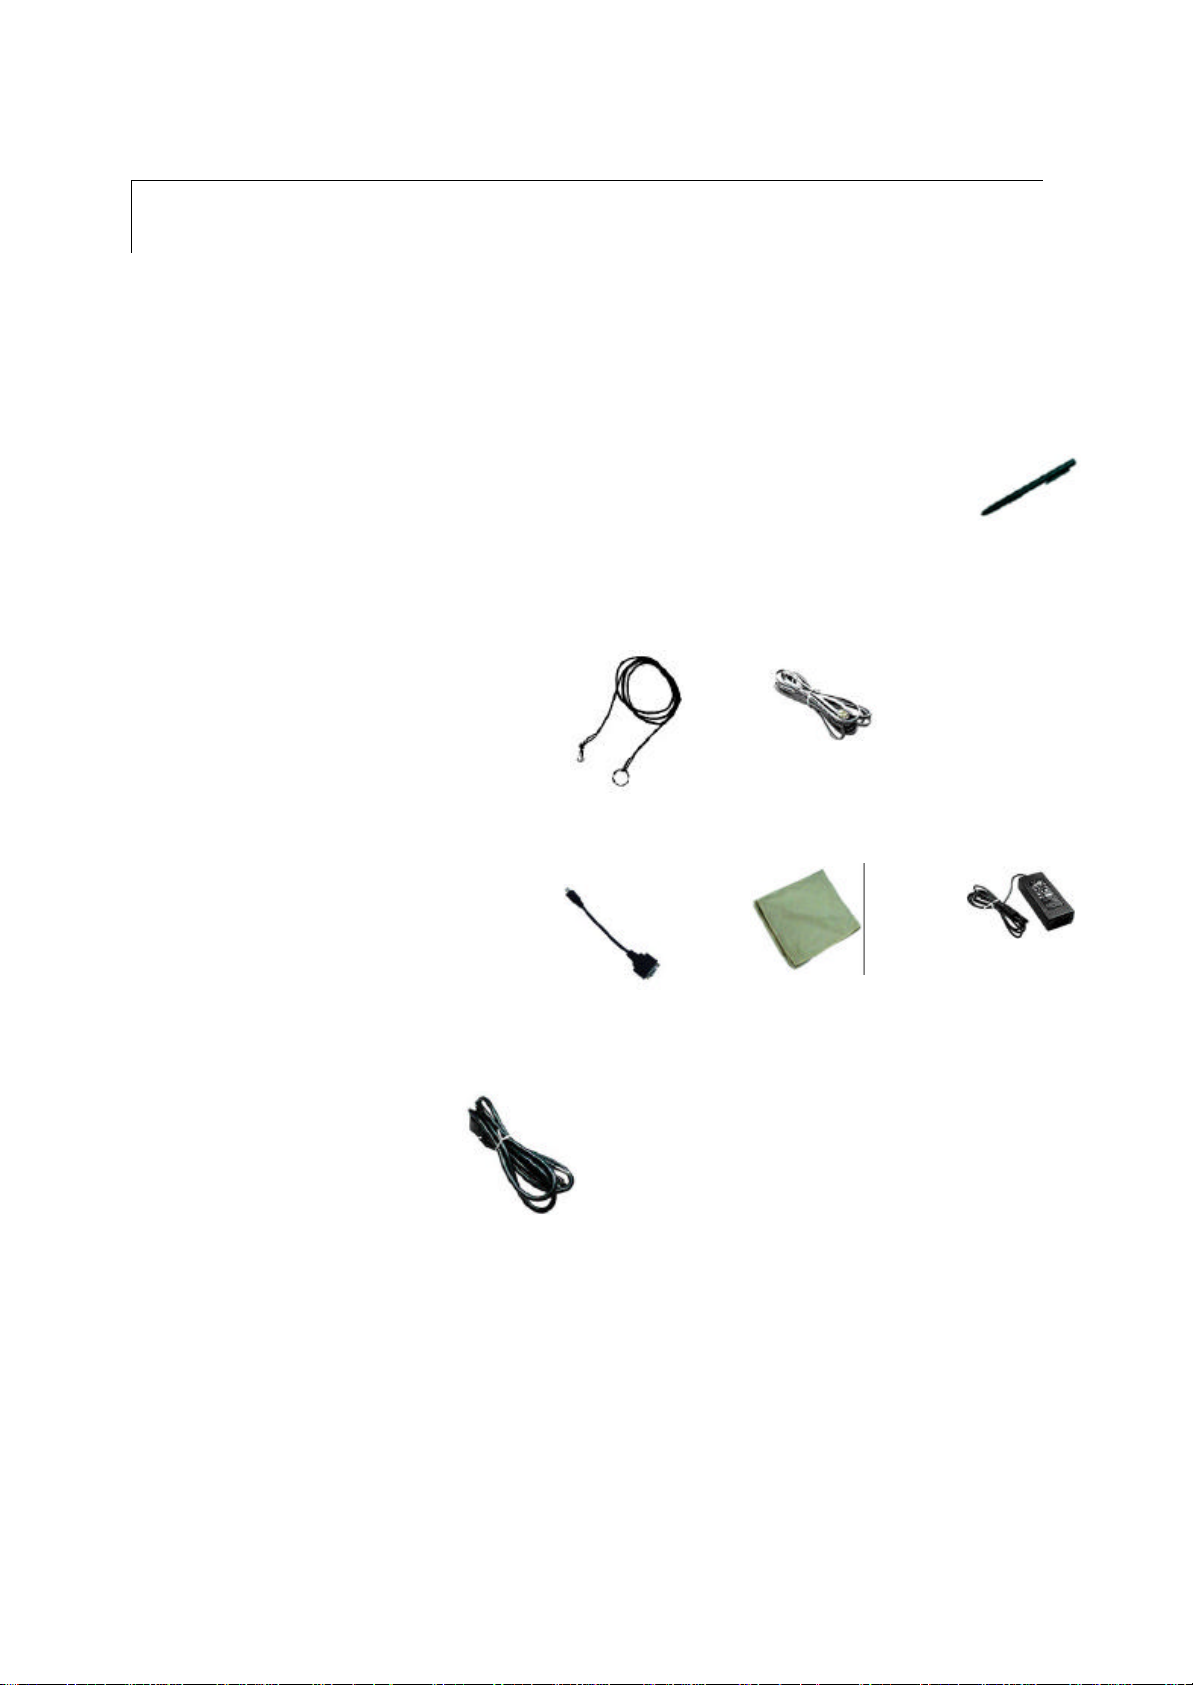
Inventory Checklist
* Note!
Your content items may vary depending on purchase.
○1 Tablet PC x 1
○2 4-cell Lithium Battery Pack x 1
1
○
2
○
3
○
○3 Stylus x 1
○4 Stylus Cord x 1
○5 Telephone Cable x 1
○6 Slip Cover x 1
○7 Mini VGA Cable x 1
○8 Soft Cleaning Cloth x 1
○9 AC Adapter x 1
○10 AC Power Cord x 1
○11 Stand x 1
○12 CD x 1
○13 Quick Start Guide x 1
10
○
○
MISSING MISSING
4
○
○
7
11
○
MISSING
5
○
8
12
○
MISSING
6
○
MISSING
9
○
13
○
MISSING
Optional Items
○14 Rubber Hand Grid
○15 SDRAM DIMM
○16 IR Keyboard
○17 8-cell Extended Lithium
Ion Battery Pack
14
○
16
○
MISSING
MISSING
15
○
17
○
MISSING
MISSING
Page 11
Chapter 2 Seeing the Tablet PC
Different Types of Tablet PC
Section for briefly explain the different types of tablet pc & the important features of each
type.
Include a front view picture for each type.
Front View of the Tablet picture & labels
Back View of the Tablet picture & labels
Topside View of the Tablet picture & labels
Bottom Side View of the Tablet picture & labels
Right Side View of the Tablet picture & labels
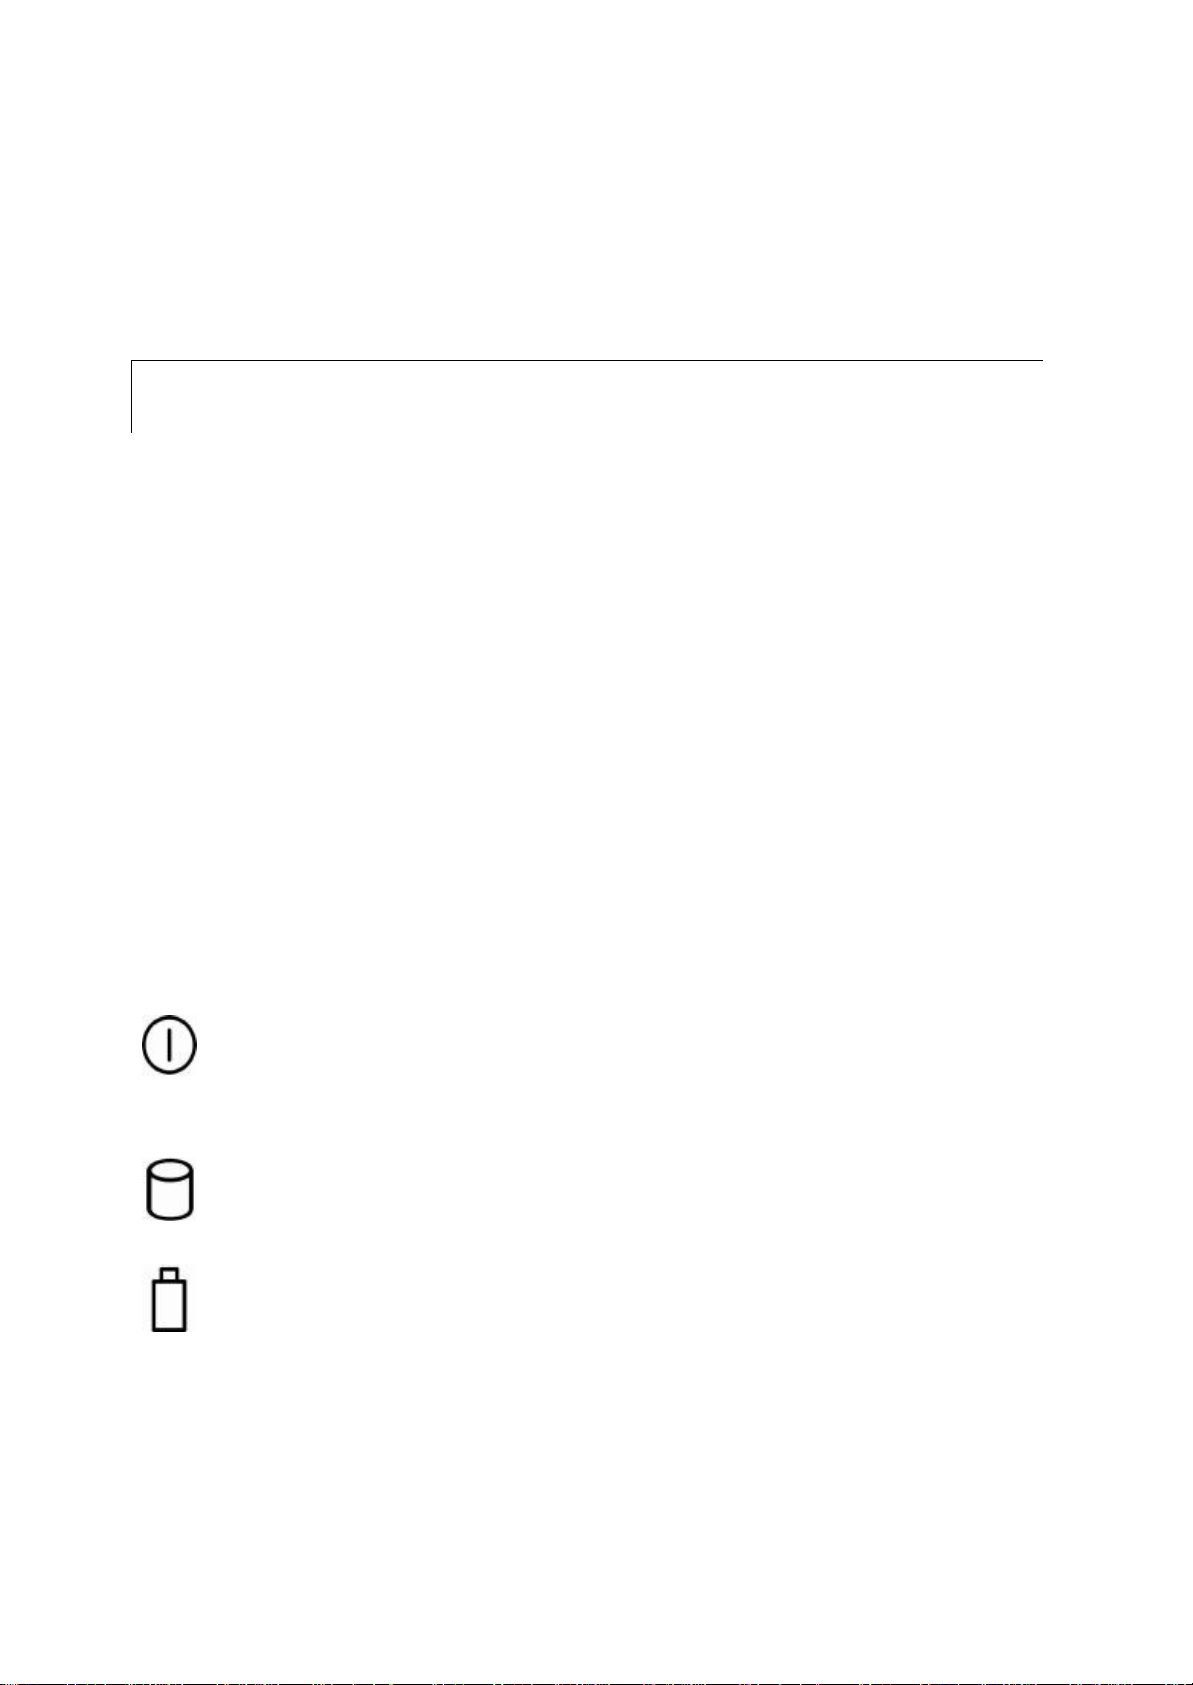
What do the lights stand for? Their icons and functions are shown below:
Power Indicator. The steady green light indicates that the PC power
status as ON. When in Standby mode, this light flashes slowly. The dark
light indicates that the PC power is OFF.
Hard Drive Indicator. The flashing green light indicates that the PC hard
drive is operating.
Battery Indicator. The flashing red light indicates low battery. The
steady red light indicates that the battery is charging.
Page 12

Chapter 3 Setting up the Tablet PC
Begin with
Tablet PC &
Unlock battery switch
by
Release battery switch
Plug in the AC Adapter
Charging Tablet PC Battery
Before you can use the Tablet PC for the 1st time, you need to charge its empty battery for at
least 4 hours with the Power OFF to reach its maximum battery energy.
The illustration below shows you the setup process.
1
○
2
○
3
○
its 4-cell Lithium Battery
Pack unattached.
pushing it downward.
At the same time, insert
battery pack into the slot.
to lock it.
4
○
into the AC/DC Power
Jack.
Connect AC Adapter to
the nearby power outlet.
Page 13

The 4-cell Lithium Ion battery pack has 3.5 maximum hours of source life. However,
battery life may vary depending on your Tablet PC usage.
Your battery charging times differ depending on whether the power is ON/OFF and the
current system state. See the table below for a list of battery charging times for different
system states.
The battery pack is removable and user inter-changeable.
Tablet PC States Battery Charging Times
Power ON
Idle position 3 hours & 13 minutes
Standby position 2 hours & 50 minutes
Operating position 11 hours
Power OFF 2 hours & 47 minutes
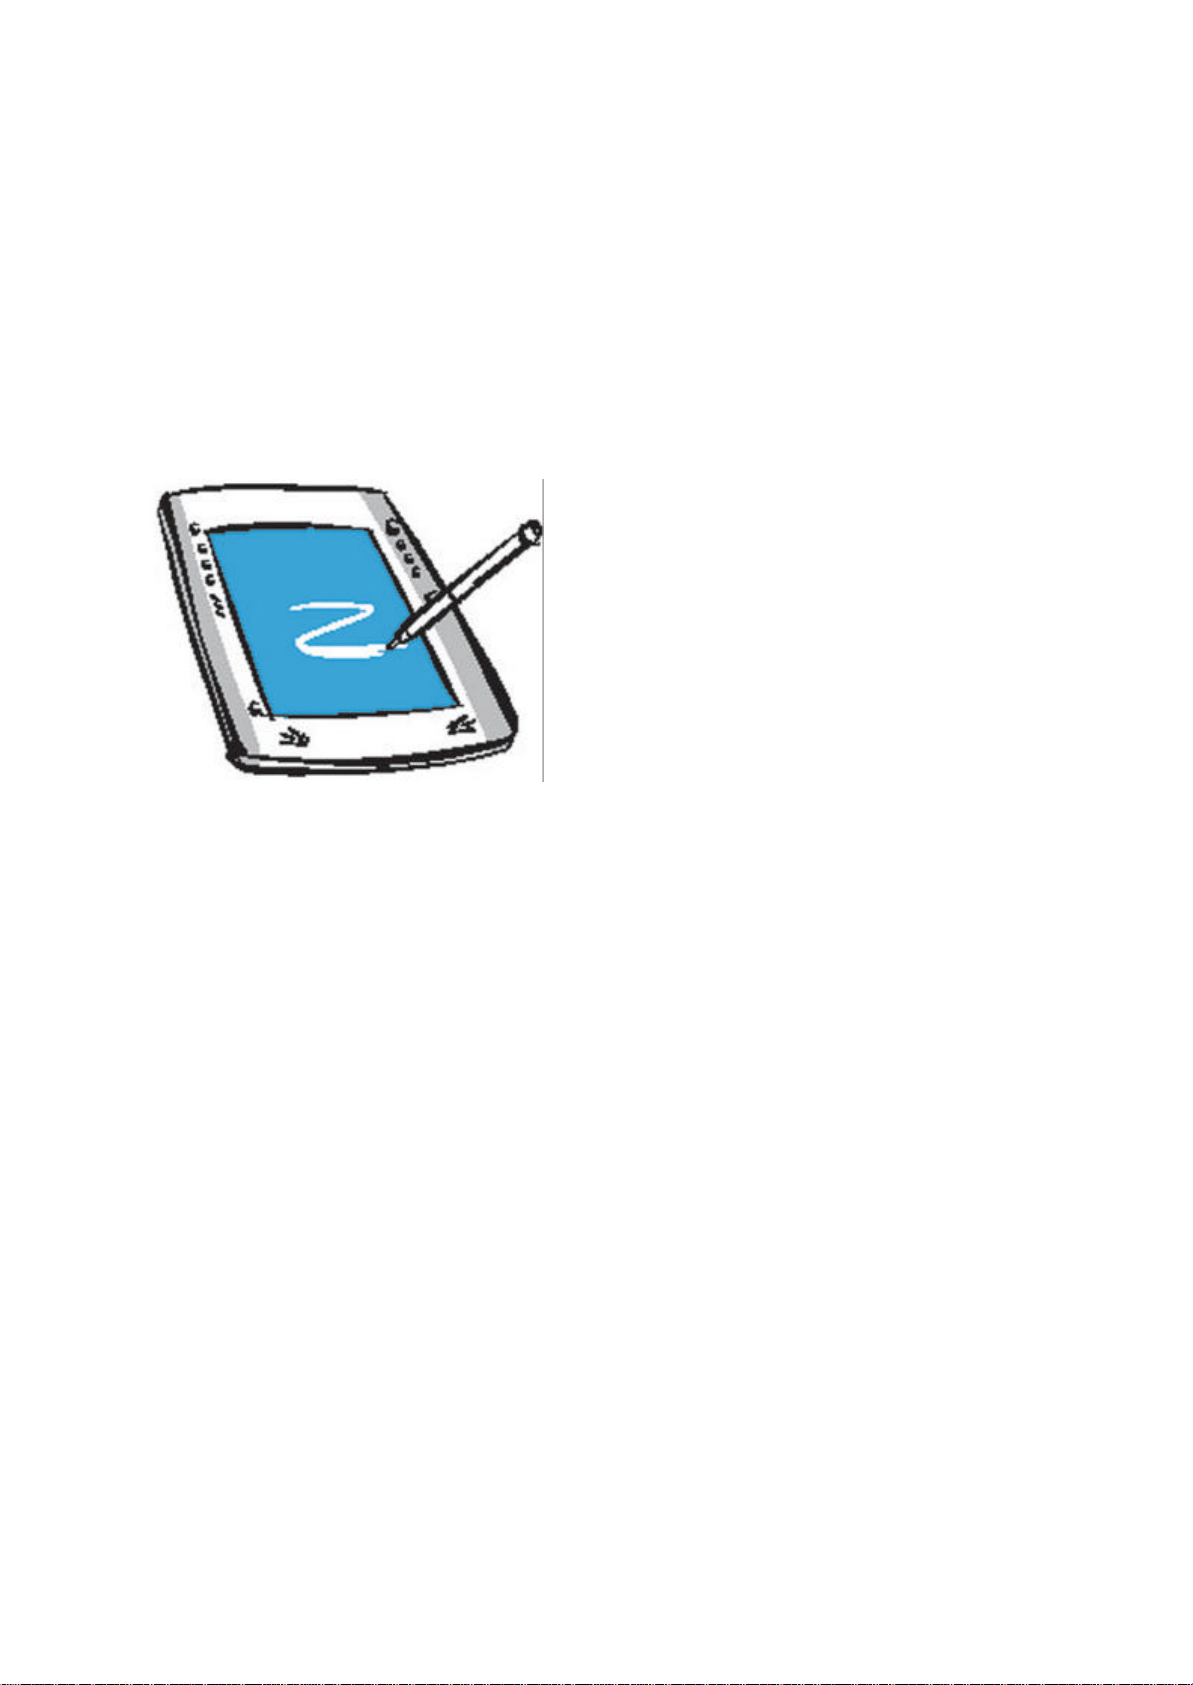
Using the Stylus
You can now use the stylus to function as a mouse. With the stylus, you can still move,
delete, and open folders on the screen.
You must watch the cursor as you move the stylus on the screen instead of aiming the tip of
the stylus on the intended object. To activate PC button functions, you press them with the
stylus. To drag items, you simply need to aim your cursor at them.
Follow the methods below to trigger the 3 typical mouse functions with your stylus.
Mouse Functions Stylus Functions
Double-left click Double-tap
Single-left click Single-tap
Right-click Tap & hold
Page 14

* Note!
You can customize pen actions. Go to Start > Control Panel > Tablet and Pen
Settings > Pen Options.
* Note!
You can also access Tablet and Pen Settings in the system tray. Tap
The scenario to the left
appears when you initiate
right-clicking function.
Turning On/Off the Tablet
You can turn on the Tablet PC by pressing the power button located as shown below.
PICTURE OF POWER BUTTON LOCATION
You have 3 methods to turn off the PC with your stylus, and they are:
1
Go to Start > Turn Off Computer > Turn Off
○
2
○
You can force the PC to shut down by pressing the power button and hold
Page 15

To change the power button setting,
3
○
for m ore than 4 seconds with your stylus.
Or you can set the Tablet to automatically display when pressing the
power button once. This way you can easily make the selection on the screen.
Putting the Tablet in Standby Mode
You have 2 methods to place the Tablet PC in standby mode.
go to Start >
Control Panel > Power Options >
Advanced.
This is the default setting where you press the power button for less than 4
1
○
seconds. Then the system is automatically placed in standby mode.
To recall the system from the standby mode, you simply press the power button
once more.
Or you can choose Standby from as shown below.
2
○
Page 16

Changing New Battery (Hot Swap Time Process)
When the battery light starts flashing and you need to change the battery in order to save your
work, follow the steps below.
1. Unplug everything from the system. (For example, unplug the VGA cable.)
2. Place the system in standby mode.
3. Take the battery off.
4. Attach a new battery.
5. Return the system to operating mode.
Attach the new battery within 5 minutes or else any unsaved work will be lost. The 5
minutes begin when you first take off the battery to when you attach the new battery.
The 5 minutes allotted for the process means no device attached to the system such as no
PCMCIA or no VGA cable.
Page 17

Go to
Start > Control Panel > Tablet
and Pen Settings > Settings
.
Calibrating Screen for Stylus Accuracy
You can make your Tablet PC screen respond better to your stylus. You need to select the
type of screen orientation you wish to calibrate: Landscape or portrait.
1. Select the appropriate screen orientation to calibrate: Landscape or portrait.
2. Now, you are ready to calibrate the screen. Tap the Calibrate… box.
Adjusting Screen Brightness
You can adjust the screen brightness of your PC to fit your needs. You’ve the choice of
adjusting the screen brightness for 2 system settings as described below.
♦ When tablet is powered by batteries
♦ When AC Adapter is plugged in
Page 18

There are 2 methods to adjust the screen brightness.
You can make the adjustment at Start > Control Panel > Tablet and Pen
1
○
Settings > Display.
Or you can simply double-tap (single-tap) on the Change Tablet and Pen Settings
in the system tray to open up the Tablet and Pen Settings (Properties) window.
Selecting Screen Orientation
There are 4 different screen orientations. They are:
A PICTURE OF EACH SCREEN ORIENTATION, TOTAL 4 PICTURES
Landscape views refer to horizontally displayed screen; while portrait views indicate
vertically displayed screen.
Page 19

You have 2 ways to select your screen orientation.
1
○
Go to Start > Control Panel > Tablet and Pen Settings > Display
You use your stylus to press the screen rotational button to alter you screen
2
○
display.
The default screen orientation sequence rotates in the clockwise order starting at Primary
Landscape.
Page 20

You can also set the sequence in which screen orientations change from one display to another
in Tablet and Pen Settings > Display > Sequence…Change.
The sequence occurs when you press the screen rotational button with your stylus OR when
you select Change Screen Orientation from the Change Tablet and Pen Settings
Changing the Time
Page 21

Projecting Materials on Screen
During presentations or group meetings, you may need to project materials on a bigger screen
for everyone to see easily. How do you do it? You can make the changes through either
the Control Panel or Intel(R) Graphics Technology in the system tray.
The system automatically sets the screen to display on Notebook, the PC screen itself. The
available options are:
♦ Monitor
♦ Notebook
♦ Intel(R) Dual Display Clone
♦ Extended Desktop
Selecting Monitor means projecting materials on another screen, and the actual Tablet PC
screen turns blank. Intel(R) Dual Display Clone option allows materials to project on both
the Tablet PC screen and another screen. Extended Desktop option transfers Tablet PC
desktop activities on to another computer screen while letting you access the tablet and work
from another computer.
Adjusting Audio Properties
Page 22

Chapter 4 Defining the Tablet PC Function Keys
Introducing PC Button Functions
You have access to thirteen buttons all with different functions to make your computing life
easier than ever. Some of these buttons even have secondary functions to save you the time
you would take to look for them. You can even define four of these thirteen buttons to do
additional tasks to meet your special needs. Working with the convenience of paper and
digital pen together with the power of a PC is within your reach. Just read on!
* Note!
The directional control and enter keys have a total count of five buttons.
Each button has a primary function, meaning a default function. Some buttons have an
additional function. The additional function is called secondary function. Of the total
thirteen buttons, you can assign your own secondary function to four of them.
Before you start operating the PC, you need to understand the two types of functions.
One function type is primary function, also the default function, where you cannot modify its
action. Instinctively, when you see the physical buttons, their icons represent their primary
functions.
The other type is the secondary function. Within the secondary functions, you need to
distinguish between user programmable keys and the already assigned secondary function
keys.
Both types of functions exist in the logon process and in the setting when desktop icons
appear on your screen. You must make the distinction between these two settings, because
there is a variance in task performance among primary and secondary functions depending on
the system setting.
How to Activate Secondary Button Functions?
You activate primary functions by pressing the buttons once. To launch the secondary
Page 23

functions, you need to press the function Fn key first before pressing the button keys that
have secondary functions.
Button Functions in the Logon Process
What is the Logon Process? It occurs when you first turn on the computer, before the
desktop icons and the taskbar appear on the monitor. If you set password security, Login
screen appears during this process asking for you to sign in for the security check.
SHOW PASSWORD PICTURE
What kind of functions? We refer to the existing functions during the Logon process as
Logon Functions. In the Logon process, you can only access five primary functions and four
secondary functions. Many of the functions available when the desktop icons appear on the
monitor are not activated during the Logon process.
What are the Primary Functions? They are listed below along with a brief explanation for
each button. Remember you only need to press these buttons once to activate them. The
buttons are described in the clockwise order starting at the Escape key.
Button Icons Button Function Explanations
Escape Key cancels the current operation.
Enter Key is the same as an enter key on a keyboard.
Down Arrow Key . Despite its icon, this button functions as a Tab
key.
Up Arrow Key. Its real function is the same as a Tab key but in the
opposite direction.
Windows Security Key launches the Windows Task Manager. It
performs the same task as Ctrl + Alt +Del.
What are the secondary functions? Activating secondary functions requires you to press
the function Fn key first and then press the appropriate button key.
Button Icons Button Function Explanations
Page 24

Escape Key works as the backspace key.
Enter Key functions as the spacebar.
Up Arrow Key. As the icon indicates, it moves things upward.
Down Arrow Key functions as the down arrow key on a keyboard.
Button Functions When Desktop Icons Appear
When do these functions occur? When the Logon process ends, the appearing of the
desktop icons indicates the start of another set of functions differ from the ones described
above as Logon Functions.
What type of functions? Buttons during this stage have more functions, and we refer to
them as the Main Functions. Main Functions include both primary and secondary functions.
What are the primary functions? All buttons have primary functions, which are also
known as default functions. The buttons are described in the clockwise order starting from
the Power key.
Button Icons Button Function Explanations
Power Key turns on/off the PC.
Screen Rotational Key changes the screen display in four different
directions.
Escape Key cancels the current operation.
Function Key initiates the secondary functions.
Fn
Up Arrow Key functions as the up cursor.
Down Arrow Key functions as the down cursor.
Right Arrow Key functions as the right cursor.
Left Arrow Key functions as the left cursor.
Page 25

Enter Key functions as the enter key.
Tablet PC Input Panel launches the Input Panel.
Windows Security Key initiates the Windows Task Manager. It
Journal Key launches the Windows Journal application.
Start Menu Key activates the Start Menu.
performs the same task as Ctrl + Alt +Del.
* Note!
You can also set the Power Button to put the PC in standby mode. See the section
“Putting the PC in Standby Mode” in Chapter 3.
* Note!
The direction control button automatically changes its functions as the screen orientation
rotates in four different views. For example, the arrow directions change when the
screen rotates from Primary Landscape to Secondary Landscape. The same applies to
when landscape views change to portrait views.
What are the secondary functions? All but three buttons either already have secondary
functions programmed in them or you can assign a secondary function to them. These three
keys below have only primary functions:
♦ Power Key
♦ Function Key
♦ Windows Security Key
Button Icons Button Function Explanations
Screen Rotational Key. A user-definable Key
Escape Key functions as Alt + Escape that send your current
window to the background.
Up Arrow Key has the Page Up function.
Down Arrow Key has the Page Down function.
Right Arrow Key has the Tab function.
Left Arrow Key. Shift + Tab function is the same as tab but in the
opposite direction.
Enter Key has the Alt + Tab function which allows you to switch
between the programs you have running.
Journal Key. A user-definable button.
Page 26

Tablet PC Input Panel Key. A user-definable button.
Start Menu Key. A user-definable button.
* Note!
User-definable button means you can assign a particular secondary function to it.
How to Configure Buttons for Secondary Functions?
You can only configure buttons in the system setting when the start task bar appears on the
screen. You have one method to configure the four user-programmable buttons. These
four buttons do not have secondary functions, only primary functions. By following the
method below, you can assign a secondary action to each of these four buttons.
* Note!
Remember , you activate a secondary function by pressing the Fn key first and then the
particular secondary function key.
1. Go to Start > Control Panel > Tablet and Pen Settings > Tablet Buttons
OR
Double-tap on the Change Tablet and Pen Settings icon in the system tray, and the
Tablet Buttons menu also appears.
2. Of the four buttons available, select the appropriate one you wish to add a secondary
function. Under Tablet Button, you should see the four choices labeled as:
n Fn + Hot1 Button
n Fn + Journal Button
n Fn + Input Panel Button
n Fn + Rotate Button
3. Tap on the Change… option
4. Verify the accuracy of your button selection by checking the button name on the first line
Page 27

of the window Change Tablet Button Actions
5. Select the desired secondary function from the Action scroll bar of 54 different choices.
6. Confirm your selection by tapping OK .
* Note!
Hot1 Button stands for the Start Menu button.
* Note!
Of the 54 possible secondary functions you can select, Application 1 launches My
Computer and Applicati on 2 launches the Calculator.
Page 28

Chapter 5 Protecting the Tablet PC
Cleaning the Screen
You use the soft cleaning cloth for removing dusts and fingerprints on your Tablet PC screen.
Page 29

Chapter 6 Troubleshooting
This window a
ppears
Go to
Start >
All
with Tablet PC
Useful Tutorials
For help with using the Microsoft Windows XP Tablet PC Edition, you can access its tutorials
with your stylus designed especially to help you learn about the new features.
See below for 2 methods of finding help to operate the Tablet PC software.
1
○
on screen when system
first turns on.
It offers 4 types of
tutorials to help you
get familiarize with
the system’s special
features.
2
○
Programs.
Select Get Going
.
Page 30

You will learn the
Go to
Start > Help
basics to start
using the Tablet
PC here.
Help and Support
You can learn more about your Tablet PC and seek answers to your questions from the Help
and Support Center.
and Support
Center
Page 31

Before Contacting COMPANY
Troubleshoot Your Tablet PC
Before you contact COMPANY Technical Support regarding any technical issues, please
first conduct the following initial checks:
□ Remove all external devices
□ Check the green light indicator on the AC Adapter to see if it’s lit
□ Make sure all power cords are completely plugged into the power outlet and the PC
□ Check the power light indicator to see if it’s on
□ Tighten any loose cable connections
□ Contact the product’s manufacturer first for problems related to USB CD-ROM drive,
scanner, printer, or other external devices.
□ Contact the software vendor first for software-related questions.
□ Load the Default Setting from the BIOS Setup after any BIOS update
Before Calling for Help
If your technical problem(s) still persist, you can contact COMPANY Technical Support.
However, you need to have these 3 items ready first. They are:
♦ Product Model & Serial Numbers
♦ BIOS Revision (Rev)
♦ EC Revision (Rev)
Page 32

ILLUSTRATING STYLUS
You can find BIOS Rev and EC Rev information in the Setting Panel.
To locate the Setting Panel, follow the steps below.
1. Turn on the Tablet PC.
2. Press the Esc key when COMPANY
NAME logo appears on the screen.
3. Boot Menu appears on the screen.
Use the arrow key to select the Setup Menu.
PICTURE OF PC
PRESSING THE POWER
BUTTON
COMPANY LOGO
4. Locate and record BIOS & EC Rev information.
Contact COMPANY
COMPANY CONTACT INFORMATION
Page 33

Appendix
Safety Notices
Battery Safety Notices
♦ The battery pack is intended for use only with this device.
♦ Do not disassemble the pack.
♦ Do not dispose of the battery pack in fire or water.
♦ To avoid risk of fire, burns, or damage to your battery pack, do not allow a metal
object to touch the battery contacts.
♦ Handle a damaged or leaking battery with extreme care. If you come in contact
with the electrolyte, wash the exposed area with soap and water. If it gets in
contact with the eye, flush the eye with water for 15 minutes and seek medical
attention.
♦ Do not charge the battery pack if the ambient temperature exceeds 113 degrees
Fahrenheit (45 degrees Celsius).
♦ To obtain a replacement battery, contact your local dealer.
♦ Do not expose the battery pack to high storage temperatures (above 140 degrees
Fahrenheit, 60 degrees Celsius).
♦ When discarding a battery pack, contact your local waste disposal provider
regarding local restrictions on the disposal or recycling of batteries.
Lithium Battery Warning
♦ This computer contains a lithium battery to power the clock and calendar
circuitry.
♦ There is a danger of explosion if the battery is replaced incorrectly. Replace only
with the same or equivalent type battery as recommended by the manufacturer.
Discard used batteries according to the manufacturer’s instructions or local laws.
Limited Warranty
Page 34

Regulatory Compliance
Copyright Notice
 Loading...