

Page 1
T
R
I
V
I
E
W
RACK MO
Installation Instructi
UNT KIT TRK-
on
1903
NOTE:
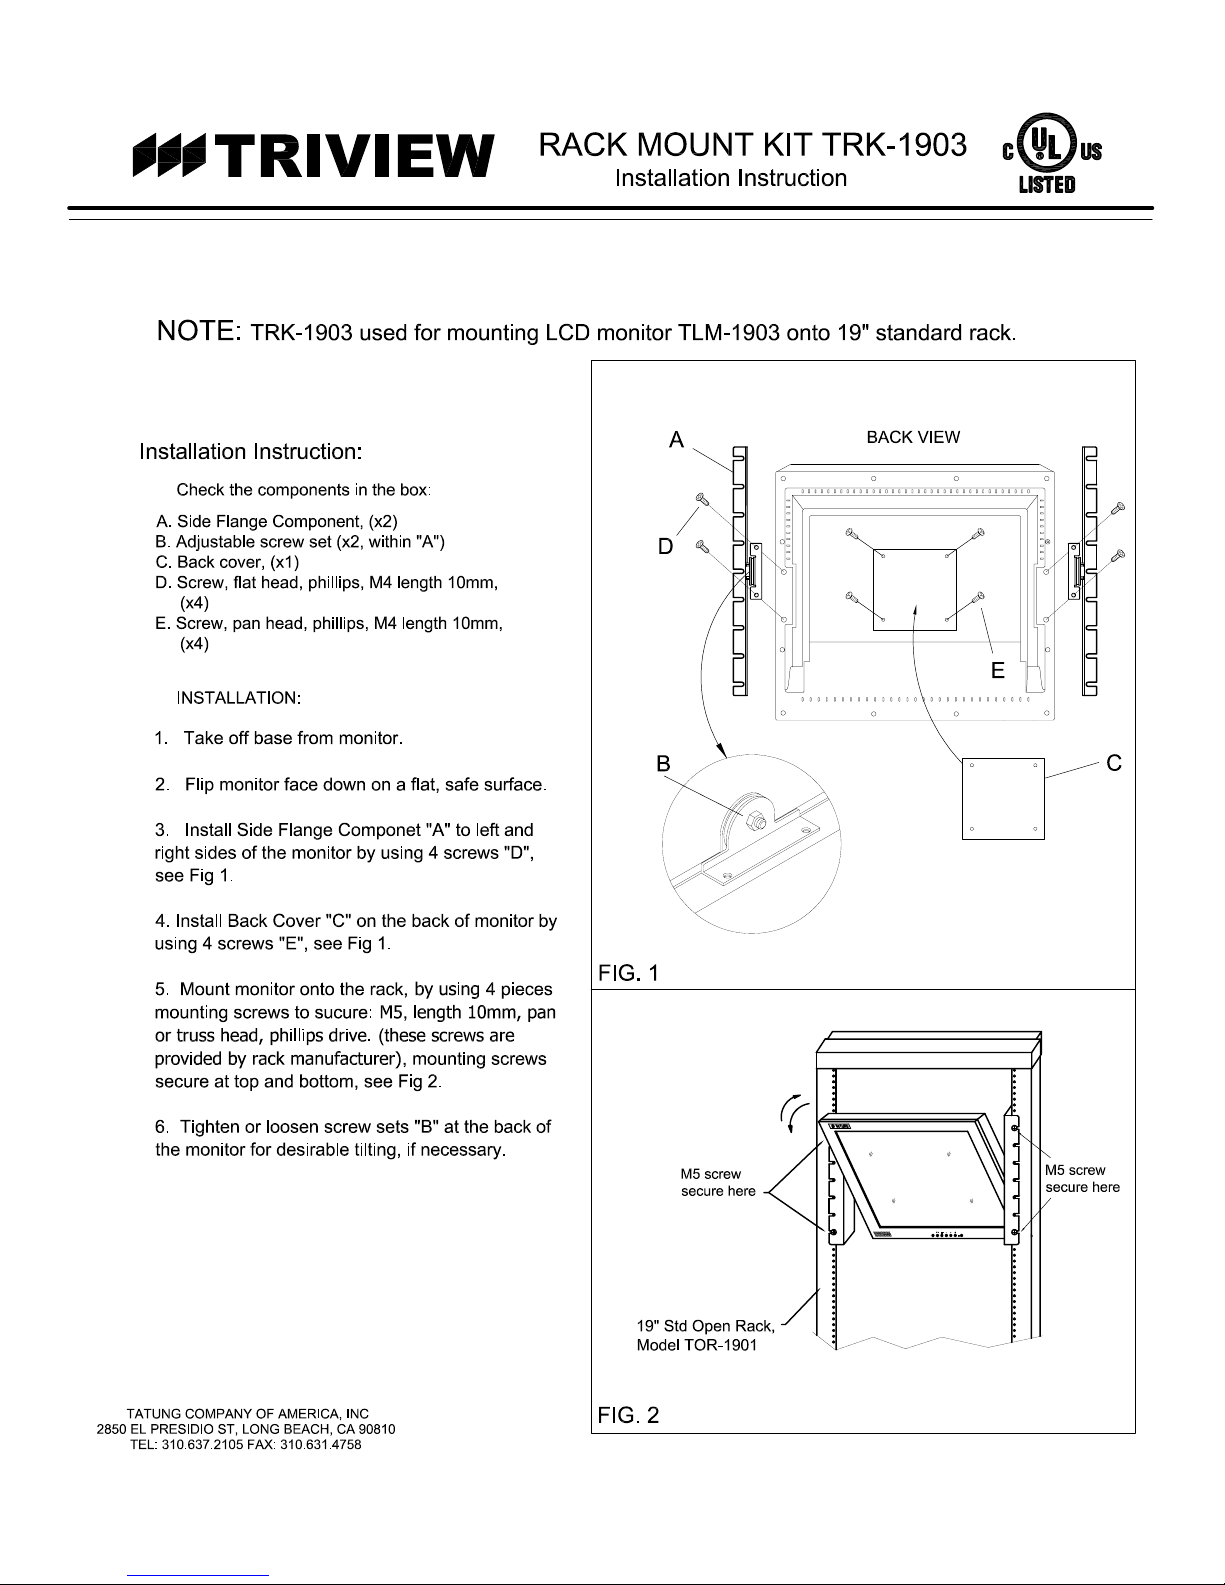
Installation Instruction:
Check the com
A. Side Flange Com
B. Adjustable screw set (x2, within "A")
C. Back cover, (x1
D. Screw, flat head, ph
(x4
E. Screw, pan head, ph
(x4
INSTALLATION
1
. Take off base from monitor.
2
. Flip monitor face down on a flat, safe surface
3
. Install Side Fl
right sides of the monitor by using 4 screws "D",
see Fig 1.
TRK-1903 used for m
ponents in the box
ponen
t, (x2)
)
illips, M4 length 10mm,
)
illips, M4 length 10mm,
)
:
ange Com
ounting LCD monitor TLM-
:
ponet "A" to left and
.
B
D
A
1903 onto 19" st
BACK VIEW
andard rack
E
.
C
4
. Install Back Cover "C" on the back of monitor by
using 4 screws "E", see Fig 1
5
. Mount monitor onto the rack,
NC
M5
:
.
(
t
m
ounting screws to sucure
or truss
provi
secure at top
6
t
he monitor for desirable tilting, if necessary.
TATUNG COMPANY OF AMERICA, I
2850 EL PRESIDIO ST, LONG BEACH, CA 90810
TEL: 310.637.2105 FAX: 310.631.4758
head, ph
ded by rack manufacturer
. Tighten or loosen screw sets "B" at the back of
illips drive
and bottom, see Fig 2
.
.
4 pieces
by using
,
l
ength 10mm,
hese screws are
)
, mounting screws
pan
FIG. 1
M5 screw
secure her
19" Std Open Rack
M
odel TOR-
FIG. 2
1901
M5 screw
e
AUT
O
,
secure her
e
 Loading...