

Page 1

Tattoo SuperStick
Prepaid Mobile Broadband
User Guide
Page 2

1
Thank you for choosing Tattoo SuperStick Prepaid Mobile Broadband!
With your Tattoo Prepaid Kit, you can access the internet anytime,
anywhere! This guide will help you live without limits with Tattoo!
Table of Contents:
The Tattoo Prepaid Kit 2
System Requirements 3
Getting to Know Your Tattoo Prepaid Kit 3
Preparations 4
Using Your Tattoo Prepaid SuperStick 6
Setting Up a Wi-Fi Connection 7
Accessing the internet 8
Web Management Page 10
SMS Feature 14
Page 3

2
The Tattoo Prepaid Kit includes:
1. Tattoo Prepaid SuperStick
2. Tattoo SIM Card
3. User Guide
4. Safety Information
The Tattoo SuperStick Prepaid Mobile Broadband
Globe’s Tattoo Prepaid SuperStick allows you to experience faster internet
speed without limits anytime, anywhere!
Send or receive texts instantly from your laptop or desktop! You can even
check your load even without internet for free!
Be ready to live without limits!
Page 4
3
System Requirements
Operating System: Windows XP SP2/SP3, Windows Vista SP1/SP2,
Windows 7; Mac OS X 10.5, 10.6 and 10.7 with latest upgrades
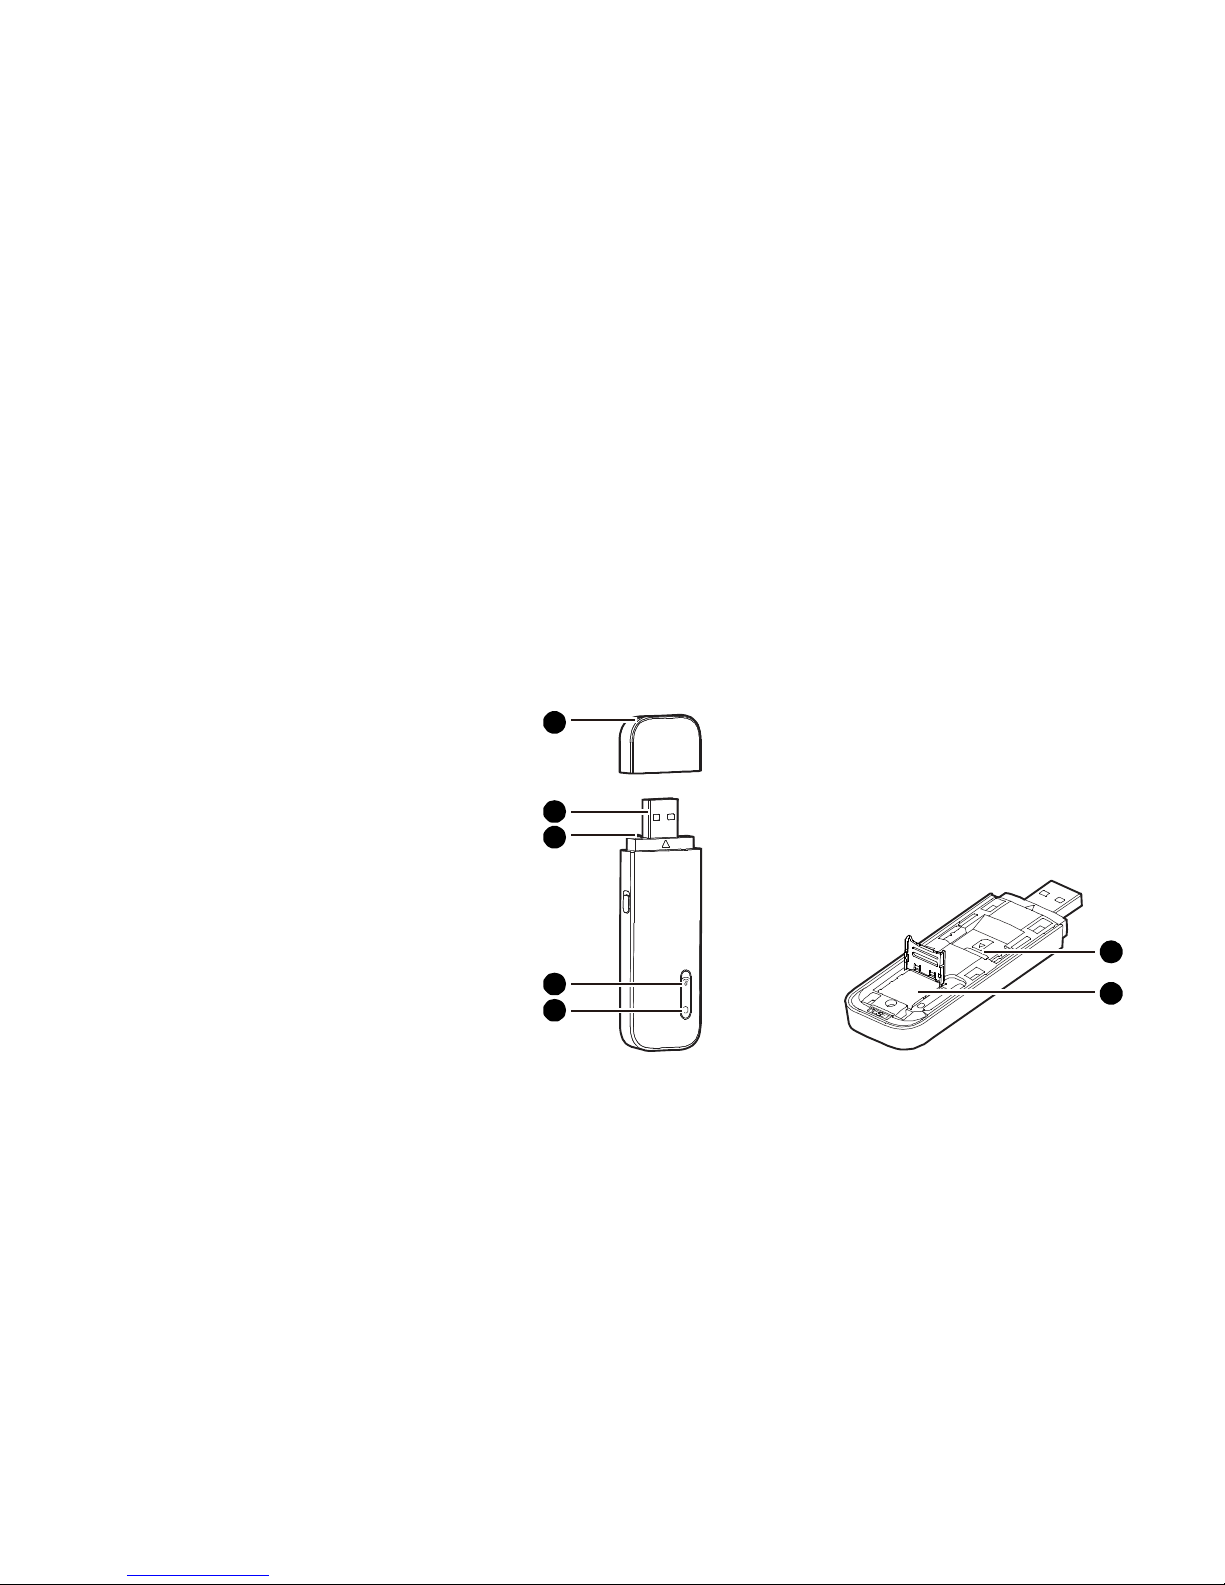
Getting to Know Your Tattoo Prepaid Kit
1. USB Connector
2. Strap Hole
3. Wi-Fi Indicator
4. 2G/3G Indicator
5. SIM/USIM Slot
6. microSD Card Slot
*the microSD card is optional and is
not included in the kit
1
2
3
4
5
6
2
Page 5
4
Preparations
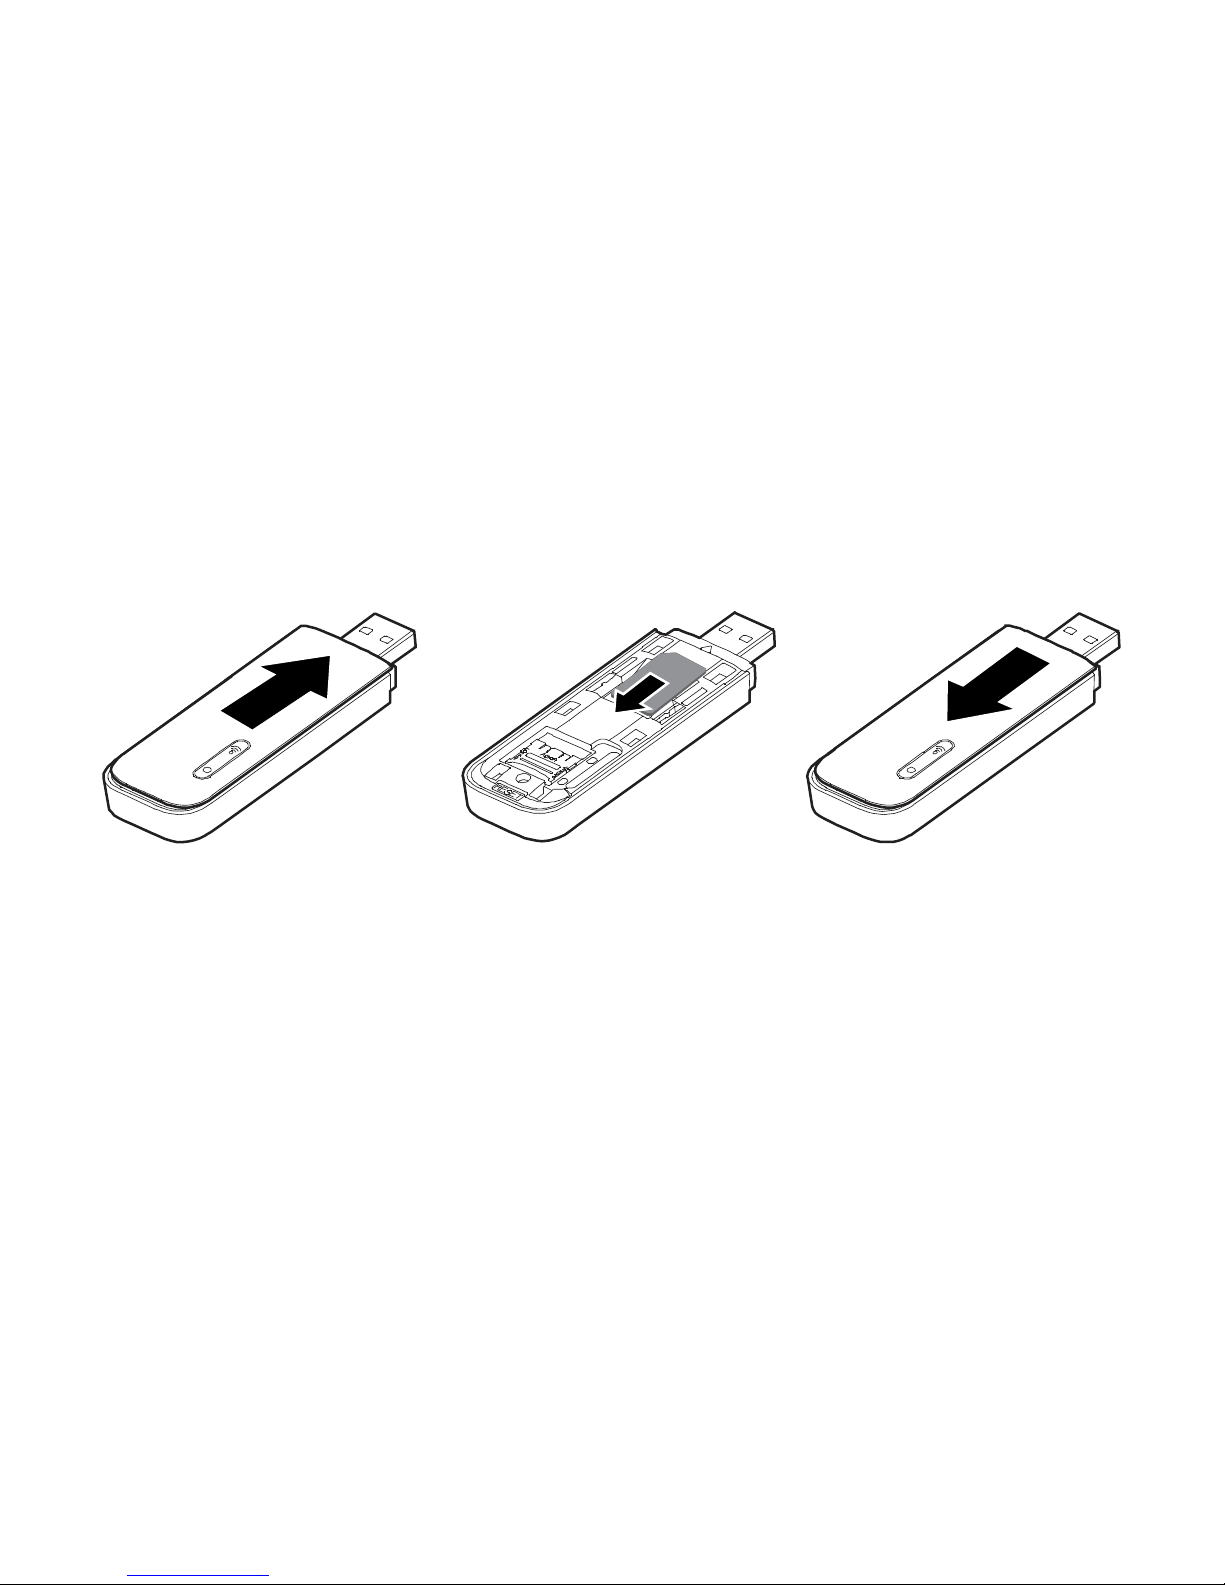
How to Insert SIM Card
1. Slide the top cover of the stick to the side of the USB cap
2. Insert the SIM card into the SIM card slot
3. Reattach the cover
4. Plug the Tattoo SuperStick into a USB port of your laptop or desktop
Page 6
5
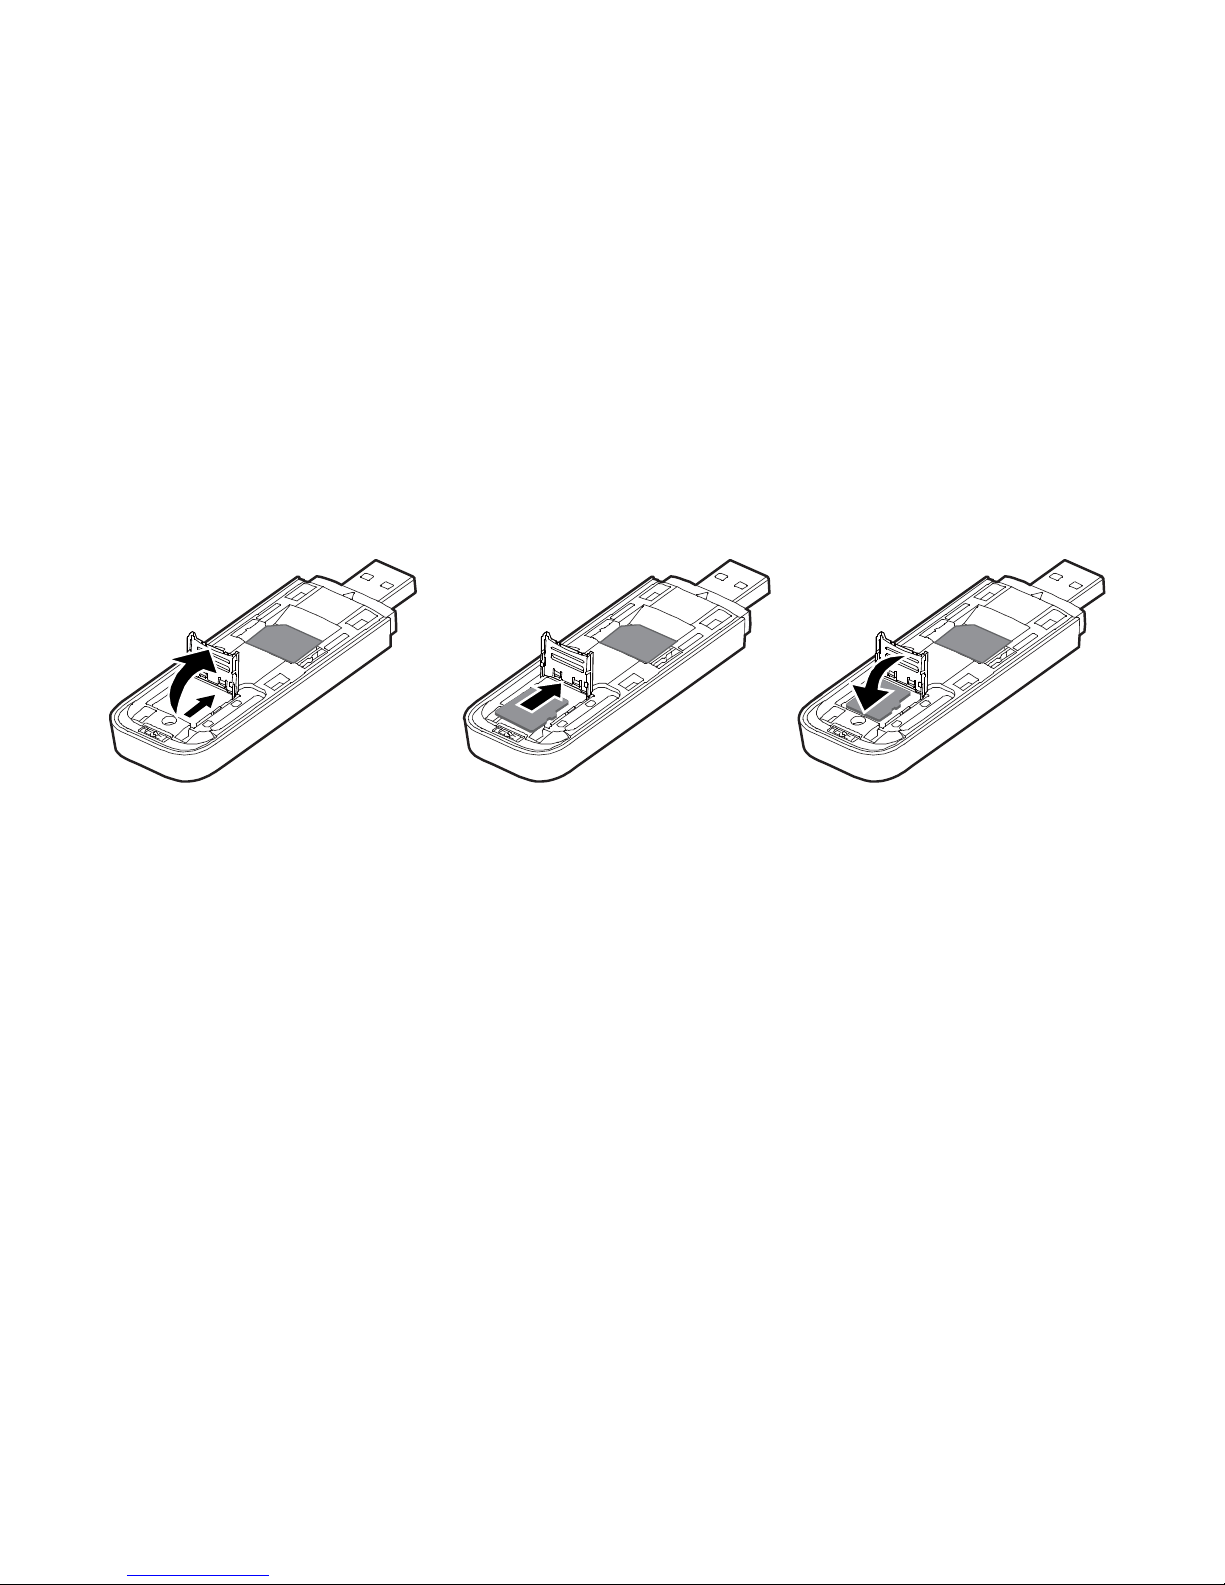
How to Install a microSD Card
1. Slide the front cover to the side of the USB cap
2. Slide the microSD card holder door towards its hinges to unlock it
3. Place the microSD card into the holder
4. Close the card holder door and slide it away from its hinges to lock it
5. Reattach the front cover
Page 7

6
Using Your Tattoo Prepaid SuperStick (for Windows)
Connecting to a 2G/3G Network
• Upon plugging the Tattoo Prepaid SuperStick into the USB port of the
laptop/desktop, the OS will automatically start the installation wizard.
(Note: If the auto-run program does not respond, find the AutoRun.exe file in the
driver path. Double-click the file to run the program)
• Follow the on-screen instructions of the installation wizard. The user
interface will automatically start after installation
Disconnecting from a 2G/3G Network
• Manually disconnect the Tattoo Prepaid SuperStick from the network
from the user interface
• Remove the Tattoo Prepaid SuperStick from the laptop/desktop
Page 8
7
Setting Up a Wi-Fi Connection
• Ensure that the Tattoo Prepaid SuperStick’s Wi-Fi function is available
• To set up a computer with the Tattoo Prepaid SuperStick, choose
Start > Control Panel > Network Connections > Wireless Connections
• Click View Available Wireless Networks
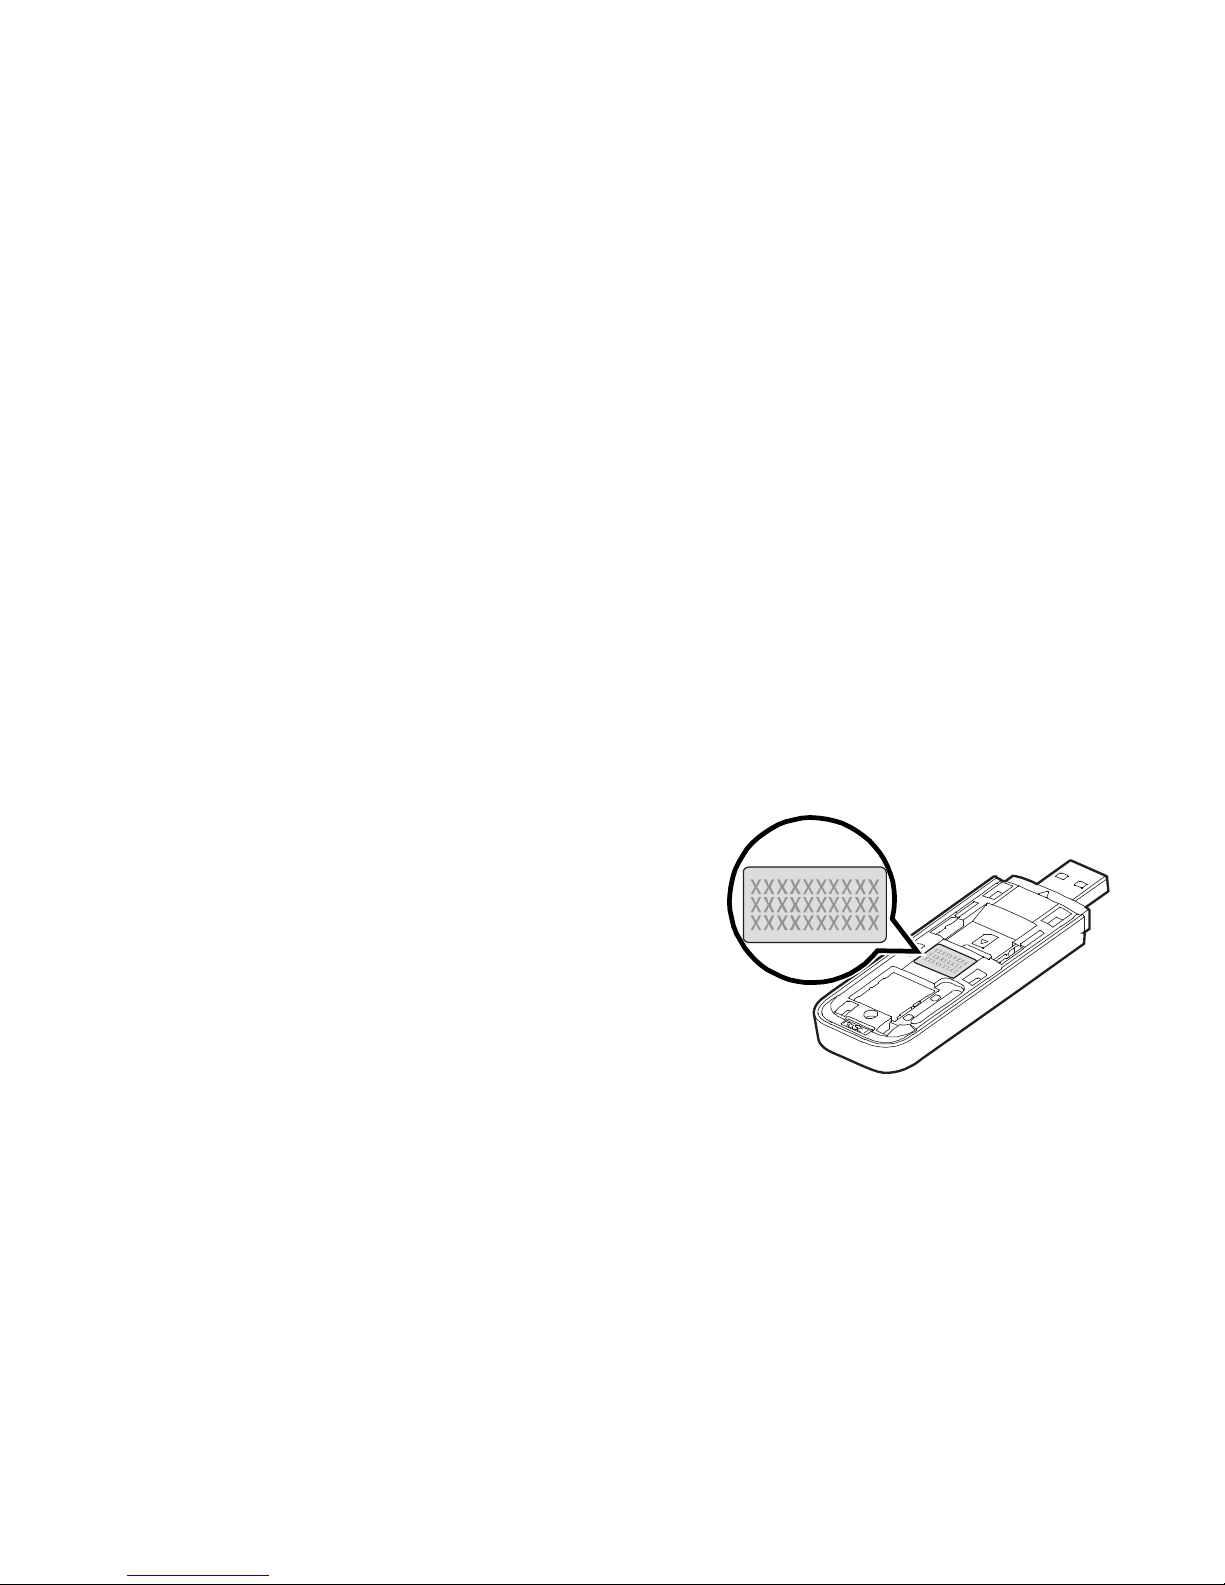
• Select the wireless network whose SSID* (Service Set Identification) is
the same as that of the Tattoo Prepaid SuperStick and click connect
*the SSID and the network key are printed on the
Tattoo Prepaid SuperStick (as shown in the
figure)
Reminder
To guarantee safety and prolong the product
service life, when using the device, connect it to your
computer or to a dedicated power adapter.
Page 9

8
Accessing the Internet
Connect up to 5 Wi-Fi devices simultaneously!
Select an appropriate mode according to your data service charging plan
from the following table:
Mode Description
Automatic If the PIN ad APN settings are correct and if there is
data being transferred after the device is powered
on, the Tattoo Prepaid SuperStick automatically
connects to the internet
Manual Log-in to the user interface and connect
to/disconnect from the internet as prompted
Page 10
9
Restoring Factory Settings
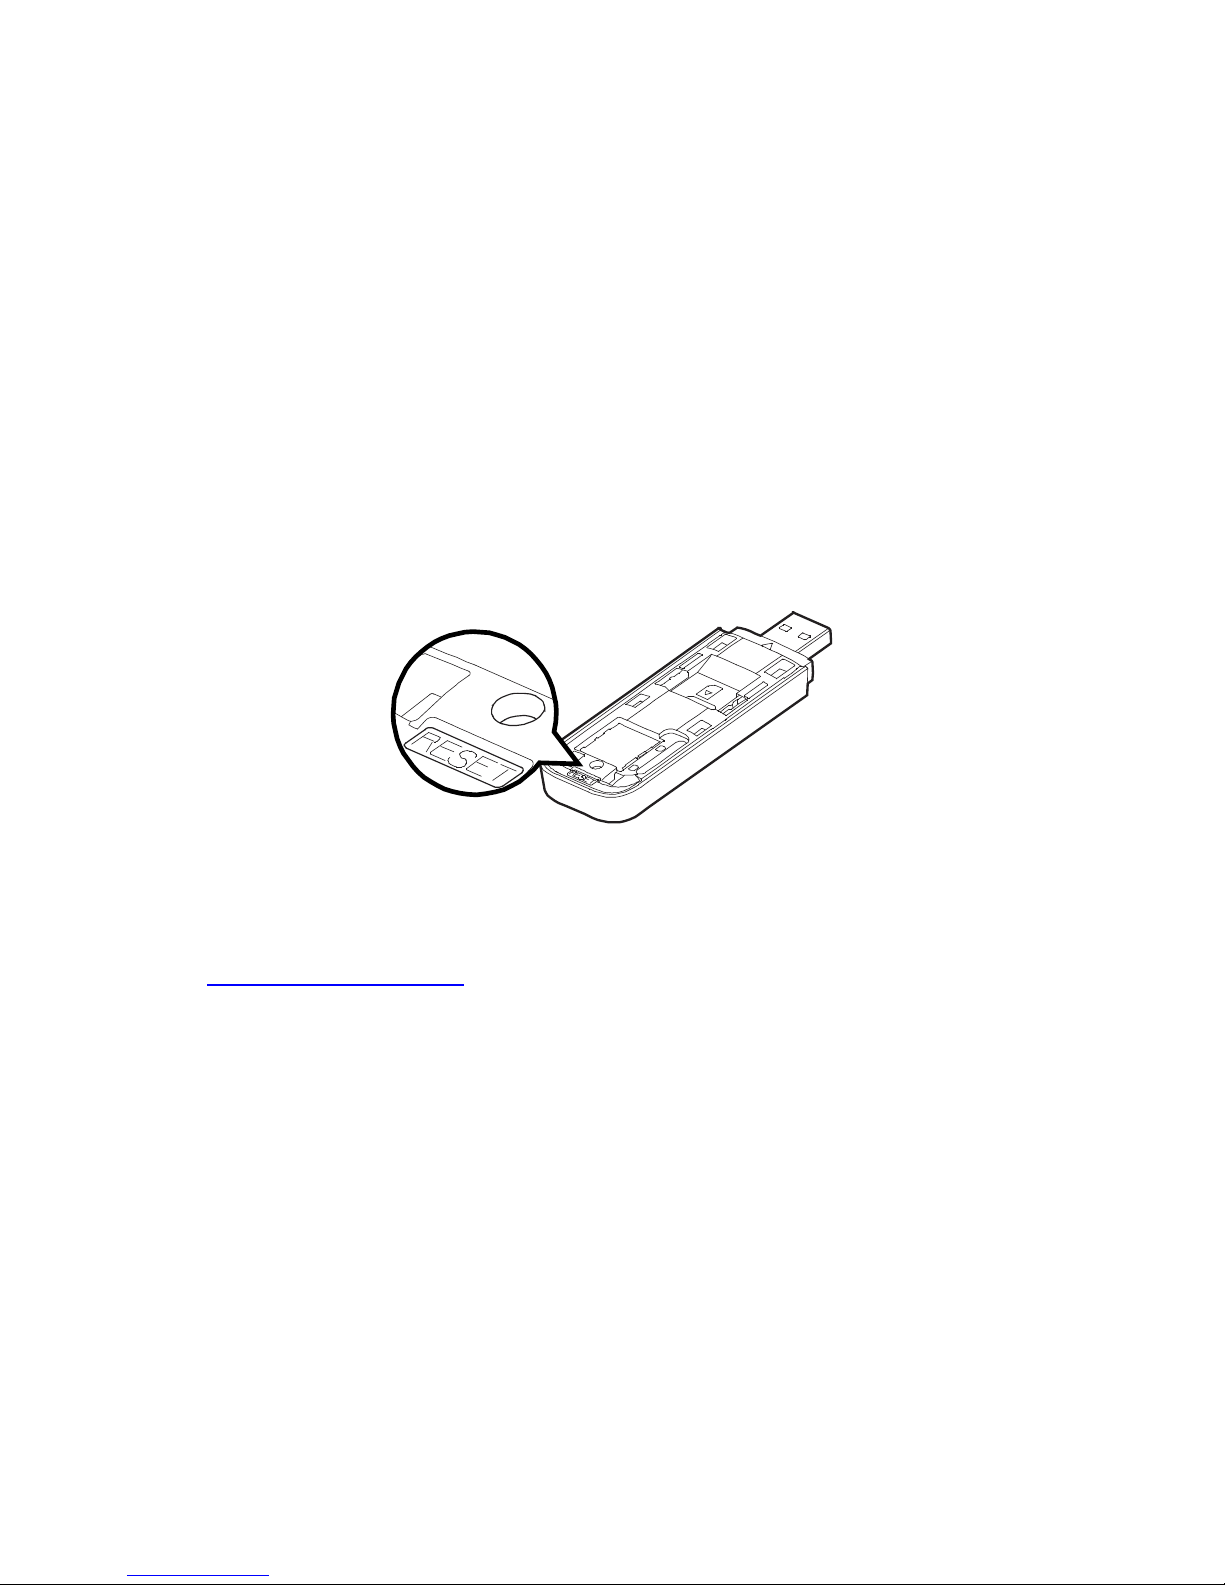
To restore factory settings, press and hold the reset button for 5 seconds
Web Management Page
Access the Web Management Page to view your service information by
visiting http://192.168.1.1
Note: The default password is admin.
Page 11

10
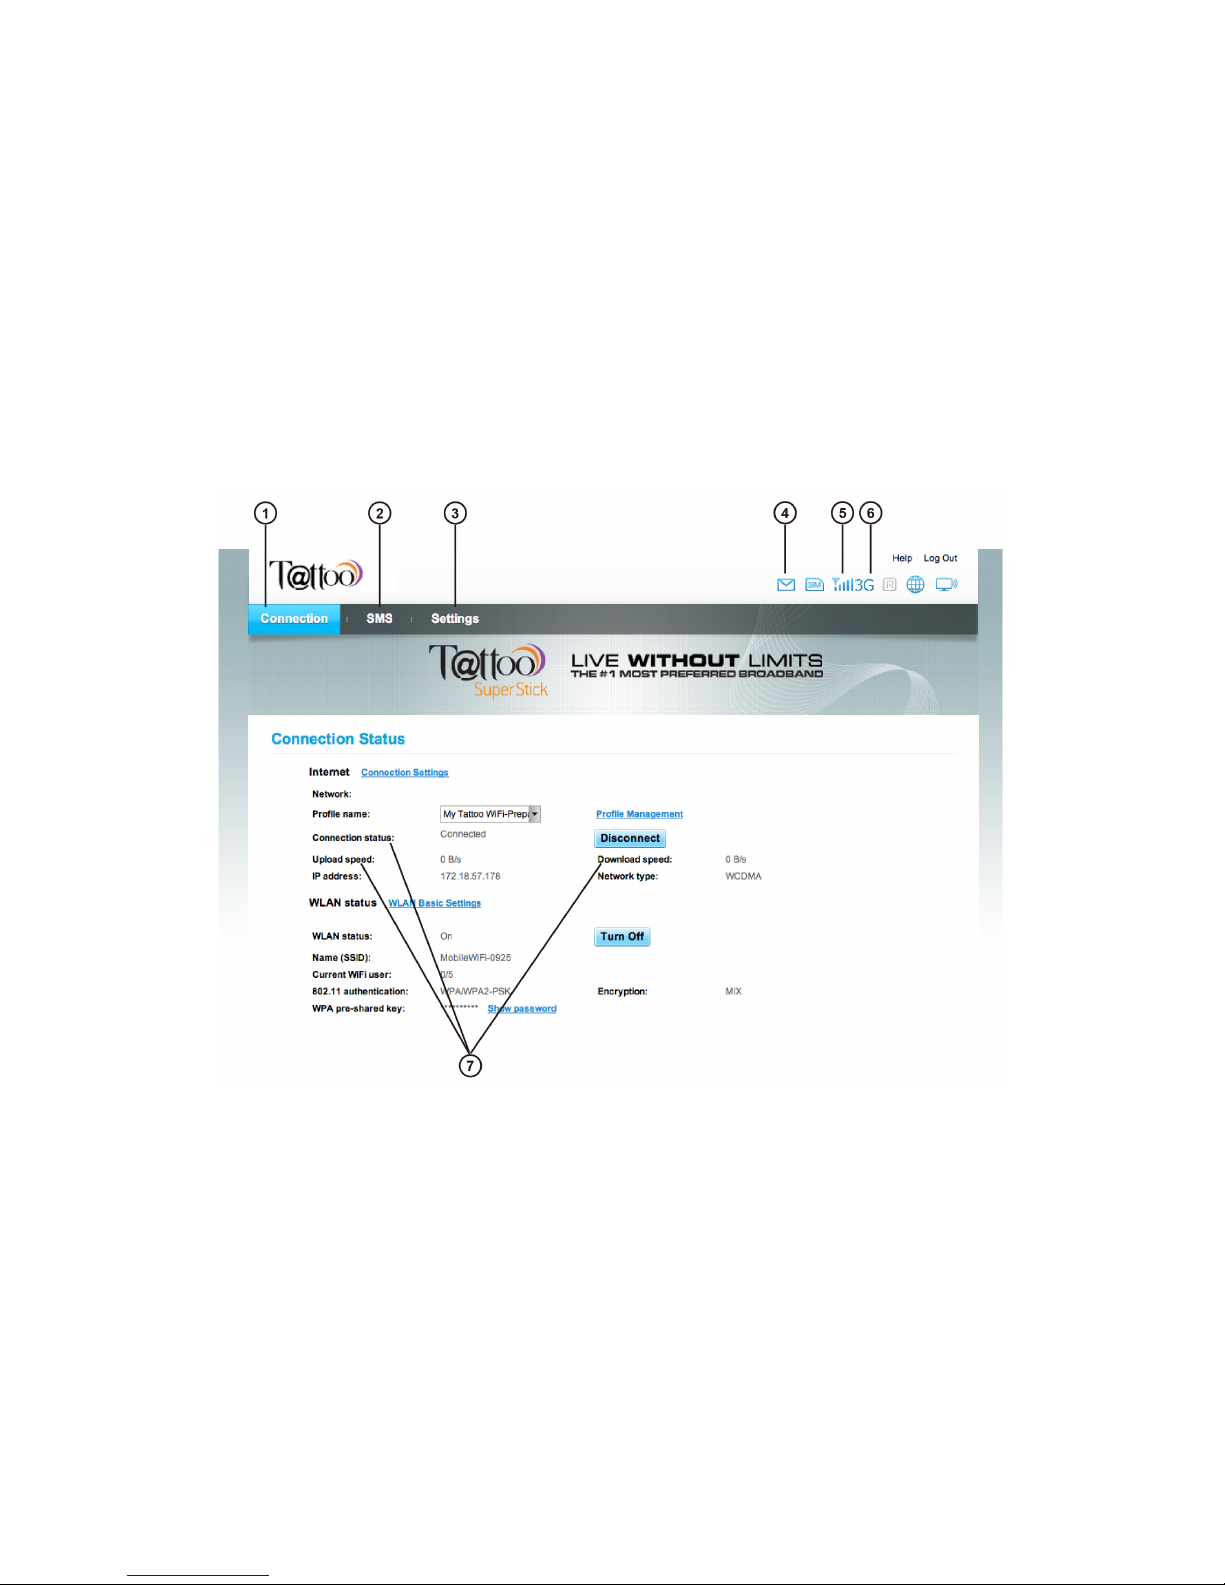
Web Management Page Interface
Legend:
1. Connection information
2. Send or receive SMS
3. Allows you to setup configurations
4. Notification area
5. Shows the signal strength
6. Shows signal type
7. Shows connection, upload and download speed
Page 12
11
Page 13
12
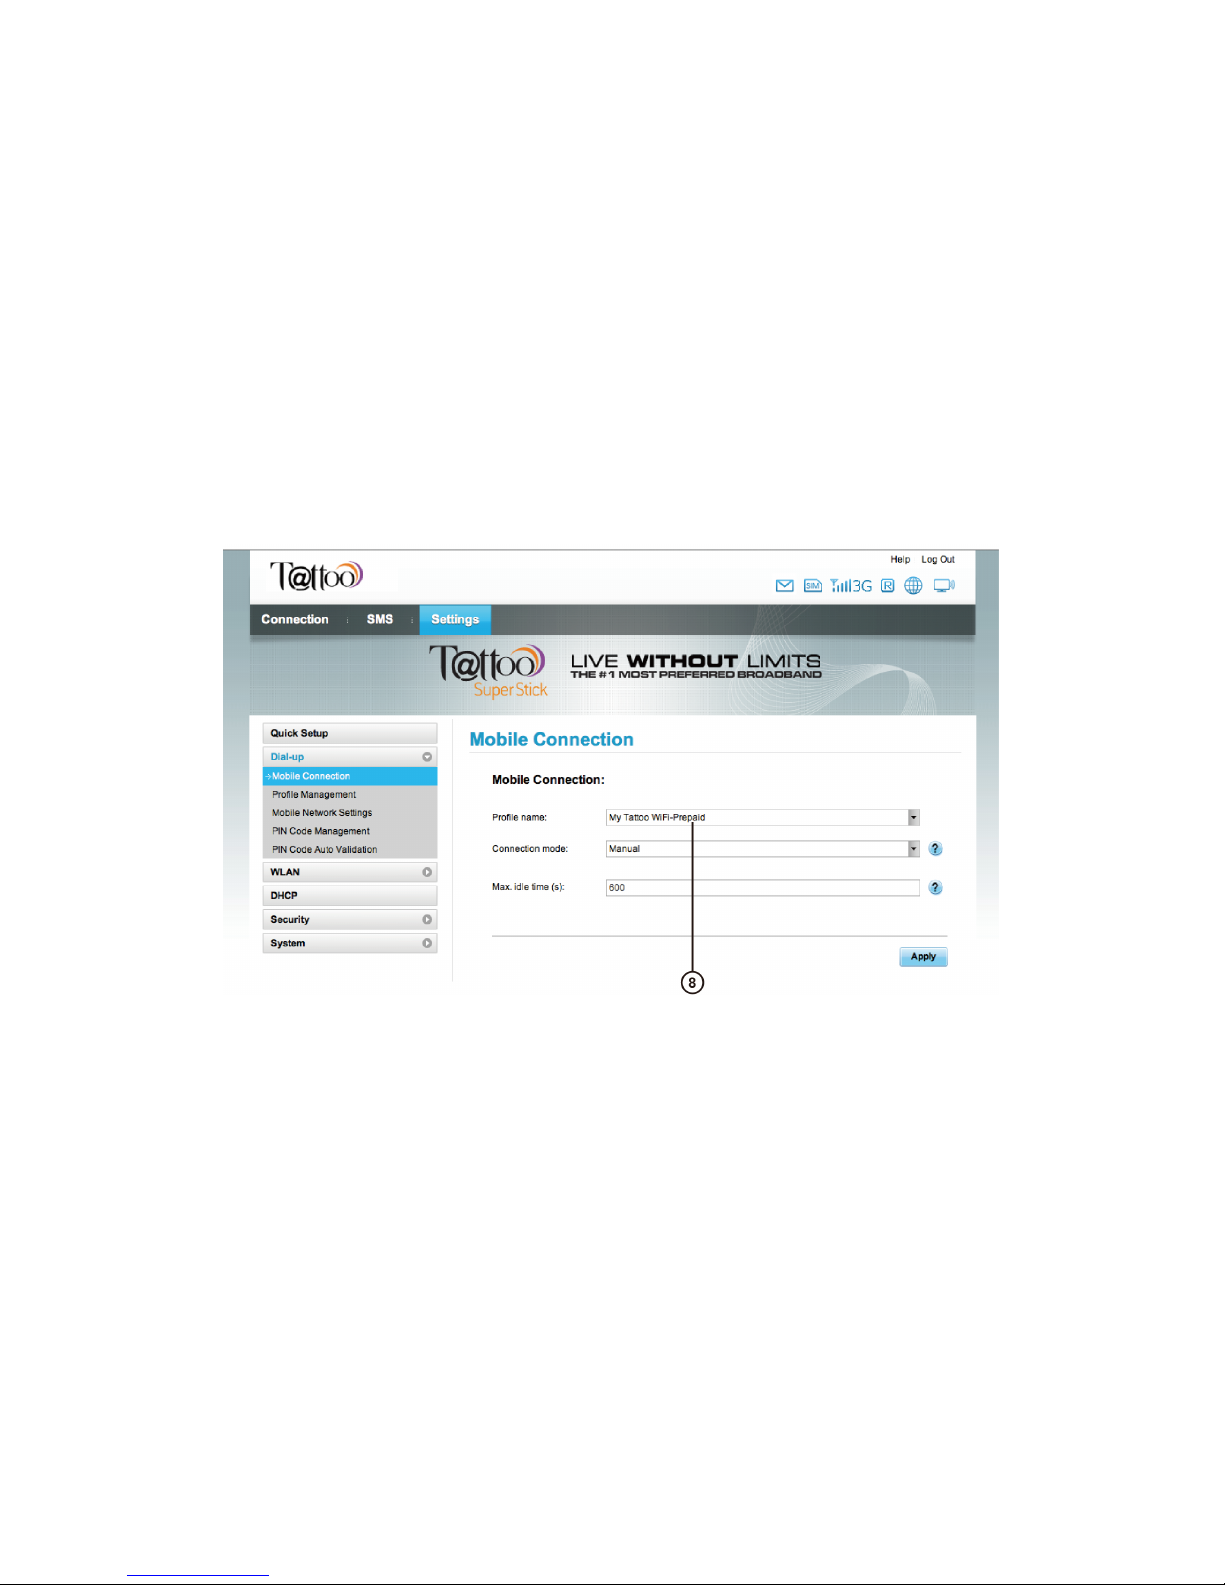
8. Allows you to indicate if your service is prepaid
Page 14
13
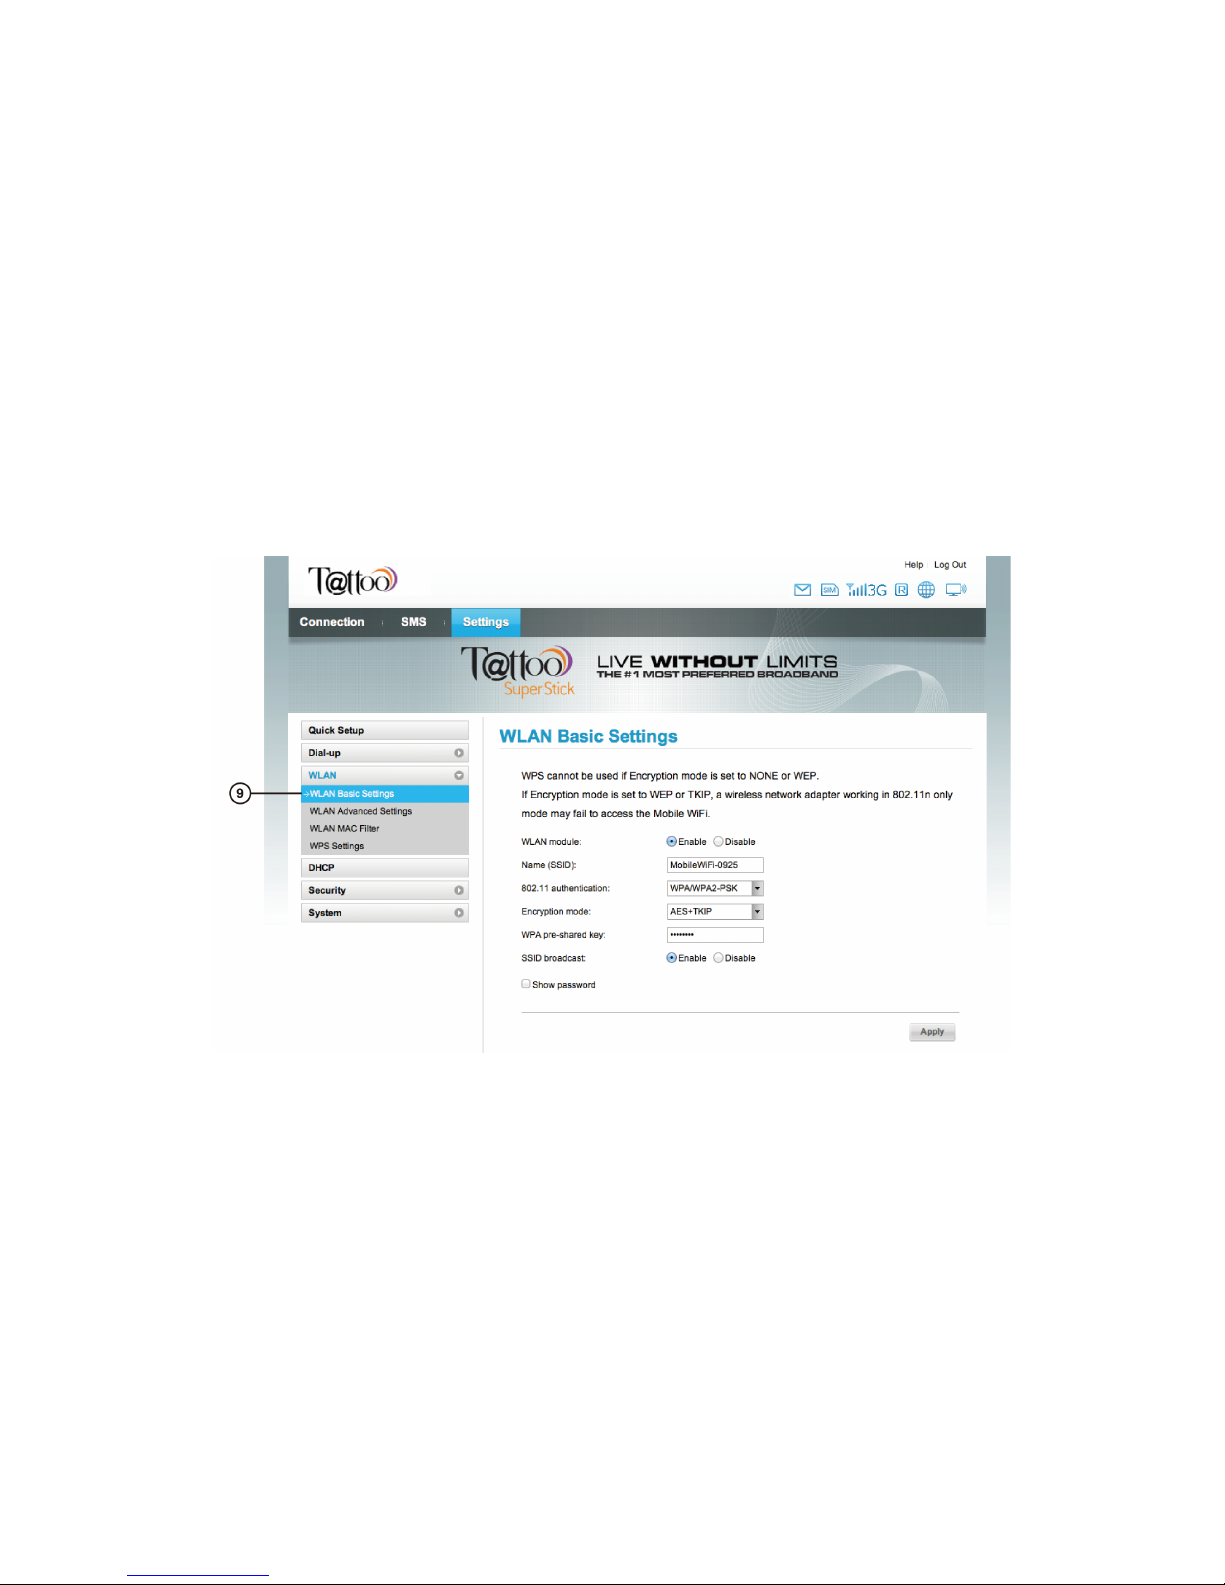
9. Allows you to modify configuration of WLAN
Page 15

14
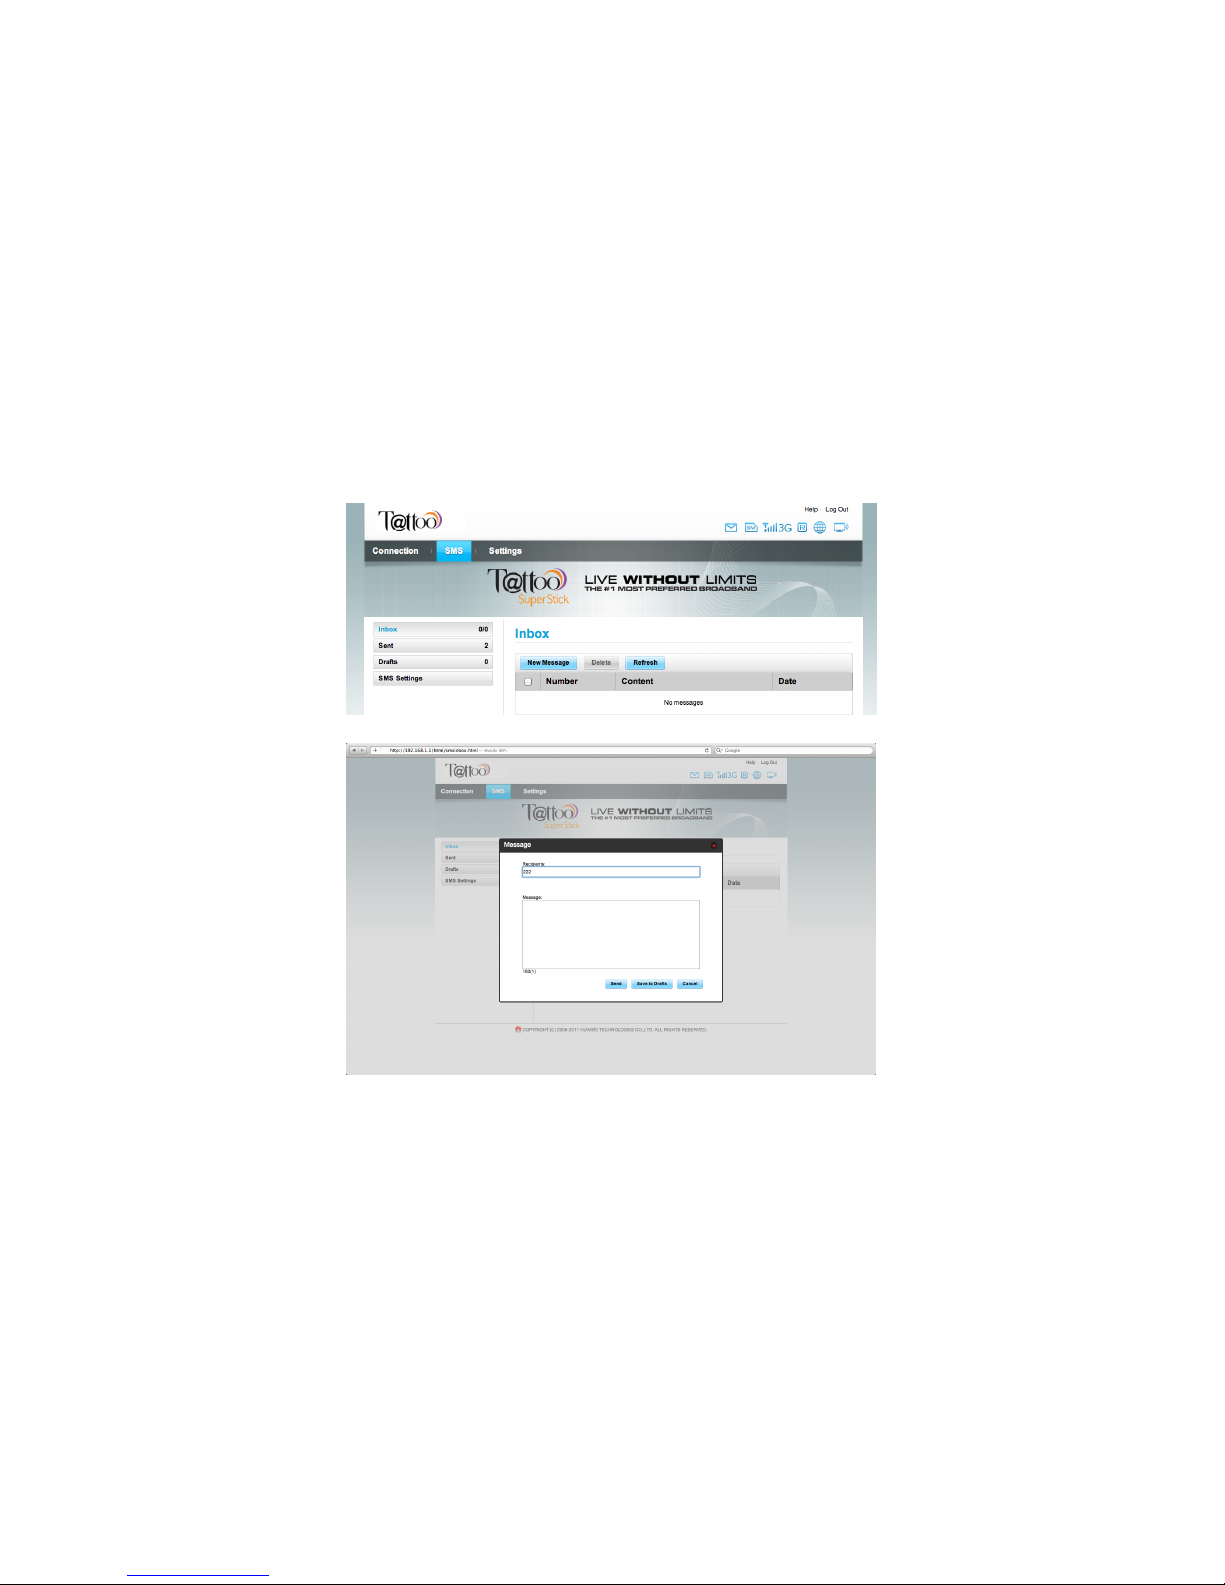
SMS Features
Maximize the features of Tattoo Prepaid Kit!
• Send and receive SMS
• Store messages in your inbox
• Forward messages
• Check and reload your account balance without internet for free
Page 16
15
Page 17

For more information, visit tattoo.globe.com.ph
 Loading...