

swingo 150
*12089-59*
V007 / 12089-59 1003
I25 I24 I23 I22 I21 I20 I19 I18 I17 I16 tr sv sl pt pl no nl it fr fi es en de da cz
Swingo 150
1
3
5
2x
M6x20
7
2x
CLICK
2
4
2x
M6x20
6
2x
?
2
Translation of the original Instructions of Use
STOPSTOP
•
STOPSTOP
STOPSTOP
STOPSTOP
STOPSTOP
STOPSTOP
STOPSTOP
STOPSTOP
STOPSTOP
Before first start-up, it is essential that you
carefully read through the instructions of
use and the safety notes.
Keep the instructions of use in an easily
accessible place so that they can be consulted
at any time.
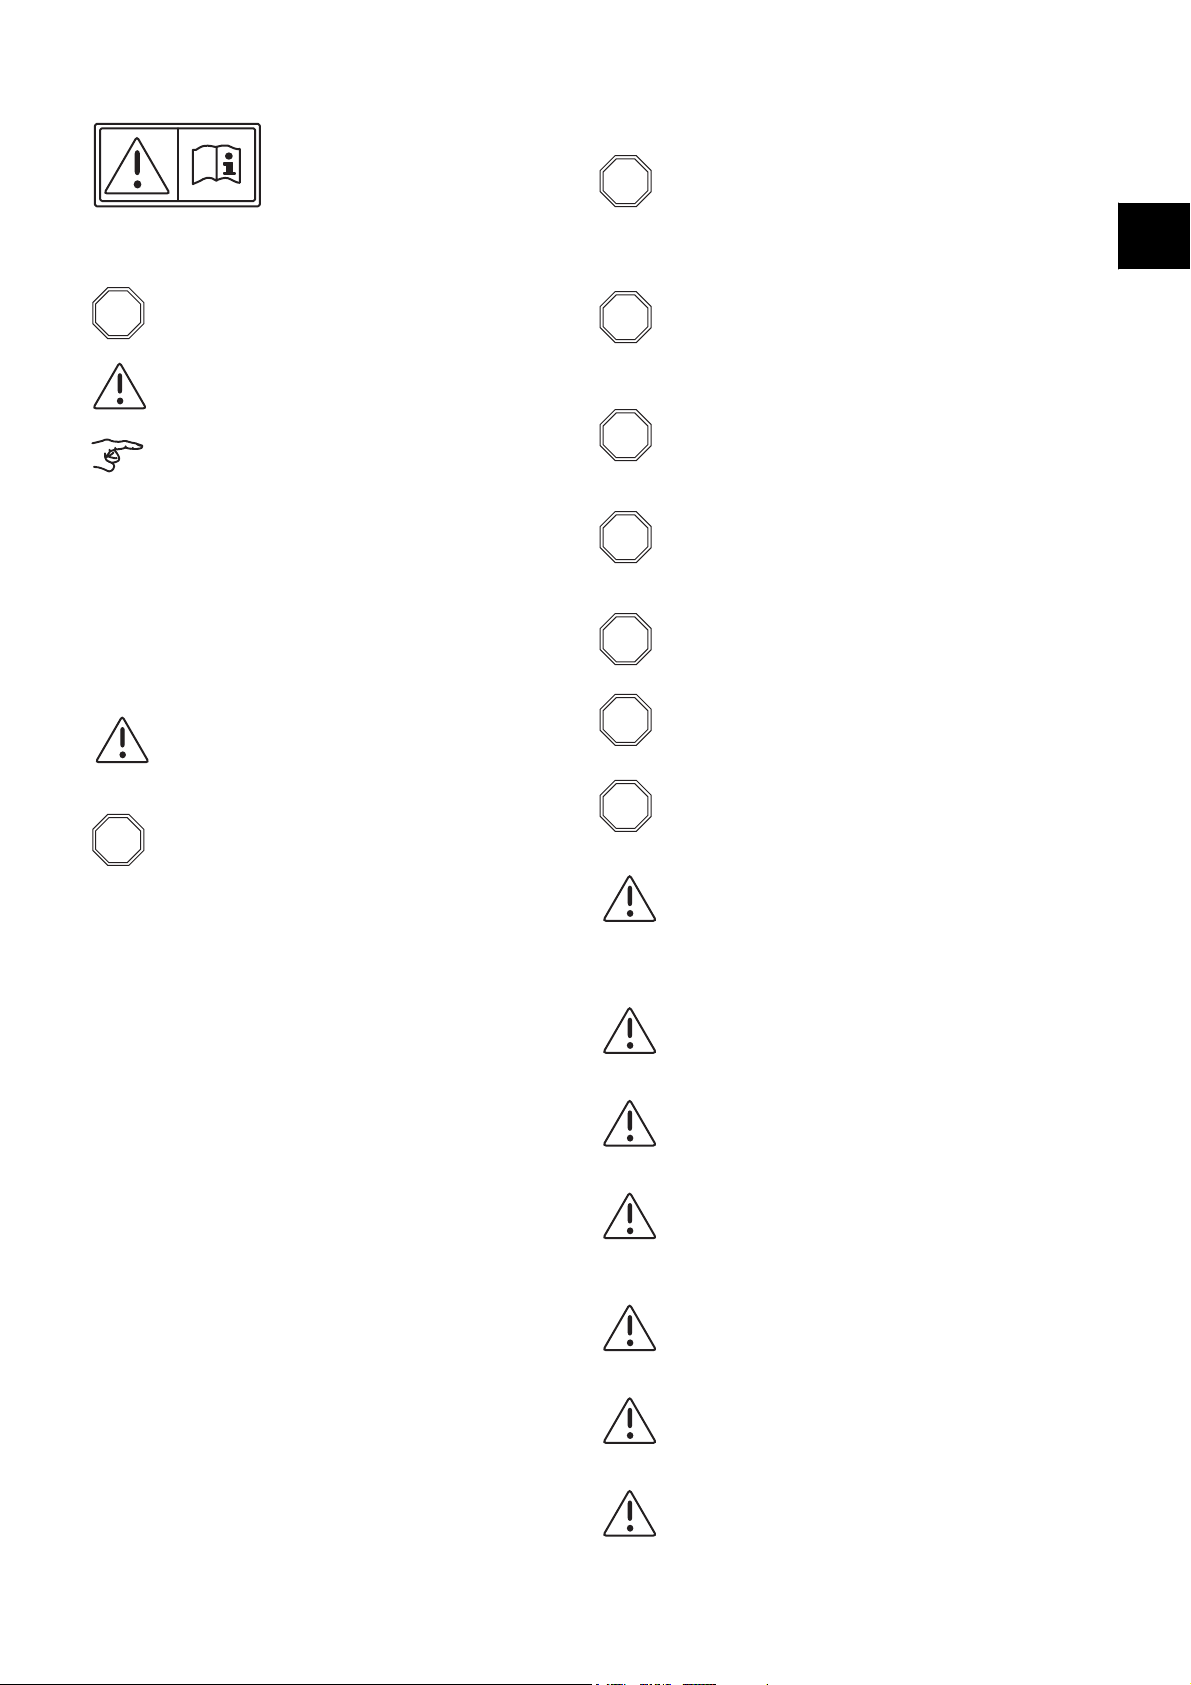
Symbols
Safety instructions
Due to their design and construction, TASKI machines comply with health and
safety requirements of the EC guidelines and therefore carry the CE sign.ATTENTION!
Persons (including children) who are not able to use this machine
safely due to their physical, sensory or mental capabilities or their
lack of experience or knowledge may not operate this machine
without supervision or instruction by a person responsible for their
safety!
Children should be supervised to ensure that they do not play with
the appliance.
Non-observance of this information can endanger people and / or
cause servere damage!
Non-observance of this information can lead to malfunctions and
property damage!
Indicates important information regarding the efficient use,
non-observance of which could lead to malfunctions!
Marks work steps that you must carry out in turn.
Intended use of machinery
TASKI swingo 150 is a scrubber dryer that is designed for commercial use (for
example, in hotels, schools, hospitals, factories, shopping centres, offices, etc.).
Under strict observation of theses Instructions for Use, it can be used for the wet
cleaning of hard floor coverings.
This machine is exclusively designed for indoor use only.
Caution:
This machine may not be used for polishing, the application of
wax, cleraning carpets or the vacuuming up of dust.
The wet cleaning of parquet and laminate floors with this machine
is carried out at your own risk.
Changes to the machine that have not been authorised by
Diversey will lead to the cancellation of the Safety Marks and the
CE conformity.
Any use of the machine contrary to its intended purpose can lead
to injuries to persons and damage to the machine and to the
working environment.
In such cases, any claims under the guarantee and warranty
claims will normally become invalid.
Content
Safety instructions . . . . . . . . . . . . . . . . . . . . . . . . . . . . . . . . . . . . . . . . . 27
Translation of the original EU Declaration of Conformity . . . . . . . . . 28
Overview . . . . . . . . . . . . . . . . . . . . . . . . . . . . . . . . . . . . . . . . . . . . . . . . . 29
Preparation for operation/Operation . . . . . . . . . . . . . . . . . . . . . . . . . . 29
Beginning work . . . . . . . . . . . . . . . . . . . . . . . . . . . . . . . . . . . . . . . . . . . 30
End of operation. . . . . . . . . . . . . . . . . . . . . . . . . . . . . . . . . . . . . . . . . . . 31
Service, maintenance and care. . . . . . . . . . . . . . . . . . . . . . . . . . . . . . . 33
Disposal . . . . . . . . . . . . . . . . . . . . . . . . . . . . . . . . . . . . . . . . . . . . . . . . . 33
Transport . . . . . . . . . . . . . . . . . . . . . . . . . . . . . . . . . . . . . . . . . . . . . . . . 33
Malfunctions . . . . . . . . . . . . . . . . . . . . . . . . . . . . . . . . . . . . . . . . . . . . . . 33
Technical data . . . . . . . . . . . . . . . . . . . . . . . . . . . . . . . . . . . . . . . . . . . . 33
Accessories . . . . . . . . . . . . . . . . . . . . . . . . . . . . . . . . . . . . . . . . . . . . . . 33
Do not use this machine in rooms in which explosive and easily
inflammable materials (such as petrol solvents, fuel oil, dusts,
etc.) are stored or processed. The electrical or mechanical
components could lead to the ignition of these materials.
This machine must not be used in rooms that are subject to
electro-magnetic loading (electro-smog).
Do not use this machine to vacuum toxic, poisonous, caustic or
irritating substances (e.g. acids, alkalis, hazardous dusts, etc.).
The filter system will not adequately retain these kinds of
materials. A possible impairment of the health of the user and of
third parties cannot be excluded.
While operating the machine, take note of the surrounding area
and pay particular attention to third parties and children!
In particular, the speed of the machine should be reduced in the
vicinity of areas with unclear vision, for example, in front of doors
or curves.
The machine may only be used by persons who have been
suitably instructed in its use.
In case of damage to parts that could affect safety, such as the
tool cover, power supply cord or covers that prevent access to
current-carrying parts, the operation of the machine must be
stopped immediately!
Regularly check the power supply cord for tearing or aging, and
do not put the machine into operation if it is not in a safe and
suitable condition!
Caution:
Repairs to mechanical or electrical parts of the machine must only
be undertaken by Diversey authorised customer service
workshops or experts who are experienced in all relevant safety
regulations.
Minimum requirement for the power supply cord H05VV-F2x1.0.
Caution:
This machine is only intended for use in dry areas, and must not
be used or stored in the open air or under damp conditions.
Caution:
Pay attention to the accident prevention regulations!
Caution:
Only use the tools that are defined in these instructions of use
under accessories or that have been recommended by the TASKI
specialist (page 33), as other tools could impair the safety of the
machine.
Caution:
The protection of persons is based on the special national
regulations and the information from the detergent producer!
Caution:
It is forbidden to plug in or unplug the main power supply cord with
wet hands!
Caution:
Take care not to damage the power supply cord by driving over it.
Avoid crimping, tearing or damaging the power supply cord
through heat, oil, or sharp objects!
27
I25 I24 I23 I22 I21 I20 I19 I18 I17 I16 tr sv sl pt pl no nl it fr fi es en de da cz

Caution:
Massaro Michele
President
Please make sure that the voltage stated on the machine label is
the same as the voltage rating of the plug socket!
Important! Switch the machine off when you:
• e.g. carry out cleaning or maintenance work, or convert the machine to
another function
• store it in a suitable room to avoid any unauthorised use of the unit
• leave it standing without supervision
Do this by pulling the power supply cord out of the mains socket.
Store the machine in a dry, dust-free room with a corrosion-free atmosphere.
The temperature must not fall below +10 °C or exceed +35 °C. Low
temperatures, damp and dust can significantly reduce the service life of the
electrical components.
Noise emission and vibrations:
TASKI machines and units have been designed so that any
danger to health through the noise emitted or through vibrations
can be excluded according to the current state of knowledge.
Refer to the technical information on page 33.
Translation of the original EU Declaration of Conformity
We hereby declare that the product described below conforms to the relevant
safety- and health-related requirements of the appropriate EU Directive in both
its basic design and construction and in the version marketed by us.
This declaration shall cease to be valid if modifications are made to the product
without our approval.
Designation: Automatic machine for the treatment of floors for
Product: scrubber dryer
Model: swingo 150
Model: CO150.5 (220-240VAC/50-60Hz, 1100W)
Serial number: Refer to the rating plate on the machine
Trademark:
Manufacturer: Lindhaus s.r.l., 35127 Padova - Italy
Applicable EU Directives:
Directive 2006/42/EC of the European Parliament and of the Council dated
17th May 2006 regarding machines and for the change to Directive 95/16/EC
(new wording)
Directive 2004/108/EC of the European Parliament and of the Council dated
15th December 2004 for the harmonisation of the legal regulations of the
Member States regarding electro-magnetic compatibility and for the annulment
of Directive 89/336/EEC
Directive 2006/95/EG of the European Parliament and of the Council dated
12th December 2006 for the harmonisation of the legal regulations of the
Member States regarding electrical equipment for use within
specific voltage limits
Harmonised standards applied:
EN 60 335-1/EN 60 335-1-A1/EN 60 335-1-A11/ EN 60 335-1-A13/
EN 60 335-2-2-ed. 5+A1+A2/
EN 50 366: 2003+A1: 2006/EN 55 014-1: 2000+A1: 2001+A2: 2002/
EN 55 014-2: 1997+A1: 2001/EN 61 000-3-2+A2: 2005/
EN 61 000-3-3: 1995+A1: 2001+A2: 2005
commercial purposes
CO150.5C (120VAC/60Hz)
It is ensured through internal measures that the products conform at all times to
the requirements of current EU Directives and relevant standards
Responsible for documentation:
Padua, 01.03.2010
The signatories act on behalf of company management and with full power of
attorney.
Stephan Engler
Diversey Europe B.V. Utrecht
Zweigniederlassung Münchwilen
CH-9542 Münchwilen
28

Overview
2
5
6
8
11
24
23
21
20
19
7
10
3
4
9
12
13 14 15 16 17 18
22
2
1
11
10
12
14
13
15
8
6
1
2
5
3
4
9
7
Y/G
WHITE
BLACKBLACK
BROWN
GREEN
WHITE
WHITE
WHITE
BLACK
BLACK
RED
BLUE
GREEN
RED
WHITE
BLACK
GREEN
RED
WHITE
Y/G
BLACK
BROWN
RED
11
10
12
16
16
14
13
15
8
6
1
2
5
3
4
9
7
BLACK
BROWN
Y/G
WHITE
WHITE
Y/G
Y/G
WHITE
BLACK
BLACK
RED
BLUE
GREENBROWN
RED
Y/G
220-240VAC/50-60Hz
100VAC/50-60Hz
120VAC/60Hz
13 - Wires kit base
7 - Pressostat (for pump version)
1 - Terminal block
WHITE WHITE
WHITE
BLACK
GREEN
1 Handle
2 Water pump switch (illuminated)
3 Suction motor switch (non-illuminated)
4 Main switch
5 Transport handle, front
6 Tank unlocking device
7 Filter housing
8 Dosing lid
9 Solution tank
10 Recovery tank
11 Brush pressure regulation
12 Unlocking device for brush holder cover
13 Side bumper
14 Squeegee
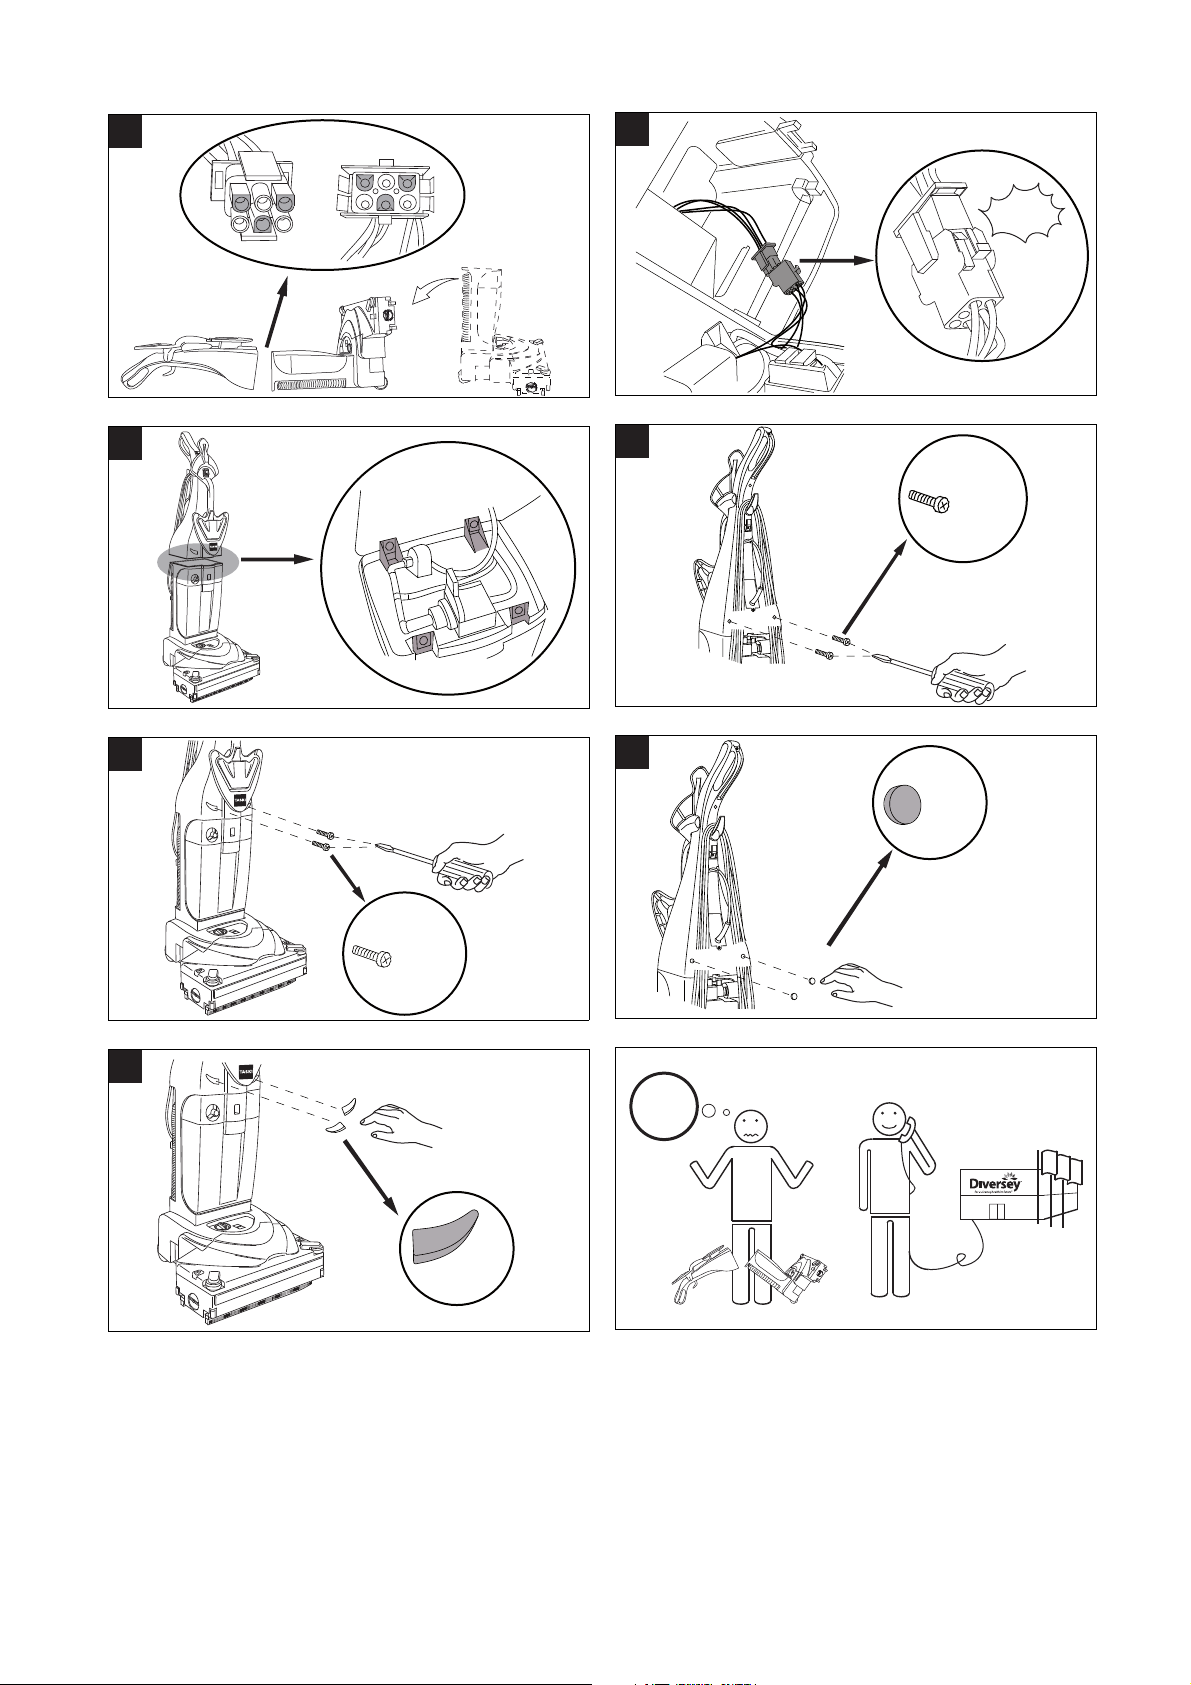
Preparation for operation/Operation
Before the machine can be put into operation, the two parts of the
machine must be connected electrically and the handle must be
screwed onto the body of the machine.
To do this, follow the assembly instruction on Page 2 of these
instructions for operation.
Electrical circuit diagram
15 Front bumper
16 Nozzle body
17 Wheels
18 Foot pedal
19 Suction hose
20 Transport handle, rear
21 Hose connection
22 Power supply cord
23 Cable hook
24 Upper cable-winding hook
25 Protective filter fpr pump
26 Suction chasnnel maintenance cover
27 Sponge filter
1 Terminal block 9 Thermal protector pump
2 Main switch 10 Terminal block
3 Vacuum switch 11 By-pass vacuum motor
4 Pump switch 12 Microswitch
5 Wires kit electric panel 13 Wires kit base
6 Wires kit upper housing 14 Circuit boards
7 Pressostat (for pump version) 15 Brush motor
8 Pump or Electro valve 16 Wire kit vac/base
29
I25 I24 I23 I22 I21 I20 I19 I18 I17 I16 tr sv sl pt pl no nl it fr fi es en de da cz

Filling water
2
1
1
2
MAX
WATER LEVEL
LIVELLO ACQUA
WASSER NIVEAU
NIVEAU DE L`EAU
NIVEL DE L`AGUA
Temperature
+5°C + +35°C
+41°F + +95°F
MAX
WATER LEVEL
LIVELLO ACQUA
WASSER NIVEAU
NIVEAU DE L`EAU
NIVEL DE L`AGUA
Temperature
+5°C + +35°C
+41°F + +95°F
1
2
- 1% / 26ml -
- 1% / 26ml -
1
2
1
2
Caution:
Maximum permissible water temperature 35 °C/95 °F.
• Use the dosing lid for the dosing. The dosing lid
can be removed from the filter housing by
turning it to the left.
• Remove the tank from the machine by pulling
on the tank unlocking device (1).
Hold the tank (2) with your other hand so that it
does not fall out of the holder when unlocked
and pull the solution tank out of the holder.
• Remove the dosing lid. The dosing lid can be
removed from the filter housing by turning it to
the left.
• Fill the solution tank up to the marking.
• The marking is indicated by a label on the side
of the solution tank.
TASKI
• Fill the dosing lid with detergent up to the
indicated mark (26 ml =1%).
Empty the contents of the dosing lid into the
solution tank.
• Screw the dosing lid back into the cutout
provided.
Ensure that the dosing lid is screwed in exactly
as shown in the illustration. The Taski lettering
must be below. Only in this way will the ribs on
the dosing lid fit into the cutouts provided in the
tank.
• Place the filter housing on the tank and lock it.
Ensure that the filter housing is lying correctly
on the tank. The locking pattern on the front side
of the tank is intended to ensure this. (see the
detail in the illustration)
The tank could open during the cleaning.
• Replace the tank (1) in the machine until it locks
into place, and then press in the tank locking
device (2) again.
Dosage:
Caution:
Wear protective gloves, goggles and the corresponding
(protective) work clothing when handling chemical products!
Only use chemical products recommended by the manufacturer.
Caution:
Do not use any products that produce foam. Read the
instructions on the sticker on the front side of the tank.
The dosing aid is marked for a 1% cleaning solution.
Dosing example:
Dosage Tank capacity Dosing aid
1% MAX 1 x MAX
30
Beginning work
Caution:
Before starting the cleaning operation, ensure that there are no
objects such as metal bits, screws, etc. lying on the floor.
These object copuld be vacuumed up and thereby damage the
machine!
• Plug the power supply cord into the mains socket.
• Press the main (ON/OFF) switch to turn the
machine on (switch lights up)
• Hold the machine firmly by the handle and bring
it into nthe working position (2) by pressing the
red foot pedal (1).
The electric brushes turn on.

• Press the suction switch (1) to turn the suction
1
2
MAX
BRUSH PRESSURE
MIN
RED
GREEN
1
2
2
1
1
2
x
2
1
unit on (no lamp)
• Press the water pump switch (2) to turn the
water pump on (lamp lights up).
• Empty the soiled solution from the tank through
the opening provided on the rear side of the
tank.
Caution:
If the red control display „brush pressure“ lights up, correct the
brush height as described below.
• Adjust the brush height by turning the regulator
until the green displaay lights up.
LED display Status indicator
Display green Brush height correctly adjusted
Display red Correct the brush height. Turn the adjustment button
to the right for more, or to the left for less brush
pressure.
End of operation
• Switch the water pump off (1).
• Allow the suction unit to run for a further 10
seconds so that the rest of the water is sucked
up.
• Switch the suction unit off (2).
Cleaning the tank
• Remove the filter housing from the tank. To do
this, open the unlocking device on the rear side
of the tank.
• Rinse out the tank with water and clean it with a damp cloth.
Wash out the motor protection filter
• Remove the motor protection filter from the
transparent filter protection above the filter
housing.
• Wash the motor protection filter under running
water.
• After washing it, wring out the motor protection
filter so that the water can flow out.
Caution:
Do not reinstall the motor protection filter before it has completely
dried out.
• Switch the machine off (main (ON/OFF) switch
+ pull out plug).
• Lock the machine in the vertical position.
• Wind the power cord around the cable hook.
Emptying the tank
Caution:
Switch the machine off (main ON/OFF switch and plug) when
carrying out work on the machine!
• Remove the tank from the machine by
pulling on the tank unlocking device (1).
Hold the tank (2) with your other hand so that it
does not fall out of the holder when unlocked
and pull the solution tank out of the holder.
Washing out the filter housing and the float
• Remove the motor protection filter from the filter protection before washing
out the filter housing.
• Wash out the filter housing and the float (X),
which is located on the underside of the filter
housing, under running water.
• Reinstall the dry motor protection ffilter.
• Place the filter housing on the tank and lock it
(see page 30)
31
I25 I24 I23 I22 I21 I20 I19 I18 I17 I16 tr sv sl pt pl no nl it fr fi es en de da cz

Cleaning the sponge and pump protection filter
1
2
2
1
3
2
1
• Remove the light-blue sponge filter using
pincers.
Wash the sponge filter every month.
Replace the sponge filter when necessary.
• Replace the squeegee in the squeegge body.
Note that the front and rear squeegees are
different. The position is shown on the upper
side of the squeegee (FRONT + REAR).
Washing out the squeegee
• The pump protection filter should be replaced
once a year.
• Open the cover of the brush housing by
loosening the unlocking device at the side.
• Turn the four yellow clips to the left to loosen the
squeegee.
• Place the machine on its side to remove the
squeegee.
Replacing the brush roller
Caution:
Danger of injury through sharp objects.
Wear gloves for your own protection!
Check the brush roller for wear after every use.
Bristles that are too short or damaged suction lips could lead to
damage to the floor covering and could impair the cleaning result!
Cleaning the brush housing
• Place the machine on its side so that the side
brush holder is facing upwards.
• Press the rotation lock (1) and turn the brush
holder (2) counter-clockwise and pull it out of
the housing (3) to remove it.
• Remove the brush roller.
• Clean the brush roller.
• Wash out the squeegee under running water.
Check the condition of the suction lips before the installation.
Bristles that vare too short or damaged suction lips could impair
the cleaning result!
Installing the brush housing
• Clean the brush housing with a damp cloth.
• Reinstall the brush roller.
In order to reinstall the brush roller, you have to
position the white traveller of the roller on the
white traveller in the squeegee body.
The ribs on the traveller of the brush roller must
fit into the correct cutouts on the traveller of the
squeegee body.
• Remount the brush holder and turn it clockwise
until the rotation lock locks in.
32

Cleaning the transport wheels
• Before and after using the machine, always
clean the runnung surfaces of the transport
wheels with a damp cloth.
The transport wheels can become soiled by
transportation over asphalt.
Service centre
Should you contact us due to a malfunction or for placing an order, please
always state the type, description and the serial number of your machine.
You can find this information on the name plate of your machine, and the
address of your nearest TASKI partner can be found on the last page of this
manual.
Transport
Make sure that the machine is securely fastened within the transportation
vehicle.
Disposal
When it has reached the end of its operational life, the machine and its
accessories must be disposed of according to the national regulations.
Cleaning the machine
Caution:
Never clean the machine with high water pressure or a water
hose.
Any water that penetrates into the machine can lead to serious
damage to the mechanical or electrical components and can
thereby also lead to injury to persons.
• Pull the power supply cord out of the mains socket.
• Wipe down the machine with a damp cloth.
Service, maintenance and care
Caution:
Only TASKI branded spare parts must be used, otherwise
warranties and liabilities will be omitted!
The machine's maintenance is a pre-condition for trouble-free running and a
long life.
Symbols:
◊ = after use, ◊◊ = every week, ◊◊◊ = every month
Activity ◊◊◊◊◊◊page
Wash out the squeegee
Clean the brush roller
Periodically check the length of the bristles.
Replace the brush roller 32
Suction channel service cover
Clean/replace the motor protection filter
Wash out the sponge filter
Pump protection filter
Clean the machine with a damp cloth
Clean the transport wheels
32
32
29
31
32
32
33
33
Malfunctions
Malfunction Possible causes Troubleshooting page
Not turned on • Turn on 30
Machine does not
run
Brush roller not
turning
Poor vacuum
performance
Power supply cord not
properly plugged into
the mains socket
Power supply cord
defect
Motor defect
Main switch defect
Machine not in the
working position
Motor runs but not
tool
Motor protection filter
soiled
Suction hose not
connected
• Check
• Call for technical
assistance
• Call for technical
assistance
• Call for technical
assistance
• Place the machine in
the working position
• Drive defective
• Call for technical
assistance
• Clean or replace the
motor protection filter.
• Check
Technical data
Name swingo 150
type CO150.5 CO150.5C
Rated voltage 220-240V 120V AC
Frequency 50-60 60 Hz
Rated power 1100 1100 W
Machine weight 12.7 12.7 kg
Dimensions (L x B x H) (ready for
operation)
A-weighted emission sound pressure
level EN 60704-1
Electrical protection class II II
43x38x112 43x38x112 cm
74 74 dB(A)
30
31
Service intervals
TASKI machines are built to the highest quality standards. This is supported by
internationally recognised quality control procedures. Electrical and mechanical
parts are subject to wear or aging if used for long periods of time.
• To maintain functional safety and operational readiness, a service must be
carried out at least once a year.
Under rough or extreme working conditions and / or insufficient
maintenance, shorter intervals may be necessary.
Accessories
Article swingo 150
7516236 Brush roller medium black X
7516237 Brush roller hard red X
7516546 Squeegee set X
33
I25 I24 I23 I22 I21 I20 I19 I18 I17 I16 tr sv sl pt pl no nl it fr fi es en de da cz

Dimensions of the machine
112
43
38
Dimensions in centimetres!
swingo 150
34
 Loading...