

Page 1
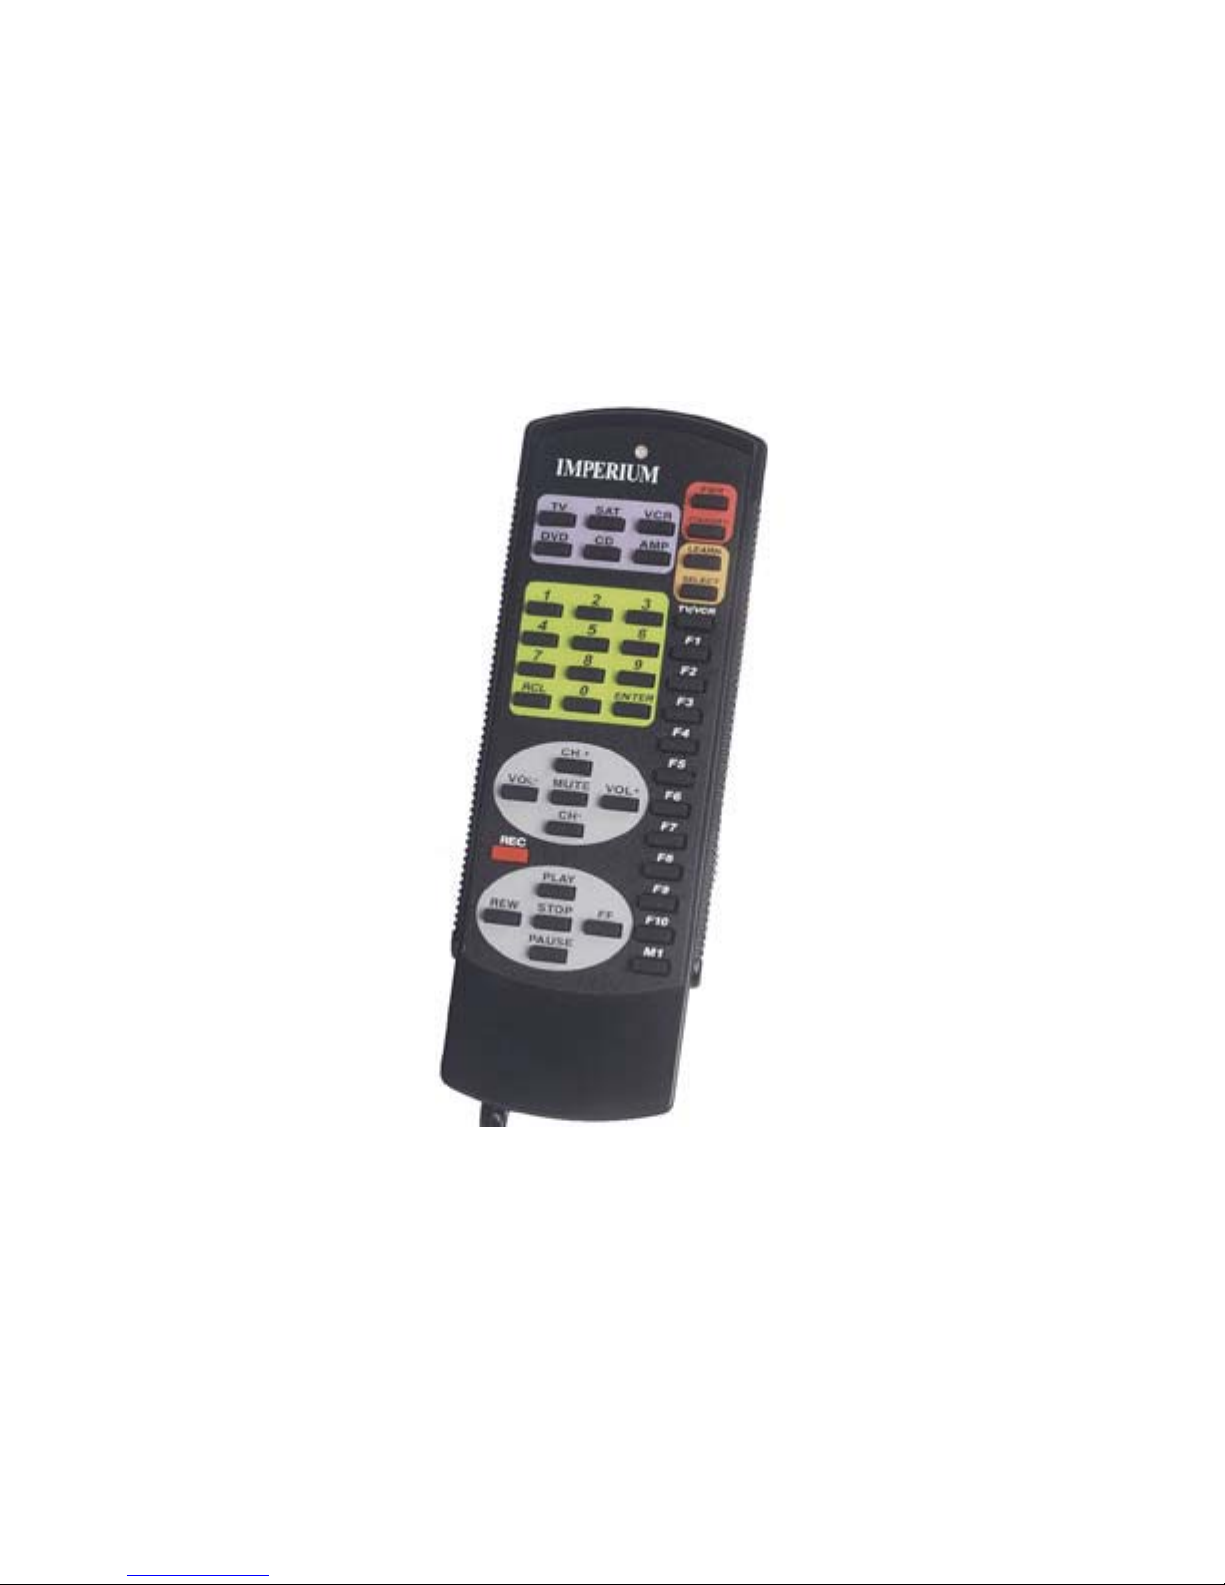
Imperium Remote Control
User Guide
Due to constant and unanticipated advances in technology,
Tash cannot guarantee all electronic appliances can be trained for the Imperium 200H.
If you are considering purchasing a new electronic appliance,
please take your existing Imperium, IR remote to the electronics store to test it.
Please see page 36 for more information.
Page 2

TV / VCR Combo - Program remote using the VCR device code.
*089: Power = Power off
Enter = Power on + Recall
THE FOLLOWING REPLACES & REVISES THE “IR FUNCTIONS”
SECTION OF THE IMPERIUM 200H USER MANUAL (PGS. 18-22)
IR Functions
When the unit scans to “ir” (remote control) on the Home Menu, press (>) for the submenu
functions to use the Imperium Infrared Remote Control (see Figure 1). These submenus control the
TV, VCR, SATELLITE/CABLE, DVD, RADIO AND CD. Press (>) to select the control menu for
the desired device.
Note: Each TV, VCR, SATELLITE/CABLE BOX, DVD, RADIO, and CD should have been
programmed on the Imperium Remote Control during system setup (see “Installing the System,” No.
10 on page 8 of User Manual). If the Imperum Remote Control is not connected properly or the
batteries are dead, the display will read “No Contoller” and the unit will say “Check cable.”
17
Page 3
The Imperium Remote Control has been designed to operate most all electronic devices. Certain
devices occasionally cannot be fully controlled because of manufacturing uniqueness.
TV Control
Remote Control
tv
Television
ch vol mut
TV Channel
Ch+ Ch- Rcl Set
TV Channel:
Channel Up
TV Channel:
Channel
Down
TV Channel:
Ch Rcl
Speaks:
“Previous”
TV
Channel
Speaks:
“Enter”
vcr sat dvd radio cd
See
Fig. 2
TV Channel
Mute
TV Volume:
Volume Mute
Speaks:
“cable”
See
Fig. 3
Vol+ Vol- TV Amp
TV Volume:
Volume
Down
TV Volume:
Volume Up
Speaks:
“auxiliary”
TV Vol:
TV Sel
See
Fig. 4
TV Vol:
Amp Sel
Speaks:
“Tuner”
See
Fig. 5
TV:
Volume Mute
TV/VCR Switch:
Toggle TV / VCR
tv / vcr F pwr
Speaks:
“F”
TV F-keys
F1 … F10, M1
Speaks:
“1-10, M”
See
Fig. 6
TV Power
Power
Button
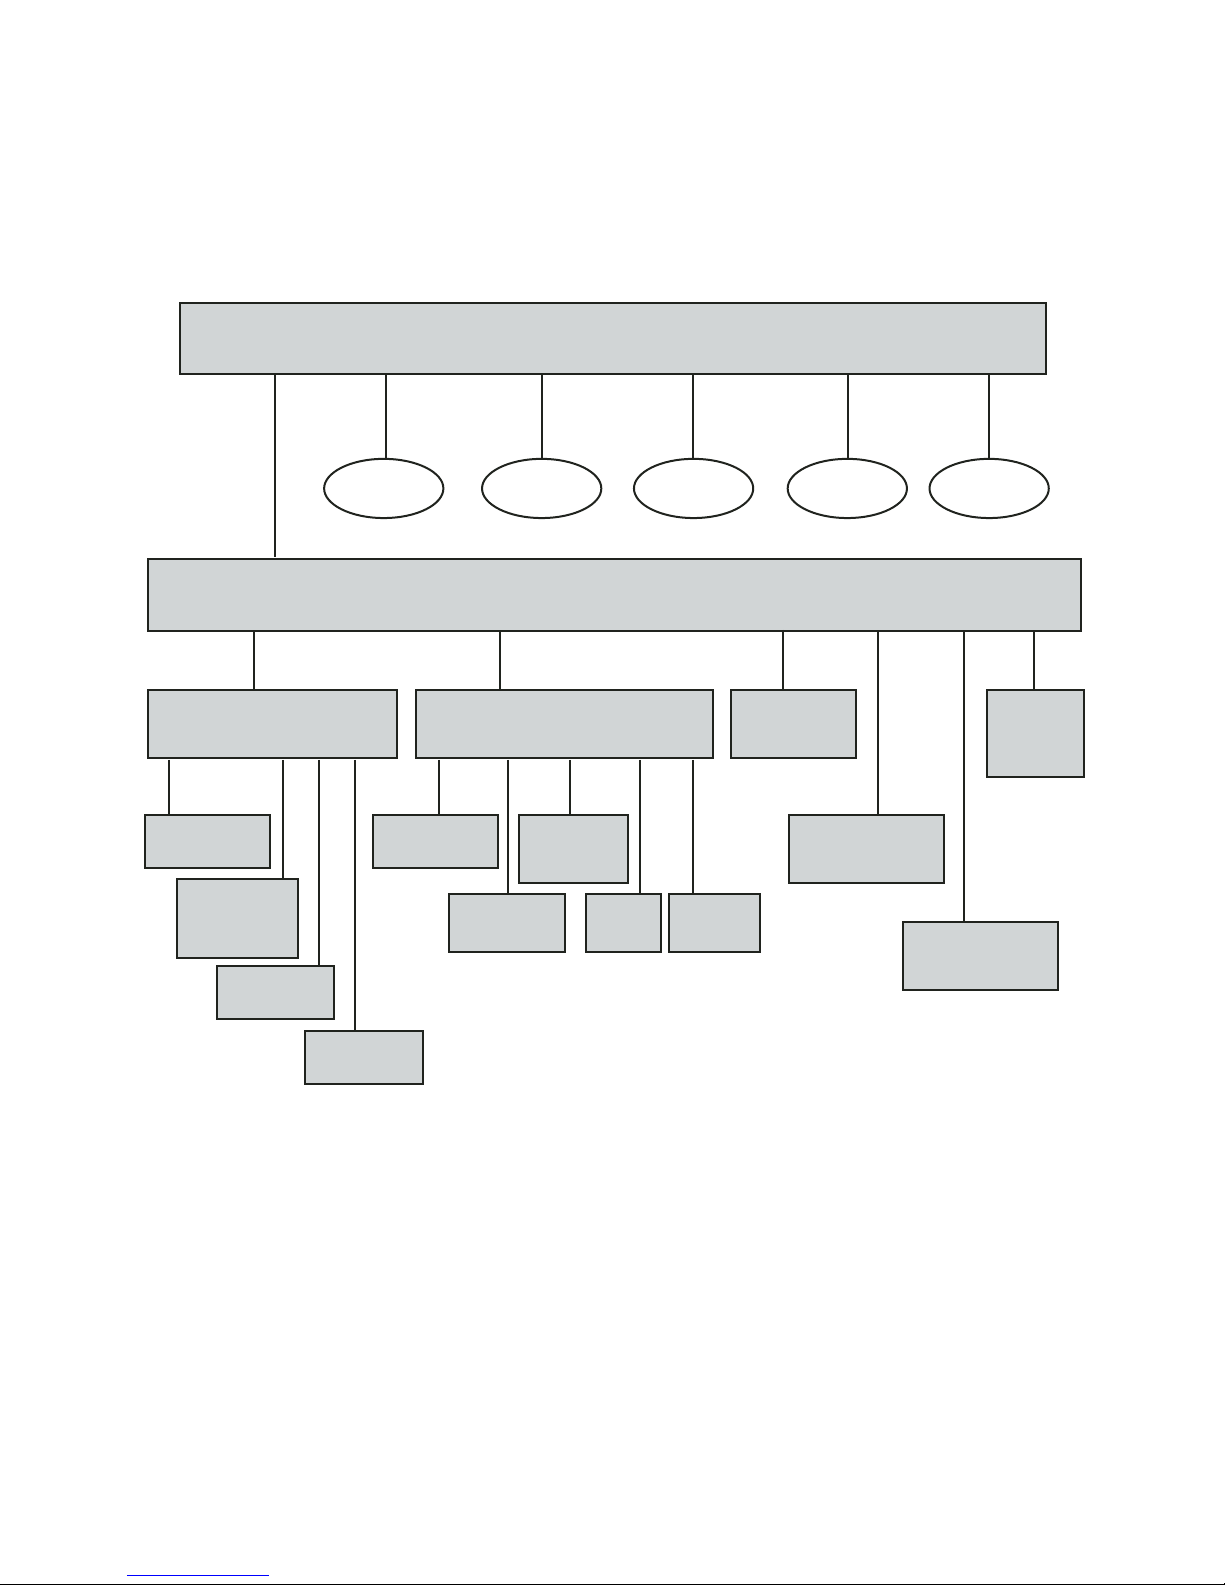
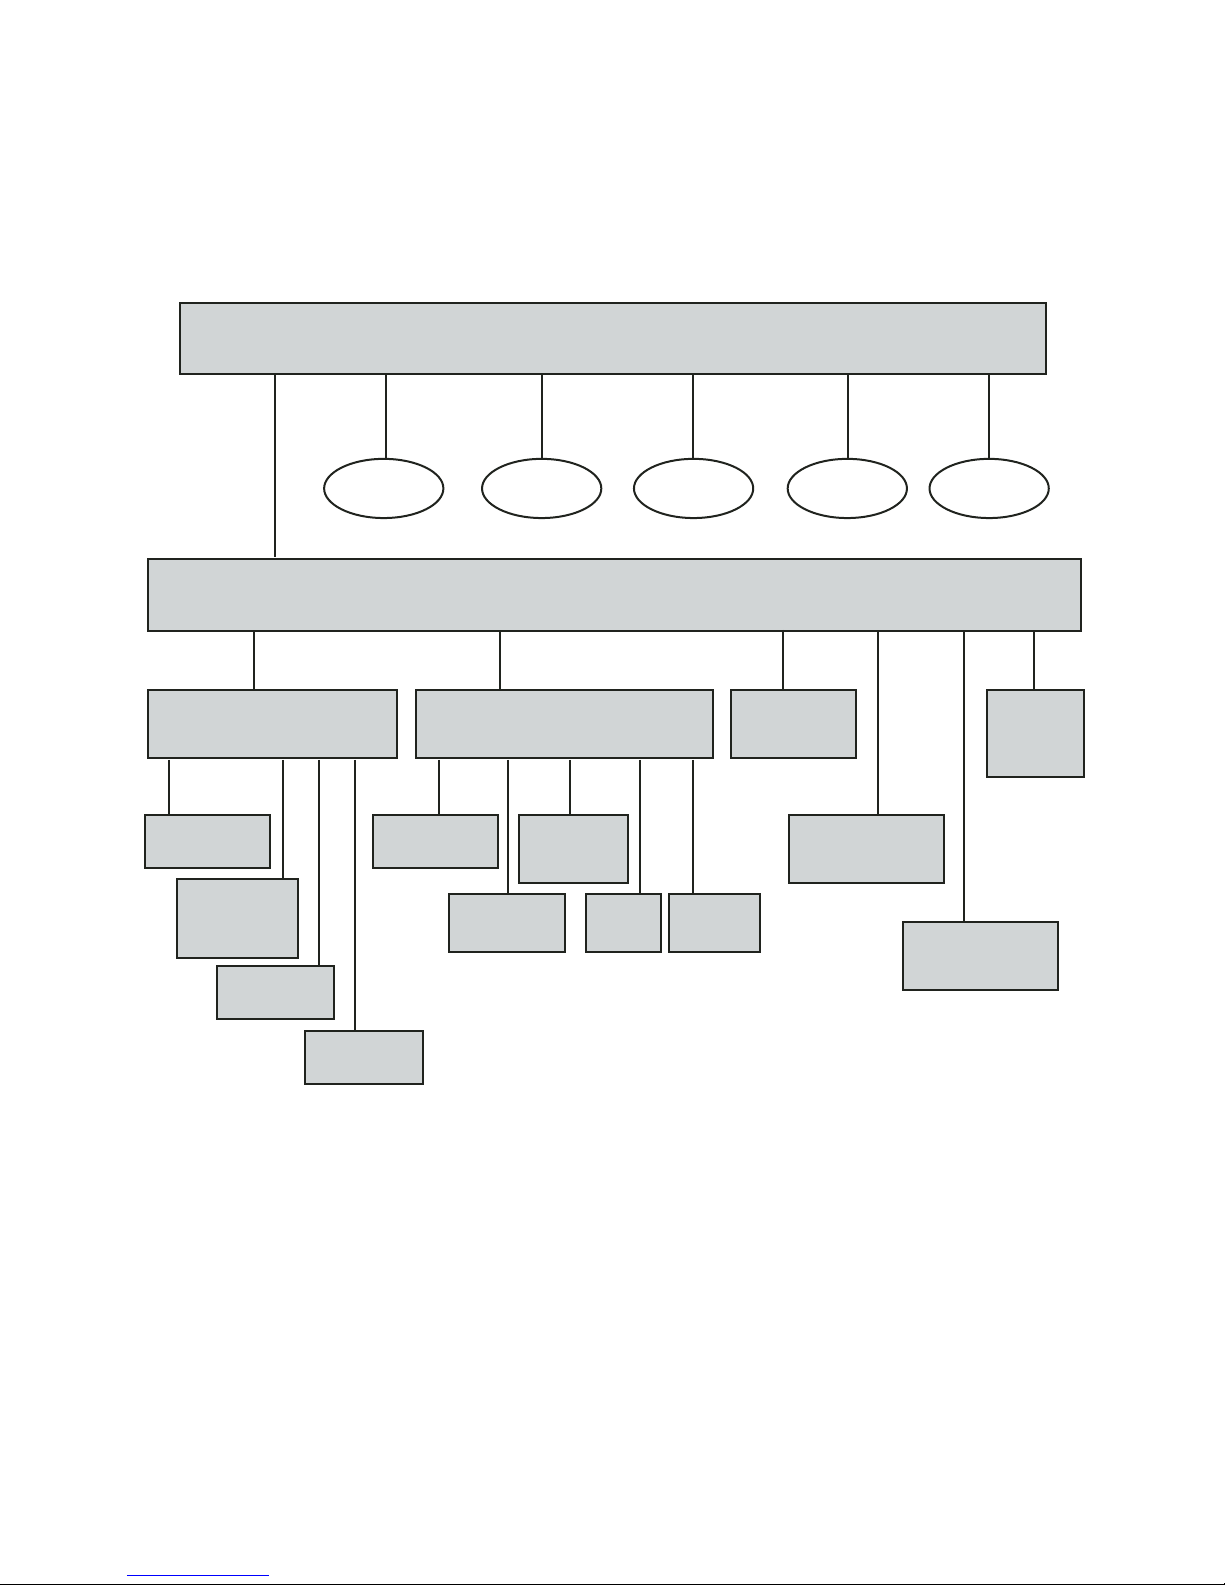
TV Function - When the “tv” function is selected in the IR Menu, “ch,” “vol,” “mute,” “tv/vcr,”
“F,” and “pwr” are displayed. (See Figure 1.)
1. Press (>) to begin scanning. Press (>) again to select the desired function.
2. Select “ch” to step the channel up or down or to enter a channel number.
18
Figure 1. Flowchart of the TV Menu
Page 4
VCR Control
Remote Control
vcr
VCR
play stop rew ff rec ch tv / vcr F pwr
VCR Play
Play
VCR REW
Rewind / Pause / Play / Pause
VCR Record
Record
TV / VCR Switch
toggle TV / VCR
Speaks:
“F”
VCR Stop
Stop
VCR FF
Fast Forward / Pause / Play / Pause
VCR Channel
Ch+ Ch- Rcl Set
VCR Channel
Channel Up
VCR Channel
Channel Down
VCR Channel
VCR Channel
Channel Rcl
Speaks:
“Enter”
Speaks:
“Previous”
VCR Power
Power Button
VCR F-keys
F1 … F10, M1
Speaks:
“1-10, M”
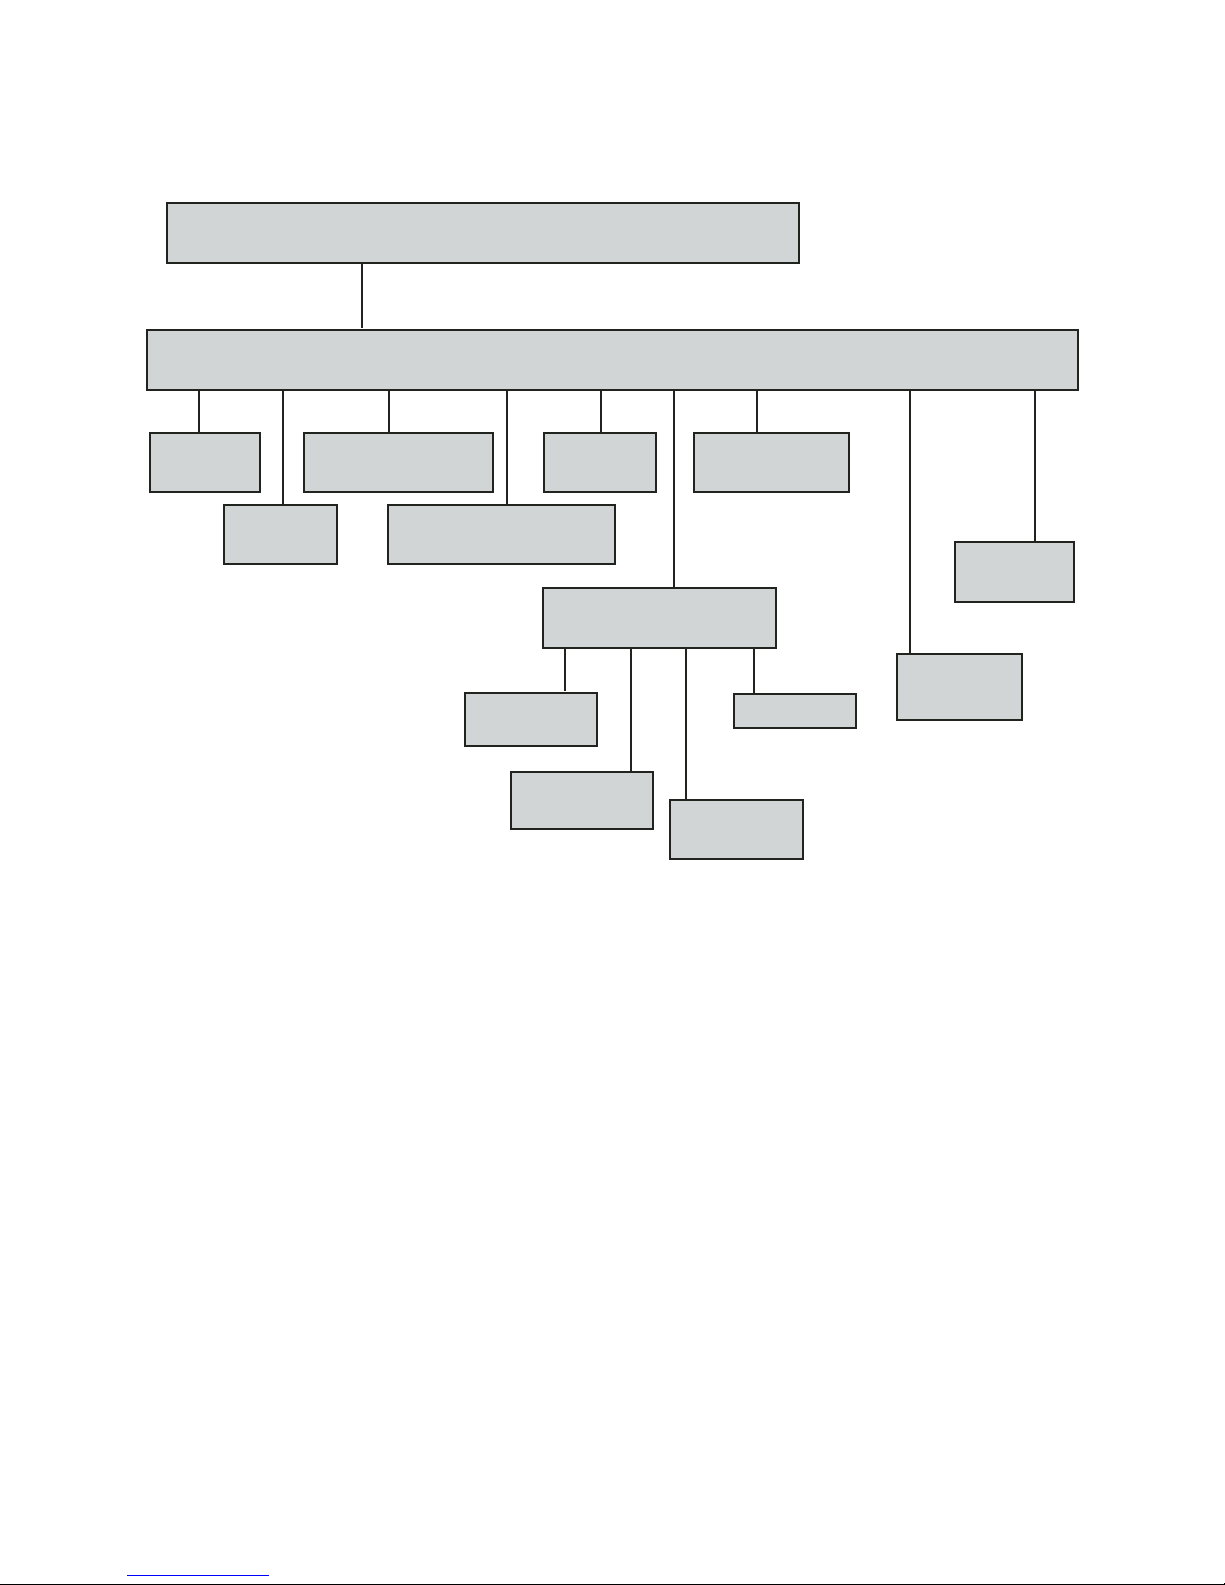
Figure 2. Flowchart of the VCR Menu
VCR Function - When “vcr” is selected from the IR Menu, “play,” “stop,” “rew,” “ff,” “rec,”
“ch,” “tv/vcr,” “F,” and “pwr” are displayed. (See Figure 2.)
1. Press (>) to begin scanning. Press (>) again to select the desired function
2. Select “play” to play or stop the VCR.
3. Select “stop” to stop the VCR.
4. Select “rew” to rewind, stop or play the VCR.
5. Select “ff ” to fast forward, stop or play the VCR.
6. Select “rec” to record with the VCR.
7. Select “ch” to enter a specific channel or to step the channel number up and down.
8. Select “tv/vcr” to toggle between the TV and VCR sources.
20
Page 5
Non Dish Net Satellite / Control
Remote Control
sat
SAT
Ch Vol Gd TV / VCR F Power
Mute Vol+ Vol- TV Amp
TV/VCR Switch
Toggle TV / VCR
SAT Power
SAT Power
Power Button
Power Button
SAT Vol
Vol Mute
Ch+ Ch- Rcl Set
SAT Ch
Ch Up
Speaks:
“Enter”
SAT Ch
SAT Vol
Vol Up
Speaks:
“Increase”
SAT Vol
Vol Down
Speaks:
“Decrease”
SAT Vol
TV Select
SAT Vol
Amp Select
Speaks:
“Tuner”
SAT F-Keys
F1 … F10, M1
Speaks:
“1-10, M”
SAT Ch
Ch Down
SAT Ch
Ent Ch
SAT Guide
Enter
SAT
Ch
Ch Rcl
Speaks:
“Previous”
SAT Guide
Ch Up
Up Down Rt Lt Inf ESC Gd Pvr
SAT Guide
Ch Down
SAT Guide
Guide Info
Speaks: “I”
SAT Guide
Guide Right
Speaks:
“Increase”
SAT Guide
Guide Left
Speaks:
“Decrease”
Speaks:
“Control”
Speaks:
“Check”
SAT Guide
Guide Cancel
Speaks: “I”
Speaks:
“Previous”
SAT Guide
Pvr Button
Speaks:
“Control”
SAT Guide
Guide Button
Speaks:
“Enter”
Speaks:
“Enter”
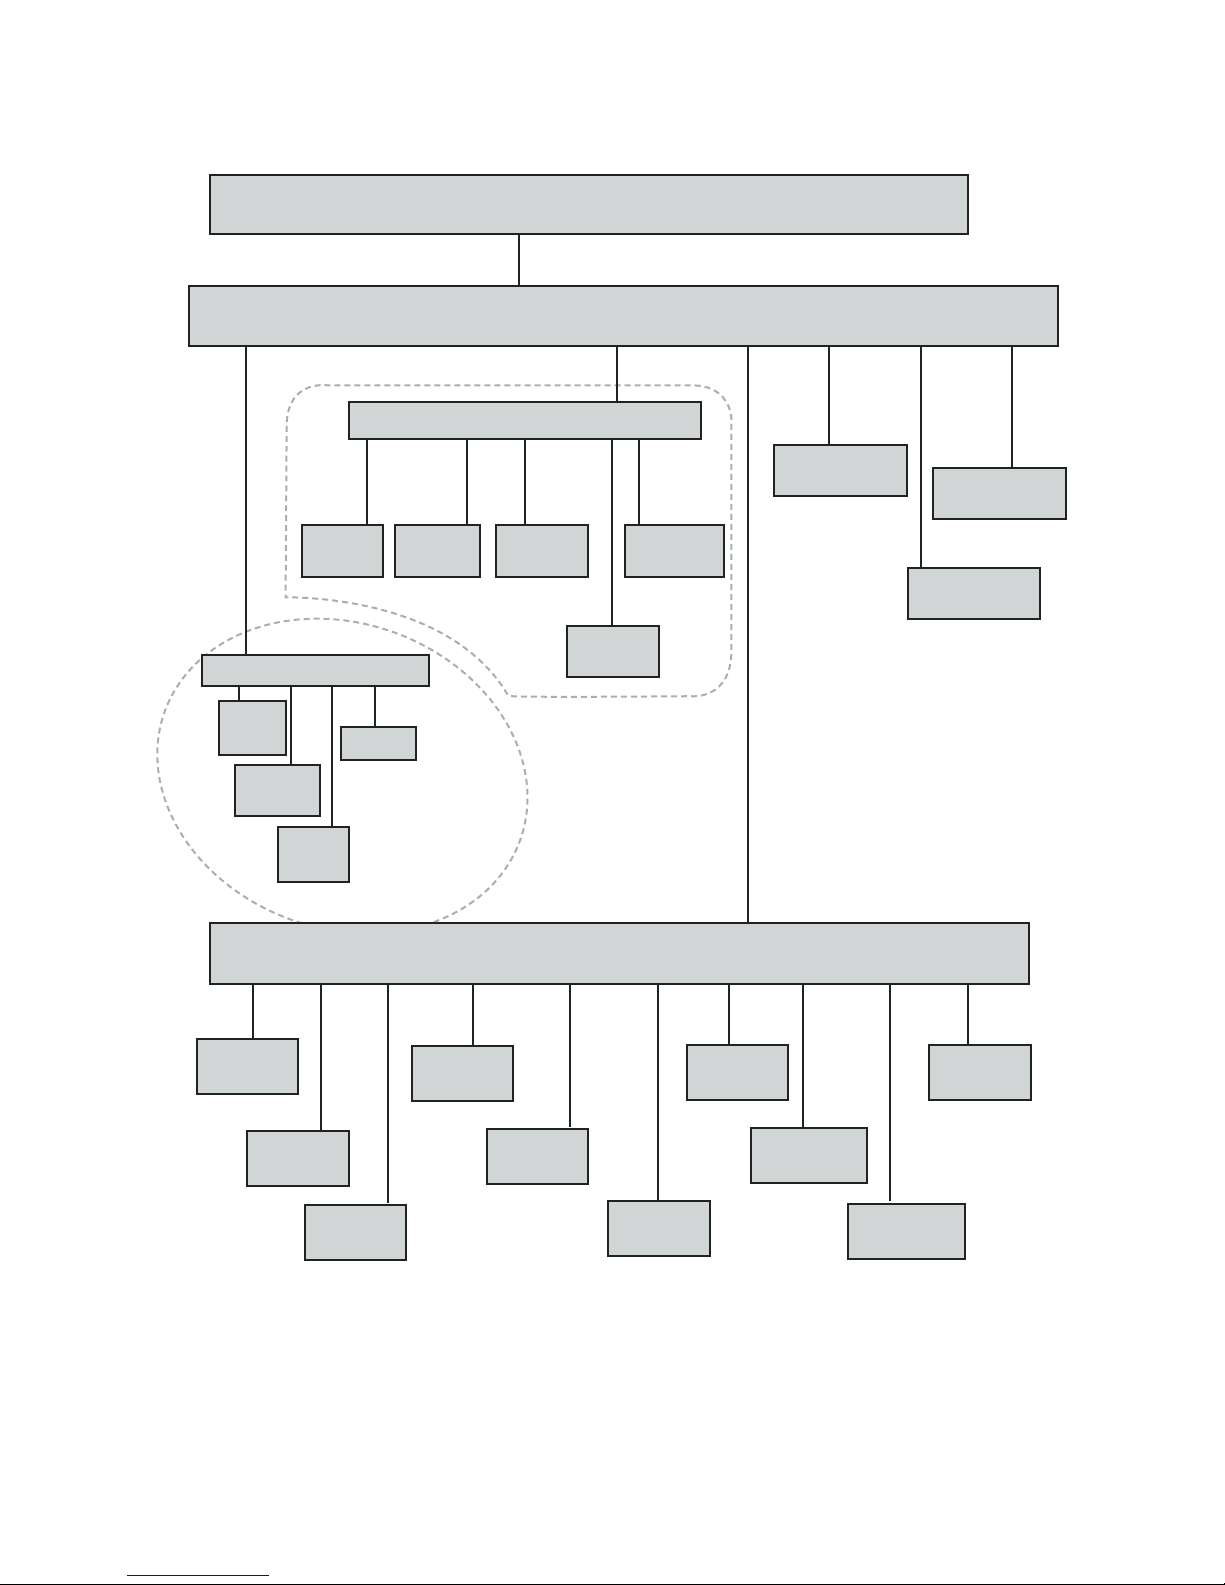
Figure 3. Flowchart of the Cable Box (Non Dish Net Satellite / Control) Menu
Speaks:
“P”
22
Page 6

Cable Box Function - When “cable” is selected from the IR Menu, “ch,” “vol,” “mute,” “tv/vcr,”
and “pwr” are displayed. (See Figure 3.)
1. Press (>) to begin scanning. Press (>) again to select the desired function.
2. Select “ch” to either set a channel number or top step the channel number up or down.
3. Select “vol” to increase or decrease the volume.
4. Select “mute” to turn the sound on or off.
5. Select “tv/vcr” toggle between TV and VCR sources.
6. Select “F” to access programmable functions.
7. Select “pwr” to turn the cable box on or off.
23
Page 7
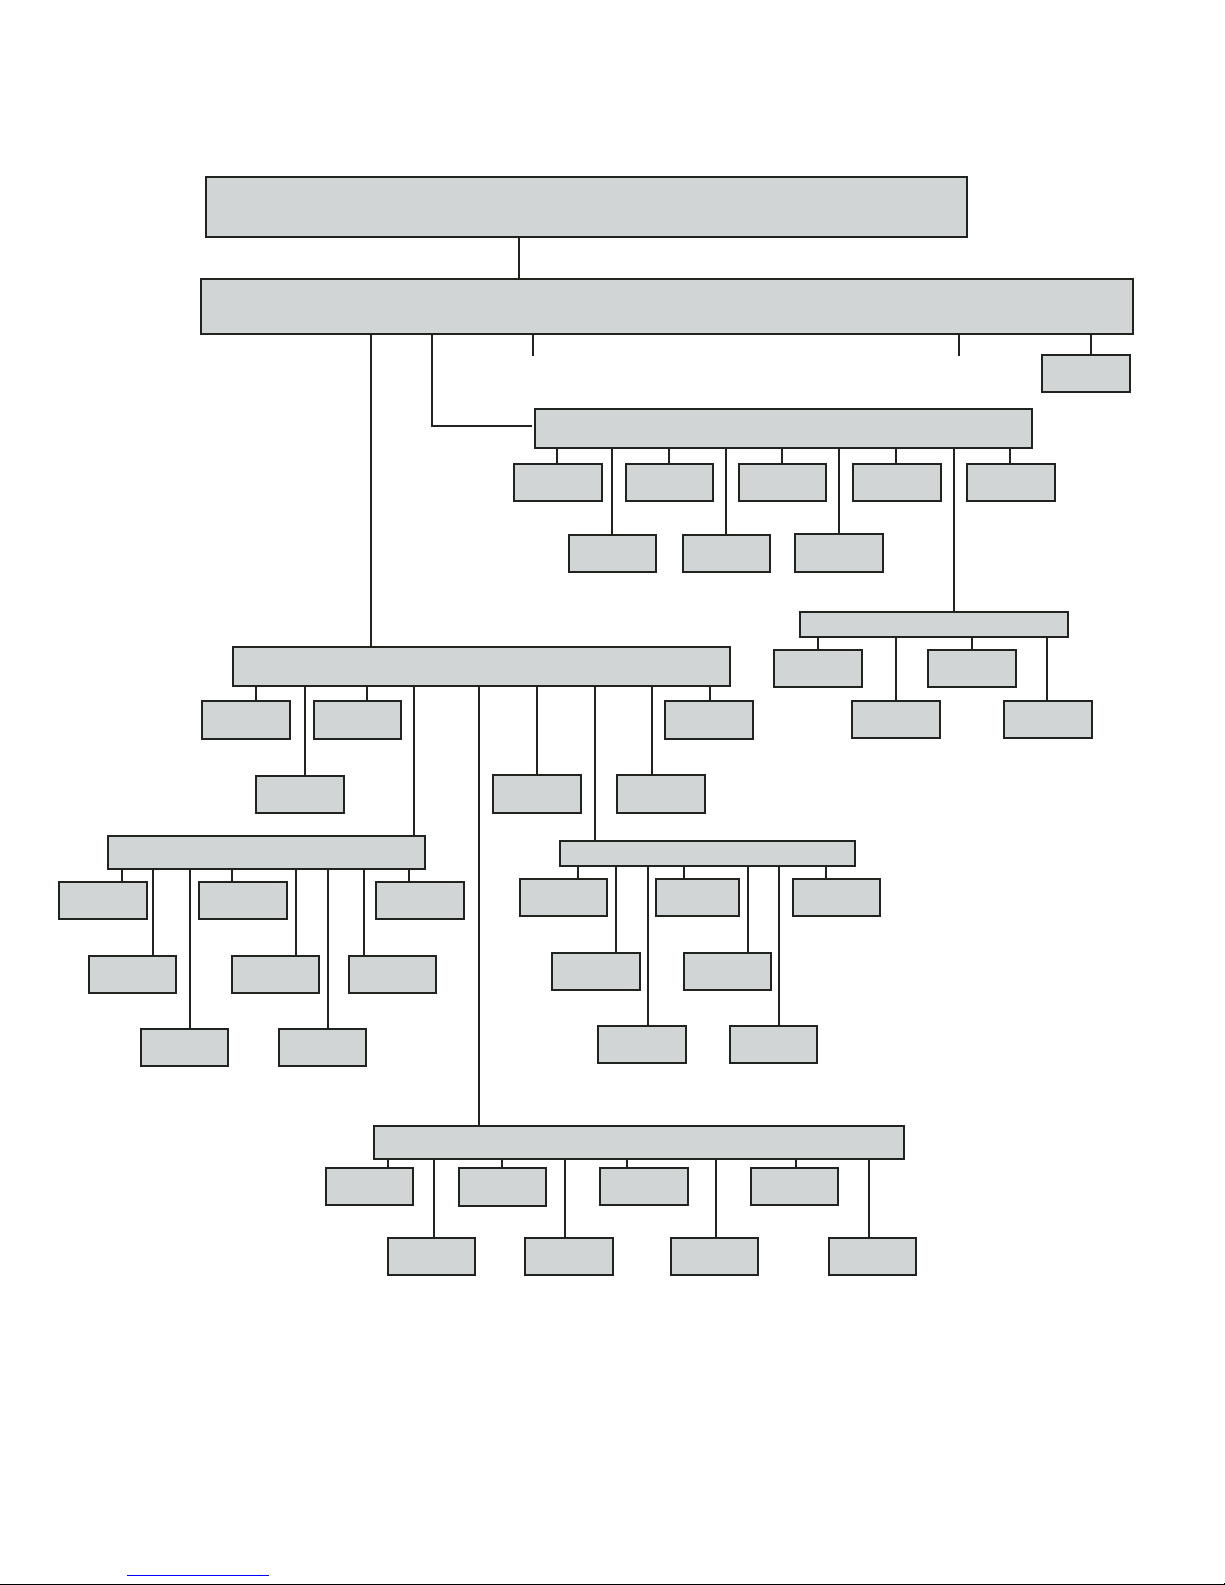
Dish Net Satellite / Cable Box Control
Remote Control
SAT
SAT
Ch Vol Gd Pvr Menu TV / VCR F Power
SAT GUIDE
Left
Speaks:
“Reverse”
SAT GUIDE
Right
Speaks:
“Forward”
lr
SAT GUIDE
Day Back
Speaks:
“D-Rewind”
SAT GUIDE
Guide Button
Speaks:
“Control”
daybkday
rt
SAT GUIDE
Day Forward
Speaks:
“D-Forward”
See next
page
Speaks: “P”
pvr sk+ sk- ff rew stop play rec esc
PVR SAT GD
PVR
Speaks:
“Control”
PVR SAT GD
Skip Forward
Speaks:
“Forward”
PVR SAT GD
Skip Reverse
Speaks:
“Reverse”
PVR SAT GD
Fast Forward
gd menu ch lr ud info srch ent esc
SAT GUIDE
Menu Button
info view
SAT GUIDE
Info
Speaks:
“I”
SAT GUIDE
Select
SAT
Channel
sel
Speaks:
“Select”
esc
SAT GUIDE
Cancel
Speaks:
“Goodbye”
SAT GUIDE
View
Speaks:
“Auxillary”
SAT GUIDE
Info
SAT GUIDE
Search
Speaks:
“Pound”
Speaks:
“Pound”
srch l r up
SAT GUIDE
Left
Speaks:
“Reverse”
SAT GUIDE
Forward
SAT GUIDE
Select
Speaks:
“Select”
Speaks:
“Forward”
SAT GUIDE
Cancel
Speaks:
“Goodbye”
SAT GUIDE
Up
Speaks:
“Up”
SAT GUIDE
Down
Speaks:
“Forward”
Speaks:
“Down”
PVR SAT GD
Rewind
Speaks:
“Rewind”
PVR SAT GD
Record
dn
sel
SAT GUIDE
Select
Speaks:
“Select”
See next
page
PVR SAT GD
Stop
Speaks:
“Stop”
PVR SAT GD
Play
Speaks:
“Play”
PVR SAT GD
Cancel
Speaks:
“Goodbye”
rec down sel esc
PVR SAT GD
Speaks:
“Record”
PVR SAT GD
Down
Speaks:
“Down”
Select
Speaks:
“Select”
esc
SAT GUIDE
Cancel
Speaks:
“Goodbye”
SAT Power
Power Button
Speaks:
“Power”
PVR SAT GD
Cancel
Speaks:
“Goodbye”
up dn pup
SAT GUIDE
Up
Speaks:
“Up”
SAT GUIDE
Down
Speaks:
“Down”
Figure 4. Flowchart of the Cable Box (Dish Net Satellite / Cable Box) Menu
24
info viewsel
SAT GUIDE
Info
Speaks:
“I”
SAT GUIDE
Page Up
Speaks:
“Ch Page-Up”
“Ch Page-Down”
pdn
SAT GUIDE
Page Down
Speaks:
Continued on Next Page
SAT GUIDE
Select
Speaks:
“Select”
SAT GUIDE
View
Speaks:
“Auxillary”
esc
SAT GUIDE
Cancel
Speaks:
“Goodbye”
Page 8
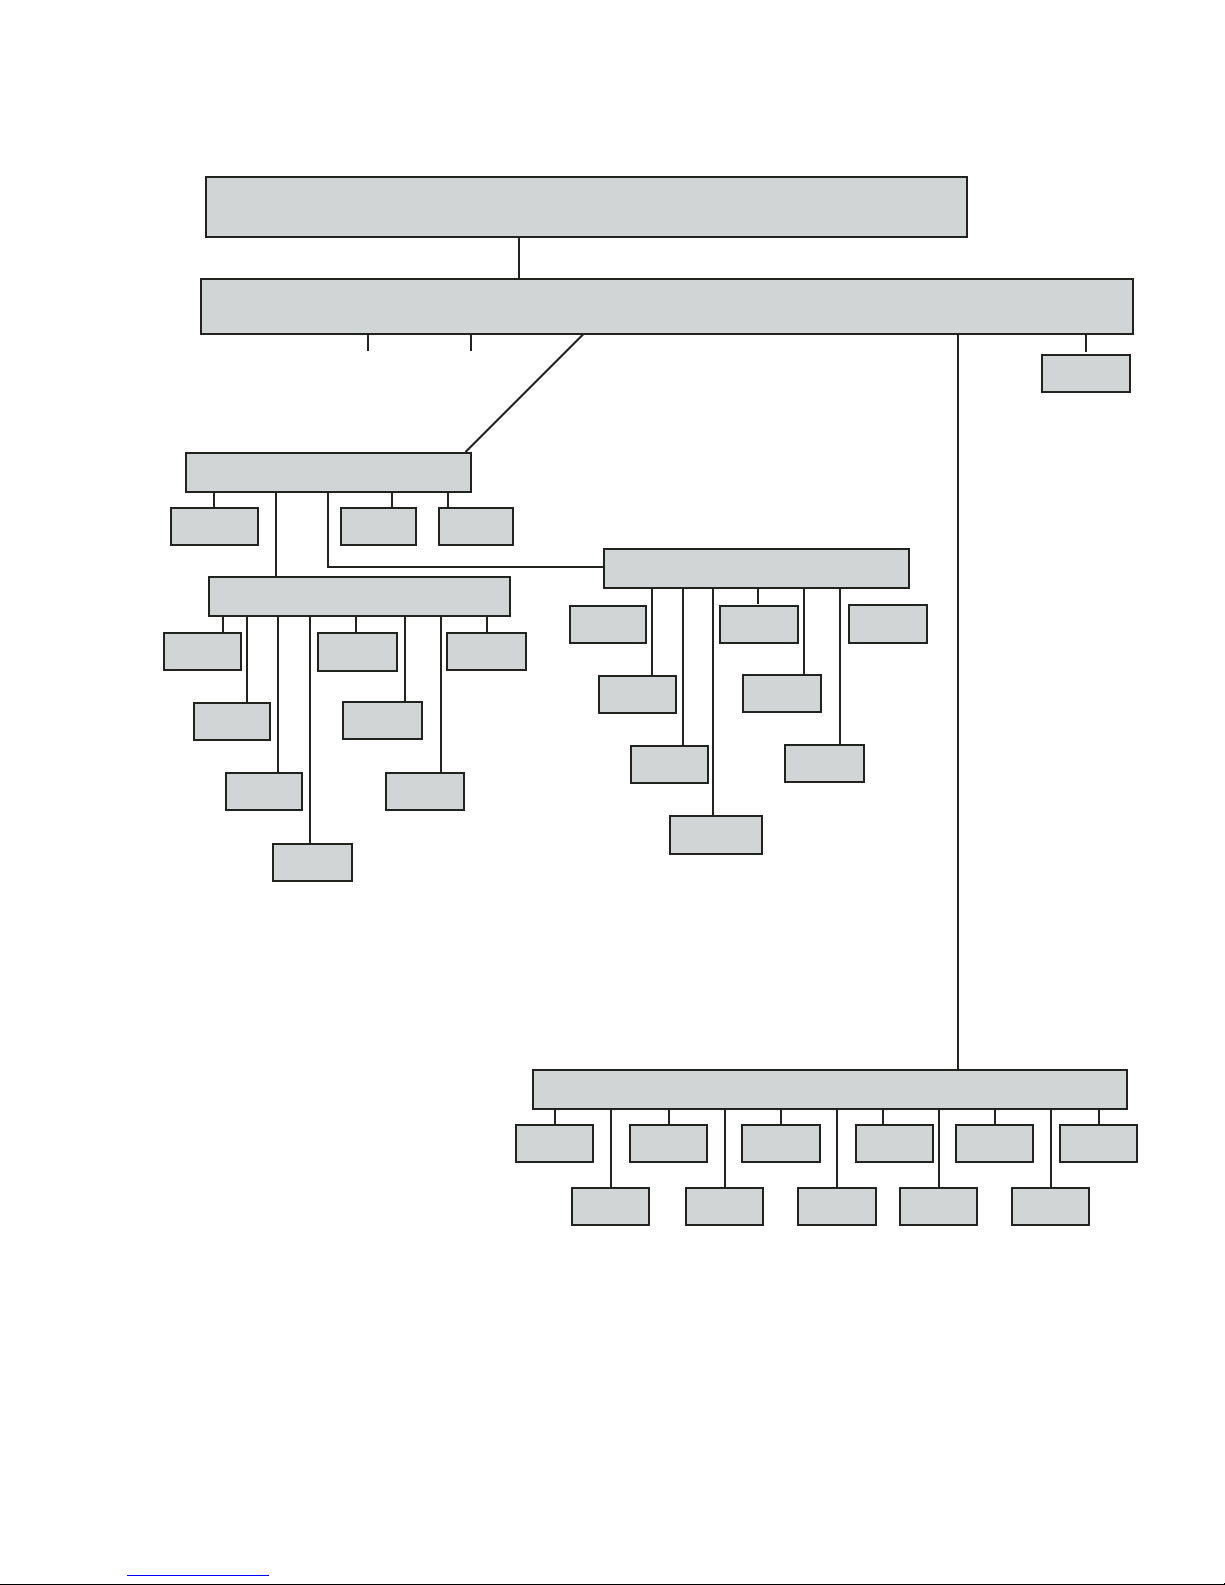
Dish Net Satellite / Cable Box Control (continued)
Remote Control
SAT
SAT
Ch Vol Gd Pvr Menu TV / VCR F Power
menu
SAT/Cable
Menu Button
Speaks: “M”
LR
SAT/Cable
Left
Speaks:
“Reverse”
SAT/Cable
Right
Speaks:
“Forward”
lr ud
Day-
Bk
SAT/Cable
Day Back
Speaks:
“D, Rewind”
See previous
Day-
Rt
SAT/Cable
Info
Speaks:
SAT/Cable
Day Forward
Speaks:
“D, Forward”
page
Speaks: “M”
See previous
page
ent esc
SAT/Cable
Select
Speaks: “Select”
SAT/Cable
Cancel
Speaks: “Goodbye”
Info Sel View Esc
SAT/Cable
Cancel
“I”
SAT/Cable
Select
Speaks:
“Select”
SAT/Cable
View
Speaks:
“Auxillary”
Speaks:
“Goodbye”
Up
SAT/Cable
Up
Speaks:
“Up”
SAT/Cable
Down
Speaks:
“Down”
P-
Dn
Up
SAT/Cable
Ch Page Up
Speaks:
“P-up”
SAT/Cable
Ch Page Down
PDn
Info Sel View Esc
SAT/Cable
Info
Speaks:
“I”
SAT/Cable
Select
Speaks:
“Select”
SAT/Cable
View
Speaks:
“Auxillary”
Speaks:
“P-down”
SAT/Cable
Cancel
Speaks:
“Goodbye”
SAT Power
Power Button
Speaks:
“Power”
Figure 4. Flowchart of the Cable Box (Dish Net Satellite / Cable Box) Menu Continued
Speaks: “F”
F1 F2 F3 F4 F5 F6 F7 F8 F9 F10 M
SAT F-Keys
1
Speaks:
“1”
SAT F-Keys
2
Speaks:
“2”
SAT F-Keys
3
Speaks:
“3”
SAT F-Keys
4
Speaks:
“4”
SAT F-Keys
5
Speaks:
“5”
SAT F-Keys6SAT F-Keys
Speaks:
“6”
SAT F-Keys7SAT F-Keys9SAT F-Keys
Speaks:
“7”
8
Speaks:
“8”
Speaks:
“9”
SAT F-Keys
Speaks:
“10”
M
Speaks:
“M”
10
25
Page 9
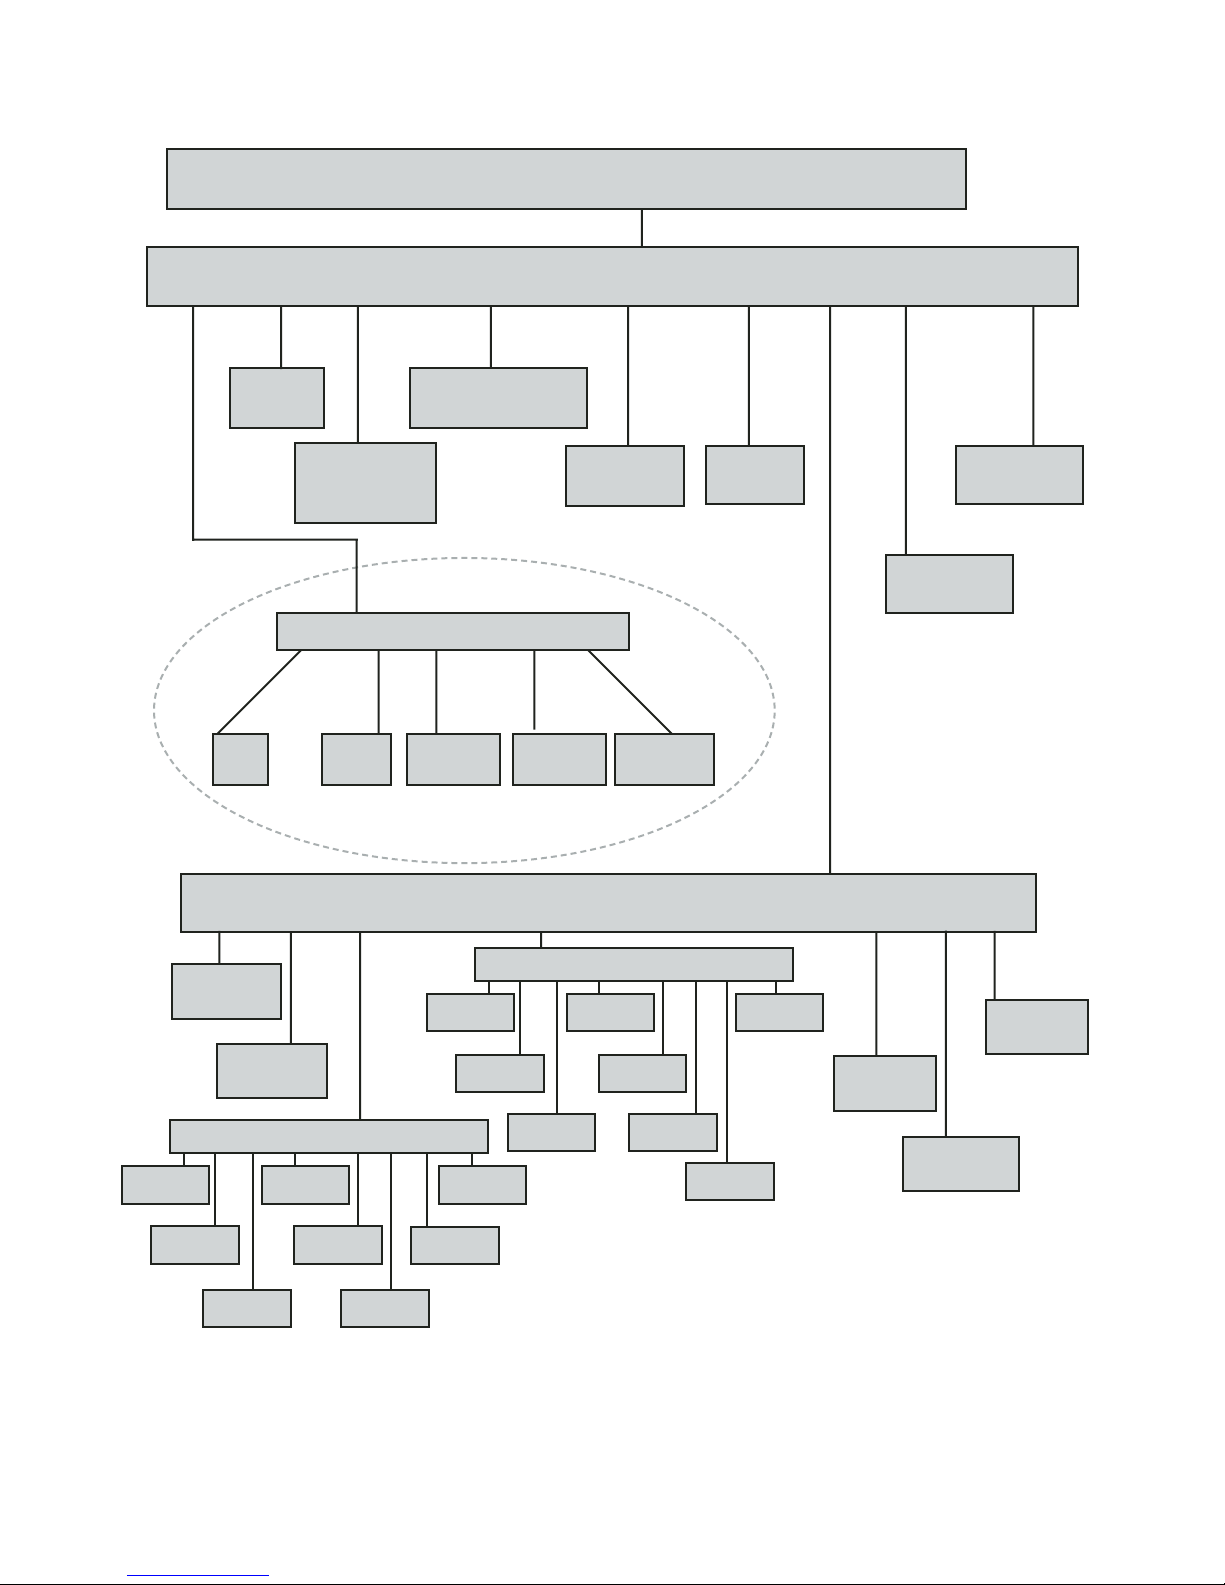
DVD Control Dish Net Satellite / Cable Box Control
Remote Control
dvd
DVD
Vol
Play For Rew trk Stop Menu F pwr
DVD
Play / Pause
DVD
Mute
DVD
Rew / Pause / Play / Pause
DVD
Fast Forward /
Pause / Play / Pause
Mute Vol+ Vol- TV Amp
Speaks:
“Increase”
DVD
Vol Up
Speaks:
“Increase”
Speaks:
“Decrease”
DVD Vol
Vol Down
Speaks:
“Decrease”
DVD
+10, 1, 2, … 10
DVD
TV Select
Speaks:
“Select”
Speaks:
“Tuner”
DVD
Amp Select
Speaks:
“Tuner”
Speaks:
“F”
DVD Stop DVD
On / Off / Standby
DVD F-keys
F1 … F10, M1
Speaks:
“1-10, M”
Speaks:
“Control”
DVD Menu
Menu Button
DVD MENU
Left
DVD MENU
Right
26
menu ch lr up info ent esc
SAT Channel
lr
DVD MENU
Day Back
daybkday
rt
DVD MENU
Day Forward
info view
DVD MENU
Info
DVD MENU
Select
DVD MENU
Up
sel
DVD MENU
Cancel
Speaks: “Goodbye”
DVD MENU
View
Speaks: “Auxillary”
up dn pup pdn
DVD MENU
Down
DVD MENU
Page Up
esc
DVD MENU
Page Down
info view
DVD MENU
Info
Speaks: “I”
DVD MENU
Select
sel
DVD MENU
View
Speaks: “Auxillary”
esc
DVD MENU
Cancel
Speaks:
“Goodbye”
DVD Menu
Info
DVD Menu
Select
Speaks:
“Select”
Figure 5. Flowchart of the DVD Menu
DVD Menu
Cancel
Speaks:
“Goodbye”
Page 10
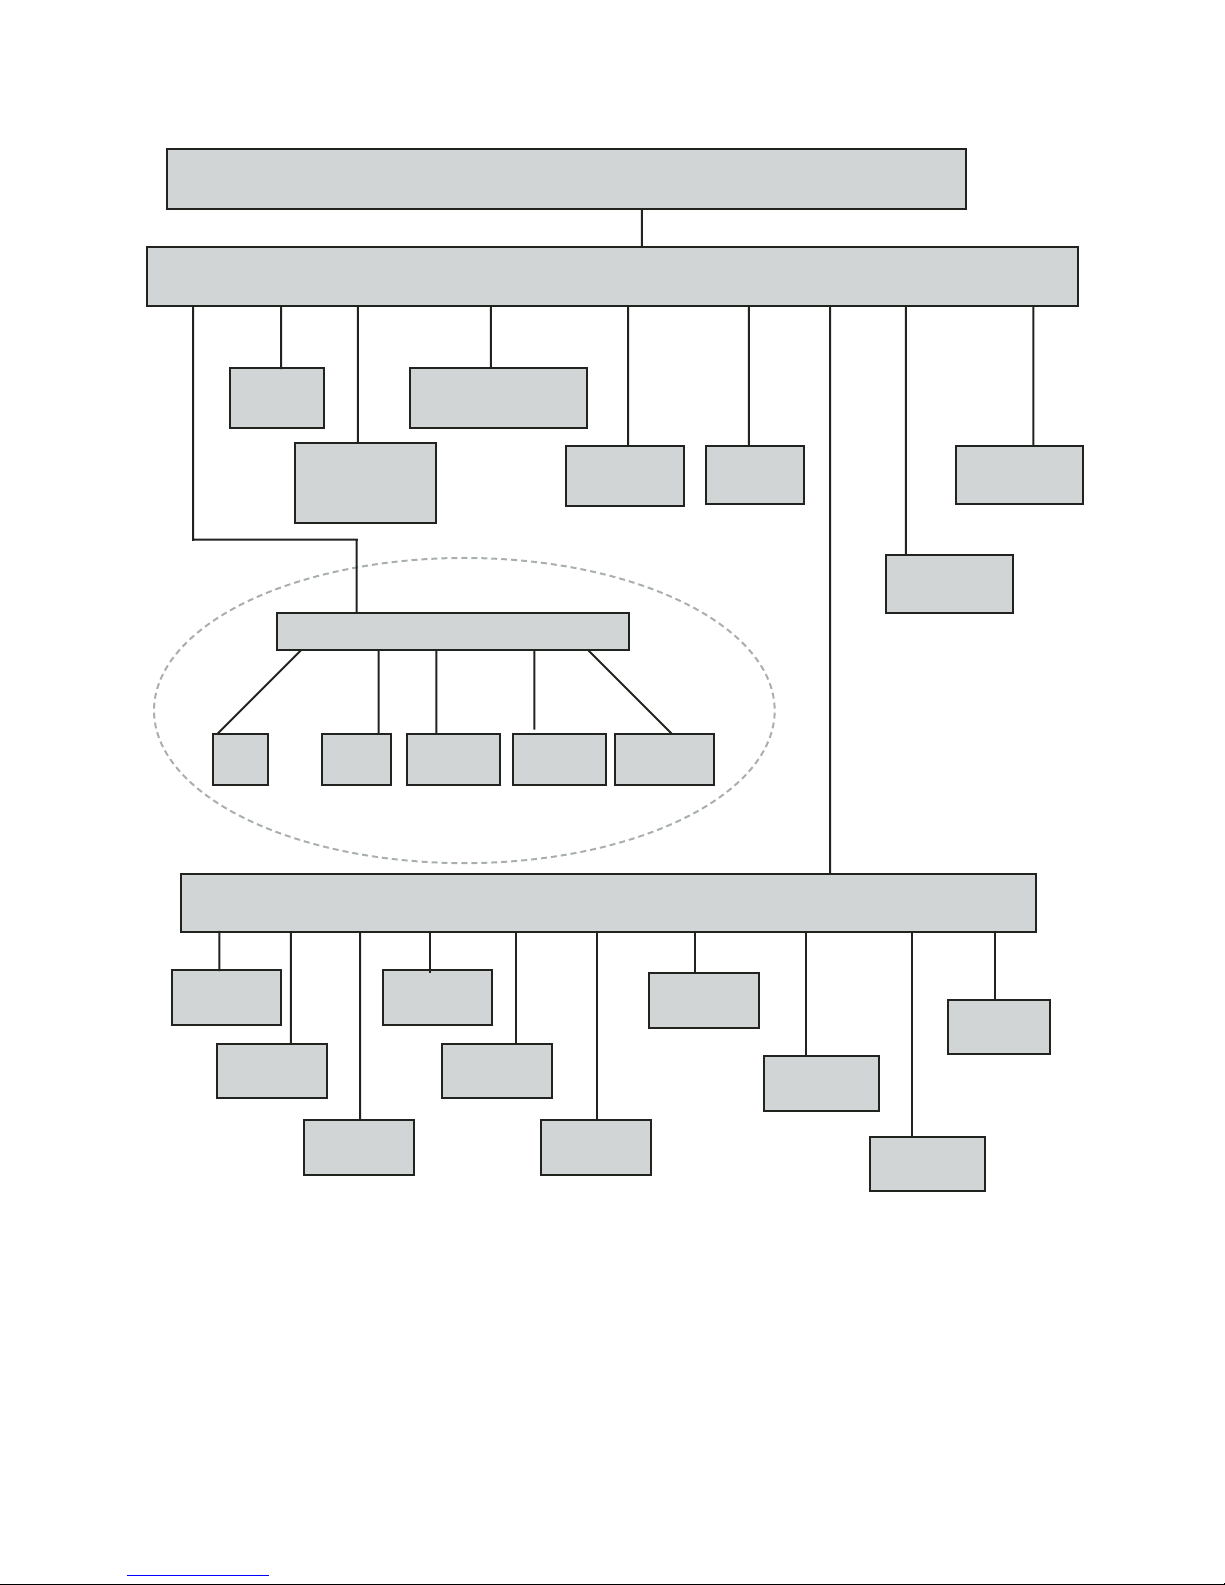
DVD Control Non Dish Net Satellite Control
Remote Control
dvd
DVD
Vol
Play For Rew trk Stop Gd F pwr
DVD
Play / Pause
DVD
Mute
DVD
Rew / Stop / Play / Stop
DVD
Fast Forward /
Stop / Play / Stop
Mute Vol+ Vol- TV Amp
Speaks:
“Increase”
DVD
Vol Up
Speaks:
“Increase”
Speaks:
“Decrease”
DVD Vol
Vol Down
Speaks:
“Decrease”
DVD
+10, 1, 2, … 10
DVD
TV Select
Speaks:
“Select”
Speaks:
“Tuner”
DVD
Amp Select
Speaks:
“Tuner”
Speaks:
“F”
DVD Stop DVD
On / Off / Standby
DVD F-keys
F1 … F10, M1
Speaks:
“1-10, M”
Speaks:
“Control”
Ent Ch Up Down Rt Lt Inf ESC Gd Pvr
Speaks:
“Check”
DVD Menu
Enter
SAT Channel
001-999
DVD Menu
Ch Up
DVD Menu
Ch Down
DVD Menu
Guide right
Speaks: “Increase”
Speaks:
“Increase”
DVD Menu
Guide left
Speaks: “Decrease”
Speaks:
“Decrease”
DVD Menu
Guide Info
Speaks: “I”
Speaks:
“Previous”
DVD Menu
Guide Cancel
Speaks: “I”
Speaks:
“Control”
DVD Menu
Guide Button
Speaks:
“Enter”
Figure 6. Flowchart of the DVD (Non Dish Net Satellite Control) Menu
Speaks:
DVD Menu
Pvr Button
Speaks:
“Enter”
“P”
27
Page 11

DVD Function - When “DVD” is selected from the IR Menu, “vol,” “play,” “for,” “rew,” “trk,”
“stop,” “Gd,” “F,” and “pwr” are displayed. (See Figure 5 and 6.)
1. Press (>) to begin scanning. Press (>) again to select the desired function.
2. Select “vol” to increase, decrease or mute the DVD volume.
3. Select “play” to play or pause the player.
4. Select “for” to move forward from the current track.
5. Select “rew” to select a previous track.
6. Select “trk” to enter a specific track number.
7. Select “stop” to stop the player.
8. Select “Gd” to select guide.
9. Select “F” to access programmable functions.
10. Select “pwr” to turn the DVD player on or off.
28
Page 12
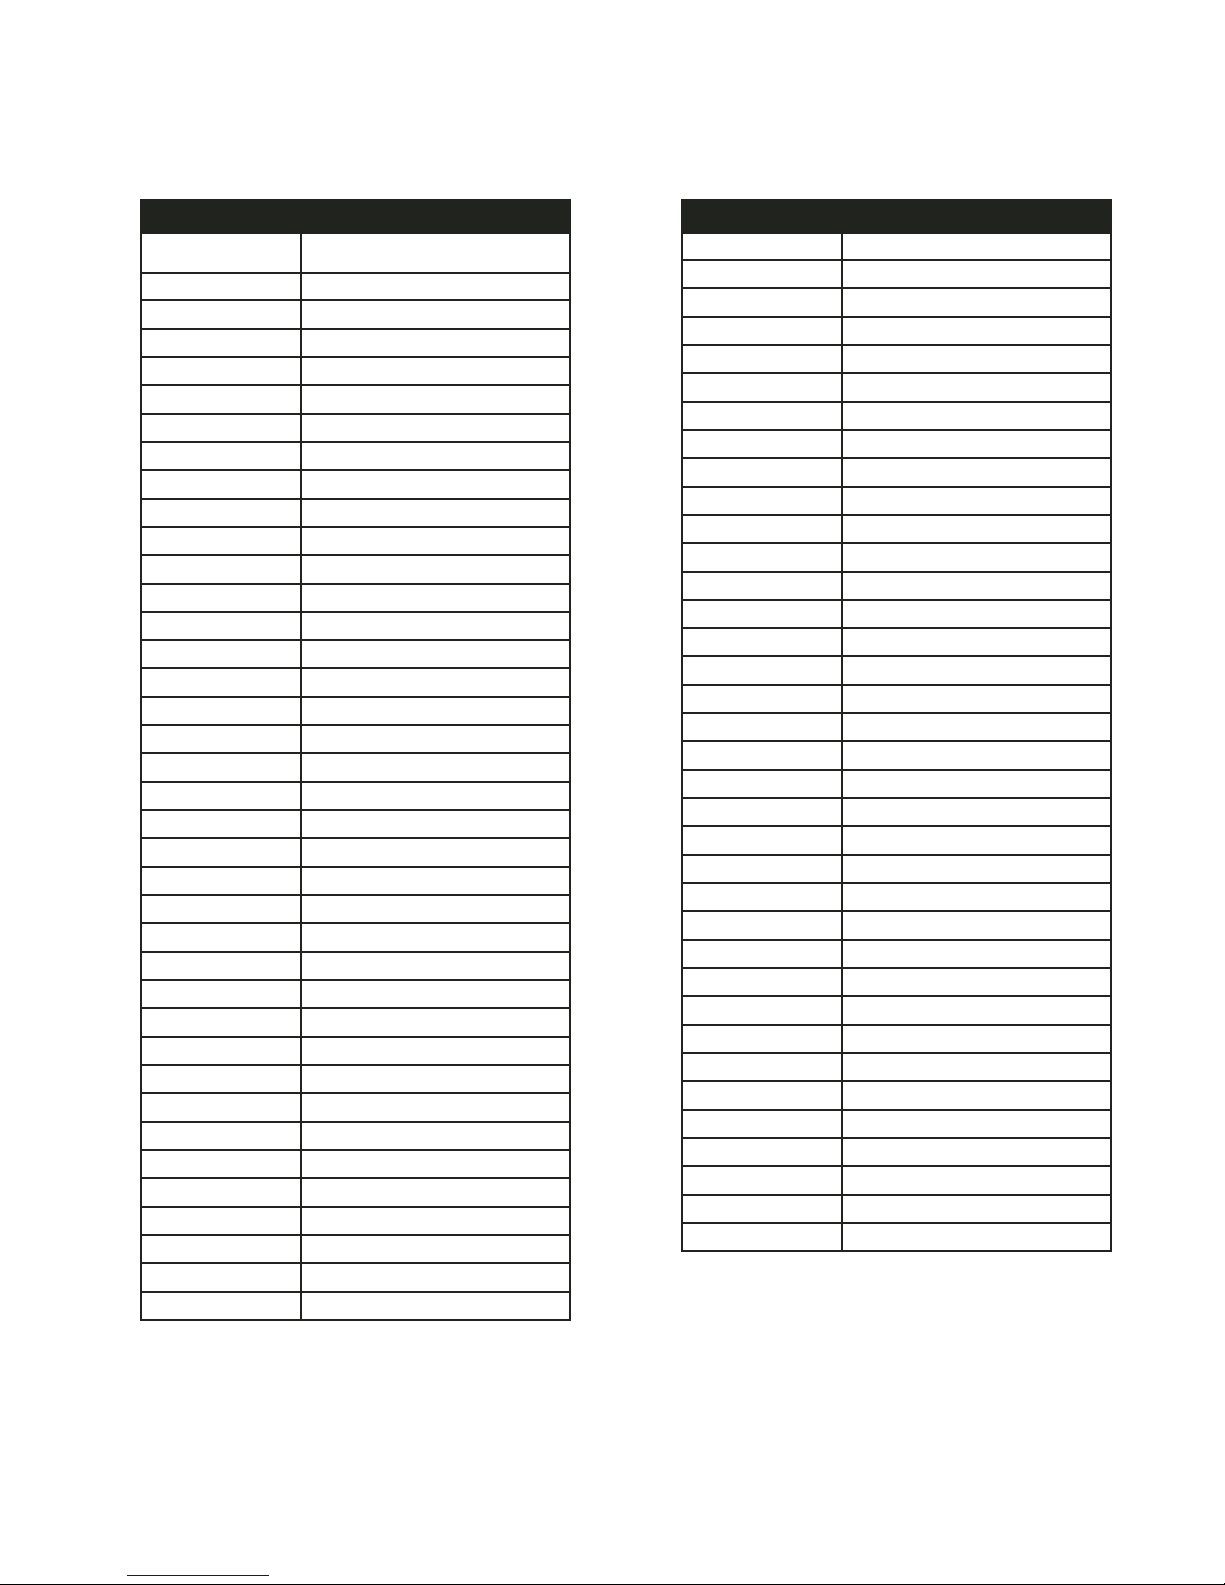
Dish Net Satellite Cable Box
Dish Net Satellite
Control Device Code 376
DISH Net (Device code 376)
Scan Code Remote Key Name
00
11
22
33
44
55
66
77
88
99
10 VIEW
11 SELECT
12 RIGHT
13 LEFT
14 UP
15 DOWN
16 BACK(REW)
17 PLAY
18 RWD(FF)
19 REC
20 STOP
21 PAUSE
22 POWER
23 RECALL
24 TV/VIDEO
25 MENU
26 GUIDE
27 INFO
28 CANCEL
29 SKIP_BACK_10_SEC
30 SKIP_FWD_#)_SEC
31 *
32 #
33 PAGE_UP
34 PAGE_DOWN
35 PVR
36 SAT
Motorola Digital Cable 377
Non Dish Net Motorola Digital Cable (377)
00
11
22
33
44
55
66
77
88
99
10 (Enter) Enter
11 (Mute) Mute
12 (Vol+) Vol +
13 (Vol-) Vol 14 (Ch+) Ch+
15 (Ch-) Ch16 (Rew) Left
17 (Play) Up
18 (FF) Right
19 (Rec) Rec
20 (Stop) Stop
21 (Pause) Down
22 (Power) Power
23 (RCL) Last
24 (TV/VCR) TV/VCR
25 (F1) Fav
26 (F2) Lock
27 (F3) Exit
28 (F4) Info
29 (F5) Guide
30 (F6) Menu
31 (F7) Page_up
32 (F8) Page_dn
33 (F9) Day_back
34 (F10) Day_forward
35 (M1) Help
29
Page 13
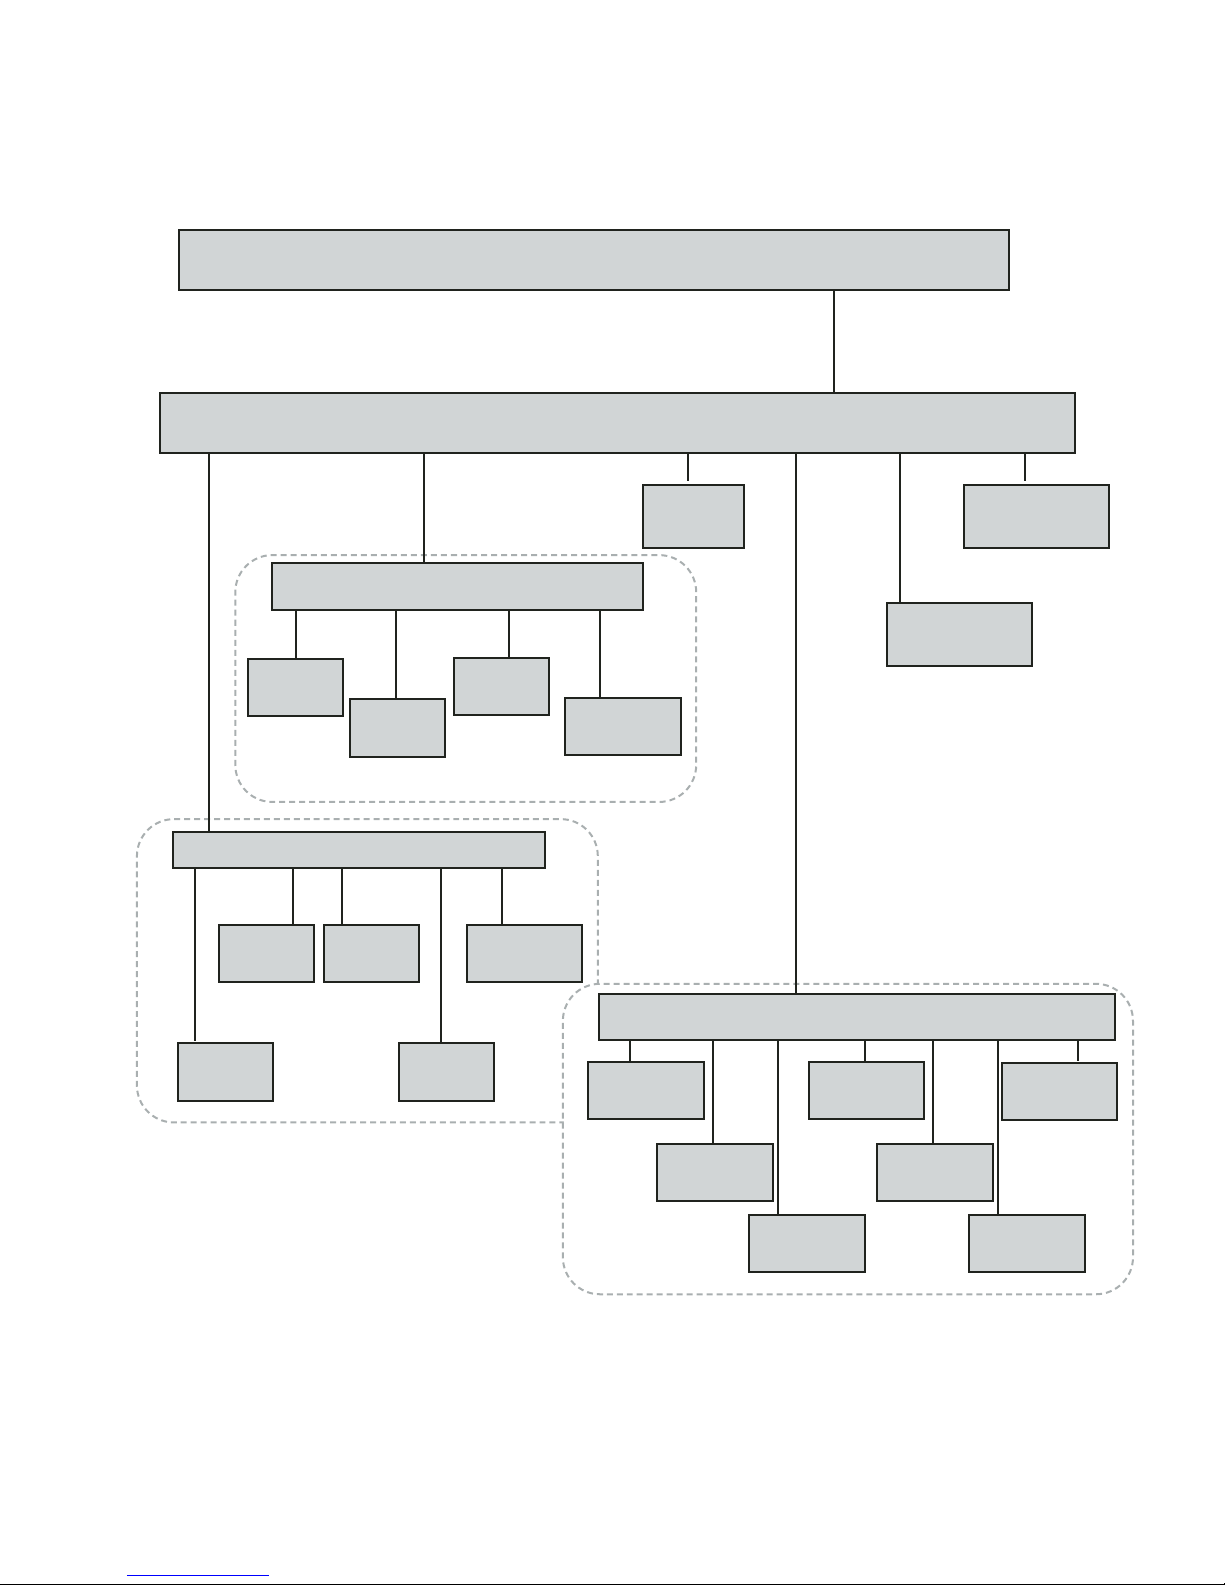
Amplifier / Radio Control
Remote Control
Amp
vol ch mute mode F pwr
radio
Amp Channel
Ch+
Speaks:
“Up”
Amp Ch
Ch Up
Speaks:
“Up”
Ch- Rcl Set
Speaks:
“Down”
Amp Ch
Amp Ch
Ch Down
Speaks:
“Down”
Ch Rcl
Speaks:
“Previous”
MUTE Vol+ Vol- TV Amp
Speaks:
“Increase”
Amp Vol
Vol Up
Speaks:
“Increase”
Amp Vol
Vol Mute
Speaks:
“Decrease”
Amp Vol
Vol Down
Speaks:
“Decrease”
Amp Vol
TV Select
Amp Vol
Amp Select
Speaks:
“Tuner”
Speaks:
“Previous”
Speaks:
“Tuner”
Amp
Vol Mute
Speaks:
“Enter”
Amp Ch
+10, 1 … 10
FM AM CD Tape
Amp Function
FM Mode
DVD F-keys
F1 … F10, M1
AMP Function
Amp Function
Tape
Amp
On / Off / Standby
Speaks:
“F”
Speaks:
“F”
VCR DVD Video
Amp Function
Vid
Figure 7. Flowchart of the Radio Menu
30
Amp Function
AM Mode
Amp Function
CD Mode
Amp Function
Vid / Aux
Amp Function
DVD
Speaks:
“Auxiliary”
Page 14
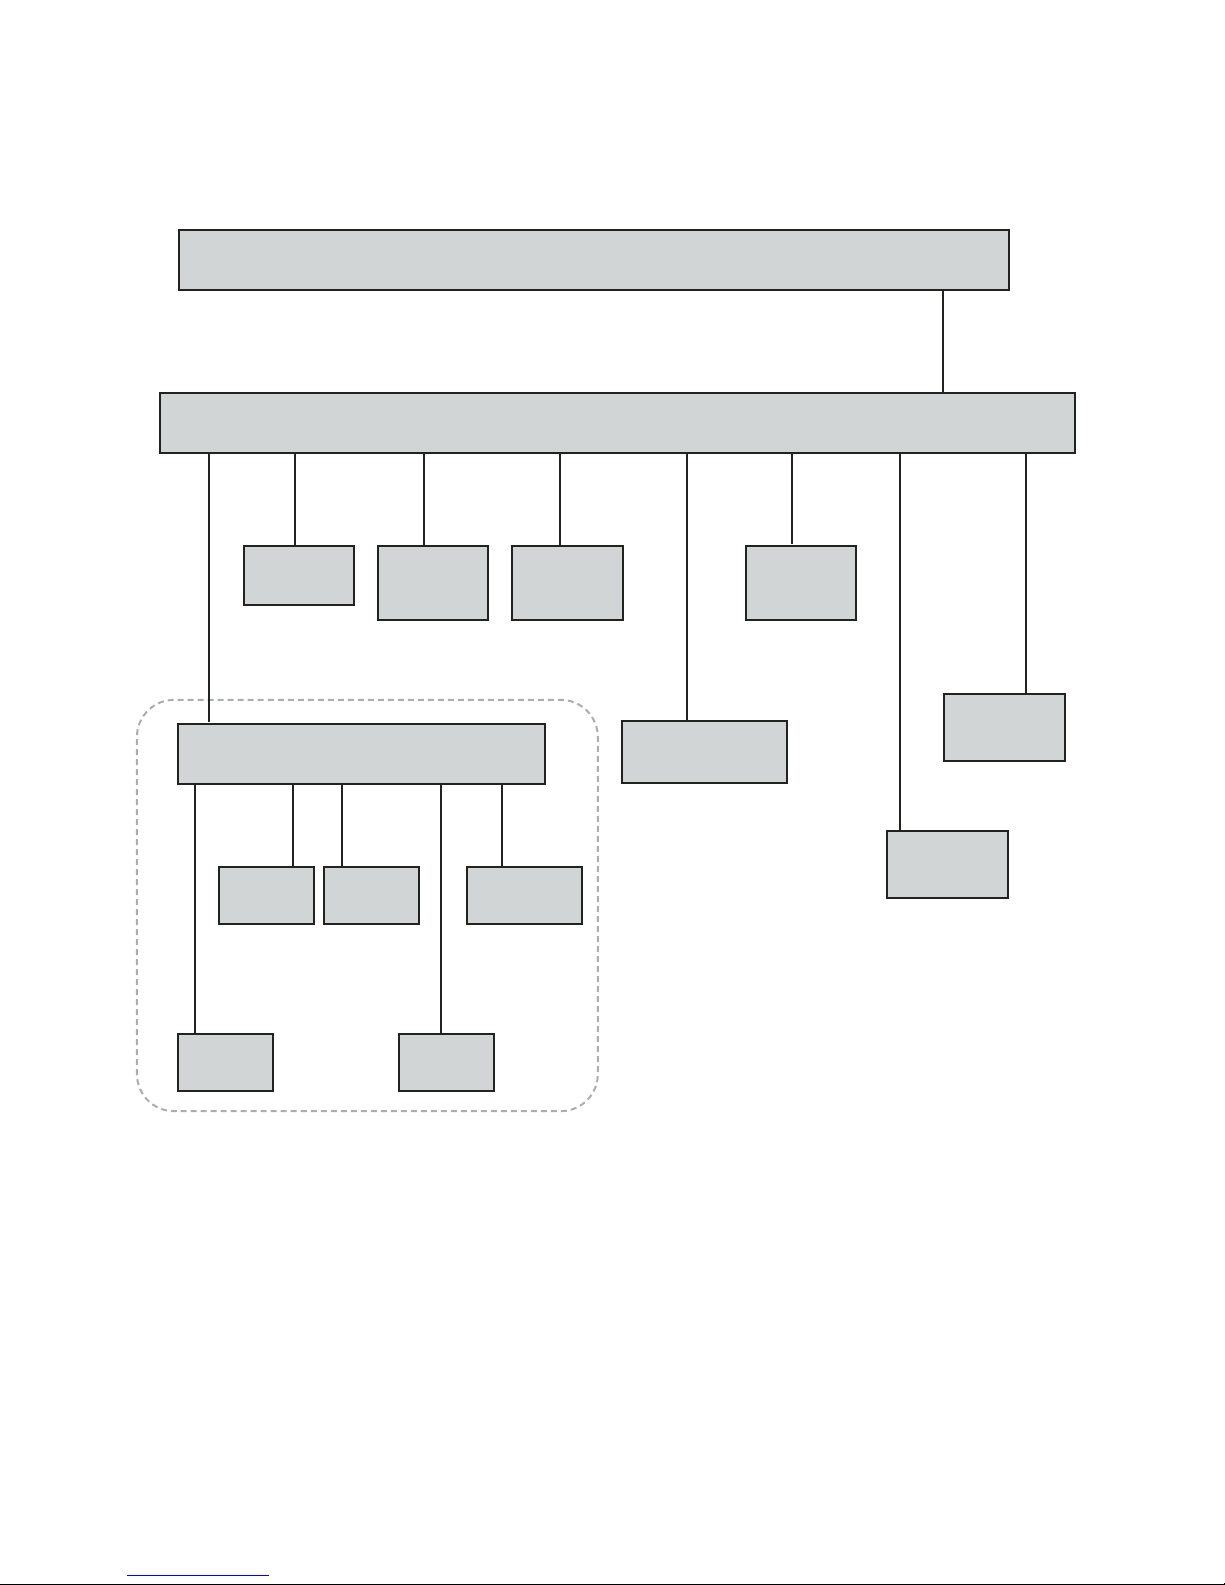
CD Player Control
Remote Control
CD Player
vol play for rew trk stop F pwr
cd
Speaks:
“F”
CD Player
Play / Pause
CD Player
Fast Forward /
Play
CD Volume
MUTE Vol+ Vol- TV Amp
Speaks:
“Increase”
CD Vol
Vol Up
Speaks:
“Increase”
CD Vol
Vol Mute
Speaks:
“Decrease”
CD Vol
Vol Down
Speaks:
“Decrease”
CD Vol
TV Select
CD Vol
Amp Select
Speaks:
“Tuner”
CD Player
Rew / Pause /
Play
Speaks:
“Tuner”
CD Player
Stop
CD Player
+10 1 2 3 4 5 6 7 8 9 10
CD Player
On / Off / Standby
CD F-keys
F1 … F10, M1
Speaks:
“1-10, M”
32
Figure 8. Flowchart of the CD Menu
Page 15

Table of Contents
Section Title Page
1 Imperium Remote Control Operation 3
Description 3
Device Buttons 3
Programming Guide 4
Learning Codes from Existing Remote Controls 5
2 Device Codes 9
TV Device Codes 9
VCR Device Codes 12
Cable Box Device Codes 14
DSS Receiver Device Codes 16
DVD Player Device Codes 16
3 Imperium 200H User Manual “IR Function” Section 17
TV Function 18
VCR Function 20
Non Dish Net Satellite / Control 22
Dish Net Satellite Cable Box Function 24
DVD Control Dish Net Satellite / Cable Box 26
DVD Control Non Dish Net Satellite 27
Radio Function 30
CD Function 32
4 Upgrading from the ONE FOR ALL SIX Remote Control 33
November, 2004
Service 1-800-944-8002 Sales 1-800-463-5685
www.tashinc.com [email protected]
2
Page 16
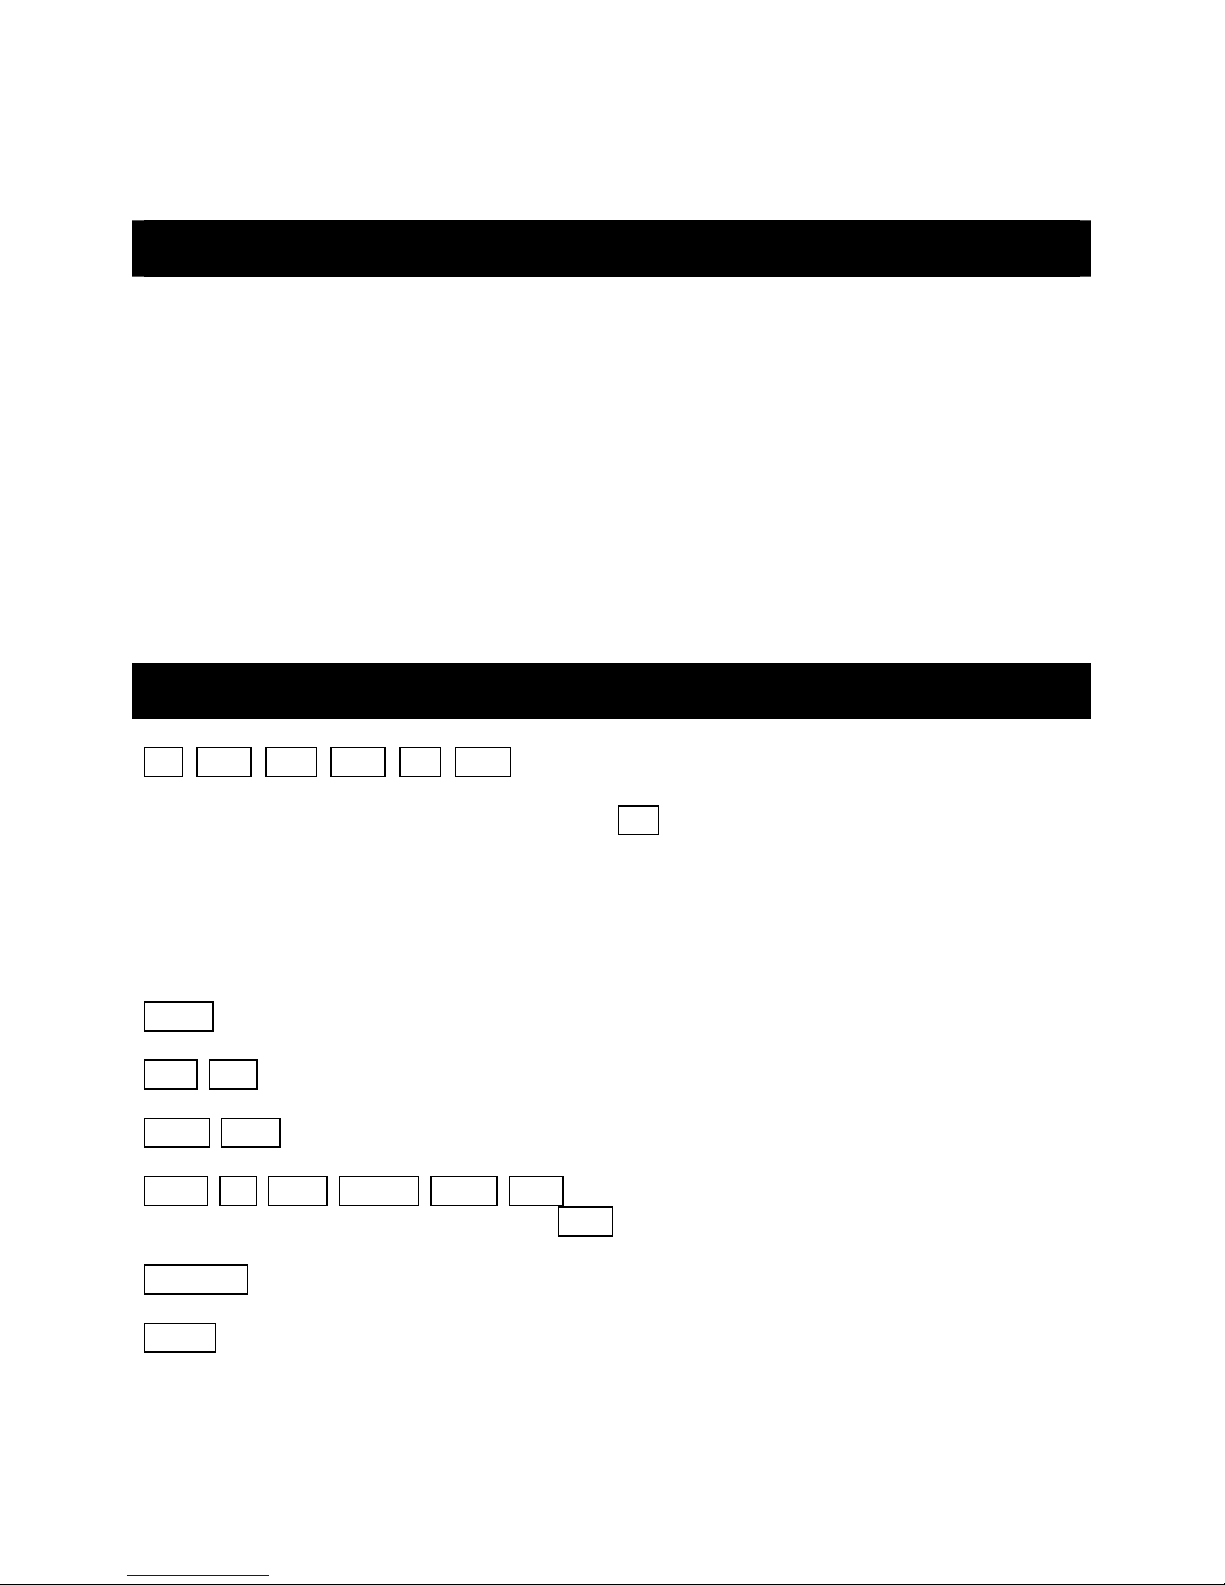
Imperium Infrared Remote Control Operation
DESCRIPTION
The Imperium Infrared Remote Control combines the convenience of a conventional universal
remote control with the power and expandabiity of a “learning” remote control.
The remote control codes for most popular TVs, VCRs, Cable Boxes, DSS receivers and DVD
players are pre-programmed into the Imperium Remote Control. In the event that your particular
entertainment device is not directly supported, or if your remote control has additional buttons
not already provided on the remote control, you can individually train these buttons into the
Imperium remote control from your device’s existing remote control.
(NOTE: This document refers only to the Imperium Infrared Remote Control. Users of the OneFor-All Six Infrared Remote Control originally included with the Imperium 200H system should
refer to the separate user manual and code book for that remote control.)
DEVICE BUTTONS
TV VCR SAT DVD CD AMP These buttons are used to select the device to control.
For example, the [SAT] button switches the remote to satellite mode and the remote control
functions then control the satellite box. Pressing TV switches the remote to TV mode.
Some controls may function even when their normal device is not selected (punch-through
mode). For example, when in cable box mode, the volume controls may still work with the
television, and the VCR controls may still control the VCR. The availability of this feature
depends upon what type of TV, VCR, and cable box you are using.
Power This button is used to turn the TV, VCR, or cable box on or off.
CH+ CH- Channel Up / Channel Down
VOL+ VOL- Raise or lower the volume.
PLAY FF REW PAUSE STOP REC VCR Play, Fast Forward, Rewind, Pause, and Stop
operate as conventional VCR controls, but REC must be pressed twice to start recording.
TV/VCR Toggles between TV and VCR functions.
MUTE This button turns muting on and off.
3
Page 17
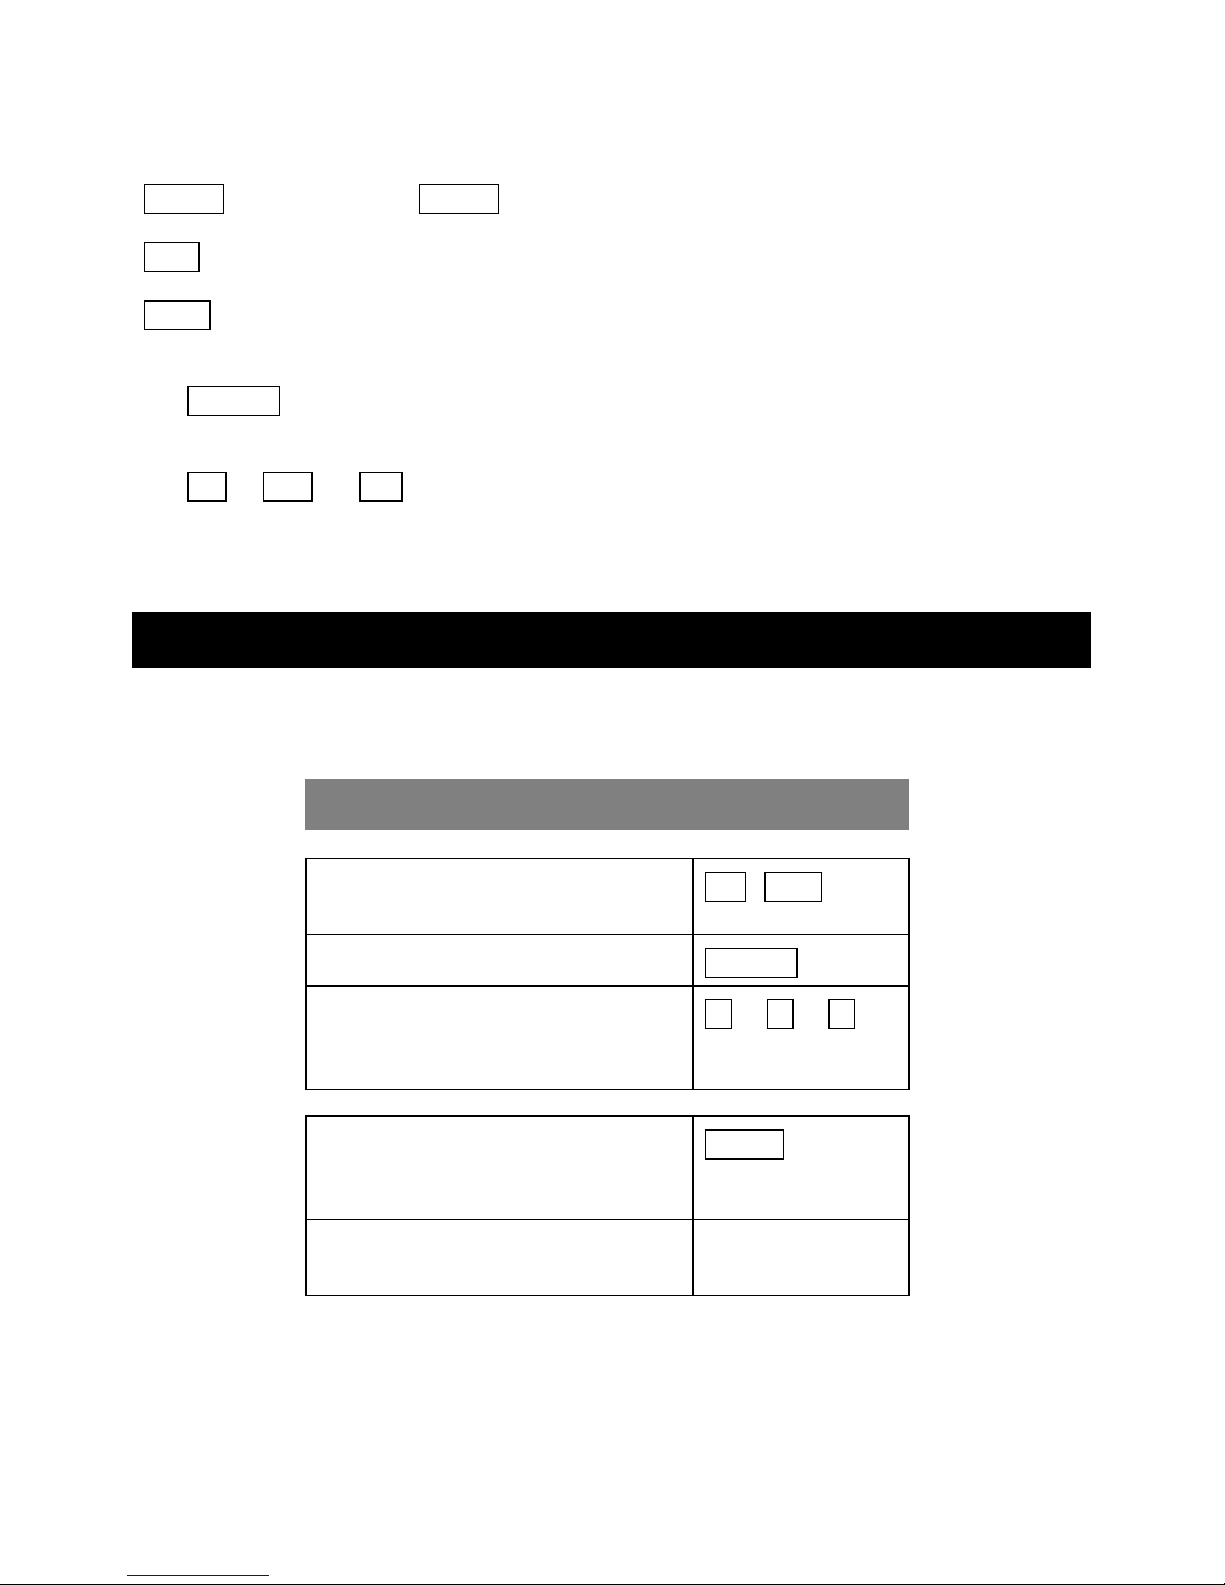
Numeric Pad: The numbers on this pad control channel settings on TVs, VCRs, satellite and
cable boxes. May also be used to learn other functions if desired (see “Learning Codes. Page 5.”)
ENTER Some TVs require ENTER be pressed when changing channels with the numeric pad.
RCL Returns to the previous channel selected on TVs which support this function.
Learn Used for learning infrared (IR) signals from other remote controls. See “Learning
Codes. Page 5.”
The SELECT button is used for programming the remote to work with your specific TV, VCR,
and cable box. Programming the remote is described later in this manual.
The F1 … F10 and M1 buttons may be used to Learn additional functions for your
entertainment device. See “Learning Codes. Page 5.”
PROGRAMMING GUIDE
Use this guide to select remote control codes from the internal “library.” These codes are listed
in the “Device Codes” section beginning on page 9.
QUICK PROGRAMMING GUIDE
Press the device button for the device
TV , VCR etc. 5
you wish to program (1 flash)
Press the Select button (2 flashes)
Input the corresponding code from
SELECT 55
1 5 2 5 3 5
the code list. (Flashes once for each
digit pressed)
When you have entered the correct
code, press SELECT. (3 flashes)
SELECT
555
Repeat steps 1-4 for each device
(TV, VCR, etc.)
4
Page 18
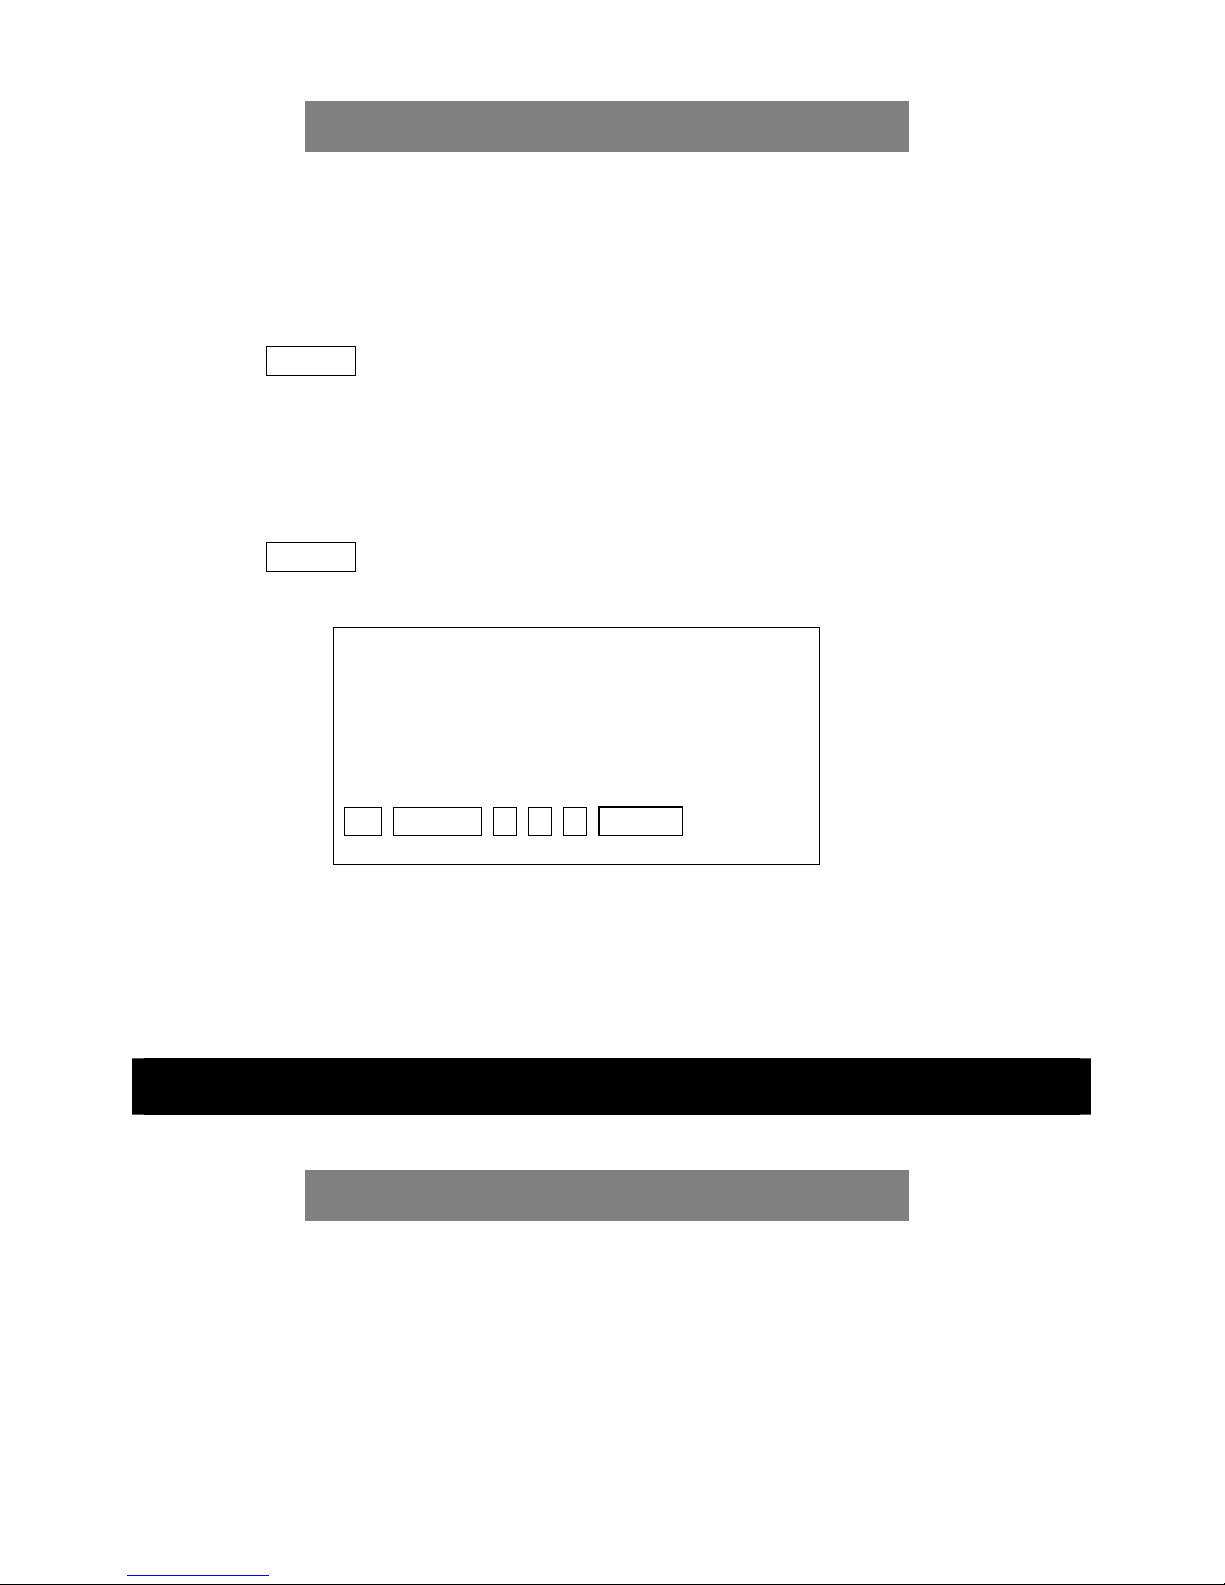
DETAILED PROGRAMMING GUIDE
To program a device:
1. Select the device you wish to program by pressing the device key (TV, VCR, Cable). For
instance to program the VCR, press the VCR device button. The light on the remote will flash
once.
2. Press the SELECT button. The light will flash twice.
3. Find the correct code from the “Device Code” list that follows (page 9). If a brand has more
than one code, the first codes in the list are the latest models.
4. Enter the correct code on the number pad. The light will flash once for each key pressed.
5. Press the SELECT button again to lock in the code. The light should flash 3 times, and
programming is finished.
For example, to program a Sony TV:
First, find the Sony codes in the code list.
Then, try the first (latest model) code. Press:
TV SELECT 3 7 3 SELECT
When finished, try to operate the TV with the remote. If the remote works with the TV, the
programming for the TV is finished. If the remote does not work, try the next code: 170, and soon, until the correct code is found. If you cannot find the correct code, refer to the Auto Search
feature.
LEARNING CODES FROM EXISTING REMOTE CONTROLS
LEARNING CODES
If the Imperium Remote Control does not already have the proper device code for your
entertainment device, you may “learn” an individual function\button from the existing remote
control. Similarly, if the Imperium Remote Control does control your device, but the original
5
Page 19
remote has additional functions
not available on the Imperium remote, you may use the Learning
feature to add these individual functions to the F1 – F10 and M1 keys.
NOTE: When training individual functions into the Imperium IR F-keys, you must now
follow the F-key menu to control the additional functions.
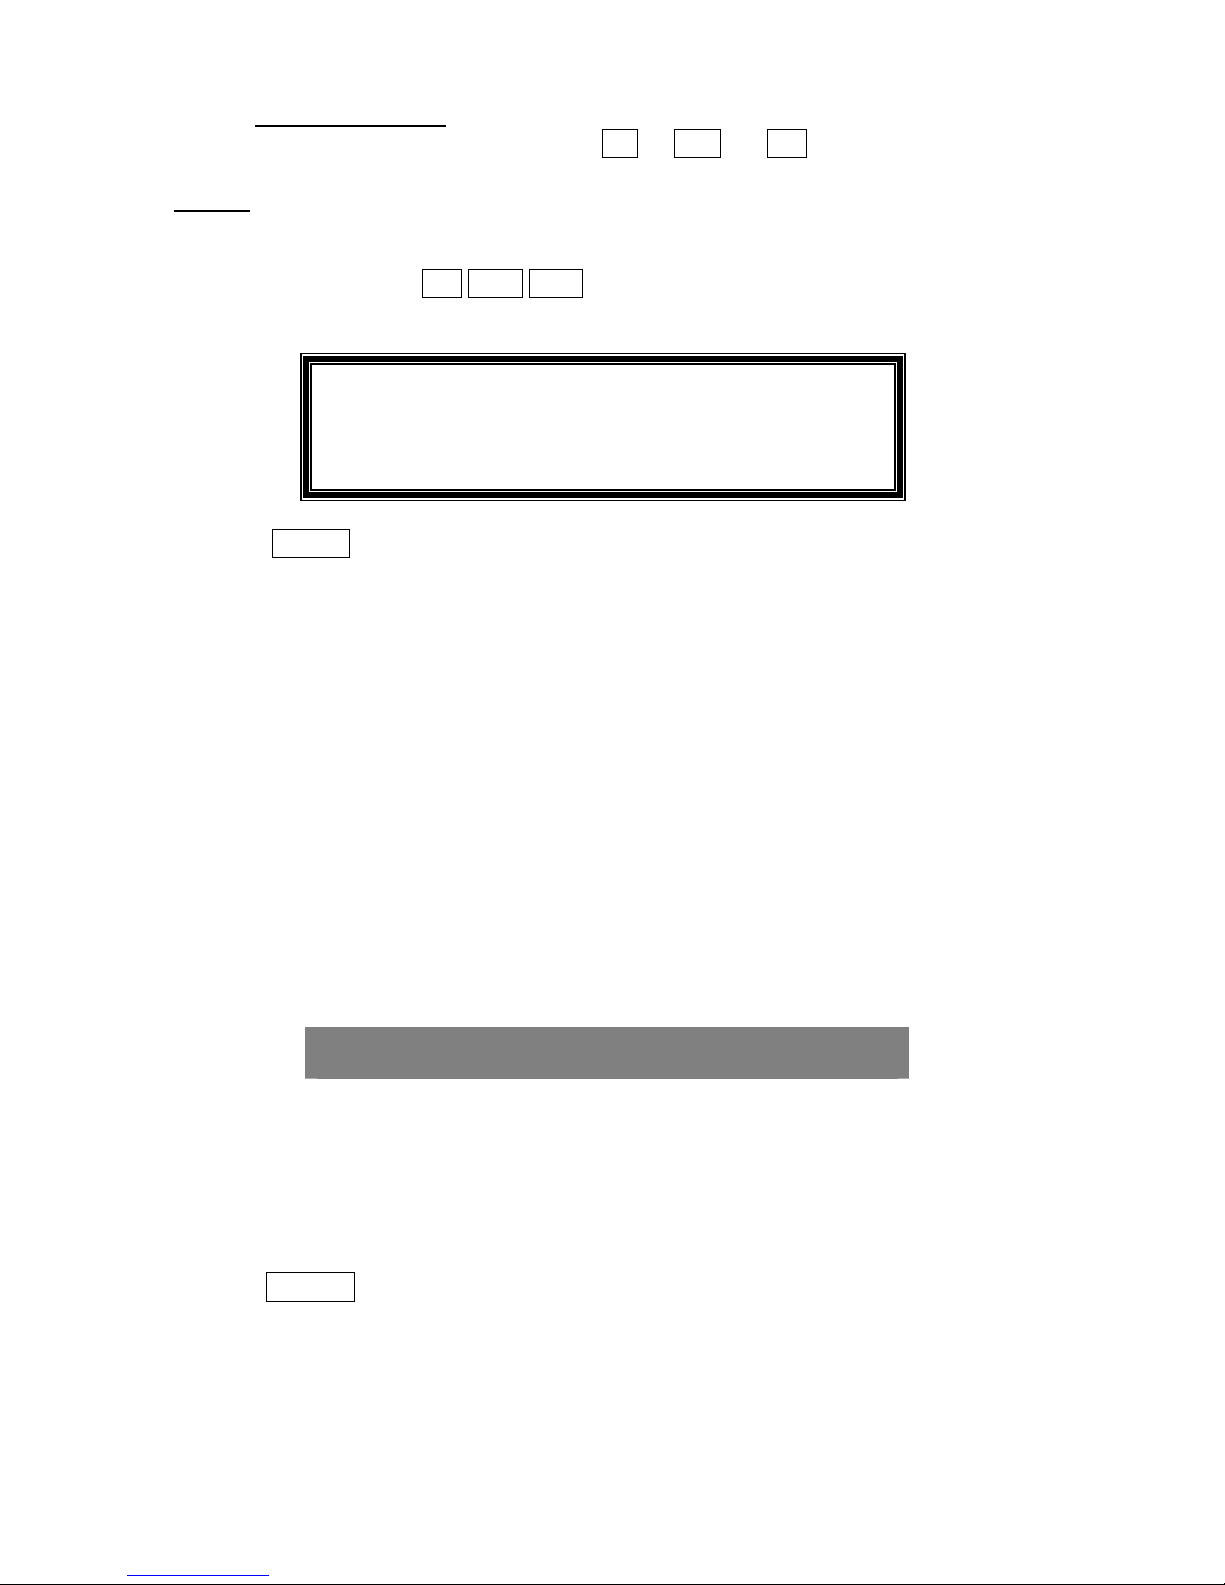
1. Press the device button ( TV VCR SAT , etc.) for which you wish to store the learned
codes. (1 flash)
Make sure you press the proper device button before you
proceed to the next step, so that you do not overwrite existing
codes that you wish to retain.
2. Press the LEARN button. The LED will now illuminate orange.
3. Now press the button on which you wish to store the learned data. The LED will now
change to red.
4. Next, point your hand-held remote at the red lens on the front of the Imperium remote
control. Now, press the desired function on your remote. In general, best results are obtained
when the remote controls are 1’’ – 3’’ apart. When the code is successfully learned, the LED
will go out. If the LED flashes green twice, there was an error and the process needs to be
repeated.
Repeat steps 2-4 to learn addition buttons for the current source.
Note: Some OEM remote controls have multiple infrared emitters. It is important to have a
direct line between the infrared emitter on the OEM remote and the IR input sensor on the
Imperium remote control.
ERASING LEARNED BUTTONS
Learned functions are associated with the selected source (TV, VCR etc.) not the device number.
To erase learned functions for a specific device (TV, VCR etc.):
1. Select the device you wish to reprogram with a device key (TV, VCR, Cable). For instance to
erase the learned buttons associated with the VCR, press the VCR device button. The light on
the remote will flash once.
2. Press the SELECT button. The light will flash twice.
3. Select a device code from the code list and enter the code on the number pad. The light will
flash once for each key pressed.
6
Page 20

4. Press the SELECT button again to lock in the code. The light should flash 3 times. The VCR
function will now operate per the selected device code without any learned buttons. Individual
buttons cannot be erased.
SPECIAL FEATURES
The Imperium Remote Control has a number of special features:
Punch Through
Punch Through allows TVs, VCRs, and cable box controls to work at the same time. For
example, after you press the SAT or VCR button, the volume controls would still work with the
television. Other functions may also work this way. Availability of this feature varies depending
on the type of TV, VCR, and cable box you are using.
Read Back Programmed Code
The remote control can read back the codes selected for TV, VCR, and cable box so you can
write them down for future reference. To do this:
1. Press the device key for which you want the code read back. For example, if you want to get
the code for your TV, press the TV key.
2. Press SELECT . The light should flash twice.
3. Press 1 and then SELECT . The light will flash the number of the first digit of the code. For
instance, if the TV’s code is 567, the light will flash five times. If a digit of the code is zero,
the light will not flash.
4. Repeat steps 2 & 3 to get the second and third digits of the TV code, by pressing 2 and
SELECT for the second digit (for code “567,” the light flashes six times) and 3 and
SELECT for the third digit (light flashes seven times). This procedure can then be repeated
for the VCR and cable box.
Substitute Devices
You may “substitute” devices with your remote control. For example, if you have two
televisions, you may program the second television on another device button such as DVD. All
of the device buttons (TV, VCR, SAT, DVD, CD, AMP) can be programmed as a TV, VCR, or
cable box, etc. Note, however, that a second TV that is programmed to a different Imperium
200H menu device (i.e., DVD) may/will have device functions which do not exactly align with
the menu. To program a TV on the DVD device button:
7
Page 21
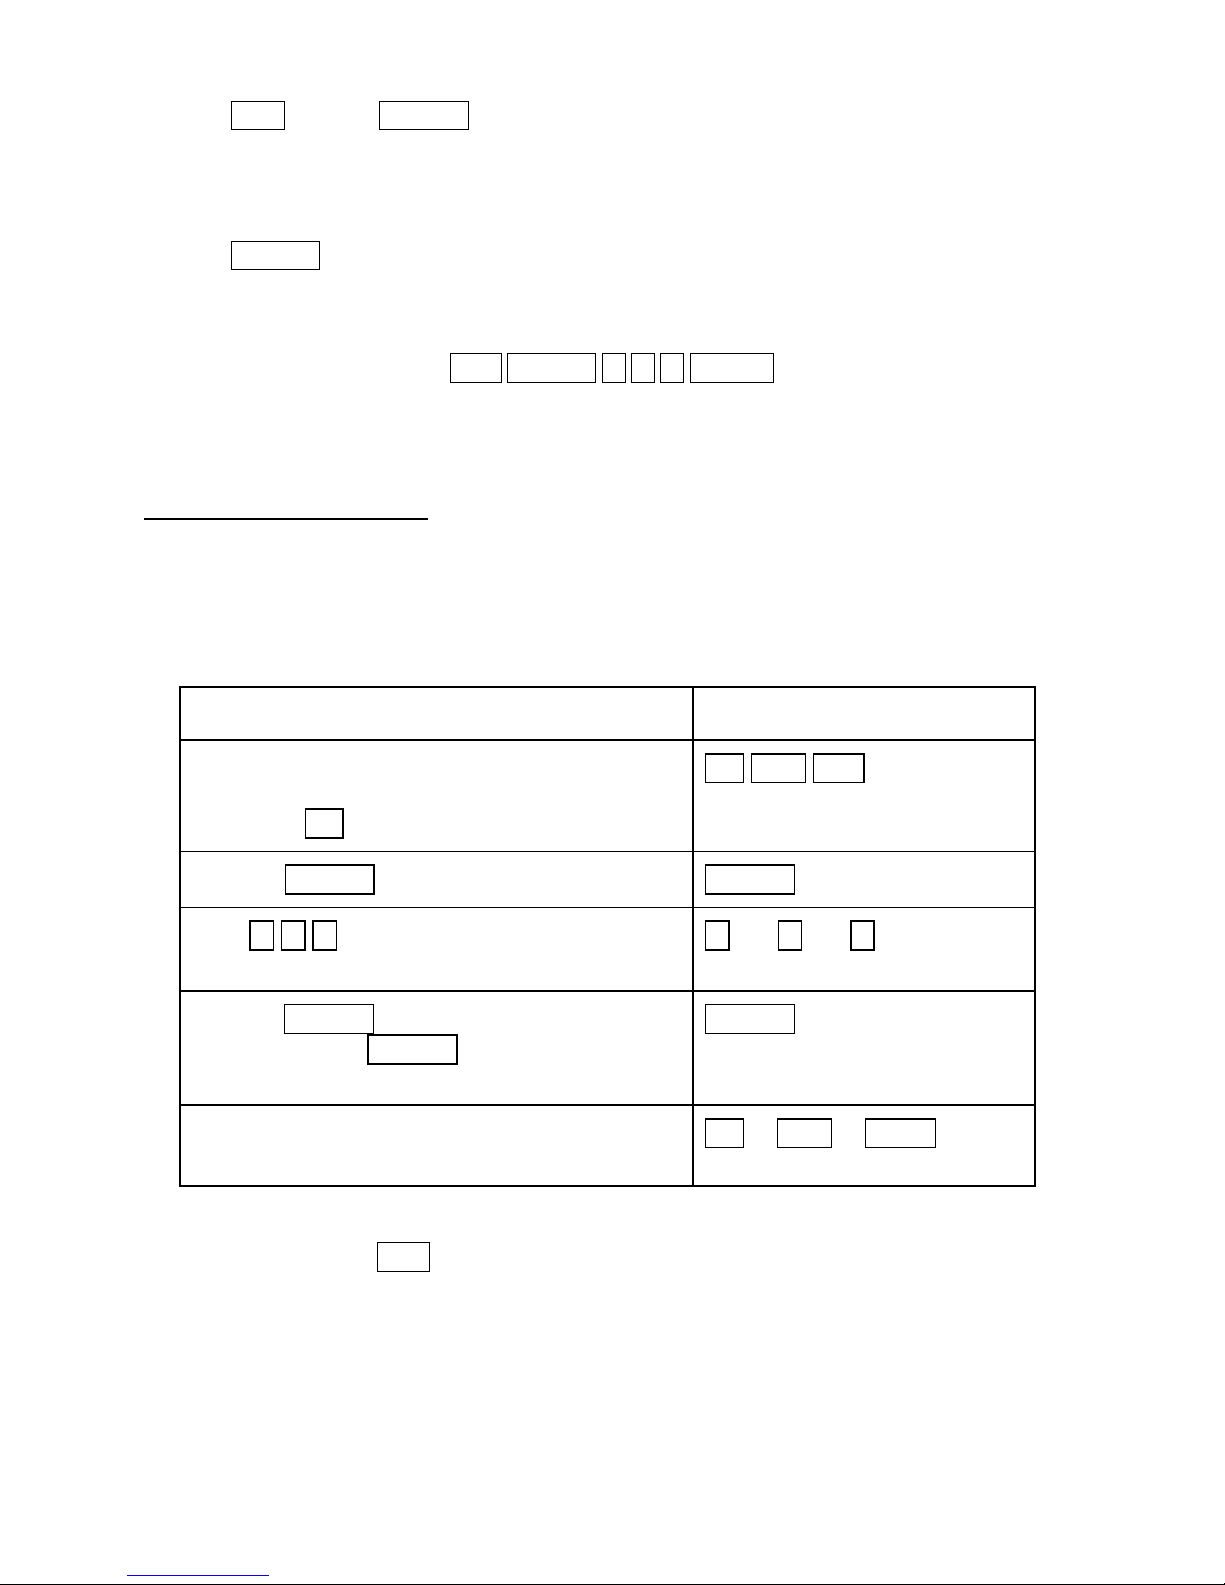
1. Press DVD and then SELECT . The light will flash twice.
2. Instead of entering a DVD code, enter the TV code for the desired TV. The light will flash
once for each digit.
3. Press SELECT and the light will flash 3 times. Now the DVD button will act as a second
TV. This works with all six devices, so it is possible to program up to six TV’s, VCR’s, etc.
For example, to program a Sony TV in the Satellite box button, press:
SAT SELECT 3 7 3 SELECT
Now the SAT button will act as a Sony TV.
Search For Correct Code
If you cannot locate a device code in the manual, and do not wish to “Learn” the code, you can
try cycling through the internal device code libraries to find the correct code for a TV, VCR etc.
It may exist.
Manually turn on the device.
Press the device key for the device code you want
TV VCR SAT , etc. 5
to search for. For example, to search for a TV
code, press TV once. (1 Flash)
Press the SELECT button once. (2 Flashes) SELECT 55
Press 0 0 0 (Flashes once for each digit
0 5 0 5 0 5
pressed)
Press the SELECT to change to the next device
SELECT 555
code. Every time SELECT is pressed, the device
code will increment.
Press the device key again to lock in the
TV or VCR or C/SAT 5
discovered code.
Note: Some devices, such as cable boxes, may not support power buttons on the remote. In this
case, you can substitute CH+ or any other supported button to test the code.
8
Page 22
DEVICE CODE LIBRARY
Following is a list of device codes to be used when programming the Imperium Remote
Control. Note that the first codes for an appliance brand are the latest models, and the
later codes are older models. You may have to try some or all of the codes for each
brand before you find a usable one.
TV Device Codes
TV Manufacturer TV Device Code
Admiral 133, 142, 025, 049, 078
Akai 071
Amark 263
Anam 049, 047
Anam National 138, 154
AOC 135, 146, 015, 014
Archer 263
Audiovox 263
Bell and Howell 078
Brooksonic 338
Candle 139, 014, 013, 023
Capehart 135
Carver 128
Centurion 001
Citizen 132, 014, 046, 013, 139, 048, 023
Concerto 139
Contec / Cony 163, 152, 049
Coronado 130, 132
Craig 154, 049
Crown 132
CTX 111
Curtis Mathes 132, 014, 046
CXC 049
Daewoo 309, 308, 306, 132, 015, 048, 067
Daytron 132
Emerson 338, 307, 171, 172, 160, 163, 152,132, 001, 025,
024, 010, 049
Envision 014
Fisher 153, 018
Fortress 142
Fujitsu 025
Funai 331, 049, 025
Futuretech 049
9
Page 23

GE 179, 172, 159, 137, 134, 138, 133, 011, 012, 038,
001
GE Combo 179
Goldstar 132, 139, 122, 083, 015, 001
Goldstar TV/VCR Combo 029
Griswold 169, 069
Hallmark 001
Hitachi 358, 176, 158, 150, 132, 131, 139, 054, 098, 008,
016,
Infinity 128
JBL 128
J.C. Penney 145, 148,133, 132, 011, 124, 015, 014, 046
JVC 359, 273, 136, 157
Kenwood 014
Kloss 013
Kloss Novabeam 126
KMC 083
KTV 171, 163, 132, 049
Linatech 169, 069
Lodgenet 079
Logik 078
Luxman 139
LXI 133, 128, 018, 081, 019
LXI Combo 205
Magnatron 111
Magnavox 164, 126, 125, 127, 143, 128, 014, 023
Marantz 014, 128
Memorex 337, 018, 078
MGA 177, 151, 149, 014, 015, 001
Mitsubishi 151, 149, 071, 015, 001, 038, 002
MTC 139, 015, 014, 046, 067
Multitech 168
NAD 081, 060
NEC 139, 014, 015, 021
Onwa 049
Optimus TV/VCR 130, 132, 029, 018, 020, 049
Optonica 142, 020
Panasonic 374, 262, 209, 210, 211, 212, 259, 176, 207, 208,
206, 134, 138, 155, 128
Philco 164, 128, 015, 014, 125, 126, 127, 023
Philips 128, 038
Pioneer 060, 131
Portland 132, 015
Proscan 133, 145, 015, 124, 137, 131, 159, 169, 332
Proton 129, 132, 001, 135
10
Page 24

Pulsar 079
Quasar 262, 209, 210, 211, 212, 259, 176, 207, 208, 206,
134, 138
Radio Shack 139, 132, 020, 049, 130
Radio Shack TV/VCR Combo 029
RCA 324, 326, 133, 145, 015, 124, 137, 131, 159, 169
Realistic 018
Realistic TV/VCR Combo 029
Sampo 014, 135, 144
Samsung 330, 046, 130, 139, 015, 014, 132
Samsung Combo 330, 050
Sanyo 018, 153, 147
Scott 049, 025, 132, 010
Sears 153, 128, 147, 133, 139, 019, 148, 081, 018, 001,
025
Sharp 020, 132, 017, 142
Signature 2000 078
Sony 373, 170, 141, 123, 039, 038
Soundesign 049, 001, 023
Spectracon 146
SSS 015, 049
Supre-Macy 013
Sylvania 360, 164, 128, 014, 126, 125, 127, 140, 023
Symphonic 331, 049, 025
Tandy 213, 142
Tatung 138
Technics 134
Techwood 139
Teknika 139, 132, 046, 078, 015, 013, 048, 149, 025, 049,
023
Tera 129
Thomson 166, 167
TMK 139, 001
Toshiba 357, 148, 081, 018, 046
Tosonic 163
Totevision 132
Universal 011, 012
Vector Research 014
Victor 136
Video Concepts 071
Vidtech 015, 001
Viking 013
Montgomery Ward 011, 012, 128, 078, 015, 125, 127, 137, 014, 143,
020, 159, 001, 164, 165
Wards 025
11
Page 25
Yamaha 015, 014
York 001
Zenith 369, 370, 371, 372, 079, 078
Zenith Combo 029
Zonda 263, 029
VCR Device Codes
VCR Manufacturer VCR Device Code
Admiral 189, 191, 080, 178, 179
Aiwa 333, 341, 343, 315, 316, 226, 204
Akai 342, 072, 052, 051, 022, 073
Audio Dynamics 192
Bell and Howell 080
Brooksonic 340, 338, 191, 195, 189, 026
Canon 176, 187, 059
Carver 185
Citizen 026
Consonic 111
Craig 050, 035, 061
Curtis Mathes 176
Daewoo 308, 199, 175, 002
Daytron 175
DBX 192
Dynatech 204
Emerson 338, 278, 307, 191, 189, 009, 204, 057, 053, 029,
073, 183, 032, 026, 195
Fisher 055, 035, 031, 028
Funai 204
GE 368, 317, 318, 320, 321, 322, 192, 176, 179, 181
Go Video 050, 197, 200
Goldstar 029, 174, 027
Harman Kardon 265, 027
Hitachi 358, 201, 176, 036, 075, 069, 204, 072, 181, 037
Instant Replay 218, 176
J.C. Penney 036, 176, 050, 027, 033
JCL 176
Jensen 072
JVC 334, 359, 072, 182, 193, 084, 194
Kenwood 182, 034, 072
Lloyd 204
Logik 030
LXI 029
LXI Combo 205
12
Page 26

Magnavox 176, 185, 190, 188
Marantz 176, 027, 185
Marta 029
MEI 176
Memorex 341, 176, 029, 178, 204, 080, 035, 055
MGA 177, 176, 073
Minolta 069, 036
Mitsubishi 265, 266, 176, 177, 073
MTC 204, 050
Multitech 204, 030
NAD 058
NEC 267, 027, 033, 072, 182, 074
Optonica 178
Optimus TV/VCR Combo 262, 029, 050, 178, 204, 176, 034, 035, 028, 055
Panasonic 364, 367, 262, 209, 210, 211, 212, 206, 207, 208,
176, 187, 184
Pentax 069, 036, 181
Philco 176
Philips 176, 185, 188
Pilot 029
Pioneer 058, 182
Portland 175
Pulsar 080
Proscan 179
Quartz 034
Quasar 262, 209, 212, 207, 176, 187, 186
Radio Shack TV/VCR Combo 029
RCA 317, 318, 320, 322, 323, 324, 206, 192, 190, 179,
181, 184, 176, 036, 069,
Realistic 029, 050, 178, 204, 176, 034, 035, 028, 055
Ricoh 042
Samsung 330, 050, 002, 051
Sansui 182, 072, 061, 074
Sanyo 034, 035, 055
Scott 191, 189, 009, 002
Sears 176, 270, 035, 034, 031, 029, 036, 028, 055, 069
Sharp 258, 178
Shintom 030
Sony 176, 041, 042, 040, 173, 043, 038
STS 036
Sylvania 176, 177
Symphonic 331, 204
Tandy 204
Tashiko 026
Tatung 072
13
Page 27
Teac 204, 072
Technics 176
Teknika 029, 176, 204, 056
TMK 053
Toshiba 002, 177, 028, 009
Totevision 050, 029
Unitech 050
Vector Research 033, 027
Victor 084, 182
Video Concepts 033, 073
Videosonic 050
M. Ward 036, 176, 178, 204, 035, 030, 190, 009, 050
Yamaha 027, 072
Zenith 080, 042, 041, 029
Cable Box Device Codes
Cable Box Manufacturer Cable Box Device Code
ABC 091, 096, 088, 093
Antronix 241
Archer 227, 271, 241, 111
Century 111
Citizen 111
Comtronics 106, 045
Eagle Comtronics 045
Eastern 086
Electricord 004
GC Electronics 063
Gemini 064, 068, 095, 116
General Instruments 362, 350, 325, 305, 249, 251, 272, 094, 091, 087,
095, 100, 101, 104, 108, 091, 087, 094
Hamilton 346, 347, 348
Hamlin 118, 119, 085, 090, 103, 311, 312
Hitachi 091
Jasco 111
Jerrold 362, 350, 325, 305, 249, 251, 272, 094, 091, 087,
095, 100, 101, 104, 108, 091, 087, 094
Kingston 111
Macom 003
Memorex
Motorola
Movie Time 004, 112, 113
NSC 112, 113
076
377
14
Page 28

Oak 088, 097, 007
Panasonic 313, 099, 109
Paragon 076
Philips 238, 239, 252, 253, 300, 106, 102
Pioneer 344, 005, 070, 062
Popular Mech. 400
Pulsar 076
RCA 099
Regal 346, 347, 348, 120, 118, 085, 119
Regency 086
Rembrandt 068
Samsung 045, 005
Scientific Atlanta 314, 089*, 096, 120
See note on page 15.
Signal 045
Signature 091
SL Marx 045
Sprucer 099, 121
Standard Compnt 065
Starcom 095, 087, 104, 108
Stargate 045, 095
Sylvania 082
Tandy 117
Teknika 006
Telecaption 115
Texscan 082, 107
Tocom 310, 093, 092, 105
Toshiba 076
Unika 227, 241, 111
United Artists 088
Universal 241, 227, 271, 066, 004, 044, 111
Viewstar 106, 117, 110, 114
West 111
Zenith 237, 076, 077
15
Page 29
DSS Receiver Device Codes
DSS Manufacturer DSS Device Code
DishNet 376
Hitachi 352
Primestar 322, 329
RCA 320, 327, 365
Sony 321, 328
Working with DSS on Screen Menus
Remote Key Name Screen Menu Function
FF
Menu
Select
Menu +
Menu Menu L
Menu R
REC
Pause
Play
Stop
Rew
DVD Player Device Codes
DVD Manufacturer DVD Device Code
JVC 354
Mitsubishi 356
Panasonic 335
Pioneer 355
Proscan 339
RCA 339
Sony 351
Toshiba 336
16
Page 30

TV / VCR Combo - Program remote using the VCR device code.
*089: Power = Power off
Enter = Power on + Recall
THE FOLLOWING REPLACES & REVISES THE “IR FUNCTIONS”
SECTION OF THE IMPERIUM 200H USER MANUAL (PGS. 18-22)
IR Functions
When the unit scans to “ir” (remote control) on the Home Menu, press (>) for the submenu
functions to use the Imperium Infrared Remote Control (see Figure 1). These submenus control the
TV, VCR, SATELLITE/CABLE, DVD, RADIO AND CD. Press (>) to select the control menu for
the desired device.
Note: Each TV, VCR, SATELLITE/CABLE BOX, DVD, RADIO, and CD should have been
programmed on the Imperium Remote Control during system setup (see “Installing the System,” No.
10 on page 8 of User Manual). If the Imperum Remote Control is not connected properly or the
batteries are dead, the display will read “No Contoller” and the unit will say “Check cable.”
17
Page 31
The Imperium Remote Control has been designed to operate most all electronic devices. Certain
devices occasionally cannot be fully controlled because of manufacturing uniqueness.
TV Control
Remote Control
tv
Television
ch vol mut
TV Channel
Ch+ Ch- Rcl Set
TV Channel:
Channel Up
TV Channel:
Channel
Down
TV Channel:
Ch Rcl
Speaks:
“Previous”
TV
Channel
Speaks:
“Enter”
vcr sat dvd radio cd
See
Fig. 2
TV Channel
Mute
TV Volume:
Volume Mute
Speaks:
“cable”
See
Fig. 3
Vol+ Vol- TV Amp
TV Volume:
Volume
Down
TV Volume:
Volume Up
Speaks:
“auxiliary”
TV Vol:
TV Sel
See
Fig. 4
TV Vol:
Amp Sel
Speaks:
“Tuner”
See
Fig. 5
TV:
Volume Mute
TV/VCR Switch:
Toggle TV / VCR
tv / vcr F pwr
Speaks:
“F”
TV F-keys
F1 … F10, M1
Speaks:
“1-10, M”
See
Fig. 6
TV Power
Power
Button
TV Function - When the “tv” function is selected in the IR Menu, “ch,” “vol,” “mute,” “tv/vcr,”
“F,” and “pwr” are displayed. (See Figure 1.)
1. Press (>) to begin scanning. Press (>) again to select the desired function.
2. Select “ch” to step the channel up or down or to enter a channel number.
18
Figure 1. Flowchart of the TV Menu
Page 32
3. Select “vol” to increase or decrease the volume.
4. Select “mute” to turn the TV sound on or off.
5. Select “tv/vcr” to toggle between the TV and VCR video sources.
6. Select “F” to access programmable functions.
7. Select “pwr” to turn the TV on or off.
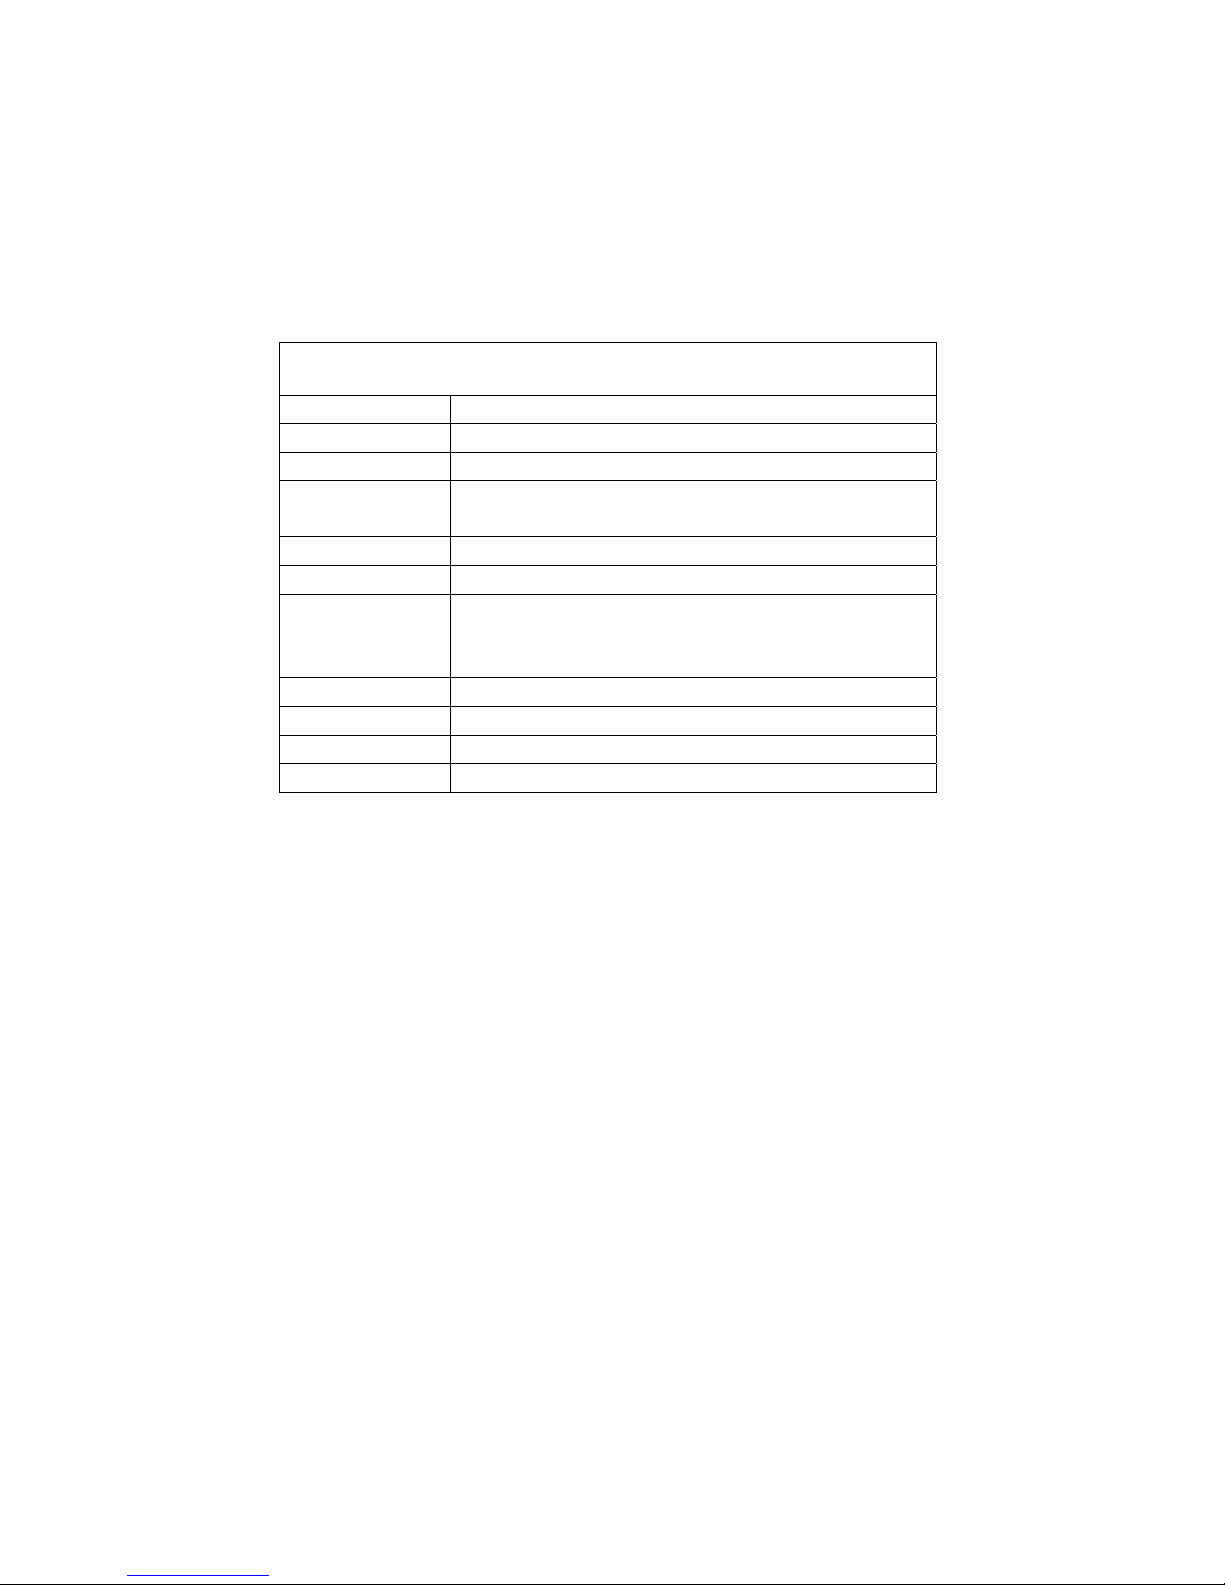
Summary of TV Selection Choices
Channel Menu
PWR
Standby Not used by most TV’s
0-9
Enter
RCL Return, jump to prior channel
Vol +
Vol –
Volume and mute should “punch thru” to TV or
AMP/Radio, which ever was used last
Mute
Ch +
Ch –
TV/VCR Input source select
F1-F10, M1 Available for user definition
19
Page 33
VCR Control
Remote Control
vcr
VCR
play stop rew ff rec ch tv / vcr F pwr
VCR Play
Play
VCR REW
Rewind / Pause / Play / Pause
VCR Record
Record
TV / VCR Switch
toggle TV / VCR
Speaks:
“F”
VCR Stop
Stop
VCR FF
Fast Forward / Pause / Play / Pause
VCR Channel
Ch+ Ch- Rcl Set
VCR Channel
Channel Up
VCR Channel
Channel Down
VCR Channel
VCR Channel
Channel Rcl
Speaks:
“Enter”
Speaks:
“Previous”
VCR Power
Power Button
VCR F-keys
F1 … F10, M1
Speaks:
“1-10, M”
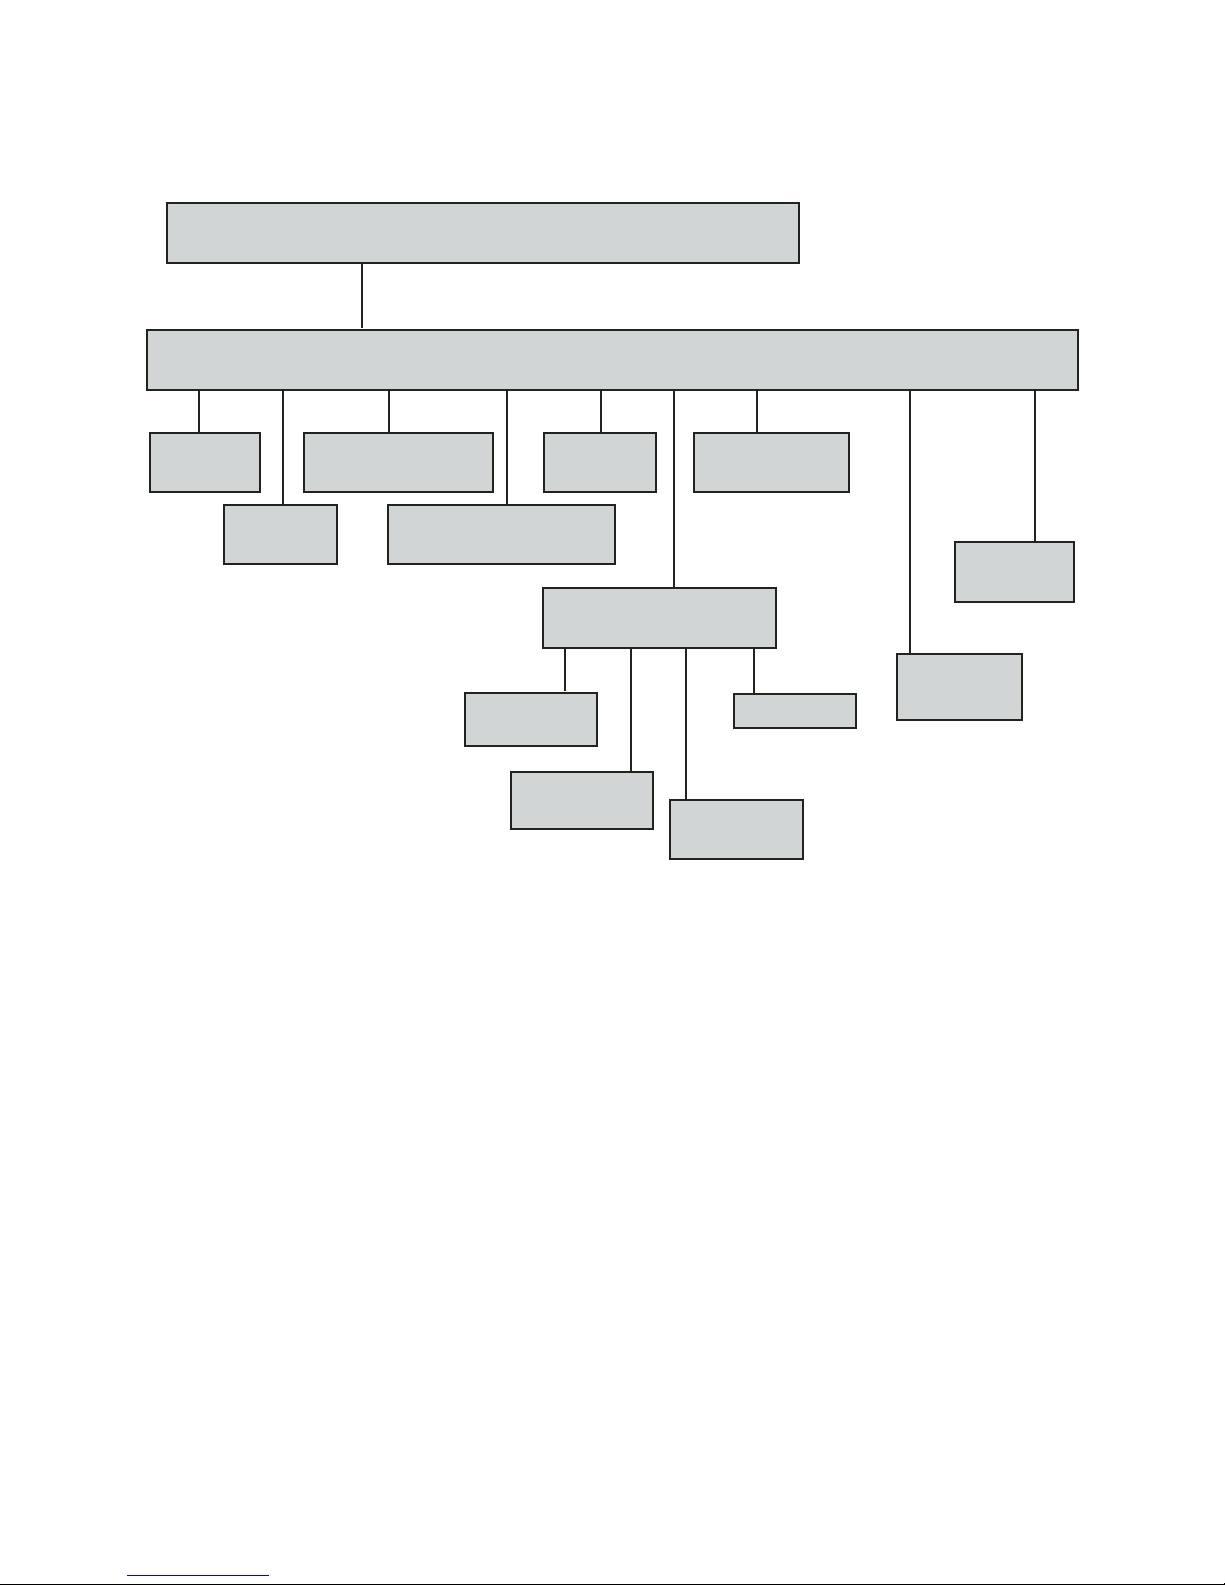
Figure 2. Flowchart of the VCR Menu
VCR Function - When “vcr” is selected from the IR Menu, “play,” “stop,” “rew,” “ff,” “rec,”
“ch,” “tv/vcr,” “F,” and “pwr” are displayed. (See Figure 2.)
1. Press (>) to begin scanning. Press (>) again to select the desired function
2. Select “play” to play or stop the VCR.
3. Select “stop” to stop the VCR.
4. Select “rew” to rewind, stop or play the VCR.
5. Select “ff ” to fast forward, stop or play the VCR.
6. Select “rec” to record with the VCR.
7. Select “ch” to enter a specific channel or to step the channel number up and down.
8. Select “tv/vcr” to toggle between the TV and VCR sources.
20
Page 34
9. Select “F” to access programmable functions.
10. Select “pwr” to turn the VCR on or off.
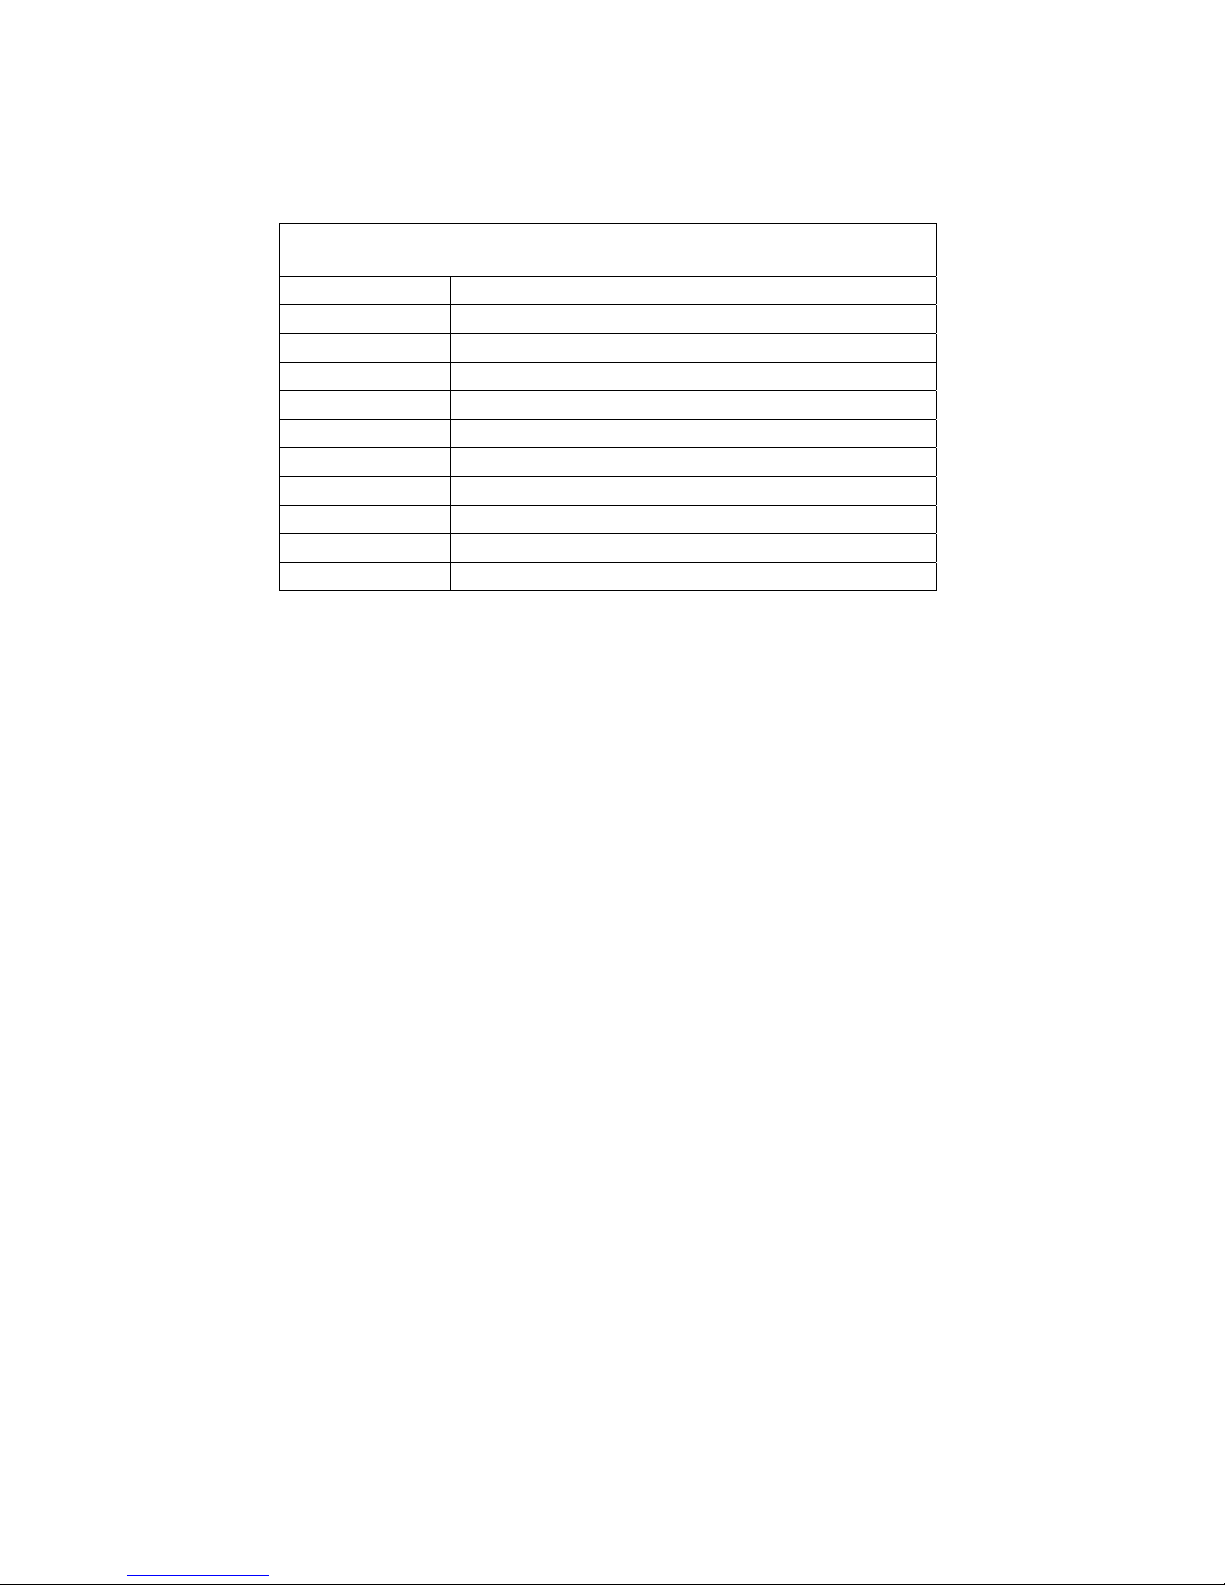
Summary of VCR Selection Choices
Play
Stop
Rew
FF
Pause
Record
TV/VCR
Channel Menu
PWR
Standby
F1-F10, M1 Available for user definition
21
Page 35
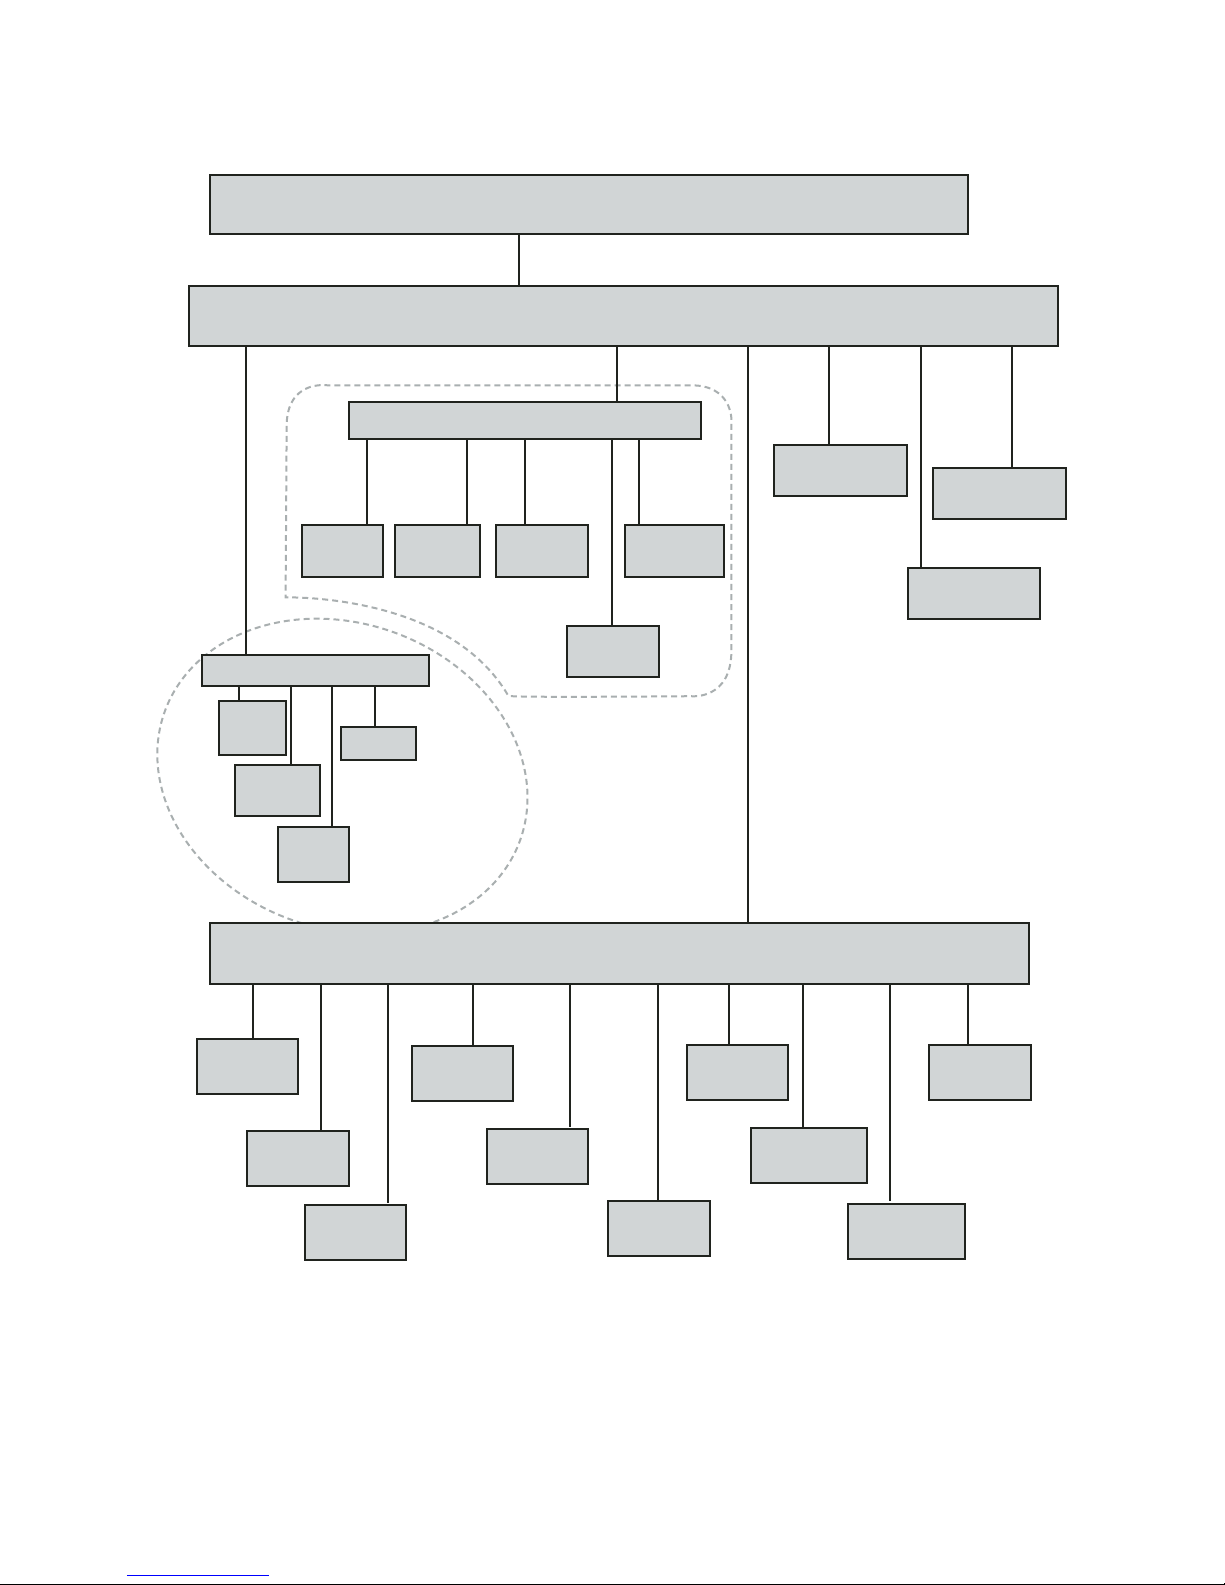
Non Dish Net Satellite / Control
Remote Control
sat
SAT
Ch Vol Gd TV / VCR F Power
Mute Vol+ Vol- TV Amp
TV/VCR Switch
Toggle TV / VCR
SAT Power
SAT Power
Power Button
Power Button
SAT Vol
Vol Mute
Ch+ Ch- Rcl Set
SAT Ch
Ch Up
Speaks:
“Enter”
SAT Ch
SAT Vol
Vol Up
Speaks:
“Increase”
SAT Vol
Vol Down
Speaks:
“Decrease”
SAT Vol
TV Select
SAT Vol
Amp Select
Speaks:
“Tuner”
SAT F-Keys
F1 … F10, M1
Speaks:
“1-10, M”
SAT Ch
Ch Down
SAT Ch
Ent Ch
SAT Guide
Enter
SAT
Ch
Ch Rcl
Speaks:
“Previous”
SAT Guide
Ch Up
Up Down Rt Lt Inf ESC Gd Pvr
SAT Guide
Ch Down
SAT Guide
Guide Info
Speaks: “I”
SAT Guide
Guide Right
Speaks:
“Increase”
SAT Guide
Guide Left
Speaks:
“Decrease”
Speaks:
“Control”
Speaks:
“Check”
SAT Guide
Guide Cancel
Speaks: “I”
Speaks:
“Previous”
SAT Guide
Pvr Button
Speaks:
“Control”
SAT Guide
Guide Button
Speaks:
“Enter”
Speaks:
“Enter”
Figure 3. Flowchart of the Cable Box (Non Dish Net Satellite / Control) Menu
Speaks:
“P”
22
Page 36

Cable Box Function - When “cable” is selected from the IR Menu, “ch,” “vol,” “mute,” “tv/vcr,”
and “pwr” are displayed. (See Figure 3.)
1. Press (>) to begin scanning. Press (>) again to select the desired function.
2. Select “ch” to either set a channel number or top step the channel number up or down.
3. Select “vol” to increase or decrease the volume.
4. Select “mute” to turn the sound on or off.
5. Select “tv/vcr” toggle between TV and VCR sources.
6. Select “F” to access programmable functions.
7. Select “pwr” to turn the cable box on or off.
23
Page 37
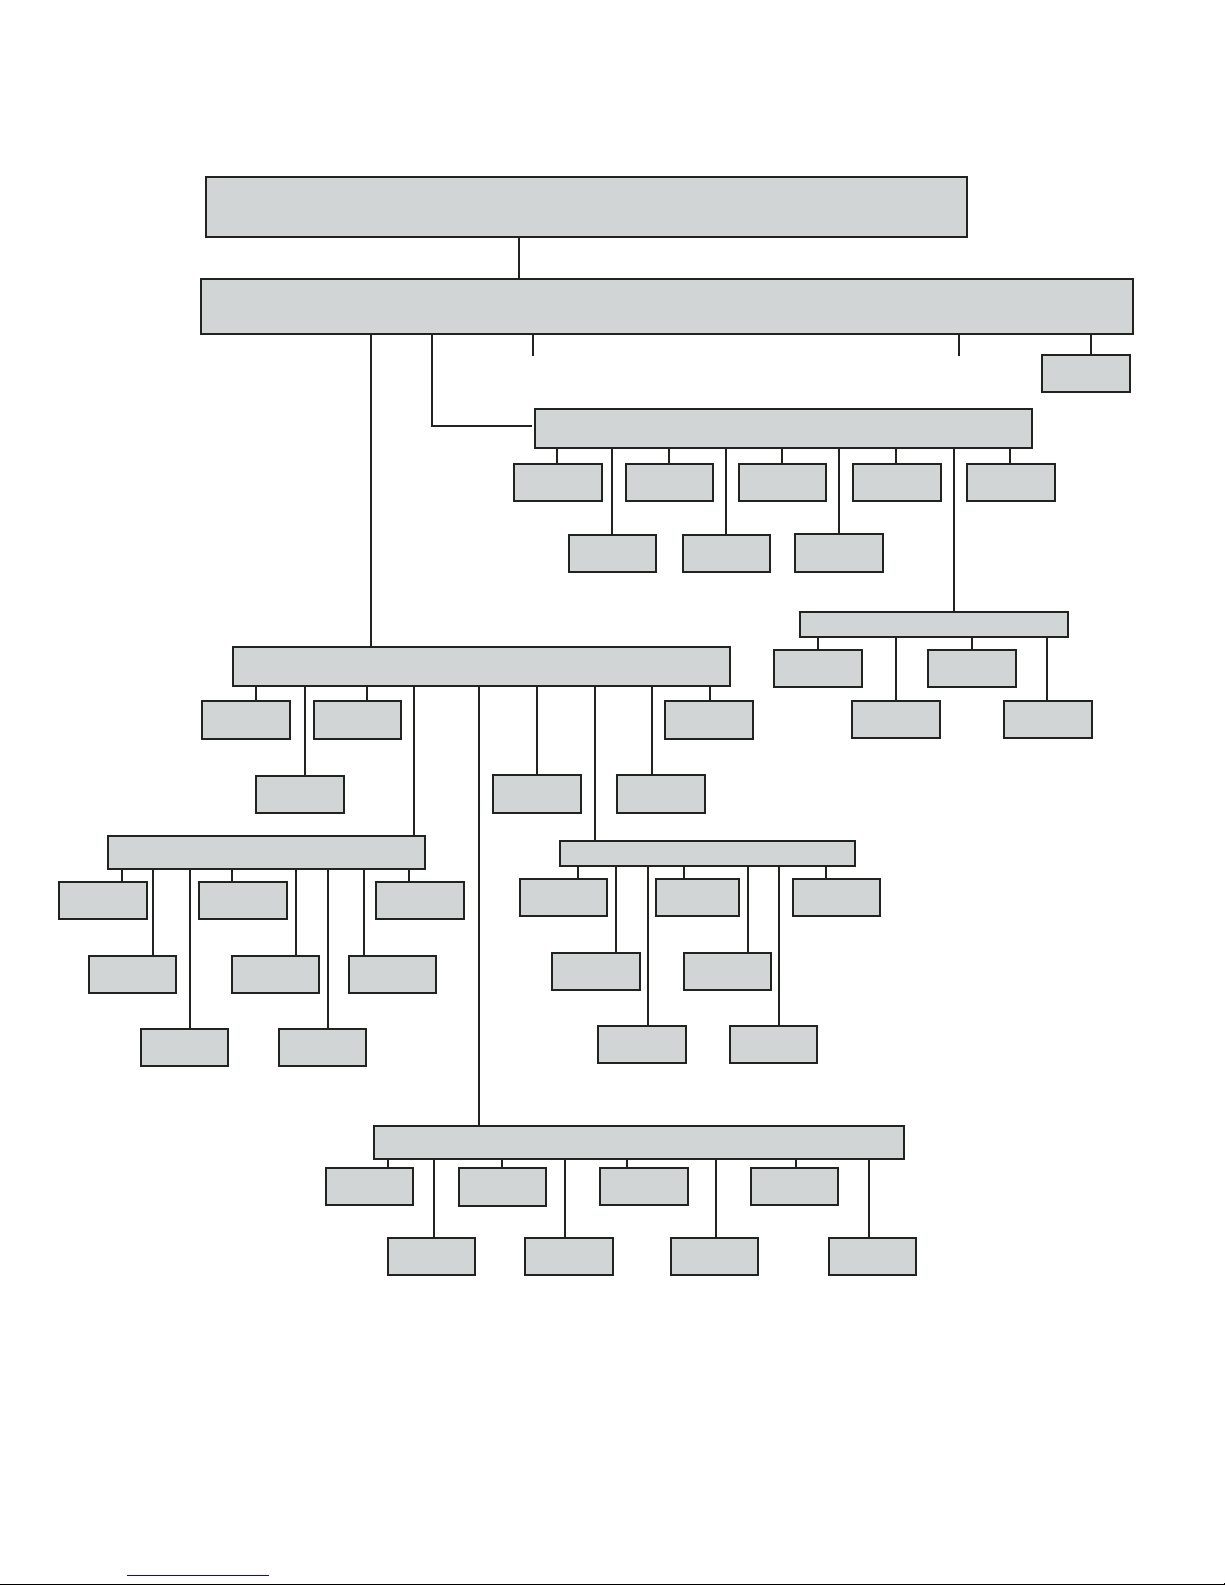
Dish Net Satellite / Cable Box Control
Remote Control
SAT
SAT
Ch Vol Gd Pvr Menu TV / VCR F Power
SAT GUIDE
Left
Speaks:
“Reverse”
SAT GUIDE
Right
Speaks:
“Forward”
lr
SAT GUIDE
Day Back
Speaks:
“D-Rewind”
SAT GUIDE
Guide Button
Speaks:
“Control”
daybkday
rt
SAT GUIDE
Day Forward
Speaks:
“D-Forward”
See next
page
Speaks: “P”
pvr sk+ sk- ff rew stop play rec esc
PVR SAT GD
PVR
Speaks:
“Control”
PVR SAT GD
Skip Forward
Speaks:
“Forward”
PVR SAT GD
Skip Reverse
Speaks:
“Reverse”
PVR SAT GD
Fast Forward
gd menu ch lr ud info srch ent esc
SAT GUIDE
Menu Button
info view
SAT GUIDE
Info
Speaks:
“I”
SAT GUIDE
Select
SAT
Channel
sel
Speaks:
“Select”
esc
SAT GUIDE
Cancel
Speaks:
“Goodbye”
SAT GUIDE
View
Speaks:
“Auxillary”
SAT GUIDE
Info
SAT GUIDE
Search
Speaks:
“Pound”
Speaks:
“Pound”
srch l r up
SAT GUIDE
Left
Speaks:
“Reverse”
SAT GUIDE
Forward
SAT GUIDE
Select
Speaks:
“Select”
Speaks:
“Forward”
SAT GUIDE
Cancel
Speaks:
“Goodbye”
SAT GUIDE
Up
Speaks:
“Up”
SAT GUIDE
Down
Speaks:
“Forward”
Speaks:
“Down”
PVR SAT GD
Rewind
Speaks:
“Rewind”
PVR SAT GD
Record
dn
sel
SAT GUIDE
Select
Speaks:
“Select”
See next
page
PVR SAT GD
Stop
Speaks:
“Stop”
PVR SAT GD
Play
Speaks:
“Play”
PVR SAT GD
Cancel
Speaks:
“Goodbye”
rec down sel esc
PVR SAT GD
Speaks:
“Record”
PVR SAT GD
Down
Speaks:
“Down”
Select
Speaks:
“Select”
esc
SAT GUIDE
Cancel
Speaks:
“Goodbye”
SAT Power
Power Button
Speaks:
“Power”
PVR SAT GD
Cancel
Speaks:
“Goodbye”
up dn pup
SAT GUIDE
Up
Speaks:
“Up”
SAT GUIDE
Down
Speaks:
“Down”
Figure 4. Flowchart of the Cable Box (Dish Net Satellite / Cable Box) Menu
24
info viewsel
SAT GUIDE
Info
Speaks:
“I”
SAT GUIDE
Page Up
Speaks:
“Ch Page-Up”
“Ch Page-Down”
pdn
SAT GUIDE
Page Down
Speaks:
Continued on Next Page
SAT GUIDE
Select
Speaks:
“Select”
SAT GUIDE
View
Speaks:
“Auxillary”
esc
SAT GUIDE
Cancel
Speaks:
“Goodbye”
Page 38
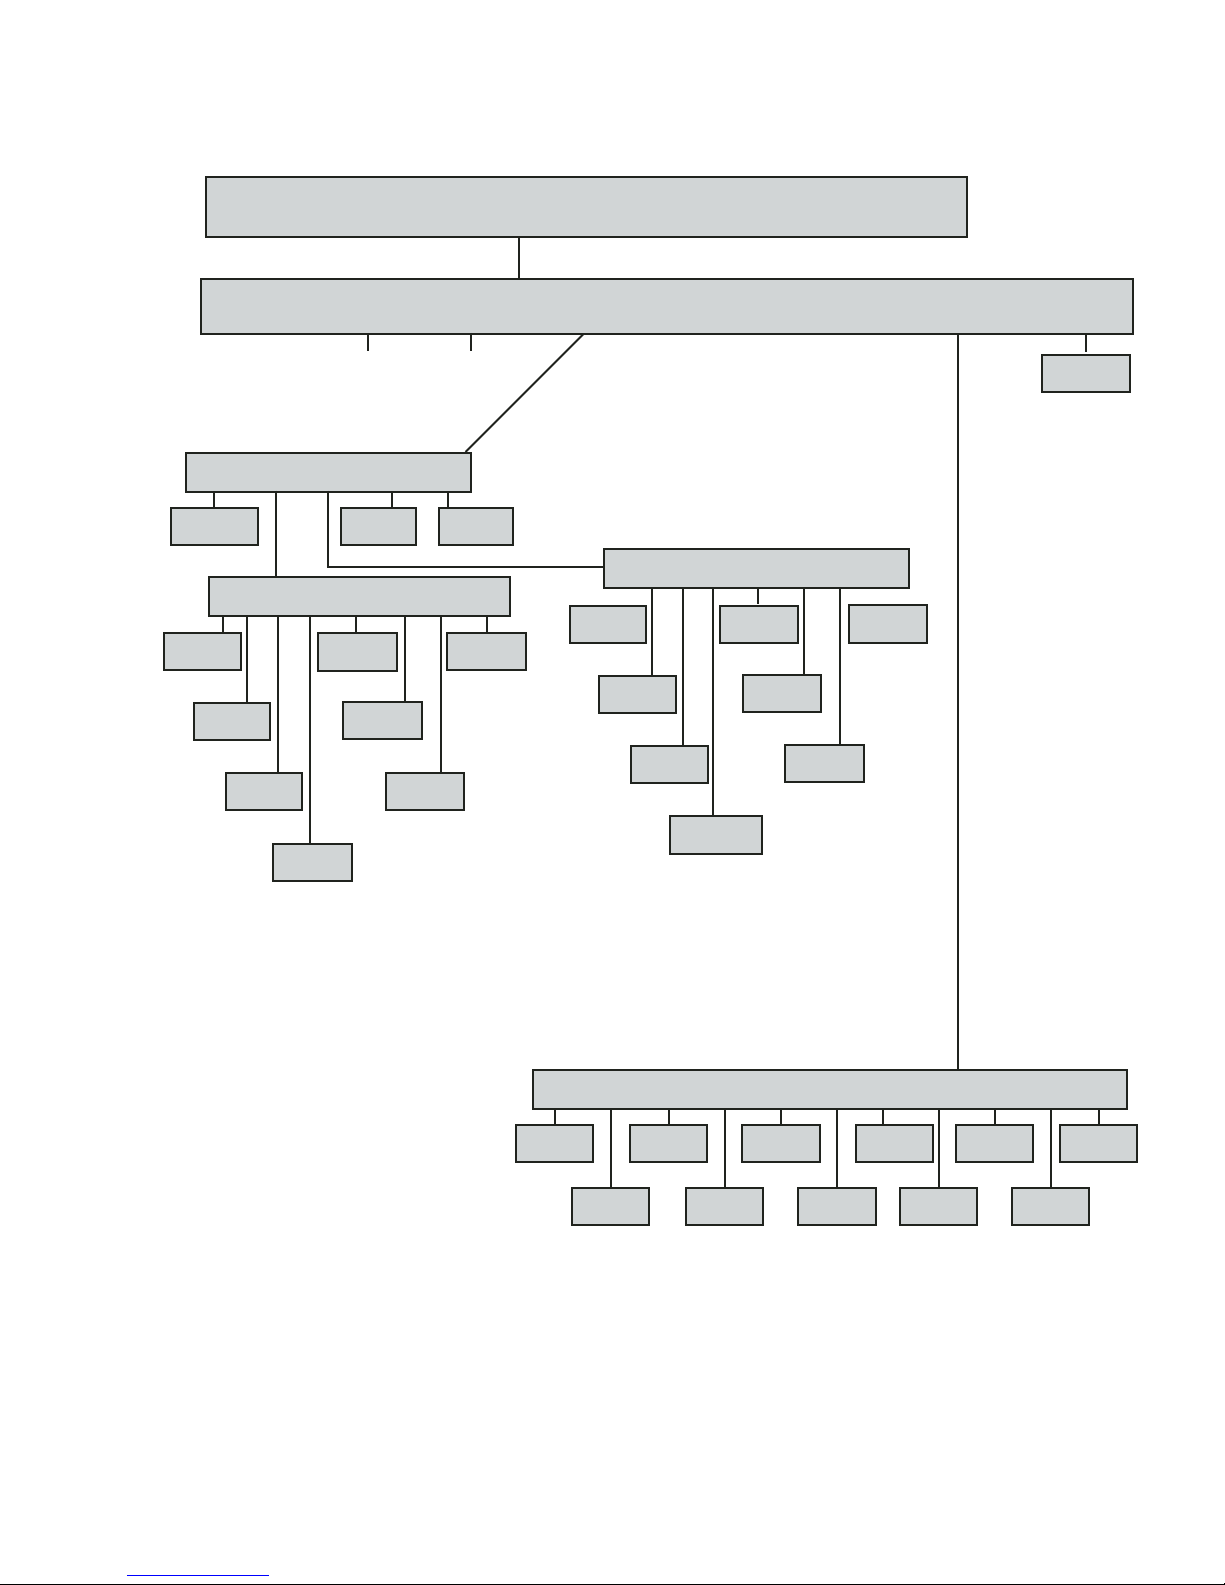
Dish Net Satellite / Cable Box Control (continued)
Remote Control
SAT
SAT
Ch Vol Gd Pvr Menu TV / VCR F Power
menu
SAT/Cable
Menu Button
Speaks: “M”
SAT/Cable
Left
Speaks:
“Reverse”
SAT/Cable
Right
Speaks:
“Forward”
LR
SAT/Cable
Day Back
Speaks:
“D, Rewind”
lr ud
Day-
Bk
SAT/Cable
Day Forward
“D, Forward”
See previous
page
Speaks: “M”
ent esc
SAT/Cable
Select
Speaks: “Select”
Day-
Rt
Info Sel View Esc
SAT/Cable
Info
Speaks:
“I”
SAT/Cable
Select
Speaks:
“Select”
Speaks:
See previous
Speaks: “Goodbye”
SAT/Cable
View
Speaks:
“Auxillary”
page
SAT/Cable
Cancel
SAT/Cable
Cancel
Speaks:
“Goodbye”
Up
SAT/Cable
Up
Speaks:
“Up”
SAT/Cable
Down
Speaks:
“Down”
P-
Dn
Up
SAT/Cable
Ch Page Up
Speaks:
“P-up”
SAT/Cable
Ch Page Down
PDn
Info Sel View Esc
SAT/Cable
Info
Speaks:
“I”
SAT/Cable
Select
Speaks:
“Select”
SAT/Cable
View
Speaks:
“Auxillary”
Speaks:
“P-down”
SAT/Cable
Cancel
Speaks:
“Goodbye”
SAT Power
Power Button
Speaks:
“Power”
Figure 4. Flowchart of the Cable Box (Dish Net Satellite / Cable Box) Menu Continued
Speaks: “F”
F1 F2 F3 F4 F5 F6 F7 F8 F9 F10 M
SAT F-Keys
1
Speaks:
“1”
SAT F-Keys
2
Speaks:
“2”
SAT F-Keys
3
Speaks:
“3”
SAT F-Keys
4
Speaks:
“4”
SAT F-Keys
5
Speaks:
“5”
SAT F-Keys6SAT F-Keys
Speaks:
“6”
SAT F-Keys7SAT F-Keys9SAT F-Keys
Speaks:
“7”
8
Speaks:
“8”
Speaks:
“9”
SAT F-Keys
Speaks:
“10”
M
Speaks:
“M”
10
25
Page 39
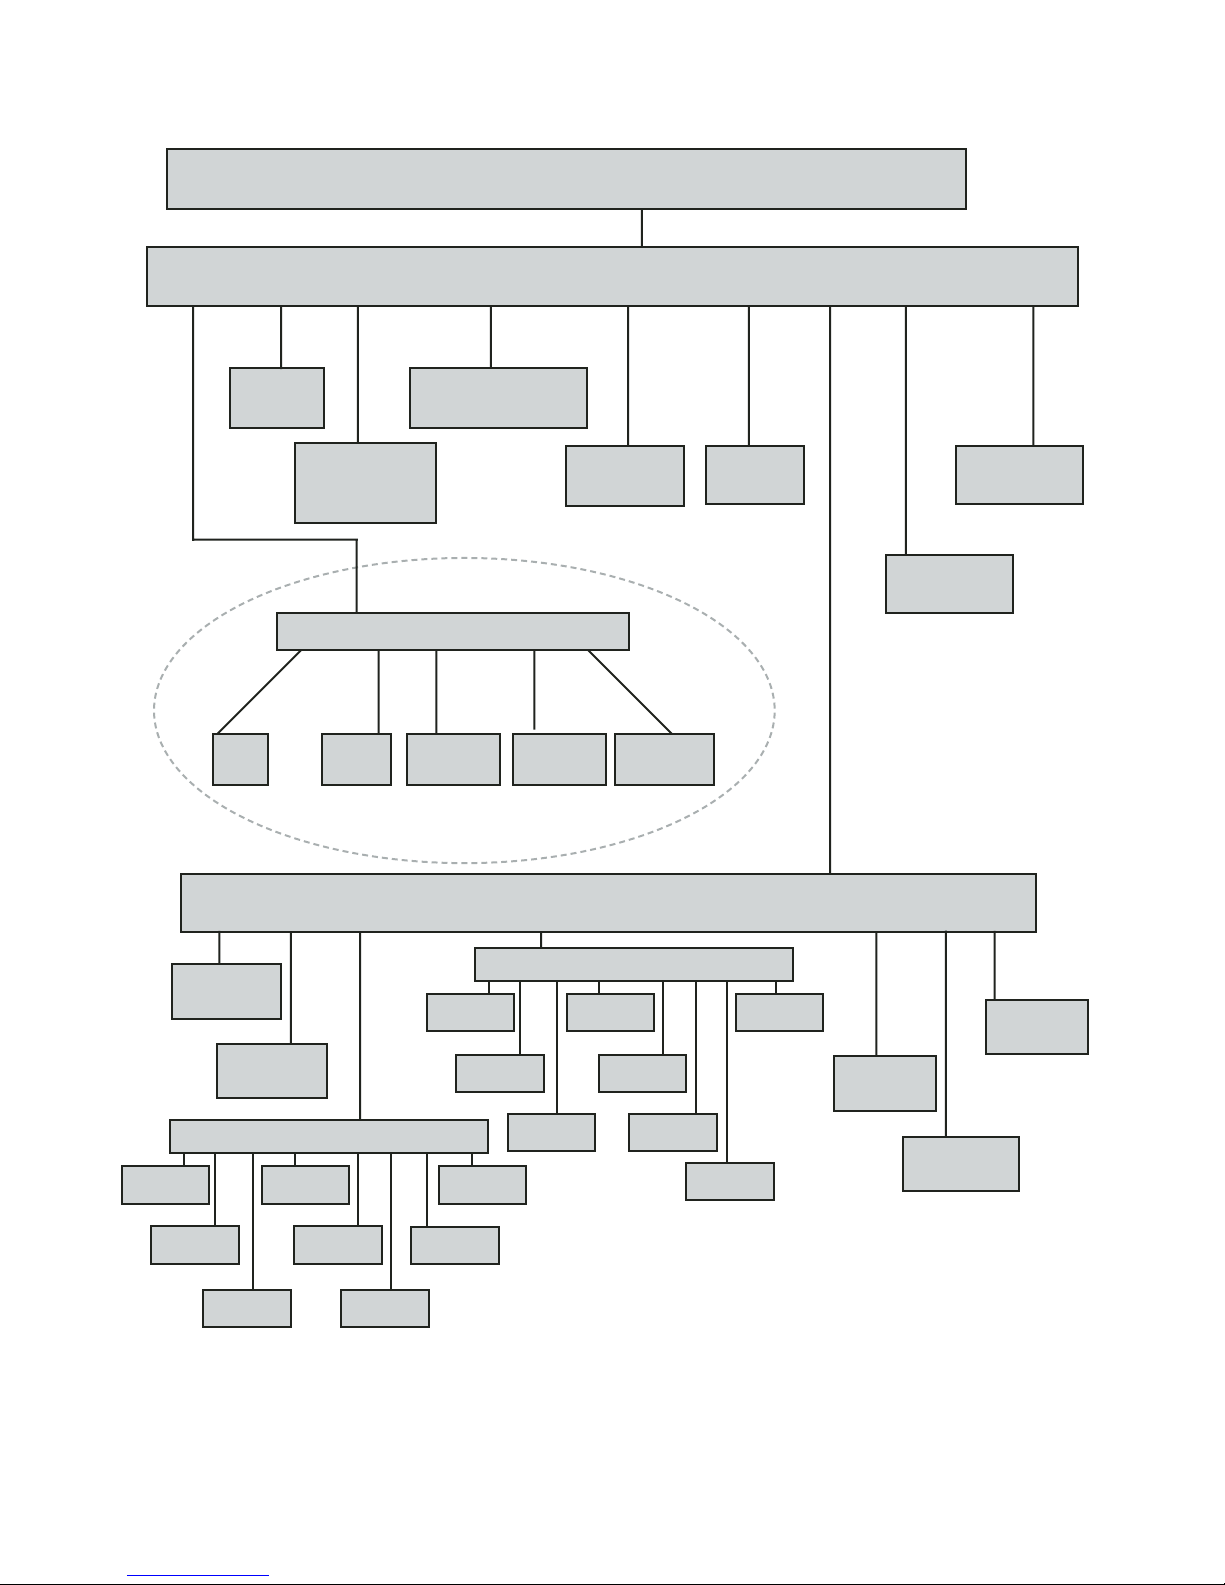
DVD Control Dish Net Satellite / Cable Box Control
Remote Control
dvd
DVD
Vol
Play For Rew trk Stop Menu F pwr
DVD
Play / Pause
DVD
Mute
DVD
Rew / Pause / Play / Pause
DVD
Fast Forward /
Pause / Play / Pause
Mute Vol+ Vol- TV Amp
Speaks:
“Increase”
DVD
Vol Up
Speaks:
“Increase”
Speaks:
“Decrease”
DVD Vol
Vol Down
Speaks:
“Decrease”
DVD
+10, 1, 2, … 10
DVD
TV Select
Speaks:
“Select”
Speaks:
“Tuner”
DVD
Amp Select
Speaks:
“Tuner”
Speaks:
“F”
DVD Stop DVD
On / Off / Standby
DVD F-keys
F1 … F10, M1
Speaks:
“1-10, M”
Speaks:
“Control”
DVD Menu
Menu Button
DVD MENU
Left
DVD MENU
Right
26
menu ch lr up info ent esc
SAT Channel
lr
DVD MENU
Day Back
daybkday
rt
DVD MENU
Day Forward
info view
DVD MENU
Info
DVD MENU
Select
DVD MENU
Up
sel
DVD MENU
Cancel
Speaks: “Goodbye”
DVD MENU
View
Speaks: “Auxillary”
up dn pup pdn
DVD MENU
Down
DVD MENU
Page Up
esc
DVD MENU
Page Down
info view
DVD MENU
Info
Speaks: “I”
DVD MENU
Select
sel
DVD MENU
View
Speaks: “Auxillary”
esc
DVD MENU
Cancel
Speaks:
“Goodbye”
DVD Menu
Info
DVD Menu
Select
Speaks:
“Select”
Figure 5. Flowchart of the DVD Menu
DVD Menu
Cancel
Speaks:
“Goodbye”
Page 40
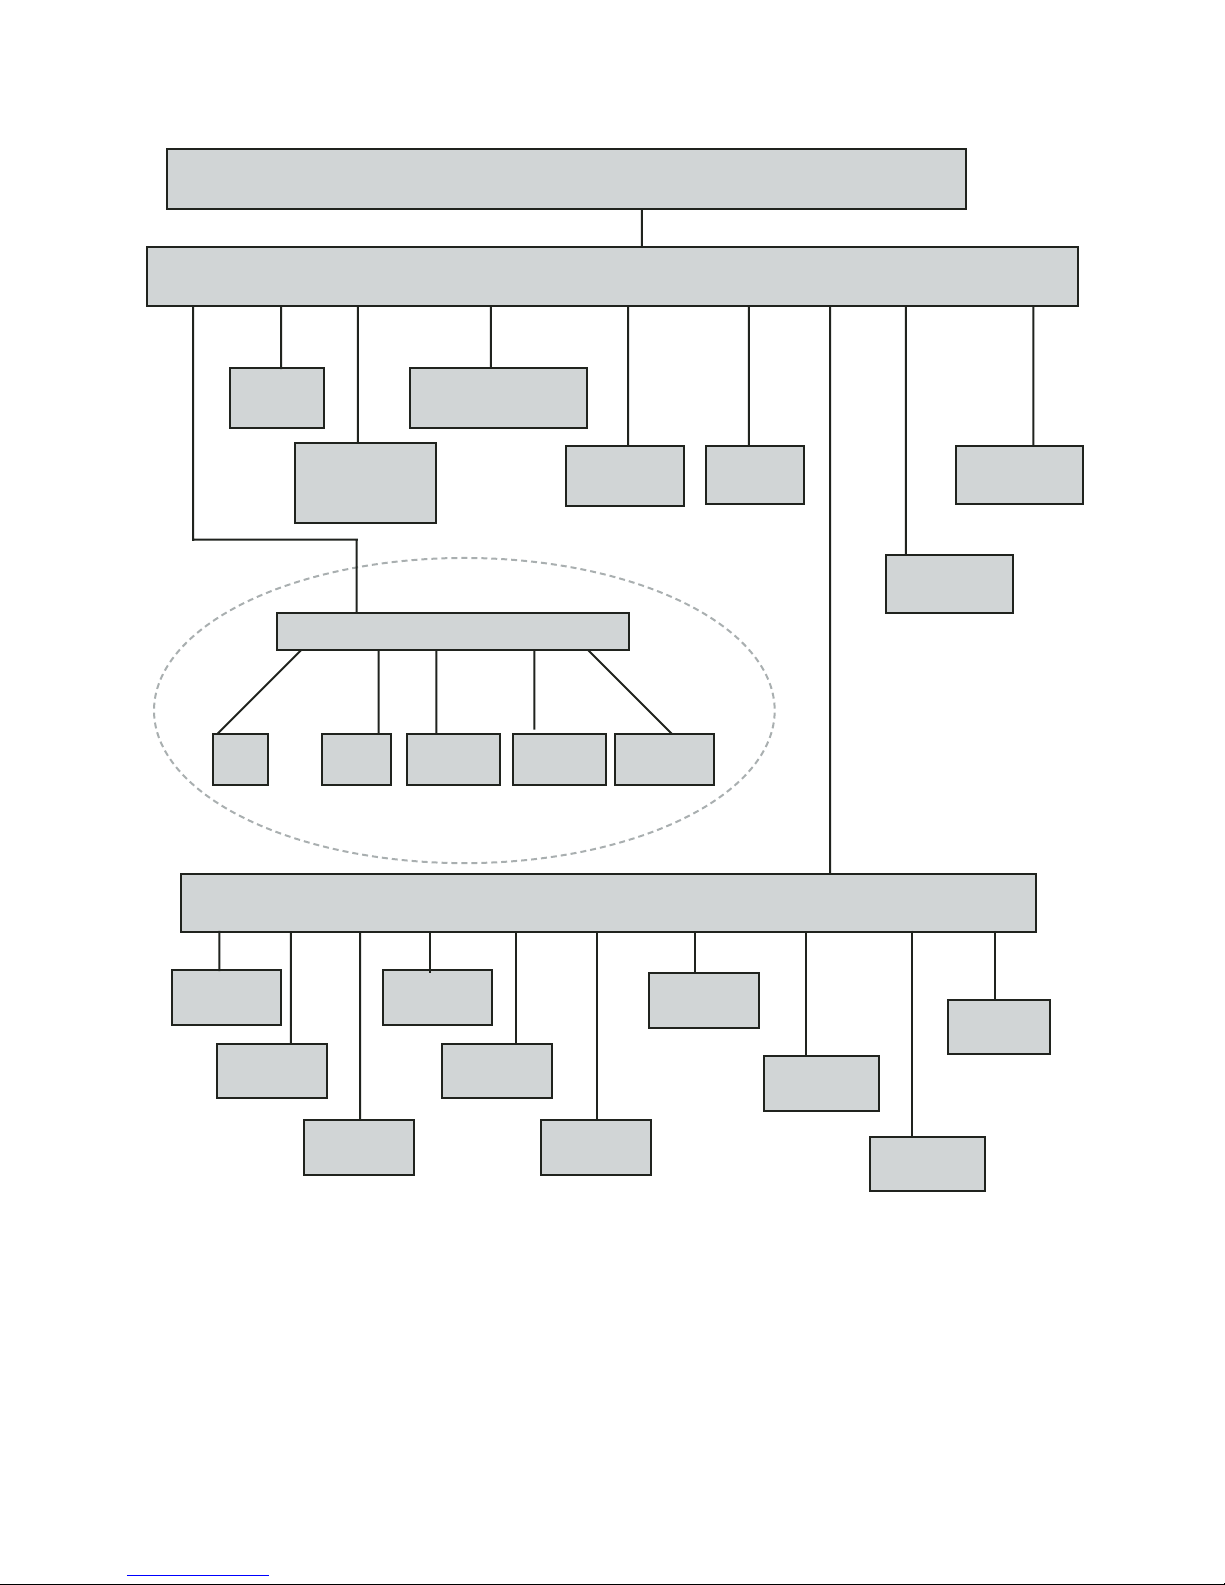
DVD Control Non Dish Net Satellite Control
Remote Control
dvd
DVD
Vol
Play For Rew trk Stop Gd F pwr
DVD
Play / Pause
DVD
Mute
DVD
Rew / Stop / Play / Stop
DVD
Fast Forward /
Stop / Play / Stop
Mute Vol+ Vol- TV Amp
Speaks:
“Increase”
DVD
Vol Up
Speaks:
“Increase”
Speaks:
“Decrease”
DVD Vol
Vol Down
Speaks:
“Decrease”
DVD
+10, 1, 2, … 10
DVD
TV Select
Speaks:
“Select”
Speaks:
“Tuner”
DVD
Amp Select
Speaks:
“Tuner”
Speaks:
“F”
DVD Stop DVD
On / Off / Standby
DVD F-keys
F1 … F10, M1
Speaks:
“1-10, M”
Speaks:
“Control”
Ent Ch Up Down Rt Lt Inf ESC Gd Pvr
Speaks:
“Check”
DVD Menu
Enter
SAT Channel
001-999
DVD Menu
Ch Up
DVD Menu
Ch Down
DVD Menu
Guide right
Speaks: “Increase”
Speaks:
“Increase”
DVD Menu
Guide left
Speaks: “Decrease”
Speaks:
“Decrease”
DVD Menu
Guide Info
Speaks: “I”
Speaks:
“Previous”
DVD Menu
Guide Cancel
Speaks: “I”
Speaks:
“Control”
DVD Menu
Guide Button
Speaks:
“Enter”
Figure 6. Flowchart of the DVD (Non Dish Net Satellite Control) Menu
Speaks:
DVD Menu
Pvr Button
Speaks:
“Enter”
“P”
27
Page 41

DVD Function - When “DVD” is selected from the IR Menu, “vol,” “play,” “for,” “rew,” “trk,”
“stop,” “Gd,” “F,” and “pwr” are displayed. (See Figure 5 and 6.)
1. Press (>) to begin scanning. Press (>) again to select the desired function.
2. Select “vol” to increase, decrease or mute the DVD volume.
3. Select “play” to play or pause the player.
4. Select “for” to move forward from the current track.
5. Select “rew” to select a previous track.
6. Select “trk” to enter a specific track number.
7. Select “stop” to stop the player.
8. Select “Gd” to select guide.
9. Select “F” to access programmable functions.
10. Select “pwr” to turn the DVD player on or off.
28
Page 42
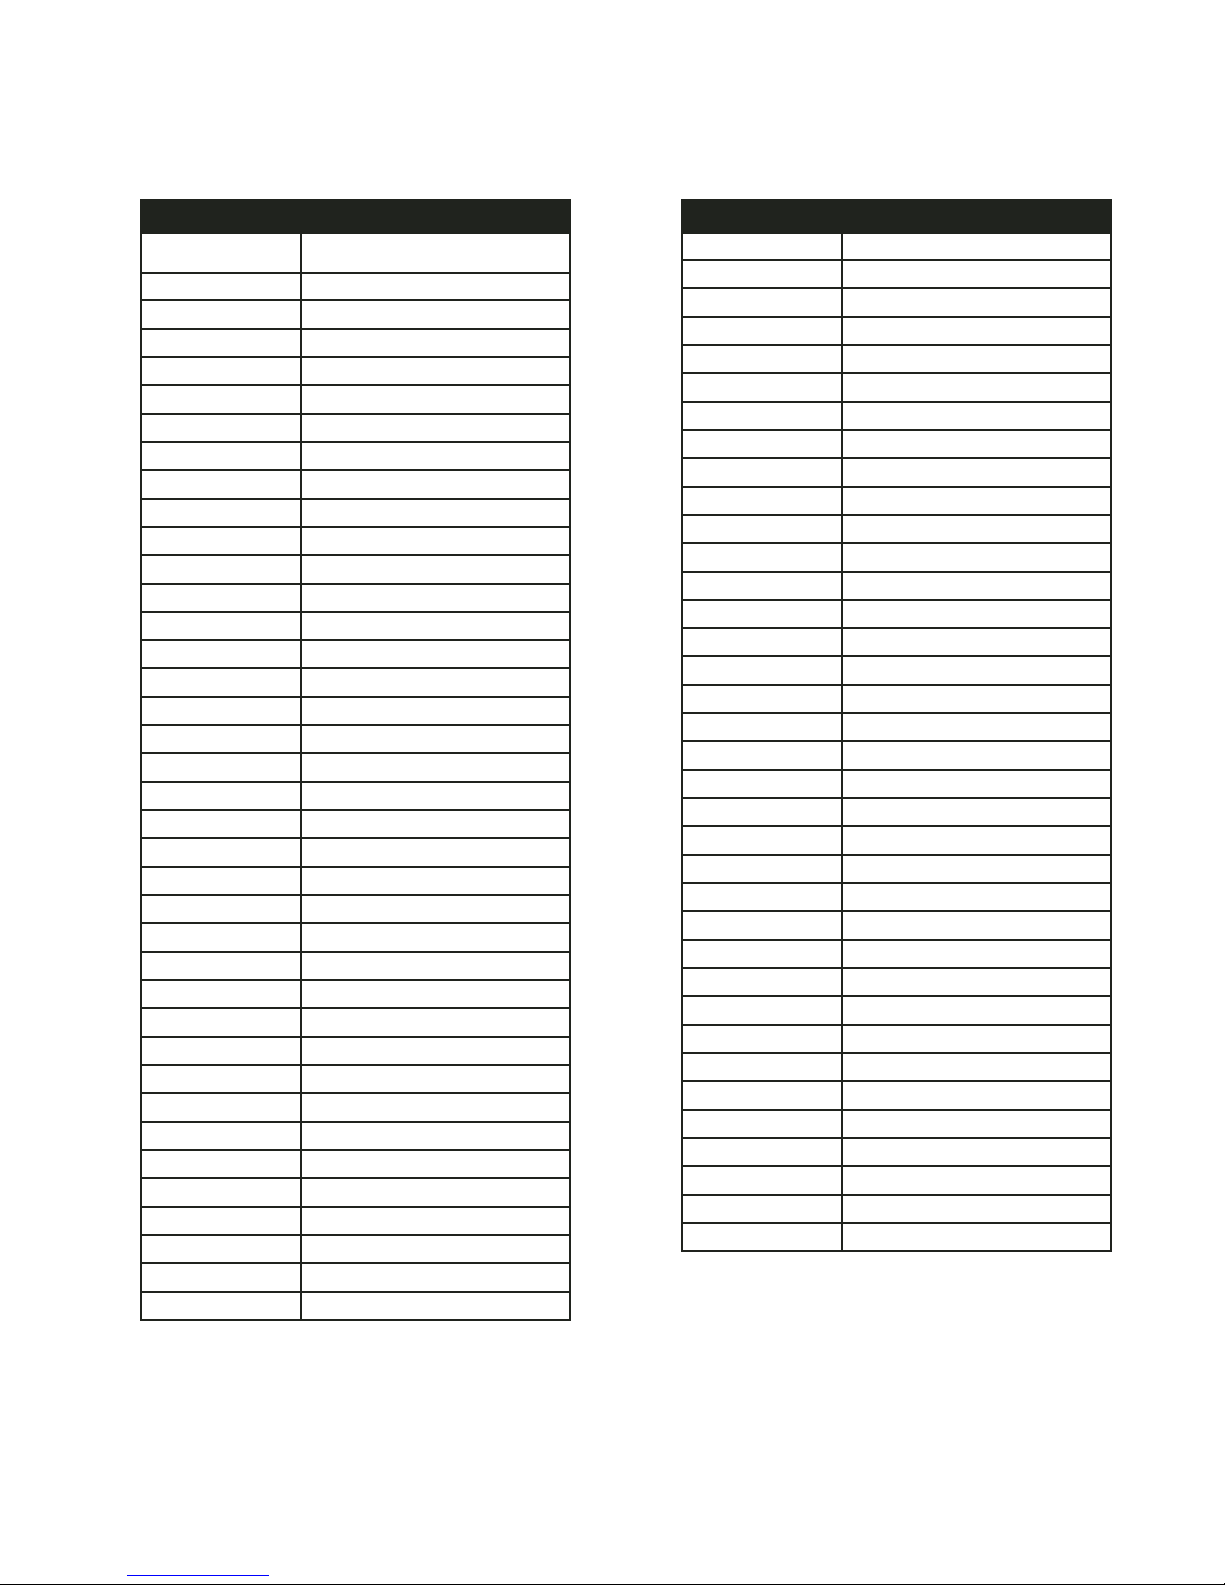
Dish Net Satellite Cable Box
Dish Net Satellite
Control Device Code 376
DISH Net (Device code 376)
Scan Code Remote Key Name
00
11
22
33
44
55
66
77
88
99
10 VIEW
11 SELECT
12 RIGHT
13 LEFT
14 UP
15 DOWN
16 BACK(REW)
17 PLAY
18 RWD(FF)
19 REC
20 STOP
21 PAUSE
22 POWER
23 RECALL
24 TV/VIDEO
25 MENU
26 GUIDE
27 INFO
28 CANCEL
29 SKIP_BACK_10_SEC
30 SKIP_FWD_#)_SEC
31 *
32 #
33 PAGE_UP
34 PAGE_DOWN
35 PVR
36 SAT
Motorola Digital Cable 377
Non Dish Net Motorola Digital Cable (377)
00
11
22
33
44
55
66
77
88
99
10 (Enter) Enter
11 (Mute) Mute
12 (Vol+) Vol +
13 (Vol-) Vol 14 (Ch+) Ch+
15 (Ch-) Ch16 (Rew) Left
17 (Play) Up
18 (FF) Right
19 (Rec) Rec
20 (Stop) Stop
21 (Pause) Down
22 (Power) Power
23 (RCL) Last
24 (TV/VCR) TV/VCR
25 (F1) Fav
26 (F2) Lock
27 (F3) Exit
28 (F4) Info
29 (F5) Guide
30 (F6) Menu
31 (F7) Page_up
32 (F8) Page_dn
33 (F9) Day_back
34 (F10) Day_forward
35 (M1) Help
29
Page 43
Amplifier / Radio Control
Remote Control
Amp
vol ch mute mode F pwr
radio
Amp Channel
Ch+
Speaks:
“Up”
Amp Ch
Ch Up
Speaks:
“Up”
Ch- Rcl Set
Speaks:
“Down”
Amp Ch
Amp Ch
Ch Down
Speaks:
“Down”
Ch Rcl
Speaks:
“Previous”
MUTE Vol+ Vol- TV Amp
Speaks:
“Increase”
Amp Vol
Vol Up
Speaks:
“Increase”
Amp Vol
Vol Mute
Speaks:
“Decrease”
Amp Vol
Vol Down
Speaks:
“Decrease”
Amp Vol
TV Select
Amp Vol
Amp Select
Speaks:
“Tuner”
Speaks:
“Previous”
Speaks:
“Tuner”
Amp
Vol Mute
Speaks:
“Enter”
Amp Ch
+10, 1 … 10
FM AM CD Tape
Amp Function
FM Mode
DVD F-keys
F1 … F10, M1
AMP Function
Amp Function
Tape
Amp
On / Off / Standby
Speaks:
“F”
Speaks:
“F”
VCR DVD Video
Amp Function
Vid
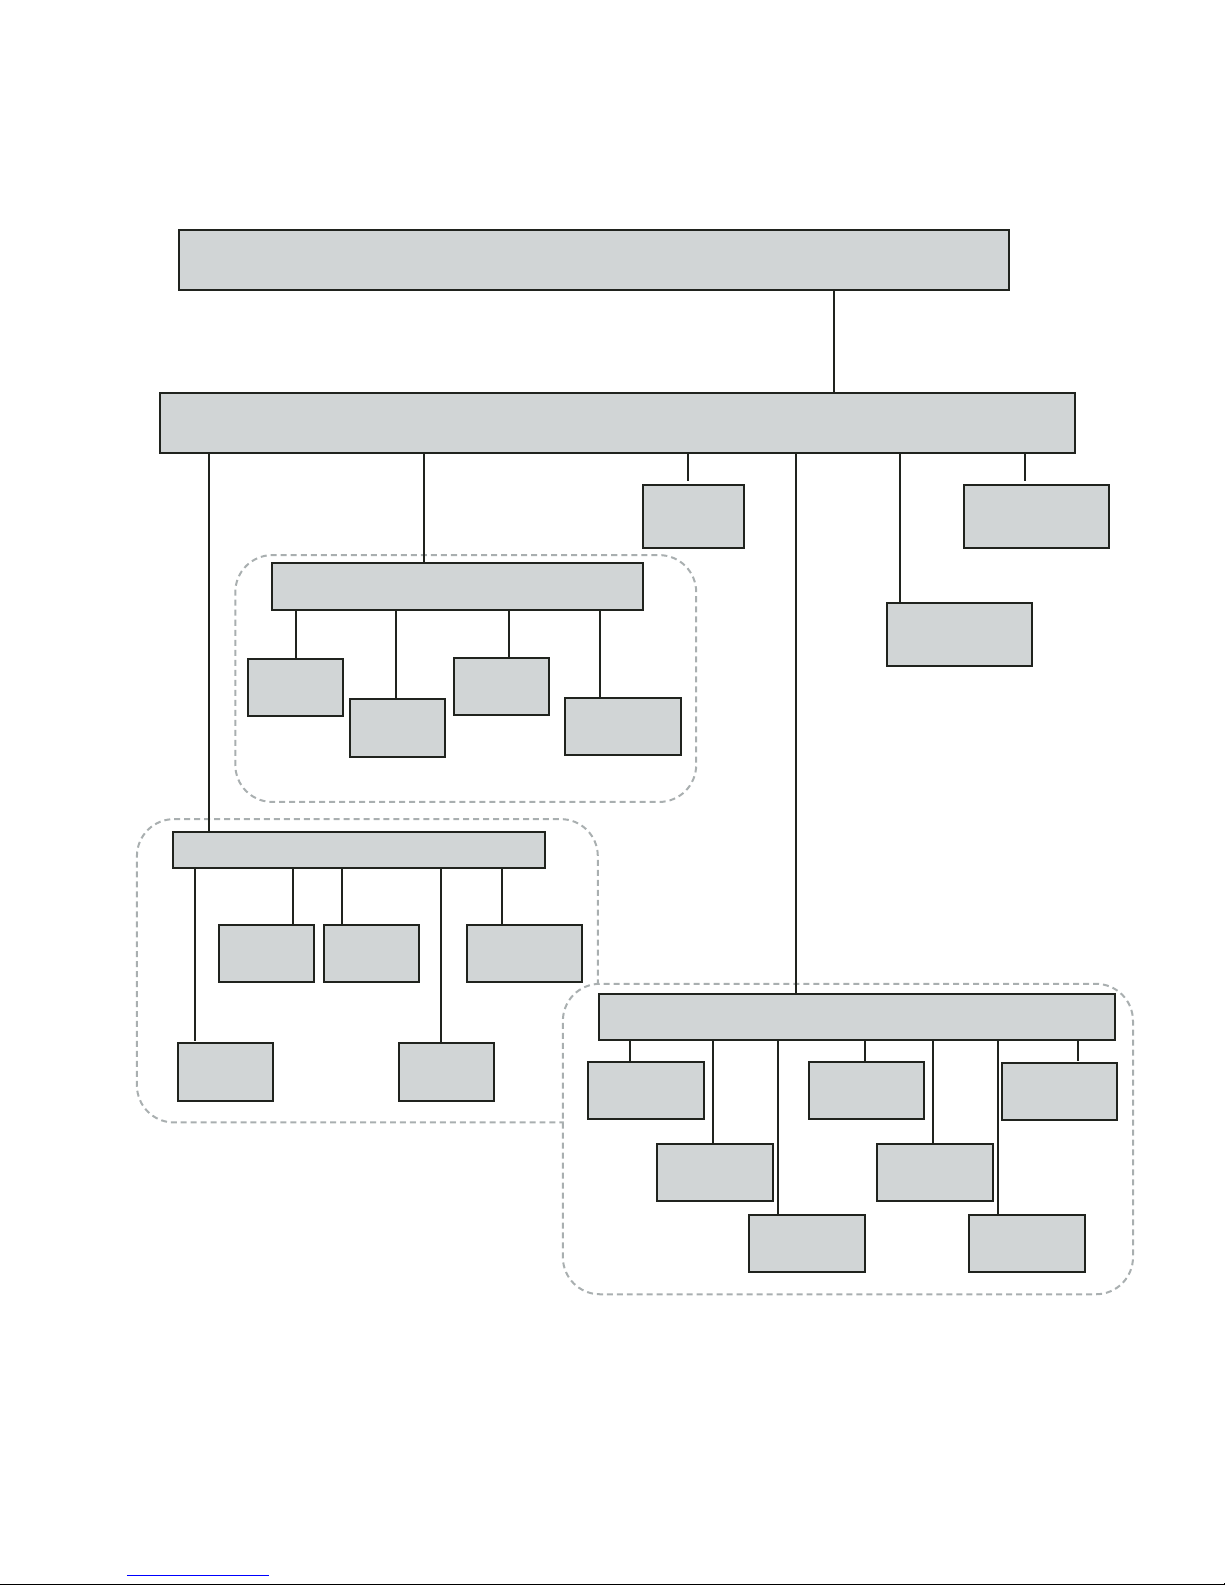
Figure 7. Flowchart of the Radio Menu
30
Amp Function
AM Mode
Amp Function
CD Mode
Amp Function
Vid / Aux
Amp Function
DVD
Speaks:
“Auxiliary”
Page 44

Radio Function - When “radio” is selected from the IR Menu, “vol,” “ch,” “mute,” “mode,” and
“pwr” are displayed. (See Figure 7.)
1. Press (>) to begin scanning. Press (>) again to select the desired function.
2. Select “vol” to increase or decrease the radio volume.
3. Select “ch” to step through preset stations. (Use instructions provided with your radio to
program station presets.)
4. Select “mute” to turn the sound on or off.
5. Select “mode” to toggle between AM and FM bands, the CD player, or to set the radio to
the”vid/aux” mode.
6. Select “F” to access programmable functions.
7. Select “pwr” to turn the radio on or off.
Summary of Amplifier/Radio Selection Choices
Vol +
Vol –
Volume and mute should “punch thru” to TV or
AMP/Radio, which ever was used last.
Mute
FM “F1”
AM “F2”
CD “F3”
Tape “F4”
VCR “F5”
DVD “F6”
Vid “F7”
F8 – F10, M1 Available for user definition
PWR
Standby
31
Page 45
CD Player Control
Remote Control
CD Player
vol play for rew trk stop F pwr
cd
Speaks:
“F”
CD Player
Play / Pause
CD Player
Fast Forward /
Play
CD Volume
MUTE Vol+ Vol- TV Amp
Speaks:
“Increase”
CD Vol
Vol Up
Speaks:
“Increase”
CD Vol
Vol Mute
Speaks:
“Decrease”
CD Vol
Vol Down
Speaks:
“Decrease”
CD Vol
TV Select
CD Vol
Amp Select
Speaks:
“Tuner”
CD Player
Rew / Pause /
Play
Speaks:
“Tuner”
CD Player
Stop
CD Player
+10 1 2 3 4 5 6 7 8 9 10
CD Player
On / Off / Standby
CD F-keys
F1 … F10, M1
Speaks:
“1-10, M”
32
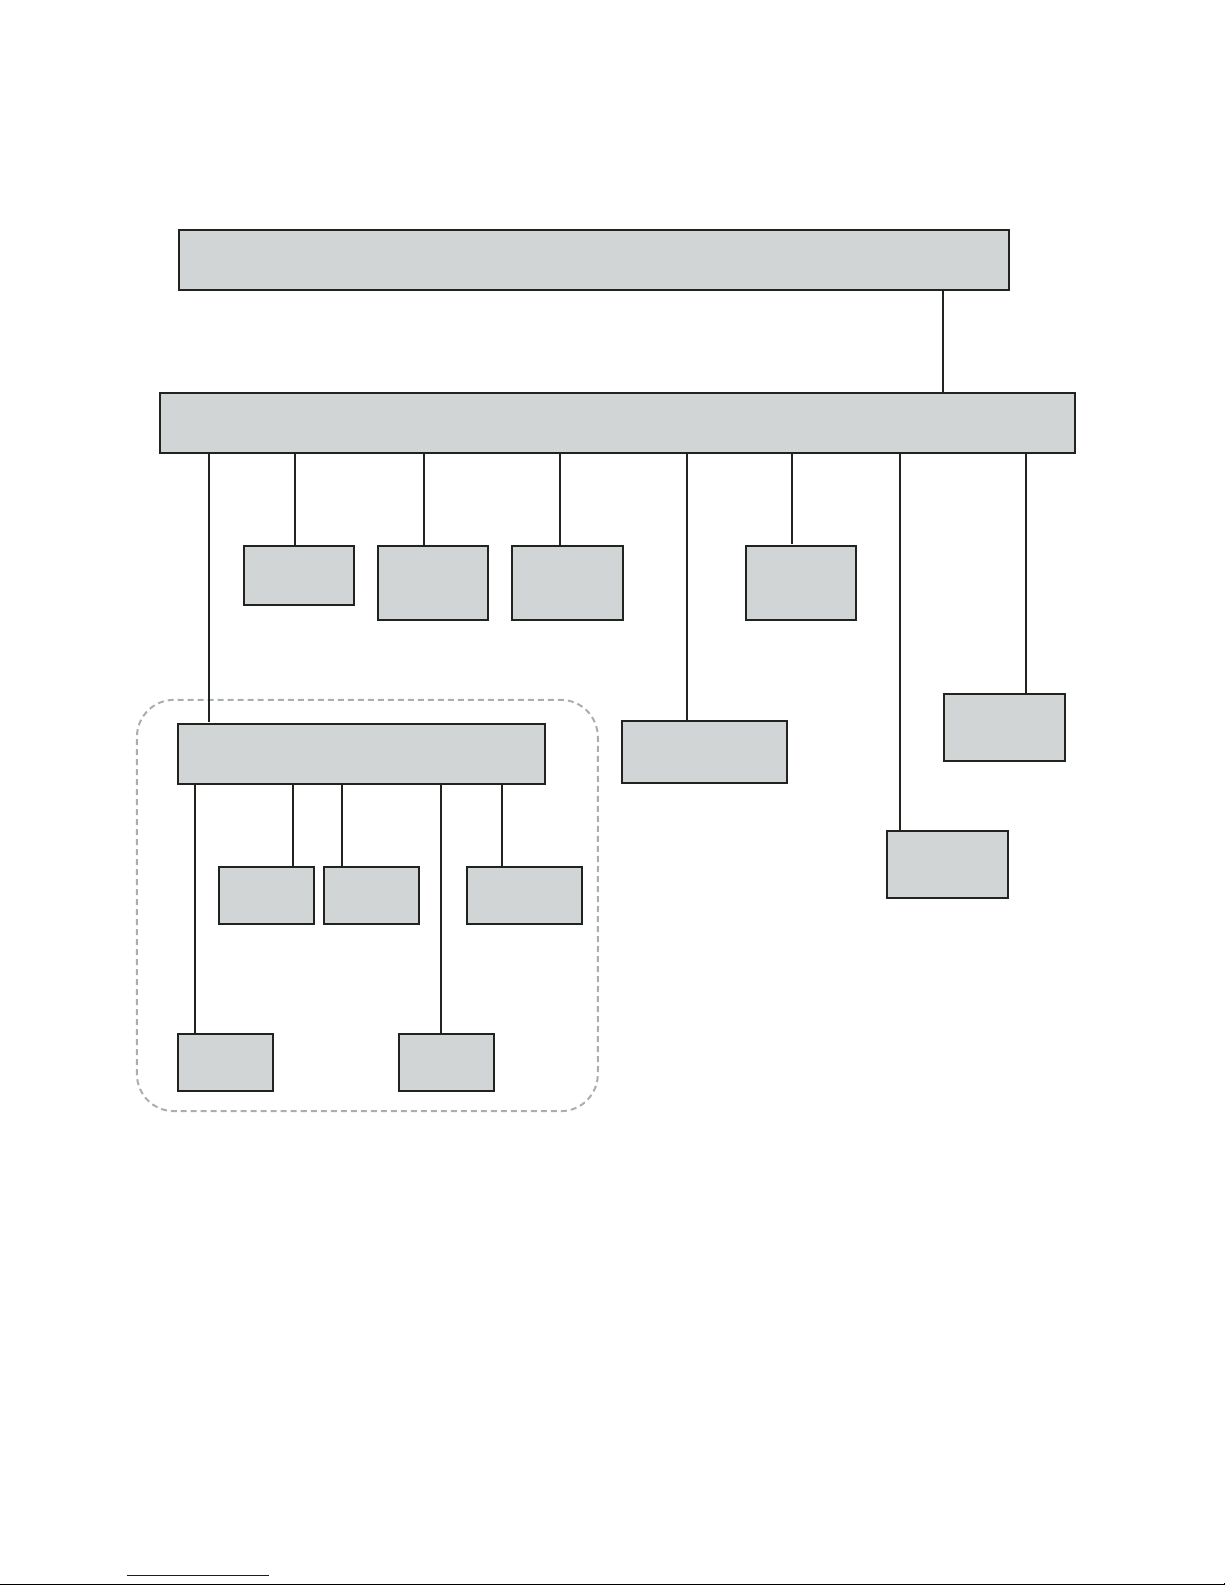
Figure 8. Flowchart of the CD Menu
Page 46

CD Function – When “cd” is selected from the IR Menu, “vol,” “play,” “for,” “rew,” “trk,” and
“stop” are displayed. (See Figure 8.)
1. Press (>) to begin scanning. Press (>) again to select the desired function.
2. Select “vol” to increase, decrease, or mute the CD volume.
3. Select “play” to play or pause the player.
4. Select “for” to move forward from the current track.
5. Select “rew” to select a previous track.
6. Select “trk” to enter a specific track number.
7. Select “stop” to stop the player.
8. Select “F” to access programmable functions.
9. Select “pwr” to turn the CD player on or off.
Summary of CD Player Selection Choices
PWR
Standby
Play
Rew
FF
Stop
Pause
0 – 9 and +10 +10 is on the M1 key
F1 – F10 Available for user definition
ONE-FOR-ALL SIX INFRARED REMOTE CONTROL
If your Imperium Infrared Remote Control is an upgrade from the One-For-All Six Infrared
Remote Control originally included with your Imperium 200H system, please take note of the
changes/improvements in the new IR remote control.
IF UPGRADING FROM THE
33
Page 47

Trainable: Learns IR Codes From Other Remote Controls
The Imperium IR Remote Control is “trainable.” As with the One-For-All Six, it has a built-in
library of command codes for many popular consumer electronic devices also (code list begins
on page 9). By being trainable, also, it can “learn” most IR codes directly from the IR remote
which came with your television or other electronic device. (For instructions, see “Learning Codes
From Existing Remote Controls” beginning on page 5 of this manual.)
Pressing Buttons: Automatic Presses
As you know from past experience, through its IR control menus the Imperium 200H
electronically “pushes the buttons” for the user on the IR remote control.
In a few instances with the Imperium IR Remote Control, when you enter a menu the system
automatically pushes an appropriate button for the user – such as the device buttons: TV, DVD,
SAT, CD, VCR, AMP. The system knows that when you enter a given menu the corresponding
device button needs pushing – and it does it automatically!
Pressing Buttons: Prolonged Presses
The IR controller will hold a button as long as the user holds the input switch or for 10 seconds,
whichever comes first. (The exception is for multi-digit channel entry, where each button is held
for 1/10 of a second.) By continuously holding the IR transmission as long as the user holds the
switch, one has much better control over volume settings and other stepping functions.
New Button Functionality
New buttons were added to the Imperium IR Remote Control which were not available on
the One-For-All Six.
x The addition of a “Standby button” function on the new Imperium IR Remote
Control. (Newer audio devices often have both a “Power” button and a “Standby”
button. The Power button only turns the device on, not off; Standby is used to turn it
off.)
x The new controller has a row of F-keys (function keys). Some of these keys are
expected to perform certain functions depending upon what device you are
controlling. More details are within this manual’s section on each device.
x Some menu buttons – such as many of the Satellite/Cable functions – are actually on
an F-key, yet we also provide an F-key menu in all devices so you can access
additional device functions previously unavailable to the user.
34
Page 48

x If an F-key isn’t preassigned to do something else, you can assign a function to it.
Similarly, you can even reassign any key which has a preassigned device-specific
function. Doing so will only lose whatever default function the key previously
performed.
Power and Standby Buttons
In some cases, there are keys on the IR controller which do not perform a particular function for
a particular electronic device because the device doesn’t use that function. For example, some
radios use a single Power button to toggle the radio On and Off. Other radios may use a Power
button to turn the radio On, but require a Standby button to turn the radio Off (Standby mode). If
your radio uses a single Power button, it won’t need the Standby button on the Imperium IR
Remote Control – and won’t recognize any signal if the Standby button were to be pressed.
On the other hand, if your radio does need both a Power and Standby command, the Imperium
IR Remote Control accommodates it. In the Imperium 200H’s AMP/Radio menu, the Power
function rolls between the Power button on first press … Standby on second press … and back to
Power for the third
press.
If your radio does not need the Standby command, we recommend you assign the Power function
to the Standby button as well as to the Power button. (For instructions on how to “train” or
assign a command to a button on the Imperium IR Remote, see “Learning Codes From Existing
Remote Controls” beginning on page 5 of this manual.)
A note about how the Text Display treats this difference. If you need both Power and Standby
functions, the Text Display shows both; it displays “On/Off” for the Power function and
“Standby” for the Standby function. If you do not need the Standby function and choose to train
the Standby menu item to be a second Power function bear in mind that the Text Display screen
will still read “Standby” (not
“On/Off”).
Unassigned Buttons
If you attempt to press a button on the IR controller via the Imperium 200H menu but the
controller doesn’t have a function assigned for that button (e.g., Standby discussion above), the
Imperium 200H ECU will beep and speak the name of the function you are pressing. If you can
see the IR controller, you will notice that its LED does not illuminate when an unassigned button
is “pressed.” This is normal operation.
35
Page 49
Button Assignments
These are the buttons used by the Imperium 200H for each device. These are the buttons you
need to “Learn” into the IR controller if a built-in library code doesn’t work well for you. For
example, if your brand of television doesn’t fully work with any of that brand’s TV codes listed
in the book, use the one which works best; then use the “Learn” function to correct the buttons
which did nothing or did the wrong thing.
Guide Menu
(common to DVD and SAT/Cable)
Function Spoken Key
Enter Enter “ENTER”
Channel Menu Channel Enters new menu
Up Up “CH +”
Down Down “CH –”
Info Check “F1”
Pvr P “F3”
Left Decrease “F6”
Right Increase “F7”
Cancel Previous “F8”
Guide Controls “F9”
Pvr = personal video recorder
Batteries & Power
The One-For-All Six Infrared Remote Control required alkaline batteries to operate. In contrast,
the Imperium Infrared Remote Control receives power from the host Imperium 200H unit, if it is
the newer model. Note that the newer models are functionally like the earlier units; cosmetically
they have a different rear panel. The newer rear panels are in color and have serial numbers
beginning with 200H. Therefore, you can program and use the Imperium Infrared Remote
Control without batteries, if it is plugged into a newer unit.
You may want to install batteries in the Imperium Remote Control and take it to the store to
verify it properly controls any electronic device you are considering buying. The Imperium
remote works with most manufacturers’ IR controlled devices; only a few are known to have
programming difficulty.
Tash Inc.
3512 Mayland Court
Richmond VA 23233
Service 1-800-944-8002 Sales 1-800-463-5685
www.tashinc.com
36
 Loading...