

Targus Stow-N-Go Wireless Optical Stow-N-GoTM Notebook Mouse 30, Stow-N-Go AMW25US User Manual
USER GUIDE
Visit our Website at www.targus.com Features an d
specifications s ubject to change without notice.
© 2008 Targus Group Inte rnational, Inc. and Targus, Inc.
AMW25US / 410-1098-00 1B
Wireless Optical
Stow-N-GoTM
Notebook Mouse
30

WIRELESS OPTICAL
STOW-N-GO
TM
NOTEBOOK MOUSE
Introduction
Congratulations on your purchase of the Wireless Optical
Stow-N-GoTM Notebook Mouse. This mouse features a
tracking resolution switch for users who require more
precision or speed with various applications. The StowN-Go receiver clips onto the mouse for ease of use while
traveling or on the go. This mouse also features a 4way scrolling tilt-wheel which allows for both vertical and
horizontal navigation.
System Requirements
• Hardware - USB port
• Windows® 2000/XP
• Windows Vista™
• Mac OS X 10.4 (or greater)
1
Wireless Optical Stow-N-GoTM Notebook Mouse
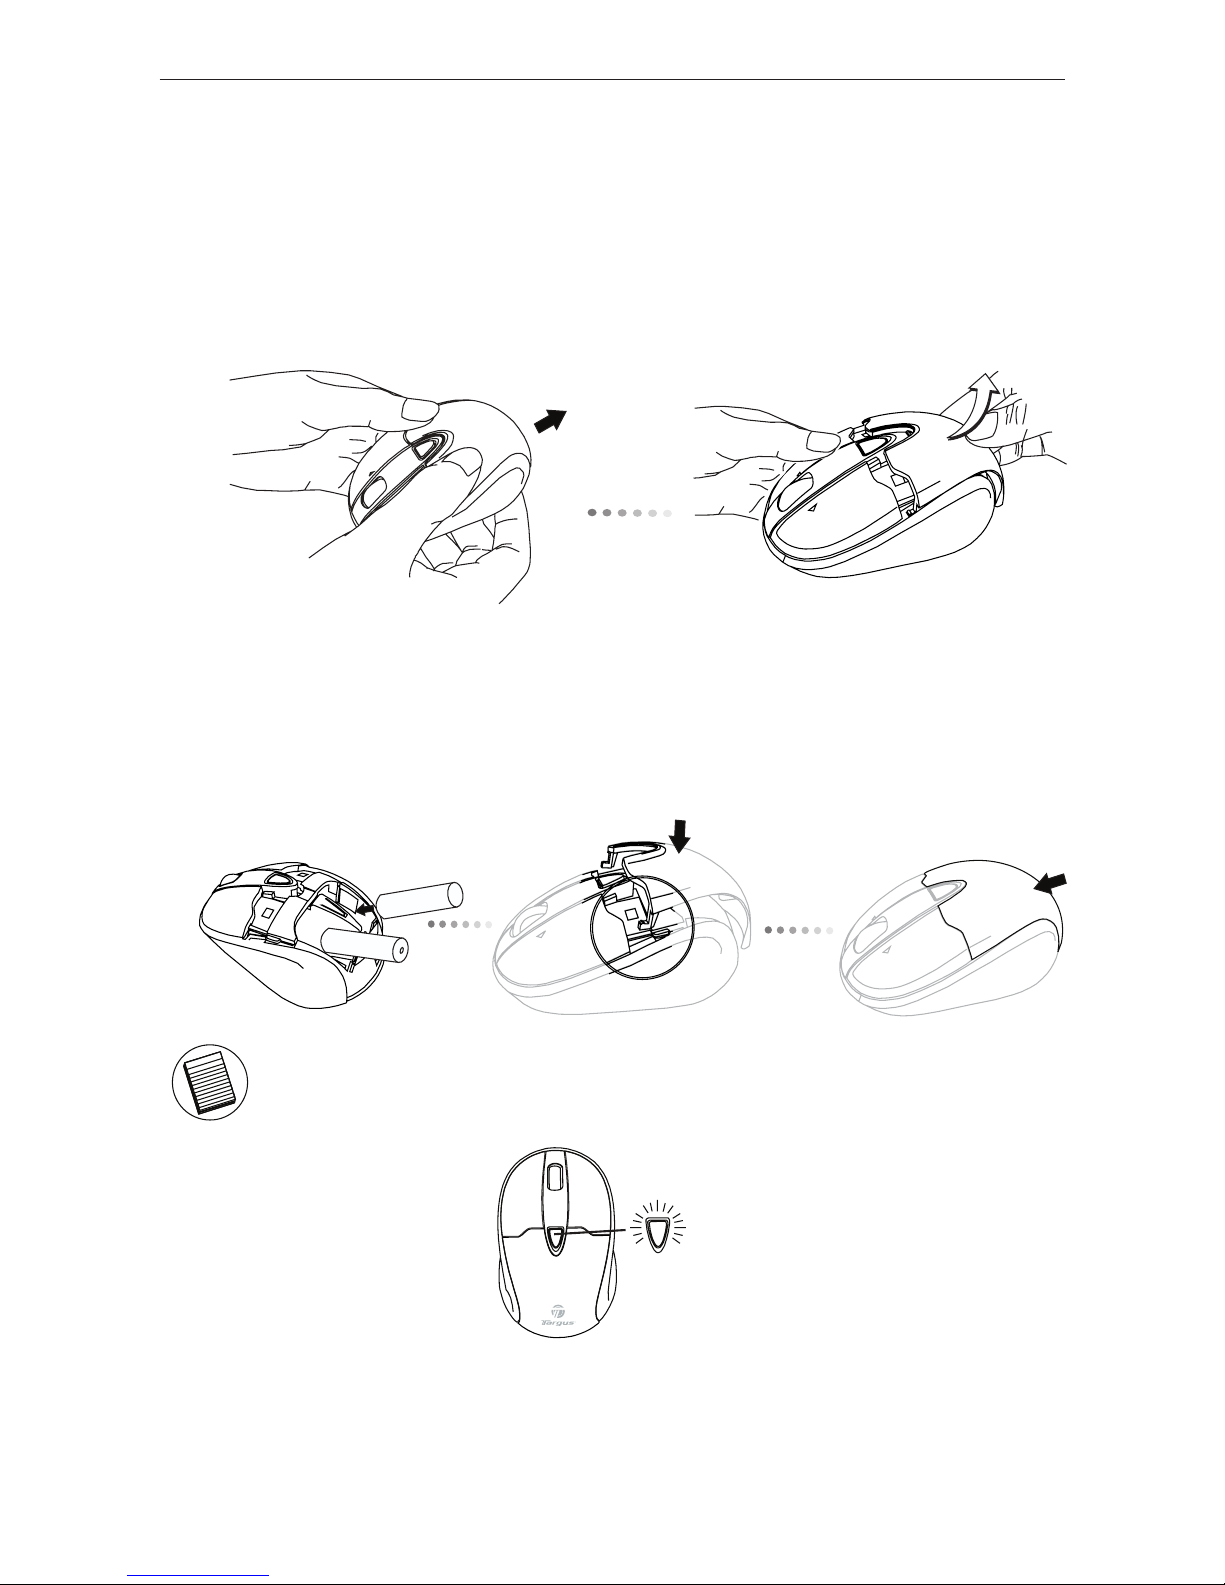
Installing the Batteries
1. Remove the battery cover from the back of the mouse by sliding
off the cover of the mouse. Hold the mouse in your hands and with
the back of the mouse away from you. Press down on the corners
of the battery cover and slide towards the back of the mouse. Lift
the cover off from the back of the mouse.
2. Insert two AA-size batteries, making sure that the positive (+)
and negative (-) ends of each battery match the polarity indicators
inside the battery compartment. To replace the battery cover,
place the cover on top of the mouse and slide forward until it clicks
into place.
NOTE: WHEN THE BATTERY IS LOW, THE LOW POWER INDICATOR LIGHT LOCATED IN
THE DPI SWITCHING BUTTON WILL FLASH RED. PLEASE REPLACE WITH TWO NEW
AA-SIZE BATTERIES.
DPI switching
button
When power is on, the mouse goes into “sleep mode” after 8
minutes of inactivity. To activate the mouse, press any mouse
key.
2
Wireless Optical Stow-N-GoTM Notebook Mouse
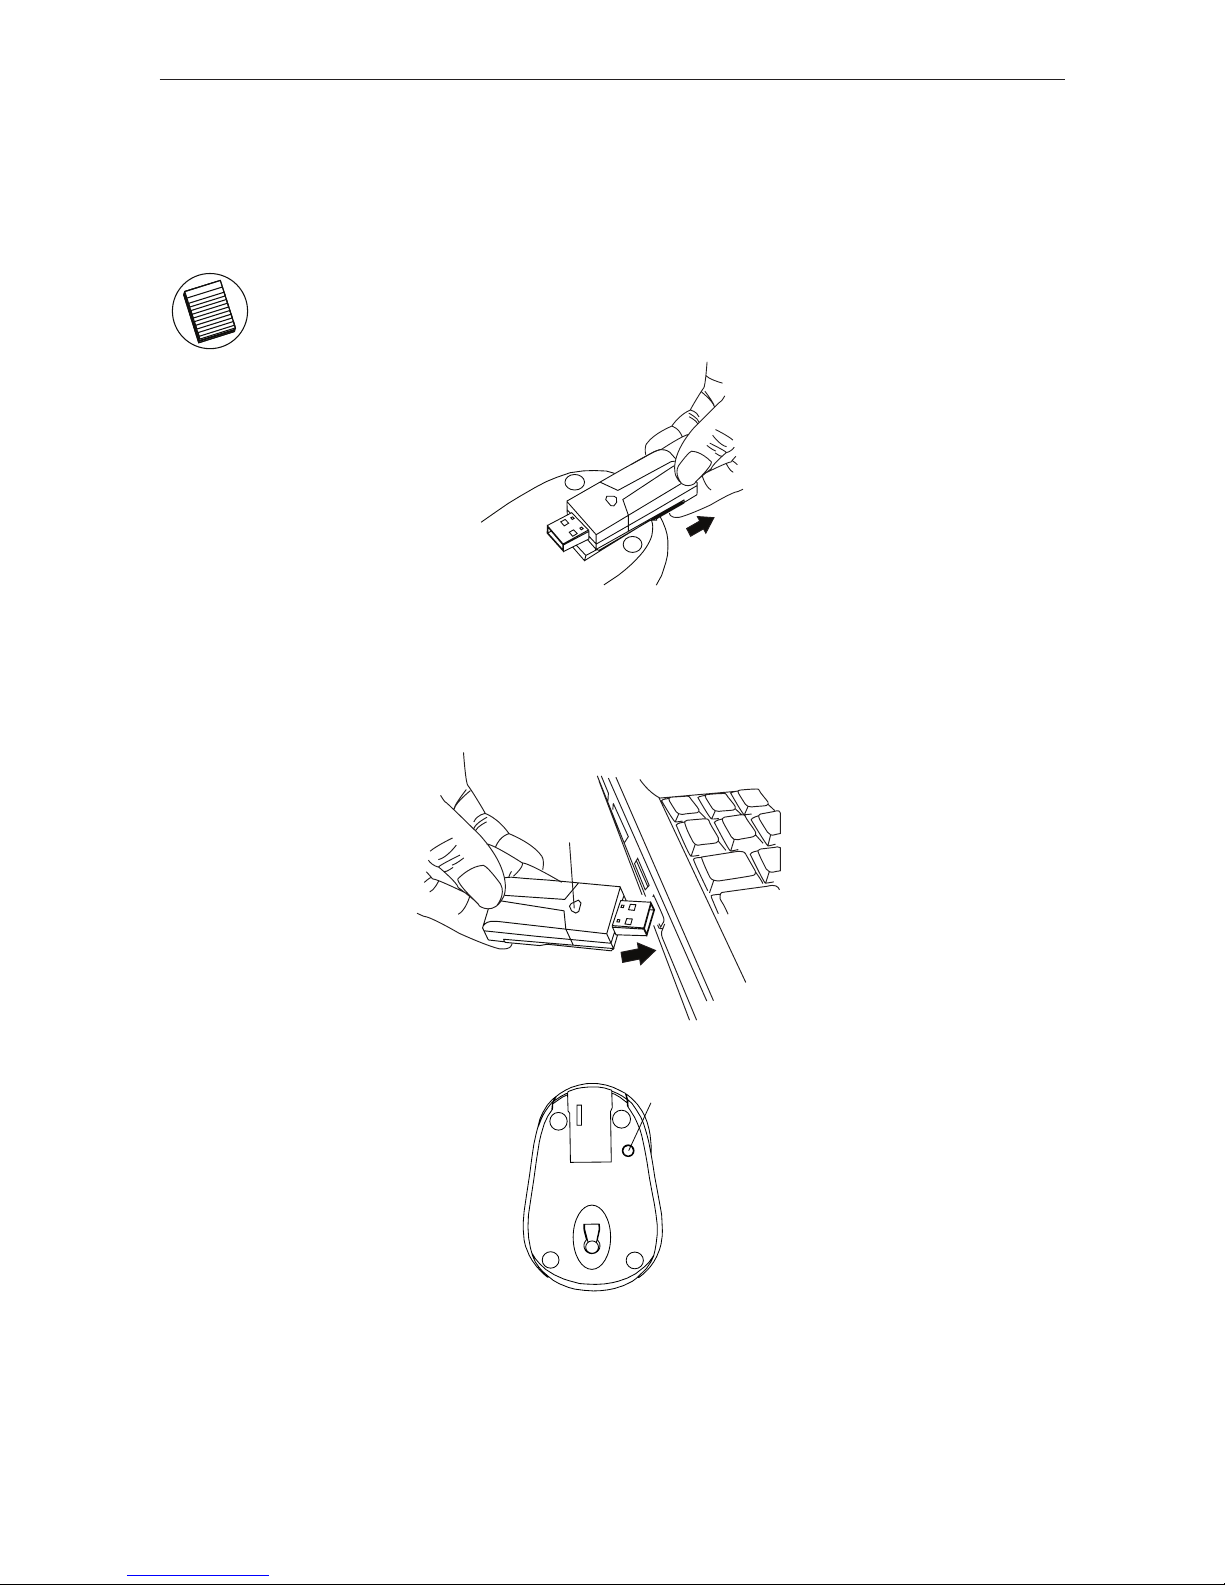
Establishing the Connection
(A) Remove the USB receiver from the bottom of the mouse.
This will activate the on/off switch.
NOTE: TO TURN THE MOUSE OFF, SIMPLY PLACE THE USB RECEIVER BACK INTO THE
STORAGE SLOT. THIS WILL MAXIMIZE BATTERY LIFE WHEN NOT IN USE.
(B) Plug the USB receiver into an available USB port on your
computer.
(C) Press and release the setup key on the receiver.
(A)
(B)
(C)
(D) Press the setup key on the bottom of the mouse.
(D)
This device has 256 identification codes that allow the mouse and
its receiver to operate without interference from other radio frequency devices. If you experience interference during use, repeat
steps C and D to change the connection channel.
3
 Loading...