

Page 1
DVD-ROM
Page 2
TARGUS Noteworthy DVD-ROM
2
Warning!
All rights reserved. The products named in this manual are only used
for identification purposes and may be trademarks or registered
trademarks of the respective companies. This device was designed
for home or office use.
Warning! This device is equipment according to EN55022 class A. This
equipment can cause radio disturbances in a residential area. If this
is the case, the user has to take appropriate measures and assume all
responsibility and costs. It may not be used near or with any lifesustaining systems.
The manufacturer is not liable for any damages that may occur from
the use of a TARGUS Noteworthy DVD-ROM system. All rights reserved. We reserve the right to make changes as technology requires.
FEDERAL COMMUNICATIONS COMMISSION - DECLARATION OF CONFORMITY
This equiqment has been tested and found to comply with the limits for a Class B digital device,
pursuant to part 15 of the FCC Rules, and RS 210 Regulations (Canada). These limits are designed
to provide reasonable protection against harmful interference in a residential area. This equiqment
generates, uses, and can radiate radio frequency energy and if, not installed and used in accordance
with the instructions, may cause harmful interference to radio communications. However, there is
no guarantee that interference will not occur in a particular installation. If this equipment does
cause harmful interference to radio or television reception, which can be determined by running
the equipment off and on, the user is encouraged to try to correct the interference by one or more
of the following measures:
• Reorient or relocate the receiving antenna.
• Increase separation between the equipment and receiver.
• Connect the equipment to an outlet on a circuit different from that to which the receiver is
connected.
• Consult the dealer or an experienced radio technician for help.
Page 3

3
User’s manual
General Information ............................................ page 4
Safety measures and operating hints ................. page 5
CHAPTER 1:
Hardware installation .......................................... page 6
CHAPTER 2:
Device description ................................................. page 7
CHAPTER 3:
Driver installation
under Windows 95 ............................................ page 8
under Windows 98 ............................................ page 10
under Windows ME ........................................... page 13
under Windows 2000 / Windows XP ................ page 16
under Windows NT 4.0 ...................................... page 20
under DOS, Windows 3.x .................................. page 21
CHAPTER 4:
Daily use of the
TARGUS Noteworthy DVD-ROM .......................... page 24
CHAPTER 5:
Reference Section .................................................. page 25
Technical Support .................................................. page 26
Specifications of the
TARGUS Noteworthy DVD-ROM .......................... page 27
Table of Contents
Page 4

TARGUS Noteworthy DVD-ROM
4
System Requirements:
Hardware Requirements
• 486DX PC or higher
• 8 MB RAM or higher, depending on the operating system
• floppy disk drive and a hard disk
• PCMCIA Card interface (type II or higher)
Operating System Requirements
• DOS
• Windows 95/98/ME
• Windows 2000
• Windows XP
• Windows NT 4.0 (DVD Movie Playback is not possible under
the NT operating system)
Media Formats
The TARGUS Noteworthy DVD-ROM reads formats according
following CD and/or DVD-ROM standards:
• MS-DOS data CD’s (High Sierra, Mode 1 & Mode 2 complying
with ISO 9660)
• Data – CDs‘ (Joliet)
• CD ROM XA
• Mixed Mode CD’s
• Kodak Photo CD’s (single and multisession)
• UDF (Universal Disc Format)
• Audio CD’s
• DVD-ROM
• DVD-R, CDI, CD-Midi, CD-R, CD-RW
Page 5

5
Contents
The contents of the TARGUS Noteworthy DVD-ROM includes:
• TARGUS Noteworthy DVD-ROM drive
• a manual
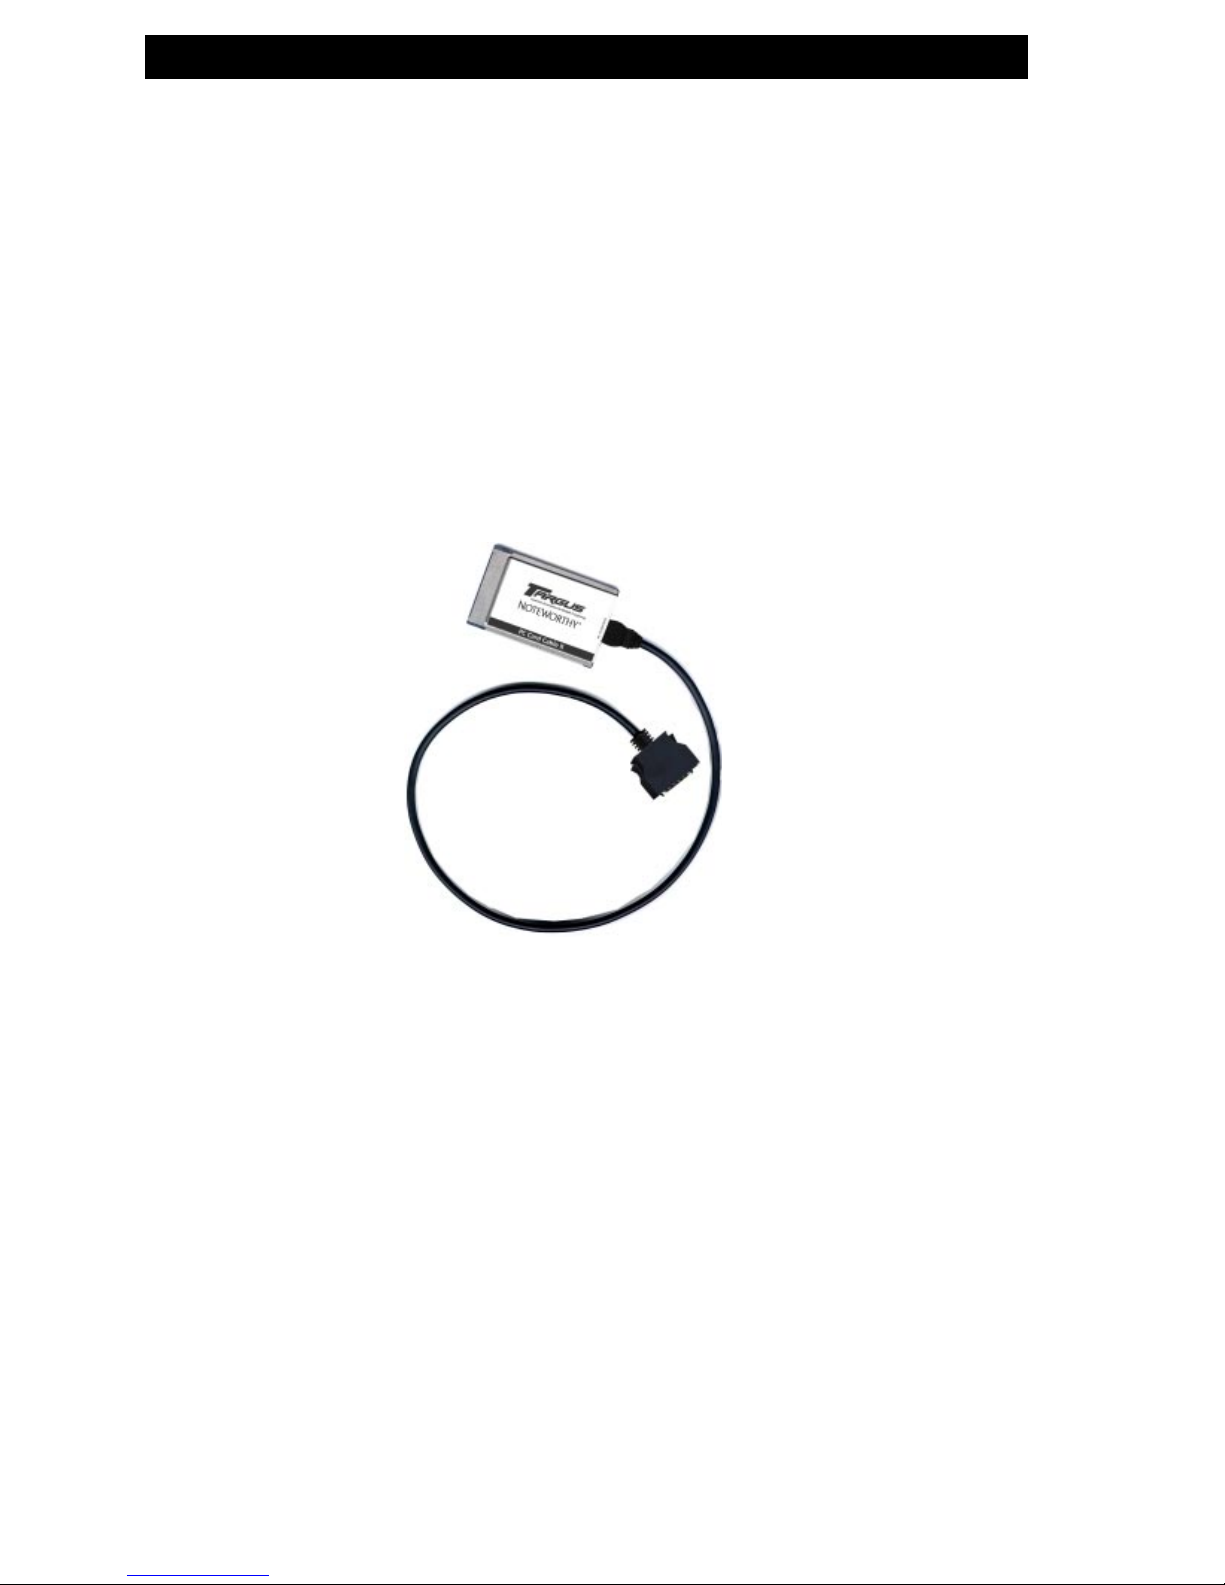
• PC Card connection cable
• Drive disk
Safety measures and operating hints
• The tray of the media can be opened in the following
modes:
- You can use the eject button when the notebook is
powered on and the drive is connected.
- If the drive is disconnected or the notebook is powered
off, you can use the emergency eject button to eject a
disk.
• The TARGUS Noteworthy DVD can be operated in either
upright or horizontal state. It should not be moved during
operation.
• Storage drives should not be used in extreme temperatures
conditions. The environment specifications while operating
are 50-113°F (10-45°C).
• After transporting the device, especially in low
temperatures, allow the TARGUS Noteworthy DVD unit to
reach room temperature before operating.
• The TARGUS Noteworthy DVD should not be used in dusty
or humid surroundings.
• There may be a delay while the drive is spinning up before
you can play an audio DVD or read a data DVD.
Safety:
• Never attempt to disassemble, adjust or repair the
DVD-ROM drive as exposure to laser light or other
safety hazards may result.
• This is a Class 1 Laser Product. This product complies
with all applicable safety standards, DHHS Rules 21
CFR Chapter 1, Subchapter J. The laser beam generated
is totally enclosed during all modes of normal
operation, and no hazardous laser light is emitted
from the drive.
General
Page 6
TARGUS Noteworthy DVD-ROM
6
CHAPTER 1: Hardware installation
1. Turn off the computer and all attached components.
2. Connect the cable to the drive.
4. Plug the PC Card Cable into any PC Card slot of your
computer.
6. Turn on your computer again.
7. You can now begin installing the software.
"Plug&Play" with the PC Card Cable for Windows 95 /
98 / ME / 2000 / XP
The TARGUS PC Card Cable is Plug & Play compatible. This
means that in Windows 95, 98, ME, 2000 and XP, the card can
be inserted while the computer is powered on.
To remove the card, while the computer is powered on, first
stop the PC Card using the PC Card (PCMCIA) icon.
In Windows NT 4.0 the card must be inserted before the
computer is powered on.
Computer
connection
connection to drive
Page 7
7
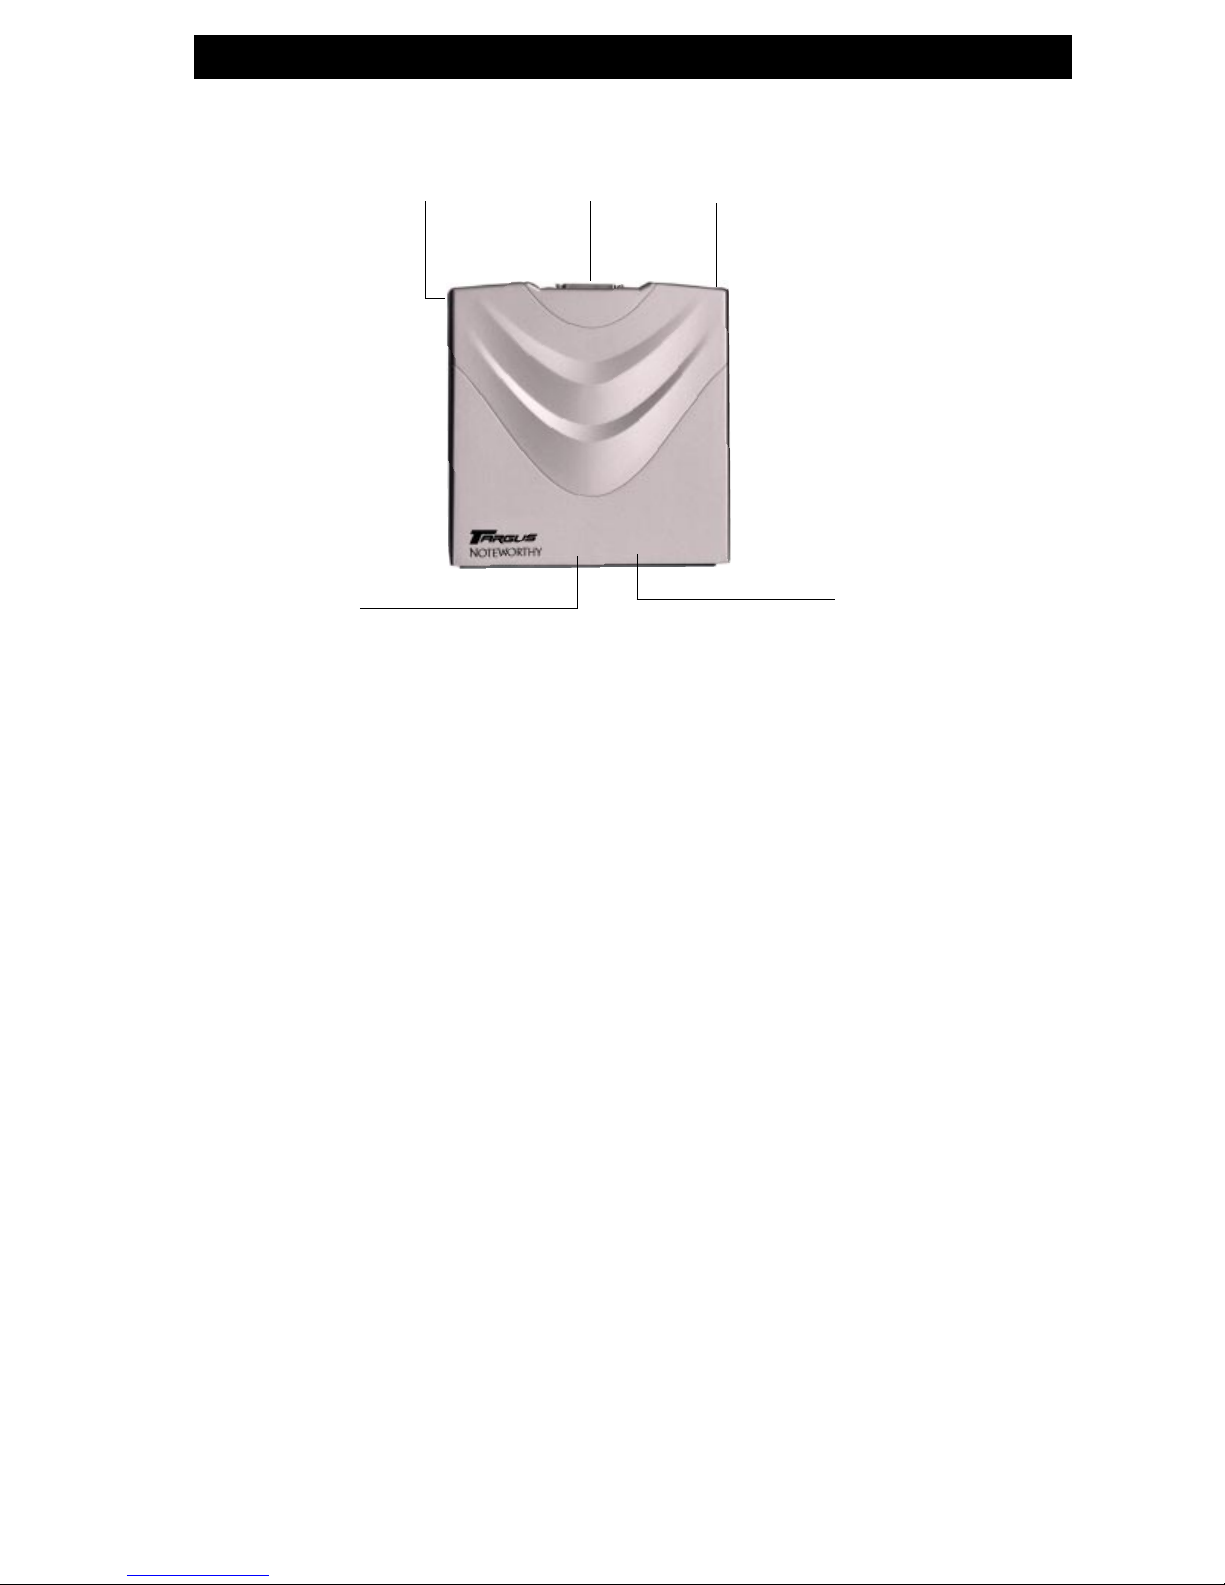
CHAPTER 2: Device description
Please note the following important details:
1. Power supply from the Notebook via PC Card:
The TARGUS Noteworthy DVD-ROM will only receive power
from the notebook’s PC Card slot (2). The notebook PC Card
slot also needs to be in full compliance with the PC Card
specifications and supply a minimum of 5V/1A of power.
An optional AC Adapter is available through TARGUS
online sales.
2. Playing Audio-CDs
You can play audio DVDs on your TARGUS Noteworthy
DVD-ROM by using the DVD Player application in Windows.
To hear the audio you need to connect either headphones
to the Audio OUT jack on the TARGUS Noteworthy DVDROM or an audio cable from the DVD-ROM to the Line In of
your notebook.
3. Emergency eject
If you need to remove a disc when there is no power to the
drive, you can unlock the tray by inserting a bent-open
paper clip, or a similar pointed object, into the emergency
eject hole until you feel resistance (a light touch does it).
When you remove the paper clip, the tray can be opened
manually.
Device description
1 Tray 3 Audio out
2 Emergency eject hole 4 PC Card Cable connection
5 power connection (optional)
1
34
5
2
Page 8

TARGUS Noteworthy DVD-ROM
8
CHAPTER 3: Driver installation
Depending on your mode of operation for the drive you can
install this DVD using standard Windows drivers or install the
included TARGUS High Speed drivers for Windows 95/98/ME/
2000/XP. We recommend installing the performance drivers
for playing DVD Movies and other DVD Video applications.
Skip to the Performance Driver Installation section to continue.
3.1 Driver installation under Windows 95
No special software is required to install your TARGUS PC Card
Cable. We however recommend using the driver on diskette
that we have enclosed. This has been specially developed and
is faster than the Standard Windows driver.
TARGUS High Speed driver (recommended)
Note: If you are not prompted to install the driver, Windows
will install the default driver automatically. Proceed then as
described in the section on later installation of the TARGUS
High Speed driver.
To install the driver, insert the TARGUS installation diskette in
your PC drive.
1. Plug the TARGUS PC Card Cable into the PCMCIA slot of
your PC.
2. The window "Update Device Driver Wizard" opens. The
TARGUS PC Card Cable is recognized as "Standard IDE/ESDI
Hard Disk Controller".
Confirm with "Next" to continue the installation.
3. The driver is found in the next window. Confirm with
"Finish".
4. The driver is installed from the disk.
5. After restart your TARGUS drive appears under „My Com-
puter“ with a new drive letter.
Uninstalling the TARGUS High Speed driver
To uninstall the TARGUS High Speed driver, select the file
"DriverRemove.exe" on the installation diskette and follow
the on-screen instructions.
Page 9

9
Driver installation
Windows 95 Default Driver
No special software is required to install your TARGUS PC Card
Cable.
1. Plug the TARGUS PC Card Cable into the PCMCIA slot of
your PC.
2. The window "Update Device Driver Wizard" opens. The
TARGUS PC Card Cable is recognized as "Standard IDE/ESDI
Hard Disk Controller". Confirm with "Next" to continue the
installation.
3. The driver is found in the next window. To install the
Windows default driver, click "Finish".
4. To finish installing the driver, Windows asks you to restart
your computer. After restart your TARGUS drive appears
under "My Computer" with a new drive letter.
Later Installation of the TARGUS High Speed driver
Note: If you are not prompted to install the driver, your system
has automatically installed the Windows default driver for
your TARGUS PC Card Cable.
To install the TARGUS High Speed driver, proceed as follows:
1. Plug the TARGUS PC Card Cable into the PCMCIA slot of
your PC.
2. Open the "Device Manager" by right-clicking on the "My
Computer" icon. A menu opens. Select "Properties" and
click on the "Device Manager" tab.
3. Click on the "+" next to the entry "Hard disk controllers".
4. Double-click on "Standard IDE/ESDI Hard Disk Controller".
5. Open the "Driver" tab. Then click on "Update Driver".
6. The "Update Device Driver Wizard" opens. The default is
selected for searching a better driver than the currently
used (Recommended). Confirm with "Next".
7. Windows automatically detects and installs the TARGUS
High Speed driver from diskette.
8. After completion of the installation, click on "Finish". The
TARGUS High Speed driver is now installed.
Page 10

TARGUS Noteworthy DVD-ROM
10
3.2 Driver installation under Windows 98
No special software is required to install your TARGUS PC Card
Cable. We however recommend using the driver on diskette
that we have enclosed. This has been specially developed and
is faster than the Standard Windows driver.
TARGUS High Speed driver (recommended)
Note: If you are not prompted to install the driver, Windows
will install the default driver automatically. Proceed then as
described in the section on later installation of the TARGUS
High Speed driver.
To install the driver, insert the TARGUS installation diskette in
your PC drive.
1. Plug the TARGUS PC Card Cable into the PCMCIA slot of
your PC.
2. The window "Hardware Installation Wizard" opens. The
TARGUS PC Card Cable is recognized as "Standard IDE/ESDI
Hard Disk Controller".
3. In the next window the option for finding the best driver
for the device has been selected. Confirm with "Next".
4. In the next window select the floppy drive to install the
driver. Click on "Next".
5. The driver is loaded from the diskette. Click on "Next" to
continue the installation.
6. In the next window click on "Next" to confirm the
installation.
7. After completion of the installation, click on "Finish". Your
TARGUS drive appears with a new drive letter under "My
Computer". The installation is then complete.
Page 11

11
Windows 98 Default Driver
No driver software is required to install the Windows default
driver.
1. Plug the TARGUS PC Card Cable into the PCMCIA slot of
your PC.
2. The window "Hardware Installation Wizard" opens. Your
TARGUS PC Card Cable is recognized as "Standard IDE/ESDI
Hard Disk Controller". Confirm with "Next" to continue the
installation.
3. In the next window the option for finding the best driver
for the device has been selected. Confirm with "Next".
4. In the next window uncheck all checkboxes and click "Next".
5. In the next window a search is performed for the new
driver. Click on "Next" to install the Windows default
driver.
6. In the next window, click on "Finish" to conclude the driver
installation. Your drive now appears with a new drive letter
under "My Computer".
Later Installation of the TARGUS High Speed driver
Note: For further information on the "Driver Choice" options
please refer to "Readme.txt" on the installation diskette.
To install the driver, insert the TARGUS installation diskette in
your PC drive.
1. Execute the "DriverChoice.exe" program, which is located
on the driver disk.
2. Select the TARGUS High Speed driver and click "Next".
Driver installation
Page 12

TARGUS Noteworthy DVD-ROM
12
3. The next window will query whether you wish to remove
the old driver. Leave the check box selected and click
"Next".
4. Now all settings that you have specified are displayed. Click
"Start" to install the driver.
5. Remove the disk from the disk drive and reboot the
computer.
6. After the reboot, a new hardware item is recognised. Insert
the disk in the drive again and follow the instructions as
described in the section "TARGUS High Speed driver",
starting with step 2. Your TARGUS PC Card Cable will be
recognised as "FREECOM_PCCARD_IDE".
Uninstalling the TARGUS High Speed driver
To uninstall the TARGUS High Speed driver, select the file
"DriverRemove.exe" on the installation diskette and follow
the on-screen instructions.
Page 13

13
Driver installation
3.3 Driver installation under Windows ME
No special software is required to install your TARGUS PC Card
Cable. We however recommend using the driver on diskette
that we have enclosed. This has been specially developed and
is faster than the Windows driver.
TARGUS High Speed driver (recommended)
Note: If you are not prompted to install the driver, Windows
will install the default driver automatically. Proceed then as
described in the section on later installation of the TARGUS
High Speed driver.
To install the driver, insert the TARGUS installation diskette in
your PC drive.
1. Plug the TARGUS PC Card Cable into the PCMCIA slot of
your PC.
2. The window "Hardware Installation Wizard" opens. The
TARGUS PC Card Cable is recognized as "Standard IDE/ESDI
Hard Disk Controller".
3. Windows ME automatically detects and installs the TARGUS
High Speed driver from diskette.
4. After completion of the installation, click on "Finish". Your
TARGUS drive appears with a new drive letter under "My
Computer". The installation is then complete.
Windows ME Default Driver
No driver software is required to install the Windows default
driver.
1. Plug the TARGUS PC Card Cable into the PCMCIA slot of
your PC.
2. The window "Hardware Installation Wizard" opens. Your
TARGUS PC Card Cable is recognized as "Standard IDE/ESDI
Hard Disk Controller". The option for finding the best
driver has been selected (Recommended). Confirm with
"Next".
3. The Windows ME Default Driver is installed automatically.
4. In the next window, click on "Finish" to conclude the driver
installation. Your TARGUS drive now appears with a new
drive letter under "My Computer".
Page 14

TARGUS Noteworthy DVD-ROM
14
Later Installation of the TARGUS High Speed driver
Note: If you are not prompted to install the driver, your system
has automatically installed the Windows default driver for
your TARGUS PC Card Cable.
Note: For further information on the "Driver Choice" options
please refer to "Readme.txt" on the installation diskette.
To install the driver, insert the TARGUS installation diskette in
your PC drive.
1. Execute the "DriverChoice.exe" program, which is located
on the driver disk.
2. Select the TARGUS High Speed driver and click "Next".
3. The next window will query whether you wish to remove
the old driver. Leave the check box selected and click
"Next".
4. Now all settings that you have specified are displayed. Click
"Start" to install the driver.
Page 15

15
Driver installation
5. Remove the disk from the disk drive and reboot the
computer.
6. After the reboot, a new hardware item is recognised. Insert
the disk in the drive again and follow the instructions as
described in the section "TARGUS High Speed driver",
starting with step 2. Your TARGUS PC Card Cable will be
recognised as "FREECOM_PCCARD_IDE".
Uninstalling the TARGUS High Speed driver
To uninstall the TARGUS High Speed driver, select the file
"DriverRemove.exe" on the installation diskette and follow
the on-screen instructions.
Assigning the drive letter under Windows 95/98/ME
After successfully completing the installation of the TARGUS
Noteworthy drive, a new drive letter is assigned automatically
(the first available letter after the internal hard drives). This can
shift the drive letter of an internal CD-ROM drive (for example,
'D' to 'E'). If this leads to problems, it is possible to change the
drive letter assignment as follows:
1. Click on "Start" - "Settings" - "Control Panel".
2. Click on "System".
3. Select "Device Manager" and click on "CD-ROM" or "Drive".
4. Click on the DVD Drive listed (such as QSI DVD), then on
"Properties" - "Settings". (The currently assigned drive
letter as well as the reserved drive letters will then be
displayed.)
Page 16

TARGUS Noteworthy DVD-ROM
16
5. Under "Reserved Drive Letter" enter a drive letter, for
example "F" for the TARGUS Noteworthy device as the
"First drive letter" and "F" again as the "Last drive letter".
6. Confirm your selection with "OK". When you restart your
computer, the TARGUS Noteworthy drive will be assigned
the letter "F" in "My Computer".
3.4 Driver installation under Windows 2000 / XP
No special software is required to install your TARGUS PC Card
Cable. We however recommend using the driver on diskette
that we have enclosed. This has been specially developed and
is faster than the Windows driver.
TARGUS High Speed driver (recommended)
Note: If you are not prompted to install the driver, Windows
will install the default driver automatically. Proceed then as
described on page 14 in the section on later installations of the
TARGUS High Speed driver.
1. To install the driver, insert theTARGUS installation diskette
in your PC drive.
2. Plug theTARGUS PC Card Cable into the PCMCIA slot of your
PC.
3. The window "Hardware Installation Wizard" opens. The
TARGUS PC Card Cable is recognized as "PCMCIA IDE /
ATAPI Controller".
(only Windows 2000: Confirm with "Next".)
4. In the next window, the default option for finding a
suitable driver for the device is selected. Confirm with
"Next".
Page 17

17
Driver installation
5. (only Windows 2000) Select the floppy drive to install the
driver. Click on "Next".
6. (only Windows 2000) The driver is loaded from the diskette.
Click on "Next" to install the driver.
7. If a message appears that no digital signature from Microsoft Windows has been found, confirm with "Yes".
8. Confirm completion of the software installation in the
window that opens by clicking on "Finish". Your TARGUS
Noteworthy drive now appears with a new drive letter
under "My Computer". The installation is then complete.
Windows 2000 / Windows XP Default Driver
No driver software is required to install the Windows default
driver.
1. Plug the TARGUS PC Card Cable into the PCMCIA slot of
your PC.
2. Windows recognizes your TARGUS PC Card Cable as
"PCMCIA IDE/ATAPI Controller" and installs the necessary
driver without prompting.
3. After completion of the installation your TARGUS
Noteworthy drive appears with a new drive letter under
"My Computer". The installation is then complete.
Page 18

TARGUS Noteworthy DVD-ROM
18
Later Installation of the TARGUS High Speed driver
To install the driver, insert the TARGUS installation diskette in
your PC drive.
1. Execute the "DriverChoice.exe" program, which is located
on the driver disk.
2. Select the TARGUS High Speed driver and click "Next".
3. The next window will query whether you wish to remove
the old driver. Leave the check box selected and click
"Next".
Page 19

19
4. Now all settings that you have specified are displayed. Click
"Start" to install the driver.
5. Remove the disk from the disk drive and reboot the
computer.
6. After the reboot, a new hardware item is recognised.Insert
the disk in the drive again and follow the instructions as
described in the section "TARGUS High Speed driver",
starting with step 2. Your TARGUS PC Card Cable will be
recognised as "FREECOM_PCCARD_IDE".
Uninstalling the TARGUS High Speed driver
To uninstall the TARGUS High Speed driver, select the file
"DriverRemove.exe" on the installation diskette and follow
the on-screen instructions.
Driver installation
Page 20

TARGUS Noteworthy DVD-ROM
20
3.5 Driver installation under Windows NT 4.0
1. Insert the
"TARGUS installation diskette"
for Windows NT
4.0 operating system into your standard floppy drive.
2. Click
"Start", "Run"
and type
"a:\setup.exe"
(Example for
disk).
3. When you have accepted the agreement, a new window
will appear. The set-up programme suggests
"C:\Program
files\TARGUS Cable II"
as the standard default directory. (If
you wish to copy the files into another directory, click
"Browse"
and enter the path name.) Confirm the chosen
folder with
"Continue"
.
4. The set-up programme then suggests the entry
"Cable II
PCMCIA"
as standard in the start menu of the programme
folder. (You also have the possibility to create your own
folder.) Confirm the chosen entry with
"Continue"
and the
files will then be installed onto your computer.
Page 21

21
5. The set-up wizard will inform you of the installation process.
Follow the on-screen instructions.
After you restart your computer, your TARGUS Noteworthy
drive will appear with a new drive letter under
"My Compu-
ter"
.
Note: Don't forget to remove the TARGUS installation disk
before restarting your computer.
The installation is now complete.
3.6 Driver installation under DOS / Windows 3.x
The installation under DOS/Windows 3.x is menu-driven to
make it as easy as possible to integrate the TARGUS Noteworthy
device into your system. You can select the various menu items
with the cursor keys and confirm your selection with [ENTER].
Installation sequence:
1. Exit Windows or other software such as the Norton
Commander.
2. Insert the driver disk into your disk drive and change to this
drive by entering either A: [ENTER] (Example for disk). Start
the installation from the DOS prompt by entering: FCINST
[ENTER].
3. Select the language in which the installation is to be
performed.
4. Select the type of connection used and the device.
Driver installation
Page 22

TARGUS Noteworthy DVD-ROM
22
5. You can now decide if you want to the installation to
proceed automatically whereby the installation program
specifies the path and modifies your computer's startup
files (Please refer to point 10 of these instructions). However,
if you want to modify the settings, select "user-defined."
Please observe the further instructions in these instructions.
6. Read the following information screen and confirm with
the Enter key.
7. If you wish to select a different path, you can specify in
which directory the TARGUS software is to be installed.
Please enter the complete path name including the drive
letter! If the directory does not yet exist, it will be created.
8. The files will now be copied to the directory you specified.
9. After the files have been copied, you will have the
opportunity to modify the startup files of your computer
(CONFIG.SYS, AUTOEXEC.BAT). You can also display these
modifications or cancel the installation.
10. The installation updates your startup files and saves the
original versions under the name CONFIG.FC and
AUTOEXEC.FC.
11. After the startup files have been modified, you can leave
the installation program. In order for the changes to take
effect, you must restart your computer.
12. If you want to undo the installation, start the program
"UNINST.EXE" in the installation directory.
Note: After restarting your computer, additional boot messages
are displayed which are generated by the device drivers for the
device you just installed.
Page 23

23
At first, the enabler for the example PCMCIA (FCPOINT.EXE) in
the CONFIG.SYS file is loaded and displays a message similar to
the following (depending on your specific device):
-----------------------------------------------------------
PC Card driver for external ATAPI-IDE Drives
Rev:2110
Found PCCARD: FREECOM PCCARD-IDE RV#052 V5.0
Initialization using C:\FC\FCPOINT.INI completed!
-----------------------------------------------------------
If a different driver message is displayed, this does not indicate
that an error has occurred. Please refer to the chapter
"Troubleshooting" only if the text contains the word
"ERROR"
or
"WARNING"
. The driver is then loaded and displays the
following – depending on the device (for example FCATAPI.SYS):
ATAPI-CD: ATAPI IDE CD-ROM Device Driver Rev. 2130 DOS
ATAPI-CD: Copyright (C) Freecom Technologies 1995-2001
ATAPI-CD: Drive: Toshiba CD-ROM XM-6202B 1110
ATAPI-CD: CD-ROM drive installation successfully completed
The driver assigns the device the first available letter following
your last hard disk For example, if you only have one hard drive
C:, the device will be assigned the drive letter D:.
The driver MSCDEX.EXE will also be called up for devices with
a CD ROM drive. It is responsible for assigning the drive letter
to the CD-ROM.
Driver installation
Page 24

TARGUS Noteworthy DVD-ROM
24
CHAPTER 4: Daily use of the TARGUS Noteworthy
DVD-ROM
To insert or eject a media, press the eject button, which is only
active when the system is ready-to-operate.
When inserting a DVD-ROM disc place printed side face up.
The disc will need to be snapped down over the spindles.
Please do not touch the underside of the media as any kind of
dirt might result in read errors or even uselessness.
Page 25

25
CHAPTER 5: Reference Section
General problems
If you have problems getting your TARGUS Noteworthy DVDROM drive to function properly please check the following:
• Does your system meet the hardware requirements.
• Check to see if the PC Card Cable is attached to the drive
correctly and inserted all the way in the PC Card slot
• Is the drive getting power? Check to see if media tray can
be opened by pressing the eject button after the notebook
is powered on.
If there is no sound, check if
• The headphones/speakers are correctly connected
• The cable is damaged
• The volume is up
• The audio software is installed
Playing a DVD-ROM Movie title
To play a DVD-ROM movie you need a DVD-ROM decoder
either installed in the notebook or a player application setup
under Windows 95/98/ME/2000. Windows NT 4.0 does not
support DVD-ROM Movie playback.
Reference Section
Page 26

TARGUS Noteworthy DVD-ROM
26
Technical Support
In the unlikely event that you encounter a problem with your
Targus accessory, please contact our technical support team at:
Email: TechSupport@targus.com
Internet: www.targus.com/support
Our knowledgeable staff is also available to answer your
questions Monday through Friday, 8 a.m. (08:00) to 6 p.m.
(18:00) C.E.T. through on of following numbers:
Belgium +32(0)02-717-2451
Denmark +45(0)35-25-8751
France +33(0)1-64-53-9151
Germany +49(0)21-16-579-1151
Italy +39(0)24-827-1151
Netherlands +31(0)53-484-9470
North American 888-970-7678
Spain +34(0)91-745-6221
Sweden +46(0)8-751-4058
Switzerland +41(0)1-212-0007
UK +44(0)20-7744-0330
Eastern Europe
& Others +31(0)53-484-9479
Check our web site www.targus.com for Frequently Asked Questi-
ons and Driver updates.
Please have the following information on hand when you call:
• The version of your installation disk
• The version of your operating system and the software
that has the problem
• An exact description of the error and any error messages
and when they occur
• The name and model of your computer and any internal
hardware
• Can you reproduce the problem at any time?
• Have you had this problem before? If it is a new problem,
have you recently changed your system configuration?
Page 27

27
Specifications of the TARGUS Noteworthy DVD-ROM
Specifications of the TARGUS Noteworthy DVD-ROM
Average Access Time:
180 ms
max. Read speed*:
DVD-Mode: 10,800 kB/s (8x DVD speed)***
CD-Mode: 3,600 kB/s(24x CD speed)
Formats:
DVD-ROM
DVD-Video
Data CD
Audio CD
Enhanced CD
CD Plus
CD Extra
i-trax CD
CD-ROM XA
Photo CD
Data Buffer:
512 kB
Dimensions:
Length: 6.81" (17,3 cm)
Width: 5.35" (13,6 cm)
Height: 0.78" (2 cm)
Weight:
0.9 pounds (450 g)
Connection to the
computer:
PC Card Cable via PC Card slot (Type II)
Storage Capacity:
* The maximum read speeds are only reached if data on the outer
edge of the CD are read in constant succession.
** information-carrying layer
***depending on the interface cable
DVD-ROM type description DVD-5 DVD-9 DVD-10 DVD-18
Capacity according to
the manufacturer 4.7 GB 8,5 GB 9.4 GB 17 GB
Actual capacity 4.38 GB 7.96 GB 8.75 GB 15.92 GB
Written sides 1 1 2 2
Layers** per side 1 2 1 2
Page 28

TARGUS Noteworthy DVD-ROM
28
Part No. 400-0056-001A
 Loading...