

Page 1

ACC9602US / 410-1486-001A
N2953
File Share Cable
for Mac
®
USER GUIDE
ww w.t arg us .co m/u s/ for Ma c
©2008 Manufactured or imported by Targus Group International, Inc.
(for U.S. sales: 1211 North Miller Street, Anaheim, CA 92806 USA,
for Australia sales: Targus Australia Pty. Ltd., 117-119 Bowden Street,
Meadowbank, NSW 2114 Australia). All rights reserved. Targus is either
a registered trademark or trademark of Targus Group International, Inc.
in the United States and/or other countries. Features and specifications
are subject to change without notice. Mac, the Mac logo and Mac OS,
are trademarks of Apple Inc., registered in the U.S. and other countries.
Windows and Windows Vista are either registered trademarks or
trademarks of Microsoft Corporation in the United States and/or other
countries. All trademarks and registered trademarks are the property of
their respective owners. United States and foreign patents pending.
ON E Y EAR LI MIT ED WAR RA NT Y
Page 2
File Share Cable for Mac
1
File Share Cable for Mac
2
Introduction
Congratulations on your purchase of the Targus File Share Cable for Mac. The
high speed File Share Cable makes it quick and simple to share music, photos,
video and data files between two Mac computers or between one Mac computer
and one PC.
System Requirements
Targus File Share Cable
for Mac
• Apple Mac or PC
• USB interface (USB 2.0 ports recommended to enable high-speed data transfers)
Using the File Share Cable
Hardware
Operating System
• Mac OS X (10.x or later)
• Windows Vista
®
• Windows® XP
Mac OS
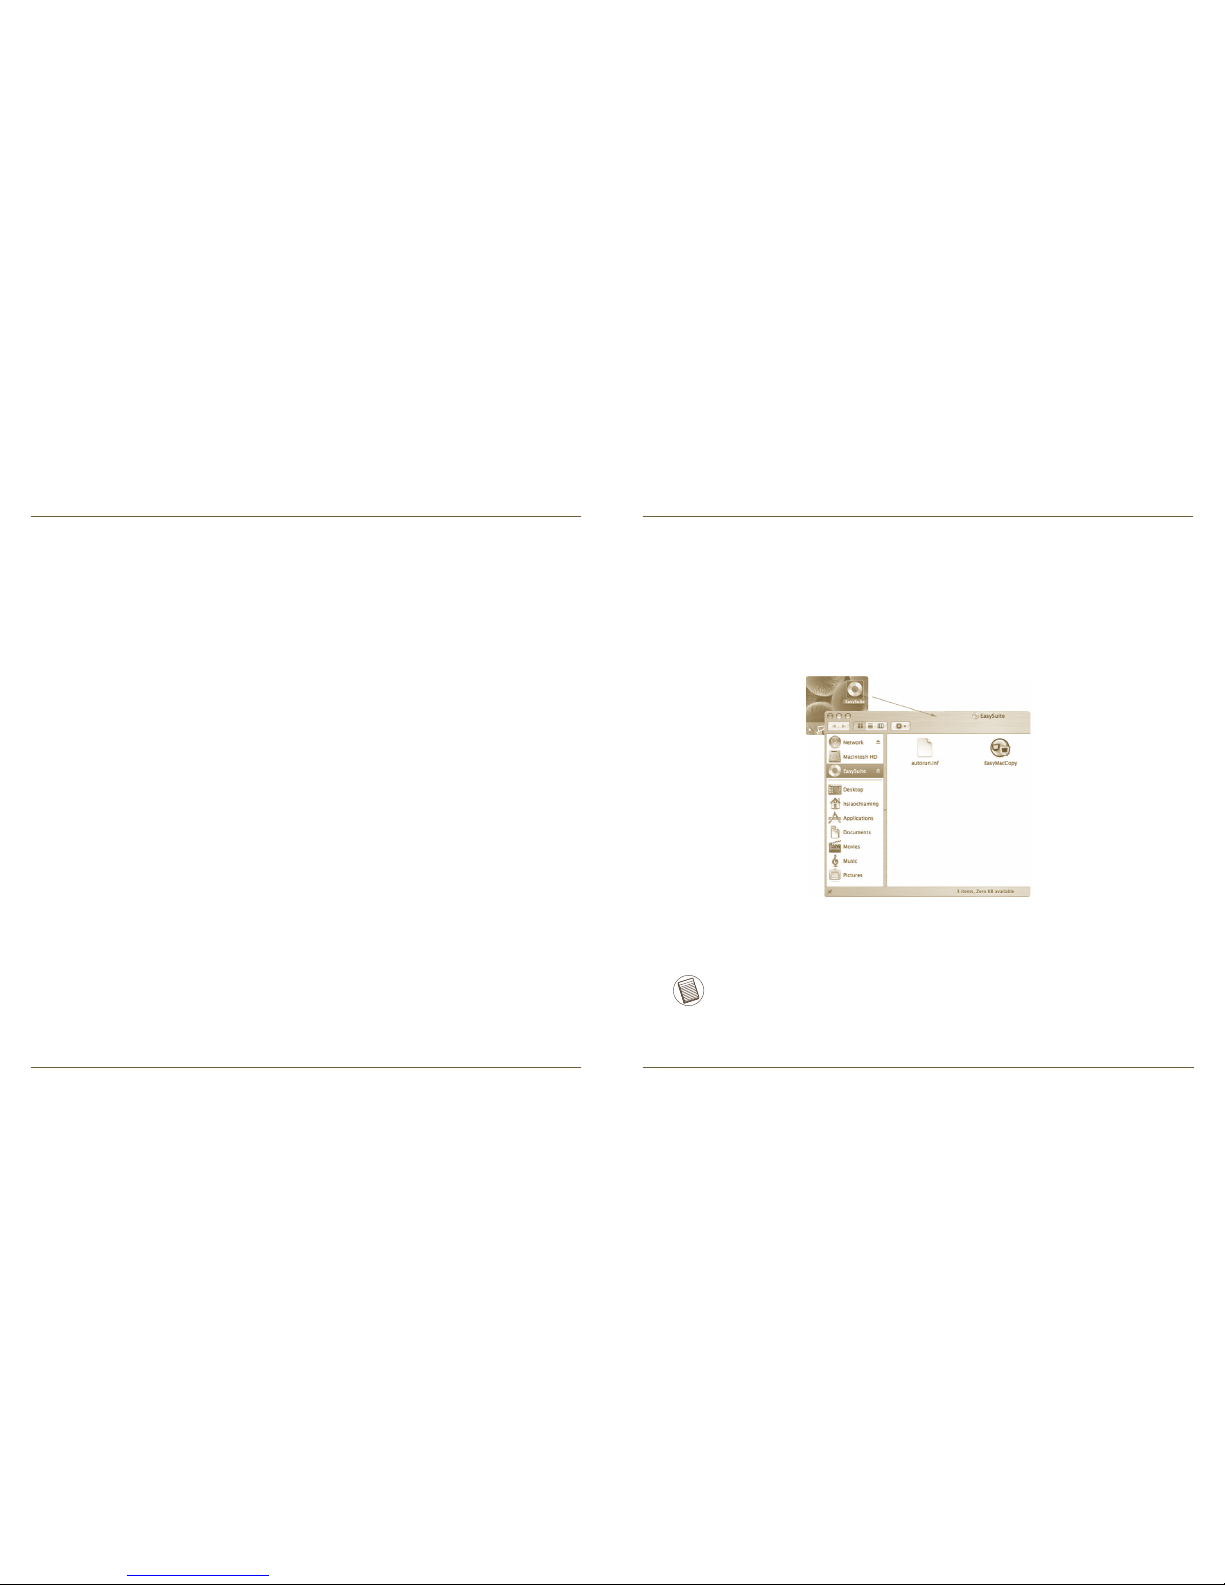
Connect two computers via the File Share Cable. The EasySuite CD icon will
appear on the desktop automatically.
NOTE: IF THE FILE SHARE CABLE IS ACCIDENTALLY UNPLUGGED DURING
OPERATION, PLEASE EXIT THE PROGRAM BEFORE RECONNECTING THE CABLE.
TO PROPERLY EXIT THE PROGRAM, PLEASE SELECT “QUIT EASYMACCOPY”
FROM THE “EASYMACCOPY” DROP DOwN MENU.
1.
Double-click the EasySuite CD icon and then double-click the EasyMacCopy
icon to start the application.
2.
After the EasySuite application has started in both computers, two file viewer
windows appear showing the remote computer on the top panel and the
local computer on the bottom panel.
3.
Page 3

File Share Cable for Mac
3
File Share Cable for Mac
4
After the EasySuite application has started in both computers, two file viewer
windows appear showing the remote computer on the top panel and the
local computer on the bottom panel.
2.
NOTE:
IF YOU USE EASYSUITE ON wINDOwS VISTA, THE “AUTOPLAY” wINDOw
wILL POP-UP. IF YOU wANT EASYSUITE TO RUN AUTOMATICALLY THE
NEXT TIME YOU ATTACH THE CABLE, TICK THE CHECKBOX “ALwAYS DO
THIS FOR SOFTwARE AND GAMES”, OTHERwISE CLICK ”RUN EASYSUITE.
EXE” TO START THE APPLICATION.
1.
IF YOU USE EASYSUITE ON wINDOwS VISTA AND LOGIN wITH
ADMINISTRATOR PRIVILEGE, YOU wILL BE PROMPTED FOR
CONFIRMATION AFTER STARTING EASYSUITE.EXE, CLICK THE “CONTINUE”
BUTTON TO PROCEED.
2.
Connect two computers via the File Share Cable. The EasySuite application
will start automatically (please see the note below if you’re using Windows
Vista). If the EasySuite application does not start automatically, go to
Windows Explorer, select the EasySuite drive and then double-click
EasySuite.exe.
Windows OS
1.
Transferring Files
Select the file/folder you wish to share and drag & drop it into the destination
folder/drive; this will initiate the copy operation between the two computers.
NOTE: DURING DATA TRANSFER, STANDBY OR HIBERNATION wILL STOP THE
PROCESS AND wILL NOT RESUME AFTER THE SYSTEM wAKES UP. PLEASE
MAKE SURE THESE FUNCTIONS ARE DISABLED BEFORE TRANSFERRING DATA.
Mac OS
Page 4

File Share Cable for Mac
5
File Share Cable for Mac
6
Select the file/folder you wish to share and drag & drop it into the destination
folder/drive; this will initiate the copy operation between the two computers. To
copy files from the local computer to the remote computer, click “System -> Setup”
in the remote computer.
NOTE: DURING DATA TRANSFER, STANDBY OR HIBERNATION wILL STOP THE
PROCESS AND wILL NOT RESUME AFTER THE SYSTEM wAKES UP. PLEASE
MAKE SURE THESE FUNCTIONS ARE DISABLED BEFORE TRANSFERRING DATA.
Windows OS
Exiting EasyMacCopy
From the EasyMacCopy menu, select Quit EasyMacCopy.
1.
Mac OS
Page 5

File Share Cable for Mac
7
File Share Cable for Mac
8
Remove the File Share Cable from both the computers.4.
Repeat steps 1 and 2 for the second computer.3.
From the Finder application, highlight the EasySuite icon, then select Eject
“EasySuite” from the File menu.
2.
In the icons panel to the right of the Windows Taskbar, right-click the “Safely
Remove Hardware” icon and then left-click the “Safely Remove Hardware”
option to stop the device.
2.
Windows OS
Exiting EasyCopy
From the EasyCopy menu, select “System -> Exit”.1.
Remove the File Share Cable from both the computers.5.
A “Safely Remove Hardware” window appears. Click the “Stop” button. A
“Stop a Hardware Device” window appears. Select the “EasySuite USB
Device” from the list and then click the “OK” button. When this window closes,
click the “Close” button on the “Safely Remove Hardware” window.
3.
Repeat steps 1 to 3 for the second computer.4.
Page 6

File Share Cable for Mac
9
File Share Cable for Mac
10
Technical Support
Regulatory Compliance
This device complies with Part 15 of the FCC Rules. Operation is subject to the
following two conditions: (1) This device may not cause harmful interference; and
(2) this device must accept any interference received, including interference that
may cause undesired operation.
FCC Statement
Tested to Comply
This equipment has been tested and found to comply with the limits of a Class B
digital device, pursuant to Part 15 of the FCC Rules. These limits are designed
to provide reasonable protection against harmful interference in a residential
installation. This equipment generates, uses, and can radiate radio frequency
energy and if not installed and used in accordance with the instructions, may
cause harmful interference to radio communications. However, there is no
guarantee that interference will not occur in a particular installation. If this
equipment does cause harmful interference to radio or television reception, which
can be determined by turning the equipment off and on, the user is encouraged to
try to correct the interference by one or more of the following measures:
• Reorient or relocate the receiving antenna;
• Increase the separation between the equipment and receiver;
• Connect the equipment into an outlet on a circuit different from that to which
the receiver is connected;
• Consult the dealer or an experienced radio/TV technician for help
Changes or modifications not authorized by the party responsible for compliance
could void the user’s authority to operate this product.
Product Registration
Targus recommends that you register your Targus accessor y shortly after
purchasing it. To register your Targus accessory, go to:
http://www.targus.com/registration.asp
You will need to provide your full name, email address, country of residence and
product information.
Warranty
Targus warrants this product to be free from defects in materials and
workmanship for one year. If your Targus accessory is found to be defective
within that time, we will promptly repair or replace it. This warranty does not cover
accidental damage, wear and tear, or consequential or incidental loss. Under no
conditions is Targus liable for loss of, or damage to, a computer or other device(s);
nor loss of, or damage to, programs, records, or data; nor any consequential or
incidental damages, even if Targus has been informed of their possibility. This
warranty does not affect your statutory rights.
For technical questions, please visit:
US Internet: www.targus.com/support.asp
Australia Internet: www.targus.com/au
Email: infoaust@targus.com
Telephone: 1800-641-645
New Zealand Telephone: 0800-633-222
 Loading...