

Targus Wi-Fi mouse, AMW58US User Manual
User Guide
410-2310-001A / AMW58US
N2953
1 YEAR LIMITED WARRANTY: We pride ourselves on
the quality of our products. For complete warranty details
and a list of our worldwide ofces, please visit www.
targus.com. Features and specications are subject
to change without notice. Microsoft, Windows and
Windows Vista are registered trademarks or trademarks
of Microsoft Corporation in the United States and/or other
countries. Wi-Fi is a registered trademark of the Wi-Fi
Alliance. All trademarks and registered trademarks are
the property of their respective owners. ©2011 Targus
Group International, Inc.
Wi-Fi MOUSE
®
Targus Wi-Fi® Mouse
2
Targus Wi-Fi® Mouse
3
Introduction
Thank you for your purchase of the Targus Wi-Fi® Mouse. The mouse uses
Wi-Fi technology to seamlessly and securely connect to your computer
System Requirements
Hardware
• WIN7 Certied Wi-Fi Network Adapter
Operating System
• Microsoft Windows® 7
Contents
• Targus Wi-Fi® Mouse
• 2 x AAA Energize r ® Max ® Alkaline Batteries
• Installation Software
• User Guide
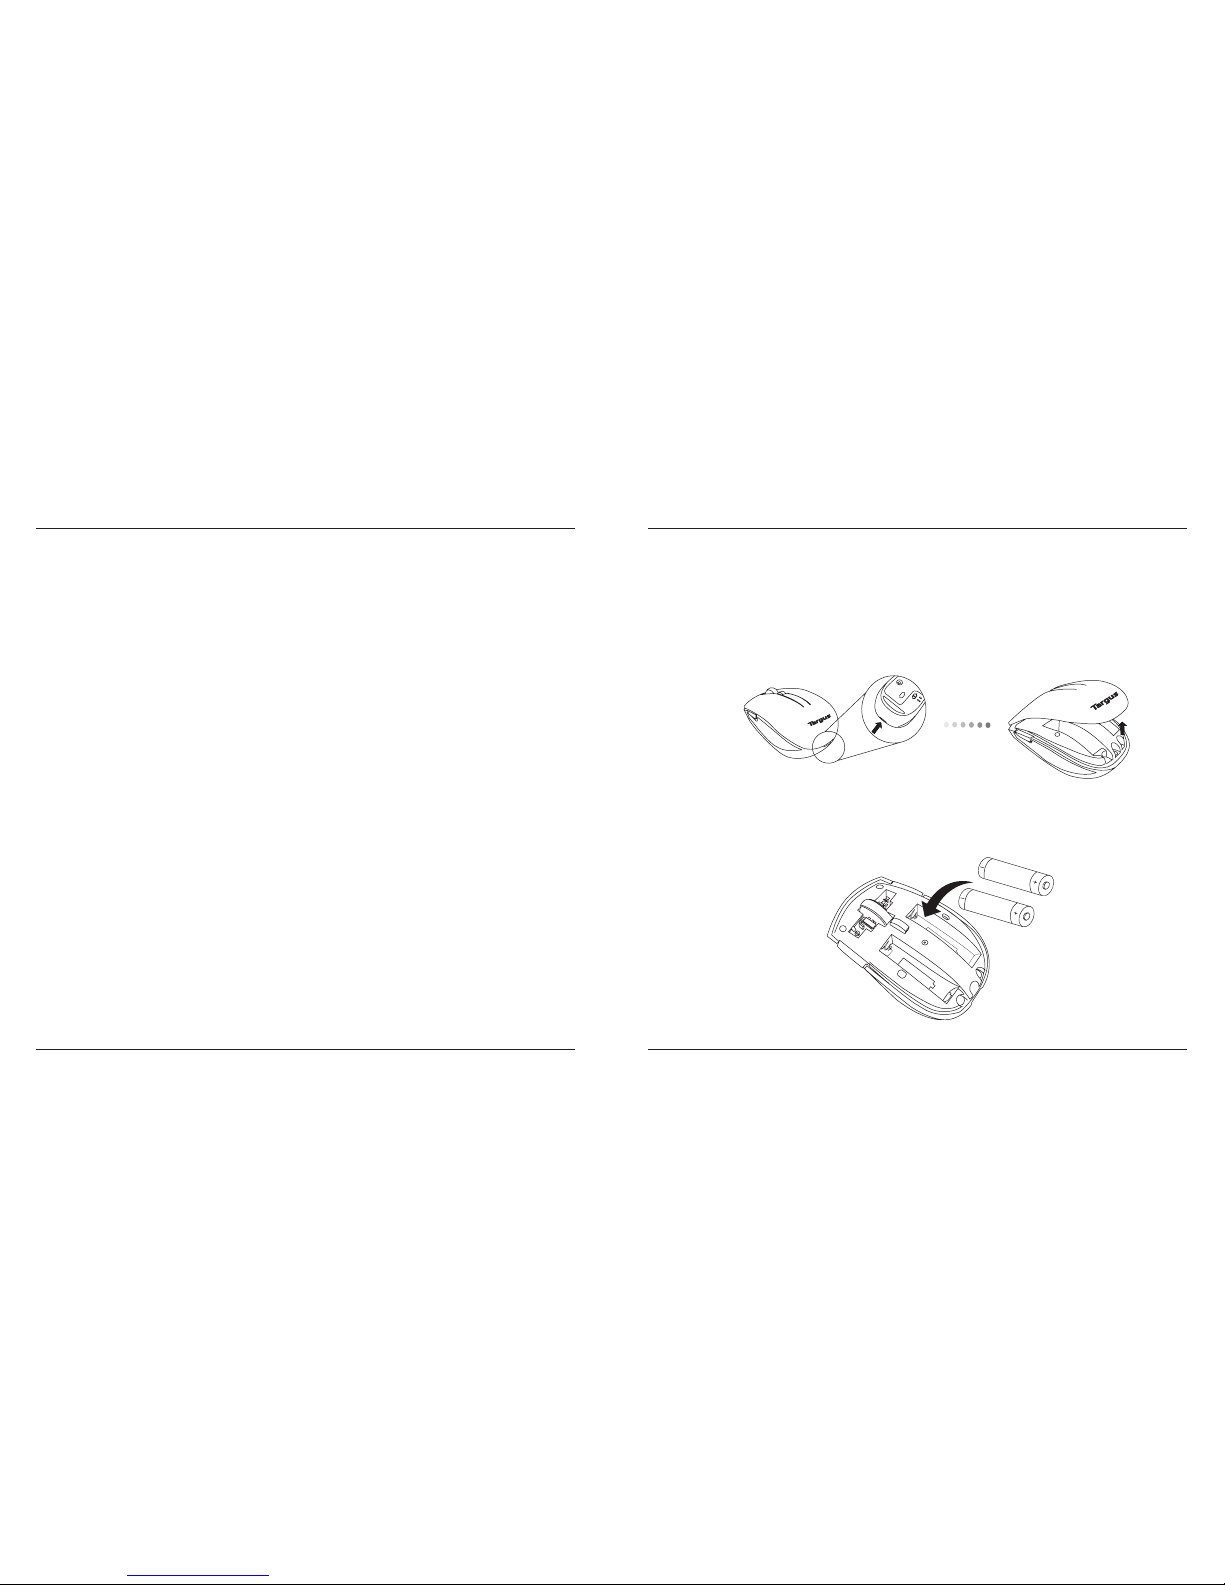
1. Remove the battery cover from the top of the mouse by using the notch
on the back. Carefully lift the cover up as shown in the diagram.
Installing the Batteries
O
N
O
F
F
2. Insert two AAA batteries, making sure that the positive (+) and negative (-)
ends match the polarity indicators inside the battery compartment.
- A
A
A
+
Targus Wi-Fi® Mouse
4
Targus Wi-Fi® Mouse
5
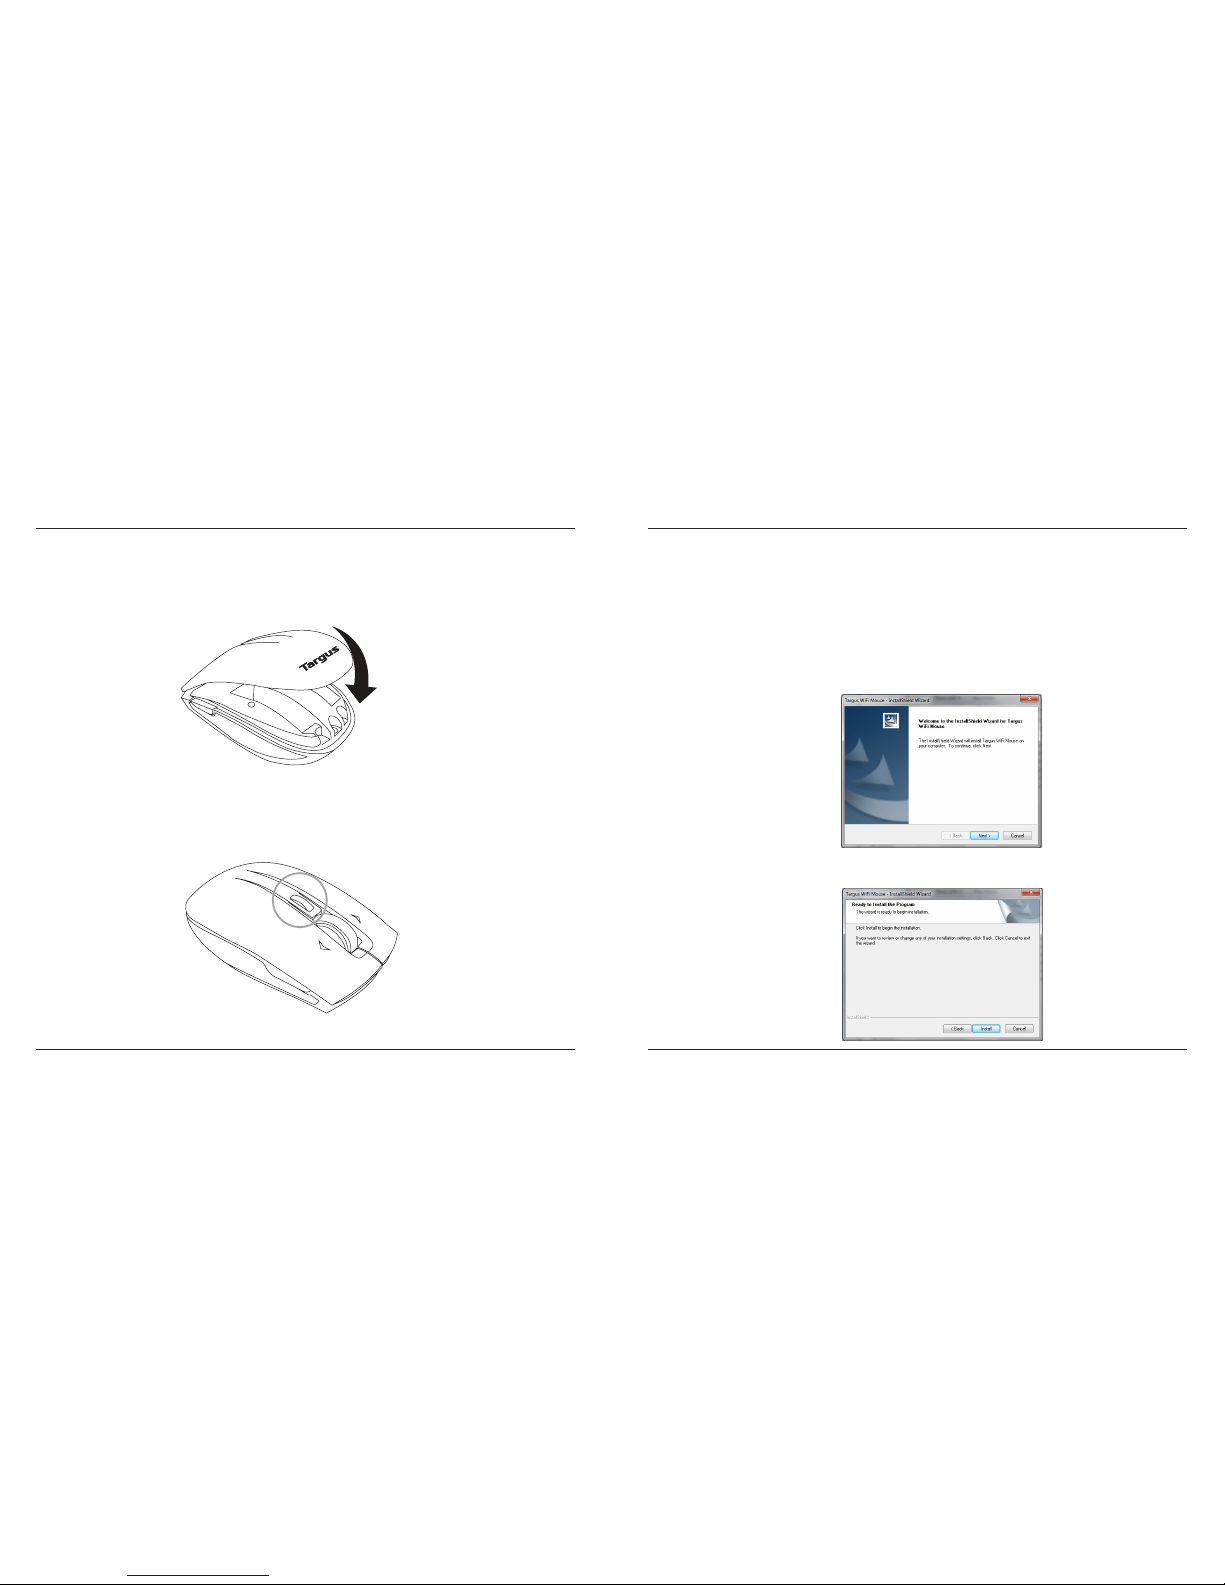
3. Replace the battery cover.
Installing the Driver
4. The Battery Indicator will light up after it is activated.
1. To Install the Targus Wi-Fi® Mouse on your PC, insert the supplied Set-up
CD in your CD or DVD drive. The driver installation will start automatically.
(The driver software can also be downloaded from the Targus website at
www.targus.com. Enter the product name into the search bar and dowload
the driver)
2. The Targus Wi-Fi® Mouse - InstallShield Wizard will pop up. Select Next to
continue with the installation.
3. This will start the installation of the Wi-Fi® Mouse driver. Please click Install
to begin the installation
 Loading...