

Page 1
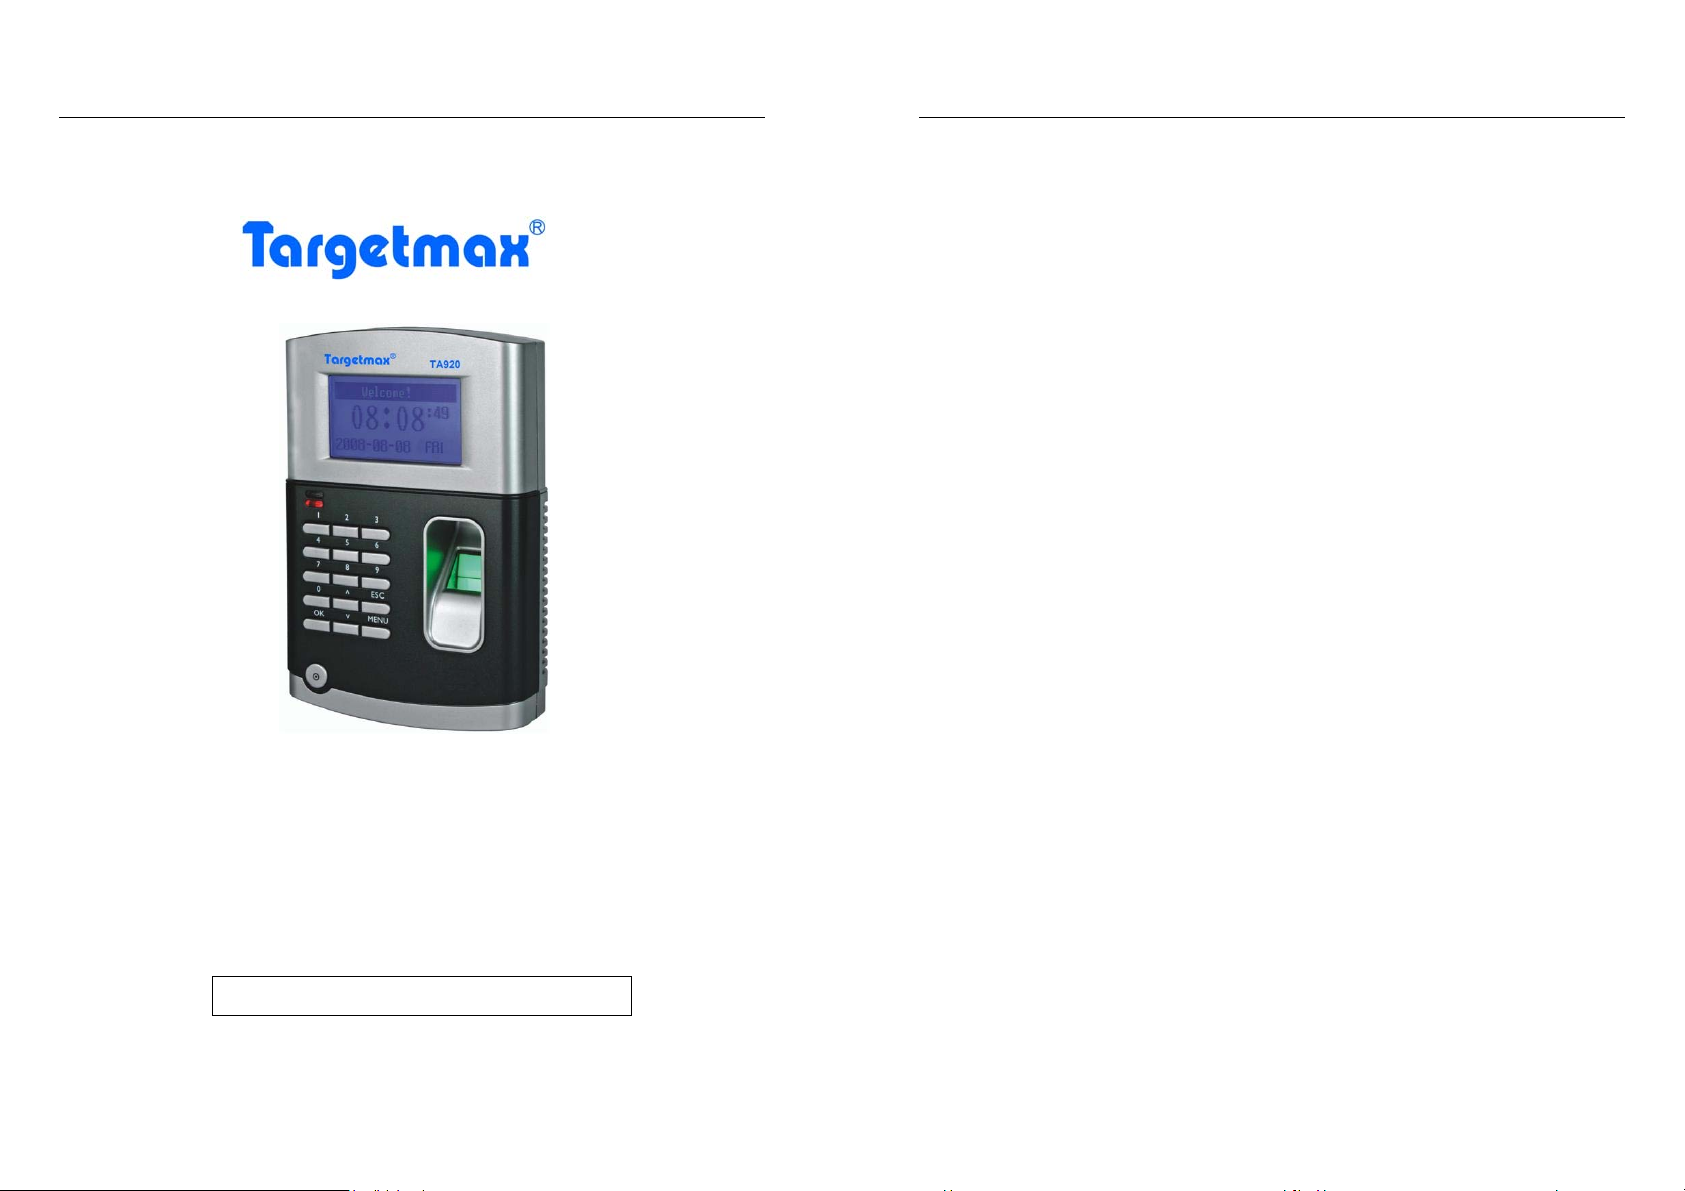
Targetmax® V.2.0 Attendance System Hardware Suite Guide
TA920
V2.0 Attendance System
Hardware
Suite Guide
Instructions Manual
Targetmax® V.2.0 Attendance System Hardware Suite Guide
CONTENTS
Chapter One - Introduction
1.1 Communication Port………………………………………………… 5
1.2 Power Source Control………………………………………………. 5
1.3 Attendance Users……………………………………………………. 6
1.4 Registering Ways…………………………………………………….. 6
1.5 User ID and Password………………………………………………. 6
1.6 Working Status……………………………………………………….. 6
1.6.1 Attending…………………………………………………….. 6
1.6.2 Managing…………………………………………………….. 7
1.6.3 Locking……………………………………………………….. 7
1.7 Recorded Data……………………………………………………….. 7
1.8 Attendance Function Setting……………………………………….. 8
1.8.1 System Setting………………………………………………. 8
1.8.2 Record Setting……………………………………………….. 11
1.9 Keypad………………………………………………………………… 13
1.9.1 Keypad Configuration………………………………………. 13
1.9.2 The Keypad Function………………………………………. 13
1.10 Menu………………………………………………………………….. 14
1.10.1 Menu Description………………………………………….. 14
1.10.2 Menu Structure…………………………………………….. 14
1.10.3 Phonic Notice………………………………………………. 21
Chapter Two – General Operation
2.1 Start the Operation ………………………………………………….. 21
2.1.1 Press “Menu” To The Managing Status…………………... 21
2.1.2 Press “ESC” Back To Normal Attending Status………….. 22
2.2 Usage Under The Normal Attending Status………………………. 22
2.2.1 Fingerprint Attendance……………………………………… 22
2.2.2 Password Attendance………………………………………. 24
2
Page 2

Targetmax® V.2.0 Attendance System Hardware Suite Guide
Chapter Three - Operation to Manager
3.1 Operation Step,,,,,,,,,,,,,,,……………………………………………. 25
3.2 Data Process…………………………………………………………. 26
3.2.1 Users’ Registration………………………………………….. 28
(A) Fingerprint Registration……………………………….. 30
(B) Password Registration………………………………… 32
(C) ID Card Registration…………………………………… 34
3.2.2 Managers’ Registration…………………………………….. 35
3.3 Delete Users…………………………………………………………. 36
3.4 View Attendance Record…………………………………………… 37
3.5 View Management Record………………………………………… 39
3.6 Delete All Records…………………………………………………. 40
3.7 Advance Setting……………………………………………………. 42
3.7.1 Machine Setting……………………………………………. 42
(A) Machine No…………………………………………….. 43
(B) Manager Total………………………………………….. 44
(C) Select Language………………………………………. 44
(D) Select Voice……………………………………………. 45
(E) LCD Backlight………………………………………….. 45
(F) Auto Shut Down………………………………………… 46
(G) Verity ……………………………………… 46
(H) Initialization…………………………………………….. 47
3.7.2 Records Setting……………………………………………. 47
(A) Management Record Warning…………………….... 48
(B) Attendance Record Warning…………………………. 49
(C) Repeat Confirmation Time……………………………. 50
3.8 Information Query…………………………………………………… 51
3.8.1 Storage Details……………………………………………… 51
3.8.2 Record Details………………………………………………. 52
3
Targetmax® V.2.0 Attendance System Hardware Suite Guide
Chapter Four - Appendix
4.1 Attention to Finger’s Reading………….…………………………… 53
4.2 Software FAQ………………………………………………………… 54
4.2.1 Hardware Portion…………………………………………… 54
4.2.2 Software Portion……………………………………………. 57
4.3 Trouble Shooting……………………………………………………. 58
4
Page 3
Targetmax® V.2.0 Attendance System Hardware Suite Guide
Targetmax® V.2.0 Attendance System Hardware Suite Guide
Chapter One - Introduction
1.1 Communication Port
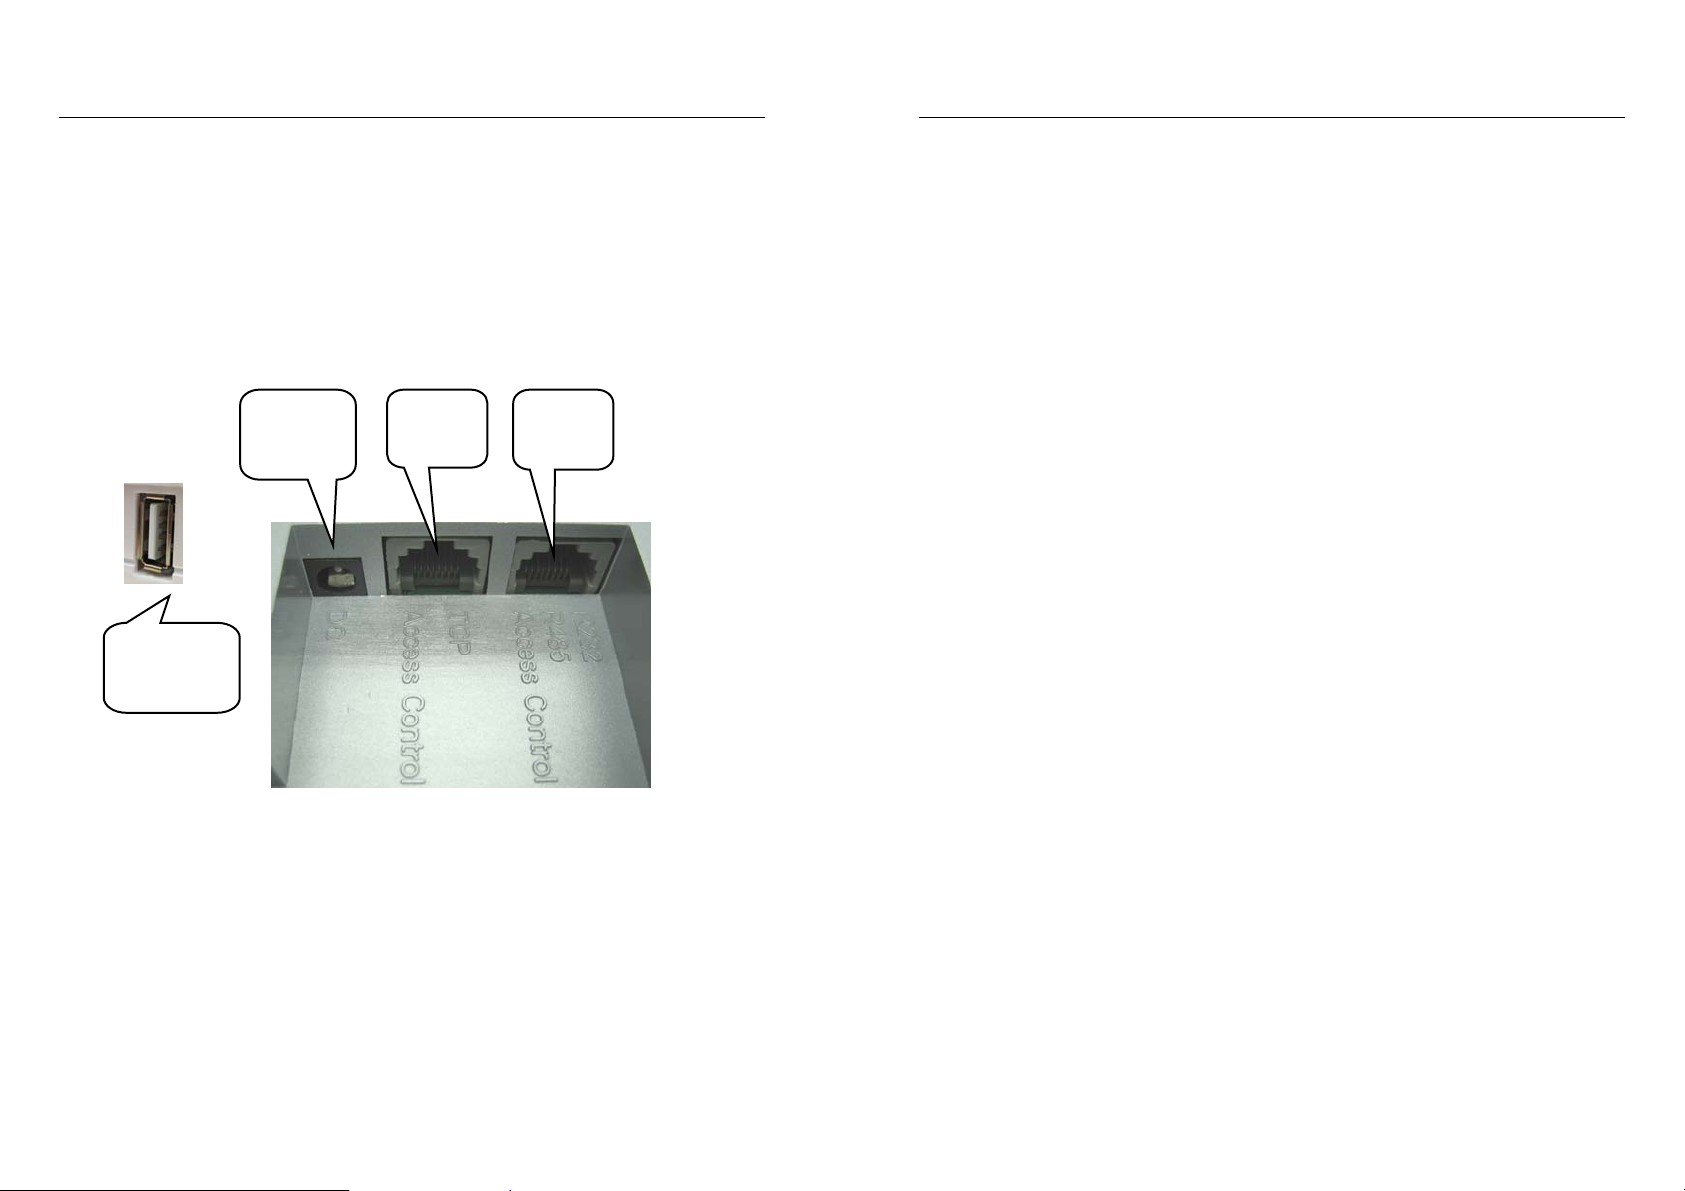
There are four communication ports for the fingerprint time attendance
terminal: 9-pin RS232/485 interface and TCP/IP interface and power cords
are as following table:
As per following figure:
USB stick
Download
1.2 Power Source Control
• Turn on the machine to attending status by press the power switch once
• The machine will be turned off automatically if no any operation exceeding
time limit during attending status in the case of “Auto off” selected
• In the case of attending status, turn off the machine by pressing the power
switch more than 4 seconds
• Turn off the machine by communication types of the managing device
Power
cords
TCP/IP
5
RS232
RS485
1.3 Attendance Users
The users to the machine can be divided into “managers” and “users”
• The “users” can operate the attendance only instead of management
• The “managers” can operate both attendance and management
The “managers” can add or delete users’ registered fingerprint or password
and, view data records or system information as well as do setting
1.4 Registering Ways
There are 3 registering ways to the machine, Fingerprint (FP), Password
(PWD) and ID Card (ID Card).
Each way is suitable to a certain users’ situation; the user is required to
select the best way for him to register prior to read the instructions
carefully.
Each user can register maximum 3 fingerprints, 1 password & 1 ID Card.
1.5 User ID and Password
The user ID number (Employee Number) is any number combination from
1 to 99999999, the password is any number combination from 1 to
99999999.
1.6 Working status
There are 3 working status which is “Attending”, “Managing” and “Locking”
1.6.1 In the case of “Attending”, the users can sign in/out by fingerprints
or passwords so as to verify themselves to be registered users or not,
if so, LCD will show their registered users’ ID
Meanwhile, output electronic signal of locking control and, record the
users’ ID and attendance time into the memory.
6
Page 4

Targetmax® V.2.0 Attendance System Hardware Suite Guide
1.6.2 In the case of “Managing”, register the new users or modify the
information, delete the registered data as well as view system
information and do settings
a. Only the managers can operate “Managing”
b. The managers must pass the fingerprint or password
confirmation so as to enter the status of “Managing”
c. Any user can operate the machine unless there is no manager
registered, in this case, the machine will do not require verifying
the manager
1.6.3 If under “Locking” status, we can only use the PC to control the
machine.
1.7 Recorded Data
- The machine will record all the operating information into the memory.
- The recorded information includes management records and attendance
records.
- The management records are the records of the managers’ operation.
- The attendance records are the records of the users’ attendance.
The recorded data will be transferred to the software of “Attendance system”
of PC and to be saved in the database, which is for viewing and statistics.
7
Targetmax® V.2.0 Attendance System Hardware Suite Guide
The recorded data is as follows:
Types
of Record
Operation
Description
Date, Time, Machine No.,
New Register
Operators’ ID, Registered ID
Management
Delete
Registered Data
Delete All The
Registered Data
Date, Time, Machine No.,
Operators’ ID, Registered ID
Date, Time, Machine No.,
Operators’ ID
Date, Time, Machine No.,
System Setting
Records
Operators’ ID
Date, Time, Machine No.,
Times Setting
Operators’ ID
Date, Time, Machine No.,
Records Setting
Operators’ ID
Attendance
Records
Users’
Confirmation
Date, Time, Machine No.,
Confirmation ID
1.8 Attendance function setting
The machine supply friendly menu so as to set and operate freely,
The setting is as follows:
1.8.1 System Setting
8.1.1 Nos. of Manager
Setting Remark
1-10
Initial
Confirm the total quantity of managers
5
8
Page 5
Targetmax® V.2.0 Attendance System Hardware Suite Guide
8.1.2 Machine No.
Targetmax® V.2.0 Attendance System Hardware Suite Guide
8.1.5 Locking delay
Setting Remark
The sole identity No. of the machine in case of
1 - 255
multi online operation
Initial
1
• Be noted the system can not run correctly if there are different devices have
the same Machine No., in this case, confusion will occurs to the software of
“Attendance system” during recording data.
8.1.3 Baud rate
Setting Remark
9600
19200
38400
Initial
•
The Baud rate must be the same as the PC, otherwise it can not realize
The communicating baud rate is 9600bps
The communicating baud rate is 19200bps
The communicating baud rate is 38400bps
38400
communicating
Setting Remark
Yes
Output locking control signal after confirmation
Do not output locking control signal after
No
confirmation
Initial
No
• Only after successful login as well as with setting of outputting locking
control signal. It is recommended set “No” if no need.
8.1.6 Auto Shut Down
Setting Remark
No
Do not turn off automatically
Turn off automatically unless no any operation
1—255
exceeding times’ limit, the time unit is “minute”
Initial
No
8.1.7 Time setting
Setting Remark
8.1.4 Language
Setting Remark
Chinese
English
LCD display traditional Chinese
LCD display English
Initial
English
9
Time setting
Initial
Set the current time of the machine
Time is the same as the controlling PC during
production, which can be also set in the software
of Attendance system
10
Page 6

Targetmax® V.2.0 Attendance System Hardware Suite Guide
8.1.8 Voice
Setting Remark
Yes
No
Initial
Will have voice notice during operation
No voice notice during operation
Yes
Targetmax® V.2.0 Attendance System Hardware Suite Guide
8.2.2 Attendance Records Warning
The machine will remind the users the attendance records memory are to be full
when the space has reduced to the setting number by display warning or phonic
notice, the users are required to download the attendance records
immediately once the machine show warning! (Setting ways refers to the
Part three)
8.1.9 System initialization
Press “OK” button to resume to initial setting system
1.8.2 Records Setting
8.2.1 Management Records Warning
The machine will remind the user the managing memory to be full when the
spare has reduced to the setting quantity by display warning or voice notice.
Setting Remark
The machine will not give warning signal; it
No
cannot save the managing records once the
memory is full.
The machine will remind the users when the
memory is almost full, for example, if we set 10,
1 - 255
then the machine will provide warning beginning
th
from the 990
, the machine cannot save any
records once the memory is full
Setting Remark
The machine will not give warning signal; it cannot save
No
the managing records once the memory is full.
The machine will remind the users when the memory is
1 - 1500
almost full, the machine cannot save any records once
the memory is full
Initial
1000
8.2.3 Repeat Confirmation Time
Check whether the users have signed in/out repeatedly, if so, the machine will
remind the user she/he has signed already, in that case, the machine will not
save the repeated information.
Setting Remark
Do not check whether the users have signed in/out
No
repeatedly
Check whether the users have signed in/out repeatedly
1 - 255
during the setting time period, the time unit is “minute”
Initial
100
11
Initial
12
No
Page 7
Targetmax® V.2.0 Attendance System Hardware Suite Guide
1.9 Keypad
1.9.1 Keypad Configuration
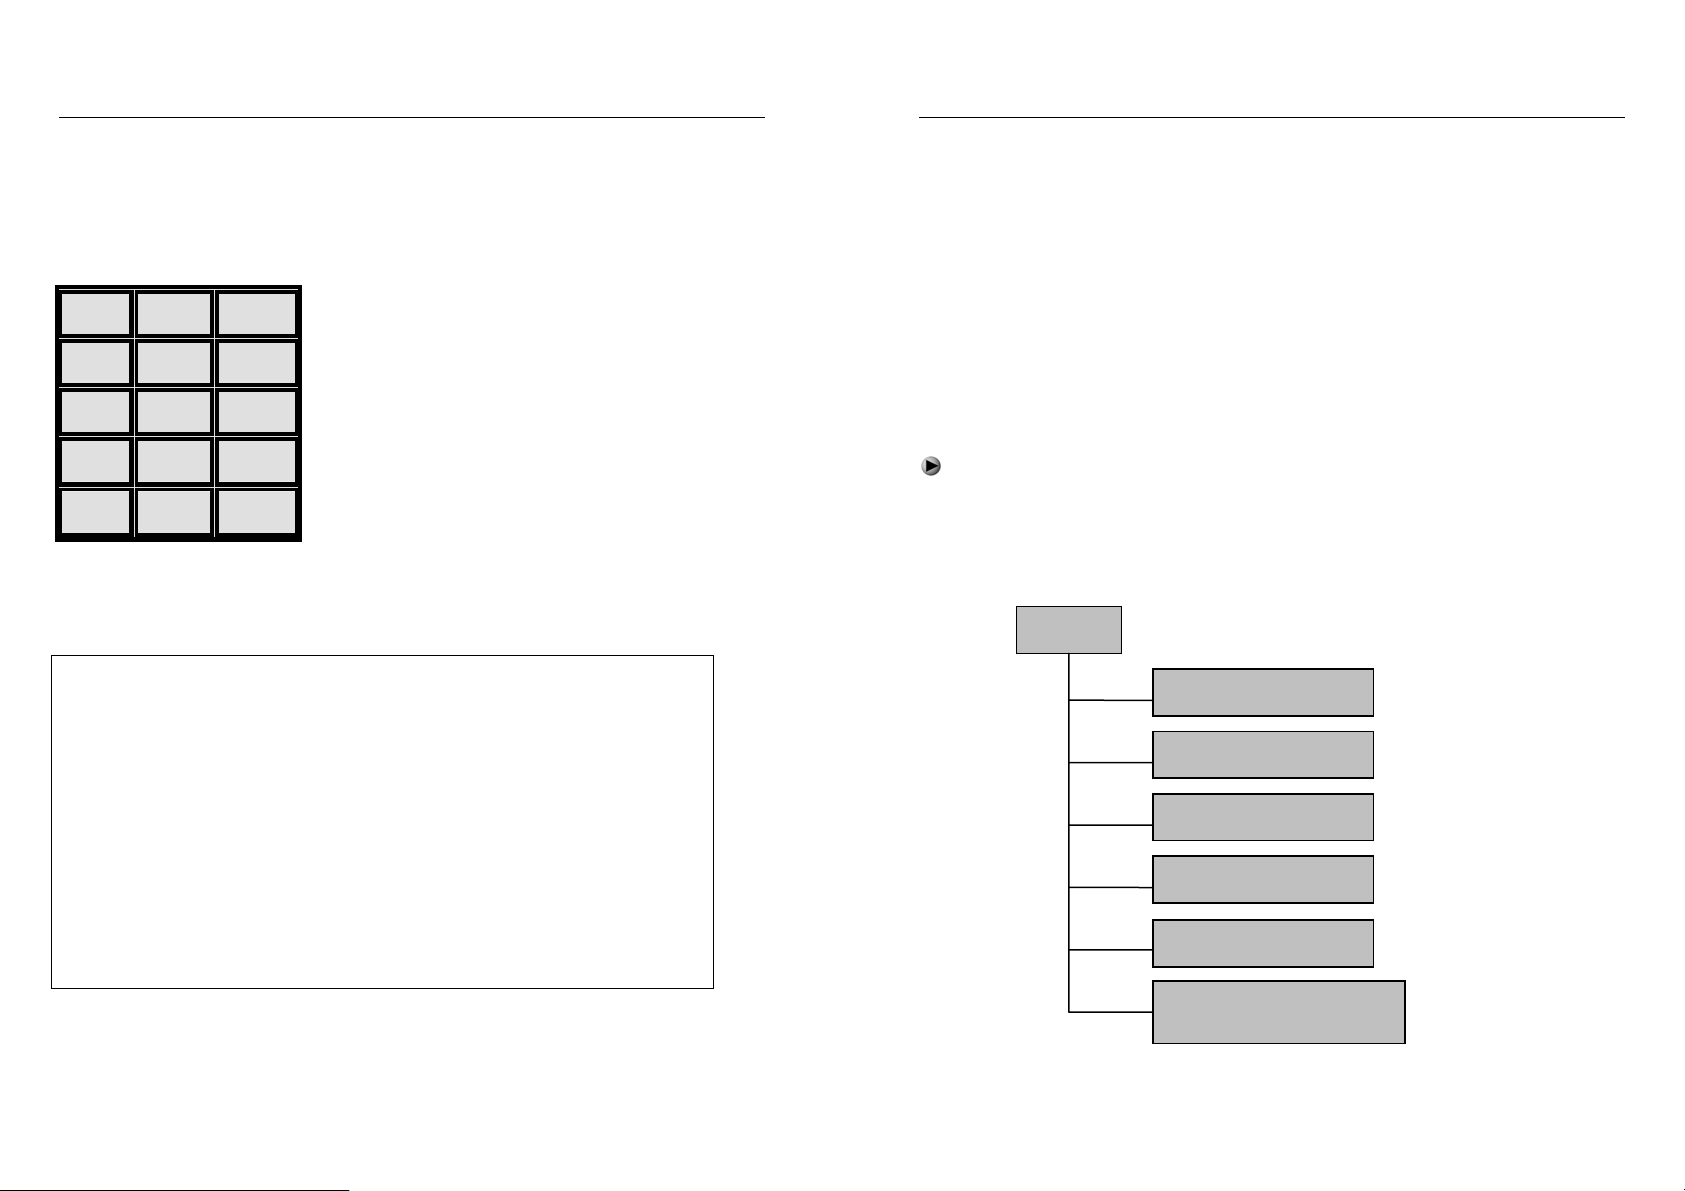
Keypad figure :
1 2 3
4 5 6
7 8 9
0 ▲ ESC
OK ▼ MENU
1.9.2 The Keypad Function
Targetmax® V.2.0 Attendance System Hardware Suite Guide
1.10 Menu
It is convenient to user to operate the machine by using the 5 operation buttons
and 0~9 numbers’ buttons. Besides, there also have notice on LCD display and
voice notice to remind the user whether the operation is correct or not.
1.10.1 Menu Description
Menu is divided into Operating menu, Setting menu and Status menu
- The “Operating menu” is for data processing
- The “Setting menu” is for setting necessary information of machine
- The “Status menu” is for display system information of machine
1.10.2 Menu Structure
Press “MENU” key to enter the 1st level menu, there are 6 items.
Press “▲”“▼” to select the corresponding columns, or press the corresponding
number to get into menu item.
For example:Press number key “3” to enter the “Data Download”
The function is illustrated as follow:
ESC Exit or Close
MENU Menu Management
OK Confirm Setting / Enter
▲ Scroll-Up
▼ Scroll-Down
0…9 Input Numbers or Selecting Menu
☉ On/Off Button
13
Menu
1. Register User
2. Delete User
3. Data Download
4. Time Setting
5. Advance Setting
6. Information Query
14
Page 8
Targetmax® V.2.0 Attendance System Hardware Suite Guide
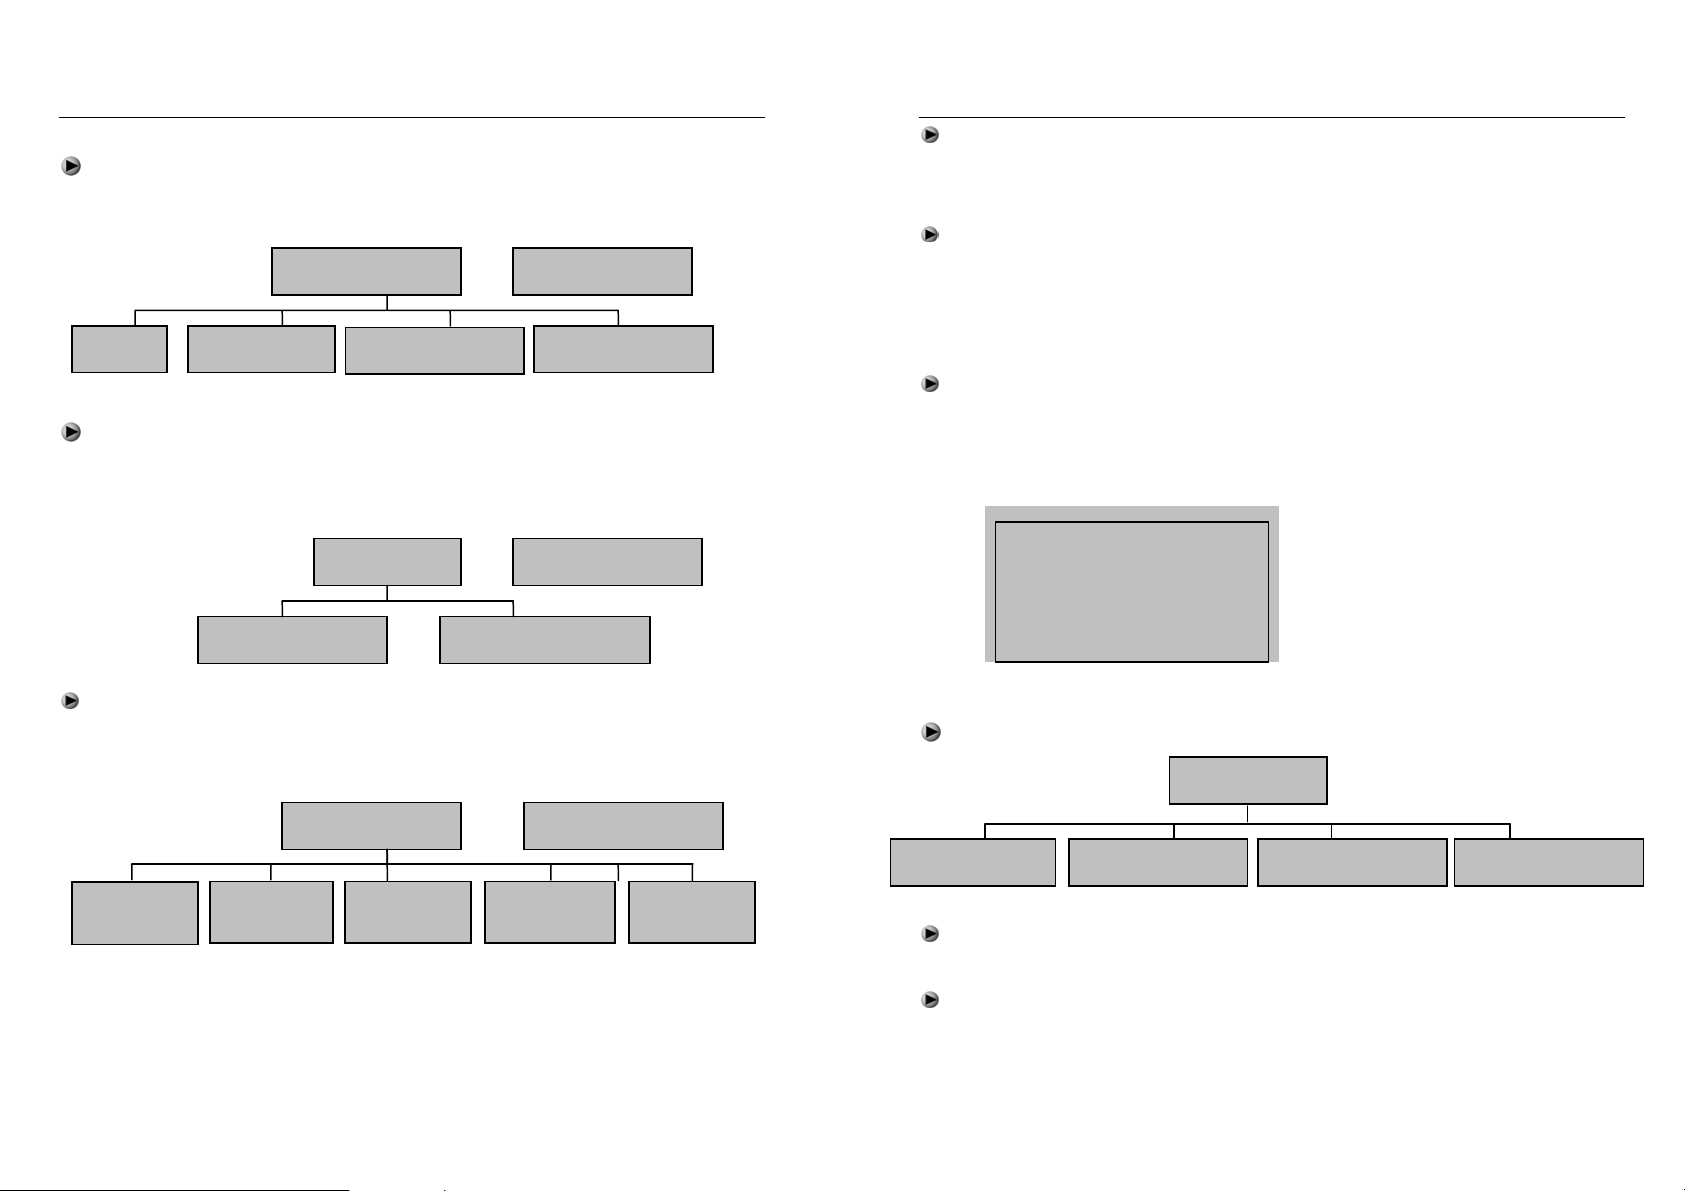
10.2.1 Registered User Menu
Select “Register User” in the level-1, there consist of 4 items, included
“User”, “Manager”, “Security Level” and “USB Upload”
1. Register User
Select Level
Targetmax® V.2.0 Attendance System Hardware Suite Guide
The item “Security Level” - 1:1 user settings level calibrator and 1:N
identification accuracy, the higher value of setup, the more precise identification
of the use of the process compared to.
USB upload
Backup data can be uploaded to the machine by those with USB interface
function.
1. User 2. Manager
3. Security Level
4. USB Upload
Select the registration level of “User” or “Manager”, and press OK, which will
have 2 items as below. “New Register” for the registration of new users,
“Backup Register” for registers backup data.
1. User
Register Mode
1. New Register 2. Backup Register
Select “New Register” or “ Backup Register”, then the screen options will as
below, selected the corresponding mode and according to screen display, then
could completed Registered User.
1. Register
Fingerpri
1. New Register
2. Register
Password
3. Register
ID Card
4. Fingerprint
+ password
Register Mode
5. Fingerprint
+ ID Card
(Remark: The function of register manager and register user, register ID card
depending on whch specific models. Backup registration means to be a
registered user to register his/her second & third fingerprint or password or ID
card )
15
10.2.2 Delete User Menu
Select “Delete User” in the level-1 and press OK key or directly press
numbers keys “2” to enter the delete user menu. Using number key or “▲”“▼”
key to input which Register number has to be deleted, press OK to confirm data
delete.
Delete User
Register No:00000001
Exit -ESC Yes -OK
10.2.3 Data Download Menu
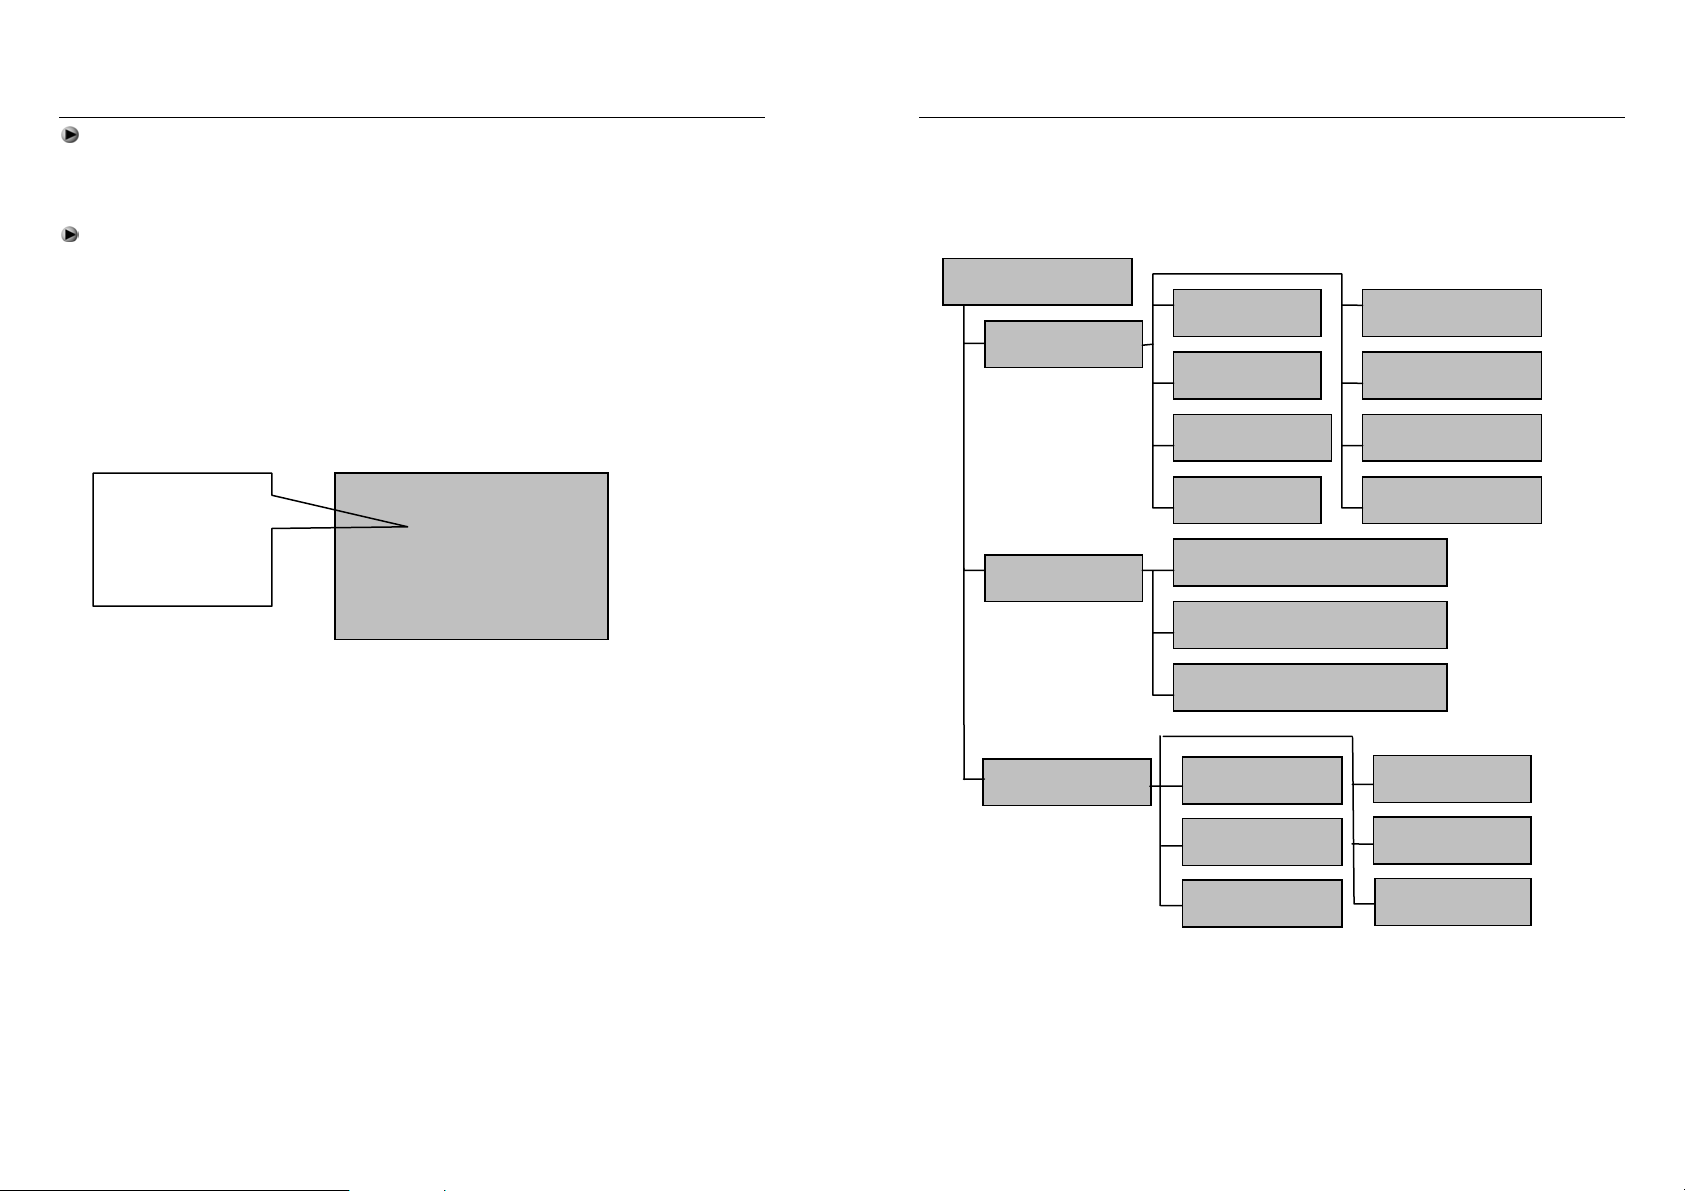
Select “Data download” in level-1, there consist of 4 items as below:
Data Download
USB Download RS232 Download RS485 Download Ethernet Download
USB Download – can download the register data and attendance records.
(This function depends on specific models)
RS232 Download - used to set the communication speed between the
machine and computer. Can select the speed after connection.
16
Page 9
Targetmax® V.2.0 Attendance System Hardware Suite Guide
RS485 Download - used to open and close the machine’s RS485
communication function , choose ‘yes’ to select the function of RS485
communication.
Ethernet Download - used to set the attendance‘s Ethernet parameters,
included IP address, subnet mask, gateway. Depends on the actual network
environment.
10.2.4 Time Setting Menu
Targetmax® V.2.0 Attendance System Hardware Suite Guide
10.2.5 Advance Setting Menu
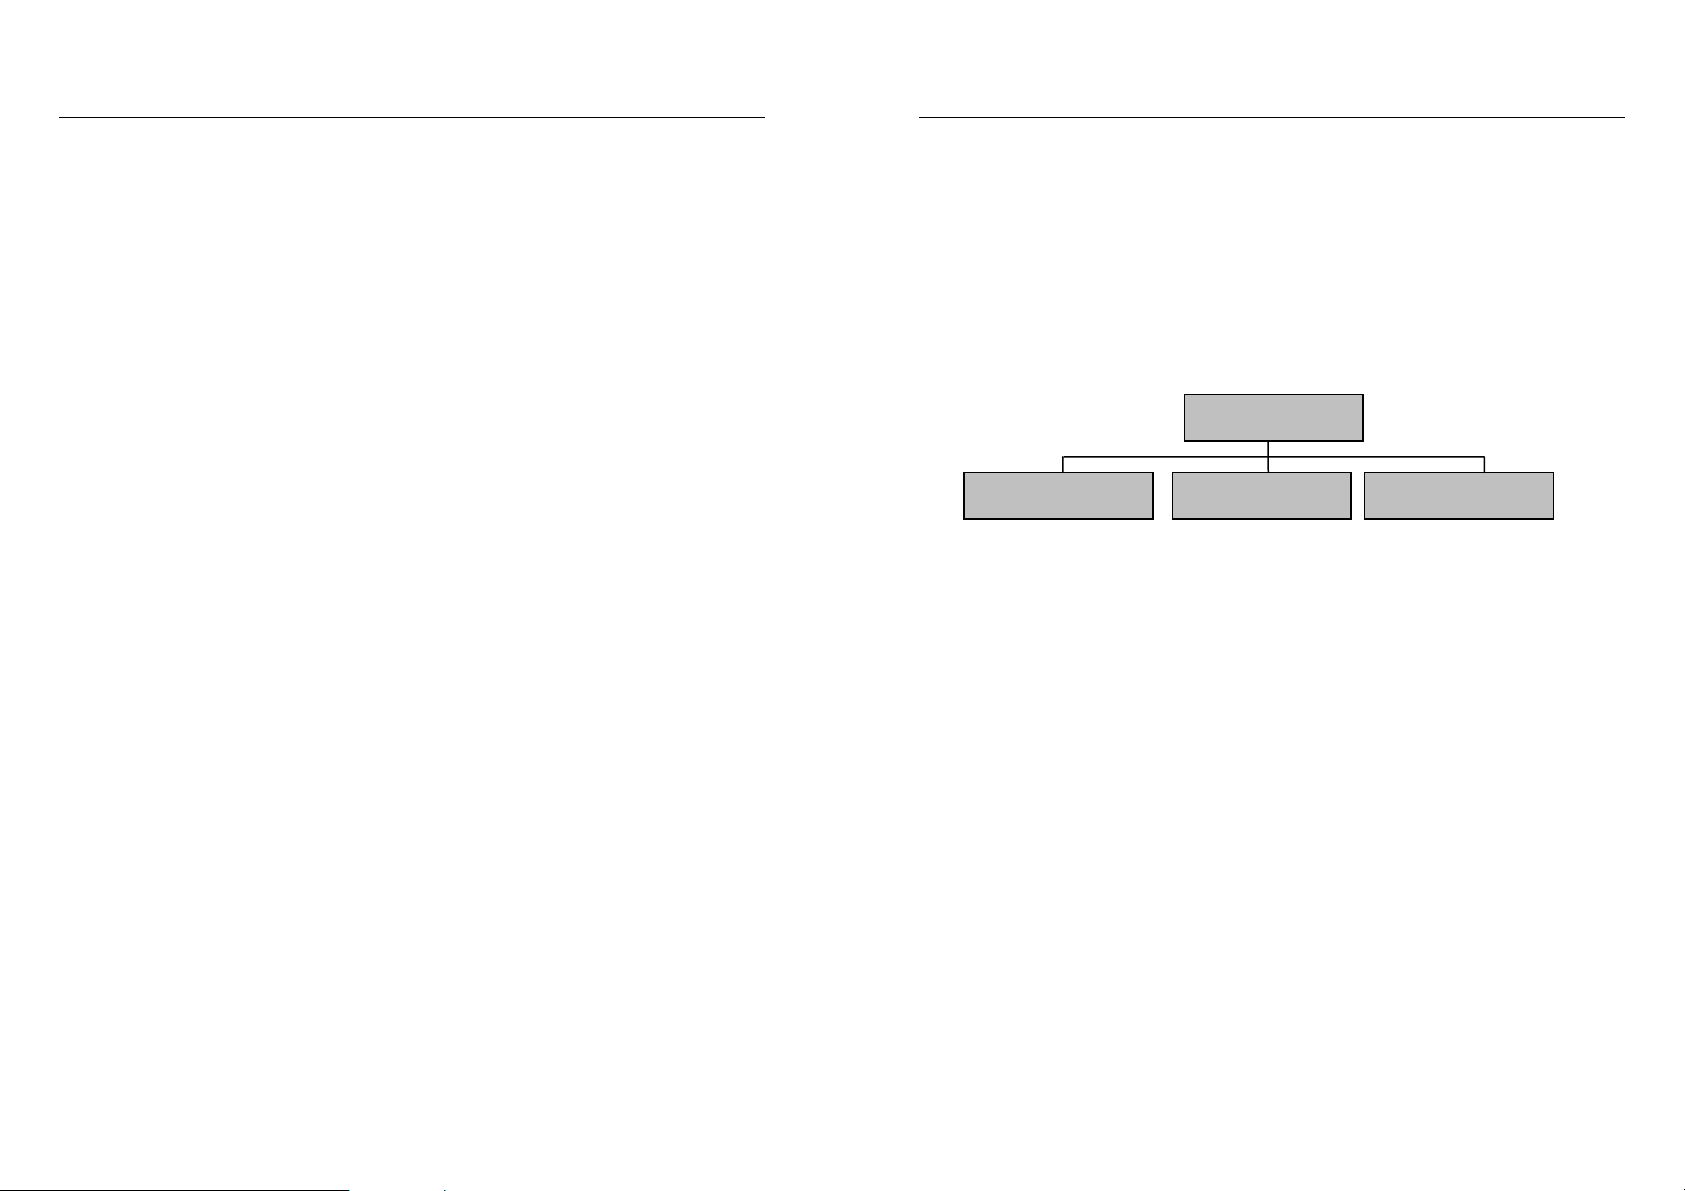
Item of advanced setting use attendance for the right machine for the
important set,
the menu structure as follows:
Advance Setting
1. Machine No.
1. Machine Setting
2、Manager Qty
5. LCD Backlight
6. Auto Shut Down
Using number key “4” or “▲”“▼” key to enter the Time Setting menu as below:
Flash portion
indicate the
cursor position
Current Time
2006-12-01
11:30:25
Friday
Using number key or “▲”“▼” key to enter the corresponding value, the correct
day will automatically displayed by the software.
17
2. Record Setting
3. Select Language
4、Select Voice
1. Management Records Warning
2. Attendance Records Warning
3. Repeat Confirmation Time
7. Verity
8. Initialization
3. Door Lock Out
1、Time Setting
4. Unlock Group
2. Lock Register
5. Unlock Time
3、Time Group
6. Lock Type Set
18
Page 10
Targetmax® V.2.0 Attendance System Hardware Suite Guide
z Machine No. - Using number key or “▲”“▼” key to enter the machine
corresponding number. For those using 1 machine customer, use the
factory default value is enough. For those using more than 1 machine
customer, the Machine No. must be same as the number selected in the
software, otherwise they cannot be communicated.
z Machine Qty - used to set the number of Managers, same enter method as
machine number setting, initialization value is 5, indicate that the machine
could register five managers. In attendance software, ordinary user can be
permitted to manager, please refer to Software Suite Guide for operation
details.
z Select Language – used to setup the screen language, same enter method
as machine number setting. Targetmax® TA series consists of three
standard languages which included the Simple Chinese, Traditional
Chinese, and English for customer selection.
z Select Voice – used to select the voice notice. Only one type of language
will be provided. Customer must specify their own requirement to
manufacturer prior to order.
z LCD Backlight – used to select the screen contrast.
z Auto Shut Down – used to setup the machine self shut down function,
initialization setting is “off”. Times limit is to tell the machine after how long
the machine will auto shut down without any operation.
z Door Lock Output – used to set whether the machine need the door lock
function and the time of control signal maintain, when open up, and the
machine must remain at the signal maintain time, in Targetmax® TA series
the green light indicate the time value selected.
z Initialization – to reset the programmed data to initial factory default values.
z Management Records Warning – used to setup the machine to give user a
warning when the total manager record is to be full.
z Attendance Records Warning – used to setup the machine to give user a
19
Targetmax® V.2.0 Attendance System Hardware Suite Guide
warning when the total attendance record is to be full.
z Repeat Confirmation Time – used to check whether the users have signed
in / out repeatedly during the setting time period to avoid double entry.
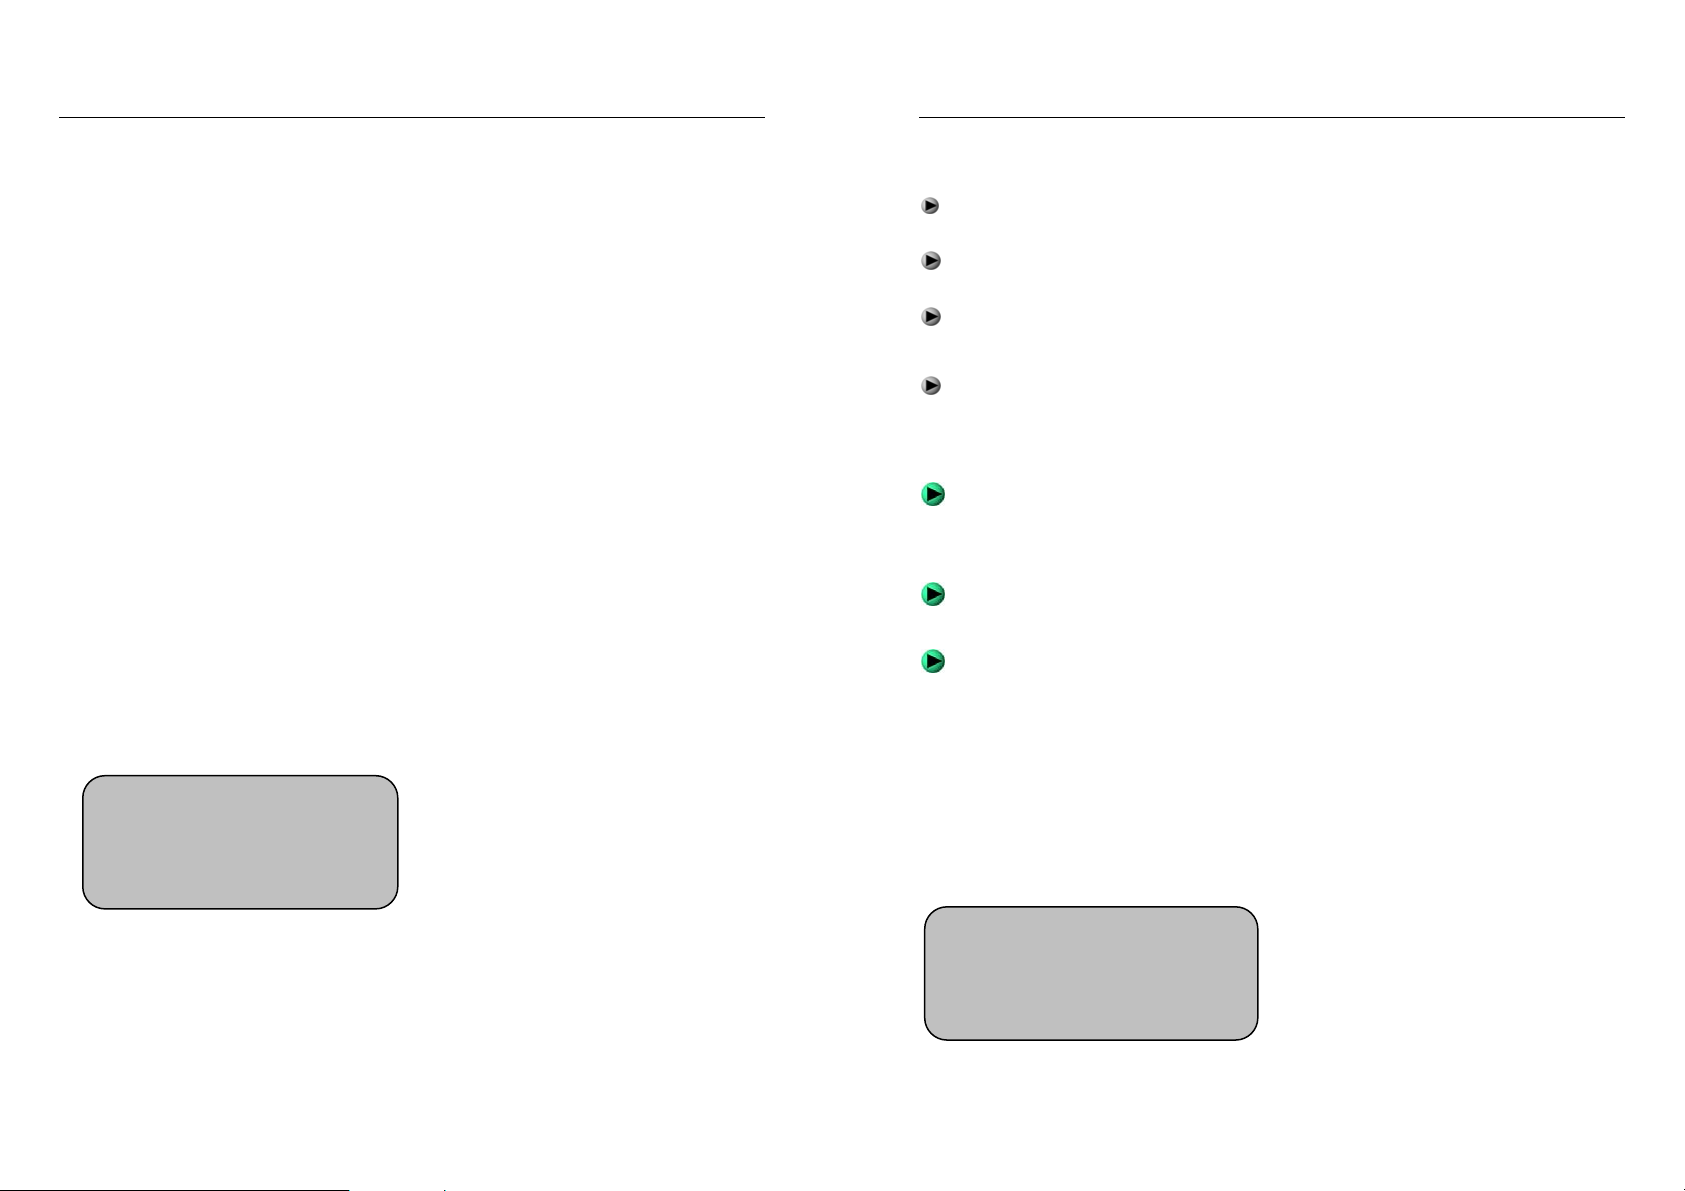
10.2.6 Information Query
To provide a way for the user to check the existing registration records,
attendance records and system details.
Information Query
2. Record Details 3. System Details 1. Storage Details
z Storage Details – to show the current registered data stored on the
machine. Included the number of registered user; the number of registered
manager; number of registered fingerprint; the number of registered
password and number of registered ID card.
z Records Details – consist of 5 elements which showing the current
attendance records, management records, inquiry attendance records,
inquiry management records and delete all records.
z System Details – consist of 6 elements which showing the attendance
production plant; equipment name; software edition, production date, serial
number and fingerprint arithmetic edition.
20
Page 11
Targetmax® V.2.0 Attendance System Hardware Suite Guide
1.10.3 Phonic Notice
To remind the user whether the operation is correct or not by LCD display or
voice notice
Selected voice on – under correct operation, the machine will give a voice
notice “Thank You” and while under incorrect operation, the machine will give a
voice notice “Press Again”
Selected voice off – under correct operation, a short “Bi, bi, bi…” sound can be
heard and while under incorrect operation, the machine will give a long “Bi---”t
sound.
The machine will resume work after 2 seconds or user can press either key to
resume normal operation.
Chapter Two - General Operation
(Please read this chapter very carefully)
2.1 Start the Operation
Turn on the machine and the screen will show:
Welcome! Please press finger…
08︰00 Saturday
2006–07–30
2.1.1 Press “Menu” to the Managing Status
The machine does not need any verify of the manager at the beginning of
operating because there is no manager registered data existed. If the machine
needs you to verify the manager, please contact your dealer to delete it via the
21
Targetmax® V.2.0 Attendance System Hardware Suite Guide
software of attendance system, if so, please refer to the “Software Suite Guide”
for details.
Setting Date and Time.
Functional Setting -
Initialization of Management and Attendance records (this can be ignored
since there is no data inside the machine when first use)
Register manager.
2.1.2 Press “ESC” back to Normal Attending Status
Press “Menu” enter the managing state
The machine needs to verify the manager identification because the
Manager’s data has been registered.
Register User
Refer to the item
Press “ESC” back to normal attending status
2.2 Usage under the Normal Attending Status
There are 3 ways in the state of normal attending, fingerprint, password and ID
card attendance.
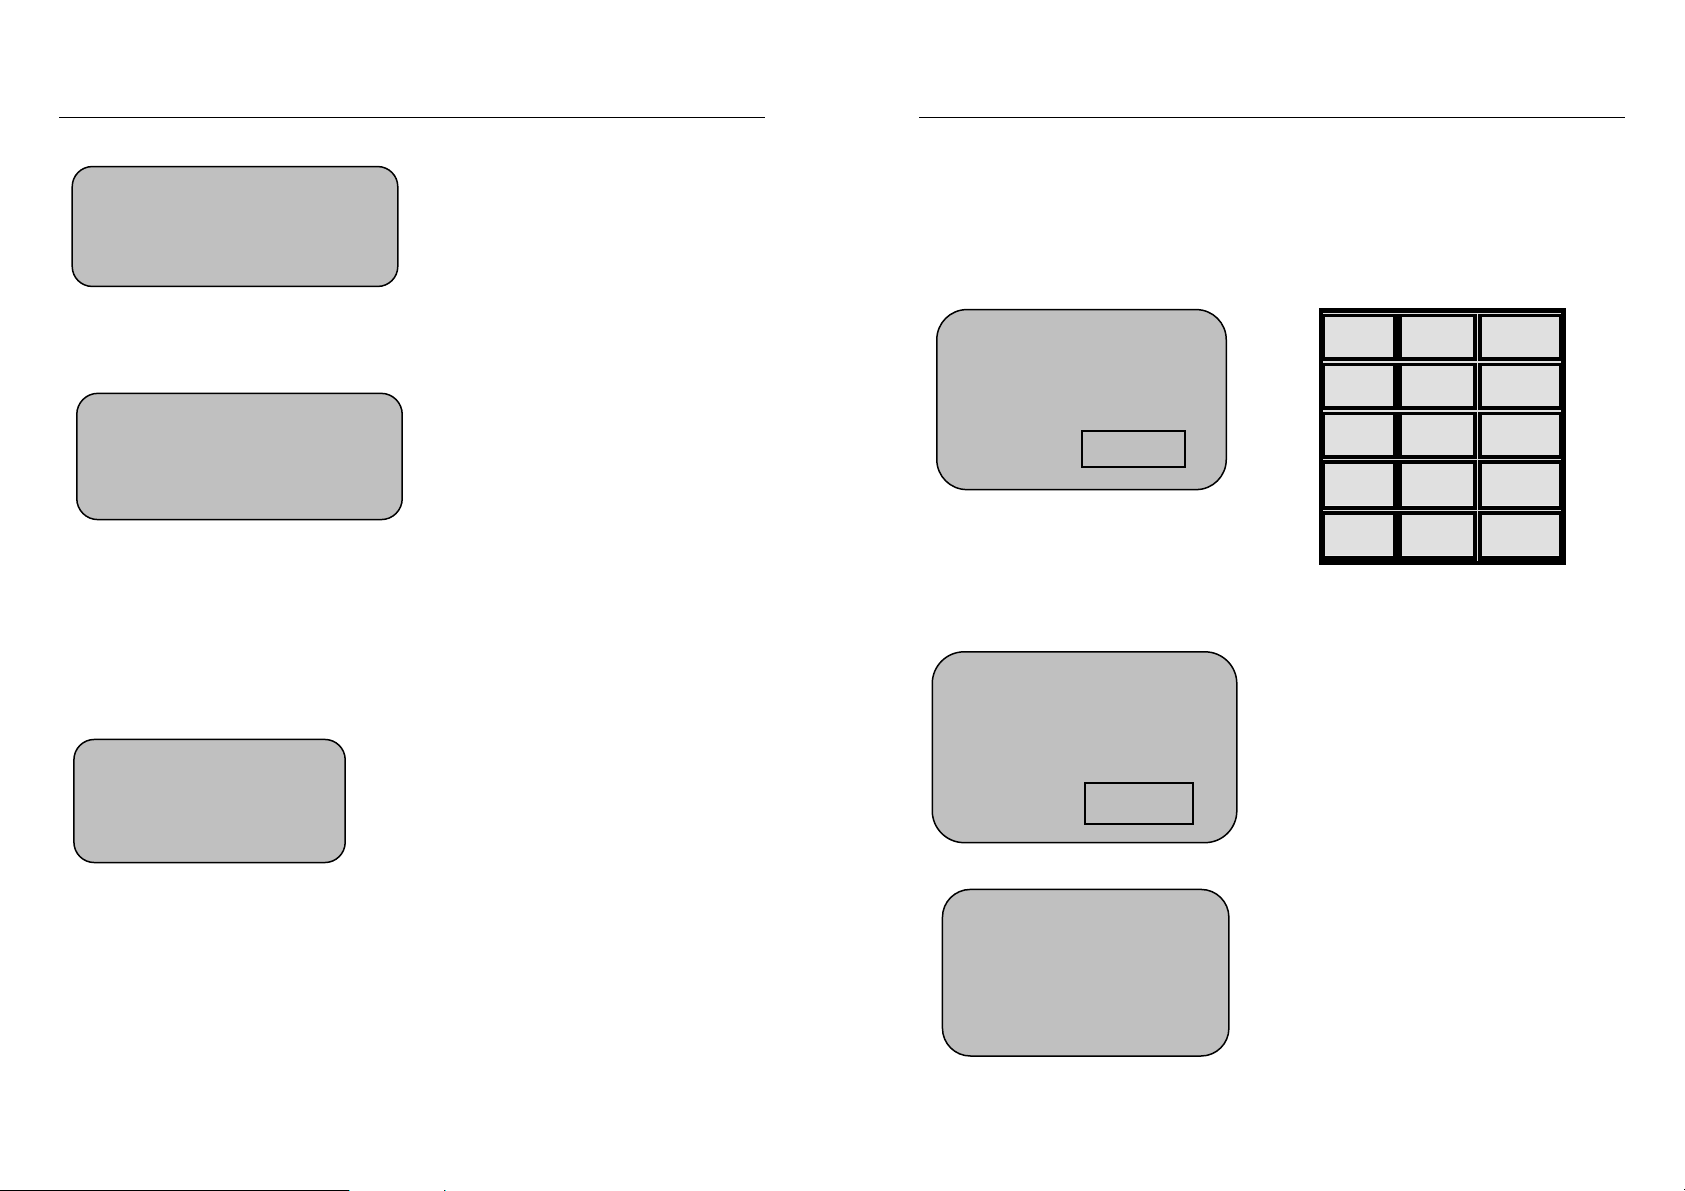
2.2.1 Fingerprint Attendance
Normal attending status show:
Welcome! Please Press Finger…
08︰00 Saturday
2006–07–30
For those Users already registered their fingerprint, please put the finger on the
22
Page 12
Targetmax® V.2.0 Attendance System Hardware Suite Guide
g
reader and screen will show:
Targetmax® V.2.0 Attendance System Hardware Suite Guide
2.2.2 Password Attendance
Fingerprint Confirming
Please Remove Fin
er!
After removing the finger, if the verification is successes, the screen will show:
Fingerprint Confirmed
Register No. 12345
Confirm Successfully!
If the machine has been set to “Voice On”, you will hear a voice saying “OK”. If
the machine has been set to “Voice Off”, you will hear a “Bi, Bi, Bi” sound.
(For those with door lock feature, the door will open at the same time)
After removing the finger, if the verification is fail, the screen will show:
Fingerprint Confirming
Please Press Again!
If the machine has been set to “Voice On”, you will hear a voice saying “Press
Again”. If the machine has been set to “Voice Off”, you will hear a long “Bi-”
sound.
The user must be sure the finger has been registered as well as the correct way
of putting on the reader.
23
For those Users already registered their password, please input the registered
Login Code(ID) first, for example, User ID No. is 00050, just input “50” and
press “OK” , the screen will display:
Password Confirming
1 2 3
4 5 6
Register No. 50
Input Password
7 8 9
0 ▲ ESC
OK ▼ MENU
Now input the registered password, the screen will display:
Password Confirming
Register No. 50
Input Password
Press OK, screen will show:
****
Fingerprint Confirming
Register No. 50
Confirmed!
24
Page 13

Targetmax® V.2.0 Attendance System Hardware Suite Guide
Targetmax® V.2.0 Attendance System Hardware Suite Guide
Password Confirmed
Register No 50
Confirm Successfully!
That means Password Attendance sign in successfully.
(For those with door lock feature, the door will open at the same time)
If in/out repeated interval time has been set, the machine will not record and
save any repeated in/out data in the interval time, in this case, will display
“Confirmed” only.
Chapter Three - Operation To Manager
Registered Managers can operate the machine and make program setting after
st
entering the 1
managing Menu.
3.1 Operation Steps
In the normal attending status, press “Menu”
(1) If the machine has not registered manager, screen will show:
Menu
1. Register Users
2. Delete Users
3. Data Download
* Enter menu interface under the operation state of manager.
(2) If the machine already registered manager, screen will show “Manager
verifying”:
Manager Veri fy ing
15︰57
2005–07–30 Saturday
a. Registered manager is required to sign in by fingerprint if he has been
registered by fingerprint.
b. Input the ID No. and Password if the registered manger is registered by
password.
Menu
1. Register Users
2. Delete Users
3. Data Download
* Enter menu interface under the operation state of manager.
(3) Display “Illegal Operation” with voice notice if un-recognition to the manager
(Different finger-mark or Wrong Password)
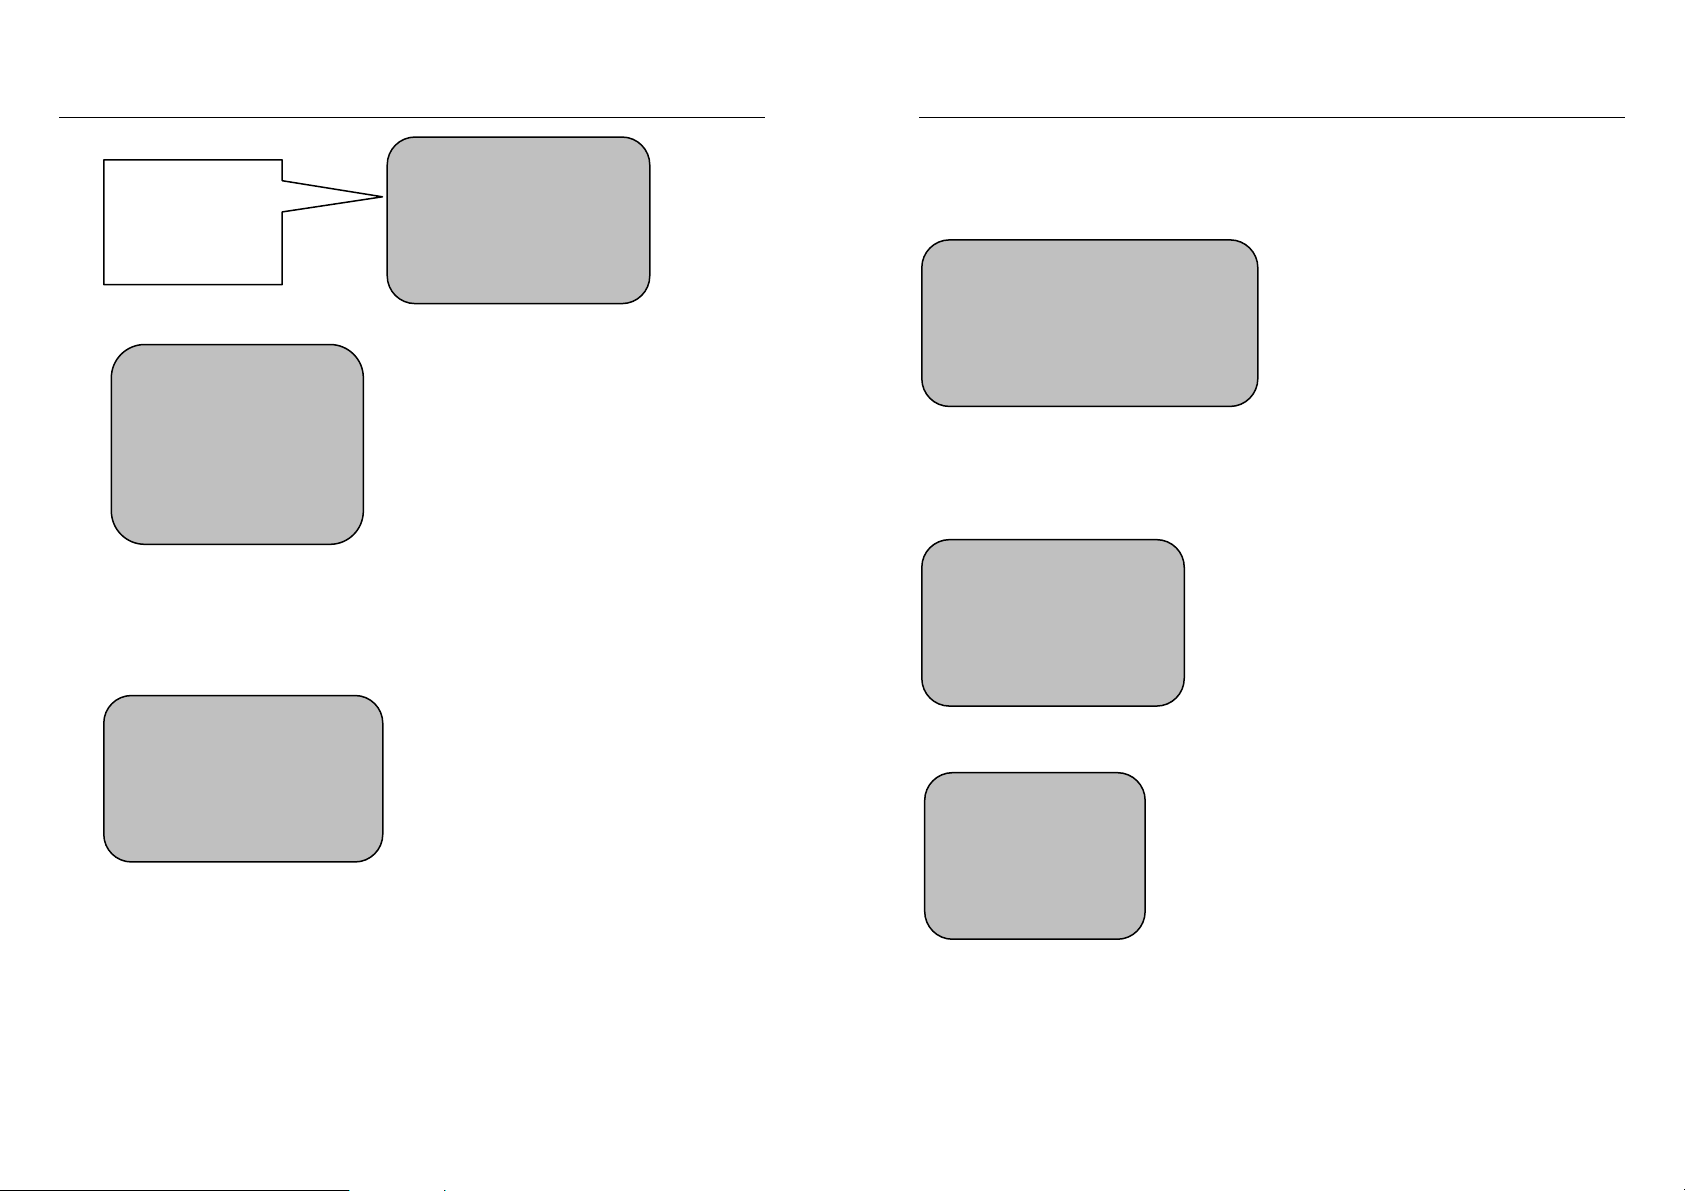
3.2 Data Process
Simple Introduction
In the normal attending status, press “Menu” (Manager Verification might
needed if the machine already registered manager)
25
26
Page 14
Targetmax® V.2.0 Attendance System Hardware Suite Guide
Using number
key or “▲”“▼”
key
to select
Menu
1. Register Users
2. Delete Users
3. Data Download
1. Select “Register Users” and press “OK”, the screen will show:
Select Level
1. User
2. Manager
3. Security Level
4. USB Upload
Press “ESC” to exit.
2. Using number key 2 or “▲”“▼” key to select to “Delete User”, the screen will
show:
Targetmax® V.2.0 Attendance System Hardware Suite Guide
3.2.1 Users’ Regis tra tion
It is the basic operation, which is required to be operated expertly.
(1) Normal attending status
Welcome! Please Press Finger..
15︰57
05–07–30
Saturday
(2) Press “Menu” (Manager Verification might needed if the machine already
registered manager)
Menu
1. Register Users
2. Delete Users
3. Data Download
Delete User
Register No : 000001
Exit - ESC Yes - OK
Press “ESC” to exit.
27
For those machines with registered manager, screen will show:
Manager’s
Verification
Required
…
Then input manager’s fingerprint, password or ID card depends on which type
of manager registered used.
28
Page 15
Targetmax® V.2.0 Attendance System Hardware Suite Guide
Targetmax® V.2.0 Attendance System Hardware Suite Guide
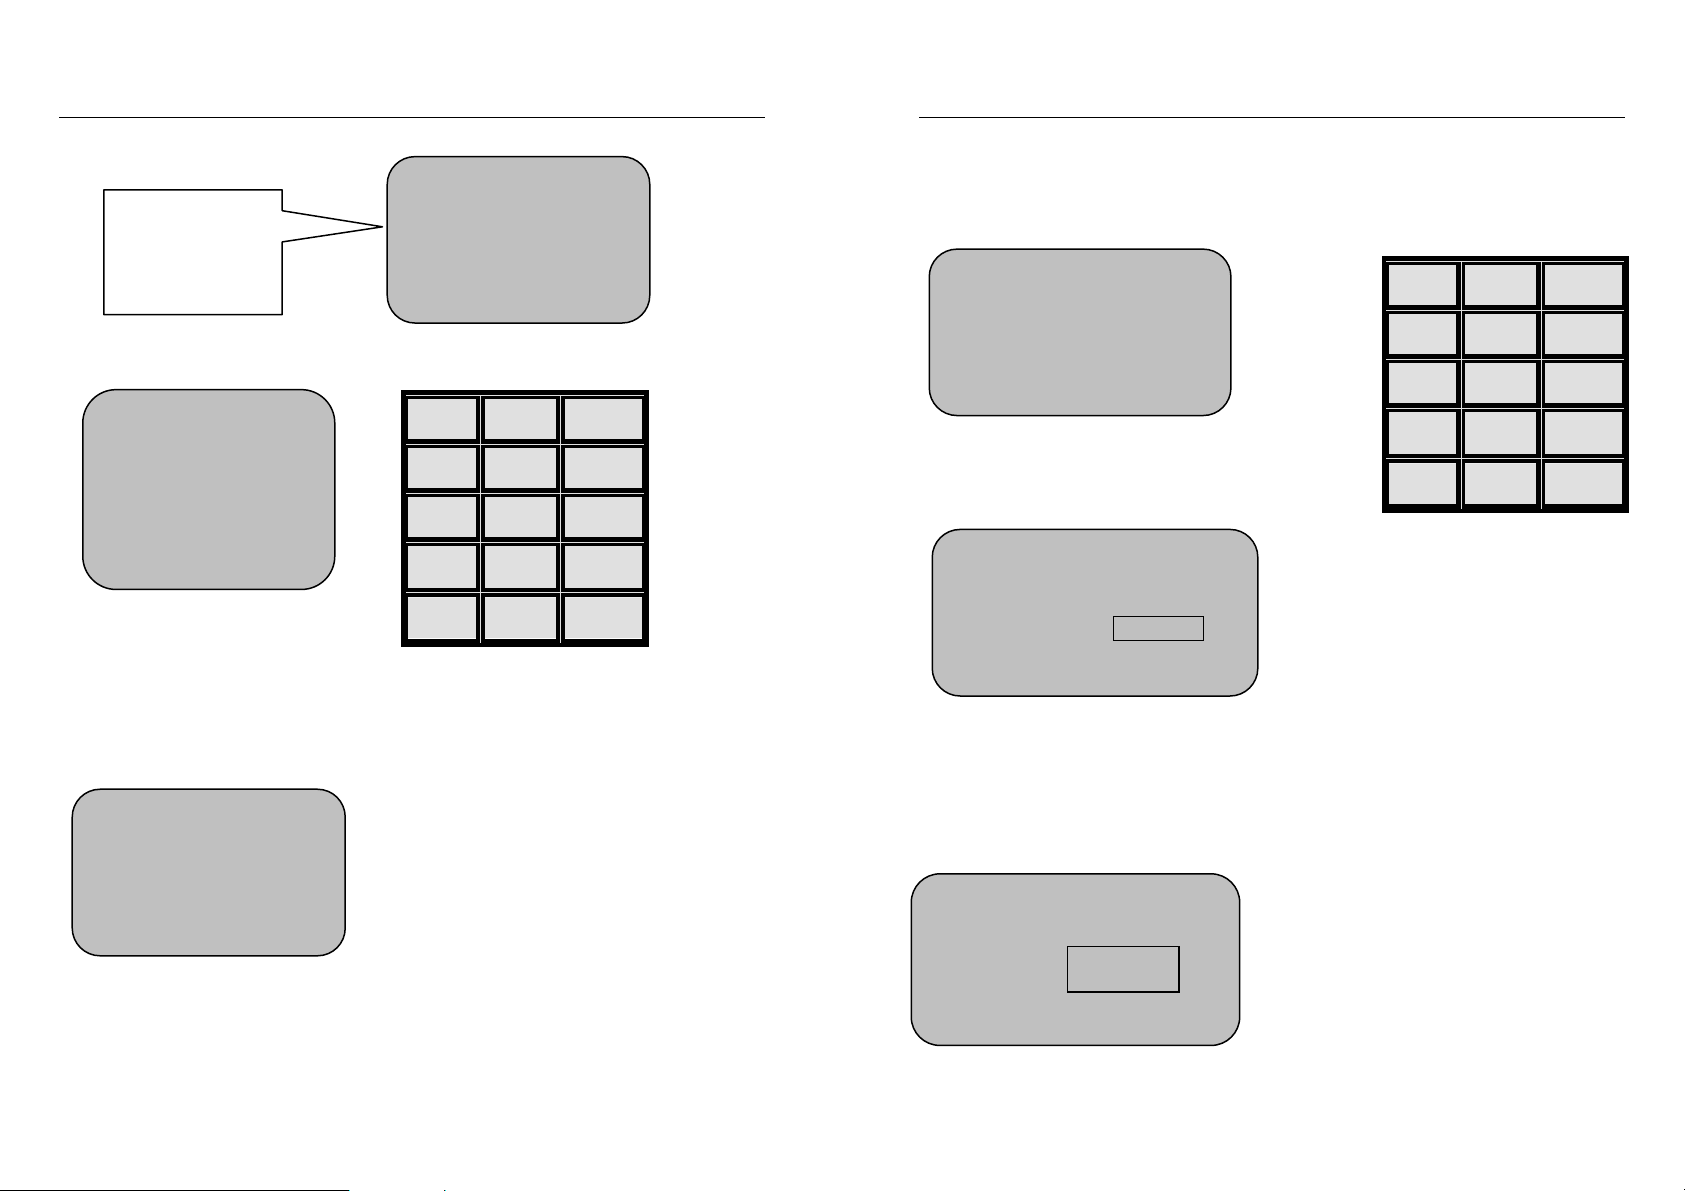
Menu
(3) Select “Register Users” and press OK
Using number
key or “▲”“▼”
key
to select
Select Level
1. User
2. Manager
3. Security Level
4. USB Upload
1. Register Users
2. Delete Users
3. Data Download
1 2 3
4 5 6
7 8 9
0 ▲ ESC
OK ▼ MENU
3.2.1 (A) Fingerprint Registration
Select Fingerprint Registration
(1) Registration new users
Fingerprint Registration
Registration No : 00001
Exit - ESC Yes - OK
Press OK to confirm.
Show new registration & registration number
New Fingerprint Registration
Registration No 00000000
Exit - ESC Yes - OK
1 2 3
4 5 6
7 8 9
0 ▲ ESC
OK ▼ MENU
(4) Registered users menu, show
Registration Mode
1. New Registration
2. Backup Registration
Register mode consist of 2 items, the
new registration & backup registration.
Both items can select fingerprint,
password or ID card register
Users with unclear fingerprint are
advised to select password or ID card
registration.
29
Using number key, input own ID number, e.g. 12345 as below:
ID number can be any number
Fingerprint Registeration
Registration No.
Exit - ESC Yes - OK
12345
combination from 1-65535
Mangers and Users are required to
remember his own ID No. this ID
no. will be recognized as Work No.
in software setting.
30
Page 16
Targetmax® V.2.0 Attendance System Hardware Suite Guide
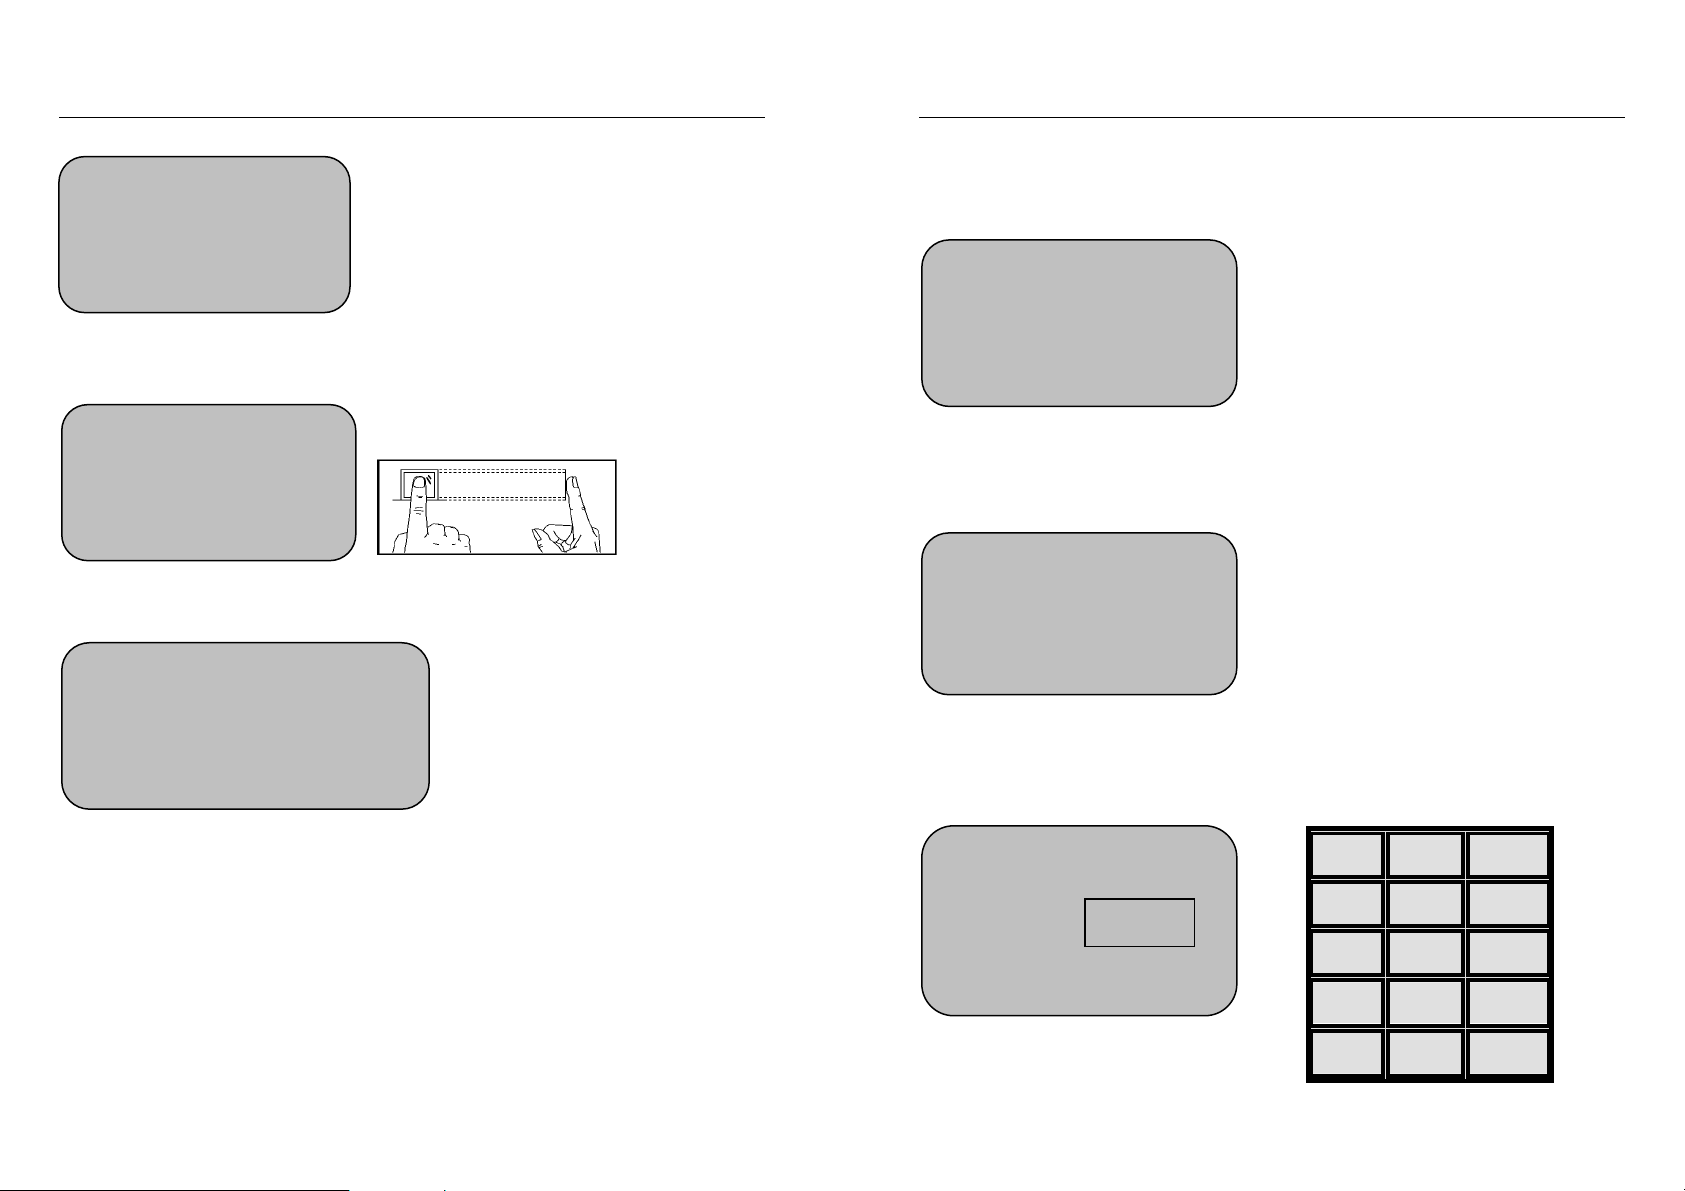
Press OK to confirm ID number and start register fingerprint.
Please Press Your Finger
1st Time
New user is requested to press his finger on the reader correctly.
Please Remove Finger!
New user is requested to register his/her same finger for 3 times repeatedly.
Fingerprint Registration
Continue Fingerprint Registration?
Exit - ESC Yes - OK
Press OK if continue fingerprint
registration is required.
or press ESC to exit
(2) Backup Registration
For Backup Register – User can register 2 more different fingerprints, 1 more
password or 1 more ID card under the same ID no. for backup usage.
Register method is same as new registration.
31
Targetmax® V.2.0 Attendance System Hardware Suite Guide
3.2.1 (B) Password Registration
It is suitable to those users who cannot be easy registered by fingerprints.
Under Registration Mode:
Registration Mode
1. Fingerprint Registration
2. Password Registration
3. ID Card Registration
Select “Password Registration” and press OK to enter the new password
registration menu.
Password Registration
Registration No : 00001
Exit - ESC Yes - OK
New User Registration
Using number key, input own ID number, e.g. 12346 as below:
Password Registration
Registration No:00001
-
12346
-
1 2 3
4 5 6
7 8 9
0 ▲ ESC
32
OK ▼ MENU
Page 17
Targetmax® V.2.0 Attendance System Hardware Suite Guide
Press OK to confirm and show new registration – using the number key to input
own password (4 digits) as below, e.g. password 1234
New Password Registration
Registration No:12346
Input Password ****
Exit - ESC Yes - OK
Press OK to confirm and screen will show:
Password Confirming
Please Enter Password Again
Enter password: ****
Exit - ESC Yes - OK
Press selected password 1234 again and press OK to save the password, then
screen will show:
Press OK if continue password registration is required or press ESC to exit
Password Registration
Continue Password Registration?
Exit - ESC Yes - OK
* Each user can only register 1 password.
33
Targetmax® V.2.0 Attendance System Hardware Suite Guide
3.2.1 (C) ID Card Registration
It is suitable to those users who cannot be easy registered by fingerprints.
Under Registration Mode:
Select “ID Card Registration” and press OK to enter the new ID card registration
menu.
Registration Mode
1. Fingerprint Registration
2. Password Registration
3. ID Card Registration
New User Registration
ID Card Registration
Registration No.: 00001
Exit - ESC Yes - OK
Using number key, input own ID number, e.g. 12347 as below:
ID Card Registration
Registration No.: 12347
Exit - ESC Yes - OK
Press OK to confirm and screen will show:
ID Card Registration
Please Present Your ID Card
Exit - ESC Yes - OK
34
Page 18

Targetmax® V.2.0 Attendance System Hardware Suite Guide
Press OK and present your ID card to the card reader.
ID Card Registration
88888888
Exit - ESC Yes - OK
The screen will show the ID Card No. 88888888, press OK to save the ID card
registration.
ID Card Registration
Continue ID Card Registration?
Exit - ESC Yes - OK
Press OK if continue ID card
registration is required.
or press ESC to exit
3.2.2 Managers’ Registration
Manager’s Registration is to manage the operation of the authorized managers.
He/She can program the machine and get information query.
Register & backup data will count under Management Record.
Registered procedure is same as Users’ Registration (clause 3.2.1)
Targetmax® V.2.0 Attendance System Hardware Suite Guide
3.3 Delete Users
Press “Menu”, select “Delete User” and press OK to enter the delete user menu
as below:
Delete User
Registered No.: 00001-1
Exit - ESC Yes - OK
1 2 3
4 5 6
7 8 9
0 ▲ ESC
Using the number keys to input the Registered No (User ID No.) which has to
be deleted from machine, e.g. 12345, as follow:
OK ▼ MENU
Delete User
Registered No.: 12345-1
Determined To Delete?
Exit - ESC Yes - OK
Delete User
Registered No.: 12345-2
Determined To Delete?
Exit - ESC Yes - OK
Press OK to delete, and press ESC to exit, if the registration number have
backup registered, the screen will be prompted to delete backup data as above
figure.
The number “-1” indicate the first registration. The number “-2” indicate the backup
registration.
Letter “P” indicate Password Registration and Letter “C” indicate ID card registration.
35
36
Page 19

Targetmax® V.2.0 Attendance System Hardware Suite Guide
A
3.4 View Attendance Record
Press “Menu” “Information Query” “Log Info” and screen will show:
Record Details
1. Attendance Record 0
2. Manager Record 0
3. View Attendance Record
4. View Management Record
5. Delete All Records
Select “View Attendance Record” and press OK enter the view attendance
record menu.
Record Details
1. Attendance Record 0
2. Manager Record 0
3. View Attendance Record
4. View Management Record
5. Delete
Press OK to view all the attendance Record.
ll Records
View Attendance Record
Register No.
Exit - ESC Yes - OK
00000
View Attendance Record
01-11-30 17:30 V_F
Exit - ESC Yes - OK
12345
C-05431
N-00001
37
Targetmax® V.2.0 Attendance System Hardware Suite Guide
The above screen displayed character and significance of information as follow:
C: Total In/Out records’ quantity
(For example: C-05431 means 5431 records recorded)
N: Serial no. of In/Out records
(For example: N- 00001 means the first records)
V_F: means verified by fingerprint
(V_P: means verified by password)
(V_C: means verified by ID card)
12345: The Registered ID No. of the user
01-11-30 17:30 means the In/Out time
The above displayed record is the latest memory of in/out record.
Press “▼▲” to check the other in/out records one by one.
Press “ESC” to exit
View specified User’s in/out recorder -
Input the Register No. (User ID No.) which you want to check his/her
attendance record and press OK. For example: User ID 12345
View Attendance Records
Register No.
Exit - ESC Yes - OK
12345
Press OK and the latest in/out record of User ID12345 will displayed as below:
38
Page 20

Targetmax® V.2.0 Attendance System Hardware Suite Guide
V
View Attendance Record
01-11-30 17:30 V_F
Exit - ESC Yes - OK
If User ID 12345 does not have any in/out record registered in the machine, the
screen will display as below:
12345
C-05431
N-00001
View Attendance Record
Register number
Without in and out records!
12345
3.5 View Management Record
The operation is the same as “View Attendance Record” but with different words
shown on the LCD.
iew Management Records
N-00001
05-07-30 08:30 E-U
12345 00008
Exit - ESC Yes - OK
C-00256
39
Targetmax® V.2.0 Attendance System Hardware Suite Guide
The screen shows the character and significance of information as follows:
E_U : Register as User
E_M : Register as Manager
E_DF : Deleted fingerprint registration data
E_DP : Deleted password registration data
D_L : Delete all records data
S_T : Time setting
S_S : System setting
3.6 Delete all records
Press “Menu” “Information Query” “Log Info” and screen will show:
Select “Delete All Records”
Record Details
1. Attendance Record 0
2. Manager Record 0
3. View Attendance Record
4. View Management Record
5. Delete All Records
1 2 3
4 5 6
7 8 9
0 ▲ ESC
OK ▼ MENU
40
Page 21

Targetmax® V.2.0 Attendance System Hardware Suite Guide
Press OK and screen will show:
Delete All Records
Press OK to confirm delete.
Determined To Delete All Records?
Press ESC to exit.
Exit - ESC Yes - OK
Once you press OK and the screen will show:
Delete All Records
Deleting, Please Wait…
A “Bi—” sound can be
heard after deleting all
records and back to data
processing menu.
Remarks to Register User and Manager:
(1) The machine will give a voice notice to remind you when the “Registration
Backup Full”
(2) The machine can automatic create the User ID number, or
a. If the user wants a different register ID, input any No. from 1 to 65525
(however the selected No. must be larger than the auto default No.)
b. In the case of inputting a duplicate No. (Register ID No.), the machine will
display “Registration Wrong Numbers!” together with a voice notice. Please
re-input a new ID No.
(3) In case the machine cannot recognizes the fingerprint, (maybe due to
incorrect putting way on reader or dirty finger), the machine will show “Please
Press Again!” together with a voice notice. Please clean up the finger and put
the finger on the reader properly.
Targetmax® V.2.0 Attendance System Hardware Suite Guide
3.7 Advance Setting
For details please reference to Chapter One – item 1.8 System Setting“ This
section shows the setting procedure.
Press “MENU” and select “Advance Setting”
Menu
1.Register Users
2.Delete Users
3.Data Download
4.Time Setting
5.Advance Setting
6.Information Query
Press OK to show.
Advance Setting
1. Machine Setting
2. Record Setting
3.7.1 Machine Setting
Under the Machine Setting Menu, there are totally eight items.
Machine Setting
1. Machine No. 1
2. Manager Qty 5
3. Select Language English
41
42
Page 22

Targetmax® V.2.0 Attendance System Hardware Suite Guide
Targetmax® V.2.0 Attendance System Hardware Suite Guide
Machine Setting
4. Select Voice Yes
5.LCD Backlight 47
6.Auto Shut Down On
F=
Machine Setting
6.Auto Shut Down No
7.Verify F/P/C
8.Initialization
. Fingerprint
P=. Password
C=. ID Card
3.7.1(A) Machine No.
Select “Machine No.” and press OK
Machine Setting
1.Machine No. 1
2. Manager Total 1
3.Select Language English
Using the “▼▲” or number key to select the Machine parameter, the range is
1-255. For example: input 3 and press OK to show:
Machine Setting
1. Machine No. 3
2. Manager Total 1
3. Select Language English
★ Please make sure the Machine no. had not duplicated from previous setting.
Duplicated machine no. will cause confusion during information query.
3.7.1(B) Manager Total
Select “Manager Total” and press OK
Machine Setting
1. Machine No. 3
2. Manager Total 1
3. Select Language English
Using the “▼▲” or number key to select the “Manager Total” , For example:
input 3 and press OK to show:
Machine Setting
1. Machine No. 3
2. Manager Total 3
3. Select Language English
3.7.1(C) Select Language
Using the “▼▲” or number key to select the “Select Language” and press OK
to show:
Machine Setting
1. Machine No. 3
2. Manager Total 1
3. Select Language English
43
44
Page 23

Targetmax® V.2.0 Attendance System Hardware Suite Guide
Using the arrow keys moving▼ to select the required language selected.
(There are 3 different languages included English, Traditional Chinese &
Simple Chinese)
3.7.1(D) Select Voice
Using the “▼▲” or number key to select the “Select Voice” menu and press OK
to show:
Machine Setting
4. Select Voice On
5.LCD Backlight 47
6.Auto Shut Down On
Using the arrow keys moving▼ to select the voice “On” or “Off”
(There is only one defaulted language inside the machine)
3.7.1(E) LCD backlight
Using the “▼▲” or number key to select the “LCD Backlight” menu and press
OK to show:
Machine Setting
4. Select Voice On
5.LCD Backlight 47
6.Auto Shut Down On
Targetmax® V.2.0 Attendance System Hardware Suite Guide
3.7.1(F) Auto Shut Down
Using the “▼▲” or number key to select the “Auto Shut Down” menu and press
OK to show:
Machine Setting
4. Select Voice On
5.LCD Backlight 47
6.Auto Shut Down On
Using the arrow keys moving ▼ to select the auto shut down feature by
selecting “On” or “Off”. The setting unit is “minutes”
3.7.1(G) Verify Fingerprint / Password / ID card
Using the “▼▲” or number key to select the “Verify” menu and press OK to
show:
Machine Setting
7.Verify F/P/C
6. Auto Shut Down On
7. Verify F/P/C
8. Initialization
Using the “▼▲” or number key to select the numerical value, higher value =
darker words.
45
Using the arrow keys moving ▼ to select the “F/C/P” feature by selecting
“F/C/P” ,”F+P” or “F+C”. The setting unit is “Registration Mode:”
46
Page 24

Targetmax® V.2.0 Attendance System Hardware Suite Guide
Targetmax® V.2.0 Attendance System Hardware Suite Guide
3.7.1(H) Initialization
Using the “▼▲” or number key to select the “Initialization” menu and press OK
to show:
Machine Setting
6. Auto Shut Down On
7. Verity F/P/C
8. Initialization
Press OK to resume all factory default setting.
3.7.2 Records setting
For details please reference to Chapter One – item 1.8.2 “Record Setting“. This
section shows the setting procedure.
Press “MENU” and select “Advance Setting”
Press OK and select “Record Setting” to show:
Advance Setting
1. Machine Setting
2. Record Setting
Press OK to enter the record setting menu.
Record Setting
1. Management Rec Warning 100
2. Attendance Rec Warning 1000
3. Repeat Confirmation Time On
There are three items under the record setting menu.
3.7.2(A) Management Record Warning
Using the “▼▲” or number key to select the “Management Record Warning”
menu and press OK to show:
Record Setting
1. Management Rec Warning 100
2. Attendance Rec Warning 1000
3. Repeat Confirmation Time On
For example: Using the number key to input 20 and press OK to confirm:
Record Setting
1. Management Rec Warning 20
2. Attendance Rec Warning 1000
3. Repeat Confirmation Time On
The machine will give a voice notice to remind you when the “Manager
Registration is almost Full”
47
48
Page 25

Targetmax® V.2.0 Attendance System Hardware Suite Guide
Targetmax® V.2.0 Attendance System Hardware Suite Guide
3.7.2(B) Attendance Record Warning
Using the “▼▲” or number key to select the “Attendance Record Warning”
menu and press OK to show:
Record Setting
1. Management Rec Warning 20
2. Attendance Rec Warning 1000
3. Repeat Confirmation Time On
For example: Using the number key to input 1500 and press OK to confirm:
Record Setting
1. Management Rec Warning 20
2. Attendance Rec Warning 1500
3. Repeat Confirmation Time On
The machine will give a voice notice to remind you when the Attendance
Registration still have only 1500 record spaces left.
The unit is 1 ~ 1500, users are required to decide the level according to their
own needs.
Fingerprint Comfirming
Register No. : 12345
Attendance Records Warning!
Fingerprint Confirming
Register No. : 12345
Exceed Attendance Records!
49
3.7.2(C) Repeat Confirmation Time
Using the “▼▲” or number key to select the “Repeat Confirmation Time” menu
and press OK to show:
Record Setting
1. Management Rec Warning 20
2. Attendance Rec Warning 1500
3. Repeat Confirmation Time On
Using the arrow keys moving ▼ to select the door lock output feature by
selecting “On” or “Off”. The setting unit is “minutes”
Record Setting
1. Management Rec Warning 20
2. Attendance Rec Warning 1500
3. Repeat Confirmation Time 20
For example: Using the number key to input 20 and press OK to confirm:
That means within 20 minutes, the users will be detected whether they have
repeated in/out registration. The repeated data will be recognized.
50
Page 26

Targetmax® V.2.0 Attendance System Hardware Suite Guide
3.8 Information Query
Press “MENU” and select “Information Query”
Menu
1.Register Users
2.Delete Users
3.Data Download
4.Time Setting
5.Advance Setting
6.Information Query
Information Query
1.Storage Details
2.Record Details
3.System Details
Press OK and select “Storage Detail”.
3.8.1 Storage Details
Display the total registered records storage on machine.
There are five items under the storage details menu.
Storage Details
1. User Reg. 100
2. Manager Reg. 1
3. Fingerprint Reg. 0
Storage Details
4. Password Reg. 1
5. ID Card Reg. 0
Targetmax® V.2.0 Attendance System Hardware Suite Guide
3.8.2 Record Details
Press “MENU” and select “Information Query”
Press OK and select “Record Details” to show:
Information Query
1. Storage Details
2. Record Details
3. System Details
Press OK and select “Record Details” menu to show:
Display the total registered records on machine.
There are five items under the storage details menu.
Record Details
1. AttendanceRecord 100
2. Management Record 1
3. View Attendance Record
Record Details
4. View Management Record
5. Delete All Records
51
52
Page 27
Targetmax® V.2.0 Attendance System Hardware Suite Guide
Chapter Four - Appendix
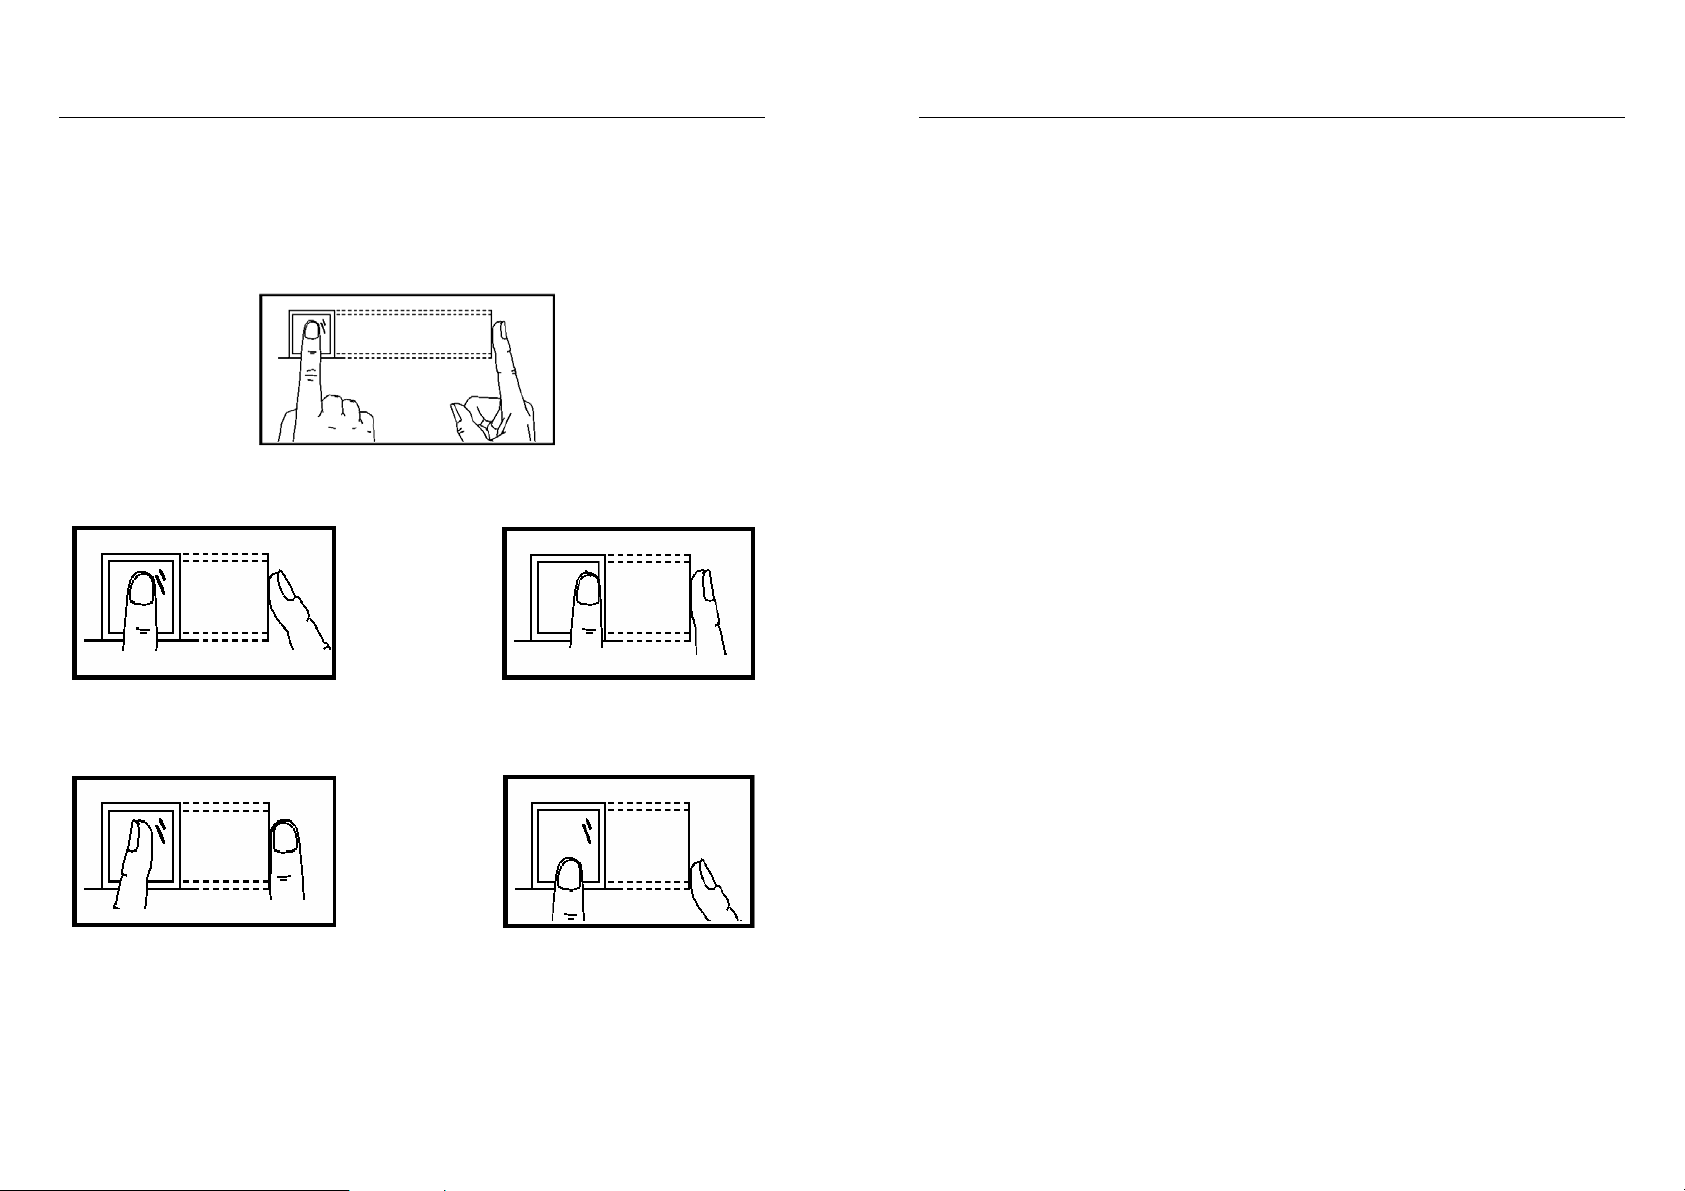
4.1 Attention to Finger’s Reading
Note: Below are the instructions on fingerprint collection. Only Figure 1 is
corrected and can be successfully register by the reader.
Figure 1
Not in center
Incline
Correct
Too deflect
Too low
Targetmax® V.2.0 Attendance System Hardware Suite Guide
4.2 Software FAQ
4.2.1 Hardware Portion
Q1. How to solve if some users’ fingerprint always cannot get through
the attendance machine?
A1. There are some reasons why the user cannot get through the
attendance machine by his/her fingerprint:
a. The fingerprint already tear down
b. Skin pucker on finger
c. Peeling seriously on finger
Due to the above circumstances, the user is advised to re-register another
finger with clear prints and register several backup fingerprints.
In addition, the user can choose the password or ID card registration.
Q2. What will be the main reason while the attendance machine
cannot communicate?
A2. Possible reasons are:
a. Incorrect communication port setting.
b. The Baud Rate setting value between the computer & attendance
machine is not the same.
c. Attendance machine has not connected to the power or not
connected to computer.
d. Attendance machine has power off.
e. Incorrect Machine no. setting.
f. Failure on the data line or converter.
g. Defective on the computer com port.
53
54
Page 28

Targetmax® V.2.0 Attendance System Hardware Suite Guide
Q3. How to solve the problem if incomplete display or blur were found
on the LCD screen?
A3. Possible reasons are:
a. Main board defective.
b. Internal identities damaged on LCD.
Under the above circumstances, please contact your supplier for repairs.
4Q. How to delete the Attendance Manager?
4A. Connecting the attendance machine to the computer, enter the staff
information and fingerprints management, selects the selected manager
and clicks modify user privileges. The registered data will be deleted, after
that can go into the menu on attendance machine.
5Q. What does it mean if there is a sound of "Tik Tik" heard after
connecting the attendance machine to the computer?
5A. Possible reasons are:
a. If using RS-232 as interface, the Baud Rate setting value between
the computer & attendance machine is not the same.
b. If using RS-485 as interface, maybe the converters cable are
reversed or stick together.
55
Targetmax® V.2.0 Attendance System Hardware Suite Guide
6Q. Why the attendance machine keep repeating “Press again” and
how to solve?
6A. Possible reasons are:
a. After using for a long period, the reader becomes dirty and scratches,
the machine misinterpret that there are user using the machine and
fail to identify the record. Under this circumstance, please use
rubberized fabric to cleanup the reader.
b. The reader cable is loose or not in correct places.
c. Main board defective
For item (b) & (c), please contact your supplier for repairs.
7Q. Under normal management operation, we can download the
fingerprint and password data, however the machine give a failure
notice when we viewing the attendance record, how to solve?
7A. This situation always get related with the data lines, converters or the
computer COM port, try to lower down the baud rate of the attendance
machine and computer communication, try to set up for 38400 or 9600 and
re-operate again.
Important Note : Avoid strong light direct spot to the reader.
56
Page 29

Targetmax® V.2.0 Attendance System Hardware Suite Guide
Targetmax® V.2.0 Attendance System Hardware Suite Guide
4.3 Trouble Shooting
4.2.2 Software Portion
1Q. How to define as overnight shift?
A1. For example, begins work from 18:00pm and off at 2:00am (next day)
Note: For overnight shift, please add 24 hours on the basis time value.
Shift setting: 18:00-26:00
2Q. How to count as abnormity overtime?
2A. For example, normal working hours is
8:00 (On duty) 12:00 (Off duty)
14:00 (on duty) 18:00 (Off duty)
Exceed working over 2 hours will be counted as overtime job; therefore the
shift setting is as below:
Shift 1 : 08:00 – 1200 (normal shift)
Shift 2 : 14:00 – 18:00 (normal shift)
Shift 3 : 19:00 – 21:00 (overtime shift)
Note: Please put a tick on the box of “Calculate Rule” so as to start the
overtime calculation features.
57
Problems Possible Reasons
No data on Originality
Record
Display “the initial use,
please set up“ suddenly
Not connecting to
RS232 / RS485
Not connecting to
TCP / IP
No data on
Attendance Report
Display “Locked”
when entering system
a. not yet collected data
b. incorrect entry date in the staff information settings
c. Forget to input the entry date
a. Database still inside the machine: check SQL, maybe the
connection is fail.
b. Database already downloaded from machine: check the server
database connections
a. The baud rate of computer is not 38400
b. The baud rate of machine is not 38400
c. Software communication baud rate is not 38400
d. Software data collect communication is not 38400
e. Machine no. is not the same
f. Defective on the communication wire
a. Corresponding IP address of software communications is
incorrect
b. Corresponding machine no. is incorrect
c. Communication password is incorrect
d. Communication cable is incor re ct
a. Check the entry date of staff
b. Check whether there are originality records
c. Check whether shifted or any automatic matching shift
d. Check whether disposed data
e. Check whether “Calculate total hour” has selected
a. To determine whether lock by manager
b. If not locked by manager, please enter the users tables of
MCZN database in SQL, change the numerical value from 0 to 1
in the field “is_stoped”
58
 Loading...