

Page 1

DP-5200x
DVD Player
USER’S MANUAL
Page 2

FEATURES OF DP-5200x DVD PLAYER
Full discs playback compatibility: DVD,MPEG4,DVD±R,DVD±RW, DVCD, MP3, CD-DA, HDCD , Picture CD.
Excellent AV effect:
1. Composite video, S-Video and component video output. Built-in progressive output enables a higher resolution of
the pictures.
2. Supports PAL or NTSC system with aspect ratio of 4:3 or 16:9. Fiber optical and coaxial audio outputs are also
available.
Totally supports multi view-angle, multi-language, multi-subtitle and multi screen mode for DVD discs.
Supports parental lock control that prevents children to watch unsuitable scenes.
Friendly-interfaced WINDOWS setup menu.
Displays the JPEG picture files.
MP3 three-dimensional (3D)dynamic playback interface.
Possesses agile zoom function, and pictures can be zoomed during playback.
NTSC/PAL/AUTO compatible, no compression of pictures.
User’s Manual
Dynamic screen saver function.
Supports setup of video quality.
Software update automatically.
Supports USB and Card reader.
Supports NERO.
Notes: "Dolby" and the double-D symbol are trademarks of Dolby Laboratories Licensing Corporation. Manufactured
under license from Dolby laboratories.
Confidential unpublished works. C 1992-1997 Dolby Laboratories. Inc. All rights reserved.
1
Page 3
PLEASE READ THIS MANUAL COMPLETELY BEFORE OPERATING THIS UNIT AND KEEP IT FOR FUTURE
REFERENCE.
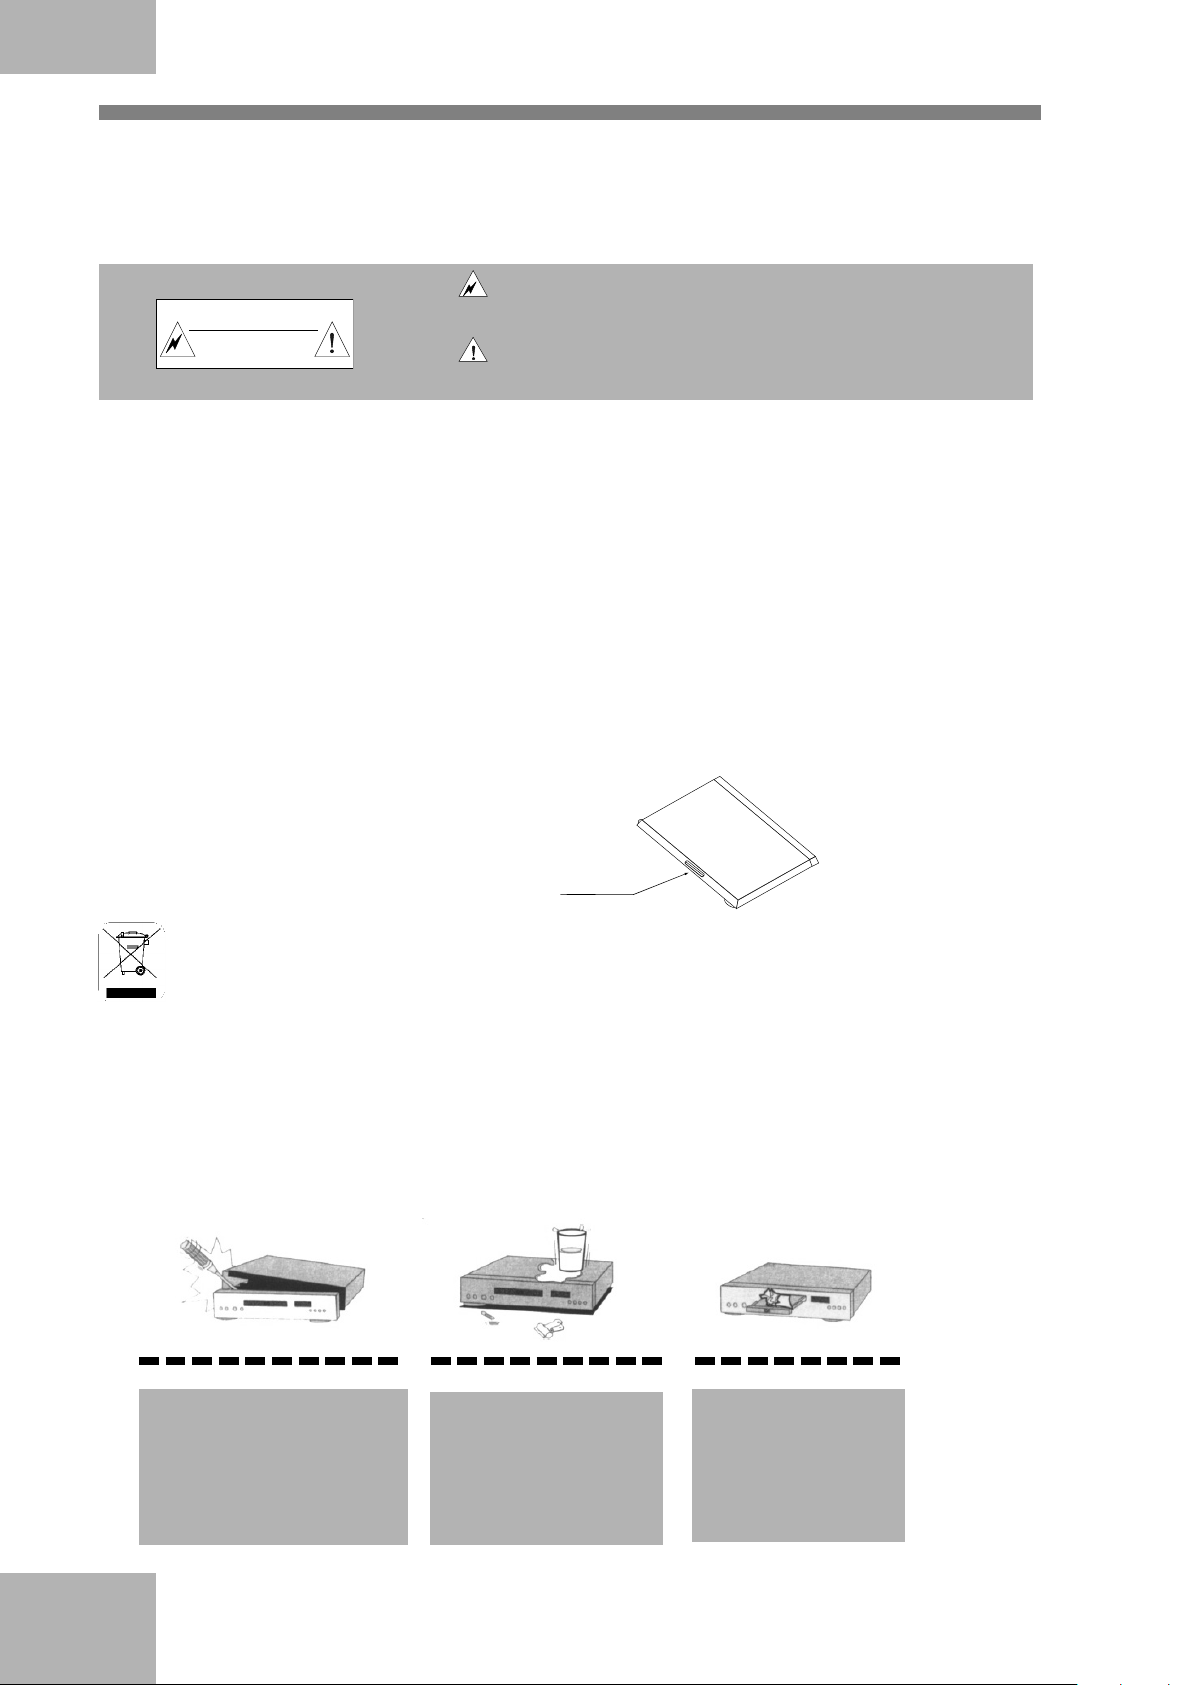
Safety Precautions
CAUTION: This symbol alerts the user that ¡dangerous voltage¡ exists in the player
CAUTION
RISK OF ELECTRIC SHOCK
DO NOT OPEN
WARNING: To reduce the risk of fire or electric shock, do not expose this player to rain or moisture. Dangerous high voltages
are present inside the cabinet. Do not open the cabinet, the player should be repaired by the qualified maintenance
person only.
CAUTION: This DVD player employs a laser system.
To ensure proper use of this product, please read this user’s manual completely and keep it for future reference.
Should the unit require maintenance, please contact an authorized service center.
To prevent direct exposure to laser beam, do not try to open the cabinet, or the laser beam may hurt your eyes.
WARNING: Without agreement of our company or any organization authorized by our company, any change or alteration to this
product may bring inconvenience to you. Refer all serving to qualified service personnel. Servicing is required
when the unit has been damaged in any way, such as power supply cord or plug is damaged, liquid has been spilled
or objects have fallen into the unit, the unit has been exposed to rain or moisture, does not operate normally or has
been dropped.
CARE: This symbol alerts the user that important operating and maintenance
cabinet with the risk of electric shock to persons.
instructions exist in manual.
Position of the label
Disposal of your old appliance
1. When this crossed-out wheeled bin symbol is attached to a product it means the product is covered by the European
Directive 2002/96/EC.
2. All electrical and electronic products should be disposed of separately from the municipal waste stream via
designated collection facilities appointed by the government or the local authorities.
3. The correct disposal of your old appliance will help prevent potential negative consequences for the environment
and human health.
4. For more detailed information about disposal of your old appliance, please contact your city office, waste disposal
service or the shop where you purchased the product.
Important Safety Instructions
Do not take apart or modify
this unit. Clean only with dry
cloth.
Do not place any metal or
liquid on or near this unit to
avoid the risk of fire or
electric shock.
Do not place any metal or
inflammable object into
the cabinet.
2
Page 4
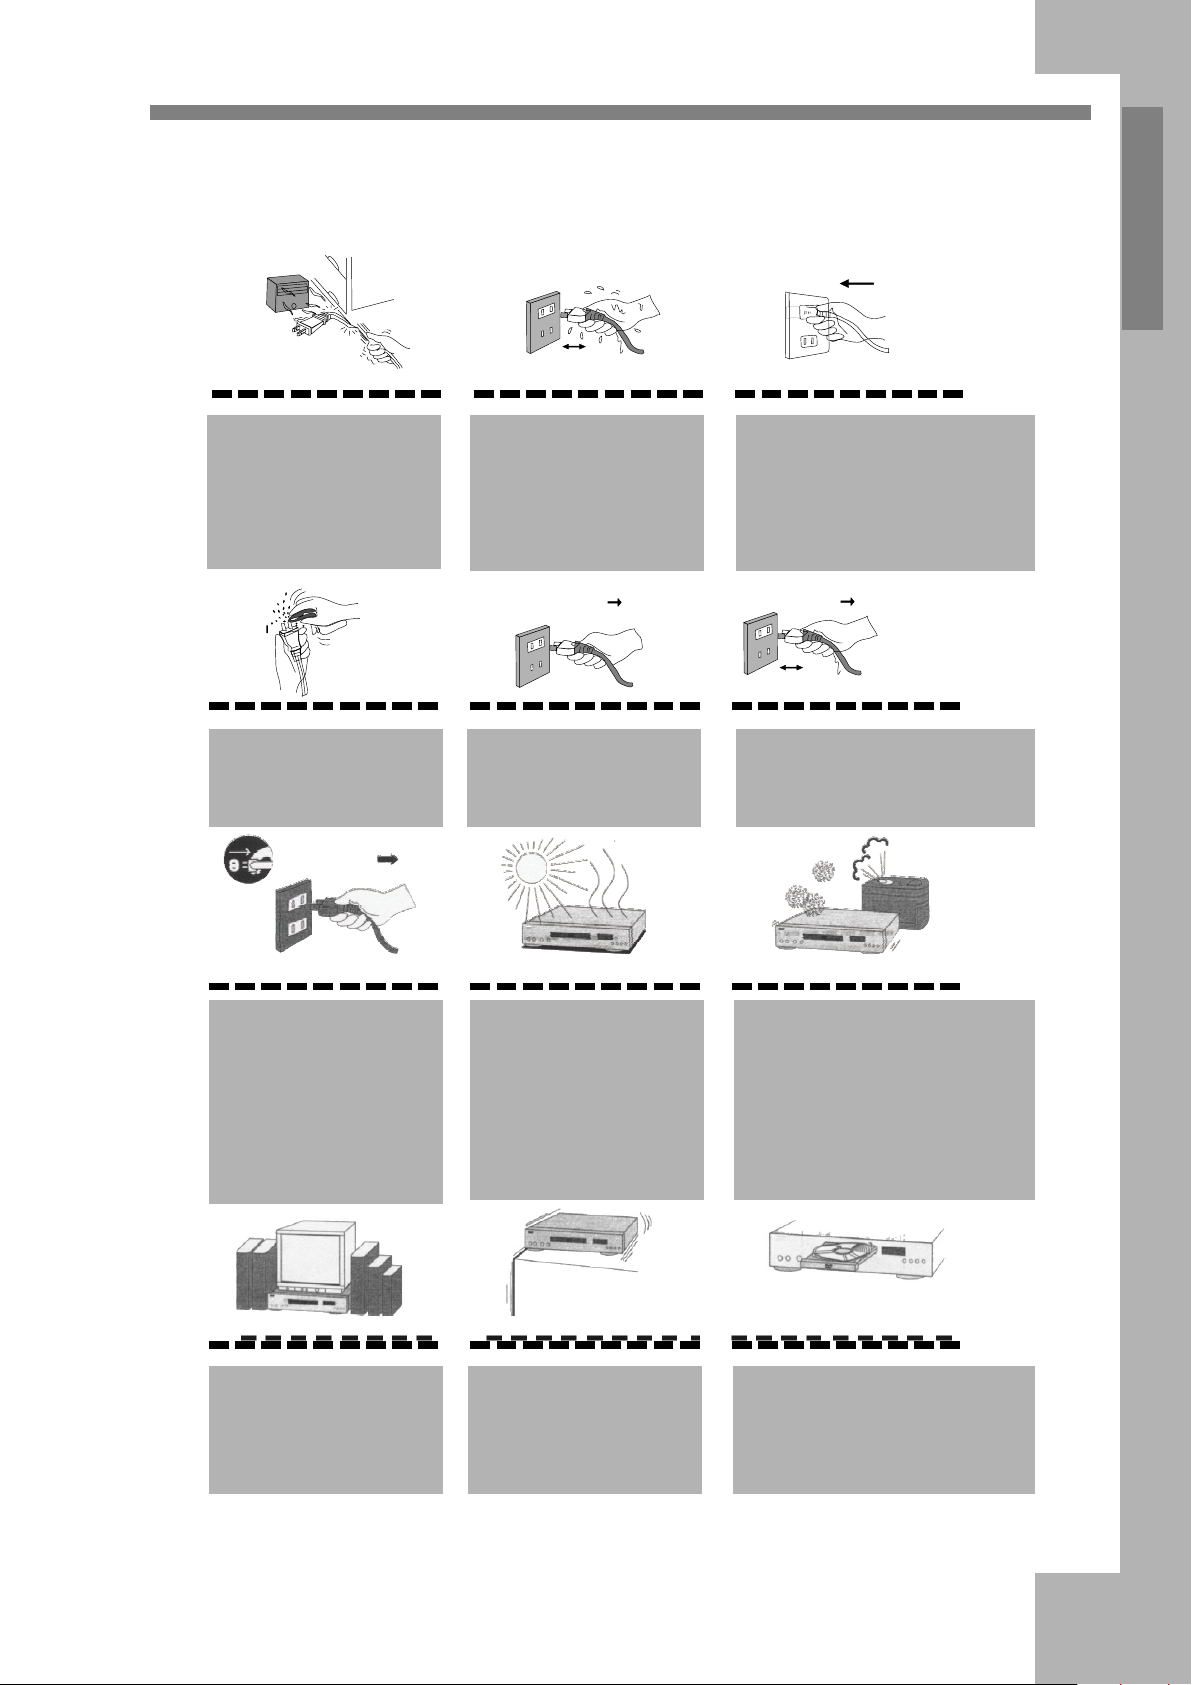
- Do not defeat the safety purpose of the grounding-type plug. If the provided plug does not fit into your
outlet, consult an electrician for replacement of the obsolete outlet.
- The wall outlet must be easily accessible.
- To completely disconnect the device from the electrical power, unplug the power cord.
- Do not use any extension cords.
User’s Manual
Do not use the broken
power cord or the power
plug.
Clean the power plug
periodically.
Shut down this unit and
unplug it if the player smoke,
sound unusual or during
lightning storms or when
unused for a long periods of
time.
Do not plug or unplug the
power when the hand is
wet.
Turn off this unit and unplug it
while lines wear out.
Do not expose this unit to
direct sunlight or in
abnormal hot place.
Plug in completely. Protect the
power cord for being walked on
or pinched.
Shut down this unit and unplug it if
liquid has been spilled, or objects
have fallen into the cabinet.
Do not situate this unit in the dusty
or moist place.
Do not situate this unit under any
heavy object or in unventilated
place.
Do not put this unit in a
shaky slope or a vibrating
place.
Do not use disc with
scratches or deformation.
3
Only use attachments/accessoires
specified by the manufacturer.
Page 5
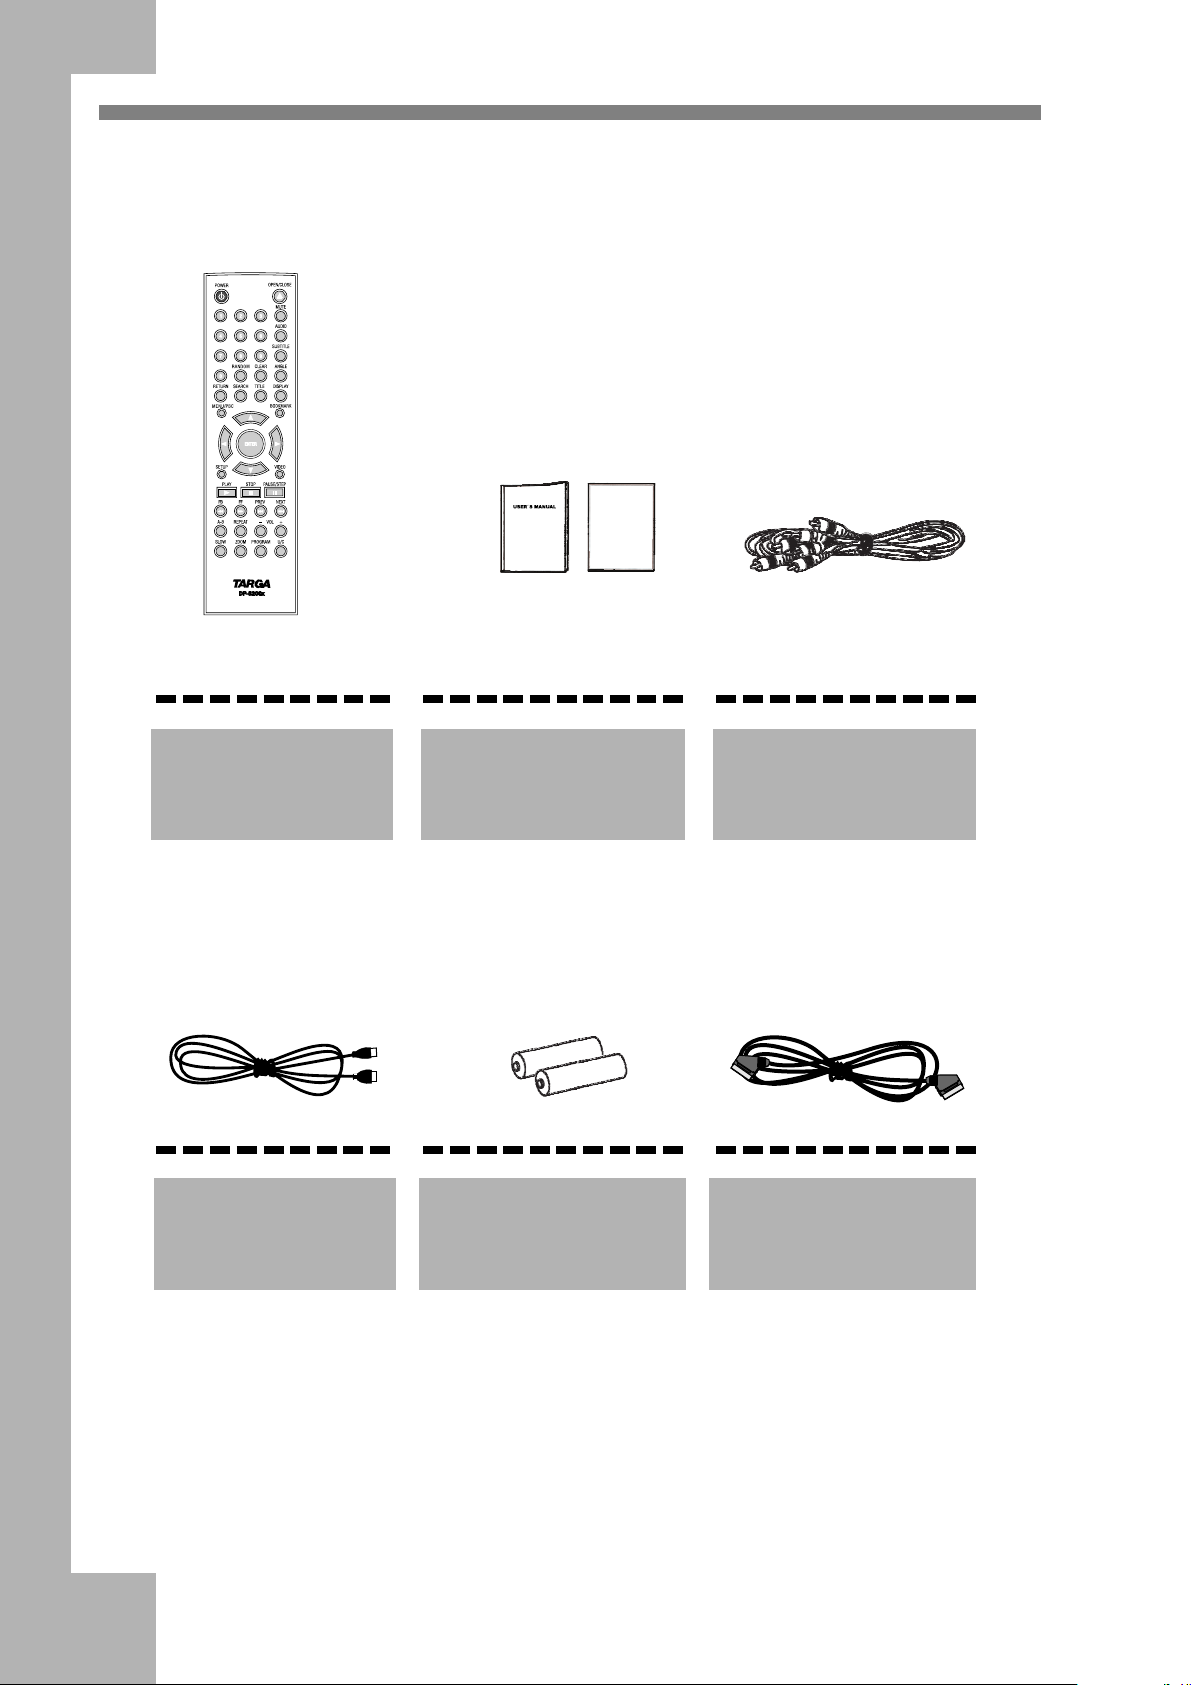
Accessories
Open the package of this DVD player,make sure the following accessories
attached with the product:
WARRANTY CARD
Remote Control
USB Cord
User's Manual,
Maintenance Card
Battery x2
Audio/Video Cable
SCART Cord
4
Page 6

I Introduction
Features of the DVD player ............................................................................................................................... 1
Safety Precautions .............................................................................................................................................. 2
Important Safety Instructions .......................................................................................................................... 2-3
Accessories ......................................................................................................................................................... 4
II Connections
Control Button Layout..................................................................................................................................... 6-9
Front Panel/Rear Panel ....................................................................................................................................... 6
DVD VFD .......................................................................................................................................................... 7
Remote Control .................................................................................................................................................. 8
Preparations/Operation of the Remote Control .................................................................................................. 9
Connecting to a TV ..................................................................................................................................... 10-11
Connecting to an Audio System .................................................................................................................. 12-13
The Amplifier System ...................................................................................................................................... 13
Connecting to an Amplifier with Digital Input Port......................................................................................... 14
User’s Manual
III Playback
Playback a Disc ........................................................................................................................................... 15-18
Basic Playback ................................................................................................................................................. 15
Playback Control ......................................................................................................................................... 16-17
Set Hot Button .................................................................................................................................................. 17
DVD Functions ................................................................................................................................................. 17
Volume Control ................................................................................................................................................ 18
Mp3 and MPEG4 /NERO/DivX Playback ....................................................................................................... 18
JPEG Picture Display ....................................................................................................................................... 18
SD/MMC/SM/MS/CF/MD/XD/USB Memory Stick Play ............................................................................... 18
Screen Saver Function ...................................................................................................................................... 18
USB/External HDD Play .................................................................................................................................. 18
IV Function Setup
Function Setup ............................................................................................................................................. 19-21
V Others
Notes on Discs .................................................................................................................................................. 22
Notes on Service ............................................................................................................................................... 23
Specifications ................................................................................................................................................... 24
5
Page 7

Front Panel/Rear Panel
Front Panel
POWER
Rear Panel
OPEN/CLOSE
DISC TRAY
REMOTE CONTROL WINDOW
STOP
PLAY PAUSE
USB
CARD SLOT
CARD SLOT
6
Page 8
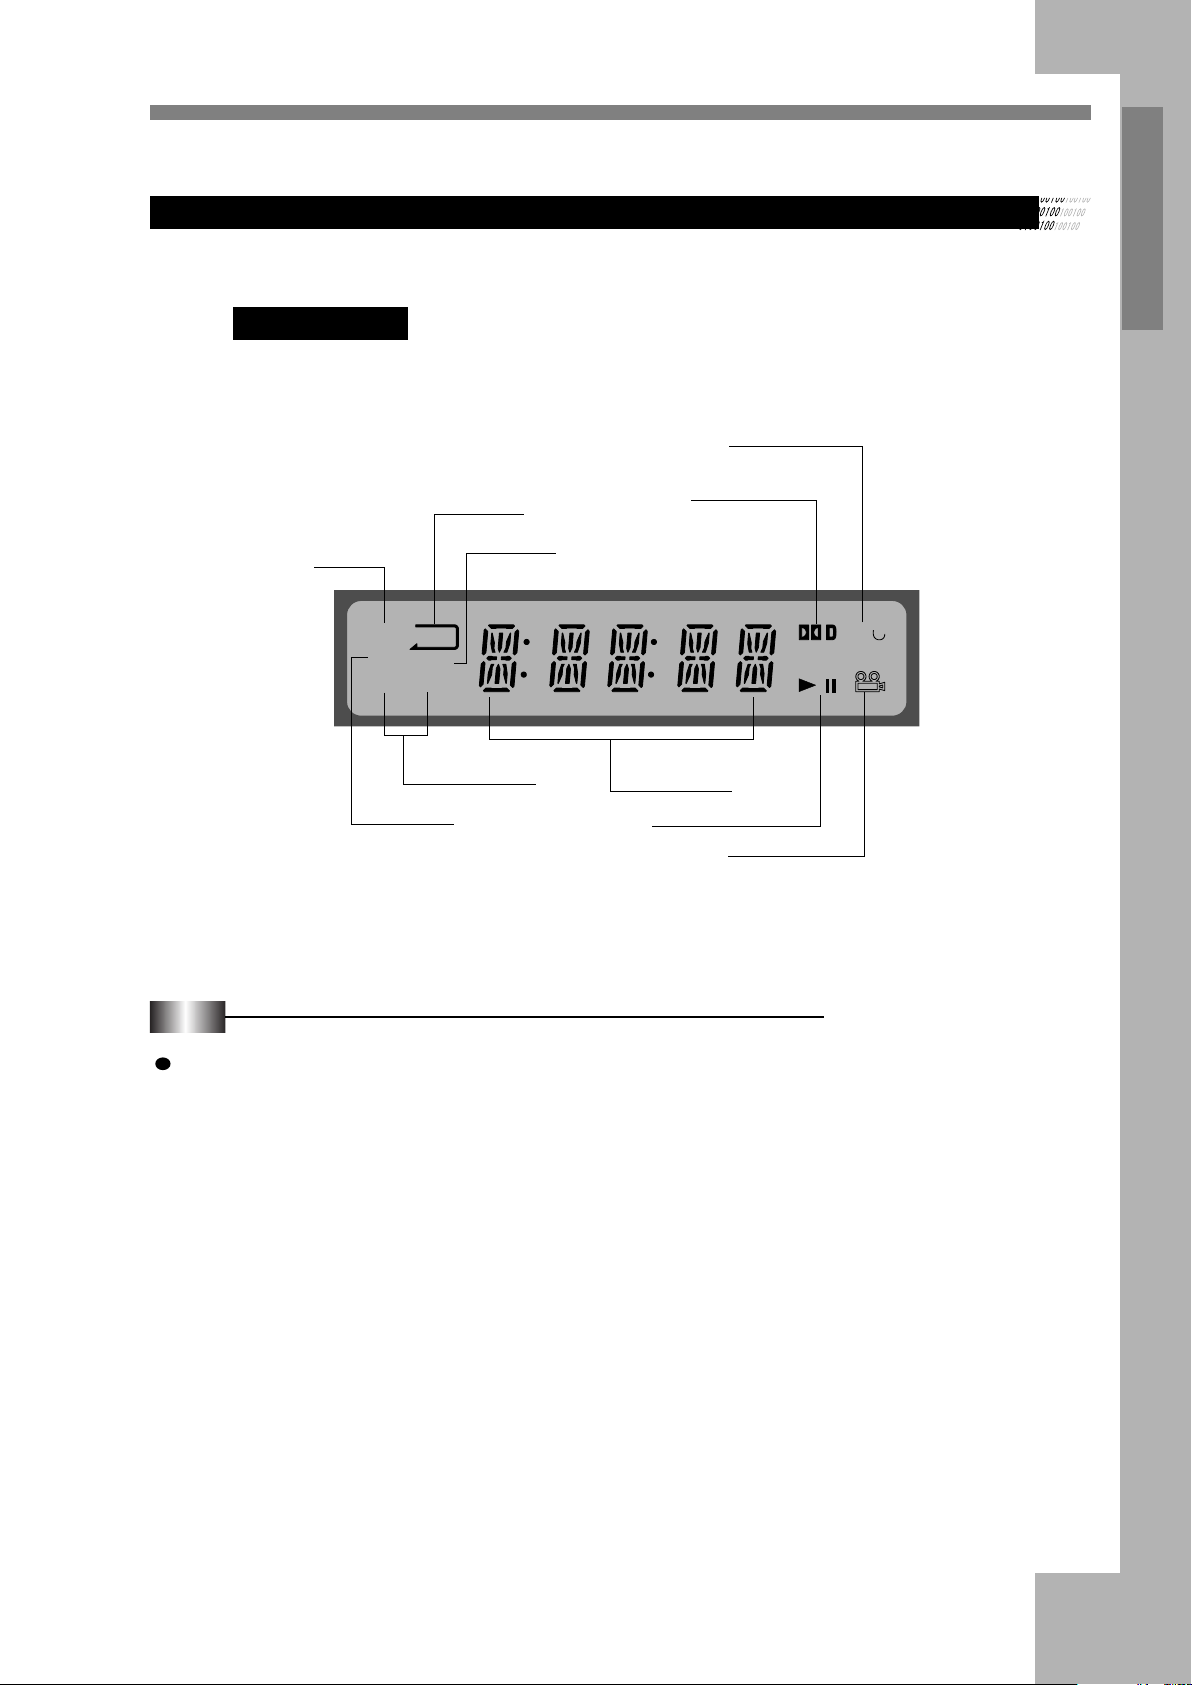
DVD VFD
DVD VFD
PBC
INDICATOR
User’s Manual
REPEAT PLAYBACK INDICATOR
DVD INDICATOR
VCD INDICATOR
REPEAT A-B
MP3/MP4 INDICATOR
TIME INDICATOR
DOLBY INDICATOR
PLAY/PAUSE INDICATOR
Notes:
It is normal if some VFD indicators disappear in playing procedure without harm.
ANGLE INDICATOR
7
Page 9

Remote Control
1. POWER: switch DVD player on or go to standby mode
2. PROGRAM: program playback
3. AUDIO:audio language selector
4. ANGLE: select DVD camera angle
5. SUBTITLE:subtitle language selector
6. MENU/PBC:access menu of a disc / open or close the PBC(VCD2.0 or SVCD)
7. ZOOM: enlarge video image
8. DIRECTION BUTTONS: select an item
9. ENTER: acknowledge selection
10. MUTE: mute sound
11. STOP: stop playback
12. PLAY: start playback
13. FB: fast reverse playback
14. FF: fast forward playback
15. REPEAT: repeat chapter, track, title or disc
16. A-B: repeat a specific segment
17. VOL: volume up +; volume down -
18. SLOW: slowly playback
19. PAUSE/STEP:pause and step playback
20. PREV: go to a previous chapter or track
21. NEXT: go to a next chapter or track
22. BOOKMARK:Bookmark playback
23. SEARCH: go to a specific scene
24. TITLE: title of a DVD disc
25. DISPLAY: to display information of a disc
26. SETUP: setup function
27. VIDEO: switch video output
28. CLEAR: clear input
29. 0-9 numerical key: select numbered items
30. U/C:switch the DVD/USB/CARD
31. OPEN/CLOSE: open or close tray
32. RETURN
33. RANDOM:Random playback
8
Page 10

Preparations for the Remote Control
User’s Manual
Operating with the Remote Control
Insert the batteries into the remote control, and you can use it
to operate DVD player.
1
2
Open the cover
Insert batteries
Make sure to match the + and - to the
mark inside the battery compartment.
This section shows you how to use the remote control.
Point the remote control at the remote sensor
and press the buttons.
30
30
Distance: Within 7m from the front of the
remote sensor.
Angle: About 30¡in each direction of the
remote sensor.
Do not expose the remote sensor of the DVD
player to a strong light source such as direct
sunlight or illumination. If you do so, you
may not be able to operate the DVD player
with the remote control.
3
Notes on the Remote Control
Direct the remote control at the remote sensor of the DVD
player.
Do not drop or give the remote control a shock.
Do not leave the remote control near an extremely hot or
humid place.
Do not spill water or put anything wet on the remote control.
Do not open the remote control.
Close the cover.
Notes on Batteries
Improper use of batteries may cause battery leakage and
corrosion. To operate the remote control correctly, follow
the instructions below.
Do not insert the batteries into the remote control in the
wrong direction.
Do not leave the discarded or exhausted batteries in the
remote control.
Do not use different types of batteries together, or mix
old and new batteries.
If you do not use the remote control for a long period of
time, remove the batteries to avoid possible damage from
battery corrosion.
If the remote control does not function correctly or if the
operating range becomes reduced, replace all batteries
with new ones.
If battery leakage occurs, wipe the battery liquid from the
battery compartment, then insert new batteries.
The battery can last for about 1 year when normally used.
Dispose worn-out batteries not with your domestic waste.
Please contact your local government for disposal
practices in your area.
9
Page 11

Connecting to a TV Connect the DVD player to a TV.
Connecting to an Interlaced Scanning TV
Notes:
(1) If your TV has a SCART input connector, connect the out jacks on the DVD player to the corresponding input on the TV.
(2) If the TV has component video input (YCbCr/YPbPr) jacks, you can connect them to the YcbCr/YPbPr jacks of the DVD
player to get a clearer picture, and use these jacks rather than the OUTPUT jack.
(3) DVD player setup: (Setup the DVD player according to the connected TV.)
If the TV system is PAL, select PAL output.
If the TV system is NTSC, select NTSC output.
Set "Video" to the Cable connection you used (Scart, S-Video, or YUV)
Connect the DVD player to the wide screen TV, set the «TV TYPE» as «16:9» in FUNCTION SETUP.
If the DVD player is connected to an ordinary TV, set the «TV TYPE» to «4:3PS» or «4:3 LB» in FUNCTION SETUP. (For
the setup method, please refer to Function Setup.)
10
Page 12

Connecting to a TV Connect the DVD player to a TV.
Connecting to a Progressive Scanning TV
HEADPHONES
User’s Manual
Notes:
1. Select progressive when you have a TV that can accept
progressive signals to enjoy accurate color reproduction
and high quality images.
2. If your TV has a component video (YPbPr) input
connector , connect the YPbPr video out jacks on the
DVD player to corresponding input on the TV.
3. Set "Video" to P-Scan YPBPR if your TV supports
progressive scan, otherwise use interlace-YUV.
4. Press key " VOL -/+" on the remote control to adjust the
earphone volume.
11
Page 13

Connecting to an Audio System
Connecting to the Amplifier System
You can enjoy the sound of discs in stereo.
Notes:
Refer to the user’s manual of the connected equipment as well.
When you connect the DVD player to other equipment, be sure to turn off the power and unplug all the equipment from the wall
outlet before making any connections.
If you place the DVD player near a tuner or radio, the radio broadcast sound might be distorted. In this case, place the DVD
player away from the tuner or radio.
The output sound of the DVD player has a wide dynamic range. Be sure to adjust the receiver’s volume to a moderate listening
level. Otherwise, a sudden high volume may damage the speakers.
Turn off the audio system before you connect or disconnect the DVD player’s power cord. Otherwise, the speaker may be
damaged.
12
Page 14

Connecting to an Audio System
You can enjoy the high quality dynamic sound of Dolby Digital, MPEG-2 and
2 Channel Digital Stereo.
Connecting to the Amplifier with Digital Input Port
Dolby Digital
Dolby Digital is the surround sound technology used in theatres showing the latest movies, and is now available to
reproduce this realistic effect at home. You can enjoy motion picture and live concert DVD video discs with this dynamic
realistic sound by connecting the DVD player to a 5.1-channel amplifier with a Dolby Digital decoder or Dolby Surround
decoder, you will obtain the full benefit from the DVD movies that provide full 5.1-channel
Dolby Digital sound tracks, as well as from those with the Dolby Surround mark.
User’s Manual
13
Page 15

Connecting to the Amplifier with 5.1 Channel Surround Input
14
Page 16

Basic Playback
Preparations
If you want to play a DVD, VCD or CD-DA disc, turn on the TV and select the video input source which is connected to the DVD player.
If you want to enjoy the sound of disc from the audio system, turn on the audio system and select the input source which is connected to the
DVD player.
For connection details, see «Connections».
User’s Manual
1. Turn on the DVD player
Press the POWER button on the front panel.
When the Player is not used for a long period,please
pull off the power plug.
The DVD player is on.
2. Open the tray
Press the OPEN/CLOSE button to open the disc tray.
3. Place the disc
When the disc tray is open, place the disc on the disc tray,
with the playback side down..
4. Play
Press the PLAY button, the disc tray closes and playback
starts.
When playing a DVD disc with the title menu recorded or
VIDEO CD with the playback control (PBC),a menu
Notes:
There are two different disc sizes.Place the disc in the correct guide
on the disc tray.If the disc is out of the guide,It may damage the disc
and cause the DVD player to malfunction.
Do not place anything except the DVD,VCD,CD and MP3 discs on
the disc tray.
Notes:
For the playback control(PBC)of the VCD2.0 or SVCD, please refer
to PBC Playback.
When not using the menu screen(with PBC) of the VCD2.0 or
SVCD, you can press the PBC button to turn off the ¡PBC¡.
screen will appear.
Notes
Do not move the DVD player during playback.Doing so may damage the disc.
Use the OPEN/CLOSE button on the remote control or DVD player to open or close the disc tray. Do not push or
touch the disc tray while moving. Doing so may cause the DVD player to malfunction.
Do not push up on the disc tray or put any objects other than discs on the disc tray.Doing so may cause the DVD
player to malfunction.
15
Page 17

Enjoy pictures of higher quality
Sometimes when playing DVD discs, on the TV screen there is unusual interference that are not common in ordinary television broadcast.
This is because the high-resolution pictures of DVD discs contain a wide range of information. The extent of the interference depends on the
TV set connected with the DVD player, and it is recommended that you set the TV set to a low contrast ratio when watch a DVD disc.
Playback Control
1. Direction Buttons
Press the direction buttons to move the cursor to the selected item,
then press the ENTER button to confirm it.
2. Play
Press this button to play the disc.
3. Pause/Step
Press this button once to pause the playback. and press this button
twice to step the playback
4. Clear
Press this button to clear the input digits (displays on the screen)
when programming tracks or in searching operation.
5. Number Buttons
When playing a VCD disc, press the number buttons directly to play
your favorite track in PBC off status. If the track number is from 1 to
9, you can directly press the number. If the track number is more than
9, you should use button 10+ and the other number buttons together
to select the track, eg.: for track 25, first, press the 10+ button twice,
then press button 5.
6. STOP
When playing a DVD disc, press this button the first time during
playback, the DVD player memorizes the location where you stopped
(press PLAY to resume playback from the memorized point). Press
this button again to stop the disc (then press PLAY to start playing
from the beginning of the disc).
7. FF / FB
You may speed up a DVD , CD, VCDor Mp3 disc by pressing the
FF/FB buttons on the Remote control . You can fast reverse at
2X,4X,8X and 20X.
8. SLOW
The DVD player allows for Slow Motion playback . Press this button
to select :1/2-1/3-1/4-1/5-1/6-1/7
Press PLAY button to resume normal playback.
9. NEXT /P REV
Press skip to select the next (previous) chapter (for DVD) or track
(for VCD/CD/MP3).
10. ZOOM
This feature allows you to enlarge the picture on screen 2X , 3X,
4X,1/2X,1/3X, and 1/4X the original size . Press the ZOOM button
to cyclically scroll through the available strengths
11. A-B
You can replay a specific portion of a disc repeatedly using this
function
Press the A-B button on the Remote control to select the starting
point for the section to be repeated.
Press the A-B button on the Remote control again to select the
ending point This section will now continue to repeat until; A-B is
pressed for a third time to resume normal playback
12. REPEAT
This function can be used to repeatedly play a Title Chapter , Track or
other part of a disc.
DVD-Press REPEAT on the Remote Control to cyclically select
CHAPTER REPEAT-TITLE REPEAT-REPEAT ALL-REPEAT OFF.
CD/VCD - When PBC is off , Press REPEAT on the Remote Control
to cyclically select REPEAT ONE-REPEAT ALL-REPEAT OFF
13. PROGRAM
You can program the player to play a customised order of specific
tracks , title or chapters . To program a DVD follow the instructions
below.
1) Press the PROGRAM button to initiate the program function
2) Press LEFT or RIGHT to highlight either T for title or C for
CHAPTER
3) Press the Numeric button of the desired title and chapter
4) Highlight PLAY on the screen using the direction button and
press ENTER. Your programmed list w will now be set
5) Press the PLAY button after programming to begin playback of
the memorised play-list . The memory is erased if the disc tray is
opened . The unit is powered OFF or the STOP button is pressed
twice.
For CD programming follow the above steps 1-5.For steps 2-3, enter
the track number instead of the title and chapter numbers
16
Page 18

Playback Control
User’s Manual
14. SEARCH
Press this button to search the playback point by chapter number or
title time (for DVD discs), disc time or track time or track number
(for SVCD/VCD/CD discs)
15. N/P
Press this button to swith the TV type ,NTSC-PAL-AUTO.
Set Hot Button
16. DISPLAY
Press this key to display on TV the time information of current
playback. For different discs, different choices are available.
17. MENU
For DVD discs, press this button to enter DVD menu (if supported
by the discs).
18. PBC
For VCD2.0 or SVCD discs, press this button to open/close the
PBC functions.
a. In the PBC display of the VCD2.0 or SVCD, if the PLAY
button is pressed, the player will enter PBC playback status. If
the PBC is turned off, the disc will be played as VCD1.0/1.1.
b. When PBC is set to ON, menu of the disc appears on the
screen, press the number buttons to select and play the track
you want.
c. Press the MENU button to return to the interface of selecting
tracks.
19. OPEN/CLOSE
Press this button to open or close the disc tray.
20. POWER
When this button is pressed, the DVD player will enter standby
status, and on the VFD screen it will displays -OFF- . Press this
button again to resume the player.
Note: When the Player is not used for a long period,please pull off
the power plug.
21. VIDEO
The user can adjust the output mode of the pictures among
INTERLACE-YUV , TV-RGB P-SCAN YPBPR or S-Video output.
This button is a hot button, it has the same function as the VIDEO
SETUP item in the SETUP menu. As for details of connection with
the TV set, please refer to the CONNECTIONS chapter.
22. AUDIO
This button allows the user to select a preferred audio language
from those included on the disc.
This button also support stereo set for the CD and VCD discs.
DVD Function
23. TITLE
For DVD discs,press this button to enter the title menu, then press
the direction buttons and PLAY button to select and play.(If it is
supported by the discs.)
24. ANGLE
Press this button to change the camera angle of the scene you are
watching if the scene was recorded from multiple angles. (It needs
support of the discs.)
25. SUBTITLE
For those DVD discs that have multiple languages of caption
recorded, press this button to change the caption to different
languages.
17
Page 19

Volume Control
JPEG Picture Display
26. VOLUME
With an analog Audio connection . The volume can be adjusted
using the VOL+ and VOL- buttons . The volume can be muted by
pressing the MUTE button on the remote control.
27. MUTE
Press this button to set the play mute, press this button again to
cancel the mute state.
Mp3 and MPEG4/NERO/DivX Playback
When an Mp3or Mpeg4/NERO disc is being played,the playback
menu will appear on the screen,as shown in the following figure.
[]
1MMEGFMF TRACK1.MP3
01:1MMEGFMF
02:1OMMEGFM
03:2MMFGFMF
04:3MMEGFMG
05:4MMEGFMG
06:5MMEGFMJ
07:6MMEGFMN
08:7MMEGFMC
09:8MMEGFMC
10:9MMEGFMC
You can either into the directory that you want to play by using the
directional button, and then the first song will be played. The
directional button can also be used to choose any file you would
like to play in the file area.
To see the DIVX VOD (VIDEO ON DEMAND) registration code
for your DVD player, during playback, press the "Angle" button.
The registration code will display. To learn more about DIVX VOD,
please visit: www.divx.com/vod.
01:TRACK1
02:TRACK2
03:TRACK3
04:TRACK4
05:TRACK5
06:TRACK6
07:TRACK7
08:TRACK8
09:TRACK9
10:TRACK10
The playback menu of the JPG picture is similar to MP3 playback
menu. Please refer to MP3 playback.
When playing the JPG pictures, press STOP button to enter the
picture previewing mode. After entering this mode, operate with the
direction buttons and play button. Press MENU button to return to
the playback mode.
SD/MMC/SM/MS/CF/MD/XD/USB
Memory Stick Play
If no other disc in the tray, just insert SD/MMC/SM/MS/CF/MD/
XD, USB Memory Stick and U-disk, the machine will play
automatically, if want to stop,just pull out the card or U-disc
directly. If some disc is playing in the loading tray, just press key "
U/C" on the remote control to switch into reading different cards or
U-disk. It is not allowed to insert 2 different cards into the slots at
the same time.
Note: Turn the device off prior to extracting an MD.
Screen Saver Function
In the stop status and when no discs in the player, the player will
enter screen saving status automatically 3 minutes later. Press the
PLAY button or OPEN/CLOSE button to resume the player.
USB/External HDD Play
1. In the state of stop and no discs in the loading tray, the machine
will play automatically when connecting with USB or an external
hard disc after pressing key "Play" on the remote control. When
there is a disc in the loading tray or a card in the slot, please press
key "U/C" on the remote control to switch into USB connection.
2. Press "pause" or "Stop" key on the remote control to cease the
playing; Pull out the USB or external HDD connection when want
to disconnect.
3. When using an external HDD, it is recommended to use the
power adapter of the external HDD.
4. Depending on the size and contents of the HDD, the loading
process duration may vary.
5. Only HDD formatted with the FAT32 file system are supported.
6. Non-supported file formats, like programs or text files, may
cause playback malfunction.
18
Page 20

Function Setup
User’s Manual
Press the SETUP button, the following graphic will display on the
screen.
SETUP SYSTEM
TV SYSTEM
SCREEN SAVER
VIDEO
TV TYPE
PASSWORD
RATING
DEFAULT
EXIT SETUP
.
1.Press the SETUP menu to enter the setup menu.
2. Use the
/ button to choose the menu item you want to
change, then press ENTER to confirm it.
3. Use the
button to move the high light icon to the right
side item.
4. Use the up/down button to change the current setup, then press
the ENTER button to confirm it.
5. Use the
button to move the high light icon to the left side
item.
6. Select the EXIT SETUP item or press the SETUP button to
quit the setup menu.
SYSTEM SETUP
TV SYSTEM >> NTSC
SCREEN SAVER >>
VIDEO >> P-SCAN¡YPBPR
TV TYPE >> 4:3 PS
PASSWORD >>
RATING >>
DEFAULT >> RESTORE
EXIT SETUP
SYSTEM SETUP
PAL
AUTO
ON
OFF
INTERLACE - YUV
TV-RGB
S-VIDEO
4:3 LB
16:9
----
NO ADULT
KID SAFE
VIEW ALL
VIDEO
Video setup has four options . If using INTERLACE-YUV output
to TV , choose INTERLACE-YUV mode. If using P-SCAN
YPBPR output to TV , choose P-SCANYPBPR mode
TV TYPE
16:9-To view broad mode picture with the broad screen TV set
4:3(LB)-To view the standard 4:3 picture or the cut standard 4:3
picture.
4:3(PS)- 4:3 subtitle block to view the full width of the broad
mode
PASSWORD
The default mode is set at LOCK , you cannot change the
RATING , and cannot change the password in this state. Factory
setup(password 0000)
If you want to change the RATING grade or the password, please
input the initial password 0000 to unlock , and press the ENTER
button first . Thereafter input your new password and enter the
ENTER button.
If later on you want to make a new setting for the RATING. And
you want to change the password , please input the new password
as set above . If you input 0000,it will also work.
Important:
Please remember to write down the new password and keep it in a
safe place(Ex.behind the remote control battery cover).
The parent lock function will only work on DVD discs with
parental control marks
RATING
There are three grade ratings . The performance of this function
will depend on the discs
DEFAULT
The default is to change your setup state to the factory default
setup
TV SYSTEM
the TV output mode can be : NTSC, PAL or AUTO . Setup the
system of your DVD player to match the system of your TV .
SCREEN SAVER
When in ON mode , if you do not make any operation or are in
stop mode for 3 minutes , the screen saver picture will appear
19
Page 21

Function Setup
LANGUAGE SETUP
LANGUAGE SETUP
OSD LANGUAGE >>
AUDIO LANG >>
SUBTITLE LANG >>
MENU LANG >>
EXIT SETUP
ENGLISH
CHINESE
GERMAN
SPANISH
FRENCH
PORTUGUESE
CHINESE
ENGLISH
JAPAN
FRENCH
SPANISH
PORTUGUESE
LATIN
GERMAN
CHINESE
ENGLISH
JAPAN
FRENCH
SPANISH
PORTUGUESE
GERMAN
OFF
CHINESE
ENGLISH
JAPAN
FRENCH
SPANISH
PORTUGUESE
GERMAN
LATIN
OSD LANGUAGE
OSD has six languages: English, Chinese, German, Spanish, French,
Portuguese.
If you choose French, the menu will be only in French
AUDIO LANG
To choose the audio language, the disc must be equipped with
different languages . It is possible that the disc may have more audio
languages than shown above . Use the AUDIO button on the remote
control to change to the desired languager
SUBTITLE LANG
To choose a subtitle language , the disc must be equipped with
different subtitle languages . It is possible that the disc may have
more subtitle languages than shown above . Use the SUBTITLE
button on the remote control to change to the desired subtitle
language
MENU LANG
The Menu can be in different languages : Chinese , English , Japan
,French , Spanish , Portuguese , German Latin etc. To choose a
menu language , the disc must be equipped with multi-language
menus .
AUDIO SETUP
AUDIO OUT >> SPDIF/OFF
TONE>>
EXIT SETUP
AUDIO SETUP
SPDIF/RAW
SPDIF/PCM
-¡- + 4
-¡- + 2
-¡- 0
-¡- - 2
-¡- - 4
AUDIO OUT
Audio output includes three different types : for common AV
output, please choose SPDIF/OFF, for coaxial or optical please
choose SPDIF/RAW or SPDIF/PCM.
TONE
Use Up/Down directional buttons to adjust the tone of the sound
VIDEO SETUP
BRIGHTNESS>> - -¡12
CONTRAST>>
HUE>>
SATURATION>>
EXIT SETUP
VIDEO SETUP
- -¡10
- -¡8
- -¡6
- -¡4
- -¡2¡
- -¡12
- -¡10
- -¡8
- -¡6
- -¡4
- -¡2¡
- -¡+6
- -¡+4
- -¡+2
- -¡0
- -¡-2
- -¡-4¡
- -¡12
- -¡10
- -¡8
- -¡6
- -¡4
- -¡2¡
- -¡0
BRIGHTNESS
Use Up/Down directional buttons to adjust the brightness
CONTRAST
Use Up/Down directional buttons to adjust the colour contrast
HUE
Use Up/Down directional buttons to adjust the hue setup
SATURATION
Use Up/Down directional buttons to adjust the colour saturation
20
Page 22

Function Setup
SPEAKER SETUP
SPEAKER SETUP
DOWNMIX>>
SUBWOOFER>>
BASS MODE>>
CENTER DELAY>>
REAR DELAY>>
EXIT SETUP
DOWNMIX
LT/RT is recommended if the discs support PROLOGIC DOLBY
STEREO , you can enjoy clear and superior sound effect as in the cinema.
If the discs support 5.1 channal output , STEREO is recommended . If
you choose VSS mode , you will enjoy virtual surround effect
SUBWOOFER
The subwoofer could open or close ,choose this option to open or close
BASS MODE
There are three BASS mode you could choose ALL LG SPK , ALL SM
SPK, MIXED SPK
CENTER DELAY
Use Up/Down directional buttons to adjust the center delay
REAR DELAY
Use Up/Down directional buttons to adjust the rear delay
DIGITAL SETUP
DYNAMIC RANGE:
LT/ RT
STEREO
VSS
OFF
OFF
ON
ALL LG SPK
ALL SM SPK
MIXED SPK
- -¡ +
- -¡4MS
- -¡2MS
- -¡0MS
- -¡ +
- -¡12MS
- -¡6MS
- -¡0MS
User’s Manual
Use the directional buttons choose and adjust this setting
DUAL MONO:
If your amplifier has Dolby digital output mode , you may choose
STEREO,MONO L,MONO R and MIX MONO for the decoding method
21
Page 23

On Handing Discs
On Discs
Do not touch the playback side of the disc.
Playback side
Do not attach paper or tape to discs.
On Cleaning discs
Fingerprints and dust on the disc may cause picture and sound
deterioration.Wipe the disc from the center outwards with a soft
cloth.Always keep the disc clean.
If you cannot wipe off the dust with a soft cloth, wipe the disc lightly with a
slightly moistened soft cloth and finish with a dry cloth. Do not use any type
of solvent such as thinner, benzine, commercially available cleaners or
antistatic spray for viny1 LPs. They may damage the disc.
On Storing Discs
Maximum
playback time
Approx.2 hours(single
sided single layer disc)
Approx.4 hours(single
sided double layer disc)
Approx .4 hours(double
sided single layer disc)
Approx.8 hours(double
sided double layer disc)
Approx .74 minutes
DVD
video
discs
VCD
Audio
CD-DA
MP 3
Disc mark
Contents
Disc size
Audio+video
(motion
picture)
Audio+video
(motion
picture)
12cm
12cm
Audio 12cm Approx .74 minutes
12cm
Audio
This DVD player adopts NTSC/PAL color system, so it can not respond to
discs that are produced in other color systems (such as SECAM).
Notes on Copyright
It is forbidden by law to copy, broadcast, show on cable, play in public, and
rent copyrighted material without permission. DVD video discs are copy
protected, and any recordings made from these discs will be distorted.
Type of TV System
Please connect this DVD player to a TV compatible with PAL/NTSC system .
Do not store discs in a place subject to direct sunlight or near heat sources.
Do not store discs in places subject to moisture and dust such as a bathroom
or near a humidifier.
Store discs vertically in a case. Stacking discs or placing objects on the case
may warp the discs.
About this User’s Manual
This user’s manual explains the basic instruction of this DVD player. Some
DVD video discs are produced in a manner that allows specific or limited
operation during playback. As such, the DVD player may not respond to all
operating commands.
Refer to instruction notes of discs.
22
Page 24

Notes on Service
Check the following guide for the possible cause of a problem before contacting service.
Symptom Cause Measure
User’s Manual
No power
No picture
No sound
The playback picture has
occasional distortion
Brightness is unstable or
noises are produced on
playback pictures
The DVD player does not
start playback
Buttons do not work.
The remote control does
not work properly.
The power plug is disconnected Connect the power plug into the wall outlet securely
The TV is not set to receive DVD signal output
The video cable is not connected securely Connect the audio cable into the jacks securely.
The audio cable is not connected securely Connect the audio cable into the jacks securely
The power of the equipment connected with the audio cable
is turned off.
The setting of output sound type is not correct. Set the audio setting correctly
The disc is dirty Eject the discs and clean it
It is in fast forward or fast reverse playback
The copy protection effect. Connect the DVD player to the TV directly
No disc is inserted Insert a disc
An unplayback disc is inserted Insert a disc(Check the disc type and color system.)
The disc is placed upside down. Place the disc on the disc tray correctly inside the guide
The disc is not placed within the guide. Place the disc on the disc tray correctly inside the guide.
The disc is dirty Clean the disc
A menu is on the TV screen. Press the SETUP button to turn off the menu screen
The parental lock function is set.
Power supply fluctuations or other abnormalities such as
static electricity may interrupt correct operations.
The remote control is not pointed at the remote sensor of
the DVD player.
The remote control is too far from the DVD player. Operate the remote control within about 7m
The batteries in the remote control are exhausted. Replace the batteries with new ones.
Select the appropriate video input mode on the TV so the picture
from the DVD player appears on the TV screen.
Turn on the equipment connected with the audio
Sometimes a small amount of picture distortion may appear.
This is not malfunction.
Cancel the parental lock function or change the parental lock
level.
Turn the power on or off with the POWER button. Or
disconnect the power plug and insert it into the wall outlet
again.
Point the remote control at the remote sensor of the DVD player.
23
Page 25

Specifications
DVD Player/Outputs/Supplied Accessories
DVD Player
Power Supply
Power Consumption 15W
Mass 2.5Kg+0.25
Size 430x255x38mm(W/H/D)
Signal system PAL/NTSC
Laser Semiconductor Laser (wavelength 650nm, 780nm)
Frequency Response +0.5-1db(20HZ-20KHZ)
Signal-to-noise ratio approx. 90db
Audio dynamic range approx. 80db
Operating conditions Temperature: 0°C ~ 40°C, Operation status: Horizontal
Outputs
Composite Video Output 1.0 Vp-p,75 Ω
Audio Output (analog audio) 2.0 Vrms
Supplied Accessories
Audio/Video Cable ........................................................ 1
Remote Control
Batteries
User’s Manual/Maintenance Card
SCART Cord
USB Cord
100 - 240V~, 50/60HZ
........................................................ 1
........................................................ 2
........................................................ 1
........................................................ 1
........................................................ 1
24
Page 26

Targa GmbH
Lange Wende 41
D-59494 Soest
(Germany)
www.targa-online.com
 Loading...