

Page 1
INSTALLATION INSTRUCTIONS
4
5
6
Remove all parts from box
STEP 1: ATTACH WIDTH ADJUSTER
Attach the Width Adjuster to the back rail in between the
castings, approximately 4' apart (Fig. 1). Tighten the thumb screw.
Fig. 1
STEP 2: PIVOT BAR ASSEMBLY
1
2
3
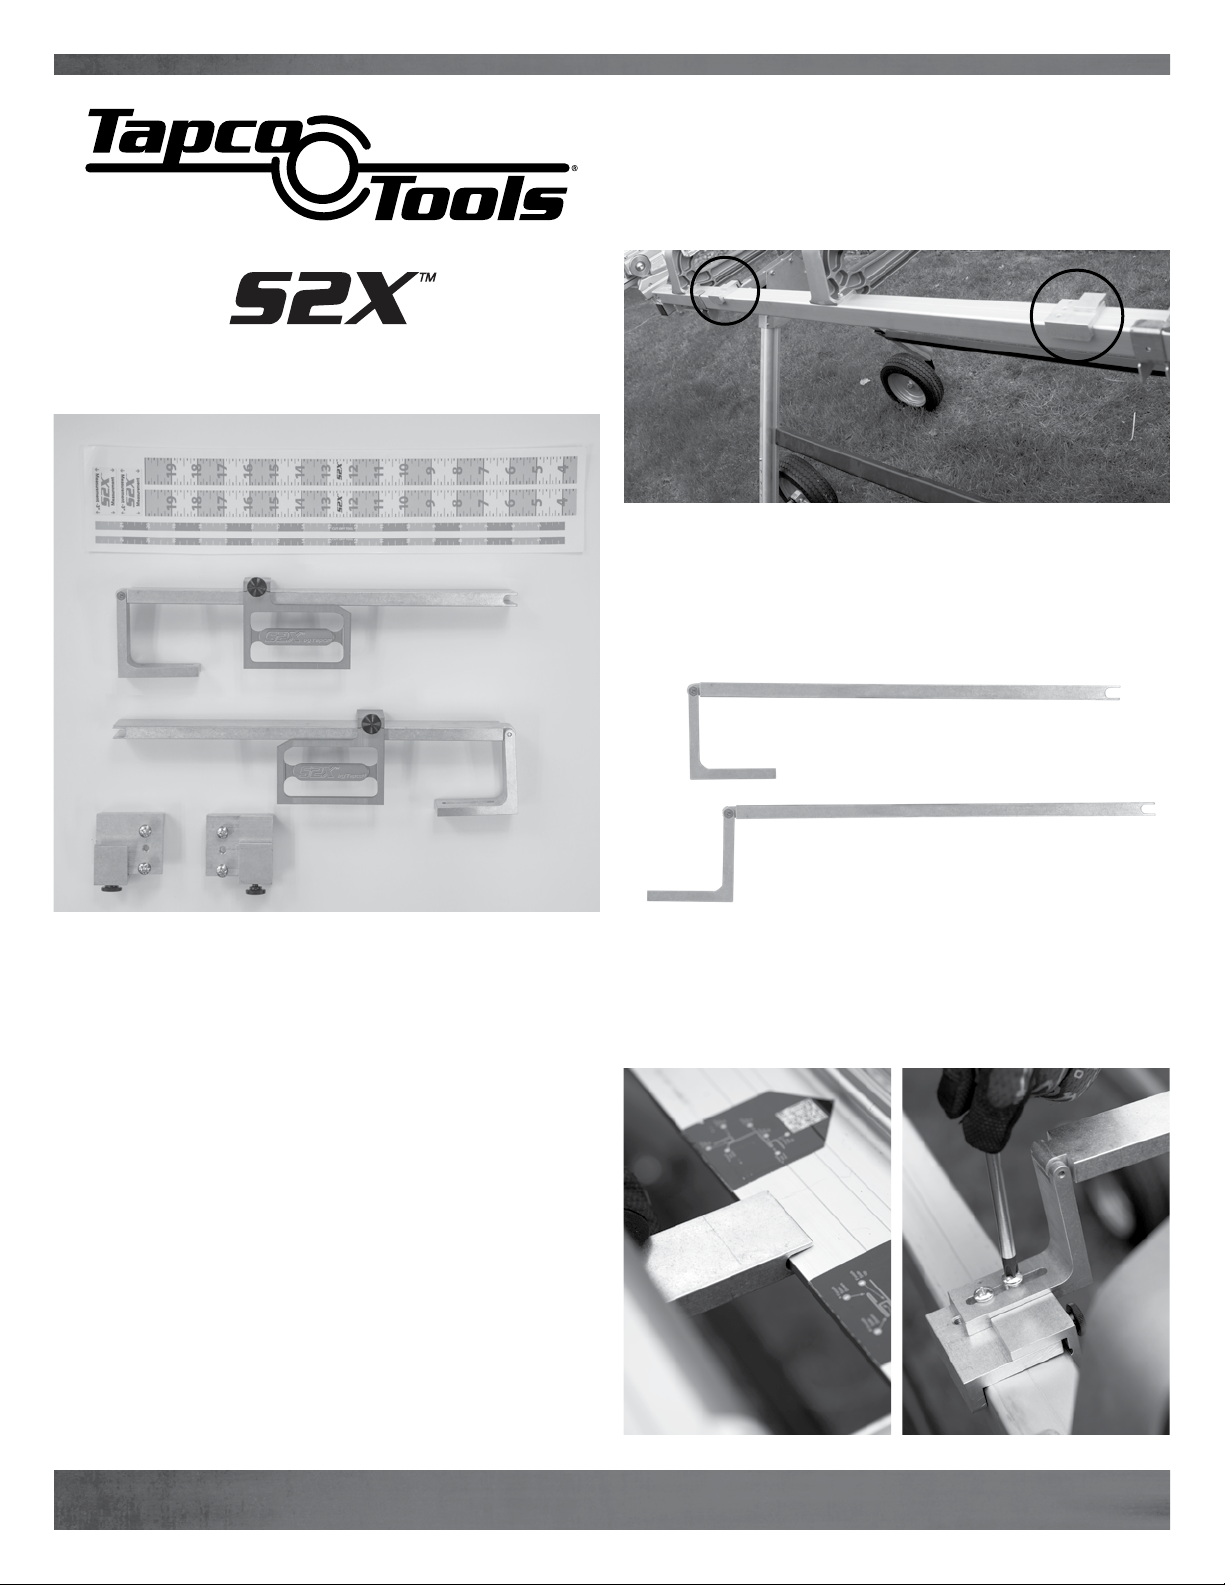
KIT INCLUDES:
(2) Pivot Bar Assembly
1
2 (2) Material Stop
3 (2) Width Adjuster Assembly
4 (2) 3" Measurement Stickers
5 (2) 20" Grey/White Measuring Tape
6 (2) Cut-Off Tape
TOOLS NEEDED:
Phillips Screwdriver
Utility Knife
Speed Square
Pencil
(3) 12x12 Pieces of Trim Coil
PRO Cut-Off (Optional)
Note: Pivot Assembly is shipped set up for a Pro 14® install. For
2
Pro 19®, rotate pivot arm 180 degrees (Fig.2)
PRO 14® Set-Up
1
PRO 19® Set-Up
Fig. 2
Ensure the brake is in the closed position. Insert slot end of Pivot
Bar onto the anvil (Fig.3). Fasten bottom of Pivot Bar Assembly to
Width Adjuster and tighten firmly (Fig. 4). The fit should be snug
and square. The Pivot Bar may have slight side to side movement.
Fig. 3 Fig. 4
1
Page 2
STEP 3: APPLYING 3” MEASUREMENT STICKER
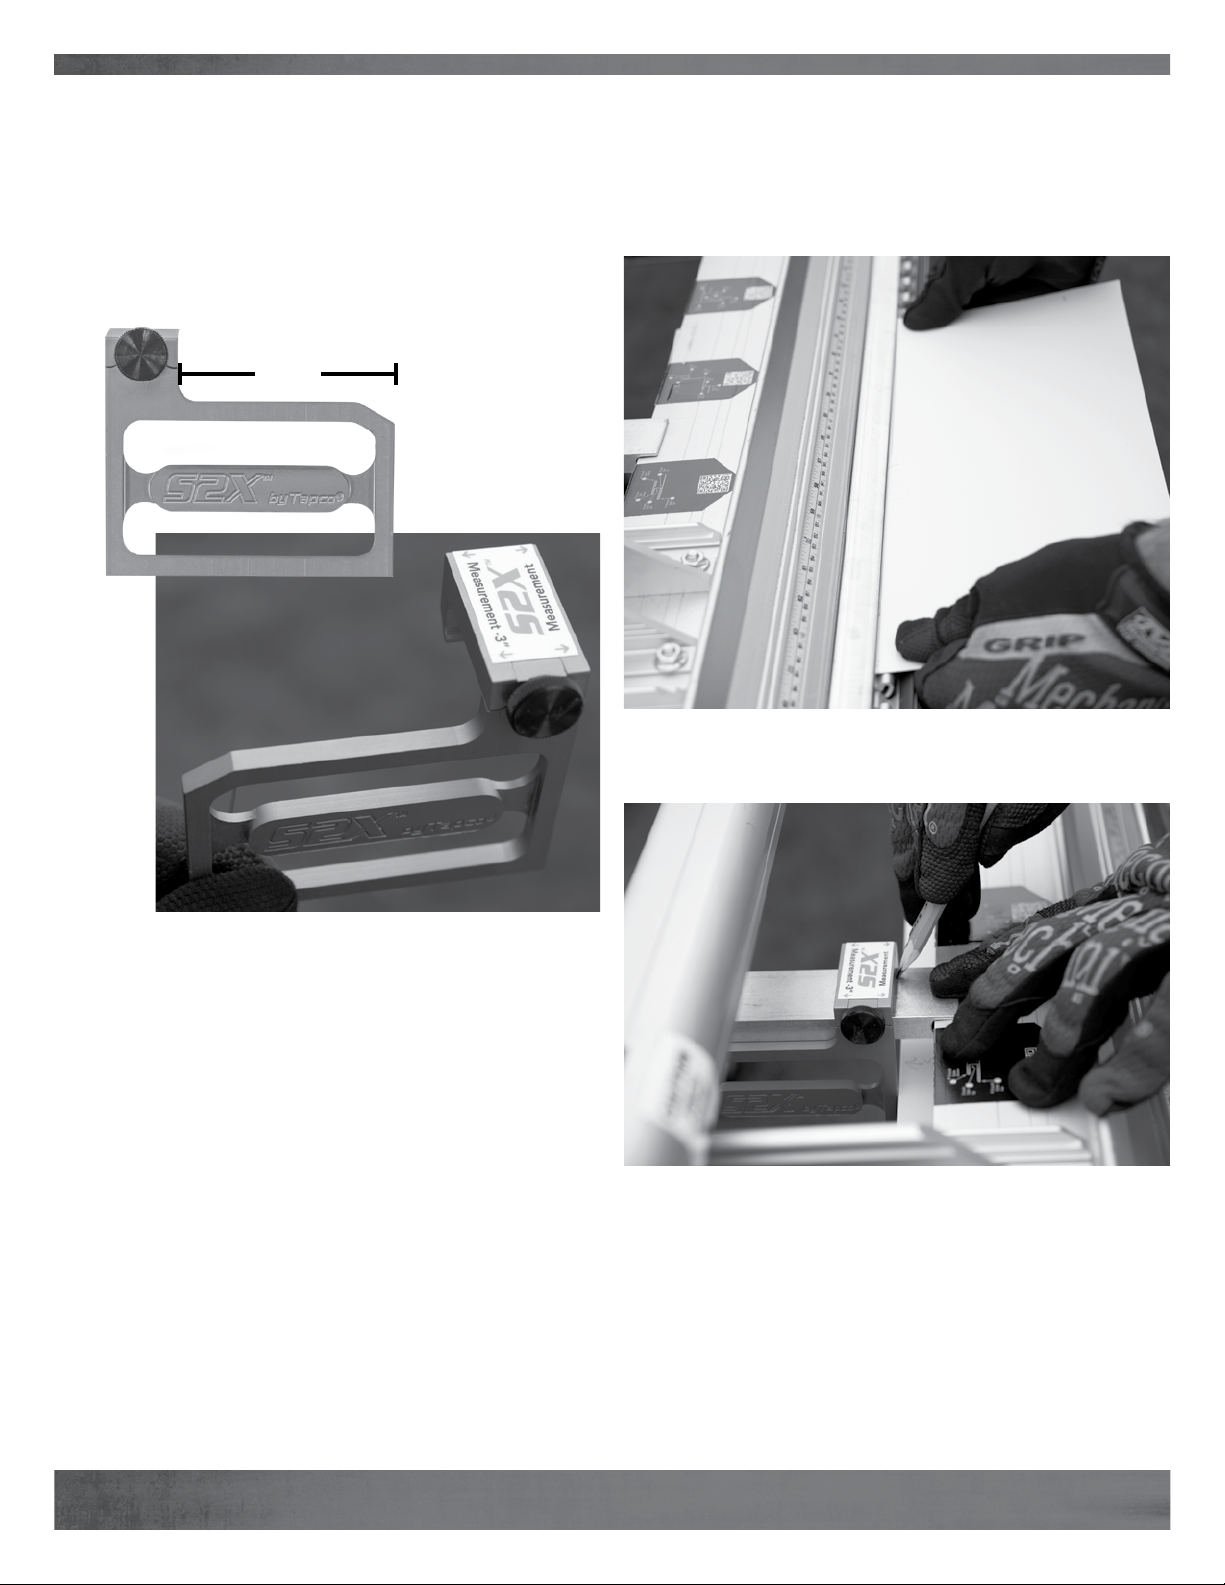
Remove the Material Stop from the Pivot Bar.
Apply the measurement sticker with the -3" arrow towards the 3"
side (Fig. 5). With the stickers in place, attach the Material Stop
to the Bar Pivot Assembly with measurement arrows pointing
toward you and the -3" pointing away.
Repeat process for remaining Material Stop.
3" Side
Square
Side
Fig. 5
STEP 4: APPLYING GREY/WHITE MEASURING TAPE
Insert 12"x12" piece of coil marked at 6" into the brake and lock it
lined up at the 6" mark (Fig. 6). Pull/slide the Material Stop toward
the front of the brake until it contacts the coil.
Tighten the thumb screw.
Fig. 6
Use the pencil to mark a line on the face of the Pivot Bar in front
of the Material Stop (Fig. 7) and remove the Material Stop.
Fig. 7
2
Page 3
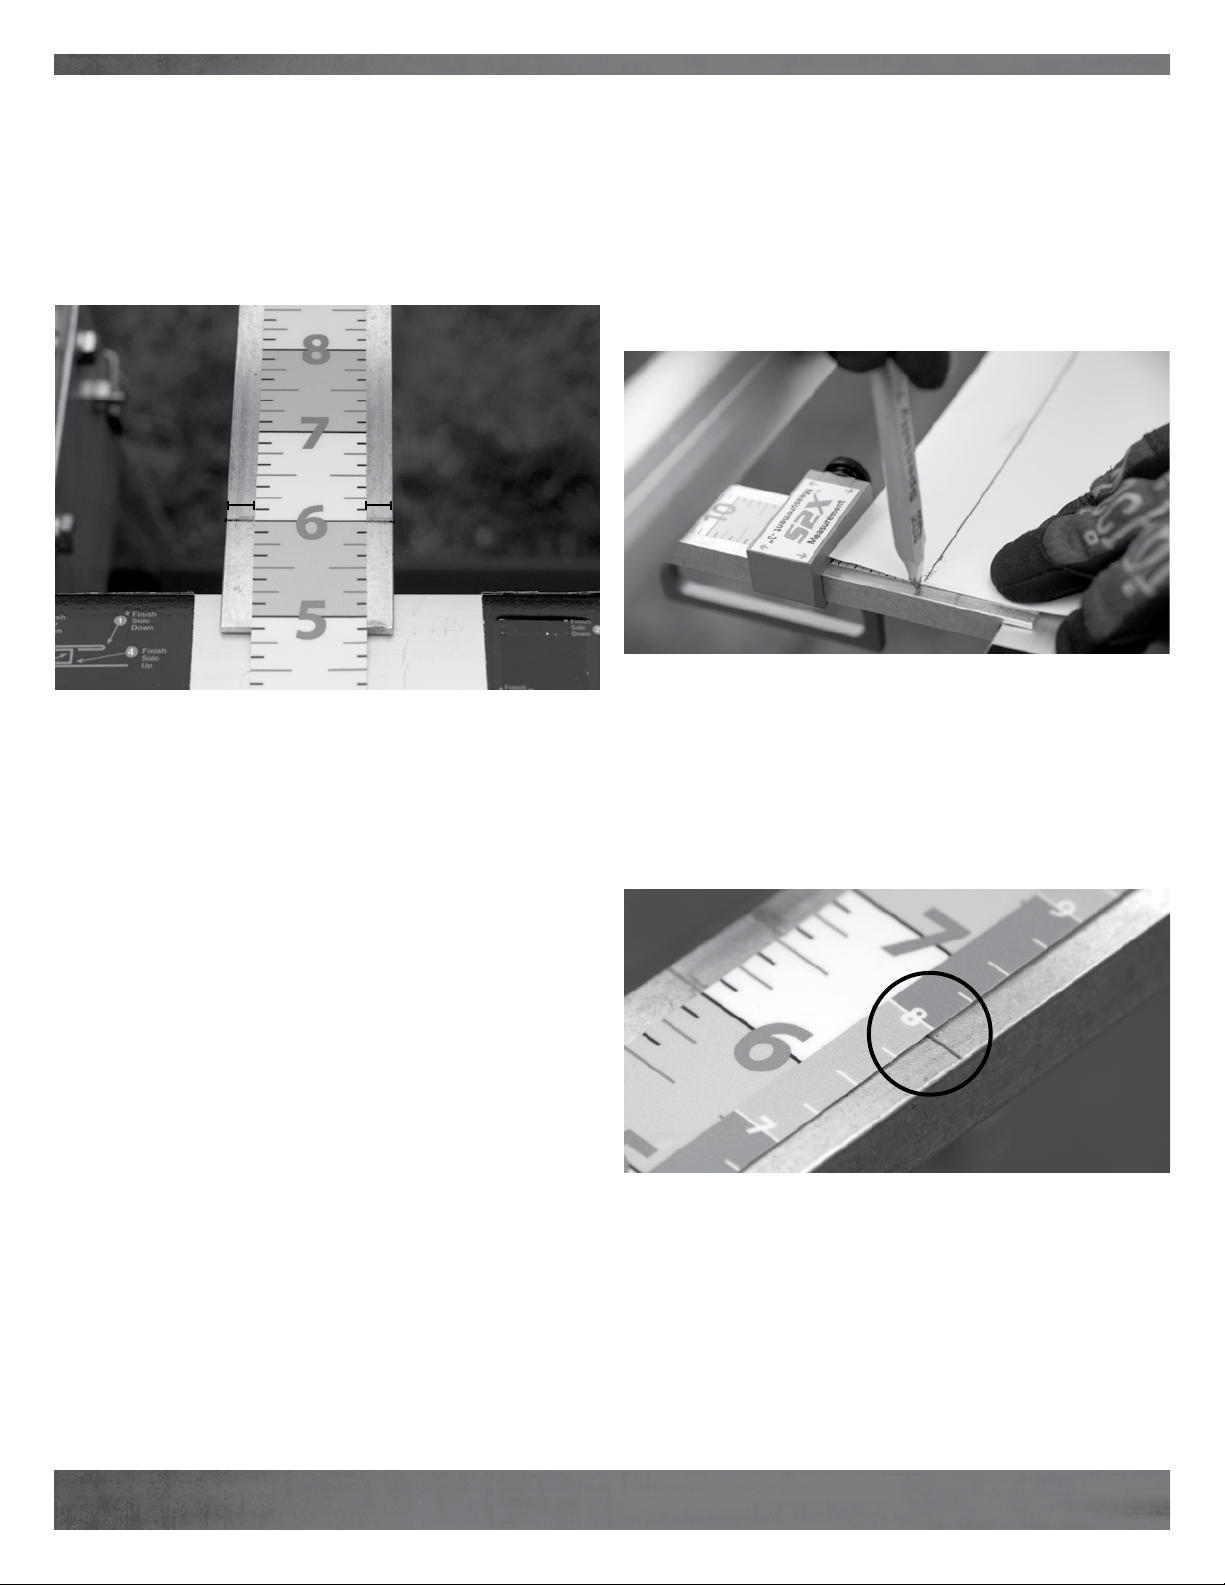
Align the 6" mark on the tape to the pencil mark and center the
tape on the Pivot Bar leaving approximately a 1/4" on either side
to account for the movement of the Material Stop. Peel from
backing and apply (Fig. 8).
Trim excess tape with utility knife.
Repeat process for remaining Pivot Bar Assembly using the same
pieces of trim coil.
STEP 5: (OPTIONAL) CUT-OFF TAPE
Insert a 12"x12" piece of coil marked at 8" into the brake and
lock it lined up at the 8” mark. Cut the coil using the PRO Cut-Off,
discard cut piece.
Set the Material Stop at the 8" mark. The material stop should
hit the material. Draw a line down the coil and remove coil from
the brake. Using the Material Stop as a square edge, transfer
the measurement onto the exposed portion of the Pivot Bar
Assembly (Fig. 9).
Fig. 8
1/4"
1/4"
Fig. 9
Remove Material Stop from Pivot Bar.
Remove the Cut-Off Tape from backing and line up the 8" mark
on the tape to the pencil mark. The Cut-Off Tape will overlap the
Grey/White Measuring Tape by ~1/4" (Fig. 10).
Trim excess tape with utility knife.
Repeat process for remaining Pivot Bar Assembly.
Fig. 10
USING THE S2X MATERIAL STOP GAUGE:
Use the Measurement mark on the S2X Gauge to measure any
piece wider than 6’’.
Use the Measurement -3" mark on the S2X Gauge to
measure any pieces narrower than 6’’ (deducting 3" from the
measurement indicated to get actual stop measurement.)
3
Page 4

TapcoTools.com | 800-521-8486
Atlantic® Premium Shutters | Builders Edge® | Foundry® Specialty Siding | Grayne® Engineered Composite Shingle
®
Kleer
| Mid-America Siding Components® | SturdiMount® | Tapco Tools® | TruExterior® Siding & Trim
®
Vantage
Shutters | Versetta Stone® | Wellcraft Egress Systems
©2019 Boral Building Products Inc. Item # 176009 | T9148 5/19
®
 Loading...