


ENGLISH
digital photo
Frame
5x7 INCH DIGITAL PHOTO FRAME
Digital Frame User Guide
Please Read This First
This guide explains how to prepare the Digital Photo Fram e and
use its basic features
The Components
Preparation
Menus and Settings
Loading Photos (PC)
FOR USE WITH MODELS SKU#
89350~89369
Flowchart and Reference Guides
The following guides and support are available. Refer to
them as necessary according to the flowchart below
For information on included
items and items sold separately
The Components Guide
Preparations
Basic hardware preparation, func-
tions and settings..
Menus and Settings
Loading Photos/Files
Frequently Asked Questions
Handling precautions, refer-
ences to various slideshow and
media functions
Troubleshooting
Packaging Exterior
Basic Manual
TAO Website
Basic Manual
TAO Website
www.taoelectronics.com

www.taoelectronics.com
3
The Components Guide
Front View
A. Display Screen
Back View
1. Tool Button
2. Next Button
3. Play/Pause
4. Previous Button
5. On/Off Button
6. A/C Adapter Slot
7. USB Flash Drive Slot
8. PC connection Slot
The Components Guide
1 2 3 4
5
6
7
A
8
9
©2008 TAO Electronics, Inc.
Overview & Specifications
Features
4
•
Load and display rich color photos in RGB
JPEG/JPG format up to 12 megapixel resolution.
•
Play your favorite songs as background music to
your photo slideshows.
•
Display and rotate photos as full screen stills,
automated slide shows, or as a dynamic splitscreen slide show.
•
Rotate and adjust the frame stand to show landscape and portrait style photos.
•
Display the time and calendar as an overlay to
your favorite photos.
Specifications
Display screen: 5.6" TFT LCD - 320 x 234
Internal memory: 128 MB
Photos: 56 ~ 100
Memory cards: CFI, CFII, SD, MMC, MS
Audio: yes ( speaker )
Formats: JPEG, Motion JPEG, MP3.
Frame: Replaceable for any standard 5x7 frame
PC interface: USB Host/Slave (2.0, 1.1)
Remote control: yes (RF, radio frequency)
Software: not required
Weight: 2 lb
Dimension:10" x 8" x 2.5" ( varies on the design)
Includes: AC adaptor, remote, USB cable, user's manual
Warranty: 1 year Domestic RMA

www.taoelectronics.com
5
Getting Started
Clock and Setup Menu Overview
•
Remove the protective film covering the LCD screen by
lifting the pull tab.
•
Plug the included AC Power Adapter into the frame,
and then into a standard110-220 volt AC electrical outlet.
•
Power on the Digital Photo Frame by pressing the
power button on the remote control or the frame.
•
If there are photos stored in the internal memory or on
an inserted memory card, a the Thumbnail Screen will
appear.
Preparation
The digital LCD panel has a viewing angle of approximately
25 degrees in either direction. You can achieve a better
viewing angle by adjusting the frame stand height.
•
Extend the frame stand to a position for greatest stability.
•
Extend or retract the strand by pushing the tab on the
stand, and adjusting the length.
•
Release the tab to lock the frame into position.
Adjusting the Viewing Angle
©2008 TAO Electronics, Inc.
Turning the Power On/Off
Turning the Digital Photo Frame On
1. Press the On/Off button.
Turning the Digital Photo Frame Off
Main Menu
6
1. Press the Tool button on the back of your frame to
enter the Main Menu.
2. Press the Next or Previous button to cycle through
modes.
Photo: Displays Digital Photos as stills, slideshow, or
split-screen slideshow.
Clock: Date and Time settings
Music: Access and play MP3 music files.
Setup: General Settings and Preferences.
1. Connect the AC adapter to a power source.
2. Press the On/Off button (back of the frame).

www.taoelectronics.com
7
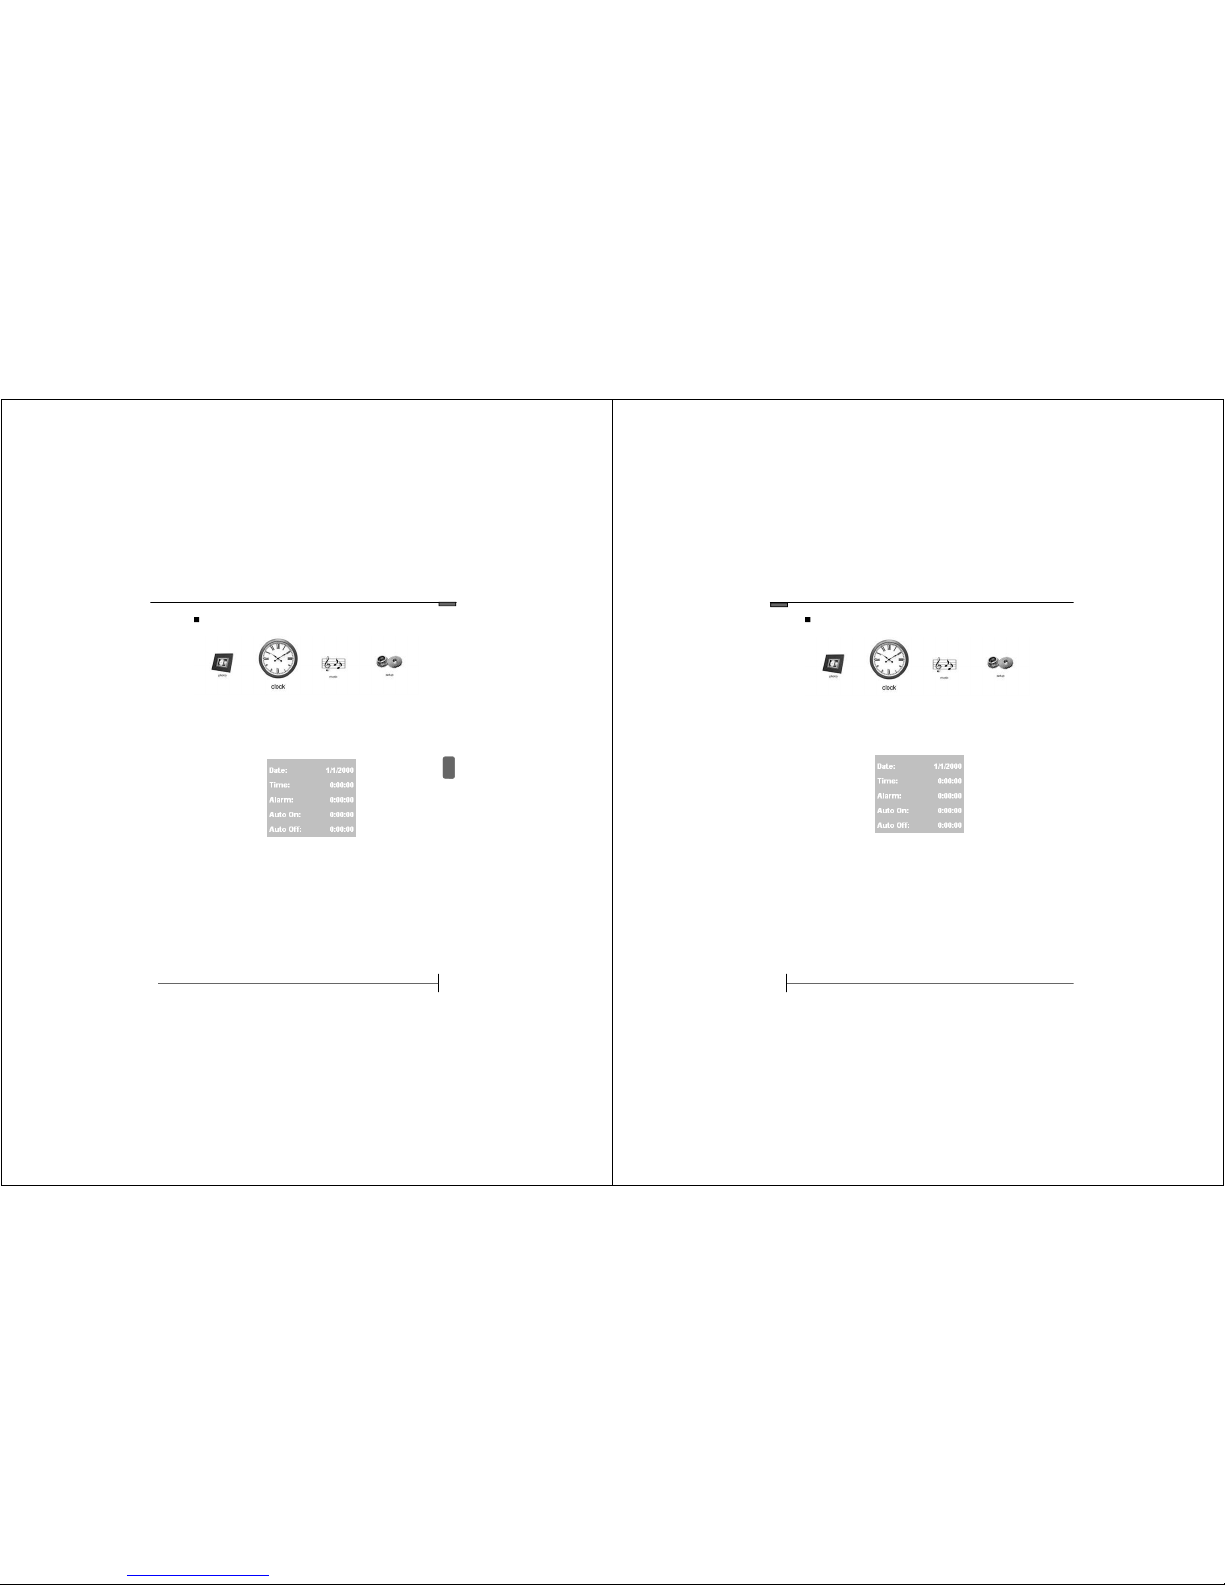
First Time Settings
Clock and Setup Menu Overview.
▪ Press the Previous and Next buttons to select the clock icon.
▪ Press the Play button to select.
(1) Adjusts the date.
(2) Adjusts the time.
(3) Adjusts the alarm time.
(4) Adjusts the auto-on time.
(5) Adjusts the auto-off time.
Preparation
(6) Selects the slide show speed.
(7) Toggles the time display in photo mode.
(8) Toggles the calendar display in photo mode.
(9) Selects the music repeat settings.
(10) Toggles the aspect ratio for photo mode.
(11) Adjusts the volume.
1
2
3
4
5
6
7
8
9
10
11
©2008 TAO Electronics, Inc.
8
Setting the Date
1. Press the Tool Button to enter the Main Menu.
2. Use the Previous and Next buttons to select “Clock
3. Press the Play button to select.
1. Press the Play button to select “DATE”.
2. Press the Previous and Next buttons to cycle
through the year, and press the Play button to
confirm. This will highlight the month.
3. Press the Previous and Next buttons to cycle
through the months, and press the Play button to
confirm. This will highlight the day.
4. Press the Previous and Next buttons to cycle
through the days, and press the Play button to
confirm.
www.taoelectronics.com
9
Menus and Settings
Setting the Time
1. Press the Tool Button to enter the Main Menu.
2. Use the Previous and Next buttons to select “Clock
3. Press the Play button to select.
1. Press the Next button to highlight “TIME”, and
press the Play button to select.
2. Press the Previous and Next buttons to cycle
through the hours, and press the Play button to
confirm. This will highlight the minutes.
3. Press the Previous and Next buttons to cycle
through the minutes, and press the Play button to
confirm. This will highlight the seconds.
4. Press the Previous and Next buttons to cycle
through the seconds, and press the Play button to
confirm.
©2008 TAO Electronics, Inc.
10
Setting the Alarm
1. Press the Tool Button to enter the Main Menu.
2. Use the Previous and Next buttons to select “Clock
3. Press the Play button to select.
1. Press the Next button to highlight “Alarm”, and
press the Play button to select.
2. Press the Previous and Next buttons to cycle
through the hours, and press the Play button to
confirm. This will highlight the minutes.
3. Press the Previous and Next buttons to cycle
through the minutes, and press the Play button to
confirm. This will highlight the seconds.
4. Press the Previous and Next buttons to cycle
through the seconds, and press the Play button to
confirm.
 Loading...