

Page 1
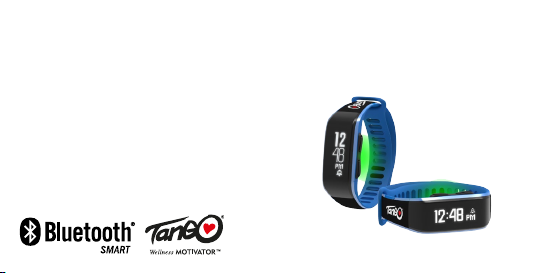
TW149 Tango HEART
USER MANUAL
Page 2

WELCOME
Congratulations on your purchase of Tango HEART, the performance-level, strapless,
continuous heart rate monitor + activity tracker that you can wear on your wrist.
HEART uses Bluetooth® Smart (4.0) technology to transmit your heart rate
data to Smartphone and other Bluetooth Smart compatible devices. Download
ACT2FIT 2 for a fully personalized, interactive workout, or take advantage of
hundreds of other Bluetooth compatible fitness apps. Simply sync your wrist band
data with the fitness app daily so you can review your STEPS, DISTANCE, CALORIES,
EXERCISE TIMER, and TARGET GOAL, SLEEP MONITORING, Reminders such as
Hydration reminder, Pill reminder, Move alert , Notifications, and monitor your
activity for both day and night.
Page 3

PLEASE NOTE:
The wrist band will automatically RESET at MIDNIGHT. At that time, the PREVIOUS DAY’S
activity data will automatically be saved. The wrist band stores up to 30 days of activity
so you can SYNC the wrist band & app at your convenience.
Page 4

Setting Up
Before you can set up your wrist band or transfer data from your wrist band to the
fitness app, you need to install the App on your Bluetooth Smart Ready device.
Search for the App “Act2Fit 2” in App Store or Google Play.
To provide you with the most accurate information, please set up all information
requested in the App. Incorrect or missing information might result in inaccurate
workout / activity recordings.
Page 5

Pairing with ACT2FIT 2 APP (IOS / Android platform)
1. Please be sure that you have your activity tracker wrist band with you when
you want to setup the APP. Also please be sure that there are no other ACT2FIT
activity tracker around you within 10 meter range except the one you would like
to pair with, otherwise there are potential risk your APP will be paired with other
ACT2FIT device.
2. Please find the ACT2FIT 2 APP in the App Store or Google Play Store and
download it. It’s FREE!
3. By the time you start install the APP into your Android phone; click the box to
authorize the 3rd party APP installation.
4. Setup your personal data (Gender / Age / Height / Weight / Stride length / Time
format / Alarm / Target Goal / Heart rate Zone / Exercise timer). You are also able
to select the language you would like to use, as well as to link your exercise data
Page 6

with the IOS Health kit as well as Google Fit. All the setting will be synced with the
activity tracker in order to provide you accurate measurement to your activity. All the
value (e.g. body weight) can be adjust at any time, and it will be update once you
finish the setting.
5. Once you finish the setting, it will have the 1st sync to your band automatically.
You can also sync your data to the APP manually when you press and hold the big
button. Now you can review all of your activity data at the APP.
Page 7

Heart Rate Monitor function
IMPORTANT SAFETY INFORMATION
Be sure to consult your doctor before beginning a new exercise program.
While this wrist band provides accurate heart rate measurements, it is not a medical
device.
Consult your doctor before using Tango HEART.
Wearing Your Tango HEART
To accurately monitor your heart rate:
1. Fasten wrist band snugly on your wrist or lower forearm, about 1–3 inches
(3–8cm) above your wrist bone. The optical sensor on the back should make good
contact with your skin tight enough without any gap or movement during exercise.
Page 8

2. If you have a smaller wrist, wear wrist band higher on your forearm, so that it
will be no gap and movement of the band during exercise.
Important: For optimal heart rate accuracy, especially if you often have cold hands or
poor circulation, we strongly recommend doing a warm up exercise for a few minutes
before you begin to track your heart rate.
GETTING YOUR HEART RATE
You can get your real-time heart rate when you put wrist band in Heart Rate (HR)
Mode. You must be wearing the wrist band to obtain an accurate heart rate reading.
The heart rate may take a few seconds to stabilize while your body is adjusting to
the physical activity. We recommend activating Heart Rate Mode during the warm
up stage of your workout.
Page 9

Troubleshooting
• Minimize wrist movement when device is searching for your initial heart
rate.
• Try tightening the strap.
• Try wearing wrist band higher on your forearm if the wrist cannot obtain good
signal. Make sure it got no gap and movement of the band during exercise.
• On colder days, activate the heart rate reading before heading outdoors.
• If you are still having trouble, try wearing wrist band on your other arm.
Important: Wash the wrist band regularly with mild soap and water to prevent skin irritation. Make sure you allow both your arm and the device to dry completely before
resuming wear.
Page 10

HEART RATE ZONES
Your target heart rate (HR) zone consists of your upper HR limit and your lower
HR limit. These limits are usually a percentage of your maximal heart rate (MHR). If
you do not know your MHR or upper and lower HR limits, you can check with your
doctor, or use this following MHR calculation method as guidance:
MHR = 208 – ( 0.7 x Age )
Dierent Heart Rate zone can be classified as:
50 – 60%: Improve Overall Health and Help Recovery
60 – 70%: Improve Basic Endurance and Fat Burning
70 – 80%: Improve Aerobic Fitness
80 – 90%: Increase Maximum Performance Capacity
90 – 100%: Develop Maximum Performance and Speed
Page 11

Setting Up Heart Rate Zones
1. Find an isolated location, away from all other Bluetooth device.
2. Fasten wrist band snugly on your wrist or forearm. Select the HR Mode.
3. Turn on the Bluetooth function of your smart phone or tablet.
4. Open the ACT2FIT 2 app. If you are opening the app for the first time, you will be
asked to set up a user profile and connect your device.
5. Select “PR149” from the list of discovered devices.
6. Choose your preferred heart rate training mode and set your heart rate zone
limits.
7. Choose to customize your lower and upper HR limits by BPM. See the detail on
Heart Rate Zone.
8. Your Tango Wellness Motivator HEART is now configured and ready to use!
9. If your Heart rate reading are out of your defined Heart rate zone, both visual
arrow and vibration will shown to remind you to slow down or to move faster.
Page 12

HEART RATE FUNCTION
The wrist band has a Heart Rate Monitor Mode. It can also display the heart rate when
you are using the Stopwatch and Exercise Timer in the band. It can also provide continuous Heart rate signal to dierent device (like Smart Phone, other Sport device
like Sport watch, Training machine as well as Cycle computer) to display / record the
heart rate data.
Page 13

USING WRIST BAND AS HEART RATE MONITOR
Go to the Heart Rate mode in the band. The Heart Rate sensor will immediately
begin searching for your HR, indicated by the blinking Heart display.
3. Hold your arm still until the Heart Rate display shown. This means the wrist band
has found your heart rate. The Heart rate reading will have few up or down in the
beginning, which is normal, since it is part of the process to stabilize the Heart rate
reading, which will match with your movement.
Once you have your Heart rate display, you can choose to have it display continuously, and the Heart Rate will keep showing without switching o to save the power.
You can choose to keep the Heart rate monitor features work at the background,
and go to other function / display of the band by press the Mode key.
Page 14

It will ask you “Keep HEART RATE ON?”, you can press the Start / Stop key to keep the
Heart rate work as the background. Bluetooth Heart Rate signal will keep deliver out
from the band while you are using other function. You can also press the Mode key
twice to turn OFF the Heart rate function. Remember to turn OFF the Heart Rate
function when you are not using it to avoid battery drainage.
Page 15

Heart Rate Monitor + Stopwatch / Exercise timer
The Heart rate function can also provide Heart rate reading when you are using the
Stopwatch function / Exercise timer function in the band. To do this, you have to
keep the Heart Rate function ON at the background, and switch to the Stopwatch
/ Exercise Timer mode. The Heart Rate reading will be shown periodically, and the
Heart rate zone alert will also perform when you reaching out the target Heart Rate
zone. Both visual display and vibration reminder will be shown.
Page 16

USING WRIST BAND WITH APPS & DEVICES
The wrist band can be used as a stand-alone heart rate monitor with heart rate (HR)
zone Alert.
You can also transmit your real-time HR data, using Bluetooth Smart (4.0) technology, to any compatible smart phones and exercise equipment computers. Connect
your wrist band to a compatible device to take advantage of the wide range of
fitness apps available.
Compatible devices will only capture wrist band data in real-time. This requires
you to have the device with you while you are tracking your heart rate.
Page 17

WORKING WITH A RECEIVING DEVICE
You will be required to pair the wrist band with every new app and receiving device
you use.
Pairing
Prevents signal interference from other sensors and devices in the area.
Tips for Pairing
• Stay 30 meters (100 feet) away from other Bluetooth sensors and devices.
• Position the receiving device as close to your wrist band as possible, within 1
meter (3 feet).
• Wear the receiving device on your arm, in your front pocket, or in front of you on a
belt or bike handlebar. Do not position the device behind you (e.g. in a back pocket
or backpack).
Page 18

• Heart rate calculation of the wrist band is not based on instant R-R interval, and
will not work for apps and devices that require heart rate variability (HRV) data.
Pairing with Apps through Bluetooth
1. Turn on the Bluetooth function of your device.
2. If you use an Android device, open the Bluetooth settings menu on your device.
Enable the setting that makes your device visible to other Bluetooth devices.
3. Put on your wrist band and turn it on.
4. Open the app that you would like to pair with. Instructions vary for each app, but
typically, you can add or scan for a heart rate sensor within the app’s settings.
Note: Pairing must be completed within the app settings, and not in your smart
device’s Bluetooth settings.
Page 19

5. Repeat the above pairing process for each app. After initial pairing is complete,
your wrist band will automatically be recognized each time you use the app.
Note: To pair with an Android app through Bluetooth Smart, all of the following
requirements must be met:
• Your device is running an Android version 4.3 or higher
• Your device has Bluetooth 4.0
• Your app supports both of the above
Pairing with Sport Devices such as Bike Computers
Instructions vary for each device. Follow your device manufacturer’s instructions for
receiving heart rate data from a chest strap.
Page 20

Activity Tracker
Product mode and function
There are total 14 modes in this activity tracker:
1.
Time display (12 / 24 hr format, selectable)
Step count
2.
Calories count
3.
Distance travelled
4.
Exercise timer
5.
Target Goal
6.
Sleep monitor
7.
Daily Alarm
8.
Page 21

9. Heart rate monitor
10. Stopwatch
11. Interval Exercise Timer
12. Battery level indicator
13. Phone finder
14. Scale display (work with ACT2FIT linked Bluetooth body scale)
You are free to choose the function you need to use and display at the band by
simply toggle the icon of the function to turn it ON or OFF. The features set in the
band will be update automatically once you finish your setting.
Page 22

Understanding the Data
ESTIMATED CALORIES BURNED
NOTE: The ESTIMATED CALORIES BURNED is based on an advanced 24-hour calories burn
formula:
BASAL Metabolic Rate (BMR):
This is the estimated amount of energy burned daily while you are at rest. Even as
you sleep, your body burns energy (expressed in the form of calories). Therefore,
when you wake up in the morning, the watch will already display a certain number
of burned calories based on the BMR. You DO NOT have to wear the watch for the
BMR to record; the BMR is based on a formula, not movement.
EXCERCISE:
Page 23

When you are wearing the wrist band, your steps + distance + calories + Exercise
time will automatically record (based on your motion). Like all exercise routines, the
more you walk the more calories you burn.
You HAVE to wear the wrist band for the STEPS, DISTANCE & EXERCISE TIME to
record; these are all based on movement.
For BEST RESULTS, the wrist band should be worn 24/7.
Target GOAL METER
During your information set-up (on the app), you will select a daily goal based on
calories, steps OR distance. To help you track your daily goal, the % of the goal you
have achieved in GOAL mode.
Page 24

Reminder
There are three kinds of reminder provided in this tracker:
1.
Move reminder
Pill reminder
2.
Hydration reminder
3.
All those reminder are helping you to maintain well + healthy activity level, take the
pill on time (if you needed), and stay good hydration level during activity. Simply
toggle the Icon of the reminder you would like to use, and select the value. It will
sync and activate to your tracker, and it can be turn OFF at any time.
Page 25
One of the very important advantages of being using an activity tracker linked with
latest smart phone is able to be notified for several activities happen at your smart
phone. It helps you to get to know it without looking at the phone, so that you can
be stay focus of what the activity you are doing.
There are 9 dierent notifications we have in this band:
1. Phone Message
2. Incoming Call
3. Missed Call
4. Email received
5. Facebook
Page 26

6. Twitter
Whatsapp
7.
Line
8.
WeChat
9.
Same as other mode and reminder, you can also select to have those notifications
activated at your band by switch ON the ICON of that notification. It will be sync and
start function at the tracker. To remove that notification, simply switch OFF the icon
and notification will be deactivated.
Page 27

IOS APP
• Download iOS app from app store by search “Act2Fit 2”.
States of APP
o Select the “Setting” in the menu bar
o Edit/Update your profile information for calculating the calories, consumption.
Android App
• As mentioned formerly, you can obtain the android app from Google Play by
search “Act2Fit 2”.
States of APP
o During the first times of launching, the app may enter a state of Initializing. In this
state, the app collects some essential profile information for calculating the calories
consumption etc.
o Simply follows the instructions to enter the fields one by one. Upon finished
Page 28

collecting the profile information, the app will lead you to the normal state.
o In normal state, you can connect with your wristband and capture data from it.
Data are illustrated through various tabs: Dash Board, History, and Sleep
o
Monitoring.
In the last tab Extra, you can have control over various function of the wristband.
o
•
Connection States of Wristband
In the left side of topmost action bar, you are notices there color changing
o
while connecting to the wristband.
Red color – the wristband simply disconnected.
o
Yellow color – the wristband is connected and is busily performing data
o
exchange.
Green color – the wristband is connected and ready to accommodate command
o
trac.
Page 29

Dash Board
s.
• In a normal state, this would be the first screen you see after the app launching.
•
Moreover, you can access this screen from the leftmost tab of the tab bar.
• On the upper half of this screen, there is a pictorial representation of the progres
Swiping the upper half of the screen can view the progress of dierent recent
days.
• On the lower half of the screen, there are numerical values for various items,
namely: Steps, Calories, Distance, and Exercise Time in hours and Deep Sleep in
hours. This part would change according to the date displayed on the upper
pictorial progress.
History
•
You can access this screen from the second tab of the tab bar, or swiping from
other tab’s screen.
Page 30

• In this screen, you can display graphical representation for daily distance/daily
steps, daily calories consumption, and daily exercise time in hours.
Dierent dataset selections can be made from lower half’s selector arranged in
•
weeks or days.
Swiping on the graph can have alternate list view of daily collected data.
•
Sleep Monitoring
You can access this screen from the third tab of the tab bar, or swiping from other
•
tab’s screen.
In this screen, you can display graphical representation for sleeping quality in a
•
10 minutes time slots.
The premise of recorded sleep quality is the wristband that entered into “Sleep
•
Mode”. No recorded sleep quality data could be displayed for non-sleep-mode.
Dierent dataset can be selected from the lower half’s selector arranged in Day
•
Page 31

(intra-day 10 minutes slot data), Weeks (Daily data), and Month (Daily data).
• Please note that the period for daily sleep data are considered from 12:00nn of
previous day to 11:59am of that day.
• Swiping on the graph can have alternate list view of daily collected data.
• Taping on the graph can toggle line chart or bar chart for dierent graphical
representation for daily data arranged in weeks or months.
Extra
• You can access from the rightmost tab of the tab bar, or swiping from other tab’s
screen.
• There are three categories of switches: Mode, Reminder, and Notification.
• For Mode, you can switch on/o the modes that formerly mentioned. Gray
colored icons denote a switched o state for that particular mode.
• For Reminder, you can adjust the parameters as well as switch on/o for formerly
Page 32

mentioned reminders. Gray colored icons denote a switched o state for that
particular reminder function.
For Notification, you can switch on/o the formerly mentioned notifications that
•
would be triggered on band. Gray colored icons denote a switched o
state for that particular notification function.
In order to make sure the corresponding commands sent to BLE band, please
•
ensure the state of band connection indicator (upper left corner of the screen)
is green with “Connected” displayed. Or otherwise the update of BLE band
commands would be enforced on next band connection.
Exercise Data Sharing
User can share the current status of meeting the goal via emails or other social
•
media.
Simply access this function via the share icon beside the top right option menu.
•
Page 33

Historic Data Sharing
• User can share the historic data in CSV format.
• These categories of data includes daily steps walked, daily computed calories
burnt, daily exercise time in hour, daily deep sleep time in hour as well as daily
light sleep time in hour.
• Simply access this function via Export in the top right option menu.
Data linked with IOS Health Kit and Google Fit
• One can access the Health Kit/Google Fit capturing setting by clicking the
Google Fit/Health Kit Icons at the lower right corner on the Setting (Profile) Page
(accessible from upper-left corner of app).
• For Health Kit (IOS Platform), one can enable the Health Kit capturing feature by
checking the checkbox. Then, your exercise data will automatically SYNC with the
Health Kit.
Page 34

• For Google Fit (Android Platform), one can enable the Google Fit capturing
feature by checking the checkbox for “Data Capture On”.
By pressing the Google Fit “Retrieve History ”, one can get the raw data obtained
•
from one’s Google Fit Account.
The premise of enabling the Google Fit capturing feature is one had been
•
logged-in Google Account from social network login page (accessible
from taping the left of the topmost action bar.
On attempting to check the “Data Capture On” checkbox, a dialog box for
•
selecting various options (items and periods etc) would be displayed.
On exiting the dialog, one may note the checked state for Google Fit’s “Data
Capture On” checkbox.
Unchecking the “Data Capture On” checkbox would stop the data capturing of
•
Google Fit.
Page 35

Cloud Backup System
During the initial setup of the app, you had oered an option to backup the
•
historic data and profile setting to the cloud. You can turn on/o anytime by
accessing the screen triggered by left side of topmost action bar.
•
The concept of cloud backup is for easing the users from inputting profile
information repeatedly every times if you want to link up the wristband with a
new phone. Profile information can be retrieved from cloud during initial setup of
the app.
•
Moreover, with this feature turned on, you can retrieve your daily steps and sleep
historic data from anywhere with Internet access.
•
In additions, if you want to share your wristband with someone, simply use a
dierent name during initial setup, your friend can then have an independent
backup of his/her profile information and historic data at the cloud.
Page 36

• Under each wristband/name pairs, we further oer a way to analyze the historic
data on a web based platform (to be released shortly). If you intended to use
this web based feature, please login any of your social network accounts (Face
book, Twitter or Google+) in the app (access from the left side of topmost action
bar). You can then using the same social network account to access the web
based platform to analyze your own historic data.
Reconnecting the wristband (Android)
•
When you make a long press gesture on the middle topmost date box, your app
will attempt to connect/re-connect a wristband.
This feature is particularly useful when you upgrade to a newer version of wrist
•
band but would like to retain the historic data that had been collected for a
period of time. Remember to hide/shutdown the old wristband before you
sync with the new one.
Page 37

Resetting the Wristband and Cloud
• If the app detects the following changes:
o Changing of wristband.
o Changing of name.
A dialog will be popped up to let you make a choice below:
o Upload current phone app data to cloud.
o Download cloud data to phone app.
o Reset phone app data, cloud data and wristband data.
• This mechanism is useful if you want to switch to use another phone, or share
your wristband with friends.
• On the other hand, on the upper-right corner of the app, you can find the Reset
button from the option menu.
Page 38

• You can have various ways to reset your wristband and cloud within the dialog
that triggered by that button, explore yourself.
Battery Conservation Mode
To conserve the battery, the display will become inactive after 5 seconds and enter
into POWER SAVE MODE.
Low Battery Warning
Signs of failing / dying batteries are:
Your activity will continue to record on your watch for a limited time, so it is imperative that you have the battery charged to avoid losing your stored activity data.
Page 39

CHARGING THE BATTERY
• Wrist band contains a rechargeable lithium polymer battery. Follow these
instructions and guidelines to maintain the battery lifespan.
• Warning: If you do not follow these guidelines, the battery life could be
shortened and there is the risk of damage to your wrist band, risk of fire, risk of
electrolyte leaks and chemical burns, and risk of injury.
Charging Your Wrist Band
• 1. Warning: Make sure the Micro USB Port of wrist band is dry. Otherwise, dry
them gently with a towel.
• 2. Connect the wrist band to your computer / charging hub with Micro USB
cable. Charging screen will be shown when the connection is successful.
Page 40

Battery Care Guidelines
• Recharge the battery at least once every 6 months.
Do not expose your wrist band to high temperatures.
•
Use your wrist band in the temperature range of 5°C to 45°C (41°F to 113°F).
•
Store your wrist band in the temperature range of 0°C to 25°C (32°F to 77°F).
•
If the band casing breaks and the battery is exposed, keep the battery away from
•
children. Contact your local recycling authority to properly dispose of the band
and battery.
Battery Lifespan
•
The battery lasts for approximately 300 charge cycles. If charged on a weekly
•
basis, the battery should last for at least 5 years.
The battery is non-replaceable. If the battery charges length is noticeably shorter
•
than before, your wrist band may have reached its end of life. Contact
Page 41

your local recycling authority to properly dispose of the device and battery.
FAQ
• How do I restart / reset my tracker?
• For Android, you can access through the dialog popped up by triggering the
Reset on the top right option menu. You have number of options to reset your
tracker, check it out yourself.
• I’m having trouble syncing my tracker with my computer/phone
• The tracker is compatible with Apple IPhone and most well-down stable android
phone with BLE supported. For android phones, owing to the implementation
and chipset stability, some phones work smoother than the others. Try to find
some well-known android phone listed by dealer.
Page 42

• The time is incorrect on my tracker’s display
If your tracker has formerly been shut down or just unpackaged, the time
•
displayed probably is incorrect. Simply make a sync/connection with your phone
would make it correct.
I cannot find the function in my tracker
•
Make sure that your wristband is connected to the phone; go to the Mode
•
section under Extra Tap.
You can turns on corresponding function in your tracker.
•
•
Which Android devices have known issues with the Android app?
Theoretically, any phone/pad with android version 4.3 or above that support
•
BLE would be compatible with Act2Fit 2. In reality, the implementation of android
phones varies among manufacturers makes the app works smoother on some
Page 43

phone than others. We recommend you to use Act2Fit on those well-known
modern stable smart phones listed from the dealer, but this is not mandatory as the
price/stability ratio gap among phones keeps improving.
• My tracker isn’t receiving call or text notifications from my Android device
• The mechanism of wristband being notified is through accessing the Notification
of Android phones. Check if you had authorized Act2Fit 2 app in Notification Access
in your android setting.
• How do I reinstall Act2Fit 2 App
• You can simply uninstall the app and search “Act2Fit 2” on Google Play to find the
app to install.
Page 44

CARING FOR YOUR WRIST BAND
o Wash wrist band regularly with mild soap and water to prevent skin irritation.
Make sure you allow both your arm and the wrist band to dry completely
o
before resuming wear.
Avoid scratching the optical sensor area to protect your wrist band from
o
damage.
Do not expose your wrist band to strong chemicals such as gasoline, cleaning
o
solvents, acetone, alcohol, or insect repellents. Chemicals can damage the seal, case,
and finish.
After rinsing wrist band with tap water and gently dry with a soft
o
cloth.
If your skin becomes irritated, wear wrist band on the other arm or discontinue wear-
o
ing until the irritation clears.
Page 45

• NEVER push the buttons under water, when the watch is wet or when you are
om
cleaning or rinsing the unit. You are actually pushing water inside the wrist band.
• DO NOT use the wrist band in a hot tub or extremely hot shower / bath. High
temperatures and steam can damage the rubber seals.
• DO NOT expose the wrist band to sudden changes of temperature by going fr
a hot tub to cold water. This can make the rubber seals contract and allow water to
penetrate.
• DO NOT wear the wrist band in soapy dishwater or bubble baths. The alkali
contained in soaps can damage the rubber seals.
• DO NOT use cleaning solvents to clean your wrist band. Solvents WILL damage
Page 46

the integrity of the plastic. The wrist band can be wiped clean with a lightly moistened cloth.
•
PROTECT the wrist band from extreme heat, shocks and excessive exposure to
direct sunlight.
•
NEVER expose the wrist band to strong chemicals such as gasoline, cleaning
solvents, acetone, alcohol, insect repellent, sunscreen and other toiletries, as they
may damage the unit.
KEEP the unit out of the reach of children and pets. The unit contains small parts
•
that might be swallowed.
•
NEVER disassemble or modify the unit. Modifications to this unit will VOID
Page 47

FCC information
FCC
1. This Device complies with Part 15 of FCC Rules and Industry Canada License-exempt RSS standard(s). Operation is subject to the following two conditions:
1. This device may not cause harmful interference, and
2. This device must accept any interference received, including interference that
may cause undesired operation of the device.
Note: Changes or modifications to this unit not expressly approved by the party responsible for compliance could void the user’s authority to operate the equipment.
2. FCC Radiation Exposure Statement:
This equipment complies with FCC radiation exposure limits set forth for an un-
Page 48

controlled environment. End users must follow the specific operating instructions
for satisfying RF exposure compliance. This transmitter must not be co-located or
operating in conjunction with any other antenna or transmitter.
The Bluetooth word mark and logos are registered trademarks owned by Bluetooth
SIG, Inc. and any use of such marks is under license. Other trademarks and trade
names are those of their respective owners.
IPhone, iPod touch, iPad mini, Mac, iTunes and App Store are trademarks of Apple
Inc, registered in the US & other countries. Tango is trademark of Health Care Success Ltd.
Warnings & Cautions
WARNING: Before starting any exercise program, we strongly suggest that you visit
your doctor for a complete physical and to discuss your exercise plans.
Page 49

PLEASE READ all information in this instruction manual before using this unit. This is
NOT A MEDICAL DEVICE!
NOTICE TO PEOPLE WEARING PACEMAKERS: While Bluetooth is a passive system and
should have no direct eect on a pacemaker, we strongly recommend anyone fitted
with such a device contact their physician or cardiologist before using this product
or starting an exercise program.
Please keep in mind; your wrist band is a sensitive technical instrument. With proper
care and maintenance, it will last for many years. However, improper care and handling can cause the various sensors to be damaged and will harm the functioning
capabilities.
 Loading...