


User Guide
Portable Document Camera
www.tamtus.co.kr
UVC-500AF
The information and specifications herein are subject to change without prior notice.

MagicView UVC-500 v1.03User Guide
2
I_Introduction
‥‥‥‥‥‥‥‥‥‥‥‥‥‥‥‥‥‥‥2
1. Hardware Specifications
‥‥‥‥‥‥‥‥‥‥‥‥‥‥‥‥2
2. Components
‥‥‥‥‥‥‥‥‥‥‥‥‥‥‥‥‥‥‥‥‥3
3. Using Hardware
‥‥‥‥‥‥‥‥‥‥‥‥‥‥‥‥‥‥‥3
II_Installation
‥‥‥‥‥‥‥‥‥‥‥‥‥‥‥‥‥‥‥5
1. The Installation Process
‥‥‥‥‥‥‥‥‥‥‥‥‥‥‥‥5
2. Software Installation
‥‥‥‥‥‥‥‥‥‥‥‥‥‥‥‥‥6
3. Hardware Installation
‥‥‥‥‥‥‥‥‥‥‥‥‥‥‥‥‥9
4. Precautions for Installation
‥‥‥‥‥‥‥‥‥‥‥‥‥‥10
III_Using MagicView UVC
‥‥‥‥‥‥‥‥‥‥‥‥‥‥11
1. Getting Started
‥‥‥‥‥‥‥‥‥‥‥‥‥‥‥‥‥‥‥11
2. Using Real-time Mode
‥‥‥‥‥‥‥‥‥‥‥‥‥‥‥‥19
3. Using Teaching Mode
‥‥‥‥‥‥‥‥‥‥‥‥‥‥‥‥22
IV_Software Features
‥‥‥‥‥‥‥‥‥‥‥‥‥‥‥‥24
1. Name of Each Part of User Interface
‥‥‥‥‥‥‥‥‥24
2. Using Features
‥‥‥‥‥‥‥‥‥‥‥‥‥‥‥‥‥‥‥26
V_Troubleshooting
‥‥‥‥‥‥‥‥‥‥‥‥‥‥‥‥‥37
VI_Precautions
‥‥‥‥‥‥‥‥‥‥‥‥‥‥‥‥‥‥‥38
Contents
The information and specifications herein are subject to change without prior notice.

MagicView UVC-500 v1.03User Guide
3
I_Introduction
MagicView UVC-500AF
Capture Area 297mm x 210mm (A4 size) or higher
Focus Autofocus
Focus Distance 7cm ~ Infinite
Lighting 12 pieces super bright white chips built-in
LED Light Intensity Varies between 300 and 600 Lux according to environment
Color / Brightness Control Manually controlled
PC Interface High speed USB 2.0
Minimum Specifications Pentium IV 1.8 GHz, 256MB RAM, 10GB HDD or higher
Operating Systems Windows XP, Windows Vista, Windows 7
Software Supplied
MagicView software
(viewer, capture, video record, image edit, annotation)
Body 3-axis articulated construction
Dimensions
Folded 2.4'' W x 3.0'' H x 6.9'' D,
Extended 2.4'' W x 4.0'' - 15.0'' H x 6.3'' D
Net Weight
720 grams
(carrying case, set-up CD and user guide not included)
Accessories Included hard carrying case, lens cover, set-up CD, user guide
1. Hardware Specifications
Dimension in Inches
2.4
15.0
11.4
7.7
4.0
6.9
3.0

MagicView UVC-500 v1.03User Guide
4
2. Components
(2) Components
Document Camera, User Guide, Set-up CD, Aluminum Carrying Case.
3. Using Hardware
(1) How to use the arm
By using the rotary head and 3-axis articulated arm of MagicView UVC as shown in this
picture, the height and angle can be easily adjusted to the best shooting position.
Rotary Head
3-axis Articulated Arm
I_Introduction

MagicView UVC-500 v1.03User Guide
5
(2) How to use the lighting system and basic focus
The camera head is equipped with an LED lighting system that produces up to
10,000mcd brightness to facilitate its placement in dark places. It can be turned on or off
depending on usage environments.
This product is designed to control all functions using a remote control UI installed in a
PC. This remote control UI is specially developed by Tamtus to be conveniently used on a
computer monitor or an interactive whiteboard in the classroom.
(3) How to use the carrying case
The aluminum case, which comes with MagicView document camera, can protect
from damage to the product during transportation and storage. It can also be used as
a platform on which the product is placed to secure a wider surface when it projects an
object larger than A4 size.
Its exte rior is made o f al uminum
material. It has a handle and a locking
device. Its interior is lined with sponge
for protection of the product.
MagicView UVC document camera on top
of aluminum case.
Adjusting
Autofocus
Turning Light
ON/OFF
Hide
I_Introduction
MagicView UVC-500 v1.03User Guide
6
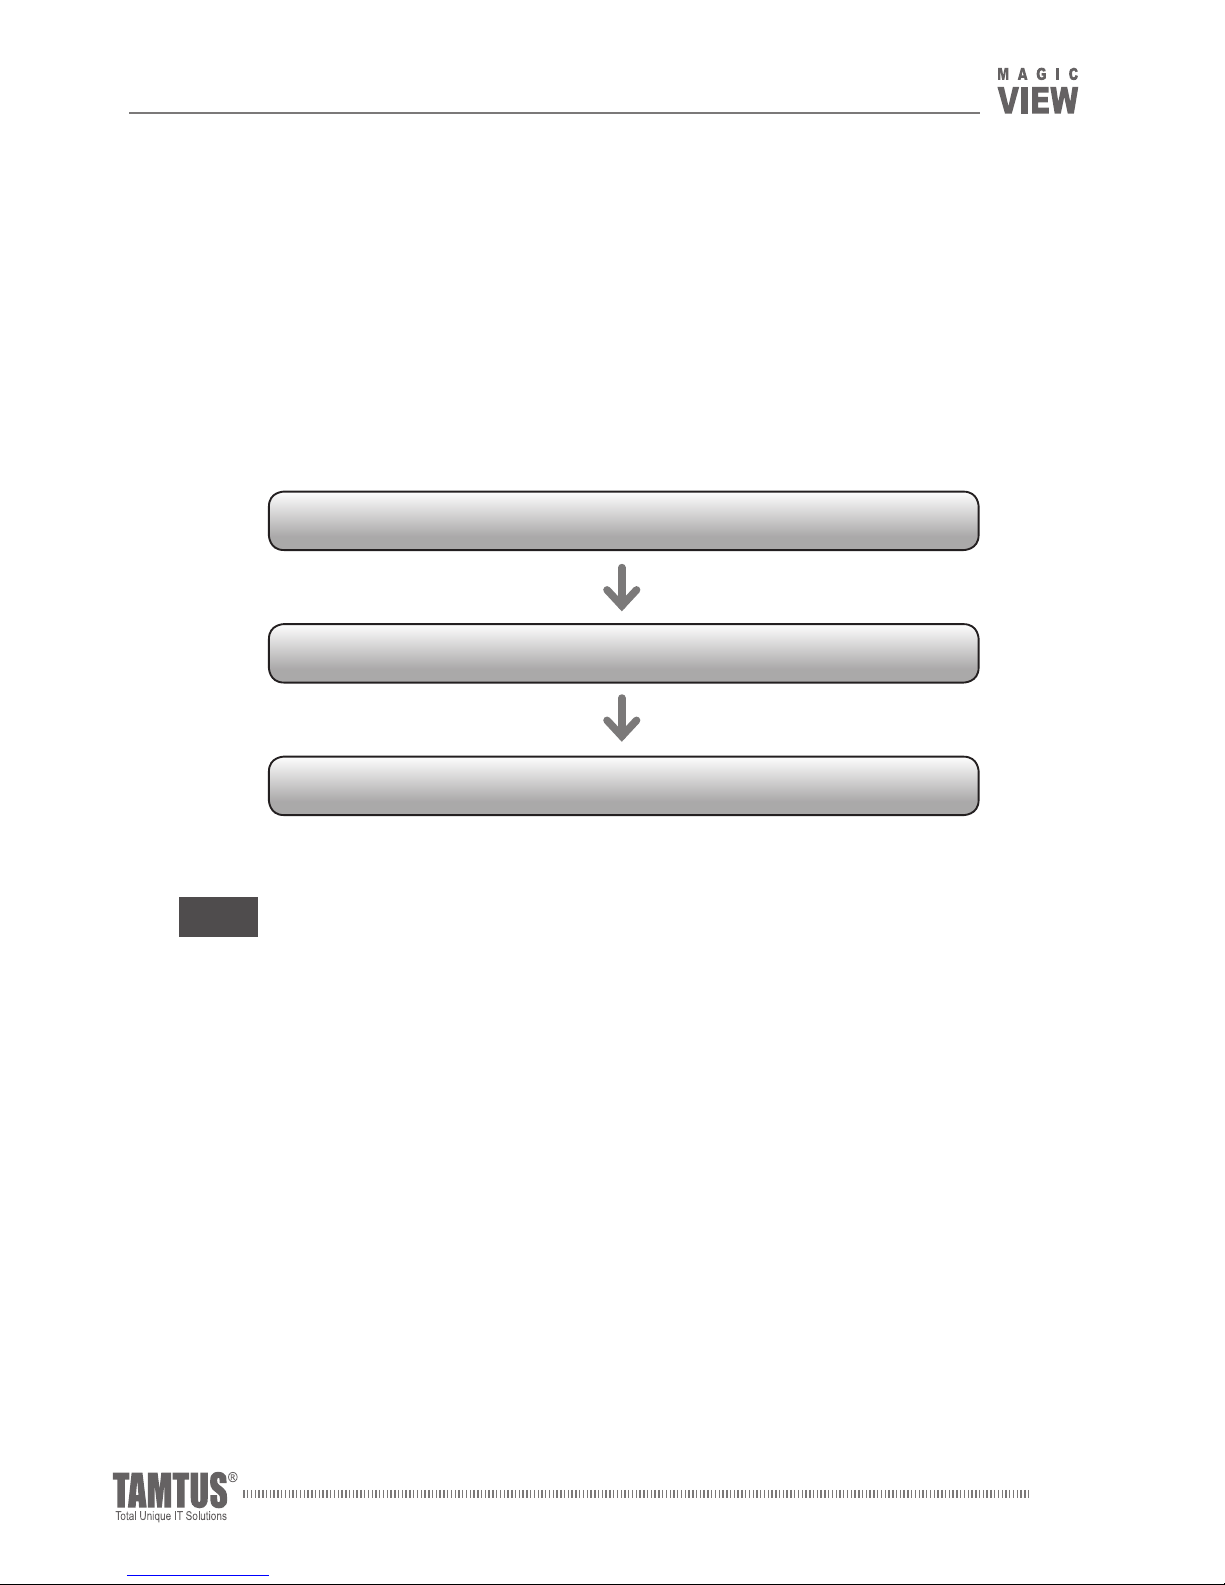
1. The installation process
Insert the MagicView UVC-500 Set-up CD, the installation program will start
automatically. Alternatively, you can install or uninstall the individual programs manually
as necessary. The MagicView UVC-500 is UVC (Universal Video Class) compatible
which installs the required driver automatically when connecting the MagicView UVC
camera to a PC's USB port. There is no need to install any special drivers.
Install the MagicView UVC program
Install Motion JPEG Codec
Execute the MagicView UVC program
If your computer does not meet the system specifications that MagicView UVC
requires, there may be no screen appearing. In that event, you may need to install
additional codecs or to upgrade the driver.
Content of Installation CD
Set-up Program, MagicView UVC Viewer Program, MJPC Codec, User Guide,
Driver Update program
II_Installation
Note

MagicView UVC-500 v1.03User Guide
7
2. Software installation
Insert the MagicView UVC-500AF Set-up CD.
(1) Install the main program
①
Click "MagicView UVC-500AF Setup."
②
Installation starts. Click "Next."
③
Read the consumer license and accept
it by clicking "I Agree."
④
Choose a folder to install the software
in an "Install" to continue the installation.
Do not connect the MagicView UVC-500 to the PC before driver and program are
installed. Otherwise, there may be no image coming to the PC monitor. If that happens,
close the MagicView UVC program being run, disconnect and then reconnect the USB
cable to the PC, and run the MagicView UVC program again.
MagicView UVC-500AF Setup
MJPEG Codec Setup
Exit
II_Installation

MagicView UVC-500 v1.03User Guide
8
⑤
When the entire installation process is
complete, click "Finish."
(2) MJPEG Codec installation
①
Click "MJPEG Codec Setup."
②
Click "OK."
③
Click "Next."
MagicView UVC-500AF Setup
MJPEG Codec Setup
Exit
④
Choose "I accept the terms of the
license agreement" and click "Next."
II_Installation

MagicView UVC-500 v1.03User Guide
9
⑥
Click "Next."
⑦
Click "Next."
⑧
Click "Install."
⑨
Click "Finish" to complete the installation.
⑤
Choose "No. I want to evaluate the
product" and click "Next."
II_Installation

MagicView UVC-500 v1.03User Guide
10
3. Hardware installation
(1) After installing the MagicView UVC-500 driver and viewer program, connect the USB
cable of the Document Camera to the USB port at the front or the rear of your PC.
(2) There is no need to install any special drivers to use MagicView UVC-500. After connecting
the USB cable of MagicView UVC-500 to a PC's USB port, wait a few seconds, a message
appears as "Your device is ready to use."
MagicView UVC-500 document camera can only be
used in USB 2.0 mode. Check if the PC supports
USB 2.0
PC의 후면에
설치되어 있는
USB 단자
USB ports at the
rear of the PC
Note
II_Installation

MagicView UVC-500 v1.03User Guide
11
4. Precautions for installation
Click "Custom Setting"
Select "2592x1944"
< Menu Panel >
Applicable OS
MagicView UVC-500 is operational on Windows XP, Windows Vista,
and Windows 7. However, Windows 95, 98, and ME do not support
MagicView UVC-500.
When USB port
is changed
For Windows XP, the "new hardware addition" Wizard is required to
install the driver, the operation of which can be run either manually or
automatically.
For Wi ndows Vist a and Wi ndows 7, t hey recogn ize th e U SB
automatically.
Connecting
the device
To start using MagicView UVC document camera, choose the right
device at "Custom Setting" after installing its software. You will have one
of the device names below at "Custom Setting:"
"USB 2.0 PC CAM", or "MagicView-500."
Select one of the device names below at "Custom Setting:"
"USB 2.0 PC CAM", or "MagicView-500."
Hide
MagicView UVC-500
II_Installation

MagicView UVC-500 v1.03User Guide
12
< Menu Panel >
1. Getting started
(1) Connect the MagicView UVC document camera and run the program.
①
Turn on power.
②
Connect the USB cable of the MagicView
UVC document camera to a USB port
at the rear of the PC in order to start
MagicView UVC-500. (If MagicView UVC
is connected to the computer for the first
time, you need to wait a while for the
hardware to be installed correctly.)
③
Double click the MagicView UVC icon on the desktop or on the startup programs
menu.
(2) Set default configurations
When you install MagicView UVC for the first time, a few additional preparations will allow
you to use it more conveniently. Click "Custom Setting"
on the menu panel to enter
the configuration settings.
Click "Custom Setting"
a
b
c
d
e
f
g
h
i
j
MagicView_
500AF
Hide
III_Using MagicView UVC
MagicView UVC-500

MagicView UVC-500 v1.03User Guide
13
ⓐ
Camera Settings
Video Device: Click the selection window and
then click "USB 2.0 PC CAM" or "Magic View
UVC-500." (A selection of a wrong device
results in no images on the screen)
Filter: This allows finer adjustments of the
brightness, contrast, chroma and etc. of the
camera.
ⓑ
Camera Resolution
The real-time resolution of the camera is
determined here. Higher resolution produces
images of higher quality; however, when a
computer has low performance, processing
speeds are too slow for convenient use, in
which case the resolution should be lowered
by a notch to obtain sharper detail.
ⓒ
Recording Resolution
The resolution to be used in image recording is determined here. When it is set high,
the size of a file becomes very large.
ⓓ
Basic Rotation
The rotation angle of the camera is determined here. When the angle is set at 90˚,
processing speed can be slow; 0˚and 180˚are recommended.
ⓔ
Path for Captured
The folder for storing captured images is determined here. Single captures or
continuous captures are all stored here. To open the folder, click "Open" in Real-time
Mode.
a
b
c
d
e
f
g
h
i
j
MagicView UVC-500
III_Using MagicView UVC

MagicView UVC-500 v1.03User Guide
14
ⓕ
Image Editor
Image editing programs such as Microsoft Paint and Adobe PhotoShop are registered
here. A click of an image-editing icon on MagicView UVC enables you to edit the image
being displayed. Besides, image viewers can be registered here too.
ⓖ
Path for Teaching Mode
The folder is storing images in Teaching Mode. You can call up images from Annotation
Mode or can save images including annotations you have made on them.
ⓗ
Image Save Format
The format that captured images are saved in is determined here. JPG is the default.
ⓘ
Menu Window Size
The size of menu can be determined according to the resolution of a monitor.
ⓙ
Register Email
It is convenient to register web-based email URLs you use frequently.
III_Using MagicView UVC

MagicView UVC-500 v1.03User Guide
15
(3) Operating basic menu window
①
Viewing the program and minimizing it
Click "Minimize"
to minimize the program on the taskbar. To restore it, select the
MagicView UVC program on the task bar.
②
Minimizing the menu panel
Click "Minimize into icon" at the bottom of the menu panel, and the menu panel
is turned into an icon while the image is still being displayed. To restore it, double click the
icon.
Click
Click
Click
Double
Click
Hide
Hide
III_Using MagicView UVC

MagicView UVC-500 v1.03User Guide
16
③
Changing modes
MagicView UVC offers 2 modes:
Real-time Mode: Documents or objects are projected and displayed in real time.
Teaching Mode: You can annotated directly over the image displayed and save it including
your annotations for later use.
Changing to Teaching Mode: Click "Teaching Mode"
in "Real-time Mode."
Changing to Real-time Mode: Click "Exit"
to get out of "Teaching Mode."
<Real-time Mode> <Teaching Mode>
Click
Click
Hide
III_Using MagicView UVC

MagicView UVC-500 v1.03User Guide
17
④
Navigation
Check the whole screen that appears on the MagicView UVC camera at a glance through
the navigation window, and then move the screen to the part of the image that you want
to look at.
Display area: a part of the whole image that you want to be displayed on the screen. You
can set the part to display by moving the selection box with the mouse.
Enlarging/Reducing rate: displays the rate of image enlarging and reducing. You can use
the mouse wheel or the +/- button.
Camera resolution: displays the current resolution of the camera. It can be changed in
"Custom Setting."
Hide/View: you can show or hide the image on the navigation window. Hiding image on
the navigation window can improve your computer's performance.
Image of entire page
Enlarging/Reducing rate
Camera resolution
Hide/View
<Navigation>
Display area
Hide
III_Using MagicView UVC

MagicView UVC-500 v1.03User Guide
18
(4) Viewing images on MagicView UVC-500
①
Installing the MagicView UVC document camera
ⓐ
Connect the MagicView UVC document camera to a computer
ⓑ
Run the MagicView UVC icon on the desktop to get images. (If you don’t obtain any
image, read through the front chapters of this Manual again)
ⓒ
The MagicView UVC document camera incorporates a three-joint and head design for
easy movements of rotation and extension. Bend or stretch joints to adjust height and
rotate the head to your desired position.
ⓓ
When all the joints are stretched and still do not gain a desired height, place the
MagicView UVC camera on the aluminum case. The strong magnet on the top of the
case allows the MagicView UVC camera to be fixed.
②
Adjusting focus
Automatic focus: MagicView UVC-500 features automatic focus adjustment capability.
Click "Autofocus"
on the menu panel to gain focus. When the focus of an object is
changed, you need to click the icon again to take the focus again.
The autofocus used in MagicView UVC is single type, which means that the camera does
not cause a dizziness resulting from its trying to take the focus regularly.
When MagicView UVC does not capture any image, it automatically turns off its camera
to improve your computer's performance. The camera comes on again and takes the
focus automatically in three seconds.
MagicView_
500AF
a
a
a
b
a
c
a
d
III_Using MagicView UVC

MagicView UVC-500 v1.03User Guide
19
③
Rotation
Click "Image Rotate"
while the camera is fixed, and you can make a 90 degree
clockwise turn per each click.
When the angle is at 90˚ or 270˚ (where images on the navigation window are viewed
vertically), the display speed may be lower than when there is no rotation. If possible, 0˚or
180˚(horizontal images) is recommended.
Determination of a basic rotation at the Configuration will save you the inconvenience of
setting rotational angles at each use.
④
Illumination
Click 'LED Off'
to turn on the LED lighting for a better view in dark environments.
⑤
Brightness adjustment
Move the slide bar of "Brightness Control" and "Contrast Control" in the menu panel to the right
or left to adjust brightness and contrast in necessary.
At "Filter" under "Custom Setting," you can make more
detailed adjustments.
III_Using MagicView UVC

MagicView UVC-500 v1.03User Guide
20
2. Using Real-time Mode
There are several different ways of saving images projected with MagicView UVC-500.
You can save the entire image being projected or just a portion of the image.
(1) Saving the entire image in jpg (image file)
①
Click "Capture" in the menu panel to save the entire images displayed in the
navigation window.
②
Saving Location/Format: Click "Custom Setting" to set or change a save location
in the "Path for Captured." You can also set or change a save format in the "Image Save
Format."
③
Click "Folder Open" to view the index of saved files.
Capture
Custom
Setting
2
1
Folder
Open
3
Hide
Hide
III_Using MagicView UVC

MagicView UVC-500 v1.03User Guide
21
(2) Saving a partial image
①
Click "Area Select" in the menu panel
②
Select a part of the image you want to save by dragging the mouse while holding the
right button.
③
Click "Save" in the submenu appearing after selecting the desired part to save the
selected part.
④
If you want to copy the selected part to clipboard, click "Copy" in the submenu.
⑤
Paste it into editable formats including Microsoft Office files such as XLS, DOC, and
PPT.
(3) Saving continuous images
①
Click "Continuous Capture" in the menu panel,
then the submenu appears. (see the picture on the
right.)
②
Set "Interval" and "Count", and click "Start" to save
images continuously.
2
Save
3
Area
Select
1
Copy
4
Paste
ctrl+v
5
Hide
III_Using MagicView UVC

MagicView UVC-500 v1.03User Guide
22
(4) Saving in Teaching Mode
In Teaching Mode, you can save images with their annotations made directly over them.
①
Click "Save" in the "Teaching Mode" menu panel to save the entire image including
its annotations
.
②
If you want to save only a part of the image, click "Select Area" to select the part of the
image you want to save, and then click "Save" to save the selected part.
③ Save Location: You can change the save location in "Path for Teaching Mode" under "Custom
Setting"
(5) Save video files
①
Click "Video Record" in the menu panel, then the submenu appears to save in a
video format.
②
Click "Record" to change the screen mode, and it starts recording itself.
Video
Recording
1
Start
Capturing
2
Save
Configuration
1
4
Area
Select
2
Save
3
III_Using MagicView UVC

MagicView UVC-500 v1.03User Guide
23
3. Using Teaching Mode
The Teaching Mode allows you to capture in Real-time capture and to use captured
images as teaching materials.
(1) Execute the Teaching Mode
①
Switching to "Teaching Mode" from "Real-time Mode"
First, set the preferred image size in Real-time mode by using "Enlarge/Reduce" feature.
ⓐ
Click "Teaching Mode" to open Teaching Mode.
ⓑ
Click "Annotation" to start annotating directly over the image.
Click
a
Click
b
Hide
III_Using MagicView UVC

MagicView UVC-500 v1.03User Guide
24
②
Opening "Teaching Mode" directly from "Area Select" using the "Crop" button.
ⓐ
Click "Area Select" in Real-time Mode, and click and drag the mouse over the part
you want to select.
ⓑ
Click "Crop" in the submenu, then the Teaching Mode opens automatically.
ⓒ
Locate the selected part where you want it to be on the screen.
ⓓ
Adjust the image size using the round handle near the top right corner of the image.
ⓔ
Double click the image.
(2) Annotating in the "Teaching Mode"
To annotate, click "Annotation"
and move the mouse cursor with the right mouse
button held down.
To move the background, click "Move" and move the mouse cursor with the left
mouse button held down.
To remove annotations. click "Eraser" click, then 3 different erasers appear.
"Color"
To choose pen colors.
"Line Width"
To Choose line width.
"Shape"
To choose shapes.
"
Save" To save images with annotations.
"File Open"
To call up saved images with annotations.
Click
b
Click
a
Korean food
It is very different from
Western food !!
c
Click
Drag
d
Image
Double click
e
Click
b
III_Using MagicView UVC

MagicView UVC-500 v1.03User Guide
25
1. Name of Each Part of User Interface
(1)
Real-time Display Mode
The Real-time Mode is to show projected images live in Real-time. Images are displayed
on a resolution set in the Custom Settings menu.
Autofocus
LED
Off
Image
Rotate
Negative
Image
Enlarge Reduce Comparative
Screen
Area
Select
Email PicasaImage Edit
Teaching Mode
Minimize into Icon
Custom
Setting
Minimize Close
Brightness
Control
Contrast
Control
Capture Continuous
Capture
Video
Recode
Folder
Open
<Real-time Display Mode>
Hide
Navigation
Enlarge/Reduce Ratio
Camera
Resolution
Hide
IV_Software Features

MagicView UVC-500 v1.03User Guide
26
(2) Teaching Mode
In the Teaching Mode, projected images can be captured and used as teaching materials.
Handwriting annotations can be added directly to the captured image.
Image Open | Enlarge | Reduce |Exit
Comparative Screen Submenu
Continuous Capture Submenu
Record | Play | Stop | Exit
Video Record Submenu
Save | Copy | Crop | Exit
Area Select Submenu
<Teaching Mode>
File
Open
Move Annotation Shape
Save Eraser Line Width Color
Enlarge Area
Select
ExitReduce
Custom
Setting
Minimize Close
Save | Copy | Crop | Exit
Area Select Submenu
IV_Software Features

MagicView UVC-500 v1.03User Guide
27
2. Using Features
(1) Custom Setting
A click of "Custom Setting"
on the menu panel will display the configuration window
pane as shown below
ⓐ
Video Device
This function is used to select the MagicView
UVC camera. If there are several cameras
connected, it should be selected manually.
ⓑ
Re-search
If the MagicView UVC document camera is
connected while the program is running, the
progra m does not reco gnize the camera.
Press the Re-search button for the program to
recognize the MagicView UVC camera.
ⓒ
Drive Select
If multiple camera drivers are installed, you need
to select the MagicView UVC camera driver. The
driver name may appear differently depending
on your computer. Select "USB 2.0 PC CAM" or
"MagicView UVC-500." If there is no image appearing after selecting one of those drive
names mentioned here, check if there are multiple drivers of the same name; if so, try
another.
ⓓ
Detail configuration
It enables you to manually control the following functions: abrightness, exposure,
contrast, and colors of the camera. Set values will persist when the program restarts.
a
b
d
e
f
g
h
i
j
k
l
m
MagicView UVC-500
c
IV_Software Features

MagicView UVC-500 v1.03User Guide
28
①
Brightness: adjusts the brightness of an image. The further the bar moves to the right,
the brighter it becomes.
②
Contrast: adjusts the contrast of an image. The further the bar moves to the right, the
higher the contrast.
③
Color: adjusts the colors of an image. The left side indicates stronger red color, while
the right side stronger blue color.
④
Chroma: adjusts the chroma of an image. The further the bar goes to right, the darker
the colors.
⑤
Clarity: adjusts the clarity of an image. The further the bar moves to right, the higher its
clarity, but the coarser it becomes.
⑥
Gamma: adjusts the gamma value of an image. Adjust the value adequately enough to
make the boundary of the image visible.
⑦
White Balance: adjust the whiteness of an image. It is recommended to set it to
Automatic.
⑧
Backlight Compensation: compensates for strong backlighting, so that images appear
clearly instead of as silhouettes.
1
2
3
4
5
6
7
8
IV_Software Features

MagicView UVC-500 v1.03User Guide
29
⑨
Camera control: adjusts the focus and exposure of the camera. It is recommended to
set it to Automatic.
⑩
Exposure: uncheck the automatic exposure and adjust the exposure manually for the
screen to change faster.
ⓔ
Camera Resolution
This function determines the resolution displayed "Real-time in the Camera Mode." When
it is set too high, images may not be displayed on a low-performance computer. Reduce
the resolution to a lower output until images become visible.
When resolution is high, processing speed slows down, whereas when resolution is
low, the speed goes up and yet the quality is degraded. It is important to determine an
appropriate resolution according to its purpose when a digital image presenter is used.
9
10
IV_Software Features

MagicView UVC-500 v1.03User Guide
30
ⓕ
Recording Resolution
This function determines the settings that are
required to record camera images in a video
format.
There are two modes of 640*480 and 800*600
available- the saving of a file in a high resolution
requires three times as large size as is required
in a low resolution.
ⓖ
Basic Rotation
This function determines a basic rotation angle
at which an image is viewed against its normal
position in the camera. It is convenient if the
rotation angle is determined according to the
location where a frequently used presenter is
situated.
ⓗ
Path for Captured
This function determines the path for the storage of teaching files to be used in the
Teaching Mode. You can open and save files in this Mode.
When you press the Save button in the Teaching Mode to store a file, you can select the
file-saving folder and a file name.
ⓘ
Image Editor
Register preferred image editing programs. MS paint is the default program.
ⓙ
Path for Teaching Mode
To choose a folder to save an image or video that will be captured in the Real-time mode.
Captured images or videos are automatically given a name before being saved.
To open the folder, press the Folder Open button in the Real-time Mode.
a
b
d
e
f
g
h
i
j
k
l
m
MagicView UVC-500
c
IV_Software Features

MagicView UVC-500 v1.03User Guide
31
Drag the MagicView logo at the top
right corner of the menu bar to move
the menu bar.
Click "Minimize"
to "minimize"
the menu bar into an icon. To restore
the default settings of the menu
panel, double click the icon.
ⓚ
Image Save Format
To choose a file format to use for saving images or videos captured in Real-time mode.
ⓛ
Menu Window Size
To set the menu window size. It is recommended to choose "Enlarge" if the resolution
is no higher than 1024x768. For higher resolution than 1024x768, "Reduce" is
recommended.
ⓜ
Register Email
Allows users to register URLs for email accounts that they often use.
(2) How to use menu panel GUI
①
Move menu bar
②
Minimize menu bar into icon
IV_Software Features
Hide
Hide

MagicView UVC-500 v1.03User Guide
32
③
Minimize/Close
Minimize: minimize the MagicView UVC program into a tray icon.
Close: close the MagicView UVC program that is currently running.
④
Navigation
The Navigation displays the whole image being projected at once. As shown in the
picture below, the white rectangular box indicates the area of the projected image which
is currently appearing on the computer screen.
Image of entire page
Enlarging/Reducing rate
Camera resolution
Hide/View
<Navigation>
Display area
Hide
Hide
IV_Software Features
MagicView UVC-500 v1.03User Guide
33
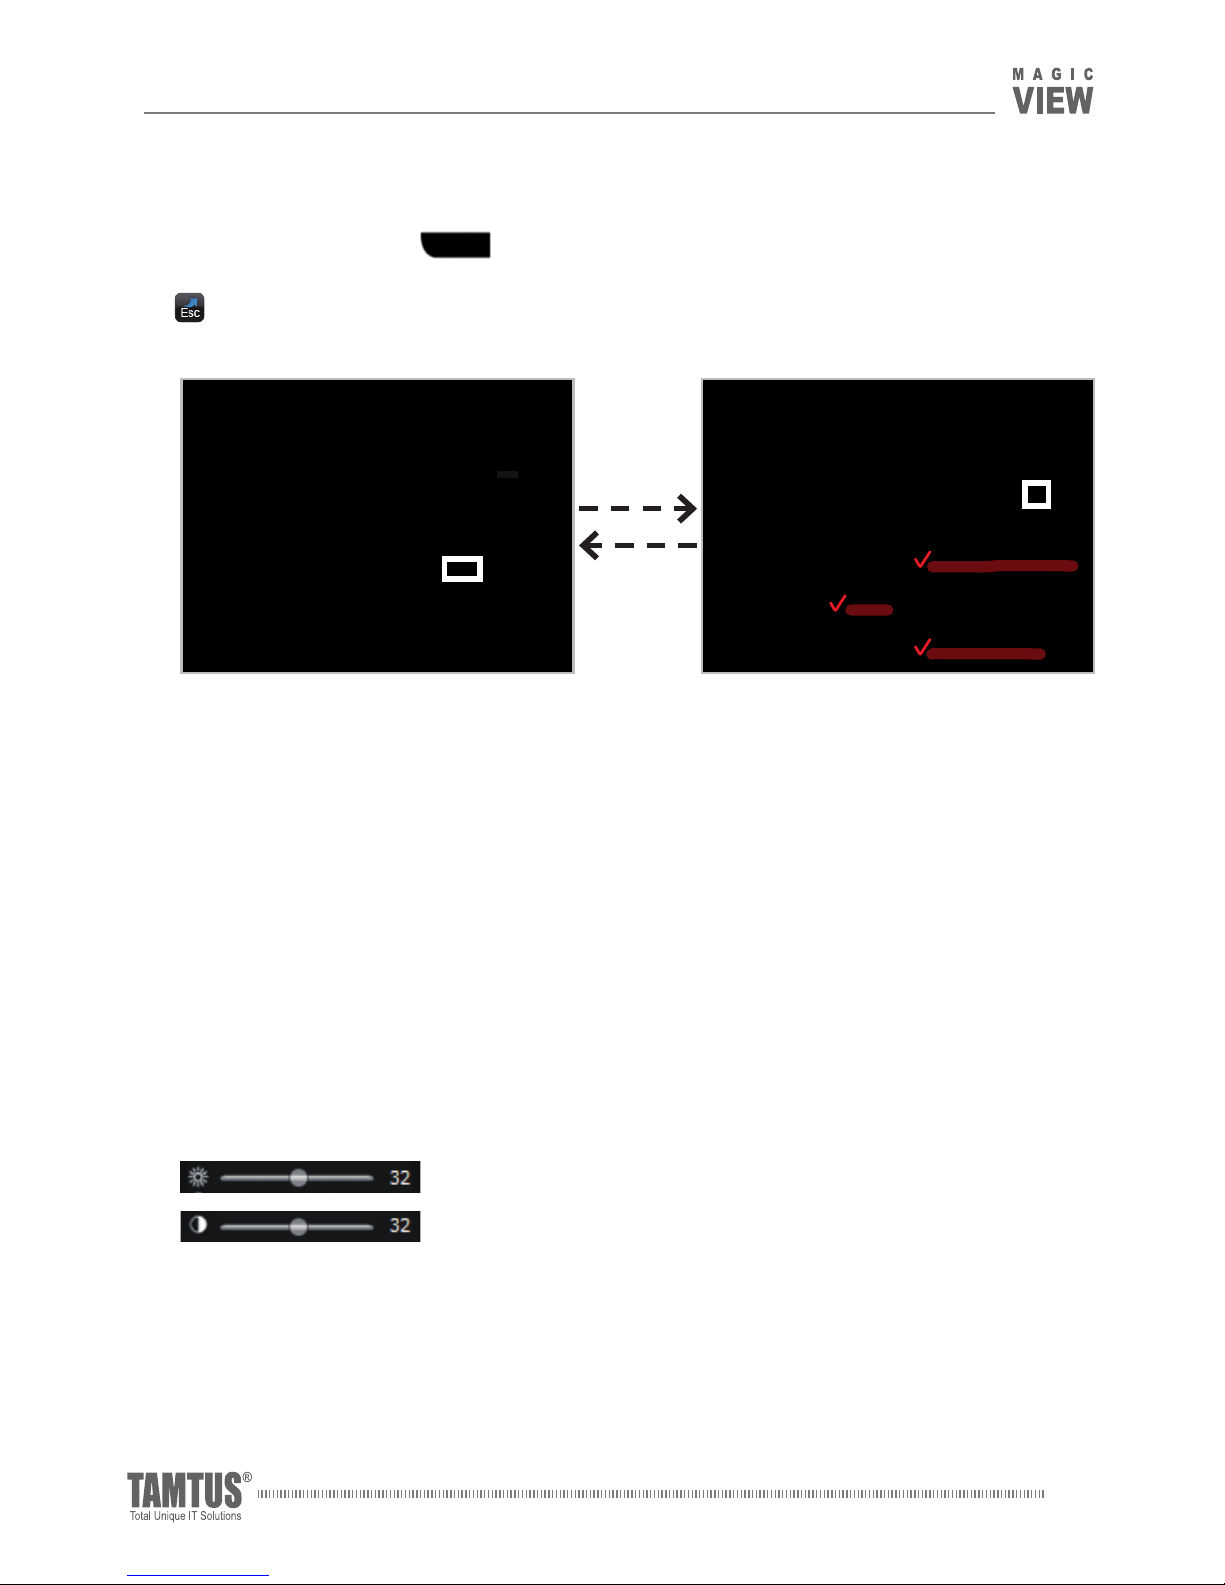
⑤
Change modes
Click "Teaching Mode"
at the bottom of the menu panel allow to switch from the
Real-time Mode to the Teaching Mode. To return to the Real-time Mode, click the "Esc"
button in the Teaching Mode.
(3) Using the "Real-time Mode"
①
Adjust camera settings
You can easily adjust the brightness and contrast of the projected image in the menu
panel. You can also adjust the image quality of MagicView at "Custom Setting."
Adjust the brightness of the camera image.
Adjust the contrast ratio of the camera image.
<Teaching Mode>
Allows users to capture the projected
image, save it on the computer and
annotate directly on the saved image.
<Real-time Mode>
Di s p l ay s real tim e image s that
MagicView projects.
IV_Software Features
Hide

MagicView UVC-500 v1.03User Guide
34
②
Using the buttons
Autofocus
Control
You can refocus the camera if the camera loses focus.
LED Off You can turn on or off the LED lights built into the camera head.
Rotation You can rotate images 90 degrees clockwise.
Inversion You can make negative images positive and vice versa.
Capture
You can capture the projected image and automatically save in a selected
folder.
Continuous
Capture
You can shoot time lapse. You can set time interval and the number of
pictures to be taken.
Video
Recording
You can capture videos and save them on the computer.
Start recording
Stop
Play
Exit
Folder
Open
You can open a folder where a captured image or video is saved.
Enlarge You can enlarge the size of projected image.
Reduce you can reduce the size of the projected size.
IV_Software Features

MagicView UVC-500 v1.03User Guide
35
Comparative
Screen
Divides the screen into two parts to view a captured image and a realtime image at once.
Adjust the split ratio by moving the central bar to the right or left.
Open the submenu to open, enlarge, reduce or close images being
displayed.
Area Select Select an area of the whole image.
Save: Automatically saves the selected area of an image.
Copy: Copies the selected area into clipboard.
Crop: Crops the selected area and paste onto a canvas.
1.
Click and drag the cut image to where you want to place it.
2.
Resize the cut image by clicking and dragging ay of the 4 corner
points of the image.
3.
Double click the image to fix it, and make your own annotations
over the image.
Exit: Closes the Area Select mode. Another way to close the Area Select
mode is click the Area Select button again to end the Area Select
mode.
Image Edit
Opens the displayed image in an image editing software you have
registered with the MagicView program. <Custom Setting→ Select a
registered image editing software.>
Emai
l
Opens a Web-based email you have registered at "Custom Setting."
Picasa Opens the Google Picasa software.
IV_Software Features

MagicView UVC-500 v1.03User Guide
36
(4) Using the Teaching Mode
In Teaching Mode, you can capture real-time camera images. Also you can call up saved
images and annotates them directly.
Clicking "
Annotation"
(Teaching Mode) in Real-time Mode transform into "Teaching
Mode", then you can make annotations directly over the image.
File Open Imports new images for handwriting on board.
Move
Moves the location of images by dragging mouse including your
annotations placed on the image.
Annotation Annotates directly over the image being displayed.
Shape
Draws shapes such as a straight line, rectangle, color filled rectangle. In
the submenu, you can choose a shape.
Erase
Removes annotations you have made on the image.
General Eraser: Erases mouse-moving parts only.
Section Eraser: Deletes designated area by dragging mouse.
Whole Eraser: Deletes all handwriting.
Line Width Select the line thickness of the handwriting pen or eraser.
Color Select Selects the color of the handwriting pen.
Enlarge
Increase image sizes by 200% at a time.
Note: the scale of image enlargement or reduction in Teaching Mode is
large. It is recommended to make the image size you prefer in Real-time
Mode, before turning into Teaching Mode.
Reduce Reduce image sizes by 50% at a time.
IV_Software Features

MagicView UVC-500 v1.03User Guide
37
Area Select Select an area of the whole image.
Save: Automatically saves the selected area of an image.
Copy: Copies the selected area into clipboard.
Crop: Crops the selected area and paste onto a canvas.
1.
Click and drag the cut image to where you want to place it.
2.
Resize the cut image by clicking and dragging ay of the 4 corner
points of the image.
3.
Double click the image to fix it, and make your own annotations over
the image.
Exit: Closes the Area Select mode.
Exit
Closes the Teaching Mode and enter into the Real-time Mode.
IV_Software Features

MagicView UVC-500 v1.03User Guide
38
If you have problems while using the MagicViewDigital Presenter or installing the driver and
program see below for the checklist and troubleshooting guide:
(1)
What to do if you don't see the picture screen when connecting the USB cable to your
PC to run the MagicViewprogram.
▷
If you don't see "Device Name" unchecked on the program default screen, the driver
has not been installed or the Windows program does not recognize the MagicView
system. If the video and camera drivers are unchecked or you see an exclamation mark
or a question mark, right click the mouse and choose the "Driver Update" menu to
locate the driver that has already been installed on the PC. If other drivers are installed
on the PC, The MagicViewcan recognize them first. Press the "Change Device" button
and choose "PhiontechOC-300 Video Camera."
(2)
What to do if the "Digital Presenter" screen does not appear while you shoot video or
you get an error message saying "Error 80040154": What to do if you cannot initialize
"Video Mixing Renderer9" or "Error 80040273": What to do if you cannot initialize
"Video Mixing Rendering."
▷
First, verify whether DirectX9.0 or a previous version has been installed on the PC. To
verify your DirectX version, go to the menu, click "Start\Execute", enter "Dxdiag" in the
text window. Once the information window is open, click on the"system tab" and you'll
see the DirectX version that is installed on your computer. If you do not have DirectX9.0
on your PC, install the DirectX9.0 available on the CD.
(3)
What to do if you still have a problem, although you have DirectX9.0 on your PC, set
the graphic accelerator to maximum.
▷
To set the graphic accelerator to maximum, go to the control panel, "Display", "Setting",
"Advanced", "Troubleshooting" and set to "Maximum." Or, go into the DirectX diagnosis
tool and go into the display tab and enable "DirectDraw", "Direct3D" and "AGP.
"
V_Troubleshooting

MagicView UVC-500 v1.03User Guide
39
(4)
What to do if the graphic card does not properly support Direct3D acceleration, and
you can't start MagicView.
▷
You need a graphic card that supports Direct3D acceleration.
(5)
What to do if you get an error when pressing the "Shot" button, due to a lack of video
RAM.
▷
If the graphic card video memory is too weak, you will get an error when capturing a
image. Set the hardware acceleration to minimum, or update the graphics card.
Precautions
Here are some care tips for when using this product:
▷
Use a clean, soft cloth to remove any dust from around the body of your camera.
▷
Do not use a cloth that contains methane alcohol or ammonia to wipe the camera.
▷
Do not let water run into the camera head.
▷
Do not leave fingerprints or other smudges on the camera lens.
▷
Use a soft cloth or cotton swabs to wipe off any dust on the camera lens.
▷
Avoid storing or using the camera in a humid or dusty environment.
▷
Do not expose the camera to direct sunlight or excessive heat.
▷
Do not point the camera lens directly at the sun.
VI_Precautions

Tamtus co., Ltd.
Tel +82 32 328 0244
Fax +82 32 328 0242
Web www.tamtus.co.kr
 Loading...