

Page 1
1) This kit is designed for experienced model makers. It may be
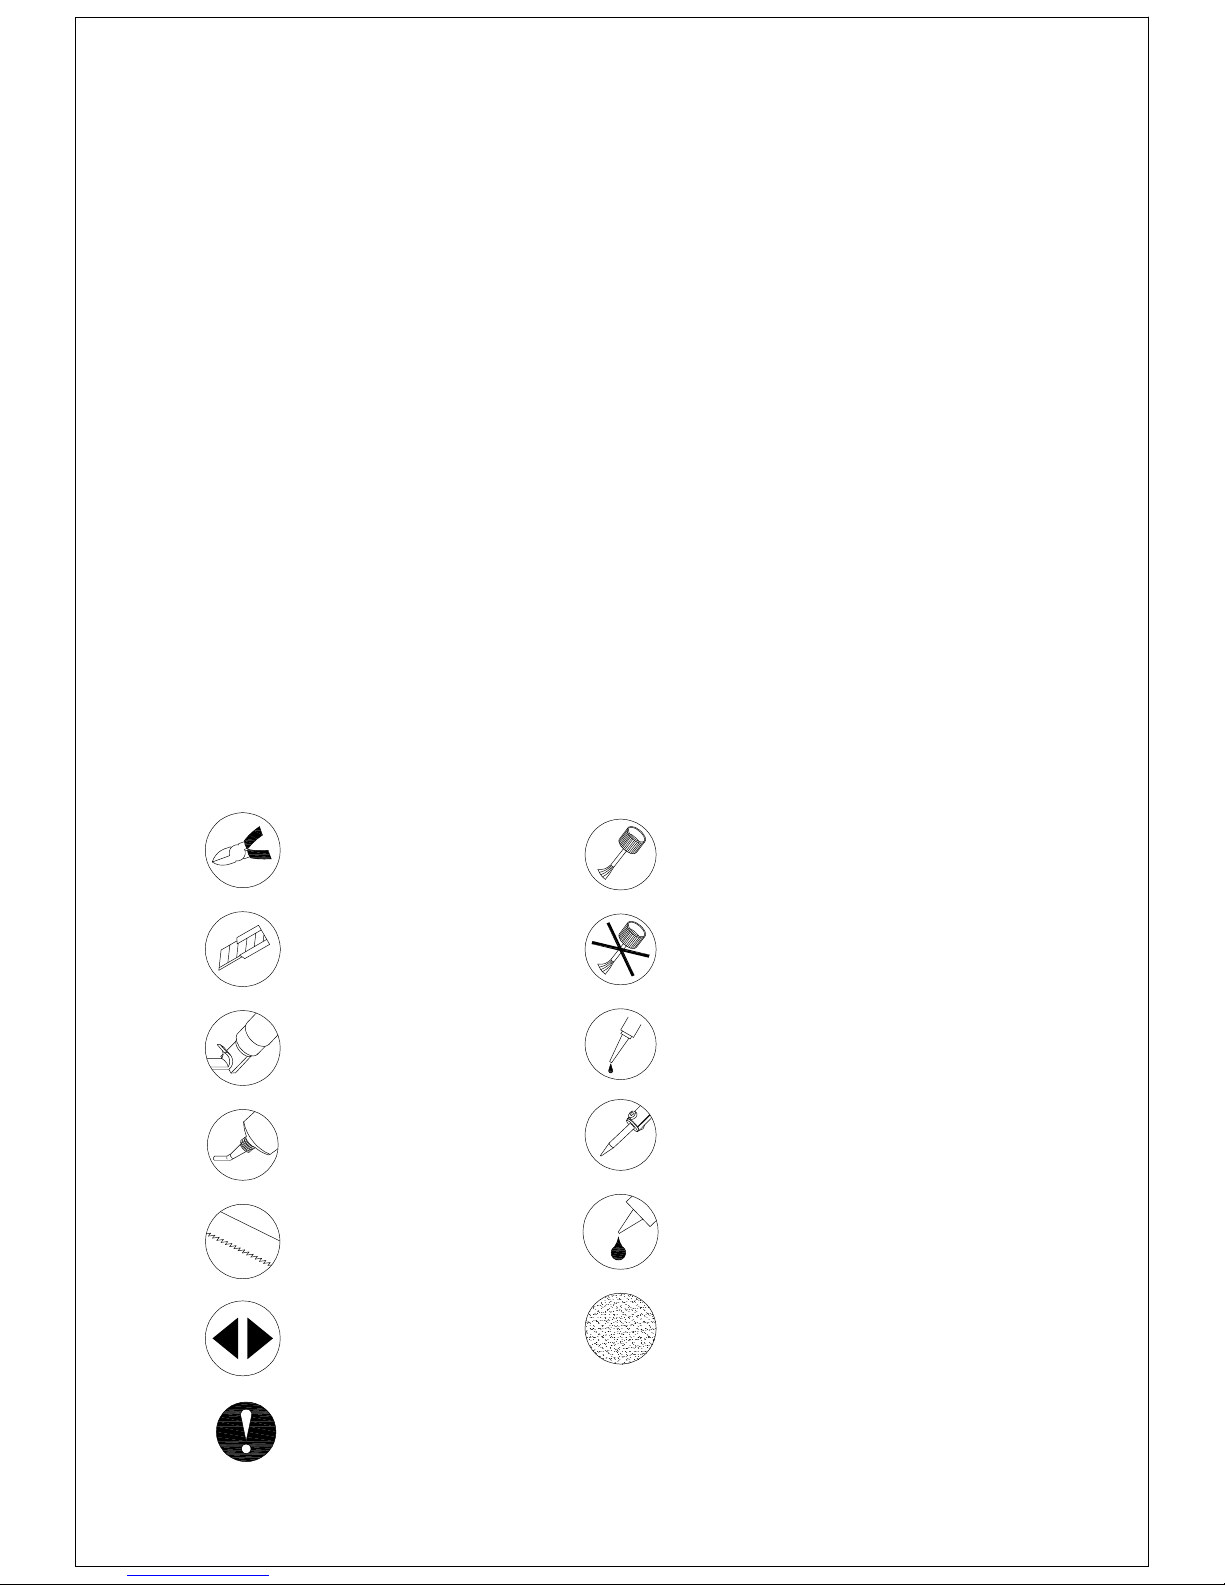
do not apply cement
modelling knife
4) Visit www.35rctank.com for addition tips and update information.
if you have the required skills and tools.
difficult for beginners. Please read this manual thoroughly to see
3) Keep room well ventilated when working with cements, paints
taken to avoid injury. Wear hand gloves and eye protection
2) Cutting tools are used frequently in this kit. Extra care should be
Attention!
carving knife
spectacle if necessary.
and organic solvents.
side cutter
apply instant glue
solder
apply cement
1/35 T55A
RC Conversion Kit for TAMIYA
Attention!
User Manual (Version 1.0)
(Item no: 35257)
all purpose glue
both sides
hand saw
polish with sand paper
apply lubrication oil
Copyright 2017 www.35rctank.com Page 1
Page 2
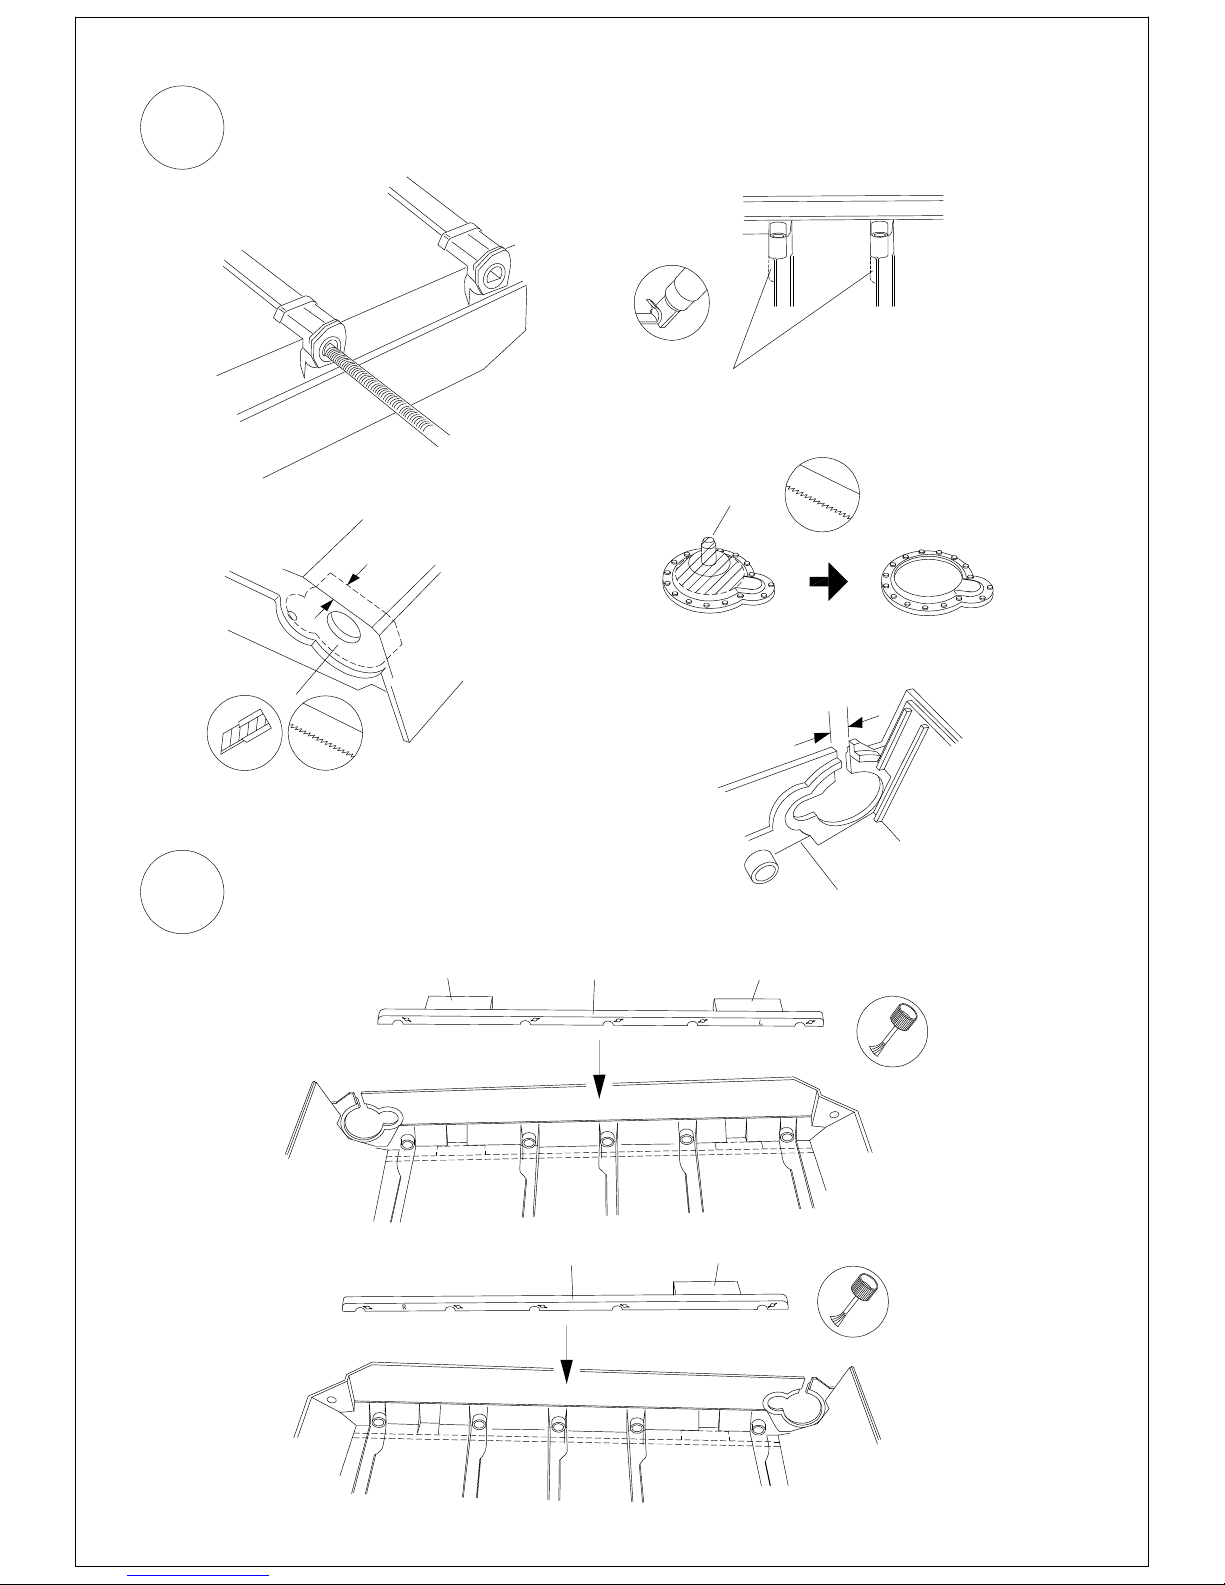
Lower hull
1
Copyright 2017 www.35rctank.com Page 2
make round holes with a circular file
lower hull
lower hull inside
to make room for torsion bars, remove 0.5mm
4mm
remove
A3
remove
4mm
make slot for sprocket
set screw
2
Torsion bars
torsion bar mount (L)
4.5mm spacer
4.5mm spacer
torsion bar mount (R)
4.5mm spacer
Page 3
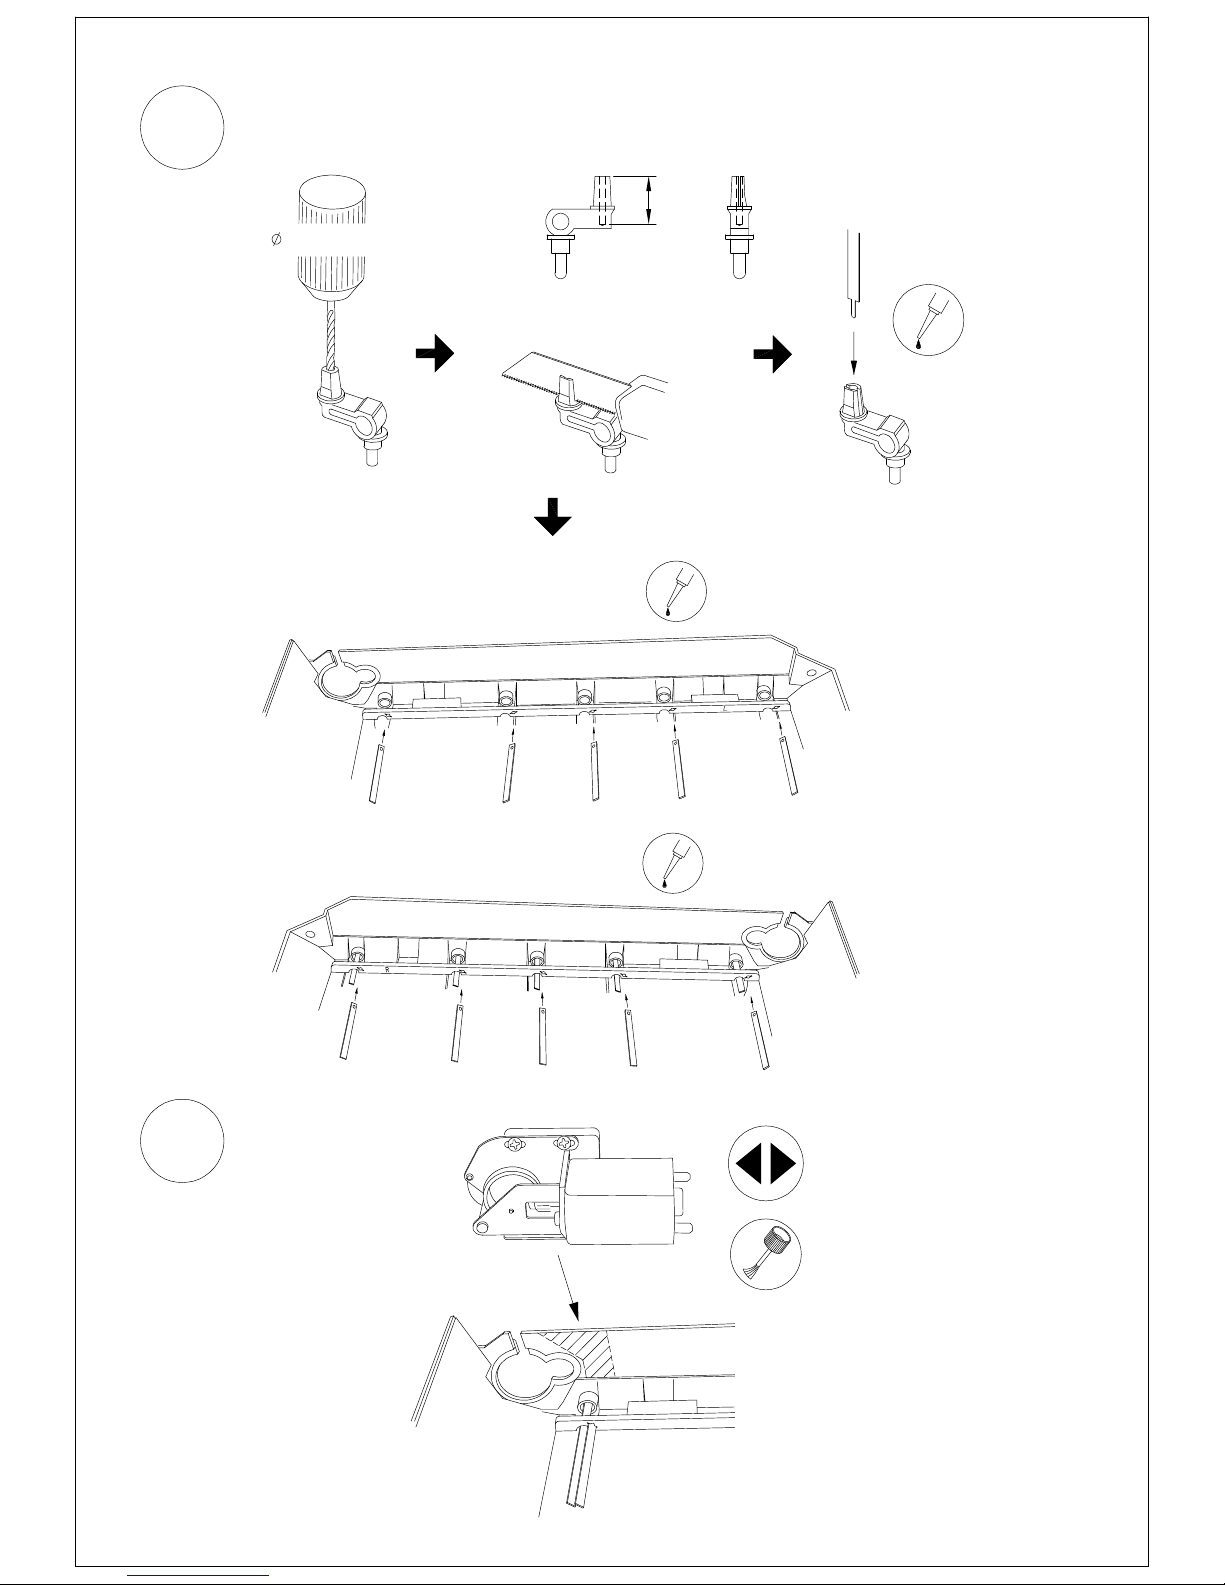
3
2
Torsion bars
Gearbox
Copyright 2017 www.35rctank.com Page 3
drill 1.2 x 8mm deep hole
8
A12, A13, A36, A37
cut 0.3mm slot
metal torsion bar
insert torsion bars into slot
insert torsion bars into slot
Page 4

6
Speaker
Copyright 2017 www.35rctank.com Page 4
4
Sprocket and wheels
do not insert polycap
remove
A10
for smooth wheel rotation,
enlarge hole with 4.2 drill
4.2
5
Turrret ring gear
turret ring gear
Attach B9 temporary
for alignment
Turret ring gear
upper hull
B9
B9
remove
1mm PS partition plate
For smooth turret rotation, remove
sharp edges with abrasive paper
Page 5

7
Connecting upper and lower hull
Copyright 2017 www.35rctank.com Page 5
16
5
5
5
13
1mm PS plate
1mm PS plate
X4
X4
attach to lower hull
8
Main gun
remove
alignment mark
metal barrel
Drill 2.5mm through hole
enlarge hole for recoil spring
Page 6

8
Main gun
Copyright 2017 www.35rctank.com Page 6
C15
turret servo assembly
recoil spring
insert barrel and secure set screw
9
Turret servos
Drill 4.5mm screw holes
M2x5
attach to upper turret
10
Main gun LED
press fit here, do not apply adhesive
LED expose during recoil
Page 7

ACU connections
secure ACU with M1.7 screws
keep cables away from moving parts
12
Attach turret
13
Install MTC-2 mini tank controller
Secure MTC-2
by M2 x 5 screws
Copyright 2017 www.35rctank.com Page 7
11
M2x5
ACU mount
secure cables with adhesive tape
notice cable positions
MTC-2 mount
MTC-2 power switch
(make opening in lower hull is optional)
Page 8

14
Lower hull connections
micro receiver
Spektrum 2.4G
AR6110e
1 Cell 3.7V Lipo battery
carboard
Copyright 2017 www.35rctank.com Page 8
16
Using Lipo battery
2) Make sure battery is small enough to put inside the lower hull.
3) Solder connector for MTC-2 as shown. Keep original connector for charging.
safety precautions and always use a dedicated Lipo charger.
Lipo battery can be dangerous if not use properly! Follow all
MTC-2 power connector
MTC-2 will damage if polarity is not correct!
1) Use 3.7V/1Cell Lipo battery (300-1000mAh)
3
.
7
V
/
1
Cell
L
i
p
o
3
0
0-10
0
0m
A
h
solder and wrap with
heat shrink tubing
+
-
(300 - 1000mAh)
secure cable with
adhesive tape
15
Main gun search light
press fit to C15
do not apply cement
remove
search light mount
 Loading...