

CB08H.1
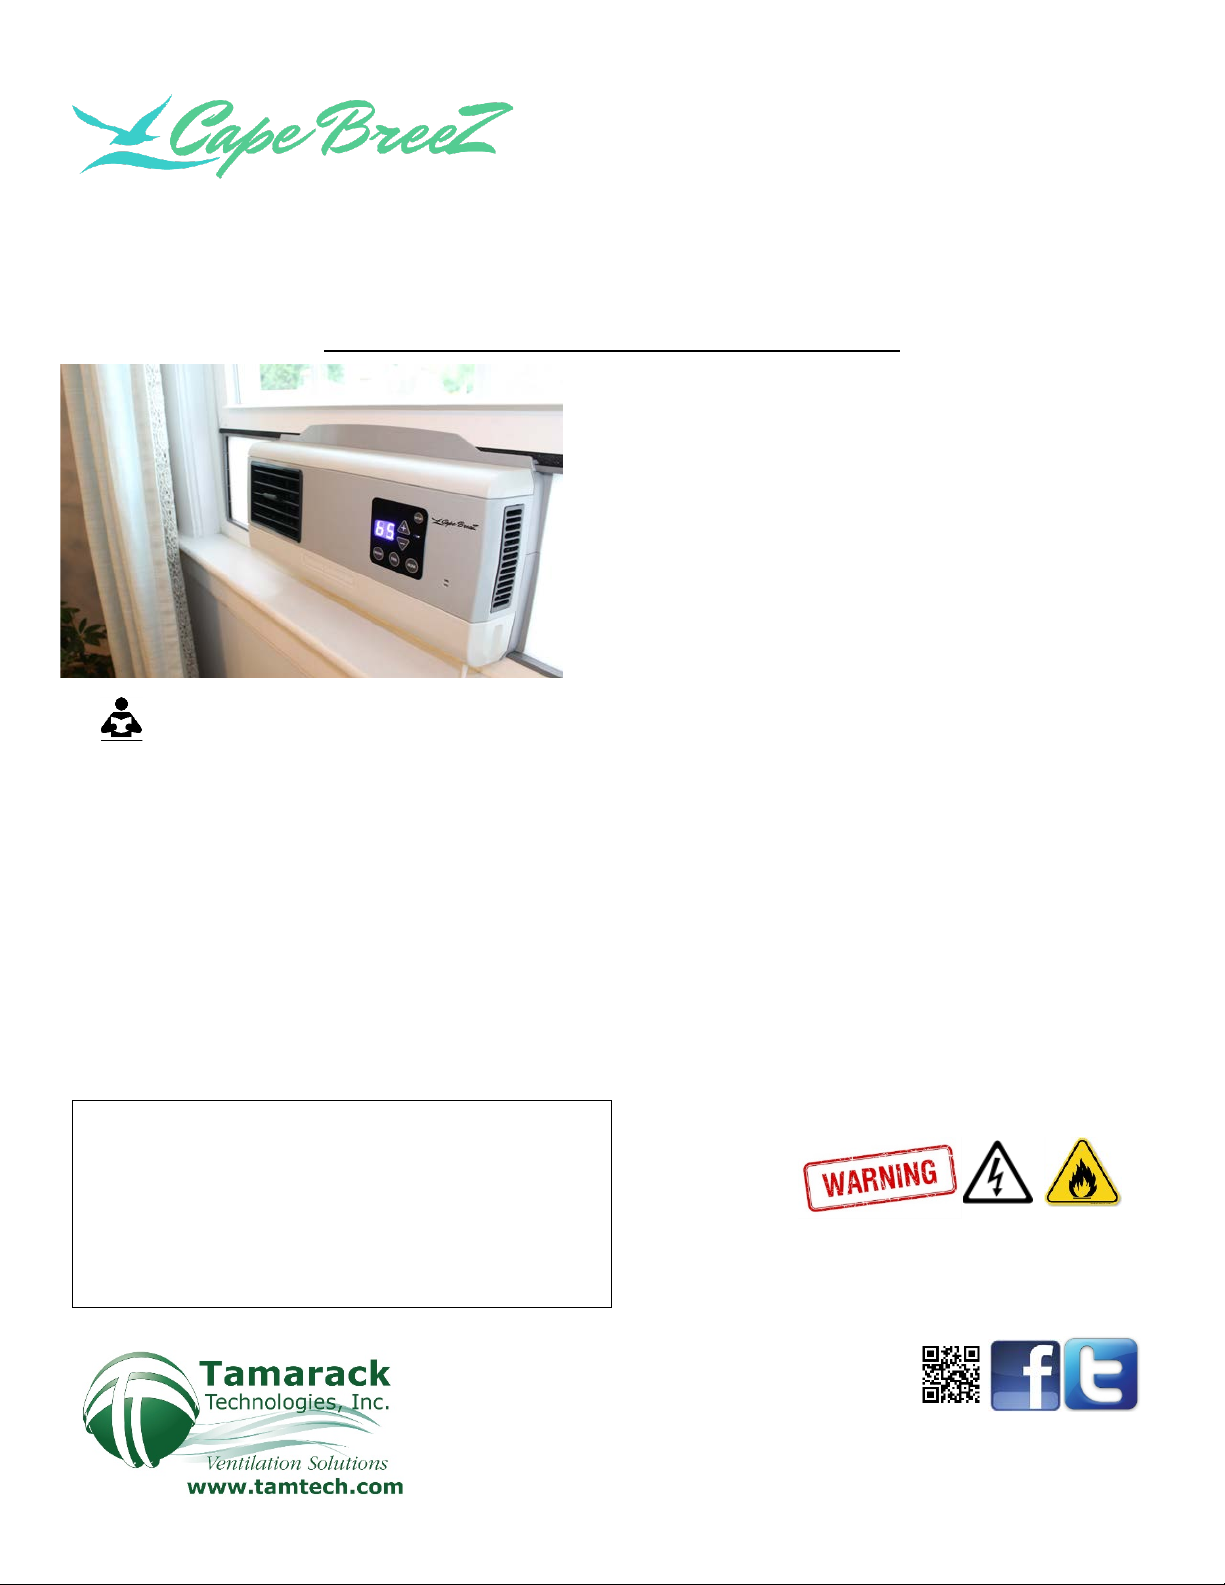
Window Ventilation Economizer (Model TTi-CB08H) for use in double hung window
PRODUCT MANUAL & INSTALLATION GUIDE
Material Included
Tools and Supplied Needed
CapeBreeZ*
CONTENTS PAGE
Warranty 6
READ AND SAVE THESE INSTRUCTIONS
Spring, summer and fall tend to be warm during the day and
cool in the evenings. Use the CapeBreeZ to cool your home
naturally with healthy, filtered air.
The CapeBreeZ is designed to run alone and will also
compliment air conditioning systems by monitoring the
temperature and humidity inside and outside of your home.
This fan is for residential use only. It is not intended to
be used in commercial, industrial or agricultural settings.
READ CAREFULLY BEFORE ATTEMPTING TO ASSEMBLE, INSTALL, OPERATE, OR MAINTAIN THE PRODUCT.
PROTECT YOURSELF AND OTHERS BY OBSERVING ALL SAFETY INFORMATION. FAILURE TO COMPLY WITH
INSTRUCTIONS COULD RESULT IN PERSONAL INJURY AND/OR PROPERTY DAMAGE. KEEP INSTRUCTIONS FOR
FUTURE REFERENCE.
(not provided)
(2) 7" Weather Strip
(2) 42" Weather Strip
(1) 42" Center Sash 2ply Insulation
(1) Wire Tie, 6"
(1) Support Bracket
*
Includes factory installed filter
(1) Leveling Adjustment Screw 1 ¾ x 1"
(3) Installation Screws #8 x ¾"
(2) Slider Extenders
(2) Insulated Foam Panels 7" x 9"
Glue Dots
• Phillips Screwdriver
• Scissors
• Drill, 3/16 bit (Suggested for metal clad
windows and may be helpful on vinyl or wood
window sills)
Important Safety Instructions 2
Installation 3
Operating Instructions 4
Troubleshooting & Maintenance 5
Specifications 5
Danger, Electrical Shock, Fire
20 Patterson Brook Rd / West Wareham, MA 02576
774-678-4433 / 800-222-5932 / Fax 774-678-4436
IMPORTANT SAFETY INSTRUCTIONS
WARNING
THE FOLLOWING:
1. Make certain the power source conforms to the electrical requirement of the fan.
2. Make sure the room is equipped with a working smoke detector.
3. Use this fan only as described in this manual. Any other use not recommended by the manufacturer may
cause fire, electrical shock, or injury to persons.
4. Keep the fan out of the reach of children.
5. Unplug the power cord before installing, maintaining, or moving the fan. Do not depend on the on/off switch
as the sole means of disconnecting power.
6. The fan must NOT be used in potentially dangerous locations such as flammable, explosive, chemical-laden or
wet atmospheres.
7. Where possible, avoid the use of extension cords because an extension cord may overheat and cause fire. If
you must use an extension cord, minimize the risk of overheating by using the shortest cord possible and
ensuring it is UL listed. NEVER use a single extension cord to operate more than one fan. DO NOT plug fan
into any other cord connected device such as a power strip, core reel, surge protector, multiple outlet
adapters or outlet type air fresheners. The use of such devices may create a fire hazard.
8. NEVER operate any fan with a damaged cord or plug or after the fan malfunctions, has been dropped or
damaged in any manner.
9. NEVER insert or allow fingers or foreign objects to enter any ventilation opening as it may cause electrical
shock, fire, or damage the fan. To reduce the risk of fire, DO NOT block or tamper with the fan in any manner
while it is in operation.
10. Locate the power cord so the fan or other objects are not resting on it. Do not run the cord under carpeting.
Do not cover the cord with throw rugs, runners, or similar coverings. Do not route the cord under furniture or
appliances. Arrange the cord away from traffic areas and where it will not be tripped over.
11. NEVER locate a fan where it may fall into a bathtub or other water container. NEVER use fan where
flammable liquids are stored.
12. DO NOT attempt to repair or adjust any electrical or mechanical functions on this unit. Doing so will void your
warranty. The inside of this fan contains no user serviceable parts. All servicing should be performed by
qualified personnel only.
13. This fan is not suitable for use in agricultural facilities including areas where livestock, poultry or other
animals are confined. Please refer to the National Electrical Code (NEC) Article 547-7 (2008), or applicable
state or local codes or standards relating to electrical requirements for Agricultural Buildings. THIS FAN DOES
NOT MEET THE REQUIREMENTS OF NEC ARTICLE 547-7 (2008).
14. This fan is not suitable for use in hazardous locations. Please refer to the National Electric Code (NEC) Article
500 or applicable state or local codes or standards relating to electrical requirements for Hazardous
locations. THIS FAN DOES NOT MEET THE REQUIREMENTS OF NEC ARTICLE 500(2008).
15.
To Reduce The Risk Of Fire Or Electric S hock, Do Not Use This F an With Any Solid-Sta te Speed Control
Device.
16. This appliance has a polarized plug (one blade is wider than the other) that should not be removed. This is a
safety feature. DO NOT remove, replace, repair, or tamper with the originally supplied plug. This plug is
intended to fit in a polarized outlet only one way. Match the wide blade of the plug to the wide slot. Fully
insert. If the plug does not fit fully in the outlet, contact a qualified electrician. Do not attempt to defeat this
safety feature. If the plug warning label is missing or damaged, call (800)222-5932 Monday through Friday
8 am – 5pm Eastern Time.
: TO REDUCE THE RISK OF FIRE, ELECTRIC SHOCK, OR INJURY TO PERSONS, OBSERVE
2

Figure 1
Figure 2
Installation Instructions – Double Hung Window
Choose a window to install the fan. The fan will fit into a double hung window 15.75" to 36"wide
with an opening height of at least 12". There must be a polarized outlet within 6' from the
window.
1. Remove the window screen
This fan will extend beyond the window screen. The unit will be sealed in the installation process. The unit also has a
filter that will block insects and bugs. A screen is not necessary with this unit.
2. Install the support bracket
Install the support bracket in the center of the window using 3 #8 x ¾ " screws (provided) to attach it
to the outside window sill. Mark the location of the screw holes on the window sill. Drill 3/16” pilot
holes for the screws. Insert the leveling screw at the end of the bracket. Adjust the height of the leveling
screw so the top is level with the highest part of the window sill.
3. Install the extenders
Remove the 2 end screws from the window bracket. Loosen the center screw. Insert the
extenders into the window bracket and secure with the 2 end screws. Tighten the middle screw.
4. Install the bottom weather strip (Figure 1)
Place 4 glue dots on the window sill where the CapeBreeZ will be placed. Cut a piece of the 42" weather strip to the
window width. Attach the weather strip to the window sill.
5. Install the weather strips
Place 3 glue dots on the sides of the windows. Attach the 7" weather strips.
6. Install CapeBreeZ in the window
Place CapeBreeZ so it is centered in the window. Slide the extenders to the window frame and into the window channel.
7. Install the foam insulation
Measure the opening in the extender. Cut the foam insulation to this dimension using scissors.
Slide foam in slot.
8. Install the top weather strip
Place 2 glue dots on the top of the unit and 2 on the end of the extenders. Cut a piece of the 42"
weather strip to the window width. Attach the weather strip to the unit.
9. Close the window
Close the window so the window frame is between the window bracket and the motor dome. For
increased security, a window lock (not provided) can be installed on the window.
10. Install the center sash insulation (Figure 2)
Cut the center sash insulation to the window width using scissors. Loop wire tie around insulation for easy
removal. Insert it in the gap between the top window pane and the lower window frame with the stiff
insulation facing indoors. For some windows with a narrow opening, the insulation may be need to be smaller.
11. Provide Power
Plug the cord into a polarized outlet. See Safety Instruction #16 for further information.
3

1 Display/Override the hours remaining on the filter (press +/- to reset)
Operating Instructions – Digital Control Panel
The CapeBreeZ can be customized for different conditions or user preferences. The standard settings are:
Fan Speed – 7 for 350 square foot room Display Light Setting - Bright
Filter Change – 50 (500 hours) Temperature Scale – Fahrenheit
Power (ON/OFF)
Plug the unit into a 120 volt outlet. Press the on/off button to turn the unit on and off.
Set up and customization (SETUP) Press SETUP to toggle through options:
2 Displays the outdoor temperature
3 Displays the indoor humidity dew point temperature
4 Displays the outdoor humidity dew point temperature
5 Maximum auto fan speed (press + or – to raise or lower) 1 low to 10 high
Based on room size or user preference. Suggesting settings:
5 =300 9 =400 sq'
6 Display light level (dimmable)
1– Dim 2 – Medium 3 – Bright
7 Filter change reminder (press + or – to raise or lower) 10-100
Adjust the hour of run time between filter changes. The hours are the
display # times ten. A display of 50 represents a setting of 500 hours.
For an area with a high level of outdoor pollution decrease the hours
between changes. For areas with a low level of outdoor pollution
increase the hours.
8 Select temperature scale (press + or – to toggle between
˚F and ˚C)
˚F
On the display in the above illustration
“Outdoor Temp” is illuminated indicating
the temperature outside is hotter
than the temperature inside.
Set desired indoor temperature (+/-)
Use the +/- to raise or lower the desired indoor temperature set point. The display will show the set point temperature
when it is being changed and then show the room temperature. A lower set point will increase the use of outside air and
can precool the home delaying or eliminating the need for air conditioning. The +/- button is also used to adjust other
settings in SETUP.
Set humidity on/off (HUM)
The CapeBreeZ has a humidity control feature that increases energy efficiency and comfort when the unit is being used
with air conditioning. When the control is on, the unit continuously monitors indoor and outdoor humidity and will not
bring in outside air that is more humid than the indoor air. When the control is on, the display light on the control panel
will illuminate. When air conditioning is not used, the control can be turned off and the display light will turn off. Please
note that the CapeBreeZ measures dew point not relative humidity. Press HUM to toggle on/off.
Set the fan mode (FAN)
Press the FAN button to toggle through the fan modes.
0 Auto Mode 1-3 Manual Speed Modes (the fan will run continuously at the setting selected) 4 Turbo Speed
Auto Mode – The room temperature will display in this mode. Auto mode control will determine when cooling is needed
and available based on the set point and will adjust the fan for maximum energy efficiency. It will gradually increase the
speed as the outdoor temperature drops and then decrease it as it nears the set point.
4

Trouble Shooting and Maintenance
The fan will not run when “Outdoor Temp” is illuminated on the display or, if the humidity lock is on, when the “Outdoor
Humidity” is illuminated. This fan will not bring warmer, humid air into the space.
Issue Reason/Action
CapeBreeZ is Not Running In Auto Mode, the CapeBreeZ will stay on or off for a minimum of 3 minutes.
Make sure fan is plugged securely into the electrical outlet.
Confirm the set point is less than indoor temperature.
Airflow Decreases Filter is dirty. Change the filter and adjust reminder settings if necessary.
Changing the filter
The filter should be changed regularly to maximize air cleaning effectiveness. The filter drawer is at the bottom of the
unit. It may be opened with the handle on the bottom or the two finger tabs on the side of the unit. Slide the drawer
completely out of the unit. Slide the cover back to access the filter. Remove the existing filter and replace with a new
one. The filter has a directional indicator for the airflow. The filter should be installed so the airflow moves upward
through it. Close the filter drawer for operation.
Note: Adjust the filter reminder based on the conditions in the area. If
you find the filter becomes clogged/dirty quickly, reduce the hours
between filter changes (SETUP).
The CapeBreeZ ships from the factory with a 12x12x1 MERV8 Media
Filter.
Replacement filters are standard 12x12x1" and may be purchased at
your local home goods or hardware store.
SPECIFICATIONS
Window Requirement: Double hung 15.75 to 36" wide
Opening height 12"
Overall Dimensions: ……………….. 15.75 x 13.5 x 9.75" H
Maximum Room Size: …….…….… 400 sq ft
Fan Speeds: ……………….………….. 5
Electrical Requirements: ……….….115V, 60 Hz, 3A
Power: ………………………………………8 Watts Low/ 17 Watts Average
Unit Weight: …………………….….…..12 lb 15 oz
Shipping Carton:………………………. 18 x 15.75 x 13" OD
Shipping Weight:……………………….16 lb .10 oz actual
17 lb dimensional
5

LIMITED WARRANTY If, within the period of one (1) year from the date of purc hase, the
CapeBreeZ (the Product) is defective or malfunctions in normal home use, Tama rack Technologies, Inc.
will repair or replace the Product, at its discretion. Customer is responsible for shipping charges.
CONDITIONS, EXCLUSIONS, AND LIMITATIONS
This Warranty is subject to the following conditions, exclusions and limitations:
THIS WARRANTY DOES NOT COVER PROBLE MS R ESULT ING FROM INSTA LLAT ION, OPERA T ION OR
MAINTENANCE THAT HAS BEEN UNDERTAKEN OTHER THAN IN ACCORDANCE WITH THE INSTRUCTIONS.
THIS WARRANTY DOES NOT COVER PROBLEMS RESULTING FROM DEFECTS IN OR CAUSED BY
ASSOCIATED EQUIPMENT (FURNACES, SOLARIA, ETC.); FROM REPAIRS OR MODIFICATIONS ATTEMPTED
BY PERSONS OTHER THAN TAMARACK TECHNOLOGIES, INC.; FROM ABUSE, ACCIDENTAL OR SHIP PING
DAMAGE OR ACTS OF GOD. THIS WARRANTY DOES NOT APPLY TO THE PRODUCT USED OUTSIDE THE
UNITED STATES, ITS TERRITORIAL POSSESSIONS, AND CANADA. EXCEPT AS SET FORTH ABOVE, NO
EXPRESS OR IMPLIED WARRANTY IS GIVEN OR AUTHORIZED BY TAMARACK TECHNOLOGIES, INC. AND
ALL OTHER SUCH WARRANTIES ARE EXPRESSLY DISCLAIMED. ANY WARRANTY OR MERCHANTABILITY OF
FITNESS FOR ANY PARTICULAR PURPOSE SHALL BE LIMITED TO THE WARRANTY HEREUNDER.
MOREOVER, ANY LIABILITY OF TAMARACK TECHNOLOGIES, INC. FOR THE PRODUCT SHALL BE LIMITED
TO THE REPLACEMENT VALUE OF THE PRODUCT. IN NO EVENT SHALL TAMA RA CK TEC HNO LO G IES, IN C.
BE LIABLE FOR ANY INCIDENTAL DAMAGES OR FOR ANY CONSEQUENTIAL PROPERTY OR COMMERCIAL
DAMAGES, IRRESPECTIVE OF THE CAUSE THEREOF, OCCURRING EITHER DURING OR AFTER THE
WARRANTY PERIOD, INCLUDING WITHOUT LIMITATION ANY DAMAGES TO ANY PART OF A BUILDING OR
ITS CONTENTS. NOTE: SOME STAT ES DO NOT ALLO W TH E EXCLU S I ON OR LIM ITATION OF INCIDENTAL
OR CONSEQUENTIAL DAMAGES AND SOME STATES DO NOT ALLOW LIMITATIONS ON HOW LONG AN
IMPLIED WARRANTY LASTS, SO THE ABOVE LIMITATIONS OR EXCLUSIONS MAY NOT APPLY TO YOU.
THIS WARRANTY GIVES YOU SPECIFIC LEGAL RIGHTS AND YOU MAY ALSO HAVE OTHER RIGHTS THAT
VARY FROM STATE TO STATE. PROOF OF PURCHASE REQUIRED.
If you have any questions about the warranty or would like to obtain warranty service, call 800-222-5932 (M-F 8-5 ET),
Email info@tamtech.com
or mail: Tamarack Technologies, Inc. 20 Patterson Brook Road, Suite 7- West Wareham, MA
02576
20 Patterson Brook Rd / West Wareham, MA 02576
774-678-4433 / 800-222-5932 / Fax 774-678-4436
6
 Loading...