

Not e: Plea se al low 1 0~1 5 min utes fo r the D DNS
ser vic e to up dat e wit h you r new D DNS
addr ess. Th is is norm al for the DD NS system.
Open In te rnet Ex pl orer an d en ter the h os t
name (e .g . Http: // MyDVR .n o-ip. or g ) in the
addre ss b ar to acc es s it.
For other detaile d operati on like mobile phone
remote view,ple ase refer to the user man ual.
3. En abl e DDN S on the DV R.
STEP3 STEP4 STEP4
Quick Guide Manual
Of DVR
Quick Guide Manual
Of DVR
SETU P LOCAL VIEWI NG ON
YOUR CO MPUTER
INTE RNET REMO TE
MONI TORING
INTE RNET REMO TE
MONI TORING
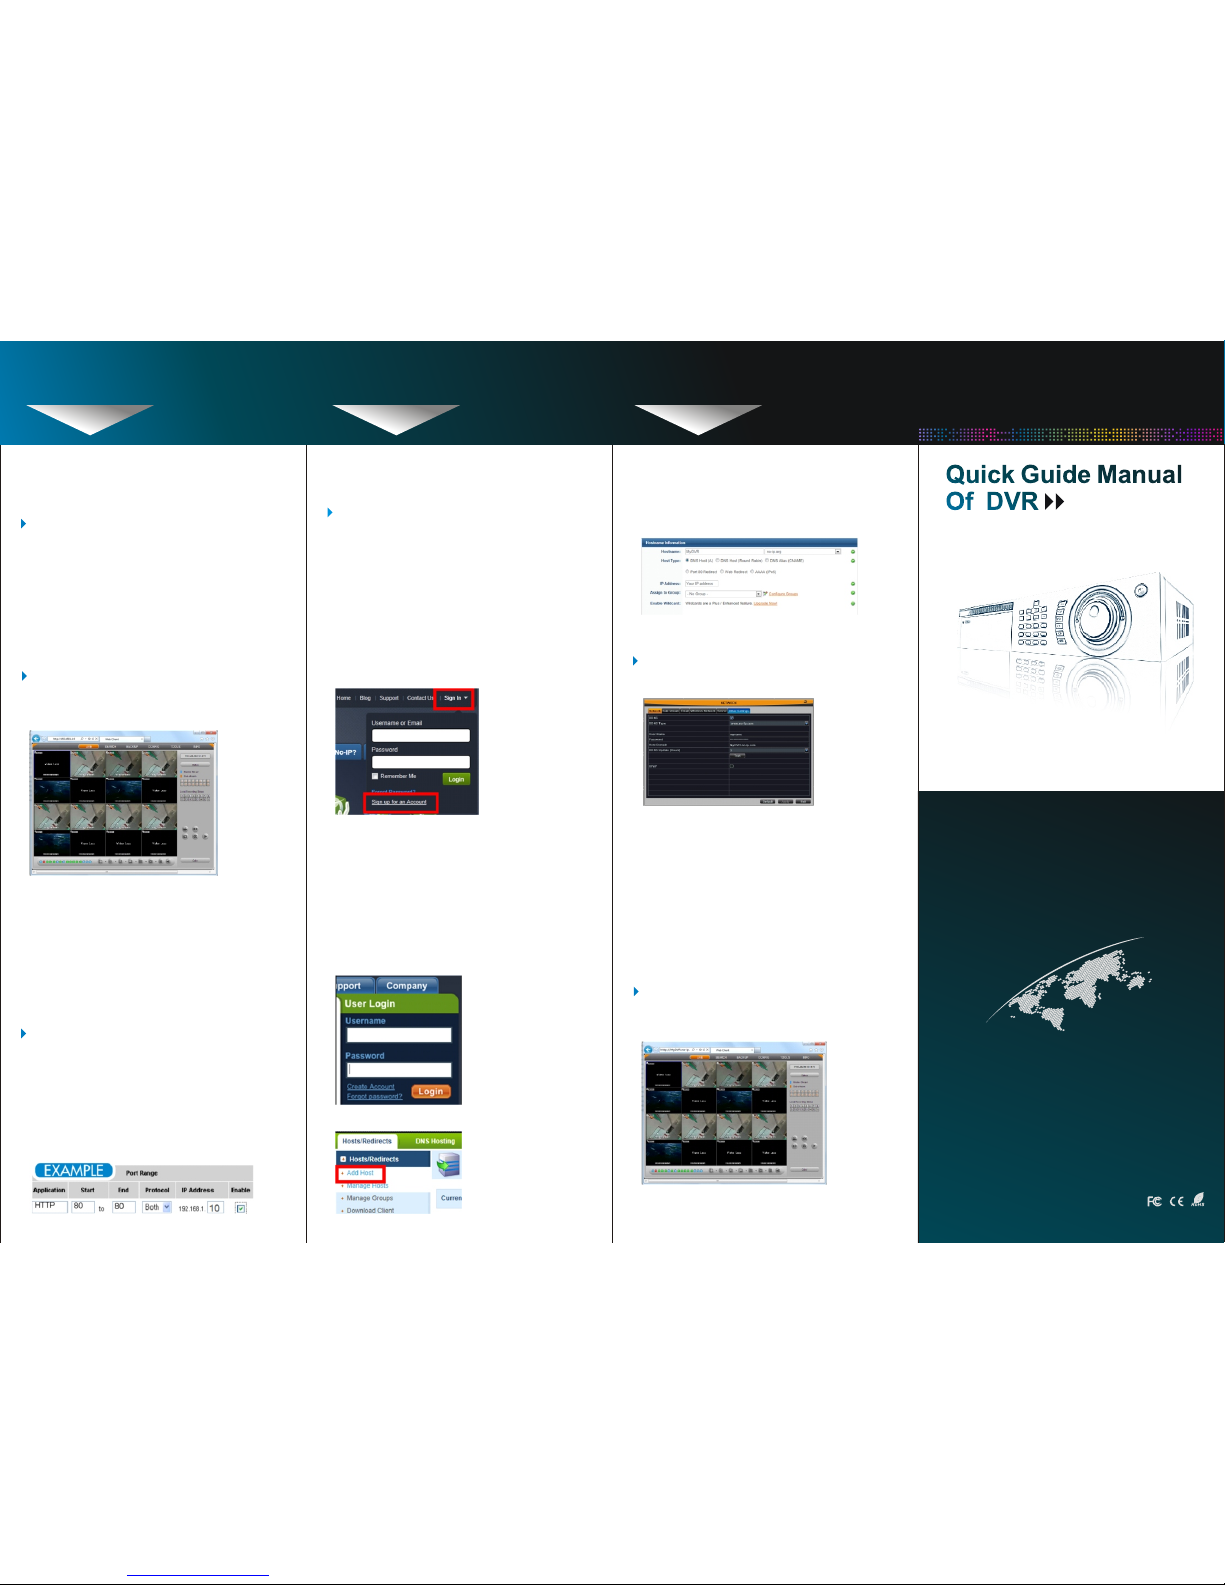
4. Acc es sin g you r DVR re mo tely.
STEP 3 SETUP LOCAL VIEWING
ON YOUR CO MPUTER
1a. Go to Main menu->System-> Network to get
the IP address, TCP port and HTTP port.
Not e: The IP a ddr ess of th e DVR sho uld be in t he
sam e field a s your co mpute r. And a s tat ic
(fi xed) IP a ddr ess is re comme nded. E .g. if
your rout er is set for the 192.168 .1.x netwo rk,
and you c ompu ter is 19 2.168. 1.8, th en the IP
add ress of y our DVR c an be 192 .168. 1.10.
Def ault IP a ddr ess is 19 2.168 .1.10 , TCP
por t: 5000 , HTTP po rt: 8 0.
Not e: You ma y wan t to use a d iff ere nt port th an the
def aul t HTT P por t 80. If s o, you nee d to
conf igur e your DV R to use the port yo u want.
When co nfig ured, reme mber that you ha ve to
s peci fy its por t numbe r in the URL (e.g . if you
sel ect p ort 8 8, yo u acc ess i t usi ng 19 2.1 68.
1.1 0:8 8).
1. Re tri ev e the ne tw ork para me ters.
2. Acc es sin g you r DVR lo ca lly
(ON YOUR LO CA L COMP UT ER ).
Open In te rnet Ex pl orer an d en ter htt p: //192 .
168.1 .1 0:80 in t he a ddres s ba r to acce ss i t.
2d. Add a ho st o r domai n to y our acc ou nt
1a. Accessi ng your route r by entering the gate
wa y ad dr ess , e. g. h ttp :/ /1 92. 16 8. 1.1
Not e: Port for wardin g guid es for va riou s rout ers on
www. portf orwar d.com
1. Po rt forwa rd .
2b. Con fi rm your a cc ount
Once yo u ha ve subm it ted you r ac count
inf orm ation int o the new u ser fo rm, it will
sen d a confi rma tio n emai l to the ad dre ss
you pr ovi ded . You will nee d to che ck tha t
accou nt a nd look f or t he emai l fr om NoIP.co m. The em ai l conta in s a link yo u
must cl ic k in orde r to c onfir m yo ur
accou nt .
2c. Log in t o your ac co unt
2a. Cre at e an acco un t.
Open th e we b brows er ( Inter ne t Explo re r by
defau lt ) and ent er h ttp:/ /w ww.no- ip .com in
the add re ss bar.
2. DD NS (Dyna mi c Dom ain Name Sy st em )
re gi ste r on the thir d par ty we bsite .
(n o- ip for exam pl e) .
Fill in t he r equir ed f ields o n th e new
accou nt f orm. On ce y ou've f il led in th e
requi re d infor ma tion an d ag reed to o ur
Terms of Se rv ice, cl ic k the "Si gn U p
Now!" b ut ton at th e bo ttom of t he p age.
Go to Mai n me nu->S et up->N et work- >O ther
Settt in gs to typ e in t he host i nf o.e.g .
Under D DN S: tick o ff;
Under D DN S type: c ho ose www. no -ip.c om ;
Under U se r Name: t he a ccoun t yo u creat ed
at no-i p. com;
Under P as sword : the p as swo rd o f yo ur
accou nt a t no-ip .c om.
Under H os t Domai n: e nter th e ho st name
you cre at ed at no- ip .com;
DDNS Update: Choose the DDNS update period.
In ord er to ad d a host to yo ur acc oun t, sel ect
the "Ad d" l ink fro m th e "Host s/ Redir ec ts"
men u. This will br ing up t he Add a Host p age.
And now y ou 're rea dy t o fill in t he d etail s of
your ne w ho stnam e.
Not e: For mo re deta iled gu ide of No -ip ser vice,
ple ase vis it http ://su pport .no-i p.com /
STEP4 INTE RNET REM OTE
MONITORI NG
1b. Fin d th e optio n ca lled po rt m appin g or
p or t fo rwa rd in g.
1c. Spe ci fy the HT TP port ( default is 80) and
T CP port (default is 5000) to be forwar ded
f rom th e inte rna l/l oca l IP addr ess of your
D VR (e. g. 1 92 .16 8. 1. 10) t o th e In ter ne t.
2b. In setu p: Cli ck le ft but to n to ente r. Cli ck
righ t but ton to ca nc el set up , or retu rn to
the pre vi ous .I f want to inpu t the val ue ,
move cu rs or to the bl ank and cli ck. An
inpu t win dow wi ll ap pea r as Fig 2.1 . It
suppo rts digits, let ter s and symbols input .
STEP1 BASI C SETUP AND
INSTALLATION
STEP1 STEP2 STEP2
STEP2
BAS IC SETU P AND
INS TALLATIO N
NAVI GATION AN D
CON TROLS
NAVI GATION AN D
CON TROLS
NAVI GATION AN D
CON TROLS
STEP 2 NAVIGATION AND
C ONTROLS
Not e: HDMI p ort is op tiona l for som e model .
1. Us ing the mai n men u.
2. Us ing a mo use .
2a. In live :Do ub le -clic k lef t butt on
on one cam era to be full scree n
disp la y. Doub le -cl ic k aga in to
retu rn to the prev io us scr ee n
disp la y.Cl ic k righ t but to n to
show th e contro l men u. Her e
are all co ntrol an d setup. Cl ic k
righ t mou se aga in to hide the
cont ro l menu .
5. Po wer in g on the DV R.
(Fo r refer ence on ly)
(Fo r refer ence on ly)
4. C on ne ct in g th e Ethe rn et c ab le .
(n ot inc lu de d).
Conne ct on e end of the Ether ne t cabl e to an
ava ila ble LAN port of your rout er (not included)
and the oth er end to th e DVR’ s networ k por t
(LAN ) on the rea r pan el of the DV R.
Conne ct th e powe r cab le to the DC 12V port
on the re ar panel an d the pow er co rd int o an
elect ri cal outl et , and the n turn on th e switch .
At start up, the syst em runs an initial logo, after
a few mom en t, it wil l load a liv e disp la y view.
Right cl ic k anyw he re on the sc reen and
choos e , or pre ss th e butt on on
the fron t pane l of the DVR. Cli ck the icon s
below to op en sub -m en us.
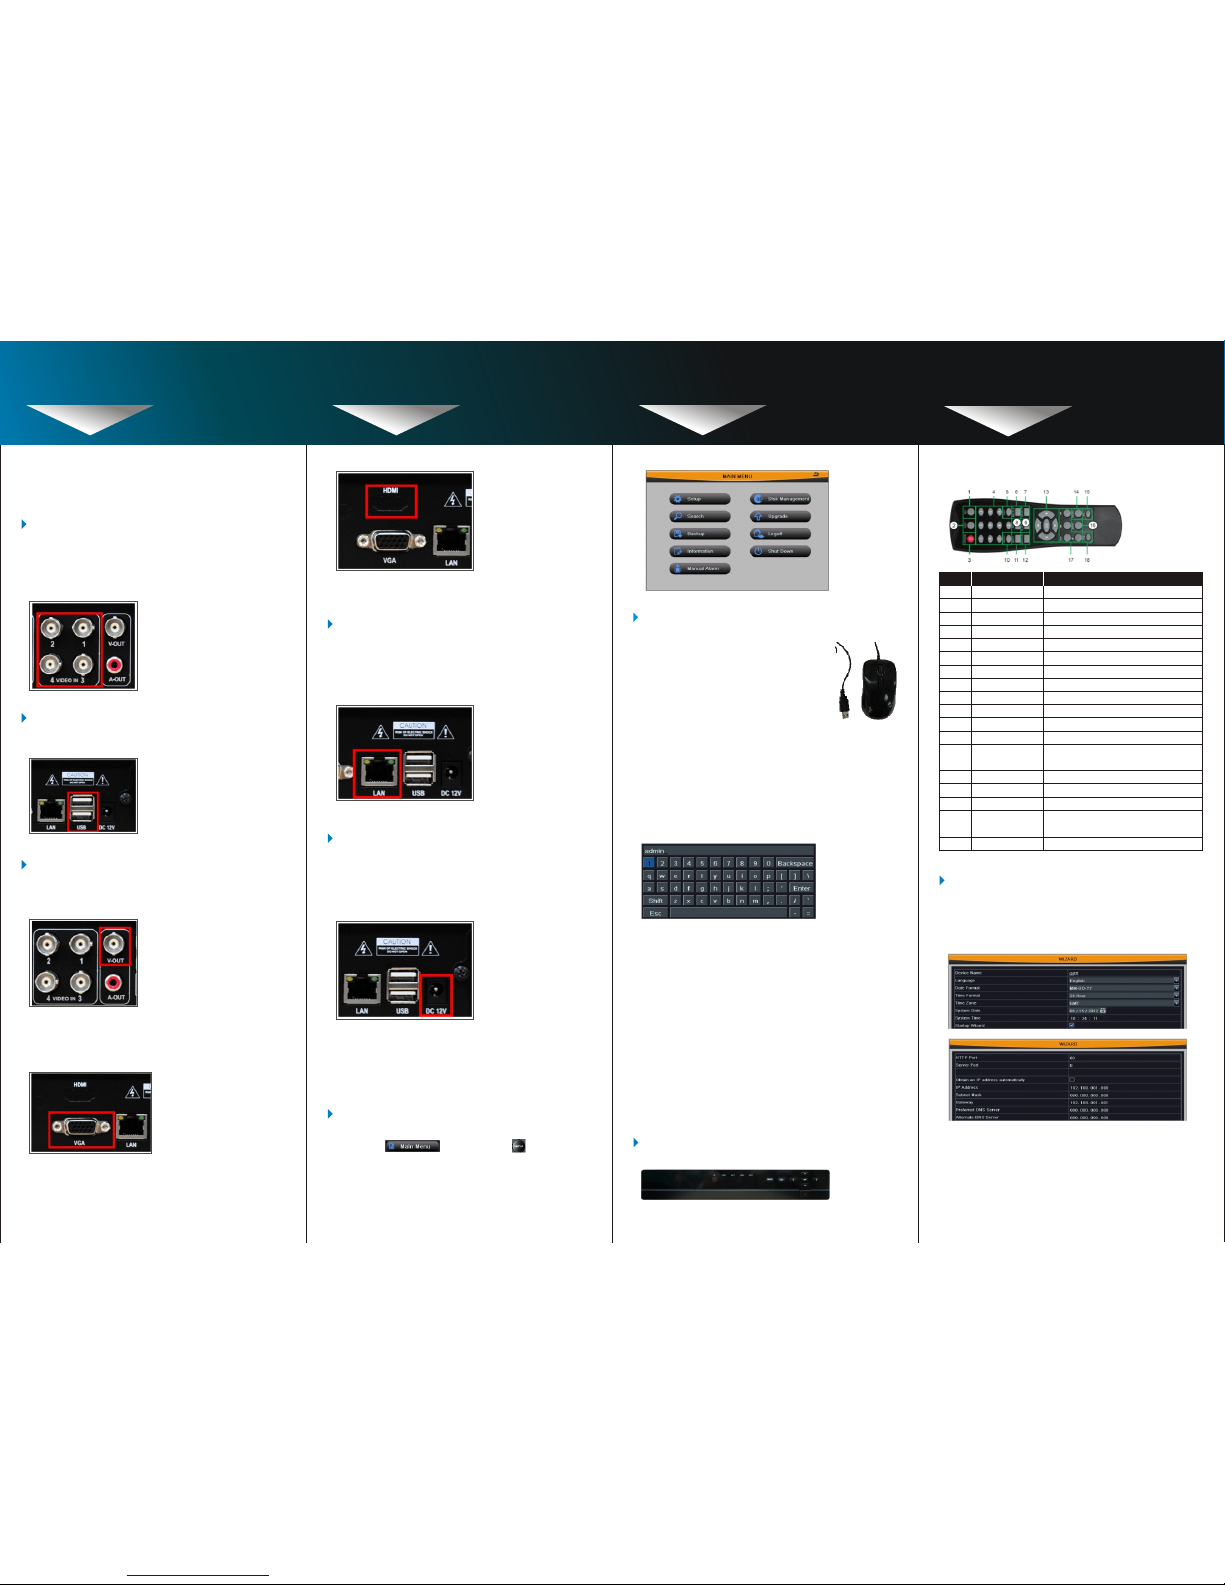
3b. Remote control
(Fo r refer ence on ly)
3a. Front panel.
3. Ot her cont ro l opt ion s
Fig 2.1 Virt ua l Key boa rd It suppo rt s mous e
drag. I. e. Set mo ti on det ec ti on are a: cl ick
custo mi zed, hol d left butt on and dr ag to set
motio n det ect io n area.
2d. In back up: Cl ic k left bu tt on to cho os e the
o pt ion s. Cl ick righ t button to re tur n to
pre vi ou s pict ur e.
2c. In play bac k:C lic k left butto n to choo se the
op ti ons . Cli ck rig ht bu tton to ret urn to li ve
mod e.
2e. In PTZ contro l: Cl ick le ft bu tto n to cho ose
t he butto ns to contr ol th e PTZ. Cl ick righ t
but to n to retu rn to liv e.
Connect a USB mouse to one of the USB ports
on the fr on t panel o r re ar pane l of t he DVR.
2. Co nne ct in g the US B mouse.
3a. Con nec t a BNC c abl e (no t inc luded) fr om
your TV or moni tor to the vid eo outpu t port
on the rear pa nel of the DVR .
(Fo r refer ence on ly)
(Fo r refer ence on ly)
3b. C onnec t a VGA ca ble (not in clu ded) fr om
yo ur m on it or t o th e VGA por t on th e re ar
pan el of t he DVR.
(Fo r refer ence on ly)
(Fo r refer ence on ly)
3c. Co nne ct a HDMI cabl e (not incl ude d) from
you r mon it or to th e HDM I por t on the re ar
pan el of th e DVR .
3. Co nne ct in g a moni tor (not in cl ud ed) .
1. Connec ti ng BNC camera s (not includ ed)
t o BN C por ts (VIDEO INPU T) on t he rear
p an el.
Note: Test the cameras prior to selecting a permanent
location by temporarily connecting the cameras
and cables to your DVR.
(Fo r refer ence on ly)
1
2
3
4
5
6
7
8
9
10
11
Numb er
Fun ction
Serial
Nam e
REC Button
ADD Button
POWER Button
Digital Button
EXIT Button
BACKUP Button
SEARCH Button
SEQ Button
To start the manual recording.
Input the number of DVR to control it.
To turn on/off the device.
Code input/number input/channel switch.
Return to the previous interface.
To enter the backup mode.
To enter the video playback interface.
To enter the auto dwell mode.
12
13
14
To electronic amplify the single channel.
To enter the sub menu.
To choose multi-screen display mode.
To choose single -screen display mode.
E-ZOOM Button
MENU Button
Direction and
Enter Button
Direction Button: move cursor to select
items.Enter Button: confirm the selection.
AUDIO Button
Fn Button
SNAP Button
To enter the audio adjustment interface.
Reserved function keys.
To snap the live pictures.
15
16
17
Playback Control
Button
To control playback, pause/play,
single-frame play, rewind, stop,
fast forward.
PTZ Button
To enter the PTZ control interface.
18
Multi Screen Button
Single Screen Button
4a. Ther e is a set up wiz ar d when po we r on
the DVR , you can se tu p the bas ic
para me te rs lik e time, dat e, IP add re ss,
record resolution, manage the HDD and etc.
Not e: By def ault, I D is ad min, no p ass word. W ith
pas sword e nable d, you ne ed to e nte r your
ID an d passw ord t o acces s the sys tem .
4. Se tti ng th e bas ic pa ramet er s.
4b. Or you can ent er in to Mai n men u>Set up
t o set up the ti me , reco rd an d netw or k
par am et ers.
 Loading...