

Page 1

Talon Pro Duplicator
User Guide
Page 2

Copyright 2003, Talon Inc.
The Talon Pro CD Duplicator is used only for copying
personal data and audio tracks. Violation of the International
Copyright Laws is a criminal charge. The Talon Pro CD
Duplicator is intended to be used only in legal copying
situations. Talon, Inc. is not responsible for the illegal use or
any damage in connection with the use or performance of
this system.
Page 3

Table of Contents
CHAPTER 1 INTRODUCTION ......................................................................................................1
INTRODUCING THE TALON PRO ............................................................................................................1
FEATURES............................................................................................................................................1
SYSTEM SPECIFICATIONS ( 7 DRIVE TOWER )........................................................................................ 1
INSTALLATION INSTRUCTIONS ............................................................................................................. 2
WARRANTY INFORMATION .................................................................................................................. 2
TECHNICAL SUPPORT........................................................................................................................... 2
CHAPTER 2 GETTING STARTED................................................................................................3
TURNING ON THE SYSTEM....................................................................................................................3
ABOUT THE LCD PANEL DISPLAY........................................................................................................ 3
FOR BEST PERFORMANCE ....................................................................................................................3
COPY AN AUDIO CD NOW! ..................................................................................................................3
MAKE MULTIPLE COPIES AT ONCE FROM A MASTER CD...................................................................... 7
COPYING DATA CDS.......................................................................................................................... 15
OVERVIEW OF THE MENU OPTIONS .................................................................................................... 19
OPERATION STATUS DETAILS............................................................................................................. 20
Copy..............................................................................................................................................20
Copy and Compare........................................................................................................................ 21
Emulate ......................................................................................................................................... 22
Compare........................................................................................................................................22
Verify.............................................................................................................................................22
External.........................................................................................................................................22
SUB-FUNCTION DETAILS.................................................................................................................... 23
Setup..............................................................................................................................................24
Show Drives ...................................................................................................................................24
Start Writers..................................................................................................................................25
Write Method.................................................................................................................................25
Write Speed.................................................................................................................................... 26
CDROM Drive...............................................................................................................................26
Autoloader.....................................................................................................................................27
Load Non-blank disc......................................................................................................................27
CD DA Load Speed........................................................................................................................27
Eject Disc ......................................................................................................................................28
Buzzer............................................................................................................................................28
CD+G ...........................................................................................................................................29
Copycomp Eject.............................................................................................................................29
Read CD DA Index 0......................................................................................................................30
Skip Read Error.............................................................................................................................30
Status 2 Compare...........................................................................................................................31
Startup Command.......................................................................................................................... 31
OTHER SYSTEM CAPABILITIES ........................................................................................................... 32
Setup..............................................................................................................................................32
Edit................................................................................................................................................32
Delete............................................................................................................................................32
Clear ............................................................................................................................................. 32
Copy x1 .........................................................................................................................................33
Emulate x1 .....................................................................................................................................33
i
Page 4

Copy x2 .........................................................................................................................................33
Emulate x2 ........................................................................................................................................i
Copy x4 .........................................................................................................................................33
Emulate x4 .....................................................................................................................................33
Copy x8 .........................................................................................................................................33
Emulate x8 .....................................................................................................................................33
Burn In ..........................................................................................................................................33
Update...........................................................................................................................................33
INDEX................................................................................................................................................39
ii
Page 5

Talon CD Duplicator Chapter 1 Introduction
Chapter 1 Introduction
Introducing the Talon Pro
The Talon Pro system enables you to copy multiple CDs at once at 52X speed.
Features
§ 52X recording speed
§ Disc At Once support for audio
§ Support for multiple CD formats, including:
- CD+G (compact disc and graphics)
- Karaoke
§ Multiple industrial fans for cooling
§ Audio track extraction for music disc compilation
System Specifications ( 7 drive tower )
Dimensions: 17”High, 7”Wide, 18”Deep
Weight: 38 lbs.
Power: Universal Power Supply (300 watt)
Duplication Speeds: 52X recording speed (3-7 drives) with internal hard drive (140 discs
per hour with normal application at max configuration)
CD Formats Support for multiple CD formats (including CD+G, Karaoke)
Other: Disc At Once support for Audio
Copy, Copy and Compare, Verification, Emulation, and Load to
Hard Drive are supported
All sizes of business card CD format are supported
1
Page 6

Chapter 1 Introduction Talon CD Duplicator
Installation Instructions
Unpack the Talon Pro system in a clean working area with Statusrate temperature control.
Confirm that the following items have been shipped with the system: power cable, user manual,
and warranty card.
Confirm that the voltage setting (AC 115/230V) is correct.
Confirm that the power input is stable and consistent. Install an uninterruptible power supply
(UPS) if necessary.
Make sure that the environment for the Talon Pro system is properly ventilated and free of dust,
excessive heat and humidity, and electronic interference.
Make sure the system is properly grounded. Do not attempt to defeat the third ground prong on
the power cable.
The system is shipped in professionally designed, foam-based external packaging. Please keep
and store this packaging for future transport or storage of the system.
Warranty Information
The Talon Pro system is guaranteed to be free from defect in materials and
workmanship for one year. The warranty is not applicable to defects or
malfunctions caused by misuse, accidents, or system changes by the end
user. Talon is not responsible for damages to data or related content by
the Talon Pro system.
NOTE: There is no need to fill out a warranty card as Talon keeps track of
all Duplicators by the serial number of the unit in a database.
Note: Talon assumes no responsibility for the illegal copying and
distribution of audio, video, and text/graphics data.
Technical Support
For detailed technical support or questions regarding the Talon Pro, contact Talon Technical
Support at 952.937.8354
2
Page 7
Talon CD Duplicator
A553M62:57
copy
<Statu
Chapter 2 Getting Started
Turning on the System
Plug the AC cord into the Talon Pro system and then into a wall outlet. Press the ON/OFF button
located in the bottom right corner of the tower unit. The LCD Panel display will light up,
indicator lights on each of the CD writer drives will flash momentarily, the ON indicator light
next to the ON/OFF button will be lit, and the system will indicate it is ready for operation by
emitting a three-tone beep.
About the LCD Panel Display
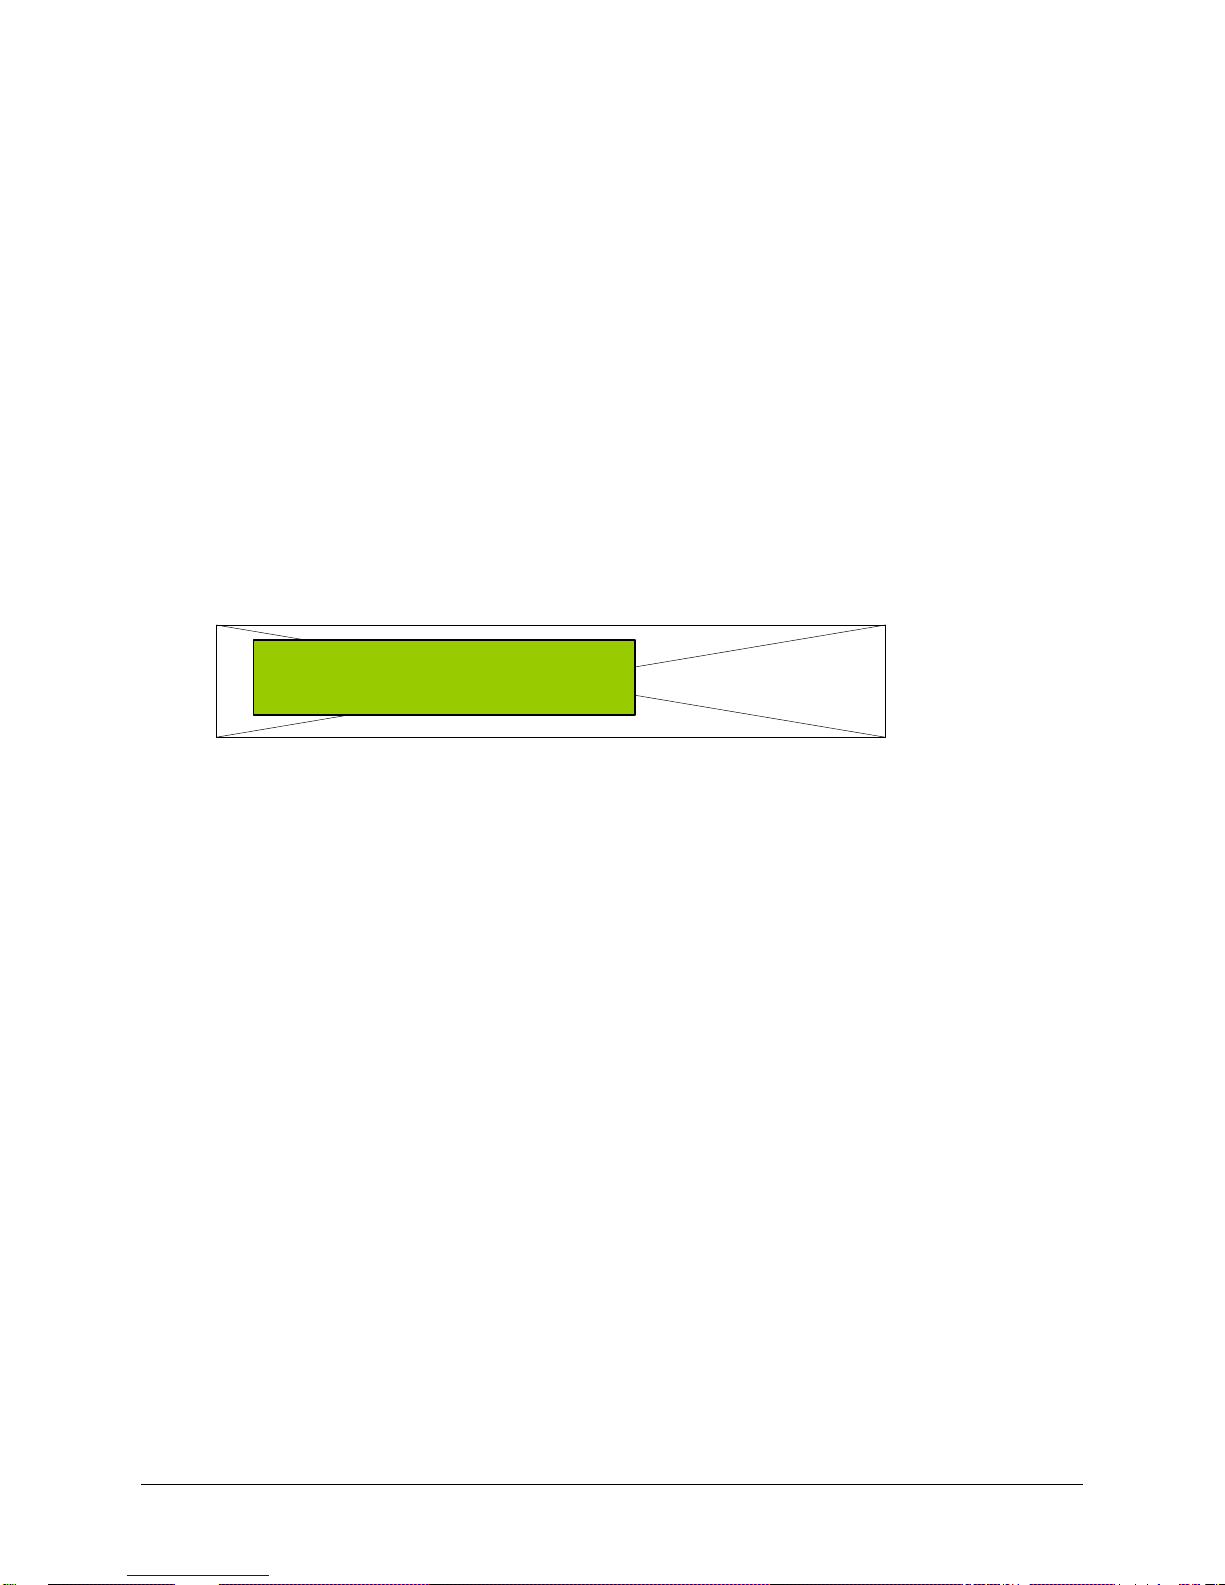
When you first turn the system on, the information displayed in the LCD Panel will indicate the
current Status of operation (e.g. copy, emulate, etc.)
If copy is not displayed in the LCD Panel Display, press the Status button to cycle through the
list of operation Statuss (copy, copy+comp, emulate, compare, verify, external) until
copy is displayed. This will ensure that you are in the correct Status for the first exercise
presented in this manual, which is copying a CD to a CD (refer to page 3).
For Best Performance
All master CDs must be 52X quality. Use Talon Branded Bulk Media (CDs recommended for
best performance), which are available in 300-disc cartons.
Please consult the dealer where you purchased your unit for the recommended media.
3
Page 8

Copy an Audio CD Now!
copy
<Status
A553M62:57
setup
<Statu
A553M62:57
copy
<Statu
Talon CD Duplicator
Overview
Select “Copy”
for the
Operation
Status
Access the
Sub-Function
Menu
This procedure explains how to set the system up for CD to CD duplication
and how to make a copy of a master audio CD.
The purpose of this procedure is to give you a quick start to using the Talon
Pro Duplicator. You will learn more advanced procedures, such as how to
set up for duplicating Karaoke CD masters, how to load various tracks from
multiple CDs into a partition on the hard drive, how to copy up to seven CDs
at a time, etc., once you have learned a few of the basic procedures.
1. Turn on the system. Note the Status of operation in the LCD display
area (copy, emulate, etc.). If copy is not already displayed as the
current Status of operation, press the Status button until copy is
displayed. Your LCD display should look something like this:
2. Press and hold the Status button until you hear the system “chirp.” Then
release the Status button. You should see setup displayed in the LCD
panel:
Back to
“Copy” Status
Insert the
Master CD
3. Press the Start button, and note that the copy Status is once again
displayed. (In this case, all other sub-function defaults will be used, so
there is no need to change any other sub-function options at this time.)
4. Place the master CD in the first CD drawer. Use the Open/Close button
to open and close the CD drawer.
4
Page 9

Talon CD Duplicator
Duplicated CD
PASS 1 FAIL 0
L 51 C51
448M51:01
1start>
copy
<Status
Copying an Audio CD (continued)
Insert a Blank
CD
System
Automatically
Analyzes the
Operation
Begin the
Copy Process
5. Open the second CD drawer and place a blank CD in it. Close the
drawer (using the Open/Close button).
Once you’ve placed the CDs in their respective drawers, you will hear the
system start up. It will automatically scan the master CD to determine the
size and the duration of the master CD. Look for this information in the
LCD Display panel. It should look something like this:
In the above example, the master CD is 448 Megabytes, and is 51 minutes,
and 01 seconds in duration, 51:01.
The 1start> prompt indicates that the system is Starting to make one copy
as soon as you press the Start button.
6. Press the Start button. The system will start the copying process. Note
that the LCD display shows L and C status codes. These indicate how
many minutes have been read (L) and how many have been written (C).
When the copy procedure is finished, you will hear a three-tone beep,
the second drawer will automatically open, and the LCD panel will
indicate that one CD passed, and that zero CDs failed the operation. For
example:
Remove the
7. Remove the duplicated CD from the second drawer and close the drawer
Congratulations! You have just copied your first CD from a master CD.
Remove the
8. Remove the duplicated CD from the second drawer and close the drawer
Duplicated CD
Congratulations! You have just copied your first CD from a master CD.
(using the open/close button on the CD drive).
(using the open/close button on the CD drive).
5
Page 10

Talon CD Duplicator
448M51:01
copy
<Status
Copying an Audio CD (continued)
Display the
Operation
Status.
Remove the
Master CD
Repeating this
Procedure
9. Press and hold the Status button until it “chirps” then release. The
LCD panel will display the operation Status once again. For example:
10. Unless you intend to make more copies of the same master CD, remove
the master CD from the first drawer.
You have already set the system up to copy from CD to CD. You can repeat
this procedure by placing a master CD in the first drawer, and a blank CD in
the second drawer, and pressing the Start button.
6
Page 11

Talon CD Duplicator
Start>
setup
<Status
[Quit]
start writers
[+] 7
A553M62:57
setup
<Statu
copy
<Statu
Make Multiple Copies at Once from a Master CD
Overview
Select “Copy”
for the
Operation
Status
Access the
Sub-Function
Menu
Set the Start
Writers SubFunction to the
# of writers
This procedure explains how to set the system up for making multiple
duplicates at once. The first CD drawer will hold the Master CD, and the
remaining drawers will contain the copies:
1. Turn on the system. Note the Status of operation in the LCD display
area (copy, emulate, etc.). If copy is not already displayed as the
current Status of operation, press the Status button until copy is
displayed. Your LCD display should look something like this:
2. Press and hold the Status button until you hear the system “chirp.”
Then release the Status button. You should see setup displayed in the
LCD panel:
3. Press the Start button, and view the start writers sub-function. The
default for this setting is the number of writers in the system. Press the
Status button as many times as is necessary to display the number for
this setting. This ensures that all CD writers are available for making
copies:
Display
4. Press the Start button as many times as is necessary to cycle through all
“setup” in the
LCD display
panel
of the other sub-functions until you display setup in the LCD Display
panel:
7
Page 12

Talon CD Duplicator
PASS 6 FAIL 0
L 51 C51 C51 C51
C49 C49 C49
L50 C49 C49 C49
448M51:01
6start>
copy
<Status
copy
<Status
Making Multiple Copies from a Master Audio CD (continued)
Back to
“Copy” Status
Insert the
Master
Insert Blank
CDs
System
Automatically
Starts the
Duplication
Process
5. Press and hold the Status button, release it when it “chirps”, and note
that the copy Status is once again displayed.
8. Place the Master CD in the first CD drawer. Use the Open/Close button
to open and close the CD drawer. The system will automatically start to
analyze the master CD and will display the size in megabytes and the
number of minutes on the CD.
9. Place a blank CD in each of the remaining drawers. Close each drawer
once you’ve inserted a blank CD. Note that the system automatically
starts counting how many CD drives have blank CDs in them.
When you put blank CDs in all of the CD writers, the system automatically
starts the duplication process once it has detected that six drives are ready for
copying. The number following the L shows how many minutes of the
master have been read; the number following the C shows how many minutes
have been copied.
Pass/Fail
Status is
Displayed
44444
When the system has completed the duplication process, all of the copied
CDs will be automatically ejected (the drawers will automatically open).
The system will indicate how many passed, and how many (if any) failed.
8
Page 13

Talon CD Duplicator
Making Multiple Copies from a Master Audio CD (continued)
Remove the
Duplicated
CDs
Remove the
Master CD
Repeating this
Procedure
10. Remove the duplicated CDs from the drawers and close each drawer
(using the open/close button on the CD drive).
Congratulations! You have just copied multiple CDs at once from a master
CD.
11. Unless you intend to make more copies of the same master CD, remove
the master CD from the first drawer. Note that the LCD Display shows
the copy Status once again.
You can repeat this procedure by placing a master CD in the first drawer, and
placing blank CDs in one or all of the remaining drawers. The system will
automatically analyze the master and detect the number of blank CDs in the
remaining CD drawers. When you are copying fewer than the number of
drives in your system, you must press the START button to begin the
duplication process. (It starts automatically when you fill all blank CD
trays.)
9
Page 14

Talon CD Duplicator
PASS 7 FAIL 0
setup
<Statu
copy
<Statu
Make Multiple Copies at Once from a Master CD (continued)
Place Blank
CDs in the
Drives
Copy
Operation
Starts
Automatically
Remove the
Master CD
1. Place a blank CD in each of the CD writers. Note that the system starts
counting the number of active CD drives as you insert blank CDs.
Once the system has identified all of the blank CDs it automatically starts to
copy the contents from the selected partition on the hard drive to the blank
CDs. You can note the progress of the copy operation by observing the L
and C status. The copy operation is complete when the number for C equals
the number of minutes of the CD.
When the load procedure is finished, you will hear a three-tone beep, all
seven drawers will automatically open, and the LCD panel will indicate that
the load operation passed:
11. Remove the duplicates from the drawers, close the drawers (using the
open/close button on the CD drive).
Note the
Initial
Operation
Status
Access the
Sub-Function
Menu
Congratulations! You have just made seven duplicates from the hard drive.
1. Turn on the system. Note the Status of operation in the LCD display
area (copy, emulate, etc.). Your LCD display should look something
like this:
2. Press and hold the Status button until you hear the system “chirp.” Then
release the Status button. You should see setup displayed in the LCD
panel:
10
Page 15

Talon CD Duplicator
A553M62:57
Start>
CD to CD
[*] Yes
A553M62:57
Start>
CD to CD
[*] No
A553M62:57
setup
<Statu
Copying Karaoke CDs
Overview
Start at the
initial
Operation
Status
Access the
Sub-Function
Menu
Change the
CD to CD SubFunction
Setting to
“Yes”
This procedure explains how to set the system up for duplicating Karaoke
CDs or any CD that has graphics and sound files. It explains how to set up
for CD to CD duplication. However, any Karaoke CD can also be loaded
into a partition on the hard drive and copied from there as well.
Turn on the system. The system will display the operation Status that is set
as the startup default operation Status. (copy, emulate, etc.).
1. Press and hold the Status button until you hear the system “chirp.” Then
release the Status button. You should see setup displayed in the LCD
panel:
2. Press the Start button until you view the CD to CD option:
3. Press the Status button to change the setting from No to Yes:
11
Page 16

Talon CD Duplicator
[Q]
CD+G
[*] Yes
Start>
setup
<Status
[Q]
CD+G
[*] No
[Q]
write method
[*] Disc At Once
A553M62:57
setup
<Statu
copy
<Status
Copying Karaoke CDs (continued)
Back to
“Copy” Status
Access the
Sub-Function
Menu Again
Change the
Write Method
Sub-Function
Setting to
“Disc At
Once”
4. Press the Start button, and note that the default operation Status is once
again displayed. In the example below the default operation Status is
copy:
5. Press and hold the Status button until you hear the system “chirp.”
Then release the Status button. You should see setup displayed in the
LCD panel:
6. Press the Start button until you view the write method option:
Press the Status button to change the setting to Disc At Once if it is not
already so (as shown above).
Change the
CD+G SubFunction
Setting to
“Yes”
Accept all
other SubFunction
Defaults
7. Press the Start button until you view the CD and G option:
8. Press Status button to change the CD+G setting to Yes. The CD +G
setting, when switched to Yes, enables the duplication of CDs that have
CD+Graphics: audio, text and graphics used in the same application.
This type of disc is usually used for Karaoke machines.
9. Press the Start button until you view the setup option:
12
Page 17

Talon CD Duplicator
copy
<Status
PASS 1 FAIL 0
L 51 C51
448M51:01
1START>
copy
<Status
Copying Karaoke CDs (continued)
Back to the
Operation
Status Display
Insert the
Karaoke
Master CD
Insert a Blank
CD
System
Automatically
Analyzes the
Operation
10. Press and hold the Status button until it “chirps.” Then release the
Status button. Note that the default operation Status is displayed. If not
already displayed, press the Status button until copy is displayed:
11. Place the master CD in the first CD drawer. Use the Open/Close button
to open and close the CD drawer.
12. Open the second CD drawer and place a blank CD in it. Close the
drawer (using the Open/Close button).
Once you’ve placed the CDs in their respective drawers, you will hear the
system start up. It will automatically scan the master CD to determine the
size and the duration of the master CD. Look for this information in the
LCD Display panel. It should look something like this:
Begin the
Copy Process
In the above example, the master CD is 448 Megabytes, and is 51 minutes,
and 01 seconds in duration, 51:01.
The 1start> prompt indicates that the system is Starting to make one copy
as soon as you press the Start button.
13. Press the Start button. The system will Start the copying process. Note
that the LCD display shows L and C status codes. These indicate how
many minutes have been read (L) and how many have been written (C).
When the copy procedure is finished, you will hear a three-tone beep,
the second drawer will automatically open, and the LCD panel will
indicate that one CD passed, and that zero CDs failed the operation. For
example:
13
Page 18

Talon CD Duplicator
448M51:01
copy
<Status
Copying Karaoke CDs (continued)
Remove the
Duplicated CD
Display the
Operation
Status.
Remove the
Master CD
Repeating this
Procedure
14. Remove the duplicated CD from the second drawer and close the drawer
(using the open/close button on the CD drive).
Congratulations! You have just copied your first Karaoke CD from a master
Karaoke CD.
15. Press and hold the Status button until it “chirps” then release. The LCD
panel will display the operation Status once again. For example:
16. Unless you intend to make more copies of the same master CD, remove
the master CD from the first drawer.
17. You have already set the system up to copy Karaoke CDs from a master
Karaoke CD. You can repeat this procedure by placing a master
Karaoke CD in the first drawer, and blank CDs in the remaining
drawers, and pressing the Start button.
14
Page 19

Talon CD Duplicator
A553M62:57
Start>
CD to CD
[*] Yes
A553M62:57
Start>
CD to CD
[*] No
A553M62:57
setup
<Statu
Copying Data CDs
Overview
Start at the
initial
Operation
Status
Access the
Sub-Function
Menu
Change the
CD to CD SubFunction
Setting to
“Yes”
This procedure explains how to set the system up for duplicating data CDs
or any CD that has text, graphics, and/or sound files. It explains how to set
up for CD to CD duplication. However, any data CD can also be loaded into
a partition on the hard drive and copied from there as well.
Turn on the system. The system will display the operation Status that is set
as the startup default operation Status (copy, load, emulate, etc.).
1. Press and hold the Status button until you hear the system “chirp.” Then
release the Status button. You should see setup displayed in the LCD
panel:
2. Press the Start button until you view the CD to CD option:
3. Press the Start button to change the setting from No to Yes:
15
Page 20

Talon CD Duplicator
[Q]
CD+G
[*] Yes
Start>
setup
<Status
[Q]
CD+G
[*] No
[Q]
write method
[*] Disc At Once
A553M62:57
setup
<Statu
copy
<Status
Copying Data CDs (continued)
Back to
“Copy” Status
Access the
Sub-Function
Menu Again
Change the
Write Method
Sub-Function
Setting to
“Disc At
Once”
4. Press the Start button, and note that the default operation Status is once
again displayed. In the example below the default operation Status is
copy:
5. Press and hold the Status button until you hear the system “chirp.” Then
release the Status button. You should see setup displayed in the LCD
panel:
6. Press the Start button until you view the write method option:
Press the Status button to change the setting to Disc At Once if it is not
already so (as shown above).
Change the
CD+G SubFunction
Setting to
“Yes”
Accept all
other SubFunction
Defaults
7. Press the Start button until you view the CD and G option:
8. Press Status button to change the CD+G setting to Yes. The CD +G
setting, when switched to Yes, enables the duplication of CDs that have
CD+Graphics: audio, text and graphics used in the same application.
9. Press the Start button until you view the setup option:
16
Page 21

Talon CD Duplicator
copy
<Status
PASS 1 FAIL 0
L 51 C51
448M51:01
1START>
copy
<Status
Copying Data CDs (continued)
Back to the
Operation
Status Display
Insert the
Karaoke
Master CD
Insert a Blank
CD
System
Automatically
Analyzes the
Operation
10. Press and hold the Status button until it “chirps.” Then release the
Status button. Note that the default operation Status is displayed. If not
already displayed, press the Status button until copy is displayed:
11. Place the master CD in the first CD drawer. Use the Open/Close button
to open and close the CD drawer.
12. Open the second CD drawer and place a blank CD in it. Close the
drawer (using the Open/Close button).
Once you’ve placed the CDs in their respective drawers, you will hear the
system start up. It will automatically scan the master CD to determine the
size and the duration of the master CD. Look for this information in the
LCD Display panel. It should look something like this:
Begin the
Copy Process
In the above example, the master CD is 448 Megabytes, and is 51 minutes,
and 01 seconds in duration, 51:01.
The 1start> prompt indicates that the system is Starting to make one copy
as soon as you press the Start button.
13. Press the Start button. The system will start the copying process. Note
that the LCD display shows L and C STATUS codes. These indicate
how many minutes have been read (L) and how many have been written
(C). When the copy procedure is finished, you will hear a three-tone
beep, the second drawer will automatically open, and the LCD panel will
indicate that one CD passed, and that zero CDs failed the operation. For
example:
17
Page 22
Talon CD Duplicator
448M51:01
copy
<Status
Copying Data CDs (continued)
Remove the
Duplicated CD
Display the
Operation
Status.
Remove the
Master CD
Repeating this
Procedure
14. Remove the duplicated CD from the second drawer and close the drawer
(using the open/close button on the CD drive).
Congratulations! You have just copied a data CD from a master data CD.
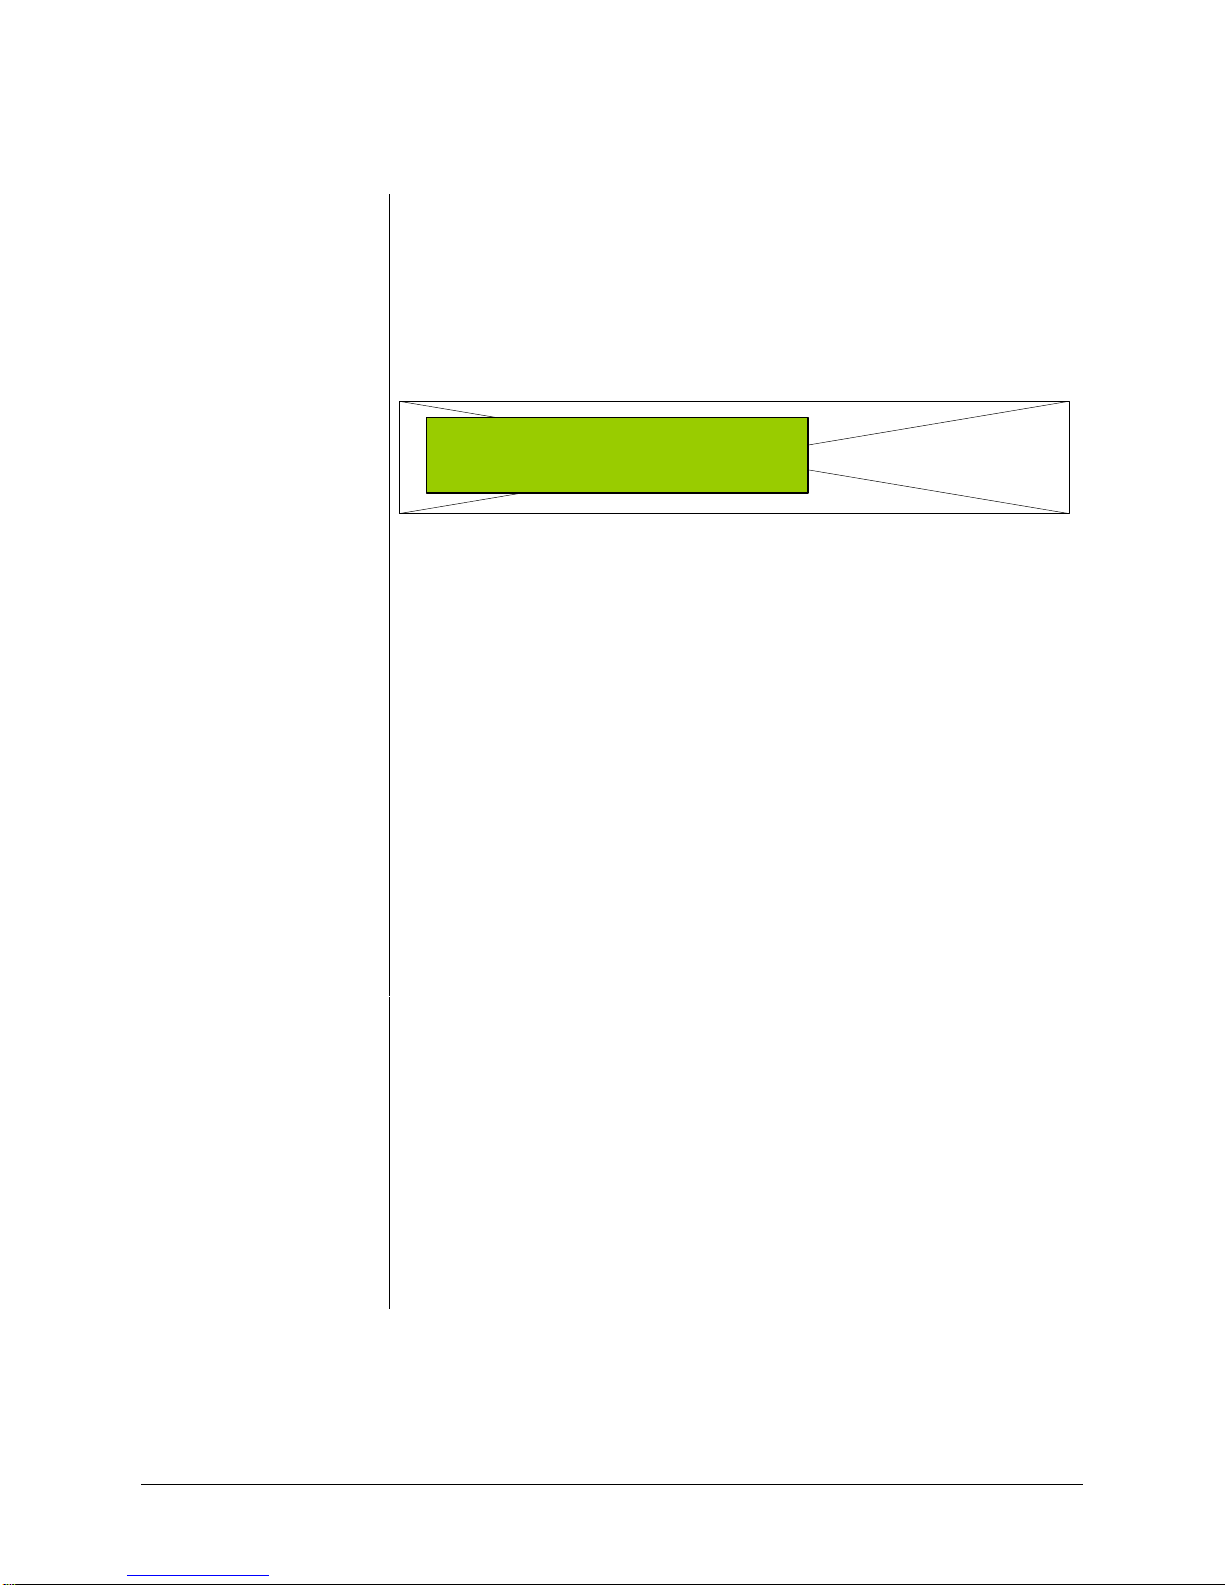
15. Press and hold the Status button until it “chirps” then release. The LCD
panel will display the operation Status once again. For example:
16. Unless you intend to make more copies of the same master CD, remove
the master CD from the first drawer.
17. You have already set the system up to copy data CDs from a master data
CD. You can repeat this procedure by placing a master data CD in the
first drawer, and blank CDs in the remaining drawers, and pressing the
Start button.
18
Page 23

Talon CD Duplicator
Functional Overview
Overview of the Menu Options
Three main menus enable you to select the Status of operation, sub-functions and settings within
those Statuss, and other system capabilities. In most instances, the Start button advances you
through the menu lists, and the Status button changes the setting of an option.
Operation Statuss Sub-Functions Other System Capabilities
Copy
(press the STATUS button for
the next item in this list)
Copy and Compare Show drives Edit
Emulate Start Writers Delete
Compare Write Method Clear
Verify Write Speed Copy x1
External CD-ROM drive Emulate x1
Setup
(press the START button for next
sub-function, and press the STATUS
button change the setting)
Autoloader Copy x2
Load Nonblank Emulate x2
CDDA Load Speed Copy x4
Eject Disk Emulate x4
Buzzer Copy x8
CD+G Emulate x8
Copycomp Eject Burn In
Read CDDA Index0 Update
Skip Read Error
Status 2 Compare
Startup Command
Setup
(press the STATUS button for the next
menu item of in this list)
19
Page 24

Operation Status Details
Copy
Use the Copy operation Status to copy from a partition on the hard disk or from a master CD
placed in the first CD drive. Before actually starting the copy operation, check your sub-function
settings. Here’s how:
§ Press and hold the Status button until it “chirps.” Then, when setup appears, press the Start
button to review each sub-function setting. Use the Status button to change any sub-function
setting.
§ If you are copying audio and graphics or text, make sure the CD+G sub-function is set to Yes.
§ Press the Start button until you can view the setup sub-function in the display panel. Then
press and hold the Status button until it “chirps” to return to the copy operation Status.
When copying from a master CD, place the master in the top CD drive and blank CDs in the
remaining CD drives. The full procedure for copying an audio CD is provided starting on page 3.
A full procedure for copying a Karaoke CD or any CD with text and/or graphics is provided
starting on page 11.
Talon CD Duplicator
20
Page 25
Talon CD Duplicator
PASS 1 FAIL 0
Copy and Compare
The copy and compare (copy +comp) operation Status is used for data CDs. This operation
makes copies (as described in the copy operation above) and then compares the copies to the
master source (the hard disk image or the master CD). When you use this operation Status, the
discs that have been successfully duplicated will be temporarily ejected and then automatically
re-inserted for the compare operation. Discs that experience successful compare operations will
be ejected automatically after comparison. The failed CD discs will remain in the CD writers.
Press the Status button to eject the failed discs (if any).
To copy and compare:
Ensure that the setup sub-functions are correct; i.e., make sure of the following:
§ Write method is set to Trk At Once
§ CD and G is set to Yes
§ All other sub-function settings are set to their default settings
Place the master CD in the CD reader (top CD drive).
Place blank CD(s) in the CD writer(s) drives. The system will automatically analyze the master
CD, display the number of megabytes, and display the total time of the CD (in minutes and
seconds).
When you are copying and comparing any less than seven CDs, you must press the Start button at
the prompt, start>, where n is the number of CD drives that have blank CDs ready for copying.
When you fill all six of the CD writers, the copy and compare operation starts automatically.
As the system performs the copy operation, it will display L and C status codes, where L
represents the number of minutes read, and C represents the number of minutes written. When
they both equal the total number of minutes of the CD, then the copy operation is complete.
The discs that have been successfully copied will be temporarily ejected, and then automatically
re-inserted for the compare operation. Again, the L status code represents the number of minutes
read from the master, and the C represents the number of minutes compared.
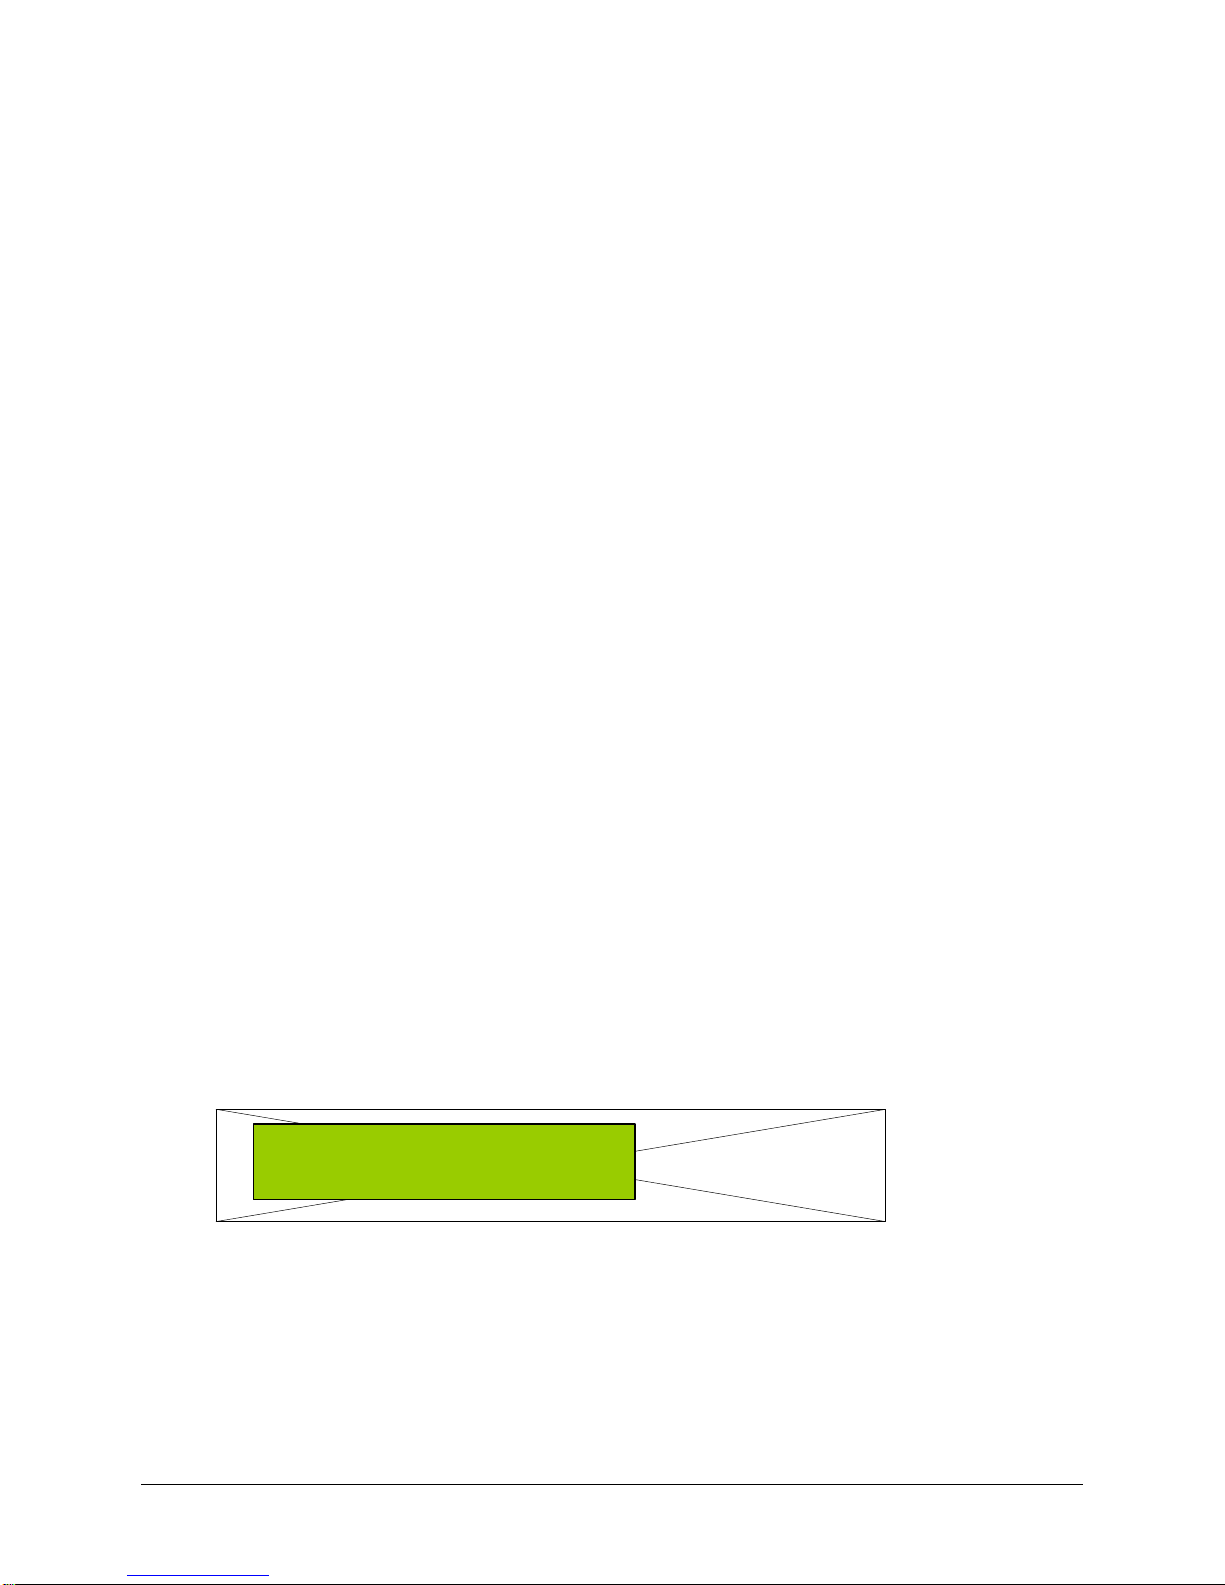
When the copy and compare operation is complete, you will hear a three-tone beep, the
successful copies will be automatically ejected, and the LCD display panel will indicate how
many CDs passed and how many failed:
If for any reason the system does not start the analysis process, check the master CD for its
integrity.
21
Page 26

Emulate
Compare
Verify
Talon CD Duplicator
The emulate operation is used to test both the master CD and the image in the specified hard
drive partition. It is a rarely-used operation, but is useful to test the system after it has been
transported and set up. This operation “emulates” a copy operation. Blank discs and source disc
information must be in place (either on a CD or in the selected partition of the hard drive) and the
system will act as if it is copying but nothing will be actually copied.
The compare operation is to be used with Data CDs only. It enables you to confirm that the data
on the master CD matches that of the copied CD.
The verify operation is to be used with audio and video CDs. It enables you to confirm that the
data on the master CD is OK for copying – either to a partition on the hard disk or to another CD.
External
The external operation is not used. It exists for future enhancements to the system involving an
external hard drive.
22
Page 27
Talon CD Duplicator
Sub-Function Details
To access the Sub-Function menu:
§ From the operation Status (copy, compare, etc.), press and hold the STATUS button until it
chirps. Release it. You should see setup in the LCD display. When setup is displayed, press
the START button. If setup is already displayed in the LCD panel, then press the Start button.
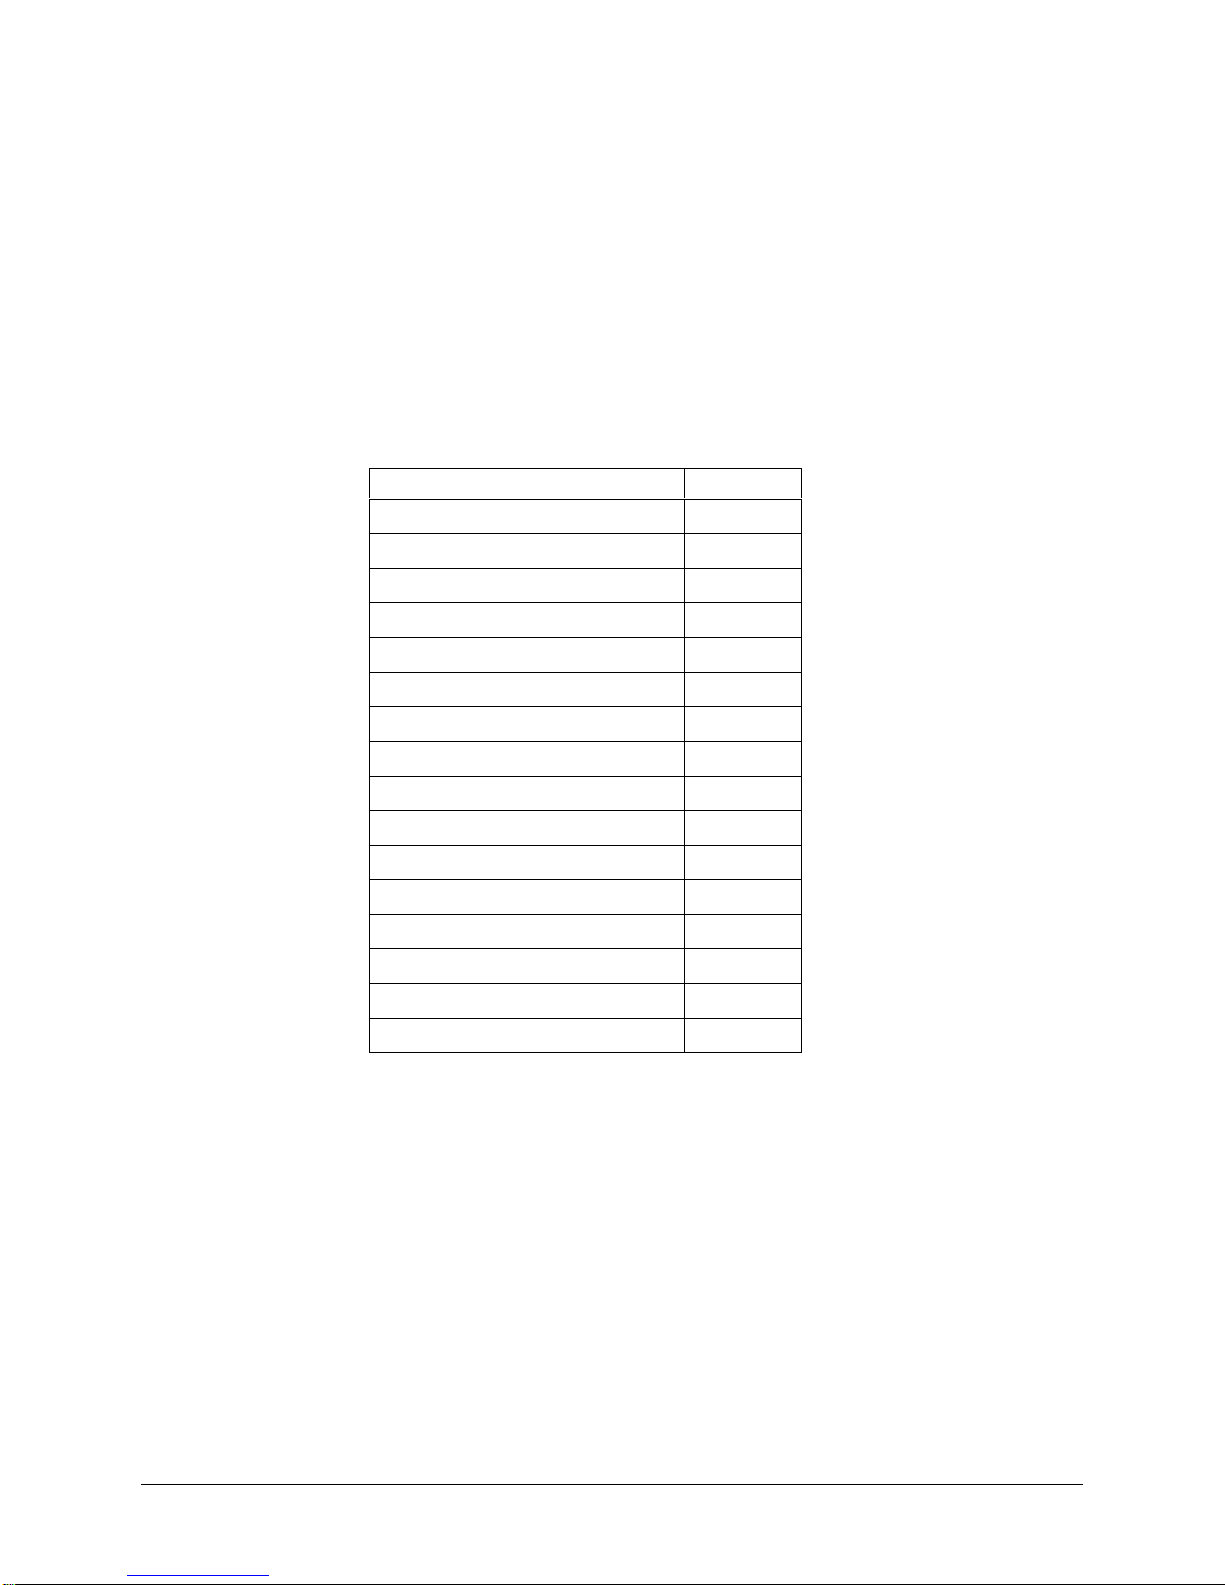
The Sub-Function menu includes the following sub-functions. Each sub-function is described in detail in
this section:
Sub-Function Page
show drives
start writers
write method
write speed
cdrom drive
autoloader
load nonblank disc
cdda load speed
eject disk
buzzer
CD+G
copycomp eject
read cdda index0
skip read error
Status 2 compare
startup command
24
25
25
26
26
27
27
27
27
28
29
29
30
30
31
31
23
Page 28
Setup
Start>
setup
<Statu
Talon CD Duplicator
To view the setup option, turn on the system. The system always displays an operation Status
(e.g., copy or emulate, etc.) at system startup. Press the Status button until it chirps. Then
release it. You should see the word setup in the display window, as shown below:
The setup option functions as a source for two menu lists:
§ Sub-Functions, and
§ Other System Capabilities.
Pressing the Start button when setup is displayed leads the user into the list of sub-function
options.
Pressing the Status button when setup is displayed leads the user into the list of “Other System
Capabilities,” (These are described starting on page 31.)
Press the Start button to proceed through the list of sub-functions.
With setup displayed in the LCD display panel, press and hold the Status button to return to
viewing an operation Status.
Show Drives
This is not a setting as much as it is an information list, showing the types of drives in the system.
The CD drives are TEAC or Lite-On drives. Pressing the STATUS button shows each name of
the drive as identified in the options list below.
Drives in the Talon CD Duplicator System:
TEAC CD-W540E ATA2.0 1.0B
Lite-On LTR2015
If you were to press the Status button, you could change the CD to CD sub-function from No to Yes.
When its setting is No, then the system will assume you are copying from the selected partition on the
hard disk. If you change this sub-function item to Yes, then the system will assume you are using the first
CD drive as the CD Reader, and that you are copying from the original CD.
Options:
No (default)
Yes
24
Page 29

Talon CD Duplicator
[Q]
write method
[*] Disc At Once
[Quit]
start writers
[+] 7
Press the Start button to display the next sub-function in the list.
Start Writers
This item indicates the number of CD writers that are enabled and ready for use. The default
setting is 7. In most cases it will not be necessary to change this setting. But if you want to deactivate any number of writers you can use the SETUP button to change this setting to any
number ranging from 0 to 7.
Options:
0
1
2
3
4
5
6
7 (default)
Write Method
There are two settings for the write method option:
Disc At Once, and
Track At Once.
Disc at Once is most often used for CD duplication, so this is the default setting. Track At Once
is never used in this system.
Options:
Trk At Once
Disc At Once (default)
25
Page 30

Write Speed
[Q]
cdrom drive
[*] auto
[Q]
write speed
[*] MAX
This setting controls the maximum writing speed of the CD writers. The default setting is MAX
which will use the highest writing speed of the writers (52X). For applications requiring a lower
write speed, change this setting using the Status button to adjust the writing speed. The options
are listed below.
Options:
1
2
4
6
8
10
12
16
20
24
32
40
48 (newer Statusls)
MAX (default)
Talon CD Duplicator
CDROM Drive
The CD-ROM (Reader) drive can be selected manually. The default setting is auto, which
implies that the first drive (top drive) is automatically selected as the reader drive. This option is
rarely changed, but if you wish to change the default reader drive to another drive other than the
top, then press the Status button to select one of the options as listed below.
Options:
ATA2.0
ATA3.0
ATA4.0
ATA5.0
ATA6.0
ATA7.0
ATA8.0
Auto (default)
26
Page 31

Talon CD Duplicator
[Q]
cdda load speed
[*] Auto
[Q]
load nonblank disc
[*] No
[Q]
autoloader
[*] No
Autoloader
This option is not used in the Talon Pro system.
Options:
CDF4800
classic
No (default)
Load Non-blank disc
The load nonblank disc option is not used by the Talon Pro Pro system.
Options:
Yes
No (default)
CD DA Load Speed
A CD DA (Compact Disc- Digital Audio) disc contains tracks with audio sectors only. You can
use the cdda load speed sub-function to set the load speed (the speed at which the digital audio
data is read from the master CD to a partition on the hard drive). The default setting for this subfunction is Auto, which is 52X.
Options:
Auto (default)
x1
x2
x4
x8
27
Page 32

Eject Disc
[Q]
buzzer
[*] On
[Q]
eject disc
[*] Pass
The eject disc sub-function controls the ejection of the discs by the CD writers. Three options
are available by pressing the Status button:
§ Always means the CD writers will always eject the CD discs whether the duplication is
§ No means all discs will remain in the CD writers when the job is done. You will then need to
§ The Pass setting, which is the default setting, will eject only the successfully duplicated discs
Options:
Pass (default)
Always
No
Talon CD Duplicator
successful or not.
eject the disks from the CD writers manually.
and leave the failed discs in the CD writers. You must press the Status button to eject the
failed CDs.
Buzzer
The Buzzer sub-function is not used in the Talon Pro Pro system.
Options:
On (default)
Off
28
Page 33

Talon CD Duplicator
[Q]
copycomp eject
[*] Auto
[Q]
CD+G
[*] No
CD+G
The CD+G sub-function, CD+Graphics, is set to No as the default. However, if you are copying
audio, text and graphics used in the same application, then you will want to use the Status button
to change this setting to Yes. This type of disc is usually used for Karaoke machines.
Options:
No (default)
Yes
Copycomp Eject
The copycomp eject sub-function controls the ejection of the CD writers when the Copy and
Compare operating Status is selected.
If the setting is Yes, the drawers will eject the recorded disks after duplicating. The system will
automatically re-insert the same discs again for subsequent comparison.
If the setting is No, the writers will not be ejected between the copy and compare operations.
The default setting is Auto, which means the ejection of the writers will take place after the
initial duplication.
Use the Status button to change this setting.
Options:
Auto
Yes
No
29
Page 34

Read CD DA Index 0
[Q]
skip read error
[*] No
[Q]
Read cdda index0
[*] Yes
CD DA stands for Compact Disc-Digital Audio. A CD-DA disc contains tracks with audio
sectors only (what we normally think of as a music CD). In CD-ROM, indexing involves
assigning searchable 'addresses' within a track--which can be up to 99. Index 0 contains
information about the tracks on the CD.
If your master CD has index markers, you must set this option to Yes in order to copy the
markers.
Use the Status button to change this setting.
Options:
Yes (default)
No
Talon CD Duplicator
Skip Read Error
In most cases you will not need to change the skip read error sub-function setting.
This setting controls error skipping during source reading. The default setting is No. When an
error is detected during the load or read-in process, the duplicator will stop and display a “Read
Error” message.
If the setting is changed to Yes (using the Status button); an error message will not be displayed
even if there is an error in the reading. You can use this setting to copy source CDs with errors.
Options:
No (default)
Yes
30
Page 35

Talon CD Duplicator
[Q]
startup command
[*] copy
[Q]
Status 2 compare
[*] No
Status 2 Compare
Under the ISO 9660 standard, a CD-ROM sector can be Status 1 or Status 2.
Status 1 allocates2048 bytes for user data, plus a third layer of error detection and error correction
codes. This is the Status that provides the highest integrity for computer data.
Status 2 allocates 2336 bytes for user data, and no third layer of error detection and error
correction. This Status is considered appropriate for segments of music, graphics and video,
especially in CD-ROM-XA and CD-I implementations.
If you want to verify that the information on the master CD matches that on the copy, then set this
sub-function to Yes, and the system will compare the two. The default for this sub-function is
No.
Options:
No (default)
Yes
Startup Command
You can set the system up so that the startup operation Status is always the same. In most cases,
users will want copy as the startup command. However, you may set the system to start with any
of the operations listed as options below.
Options:
copy
copy+comp
emulate
compare
format
test
quick erase
full erase
verify
external
31
Page 36

Other System Capabilities
Start>
setup
<Statu
Setup
To view the setup option, turn on the system. The system always displays an operation Status
(e.g., copy, load, emulate, etc.) at system startup. Press the Status button until it chirps. Then
release it. You should see the word setup in the display window, as shown below:
The setup option functions as a source for two menu lists:
§ Sub-Functions, and
§ Other System Capabilities.
With setup displayed in the LCD panel, press the Status button to view the menu list of Other
System Capabilities:
Talon CD Duplicator
Edit
Delete
Clear
The edit function enables you combine tracks from different CDs onto one single CD. Refer to
page Error! Bookmark not defined. for a detailed procedure that describes how to use this
function.
When the last music track stored in the partition on the hard drive is not the one you wish to keep,
you can use the delete function to delete the last track.
Before you put selected tracks in a partition of the hard drive, you must first clear the partition
using the clear function. This process is described in the procedure starting on page Error!
Bookmark not defined..
32
Page 37

Talon CD Duplicator
Under some conditions, you may wish to reduce the writing speed of the
Copy x1
Emulate x1
Copy x2
Emulate x2
CD writers. Switch to any of these copy or emulate speeds and the
Copy x4
Emulate x4
Copy x8
Emulate x8
Burn In
writing speed of the system will be adjusted accordingly
This function is used by the system developer to test the system. General users are to ignore this
function.
Update
This function is used by system developers to update the firmware of the system. General users
are to ignore this function unless instructed to do so by Talon service personnel.
When setup appears in the LCD display panel, press and hold the Status button to return to an operation
Status.
33
Page 38

Glossary
Talon CD Duplicator
CD
CD Duplication
CD+G
CD-DA
CD-R [Disc]
CD-Recordable
Short for compact disc, an optical disc storage format developed by
Philips and Sony.
The process of making one or more copies of a compact disc.
CD+Graphics. Audio, text and graphics used in the same application. This
type of disc is usually used for Karaoke machines.
Compact Disc-Digital Audio. A CD-DA disc contains tracks with audio
sectors only. In 1982 Philips and Sony introduced the necessary
technology for storing digital audio signals on a compact disc, and
introduced the CD-Digital Audio.
An acronym for compact disc-recordable which is a type of media that
allows you to record information using a CD Recorder.
CD-Recordable technology allows production of CD-ROMs on the
desktop ('one-offs'). It requires a PC, a CD-R recorder or drive,
appropriate software, and 'recordable' media. The reduction of prices for
this hardware and software, and their ease of use, has helped the growth of
CD-ROM production in-house. The 'one-off' is very different from the
mass- reproduced or 'hot-pressed' CDs. It is sold pre-grooved, in 63 or 74
minute capacities, and it involves a layered structure--with a sensitive
chemical recording layer, and almost always with a Startld reflective
layer. Once recorded, the CD-R disc (one-off)performs in the same way as
the mass-reproduced CDs.
CD-ROM
Compact Disc-Read Only Memory. A standard for compact disc to be
used as a digital memory medium for personal computers. The
specifications for CD-ROM were first defined in the Yellow Book.
CD-ROM Disc
A CD-ROM disc contains only data sectors as defined in the Yellow
Book.
CD-ROM
Drive
A peripheral device attached to a computer which allows it to read/play a
CD-ROM disc. All CD-ROM players can also play back audio CDs, but
you need external headphones or speakers to hear them.
34
Page 39

Talon CD Duplicator
Compact Disc
Compact Disc
Formats
Digital Audio
Digital Audio
Extraction
(DAE)
CD stands for compact disc which is a general term for all formats of CD
media. CD formats available on the market now include CD Audio, CDROM, CD-ROMXA, Video CD, CD-I and others.
During the last two decades several Compact Disc formats were developed
to serve different purposes and uses. Starting with the CD-DA format in
1980, as a way to distribute high quality music in a compact and
convenient format, the first compact disc standard was formulated. Then,
the idea of storing computer data on the same media, more than 10 years
aStart, lead to a new format: the CD-ROM (along with CD). In the last few
years, the desire to store a whole new generation of multimedia
contents(audio, video, games, pictures etc.) demanded new formats: CDI,CD-XA, Photo-CD, Video-CD, CD+ etc. were invented.
Although digital audio can have a variety of sampling rates and
quantization, the Red Book specifies CD-Digital Audio as being sampled
at 44.1KHz, and quantized at 16 bits/sample, for high quality stereo sound
(65,536 values).Therefore, sound of different quality, even if it is placed in
a CD, is not Red Book Digital Audio.
The process of copying CD-DA audio tracks digitally from your CDwriter or another CD-ROM drive, to a hard disk or to a recordable CD.
Not all CD-ROM drives support this.
Disc Read
Head--Disc
Write Head
Disc-At-Once
(DAO)
Storage drives (magnetic and optical) have a head or heads that float over
the recorded area to read and write. Obviously, CD-ROM drives have only
a read head, which involves a low-intensity red laser diode (a.k.a. infrared
laser diode), lenses that focus the laser on the track, and others that
redirect the reflections to one of the photodiodes for appropriate decoding.
Some Write-Once and Rewritable optical drives involve two heads (to
write and read), while other drives, including CD-Recordable, use only
one head to do both--using a high-intensity blue arStartn laser for the write
function. For mass replication of CD-Audio, CD-ROM, and DVDs, the
glass master is produced by encoders that have special recording heads.
A method of writing in which one or more tracks are written in a single
operation. The laser will not stop until the whole disc recording is finished
and the disc is closed - hence no no clicks between audio tracks. Disc-atOnce has only been added/available with the recent generation of CD
recorders and recent firmware upgrades.
35
Page 40

Talon CD Duplicator
Disk Sector
Emulate
Enhanced CD
HDCD
Hz
In magnetic disks, formatting provides a geography of the platters; which
are divided into concentric circles, and these circles are further subdivided
into sectors. Although sectors vary in size depending on their position in
the disk, they have a specific capacity in bytes. This sectored framework is
found in constant angular velocity (CAV) drives, and is compatible with
the FAT used in PCs. When discussing optical discs, 'sector' is used to
refer to discrete amounts of data with a specific layout or structure along
the single spiral track.
To test the function of a disc on a computer after formatting a complete
disc image.
A general term for various techniques that add computer software to a
music CD, producing a disc which can be played in a music player or read
by a computer. Also called CD Extra, CD Plus, hybrid CD, interactive
music CD, mixed-Status CD, pre-gap CD, or track-zero CD.
High-definition Compatible Digital. A proprietary method of enhancing
audio on CDs.
Hertz. A unit of frequency measurement. The number of cycles
(repetitions) per second.
Jewel Box/Case
Karaoke
Master
Mastering
The plastic clamshell case that holds a CD for shipping or for storage.
Literally, empty orchestra. The social sensation from Japan where people
sing along to a music track. Karaoke was largely responsible for the
success of laserdisc in Japan, thus supporting it elsewhere.
The metal disc used to stamp replicas of optical discs. The tape used to
make additional recordings.
Technically, refers to the process of creating a glass master from which
compact discs will be reproduced in quantity. In desktop recordable CD
systems, mastering is done together with premastering by the desktop CD
recorder, and the term is generally used to mean "recording."
36
Page 41

Talon CD Duplicator
Status
Multimedia
Protective
Coating
Track-At-Once
Under the ISO 9660, a CD-ROM sector can be Status 1 or Status 2.
Status 1 allocates2048 bytes for user data, plus a third layer of error
detection and error correction codes. This is the Status that provides the
highest integrity for computer data.
Status 2 allocates 2336 bytes for user data, and no third layer of error
detection and error correction. This Status is considered appropriate for
segments of music, graphics and video, especially in CD-ROM-XA and
CD-I implementations.
Information in more than one form, such as text, still images, sound,
animation, and video. Usually implies that the information is presented by
a computer.
Optical discs are given a clear plastic or lacquer coat that protects the
metallic layer. Even with this coating, small scratches, pressure, dirt and
other markings can make the disc unreadable. The coating also prevents
air from reaching and oxidizing the metallized layer--which would render
the disc unreadable
With Track-at-Once writing Status, a CD-Recorder will record one track at
a time. In between every two tracks (unless you are only recording a single
track). The CD-Recorder laser will stop while the hard disc prepared for
the contents of the next track. Each time the laser is stopped, it writes RunOut blocks. When starting again, it writes Run-In blocks (a total of 7
blocks).These are ignored by CD-ROM readers and so do not disturb data
transmission, but in some audio players you might hear a click between
tracks. This is why disc-at-Once recording is preferable for audio discs.
Wave
Yellow Book
A Wave file (.WAV) is a type of sound file which stores digitized analog
signals.
The book which sets out the standard developed by Philips and Sony for
the physical format of compact discs to be used for information storage
(CD-ROM).
37
Page 42

Page 43

Talon CD Duplicator Index
Index
Autoloader..................................................... 27
Burn In.......................................................... 33
Buzzer...........................................................28
CD ................................................................ 34
CD DA Load Speed.......................................27
CD Duplication ............................................ 34
CD master discs ............................................... 3
CD+G...................................................... 29, 34
CD-DA.......................................................... 34
CD-R [Disc] .................................................. 34
CD-Recordable ............................................ 34
CD-ROM...................................................... 34
CD-ROM Disc .............................................. 34
CDROM Drive.............................................. 26
Clear
clearing a partition on the hard drive .......... 32
Compact Disc...............................................35
Compact Disc Formats ................................ 35
Compare........................................................ 22
Copy.............................................................. 20
Copy and Compare........................................ 21
Copy x1 ......................................................... 32
Copy x2 ......................................................... 32
Copy x4 ......................................................... 32
Copy x8 ......................................................... 32
Copycomp Eject ............................................ 29
copying CDs
how to copy a CD to a CD ........................... 4
data CDs
how to copy............................................... 15
Delete
deleting the last track................................. 32
Digital Audio................................................ 35
Digital Audio Extraction.............................. 35
Disc Read Head--Disc Write Head.............. 35
Disc-At-Once................................................ 35
Disk Sector................................................... 36
duplication rates .............................................. 1
Edit ............................................................... 32
Eject Disc......................................................28
Emulate................................................... 22, 36
Emulate x1 .................................................... 32
Emulate x2 .................................................... 32
Emulate x4 .................................................... 32
Emulate x8 .................................................... 32
Enhanced CD...............................................36
External......................................................... 22
HDCD........................................................... 36
Hz..................................................................36
installation instructions..................................... 2
Jewel Box/Case.............................................36
Karaoke CDs
how to copy................................................11
Load Non-blank disc...................................... 27
Master...........................................................36
Mastering......................................................36
Status............................................................37
Status 2 Compare...........................................31
Status of operation
current Status ...............................................3
Multimedia ...................................................37
Protective Coating........................................37
Read CD DA Index 0.....................................30
setup ......................................................23, 33
Setup........................................................24, 32
Show Drives................................................... 24
Skip Read Error ............................................. 30
Start Writers...................................................25
Startup Command ..........................................31
system specifications ........................................1
technical support..............................................2
Track-At-Once ............................................. 37
Update ........................................................... 33
Verify ............................................................ 22
warranty information ........................................2
Wave.............................................................37
Write Method.................................................25
Write Speed ................................................... 26
Yellow Book..................................................37
39
Page 44

Page 45

Talon CD Duplicator Index
41
 Loading...