

Page 1
1
GENERAL SAFETY RULES
GB
MODEL NO. ACA007
USER MANUAL
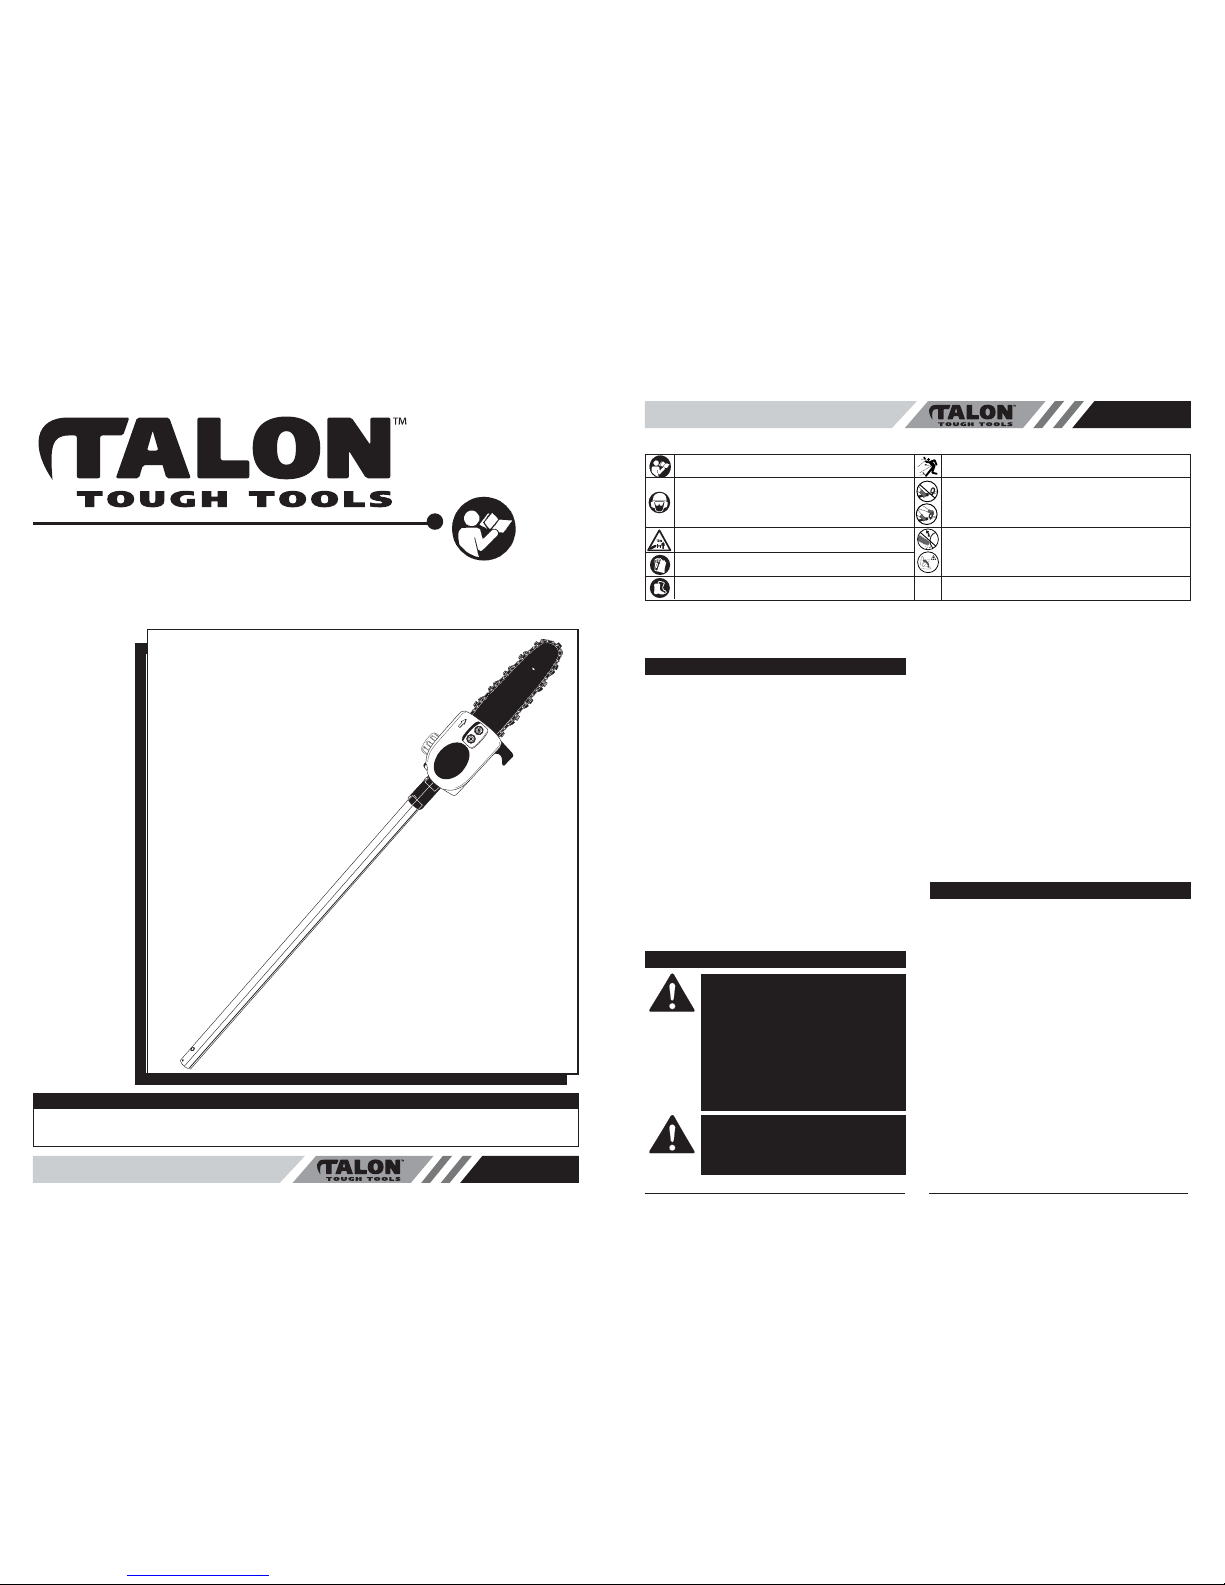
Pole Saw Attachment
9096-A007xx
WARNING • PLEASE READ
For your own safety please read this manual before attempting to operate your new unit. Failure to follow instructions
can result in serious personal injury. Spend a few moments to familiarize yourself with your pole saw before each
use.
1. Keep bystanders, especially children and pets, at
least 50 ft (15 m) away.
2. Wear safety glasses or goggles that are marked as
meeting ANSI Z87.1 standards, and ear/hearing protection when operating this unit. Wear a face or dust
mask if the operation is dusty.
3. Wear heavy, long pants, boots, gloves and a long
sleeve shirt. Do not wear loose clothing, jewelry, short
pants, sandals or go barefoot. Secure hair above
shoulder level.
4. Use the unit only in daylight or good artificial light.
5. Use the right tool. Only use this tool for the purpose
intended.
6. Always stop the engine/motor when operation is
delayed or when walking from one location to another.
7. Use only genuine factory replacement parts and
accessories for this unit. These are available from
your authorized service dealer. Use of any unauthorized parts or accessories could lead to serious injury
to the user or damage to the unit, and void your warranty.
1. With a basic understanding of kickback, you can
reduce or eliminate the element of surprise. Sudden
surprise contributes to accidents.
2. Grip saw firmly. Hold the chain saw firmly with both
hands when the motor is running. Keep a good firm
grip on the saw with both hands, the right hand on the
rear handle, and the left hand on the front handle.
3. Do not let the nose of the guide bar contact a log,
branch, ground or other obstruction.
4. Always cut with the engine running at full speed.
Fully squeeze the throttle trigger and maintain a
steady cutting speed.
5. Do not over reach.
6. Follow the manufacturer’s sharpening and maintenance instructions for the saw chain.
7. Use only replacement bars and chains specified by
the manufacturer or the equivalent.
1. DO NOT operate a chain saw with one hand! Serious
injury to the operator, helpers, or bystanders may
result from one-handed operation. A chain saw is
intended for two-handed use.
2. Do not operate a chain saw if you are fatigued.
3. Do not wear loose clothing or jewelry, as they can get
caught in moving parts. Non-skid footwear is recommended when working outdoors. Wear protective hair
covering to contain long hair.
4. Use safety glasses, safety footwear, snug fitting
clothing, protective gloves, and protective hearing
and head gear.
5. Use caution when handling fuel. Move the chain saw
at lest 10 feet (3 m) from the fueling point before starting the engine.
6. Do not allow other persons to be near the chain saw
when starting or cutting with the chain saw. Keep
bystanders and animals out of the work area.
7. Keep the work area clean. Cluttered areas invite
injuries. Do not start cutting until you have a clear
work area, secure footing, and a planned retreat path
from the falling branches.
WARNING! When using tools, basic safety precautions, including the following, should always be followed to reduce
the risk of serious personal injury and/or damage to the unit.
Read all these instructions before operating this product and save these instructions.
Meaning of symbols marked on the product
Read the user manual before using the machine
Whenever the machine is in use, safety goggles must be worn
to safeguard against flaying object, as must ear protectors,
such as a soundproof helmet, in order to protect the operator’s
hearing. If the operator is working in an area where there is a
risk of falling objects, a safety helmet must also be worn.
Do not operate unit without proper attachments and
guards in place.
Keep people or animals at least 15m away from
the machine during operation
Wear gloves to protect your hands
Wear safety boots to protect against electric shock
Contact of the guide bar tip with any object should
be avoided. Tip contact may cause the guide bar to
move suddenly upward and backward, which may
cause serious injury.
Always use both hands while operating the chain
saw. Never use only one hand to operate the saw.
WARNING: Kickback may occur when the
nose or tip of the guide bar touches an
object, or when the wood closes in and
pinches the saw chain in the cut. Tip contact
in some cases may cause a lightning-fast
reverse action, kicking the guide bar rapidly
back towards the operator. Pinching the saw
chain along the top of the guide bar may
push the guide bar rapidly back towards the
operator. Either of these reactions may cause
you to lose control of the saw, which could
result in serious injury to the user.
WARNING: Do not rely exclusively upon the
safety devices built into your saw. As a chain
saw user, you should take several steps to
keep your cutting jobs free from accident or
injury.
CHAIN SAW OPERATING PROCEDURES
KICKBACK SAFETY PRECAUTIONS
OTHER SAFETY PRECAUTIONS
Page 2
2
GB
8. Stay Alert. Watch what you are doing. Use common
sense. Do not operate the chain saw when you are
tired. Keep all parts of your body away from the saw
chain when the motor is operating. Before you start
the saw, make sure the saw chain is not contacting
anything.
9. Disconnect the chain saw when not in use, before
servicing, and when changing accessories and
attachments such as saw chain and guard.
10. Check damaged parts. Before further use of the
chain saw, a guard or other part that is damaged
should be carefully checked to determine that it will
operate properly and perform its intended function.
Check for alignment of moving parts, binding of
moving parts, breakage of parts, mounting, and any
other conditions that may affect its operation. Aguard
or other part that is damaged should be properly
repaired or replaced by an authorized service center,
unless otherwise indicated in this instruction manual.
11. Use extreme caution when cutting small sized brush
and sapling, as slender material may catch the saw
chain and be whipped toward you or pull you off balance. Do not operate a chain saw in a tree unless you
are specifically trained to do so. When cutting a limb
that is under tension, be alert for spring back so that
you will not be struck when the tension in the wood
fibers is released. Do not expose the chain saw to
rain. Do not use the chain saw in damp or wet locations. Do not use the chain saw in the presence of
flammable liquids or gases.
12. All chain saw service, other than the items listed in
the user manual safety and maintenance instructions,
should be performed by competent chain saw personnel. Do not attempt to repair it yourself; there are
no user serviceable parts inside.
13. When not in use, chain saws should be stored out of
the reach of children, in a dry, high or locked-up
place. When storing saw, use a scabbard or carrying
case.
14. The chain saw will do a better and safer job when
used at the rate for which it was intended.
15. Use the right tool. Cut wood only. Do not use the
chain saw for purposes for which it was not intended.
For example, do not use the chain saw for cutting
plastic, masonry, or non-building materials.
16. Use devices, such as low-kickback chain, guide bar
nose guards, chain brakes and special guide bars,
which reduce the risks associated with kickback.
17. There are no other replacement components for
achieving kickback protection in accordance with
CSA Z62.3.
18 Do not operate a chain saw that is damaged,
improperly adjusted, or not completely and securely
assembled. Be sure that the saw chain stops moving
when the trigger is released.
19. Do not attempt operations beyond your capacity or
experience.
20. Never remove, modify or make inoperative any safety
device furnished with your unit.
21. This saw is classified by CSA as a Class 2C saw. It is
intended for infrequent use by homeowner’s, cottagers and campers, and for such general applications such as clearing, pruning, cutting firewood, etc.
It is not intended for prolonged use. If the intended
use involves prolonged periods of operation, this may
cause circulatory problems in the user’s hands due to
vibration. It may be appropriate to use a saw having
an anti-vibration feature.
22. Safety clothing required by your safety organizations,
government regulations, or your employer should be
used; otherwise, snug fitting clothing, safety footwear,
and hand and ear protection should be worn.
Low-kickback saw chain is chain that has met the
kickback performance requirements of ANSI B175.11991 and is in accordance with CSA Z62.3. Do not
use other replacement chain unless it has met these
requirements for your specific model.
23. Do not use any other cutting attachment or
accessories. Use only original equipment
manufacturer replacement parts and accessories,
which are designed specifically to enhance the
performance and maximize the safe operation of our
products. Failure to do so may cause poor
performance and possible injury. Use only the chain
and bar supplied with this product. Do not use any
other cutting attachment. Use of such attachments
will void your factory warranty and could result in
serious bodily injury.
24. Never touch the chain or attempt to service the saw
while the engine is running. Make sure all moving
parts have stopped. Allow the chain saw to cool, as
the chain can be hot.
25. Check the bar and chain at frequent intervals for
proper adjustment. Make sure the bar and chain are
properly tightened and sharpened. Visually inspect
for damage. Repair any damage before restarting or
operating the chain saw.
26. Do not cut near electrical cables or power lines.
27. Do not use the pole saw to fell a tree. Use a standard
chain saw for this application.
1. Be aware of extension cord while operating chain
saw. Be careful not to trip over cord. Keep cord away
from chain and operator at all times.
2. Keep bystanders 50 feet (15 meters) away when
operating saw.
3. Do not use the pole saw to cut down trees. Use the
chain saw without pole attachment.
4. Grip pole saw securely - one hand on the pole, the
other on the handle.
5. Keep finger off trigger until ready to make cut.
6. Before starting pole saw, make sure chain is not
touching anything.
7. Keep all parts of body away from chain when saw is
running.
8. Do not force chain saw while cutting. Apply light pressure. It will do the job better and safer at the rate for
which it was intended.
9. When cutting limbs or branches that are under tension, use extreme caution. Be alert for wood springing back. When wood tension is released, limb could
spring back and strike operator causing severe injury
or death.
10. When Carrying pole saw from one place to another: •
unplug unit • return telescoping pole to shortest position • hold pole at balance point (close to saw end) •
keep guide bar and chain to rear.
11. Do not cut small brush and saplings with the pole
saw. Use the chain saw only, with extreme care.
Slender matter may catch in the chain and be
whipped toward you. This could also pull you off balance.
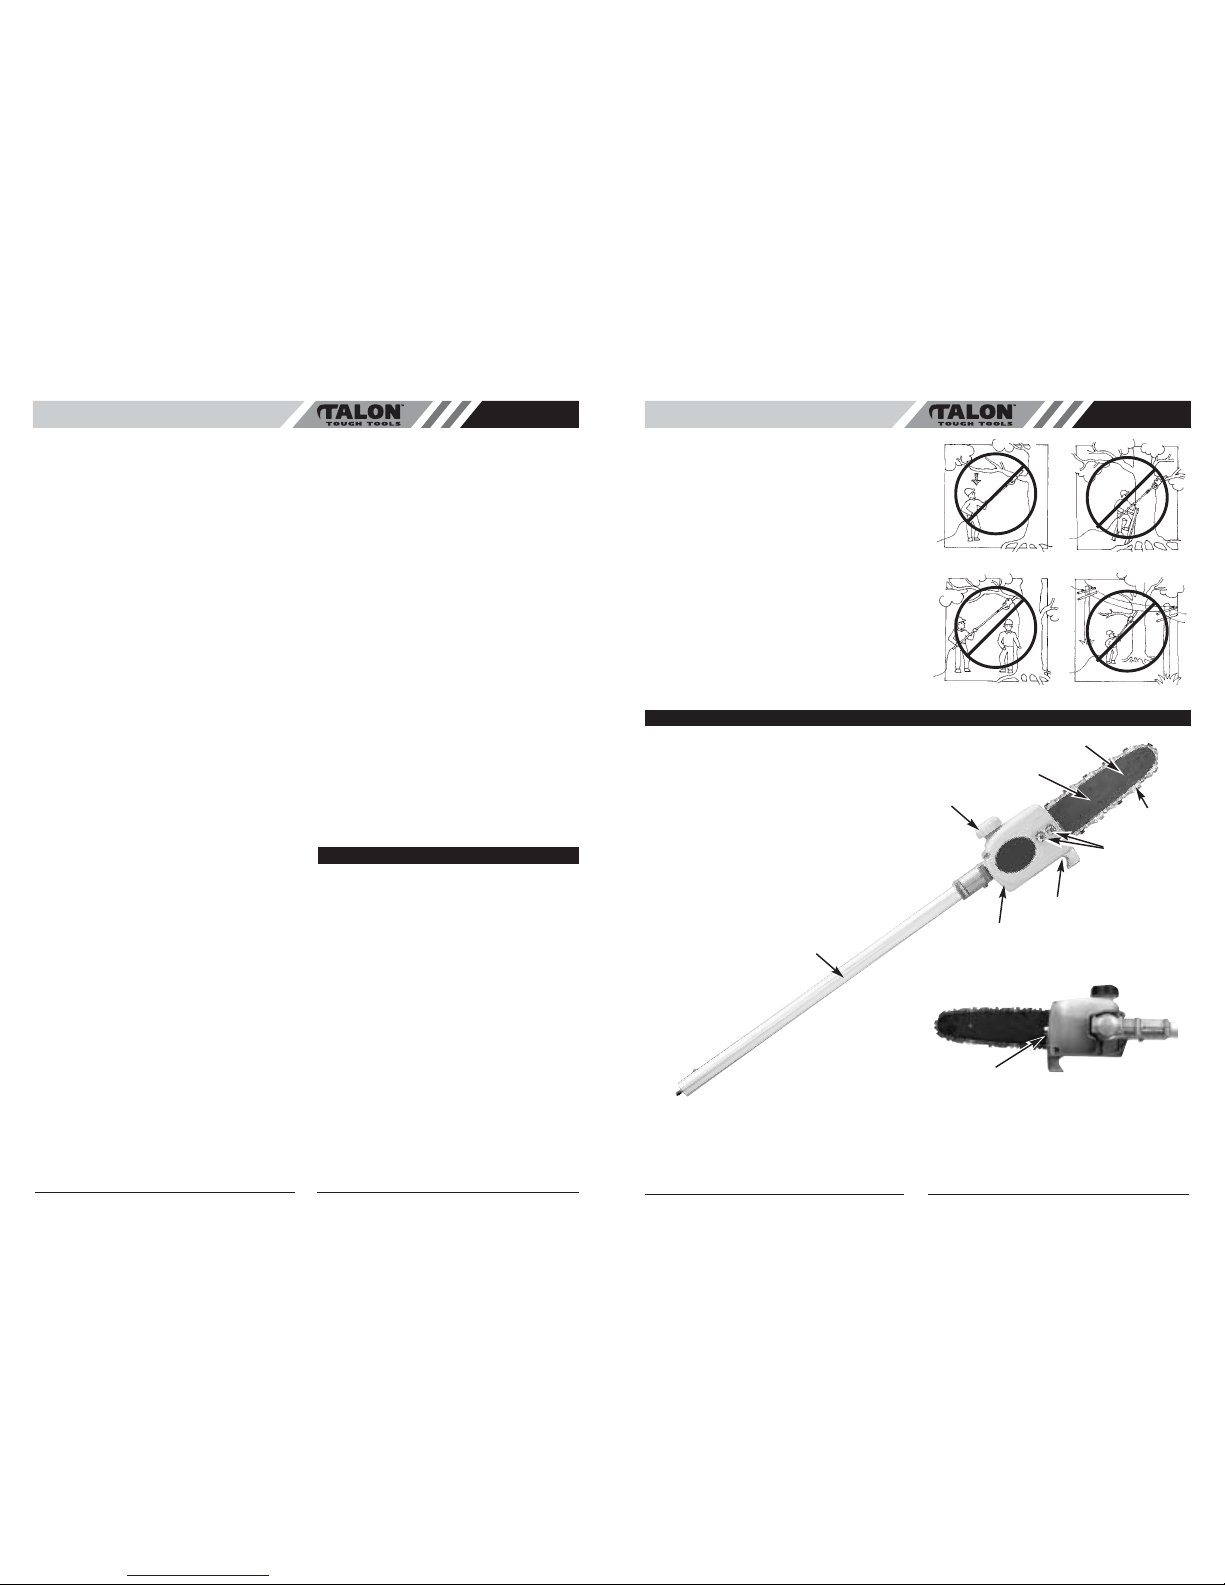
12. Never stand directly under the limb you are trimming.
Always position yourself out of the path of falling
debris. (See Fig. 1A)
13. Never stand on a ladder or other type of unstable
support while using the pole saw.
14. Always use both hands to operate pole saw. Keep a
firm, steady pressure on the pole saw while cutting
but do not try to force the saw through the wood.
15. Do not use the pole saw to cut limbs larger in diameter than 4” (10 cm) in diameter. (See Fig. 1B)
16. Keep other persons away from cutting end of pole
saw and at a safe distance from work area. (See Fig.
1C)
17. Do not use pole saw near cable, electric power or
telephone lines. Maintain a minimum clearance of 10
feet from all power lines. (See Fig. 1D)
GB
POLE SAW TRIMMING PRECAUTIONS
Fig. 1A Fig. 1B
Fig. 1C Fig. 1D
GENERAL IDENTIFICATION
1. Saw Chain
2. Guide Bar
3. Bar Retaining Nuts
4. Guide Bar Nose
5. Oil Tank Cap
6. Drive Shaft
7. Sprocket Cover
8. Chain Catcher
9. Tension Adjustment Screw
1
5
2
3
4
6
8
7
9
3
Page 3
5
GB
•SAW CHAIN REPLACEMENT/INSTALLATION
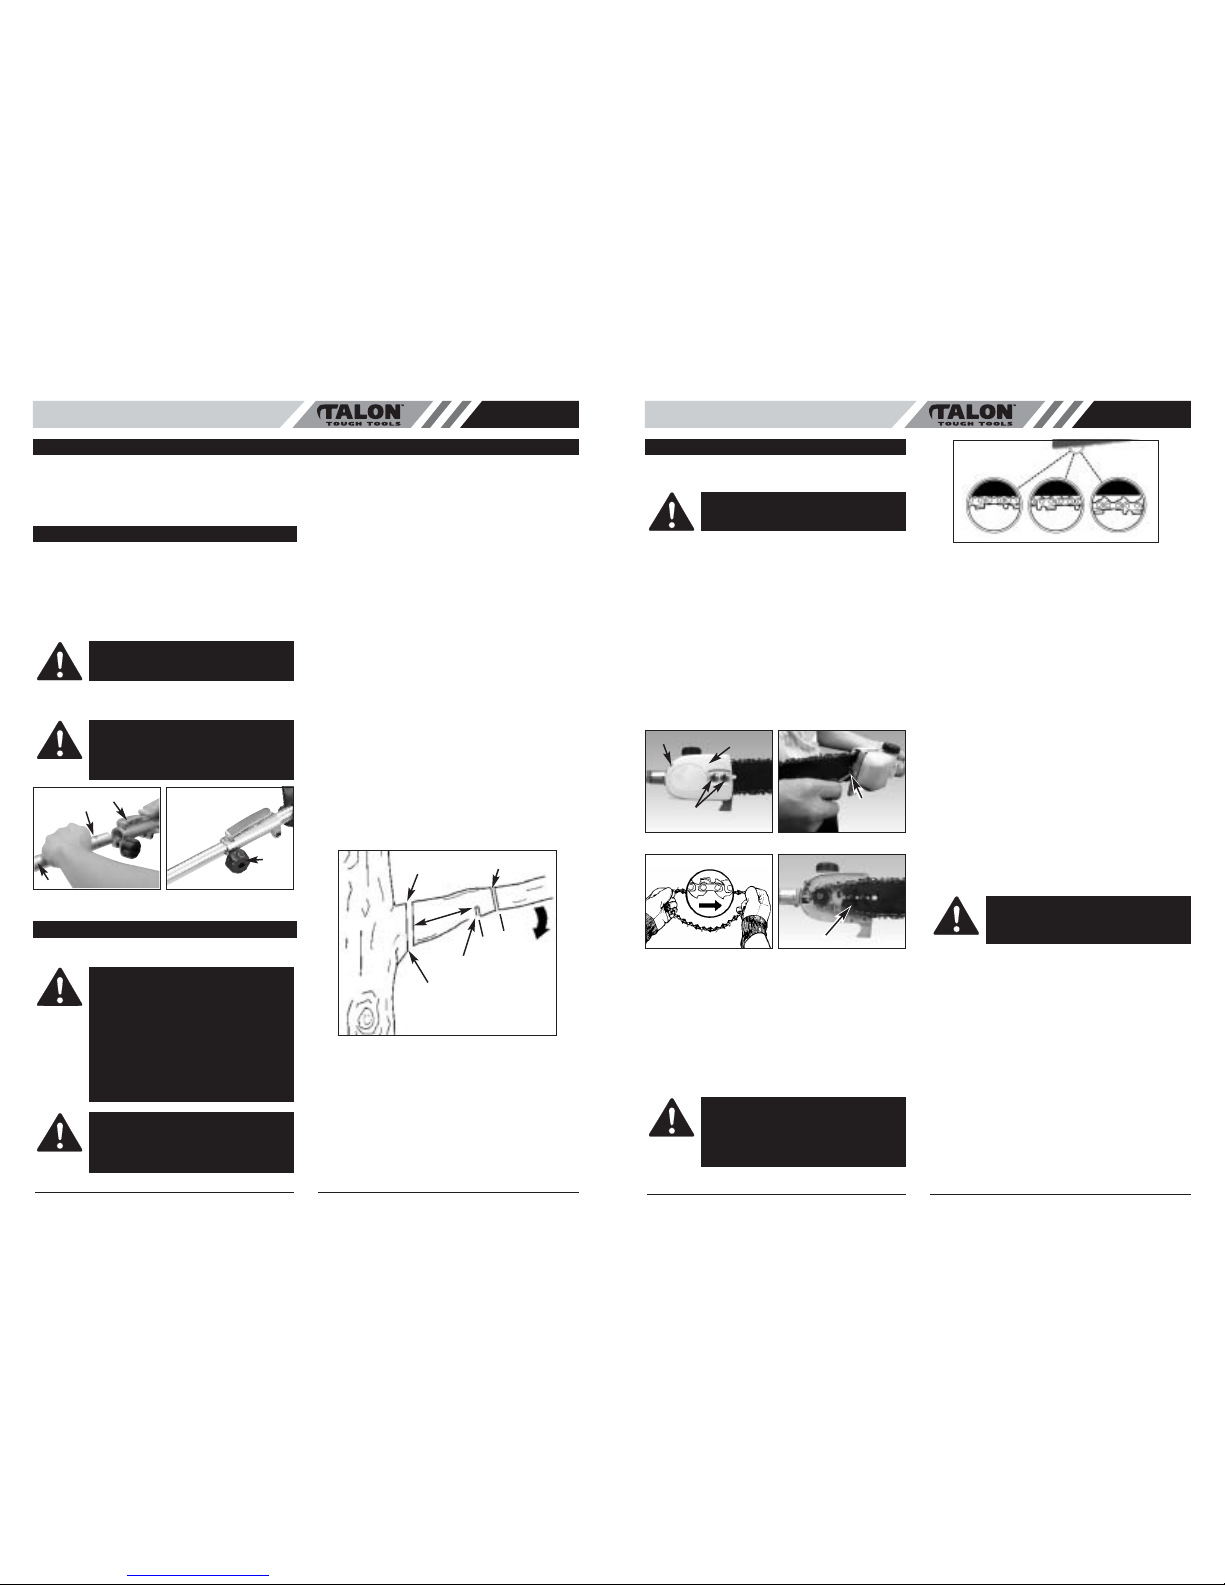
1. Remove the bar retaining nuts and screw. Then take
off the sprocket cover (Fig. 4A).
2. Using a straight screwdriver turn tension adjustment
screw counterclockwise (Fig. 4B) as far as it will go
or to the end of its travel, take off the chain then
remove the bar.
3. Prepare new chain or bar.
4. Loop the saw chain over the drive sprocket with the
cutting edges of the chain pointing in the direction of
rotation (Fig. 4C).
5. Adjust the tension adjustment screw (Fig. 4B) to
allow insertion of the bar (Fig. 4C). Make sure the
chain follows the slot in the guide bar and adjust the
tension adjustment screw to make the chain tighten.
6. Install the sprocket cover and tighten bar retaining
nuts and screw (Fig. 4A).
•SAW CHAIN TENSION ADJUSTMENT
Proper tension of the saw chain is extremely important
and must be checked before starting, as well as during,
any cutting operation. Taking the time to make needed
adjustments to the saw chain will result in improved
cutting performance and prolonged chain life.
NOTE: A new chain and bar will need readjustment after
as few as 5 cuts. This is normal during the break-in period, and the interval between future adjustments will
lengthen quickly (Fig. 5).
TO ADJUST THE SAW CHAIN TENSION:
1. Loosen the bar retaining nuts so they are hand tight
(Fig. 4a).
2. Holding the nose of the bar up, use the screwdriver or
scrench (if provided in your unit’s hardware pack) to
turn the guide bar adjustment screw clockwise to
tighten the chain (Fig. 4b). Turning the screw counterclockwise loosens the chain on the guide bar.
3. While wearing heavy duty work gloves (after you’ve
made the adjustment), move the saw chain back and
forth on the guide bar to be sure the chain moves
freely and is in proper mesh with the sprocket. Never
move the chain with your bare hands.
NOTE: IF the chain is difficult to rotate or if it binds on the
guide bar, there is too much tension applied and it must be
adjusted. To decrease tension, turn the adjustment screw
counterclockwise, slowly. Move the chain back and forth
until it moves freely.
4. Holding the nose in upper position, securely tighten
the bar retaining nuts.
• OILING THE CHAIN
The pole saw chain is self-lubricating. Oil is dispersed
onto the chain as the unit is used. Keep an adequate
amount of oil in the oil tank. Use the bar-chain oil
provided in the hardware pack. Always use bar-chain and
sprocket oil or similar chain saw oil.
• GUIDE BAR MAINTENANCE
NOTE: Proper maintenance of the guide bar is essential
to the performance of your pole saw. Proper guide bar
maintenance will keep your saw in good working order.
Most guide bar problems can be prevented merely by
keeping the chain saw well maintained.
Incorrect filing and non-uniform cutter and depth gauge
settings cause most guide bar problems, primarily
resulting in uneven bar wear. As the bar wears unevenly,
the rails widen, which may cause chain clatter and
difficulty in making straight cuts.
Insufficient guide bar lubrication and operating the saw
with a chain that is too tight will contribute to rapid bar
wear. Refer to Saw Chain Tension Adjustment.
To help minimize bar wear, the following guide bar
maintenance is recommended:
• BAR WEAR
Turn guide bar frequently at regular intervals (for
example, after 5 hours of use), to ensure even wear on
top and bottom of bar.
GB
4
• DRIVE SHAFT
Installing the lower shaft
1. Remove the hanger from the lower shaft (A). Press
the release lever (B) while pushing the lower shaft into
the tool-link couping. (Fig. 2A)
2. Locate and lock the release lever into the primary hole
(C) in the shaft. (Fig. 2A)
3. Tighten the knob (D) securely clockwise before using
the unit. (Fig. 2B)
• TRIMMING A TREE (PRUNING)
Avoid kickback. Kickback can result in severe injury or
death.
Do not operate the pole saw while in a tree, on a ladder
or any other unstable work surface, or in any awkward
position. You may lose control of the pole saw causing
severe injury.
Do not extend your arms above shoulders when using
the pole saw. Seek professional help if you are facing
conditions beyond your ability.
Trimming a tree is the process of cutting limbs from a
living tree. Make sure your footing is firm. Keep your feet
apart. Divide your weight evenly on both feet.
TO TRIM A LIMB (PRUNING):
1. Make the first cut six inches from tree trunk on the
underside of the limb. Use the top of the guide bar
to make this cut. Cut a third of the way through the
diameter of the limb (Fig. 3).
2. Move two to four inches farther out on the limb.
Make the second cut from above the limb. Continue
the cut until you cut the limb off.
3. Make the third cut as close to the tree trunk as
possible on underside of limb stub. Use the top of
the guide bar to make this cut. Cut a third through
the diameter of stub.
4. Make the fourth cut directly above the third cut. Cut
down to meet the third cut. This will remove the
limb stub.
ASSEMBLYINSTRUCTIONS
SPECIFICATIONS
Cutting Width . . . . . . . . . . . . . . . . . . . . . . . . . . . . . . . . . . . . . . . . . . . . . . . . . . . . . . . . . . . . . . . . . . . . . . . .8” (200mm)
Blade Arbor . . . . . . . . . . . . . . . . . . . . . . . . . . . . . . . . . . . . . . . . . . . . . . . . . . . . . . . . . . . . . . . . . . . . . . . . . . . . . . .7/8”
Net Weight of Attachment . . . . . . . . . . . . . . . . . . . . . . . . . . . . . . . . . . . . . . . . . . . . . . . . . . . . . . . . . . . . . . . . . . .1.5 kg
B
A
Fig. 2A Fig. 2B
C
D
CAUTION:
Make sure the release lever is
locked in the primary hole and knob is securely
tightened before operating this unit.
CAUTION:
All attachments are designed to be
used in the primary hole unless otherwise indicated in the specific attachment’s operator’s
manual. If the incorrect hole is used, it could
result in injury, or damage to the unit.
OPERATING INSTRUCTIONS
WARNING:
Kickback may occur when the
nose or tip of the guide bar touches an
object, or when the wood closes in and
pinches the saw chain in the cut. Tip contact
in some cases may cause a lightning-fast
reverse action, kicking the guide bar rapidly
back towards the operator. Pinching the saw
chain along the top of the guide bar may
push the guide bar rapidly back towards the
operator. Either of these reactions may cause
you to lose control of the saw, which could
result in serious injury to the user.
WARNING:
Do not rely exclusively upon the
safety devices built into your saw. As a chain
saw user, you should take several steps to
keep your cutting jobs free from accident or
injury.
Fig. 3
Cut 4
Cut 2
Cut 3
Cut 1
2-4”
6”
MAINTENANCE AND REPAIR INSTRUCTIONS
WARNING:
Whenever handling the saw
chain, always wear work gloves for protection
against sharp cutting edges.
Screw
Bar Retaining
Nuts
Fig. 4A Fig. 4B
Sprocket
Cover
Tension
Adjustment
Screw
Fig. 4C Fig. 4D
CAUTION:
If a chain is too loose or too tight,
the bar chain and saw bearings will wear
more rapidly. Refer to Figure 5 for information
concerning correct cold tension (A), correct
warm tension (B), and a chain in need of
adjustment (C).
Fig. 5
ABC
WARNING:
Ensure that the unit is off and the
spark plug is disconnected (gas powerheads)
before performing any maintenance on your
saw.
Page 4
5
GB
• BAR GROOVES
Bar grooves (or rails which support and carry the chain)
should be cleaned if the saw has been heavily used or if
the saw chain appears dirty. Rails should always be
cleaned every time the saw chain is removed.
TO CLEAN GUIDE BAR RAILS:
1. Remove sprocket cover, bar and chain. Refer to Saw
Chain Replacement / Installation.
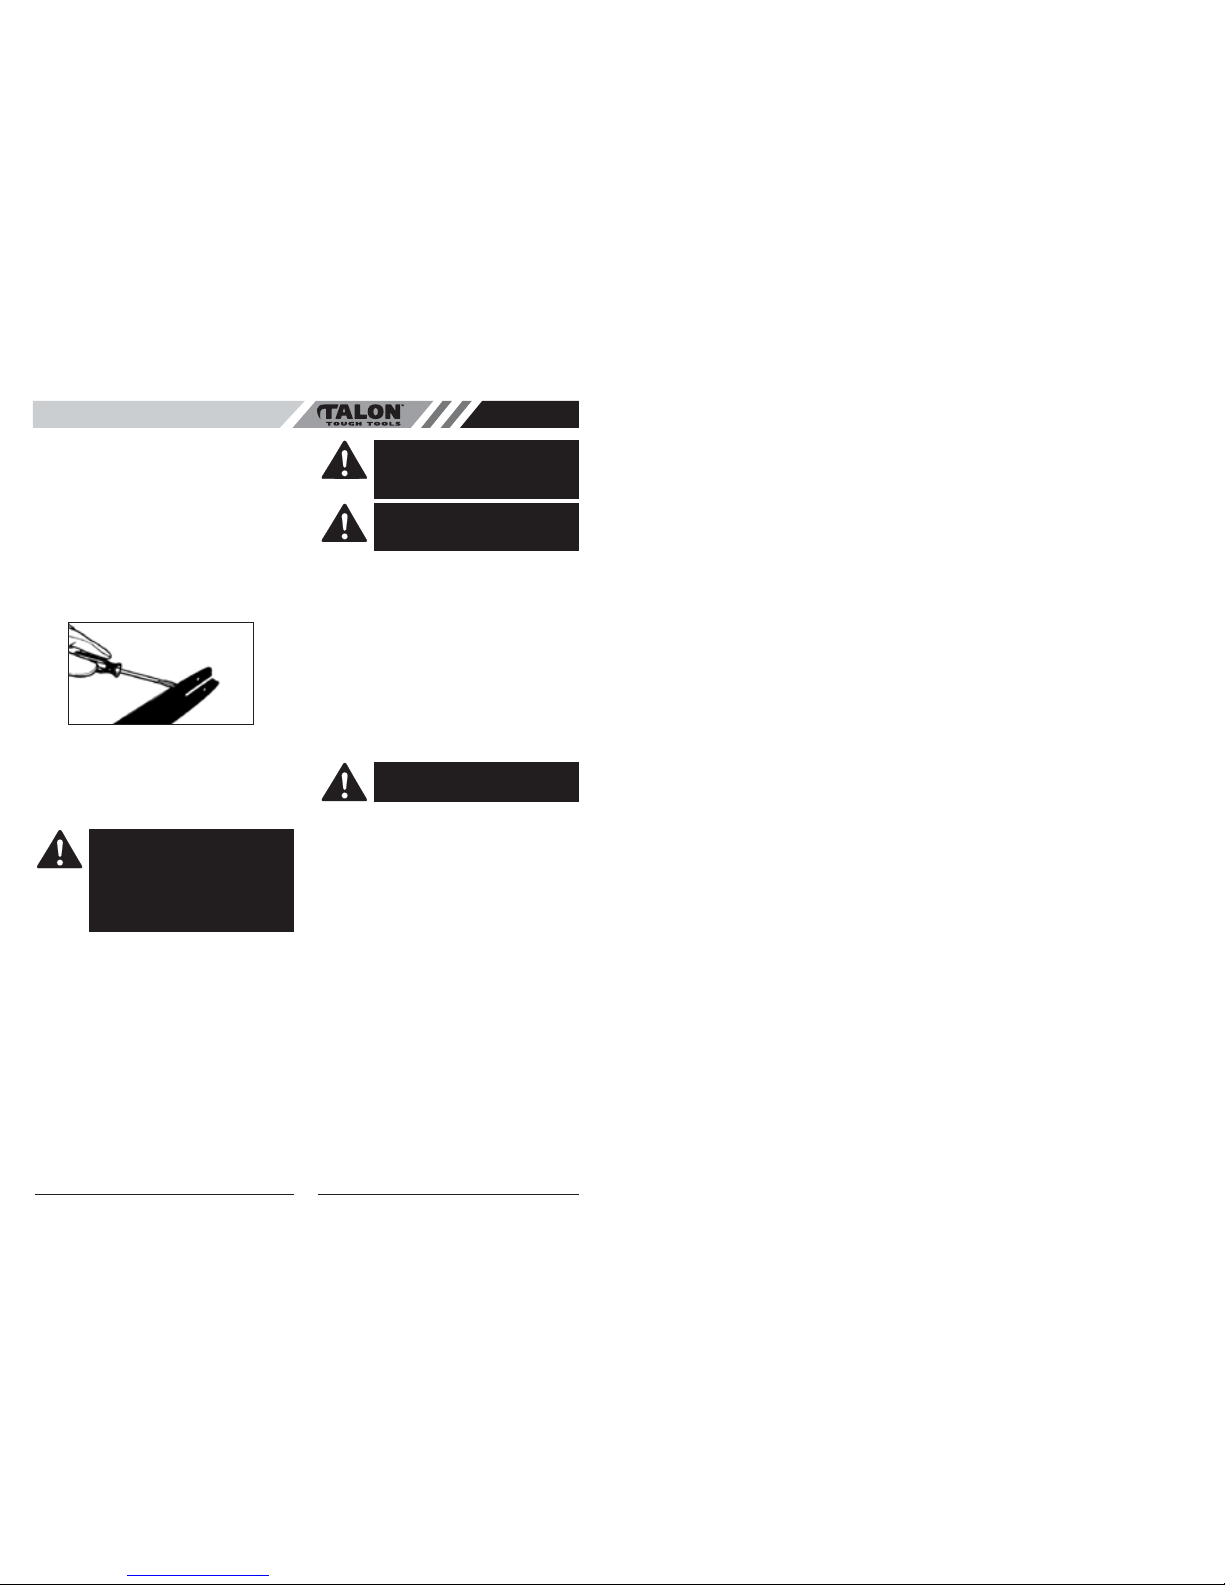
2. Using a screwdriver, putty knife, wire brush or other
similar instrument, clear residue from the rails on the
guide bar (Fig. 6).
This will keep the oil passages open to provide proper lubrication to the bar and chain.
3. Reinstall the bar, chain and bar bolt retaining nuts.
Refer to Saw Chain Replacement / Installation.
• OIL PASSAGES
Oil passages at bar pad should be cleaned to ensure
proper lubrication of the bar and chain during operation.
This can be done using a soft wire small enough to insert
into the oil discharge hole.
• CHAIN MAINTENANCE
A low-kickback saw chain should always be used in conjunction with other kickback protection devices such as
the hand guard, which is furnished with your unit.
Always use a replacement saw chain designed as “lowkickback” or a saw chain which meets the low-kickback
performance.
Astandard saw chain (a chain which does not have the
kickback reducing guard links) should only be used by an
experienced professional chain saw operator.
Low-Kickback Saw Chain
A low-kickback saw chain is a chain which has met the
kickback performance requirements of ANSI B175.1. Do
not use other replacement chain unless it has met these
requirements for your specific model.
By keeping the saw chain in good working condition and
correctly serviced as recommended in this manual, you
will be able to maintain the safety system of your chain
saw over the life of the product.
CHAIN TENSION
Check the chain tension frequently and adjust as often as
necessary to keep the chain snug on the bar, but loose
enough to be pulled around by hand. Refer to Saw Chain
Tension Adjustment.
BREAKING IN A NEW SAW CHAIN
A new chain and bar will need readjustment after as few
as 5 cuts. This is normal during the break-in period, and
the interval between future adjustments will begin to
lengthen quickly.
Over a period of time, however, the moving parts of the
saw chain will become worn, resulting in what is called
chain stretch. This is normal. When it is no longer possible to obtain correct chain tension adjustment, a link will
have to be removed to shorten the chain. See your TroyBilt Authorized Service Center to have this repair performed.
• MAINTENANCE AND STORAGE
• Allow the unit to cool before storing or transporting.
Be sure to secure the unit while transporting.
• Store the unit in a locked up and dry or high and dry
place to prevent unauthorized use or damage, out of
the reach of children.
• Never douse or squirt the unit with water or any other
liquid. Keep handles dry, clean and free from debris.
Clean after each use.
• Keep these instructions. Refer to them often and use
them to instruct other users. If you loan someone this
unit, also loan them these instructions.
• Only qualified personnel should perform any repairs
or maintenance procedures that are not described
in this manual.
Fig. 6
WARNING:
Unless you have experience and
specialized training for dealing with kickback
(see Important Safety Instructions), always
use a low-kickback saw chain, which significantly reduces the danger of kickback. Lowkickback saw chain does not completely
eliminate kickback. A low-kickback or “safety
chain,” should never be regarded as total
protection against injury.
WARNING:
Never remove, modify or make
inoperative any safety device furnished with
your unit. The hand guard and low-kickback
saw chain are major safety features provided
for your protection.
WARNING:
Ensure that the unit is off and the
spark plug is disconnected (for gas powerheads) when working on the saw chain. Wear
heavy duty gloves too.
WARNING:
Never use a loop of chain that
has more than 3 links removed from it. This
could damage the sprocket.
 Loading...