

Page 1
TallyGenicom Intelliprint 8026DN Color Laser Printer User Guide
Jun 06
Page 2

ii TallyGenicom Intelliprint 8026DN Color Laser Printer User Guide
Trademarks
Trademarks
The following are trademarks or registered trademarks of their respective owners. Other
product names mentioned in this manual may also be trademarks or registered trademarks of
their respective owners. Registered trademarks are registered in the United States Patent and
Trademark Office; some trademarks may also be registered in other countries. TallyGenicom, is
registered trademarks of TallyGenicom. PostScript is a trademark of Adobe Systems
Incorporated for a page description language and may be registered in certain jurisdictions.
Throughout this manual, “PostScript 3” (PS-3) is used to refer to a set of capabilities defined by
Adobe Systems for its PostScript Level 3 page description language. Adobe, Adobe PhotoShop,
Adobe PageMaker/Adobe Systems Incorporated. Apple, AppleTalk, EtherTalk, LaserWriter,
LocalTalk, Macintosh, TrueType/Apple Computer, Inc. Banyan, VINES/Banyan. DEC, DECnet,
LN03, VMS/Digital Equipment Corporation. Hewlett-Packard, HP, PCL, HP-GL, HP-UX,
LaserJet/Hewlett-Packard Co. IBM PC, Token-Ring/International Business Machines
Corporation. Intel/Intel Corporation. Microsoft, MS-DOS, Windows/Microsoft Corporation.
Novell and NetWare/Novell, Inc. The ENERGY STAR logo/United States Environmental
Protection Agency. The ENERGY STAR emblem does not represent EPA endorsement of any
product or service. UNIX/UNIX Systems Laboratories.
Jun 06
Page 3

Copyright Notice
This manual is Copyrighted © 2006 by TallyGenicom. All Rights Reserved. This manual may not
be copied in whole or in part, nor transferred to any other media or language, without the
express written permission of TallyGenicom.
The specifications of your printer and the content of this publication are subject to change
without prior notice. Every attempt has been made to verify the accuracy of the content herein.
TallyGenicom Intelliprint 8026DN Color Laser Printer User Guide iii
Copyright Notice
Jun 06
Page 4

iv TallyGenicom Intelliprint 8026DN Color Laser Printer User Guide
Important
Important
c This manual is copyrighted with all rights reserved. Under the copyright laws, this manual may not be
copied or modified in whole or part, without the written consent of the publisher.
d Parts of this manual are subject to change without prior notice.
e We welcome any comments on ambiguities, errors, omissions, or missing pages.
f Never attempt any procedure on the machine that is not specifically described in this manual.
Unauthorized operation can cause faults or accidents. TallyGenicom is not liable for any problems
resulting from unauthorized operation of the equipment.
Jun 06
Page 5
Preface
Thank you for choosing the 8026DN. This is a guide on operating the 8026DN and the important points to note. To understand the features fully and to use the machine correctly and effectively, please read this guide before using it.
Keep this guide handy for use as a quick reference on using the machine. This guide is written
for users who are familiar with the personal computers, operating systems, and software compatible with this printer. For operational procedures and information regarding these items, refer
to the documentation provided with the various hardware and software that you are using.
It may be a legal offence to print currency notes, certificates of stocks and securities, or any
other documents of similar nature, regardless of whether they will be used.
Data Loss in Hard Disk
Saved data may be lost if hard disk of the machine breaks down due to external shocks or if
the power is accidentally cut off in a manner not following the methods listed in manuals or
other documentations. TallyGenicom is not responsible for such data loss and any
consequence caused by such data loss.
TallyGenicom Intelliprint 8026DN Color Laser Printer User Guide v
Preface
This device complies with the guidelines (general-purpose device high frequency control
standards) for high frequency copying devices and similar machine types as set by the Japan
Business Machine Makers Association (JBMA).
In this manual, safety instructions are marked with the symbol . Always read these before
performing procedures and make sure you follow them.
This is a class 1 laser product, and does not emit dangerous laser radiation. This equipment
should be operated in accordance with this manual in order to avoid injury or damage.
This is a class B information processing device and complies with Voluntary Control Council
for Interference by Information Technology Equipment (VCCI) standards. This device is
designed for domestic use, however it may cause radio interference when placed near a
radio, television, or other type of receiver. Please follow the instructions in this manual closely.
As a member of the International Energy Star Program, TallyGenicom confirm
this product satisfies the requirements for International energy Star Program
standards.
Jun 06
Page 6
vi TallyGenicom Intelliprint 8026DN Color Laser Printer User Guide
About this Manual
About this Manual
Scope
This User Guide contains all of the information necessary to operate and care for your printer
and accessories. It is intended to be used with the pictorial unpacking instructions and the
Installation Guide, both included in the printer packaging. If you have not already unpacked and
installed the printer, please refer to these documents. This guide does not contain instructions
for unpacking and installing the printer.
Overview
This manual contains Safety Notes, eight chapters (1 through 8) and one appendix:
Printer Orientation
Throughout this guide, the four sides of the printer are referred to as front, rear, right, and left.
The front of the printer is the side near the control panel, and the rear of the printer is opposite
the front. The left and right sides of the printer are defined as the sides to the left and right,
respectively, of a person who is facing the front of the printer.
Conventions
This following conventions are used throughout this manual to emphasize certain procedures or
information:
NOTE: A note is a tip or extra information that may be helpful in installing or using the
printer.
A caution message provides information that may help you avoid equipment damage, process
failure, or inconvenience. Read all caution messages carefully.
A warning message indicates the possibility of personal injury if a specific procedure is not performed exactly as described in the guide. Pay close attention to these sections and read them
fully to prevent possible injury.
Jun 06
Page 7

Organization
The following is a summary of each chapter:
Safety Notes
This section explains the items of which to take note to ensure that you use this printer safely
and correctly. Be sure to read this section to prevent serious injuries and accidents.
Chapter 1 Installing the Printer
This chapter explains the procedures to decide on the installation location, check the package
contents, and set up the printer at the installation location.
Chapter 2 Daily Care
This chapter explains the essential operations for using the printer on a daily basis such as
replenishing paper and cleaning.
Chapter 3 Troubleshooting
This chapter explains the problems that may arise when using the printer and the way of handling them. Do not consider the problems as a mechanical breakdown until you have read this
chapter.
TallyGenicom Intelliprint 8026DN Color Laser Printer User Guide vii
Organization
Chapter 4 Clearing Paper Jams
This chapter explains the ways to solve paper jams.
Chapter 5 About Consumables
This chapter explains the essential consumables for this printer, cautions on using them, and
the way of replacing them.
Chapter 6 Optional Accessories
This chapter explains the optional accessories and how to install and uninstall them.
Chapter 7 Understanding and Navigating the Control Panel Menus
This chapter explains the control panel and its functions, and also demonstrates how to navigate throughout the various menus and submenus that allow you to view and change the
printer settings.
Chapter 8 Optional Extended Features
This chapter describes the procedures for installation of DRAM Memory DIMMs and the Hard
Disk Option. Also describes how to use the extended features associated with these options.
Appendix Consumables
This Appendix includes the printer specifications and expected life of the consumables. Specifications for the printer and options are listed here.
Jun 06
Page 8
viii TallyGenicom Intelliprint 8026DN Color Laser Printer User Guide
Special Features of This Printer
Special Features of This Printer
This printer has the following special features:
■ Quality printing at a high speed
With its 1,200 dpi laser-style resolution, it can print in high definition and high quality
(optional feature). Attains high-speed printing of 35/25 sheets per minute when printing the
same A4-sized document by long edge feed.
■ Flexible use of paper sources and delivery methods
A paper tray for various paper sizes, from A5 to Legal 14, can be used in the tray module.
Special media such as envelopes and labels can also be used.
Optional tray module (A4/550 sheets) is available. By adding the optional tray module, you
can load up to 1,800 sheets.
You can add up to two optional tray modules.
Two sided printing.
■ Network-readiness
The printer includes an Ethernet Network Interface Card.
■ Easy operation
The easy-to-read control panel display clearly shows the status of printer operation. Control panel pushbuttons allow you to access and view printer menus, submenus, and status
messages.
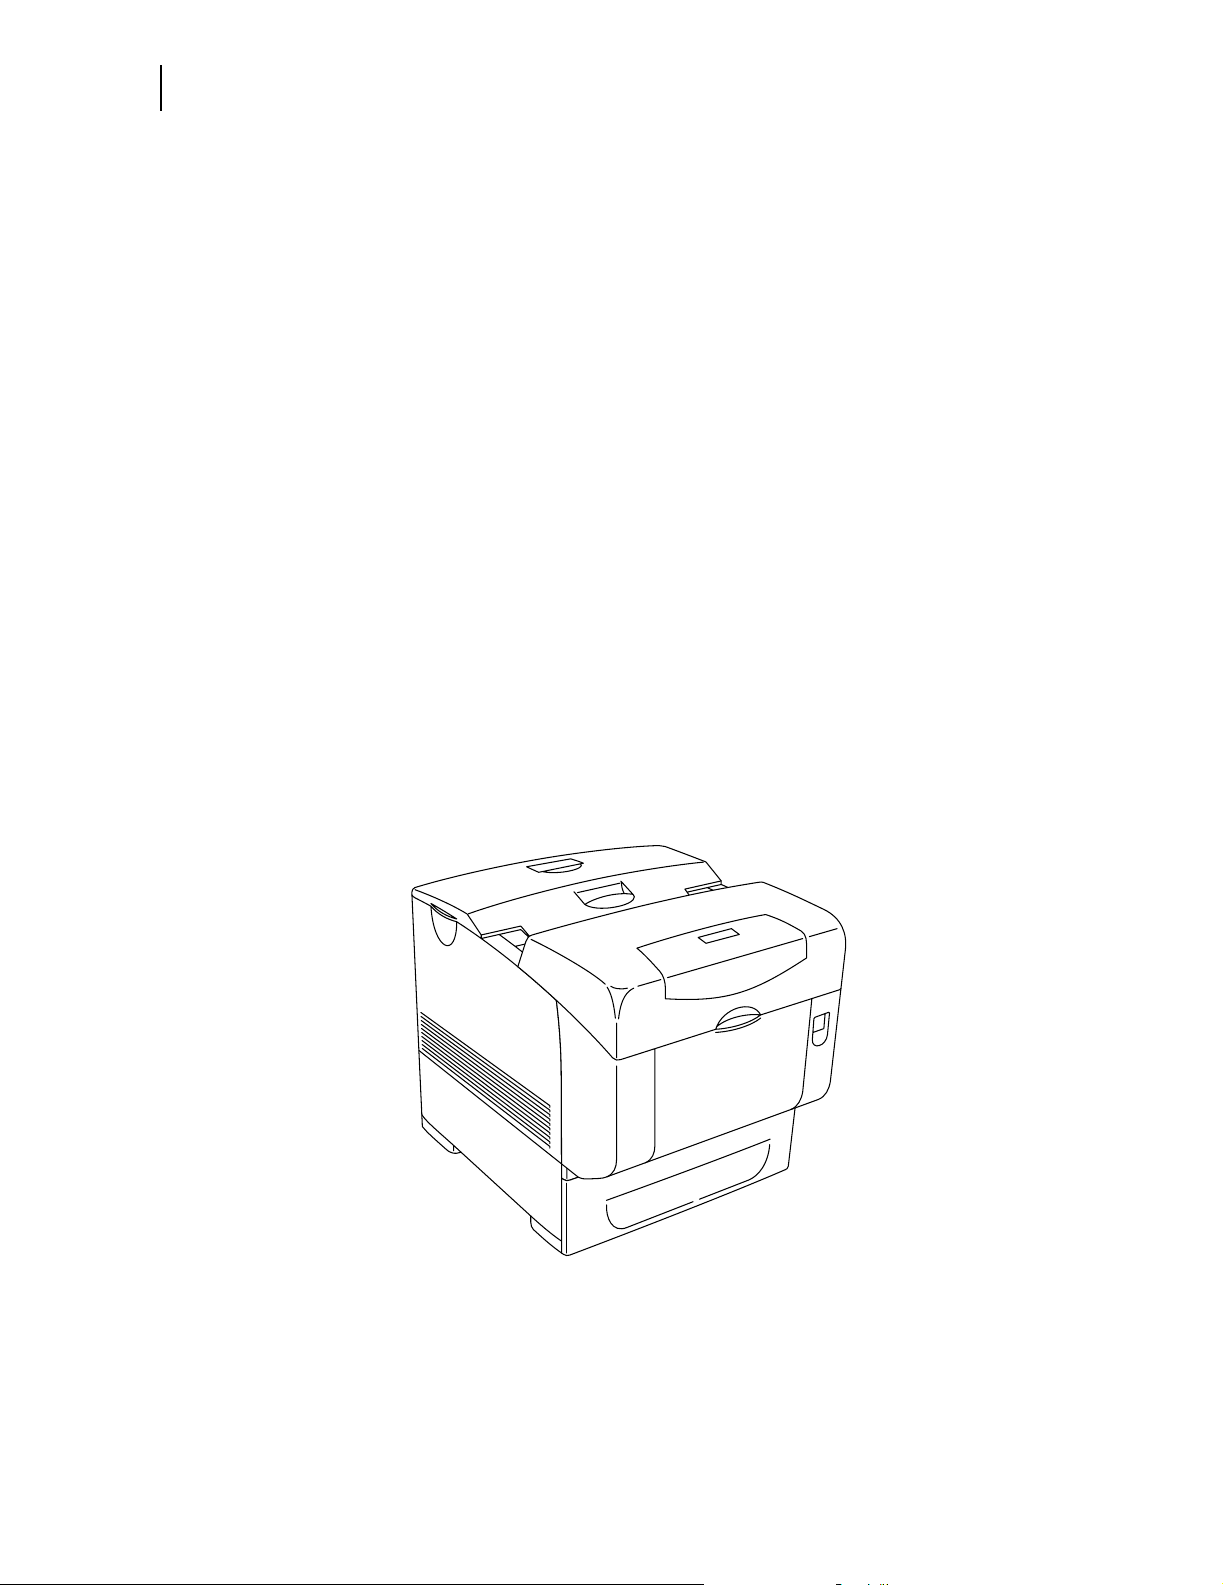
The following diagram shows the printer with the 500 sheets exit as well as the 550 sheet main
tray.
Jun 06
Page 9

Table of Contents
Safety Notes i-1
This Chapter contains the Safety Notes i-1
Safety Notes i-2
For Installation & Relocation i-3
For Power & Earth Connection i-6
For Machine Operation i-9
Illegal Copies and Printouts i-12
Chapter 1 Installing the Printer 1-1
About this Chapter 1-2
Installation Location 1-2
Connect the Printer to Its Own AC Outlet 1-2
Unsuitable locations 1-3
When Using an Ultrasonic Water Vaporizer 1-3
Jun 06
Safety Precautions 1-3
Handling the Printer 1-3
Printer Location Requirements 1-4
Printer Weight and Dimensions 1-4
Minimum Installation Clearances 1-4
Accessories 1-5
Page 10

2 TallyGenicom Intelliprint 8026DN Color Laser Printer User Guide
Table of Contents
Carrying the Printer 1-6
Front Side of the Printer is Heavier Than the Rear 1-6
Installation Procedure 1-7
Removing the Tape 1-7
Installing the Optional Accessories 1-7
550 Sheet Tray Module / 1100 Sheet Tray Module 1-7
Installing the Drum Cartridge 1-7
Preparing the Toner Cartridges 1-10
Loading Paper 1-12
Loading Paper in the Multipurpose Feeder 1-12
Loading Envelopes in the Multipurpose Feeder 1-15
Loading Paper in the Paper Tray 1-16
Connecting the Power Cord 1-19
Turning the Printer On 1-20
Switching Off the Power 1-20
Adjusting Colour Alignment 1-21
Adjustments 1-22
Print out an Alignment Page 1-22
Set the K-V Adjustment 1-23
Set the K-H Adjustment 1-23
Adjusting Colour Registration 1-25
Determining Values 1-25
Entering Values 1-25
Selecting a Display Language 1-27
Printing PCL and PostScript Font Lists 1-28
Chapter 2 Daily Care 2-1
Main Components and Their Function 2-2
Front view 2-2
Control panel 2-3
Rear view 2-4
Internal view 2-5
Paper Handling 2-6
Suitable Paper Types 2-6
Plain Paper 2-6
Standard Paper 2-6
Special Media 2-7
Paper Trays and Types 2-8
Available Paper Sizes 2-9
Duplex Printing Paper Types and Sizes 2-9
Unsuitable Paper types 2-10
Jun 06
Page 11

TallyGenicom Intelliprint 8026DN Color Laser Printer User Guide 3
Storing Paper 2-11
Loading Paper 2-11
Loading Paper in the Multipurpose Feeder 2-11
Loading Envelopes in the Multipurpose Feeder 2-13
Loading Paper in Paper Tray 2-14
Cleaning the Printer 2-17
Cleaning the exterior 2-17
Cleaning the interior 2-17
Cleaning the Density Sensor 2-18
Cleaning the Drum Cartridge 2-21
Moving the Printer 2-25
Chapter 3 Troubleshooting 3-1
Dealing With Problems 3-2
Power Problems 3-2
Table of Contents
Cannot Print 3-3
Print Quality Problems 3-4
Printing Is Not Clear 3-10
Paper Transport Problems 3-11
Other Problems 3-12
Warning Messages and Error Messages 3-13
Warning Messages 3-13
Error Messages 3-14
Chapter 4 Clearing Paper Jams 4-1
Clearing Paper Jams 4-2
Paper Jams in the Multipurpose Feeder 4-3
Paper Jams in the Standard Tray 4-4
Paper Jams between Drum Cartridge and Fuser Unit 4-6
Paper Jams at the Fuser Unit 4-7
When Long Paper Jams 4-11
Jun 06
Paper Jams at the Paper Inverter 4-12
Paper Jams in the Optional Tray Module 4-13
Page 12

4 TallyGenicom Intelliprint 8026DN Color Laser Printer User Guide
Table of Contents
Chapter 5 About Consumables 5-1
Consumables Overview 5-2
Toner Cartridges 5-2
Drum Cartridge 5-3
Fuser Unit 5-3
Transfer Roll Cartridge 5-4
Retard Roll 5-4
Replacing the Toner Cartridges 5-5
Toner Cartridge Handling Precautions 5-5
Handling Precautions 5-5
Storage Precautions 5-5
Replacing Toner Cartridges 5-6
Drum Cartridge 5-9
Handling Precautions 5-9
Replacing the Drum Cartridge 5-9
Storage Precautions 5-12
Transfer Roll Cartridge 5-13
Transfer Roller Cartridge Handling Precautions 5-13
Handling Precautions 5-13
Replacing the Transfer Roll Cartridge 5-13
Fuser Unit 5-16
Replacing the Fuser Unit 5-16
Retard Roll 5-19
Replacing the Retard Roll 5-19
Chapter 6 Optional Accessories 6-1
Options 6-2
Options Overview 6-2
550 Sheet Tray Module 6-2
1100 Sheet Tray Module 6-2
Tray Module 6-3
Installing the Optional 550 Sheet Tray Module 6-3
Installing the Optional 1100 Sheet Tray Module 6-6
Installing the Optional 550 Sheet and 1100 Sheet Tray Module 6-10
Removing the Tray Module 6-15
Jun 06
Page 13

TallyGenicom Intelliprint 8026DN Color Laser Printer User Guide 5
Table of Contents
Chapter 7 Understanding and Navigating the Control
Panel Menus 7-1
About this Chapter 7-2
Control Panel Features 7-2
LCD Display 7-2
LED Indicators 7-3
Pushbuttons 7-3
Navigating the Control Panel Menus 7-5
Menu Structure 7-7
Status Menu 7-8
Job Library 7-9
At the Computer 7-9
Procedure – PCL 7-9
Procedure – TallyGenicom PS 7-11
Operation on the control panel – for both PCL and PS 7-13
Output print data stored – for both PCL and PS 7-14
Print secure jobs 7-15
At the Computer 7-15
Procedure – PCL 7-16
Procedure – TallyGenicom PS 7-18
Output print data stored – for both PCL and PS 7-20
Job Library Errors 7-21
Job Accounting 7-21
Paper Menu 7-22
Interface Menu 7-25
PS Menu 7-28
PCL Menu 7-29
System Menu 7-32
Quality Menu 7-34
Color Menu 7-35
Functions Menu 7-37
FLASH Menu 7-38
DISK Menu 7-39
Date/Time Menu 7-40
Jun 06
Page 14

6 TallyGenicom Intelliprint 8026DN Color Laser Printer User Guide
Table of Contents
Chapter 8 Optional Extended Features 8-1
About this Chapter 8-2
Installing DRAM Memory DIMMS 8-2
Installing the Hard Disk/Compact Flash Option 8-4
Installing the Flash Option in the Printer 8-6
Using the Hard Disk/Compact Disk Option and User Flash DIMM
Module 8-9
Operator Panel MENU Structure 8-9
Using the Disk Menu 8-10
Using the Flash Menu 8-10
Using the FLASH SIMM or Hard Disk/Compact Flash Option as a
PostScript Device 8-11
PostScript Operators 8-11
Device Parameter Sets 8-12
Warmstart.ps and Sys/Start Files 8-12
Using the Power-On Files Feature 8-13
Power-on Files Defined 8-13
Collating, Saved Jobs, and Job Accounting 8-14
Collating Feature 8-14
Saved Jobs Feature 8-19
Job Accounting Feature 8-30
Using the Custom Paper Size Feature 8-31
Operator Panel Access 8-31
Printer Driver Access 8-32
Custom Page size and Microsoft Word, Word 2000, and Word 2003
8-35
Resolution 8-35
Accessing the Printer Web Page 8-37
Printer Setup 8-42
Job Accounting 8-49
Appendix A Specifications and consumables A-1
Specifications A-2
Printer Specifications A-2
Printable area A-3
Expected life of Consumables A-3
Jun 06
Page 15

Safety Notes
This Chapter contains the Safety Notes
Jun 06
Page 16

2 TallyGenicom Intelliprint 8026DN Color Laser Printer User Guide
Safety Notes
Safety Notes
For your own safety, please read this page carefully before using the machine.
Do not place the machine in a hot, humid, dusty, or poorly ventilated environment.
Prolonged exposure to these adverse conditions can cause fire or electric shock.
Do not place the machine near heaters or volatile, flammable, or combustible materials
such as curtains that may catch fire.
Graphic Symbols Used
WARNING
CAUTION
A symbol for items to pay attention to when handling the
machine. Follow instructions carefully to use machine safely.
A symbol for prohibited items. Follow instructions
carefully to avoid any dangerous acts.
A symbol for items that must be performed. Follow
instructions carefully to carry out these essential tasks.
Used for items that if not followed strictly, can lead to severe or fatal injuries.
Used for items that if not followed strictly, can cause injuries to user or damages to the
machine.
Jun 06
Page 17

TallyGenicom Intelliprint 8026DN Color Laser Printer User Guide 3
For Installation & Relocation
CAUTION
Do not place the machine in a hot, humid, dusty, or poorly ventilated environment.
Prolonged exposure to these adverse conditions can cause fire or electric shock.
Do not place the machine near heaters, combustible spray, flammable thinner or materials
such as curtains that may catch fire easily.
Place the machine on a level and sturdy surface that can withstand the machine weight. If
tilted, the machine may fall over and cause injuries.
The machine weighs 31.5 kg (70 lb) for a standard configuration (not including
consumables). When moving the equipment, make sure that there are two or more
persons carrying it.
When lifting the machine, be sure to observe the following points. Failure to do so may
cause the machine to fall and result in injuries.
• Remove the drum cartridge first, then two persons, one facing the front of the machine
(control panel) and the other facing the back, should firmly grip the recessed areas on the
bottom part of both sides of the machine. Never try to lift the machine by gripping any
other areas.
• Bend your knees to avoid possible injuries to your back.
Safety Notes
Jun 06
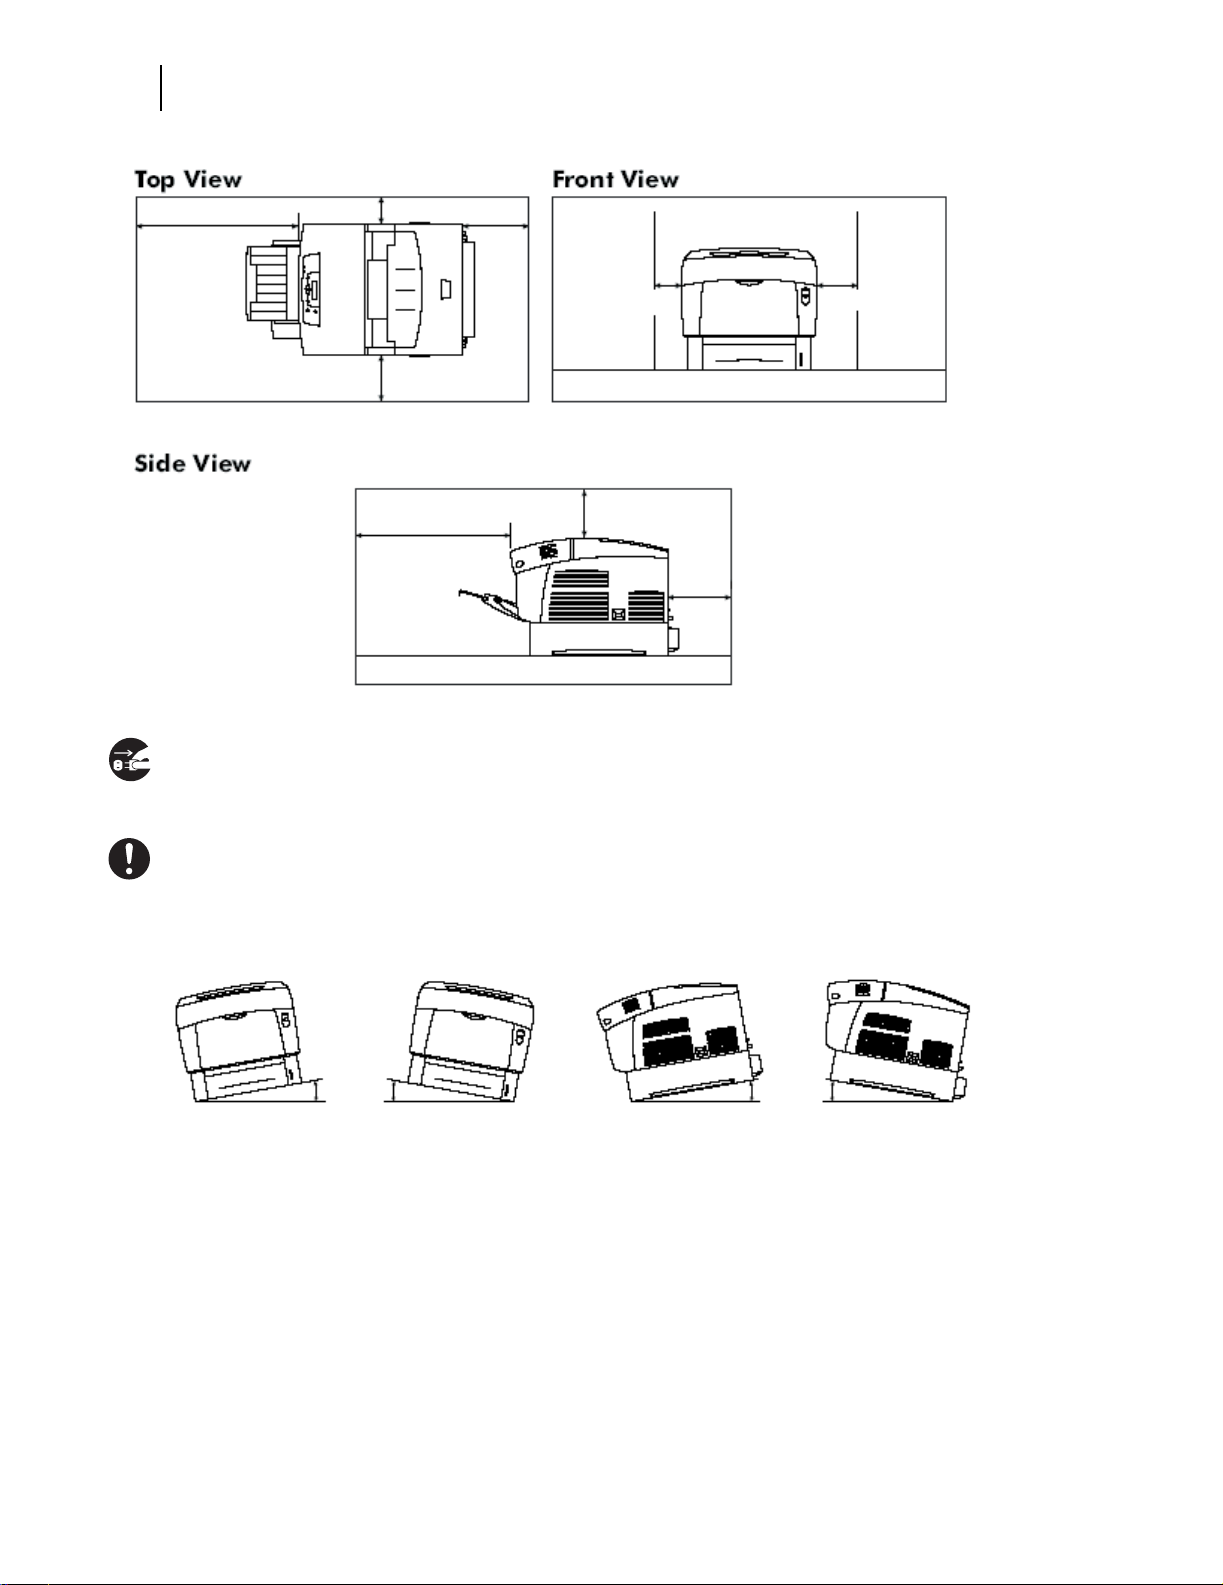
The machine has ventilation holes on the side and rear panels. Ensure that the machine is
installed with a minimum clearance of 100 mm (3.9") from the rear vent to the wall, 100 mm
(3.9") from the left vent to the wall, and 100 mm (3.9") from the right vent to the wall. A
poorly ventilated machine can cause excessive internal heat and fire. The following
diagram shows the minimum clearances required for normal operation, consumables
replacement, and maintenance to ensure your machine operates at peak performance.
Page 18
4 TallyGenicom Intelliprint 8026DN Color Laser Printer User Guide
Safety Notes
600 mm/1'11.6" 100 mm 3.9"
100 mm 3.9"
600 mm/1'11.6"
100 mm
3.9"
350 mm 1'1.8"
100 mm/3.9"
100 mm/3.9"
100 mm
3.9"
When moving the machine, be sure to unplug the power cord from the outlet. If the machine
is moved with the power cord connected, it can cause damage to the cord which could result
in fire or electric shock.
Do not move the machine by lifting it by the front and rear edges (positions shown in the
following diagram) when the paper tray is extended (loaded with Legal 14 paper). The
machine may fall and result in injuries or the paper tray may be damaged.
Do not tilt the printer more than 10 degrees.
10° 10° 10° 10°
Jun 06
Page 19

TallyGenicom Intelliprint 8026DN Color Laser Printer User Guide 5
Safety Notes
• The machine is capable of operating normally within the following recommended environmental
limits.
Temperature range: 15 – 28 °C (59 – 82°F)
Humidity range: 20 – 70% (no condensation)
• Sudden temperature fluctuations can affect copy quality. Rapid heating of a cold room can cause
condensation inside the machine, directly interfering with image transfer.
• Do not expose the machine to direct sunlight. Exposure to direct sunlight can adversely affect
the machine’s performance.
• Do not allow the machine to tilt more than 5 mm (0.2") front to back and more than 10 mm (0.4")
left to right. If tilted excessively, consumables may spill and cause machine damage.
• Do not place the machine where the wind from an air conditioner or a heater blows directly on
it. It causes the temperature inside the machine to change, and may damage the machine.
Jun 06
Page 20

6 TallyGenicom Intelliprint 8026DN Color Laser Printer User Guide
Safety Notes
For Power & Earth Connection
WARNING
Use only the power cord specified for this printer. Using a different cord may cause fire or
electric shock. Also, do not use the machine’s power cord with other equipment.
The power specifications are listed below. The specifications that apply to your machine
depend on your machine configuration. Connect the power plug only to a properly rated
power outlet. Otherwise, it can cause fire or electric shock. If in doubt, contact our Customer
Support Center or your dealers.
• Rated voltage 100/120 V
Rated frequency 50/60 Hz
• Rated voltage 220/240 V
Rated frequency 50/60 Hz
Ensure that the plug connection is free of dust. In a damp environment, a contaminated
connector can draw a non-negligible amount of current that can generate heat and
eventually cause fire over an extended period of time.
Always use the power cord provided with your machine. When an extension power cord is
required, always use a properly rated cord.
• In Japan: 125 V/15 A
• In other countries: Contact our Customer Support Center or your dealers. If you use a cord
with an unspecified current rating, the machine or plug may emit smoke or become hot to
the touch externally.
Do not use any other power cords except those provided. Also, when using the power cords,
please observe the following points. Failure to do so may cause fire or electric shock:
• Do not touch the plug when your hands are wet.
• Do not spoil, damage, or make any changes to the cord.
• Do not place a heavy object on the cord or pull and overstretch it.
• Do not place the cord near a heater.
• Do not bundle or tie up the cord.
• Do not pull out the plug at all times, and do not place any object around the power plug.
If the power cord is broken or insulated wires are exposed, ask our Customer Support
Center for a replacement. Using a damaged cord can cause electric shock.
Never touch a power cord with wet hands. Danger of electric shock exists.
Jun 06
Page 21
TallyGenicom Intelliprint 8026DN Color Laser Printer User Guide 7
Safety Notes
Stop operation immediately if your machine produces smoke, excessive heat, unusual
noise, or smell, or if water or foreign object (e.g. metal strip, liquid) enters the machine.
These conditions can cause fire. Immediately switch off and unplug the machine, and
contact our Customer Support Center or your dealers.
To prevent fire or electric shock, follow the instruction below based on your machine
configuration. If in doubt, contact our Customer Support Center or your dealers.
• If your machine is a 220/240 V model, there is no need to attach a separate earth line
since the earth connection is incorporated in the power line. Plug it into a properly rated
outlet.
• If your machine is a 100/120 V model, use the green earth wire bundled with the power
cord, located at the rear of the machine.
The earth wire must be connected to one of the following conductors:
- Earth terminal of the specified power outlet
- A piece of copper buried in the earth 650 mm (25.6") or deeper
- Earth terminal with Class D* earthing.
* Class D is the regulation for Japan only.
Never connect the earth wire to any of the following:
• Gas pipe, which can be ignited and explode
• Telephone line earth wire or lightning rod, which can draw an excessive electric current if
hit by lightning
• Water faucet or pipe whose electrical conductivity is broken by a non-metal part
CAUTION
Do not unplug or replug the machine while it is on. Unplugging a live connector can deform
the plug and cause fire.
When unplugging the machine, grasp the plug instead of the cord. Forcibly pulling on a cord
can damage it and cause fire or electric shock.
Be sure to switch off and unplug the machine before accessing the interior of the machine
for cleaning, maintenance, or fault clearance. Access to a live machine's interior can cause
electric shock.
When removing jammed paper, make sure that no pieces of torn paper are left in the
machine. A piece of paper remaining in the machine can cause fire. If a sheet of paper is
wrapped around the heat roller, or when clearing a jammed paper that is difficult or
impossible to see, do not try to remove it by yourself. Doing so can cause injuries or burns.
Switch off the machine immediately, and contact our Customer Support Center.
Do not use conductive paper, e.g. folding paper, carbonic paper and coated paper. When
paper jam occurs, they can cause a short circuit and fire.
Jun 06
Page 22
8 TallyGenicom Intelliprint 8026DN Color Laser Printer User Guide
Safety Notes
Once a month, unplug the machine and check the power cord for the following:
• The power cord is plugged firmly into a receptacle.
• The plug is not excessively heated, rusted, or bent.
• The plug and receptacle are free of dust.
• The cord is not cracked or frayed.
If you notice any unusual conditions, contact our Customer Support Center or your dealers.
When the machine is not used over an extended period of time, switch it off and unplug it. If
an unused machine is left connected to a power source for a long period, degraded
insulation can cause electric shock, current leakage, or fire.
Switch off the machine before connecting the interface cable and optional product.
Connecting the cable or card with a live machine can cause electric shock.
• Reception interference
When installed at a certain location, the machine may cause interference with radio and
television reception. If you notice flickering or distorted images or noises on your audio-visual
units, your machine may be causing radio interference. Switch it off, and if the interference
disappears, the machine is the cause of radio interference. Perform the following procedure until
the interference is corrected.
• Move the machine and the TV and/or radio away from each other.
• Reposition or reorientate the machine and TV and/or radio.
• Unplug the machine, TV and/or radio, and replug them into outlets that operate on different
circuits.
• Reorientate the TV and/or radio antennas and cables until the interference stops. For an outdoor
antenna, ask your local electrician for support.
• Use coaxial cable antennas.
Jun 06
Page 23
For Machine Operation
Do not place any liquid container such as a vase or coffee cup on the machine. Split water
can cause fire or electric shock.
Do not place any metal parts such as staples or clips on the machine. If metal and flammable
parts get into the machine, they can short-circuit internal components, and cause fire or
electric shock.
If debris (metal or liquid) gets into the machine, switch off and unplug the machine. Contact
our Customer Support Center. Operating a debris-contaminated machine can cause fire or
electric shock.
Never open or remove machine covers that are secured with screws unless specifically
instructed in this manual. A high voltage component can cause electric shock.
TallyGenicom Intelliprint 8026DN Color Laser Printer User Guide 9
Safety Notes
WARNING
Do not try to alter the machine configuration, or modify any parts. An unauthorized
modification can cause smoke or fire.
This equipment is certified as a Class 1 laser product under IEC60825-1 (Class 1). This
means that the machine does not emit hazardous laser radiation. Since radiation emitted
inside the machine is completely confined within the protective housings and external
covers, the laser beam cannot escape from the machine during any phase of user
operation. Do not perform any operation apart from the instructions given in the manual.
There may be a danger of laser beam leakage.
CAUTION
Do not place a magnet near the safety switch of the machine. A magnet can activate the
machine accidentally, resulting in injuries.
Never touch a labeled area found on or near the heat roller. You can get burnt. If a sheet of
paper is wrapped around the heat roller, do not try to remove it by yourself to avoid injuries
or burns. Switch off the machine immediately, and contact our Customer Support Center or
your dealers.
Do not place any heavy object on the machine. An off-balance machine can fall over or the
heavy object can fall, causing injuries.
Jun 06
Do not use a highly flammable spray or solvent near the machine. It can cause fire.
Page 24
10 TallyGenicom Intelliprint 8026DN Color Laser Printer User Guide
Safety Notes
When removing jammed paper, make sure that no pieces of torn paper are left in the
machine. A piece of paper remaining in the machine can cause fire. If a sheet of paper is
wrapped around the heat roller, or when clearing a jammed paper that is difficult or
impossible to see, do not try to remove it by yourself. Doing so can cause injuries or burns.
Switch off the machine immediately, and contact our Customer Support Center or your
dealers.
When clearing a paper jam or other fault, follow this manual.
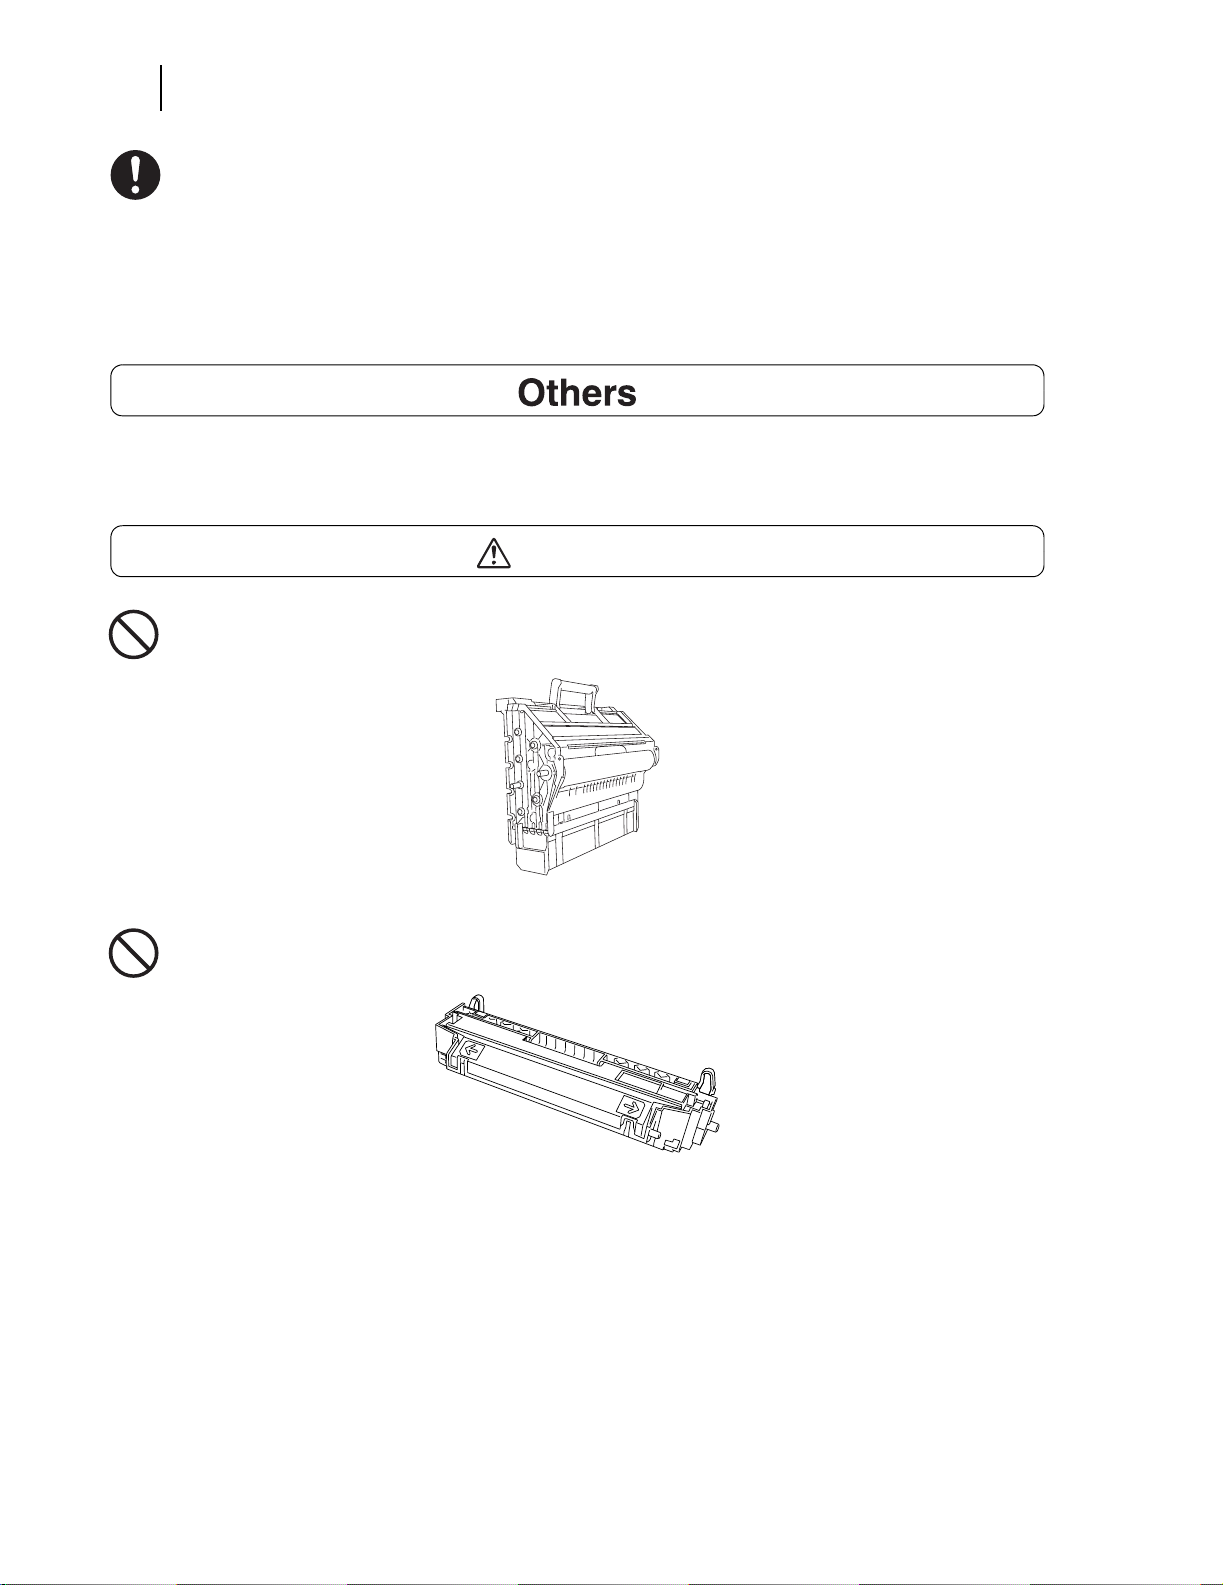
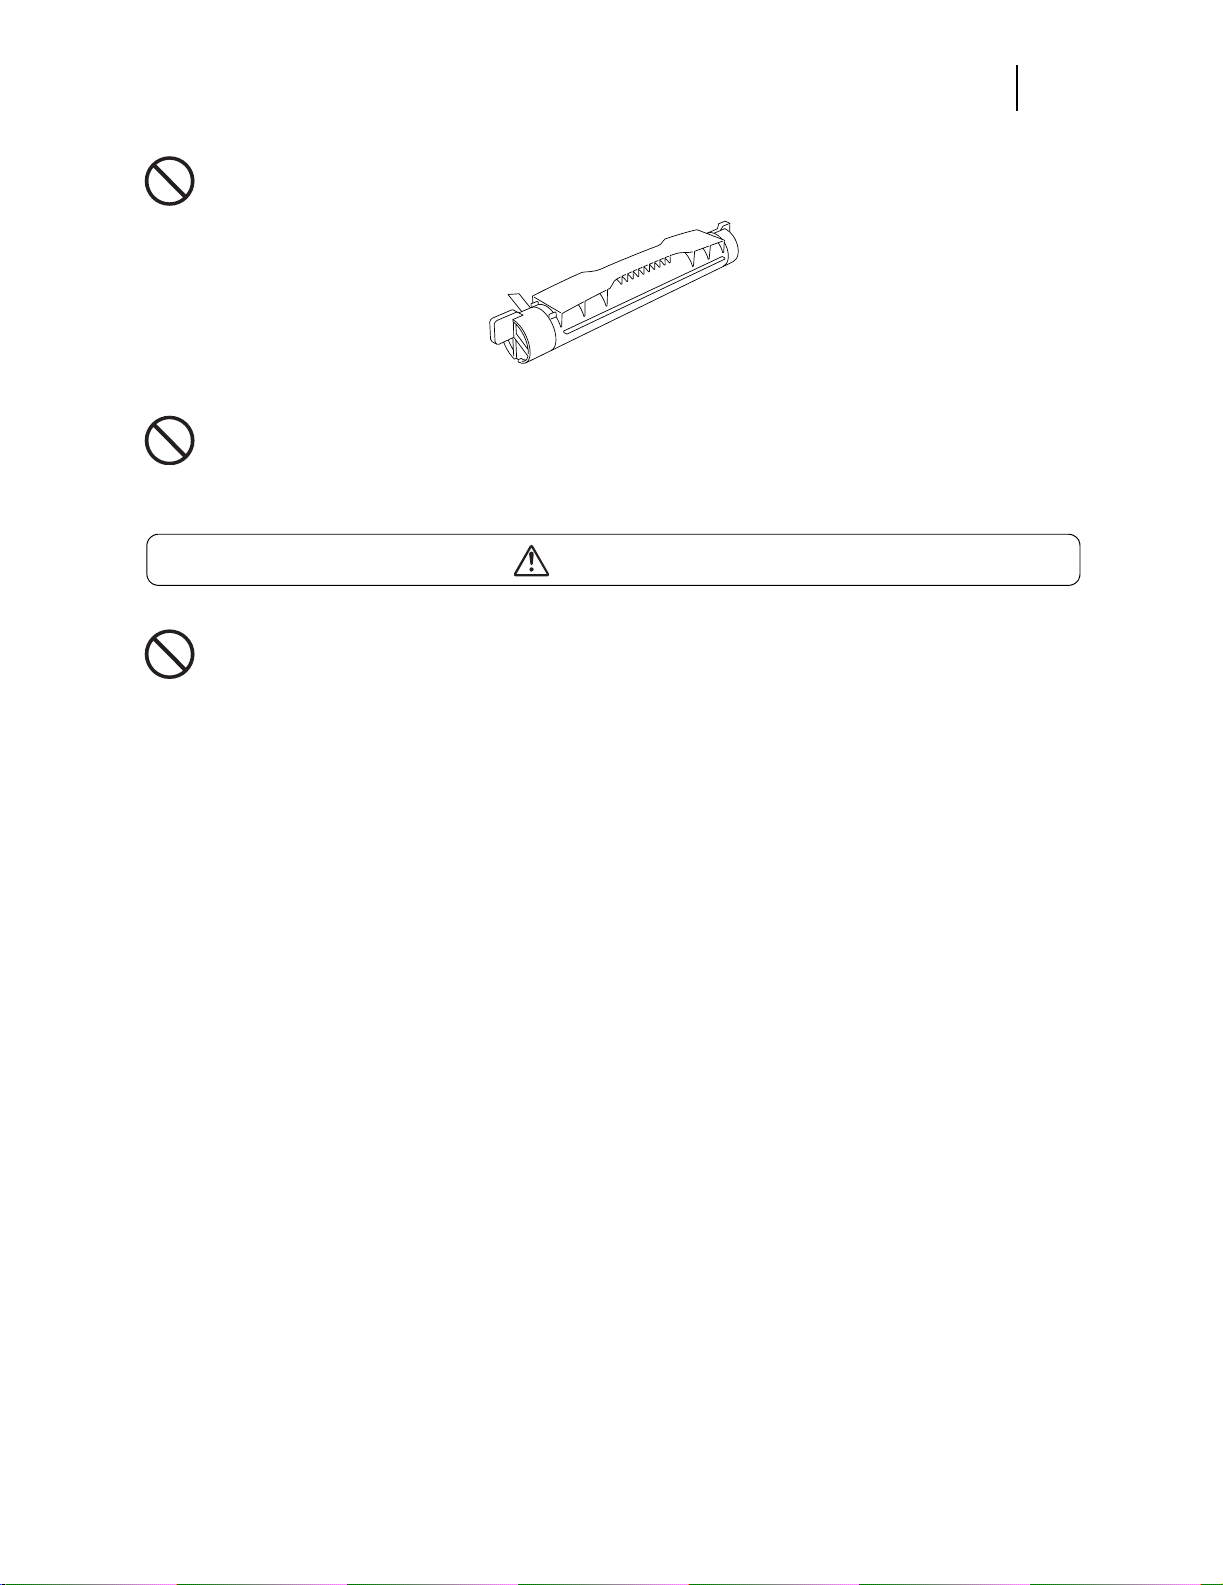
WARNING
Never throw a drum cartridge into an open flame. It can cause an explosion and you can get
burnt.
Never throw a transfer roll cartridge into an open flame. It can cause an explosion and you
can get burnt.
Jun 06
Page 25
TallyGenicom Intelliprint 8026DN Color Laser Printer User Guide 11
Safety Notes
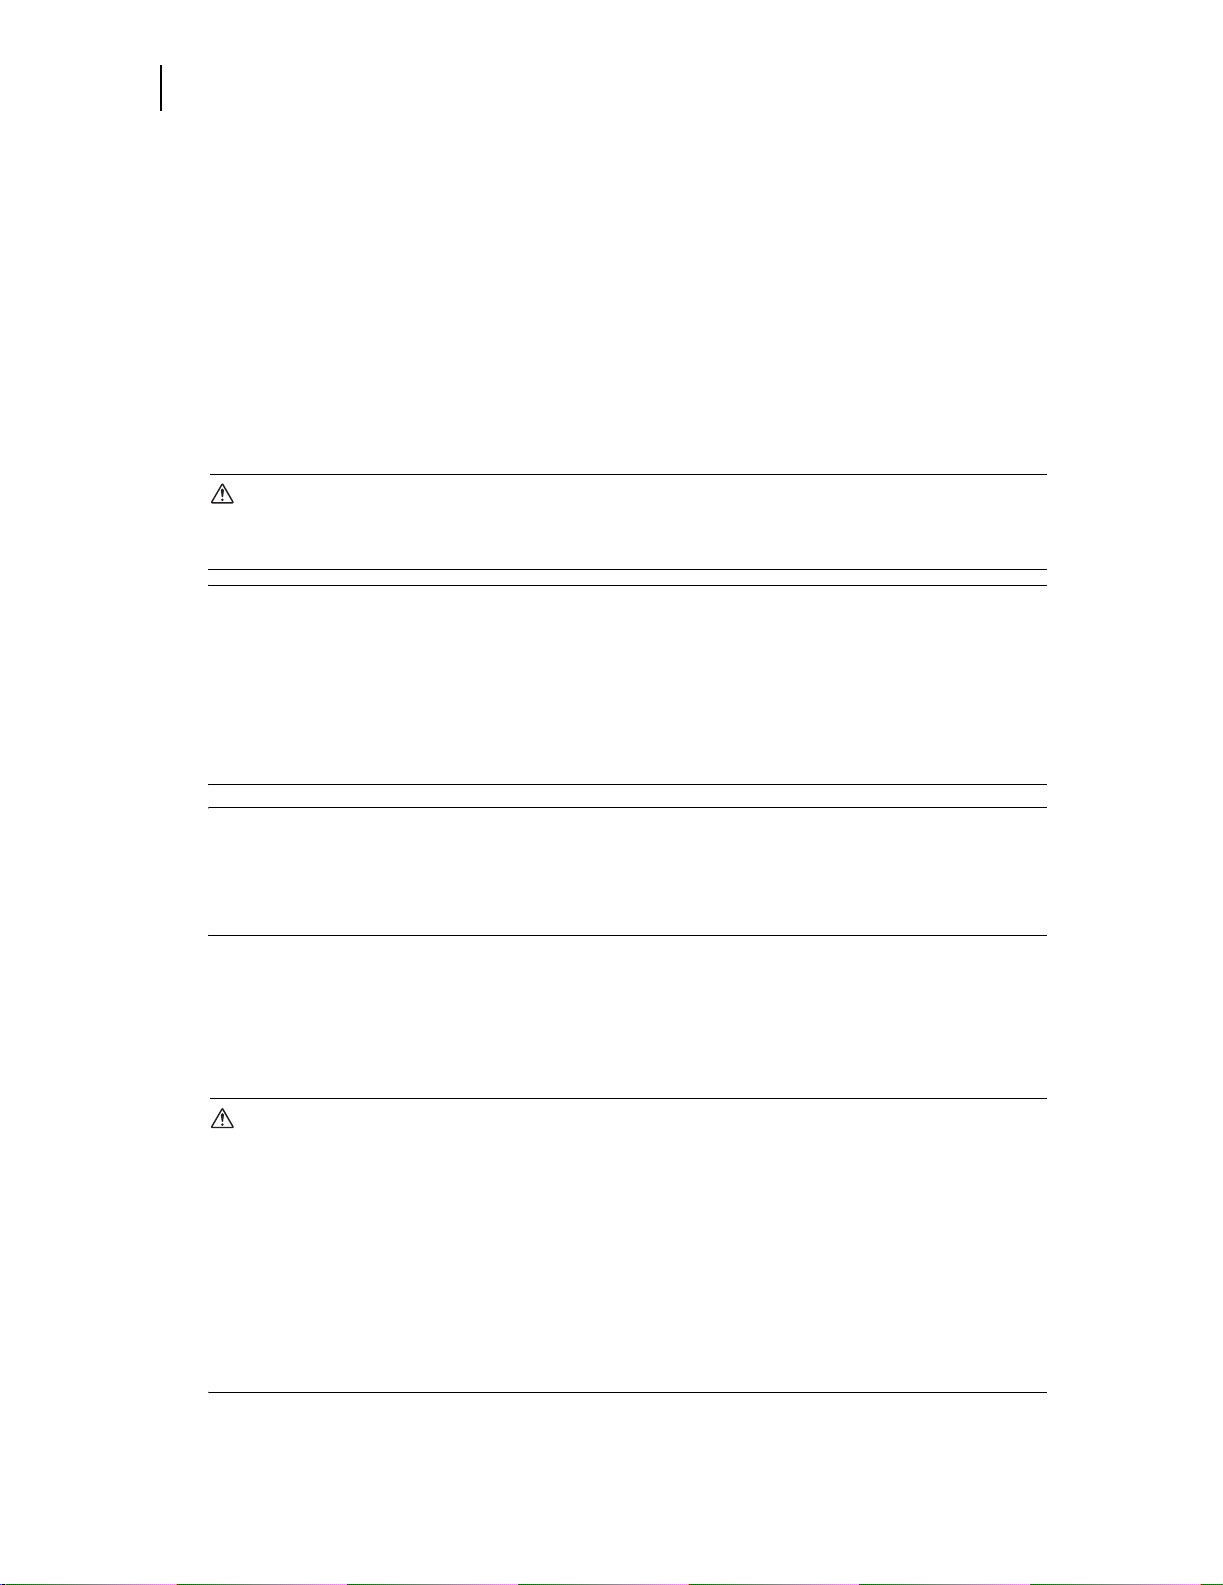
Never throw toner or a toner container into an open flame. It can cause an explosion and
you can get burnt.
Do not use a vacuum cleaner for cleaning a toner spilled on the floor. Use a broom to sweep
it out, or a cloth soaked with soap water to wipe it out. The vacuumed toner may cause a fire
in the cleaner due to its electrical sparks.
CAUTION
Keep the drum cartridge, transfer roll cartridge, and toner cartridge in a location out of reach
of children.
Jun 06
Page 26

12 TallyGenicom Intelliprint 8026DN Color Laser Printer User Guide
Illegal Copies and Printouts
Illegal Copies and Printouts
Copying or printing certain documents may be illegal in your country. Penalties of fines
or imprisonment may be imposed on those found guilty. The following are examples of
items that may be illegal to copy or print in your country.
Currency
Banknotes and checks
Bank and government bonds and securities
Passports and identification cards
Copyright material or trademarks without the consent of the owner
Postage stamps and other negotiable instruments
This list is not inclusive and no liability is assumed for either its completeness or
accuracy. In case of doubt, contact your legal counsel.
Jun 06
Page 27

Installing the Printer
Chapter 1
In this Chapter . . .
■ “Installation Location” on page 1-2
■ “Safety Precautions” on page 1-3
■ “Printer Location Requirements” on page 1-4
■ “Minimum Installation Clearances” on page 1-4
■ “Accessories” on page 1-5
■ “Carrying the Printer” on page 1-6
■ “Installation Procedure” on page 1-7
■ “Loading Paper” on page 1-12
■ “Adjusting Colour Alignment” on page 1-21
■ “Selecting a Display Language” on page 1-27
■ “Printing PCL and PostScript Font Lists” on page 1-28
Jun 06
Page 28
1-2 TallyGenicom Intelliprint 8026DN Color Laser Printer User Guide
Installation Location
About this Chapter
This chapter reviews the contents of the printer packaging, explains the parts of the printer, and
describes the space and environment requirements of the printer. For safe and convenient
printer operation, take time to read the information in this section when deciding where to place
your printer.
Installation Location
In order to make use of the printer safely and comfortably, choose an installation location with
the following considerations.
CAUTION
Place the machine on a level and sturdy surface that can withstand the machine weight. If tilted,
the machine may fall over and cause injuries.
NOTE: The weights of the optional tray modules are as follows:
550 sheet tray module: 6.8 kg (15 lb)
1100 sheet tray module: 21.0 kg (46 lb)
Level and stable surface (with vertical interval of 5 mm (0.2") left-to-right and 10 mm (0.4")
front-to-back).
Well ventilated.
Ambient temperature range of 15 to 28 °C (59 to 82 °F), relative humidity 20 to 70% (no
condensation).
NOTE: Do not position the printer in a room where there are sudden temperature
fluctuations. Do not move the printer from a cool, dry location to a warm, humid location.
Sudden temperature fluctuations can cause water droplets (condensation) to form inside
the printer and cause the print quality to deteriorate. If condensation occurs, allow at least
one hour for the printer to adapt to the new environment before use.
Connect the Printer to Its Own AC Outlet
Do not plug any other equipment into the printer’s AC outlet, especially high-current equipment
such as copiers or air conditioners. Electrical noise and voltage fluctuations from other
equipment plugged into the same outlet can cause computing errors and data loss.
WARNING
Two power specifications are listed below. The specifications that apply to your machine depend
on your machine configuration. Connect the power plug only to a properly rated power outlet.
Otherwise, it can cause fire or electric shocks.
• Rated voltage 100/120 V
Rated frequency 50/60 Hz
• Rated voltage 220 – 240 V
Rated frequency 50/60 Hz
• Never use multi-plug adapters to plug multiple power plugs in the same outlet. Be sure to
operate the machine on a sole-use receptacle. Multiple connectors can cause the outlet to
overheat and cause fire.
Jun 06
Page 29

TallyGenicom Intelliprint 8026DN Color Laser Printer User Guide 1-3
Safety Precautions
Unsuitable locations
■ Locations with direct exposure to sunlight
■ Locations close to cooling/heating appliances
■ Locations with direct exposure to drafts
■ Locations susceptible to vibrations
■ Dusty and dirty locations
■ Locations close to open flame
■ Damp locations
■ Locations exposed to magnetic forces
■ Locations susceptible to sudden changes in temperature or humidity
When Using an Ultrasonic Water Vaporizer
Using tap or well water with ultrasonic water vaporizers disperses impurities into the air. These
impurities can accumulate inside the printer and cause print quality to deteriorate. If you install
the printer in the same room as an ultrasonic water vaporizer, use only filtered water in the
water vaporizer.
Safety Precautions
This printer is available in either of the following power specifications: 110V and 220V. The
specifications that apply to your printer depend on your machine configuration. To prevent fire
or shock hazards, connect the power plug only to a properly rated power outlet.
Handling the Printer
Follow the guidelines below when lifting or moving the printer:
■ The printer is very heavy, and should always be lifted by two people. The weight of the printer
without paper tray, toner cartridge, and paper is about 70 lbs (31,5 kg). Never attempt to lift
the printer alone.
Jun 06
■ To lift the printer, have two individuals facing each other from the front and the rear of the
printer grasp the recessed areas on each side of the printer. Do not lift the printer by grasping
any area other than these recessed areas.
■ When lifting the printer, maintain proper lifting posture to prevent injuries.
Page 30
1-4 TallyGenicom Intelliprint 8026DN Color Laser Printer User Guide
Printer Location Requirements
Printer Location Requirements
Printer Weight and Dimensions
This printer weighs approximately 70 lbs (31,5 kg) and should always be lifted by two people.
The dimensions of the printer are listed below.
■ Printer Height: 16.3 in (413 mm)
■ Printer Width (left to right): 16.6 in (422 mm)
■ Printer Depth (front to back): 17.3 in (439 mm)
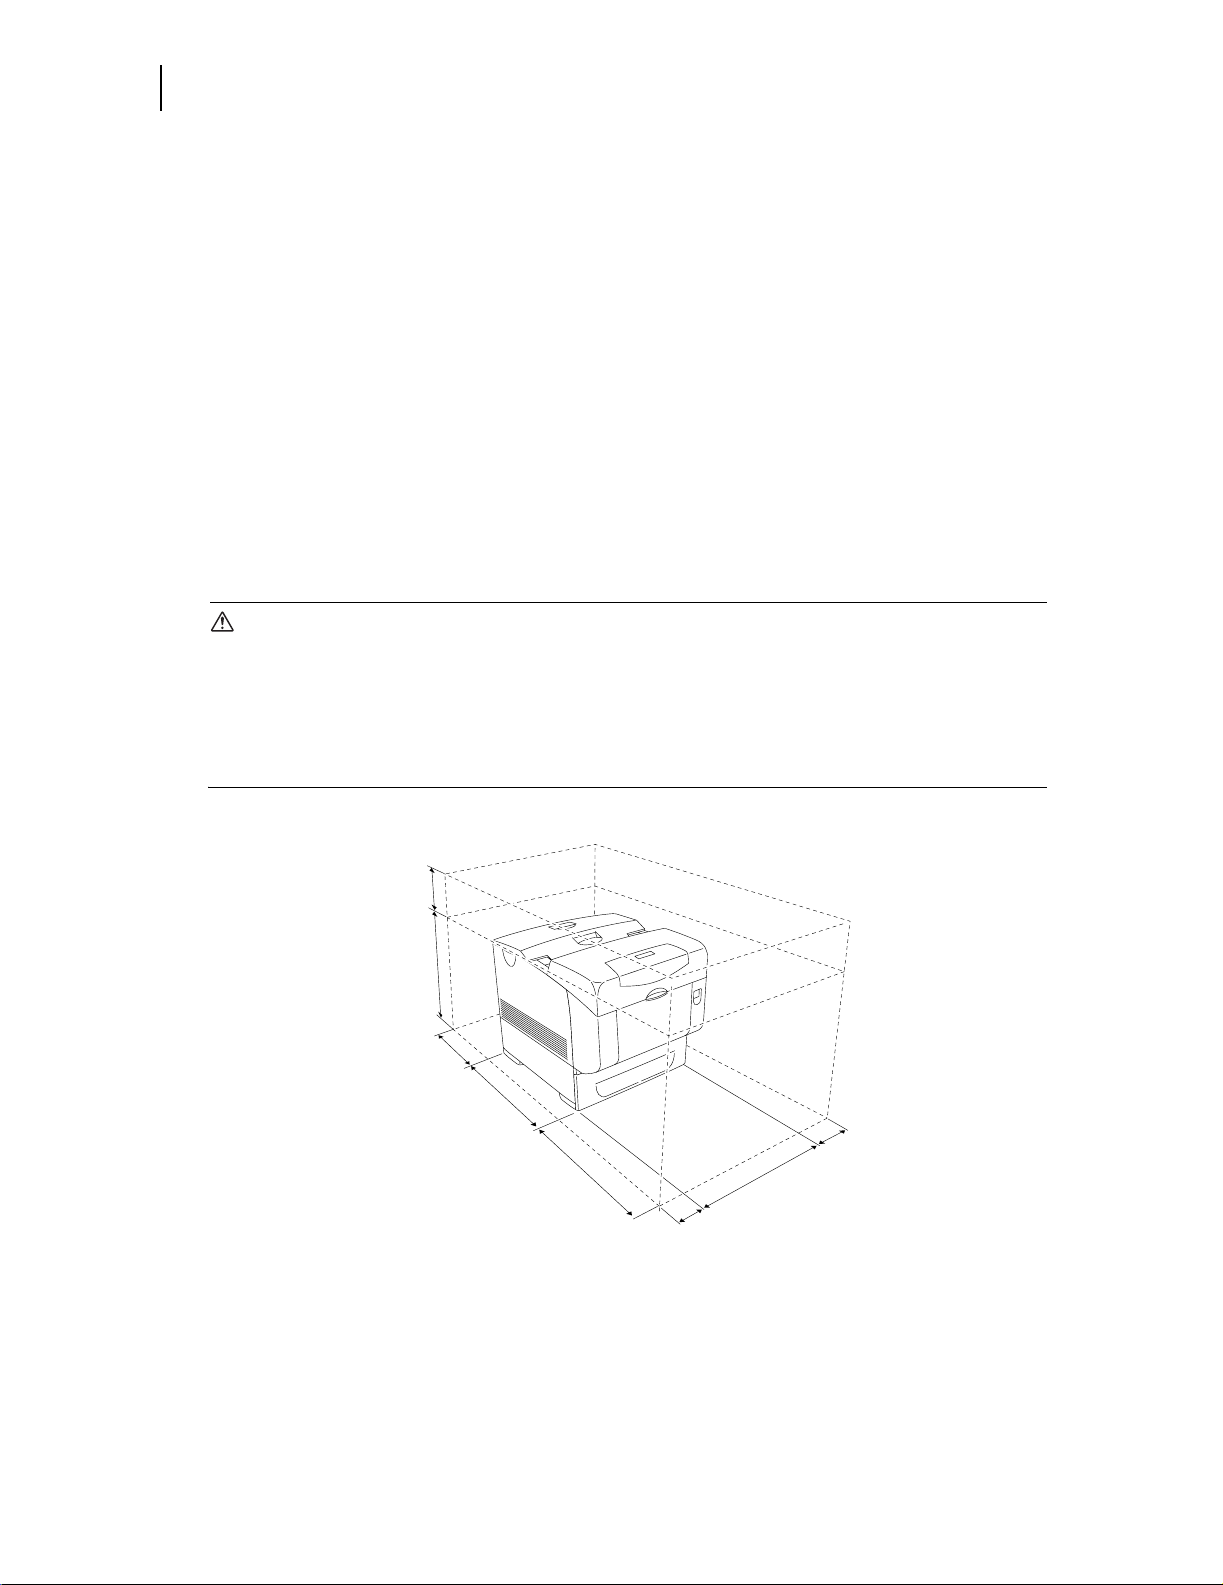
Minimum Installation Clearances
Be sure to install the printer in a location that respects the minimum clearances indicated in the
illustration below.
CAUTION
The machine has ventilation holes on the left, right, and rear sides. Ensure that the machine is
installed with a minimum clearance of 100 mm (3.9") from the right side, 100 mm (3.9") from the
left side, and 100 mm (3.9") from the rear side. A poorly ventilated machine can cause
excessive internal heat and fire. The accompanying diagram shows the minimum clearances
required for normal operation, consumables replacement, and maintenance to ensure your
machine operates at peak performance.
350 mm
1'1.8"
457 mm
1'6.0"
100 mm
3.9"
580 mm
1'10.8"
600 mm
1'11.6"
100 mm
3.9"
429 mm
1'4.9"
100 mm
3.9"
Jun 06
Page 31

Accessories
The standard configuration of the printer is as follows. Ensure that all the parts are available
before installation.
NOTE: Retain the packaging material and box for future use if there is a possibility that the
printer will be moved over long distances. See “Options” (P. 6-2) for details on the optional
accessories.
The standard printer package consists of the following items. Before installing the printer,
confirm that all the items listed below are accounted for.
Refer to
• About optional accessories for the printer: “Options” (P. 6-2)
Printer
TallyGenicom Intelliprint 8026DN Color Laser Printer User Guide 1-5
Accessories
Without options
Drum cartridge
Power cord
Quick Start Guide with CD-ROM
With full option
Jun 06
Page 32

1-6 TallyGenicom Intelliprint 8026DN Color Laser Printer User Guide
Carrying the Printer
Carrying the Printer
When moving the printer to a place for installation, take note of the following points.
Hold the recessed areas on the left and right sides of the printer.
CAUTION
• Bend your knees when lifting the printer to avoid back injury.
• To move the printer safety, remove the optional 550 sheet tray module and 1100 sheet tray
module before moving the printer. To lift the printer safely, remove the drum cartridge and lift
it with two people. Please put the removed drum cartridge on a flat even desk without things,
such as a pencil and a clip. Please cover the removed drum cartridge by a newspaper or so
not to expose the direct light. Lifting the optional 1100 sheet tray module safely requires two
people.
To lift the printer, face the front and back of the printer and grip the recessed areas at the bottom
left and right with both hands. Never try to lift the printer by gripping any other areas. Lifting the
printer by gripping other areas can cause the printer to fall, resulting in injury.
CAUTION
• When moving the printer, do not tilt it more than 10 degrees. If tilted excessively, the printer
may fall over and cause injuries.
Front Side of the Printer is Heavier Than the Rear
The front side of this printer is heavier than the rear. Take note of this difference in weight when
moving the printer.
Jun 06
Page 33

TallyGenicom Intelliprint 8026DN Color Laser Printer User Guide 1-7
Installation Procedure
This section describes how to install the printer.
Removing the Tape
When the printer is first taken out of the packaging box, the covers of the printer are taped.
Remove the tapes.
Installing the Optional Accessories
If you have purchased any optional accessories, install them before the drum cartridge, and
before loading paper. If there are no optional accessories to install, proceed to the next section,
“Installing the Drum Cartridge” (P. 1-7).
550 Sheet Tray Module / 1100 Sheet Tray Module
Refer to “550 Sheet Tray Module” (P. 6-2) and “1100 Sheet Tray Module” (P. 6-2) for details.
Installing the Drum Cartridge
When installing the drum cartridge, take note of the following points:
Installation Procedure
WARNING
• Never throw a drum cartridge into an open flame. Toner remaining in the cartridge can cause
an explosion and you can get burnt.
• Do not subject it to direct sunlight or strong light.
• When installing the drum cartridge, select a location not subject to strong light and try to finish
the installation within 1 minutes.
• Do not touch the surface of the photosensitive drum. Do not stand or place the drum cartridge
upside down. The drum might get damaged.
Refer to
• Replacing the drum cartridge: “Replacing the Drum Cartridge” on page 5-9
1. Push up button 1 and fully open the front cover 2.
Jun 06
Page 34

1-8 TallyGenicom Intelliprint 8026DN Color Laser Printer User Guide
Installation Procedure
2. Press the button as shown in the diagram and open the output tray cover.
3. Hold the protective cover by the handle and pull it upward out of the printer.
4. Take the new drum cartridge out of the packaging box by holding its handle and remove the
protective cover from the drum cartridge.
Important
• Make sure nothing touches or scratches the light-sensitive drum surface (green-colored part)
or charge roller (black-colored part). Scratches, dirt, or oil from your hands on the
light-sensitive drum surface or charge roller deteriorates print quality.
• Do not expose the drum cartridge to direct sunlight or strong light.
Jun 06
Page 35

TallyGenicom Intelliprint 8026DN Color Laser Printer User Guide 1-9
Installation Procedure
5. Holding the drum cartridge by the handle and the flat part facing the back of the printer,
align the bosses, indicated by the arrows, on both sides of the drum cartridge with the slots
that are indicated by the arrows on the printer. Gently lower the drum cartridge into the
printer.
Important
• Lowering the drum cartridge into the printer without correctly aligning the rollers with the slots
can damage the drum cartridge.
6. Pull the protective cover on the drum cartridge straight up to remove.
Jun 06
7. Close the output tray cover.
Page 36

1-10 TallyGenicom Intelliprint 8026DN Color Laser Printer User Guide
Installation Procedure
8. Close the front cover.
Preparing the Toner Cartridges
Refer to
• Replacing the toner cartridges: “Replacing Toner Cartridges” on page 5-6
1. To prepare the toner cartridge, remove the top cover.
2. Pull the toner seal for each toner cartridge straight up to remove it.
Jun 06
Page 37

TallyGenicom Intelliprint 8026DN Color Laser Printer User Guide 1-11
Installation Procedure
3. Replace the top cover by inserting its front side into the printer first.
Jun 06
Page 38

1-12 TallyGenicom Intelliprint 8026DN Color Laser Printer User Guide
Loading Paper
Loading Paper
This section describes how to load paper. Load paper correctly to reduce troubles such as paper
jams.
Important
• See the package of paper to determine the front and back sides of the paper when loading it.
Refer to
• Types of paper suitable for printing: “Loading Paper” (P. 2-11)
• Loading paper in the multipurpose feeder: “Loading Envelopes in the Multipurpose Feeder”
(P. 1-15)
Loading Paper in the Multipurpose Feeder
In addition to plain paper, the multipurpose feeder can use various other sizes and types of print
media such as envelopes and transparencies.
Make sure of the following points when loading paper in the multipurpose feeder.
• You can load up to 150 sheets or a stack of paper (60 g/m
(0.6") high.
2
to 216 g/m2) less than 15 mm
• The multipurpose feeder accepts print media within the following dimensions:
– Width: 88.9 mm (3.5") to 220 mm (8.7")
– Length: 139.7 mm (5.5") to 355.6 mm (14")
• You can load paper (64 g/m
355.6 mm (14") in length has to be fed one sheet at a time and supported by hand.
Important
• Make sure of the following points to avoid any troubles during printing.
• Do not load different types of paper at the same time.
• Use high quality paper for laser printers to print at high quality. Refer to “Paper Handling”
(P. 2-6) for details.
• Do not remove or add paper to the multipurpose feeder when printing or if there is any paper
still in the multipurpose feeder. Doing so may cause a paper jam.
• Load paper printable surface facing down. Also, load the paper which you want to print on
first in the top of the multipurpose feeder.
• Do not put any objects other than paper on the multipurpose feeder. Also, do not push or
force down the multipurpose feeder.
2
to 105 g/m2) up to 900 mm (35.4") long. However, paper over
Jun 06
Page 39

TallyGenicom Intelliprint 8026DN Color Laser Printer User Guide 1-13
Loading Paper
1. Gently pull open the multipurpose feeder cover, and pull out the extension tray.
2. Slide the width guides to the edge of the tray. The width guides should be fully extended.
3. Insert all media face down and top edge first into the multipurpose feeder.
Important
• Do not force the print media.
Jun 06
Page 40

1-14 TallyGenicom Intelliprint 8026DN Color Laser Printer User Guide
Loading Paper
4. Slide the width guides until they rest lightly against the edge of the print media stack.
Important
• Be careful not to bend the print media.
Jun 06
Page 41

TallyGenicom Intelliprint 8026DN Color Laser Printer User Guide 1-15
Loading Paper
Loading Envelopes in the Multipurpose Feeder
To load envelopes that are under 220 mm (8.66 inches) in width in the multipurpose feeder,
insert the envelopes with the flaps open and at the rear. To load envelopes that are over 220 mm
(8.66 inches) in width in the multipurpose feeder, insert the envelopes with the flaps closed and
at the right side. The print side must be facing down. You can load envelopes up to the maximum
fill line in the tray at one time.
Important
• For best performance, do not use envelopes that:
• Have excessive curl or twist
• Are stuck together or damaged in any way
• Contain windows, holes, perforations, cutouts, embossing
• Use metal clasps, string ties, or metal folding bars
• Have an interlocking design
• Have postage stamps attached
• Have any exposed adhesive when the flap is in the sealed or closed position
• Have nicked edges or bent corners
• Have rough, cockle, or laid finishes
NOTE: Make sure set the envelope flaps are completely unfolded when loading envelopes
that are under 220 mm (8.7") in width.
Jun 06
Page 42

1-16 TallyGenicom Intelliprint 8026DN Color Laser Printer User Guide
Loading Paper
Loading Paper in the Paper Tray
This section describes how to load paper in the standard and optional paper trays. All trays are
loaded the same way.
Important
• Do not remove the tray during printing. It may cause a paper jam.
1. Pull the tray out of the printer until it stops. Hold the tray with both hands, lift the front
slightly, and remove it from the printer.
2. Slide the width guides to the edge of the tray. The width guides should be fully extended.
NOTE: When loading paper that is 210 mm (8.3") wide such as A4 size paper, set the tab
on the side of the tray to the [A4] position.
Jun 06
Page 43

TallyGenicom Intelliprint 8026DN Color Laser Printer User Guide 1-17
Loading Paper
3. Squeeze the length guide and slide it to the edge of the tray.
4. Before loading the print media, flex the sheets back and forth, and then fan them.
Straighten the edges of the stack on a level surface.
5. Place the print media into the tray with the recommended print side face up.
Important
• Do not exceed the maximum fill line in the tray. Overfilling the tray may cause paper jams.
6. Slide the width guides and length guide until they rest lightly against the edge of the print
media stack.
Jun 06
Page 44

1-18 TallyGenicom Intelliprint 8026DN Color Laser Printer User Guide
Loading Paper
7. Insert the tray into the printer, and push until it stops.
Important
• Do not use excessive force on the tray. Doing so could damage the tray or the inside the
printer.
Jun 06
Page 45

TallyGenicom Intelliprint 8026DN Color Laser Printer User Guide 1-19
Loading Paper
Connecting the Power Cord
WARNING
• The Power specifications are listed below. The specifications that apply to your machine
depend on your machine configuration. Connect the power plug only to a properly rated
power outlet. Otherwise, it can cause fire or electric shocks.
– Rated voltage 100–120 V
Rated frequency 50/60 Hz
– Rated voltage 220–240 V
Rated frequency 50/60 Hz
• Never use multi-plug adaptors to plug multiple power plugs in the same outlet. Be sure to
operate the machine on a sole-use receptacle. Multiple connectors can cause the outlet to
overheat and cause fire.
• To prevent fire or electric shocks, follow the instruction below based on your machine
configuration.
If your machine is a 220 – 240 V model, there is no need to attach a separate earth line since
the earth connection is incorporated in the power line. Plug it into a properly rated outlet.
If your printer is a 100–120 V model, use the earth bundled with the power cord, located at
the rear of the printer. The earth wire must be connected to one of the following conductors:
– Earth terminal of the specified power outlet
– A piece of copper buried in the earth 650 mm (25.6") or deeper
– Earth terminal with Class D* earthing.
*Class D is the regulation for Japan only.
1. Connect the power cable into the printer, and plug it into the electrical wall outlet.
Jun 06
Page 46

1-20 TallyGenicom Intelliprint 8026DN Color Laser Printer User Guide
Loading Paper
Turning the Printer On
Switch on the power before operating the printer. When you have finished using the printer for
the day or you do not intend to use it for a long period of time, switch off the power.
1. On the printer’s right side, press the side of the power switch marked [I] to turn the printer
on.
Switching Off the Power
1. Make sure that the printer is not in processing.
2. Press the power switch to the <O> position to turn the power off.
Jun 06
Page 47

TallyGenicom Intelliprint 8026DN Color Laser Printer User Guide 1-21
Adjusting Colour Alignment
This allows adjustment of the horizontal (K-H) and vertical (K-V) images on an A4 or Letter
based page. The adjustment allows the printed images to be centered on the pages and
applies the adjustment to all paper sources.
Adjusting Colour Alignment
Jun 06
Page 48

1-22 TallyGenicom Intelliprint 8026DN Color Laser Printer User Guide
Adjusting Colour Alignment
Adjustments
Select the paper tray to be used for the test.
1. From the Ready status, press MENU, the control panel display will read:
Menu
Job Library
2. Press PREVIOUS or NEXT until the display reads:
Menu
Paper Menu
3. Press SELECT, the display will read:
Paper Menu
Copies
4. Press PREVIOUS or NEXT until the display reads:
Paper
Default Source
5. Press SELECT, the display will read:
Default Source
Tray 2
6. Press PREVIOUS or NEXT until the desired paper tray appears on the bottom line of the
display.
7. Press SELECT. You have now changed the paper tray to be used for the alignment.
Print out an Alignment Page
Print out an alignment page to determine whether the image is in the center of the page.
1. From the Ready status, press MENU, the control panel display will read:
Menu
Job Library
2. Press PREVIOUS or NEXT until the display reads:
Menu
Colour Menu
3. Press SELECT, the display will read:
Colour Menu
Rendering Intent
4. Press PREVIOUS or NEXT until the display reads:
Colour Menu
Alignment
Jun 06
Page 49

TallyGenicom Intelliprint 8026DN Color Laser Printer User Guide 1-23
Adjusting Colour Alignment
5. Press SELECT, the display will read:
Alignment
Alignment Page
6. Press SELECT to print out an Alignment page. Use the outermost border to determine
whether or not the image is centered on the page. Use the adjustments below (K-V) and
(K-H) to centralize the image.
Set the K-V Adjustment
Adjust the vertical position of the image.
1. From the Ready status, press MENU, the control panel display will read:
Menu
Job Library
2. Press PREVIOUS or NEXT until the display reads:
Menu
Colour Menu
3. Press SELECT, the display will read:
Colour Menu
Rendering Intent
4. Press PREVIOUS or NEXT until the display reads:
Colour Menu
Alignment
5. Press SELECT, the display will read:
Alignment
Alignment Page
6. Press PREVIOUS or NEXT until the display reads:
Alignment
K-V Adjust
7. Press SELECT, the display will read:
K-V Adjust
0
8. Press PREVIOUS or NEXT until the correct adjustment value is shown on the display.
9. Press SELECT to store this value.
Jun 06
NOTE: The adjustment for K-V is -127 to 127, where each increment is 0.17 mm.
Negative increments move the image towards the top of the page.
Set the K-H Adjustment
Adjust the horizontal position of the image.
Page 50

1-24 TallyGenicom Intelliprint 8026DN Color Laser Printer User Guide
Adjusting Colour Alignment
1. From the Ready status, press MENU, the control panel display will read:
Menu
Job Library
2. Press PREVIOUS or NEXT until the display reads:
Menu
Colour Menu
3. Press SELECT, the display will read:
Colour Menu
Rendering Intent
4. Press PREVIOUS or NEXT until the display reads:
Colour Menu
Alignment
5. Press SELECT, the display will read:
Alignment
Alignment Page
6. Press PREVIOUS or NEXT until the display reads:
Alignment
K-H Adjust
7. Press SELECT, the display will read:
K-H Adjust
0
8. Press PREVIOUS or NEXT until the correct adjustment value is shown on the display.
9. Press SELECT to store this value.
NOTE: The adjustment for K-H is -127 to 127, where each increment is 0.17 mm.
Negative increments move the image towards the left of the page.
Jun 06
Page 51

TallyGenicom Intelliprint 8026DN Color Laser Printer User Guide 1-25
Adjusting Colour Registration
After printing out the alignment page, determine the correct values for colour alignment.
Determining Values
There are two sets of colour registration bars, one vertical set and one horizontal set. Under
the horizontal bars are a number of vertical lines, Yellow, Magenta and Cyan. Find the values
of the straightest lines. These are the vertical registration values.
From the lines to the left of the vertical bars find the values of the straightest lines. These are
the horizontal values.
Entering Values
Using the control panel, enter the values that you found in the Colour Registration Adjustment
Chart to make the adjustments.
1. From the Ready status, press MENU, the control panel display will read:
Menu
Job Library
2. Press PREVIOUS or NEXT until the display reads:
Adjusting Colour Registration
Menu
Colour Menu
3. Press SELECT, the display will read:
Colour Menu
Rendering Intent
4. Press PREVIOUS or NEXT until the display reads:
Colour Menu
Alignment
5. Press SELECT, the display will read:
Alignment
Alignment Page
6. Press PREVIOUS or NEXT until the display reads:
Alignment
M-V Adjust (600)
7. Press SELECT, the display will read:
M-V Adjust
0
8. Press PREVIOUS or NEXT until the correct adjustment value is shown on the display.
Jun 06
9. Press SELECT to store this value.
Repeat steps 6 to 9 to adjust the other settings, Y-V, C-V, M-H, Y-H and C-H.
Print out another colour Adjustment page to confirm the alignments.
Page 52

1-26 TallyGenicom Intelliprint 8026DN Color Laser Printer User Guide
Adjusting Colour Registration
NOTE: When “0” is the value nearest the straight line, you do not need to adjust the colour
registration. If “0” is not next to the straightest lines, determine the values and adjust again.
Important
• After printing the Colour Registration Adjustment Chart, do not turn off the printer until the
motor has stopped running.
Jun 06
Page 53

TallyGenicom Intelliprint 8026DN Color Laser Printer User Guide 1-27
Selecting a Display Language
The default language for all LCD display messages and the Configuration Summary and Test
Page is English. You can change the language to German, French, Italian, Spanish, Portuguese, Dutch, Danish, Norwegian, Swedish, Greek, Polish, Russian, Turkish or Brazil.
NOTE: The language that you select will be reflected on all LCD display messages, and
also the content of the Configuration Summary and Test Page.
To change the default language from English to one of the other 14 available selections:
1. From the Ready status, press MENU, the control panel display will read:
Menu
Job Library
2. Press PREVIOUS or NEXT until the display reads:
Menu
Selecting a Display Language
System Menu
3. Press SELECT, the display will read:
System Menu
Factory Defaults
4. Press NEXT or PREVIOUS until the display reads:
System Menu
Display Language
5. Press SELECT, the display will read:
Display Language
English
6. Press NEXT or PREVIOUS until the desired default language appears on the bottom line
of the display.
7. Press SELECT. You have now changed the default language.
Jun 06
Page 54

1-28 TallyGenicom Intelliprint 8026DN Color Laser Printer User Guide
Printing PCL and PostScript Font Lists
Printing PCL and PostScript Font Lists
Your printer has the capability of printing lists of all installed PCL or PostScript fonts. To print a
Font List, follow these steps:
1. From the Ready status, press MENU, the control panel display will read:
Menu
Job Library
2. Press PREVIOUS or NEXT until the display reads:
Menu
Functions
3. Press SELECT, the display will read:
Functions
Reset Printer
4. Press NEXT or PREVIOUS until the display reads:
Functions
Print Fonts
5. Press SELECT, the display will read:
Print Fonts
PCL Fonts
NOTE: You may toggle between PCL Fonts and Postscript Fonts using the PREVIOUS or
NEXT push-buttons.
6. Press SELECT. A multi page resident Font List will print.
◆ ◆ ◆
Jun 06
Page 55

Daily Care
Chapter 2
In this Chapter . . .
■ “Main Components and Their Function” on page 2-2
■ “Paper Handling” on page 2-6
■ “Storing Paper” on page 2-11
■ “Loading Paper” on page 2-11
■ “Cleaning the Printer” on page 2-17
■ “Moving the Printer” on page 2-25
Jun 06
Page 56

2-2 TallyGenicom Intelliprint 8026DN Color Laser Printer User Guide
Main Components and Their Function
Main Components and Their Function
Front view
9
1
2
3
4
5
7
8
6
9
10
11
12
13
No. Name Description
1 Center output tray Print jobs are output with the printed side facing down.
2 Control panel Consists of operation buttons, indicators, and the display.
3 Button A Push up this button when opening the front cover.
4 Multipurpose feeder Load paper here.
Standard 550 sheet tray Load paper here.
5
Jun 06
Page 57

TallyGenicom Intelliprint 8026DN Color Laser Printer User Guide 2-3
Main Components and Their Function
No. Name Description
6 Front cover Open this when replacing the drum cartridge and removing
jammed paper.
7 Paper stopper
8 Top cover Open this when replacing the toner cartridges.
9 Ventilation hole Releases heat to prevent the interior of the printer from heating
10 Button B Press this button when opening the upper part of the front
11 Power switch Switches the power of the printer on and off. Pushing the switch
12 Optional 550 sheet tray
module
13 Optional 1100 sheet tray
module
Raise this when printing on paper larger than Letter size.
up.
cover.
to the <I> side switches it on and pushing it to the <
switches it off.
Load paper here.
Load paper here.
Ο> side
Control panel
1
Jun 06
No. Name Description
1 Control panel display Displays printer status, menus and messages.
Page 58

2-4 TallyGenicom Intelliprint 8026DN Color Laser Printer User Guide
Main Components and Their Function
Rear view
1
6
3
4
5
2
No. Name Description
1 Ventilation hole Releases heat to prevent the interior of the printer from heating
up.
2 Power cord connector Connect the power cord here.
3 USB port Connect the USB cable here.
4 Parallel port Connect the parallel cable here.
5 Ethernet port Connect the Ethernet cable here.
6 Ventilation hole Air intake to prevent the interior of the printer from heating up.
Jun 06
Page 59

Internal view
TallyGenicom Intelliprint 8026DN Color Laser Printer User Guide 2-5
Main Components and Their Function
1
2
5
No. Name Description
3
4
1 Output tray cover Open this when replacing the drum cartridge and removing
jammed paper.
2 Drum cartridge Consists of the light-sensitive drum and the intermediate
transfer roller. Images are initially created as an electrical
charge on the surface of this drum.
3 Output Tray Cover
Button
4 Fuser unit Fixes the toner on the paper. Do not touch this when using the
5 Transfer roll cartridge Transfers the toner image on the surface of the intermediate
Press this button when opening the output tray cover.
printer as it is hot.
transfer roller of the drum cartridge to the paper.
Jun 06
Page 60

2-6 TallyGenicom Intelliprint 8026DN Color Laser Printer User Guide
Paper Handling
Paper Handling
Using paper that is unsuitable for printing can cause paper jams and deteriorate print quality.
We recommend using the types of paper listed below to obtain the best results from your
printer.
Suitable Paper Types
Plain Paper
This printer can print on paper that is commonly sold. Select paper suitable for use by referring
to the table below. However, we recommend the use of the standard paper for clearer printing.
Paper feed G. S. M .
Multipurpose feeder
Standard 500 sheet tray
Optional 550 sheet tray module or 1100 sheet tray module
NOTE: G.S.M. indicates the weight of a 1 m2 sheet of paper.
60 – 216 g/m
60 – 163 g/m
Standard Paper
Standard paper for this printer is as follows:
Paper type G. S .M . Paper type
XC-4200DP 20lb Letter
XC Premier 80gsm A4 XC Premier 80gsm A4
P Paper A4 P Paper A4
60 – 105 g/m
2
XC-4200DP 20lb Letter
2
2
Jun 06
Page 61

TallyGenicom Intelliprint 8026DN Color Laser Printer User Guide 2-7
Paper Handling
Special Media
In addition to plain paper, you can use the following types of special paper.
Paper size Paper type
Transparencies Letter (215.9 × 279.4 mm/8.5" × 11") /
A4 (210 × 297 mm/8.3" × 11. 7")
A4 (210 × 297 mm/8.3" × 11.7") V516
Labels Letter (215.9 × 279.4 mm/8.5" × 11") XEROX 3R12520
A4 (210 × 297 mm/8.3" × 11.7") XEROX V862
Envelopes Com#10 (104.8 × 241.3 mm/4.1" × 9.5") Columbia 3B1183
C5 (162 × 229 mm/6.4" × 9.0") River Series #02067
DL (110 × 220 mm/4.3" × 8.7") River Series 3B1042
Monarch (98.4 × 190.5 mm/3.9" × 7.5") Monroe Brand 3B1039
114 × 162 mm/4.5" × 6.4" Youkei 2
98 × 148 mm/3.9 × 5.8" Youkei 3
105 × 235 mm/4.1" × 9.3" Youkei 4
120 × 235 mm/4.7" × 9.3" Youchoukei 3
120 × 235 mm/4.7" × 9.3" Choukei 3
Postcards Japanese official postcards (100 × 148 mm/3.9" ×
5.8")
3M PP-2500
XEROX 3R97408
–
Jun 06
Double postal cards (148 × 200 mm/5.8" × 7.9") –
Four-facet postal cards –
Coated paper Letter (215.9 × 279.4 mm/8.5" × 11 " )
Card stock A4 (210 × 297 mm/8.3" × 11.7") RX 160 Premiere
76.2 × 127 mm/3.0" × 5.0" – 210 × 297 mm/8.3" × 11.7"
(A4) or 215.9 × 279.4 mm/8.5" × 11" (Letter)
Strobe Gloss
3R91798
Classic Crest Super
Smooth
Cover Stock 3R3041
*
* Load this paper into the multipurpose feeder and print one sheet at a time.
Important
• Make sure the humidity is low because high humidity and the high printing temperatures may
seal the printing quality.
Page 62

2-8 TallyGenicom Intelliprint 8026DN Color Laser Printer User Guide
Paper Trays and Types
Paper Trays and Types
You can load the following types of paper into the paper tray or multipurpose feeder.
Multipurpose Feeder
Paper that can be loaded in the multipurpose feeder is as follows:
Paper type Maximum capacity
Standard paper 150 sheets
Other paper Up to a height of 15 mm/0.6"
Standard and Optional Trays
Paper that can be loaded in the standard and optional 550 sheet tray module and optional 1100
sheet tray module is as follows:
Tray Modules
Maximum capacity
Paper type
550 sheet tray module 1100 sheet tray module
Standard paper 550 sheets or up to a height of
2
61 mm/2.4" (60 to 163 g/m
Other paper Up to a height of 61 mm/2.4" Up to a height of 61 mm/2.4"
)
1100 sheets
Paper Trays
Paper type Maximum Capacity
Paper tray (A4/150 sheets) Paper tray (A4/550 sheets)
Standard paper 150 sheets 550 sheets
Other paper Up to a height of 17.5 mm/0.7" Up to a height of 59.4 mm/2.3"
Japanese official
postcards
Envelopes Columbian Com10 15 sheets 80 sheets or max 49.4 mm/1.9"
55 sheets 200 sheets or max 49.4 mm/1.9"
Labels 100 sheets 350 sheets
Transparencies 100 sheets 100 sheets
Card stock 120 sheets 400 sheets
Jun 06
Page 63

TallyGenicom Intelliprint 8026DN Color Laser Printer User Guide 2-9
Paper Trays and Types
Available Paper Sizes
The following paper sizes can be loaded in the paper tray and multipurpose feeder:
Loadable: {Not loadable:
Paper size Multipurpose feeder
A4
B5
A5
Letter
Legal (8.5 × 13 in.)
Legal (8.5 × 14 in.)
Executive
User-specified print size Width: 90 to 215.9 mm/3.5" to 8.5"
COM-10 envelope
Monarch
DL
C5
×
{{
{{
{{
{{
{{
{{
{{
Length: 148 to 355.6 mm/5.8" to 14"
{
{
{
{
Paper tray (550 sheets)
Paper tray (1100 sheets)
×
×
×
×
×
Postcard
{
×
Duplex Printing Paper Types and Sizes
The available paper types and sizes for 2 sided printing are as follows:
Paper type Paper size G. S .M .
Standard paper A4
B5
Letter
Legal (8.5 × 13 in.)
Legal (8.5 × 14 in.)
User-specified print size*
* Duplex printing supports user-specified print media that are 149 mm to 215.9 mm (5.9" to 8.5"
wide and 210 mm to 355.6 mm long.
64 to 105 g/m
(20 lb to 28 lb)
2
Jun 06
Page 64

2-10 TallyGenicom Intelliprint 8026DN Color Laser Printer User Guide
Paper Trays and Types
Unsuitable Paper types
Avoid using the following paper types as they can cause paper jams or damage to the printer.
• Transparency sheets other than those recommended
• Ink jet paper
• Paper that is too thick or too thin
• Paper with one face already printed using another printer or copier, or paper already printed
with ink
• Folded, creased or torn paper
• Damp or wet paper
• Undulated or warped paper
• Sheets adhered by static electricity
• Layered or adhesive paper
• Coated paper
• Colored paper with a treated surface
• Paper printed with ink that cannot withstand temperatures of 155
• Heat-sensitive paper
• Carbon paper
• Paper with staples, paper clips, tape or ribbons attached
• Paper with a rough surface such as textured or fiber form paper
• Using acidic paper can cause the characters to fade over time. Use neutral paper to prevent
this problem.
• Envelopes with a rough surface or clips attached
• Envelopes with sticky adhesive (Printing on some types of envelopes with adhesive is be
possible, depending on the condition of the adhesive.)
• Label sheets where the backing has peeled away or are pre-cut.
o
F (68oC).
Jun 06
Page 65

Storing Paper
Failure to properly store paper can result in paper jams, impaired print quality, or damage to the
printer. Store paper under the following conditions:
• Temperature 10
• In a dry place
• After opening the package, wrap unused sheets in their original package and store in a
cabinet or other dry place.
• Store paper on a flat surface. Do not lean paper against other objects or place it in an upright
position.
• Avoid storing paper in way that may cause creasing, folding, or curling.
• Store paper away from direct sunlight.
Loading Paper
This section explains how to load paper when the paper in the paper tray runs out.
TallyGenicom Intelliprint 8026DN Color Laser Printer User Guide 2-11
o
to 30oC (50o to 86oF)
Storing Paper
Loading Paper in the Multipurpose Feeder
In addition to plain paper, the multipurpose feeder can use various other sizes and types of print
media such as envelopes and transparencies.
Make sure of the following points when loading paper in the multipurpose feeder.
• You can load up to 150 sheets or a stack of paper (60 g/m
(0.6") high.
• The multipurpose feeder accepts print media within the following dimensions:
- Width: 88.9 mm to 220 mm (3.5" to 8.7")
- Length: 139.7 mm to 355.6 mm (5.5" to 14")
• You can load paper (64 g/m
(14") in length has to be fed one sheet at a time and supported by hand.
Important
• Make sure of the following points to avoid any troubles during printing.
• Do not load different types of paper at the same time.
• Use high quality paper for laser printers to print at high quality. Refer to “Paper Handling”
(P. 2-6) for details.
• Do not remove or add paper to the multipurpose feeder when printing or if there is any paper
still in the multipurpose feeder. Doing so may cause a paper jam.
• Load paper printable surface facing down. Also, load the paper which you want to print on
first in the top of the multipurpose feeder.
• Do not put any objects other than paper on the multipurpose feeder. Also, do not push or
force down the multipurpose feeder.
2
to 105 g/m2) up to 900 mm long. However, paper over 355.6 mm
2
to 216 g/m2) less than 15 mm
Jun 06
Page 66

2-12 TallyGenicom Intelliprint 8026DN Color Laser Printer User Guide
Loading Paper
1. Gently pull open the multipurpose feeder cover, and pull out the extension tray.
2. Slide the width guides to the edge of the tray. The width guides should be fully extended.
3. Insert all media face down and top edge first into the multipurpose feeder.
Important
• Do not force the print media.
Jun 06
Page 67

TallyGenicom Intelliprint 8026DN Color Laser Printer User Guide 2-13
Loading Paper
4. Slide the width guides until they rest lightly against the edge of the print media stack.
Important
• Be careful not to bend the print media.
Loading Envelopes in the Multipurpose Feeder
To load envelopes that are under 220 mm (8.66 inches) in width in the multipurpose feeder,
insert the envelopes with the flaps open and at the rear. To load envelopes that are over 220
mm (8.66 inches) in width in the multipurpose feeder, insert the envelopes with the flaps closed
and at the right side. The print side must be facing down. You can load envelopes up to the
maximum fill line in the tray at one time.
Jun 06
Important
• For best performance, do not use envelopes that:
• Have excessive curl or twist
• Are stuck together or damaged in any way
• Contain windows, holes, perforations, cutouts, embossing
• Use metal clasps, string ties, or metal folding bars
• Have an interlocking design
• Have postage stamps attached
• Have any exposed adhesive when the flap is in the sealed or closed position
• Have nicked edges or bent corners
• Have rough, cockle, or laid finishes
Page 68
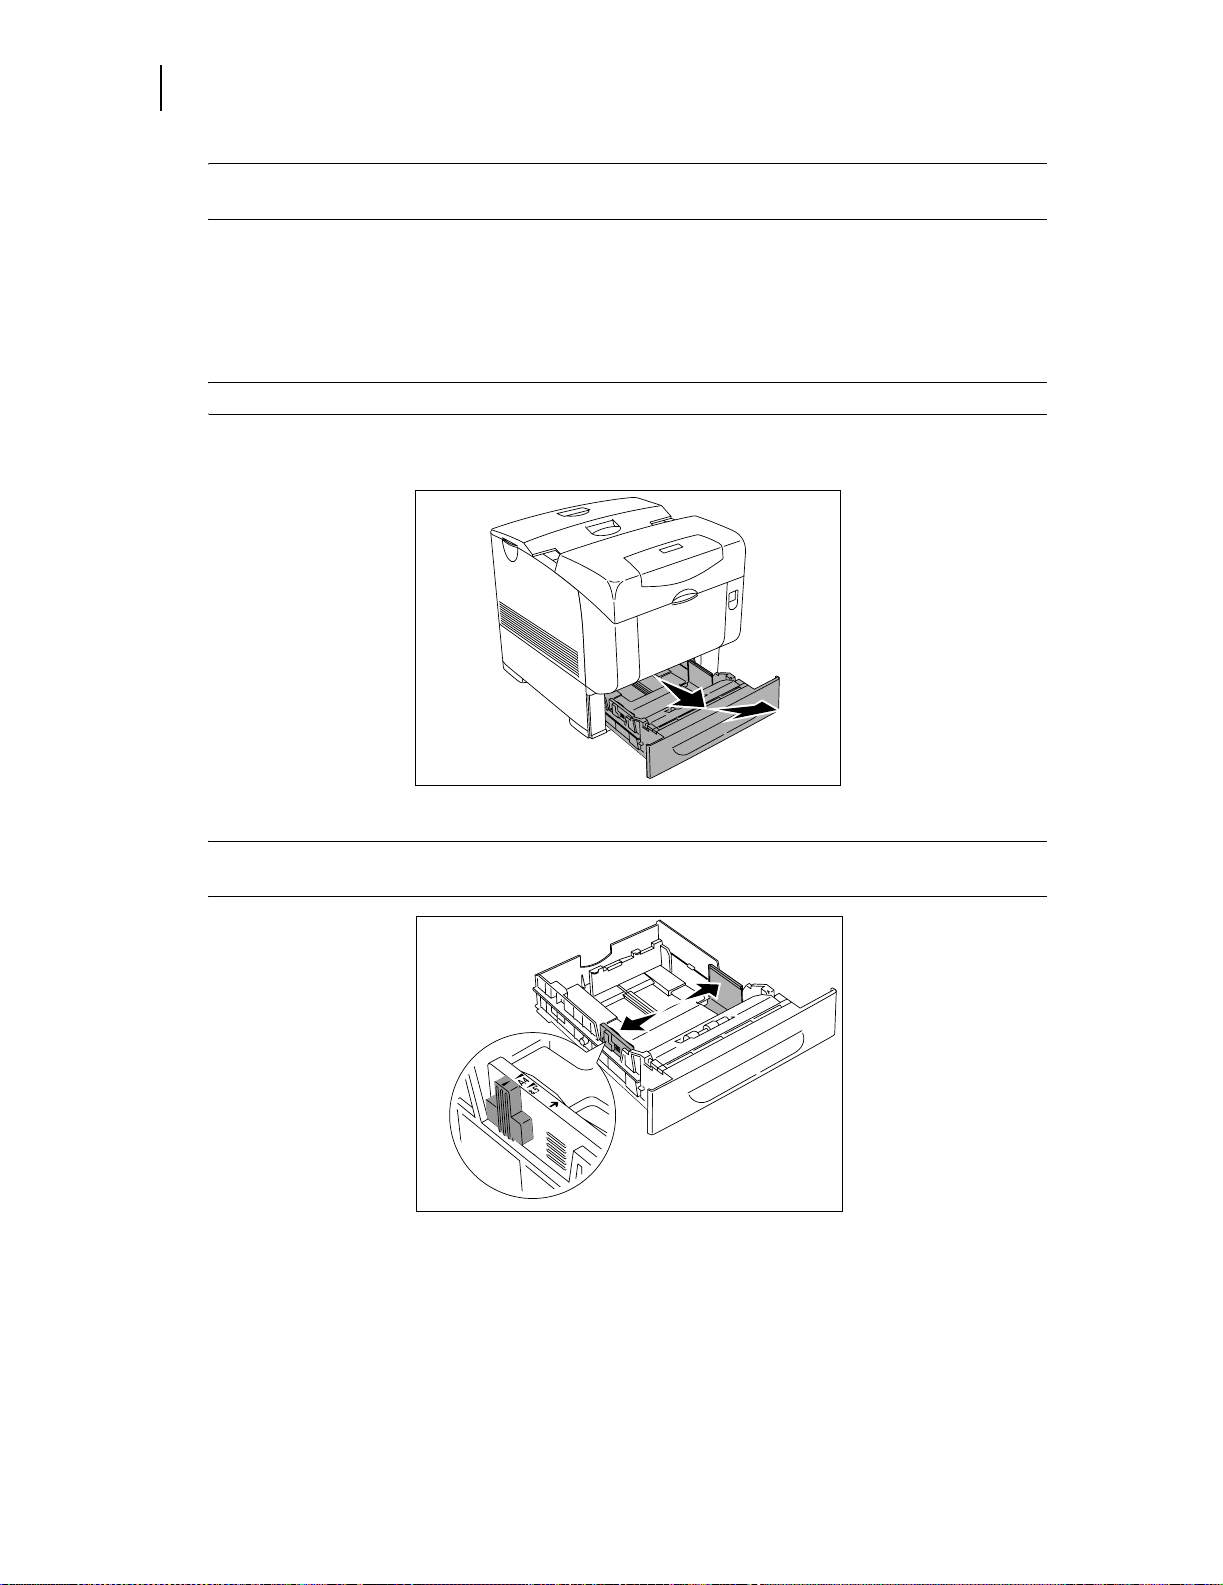
2-14 TallyGenicom Intelliprint 8026DN Color Laser Printer User Guide
Loading Paper
NOTE: Make sure set the envelope flaps are completely unfolded when loading envelopes
that are under 220 mm in width.
Loading Paper in Paper Tray
This section describes how to load paper in the standard and optional paper trays. All trays are
loaded the same way.
NOTE: Do not remove the tray during printing. It may cause a paper jam.
1. Pull the tray out of the printer until it stops. Hold the tray with both hands, lift the front
slightly, and remove it from the printer.
2. Slide the width guides to the edge of the tray. The width guides should be fully extended.
NOTE: When loading paper that is 210 mm wide such as A4 size paper, set the tab on the
side of the tray to the [A4] position.
Jun 06
Page 69
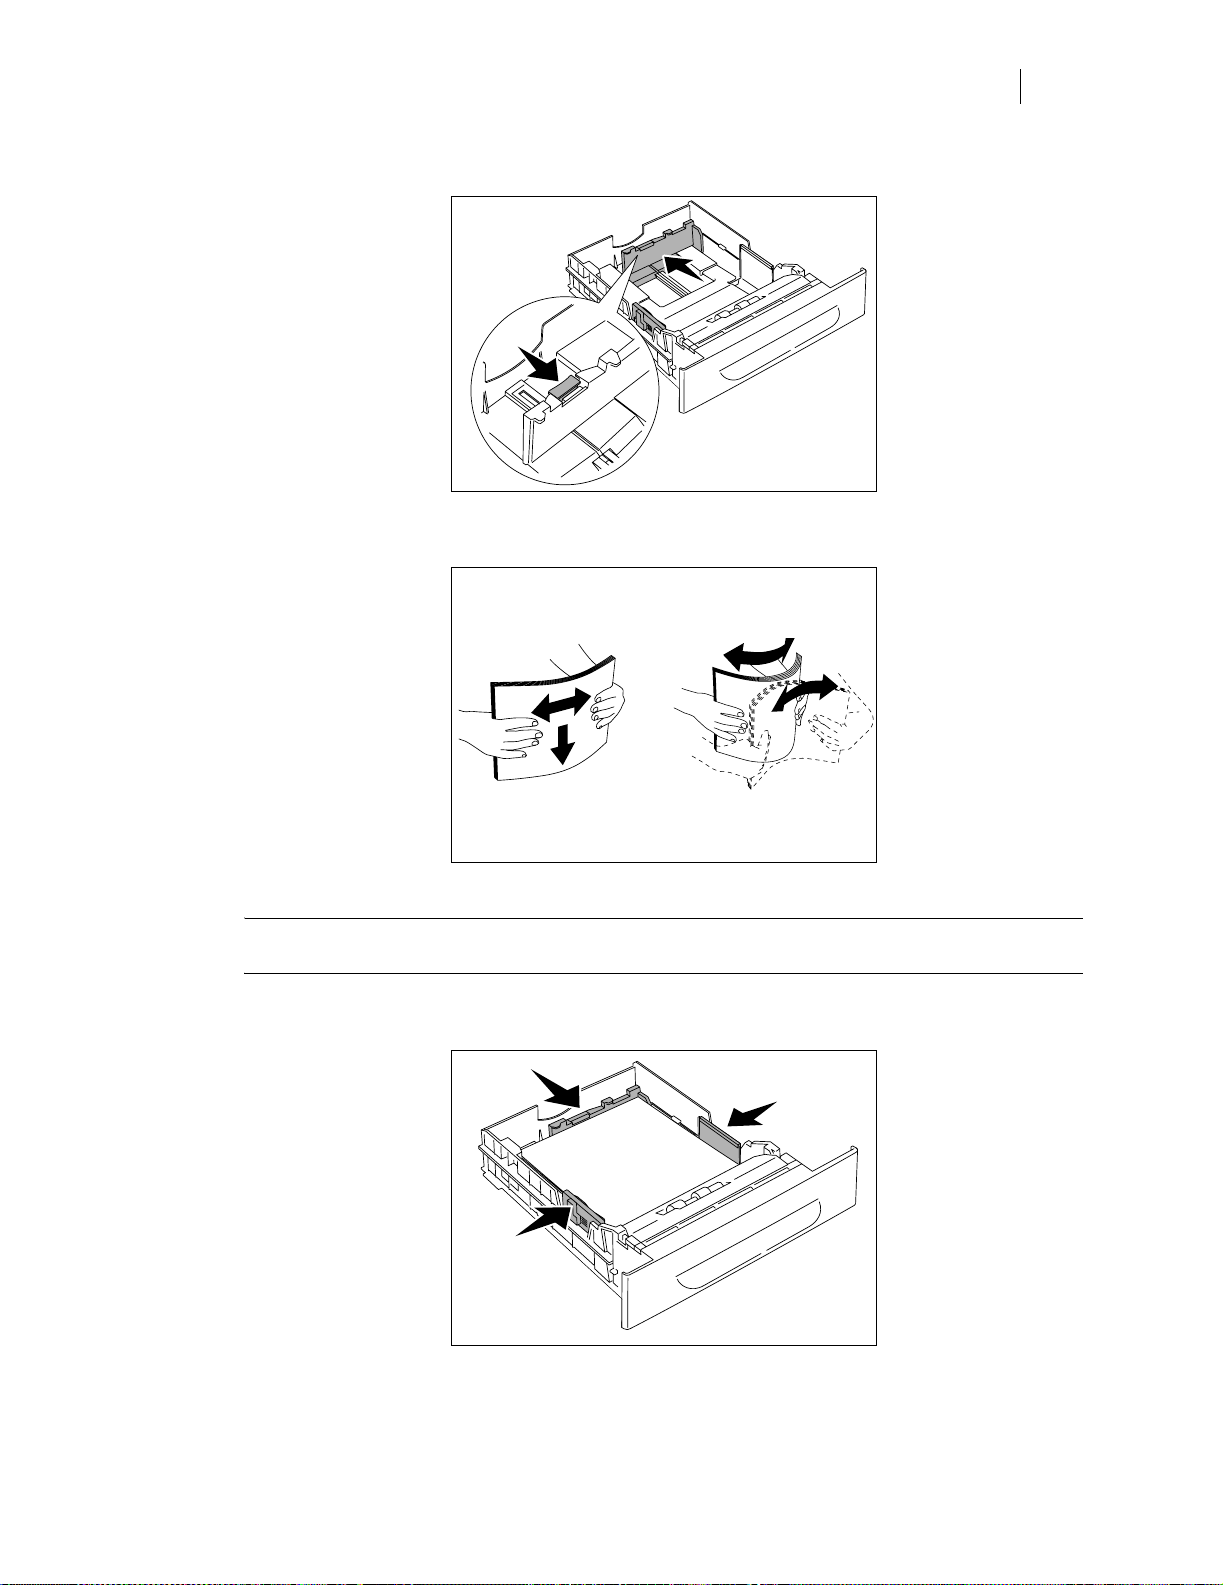
TallyGenicom Intelliprint 8026DN Color Laser Printer User Guide 2-15
Loading Paper
3. Squeeze the length guide and slide it to the edge of the tray.
4. Before loading the print media, flex the sheets back and forth, and then fan them.
Straighten the edges of the stack on a level surface.
5. Place the print media into the tray with the recommended print side face up.
NOTE: Do not exceed the maximum fill line in the tray. Overfilling the tray may cause
paper jams.
6. Slide the width guides and length guide until they rest lightly against the edge of the print
media stack.
Jun 06
Page 70

2-16 TallyGenicom Intelliprint 8026DN Color Laser Printer User Guide
Loading Paper
7. Insert the tray into the printer, and push until it stops.
NOTE: Do not use excessive force on the tray. Doing so could damage the tray or the inside the printer.
Jun 06
Page 71

TallyGenicom Intelliprint 8026DN Color Laser Printer User Guide 2-17
Cleaning the Printer
This section describes how to clean the printer in order to maintain the printer in good condition
and print clean printouts all the time.
CAUTION
• Be sure to switch off and unplug the machine before accessing the interior of the machine for
cleaning, maintenance, or fault clearance. Access to a live machine’s interior can cause
electric shock.
Cleaning the exterior
Clean the exterior of the printer about once a month. Wipe the surface with a damp, well-wrung
soft cloth. Then wipe with another dry soft cloth. For stubborn stains, moisten a soft cloth with a
small amount of neutral detergent, and gently wipe the stain off.
NOTE: Do not spray the detergent directly on the printer. The liquid detergent may enter
the printer through a gap and cause problems. Never use cleaning agents other than
neutral detergent.
Cleaning the Printer
Jun 06
Cleaning the interior
After clearing paper jams or replacing the Toner Cartridge, inspect the interior of the printer
before closing the top cover.
CAUTION
• Never touch areas labeled as “High Voltage.” You can get an electric shock.
• Never touch a labeled area found on or near the heat roller. You can get burnt. If a sheet of
paper is wrapped around the heat roller, do not try to remove it by yourself to avoid injuries or
burns. Switch off the machine immediately, and contact our Printer Support Desk.
■ Remove any remaining pieces of paper.
■ Remove any dust or stains with a dry clean cloth.
Page 72

2-18 TallyGenicom Intelliprint 8026DN Color Laser Printer User Guide
Cleaning the Printer
Cleaning the Density Sensor
When the printers density sensor is dirty, follow the procedure below to clean it.
CAUTION
• Do not touch the edge of the plate at the upper side of the transfer roll cartridge because it is
sharp.
1. Turn off the printer.
2. Push up the button 1 and fully open the front cover 2.
3. Grip the tabs at both ends of the transfer roll cartridge and gently lift it out of the printer.
NOTE: Do not touch inside the printer with your hands. Some parts may be hot. Allow time
for the printer to cool before attempting to remove parts in this area.
Jun 06
Page 73

TallyGenicom Intelliprint 8026DN Color Laser Printer User Guide 2-19
Cleaning the Printer
4. Gently wipe the density sensor window with a clean dry cloth or cotton swab.
NOTE: Do not allow anything hard to come in contact with the density sensor window. Do
not use excessive force to clean the window.
5. Replace the transfer roll cartridge. Grip the tabs as shown in the diagram.
Jun 06
6. Align the arrow marks on the transfer roll cartridge to the marks on the printer, and gently
push the roller into the printer.
Page 74

2-20 TallyGenicom Intelliprint 8026DN Color Laser Printer User Guide
Cleaning the Printer
7. To lock the transfer roll cartridge into the printer push down the tabs until you hear a click.
8. Close the front cover.
9. Turn on the printer.
Jun 06
Page 75

TallyGenicom Intelliprint 8026DN Color Laser Printer User Guide 2-21
Cleaning the Printer
Cleaning the Drum Cartridge
When the colored dots appears on the printed paper at regular intervals (about 30 mm), clean
the drum cartridge as following procedure.
NOTE: Remove any print jobs from the center output tray, close the multipurpose feeder
cover before opening the front cover.
1. Push up the button 1 and fully open the front cover 2.
2. Push the button as shown in the diagram and open the output tray cover.
3. Grab the drum cartridge by the handle, and pull it up and out.
Jun 06
Page 76

2-22 TallyGenicom Intelliprint 8026DN Color Laser Printer User Guide
Cleaning the Printer
CAUTION
• Do not touch inside the printer with your hands. Some parts may be hot. Allow time for the
printer to cool before attempting to remove parts in this area.
4. Place the drum cartridge next to the print sample on which the colored dots appear to find
the part that needs to be cleaned.
1
2
3
4
NOTE: -You must find the part to be cleaned yourself.
-The illustration shows the parts, one to four, to be cleaned.
-To prevent the light-sensitive drum being overexposed, do the operation quickly.
5. Align the colored dots printed on the print sample with the corresponding part of the drum
cartridge. 1 indicates the lateral position of the colored dots. 2 indicates the color of the colored dots.
1
2
NOTE: The graphic shows an example with magenta colored dots.
Jun 06
Page 77

TallyGenicom Intelliprint 8026DN Color Laser Printer User Guide 2-23
Cleaning the Printer
6. Determine the position where colored dots were printed. Then turn the gray-colored part on
the charge roll (black-colored roller) by rolling it with your finger on its left side to find the
dirt.
7. Clean any dirt from the roller.
Jun 06
NOTE: Use a soft cloth, such as cotton for cleaning.
NOTE: Make sure nothing touches or scratches the surface of the light-sensitive drum
(green-colored roller) or the charge roll (black-colored roller).
8. Replace the drum cartridge. Holding the drum cartridge by the handle with the flat part facing the back of the printer, align the plastic guides on both sides of the drum cartridge with
the slots in front of the arrows on the printer.
Page 78

2-24 TallyGenicom Intelliprint 8026DN Color Laser Printer User Guide
Cleaning the Printer
9. Close the output tray cover.
10. Close the front cover.
Jun 06
Page 79

Moving the Printer
Before transporting the printer by car or truck over long distances, follow the procedure below to
prevent strong vibrations from damaging the printer.
Carry out the following procedure when moving the printer.
CAUTION
• Bend your knees when lifting the printer to avoid back injuries.
Important
• The weight of this printer, without the optional accessories, consumables (drum cartridge)
and paper, is 31.5 kg (70 lb). If the optional tray module has been installed, uninstall it before
moving the printer. Otherwise, they may fall to the ground and cause injuries. Refer to
“Optional Accessories” on page 6-1 for details on uninstalling the optional accessories.
• To lift the printer safely, remove the drum cartridge and lift it with two people.
When lifting the printer, there should be 2 persons, one in front and one behind the printer, to
firmly grip the recessed areas provided on both sides of the printer. Never try to lift the printer by
gripping any other areas. Lifting the printer by gripping any other areas can cause the printer to
fall and result in injuries.
TallyGenicom Intelliprint 8026DN Color Laser Printer User Guide 2-25
Moving the Printer
Jun 06
1. On the right side of the printer, press <{> on the power switch to turn off the printer.
2. Disconnect the power cord, interface cable, and any other cables.
Page 80

2-26 TallyGenicom Intelliprint 8026DN Color Laser Printer User Guide
Moving the Printer
WARNING
• To prevent electric shock, never touch the power plug with wet hands.
CAUTION
• When removing the power cord, make sure that you pull the plug and not the cord. Pulling
the cord can damage it, which can lead to fire or electrical shock.
3. Remove any paper in the center output tray and return the paper stopper to its original
position, if it is extended.
4. Remove any paper in the multipurpose feeder. Keep the paper wrapped and away from
humidity and dirt.
5. Pull out the paper tray from the printer and remove any paper in the tray. Keep the paper
wrapped and away from humidity and dirt.
Jun 06
Page 81

TallyGenicom Intelliprint 8026DN Color Laser Printer User Guide 2-27
Moving the Printer
6. Push up the button and fully open the front cover 1, then press the button as shown in the
diagram and open the output tray cover 2.
7. Grab the drum cartridge by the handle, and pull it up and out.
Important
• Do not touch inside the printer with your hands. Some parts may be hot.
Jun 06
8. Close the output tray cover and the front cover.
Page 82

2-28 TallyGenicom Intelliprint 8026DN Color Laser Printer User Guide
Moving the Printer
9. Lift the printer and move it gently. If the printer is to be moved over a long distance, pack it
inside a box.
10. After transporting the printer, adjust the color registration before using it.
◆ ◆ ◆
Jun 06
Page 83

Troubleshooting
Chapter 3
In this Chapter . . .
■ “Dealing With Problems” on page 3-2
■ “Cannot Print” on page 3-3
■ “Print Quality Problems” on page 3-4
■ “Other Problems” on page 3-12
■ “Warning Messages and Error Messages” on page 3-13
■ “Warning Messages” on page 3-13
Jun 06
Page 84

3-2 TallyGenicom Intelliprint 8026DN Color Laser Printer User Guide
Power Problems
Dealing With Problems
When your printer suffers from a problem, refer to one of the four categories below to determine
the cause of your problem, and the action needed to rectify it.
• Power problems
• Print quality problems
• Paper transport problems
• Other problems
If your problem is not included in these categories or if you cannot rectify the problem using the
prescribed procedures, turn off the printer, disconnect the power cord from the AC outlet, and
contact your dealer or a Customer Service Center for assistance.
WARNING
• Do not make any changes or modifications to the equipment, as this may result in fire.
CAUTION
• Turn off the printer and disconnect the power cord from the AC outlet before performing
maintenance on the printer. Failure to turn off the printer and disconnect the power cord may
result in electric shock.
Power Problems
Description Cause Action
No power The < I > mark of the power switch
The unit turns off
frequently
Check that the power switch is in
is not depressed.
The power cord is not properly
connected to the AC outlet.
The AC power supply’s voltage is
not suitable for use with the unit.
The printer is defective. Turn off the unit, disconnect the
The power cord is not properly
connected to the AC outlet.
the < I > position.
Turn off the unit, confirm that the
power cord is properly connected to
the AC outlet, and turn the unit back
on.
Confirm that the printer is
connected to a suitable power
supply.
power cord from the AC outlet, and
contact your dealer or a Customer
Service Center for assistance.
Turn off the unit, confirm that the
power cord is properly connected to
the AC outlet, and turn the unit back
on.
Jun 06
Page 85

Cannot Print
Status Items to check Action
TallyGenicom Intelliprint 8026DN Color Laser Printer User Guide 3-3
Cannot Print
Print instruction was sent but
processing did not start.
Is the error indicator lit?
Is the error indicator blinking?
Is the print-ready indicator off?
Is there any message
displayed on the control panel?
Is there any message
displayed in the computer?
Carry out the action according
to the status of the indicator.
Check the message, then carry
out the action.
Check the message, then carry
out the action.
Jun 06
Page 86

3-4 TallyGenicom Intelliprint 8026DN Color Laser Printer User Guide
Print Quality Problems
Print Quality Problems
Description Cause Action
Faded printouts The media is outside the
recommended specification range.
The paper is damp. Replace the paper.
The drum cartridge or transfer roll
cartridge is old or damaged.
The high-voltage supply is
defective.
The development unit is damaged. Contact your dealer or a Customer
Stray black dots or
white areas (drop
outs)
The paper is outside the
recommended specification range.
Replace the media with a
recommend size and type, and
confirm that your printer driver
settings are correct.
Refer to
• “Paper Handling” on page 2-6
Refer to
• “Paper Handling” on page 2-6
Replace the drum cartridge or
transfer roll cartridge.
Refer to
• “Drum Cartridge” on page 5-9
• “Transfer Roll Cartridge” on page
5-13
Contact your dealer or a Customer
Service Center for assistance.
Service Center for assistance.
Replace the paper with a
recommend size and type, and
confirm that your printer driver
settings are correct.
Refer to
• “Paper Handling” on page 2-6
The drum cartridge or transfer roll
cartridge is old or damaged.
The development unit is damaged. Contact your dealer or a Customer
Replace the drum cartridge or
transfer roll cartridge.
Refer to
• “Drum Cartridge” on page 5-9
• “Transfer Roll Cartridge” on page
5-13
Service Center for assistance.
Jun 06
Page 87

TallyGenicom Intelliprint 8026DN Color Laser Printer User Guide 3-5
Print Quality Problems
Description Cause Action
Vertical black or
color streaks
The drum cartridge, transfer roll
cartridge, or fuser unit is old or
damaged.
Check the condition of the drum
cartridge, transfer roll cartridge and
fuser unit, and replace as
necessary.
Refer to
• “Drum Cartridge” on page 5-9
• “Transfer Roll Cartridge” on page
5-13
• “Fuser Unit” on page 5-16
Recurring smudges Dirt in the paper path. Print several blank sheets.
The drum cartridge, transfer roll
cartridge, or fuser unit is old or
damaged.
Check the condition of the drum
cartridge, transfer roll cartridge and
fuser unit, and replace as
necessary.
Refer to
• “Drum Cartridge” on page 5-9
• “Transfer Roll Cartridge” on page
5-13
• “Fuser Unit” on page 5-16
Ink smears when
rubbed
The paper is damp. Replace the paper.
Refer to
• “Paper Handling” on page 2-6
The paper is outside the
recommended specification range.
The fuser unit is old or damaged. Replace the fuser unit.
Black pages The drum cartridge is old or
damaged.
The high-voltage supply is
defective.
Replace the paper with a
recommend size and type, and
confirm that your printer driver
settings are correct.
Refer to
• “Paper Handling” on page 2-6
Refer to
• “Fuser Unit” on page 5-16
Replace the drum cartridge.
Refer to
• “Drum Cartridge” on page 5-9
Contact your dealer or a Customer
Service Center for assistance.
Jun 06
Page 88
3-6 TallyGenicom Intelliprint 8026DN Color Laser Printer User Guide
Print Quality Problems
Description Cause Action
Blank pages Two or more sheets may be feeding
at once.
The drum cartridge or transfer roll
cartridge is old or damaged.
The high-voltage supply is
defective.
The development unit is damaged. Contact your dealer or a Customer
Hair-like marks
appear in or around
black half-tone
The paper was left unwrapped for a
long time (especially in a dry
environment).
printing
The paper is outside the
recommended specification range.
Remove the paper stack from the
tray, fan it, and reinsert it.
Replace the drum cartridge or
transfer roll cartridge.
Refer to
• “Drum Cartridge” on page 5-9
• “Transfer Roll Cartridge” on page
5-13
Contact your dealer or a Customer
Service Center for assistance.
Service Center for assistance.
Replace the paper.
Refer to
• “Paper Handling” on page 2-6
Replace the paper with a
recommend size and type, and
confirm that your printer driver
settings are correct.
Refer to
• “Paper Handling” on page 2-6
Shadows appear
around areas of
dense black
printing
The transfer roll cartridge is old or
damaged.
Replace the transfer roll cartridge.
Refer to
• “Transfer Roll Cartridge” on page
5-13
Jun 06
Page 89

TallyGenicom Intelliprint 8026DN Color Laser Printer User Guide 3-7
Print Quality Problems
Description Cause Action
Color around the
edge of printing is
incorrect
Colored dots are
printed at regular
intervals (about 30
mm/1.2")
The color registration is incorrect. Adjust the color registration.
Refer to
• “Adjusting Colour Alignment” on
page 1-21
The drum cartridge is dirty. Clean the drum cartridge.
Refer to
• “Cleaning the Drum Cartridge” on
page 2-21
Jun 06
Page 90

3-8 TallyGenicom Intelliprint 8026DN Color Laser Printer User Guide
Print Quality Problems
Description Cause Action
Partial blanks,
creased paper or
blotted printing
The paper is damp. Replace the paper.
Refer to
• “Paper Handling” on page 2-6
The paper is outside the
recommended specification range.
Replace the paper with a
recommend size and type.
Refer to
• “Paper Handling” on page 2-6
The transfer roll cartridge or fuser
unit is not installed correctly.
Reinstall the transfer roll cartridge
and/or fuser unit.
Refer to
• “Transfer Roll Cartridge” on page
5-13
• “Fuser Unit” on page 5-16
Condensation inside the printer
causes partial blanks or creased
paper.
Turn the printer on and leave it one
hour at least to get rid of the
condensation. If the problems still
occur, contact your dealer or a
Customer Service Center for
assistance.
Vertical blanks The drum cartridge is not installed
correctly.
The drum cartridge, transfer roll
cartridge, or fuser unit is old or
damaged.
The development unit is damaged. Contact your dealer or a Customer
Reinstall the drum cartridge.
Refer to
• “Drum Cartridge” on page 5-9
Check the condition of the drum
cartridge, transfer roll cartridge and
fuser unit, and replace as
necessary.
Refer to
• “Drum Cartridge” on page 5-9
• “Transfer Roll Cartridge” on page
5-13
• “Fuser Unit” on page 5-16
Service Center for assistance.
Jun 06
Page 91

TallyGenicom Intelliprint 8026DN Color Laser Printer User Guide 3-9
Print Quality Problems
Description Cause Action
Slanted printing The paper guides in the paper tray
or multipurpose feeder are not set
correctly.
Reset the paper guides in the paper
tray or multipurpose feeder.
Refer to
• “Loading Paper in Paper Tray” on
page 2-14
Jun 06
Page 92

3-10 TallyGenicom Intelliprint 8026DN Color Laser Printer User Guide
Printing Is Not Clear
Printing Is Not Clear
Status Items to check Action
Transparencies are not printed
clearly.
Postcards are not printed
clearly.
Envelopes are not printed
clearly.
Are the correct type of
transparencies used?
Are the correct type of
postcards used?
Are the postcards correctly
loaded in the paper tray?
Are the correct type of
envelopes used?
Are the envelopes correctly
loaded in the paper tray?
Load the correct type of
transparencies.
Refer to
• “Special Media” on page 2-7
Load the correct type of
postcards.
Refer to
• “Special Media” on page 2-7
Load the postcards correctly in the
paper tray.
Load the correct type of
envelopes.
Refer to
• “Loading Envelopes in the
Multipurpose Feeder” on
page 2-13
Load the envelopes correctly in
the paper tray.
Jun 06
Page 93

TallyGenicom Intelliprint 8026DN Color Laser Printer User Guide 3-11
Paper Transport Problems
Description Cause Action
Paper Transport Problems
Paper does not
feed
Paper jams
Several sheets
feed at once
Paper does not
feed straight
The paper is not loaded correctly. Reload the paper in the paper tray
or multipurpose feeder.
Refer to
• “Loading Paper in Paper Tray” on
page 2-14
The paper is outside the
recommended specification range.
The paper is damp. Replace the paper.
There is paper jammed in the
printer.
Replace the paper with a
recommend size and type.
Refer to
• “Paper Handling” on page 2-6
Refer to
• “Paper Handling” on page 2-6
Remove the jammed paper. Also,
inspect the inside of the printer and
thoroughly remove any tape or
adhesive stuck to the rollers and
other components along the paper
path.
Refer to
• “Clearing Paper Jams” on page
4-2
The printer is not level. Reposition the printer on a flat,
stable surface.
The printer is defective. Turn off the unit, disconnect the
power cord from the AC outlet, and
contact your dealer or a Customer
Service Center for assistance.
Jun 06
Page 94

3-12 TallyGenicom Intelliprint 8026DN Color Laser Printer User Guide
Other Problems
Other Problems
WARNING
• Do not try to alter the machine configuration, or modify any parts. An unauthorized
modification can cause smoke or fire.
CAUTION
• Be sure to switch off and unplug the machine before accessing the interior of the machine for
cleaning, maintenance, or fault clearance. Access to a live machine's interior can cause
electric shocks.
Description Cause Action
Unusual noises The printer is not level. Reposition the printer on a flat,
stable surface.
Refer to
• Safety Notes
The paper tray is not inserted
properly.
There is a foreign object inside the
printer.
Push the paper tray completely into
the printer.
Turn off the printer and remove the
foreign object.
If you need to disassemble the
printer to remove the foreign
object(s), contact your dealer or a
Customer Service Center for
assistance.
Jun 06
Page 95

TallyGenicom Intelliprint 8026DN Color Laser Printer User Guide 3-13
Warning Messages and Error Messages
Warning Messages and Error Messages
The control panel display shows a warning message or error message when there is a problem
with the printer. Some messages indicate routine status conditions such as an empty paper
tray, while others indicate that a sheet of paper has jammed in a specific area of the printer.
Some messages indicate more serious printer problems that may require the help of a service
technician.
Warning messages use only the second line of the display and indicate conditions that do not
prevent the printer from operating. For example, if Tray 2 is out of paper but the printer is currently drawing paper from Tray 3, a warning message will appear on the second line of the display indicating that Tray 2 is out of paper—but the printer will continue to operate, drawing
paper from Tray 3.
Error messages use both lines of the display and indicate conditions that prevent the printer
from operating. The first line of an error message contains the error code and type of error,
while the second line of the display contains information about the action required to recover
from the error.
When the control panel displays a warning or error message, refer to the following tables and
complete the actions recommended for the specific message that is shown.
Warning Messages
The following table lists warning messages, possible causes, and the actions required to correct each cause.
Warning Message
Line 2 of display
Paper Out Tray [x] There is no paper in tray [x]. Add paper to the tray [x].
Calibrating … Printing is performing a self
Fuser EOL Near Fuser unit needs to be replaced
BTR EOL Near BTR unit needs to be replaced
PDH EOL Near PHD (process) unit needs to be
Toner Low [x] The toner [x] is low. Replace the toner [x] cartridge
Dev [x] life Warning Developer [x] needs to be replaced
Possible Cause Action
No action reqd. Information
calibration
soon
soon
replaced soon
soon
message only
Replace the fuser unit shortly
Replace the BTR unit shortly
Replace the PHD unit shortly
soon.
Replace the developer unit
shortly
Jun 06
Maintenance Reqd. Printer has printed 300,000 pages Call for service
Page 96

3-14 TallyGenicom Intelliprint 8026DN Color Laser Printer User Guide
Warning Messages and Error Messages
Error Messages
The table below lists error messages, the possible causes of each error, and the actions
required to recover from each error.
Error Message Possible Cause Action
Load Paper Tray [x]
[type] [size]
Tray [x] Missing
Insert Tray
Front Cover Open
Close Cover
Feed Jam
Check Tray [x]
Registration Jam
Open Cover A
Registration Jam
Open Cover B
Fuser Jam
Open Cover B
Duplex Jam
Open Cover B
Fuser Missing
Install Fuser
BTR Missing
Install BTR
There is no paper or wrong paper in
tray [x]
Tray [x] is out of printer Insert the corresponding tray into
The front cover is open Close the front cover
A paper jam has occurred in tray [x] Remove jammed paper from
A paper jam has occurred inside of
printer
A paper jam has occurred inside of
printer
A paper jam has occurred inside the
printer
A paper jam has occurred inside the
printer
The fuser is missing from the printer Re-install the fuser
The BTR is missing from the printer Re-install the BTR
Add correct paper type to
corresponding tray
printer
corresponding tray
Open cover A and remover the
jammed paper
Open cover B and remove the
jammed paper
Open cover B and remove the
jammed paper
Open cover B and remove the
jammed paper
PHD Missing
Install PHD
Toner [x] Missing
Install Toner [x]
Fuser Life Over
Replace Fuser
BTR Life Over
Replace BTR
PHD Life Over
Replace PHD
Toner [x] Empty
Replace Toner
Fuser Type Err
Install / Reset
Fuser Type Err
Install / Reset
The process unit is missing from the Re-install the PHD (process) unit
Toner cartridge [x] is missing Re-install the corresponding toner
cartridge
The fuser unit needs to be replaced Replace the fuser unit
The BTR unit needs to be replaced Replace the BTR unit
The process unit needs to be
replaced
Toner cartridge [x]is empty Replace toner cartridge [x]
Wrong fuser unit installed Re-install or replace with correct
Wrong fuser unit installed Re-install or replace the fuser unit
Replace the PHD (process) unit.
fuser
Jun 06
Page 97

TallyGenicom Intelliprint 8026DN Color Laser Printer User Guide 3-15
Warning Messages and Error Messages
Error Message Possible Cause Action
PHD Type Err
Install / Reset
Toner [x] Type Err
Install / Reset
CRUM ID: Fuser
Replace Fuser
CRUM ID: PHD
Replace PHD
CRUM ID Error: [x]
Replace Toner
CRUM Failure: [x]
Replace Toner
[x] Tape Remaining
Check Toner
CTD Sensor Dusty
Clean CTD Sensor
Fuser ID Warning
Install / Reset
PHD ID Warning
Install / Reset
Wrong PHD (process) unit installed Re-install or replace the PHD unit
Wrong Toner [x] cartridge installed Re-install or replace the toner
cartridge
Wrong Fuser unit installed Replace with correct fuser
Wrong PHD installed Replace with the correct PHD
Wrong Toner cartridge [x] installed Replace with the correct toner
cartridge
CRUM unit faulty Replace toner cartridge [x]
Toner cartridge [x] tape not removed Remove tape from cartridge
Toner density sensor is dusty Clean the toner density sensor
Fuser CRUM faulty Re-install or replace fuser unit
PHD CRUM faulty Re-install or replace the PHD unit
Toner [x] ID Warning
Replace / Reset
Dev [x] Life Over
Install / Reset
Out of Memory
Press Start
Clock Not Set
Press Start
Error: You Must
Turn DHCP Off
IPADDR Collision
Press Start
NVRAM Error xx
Press Start
Ready
Maintenance Reqd.
ROS Failure
Call Service
Toner [x] CRUM faulty Re-install or replace the Toner
cartridge
Developer [x] needs to be replaced
Insufficient memory to complete job Add more memory
Real time Clock not set Set the time and date
Trying to set IP address with DHCP
turned on
Turn off DHCP before manually
setting IP address
IP packet collision Press start to continue
Memory problem Press start to continue
Printer has printed 300,000 pages Call for service
ROS faulty Call for service
Jun 06
Page 98

3-16 TallyGenicom Intelliprint 8026DN Color Laser Printer User Guide
Warning Messages and Error Messages
Error Message Possible Cause Action
Fuser Failure
Call Service
MCU/NVRAM Error
Call Service
CTD Sensor Error
Call Service
MCU SW Error
Call Service
Env Sensor Error
Call Service
Low Density Error
Call Service
Main Motor Fail
Call Service
Dev Motor Fail
Call Service
Fuser Motor Fail
Call Service
Fuser unit faulty Call for service
Problem with engine controller board Call for service
CTD sensor faulty Call for service
Problem with engine controller board Call for service
Envelope sensor faulty Call for service
Toner supply error Call for service
Main motor faulty Call for service
Developer motor faulty Call for service
Fuser motor faulty Call for service
◆ ◆ ◆
Jun 06
Page 99

Clearing Paper Jams
Chapter 4
In this Chapter . . .
■ “Clearing Paper Jams” on page 4-2
■ “Paper Jams in the Multipurpose Feeder” on page 4-3
■ “Paper Jams in the Standard Tray” on page 4-4
■ “Paper Jams between Drum Cartridge and Fuser Unit” on page 4-6
■ “Paper Jams at the Fuser Unit” on page 4-7
■ “When Long Paper Jams” on page 4-11
■ “Paper Jams at the Paper Inverter” on page 4-12
■ “Paper Jams in the Optional Tray Module” on page 4-13
Jun 06
Page 100

4-2 TallyGenicom Intelliprint 8026DN Color Laser Printer User Guide
Clearing Paper Jams
Clearing Paper Jams
If a paper jam occurs, refer to the illustration below to select the appropriate corrective action
and clear the paper the paper jam immediately.
NOTE: The illustration below shows the printer with the optional 550 sheet and 1100 sheet
tray modules are installed.
“Paper Jams at the
Fuser Unit” on page 4-7
“Paper Jams in the
Multipurpose Feeder” on
page 4-3
“Paper Jams at the
Paper Inverter” on page
4-12
“Paper Jams in the
Standard Tray” on page
4-4
“Paper Jams in the
Optional Tray Module”
on page 4-13
“Paper Jams between
Drum Cartridge and
Fuser Unit” on page 4-6
CAUTION
• Never touch areas labeled as “High Voltage”. You can get an electric shock.
• Never touch a labeled area found on or near the heat roller. You can get burnt. If a sheet of
paper is wrapped around the heat roller, do not try to remove it by yourself to avoid injuries or
burns. Switch off the machine immediately, and contact our Printer Support Desk.
NOTE: Paper jams can be caused by incorrect printer installation or by using unsuitable or
low-quality paper. For information about paper, refer to “Paper Handling” (P. 2-6). Refer to
“Printer Location Requirements” (P. 1-4) and install the printer at the proper place.
Jun 06
 Loading...