

Page 1

User Guide
Color Laser Printer
T8006e
Page 2

Page 3

I
Table of Contents
Chapter 1
Introduction . . . . . . . . . . . . . . . . . . . . . . . . . . . . . . . . . . 1
About This Manual . . . . . . . . . . . . . . . . . . . . . . . . . . . . . . . . . . . . . . . . 1
Warnings, Cautions, and Notes . . . . . . . . . . . . . . . . . . . . . . . . . . . 1
Numbered steps . . . . . . . . . . . . . . . . . . . . . . . . . . . . . . . . . . . . . . . 2
Illustrations . . . . . . . . . . . . . . . . . . . . . . . . . . . . . . . . . . . . . . . . . . . 2
Bold fonts . . . . . . . . . . . . . . . . . . . . . . . . . . . . . . . . . . . . . . . . . . . . 2
Displays. . . . . . . . . . . . . . . . . . . . . . . . . . . . . . . . . . . . . . . . . . . . . . 2
Product Overview. . . . . . . . . . . . . . . . . . . . . . . . . . . . . . . . . . . . . . . . . 2
Printer Components . . . . . . . . . . . . . . . . . . . . . . . . . . . . . . . . . . . . . . . 3
Chapter 2
Setting Up Your Printer . . . . . . . . . . . . . . . . . . . . . . . . . 5
System Requirements . . . . . . . . . . . . . . . . . . . . . . . . . . . . . . . . . . . . . . 5
Operating System Requirements . . . . . . . . . . . . . . . . . . . . . . . . . . 5
Hardware Requirements. . . . . . . . . . . . . . . . . . . . . . . . . . . . . . . . . 5
Printer Location . . . . . . . . . . . . . . . . . . . . . . . . . . . . . . . . . . . . . . . . . . 6
Space . . . . . . . . . . . . . . . . . . . . . . . . . . . . . . . . . . . . . . . . . . . . . . . . 6
Temperature . . . . . . . . . . . . . . . . . . . . . . . . . . . . . . . . . . . . . . . . . . 7
Humidity . . . . . . . . . . . . . . . . . . . . . . . . . . . . . . . . . . . . . . . . . . . . . 7
Power Source . . . . . . . . . . . . . . . . . . . . . . . . . . . . . . . . . . . . . . . . . 7
Unpacking the Printer. . . . . . . . . . . . . . . . . . . . . . . . . . . . . . . . . . . . . . 8
Moving the Printer . . . . . . . . . . . . . . . . . . . . . . . . . . . . . . . . . . . . . . . . 8
Repacking the Printer for Shipment . . . . . . . . . . . . . . . . . . . . . . . 9
Installing the Starter Kit . . . . . . . . . . . . . . . . . . . . . . . . . . . . . . . . . . . 10
Installing the Paper Tray . . . . . . . . . . . . . . . . . . . . . . . . . . . . . . . 11
Installing Toner Cartridges . . . . . . . . . . . . . . . . . . . . . . . . . . . . . 11
Installing the Oil Bottle and Fuser Cleaning Roller . . . . . . . . . . 13
Setting the Fuser Cleaning Roller Counter to Zero . . . . . . . . . . 14
Installing the Optical Photoconductor (OPC) Belt Cartridge . . 15
Setting the OPC Belt Counter to Zero . . . . . . . . . . . . . . . . . . . . 17
Installing the Power Cord . . . . . . . . . . . . . . . . . . . . . . . . . . . . . . 18
Starting the Printer . . . . . . . . . . . . . . . . . . . . . . . . . . . . . . . . . . . . . . . 18
Loading Paper for Test Printing . . . . . . . . . . . . . . . . . . . . . . . . . 18
Turning On the Printer . . . . . . . . . . . . . . . . . . . . . . . . . . . . . . . . 19
Printing a Test Page . . . . . . . . . . . . . . . . . . . . . . . . . . . . . . . . . . . 20
Page 4

Tally T8006e Color Laser Printer User Guide
II
Chapter 3
Installing Printer Drivers and Utilities. . . . . . . . . . . . . 23
Tally Printer Autoplay CD. . . . . . . . . . . . . . . . . . . . . . . . . . . . . . . . . 23
Setting up a Local Printer in Windows . . . . . . . . . . . . . . . . . . . . . . . 23
Setting up a Network Printer in Windows . . . . . . . . . . . . . . . . . . . . 24
Configuring Windows to Print Using TCP/IP . . . . . . . . . . . . . 24
Assigning the Printer an IP Address, Subnet Mask and Gateway
Address. . . . . . . . . . . . . . . . . . . . . . . . . . . . . . . . . . . . . . . . . . . . . 25
IP Setting . . . . . . . . . . . . . . . . . . . . . . . . . . . . . . . . . . . . . . . . . . . 28
Configuring the LPR TCP/IP Printer Port
in Windows 95/98/ME. . . . . . . . . . . . . . . . . . . . . . . . . . . . . . . . 29
Configuring the RAW (TCP/IP) Printer Port
in Windows 95/98/ME. . . . . . . . . . . . . . . . . . . . . . . . . . . . . . . . 30
Configuring the TCP/IP printer port in Windows NT 4.0. . . . 30
Configuring the TCP/IP Printer Port in
Windows 2000/XP . . . . . . . . . . . . . . . . . . . . . . . . . . . . . . . . . . . 31
Configuring Windows to Print on a NetWare Network . . . . . . 32
Uninstalling Windows Drivers . . . . . . . . . . . . . . . . . . . . . . . . . . 32
Setting Up a Network Printer on Macintosh . . . . . . . . . . . . . . . . . . 33
Operating System Requirements. . . . . . . . . . . . . . . . . . . . . . . . . 33
Hardware Requirements . . . . . . . . . . . . . . . . . . . . . . . . . . . . . . . 33
Installing Macintosh Printer Drivers . . . . . . . . . . . . . . . . . . . . . 33
Uninstalling MacIntosh Printer Drivers . . . . . . . . . . . . . . . . . . . 34
Chapter 4
Operating Your Printer . . . . . . . . . . . . . . . . . . . . . . . . 35
Turning the Printer On . . . . . . . . . . . . . . . . . . . . . . . . . . . . . . . . . . . 35
Turning the Printer Off . . . . . . . . . . . . . . . . . . . . . . . . . . . . . . . . . . . 35
Selecting Media. . . . . . . . . . . . . . . . . . . . . . . . . . . . . . . . . . . . . . . . . . 35
Tray 1 . . . . . . . . . . . . . . . . . . . . . . . . . . . . . . . . . . . . . . . . . . . . . . 36
Trays 2 . . . . . . . . . . . . . . . . . . . . . . . . . . . . . . . . . . . . . . . . . . . . . 36
Loading Media . . . . . . . . . . . . . . . . . . . . . . . . . . . . . . . . . . . . . . . . . . 37
Control Panel . . . . . . . . . . . . . . . . . . . . . . . . . . . . . . . . . . . . . . . . . . . 39
Display . . . . . . . . . . . . . . . . . . . . . . . . . . . . . . . . . . . . . . . . . . . . . 39
Indicators . . . . . . . . . . . . . . . . . . . . . . . . . . . . . . . . . . . . . . . . . . . 39
Control Keys . . . . . . . . . . . . . . . . . . . . . . . . . . . . . . . . . . . . . . . . 40
Chapter 5
Changing Print Defaults. . . . . . . . . . . . . . . . . . . . . . . . 43
Changing Default Print Driver Properties . . . . . . . . . . . . . . . . . . . . 44
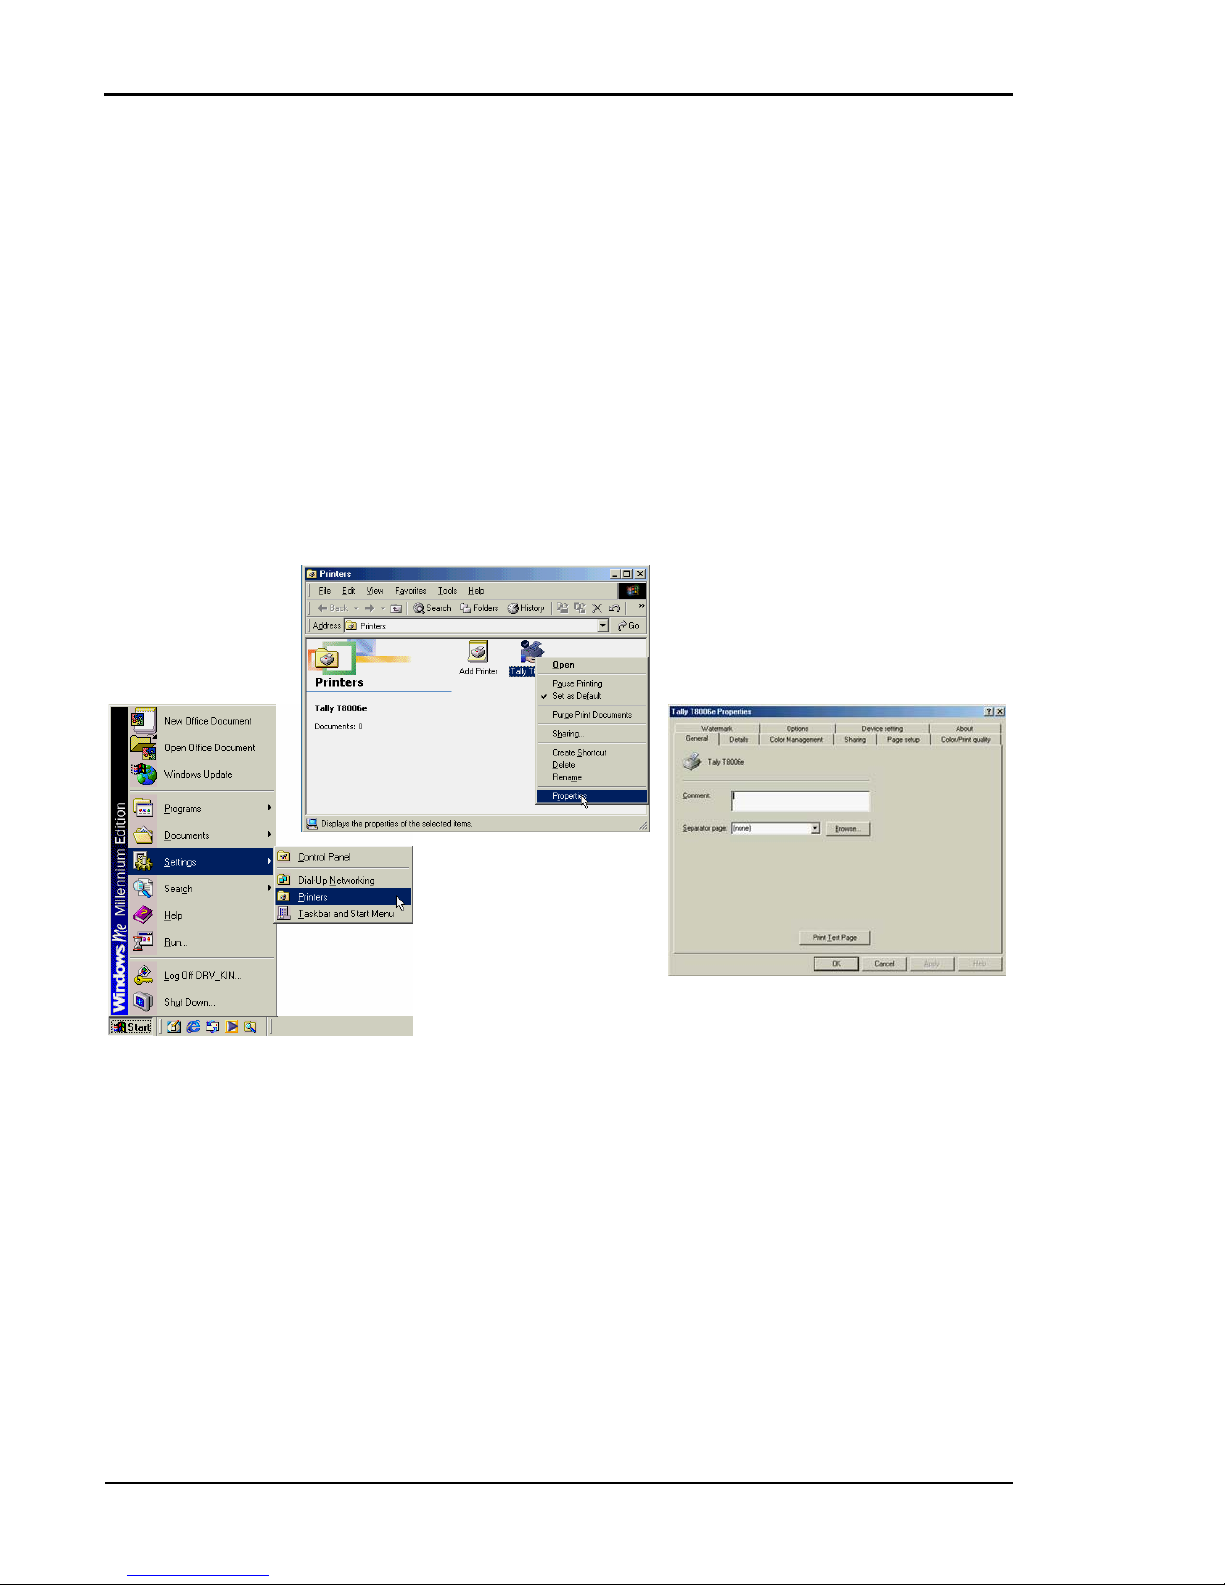
Windows 95/98/ME. . . . . . . . . . . . . . . . . . . . . . . . . . . . . . . . . . 44
Windows NT 4.0 . . . . . . . . . . . . . . . . . . . . . . . . . . . . . . . . . . . . . 45
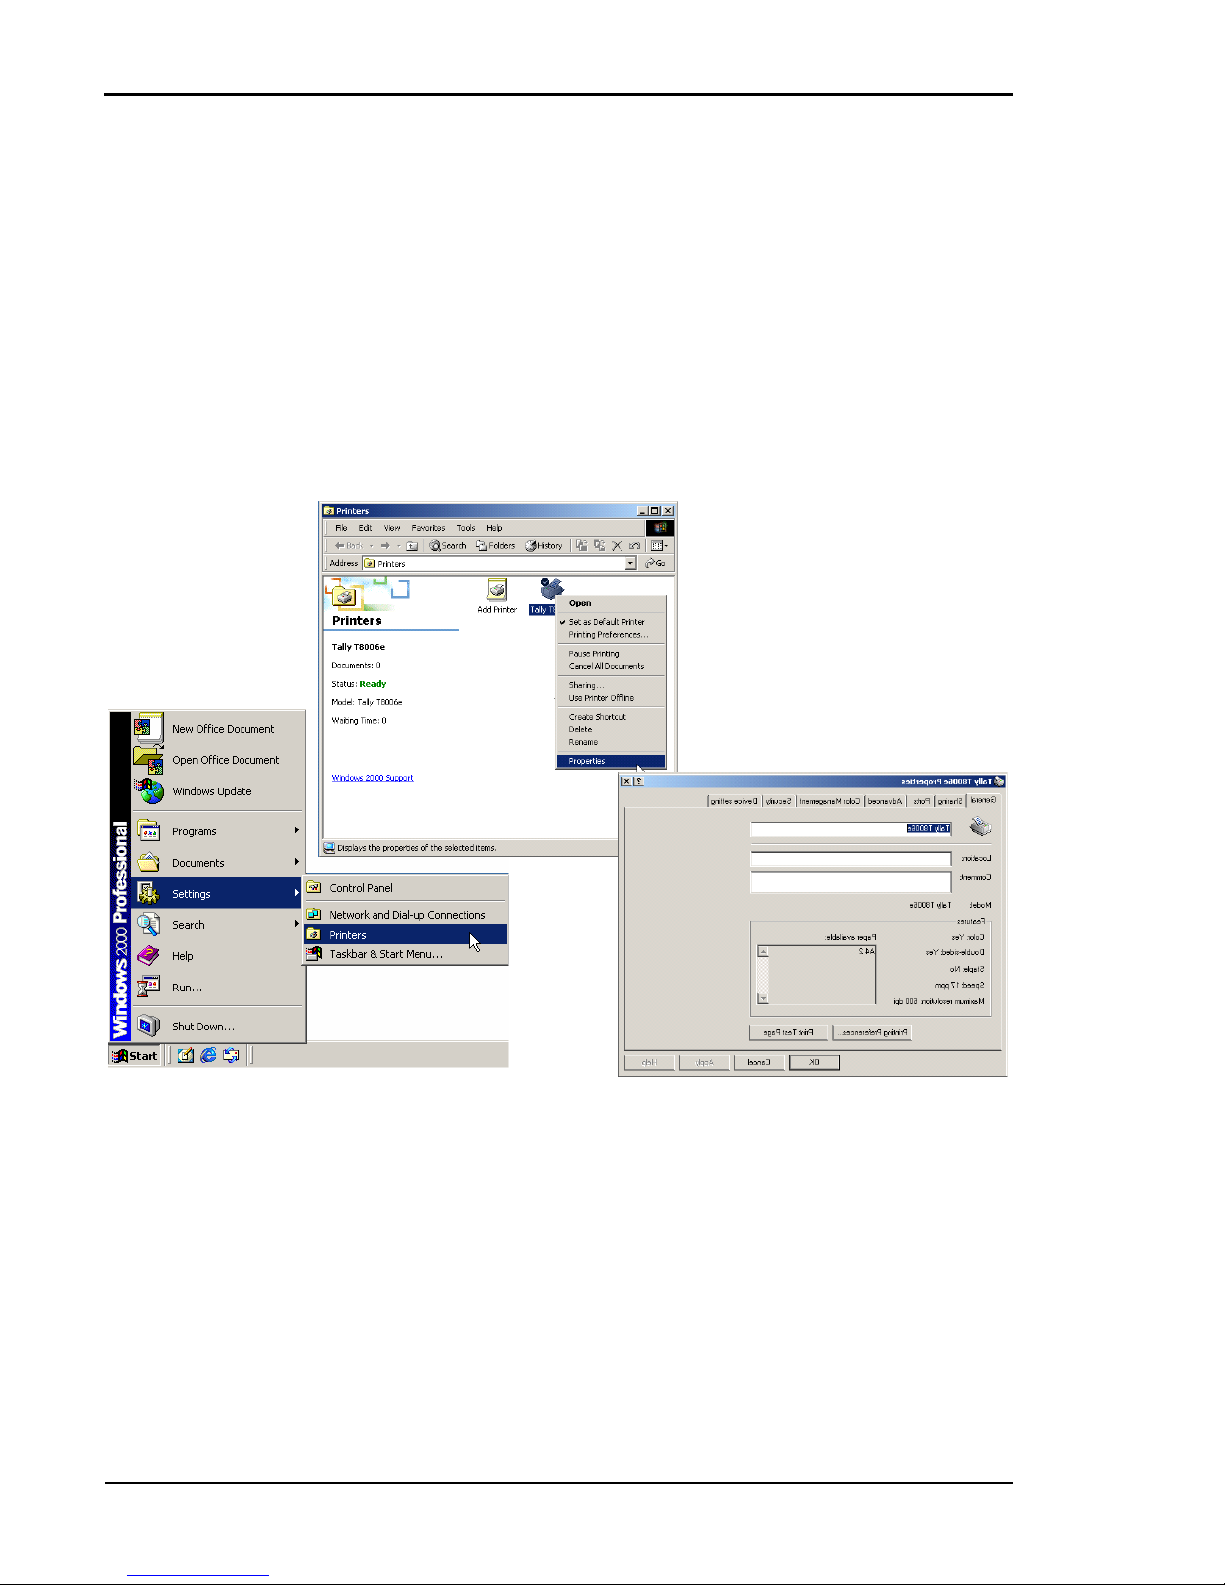
Windows 2000 . . . . . . . . . . . . . . . . . . . . . . . . . . . . . . . . . . . . . . . 46
Windows XP . . . . . . . . . . . . . . . . . . . . . . . . . . . . . . . . . . . . . . . . 47
Selecting Page Settings. . . . . . . . . . . . . . . . . . . . . . . . . . . . . . . . . . . . 48
Page 5

Table of Contents
III
Setting Colors and Print Quality . . . . . . . . . . . . . . . . . . . . . . . . . . . . 51
Adjusting Colors . . . . . . . . . . . . . . . . . . . . . . . . . . . . . . . . . . . . . . . . . 53
Adjusting Density . . . . . . . . . . . . . . . . . . . . . . . . . . . . . . . . . . . . . . . . 54
Registering Custom Edits. . . . . . . . . . . . . . . . . . . . . . . . . . . . . . . . . . 55
Customizing Watermarks . . . . . . . . . . . . . . . . . . . . . . . . . . . . . . . . . . 56
Setting Options . . . . . . . . . . . . . . . . . . . . . . . . . . . . . . . . . . . . . . . . . . 57
Setting Device Settings . . . . . . . . . . . . . . . . . . . . . . . . . . . . . . . . . . . . 59
Setting Printing Conditions . . . . . . . . . . . . . . . . . . . . . . . . . . . . . . . . 60
Chapter 6
Maintaining Your Printer. . . . . . . . . . . . . . . . . . . . . . . 61
Replacing Toner Cartridges . . . . . . . . . . . . . . . . . . . . . . . . . . . . . . . . 61
Replacing the Oil Bottle . . . . . . . . . . . . . . . . . . . . . . . . . . . . . . . . . . . 63
Replacing the Waste Toner Pack . . . . . . . . . . . . . . . . . . . . . . . . . . . . 65
Replacing the Fuser Cleaning Roller . . . . . . . . . . . . . . . . . . . . . . . . . 66
Replacing the Ozone Filter. . . . . . . . . . . . . . . . . . . . . . . . . . . . . . . . . 68
Replacing the Optical Photoconductor (OPC) Belt Cartridge . . . . . 69
Disposing of Supplies . . . . . . . . . . . . . . . . . . . . . . . . . . . . . . . . . . . . . 71
Chapter 7
Cleaning the Printer . . . . . . . . . . . . . . . . . . . . . . . . . . 73
Cleaning the Registration Roller. . . . . . . . . . . . . . . . . . . . . . . . . . . . . 73
Cleaning the Transfer Roller . . . . . . . . . . . . . . . . . . . . . . . . . . . . . . . 74
Cleaning the Paper Discharger. . . . . . . . . . . . . . . . . . . . . . . . . . . . . . 75
Cleaning the OPC Belt Cartridge. . . . . . . . . . . . . . . . . . . . . . . . . . . . 76
Cleaning the Optical Unit Glass. . . . . . . . . . . . . . . . . . . . . . . . . . . . . 79
Cleaning the Inside of the Printer . . . . . . . . . . . . . . . . . . . . . . . . . . . 80
Chapter 8
Options and Accessories . . . . . . . . . . . . . . . . . . . . . . . 83
Memory Module . . . . . . . . . . . . . . . . . . . . . . . . . . . . . . . . . . . . . . . . . 83
Duplex Printing Unit . . . . . . . . . . . . . . . . . . . . . . . . . . . . . . . . . . . . . 83
Paper Feeder . . . . . . . . . . . . . . . . . . . . . . . . . . . . . . . . . . . . . . . . . . . . 83
Installing Memory Modules . . . . . . . . . . . . . . . . . . . . . . . . . . . . . . . . 84
Installing the Duplex Printing Unit . . . . . . . . . . . . . . . . . . . . . . . . . . 86
Adjusting the Paper Feeder . . . . . . . . . . . . . . . . . . . . . . . . . . . . . . . . 86
Page 6

Tally T8006e Color Laser Printer User Guide
IV
Chapter 9
Troubleshooting . . . . . . . . . . . . . . . . . . . . . . . . . . . . . . 89
How to Solve Printing Problems. . . . . . . . . . . . . . . . . . . . . . . . . . . . 89
Paper Jam Areas . . . . . . . . . . . . . . . . . . . . . . . . . . . . . . . . . . . . . . . . . 89
Clearing Jam 1 . . . . . . . . . . . . . . . . . . . . . . . . . . . . . . . . . . . . . . . 90
Clearing Jam 2 . . . . . . . . . . . . . . . . . . . . . . . . . . . . . . . . . . . . . . . 93
Clearing Jams 3 and 4 . . . . . . . . . . . . . . . . . . . . . . . . . . . . . . . . . 95
Poor Print Quality . . . . . . . . . . . . . . . . . . . . . . . . . . . . . . . . . . . . . . . 98
Slow or No Printing. . . . . . . . . . . . . . . . . . . . . . . . . . . . . . . . . . . . . 101
Macintosh Chooser Problems . . . . . . . . . . . . . . . . . . . . . . . . . . . . . 104
Network Problems. . . . . . . . . . . . . . . . . . . . . . . . . . . . . . . . . . . . . . 105
Printer Driver Restrictions. . . . . . . . . . . . . . . . . . . . . . . . . . . . . . . . 107
Appendix A
Printer Specifications . . . . . . . . . . . . . . . . . . . . . . . . . 109
Appendix B
Periodic Replacement Parts . . . . . . . . . . . . . . . . . . . . 113
Appendix C
Control Panel Menu Functions . . . . . . . . . . . . . . . . . . 115
Menu Tree . . . . . . . . . . . . . . . . . . . . . . . . . . . . . . . . . . . . . . . . . . . . 116
Panel Menu Tree . . . . . . . . . . . . . . . . . . . . . . . . . . . . . . . . . . . . . . . 117
Utility Menu and Network Menu Tree . . . . . . . . . . . . . . . . . . . . . . 118
Menu Navigation Keys . . . . . . . . . . . . . . . . . . . . . . . . . . . . . . . . . . 119
Menu Display Format . . . . . . . . . . . . . . . . . . . . . . . . . . . . . . . . . . . 119
Test Menu. . . . . . . . . . . . . . . . . . . . . . . . . . . . . . . . . . . . . . . . . . . . . 120
TestPrint. . . . . . . . . . . . . . . . . . . . . . . . . . . . . . . . . . . . . . . . . . . 120
ConfigPage. . . . . . . . . . . . . . . . . . . . . . . . . . . . . . . . . . . . . . . . . 121
NetConfigPage. . . . . . . . . . . . . . . . . . . . . . . . . . . . . . . . . . . . . . 122
StatusPage . . . . . . . . . . . . . . . . . . . . . . . . . . . . . . . . . . . . . . . . . 123
TestMode . . . . . . . . . . . . . . . . . . . . . . . . . . . . . . . . . . . . . . . . . . 124
Config Menu. . . . . . . . . . . . . . . . . . . . . . . . . . . . . . . . . . . . . . . . . . . 125
Timeout . . . . . . . . . . . . . . . . . . . . . . . . . . . . . . . . . . . . . . . . . . . 125
SleepMode . . . . . . . . . . . . . . . . . . . . . . . . . . . . . . . . . . . . . . . . . 126
SleepTime. . . . . . . . . . . . . . . . . . . . . . . . . . . . . . . . . . . . . . . . . . 127
Port. . . . . . . . . . . . . . . . . . . . . . . . . . . . . . . . . . . . . . . . . . . . . . . 128
Priority . . . . . . . . . . . . . . . . . . . . . . . . . . . . . . . . . . . . . . . . . . . . 129
Display . . . . . . . . . . . . . . . . . . . . . . . . . . . . . . . . . . . . . . . . . . . . 130
Parallel Menu . . . . . . . . . . . . . . . . . . . . . . . . . . . . . . . . . . . . . . . . . . 132
ComMode . . . . . . . . . . . . . . . . . . . . . . . . . . . . . . . . . . . . . . . . . 132
Timing . . . . . . . . . . . . . . . . . . . . . . . . . . . . . . . . . . . . . . . . . . . . 133
Page 7

Table of Contents
V
Utility Menu . . . . . . . . . . . . . . . . . . . . . . . . . . . . . . . . . . . . . . . . . . . 135
Clear FC. Roll . . . . . . . . . . . . . . . . . . . . . . . . . . . . . . . . . . . . . . . 135
Clear BeltCG. . . . . . . . . . . . . . . . . . . . . . . . . . . . . . . . . . . . . . . . 136
Clear Print Info. . . . . . . . . . . . . . . . . . . . . . . . . . . . . . . . . . . . . . 137
Tray2 Margin. . . . . . . . . . . . . . . . . . . . . . . . . . . . . . . . . . . . . . . . 138
Duplex Margin . . . . . . . . . . . . . . . . . . . . . . . . . . . . . . . . . . . . . . 139
Network Menu . . . . . . . . . . . . . . . . . . . . . . . . . . . . . . . . . . . . . . . . . 140
IP Address . . . . . . . . . . . . . . . . . . . . . . . . . . . . . . . . . . . . . . . . . 140
Subnet Address. . . . . . . . . . . . . . . . . . . . . . . . . . . . . . . . . . . . . . 141
Gateway Address . . . . . . . . . . . . . . . . . . . . . . . . . . . . . . . . . . . . 143
IP Setting. . . . . . . . . . . . . . . . . . . . . . . . . . . . . . . . . . . . . . . . . . . 144
Appendix D
Control Panel Messages . . . . . . . . . . . . . . . . . . . . . . 147
Messages . . . . . . . . . . . . . . . . . . . . . . . . . . . . . . . . . . . . . . . . . . . . . . 147
Paper Sizes. . . . . . . . . . . . . . . . . . . . . . . . . . . . . . . . . . . . . . . . . . . . . 152
Paper Types. . . . . . . . . . . . . . . . . . . . . . . . . . . . . . . . . . . . . . . . . . . . 152
Appendix E
Network Management . . . . . . . . . . . . . . . . . . . . . . . 153
Overview . . . . . . . . . . . . . . . . . . . . . . . . . . . . . . . . . . . . . . . . . . . . . . 153
Network Interface . . . . . . . . . . . . . . . . . . . . . . . . . . . . . . . . . . . 153
Supported Printing Protocols . . . . . . . . . . . . . . . . . . . . . . . . . . 153
Supported Management Protocols . . . . . . . . . . . . . . . . . . . . . . 153
Supported Operating Systems . . . . . . . . . . . . . . . . . . . . . . . . . . . . . 154
Setting Up the Printer for Network Management. . . . . . . . . . . . . . 154
Setting Up an IP Address. . . . . . . . . . . . . . . . . . . . . . . . . . . . . . 154
Managing Network Settings with the Web Interface . . . . . . . . . . . 155
Managing Basic Network Operations with the Web Interface 155
Managing TCP/IP Settings . . . . . . . . . . . . . . . . . . . . . . . . . . . . 157
Managing AppleTalk Settings . . . . . . . . . . . . . . . . . . . . . . . . . . 159
Configuring SNMP settings . . . . . . . . . . . . . . . . . . . . . . . . . . . . 160
Configuring the Printer for IPP. . . . . . . . . . . . . . . . . . . . . . . . . 162
Configuring the Printer for Email . . . . . . . . . . . . . . . . . . . . . . . 164
Using “Discover” tool . . . . . . . . . . . . . . . . . . . . . . . . . . . . . . . . 166
Remote Printer Management . . . . . . . . . . . . . . . . . . . . . . . . . . 167
Displaying the General Printer Information . . . . . . . . . . . . . . 169
Displaying the Printer Report List . . . . . . . . . . . . . . . . . . . . . . 171
Performs Printing Test Page . . . . . . . . . . . . . . . . . . . . . . . . . . . 172
Managing Configuration Setting for the Printer . . . . . . . . . . . . 173
Displaying the state of consumables . . . . . . . . . . . . . . . . . . . . 175
Displaying the status of Job History . . . . . . . . . . . . . . . . . . . . . 177
Displaying the setting of Network. . . . . . . . . . . . . . . . . . . . . . . 178
Managing NetWare Settings. . . . . . . . . . . . . . . . . . . . . . . . . . . . 179
Configuring the Server . . . . . . . . . . . . . . . . . . . . . . . . . . . . . . . . 181
Index . . . . . . . . . . . . . . . . . . . . . . . . . . . . . . . . . . . . . 187
Page 8

Page 9

1
Chapter 1
Introduction
About This Manual
This manual is intended to provide guidance for the proper installation,
operation, and maintenance of your Tally T8006e printer. Please read this
manual carefully to ensure proper use of the printer. Keep the CD-ROM
in a safe place, where it can be retrieved readily when needed.
The following documentation conventions are used in this manual for
ease in understanding and use.
Warnings, Cautions, and Notes
Warnings, cautions and notes provide important safety information
throughout this manual. Carefully follow all the warnings, cautions and
notes as you read through the instructions in this manual before you
operate the printer.
Information in the warnings and cautions describe potential hazards.
If you don’t understand the safety information, contact Tally Technical
Services.
Here are the warning, caution, and note definitions:
Warning! If a specific action or procedure in a Warning is not followed,
equipment damage or personal injury can occur.
Caution! If a specific action or procedure in a Caution is not followed,
damage to equipment can occur.
Note: Notes offer additional information to help you more fully
understand a concept or subject. If a note is not followed, a task or procedure
may not be properly accomplished.
Page 10

Tally T8006e Color Laser Printers User Guide
2
Numbered steps
Instructions are presented under main topic headings with easy-to-follow,
sequential steps.
Illustrations
Illustrations are displayed alongside numbered steps.
Bold fonts
Software commands and key commands are printed in bold type fonts.
Displays
Text messages that display on the printer control panel are shown as they
appear on the control panel.
Product Overview
Tally has engineered the following features into the T8006e printers.
Space-saving design. The printer is compact for easy installation in
small office spaces or on desk tops.
Low-cost operation. The printer toner cartridges and the developer are
incorporated as a single unit, so there are fewer supplies to replace.
T8006e accepts various printing media. The printer accepts many
types, sizes, and weights of paper and other media, including envelopes,
heavy paper stocks, OHP transparencies, and labels.
Note: The T8006e accepts paper sizes up to legal size (8.5” x 14”).
Simple network connection. The printer has an RJ-45 port for LAN
connections, and the printer can adapt to your existing network protocol
whether it is a TCP/IP, Windows® or IPX/SPX network. You can also
use a Web control function to monitor the printer from a browser screen.
It support MAC OS ver 9.X or earlier as well.
Time-saving color adjustments. The printer supports functions for
fine color adjustment, and allows you to manually save the settings. You
can save color adjustments under a specific name, and retrieve these
specific user-defined color adjustments later for quick printing.
Page 11

Chapter 1 Introduction
3
Printer Components
Control Panel keys and
indicator lights allow you
to control and monitor
printer operations.
Top Co v er provides access to internal
supplies such as the oil bottle, and
functions as the paper exit tray.
Power Switch controls
all power to the printer.
Front Cover provides access
to the toner cartridges.
Paper Trays provide
the media to be printed.
Power Cord Socket
provides power to the printer.
RJ-45 Port provides
printer-to-network connection.
Parallel Port provides direct
printer-to-computer connection.
Page 12

Tally T8006e Color Laser Printers User Guide
4
Fusing Unit thermally
bonds the toner to the
media.
Fuser Cleaning Roller
removes any dust from
the fusing unit and the
fixing roller.
Oil Bottle stores oil for
use in the fixing process.
Optical Photoconductor (OPC)
Belt Cartridge processes laser
beam activity that produces images
one color at a time (not shown).
Toner Cartridges provide
the toner for the printing
process.
Ozone Filter reduces
the amount of ozone
emitted during the
printing process.
Waste Toner Pack
collects and retains
waste toner.
Page 13

5
Chapter 2
Setting Up Your Printer
System Requirements
For optimum printer performance and productivity, install the Tally
printer driver software in a computer operating system that meets the
following specifications.
Operating System Requirements
To use the Tally printer drivers included for this model, the connecting
computer must use one of the following Microsoft operating systems:
• Windows 95
• Windows 98/ME
• Windows NT 4.0
(The Windows NT 4.0 printer driver will only operate on
X86 architectures.)
• Windows 2000
• Windows XP
Hardware Requirements
The connecting computer must meet the following minimum hardware
requirements:
Microprocessor
Pentium® 200 MHz minimum. Pentium® 500 MHz or higher
microprocessor is recommended.
Memory
At least 64 MB. 128 MB or more of memory is recommended.
Disk Space
At least 100 MB. 200 MB or more of disk space is recommended.
Note: For Apple Macintosh hardware requirements, see “Setting Up a
Network Printer on Macintosh” on page 33.
Page 14
Tally T8006e Color Laser Printers User Guide
6
Printer Location
Tally color printers require the following environment specifications for
optimal operation.
Space
Put the printer on a stable surface with good ventilation. Ensure printer is
level for optimum performance. Keep the printer away from corrosive
chemicals, gases, dust, and other contamination, and away from
equipment that generates magnetic fields, electrical noise, vibration, or
shock.
The surface that holds the printer must support at least 313 pounds or
142 kilograms, which includes the weight of the printer, paper, and all
optional components. The surface must be large enough to support an
extended paper tray.
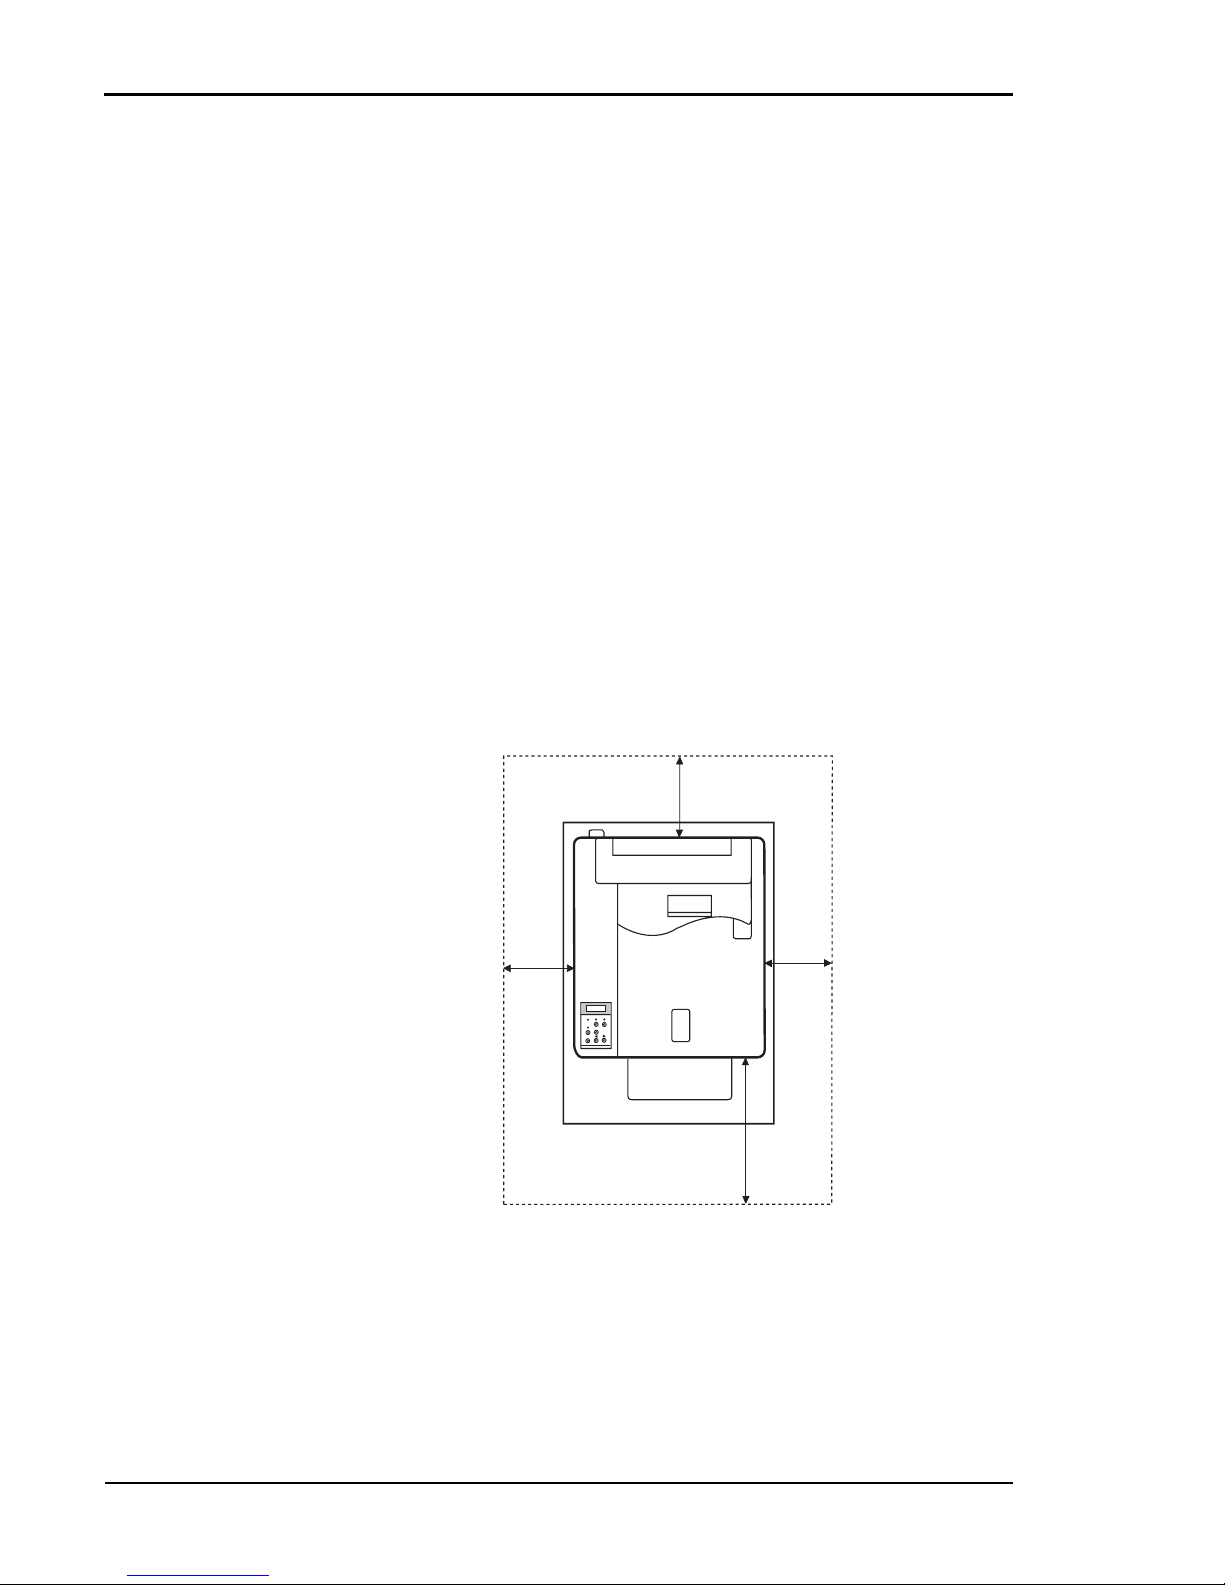
Allow enough clear space around your printer to provide good airflow for
printer cooling and for easy maintenance access.
The recommended clearance between a printer and other objects is
shown here:
7.88 in. (20 cm)
19.70 in. (50 cm)
3.94 in. (10 cm)
27.50 in. (70 cm)
Page 15

Chapter 2 Setting Up Your Printer
7
Temperature
Make sure the temperature in the printer location stays constant. Keep the
printer away from direct sunlight. For best printer operation, install the
printer in a location where the temperature levels stay within the following
ranges:
Humidity
Excessive changes in humidity can cause unwanted condensation inside
the printer. For best printer operation, install the printer in a location
where humidity levels stay within the following ranges:
Power Source
Each printer model requires different types of electrical power, as shown
below. If you need additional information about the power requirements,
contact your dealer or a Tally Service Technician.
Warning! Use properly grounded wall sockets. Do not use converter plugs.
Caution! Use surge protection between the power source and the printer.
Fahrenheit Celsius
Recommended range:
63.5º to 80.6º 17.5º to 27º
Permitted range:
50º to 90.5º 10º to 32.5º
Recommended range:
50% to 70%
Permitted range:
20% to 80%
Model T8006e Part Number: 043302
Voltage
120 VAC + 10%
Frequency
60 Hz + 2 Hz
Consumption
Up to 1,350 W
Model T8006e Part Number: 043300
Voltage
220 VAC to 240 VAC
Frequency
50 - 60 Hz + 2 Hz
Consumption
Up to 1,350 W
Page 16

Tally T8006e Color Laser Printers User Guide
8
Unpacking the Printer
The printer is heavy. Two or more persons must use the four grip
locations on the underside of the printer to move it.
The printer is packaged with a lift-off box top and bottom tray carton.
Depending on the printer model, the printer can be delivered on a pallet.
Warning! Do not lift the printer using the polyethylene bag that covers the
printer.
Moving the Printer
Remove the fuser unit before moving the printer. A printer can be
damaged by toner and oil spillage if it is tilted while being moved. Always
keep it horizontal. If you use a cart to move the printer, push it carefully
and slowly. Sudden shocks or strong vibration may damage the printer.
Caution! Have two people carry the printer without tilting it.
1. Remove the Starter Kit and the
polyethylene bag.
2. Remove the carton from the
printer and lift the printer from
the bottom carton tray using the
four grips on the underside of
the printer.
3. Put the printer in the desired
location.
Page 17

Chapter 2 Setting Up Your Printer
9
Repacking the Printer for Shipment
Before the printer can be repacked for shipment, the supplies in the
printer must be removed and the inside of the printer must be cleaned.
After the fuser oil bottle is removed, the residual fuser oil that remains
within the printer, must be removed.
Repacking a printer that has previously been installed needs careful
attention. To find out more about the printer repacking instructions or for
assistance, see the Tally T8006e Color Laser Printers Quick Start Guide
on the Tally CD-ROM or contact your dealer or a Tally Service
Technician..
The following diagram shows how the printer and supplies are packaged.
Starter Kit
Page 18

Tally T8006e Color Laser Printers User Guide
10
Installing the Starter Kit
Your printer comes with a Starter Kit that contains:
• Toner cartridges (4)
• Oil bottle
• Oil dropper
• Fuser cleaning roller
• Optical photoconductor (OPC) belt cartridge
•CD-ROM
• Quick Start Guide
Note: The oil dropper is used to draw oil out of the fusing unit when the
printer must be moved or shipped. Keep the dropper in a convenient, safe
location for future use.
The printer also comes with an ozone filter and a waste toner pack that
have been pre-installed at the factory.
Additional items are also included with the printer:
• Paper tray
• Power cord
Y
M
C
K
Oil Bottle
OPC Belt Cartridge
Toner Cartridges
Fuser Cleaning
Roller
Power Cord
Paper Tray
Oil Dropper
Page 19

Chapter 2 Setting Up Your Printer
11
Installing the Paper Tray
Installing Toner Cartridges
Each toner cartridge is labeled with the capital letter of the toner color.
Insert the toner cartridges in the appropriate slots in the printer from the
bottom to the top as follows: C (Cyan), M (Magenta), Y (Yellow), and K
(Black). The toner cartridges from the Starter Kit are filled at half volume
for first-time installation only.
Warning! If you get toner in your eyes, immediately flush your eyes with
water for at least 15 minutes, and contact a physician.
Warning! Make sure the printer is off and unplugged before installing
supplies.
Caution! Handle the toner cartridges horizontally with the labels facing
up. Do not install the toner cartridges upside-down or in reverse positions.
No Paper Feeder
Insert the paper tray squarely and
evenly into the printer.
1. Release the front cover latch.
2. Open the front cover.
Page 20

Tally T8006e Color Laser Printers User Guide
12
3. Rock the toner cartridge three or
four times in the direction of the
arrows on the cartridge to level
out the toner inside.
4. Peel the tape off the cartridge
and remove the protective cover
from the cartridge.
Note: Save the protective cover for future use when shipping the printer and toner
cartridge separately.
5. Insert the toner cartridge carefully along the guide and into the
appropriate toner cartridge slot
in the printer.
6. Repeat steps 3 through 5 for each
toner cartridge.
7. Close the front cover.
Page 21

Chapter 2 Setting Up Your Printer
13
Installing the Oil Bottle and Fuser Cleaning Roller
The oil is used for fixing the toner on the paper. The fuser cleaning roller
removes any accumulated dust from the fusing unit.
Caution! Always keep the printer horizontal to prevent spillage of
residual oil and toner.
1. Release the top cover latch and
open the top cover.
2. For the T8006e, push the large
green levers at the sides of the
fuser rollers backward until they
click into position.
3. Insert the oil bottle.
4. Insert the fuser cleaning roller.
5. Turn the two green lock levers to
lock the fuser cleaning roller and
the oil bottle in place.
Note: After replacing the fuser cleaning roller, reset the fuser cleaning roller counter to
zero.
Page 22

Tally T8006e Color Laser Printers User Guide
14
Setting the Fuser Cleaning Roller Counter to Zero
Printer software tracks fuser cleaner roller usage. After the counter
reaches a pre-set number, the printer displays a message to indicate that
maintenance is necessary.
Whenever replacing the fuser cleaning roller the counter has to be set to
zero as detailed below.
1. Take the printer off line, by pressing the
ONLINE key. Press and hold the
MENU/ENTER/. The printer
shows test mode, keep pressing the
menu key until printer says utility menu.
Release the menu key and press it once.
2. Printer shows utility Menu clear FC
roller.
3. Press MENU/ENTER/ . The display will show Clear FC. Roll Not
Execute.
4. Press either TRAY/or MEDIA/
until the display shows Clear FC. Roll
Execute.
5. Press MENU/ENTER/ once, and after approximately 10 seconds,
the display will show Completed Clear FC. Roll.
6. Press the key three times to exit the utility menu and then press the
online key. Or turn the printer off.
NoteFor more information about displayed error messages, see “Appendix D Control
Panel Messages” on page 147.
Page 23

Chapter 2 Setting Up Your Printer
15
Installing the Optical Photoconductor (OPC) Belt
Cartridge
Caution! Do not touch or wipe off any powder that is on the OPC belt, or
expose the OPC belt to light.
1. Open the top and front covers.
2. Lift the green OPC belt cartridge
lock levers up until they unlock,
with the channels upright.
3. With the top cover open, remove
the protective sheet from the
OPC belt cartridge.
4. Remove the two shipping pins
from the OPC belt cartridge.
5. Hold the OPC belt by the handle
at the top. Ensure that the white
gear is on the right hand side as
viewed from the front of the
printer. Slide the OPC belt cartridge downward along the green
lock-lever guides and into the
printer carefully.
Page 24

Tally T8006e Color Laser Printers User Guide
16
Note: After replacing the OPC belt cartridge, reset the OPC belt counter
to zero.
6. Press the green OPC belt cartridge lock levers to the closed
position.
7. Close the top and front covers
carefully until they lock shut.
Page 25

Chapter 2 Setting Up Your Printer
17
Setting the OPC Belt Counter to Zero
Printer software tracks OPC belt usage. After the counter reaches a preset number, the printer displays a message to indicate that maintenance is
necessary. After the first installation, and after every replacement of the
OPC belt, set the counter to zero.
1. Take the printer off line, by
pressing the ONLINE key.
Press and hold the MENU/
ENTER/. The printer shows
test mode, keep pressing the
menu key until printer says utility menu. Release the MENU/
ENTER/ key and press it
once.
2. When Warming up is displayed
(about 5 seconds), release
MENU/ENTER/. The display will show Utility Menu
Clear FC. Roll.
3. Press either TRAY/ or MEDIA/ until the display shows Clear
BeltCG.
4. Press MENU/ENTER/. The display will show Clear BeltCG Not
Execute.
5. Press either TRAY/or MEDIA/ until the display shows Clear
BeltCG Execute.
6. Press MENU/ENTER/. The display will show
Clear BeltCG Exe-
cute.
7. Press MENU/ENTER/. The display will show Completed Clear
BeltCG.
8. Press MENU/ENTER/. The display will show Utility Menu
Clear BeltCG.
9. Press the key three times to exit the utility menu and then press the
ONLINE key. Or turn the printer off.
Note: For information about displayed error messages, see “Appendix D Control
Panel Messages” on page 147.
Page 26

Tally T8006e Color Laser Printers User Guide
18
Installing the Power Cord
Warning! Use properly grounded wall sockets. Do not use converter plugs.
Starting the Printer
After you install the Starter Kit and plug in the printer, load paper into the
paper tray, turn on the printer, and print a test page.
Loading Paper for Test Printing
1. Plug the printer power cord into
the printer.
2. Plug the printer power cord into
a power source with surge protection.
1. Remove the paper tray from the
printer by gently lifting both
sides of the tray while pulling
outward.
Page 27

Chapter 2 Setting Up Your Printer
19
Turning On the Printer
2. Place about 100 sheets of A4 or
standard letter-size (8-1/2” x
11”) paper into the paper tray.
3. Slide the paper tray back into the
printer carefully until it locks.
1. Press the main power switch. The printer will perform a series of diagnostic tests and then begin the warm-up cycle. This process may take
up to 4 minutes.
2. Once the printer has completed the warm-up cycle, make sure the
printer display reads “Ready.”
Note: If the MESSAGE lamp is lit, a printer error has occurred. Check the
display for an error message. See “Chapter 9 Troubleshooting” on page 89.
PAPER
LABEL
OHP FILM
ENVELOPE
Page 28

Tally T8006e Color Laser Printers User Guide
20
Printing a Test Page
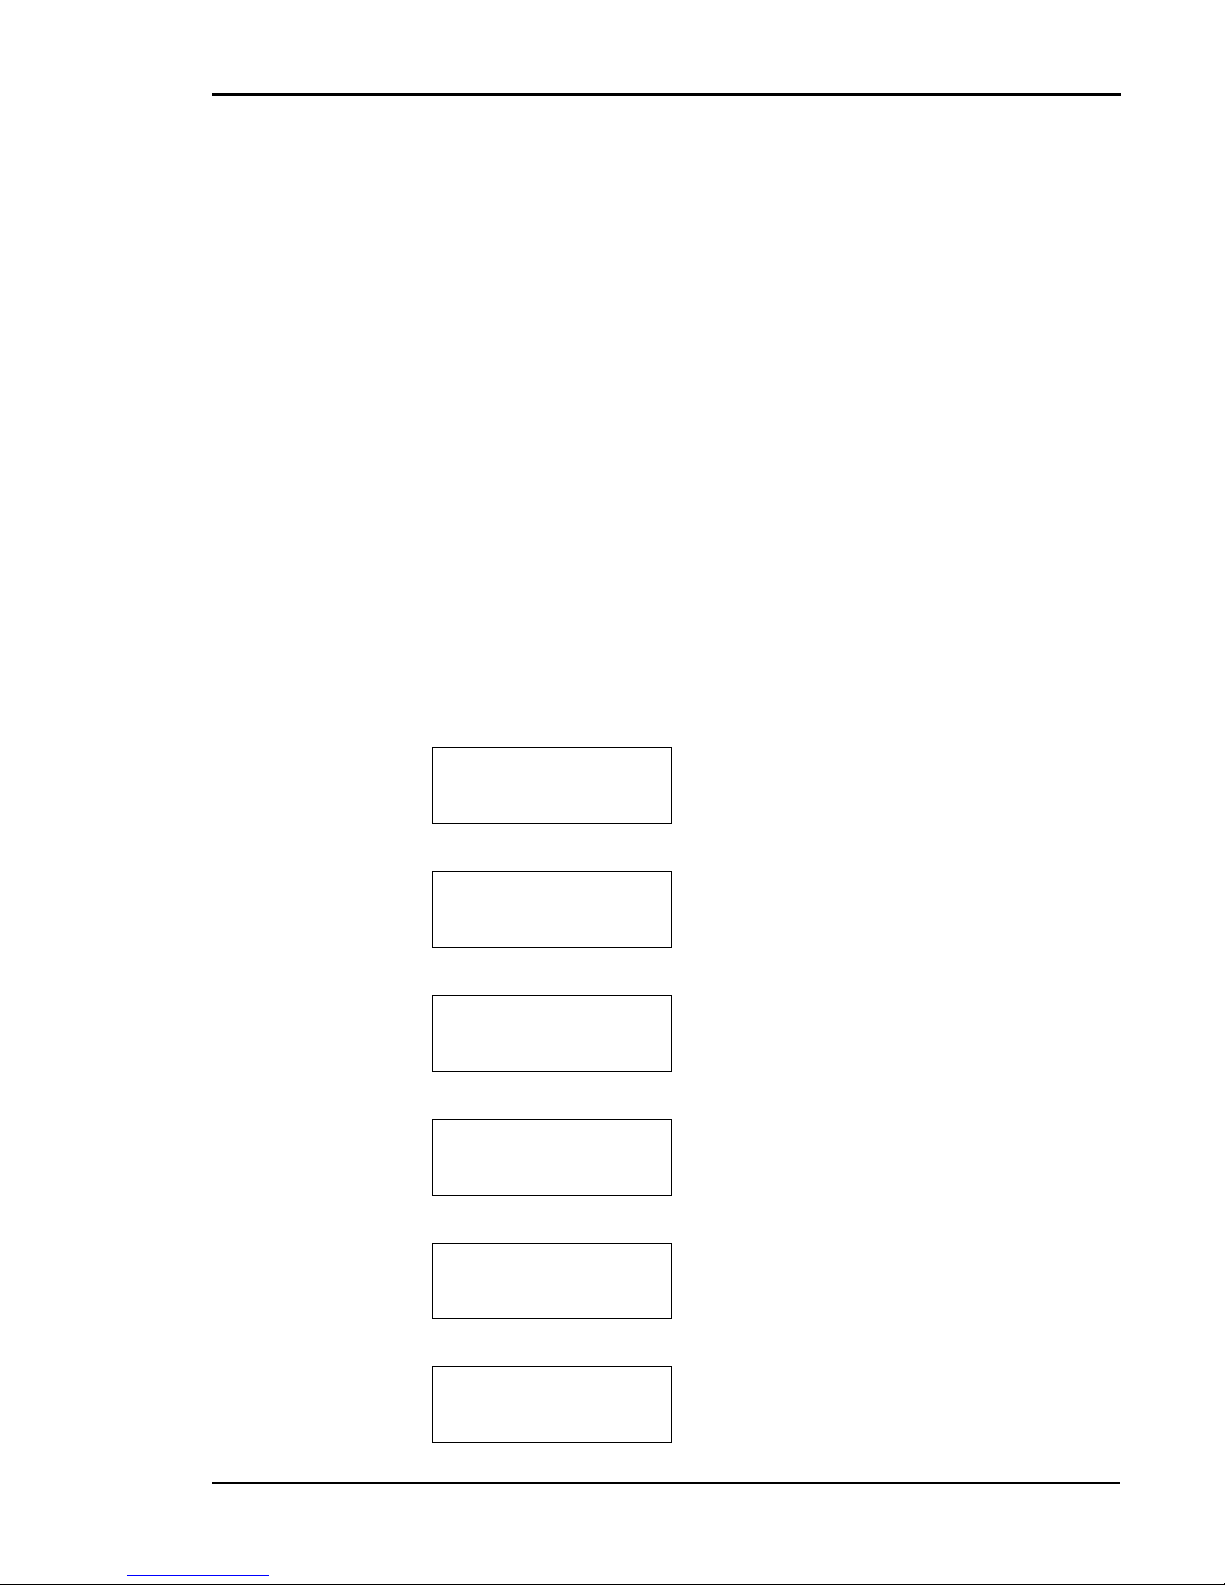
To print a test page, use A4 or standard letter-size (8-1/2” x 11”) paper.
Tray 1: A4
Ready
1. Check that the control panel displays
“Ready.”
Tray 1: A4
Not Ready
2. Press the ONLINE key.
Tray 1: A4
Tes t M en u
3. Press the MENU/ENTER/ key.
Tray 1: A4
Tes t P ri nt
4. Press the MENU/ENTER key a
second time.
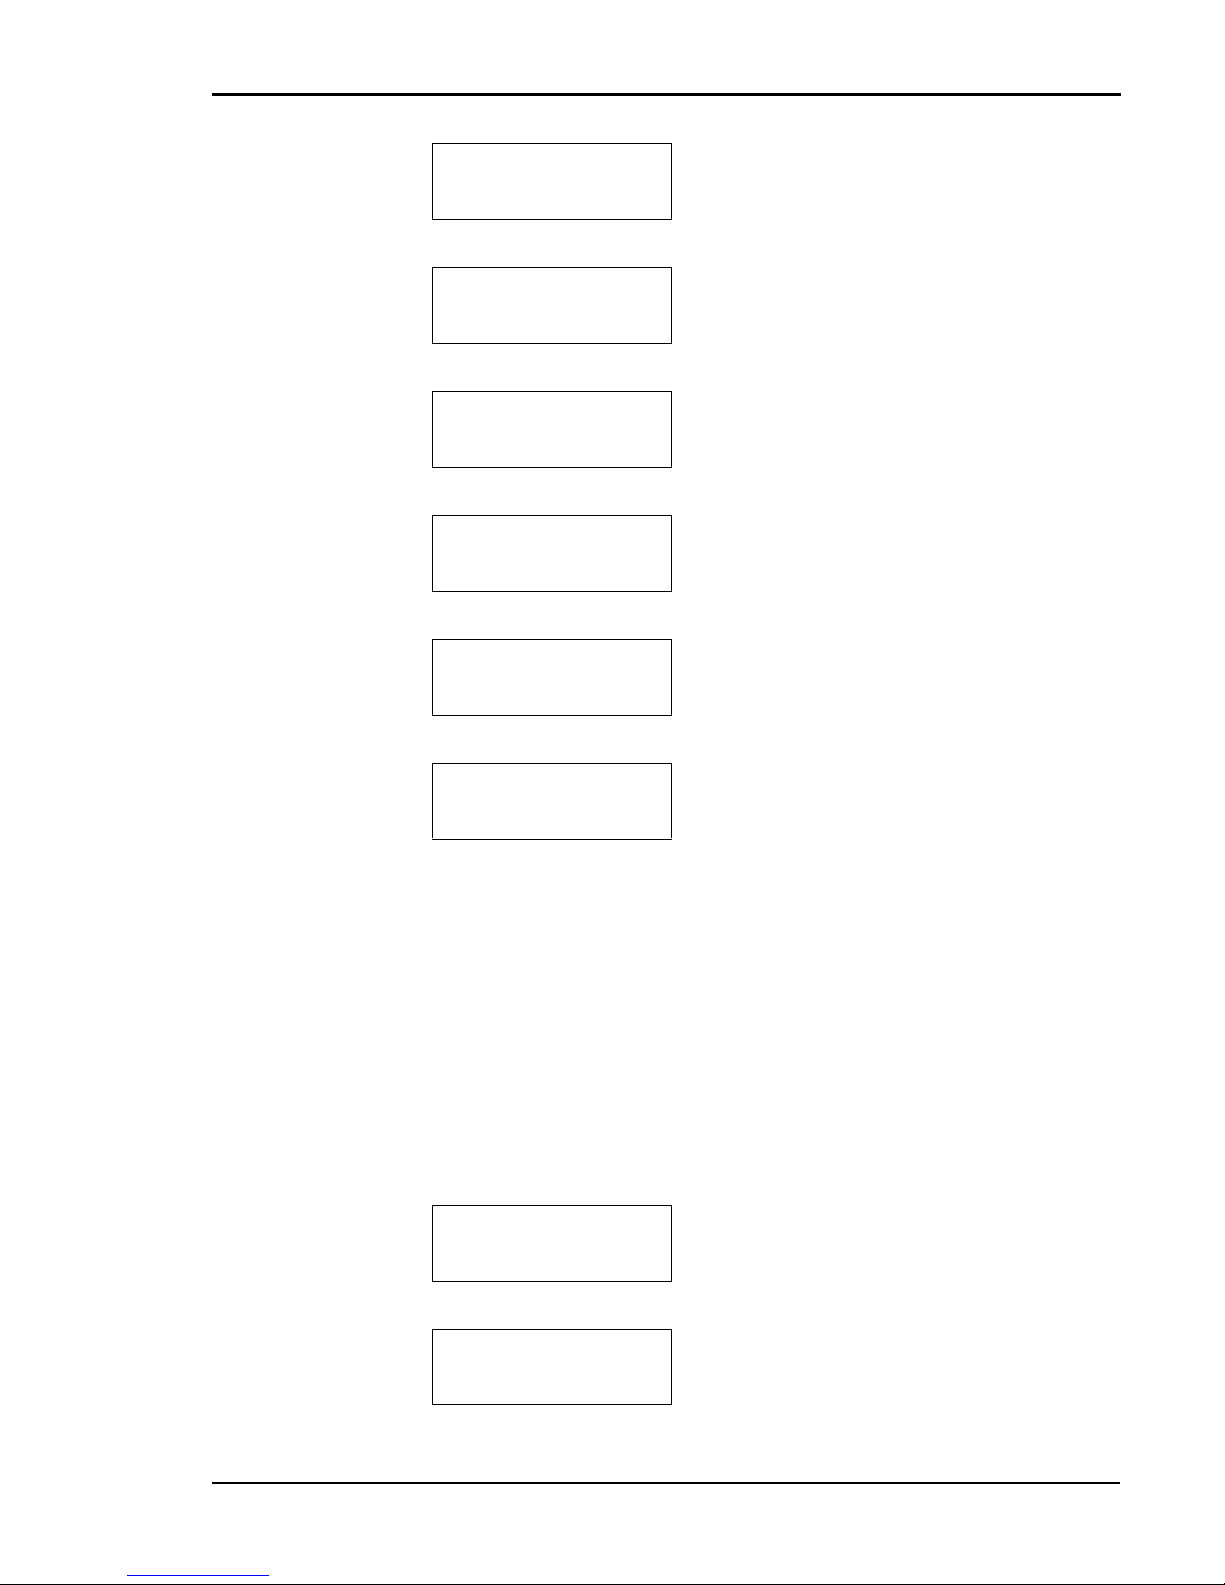
Tray 1: A4
Tes t P ri nt
5. Press the MENU/ENTER key a
third time. The DATA lamp will
blink as the test page starts to print.
Tray 1: A4
Not Ready
6. When the test print is complete, the
DATA lamp will go out.
Tray 1: A4
Ready
7. Press the ONLINE key.
Page 29

Chapter 2 Setting Up Your Printer
21
Here is a typical printed test page for the Tally T8006e color printers:
If the test page doesn’t print properly, check for error indications on the
control panel display. See “Chapter 9 Troubleshooting” on page 89.
Before you can send files from your computer application to the printer,
you must install the appropriate print driver and utilities for your specific
computing system. See “Chapter 3 Installing Printer Drivers and Utilities”
on page 23.
Page 30

Page 31

23
Chapter 3
Installing Printer Drivers
and Utilities
Tally Printer Autoplay CD
The Tally T8006e CD included with your printer has an autoplay feature
that will automatically start the installation process of the drivers and
utilities for your printer. The CD contains the T8006e printer drivers,
network utilities, and the documentation for your printer. The CD
automatically senses your operating system and supplies the appropriate
driver.
Setting up a Local Printer in Windows
The Tally auto-install CD-ROM automatically installs the Tally T8006e
printer drivers on your computer and installs the printer on the LPT1
port. To install the printer on your LPT1 port:
1. Insert the CD in your CD-ROM drive.
2. Click the I Accept button.
3. Click the T8006e - Install Software button.
4. To begin the local installation process, click Local.
5. Click Install Printer Driver.
6. Click Exit This CD.
Page 32

Tally T8006e Color Laser Printers User Guide
24
Setting up a Network Printer in Windows
Configuring Windows to Print Using TCP/IP
The Tally auto-install CD-ROM automatically installs the drivers and
utilities your computer needs to print using TCP/IP. If you are uncertain
whether your network settings are correct for printing over the network,
consult your Windows Help for your operating system. To install the
network printer software on a computer using TCP/IP:
1. Insert the CD in your CD-ROM drive.
2. Click the I Accept button.
3. Click the T8006e - Install Software button.
4. (Windows 95/98/ME only) To begin the local installation process,
click Network.
5. Click the Install Printer Driver button to install the printer drivers.
6. (Windows 2000 and Windows XP only) If Windows prompts you
that the driver’s Digital Signature was not found, click Yes to continue the installation.
7. (Windows 95/98/ME only) Click the Network Utilities button to
install the network utilities.
8. (Windows 95/98/ME only) Follow the installation wizard to install
Print Monitor.
9. Click Exit This CD to complete the software installation process.
10. To complete the installation of the printer, assign the printer an IP
address, subnet mask, and gateway, then go to the port configuration
section for your operating system.
Page 33
Chapter 3 Installing Printer Drivers and Utilities
25
Assigning the Printer an IP Address, Subnet Mask
and Gateway Address
To print using the TCP/IP protocol, you must assign the printer an IP
address, subnet mask and a gateway. If you are uncertain about what
setting you should use, consult your network administrator.
The IP address, Subnet Mask, and Gateway can be assigned through the
printer's control panel or by using the Discover Tool and the printer's
internal web page. The Discover Tool is a utility that searches the
network for T8006e printers and displays the IP address and device name.
Clicking on the IP address will take you to the printer's internal web page
and allow the configuration of the network settings.
For more information on how to use the Discover Tool and to how to
configure the printer using the internal web page, refer to Appendix E
Network Management.
IP Address
The IP Address submenu allows you to set the printer IP address from
the printer control panel. The following example shows how to set the
printer IP address to 192.168.31.27.
Note: Press the key to go back to the previous step.
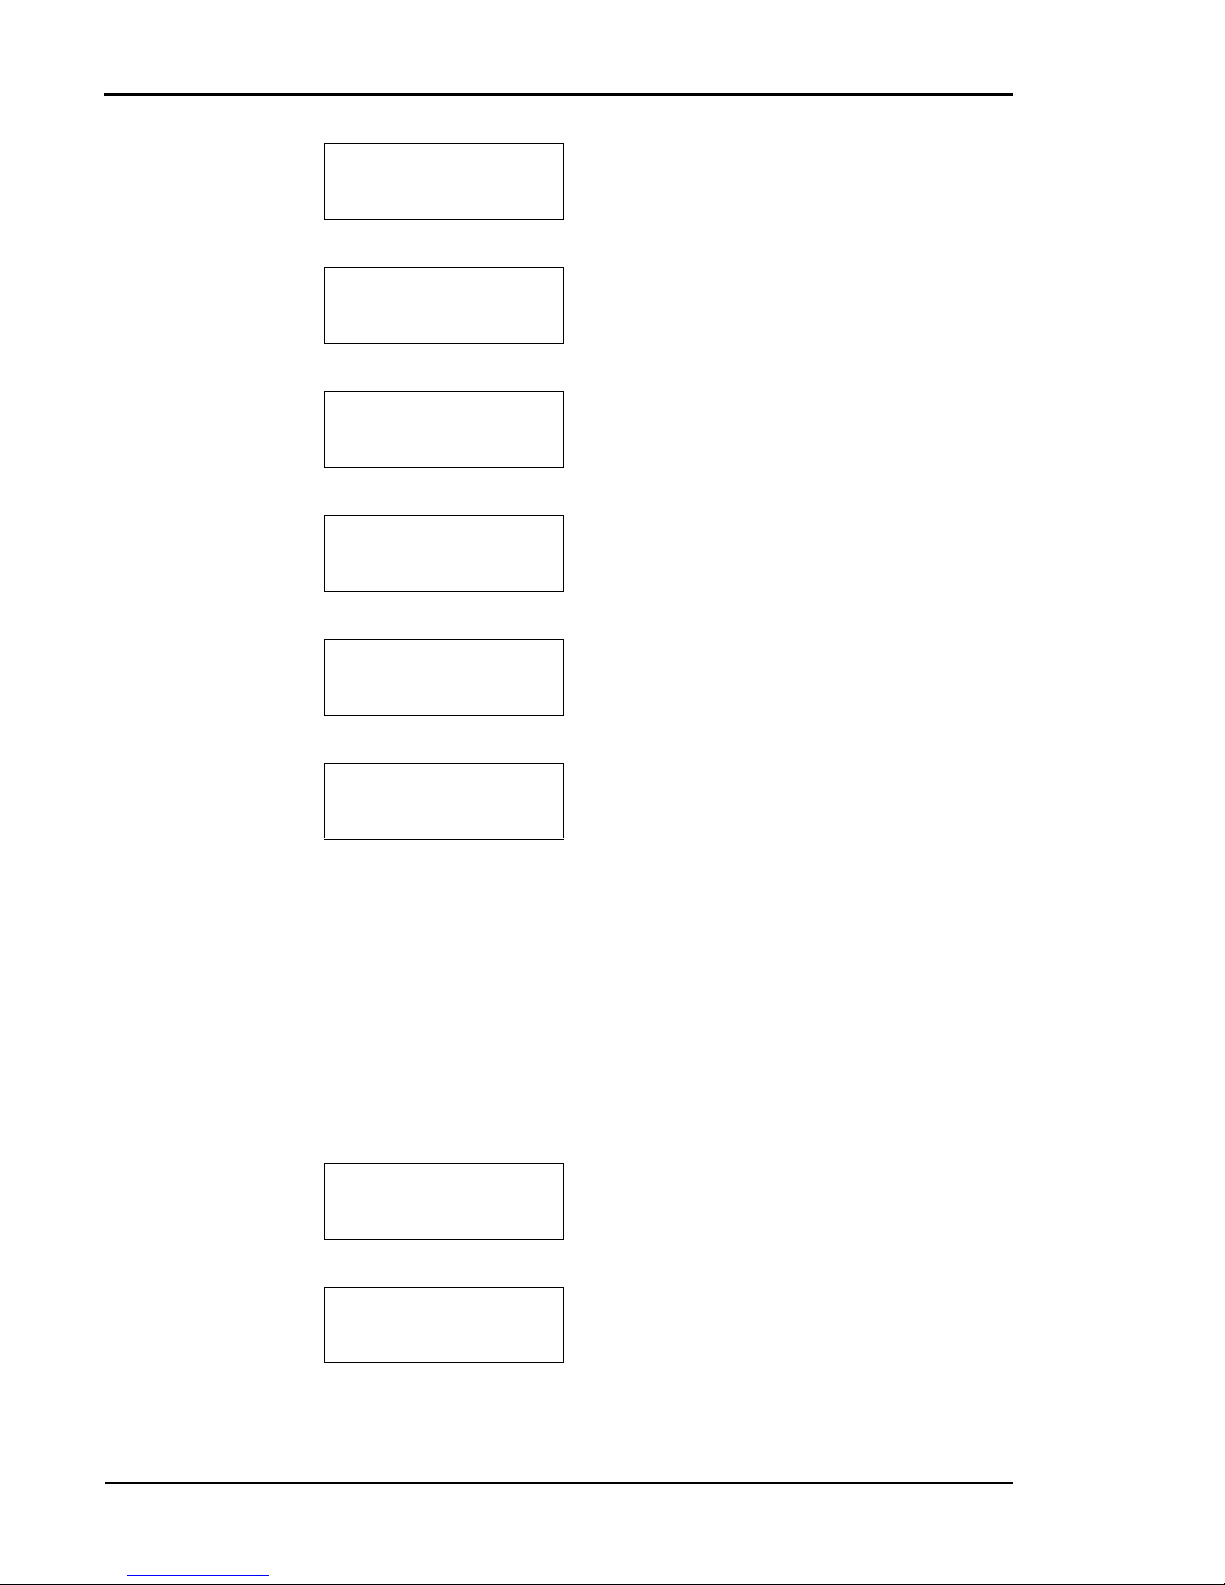
Tray1 : A4
Ready
1. Check that “Ready” appears on the display
and the DATA light is off.
Tray1 : A4
Not Ready
2. Press the ONLINE key to go “Not
Ready”.
Tray1 : A4
Tes t M en u
3. Press and hold the MENU key to start the
Extend Menu.
Tray1 : A4
Utility Menu
4. If “Utility Menu” appears on display,
release the MENU key.
Tray1 : A4
Network Menu
5. Press the and keys to go to the Network Menu.
IP Addr
169.254.193.249
6. Press the ENTER key to select the IP
address submenu.
Page 34

Tally T8006e Color Laser Printers User Guide
26
SubNet Mask
The SubNet Mask submenu allows you to set the subnet mask value for
the printer. When the value is set to 0.0.0.0, the printer subnet mask will
be defined according to the address class of the IP address for the printer.
The following example shows how to set the subnet mask address to
255.255.255.0.
Note: Press the key to go back to the previous step.
IP Addr
(192)
7. Using the and keys, change the
number in parentheses to 192. Then, press
the ENTER key.
IP Addr
192.(168)
8. Using the and keys, change the
number in parentheses to 168. Then, press
the ENTER key.
IP Addr
192.168.(31)
9. Using the and keys, change the
number in parentheses to 31. Then, press
the ENTER key.
IP Addr
192.168.31.(27)
10. Using the and keys, change the
number in parentheses to 27. Then, press
the ENTER key.
IP Addr
192.168.31.27 *
11. The IP address has now been set.
IP Addr
192.168.31.27
12. Press the key to leave the IP address
submenu.
IP Addr
192.168.31.27
1. Press the and keys to go to the Sub-
Net Mask address submenu.
SubNet Mask
255.255.0.0
2. Press the ENTER key when subnet is displayed.
Page 35
Chapter 3 Installing Printer Drivers and Utilities
27
Once the IP address, subnet mask and gateway address are set , you can
complete the installation of the printer using TCP/IP by configuring the
TCP/IP printer port for your operating system.
Gateway address
The Gateway Address submenu sets the IP address of the default gateway
for the printer. When the value is set to 0.0.0.0, no default gateway is
defined.
The following example shows how to set the printer gateway address to
192.168.31.240.
Note: Press the key to go back to the previous step.
SubNet Mask
(255)
3. Using the and keys, change the
number in parentheses to 255. Then, press
the ENTER key.
SubNet Mask
255.(255)
4. Using the and keys, change the
number in parentheses to 255. Then, press
the ENTER key.
SubNet Mask
255.255.(255)
5. Using the and keys, change the
number in parentheses to 255. Then, press
the ENTER key.
SubNet Mask
255.255.255.(0)
6. Using the and keys, change the
number in parentheses to 0. Then, press
the ENTER key.
SubNet Mask
255.255.255.0 *
7. The SubNet Mask address has now been
set.
SubNet Mask
255.255.255.0
8. Press the key to leave the Gateway
address submenu.
IP Addr
192.168.31.27
1. Press the and keys to go to the
Gateway address submenu.
Gateway Addr
0.0.0.0
2. Press the ENTER key to select the Gateway address submenu.
Page 36
Tally T8006e Color Laser Printers User Guide
28
IP Setting
The IP setting submenu sets how to set the IP address for the printer.
When the value is set to AUTO, the printer obtains the IP address from
DHCP server or sets it self by Auto IP function.
If the IP address is set with Panel, the IP Setting is changed to MANUAL
automatically.
The following example shows how to set the IP setting to MANUAL.
Note: Press the key to go back to the previous step.
Gateway Addr
(192)
3. Using the and keys, change the
number in parentheses to 192. Then, press
the ENTER key.
Gateway Addr
192.(168)
4. Using the and keys, change the
number in parentheses to 168. Then, press
the ENTER key.
Gateway Addr
192.168.(31)
5. Using the and keys, change the
number in parentheses to 31. Then, press
the ENTER key.
Gateway Addr
192.168.31.(240)
6. Using the and keys, change the
number in parentheses to 240. Then, press
the ENTER key.
Gateway Addr
192.168.31.240 *
7. The Gateway address mask has now been
set.
Gateway Addr
192.168.31.240
8. Press the key to leave the Gateway
address submenu.
IP Addr
192.168.31.27
1. Press the and keys to go to the IP
Setting submenu.
IP Setting
AUTO
2. Press the ENTER key to select the IP
Setting submenu.
Page 37

Chapter 3 Installing Printer Drivers and Utilities
29
Configuring the LPR TCP/IP Printer Port in
Windows 95/98/ME
By default, your printer is installed on LPT1 — the physical printer port
of your computer. To print over the network, you must now install a
virtual port, and tell Windows to print over the virtual printer port rather
than the physical port.
1. From the Start button, select Settings and click Printers.
2. In the Printers folder, right-click the Tally T8006e printer you just
installed.
3. Click Properties.
4. In the Printer Properties window, select the Details tab.
5. Click the Add Port button.
6. Click the Other button and from the list choose Print Server Port,
then click OK.
7. Select LPR (TCP/IP) as the network protocol and click OK.
8. Enter the IP address or the name of your print server and click OK.
9. The LPR port will then be added automatically to the list of available
ports and will be selected as the current port.
10. Click OK to complete the port installation.
IP Setting
AUTO *
3. Using the and keys, to select the
MANUAL.
IP Setting
MANUAL
4. Press the ENTER key.
IP Setting
MANUAL *
5. The IP Setting has now been set.
IP Setting
MANUAL
6. Press the key to leave the IP Setting
submenu.
Page 38

Tally T8006e Color Laser Printers User Guide
30
Configuring the RAW (TCP/IP) Printer Port in
Windows 95/98/ME
By default, your printer is installed on LPT1 --- the physical printer port
of your computer. To print over the network, you must now install a
virtual port, and tell Windows to print over the virtual printer port rather
than the physical port.
1. From the Start button, select Setting and click Printers.
2. In the Printers folder, right-click the Tally T8006e printer you just
installed.
3. Click Properties.
4. In the Printer Properties window, select the Details tab.
5. Click Add Port button.
6. Click the Other button and from the list choose Print Server Port,
then click OK.
7. Select RAW (TCP/IP) as the network protocol and click OK.
8. Enter the IP address or the name of your print server and click OK.
9. The RAW port will then be added automatically to the list of available
ports and will be selected as the current port.
10. Click OK to complete the port installation.
Configuring the TCP/IP printer port in Windows NT 4.0
By default, your printer is installed on LPT1 — the physical printer port
of your computer. To print over the network, you must now install a
virtual port, and tell Windows to print over the virtual printer port rather
than the physical port.
1. From the Start button, select Settings and click Printers.
2. In the Printers folder, right-click the Tally T8006e printer you just
installed and select Properties.
3. In the Printer Properties window, select the Ports tab.
4. Click the Add Port button to open the Printer Ports window.
5. In the Printer Ports window, select LPR Port and New Port to open
the Add LPR Compatible window.
6. In the Add LPR Compatible window, enter the IP address or the name
of your print server, enter any name for your printer name, and click
OK.
7. Click Close to close the printer ports window.
8. The LPR port will then be added automatically to the list of available
ports and will be selected as the current port.
9. Click OK to complete the port installation.
Page 39

Chapter 3 Installing Printer Drivers and Utilities
31
Configuring the TCP/IP Printer Port in
Windows 2000/XP
By default, your printer is installed on LPT1 — the physical printer port
of your computer. To print over the network, you must now install a
virtual port, and tell Windows to print over the virtual printer port rather
than the physical port.
1. Open the Printers folder.
Windows 2000: from the Start button, select Setting and click
Printers.
Windows XP: from the Start button, select Printers and Faxes.
2. In the Printers folder, right-click the Tally T8006e printer you just
installed and select Properties.
3. In the Printer Properties window, select the Ports tab.
4. Click the Add Port button to open the Printer Ports window.
5. In the Printer Ports window, select Standard TCP/IP Port to start
the Add Standard TCP/IP Printer Port Wizard. Click Next to begin
the Wizard.
6. Enter the IP address or network name of the printer. This will also be
used as the Port Name of the printer. Click Next to continue.
7. If the printer was found on the network, the Wizard will display the
network characteristics of the printer. Verify that the settings are correct and click Finish to complete the Add Standard TCP/IP Printer
Port Wizard.
8. Click Close to close the Printer Ports window.
9. In the Tally T8006e Properties window, click Close to complete the
printer port installation.
Page 40

Tally T8006e Color Laser Printers User Guide
32
Configuring Windows to Print on a NetWare Network
To configure Windows to print on Novell NetWare networks, install the
printer drivers on the network clients. For more information about using
the Web Pages to configure network settings, see “Appendix E Network
Management”.
Uninstalling Windows Drivers
Before installing any updates to the printer drivers, you should uninstall
the old drivers. To uninstall Windows drivers:
1. From the Windows Start button, select Settings and click Printers.
2. In the Printers folder, right-click the Tally T8006e printer and select
Delete.
Page 41

Chapter 3 Installing Printer Drivers and Utilities
33
Setting Up a Network Printer on Macintosh
Operating System Requirements
For optimum printer performance, use the Macintosh printer driver in the
following system and network environment:
• Mac OS 8.1 through Mac OS 9.x, Mac OS X classic environment
(English Version)
• AppleTalk connection
• Standard 10BASE-T/100BASE-TX Ethernet interface
Hardware Requirements
The Macintosh computer must meet the following minimum hardware
requirements.
Microprocessor
Power PC.
Memory
At least 32 MB. 64 MB or more of memory is recommended.
Disk Space
At least 16 MB. 100 MB or more of disk space is recommended.
Installing Macintosh Printer Drivers
1. Insert the CD into your CD-ROM drive.
2. Double-click the Tally T8006e CD-ROM.
3. Double click the folder of the language you want to use.
4. In the driver folder for your printer model, double-click Installer.
5. The Installer will present a license agreement. Click Agree to con-
tinue.
6. In the Easy install tab of the Installer, click the Install button.
7. When the computer prompts you, click Restart.
8. After the computer restarts, go to the Chooser.
9. Click the Tally T8006e printer icon. The Connected To: window will
display the name of your printer.
Note: If the Connected To: window does not show your printer, verify the
printer is connected to the network and the printer is configured properly. For
further help, see “Macintosh Chooser Problems” on page 104.
10. Close the Chooser.
Page 42

Tally T8006e Color Laser Printers User Guide
34
Uninstalling MacIntosh Printer Drivers
1. Insert the CD into your CD-ROM drive.
2. Double click the Tally T8006e CD-ROM.
3. Double click the folder of the language you want to use.
4. In the driver folder for your printer model, double-click Installer.
5. The Installer will present a license agreement. Click Agree to con-
tinue.
6. Select the Custom Remove tab.
7. Select the “All the software which QuickDraw uses.” tab.
8. Click the Remove button.
9. When the computer prompts you, click Restart.
Note: For specific information about Macintosh driver features and
operation, see the Macintosh driver help files.
Page 43

35
Chapter 4
Operating Your Printer
Turning the Printer On
1. Press the main power switch. The printer will perform a series of diagnostic tests and then begin the warm-up cycle. This process may take
up to 4 minutes.
2. Once the printer has completed the warm-up cycle, make sure the
printer display reads “Ready.”
Note: If the MESSAGE lamp is lit, a printer error has occurred. Check
the display for an error message, and take the appropriate action.
Turning the Printer Off
1. Ensure that the printer is not printing a job or warming up.
2. Press the power switch.
Note: When restarting the printer, wait at least five seconds after turning
off the printer before turning it on again.
Selecting Media
Loading your printer with the correct media is important in keeping your
printer running well. Because some types of paper may shorten the life
span of the printer components or quickly exhaust toner supplies, you
should use paper of the correct type, weight and size. Following the
guidelines for filling the paper trays listed below will maximize the
performance of your printer and the quality of your print jobs.
When loading transparencies, labels or envelopes, you must use Tray 1.
Page 44

Tally T8006e Color Laser Printers User Guide
36
Tray 1
Trays 2
Note: Some types of paper may result in frequent paper jams or poor
printing quality. When determining the paper to use, consult the table above
for capacities.
Media Type Media Specifications Capacity Media Size
Plain Paper
Laser Printer Stock
Paper weight:
16 - 24 lb. bond
(60 to 90 g/m
2)
250 sheets A4, B5 JIS, B5 ISO,
letter, legal, executive,
and custom sizes to
8.5” x 11.7”.
Thick Stock
Laser Printer Stock
Paper weight: 90 lb.
Index (90 to 160 g/m
2)
80 sheets
Label Paper
Laser Printer Stock 80 sheets
Transparency
Laser Printer Stock 50 sheets A4 and letter
Envelope
15 Commercial #10,
International DL
Media Type Media Specifications Capacity Media Size
Plain Paper
Laser Printer Stock
Paper weight:
16 - 24 lb. bond
(60 - 90 g/m2)
About 500
sheets
A4, B5 JIS, B5 ISO,
letter, executive
Page 45

Chapter 4 Operating Your Printer
37
Loading Media
When loading paper or transparencies into your printer, do not load too
much and make sure that the media is all the same size. Loading beyond
the specified capacity will cause paper jams. When using transparencies
ensure that this is the only media in the tray.
1. With both hands, gently lift and
pull the paper tray out of the
printer.
2. Using the green grips, adjust the
lateral and end paper retainers
according to the paper size.
3. Place the paper in the paper tray with
the printing surface facing up. Make
sure that the paper does not exceed the
limit marked on the inside of the green
grips.
PAPER
LABEL
OHP FILM
ENVELOPE
Page 46

Tally T8006e Color Laser Printers User Guide
38
4. Put the paper tray into the printer.
5. Confirm that the display shows the
correct paper size. If --- appears on the
display as the paper size, reinstall the
paper, making sure the paper fits
securely in the tray.
Page 47

Chapter 4 Operating Your Printer
39
Control Panel
The control panel is made up of the display, four indicator lamps, and
seven control keys that allow you to control and monitor printer
operations.
Display
The display provides messages indicating the state of the printer.
The example display below shows the printer printing a file using Letter
paper loaded into Tray 1.
Indicators
.
MESSAGE lamp (orange): Lights when an
error message is on the display.
READY lamp (green): Is lit when the printer is
ready to print. During warm-up, this lamp blinks.
DATA lamp (green): Blinks while the printer is
receiving an incoming print job.
ONLINE lamp (green): Is lit when the printer
is ready to receive print jobs.
T r a y 1 : L e t t e r
P r i n t i n g
Paper tray
selected
Size of paper contained in the
selected paper tray
Printer condition
Page 48

Tally T8006e Color Laser Printers User Guide
40
Control Keys
The T8006e control panel has seven control keys that allow you to control
the printer functions.
FORMFEED
Use FORMFEED to force the printer to print to the currently loaded
media.
Note: Using FORMFEED to print on paper smaller than the size
specified on the display will cause the printer to print the job incorrectly and
reduce overall print quality of the printer.
1. Confirm that the printer has print data to print by checking that the
data lamp is blinking.
2. Press FORMFEED.
The following example shows the messages that will display when you use
FORMFEED to print on letter paper instead of transparencies.
FORMFEED: Forces a job to print.
CLEAR: Clears print data.
ONLINE: Places the printer in online or offline
status.
MENU/ENTER/ : Opens the menu and enters
changes.
TRAY/ : Changes the paper feed source tray for
printing.
MEDIA/ : Changes the media type for printing.
: Navigates to the next higher menu level.
Tray1: Letter
Tray1 Load Trans
The display indicates that Tray 1 requires
transparencies to be loaded.
Tray1: Letter
Printing
By pressing FORMFEED printing
begins; the display shows normal
printing.
Page 49

Chapter 4 Operating Your Printer
41
CLEAR
Use CLEAR to clear the printer memory once a job has been started.
1. Press ONLINE to stop printing.
2. Cancel the print job on the sending computer.
3. Hold down CLEAR for at least two seconds.
When the print data is erased, the DATA lamp will shut off, and the
printer will automatically return to online mode.
If the MESSAGE lamp is lit, and the printer has not returned to online
mode, check the message on the display, and take the appropriate action.
ONLINE
Use ONLINE to switch the printer state from the online printing mode
to the offline printer configuration mode.
TRAY
Use TRAY to change the paper feed source tray.
1. When the display prompts to load a new paper size or type, press
TRAY to select the correct tray. The new tray is indicated on the top
row of the display.
2. Press ONLINE to begin printing from the new source tray.
The following example shows the messages that will be displayed when
changing the source tray. In this example, the source tray is changed from
Tray 1, containing letter paper, to Tray 2, containing the required A4
paper needed for the current job.
MEDIA
Use MEDIA to change the media to be printed on when the media
specified on the display is not available.
The following example shows the messages that will be displayed when
changing the media. In this example, the media is changed from
transparencies to plain paper.
Tray1: Letter
Tray1 Load A4
The display indicates that Tray 1 contains
Letter paper and needs A4 paper to print
the current job.
Tray1: Letter
Tray2 Load A4
By pressing TRAY, Tray 2 is selected.
Tray2: A4
Printing
Once Tray 2 is displayed, pressing
ONLINE starts the job.
Page 50

Tally T8006e Color Laser Printers User Guide
42
.
More information about Control Panel menu functions and display
messages is contained in the appendixes. See “Appendix C Control Panel
Menu Functions” on page 115, and “Appendix D Control Panel
Messages” on page 147.
Tray1: Letter
Tray1 Load Trans
The display indicates that the currently
selected source tray (Tray 1) contains letter-size paper, and transparencies need to
be loaded to print the current job.
Tray1: Letter
Tray1: Load Plain
By pressing the MEDIA key, the media
already contained in Tray 1 (plain paper)
is selected.
Tray1: Letter
Printing
Press ONLINE.
Page 51

43
Chapter 5
Changing Print Defaults
A printer driver is software your computer uses to translate your
documents into a format the printer can understand. By configuring the
printer driver settings, you can change how your computer sends
documents to the printer.
There are two ways that you can configure the printer driver settings; you
can set default properties for all documents sent from your computer, or
you can set a document’s properties in the application you are currently
printing from. Whether you are setting the default properties, or
customizing the settings for a particular document, the Tally driver
interface is exactly the same.
To set the print properties for a particular document, use the Print dialog
of the application you are printing from. The Print dialog is normally
located in the File menu of the application you are currently using. From
the File menu, select Print to open the Print Setup window. In the Print
Setup window, click on the Properties button.
To configure the driver settings permanently, use the procedures on the
following pages to open up the default printer settings dialog.
Page 52
Tally T8006e Color Laser Printer User Guide
44
Changing Default Print Driver Properties
Windows 95/98/ME
1. From the Windows taskbar, click the Start button.
2. Go to Settings.
3. Click on Printers to open the Printers folder.
4. In the Printers folder, right click the Tally T8006e Printer icon.
5. Click on Properties.
6. Click on the Page setup tab.
Page 53

Chapter 5 Changing Print Defaults
45
Windows NT 4.0
1. From the Windows taskbar, click the Start button.
2. Go to Settings.
3. Click on Printers to open the Printers folder.
4. In the Printers folder, right click the Tally T8006e Printer icon.
5. Click on Properties.
Page 54
Tally T8006e Color Laser Printer User Guide
46
Windows 2000
1. From the Windows taskbar, click the Start button.
2. Go to Settings.
3. Click on Printers to open the Printers folder.
4. In the Printers folder, right click the Tally T8006e Printer icon.
5. Click on Properties to open the Tally T8006eProperties dialog.
6. From the General tab, select Printing Preferences.
Page 55

Chapter 5 Changing Print Defaults
47
Windows XP
1. From the Windows taskbar, click the Start button.
2. Click on Control Panel.
3. Click on Printers and Faxes to open the Printers folder.
4. In the Printers folder, right click the Tally T8006e Printer icon.
5. Click on Properties to open the Tally T8006eProperties dialog.
6. From the General tab, click Printing Preferences button.
Page 56

Tally T8006e Color Laser Printer User Guide
48
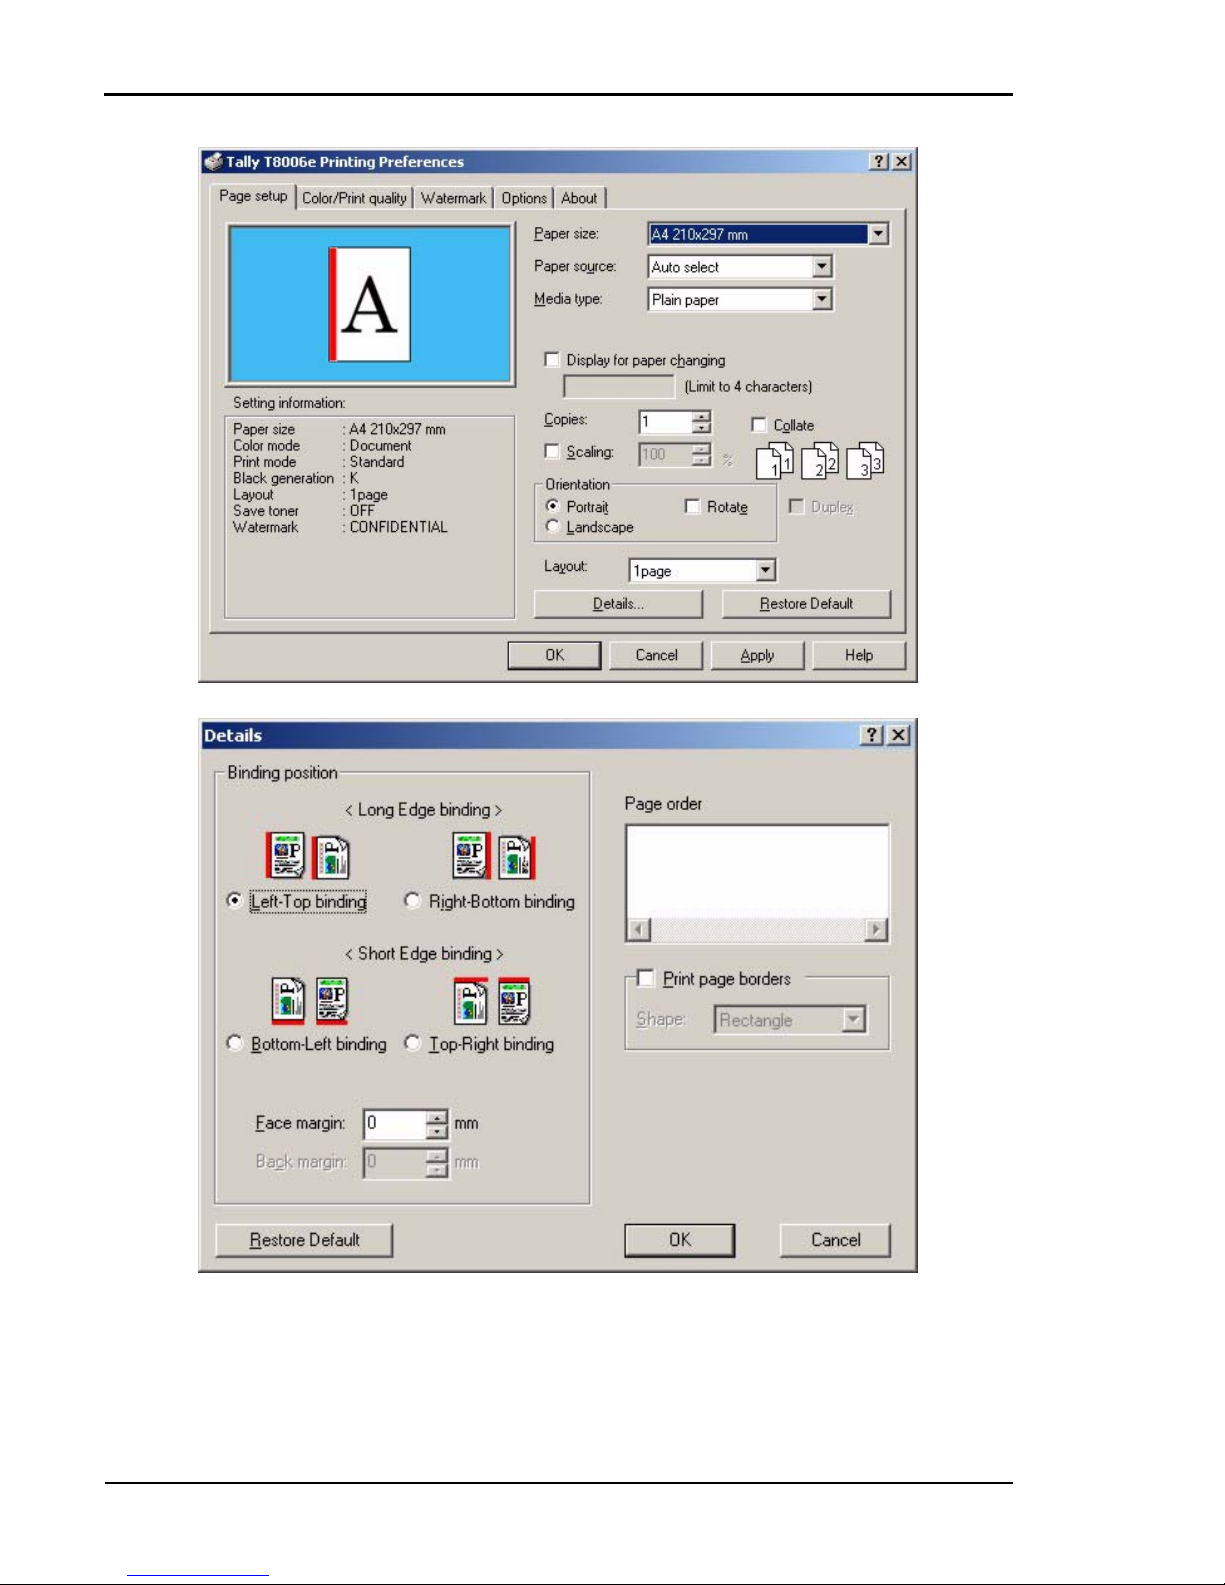
Selecting Page Settings
The Tally Print Driver Page setup tab allows you to select optional paper
sources and media types. Here you can begin to change settings to make
the page look the way you want it to look. In addition, you can select
several options such as the number of copies you want to print. Following
is a summary of the settings.
To finalize your custom print job after you select the settings, click OK.
Item Description
Paper Size
Use Paper Size to select a desired size from the
list box. You can select predefined paper sizes
or your own custom size. Use the Custom Size
window to set width, length, and units of measurement. Paper Set Direction shows the direction the paper is loaded in the current paper
tray.
Paper Source
Paper Source allows you to select the current
paper tray.
Media Type
Use Media Type to select the type of media
you want to print on.
Copies
Use Copies to select the number of copies to
print.
Scaling
Select scale of Print size between 25% and
400%.
Orientation
Orientation allows you to choose to print in
portrait or landscape mode. The number
below the Orientation icon indicates the
reduced print ratio — determined according to
the paper size, print size and layout.
Display for Paper
Changing
If none of the paper trays contain the paper
required for the current print job, the printer
will display the paper required and a four-character user-identification message. Use the Display for Paper Changing selection to customize
the message that will be displayed when the
printer requires the paper to be changed.
Layout
Use Layout to select how many pages will be
printed on the same sheet of paper. You can
select one, two or four.
Page 57

Chapter 5 Changing Print Defaults
49
Duplex Printing
Use Duplex Printing to print on both sides of
the currently selected media. To use the
Duplex Printing mode, select the Duplex
Printing check box. Duplex Printing is not
available for Commercial#10, International
DL, or custom paper sizes. Duplex Printing on
Ledger require an additional memory module
to be installed.
Details
Within Details, there are three major selection
choices. Use Binding Position to select which
edge the binding will be set to on the paper,
and how large the margin will be.
Use Print Order to specify the page order
when you select one page, two pages, or four
pages in the Layout setting.
Use Print Page Border to select whether a border should be printed around the print area.
Setting Information
This list provides a visual summary of the current print settings.
Item Description
Page 58
Tally T8006e Color Laser Printer User Guide
50
Page 59

Chapter 5 Changing Print Defaults
51
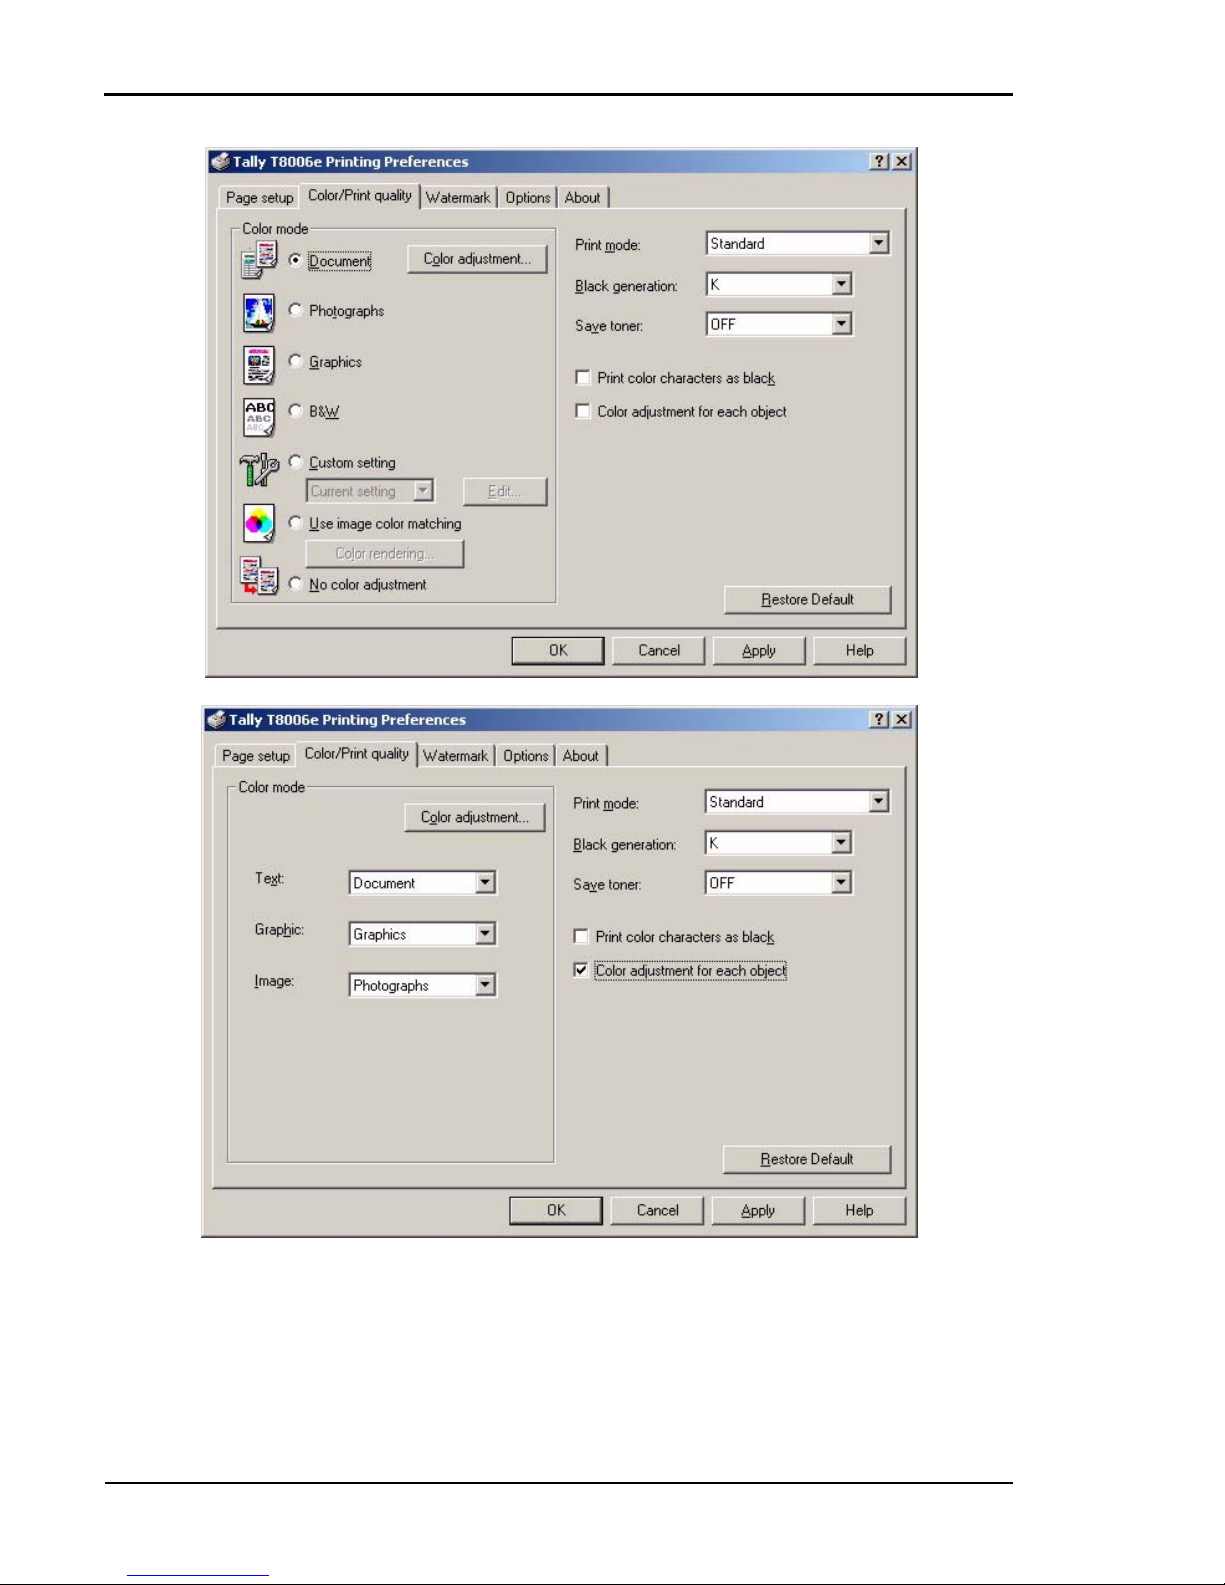
Setting Colors and Print Quality
The Color/Print quality tab allows you to make customized color and
mode choices for documents, photographs, and graphics. The default
setting is document, which provides the best settings for printing text or
mixed text and graphics. For sharper photographs, choose photographs;
for sharper graphics, or to match a specific color, choose graphics. It also
allows you to choose to print the color black either from a combination of
colors or from a black color cartridge. You can customize settings further,
with Color Adjustment and Density Adjustment. Each time you make a
custom Color Mode setting scheme, you can name it, save it, and use it
again.
After you choose your settings on the Color/Print quality tab, click OK.
Item Description
Color Mode Settings
Use Color Mode settings to configure how
images will be printed according to the type of
image to be printed.
Print mode
Use Print Mode to select whether print speed or
print quality has a higher priority. Standard mode
is the optimal median between speed and quality
printing.
Black Generation
Setting
Use Black Generation to create black color using
black toner instead of a combination of toner
colors. Selecting Black Generation can improve
printing results of a densely-colored image.
When printing black over a large area, black created through a combination of colors may not
fully adhere to the media and peel away.
Save toner
Save Toner uses less toner on the printed page
and therefore lightens the printed page for draft
printing.
Print color characters at black
Color characters are printed by black. When the
check box of "Print color characters at black" is
on, color characters are printed by black.
Color adjustment
for each object
Select setting color adjustment for each object
(text, image, graphic).
Custom Setting
To make custom color settings, the Custom Setting button in the Color Mode Settings must be
selected. Custom Setting features allow you to
make several sets of color and density settings,
and save (register) them with a specific 10-character name. A custom setting can be chosen
from the drop-down list.
Page 60
Tally T8006e Color Laser Printer User Guide
52
Page 61
Chapter 5 Changing Print Defaults
53
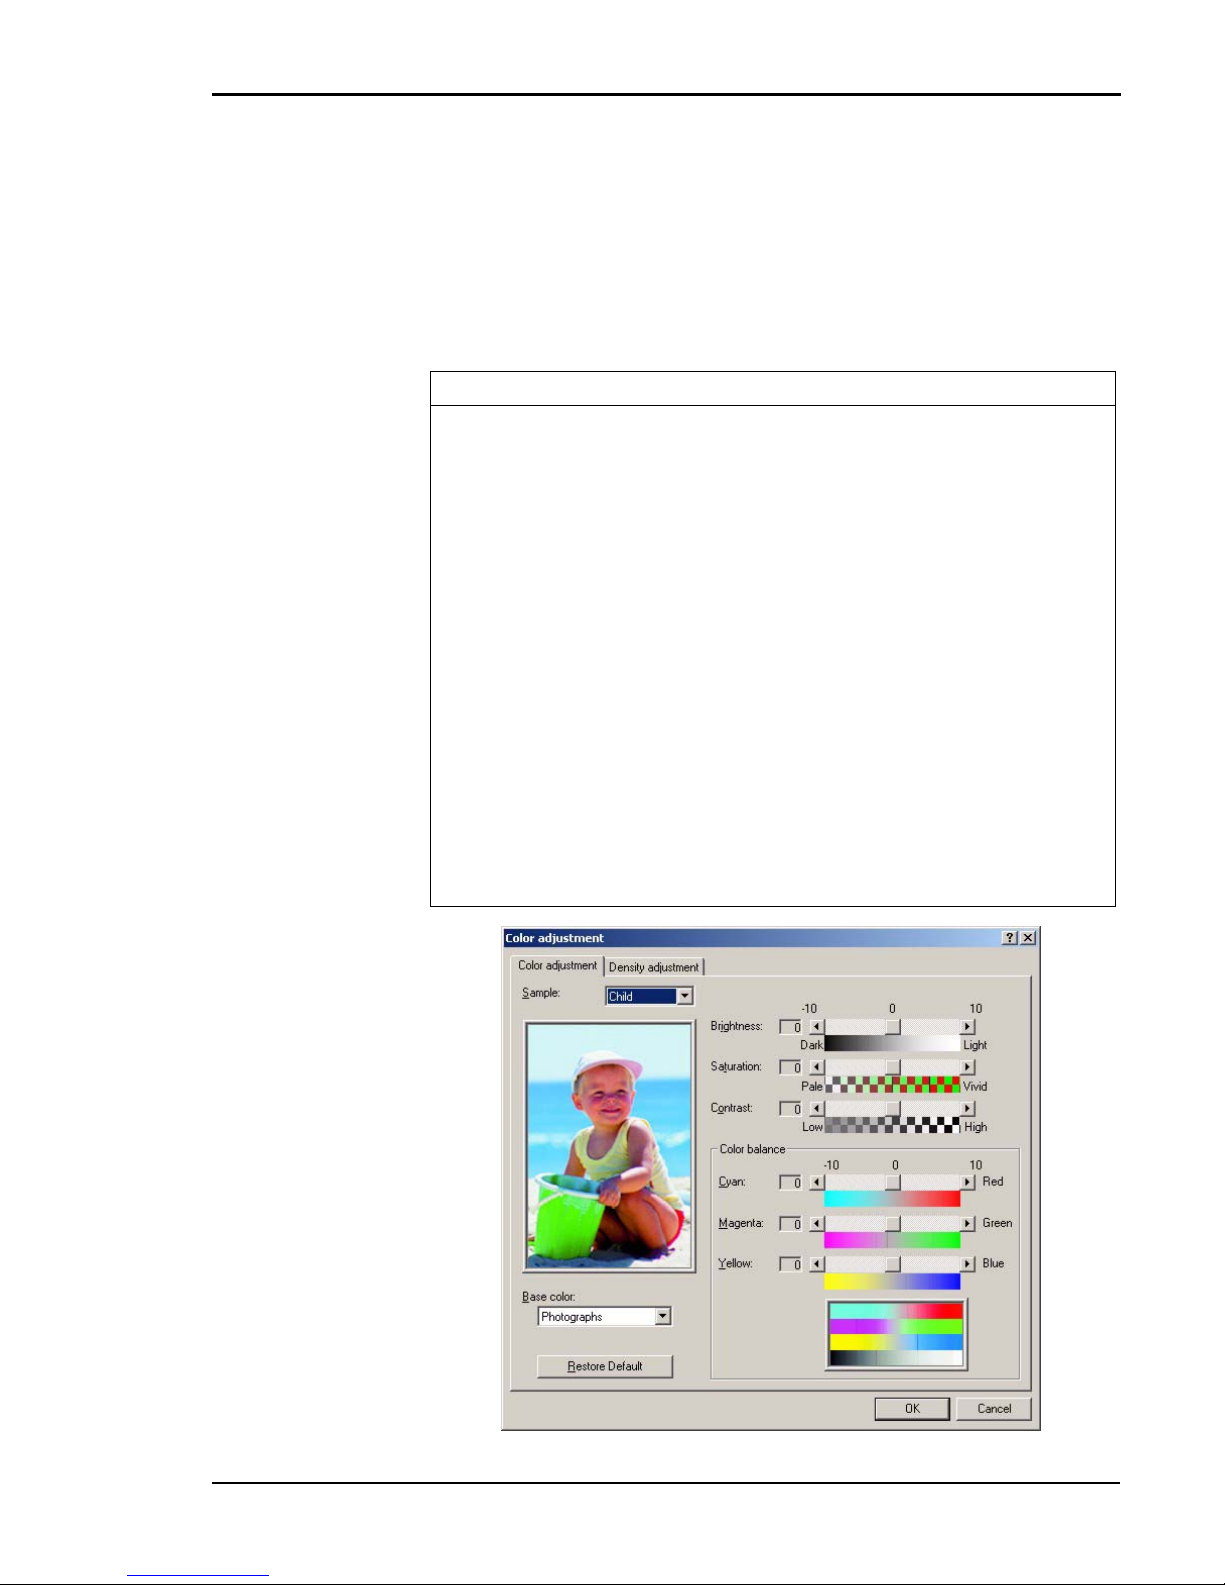
Adjusting Colors
Use the Color Adjustment button to adjust the hue, color, and density of
the printer output. Color Adjustment will only work when Custom Setting
is selected under Color Mode settings.
Following is a summary of the available adjustments to customize the
color output of your printer. Each has 21 levels of gradation, from -10 to
10.
Item Description
Sample
Use the Sample drop-down list to select the image
to be shown in the sample window when adjusting
the colors.
Base Color
Use the Base Color drop-down list to select a color
mode based on the content you are printing.
Brightness
When you move the scroll box to the right, the colors lighten. The colors darken when you move the
scroll box to the left. Or, you can use the arrow
buttons for incremental adjustments.
Saturation
When you move the scroll box to the right, the colors become sharper, and to the left, the colors
become paler.
Contrast
Moving the scroll box to the right provides a high
contrast, and to the left provides a low contrast.
Color Balance
Use Color Balance to adjust the hue by changing
values between cyan and red, magenta and green,
and yellow and blue.
Page 62
Tally T8006e Color Laser Printer User Guide
54
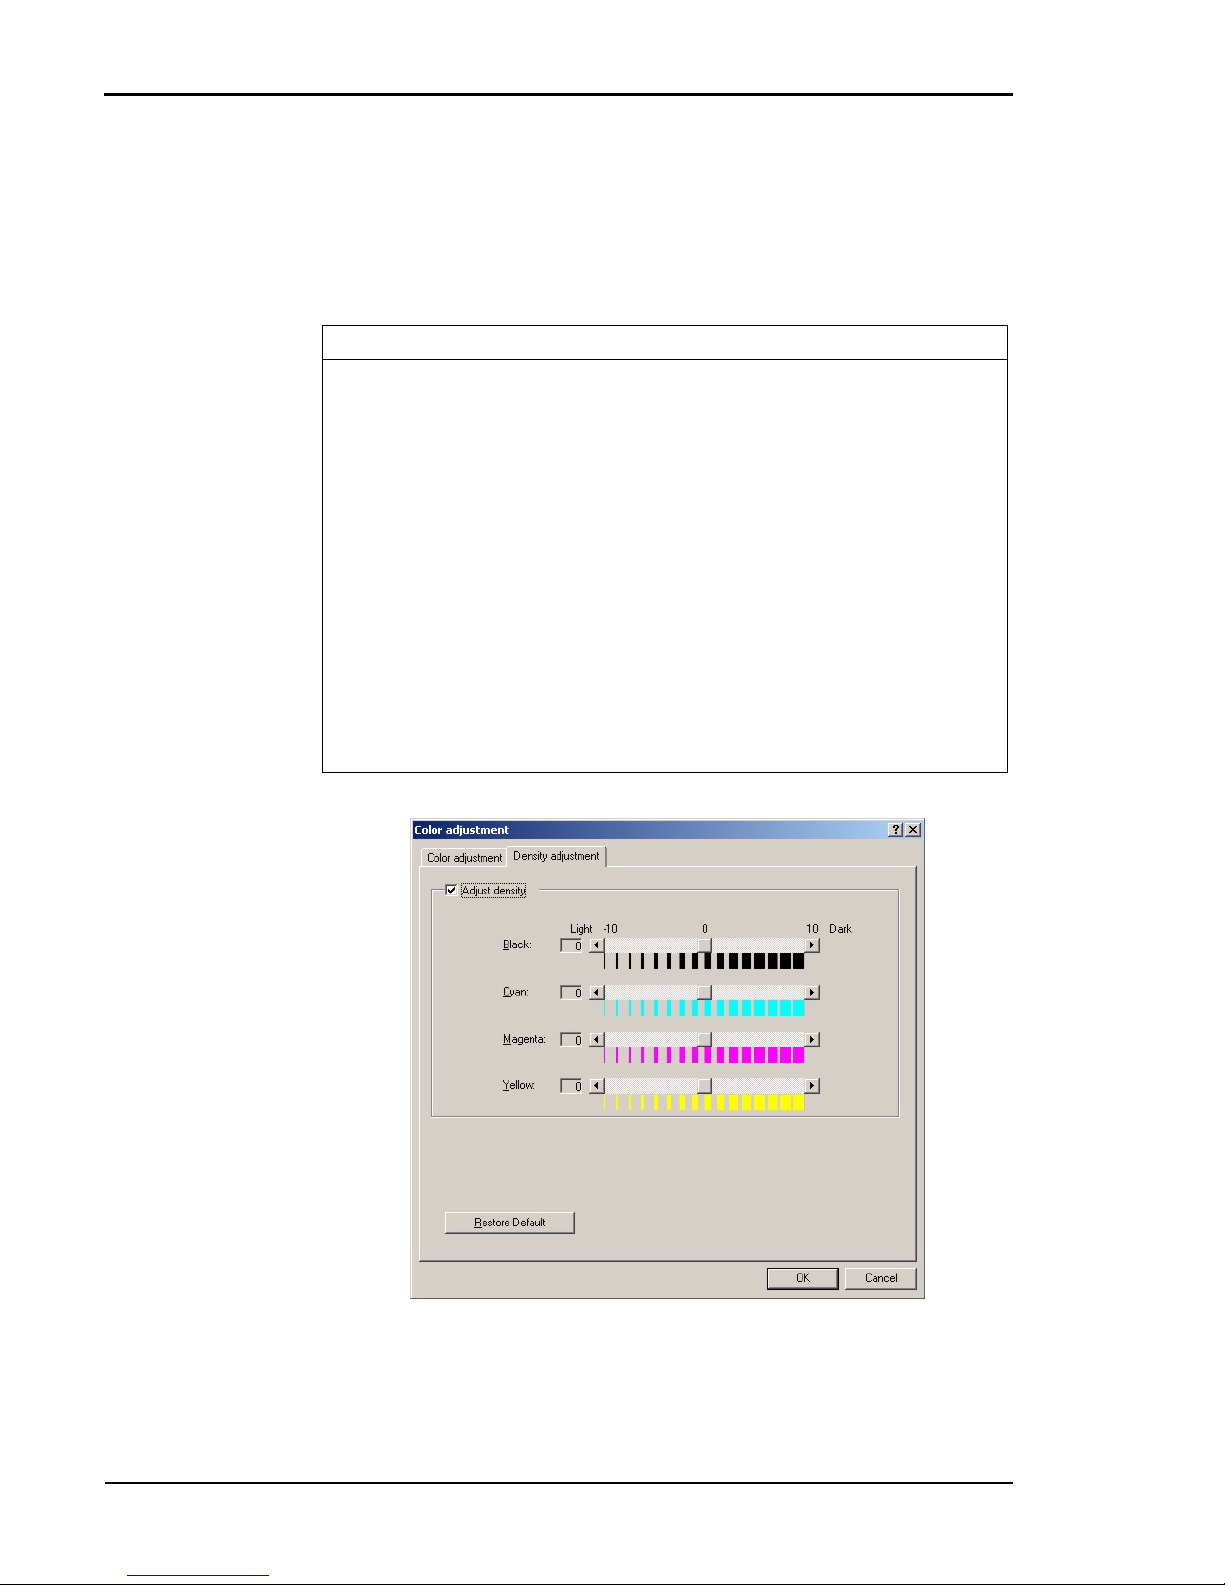
Adjusting Density
From the Density Adjustment tab, select the Adjust Density check box
to adjust the print density for each color. Use the scroll box for each
color—Black, Cyan, Magenta, and Yellow—to decrease or increase 21
density levels from light, -10, to dark, +10.
Item Description
Black
Move the scroll box to the left to make the black
print density lighter or to the right to make it
darker.
Cyan
Move the scroll box to the left to make the cyan
print density lighter or to the right to make it
darker.
Magenta
Move the scroll box to the left to make the
magenta print density lighter or to the right to
make it darker.
Yel lo w
Move the scroll box to the left to make the yellow
print density lighter or to the right to make it
darker.
Restore Default
Click this button to change density adjustments
back to the original default settings.
Page 63

Chapter 5 Changing Print Defaults
55
Registering Custom Edits
Use the Edit option to register custom color settings and save them for
later use. The registration name can include up to ten characters, and you
can register up to ten configurations. To use the custom color settings,
you must select Custom Setting from the Color Mode section of the
Color tab.
Item Description
List
Displays names of your custom settings.
Name
Allows you to type the name of your custom setting.
Save
Click this button to save a new setting name.
Modify
After you have adjusted the current custom color
settings, select a name in the list to change, and
click Modify to save the changes to this file.
Delete
Select a setting name in the list and click Delete to
permanently remove it from the list.
Close
Click Close to end the Edit option.
Page 64
Tally T8006e Color Laser Printer User Guide
56
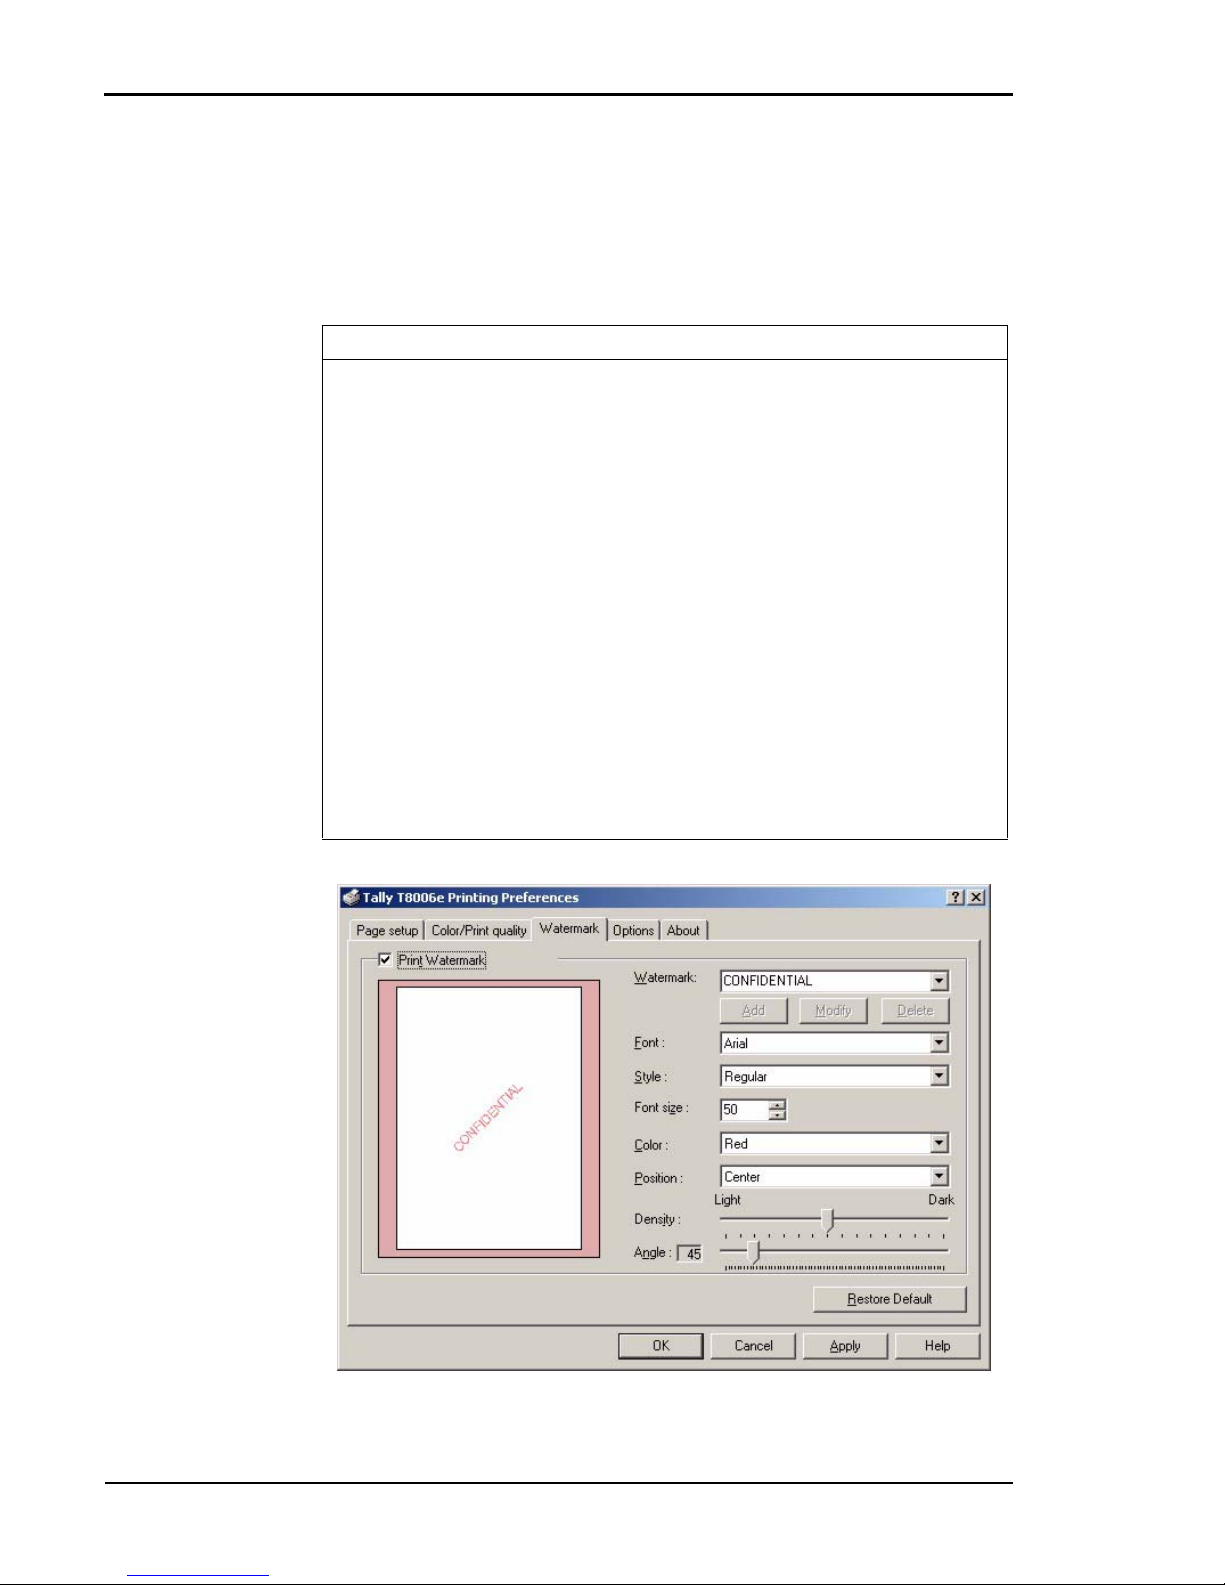
Customizing Watermarks
Custom color watermarks can identify special types of documents, such as
“Confidential.” The Watermark settings allow you to position your
watermarks on your printed page, and to specify, register, or delete
watermarks.
Item Description
Print Watermark
Select this check box to print watermarks.
Watermark
Select a predefined watermark from this list, or
type in up to sixteen characters to specify your custom watermark.
Font
Select a font for the watermark.
Style
Select a character style.
Font Size
Select a font point size between 8 and 72.
Color
Select a color for the watermark.
Position
Specify where you want to put the watermark on
the page.
Density
Move the slider left or right to select the density of
a watermark from within the range of 0 to 15.
Angle
Move the slider to select the watermark print angle.
Any angle within the range of 0 to 355 degrees can
be set in steps of five degrees.
Page 65

Chapter 5 Changing Print Defaults
57
Setting Options
The Options tab allows you to further customize your print job. For
example, you can choose to make the printer feed a sheet of paper
between each print job, or display some information while a job is
printing. Also, Printing Options and Other Features allow you to set
character smoothing or special black characters, among other available
settings.
Item Description
Output Tab
Page
Select Output Tab Page to produce a tab page for
each print job. A tab page is a sheet of paper that
separates one print job from another.
Before Print Job
Select this box to direct the printer to put a tab
page before your job prints.
After Print Job
Select this box to put a tab page after your job
prints.
Before and
After Print Job
Select this box to put a tab page before and after
your print job.
Display User ID
when printing
Select Display User ID when printing, to adjust the
user information that displays during printing. To
change the user information, select this box and
then enter a custom message to be displayed.
Output Blank
Paper
Select Output Blank Paper to prevent the printer
from producing blank pages that are not created by
a page break.
Print Slowly
Select Print Slowly to help reduce inconsistencies
in density.
Remove sleep
mode
Turning on the check box of "Remove sleep mode"
can make an instant warming-up at the start of
print job even if the printer is in the sleep mode.
EMF Spooling
EMF Spooling enables Expanded Meta File spooling. This setting accelerates print speed. If incorrect printing results, however, clear the EMF
Spooling check box.
Page 66
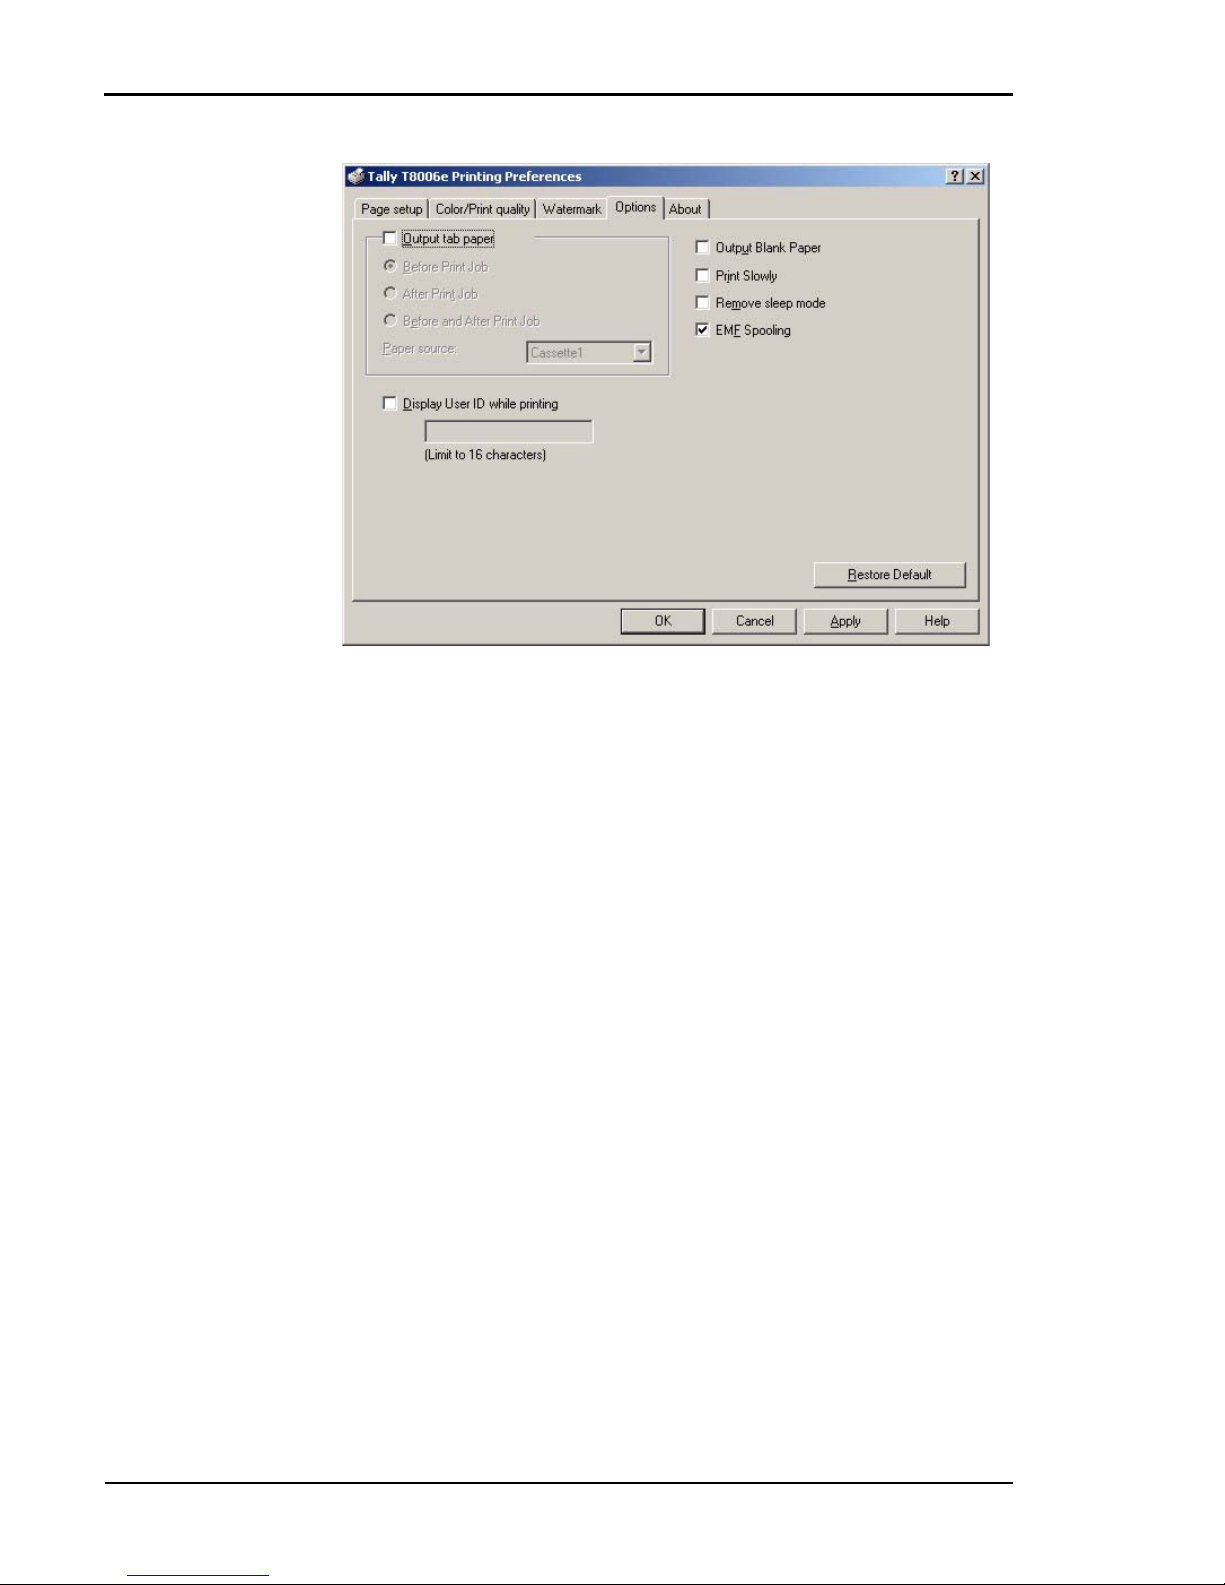
Tally T8006e Color Laser Printer User Guide
58
Page 67

Chapter 5 Changing Print Defaults
59
Setting Device Settings
The Device setting tab allows you to further set your printer
information. Before you can use the optional devices, you must tell the
drivers that optional devices are installed. The information on a printer
was acquired and it made it possible to be automatic and to set up.
Item Description
Available
options
The option connectable with a printer is displayed.
Installed
options Add
The option connected to the printer is displayed.
Select the option from “Available options”, and
click this button. The selected option will be displayed in the “Installed options”.
Remove
Select the option from “Installed options”, and
click this button. The selected option will be displayed in the “Available options”.
Auto setting
Automatically detects the option structure and
makes proper settings.
Page 68

Tally T8006e Color Laser Printer User Guide
60
Setting Printing Conditions
The About tab provides information about the Tally Color Printer
Driver, and also gives you an opportunity to replace all of your
customized settings with the original Tally default print settings.
To close the
About tab, click OK.
Item Description
Restore All
Items to Default
Click the Restore All Items to Default button to
reset all of your customized print settings to the
initial default settings of the printer.
Page 69

61
Chapter 6
Maintaining Your Printer
When supplies such as toner cartridges and fuser oil need replacement,
and when printer parts need replacement after high-volume printing, the
control panel displays messages.
See “Chapter 4 Operating Your Printer” on page 35, and “Appendix D
Control Panel Messages” on page 147for more information about control
panel messages.
Printer parts must be replaced by a qualified Tally Service Technician. For
more information on part replacement, see “Appendix B Periodic
Replacement Parts” on page 113.
For more information about supply orders, see the Tally T8006e Color
Laser Printers Quick Start Guide on the Tally CD-ROM.
Perform the following steps to replenish the supplies in your printer.
Warning! Make sure the power switch is off, and that the printer has
cooled for a minimum of 30 minutes before replacing the fuser consumables.
Replacing Toner Cartridges
Replace toner cartridges at least once every 12 months, or more often
depending on usage. At a 5% coverage rate and continuous printing of
letter-size paper, T8006e toner cartridges can print about 12,000 pages for
black (K), and 7,200 pages for color (C, M and Y).
Note: The original toner cartridges from the Starter Kit are filled at half
volume for first-time installation only. Their early replacement does not reflect
the replacement cycle stated above.
Warning! If you get toner in your eyes, immediately flush your eyes with water for at
least 15 minutes, and contact a physician.
Page 70

Tally T8006e Color Laser Printers User Guide
62
1. Unlock the lever.
2. Open the front cover.
Caution! Do not install the toner cartridges upside-down or in reverse order.
To avoid toner spillage, keep the toner cartridge horizontal with the labels facing
upward.
3. Pull the empty toner cartridge
out of the printer.
4. Discard the empty toner cartridge. See “Disposing of Supplies” on page 71.
5. Rock the new toner cartridge
three or four times in the direction of the arrows on the cartridge to level out the toner.
6. Peel the tape off the cartridge
and remove the protective cover
from the cartridge.
Note: Save the protective cover for future use when shipping the printer and
toner cartridges separately.
Page 71
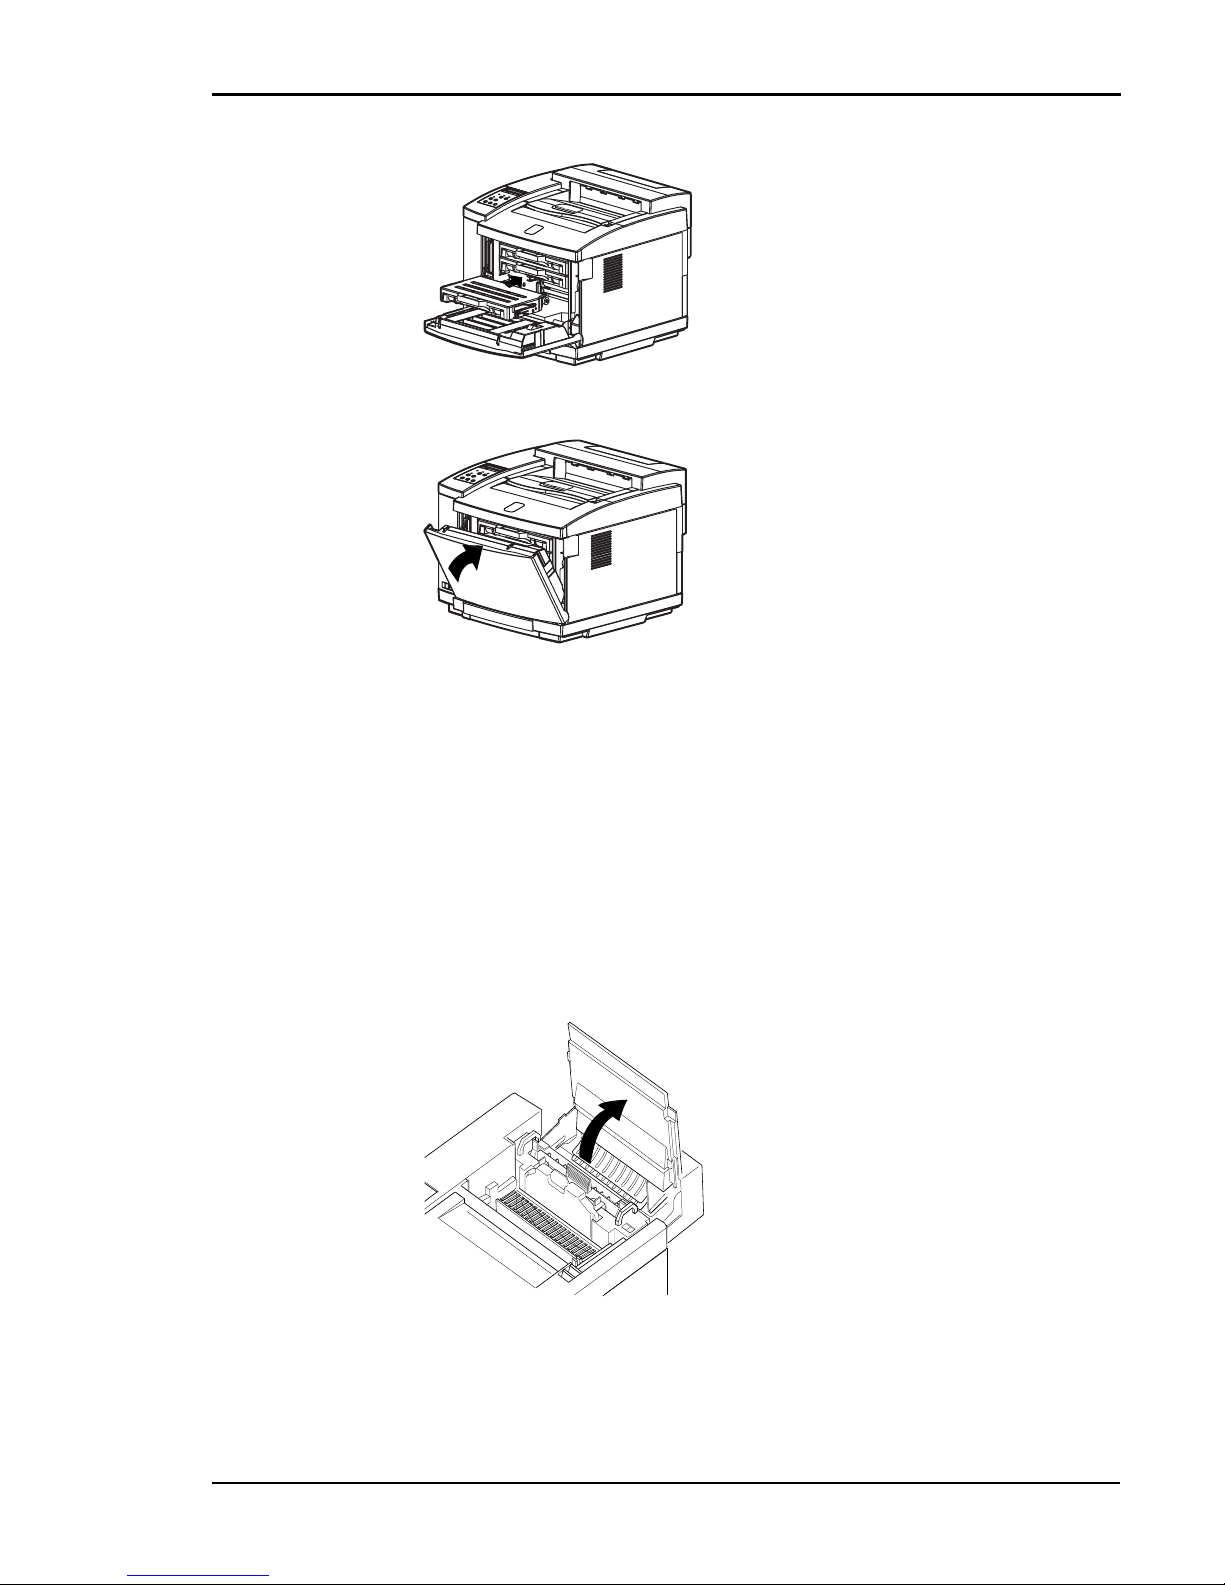
Chapter 6 Maintaining Your Printer
63
Replacing the Oil Bottle
Replace the oil bottle after 12,000 pages have printed (at a 5% toner
coverage rate on letter-size paper). The oil must be replaced sooner than
the 12,000-page specification if the fusing unit has been replaced, because
the new fusing unit requires extra oil for the initial coating of its rollers.
Warning! Make sure the power switch is off and the printer has cooled for
a minimum of 30 minutes before replacing supplies near the fusing unit.
7. Carefully insert the toner cartridge along the guide and into
the appropriate toner cartridge
slot in the printer.
8. Close the front cover by carefully
pushing it inward until it locks.
1. Pull and unlock the lever.
2. Open the top cover fully.
3. Turn the two green lock levers to
unlock the oil bottle.
Page 72

Tally T8006e Color Laser Printers User Guide
64
4. Lift the used oil bottle out of the
printer.
5. Discard the used oil bottle as indicated
in “Disposing of Supplies” on page 71.
Note: To avoid drips, hold a sheet of paper under the used oil bottle while you lift it
out of the printer.
6. Insert the new oil bottle.
7. Turn the two green lock levers to lock
the new oil bottle in place.
8. Close the top cover carefully until it
locks.
Page 73
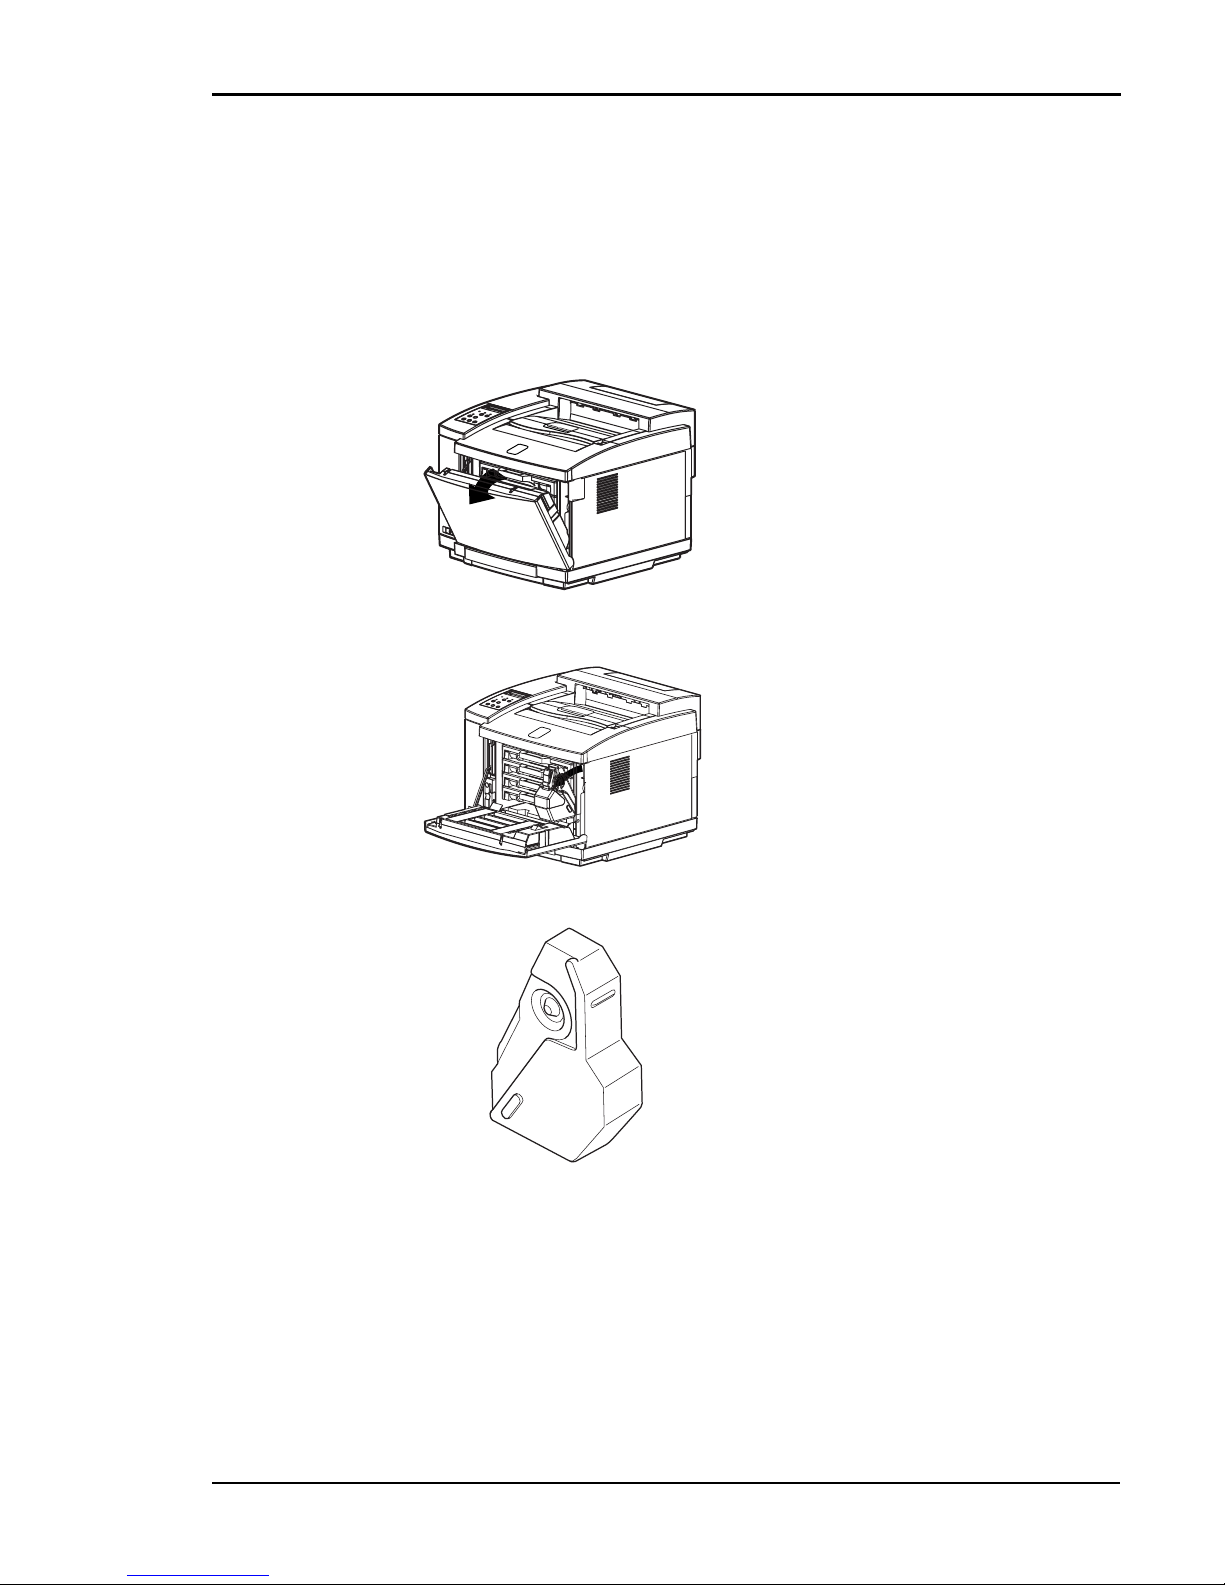
Chapter 6 Maintaining Your Printer
65
Replacing the Waste Toner Pack
Replace the waste toner pack in the T8006e after 12,000 pages (3000 color
pages) of printing (at a 5% toner coverage rate on letter-size paper).
Warning! If you get toner in your eyes, immediately flush your eyes with
water for a minimum of 15 minutes and contact a physician.
1. Unlock the lever.
2. Open the front cover.
3. Remove the used waste toner pack.
4. Peel the provided seal off of the side of
the used waste toner pack, and seal the
used toner pack.
5. Remove the new waste toner pack from its polyethylene bag.
6. Insert the used waste toner pack in the bag and seal it shut.
7. Discard the used waste toner pack as indicated in “Disposing of Supplies” on page 71.
Page 74
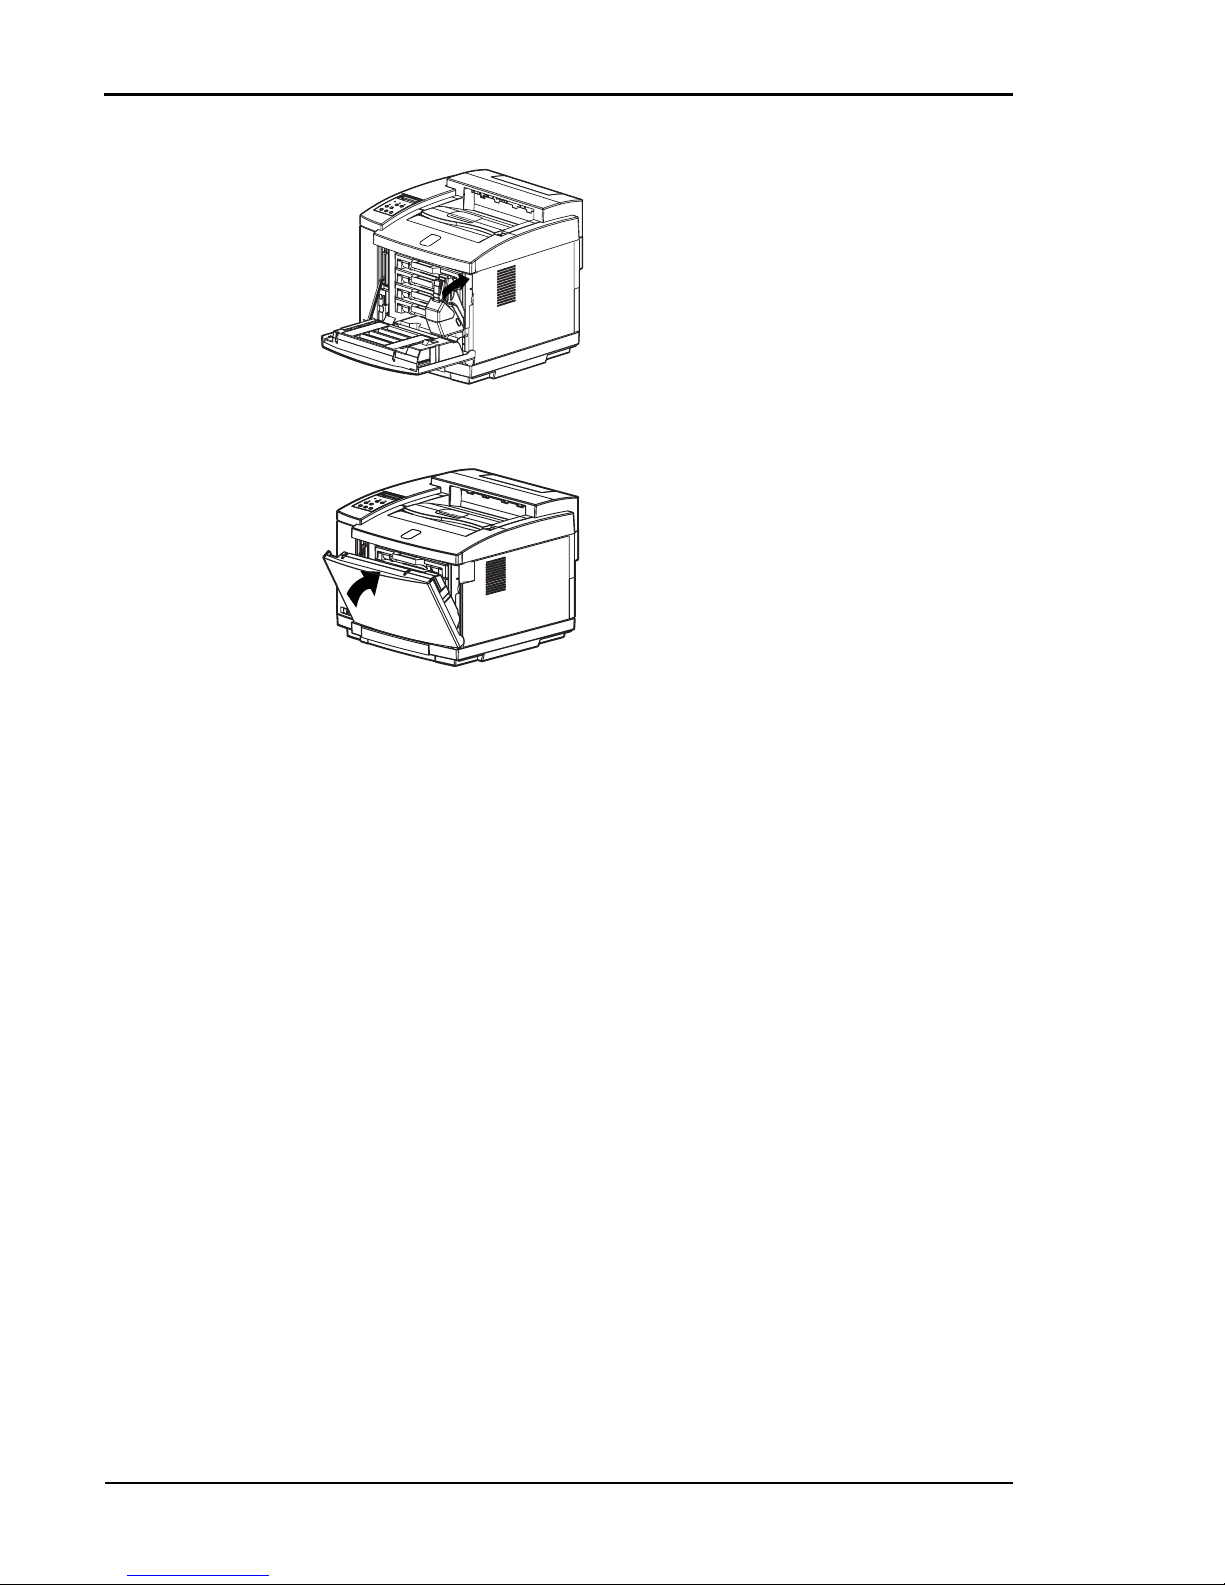
Tally T8006e Color Laser Printers User Guide
66
Replacing the Fuser Cleaning Roller
Replace the fuser cleaning roller at least once every 12 months, or when
the control panel display indicates that replacement is necessary. The life
of the fuser cleaning roller in the T8006e is about 12,000 pages (at a 5%
toner coverage rate on letter-size paper).
Warning! Make sure the power switch is off, and that the printer has
cooled for a minimum of 30 minutes before replacing supplies near the fusing
unit.
Caution! Always replace the ozone filter when you replace the fuser
cleaning roller.
8. Install the new waste toner pack.
9. Close the front cover by carefully pushing it inward until it locks.
1. Turn off the power switch.
Page 75

Chapter 6 Maintaining Your Printer
67
2. Pull and unlock the lever.
3. Open the top cover fully.
4. Turn the two green lock levers to
unlock the used fuser cleaning roller.
5. Lift the fuser cleaning roller out of the
printer.
6. Discard the used fuser cleaning roller as
indicated in “Disposing of Supplies” on
page 71.
7. Insert the new fuser cleaning roller.
8. Turn the two green lock levers to lock
the new fuser cleaning roller in place.
9. Close the top cover carefully until it
locks.
Note: Set the fuser cleaning roller counter to zero after initial installation
and replacement. For more information, see “Setting the Fuser Cleaning Roller
Counter to Zero” on page 14..
Page 76
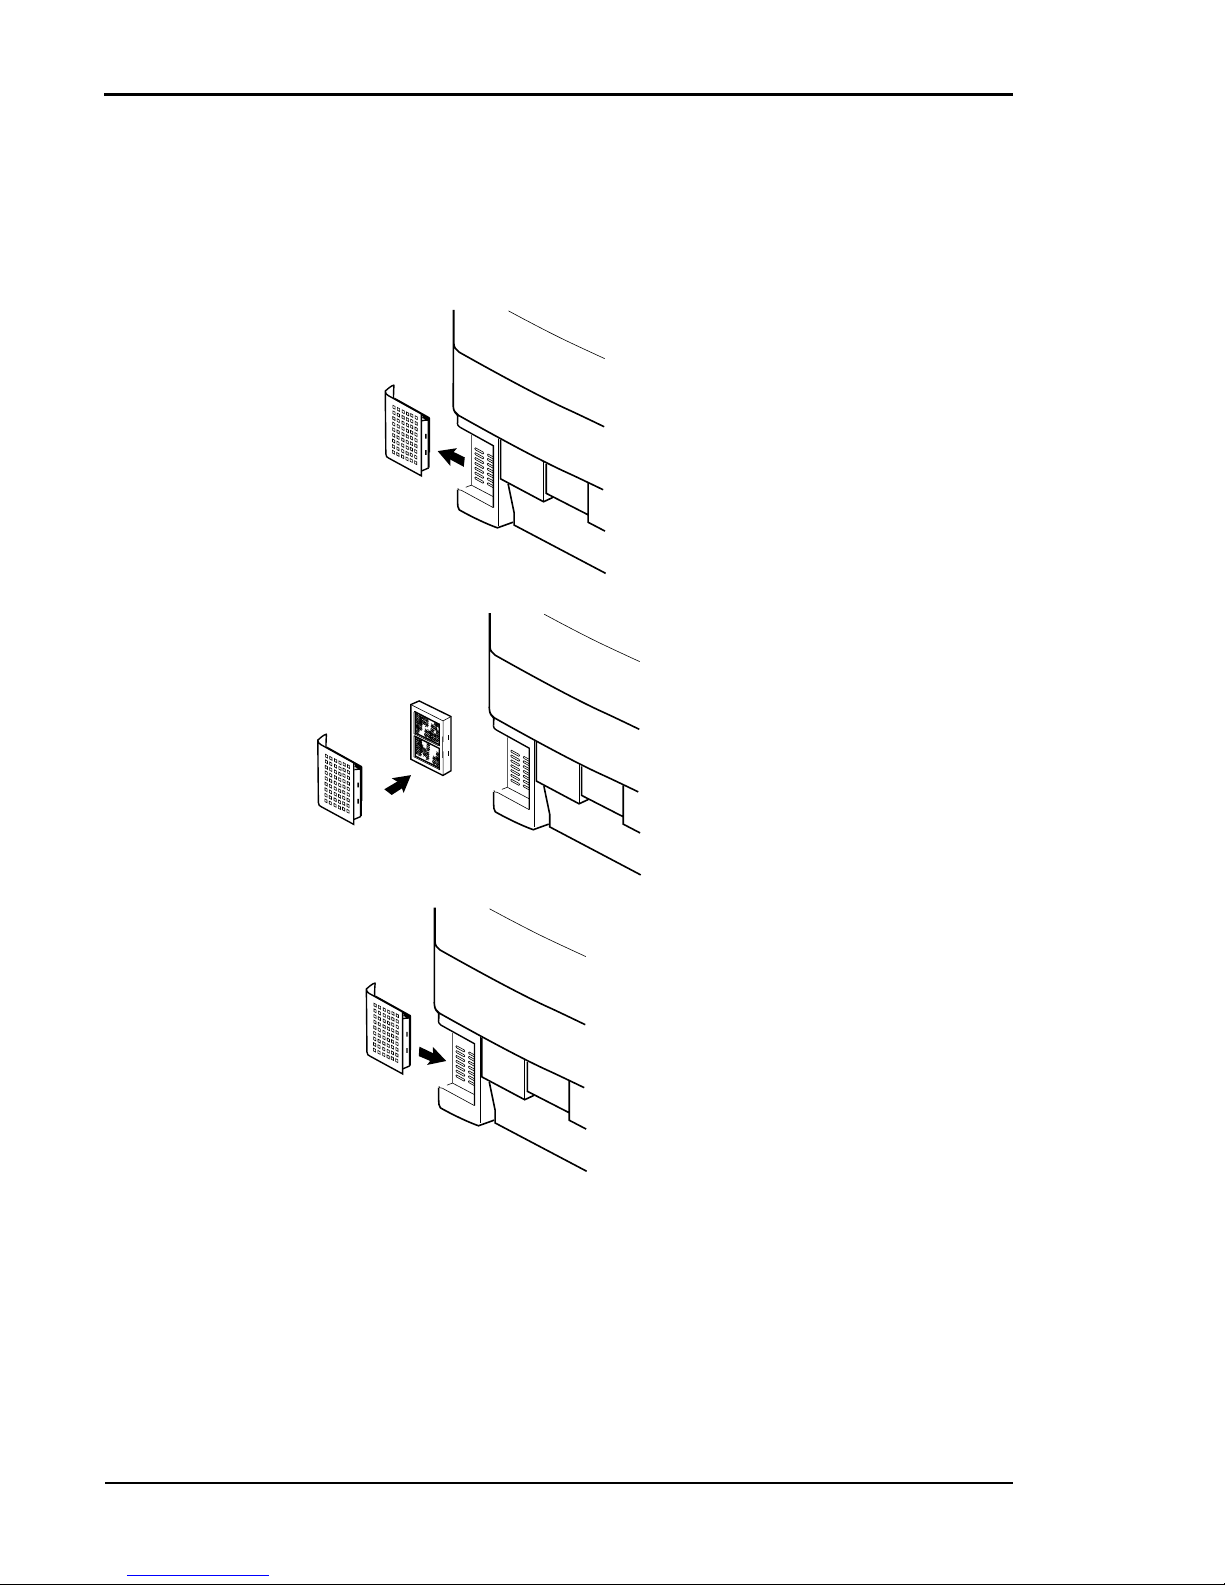
Tally T8006e Color Laser Printers User Guide
68
Replacing the Ozone Filter
Replace the ozone filter whenever you replace the fuser cleaning roller, at
least once every 12 months.
1. Turn the power switch off.
2. At the rear of the printer, slide
the ozone-filter case out.
3. Remove the ozone filter from the
case.
4. Discard the used ozone filter as
indicated in “Disposing of Supplies” on page 71.
5. Insert the new ozone filter into
the case.
6. Slide the case back into the
printer.
Page 77
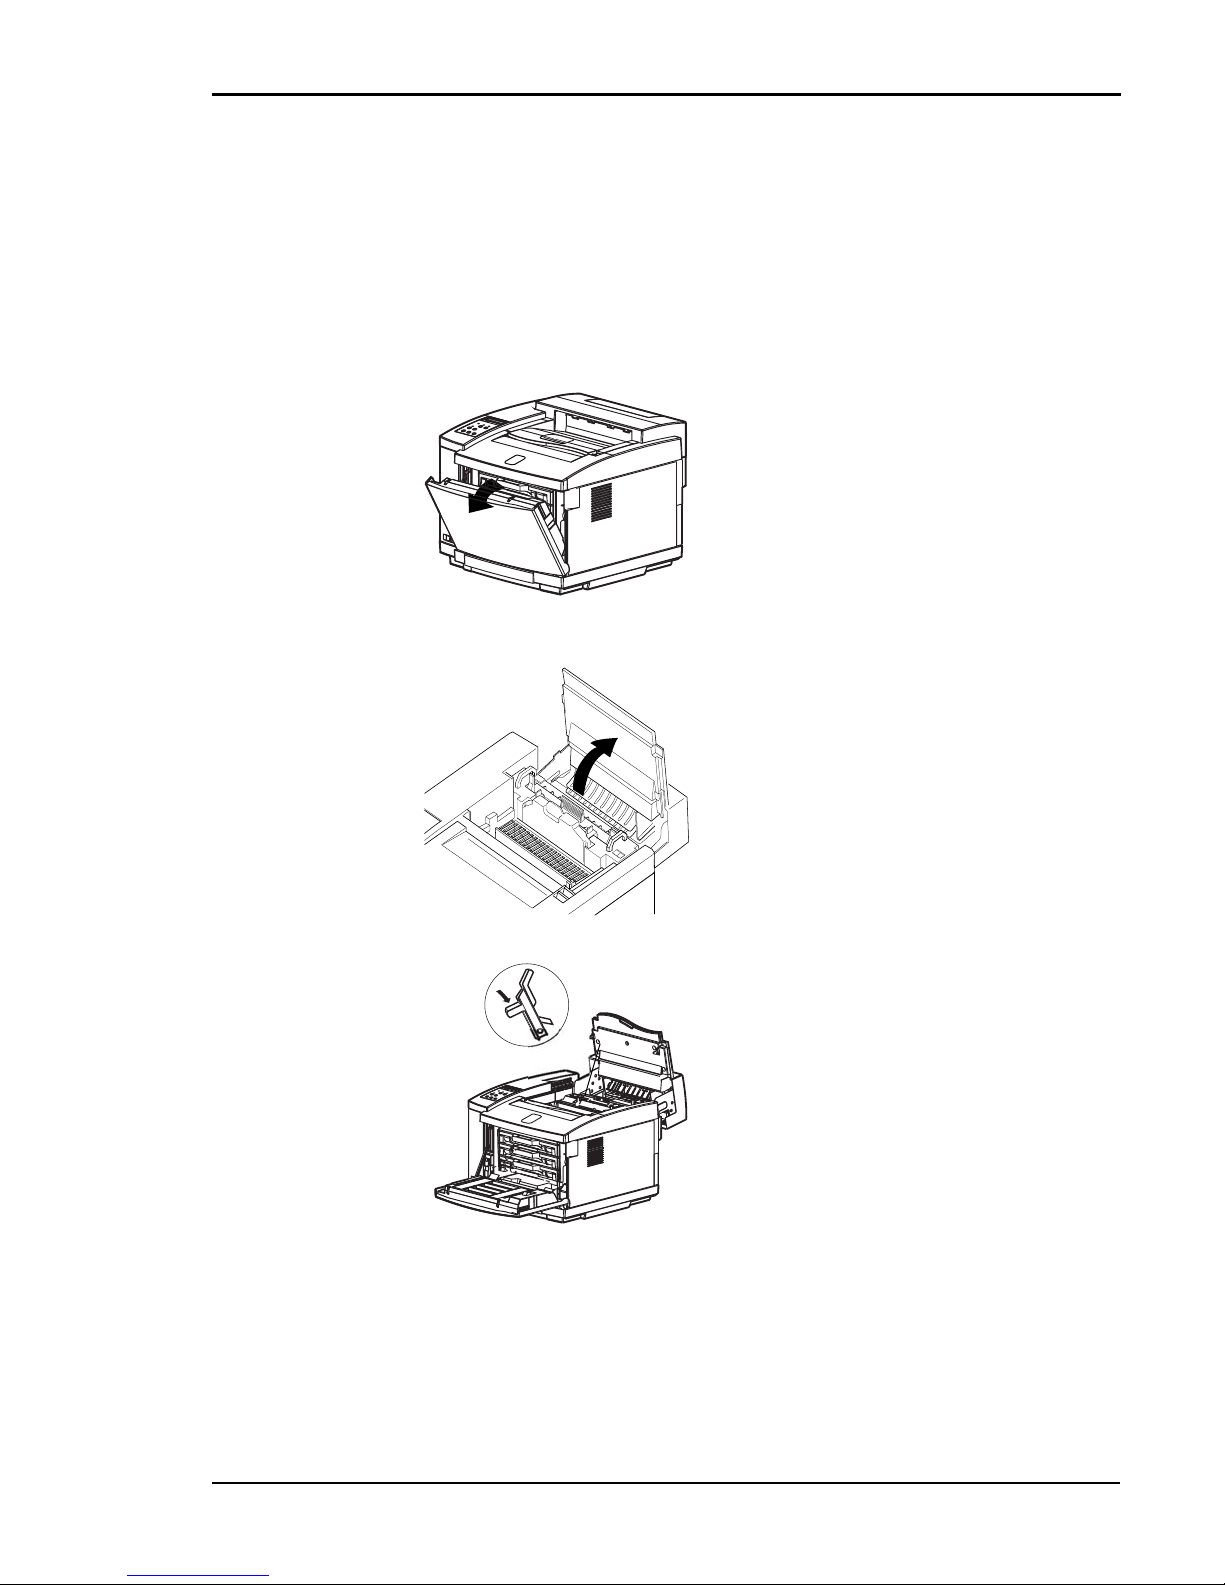
Chapter 6 Maintaining Your Printer
69
Replacing the Optical Photoconductor (OPC)
Belt Cartridge
Replace the OPC belt cartridge at least once every 12 months, or when
the control panel display indicates that replacement is necessary. The life
of the OPC belt cartridge for the T8006e is about 60,000 images (15,000
color pages) at a 5% toner coverage rate on letter-size paper.
1. Turn the power switch off.
2. Unlock the lever to open the front
cover. This releases the pressure on the
toner cartridges.
3. Unlock the lever to open the top cover
fully.
4. Pull the green OPC belt cartridge lock
levers up until they unlock.
Page 78

Tally T8006e Color Laser Printers User Guide
70
5. Pull the used OPC belt cartridge
upward and out of the printer carefully
to avoid spilling toner.
6. Discard the used OPC belt cartridge as
indicated in “Disposing of Supplies” on
page 71.
Caution! Do not touch or wipe off any powder that is on the OPC belt, nor expose
the OPC belt to light.
7. Remove the two shipping pins from the
new OPC belt cartridge.
8. Remove the protective sheet that covers
the photosensitive belt.
9. Slide the new OPC belt cartridge downward into both green lock-lever guides
and into the printer carefully.
10. Push the green OPC belt cartridge lock
levers down until they lock.
Page 79

Chapter 6 Maintaining Your Printer
71
Disposing of Supplies
Discard supplies as general nonflammable articles (waste plastics and
metal). Follow a method for disposing of and sorting such articles if the
method is specified by municipal bylaws. If you rely on a commercial
processor to dispose of your consumables as industrial waste, refer to the
following types and characteristics of the supplies:
Warning! Never burn toner cartridges or waste toner packs.
For more information on Tally replacement printer parts, see “Appendix
B Periodic Replacement Parts” on page 113.
11. Close the top and front covers carefully
until they both lock.
Note: Set the OPC belt counter to zero after initial installation and replacement. For
more information, see “Setting the OPC Belt Counter to Zero” on page 17.
Component Type Shape Heavy metals
Toner Cartridges
Waste plastics
Cinders
Scrap metal
Solid None
OPC Belt Cartridge
Waste plastics
Cinders
Scrap metal
Solid None
Fuser Cleaning
Roller
Waste plastics Solid None
Ozone Filter
Waste plastics Solid None
Oil Bottle
Waste plastics
Scrap metal
Solid None
Waste Toner Pack
Waste plastics
Cinders
Solid None
Page 80

Page 81

73
Chapter 7
Cleaning the Printer
Cleaning the Registration Roller
Use dry soft cotton cloth to clean the registration roller following the
procedure below.
Caution! Do not use alcohol or water to clean the registration roller.
1. Turn off and unplug the printer.
2. Open the back cover of the printer.
3. Using a dry cotton cloth, gently
wipe the registration roller.
4. Close the rear cover and plug in the
printer power cord.
Page 82
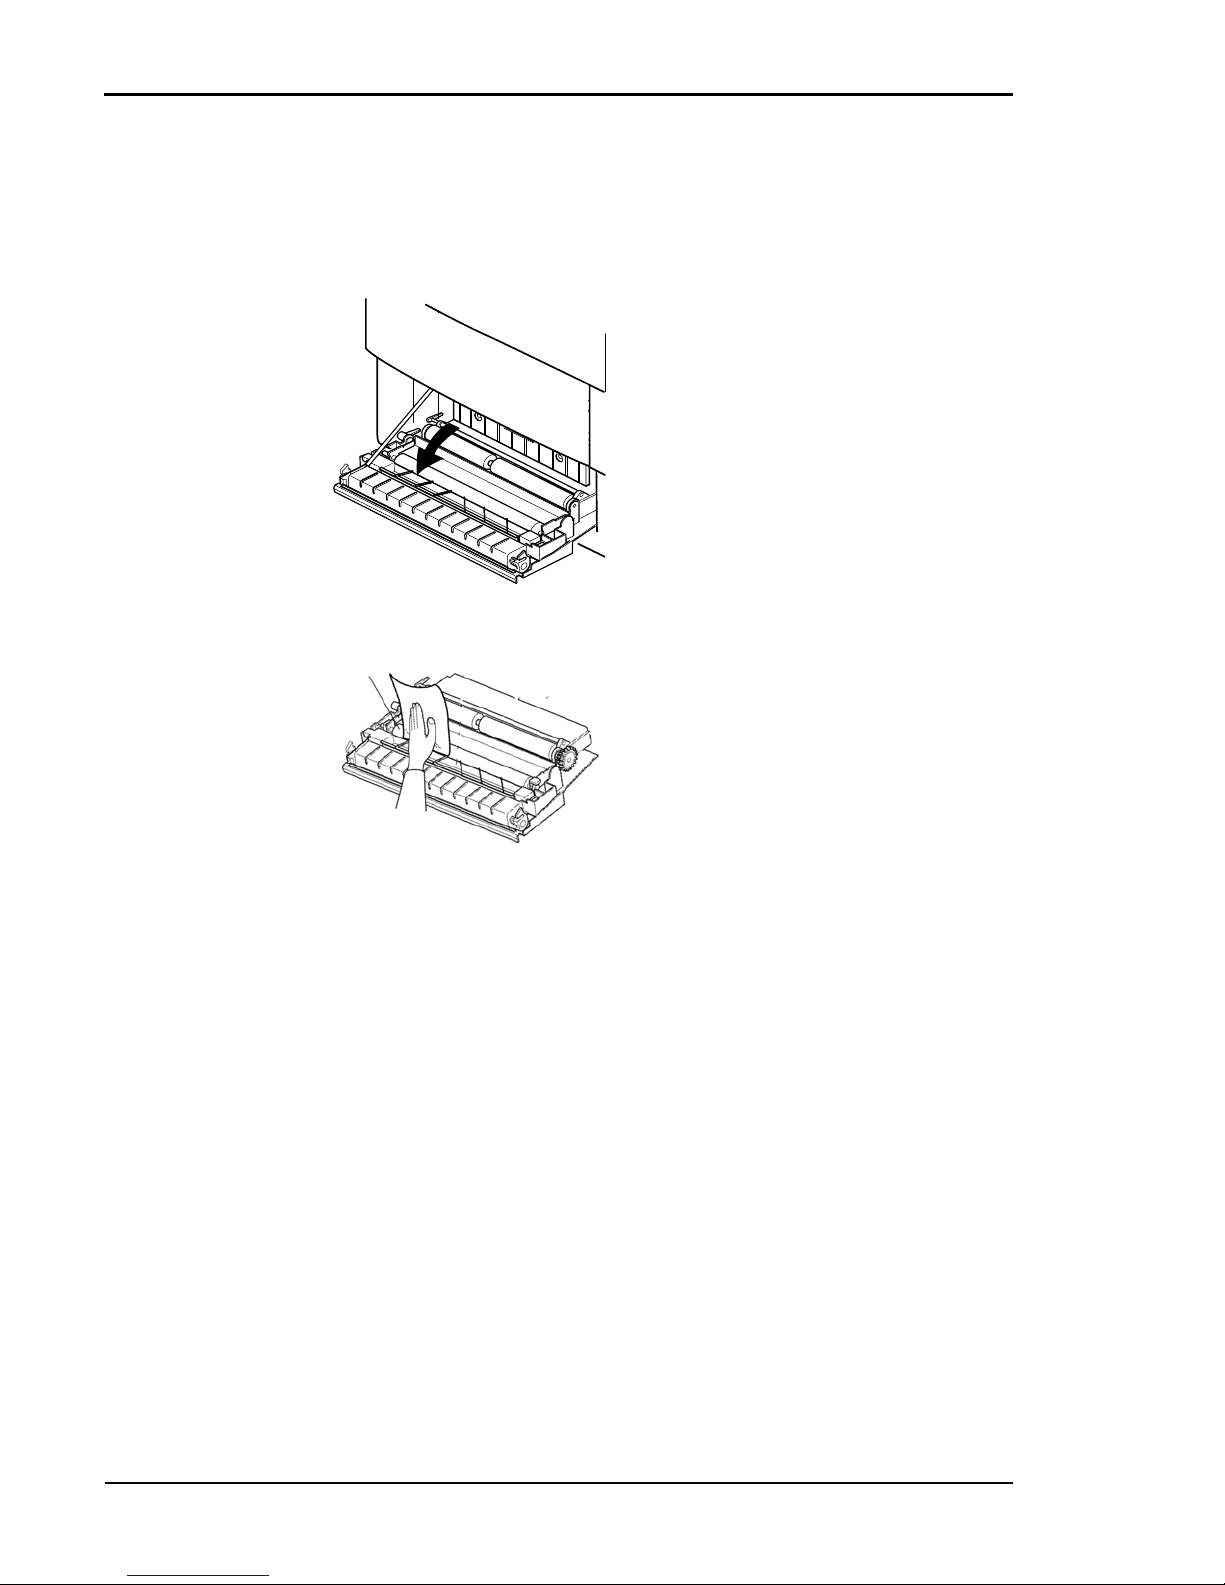
Tally T8006e Color Laser Printers User Guide
74
Cleaning the Transfer Roller
Use dry soft cotton cloth to clean the transfer roller following the
procedure below.
1. Turn off and unplug the printer.
2. Open the back cover of the printer.
3. Using a dry cotton cloth, gently
rotate and wipe off any paper or
toner particles remaining on the surface of the transfer roller.
4. Close the rear cover and plug in the
printer power cord.
Page 83
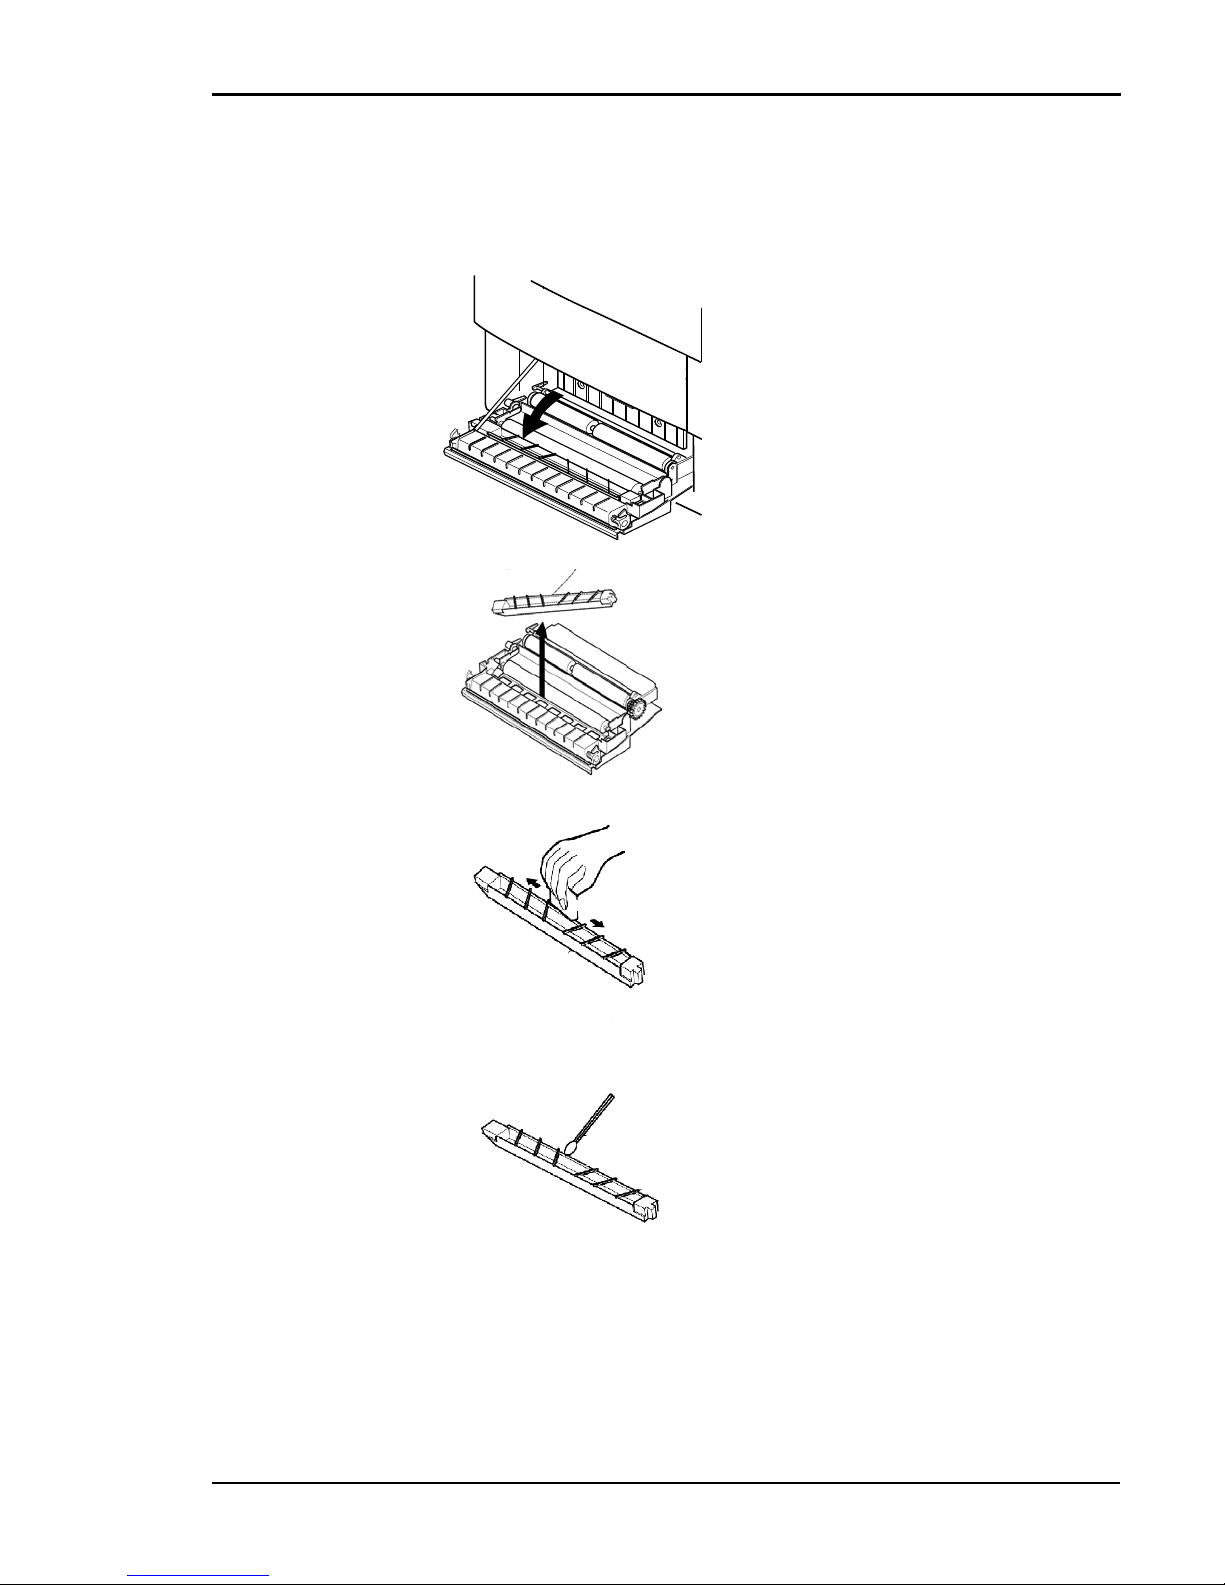
Chapter 7 Cleaning the Printer
75
Cleaning the Paper Discharger
Use dry soft cotton cloth and a cotton swab to clean the transfer roller
following the procedure below.
1. Turn off and unplug the printer.
2. Open the back cover of the printer.
3. Remove the paper discharger by sliding it to the left, then lifting it out of
its cradle on the right side.
4. Use a dry cotton cloth to remove any
dust or toner on the exterior of the
discharger.
5. Use a dry cotton swab to clean the
paper discharger wire and the interior
of the discharger.
6. Reinstall the paper discharger by inserting the left end of the paper
discharger into the cradle, and then lowering the right side until it is
fully seated.
7. Close the rear cover and plug in the printer power cord.
Page 84

Tally T8006e Color Laser Printers User Guide
76
Cleaning the OPC Belt Cartridge
Clean the OPC belt cartridge following the procedure below.
Caution! Do not expose the OPC belt cartridge to light, and do not touch
the surface of the OPC belt.
1. Turn off and unplug the printer.
2. Open the front cover.
3. Open the top cover.
4. Push the green OPC belt cartridge lock
levers up until they unlock.
Page 85
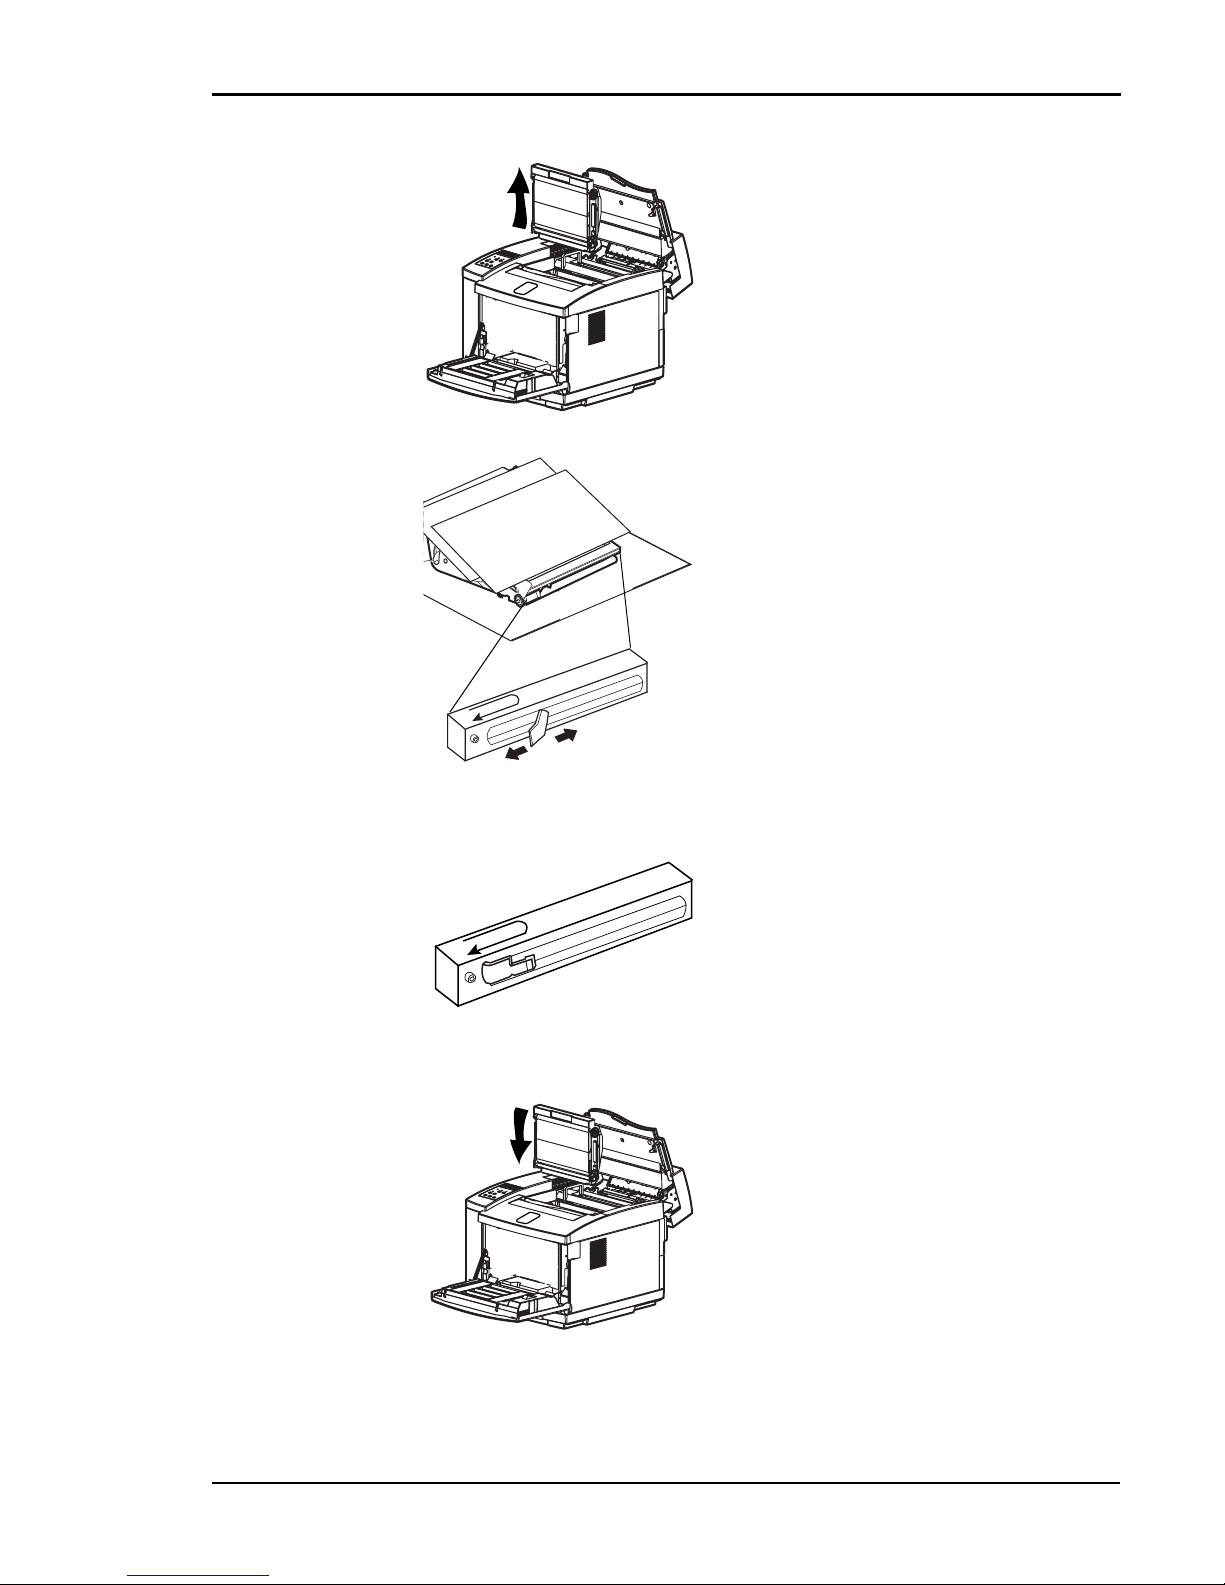
Chapter 7 Cleaning the Printer
77
5. Pull the OPC belt cartridge out of the
printer.
6. Put the OPC belt cartridge on a sheet
of clean paper with the photosensitive
belt facing upward.
7. Put several sheets of clean paper over
the OPC belt cartridge to protect the
photosensitive belt from light.
8. Gently slide the wire cleaner lever along
the charging wire several times.
9. Reposition the wire cleaner lever to its
original flush left position when the
charging wire is clean.
10. Slide the OPC belt cartridge downward
into both green lock-lever guides and
into the printer carefully.
Page 86

Tally T8006e Color Laser Printers User Guide
78
11. Push the green OPC belt cartridge lock
levers down until they lock.
12. Close the top and front covers and plug
in the printer power cord.
Page 87

Chapter 7 Cleaning the Printer
79
Cleaning the Optical Unit Glass
Use dry soft cotton cloth to clean the optical unit glass following the
procedure below.
Caution! Do not expose the OPC belt cartridge to light, and do not touch
the surface of the OPC belt.
1. Turn off and unplug the printer.
2. Open the front cover.
3. Open the top cover.
4. Remove the toner cartridges.
5. Remove the OPC belt cartridge.
6. Put the OPC belt cartridge on a sheet
of clean paper with the photosensitive belt facing upward.
7. Put several sheets of clean paper over
the OPC belt cartridge to protect the
photosensitive belt from light.
Page 88

Tally T8006e Color Laser Printers User Guide
80
Cleaning the Inside of the Printer
Use a toner vacuum and a soft cotton cloth to clean the inside of the
printer following the procedure below.
Caution! Before cleaning the inside of the printer, put a sheet of paper
around the transfer drum so the toner vacuum does not touch the drum. Use
only a dry cotton cloth to wipe the inside of the printer. Do not expose the
OPC belt cartridge to light, and do not touch the surface of the OPC belt.
8. Slide the glass cover out of the optical
unit.
9. Using a dry cotton cloth, clean the
surface of the glass.
10. Slide the glass cover into the optical
unit.
11. Reinstall the OPC belt cartridge and
toner cartridges.
12. Close top and front covers and plug
in the printer power cord.
1. Open the top and front covers.
2. Remove the toner cartridges.
3. Remove the OPC belt cartridge.
4. Put the OPC belt cartridge on a sheet
of clean paper with the photosensitive belt facing upward.
5. Put several sheets of clean paper over
the OPC belt cartridge to protect the
photosensitive belt from light.
Page 89

Chapter 7 Cleaning the Printer
81
6. Use a toner vacuum to clean any dust
or toner that is loose in the bottom of
the printer.
7. Use a dry cloth to gently wipe the
inside of the printer.
8. Reinstall the OPC belt cartridge.
9. Remove the drum cleaner roller
cover.
10. Pull the drum cleaner roller up and
out of the printer.
11. Carefully vacuum the drum cleaner
roller.
12. Carefully vacuum around the waste
toner removal auger directly below
the drum cleaning roller.
13. Reinstall the drum cleaning roller.
14. Reinstall the toner cartridges.
15. Close the top cover.
16. Carefully remove the waste toner
pack.
17. Vacuum the end of the waste toner
tube and the waste toner pack holder.
Page 90
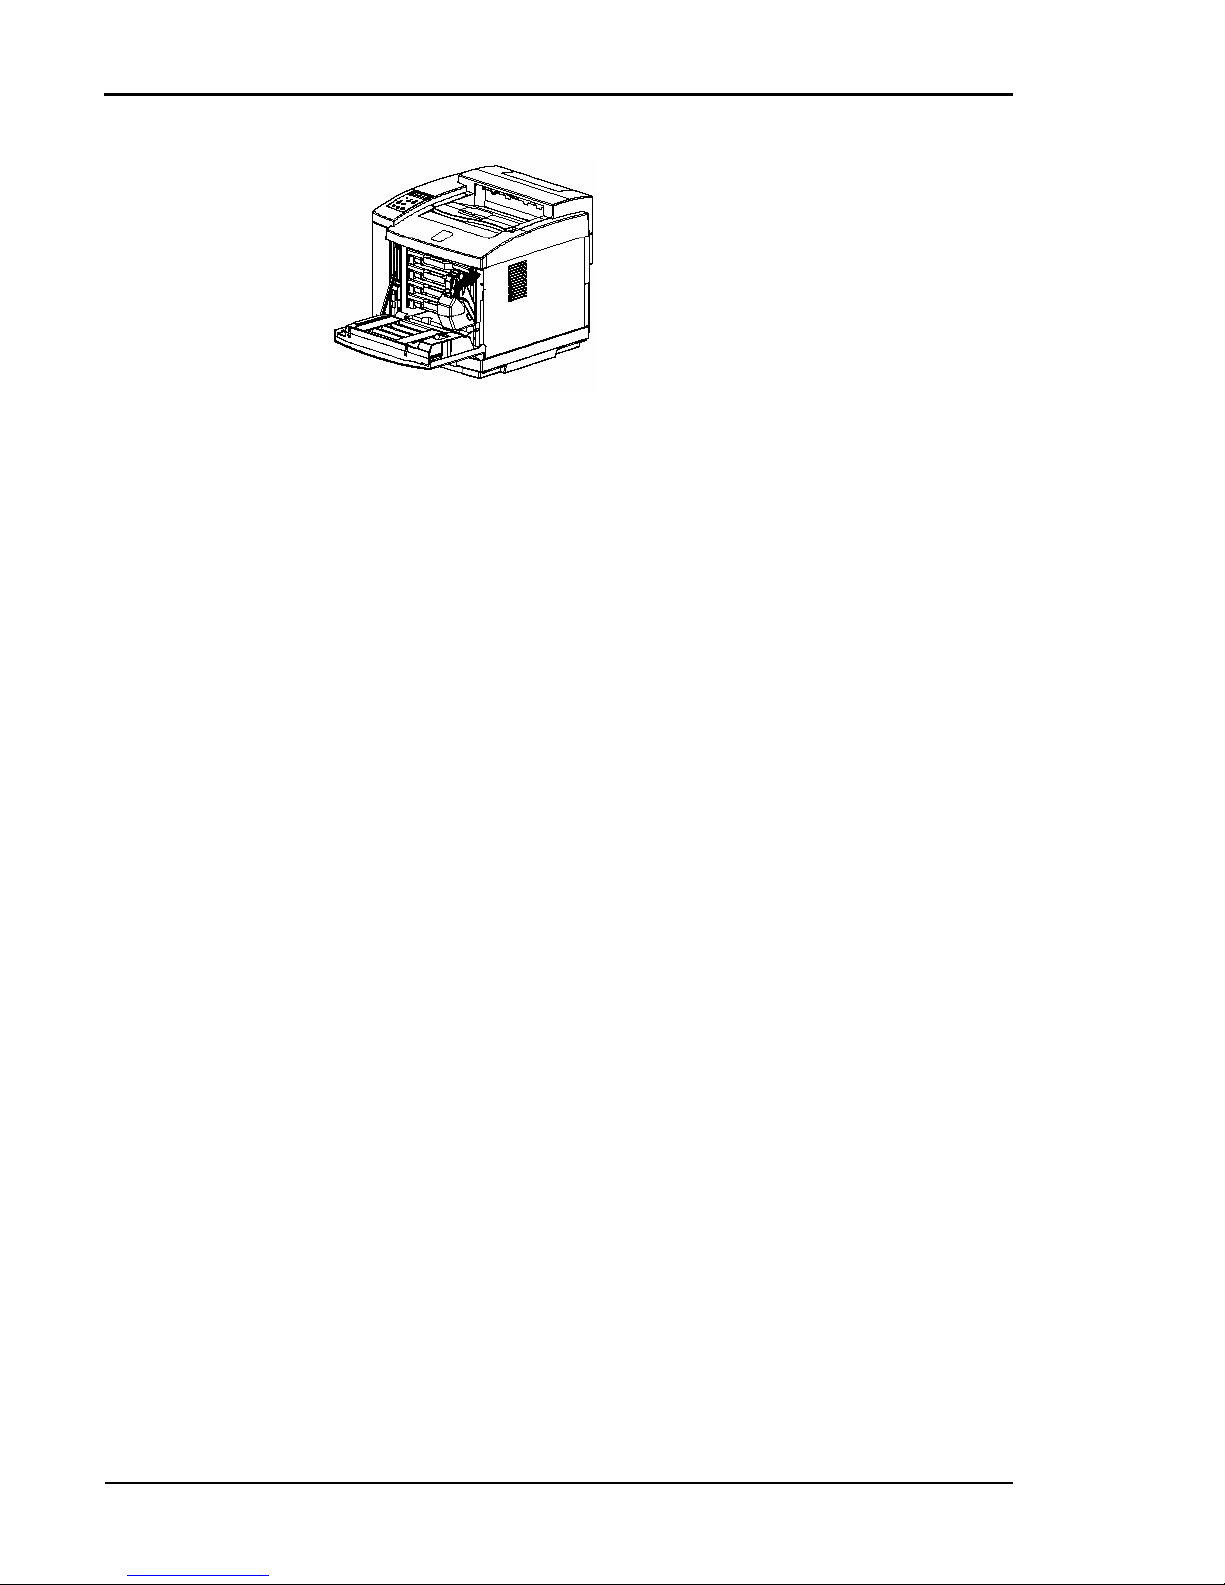
Tally T8006e Color Laser Printers User Guide
82
18. Reinstall the waste toner pack.
19. Close the front cover and plug in the
printer power cord.
Page 91

83
Chapter 8
Options and Accessories
Options and accessories for your printer include memory modules, a
duplex printing unit, and a paper feeder. The duplex printing unit
provides the ability to print images on both sides of paper or media. To
support large print jobs, you can add paper feeder trays to increase the
paper capacity up to 500 sheets.
For information on how to order options and accessories for the Tally
T8006e printer, see the Color Laser Printers Quick Start Guide on the
CD-ROM.
Memory Module
Duplex Printing Unit
Paper Feeder
The memory module can increase printing speed when printing multiple-page
documents. You can install up to two
additional memory modules.
Extra Memory modules may be required
for duplexing and large paper sizes.
The duplex printing unit will allow you to
print images on both sides of the paper.
To install this unit, you must also install
an extra paper feeder.
The additional paper feeder can hold up
to 500 sheets of paper.
Page 92

Tally T8006e Color Laser Printers User Guide
84
Installing Memory Modules
Caution! The memory module is sensitive to static discharge. Before
removing the memory module from its protective bag, touch a grounded metal
object to discharge any static electricity that could be stored in your body.
Installation procedureAfter you install additional memory:
1. Turn off the printer.
2. Remove the power cord, and the
interface cables if they are connected.
3. Using a small Phillips-head screwdriver, remove the two screws holding the controller board, and slide the
controller board out of the printer.
4. Place the controller board on a flat
surface.
5. Holding the memory module by the
edges, remove the memory module
from its protective bag.
6. Hold the memory module so the
metal edge faces toward the first
available memory socket and the two
notches on the metal edge are aligned
correctly with the socket.
7. Carefully insert the memory module
into the socket until it is fully seated
and the retaining clips on both sides
of the module secure it into place.
Page 93
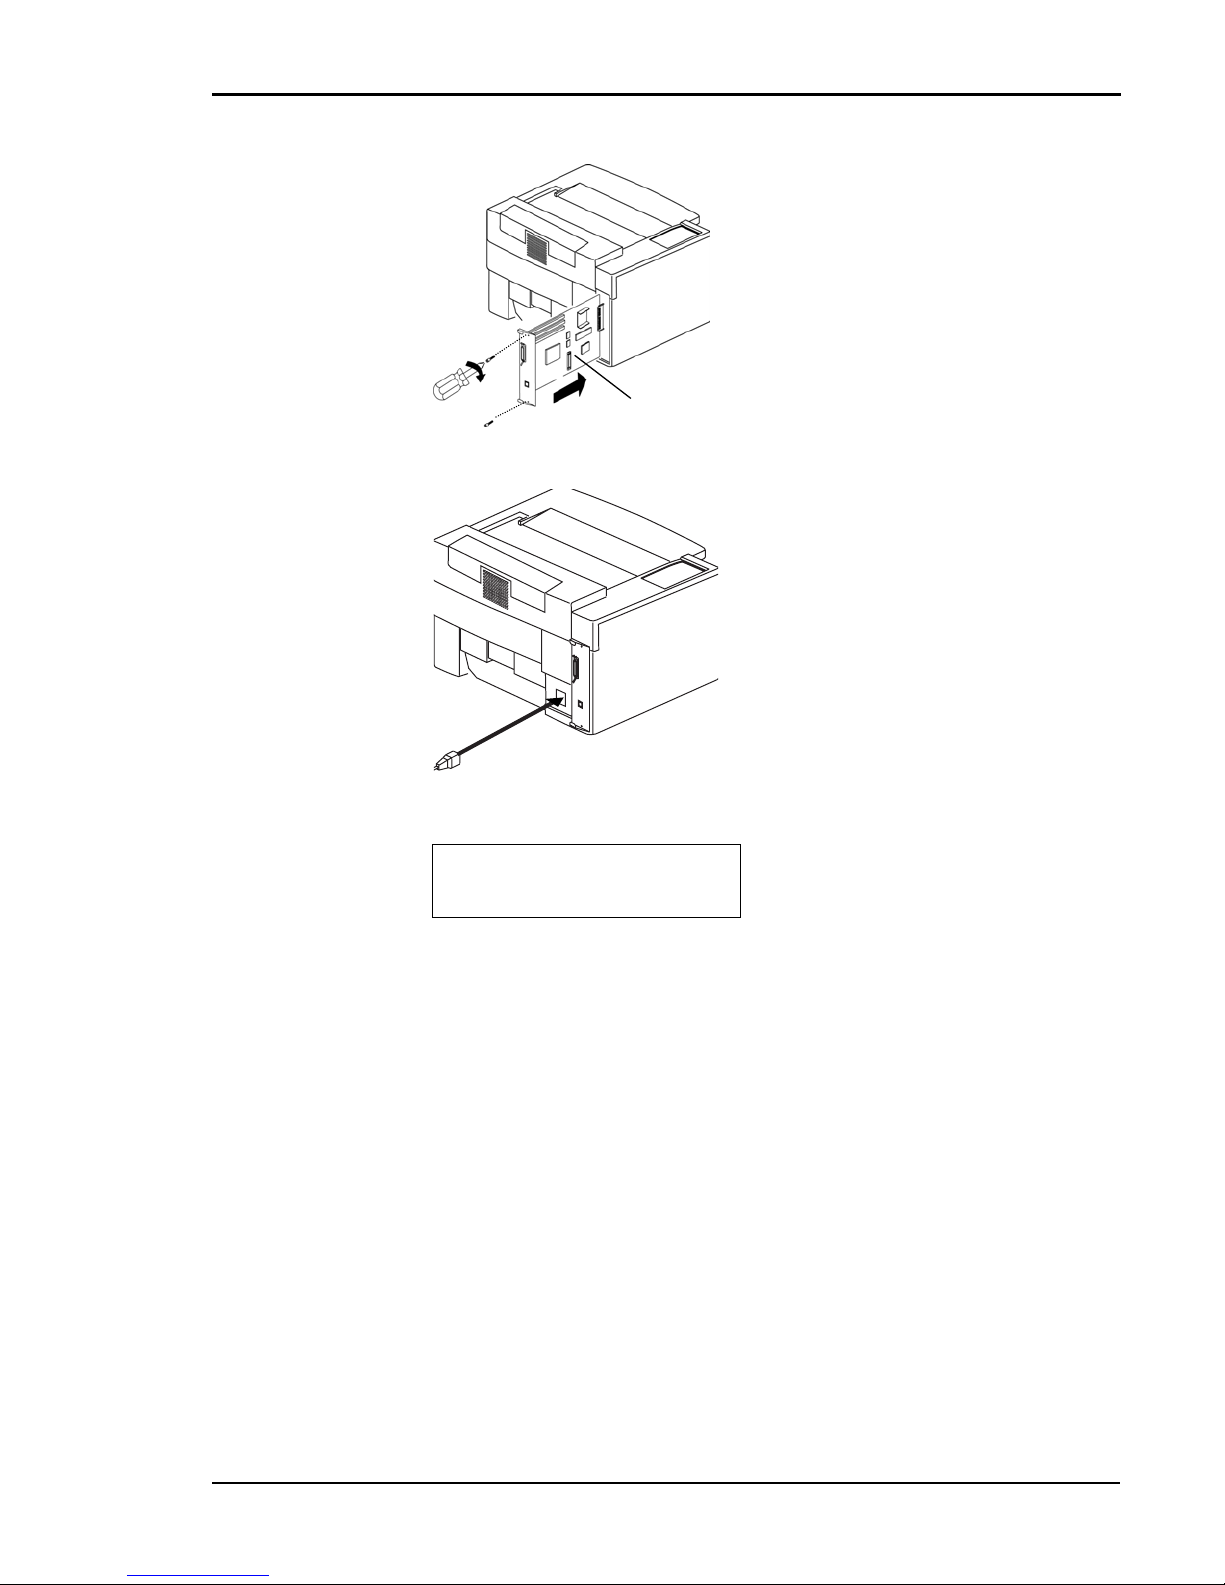
Chapter 8 Options and Accessories
85
8. Slide the controller board back into
the printer and reinstall the screws.
9. Connect the power cord and the
interface cable to the printer.
TEST00
DRAM RW $$M
10. Turn on the printer and ensure that
during the self-test cycle, the display shows the new memory in the
DRAM tests. If the memory indicated is incorrect, reinstall the
memory module.
$$ is a running count of bytes
tested (1M, 2M, 4M, 8M, 16M,
32M, 64M, 96M).
Note: The amount of memory installed is shown on the bottom row of the display
immediately after start-up.
Page 94
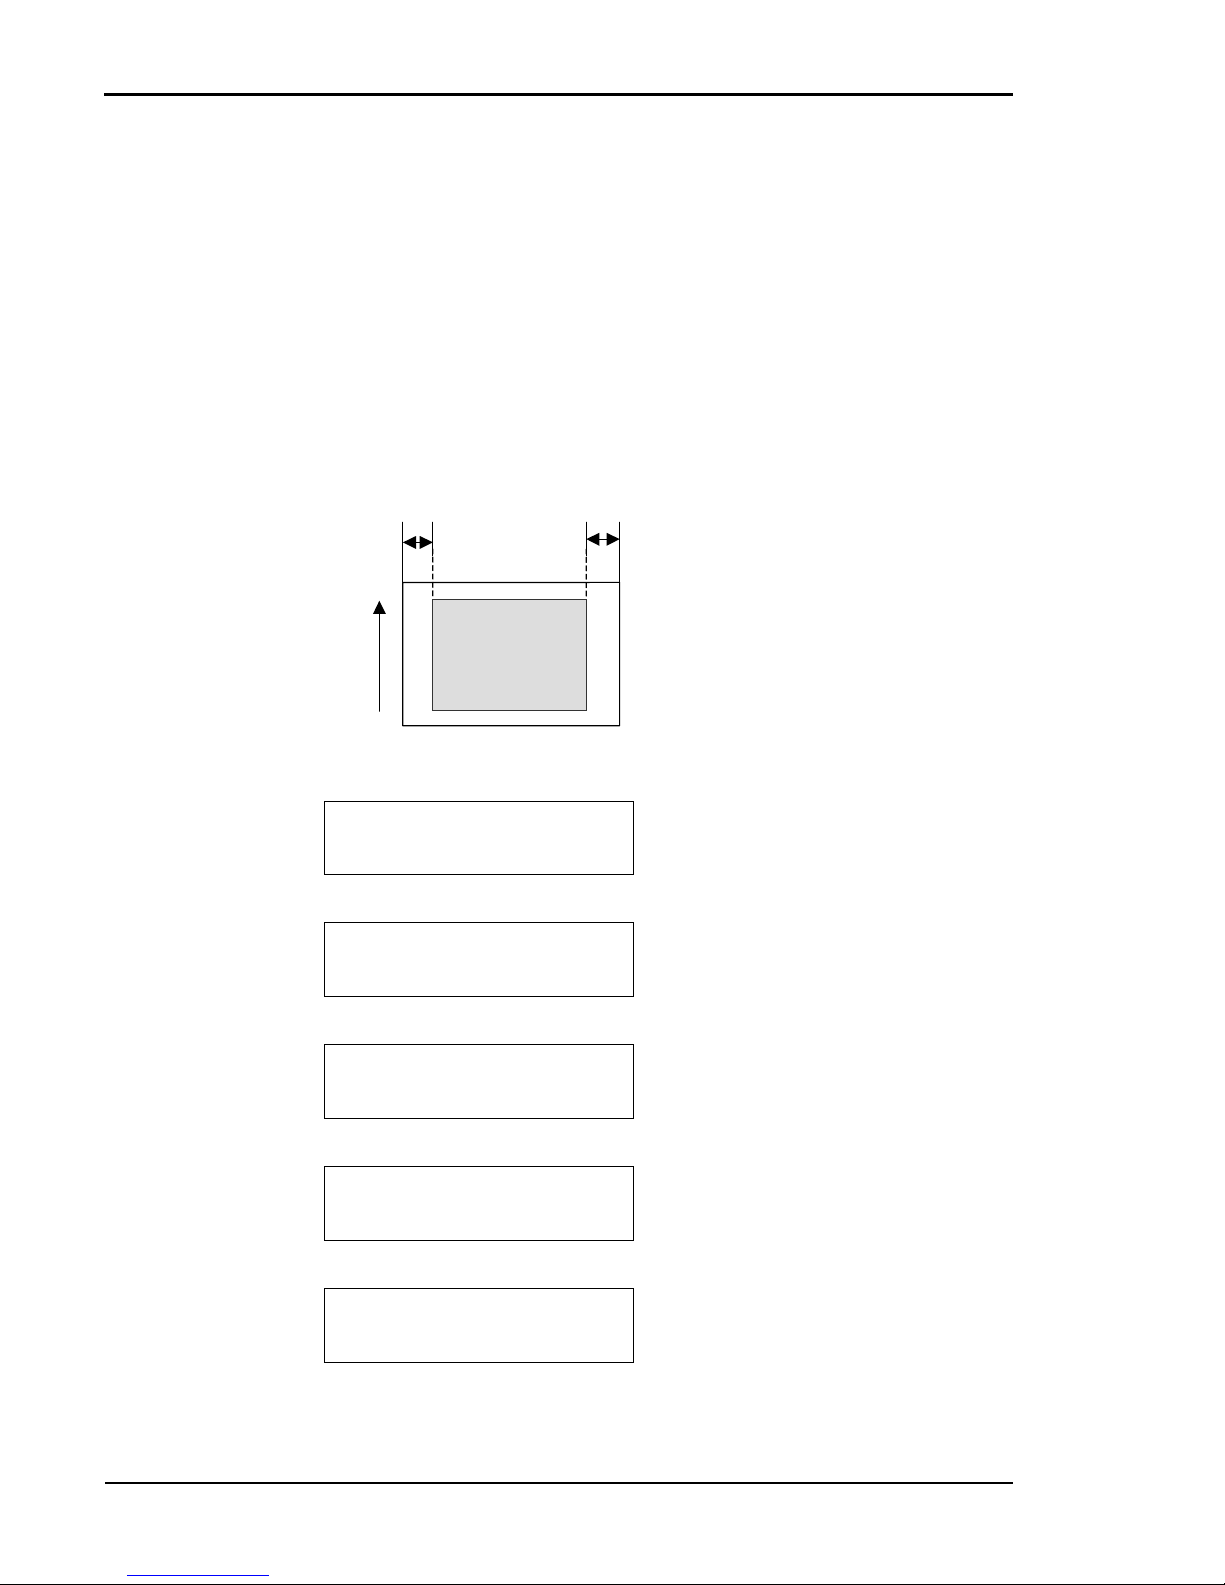
Tally T8006e Color Laser Printers User Guide
86
Installing the Duplex Printing Unit
For details on how to install the optional Duplex Unit, see the operation
manual supplied with the Duplex Unit.
For details on how to install the optional paper feeder, see the operation
manual supplied with the paper feeder.
Adjusting the Paper Feeder
When printing from the paper feeder, if your documents are not centered
on the paper, use the following procedure to adjust the margins of the
documents.
1. Set the paper feeder as the source
tray and print a test pattern.
2. Measure the left margin and right
margin in millimeters.
3. Subtract the left margin from the
right margin and multiply the result
by five.
4. Restart the printer while holding
down the MENU key on the control panel.
Utility Menu
Tray 2 Margin
5. In the Utility menu, adjust the Margin settings using the menu navigation keys.
Utility Menu
Tray 2 Margin
6. Select the appropriate paper tray.
Select Margin 2
0
7. Press the ENTER key. The current
settings appear at the bottom of
the display.
Select Margin 2
-15
8. Use the navigation keys to change
the value to the number calculated
in step 3.
Tray 2 Margin
New:-15 Old: 0
9. Press the ENTER key to update
the settings.
Printed image
Paper feeding
direction
A B
Page 95

Chapter 8 Options and Accessories
87
Utility Menu
Tray 2 Margin
10. Press the ENTER key again to
confirm the settings.
11. Restart the printer.
12. Reprint the test pattern and check
the margins.
Page 96

Page 97

89
Chapter 9
Troubleshooting
How to Solve Printing Problems
To correct a printer problem, use the troubleshooting tables in this
chapter as follows:
Possible causes are listed from top to bottom from the most to least likely.
Some corrections are summarized. If needed, these corrections are
supported by reference to detailed procedures in other sections of this
manual.
Caution! Do not disassemble the printer for further troubleshooting and/
or repair. If the problem is not found and corrected after following these
troubleshooting steps, contact a Tally Service Technician.
Paper Jam Areas
Paper jams are indicated by messages on the control panel display. The
messages give you the name of the jam area within the printer that needs
clearing or attention.
1. Locate your current printer problem in the left “PROBLEM” column.
2. Match the problem to the possible causes in the “POSSIBLE
CAUSE” column.
3. Match the correction procedure to the possible cause, and proceed
with the corrective action to solve the printing problem.
Page 98
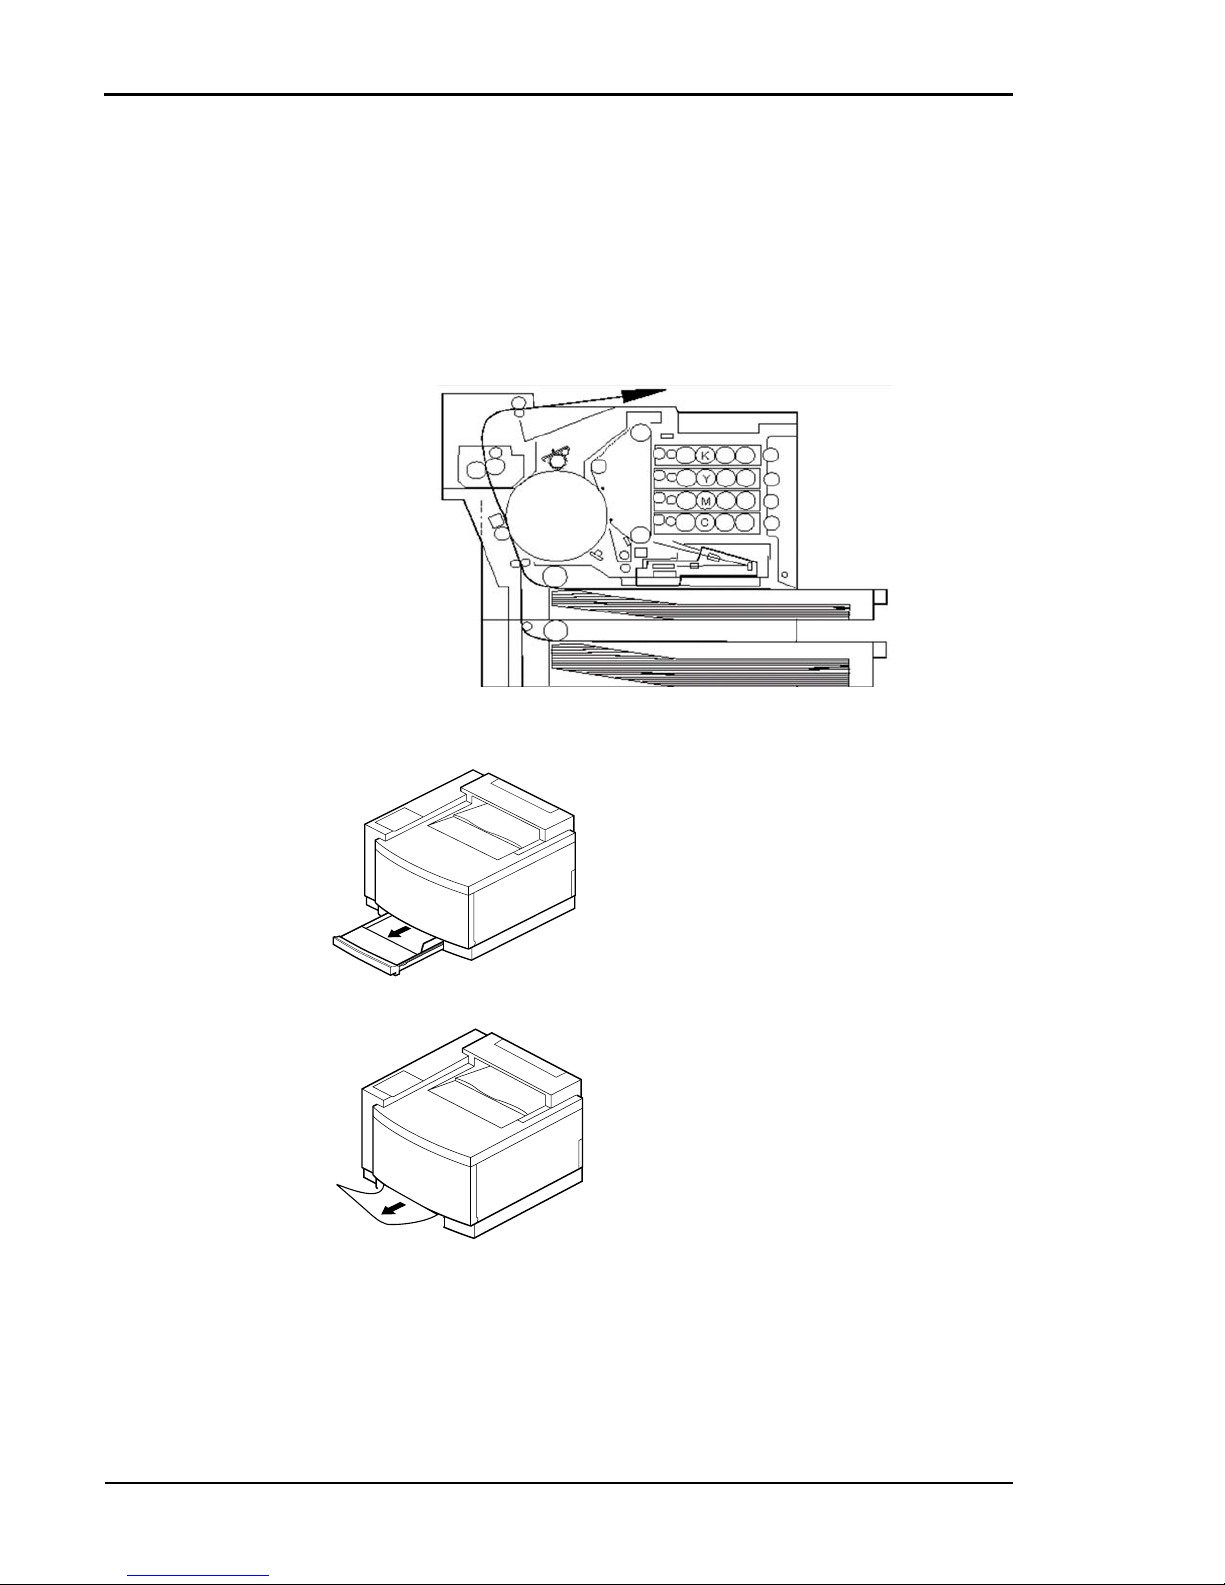
Tally T8006e Color Laser Printers User Guide
90
Clearing Jam 1
The illustration below shows the Jam 1 area within the printer. Jams
usually occur in this area because paper is jammed between the paper tray
and the transfer drum.
If you are unable to clear the jam or if the jam continues to occur, follow
the troubleshooting procedures at the end of the steps for clearing the
Jam 1 area.
Caution! Do not force jammed paper out of the printer.
.
1. Remove the paper tray indicated
on the control panel display.
2. Pull the jammed paper out of the
printer slowly and evenly.
Page 99
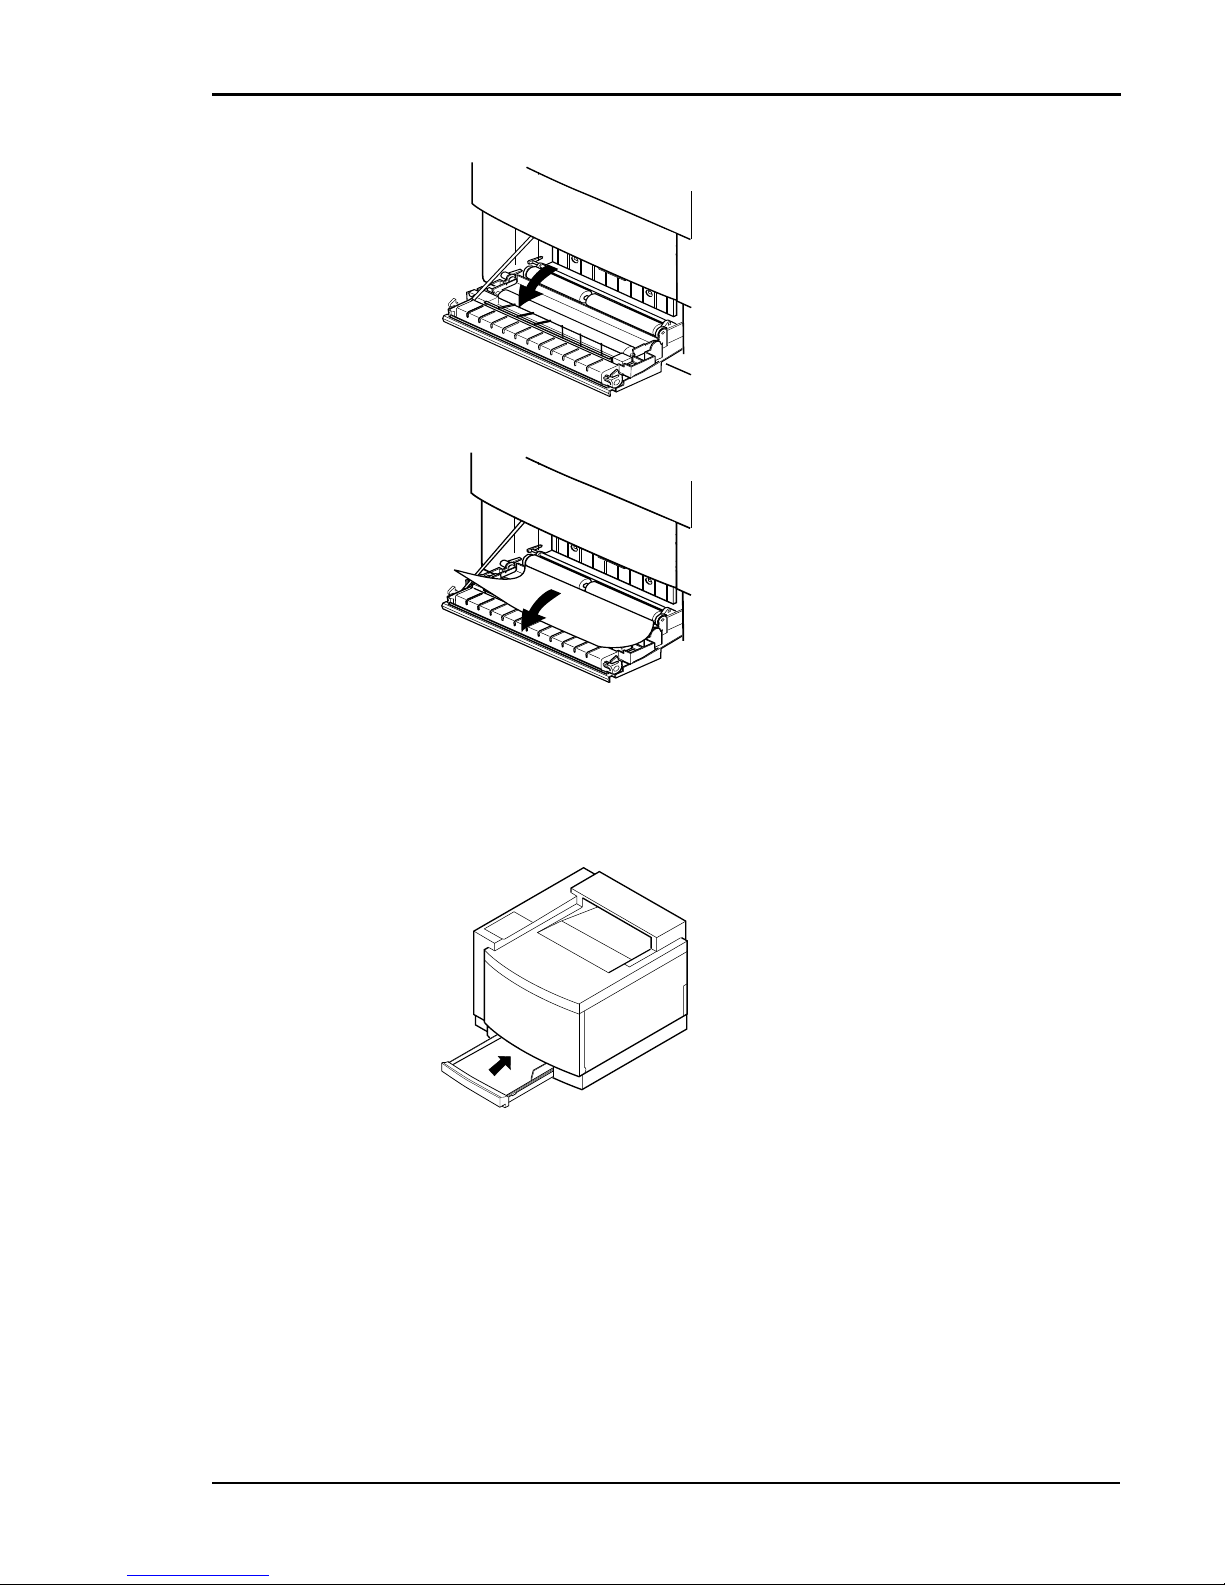
Chapter 9 Troubleshooting
91
Troubleshooting Jam 1
If jams occur often in the Jam 1 area, proceed to the following problemand-correction procedures.
Caution! Do not disassemble the printer for further troubleshooting and/
or repair. If the problem is not found and corrected after following these
troubleshooting steps, contact a Tally Service Technician.
3. Open the back cover(s) of the
paper feeder and/or the printer.
4. Pull the jammed paper slowly
and evenly out of the printer or
the paper feeder, whichever is
applicable.
5. Make sure that no jammed or torn pieces of paper remain in the
printer.
6. Close and carefully lock the back cover(s).
7. Insert the paper tray squarely and
evenly back into the printer.
8. Close the back cover carefully until it locks.
Page 100
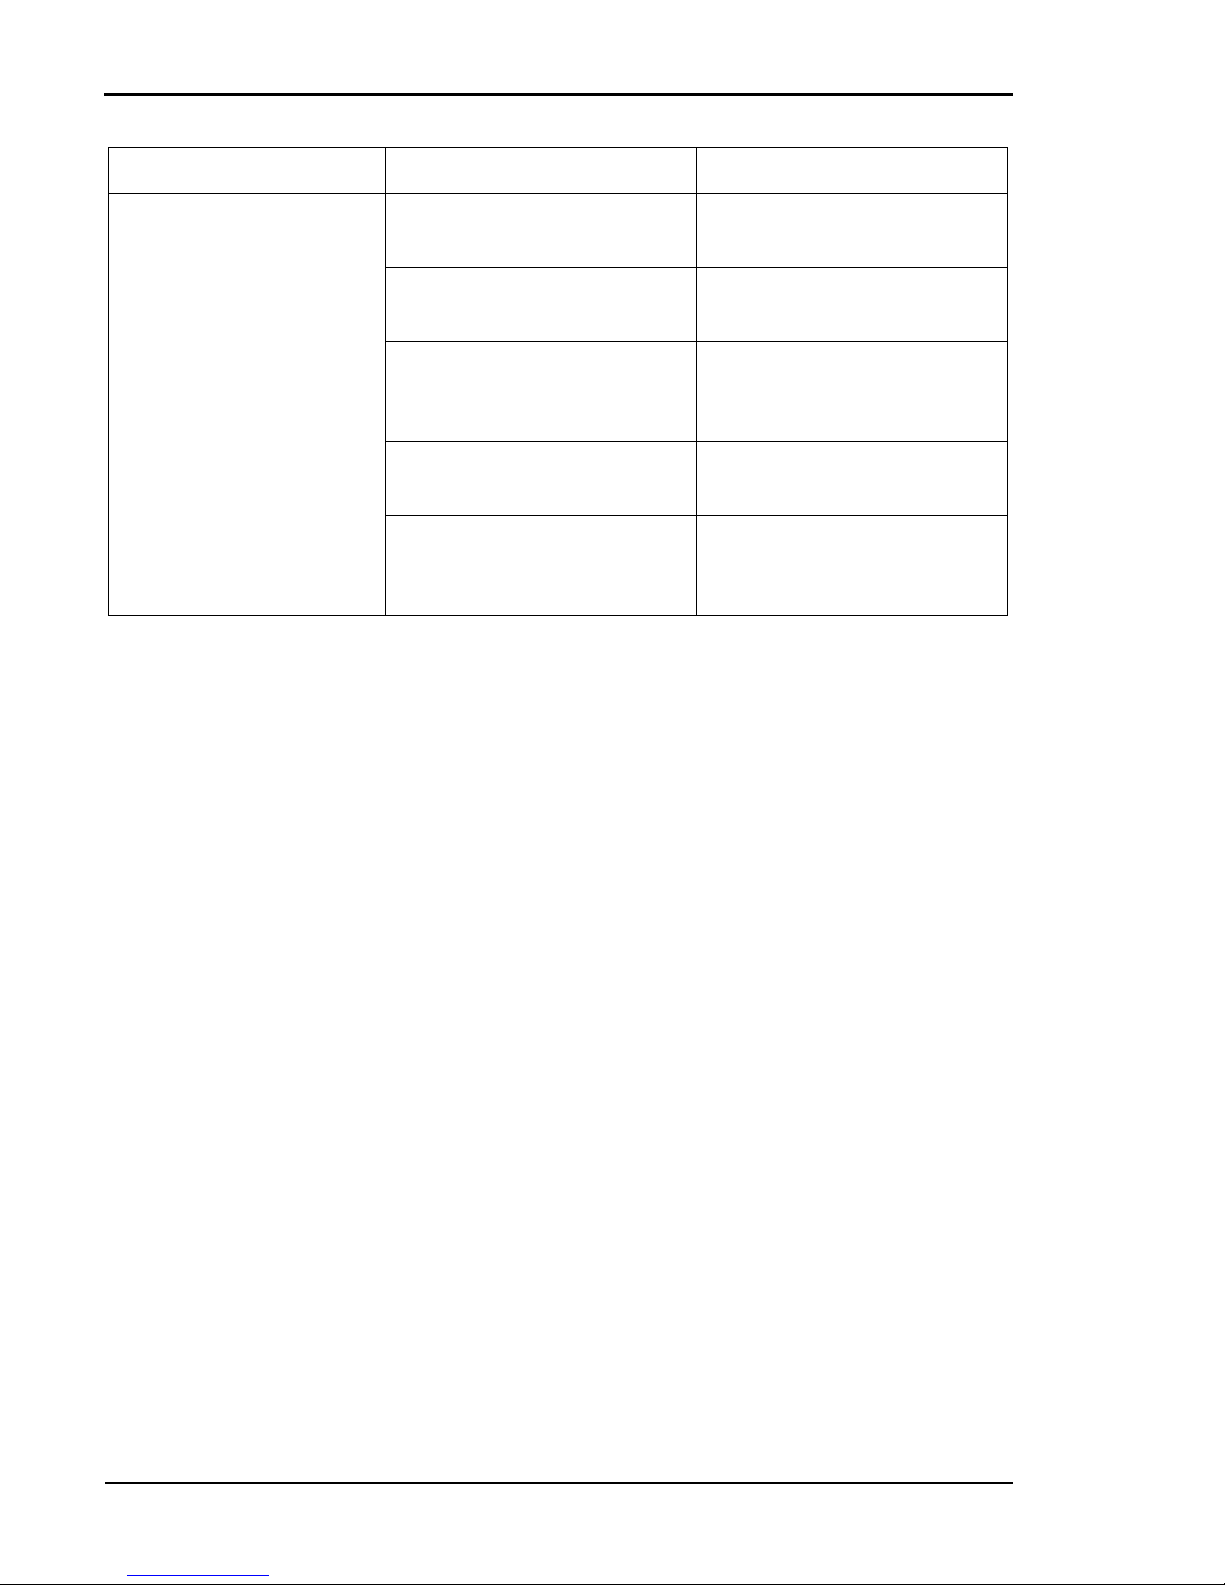
Tally T8006e Color Laser Printers User Guide
92
.
Jam 1 Possible Cause Correction
Paper from the paper tray
jams between the paper
tray and the transfer drum.
Too many sheets of paper are
in the paper tray.
Put the proper number of
sheets of paper in the tray.
The paper guides do not guide
the paper properly.
Adjust the paper guides to the
paper size.
Paper from a previous paper
jam is caught inside of the
printer.
Remove or release the paper.
The paper is damp from infrequent use of the printer.
Reload paper trays with fresh
paper from new packages.
The paper or material is the
wrong thickness for proper
printer operation.
Reload trays with paper or
material of the proper thickness.
 Loading...