


VIP3000 Visually Impaired Programmable Thermostat / Customer Information
C
Large Print Customer Instructions
Visually Impaired Programmable
Talking Thermostat™
VIP 3000 Model
For 3 Stage Heat & 2 Stage Cool
Conventional & Heat Pump Systems
ongratulations on acquiring the VIP3000 “Talking Thermostat™” specifically
designed for visually impaired and blind users. The VIP is the first digital
thermostat with audio playback of day, time, indoor temperature, system settings,
temperature settings and programming instructions so visually impaired and blind
users can precisely and easily manage their indoor comfort.
SECTION 1: GETTING TO KNOW THE VIP3000
The best way to get familiar with your new VIP3000 thermostat is to pick it up and
examine it! Knowing where everything is located will help you to easily follow its
voice instructions.
To get your bearings, hold the VIP3000 thermostat in both hands. The thermostat’s
dimensions are approximately 7 inches across, 4 inches high and 1 inch deep. Feel
for the side with some rubber buttons, a display screen and a swing down panel
door. That’s the front side. Have that side face towards you. Feel along the
backside of the thermostat until you touch a flexible plastic ribbon. This ribbon
prevents the batteries from discharging during shipping. Remove this ribbon by
gently pulling until it is separate from the thermostat. The thermostat should now
have power from the batteries.
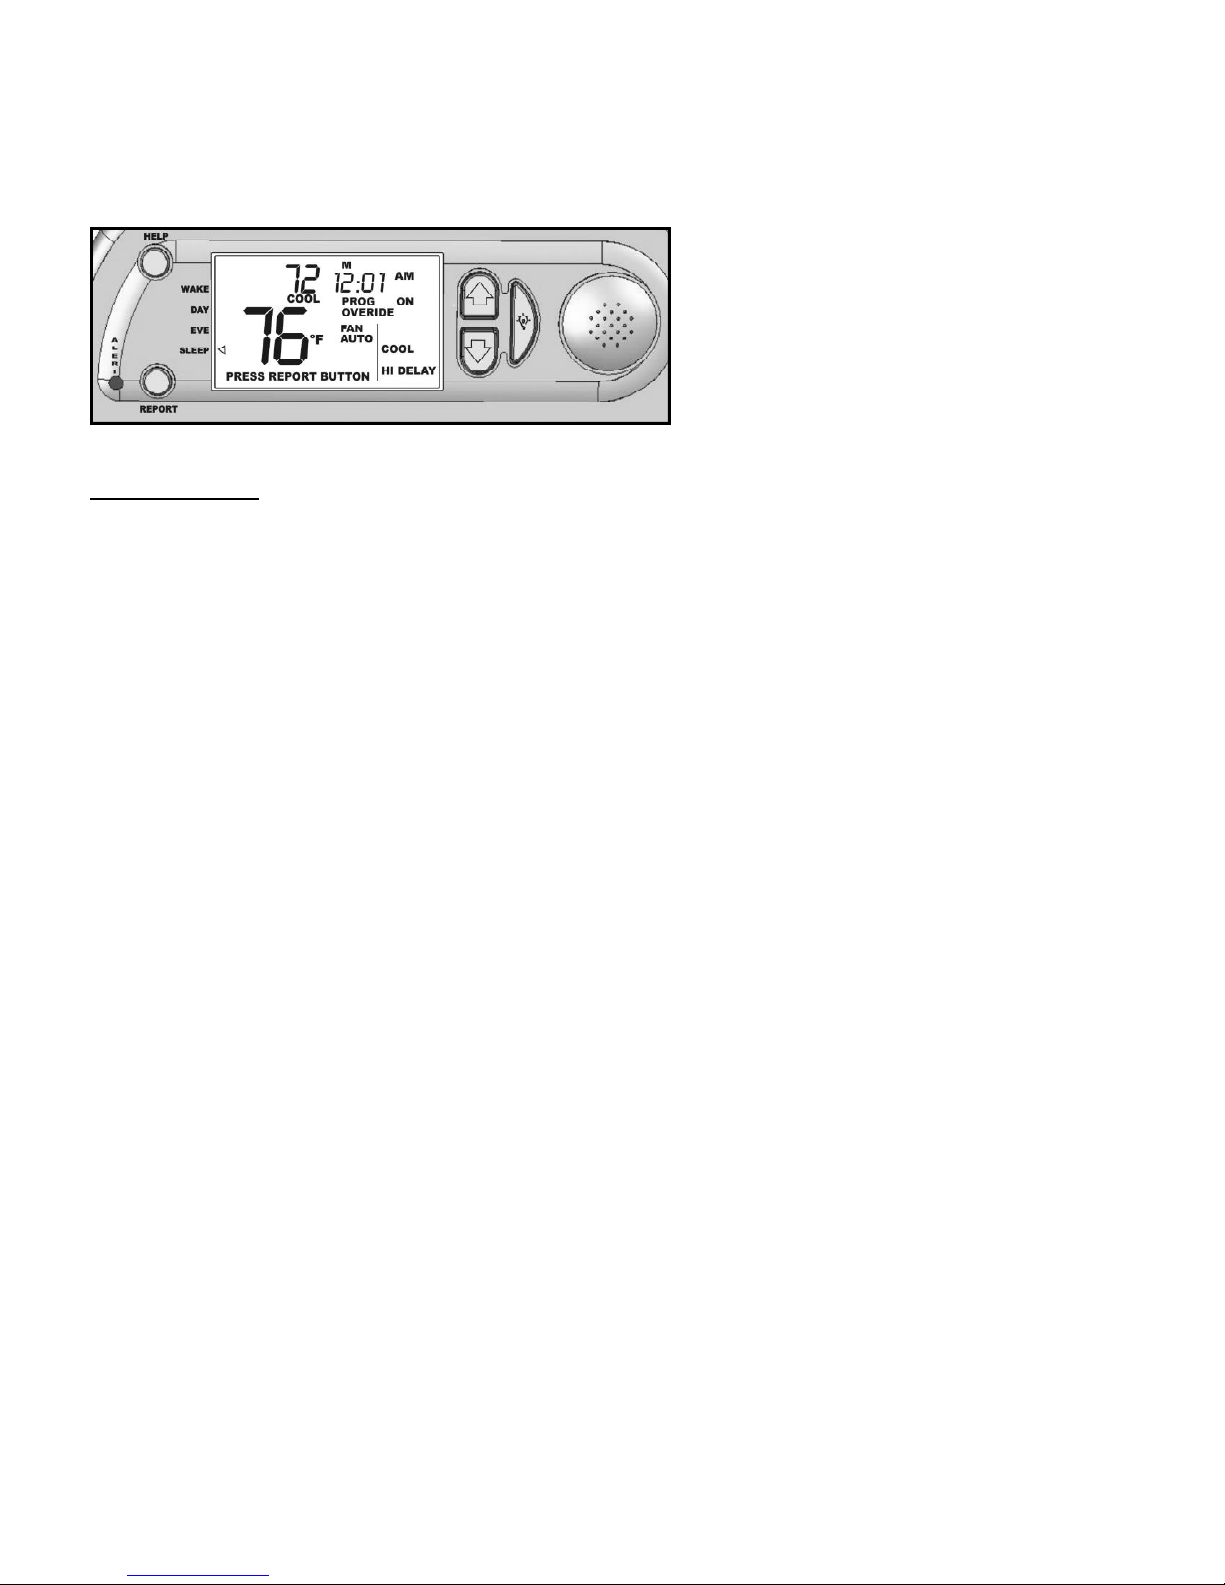
Return your hands to their original positions. Move your left thumb up along the left
side until it meets the top curved edge. Now move your thumb down about a half an
inch until you feel a small round button. This is the HELP button. Press it and you’ll
hear useful service information. If you don’t hear anything, check that the batteries
are properly installed and are not discharged. To replace batteries please refer to
“Low Battery Alert and Replacing Batteries” section, located on page 12 of this
instruction pamphlet.
1

VIP3000 Visually Impaired Programmable Thermostat / Customer Information
Move down about an inch more until you feel another small round button. This is the
REPORT button. Press it and you’ll hear the indoor temperature, the system setting
and the temperature setting.
Now move your right thumb up along the right side until it meets the top curved edge.
Move down about an inch and you’ll find a one inch round protrusion for the speaker.
Move to the immediate left of the speaker and you’ll find a crescent shaped button.
This is the BACKLIGHT button. Briefly press and, for sighted users, the display
screen will light up. Hold down the button for about 7 seconds and you will hear the
software version of your VIP3000 thermostat. Move your thumb slightly to the left
and you’ll find two extended half round buttons, one above the other, separated by
about quarter inch space. These are the UP and DOWN buttons used to adjust
temperature settings. The top button is the UP button and the bottom button is the
DOWN button. Briefly press the UP button and, with each press, the temperature
setting is raised by one degree. Briefly press the DOWN button and, with each
press, the temperature setting is lowered by one degree
Move your right thumb down one inch and then a little to your left until you find a thin
one inch horizontal, raised plastic tab. This is the pull used to open the panel door.
Gently pull it down with your thumb and the front panel door will swing open. You
can now access the buttons that operate the thermostat.
Place the VIP thermostat, front side up, on a flat surface. Place your finger inside
the open panel door and move it right until you feel two large, side by side, half
round buttons. The one on the right is the SYSTEM button. It controls which mode
your system’s running. Press it and you’ll hear “OFF”. Press again and you’ll hear
“COOL”. Press again and you’ll hear “HEAT”. Press it one more time and you’ll
hear it return to “OFF”.
Move your finger just a little left of the SYSTEM button and you’ll feel another large
half round button. This is the FAN button. It’s used to control your system’s fan.
Press this button once and you’ll hear “FAN AUTO”. In the AUTO position the Fan
runs only when your heating or cooling system is operating. Press the Fan button
again and you’ll hear “FAN ON”. In the ON position the fan will constantly run.
Press it one more time and you’ll hear it return to “FAN AUTO”.
Move your finger a little left and you’ll feel a vertical plastic ridge. Move past it, left
another half an inch, and you’ll find two half round buttons; one above the other. The
top one is the YES button. Below it is the NO button. These are used to accept or
decline programming changes.
Move your finger left about one quarter inch until you find two more half round
buttons one above the other. The upper button is the WEEKEND button. The
2

VIP3000 Visually Impaired Programmable Thermostat / Customer Information
WEEKEND button is used to set up Saturday and Sunday programmable settings.
The lower button is the WEEKDAY button. The WEEKDAY button is used to set up
Monday through Friday programmable settings.
Move your finger left about one quarter inch until you find two more half round
buttons one above the other. The top button is the PROG button. The lower button
is the RUN button. Press the PROG button. If you hear “Program is Off” the
thermostat is set to run as a conventional thermostat. If you hear “Program is On” the
thermostat is set to programmable operation. Press the PROG button again and
you’ll hear the opposite setting. Below the PROG button, is the RUN button. It’s
pressed to accept program changes and is used much like a computer’s “Enter” key.
Move your finger left one quarter inch until you find two more half round buttons one
above the other. The top button is the DAY/TIME button. Briefly press this button
once to hear the current day and time settings. Quickly press it twice to change day
and time to the correct settings. Below the DAY/TIME button is the RESET button.
Briefly press the RESET button if you wish to exit a program setup without accepting
any changes.
Move your finger up about an inch above the panel door until you feel a smooth, two
and a half inch by one and half inch rectangular surface. This is the display screen
for sighted users. All operations that are spoken are also displayed on this screen.
That’s it! For more information about the function of each button refer to Inside
Panel Door Buttons and Case Buttons & Display Screen in Section 2 below.
SECTION 2: BUTTON FUNCTIONS AND OTHER FEATURES
Now that we’ve reviewed the general layout, let’s go over the function of all buttons
and other features. As each is reviewed, try to locate them on your thermostat.
Inside Panel Door Buttons
Most of the set up buttons are located inside the front panel door. Gently pull the
door down to access the following buttons:
3

VIP3000 Visually Impaired Programmable Thermostat / Customer Information
• RESET Button: Briefly press when you wish to exit program setup without
accepting any changes. Your original program settings will be maintained.
• DAY/TIME Button: Press briefly once to hear current day and time settings.
Quickly press twice to hear instructions on adjusting the day and time settings.
• PROG Button: Press to turn the programmable operation on and off. When on
you'll hear, “Program is On”. When off you'll hear, "Program is Off”. Pressing
repeatedly toggles operation back and forth, between settings. (When program is
on, sighted users will see the words “PROG ON” on the display screen
• RUN Button: Press to accept a programming change. This button is very similar
to a computer’s “Enter” key. It can also be used to turn off a temporary override of
a programmable temperature setting. (For the sighted user the word “OVERRIDE”
appears and disappears from the display screen when override is on and off).
• WEEKEND Button: Press to program Saturday and Sunday time and temperature
settings
• WEEKDAY Button: Press to program Monday through Friday time and
temperature settings
• YES Button: Press to accept making a program change.
• NO Button: Press to decline making a program change or to skip a time period
during programmable operation set up.
• FAN Button: Each press changes the fan operation. When you hear “Fan On”, the
fan runs continuously. When you hear “Fan Auto”, the fan runs only when heating
or cooling is operating. If you hear “Fan Indoor Air Quality” the fan is programmed
to run a selected number of minutes, on the hour, every hour. (Sighted users will
see the words “ON”, “ON AUTO” or “ON IAQ” below the word “FAN” on the
display screen).
• SYSTEM Button: Each press changes the system operation setting. When you
hear “OFF” the thermostat is off and neither heating nor cooling will run. When
you hear “COOL” the thermostat is set to bring on air conditioning. When you
hear “HEAT” the thermostat is set to bring on heating. If you hear “AUTO” the
thermostat is in auto change-over and system operation will automatically change
from heating to cooling, and vice versa. If you hear “AUXILIARY” you have a
heat pump system and thermostat is set to run in emergency heat. (Sighted users
will also see the words “OFF”, “COOL”, “HEAT”, “AUTO” or “AUX” in the lower
right of the display screen)
4
VIP3000 Visually Impaired Programmable Thermostat / Customer Information
External Case Buttons & Display Screen
Case Buttons
For easy access, routinely used buttons are located on the case, outside the panel
door. They’re as follows:
• HELP Button: Press this button to hear important system service information.
• REPORT Button: Press this button to hear the indoor temperature, the system
setting, the temperature setting and, if present, any alert conditions.
If you don’t hear the audio or hear a low battery warning when the REPORT button
or the UP or DOWN buttons are pressed, replace the batteries as explained on page
12. (Sighted users will also see “PRESS REPORT BUTTON” and “LO BAT” appear
on the display screen.)
If you hear the alert, “It’s time to check your air filter”, after pressing the REPORT
button; your system has run a sufficient number of hours to require your air filter be
cleaned or replaced. (Sighted users will also see the words “PRESS REPORT
BUTTON” and “CHK FILT” appear on the display screen).
If you hear the alert, “Your system has run the recommended number of hours before
requiring service”, it’s time to contact your service company for routine system
maintenance. (Sighted users will also see “PRESS REPORT BUTTON” and “CALL
FOR SERV” appear on the display screen). After your system’s been serviced, this
alert is cleared by pressing and holding the NO button down for 7 seconds.
If you hear the alert, “It’s time to service your air purification system”, your UV light bulb
is near the end of its life expectancy and should be replaced. This alert is, by
default, set not to be active. UV Lights are used for air purification and, if you have
one, to activate this alert please refer to “UV” in the table on page 15 of the “VIP3000
User’s Guide” or contact your service company.
5
 Loading...