


TAKOON would like to thank you for purchasing this TAKOON kite, and for your confidence in the high quality of our
products. Before any attempt to use this product, please ensure you pay full and careful attention to the contents of
this manual. Although exciting and attractive, kitesurfing can prove to be highly dangerous and, in some cases,
even fatal if essential safety rules are ignored. We recommend proper instruction from a certified kitesurfing school.
Reading this manual will help you for safe and enjoyable use of your new kite, but nothing replaces proper
instruction. Safety, assembly, flying and maintenance are explained in this manual.
TAKOON vous remercie pour l’achat de votre nouvelle aile TAKOON, ainsi que de la confiance que vous avez bien
voulu nous porter. Avant toute utilisation, nous vous prions de bien vouloir lire ce manuel pratique avec la plus
grande attention. La pratique du kitesurf, aussi attrayante qu’elle soit, peut s’avérer très dangereuse, voire mortelle
si les règles élémentaires de sécurité ne sont pas respectées. Ce manuel vous aidera à faire connaissance avec
votre aile, et vous fournira toutes les informations nécessaires pour une bonne utilisation. Il vous guidera dans votre
apprentissage et votre perfectionnement. La sécurité, le montage de l’aile, son pilotage ainsi que les conseils
d’entretien y sont expliqués en détail.
1-Introduction/Introduction
2-Safety/La sécurité
3-Wind: basic principles/Le vent: Notions de base
4-Contents of this product/Présentation générale
5-Assembly and adjustment/Mise en place de l’ aile
6-Quick releases and rules for launching the kite/Systèmes de largage et règles de décollage du kite
7-Tuning the TAKOON kite your kite/Régler votre kite TAKOON
8- Common mistakes/Les erreurs les plus fréquentes
9-Maintenance/Conseils d’entretien
10-Repairs/Réparation
11-Right of way and courtesy/Regles de priorité et de courtoisie
12-Glossary/Glossaire
Table of contents/table des matières

1- Introduction
You must read and understand the entire contents of this manual before any attemp to fly your kite. This manual
is made to help you operate your new kite, but nothing replaces proper instruction.
You must be fully aware of the risks that go with this sport, and know that you are exposing yourself to real
danger. Inappropriate use of traction kite devices can cause severe accidents or even lead to the death
of the user or third parties. It is heavily recommended to undergo an initial training in a recognised kitesurf
school.
TAKOON is a partner of IKO international school network. As defined by this user
manual, the distributors of our products are under no circumstances liable for
material or bodily damage sustained as a result of inapropriate use of this product.
2- Safety
2.1 – Essential rules
• Never forget that you are responsible for any material or bodily damage sustained while using this product.
Check that you are insured against damages resulting from the sport of kitesurfing.
• Use your common sense at all times.
• NEVER kitesurf ALONE. An assistant is a considerable safety asset,on land as well as at sea.
• NEVER attach yourself permanently to your kite by any means (e.g.tying the lines onto your harness).
It is imperative that you are able to disconnect yourself from the kite quickly if you are experiencing difficulties.
• Always use the kite leash when operating your kite. You must not dismantle or modify the quick releases built
into your control bar.
• Respect local regulations pertaining specifically to this sport.
• Kitesurfing is an exhausting sport, especially for beginners who will tire more quickly. Learn to recognise the
early signs of fatigue and come in to rest.
• It is essential to know how to swim.
• You must be fully comfortable with procedures for launching, landing, and returning to the beach in case of
difficulties.
• Never operate your kite while you are attached to a fixed object such as a car or a tree.
• This kite is designed specifically to be used as a traction device for kitesurfing, and must never be used for
paragliding or any other forms of unassisted flight.
• Never touch the bridles or flying lines while they are under tension.
• If your kite is not in use but is inflated, it must be secured in the neutral position using sand or heavy objects.
• Never lend this kite to anyone who is unfamiliar with the power developed by dedicated traction devices.
• For your safety and for others around you, never accept assistance from a person who might not be
competent in landing or launching procedures.
2.2 – Operating space
On the ground
• You must check that your chosen operating space is free of any
obstacles, people or animals. To manoeuvre your kite, you need AT
LEAST 100 METERS DISTANCE on either side of your kite, as well
as DOWNWIND (the area in front of you when your kite is air-borne).
Be especially careful about obstacles downwind of you.
• Before launching, be sure to have identified a safe landing area
further downwind, in the event you are not able to return to your
departure point.
• Never use your kite near people, animals, posts, trees, buildings,
cars, power lines, airports, roads, etc…
On water
• Your operating space must be completely free of boats, buoys,
rocks, pontoons, piers, jetties, etc… Stay as far away as possible
from swimmers, and don’t sail in shipping lanes.
•Avoid vertical areas bounded by rocks or cliffs where the wind might
be extremely turbulent.
Min 100m
Danger zone
Avoid this area
Flying Zone
(= zone between kite & pilot)
STAY OUT OF THIS AREA
wind
Min 70m Min 30m

2.3 - Weather
• Never underestimate the wind and sea conditions.
• Consult the local forecast before setting out.
* Never attempt to kitesurf in changing or stormy weather conditions.
* Never attempt to kitesurf if the wind is strong and gusty.
* Never attempt to kitesurf if the wind is off shore, blowing you away from land.
* Never ride in or near electrical storms as the lines will massively increase your chances of electrocution.
• Find out about tides and areas with strong currents.
• Beginners must sail in calm sea conditions.
• Take time to gauge the wind speed once you have reached your chosen sailing area.
• If you are not confident in evaluating the forecast, speak to someone who is competent in forecast interpretation.
• Wear suitable equipment to avoid hypothermia-related accidents (wetsuits and drysuits).
* Safety helmets and impact vests are strongly recommended.
2.4 – Beginners
• TAKOON kites (specially Skoop2) are a performance kite which is not suitable for beginners.
• We highly recommend practising on a very small traction kite before attending a kitesurf school, as you will find
this dramatically reduces the time it takes you to learn the basics.
• Learn how to fly the kite on land in wide open spaces before venturing to the water.
• Always choose the size of kite that corresponds to your weight and level of competence.
2.5 – Good conduct
• Be respectful of other people out on the water: swimmers, surfers, windsurfers, jet skis, pleasure craft etc…
• Follow the rules of priority on the water.
• Make sure your lines are not laid out in an area used by pedestrians. Wind up your lines when not in use.
• Do not let anyone move between you and your kite.
• Help other kitesurfers with launches and landings. You’ll appreciate their help when it’s your turn!
• If necessary, explain the essential safety rules to other kitesurfers.
• Don’t touch other kitesurfers’ equipment unless specifically asked.
• Usually check and test your quick releases
2.6 – Appropriate clothing
The following is a list of indispensable kitesurfing
gear:
Never forget: it’s easier to kitesurf if you’re alive !
3- Wind: Basic principles
3.1 – Wind strength
Wind strength can be measured with the
Beaufort scale, miles/kilometres per hour, or
knots.
Important:
merely for guidance and should not be your
only criterion for gauging wind strength: you
should also take into account its ‘density’ and
how gusty it is.
Never use your kite in extremely gusty
conditions : even if you do escape injury you
won’t enjoy the experience anyway!
the wind scale supplied below is
1 knot = 1,852 km/h
essential recommended
Neoprene wet suit
helmet
Life jacket/impact vest
sunblock
Line cutter Gloves and boots
Bft Km/h Knots Description
0 <1 <1 Calm, smoke raises vertically
1 1-5 1-3 Light air
2 6-11 4-6 Gentle breeze
3 12-19 7-10 Flags extended
4 20-28 11-16 First white caps appear
5 29-38 17-21 Trees begin to sway
6 39-49 22-27 Sand blows on the beach/not for beginners
7 50-61 28-33 Breaking waves blow in streaks
8 62-74 34-40 Resistance felt in walking against wind
9 75-88 41-47 High waves and large spray
+ >89 >48 Go home and drink a beer
10

3.2 – Choosing which size to operate
YOU MUST ALWAYS USE THE RIGHT KITE SIZE FOR
THE GIVEN CONDITIONS.
The weight of the rider is a major factor in choosing the
surface area of the kite .
Wind direction
Make sure the wind direction is suited to the spot you have
chosen for sailing.
The ideal is cross-shore that is blowing parallel to the
beach.
NEVER launch your kite in an offshore or cross-offshore
wind.
Onshore wind can be good for the competent kitesurfer but
is dangerous because of objects down wind. Sail well off
shore.
3.3 – Turbulences
Cross-shore wind
side shore wind
w
wind
e
r
o
off
-
h
s
f
f
o
-
Cross
e
d
i
s
w
e
r
o
h
s
w
n
onshore wind
on shore wind
d
n
i
wind
off shore wind
Offshore
i
s
e
d
o
-
o
r
C
n
o
-
s
s
LAND
Land
Obstacles situated upwind of
you can create turbulent airpockets, which often lead to
your kite stalling & depowering
abruptly, falling from the sky,
and suddenly powering up
dangerously.
Turbulence is present for a
down-wind distance equivalent
to approximately 7 times the
height of the obstacle.
d
n
i
d
n
i
Warning: wind is always stronger at altitude than it is at ground level, be sure not to let this catch you unaware.
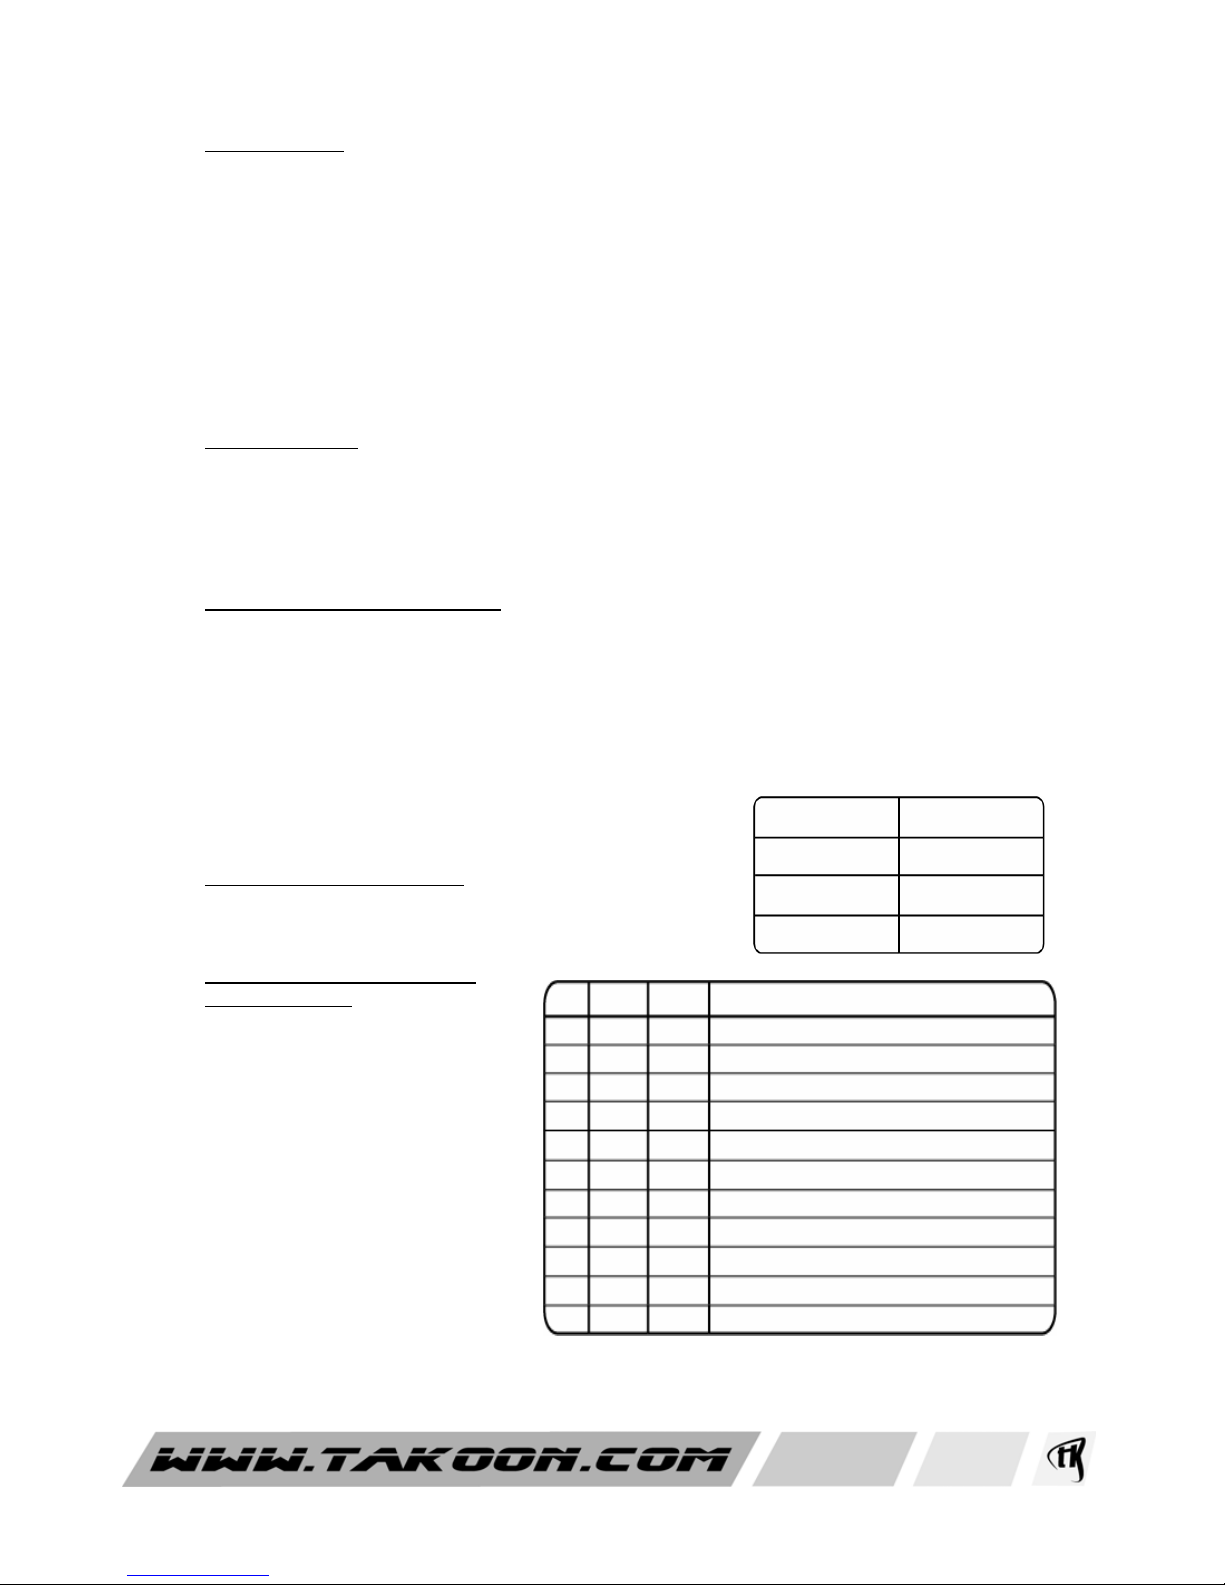
3.4 – The ‘wind-window’
This is a theoretical concept which you must have clear in your mind before using this kite. The windwindow is the region of 3-dimensional space in which your kite will operate, and resembles one quarter of
a sphere.
IMPORTANT: The power generated by your kite will vary according to which part of the window it is flying
in.
Wind Window & Power Zones
Neutral zone
Power zone
Minimum power is at the ‘zenith’(directly above you),this is
called the neutral zone. Maximum power is generated when
the kite is located at the centre and towards the bottom of the
window, which is in effect dead downwind of you. Never fly
your kite in this power zone.
On the extreme right and left-hand edges of the window, the
power generated is moderate. These are the zones you will
mostly fly your kite in while sailing.

4- Contents of this product
struct
Trailing edge
PARTS LIST
•TAKOON kite
• Flying lines
• Control bar
•Kiteleash
• Complete harness loop with
quick release
•Storagebag
• Hand pump
• Repair kit and connectors
Leading edge
Adjustement strap for
center line
Your TAKOON kite comes with our 4 lines control
system, which is made for more refined flying
characteristics and better power control thanks to the depowering mechanism.
The result is more comfortable and controlled sailing in
irregular winds, and the option to spill excess power in
severe gusts.
never forget that 4 lines flying is
Back lines
Warning:
more complicated than 2 lines flying.
This kite is not intended for beginners, and you
must have mastered dedicated traction-kite
flying before attempting to launch this power
tool.
Never over-estimate your own ability.
Front lines
kite leash
Quick release

5- Assembly and adjustement
Before assembling your kite, make sure the operating space you have chosen is
suitably free of obstacles and measures at least 100m by 100m.
The bar is supplied with lines attached- you only have to connect the line to the
kite before launching.
5.1– Setting up the kite
Your kite takes its shape from several vertical inflatable
struts, and one large horizontal inflatable strut called the
leading edge.
Unroll your kite with its outer surface on the ground, and
the leading edge towards the wind. You should stand with
your back facing the wind as close to the leading edge as
possible, especially in high winds.
Before using the pump, operate it a few times to eject any
sand left in the tube. This will prevent any sand from
entering the kite’s inner tubes, thus increasing the life of
the tubes.
Inflating the struts:
You can hold the pump perpendicular to the valve. Stop to
inflate when the pumping become hard. Close the valve and
secure it shut using the velcro strap.
If any air escaped while closing the valve, the strut will be underinflated and you should repeat the whole procedure. Inflate the
leading edge strut last. Use the pump leash to attach the valve
of the struct of the middle to the pump. Like this you can pump
easier using your two hands to handle the pump (see pictures).
Important
touch, they are sufficiently inflated. Over-inflation can lead to
burst inner tubes, especially if the struts are left exposed to the
sun for a long period. Equally, you should not under-inflate the
struts as the kite will not hold its correct shape. This can lead to
poor flight characteristics and, more importantly, difficult
relaunching from water.
Once the kite is correctly inflated, flip it over so that the the
leading edge is on the ground and perpendicular to the wind.
The fabric of the kite (canopy) should be down wind and the kite
should not be catching the wind.
To secure the kite from blowing away, place sand on the fabric
of the kite (canopy), just behind the leading edge. This is the
neutral position on the ground.
: Do not over-inflate the struts. If they feel rigid to the
sand

5.2- Connecting the lines to the kite
Your bar is supplied with yellow and grey back lines (yellow for the
left side and grey for the right side) and white front lines. Connect
your back lines to the back connectors of your kite using a Lark’s
Head knot (grey to grey for the right side and yellow to yellow for the
left back line). The front lines have to be connected to the connector
of the kite with the right color (grey to gray, yellow to yellow).
Your bar is made to avoid accidentally switching back lines and front
lines and between right side and left side connections. Be sure
lines are not tangled. Setting up the lines wrong is a major source
of accidents.
6- Quick releases and rules for lauching
6.1– Quick releases
DO NOT, UNDER ANY CIRCUMSTANCES, OPERATE YOUR KITE WITHOUT THE KITE LEASH AND THE
QUICK RELEASE. TRY AND CHECK THEM BEFORE RIDING. USING INSTINCTIVELY A QUICK RELEASE
NEED A REAL LEARNING. THE QUICK RELEASES NEED A MINIMUM OF CHARGE TO WORK.
IMPORTANT:
Before launching your kite, you must have understood the purpose
and operation of the quick releases in place on your control bar:
• a leash with Quick Release and attachment to your harness
• a quick release on the chicken loop (de-power loop)
• a quick release on the large harness line
The leash allows you to let go of the control bar without losing your
kite. The kite leash is fitted to one of the front lines close to the
adjustment strap, and should reach your harness.
Releasing the control bar (using the quick release on the harness line or the chicken loop (de-power loop) will
automatically depower the kite, which will land by itself. Make sure you have enough safe room down wind.
The Quick Release also allows you to kill the power developed by the kite. The Quick Release should only be
operated if you want to release the control bar (e.g. the power is too great to unhook the harness loop from your
harness, the situation is dangerous).
Harness line quick release:
Chicken loop quick release:
Pull the red bowl
Pull the red loop

leash quick release:
Pull the red bowl
Use it only in dramatic situation, the kite can be dangerous for other people.
Note : most riders have the wrong instinct to hang on desperately to the bar if they get into difficulties. You should not
hesitate to dump the bar and retain the kite via the leash.
Warning
: You have to be used to the quick release before a critical situation. Most riders have the bad habit to
try their quick release for the first time in dangerous conditions and they are not aware about its use.
Reload the chicken loop quick release
Reload the harness line quick release
6.2– Pre-flight checks
Before launching your kite, check all the equipment one last time.
The following is a check-list of the main points:
• general condition of the kite
• pressure in the struts
• flying lines with the right length, not crossed and free of
knots
• lines connected to the correct sides of the kite
• harness loop centered on the control bar
• kite leash in good condition
• quick releases in good condition
Points to remember:
• Always make sure you are fully equipped
before launching: harness, personal
floatation device, helmet, etc…
• Always wear some kind of foot protection
when launching, as you risk injuring your
feet if you slide a few yards while the kite
gains altitude.
6.3- Basic rules for launching
YOUR KITE MUST ALWAYS BE LAUNCHED FROM THE EDGE OF THE WIND WINDOW, NEVER FROM THE
CENTER DOWN WIND.
The power would be far too great for you to control. You would endanger your own life and those of others around
you. This still holds true in light winds.
Get into the habit of connecting the leash to your harness before even picking up the control bar.
YOUR CHICKEN LOOP (DE-POWER LOOP) ON YOUR CONTROL BAR MUST ALWAYS BE HOOKED INTO THE
HARNESS BUCKLE.
This will allow you to reduce the power during launching by de-powering fully (pushing the bar away from you).

6.4 - Adjusting the length of the central strap
The control bar setup includes an adjustment strap for the front lines, which allows you to adjust the power of your
kite for a variety of wind conditions, even while riding. With the strap fully released, your kite will develop maximum
power, as the back lines will be pulling the kite square to the wind.
By tightening the adjustment strap (pulling
towards you), the kite will progressively
become less powerful (left picture), as the
relative slack in the back lines will allow
the kite to ‘open up’ and present less
surface area to the wind. The kite
becomes very slightly less responsive
when the strap is tightened. Pull the plastic
coated loop located on the strap to have
more power (see right picture). You can
progressively increase the power of your
kite by incrementally pulling the plastic
loop. It is safer when launching the
kite to have the kite depowered with
relatively more front line tension.
7- Tuning the TAKOON kite
You can control the power of your kite using the depower system. Following your style, tune the lenght of your
backlines using a lark’s head knot from the connector of the bar winders to one of the knots made in the back line (A,
B or C).
Knot A: more power, and more reactivity.
Knot B: standard tuning.
Knot C: Less power and less reactivity.
Perfect for learning tricks.

You can tune your kite to be less or more
responsive (see picture) using the front or
the rear attachment point for the backlines.
- Less sensitive
-Perfect for tricks
You don’t ride with a TAKOON bar with the anti-invert line system
Your TAKOON kite is delivered with two small connectors (a grey one and a yellow one) that you must connect
to the loops of your backlines. To connect the backline to the connector act as follow. Like this, you benefit
to the anti-invert line system.
- Better maneuverability
- Ideal for surfing
8- Common mistakes
• Not understanding how or when to operate the
quick releases
• Forgetting to attach the kite leash
• Seeking assistance from inexperienced
individuals
• Flying in insufficient space
• Choosing an unsuitable spot for kitesurfing
• Failing to check the state of your equipment
before launching
• Not launching from the edge of the wind window
• Underestimating the wind strength
• Failing to hook in to the de-power loop during
launching
• Flying the kite through the centre of the wind
window
• Flying the kite violently into the ground
Troubleshooting :
The kite is flying badly or is deformed:
• The struts are under-inflated
• A strut is deflating due to a puncture
• The wind is too light
The kite is not responding properly to steering
inputs:
• The lines are tangled
• You have confused the rear lines for the
centre lines when setting up for 4 line flying
• You are holding the control bar the upside
down.

9- Maintenance
Avoid exposing your kite to direct sunlight for extended periods of time, as this may damage the colours and decals.
Do not leave your kite fully inflated on the beach when you are not using it for extended periods.
Do not leave your struts fully inflated in a confined hot space such as a car.
Take extreme care to avoid introducing any sand or water into the inner tubes.
Rinse off your kite (especially the small pulleys located on tips), lines and control bar after each session, as sand
and salt will drastically reduce the lifespan of your equipment.
Never leave your kite damp. Dry it off properly after rinsing.
Wind your lines onto the bar in a figure of 8 to prevent damage and tangles.
10- Repairs
10.1– Ripped fabric
If the kite has a major tear, consult your retailer for details of your nearest official repair center.
The same goes for any damage sustained to a strut.
Repair any minor tears using the following recommendations:
• rinse and dry the kite, and lay it out on a clean and flat surface,
• cut out two identically sized strips of adhesive mylar large enough to cover the tear with an extra centimeter all
around.
• stick one piece over the tear and rub it down in order to eliminate any air bubbles,
• stick the other piece on the other side of the material in the same way.
10.2 – Inner tubes
You should choose a clean and sheltered spot out of the wind for any repairs on inner tubes. You will need the
repair kit supplied with this kite and two flying lines.
• Undo the velcro strap at the base of the damaged strut,in order to access the inner tube,
• Open the valve and remove velcro strap from around the valve,
• Tie one end of the flying line to the valve using a lark’s head knot, which will allow you to insert the inner tube
following repairs,
• Push the valve into the strut to free it, then gently pull the inner tube out of the end of the strut ensuring the flying
line stays connected.
• Clean any sand and salt from the inner tube, inflate it and immerse it in water in order to locate the puncture,
• Use a marker to identify the puncture. Now dry and clean the inner tube
using a soft cloth and deflate it again,
• If the hole is on a seam just use glue and allow drying for about 20 minutes,
• If the hole is on a flat surface of the inner tube use a patch cut from the
clear plastic supplied to repair the puncture, and allow to dry for about 20
minutes,
• Check the repair by inflating the inner tube and leaving it for a few minutes,
• Using the flying line you attach to the valve, introduce the inner tube
delicately back into the strut making sure it is not twisted in any way,
• Pass the valve back through the hole in the strut, detach the flying line and
fit the valve cap back on,
• Fit the velcro strap back onto the valve and close the end of the strut.
Your strut is now ready for inflation!

10.3- Leading edge
The same technique is used to repair the leading edge, with a few minor differences:
• You must attach a flying line to both ends of the inner tube
• The inner tube is removed via an access zip in the centre of the leading edge.
Repair the puncture in exactly the same way. When reintroducing the inner tube, be extremely careful not to twist it,
as this will lead to problems when inflating the leading edge. It is a good idea to coat the inner tube with talcum
powder before reintroducing it into the leading edge.
Note: if the puncture is too large to repair or the repaired tube is not holding air, you will need to order a new inner
tube from your retailer.
11- Right way of courtesy
11.1- Launching
• A kitesurfer setting out or changing direction should be careful not to get in anybody else’s way.
• A kitesurfer who with his kite at it’s zenith, while maneuvering or at a stand still, has right of way over everyone
else. Any kitesurfer moving towards him must steer clear.
• A kitesurfer should whenever possible, sail downwind from all other craft (windsurfers, boats, swimmers…) using
the same sailing area.
• A kitesurfer going on the water has right of way over a kitesurfer going on the beach.
11.2- Crossing other kitesurfers
• A kitesurfer who sails with the wind on the starboard tack (wind over the right side of the board) in his direction has
right of way over a kitesurfer who’s wind direction is port (left).The starboard kitesurfer should, as much as possible,
go straight ahead and the port kitesurfer should maneuver to keep clear.
• An experienced kitesurfer should anticipate and not hinder a beginner’s movements. The experienced kitesurfer
should sail up-wind of the beginner to keep out of his way.
• A kitesurfer must keep out of the way of all other craft (sailboards, boats…).
• When two kitesurfers cross or overtake, the up-wind kitesurfer (the one who is closest to the wind’s source) must
progressively raise his kite in order to reduce his speed, to avoid being hurled towards the person he is overtaking
or crossing. The down-wind kitesurfer must, on the other hand, lower his kite to avoid crossing lines in case he
underestimates the distance.
11.3- Sailing on the same tack
• An overtaking kitesurfer must keep clear.
11.4- Jumps and transitions
• While getting ready for a jump or transition, the kitesurfer must first of all determine wind stability (avoid jumping
during a gust of wind) as well as the sailing area down-wind and up-wind. This area should be free and clear at least
100m down-wind and 20m up-wind. Before attempting any jumps or transitions, the kitesurfer should be certain not
to hinder any other craft all the way through the move.
11.5- Sailing in waves
• In waves the previous "starboard" rule doesn’t apply, the kitesurfer going out facing the waves has right of way
over the one who is surfing in.
• While surfing, the kitesurfer closest to the wave’s peak has right of way. Surfers have right of way because they
are less maneuverable.
12- Glossary
Inflatable kite: a kite consisting of inflatable struts which allow it to relaunch from water. Can be flown on 2 or 4 lines.
Strut: tube of material which houses the inner tube.
Inner tube: an airtight rubber tube fitted with a valve, found in each strut and the leading edge.
Leading edge: the front section of the kite, which contains the largest inner tube.
Trailing edge: the rear section of the kite.
Body dragging: using the power of the kite to pull you through the water without your board. Kitesurf or kiteboard or
flysurf: The name given to the water sport which combines a traction kite and a surfboard.
Control bar: used to steer the kite.
De-power: the system which allows the operator to control the amount of power developed by the kite, by pushing
or pulling on the control bar.
Front lines: on a four line setup, these are the two flying lines which lead from the centre of the control bar and
attach to the wing tips on the leading edge.
back lines: on a four line setup, these are the two flying lines which lead from the ends of the control bar to the wing
tips on the trailing edge. Also known as “brake lines”.

Harness: attaches around your waist and is equipped with a hook. Used to attach to the control bar in order to use
your body weight to hold the kite.
Line cutter: specialist blade which must be easily accessible and is used to cut the flying lines in an emergency.
Overpowered: using a kite that is too big for your body weight or the prevailing wind conditions or your level.
Underpowered: using a kite that is too small for your body weight or the prevailing wind conditions.
Cross-shore: wind blowing parallel to the beach.
Offshore: wind blowing from the land out to sea.
Onshore: wind blowing from the sea onto the land.
Cross-off: a combination of offshore and cross-shore wind
Cross-on: a combination of onshore and cross-shore wind
Upwind: the region where the wind is coming from
Downwind: the region where the wind is traveling to
Beaufort scale: scale used to measure wind speeds, ranging from 0 to 12.
Personal notes
Version Française
1- Introduction
L’UTILISATEUR DOIT IMPERATIVEMENT LIRE ET ASSIMILER L’ENSEMBLE DE CET OUVRAGE AVANT
TOUTE UTILISATION DE L’AILE.
Le pratiquant doit être pleinement conscient des risques que comporte la discipline, et sait qu’il s’expose à de
réels dangers.
UNE UTILISATION INAPPROPRIEE DES AILES DE KITESURF PEUT CAUSER DES ACCIDENTS GRAVES
OU ENTRAINER LA MORT DE L’UTILISATEUR OU DE TIERS.
Il est très vivement conseillé de suivre une formation dans une école de kitesurf
agréée. TAKOON est partenaire du réseau international d’écoles IKO.
2- La sécurité
2.1 – Règles de base
• N’oubliez jamais que vous êtes responsable des dommages corporels ou matériels que vous pouvez
occasionner. Vérifiez auprès de votre assurance que votre responsabilité civile couvre la pratique du kitesurf.
• Utilisez votre bon sens en matière de sécurité.
• Ne pratiquez JAMAIS le kitesurf SEUL.Une assistance constitue une sécurité non négligeable, aussi bien à
terre qu’en mer.
• Il est impératif de pouvoir se désolidariser à tout moment et rapidement de l’aile en cas de problème. Ne
vous attachez donc JAMAIS en permanence à votre aile, par quelque moyen que ce soit.
• Utilisez toujours votre aile avec un leash d’aile. Vous ne devez pas démonter ou modifier les systèmes de
largage montés d’origine sur la barre de contrôle.
• Respectez scrupuleusement la législation locale en vigueur relative à la pratique du sport.
• Le kitesurf est un sport éprouvant, particulièrement pour les débutants qui s’épuiseront plus vite. Sachez
vous arrêter dès les premiers signes de fatigue.
• Il est indispensable de savoir nager.
• Vous devez avoir assimilé les règles de sécurité du décollage et de l’atterrissage, ainsi que le retour sur la
plage en cas de problème.
• N’utilisez jamais votre aile en vous accrochant à un point fixe (un arbre ou une voiture par exemple).
• Votre aile est un engin de traction spécifique à la pratique du kitesurf, et nullement un parapente. À ce titre,
ne l’utilisez jamais comme un engin de vol pur.
• Ne touchez jamais les lignes de bridage ou les lignes de vol de votre aile lorsqu’elles sont tendues.
• Lorsque votre aile est gonflée mais que vous ne l’utilisez pas, lestez-la avec du sable ou un objet lourd pour
ne pas qu’elle s’envole.
•Ne prêtez jamais votre matériel à une personne qui ne sait pas correctement utiliser les ailes de traction.
• Pour votre sécurité et celle d’autrui, ne jamais laisser des personnes non compétentes vous aider à décoller
ou faire atterrir votre aile.
2.2 – Zone d’évolution
Au sol
• Veillez à ce que votre zone d’évolution soit dégagée de tout
obstacle, et que personne ne se trouve autour de vos lignes. Pour
faire évoluer votre aile, il est impératif de DISPOSER D’UN ESPACE
D’AU MOINS 100 MÈTRES de chaque côté de votre aile, ainsi que
SOUS LE VENT (c’est-à-dire devant vous lorsque l’aile est en l’air).
Soyez particulièrement vigilant à l’espace libre sous le vent.
• Avant le décollage, assurez-vous d’avoir repéré un lieu
d’atterrissage précis, au cas où vous ne parviendriez pas à retourner
à votre point de départ.
• Au sol, n’utilisez pas votre aile à proximité de personnes, d’animaux,
de poteaux, d’immeubles, d’automobiles, de lignes haute tension,
d’aéroports, de grands axes de communication, etc…
En navigation
• Evitez d’évoluer à proximité de bateaux, bouées, rochers, digues,
pontons, phares, etc…
Eloignez-vous autant que faire se peut des baigneurs, et évitez les
voies navigables.
• Évitez les zones rocheuses ou de falaises. Le vent y est très
perturbé.
Min 100m
Zone
dangereuse
Éviter cette zone
Zone de vol
(= zone entre le pilote et l’aile)
Rester hors de cette zone
vent
Min 70m Min 30m
2.3 - Météorologie
• Ne sous-estimez jamais les conditions de vent et de mer.
• Consultez la météo marine avant le départ.
• Renseignez-vous aussi sur les horaires des marées et les zones de courants forts.
• Lorsque vous débutez,il est fortement conseillé de naviguer par mer calme.
• Portez la plus grande attention lorsque :
- le vent porte les embarcations vers le large
- le vent est fort et irrégulier
• Prenez le temps d’évaluer la force du vent une fois que vous êtes sur le site de navigation.
• Vous n’arrivez pas à évaluer les conditions météo, adressez-vous à une personne compétente. Un
anémomètre est aussi un outil utile.
• Pour vous protéger du froid et éviter les accidents hypothermiques, portez les protections adéquates (shorty,
combinaison…).
• N’allez en aucun cas naviguer par temps orageux. L’électricité ambiante augmente et cela peut s’avérer très
dangereux (électrocution).
2.4 – Apprentissage
• N’essayez jamais votre aile sans avoir reçu une formation préalable dans un établissement spécialisé dans
l’apprentissage du kitesurf. Aussi, la Skoop2 n’est pas une aile de débutant.
• Il est vivement conseillé de vous familiariser au pilotage des ailes de kitesurf avec une aile 2 lignes qui sera
plus facile à manoeuvrer qu’une aile 4 lignes.
• Prenez votre aile en main à terre.
• Utilisez toujours une surface d’aile appropriée à votre gabarit et à votre niveau.
2.5 – Bonne conduite vis à vis d’autrui
• Votre milieu environnant peut être une source d’accidents, à ce titre prêtez attention aux usagers qui vous
entourent: baigneurs, surfeurs, windsurfers, plaisanciers, jets skis, etc…
• Respectez les règles de priorité sur l’eau.
• Assurez-vous que vos lignes ne sont pas posées sur un passage fréquenté par les piétons. Enroulez vos
lignes quand vous ne vous en servez pas.
• Ne laisser en aucun cas une personne se mouvoir entre vous et votre aile.
• Aidez les kitesurfers qui souhaitent faire décoller ou poser leur aile. Une assistance est en effet très
appréciable.
• Si nécessaire, expliquez les règles de sécurité aux autres kitesurfers.
• Ne touchez pas à l’équipement des autres kitesurfers, sauf s’ils vous le
demandent.
• Testez souvent vos largueurs.
essentiel recommandé
combinaison
gilet
2.6 – Porter une tenue appropriée
L’équipement indispensable à la pratique du kitesurf est le suivant:
casque
Crème solaire
N’oubliez jamais :un bon kitesurfer est un kitesurfer vivant !
3- Le vent: les notions de base
3.1 – Force du vent
La force du vent peut-être indiquée en
Beauforts, en kilomètres/heure ou en
noeuds.
Important: l’échelle de vent à côté n’est
donnée qu’à titre indicatif et ne doit en
aucun cas être votre seul critère pour
estimer la force du vent: vous devez aussi
tenir compte de la régularité du vent, de sa
«densité».
Ne jamais utiliser votre aile lorsque le vent
est très irrégulier.
1noeud=1mille marin par heure=1,852km/h
Bft Km/h noeuds Description
0 <1 <1 Calme, la fumée s’élève verticalement
1 1-5 1-3 Soupçon de vent
2 6-11 4-6 Brise légère
3 12-19 7-10 Les drapeaux flottent dans le vent
4 20-28 11-16 Brise modérée et premiers « moutons »
5 29-38 17-21 Les parasols s’envolent
6 39-49 22-27 Le sable vole sur la plage
7 50-61 28-33 Avis de grand frais
8 62-74 34-40 Marche difficile face au vent
9 75-88 41-47 Fort coup de vent,
10+ >89 >48 Oubliez, les enfants de -12ans s’envolent
Coupe ligne
Gants, chaussons
naviguez qu’avec les lignes

3.2 – Surface d’aile à utiliser
IL EST ESSENTIEL D’UTILISER UNE SURFACE D’AILE
ADAPTÉE À LA FORCE DU VENT.
Le poids du pilote est un facteur important dans le choix
de la surface de l’aile.
Direction du vent
Assurez-vous que la direction du vent est bonne par
rapport au site où vous souhaitez naviguer.
L’idéal est un vent side-shore, c’est-à-dire parallèle à la
plage. N’utilisez jamais votre aile si le vent est off-shore
ou side-off.
Un vent on-shore peut convenir si vous avez un bon
niveau.
3.3 – Turbulences
Cross-shore wind
Vent side shore
h
w
s
f
f
f
f
o
o
-
-
s
e
s
d
i
o
s
r
t
C
n
e
V
onshorevent
n
o
i
-
w
e
onshore wind
e
d
r
n
o
i
wind
Offshore
Vent off-shore
-
s
s
t
o
n
r
e
C
v
LAND
Terre
d
n
i
o
s
Si des obstacles se trouvent en
amont du vent, cela crée des
turbulences, ce qui peut être très
dangereux car votre aile risque
de déventer violemment.
Les turbulences sont présentes
sur une distance équivalente à 7
fois la hauteur de l’obstacle.
e
r
o
h
s
d
n
Attention
: le vent est toujours plus fort en hauteur qu’au sol, ne vous faites pas surprendre.
3.4 – Fenêtre de vol
Il s’agit d’une notion élémentaire qui doit être assimilée avant toute utilisation de votre aile. On appelle
fenêtre de vol la zone dans laquelle l’aile évolue (équivalent à un quart de sphère).
La puissance de votre aile varie en fonction de l’endroit où elle se trouve dans la fenêtre de vol.
Fenêtre de vol & Zones de Puissance
Zone neutre
Zone avec un maximum de puissance
Quand l’aile est au zénith (au-dessus de vous), la puissance
dégagée est minimale: c’est la zone neutre.
La puissance maximale est obtenue lorsque l’aile se trouve à
la fois au centre et vers le bas de la fenêtre de vol. Ne faîtes
jamais évoluer votre aile dans cette partie de la fenêtre de
vol.
Quand l’aile se trouve sur les côtés de la fenêtre de vol
(extrémités gauche et droite) la puissance dégagée est
modérée. En navigation, vous ferez évoluer votre aile
principalement dans cette partie de la fenêtre de vol.

4- Présentation du matériel
Bord d’attaque
Sangle de réglage des
avants
latte
Bord de fuite
Package
•KiteTAKOON
• Lignes de vol avec pré-lignes
intégrées
• Barre de contrôle
• Leash d’aile avec
largueur intégré
• Grand bout de harnais
avec largueur intégré
• Petit bout de harnais avec
largueur intégré
•Sac
•Pompe
• Kit de réparation, connecteurs
Votre aile TAKOON se dirige avec 4 lignes, ce qui
procure un pilotage plus fin et permet une meilleure
gestion de la puissance de l’aile, grâce au système de
choqué / bordé. La navigation devient ainsi plus
confortable lorsque le vent est irrégulier, car vous
pouvez réduire la puissance de l’aile lors des rafales.
n’oubliez jamais que le pilotage en 4
Lignes
arrières
Attention:
lignes est plus difficile que le pilotage en 2 lignes.
Votre voile n’est pas destinée aux débutants, et
vous devez obligatoirement maîtriser le pilotage
des ailes de kitesurf avant toute utilisation.
Leash de
sécurité
Sachez donc évaluer au préalable votre
niveau. Les accidents sont souvent causés par
un excès de confiance.
Lignes
avants
largueurs

5- Mise en place de l’aile
Avant de mettre en place votre aile, assurez-vous que la zone est adaptée et
que vous disposez d’un espace suffisamment dégagé (100 mètres sur 100
mètres).
La barre de pilotage est fournie montée, vous devez juste dérouler les lignes en
prenant garde de ne pas avoir de noeuds et connecter votre kite.
5.1 – Montage de l’aile
Allez vers les extrémités des lignes qui se trouvent du
côté opposé à la barre. C’est de cet endroit que l’aile
décollera.
Votre aile se compose de boudins verticaux, les lattes, et
d’un boudin horizontal, appelé bord d’attaque.
Déroulez votre aile en la posant sur l’extrados (le côté où
la déco est peinte). Vous devez vous placer dos au vent,
le plus proche possible du bord d’attaque surtout si le
vent est soutenu.
Avant d’utiliser la pompe, faites-la fonctionner à vide afin
d’évacuer le sable qui aurait pu s’y introduire. Cela
évitera d’injecter du sable dans les chambres à air, ce qui
les ferait vieillir prématurément.
Gonflage des boudins :
Tenez la pompe et gonflez les lattes jusqu'à ce que vous forciez
sur la pompe. Fermez la valve et fixez la pièce de velcro. Si de
l’air s’est échappé en refermant la valve, alors le boudin est sous
gonflé et il faut recommencer. Vous devez gonfler le bord
d’attaque en dernier seulement. Pour cela, accrochez le leash
de pompe sur la valve de la latte transversale du milieu. Comme
ceci, vous pouvez gonfler votre aile en utilisant vos deux mains.
Important: Ne sur gonflez pas les boudins. S’ils sont assez
rigides au toucher, cela signifie que le gonflage est suffisant. Un
gonflage trop important peut provoquer l’éclatement d’un boudin,
particulièrement si votre aile reste longtemps exposée au soleil.
Inversement, il ne faut pas sous gonfler les boudins: si l’aile
n’est pas suffisamment rigide, elle risque de ne pas voler ou de
redécoller très difficilement.
Une fois l’aile gonflée, retournez là de manière à ce que les
boudins soient placés du côté du sol et que le bord d’attaque
soit face au vent.
Placez du sable sur la toile, juste derrière le bord d’attaque.
sable

5.2- Connexion des lignes sur le kite
Votre barre est fournie avec des lignes arrières jaunes et grises
(jaune à gauche et gris à droite) et des lignes avants blanches.
Connectez vos lignes arrières aux connecteurs arrières (des
boucles) de votre aile en faisant une tête d’alouette du connecteur
sur la ligne (gris sur gris et jaune sur jaune). Les lignes avants
doivent être fixées aux connecteurs situés sur les extrémités du
bord d’attaque (fin de ligne grise avec connecteur gris et fin de ligne
jaune avec connecteur jaune).
Votre barre a été conçue pour éviter les risques d’inversion
avant/arrière et droite/gauche. Ces inversions sont une des
premières causes d’accident faites attention!!!
6- Systèmes de largage et règles de décollage
6.1 – Systèmes de largage
N’UTILISEZ SOUS AUCUN PRETEXTE VOTRE KITE SANS LEASH DE SECURITE NI LARGUEUR.
L’UTILISATION INSTINCTIVE DES LARGUEURS NECESSITE UN APPRENTISSAGE. ESSAYEZ LES ET
VERIFIEZ LES AVANT CHAQUE NAVIGATION. LES LARGUEURS NECESSITENT UN MINIMUM DE TENSION
POUR FONCTIONNER.
IMPORTANT:
Avant de faire décoller votre aile, vous devez avoir assimilé l’utilité
et le fonctionnement des largueurs de la barre de contrôle:
• un leash d’aile équipé d’un largueur
• un largueur au niveau du grand bout de harnais
• un largueur au niveau du petit bout de harnais
Le leash permet de lâcher la barre sans pour autant se désolidariser
de l’aile. Il se fixe sur un des avants près de la sangle de réglage et
doit revenir se fixer à votre boucle de harnais grâce au clip fourni
avec le leash.
En lâchant la barre, la puissance va automatiquement s’annuler et l’aile se poser.
Le largueur permet de vous désolidariser de l’aile en cas de problème, donc d’annuler totalement la puissance de
l’aile. Si vous souhaitez lâcher la barre mais que vous avez du mal à décrocher un ou les deux bouts de harnais
(tension trop forte, etc), vous devez alors actionner le ou les largueurs en tirant sur la boucle prévue à cet effet.
Largage du grand bout de harnais:
Largage du petit bout de harnais: Tirez sur la poignée rouge
Tirez sur la boule rouge

Largage du leash d’aile:
Tirez sur la boule rouge
A utiliser seulement en situation dramatique, le kite peut s’avérer dangereux pour les autres
A noter: De nombreux riders ont le mauvais réflexe de s’agripper désespérément à la barre s’ils sont en difficulté.
Vous ne devez pas hésiter un instant à larguer votre aile lorsque vous rencontrez un imprévu, remonter sa barre et
redécoller est un exercice facile.
Attention
: Vous devez vous entraîner à utiliser vos largueurs avant de rencontrer une situation critique.
Trop de kitesurfers ont pris la mauvaise habitude d’essayer leur largueur pour la première fois en situation
d’urgence. Dans ce cas, vous ne saurez jamais l’utiliser à bon escient.
Réarmer le largueur du petit bout de harnais
Réarmer le largueur du grand bout de harnais
6.2 – Dernières vérifications
Avant de faire décoller votre aile, vous devez faire une dernière
vérification de votre équipement. Voici une liste des principaux points
à examiner :
• état général de l’aile/pression des boudins
• lignes et pré-lignes à la bonne longueur, en bon état, non
croisées et sans noeuds
• connexion correcte des lignes sur l’aile
• grand bout de harnais centré sur la barre
• leash d’aile en bon état
Remarques :
• Pensez toujours à vous équiper avant de
faire décoller l’aile: harnais, combinaison,
gilet, casque, etc.
• Portez toujours des chaussures lors du
décollage: vous risquez de vous faire
traîner sur les pieds pendant quelques
mètres et vous blesser.
• Largueurs en bon état
6.3- Règles de décollage
VOUS DEVEZ IMPERATIVEMENT DECOLLER VOTRE KITE EN BORD DE FENETRE ET JAMAIS EN MILIEU
DE FENETRE.
La puissance développée par votre kite risque d’être incontrôlable. Vous, ainsi que tous les gens autour de vous,
vous mettez en grave danger. Ceci est aussi vrai pour le petit temps.
Prenez l’habitude de connecter votre leash d’aile au harnais avant d’utiliser la barre.
VOTRE BOUT DES AVANTS DOIT TOUJOURS ETRE ATTACHE A VOTRE HARNAIS.
Accrochez le bout des avants sur votre harnais avant le décollage et décrochez le une fois l’aile posée.
Cette méthode vous permet de contrôler la puissance du kite lors du décollage de l’aile (en poussant sur la barre).

6.4- Ajustement de la longueur de la sangle de réglage
Votre barre est munie d’une sangle de réglage située sur le bout des avants. Cette sangle a pour effet d’adapter, en
navigation, la puissance de votre kite en fonction des conditions de vent. Lorsque la sangle est complètement
détendue, le kite génère sa puissance maximale, comme lorsque vous tirez sur votre barre.
En tirant sur la boucle en sangle, le kite
devient moins puissant (photo de gauche).
Les lignes arrières se détendent et le kite
est un peu moins réactif.
Pour développer plus de puissance, tirez
sur la boucle recouverte de plastique
transparent (photo de droite). Vous
pouvez augmenter progressivement la
puissance du kite en ne tirant que petit à
petit sur la boucle. Atterrissez votre kite
diminuant au maximum la puissance
(sangle de réglage positionnée avec une
longueur minimale)
7- Régler votre kite TAKOON
Vous pouvez contrôler la puissance de votre kite en utilisant votre système de bordé/choqué. En fonction de
votre style de navigation, vous pouvez régler la longueur de vos lignes arrières en faisant une tête d’alouette du
connecteur situé sur un de vos embouts de barre sur un des nœuds situé sur votre préligne intégrée (voir
schéma ci-dessous).
Nœud A: plus de puissance et de réactivité
Nœud B: réglage standard
Nœud C: moins de puissance et de réactivité.
Idéal pour apprendre de nouveau tricks

Vous pouvez aussi rendre votre kite plus ou moins
nerveux (voir photo ci-contre) en plaçant le
connecteur sur l’attache avancée ou reculée des
lignes arrières.
- Moins sensible
-Idéal tricks et vent
fort
Vous ne possédez pas de barre TAKOON avec le système d’anti-inversion avant/arrière:
Votre aile TAKOON est fournie avec deux petits connecteurs (un jaune, un gris) que vous devez mettre sur
les boucles de vos lignes arrières. Procédez comme suit pour lier le connecteur à votre ligne. Ce système vous
permet de bénéficier de l’anti-inversion des lignes avants/arrières.
- Plus de manoeuvrabilité
-Idéal pour le surf
8- Les erreurs les plus fréquentes
• Ne pas connaître le fonctionnement et l’utilité
des largueurs
• Oublier d’attacher le leash d’aile
• Demander de l’aide à une personne
inexpérimentée dans la pratique du kite
• Rider dans un endroit non dégagé
• Choisir un lieu inadapté à la pratique du kite surf
• Ne pas vérifier l’état de son matériel avant
chaque décollage
• Ne pas décoller l’aile en bord de fenêtre
• Sous estimer la force du vent
• Ne pas accrocher le petit bout lors du décollage
• Faire voler le kite au centre de la fenêtre de vol
• Faire tomber violemment l’aile au sol
Problèmes possibles :
Le kite vole mal ou se déforme:
• les lattes sont sous gonflées
• Une latte se dégonfle car elle est percée
• le vent est trop faible
Le kite ne répond pas normalement aux
commandes:
• les lignes sont croisées entre elles
• Vous avez confondu les lignes avants et les
lignes
• Vous tenez la barre à l’envers (le côté droit
de la barre dans la main gauche)

9- Conseils d’entretien
Evitez d’exposer votre aile directement au soleil pendant de longues périodes, les couleurs et le film protecteur de
votre aile peuvent s’en trouver détériorés.
Ne laissez jamais votre kite gonflé sur la plage quand vous ne l’utilisez pas.
Faites attention à ne pas faire rentrer de l’eau ou du sable dans les tubes de latte .
Rincez votre kite après chaque session ainsi que votre barre et vos lignes.
Le sable et le sel marin réduisent de façon très importante la durée de vie de votre matériel (d’au moins de la
moitié).
N’entreposez jamais votre kite humide. Avant de le ranger, il doit toujours être sec (sinon les couleurs peuvent
déteindre).
Enroulez vos lignes sur votre barre “en huit” pour éviter de vriller les lignes.
10- Réparation
10.1 – Déchirure
Si votre kite présente une déchirure sur le bord d’attaque, consultez votre revendeur TAKOON qui saura vous
conseiller.
Il en est de même pour les réparations envisagées sur une latte.
Réparez de petites déchirures de la manière suivante:
• rincez, séchez et étendez votre aile sur une surface propre et lisse,
• découpez 2 pièces identiques dans le dacron adhésif de manière à recouvrir la déchirure en gardant 1cm de
marge autour de la déchirure.
• Collez une des pièces sur la déchirure et frottez de manière à évacuer les bulles d’air,
• Placez la deuxième pièce autocollante de l’autre côté de la même façon.
10.2 – Chambre à air
Vous devez choisir un endroit propre et à l’abri du vent pour toutes les réparations de chambre à air. Vous aurez
besoin du kit de réparation et d’une ligne de vol.
• Défaites le velcro situé à l’extrémité de la latte crevée pour accéder à la chambre à air.
• Ouvrez la valve et enlevez le velcro et le bouchon de la valve,
• Accrochez une de vos lignes de vol à la valve au moyen d’une tête d’alouette, cette action vous permettra de
réinsérer le tube ultérieurement,
• Rentrez la valve à l’intérieur de la latte puis tirez délicatement la chambre à air par l’extrémité de la latte de
manière à ne pas déconnecter la ligne de la valve de la chambre à air.
• Nettoyez la chambre à air (sable et sel), gonflez et mettez la dans une bassine d’eau de manière à localiser le
trou.
• Utilisez un marqueur pour identifier le trou, nettoyez, séchez le boudin et
dégonflez le.
• Si le trou est au niveau d’une soudure, appliquez de la colle dessus et
laissez sécher 20 minutes,
• Si le trou est sur une surface plane de la chambre à air, utilisez un patch
fourni dans le kite de réparation et laissez sécher 20 minutes,
• Vérifiez l’étanchéité de la réparation en gonflant la chambre et en la laissant
un moment comme ceci.
• Utilisez la ligne de vol attachée à la valve, introduisez la dans la latte et tirez
dessus délicatement du coté de l’orifice prévu pour la valve pour faire rentrer
la chambre dans la latte en évitant les vrillages,
• Ressortez la valve par le trou prévu à cet effet dans la latte, détachez la
ligne et remettez le bouchon et les scratches dessus,
Votre latte est maintenant prête pour un nouveau vol!

10.3- Le bord d’attaque
Utilisez la même technique pour réparer le bord d’attaque, il subsiste cependant quelques différences mineures:
• Vous devez attacher des lignes de vol aux deux extrémités de la chambre à air du bord d’attaque.
• Sortez la chambre à air au niveau de la fermeture éclair située au centre du bord d’attaque.
Réparez le trou exactement de la même façon que pour une latte. En replaçant la chambre à air, soyez
extrêmement vigilant de ne pas le vriller, ce qui risquerait de le percer à nouveau au premier gonflage. Il est
fortement recommandé de mettre du talc sur la chambre à air avant de la remettre dans le bord d’attaque
A noter: si le trou est trop gros, allez chez votre revendeur TAKOON qui vous en fournira un nouveau.
11- Règles de priorité et de courtoisie
11.1- Dans l’eau
• Un kitesurfer démarrant ou changeant de direction doit faire attention de ne pas gêner son entourage.
• S’écarter d’un kitesurfer manoeuvrant son aile, ou l’aile au zénith. Tout kitesurfer faisant route vers lui doit s’en
écarter.
• Un kitesurfer doit naviguer tant que possible sous le vent de tout autre engin évoluant sur le plan d’eau (planche à
voile, bateau, baigneur…).
Un kitesurfer partant à l’eau est prioritaire sur un kitesurfer qui rentre à terre.
11.2- Le croisement de kitesurfers
• Le kitesurfer qui navigue avec le vent venant de tribord (main droite devant) par rapport à sa route est prioritaire
face à un kitesurfer dont le vent vient de bâbord (main gauche devant). Le kitesurfer tribord doit garder tant que
possible sa route et le kitesurfer bâbord doit tout faire pour ne pas entraver cette route.
• Un kitesurfer confirmé ne doit pas entraver le déplacement d’un kitesurfer débutant, ce dernier étant le moins
manoeuvrant. De plus, le kitesurfer confirmé doit naviguer au vent du débutant pour ne pas le gêner.
• Un kitesurfer doit laisser évoluer librement tout autre engin (planche à voile, bateau…).
• Lorsque deux kitesurfers se croisent ou se doublent, le kitesurfer au vent (celui qui est le plus proche de l’origine
du vent) doit remonter progressivement son aile afin de diminuer sa vitesse pour éviter d'être projeté vers la
personne qu’il double ou qu'il croise. Le kitesurfer sous le vent doit, au contraire, baisser son aile pour éviter le
croisement des lignes dû à une mauvaise évaluation de distance.
11.3- La navigation sur le même bord
• Un kitesurfer qui veut dépasser un autre engin sur sa route doit s'écarter et garder suffisamment d'espace de
sécurité (au moins 50 mètres) pour laisser évoluer librement l’engin doublé.
11.4- Les sauts et transitions
• Lors de la préparation d’un saut ou d’une transition, le kitesurfer doit avant tout vérifier la constance du vent (éviter
de sauter dans une rafale de vent) ainsi que l’aire de pratique sous le vent et au vent. Cette aire sous le vent doit
être suffisamment grande et dégagée pour permettre un contrôle en toute circonstance de son matériel (au moins
100m sous le vent et au moins 20m au vent).
De plus, avant tout saut, le kitesurfer doit s’assurer de ne gêner aucun autre engin durant toute la phase du saut ou
de la transition.
11.5- La pratique dans les vagues
• En vague la règle " tribord " précédente ne s'applique pas, le kitesurfer qui remonte face aux vagues vers le large
est prioritaire sur celui qui surfe.
• En surf, le kitesurfer le plus près du pic de la vague est prioritaire sur les autres. Mais un surfer, pour des raison
de maniabilité évidente est prioritaire sur un kitesurfer (soyez cool et humble avec les rameurs…)
12- Glossaire
Aile gonflable ou aile à boudins: aile qui comporte des boudins gonflables afin qu’elle puisse flotter et redécoller de
l’eau en cas de chute. Se pilote avec 2 ou 4 lignes selon le modèle.
Aile = voile = kite
Boudin: enveloppe en tissu qui accueille la chambre à air.
Chambre à air: équipée de valve, on en trouve dans chaque boudin et dans le bord d’attaque.
Bord d’attaque: partie frontale de l’aile où se trouve le boudin principal.
Bord de fuite: partie postérieure de l’aile (ou chute).
Nage tractée ou bodydragging: pratique qui consiste à se faire traîner sur l’eau et sur le ventre, sans flotteur, pour
descendre le vent uniquement.
Kitesurf ou kiteboard ou flysurf ou planche à cerf volant: nom donné au sport nautique né de l’utilisation combinée
d’une aile de traction et d’une planche.
Barre de pilotage: permet au pilote de diriger son aile.
Choqué/bordé: nom donné au système permettant de gérer la puissance de l’aile en tirant la barre vers soi ou en la
poussant.

Les avants: nom donné aux deux lignes de pilotage qui partent du centre de la barre de pilotage et qui se fixent aux
extrémités de l’aile, au niveau du bord d’attaque (en configuration 4 lignes uniquement). Aussi appelés lignes
centrales ou principales.
Les arrières: nom donné aux deux lignes de pilotage qui partent des extrémités de la barre de pilotage et qui se
fixent aux extrémités de l’aile, au niveau du bord de fuite (en configuration 4 lignes uniquement). Aussi appelés
lignes de frein ou freins.
Harnais: attaché autour de la taille du pilote et équipé d’un crochet, de type ceinture ou culotte, il permet
d’accrocher le bout de harnais qui se trouve sur la barre de pilotage dans le but d’utiliser le poids de son corps pour
retenir l’aile.
Coupe ligne: outil équipé d’une lame, qui doit rester facilement accessible et qui permet de couper les lignes de
pilotage à tout moment.
Surtoilé (être): le pilote utilise une aile trop puissante et inadaptée à son poids et à la force du vent.
Soustoilé (être): le pilote utilise une aile pas assez puissante et inadaptée à son poids et à la force du vent.
Sideshore: le vent souffle dans une direction parallèle au rivage.
Offshore: le vent provient des terres et souffle vers le large.
Onshore: le vent provient de la mer et souffle vers la terre.
Sideoff: combinaison de vents offshore et sideshore.
Sideon: combinaison de vents onshore et sideshore.
Au vent: situé du coté d'où vient le vent
Sous le vent: du coté où va le vent
Échelle de Beaufort: échelle utilisée pour mesurer la force du vent, graduée de 0 à 12.
Notes personnelles

TAKOON WARRANTY POLICY / CONDITIONS DE GARANTIE
TAKOON PRODUCTS ARE WARRANTED to be free of defects from manufacture in material and or workmanship to the original
This warranty is subject to the following limitations:
• The warranty is valid only when this product is used for normal recreational activities,
• This warranty does not cover damage caused by misuse or abuse, damage due to excessive sun exposure or seam failure due to
over inflation in the sun, damage caused by improper handling and storage, damage caused by use in shore break, damage resulting
from improper maintenance and damage caused by anything other than defects in material and workmanship,
• This warranty is voided if any unauthorized repair, change or modification has been made to any part of the equipment,
• The warranty originates from the date of the original purchase only,
• There are no warranties, which extend beyond the warranty specified here. If you are faced with any problem respecting the warranty
limitations, bring back the defective product to your TAKOON dealer with the following documents and informations:
- A copy of the kite/board user's invoice which indicates the purchase date (if it does not clearly figure on the invoice, the sale date to
the distributor will be chosen as beginning of the warranty),
- The type of the board/kite,
- The serial number (located on a tip),
- A precise description of the defect,
- A good picture of the defect (no POLAROID, they are too hazy),
- Your name and your address.
Your TAKOON dealer will send the defective product to an official TAKOON repair center. You will have to pay the carriage costs.
TAKOON will make the warranty determination.
If a product is deemed to be defective by TAKOON, the warranty covers the repair or replacement of the defective product only.
TAKOON will not be responsible for any costs, losses, or damages incurred as a result of loss or use of this product.
LES PRODUITS TAKOON SONT GARANTIS contre tout défaut de fabrication et/ou de matériaux pour une durée de 1 AN.
Cette garantie est soumise aux conditions suivantes:
• Elle couvre une utilisation normale du produit,
• Elle ne couvre pas les dommages résultant d’une mauvaise utilisation ou d’une utilisation abusive du produit au regard de ce manuel,
ni les dommages résultant d’une exposition excessive au soleil, ni ceux résultant d’un stockage inadapté du produit,
• Aussi, la garantie ne couvre pas les dommages résultant d’une utilisation dans un lieu inadapté à la pratique du kiteboard (shore
break par exemple), ni ceux résultant d’une maintenance incorrecte du produit et, d’une manière générale, tous les dommages n’ayant
pour cause un défaut de fabrication et/ou de matériaux,
• Elle ne peut être applicable si une modification ou une réparation non conventionnelle a été apportée à quelque partie que ce soit du
produit,
• La garantie est valable pour une durée de 1 an à compter de la date d’achat du produit en magasin,
• Aucune extension de garantie n’est possible.
Si vous rencontrez un problème qui entre dans le cadre de la garantie, ramenez le produit défectueux à votre revendeur TAKOON,
accompagné des documents et informations suivants :
- Une copie de la facture du produit indiquant la date d’achat (si cette dernière ne figure pas explicitement, c’est la date de vente du
produit au distributeur qui sera prise en compte comme point de début de la garantie),
- Le nom du modèle de board/kite,
- Le numéro de série du produit (pour les kites, il se situe sur une oreille),
- Un descriptif précis du défaut ou problème rencontré,
- Une photo permettant d’identifier facilement le défaut (pas de Polaroid),
- Votre nom et vos coordonnées.
Votre revendeur TAKOON se chargera, à vos frais, de retourner le produit défectueux.
Seule la société TAKOON est en mesure de prendre la décision finale de prise en garantie du produit et donnera ou non son
approbation après expertise.
Tout produit jugé défectueux sera réparé ou remplacé dans les plus brefs délais par un centre agréé TAKOON, puis retourné à vos
frais à votre revendeur TAKOON.
owner FOR 1 YEAR.
It is the user’s responsibility to carefully read this user’s guide and instruct all users on the safe
operation of this product.
Il est indispensable de lire attentivement ce manuel avant toute utilisation de votre aile TAKOON.
© This document is copyright to TAKOON and cannot be used without the author’s permission.
© 2003 TAKOON International/Ce document ne peut être utilisé sans l’autorisation de son auteur.
WARNING / ATTENTION
 Loading...