


OPPEERRAATTII
O
M
O
DEELL TTAALL--33110000RR
O
D
D PPRR
N
D
O
RRO
M
U
U
N
AAPPPPLLIICCAATTO
O
O
O
O
NSS
N
D
D
MAA
M
UCCTT LLAABBEELL
U
N
UAALL
N
U
ORR
TAKE-A-LABEL
16900 Power Dr.
Nunica, MI 49448
Phone: (616) 837-9300
Fax: (616) 937-9301
http://www.take-a-label.com
E-Mail sales@take-a-label.com
Page 1 of 14

TTAALL--33110000RR RRoouunndd PPrroodduucctt LLaabbeell AApppplliiccaattoorr
Machine Startup:
1. Unpack TAL-3100R Label applicator from shipping container.
2. Place the TAL-3100R on a firm level surface.
3. Plug the TAL-3100R into an 110VAC 10 AMP Grounded outlet.
4. Connect the labeler to a sufficient air supply. Minimum 80 PSI clean dry air.
Note: The TAL-3100R typically operates around 30 PSI depending on the label.
Label Threading:
1. Remove outer unwind disc (48) install new roll of labels and replace disc.
2. Pull label web under the first roller, threw the photo eye (14). Continue pulling the
label web over the top of the next roller. Thread webbing between the peel edge and
the rubber drive roller (30). Then back towards the supply roll, over the idler roller.
3. Pull web down and wrap under the drive roller (24), and up between the drive roller
(24) and pinch roller (17), then back down to the waist wind shaft (5). Note: The
pinch roller (17) is spring loaded. Slight pressure will be needed to separate the pinch
roller from the drive roller for threading.
4. Install waist wind clip (47) on waist wind shaft (5) placing the webbing between the
shaft and the clip.
Page 2 of 14

Teaching the photo eye:
1. It is recommended that you teach the photo eye (14) with every new roll of labels used.
2. Remove one label from the webbing and place the webbing only in the photo eye.
3. Press and hold the “Normal” button on photo eye for 3 seconds. When the lights finish
flashing the photo eye is taught.
Page 3 of 14
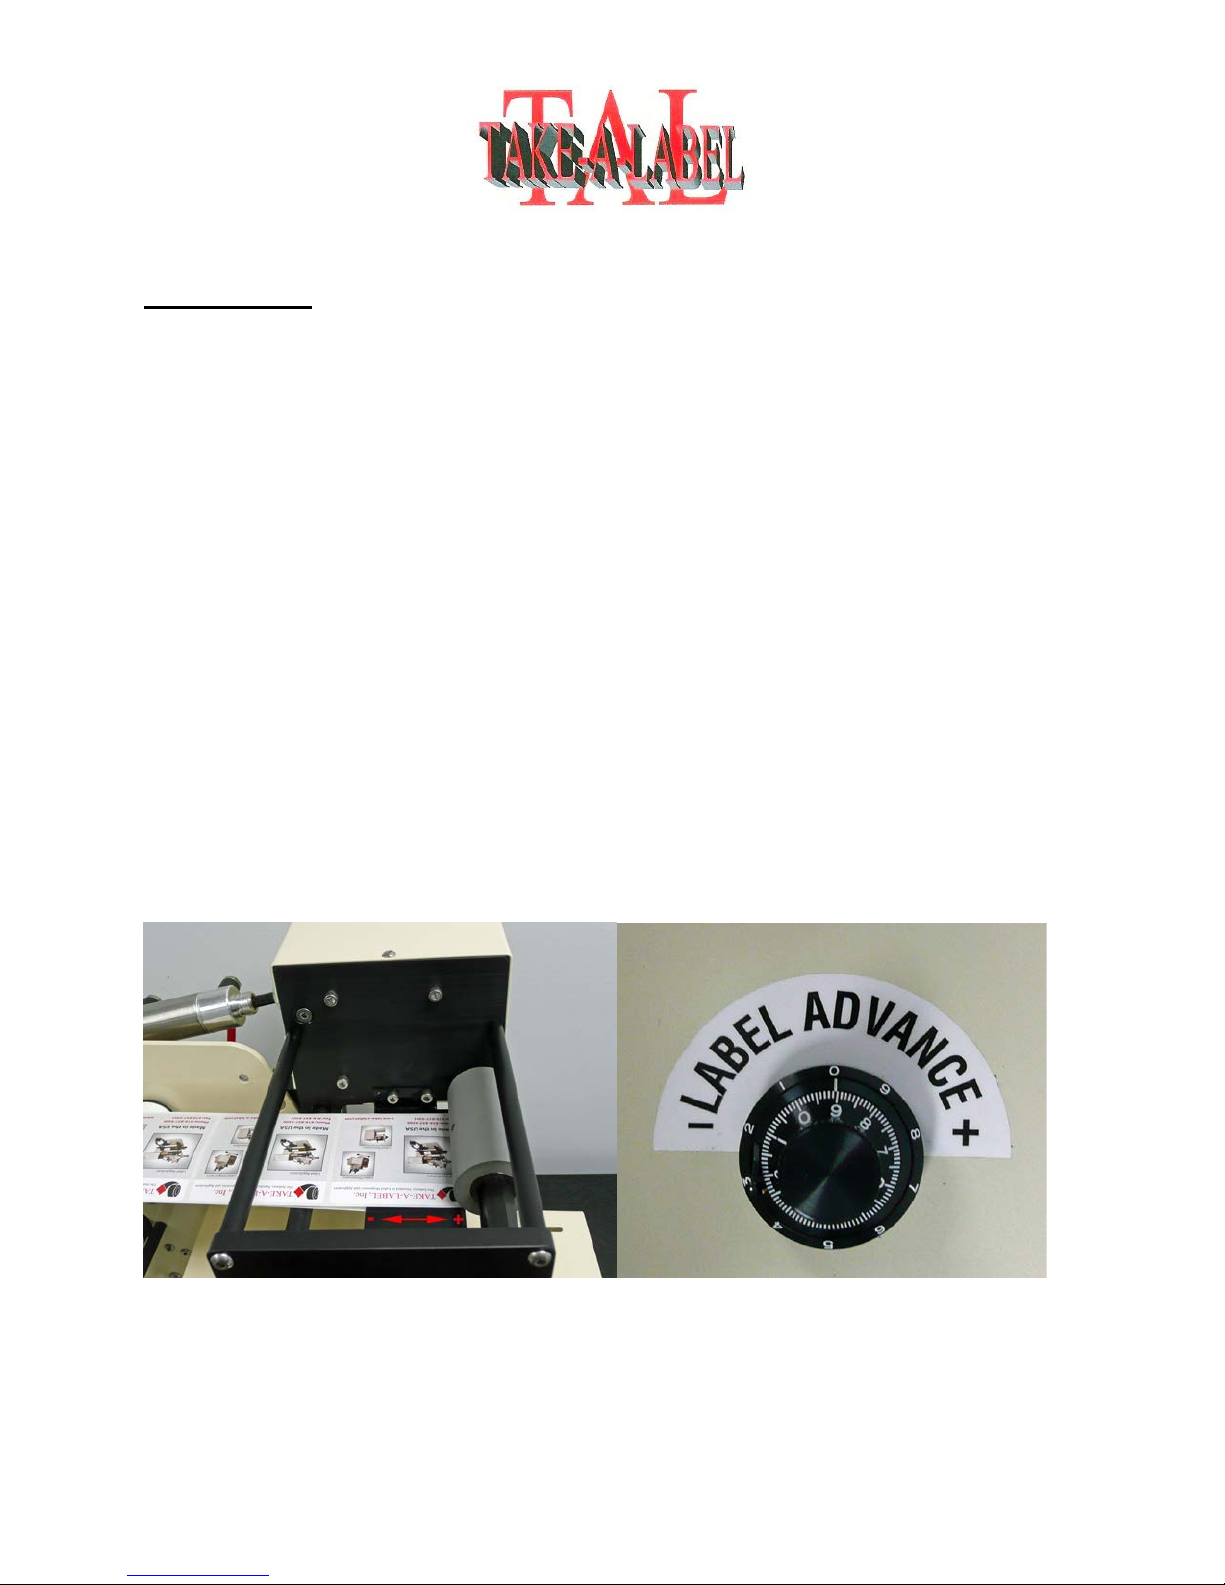
Label Setup:
The label advance potentiometer resides on top of the TAL-3100R electrical housing.
The purpose is to adjust the stopping position of the label with respect to the peel plate.
With the label advance pot turned all the way counterclockwise the photo eye will stop
the applicator instantly when it senses a gap. By rotating the potentiometer toward the +
the applicator will dispense more of the label, and by rotating the potentiometer toward
the – the applicator will dispense less of the label.
1. To setup the label position, rotate the label advance pot to the – as far as it will rotate.
2. The goal is to have the applicator stop with a label gap right at the peel edge.
3. Activate the applicator and watch the dispensing label. If the label does not advance far
enough turn the label advance pot to the +, and repeat until one label is completely
dispensed and the next label is stopped at the peel edge.
Page 4 of 14

Product Carriage Setup
1. Keeping the product carriage table (34) level, raise or lower the product carriage by
loosening the ratchet handles (2). Position the carriage with a ½” gap between the rubber
traction roller (30) and the top of the bottle when the head is in the raised position.
2. Position the product rollers (44) with the center of the bottle under the rubber traction
roller (30).
3. The product should be setting on the product rollers (44) so it will roll easily. If the label
tends to “walk” to one side of the bottle during application, the product rollers (44) may
need to be repositioned. Some products may even require one of the product rollers (44)
to be slightly skewed.
Page 5 of 14

Qty.
Description
Part # 1 Pinch Roller
31002
1
Waist wind Clip
45131 1 Drive V Belt
21031 1 Timing Belt
31834 2 Unwind Disc
45136
1
Label Drive Motor
76800
1
Feed Head Motor
31839
1
Rubber Drive Roller
31408 1 Foot Switch
30110 1 Air Cylinder
31806 1 Circuit Board
31255
3
Unwind Felt Pad
72618
1
Main Fuse
45157
1
Peel Edge Cover
31375
1
Valve Assembly
31805 1 Photo Eye
30106
2
Product Rollers
37007
2
Left Torsion Spring
21027
2
Right Torsion Spring
21028
Recommended Spare Parts List TAL-3100R:
Page 6 of 14

Depending on frequency of use and importance of the machine function, this list
may nee d to be modified to include more of each part to prevent any down time .
Page 7 of 14

Page 8 of 14

Page 9 of 14

TAL-3100R Parts List
Item # Description #
11004 Roller Support Bracket 1
11007 Carriage Ratchet Handle 2
11008 Unwind Shaft 3
11010 Carriage Bolt 4
11016 Waste Wind Shaft 5
21031 Gates Drive Belt 6
21026 Motor Spacers 7
21027 Left Torsion Spring 8
21028 Right Torsion Spring 9
25112 Washer 10
25113 Spring 11
26001 Collar 12
26002 Hub Screw 13
30106 Tri-Tronics Photo Eye 14
30143 Flow Control 15
30110 Footswitch 16
31002 Pinch Roller 17
31015 Plastic Bearing 18
31017 Bronze Bushing 19
31029 Bronze Bushing 20
31060 Rewind Bracket 21
31255 Control Board 22
31282 V Belt Tensioner 23
31355 Main Drive Roller 24
31366 Extension Rod 26
31370 3/8” x 3/8” Knuckle 27
31373 V Belt Pulley 28
31380 V Belt Tensioner Roller 29
31408 Rubber Traction Roller 30
31416 Label Advance Dial 31
31417 Label Advance Pot with Wiring 32
31721 Adhesive Backed Rubber Feet 33
31802 Bottle Carriage Table 34
31803 Threaded Guide Rod Support 35
31804 Cylinder Spacer 36
31805 MAC Valve Kit 37
31806 Cylinder and Clevis 38
31818 Peel Plate 39
31832 Flanged Pulley 40
31833 Unflanged Pulley 41
Page 10 of 14

31834 Timing Belt 42
31835 Bronze Bearing 43
37007 Product Rollers 44
40007 On/Off Switch 45
45131 Clip 46
45136 Unwind Disc 47
45155 Fuse Holder 48
45157 Fuse 49
45217 Power Cord 50
72618 Felt Pad 51
76800 Heavy Duty Motor 52
31839 Feed Head Motor (No Brake) 53
81912 Small Cord Grip 54
Page 11 of 14

Optional Accessories
All Purpose Carriage:
The All Purpose Carriage provides greater flexability and adjustablilty that the standard bottle
carriage. It is expessially useful for larger bottles or containers that have lips or ridges that can affect
how the bottle rotates in the carriage. The All Purpose Carriage also allows some tapered products to be
run on the TAL-3100R.
Lion 8200 Clear Label Photo Eye:
1. Labels must pass under the “Sensing Area” indicator.
2. Remove a label and place the liner only in the sensor.
3. Press both Adjust buttons at the same time to quicly set the sensor, or...
a. Manually use Adjust Arrow buttons to light the “Gap Setup” light on the light bar.
4. Run labels through the sensor to verify that the three “Running” lights are active (on or
flashing) while labels are passing through the sensor. If not, use Adjust buttons until they are.
More lights than the three “Running” lights may be active while running labels.
5. If sensor is not performing satisfactorily, adjust up and/or down a few clicks and see if
Page 12 of 14

performance improves, but always keep the three Triple-Checklights on when running.
Front and Back Label Option
Setting First Label Advance:
1. Turn both label advance dials counter clockwise to 0.0. Then turn label
spacing dial to 5.0.
2. Cycle the machine. Focus only on the first label. Using the 1st label
advance pot on the left. Turn the label advance pot clockwise until the gap
between the labels stops on the peel edge.
Setting Second Label Advance:
3. Once the first label is dispensing and stopping at the peel edge focus on
the second label. Use the 2nd label advance pot on the right to advance the
label so it is completely dispensed and the applicator stops at the gap.
Setting Label Spacing:
4. Use the Label Spacing pot to adjust the spacing between the front and back
labels. Turning the pot to the + will increase the delay and your spacing
between each label. Turning it to the – will decrease your delay and
spacing.
Page 13 of 14

Registered Ink Imprinter:
The registered ink imprinter allows you to imprint an alphanumeric code on the label prior to
application to the bottle. This is commonly used for batch codes, expireation dates, or lot codes.
• To adjust the printing location left to right on the web. Loosen two knobs and slide
coder to appropriate location.
• To adjust the printing location with the flow of the web. Slide the roller forward or
backwards to acheave desired print location.
Page 14 of 14
 Loading...