

INSTALLATION & OPERATING
INSTRUCTIONS
TUNING Models
Edition: 08/2012 Part No: EA 12.1
This harness restraint is manufactured in accordance to the European
Standard ECE-R 16.04 and/or FMVSS 209. It must only be installed in
cars on front outer seating positions and must only be used by adult
occupants [minimum age of 12] and a weight of at least 40 kg [88 lbs].
Please heed national laws and DOT requirements when installing this
product.
This harness restraint is not approved or intent to be used by children
less than 12 years of age or less than 40 kg [88 lbs] of weight.
SEAT REQUIREMENTS
Harness belt systems must not be installed in vehicles equipped with
seats which do not have adjustable head restraints or seats with
backrests with integrated head restraints where there are no openings for
the shoulder belts. The seatbelts will not function properly in these type
of seats. Shoulder belts will tend to slip off the shoulders. Never create
a new opening in the seats installed in your car.
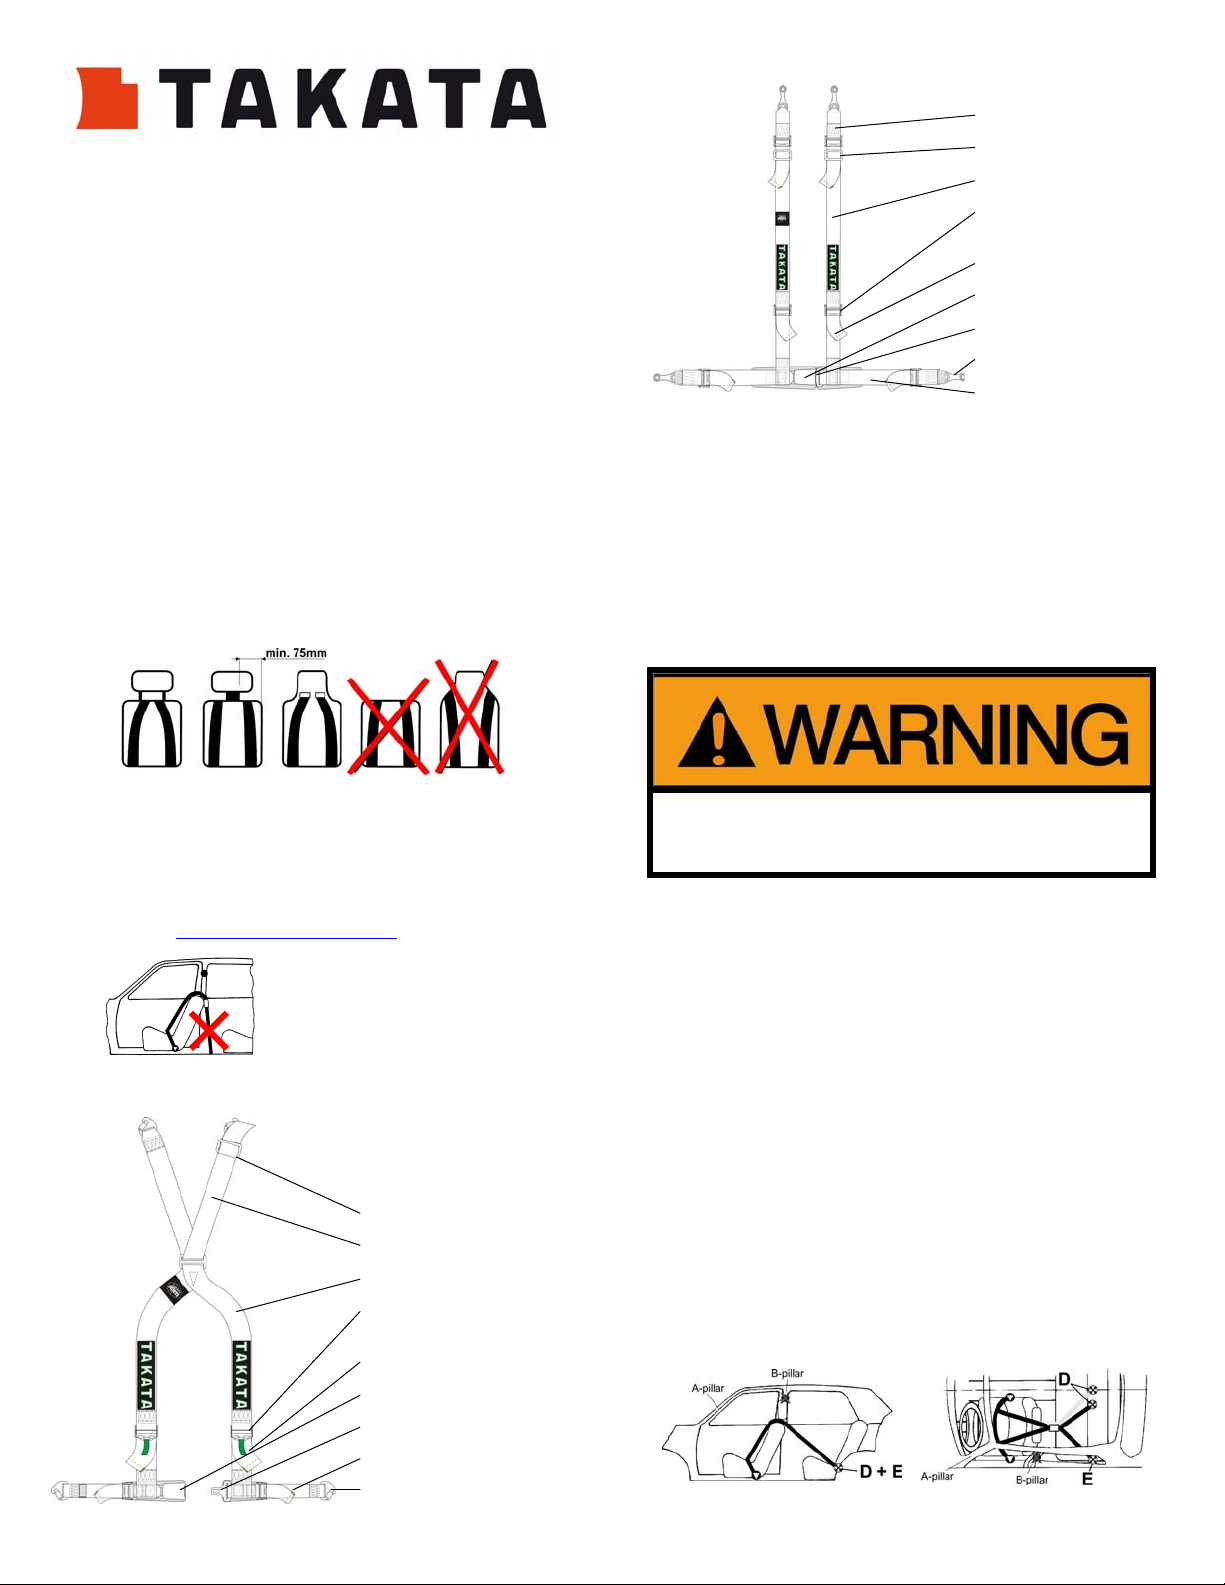
DRIFT II [bolt-on]
Definitions:
tail strap
basic 3-bar adjuster
shoulder belts
shoulder belt tilt lock
adjusters
adjustment strap ends
buckle
buckle tongue
bolt-on brackets
lap belt
INSTALLATION
ANCHOR POINTS, BOL TS AND THREADS:
These harness restraints are designed for installation to OEM stock
anchor points providing threads with the dimension of 7/16“ 20 UNF.
Bolts supplied match with this 7/16” 20 UNF thread size. Self-drilled
holes may be too weak or may be in an incorrect or dangerous
geometrical location. TAKATA does not take any responsibility for the
adequate performance of such anchor points. Always check for the
proper length of bolts used, the stock thread must be fully filled by the
bolt. Tighten 7/16” bolts with a torque of 40 Nm (30 ft-lb)
When shoulder belts are installed to rear seat lap belt anchorages, the
front seat backrest must be able to take load applied by the shoulder
belts during an accident. Tested and approved seats must be used for
such installation only. Horizontal installation of shoulder belts is preferred
(to a roll-cage or approved harness bar).
[A list of approved stock and special seats can be obtained from the
TAKATA website www.takataracing.com/seat-list
right right right wrong wrong
]
Never install shoulder belts
directly to the floor behind the
seat!
DRIFT III [snap-on]
Definitions:
basic 3-bar adjuster
tail strap
shoulder belts
shoulder belt tilt lock
adjusters
adjustment strap ends
buckle
buckle tongue
lap belt
snap-on brackets
Incorrect thread dimensions, using bolts that are too short
or not properly tightened bolts may result in belt failure
during an accident. Severe injuries or death may occur.
LAP BELT ANCHOR POINTS
1. Anchor points to the car centre/middle
They are either located to the centre tunnel or to the seat structure
close to the seat rail.
2. Outer/Outboard anchor points
They are either located to the door sill or to the seat structure close to
the seat rail. In case of a 2-door car with a lap belt slide-bar at the
door sill, use the front slide attachment point for harness restraint door
side lap belt installation.
SHOULD ER BELT ANCHORAGES
1. Shoulder belt anchor points for harness restraints with 2 tail
straps.
The rear seat lap belt anchor points [D & E] are available for
installation. Always install the shoulder belts [Drift II] crossing over to
prevent the shoulder belts from slipping off the shoulders during
normal wear as well as during an accident.
1 2

2. Other anchor points
Self-drilled anchor points or anchor points to a roll cage or harness bar
must meet the following requirements to provide adequate
performance:
a) Strength: > 14.7 kN [3200 lbs] each
b) Geometry:
Lap belt shall route between 60°
and 80° down
Shoulder belts routing shall be
horizontal and not more than –
20° down.
Route shoulder belts symmetrically to seat centre line
backwards.
INSTALLATION OF BRAC KETS
1. Stainless Steel Bolt-on Bracket Installation
washer
bolt
The brackets are made from
special stainless steel so they
can be pre-bent at installation
to the direction of pull of the
webbing where it is attached to
the bracket as the belt flows
over the body.
Proper alignment of the
webbing pull through the
bracket reduces the bending
stress [risk of fatigue cracks] to
anchor points during driving
and during an accident.
2. Snap-on bracket with eye bolt Installation
The eye bolt must be positioned so the
snap-on bracket can hook into the eye
with enough freedom for the bracket to
move into the direction of pull. The
snap-on bracket must be allowed to
fully align with the webbing routing
when loaded.
3. Bending Procedure
Brackets which are restricted in alignment to the direction
of pull may be damaged or cut during an accident causing
complete or partial belt failure during an accident.
Severe injuries or death may occur.
Do not bend bracket back and forth several times. Multiple
bends in opposite directions will weaken the material and
the bracket may fail during an accident.
Make sure the webbing is not damaged during bracket
bending or the webbing may fail during an accident.
Severe injuries or death may occur.
3 4
WRONG WRONG
CORRECT
 Loading...